Unusual job on the bench today
Discussion


NDA said:
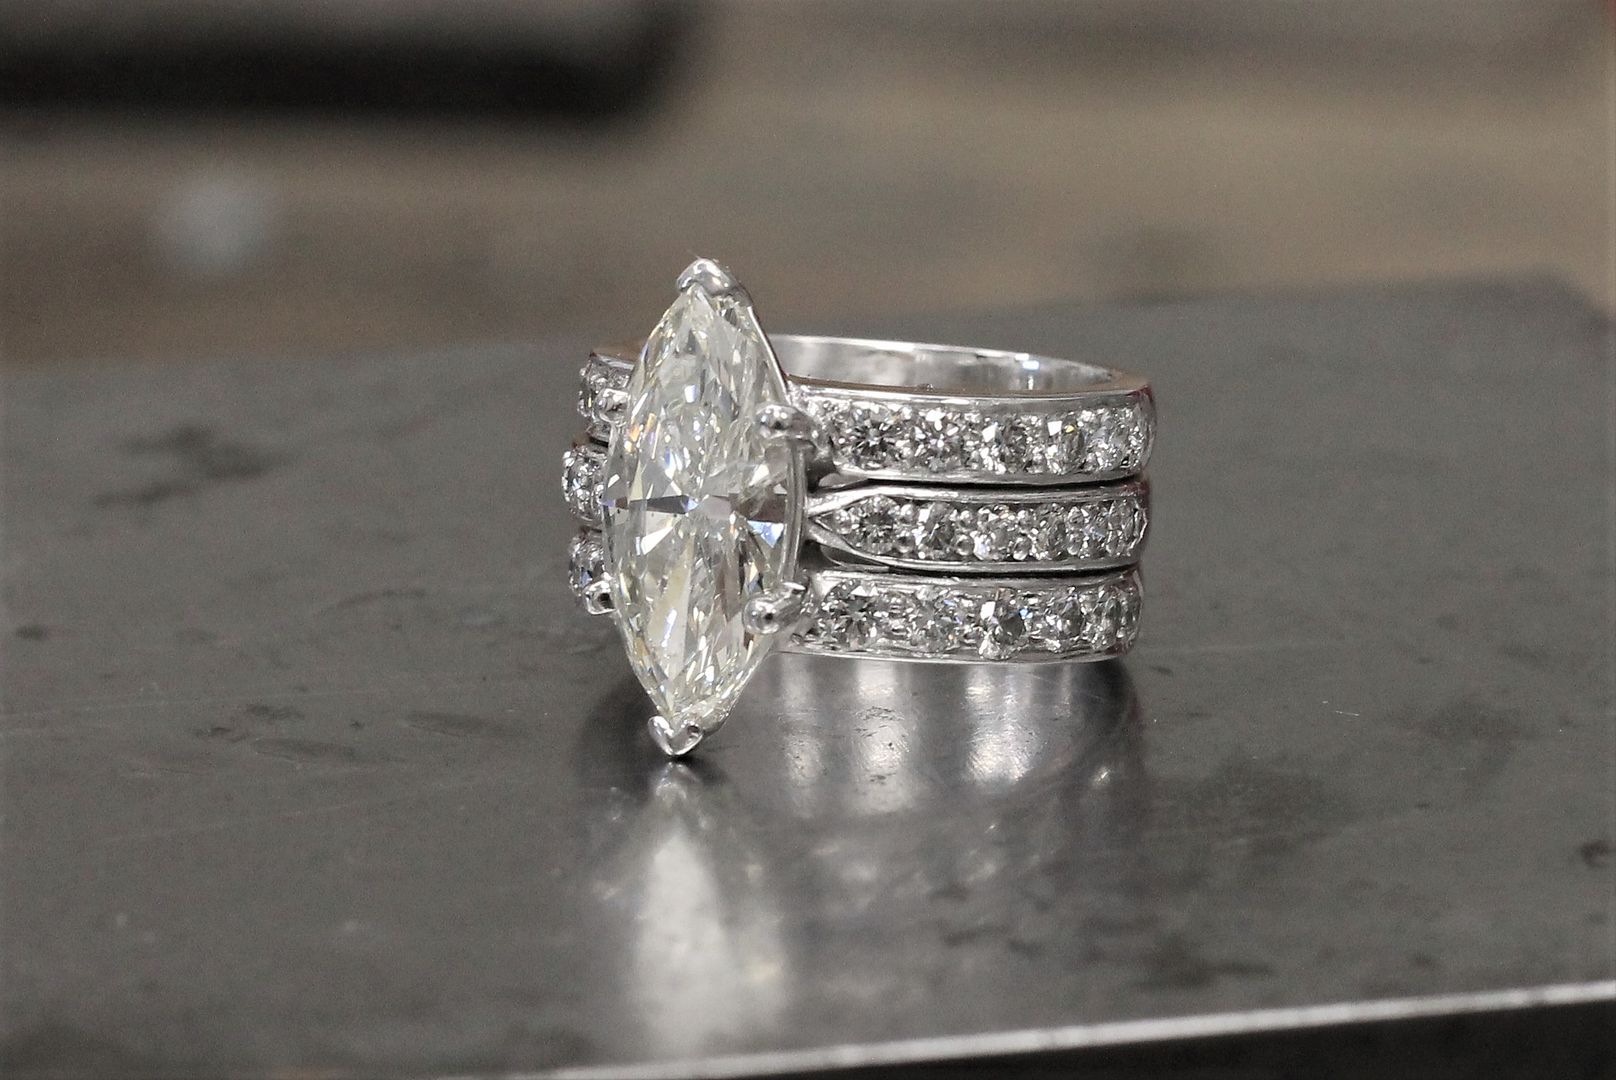
That's a strange looking stone Eddie.... any details about it? Are they cheaper than regular diamonds?
Yeah, they're something you don't see everyday. Cost wise, they are cheap enough. Circa £200-400 per carat at that size. They do come with risks attached as they are more prone to cracking or breaking than solid white diamonds. Howdy guys.
I have been meaning to post up but there is 1 thing in my way.....
I moved house in May and our local internet speed is practically a negative number. Amazing in 2018 that we are on sub 3Mb compared to over 40 in my previous house round the corner.
Anyway, I've done a couple of jobs recently that I've photographed and bunged in my FB page from work. As soon as I get a minute I'll transplant to here for you all to gawp at
Thanks to the handful of PHers who've come to me over the past few weeks. It's good to hear from you and even nicer that I'm still considered and appreciated for my work
Howdy
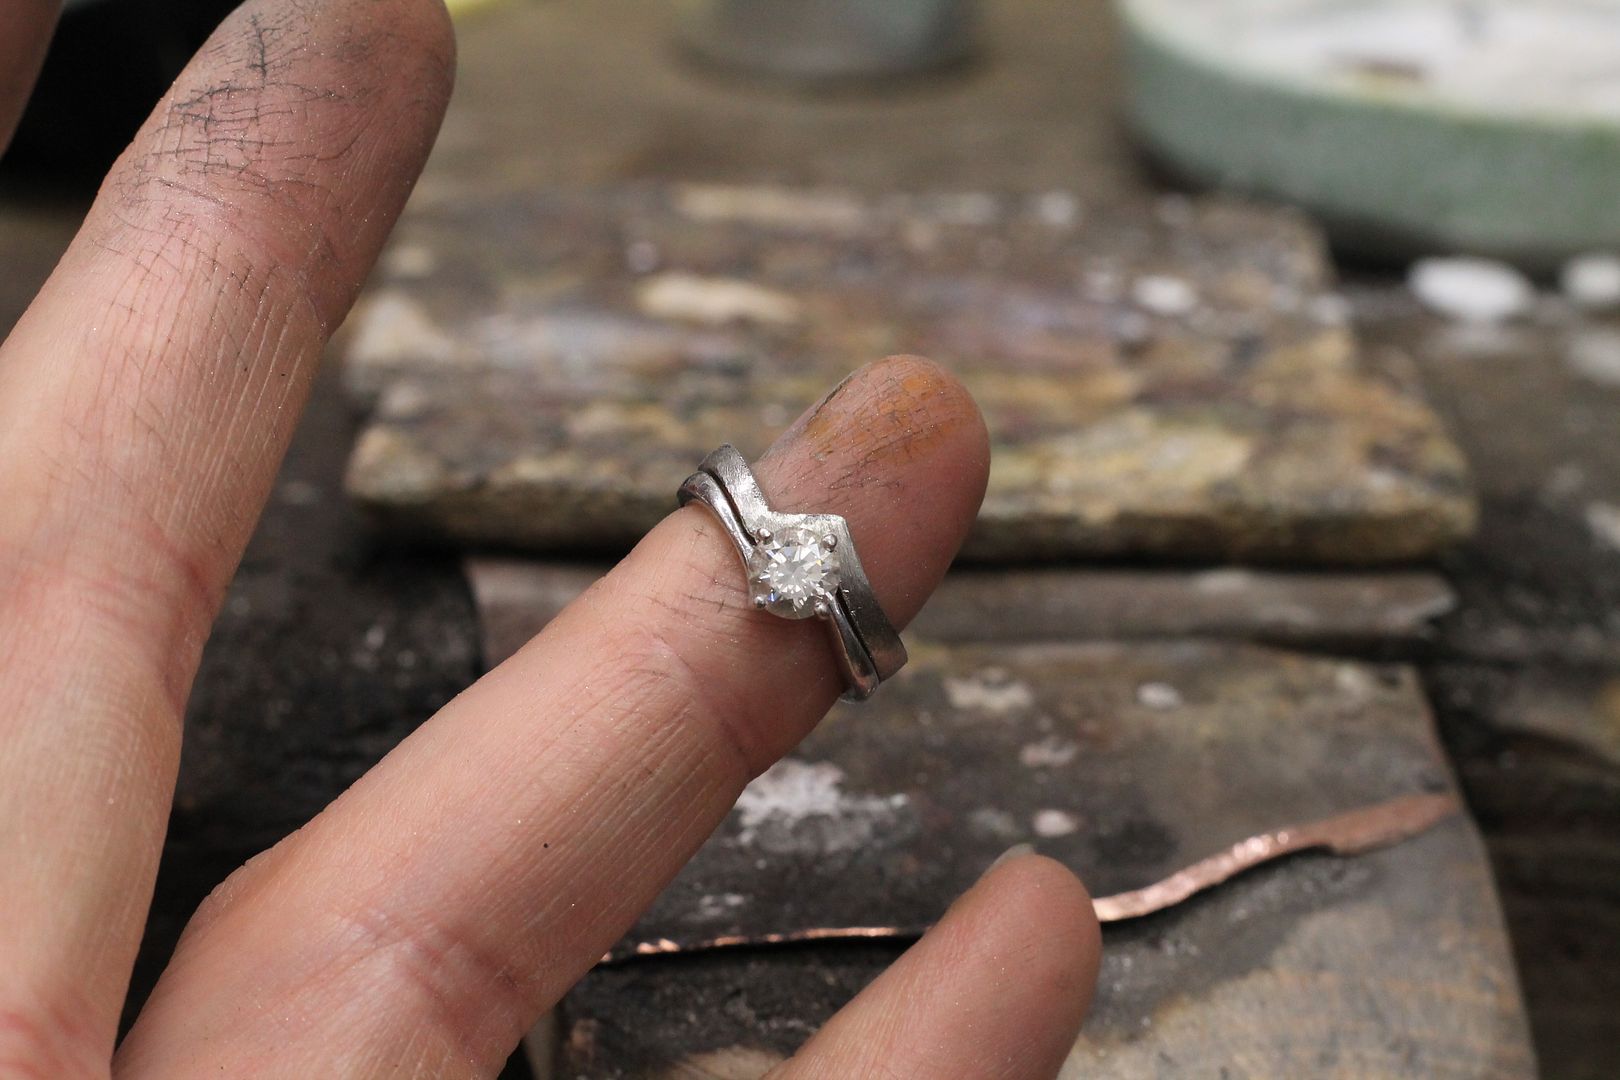
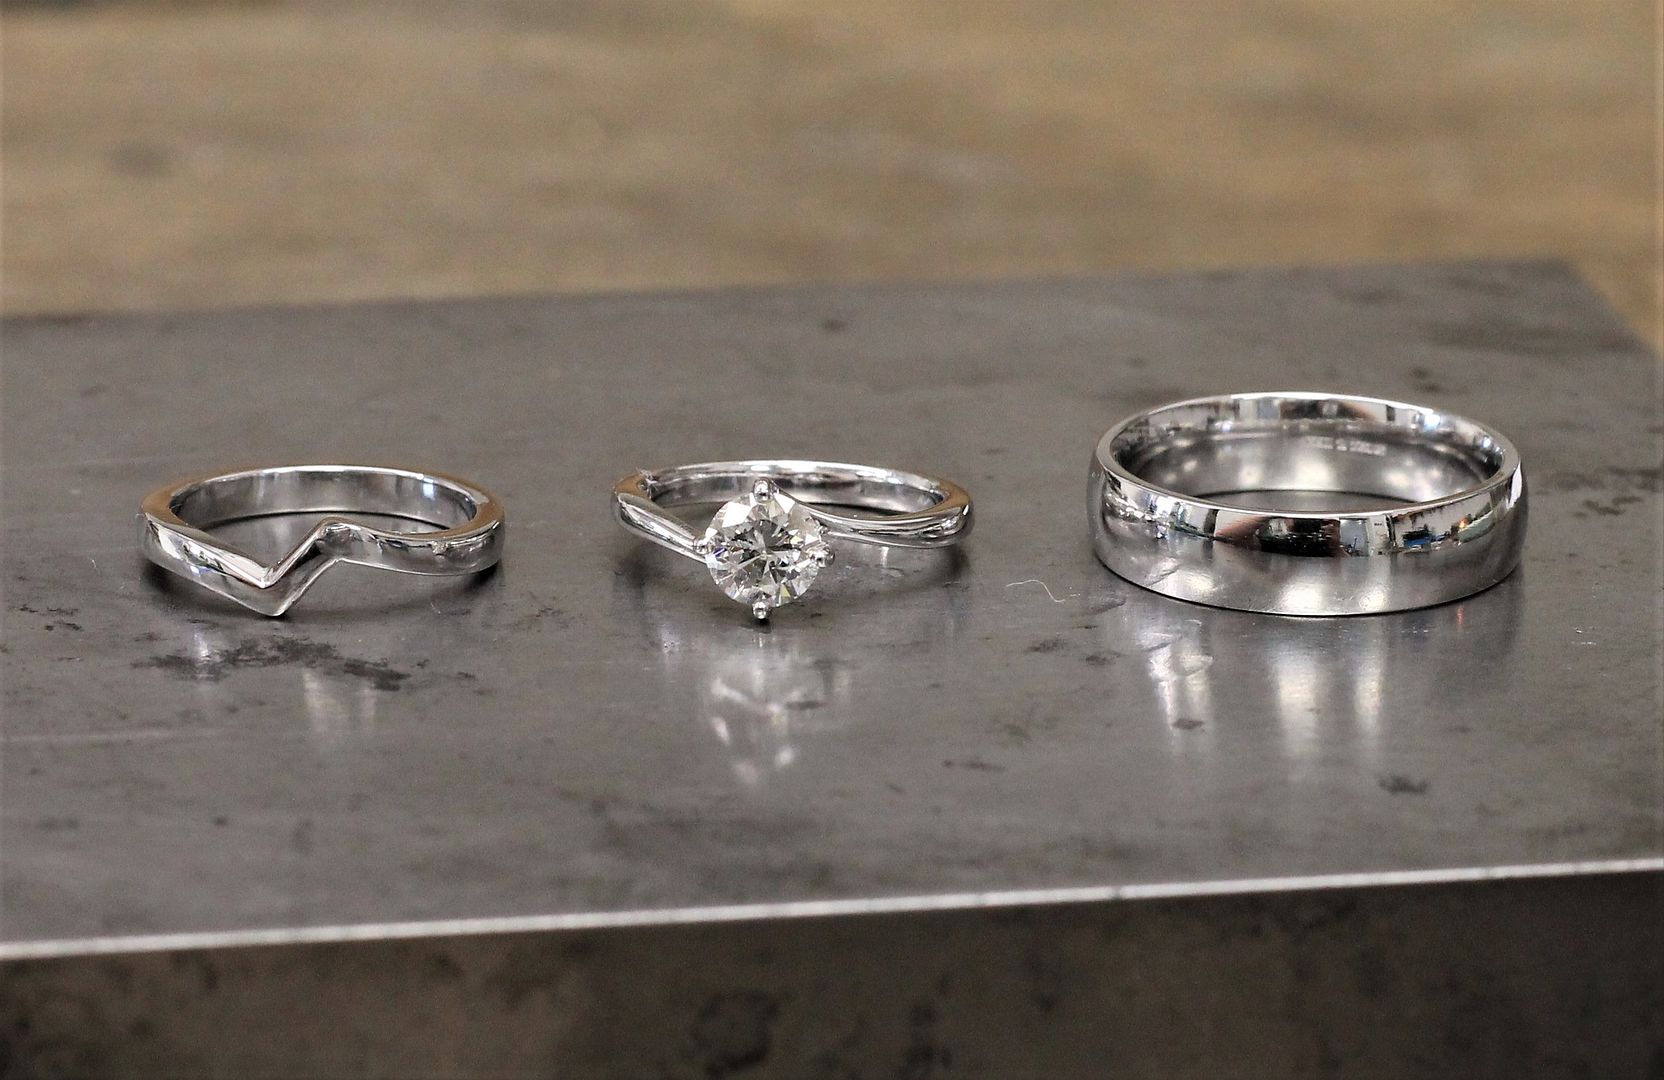
Just waved off the happy couple after making this shaped platinum band for them this morning (and supplying a gents platinum band)
Any questions on the processes just ask
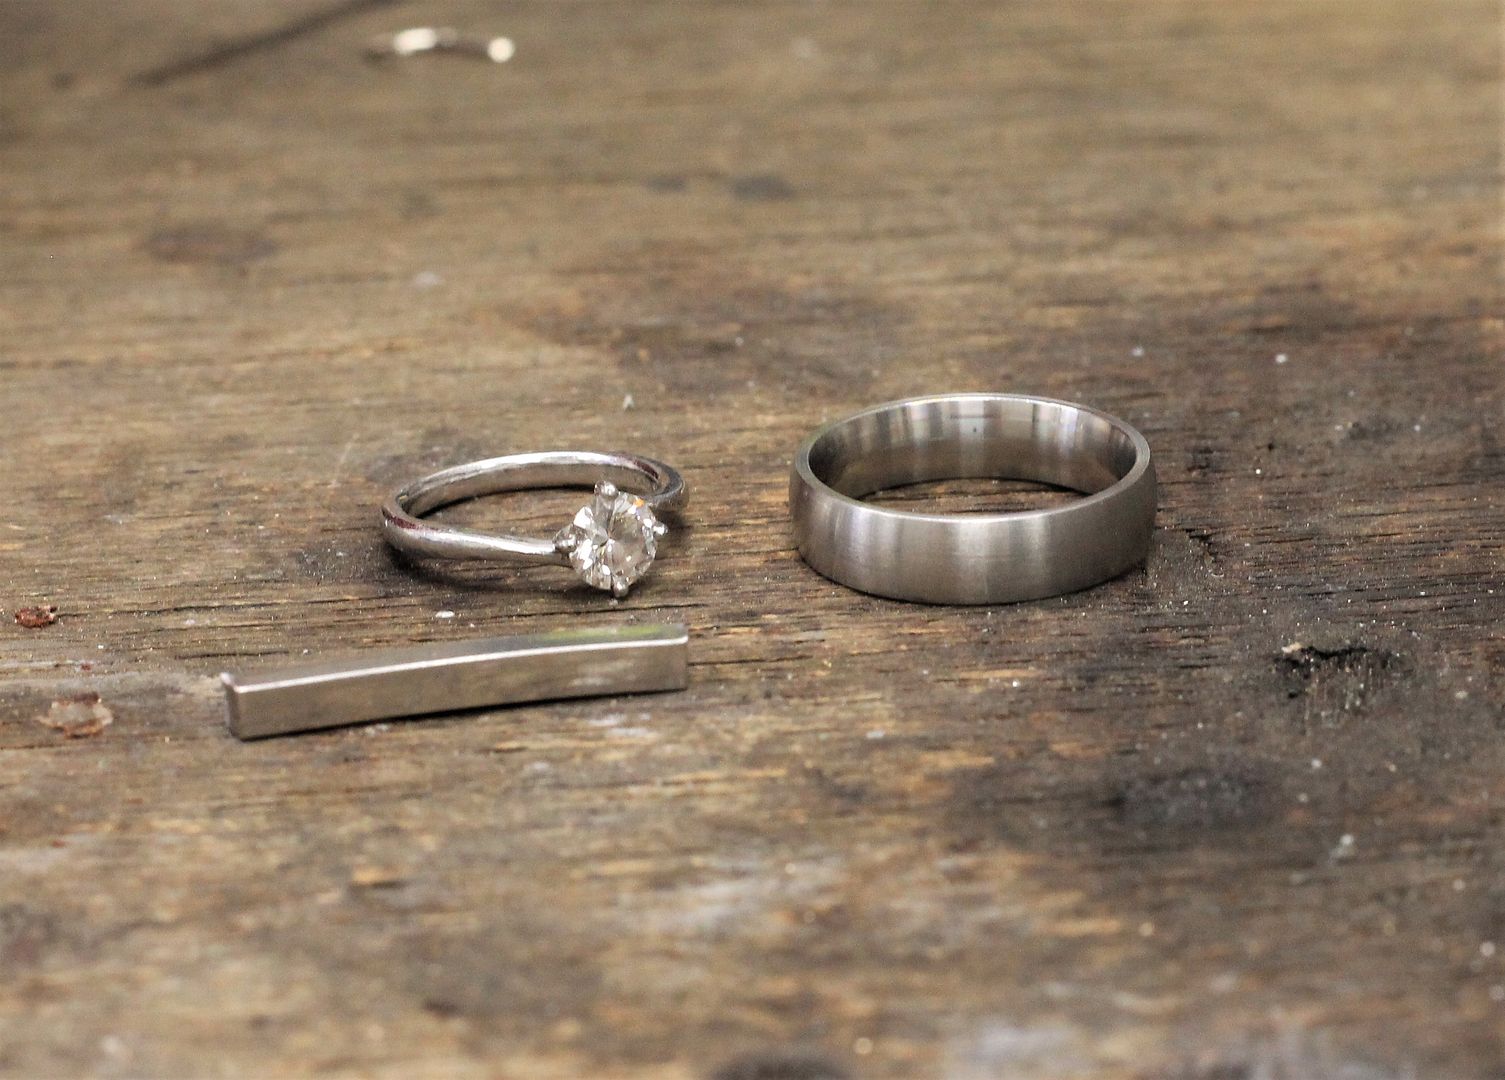
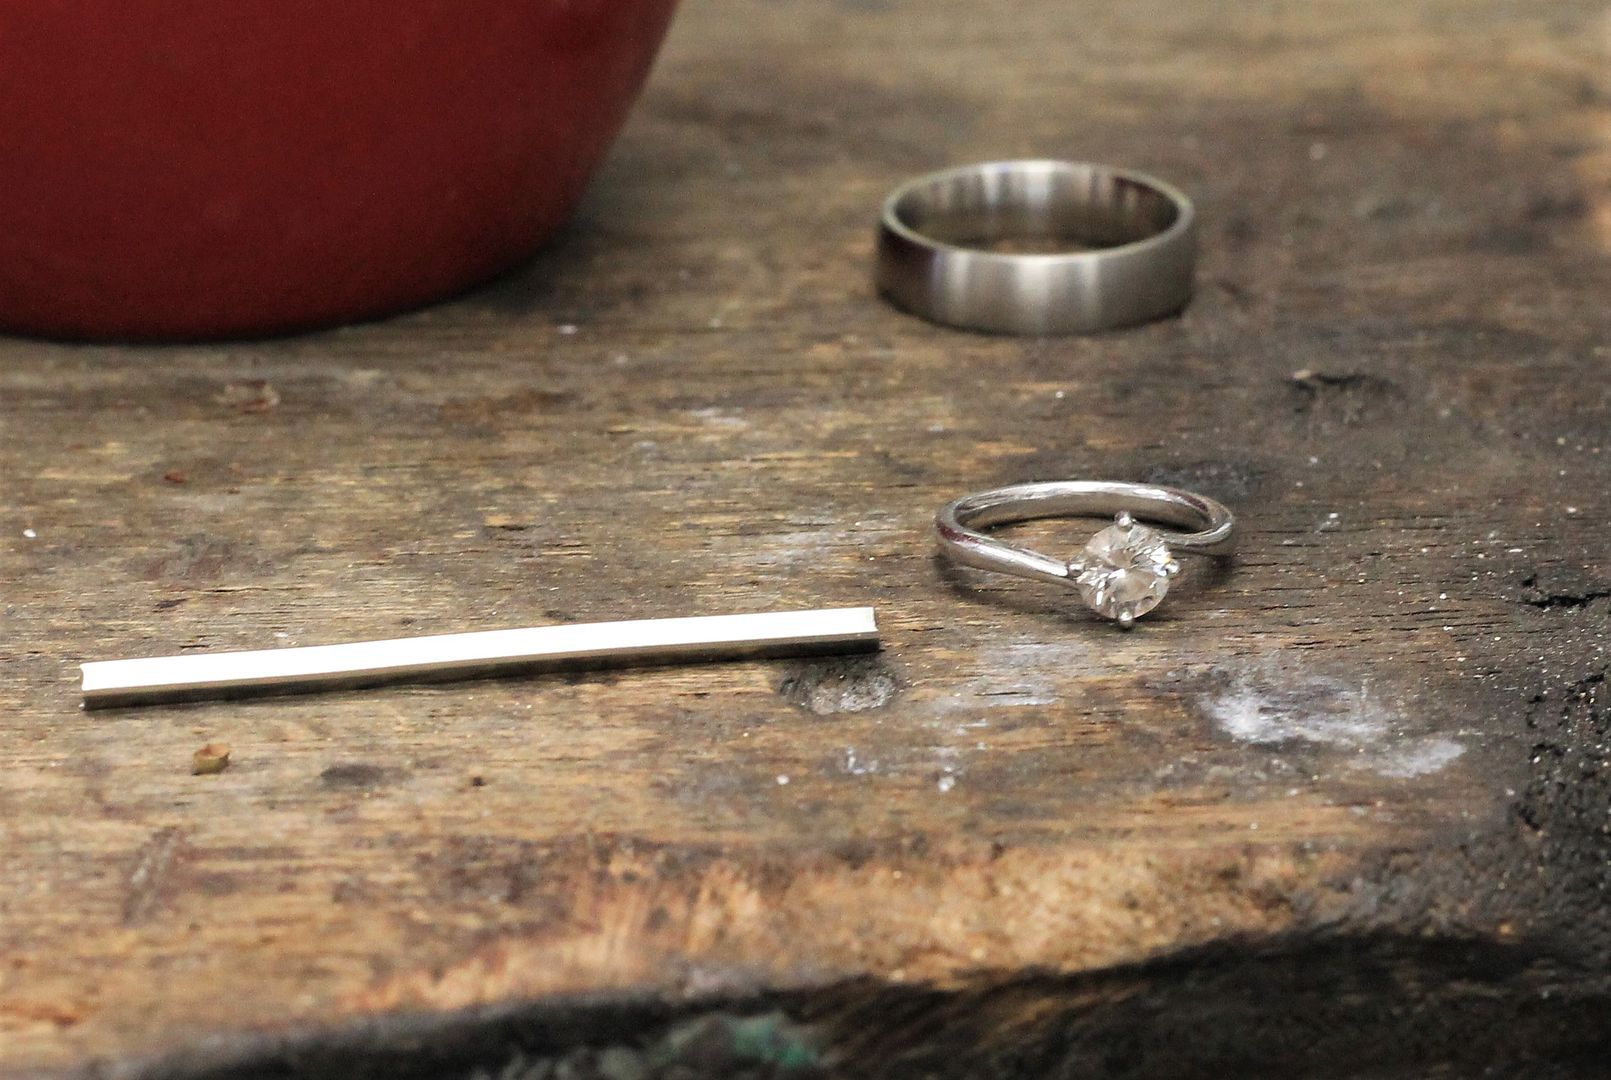
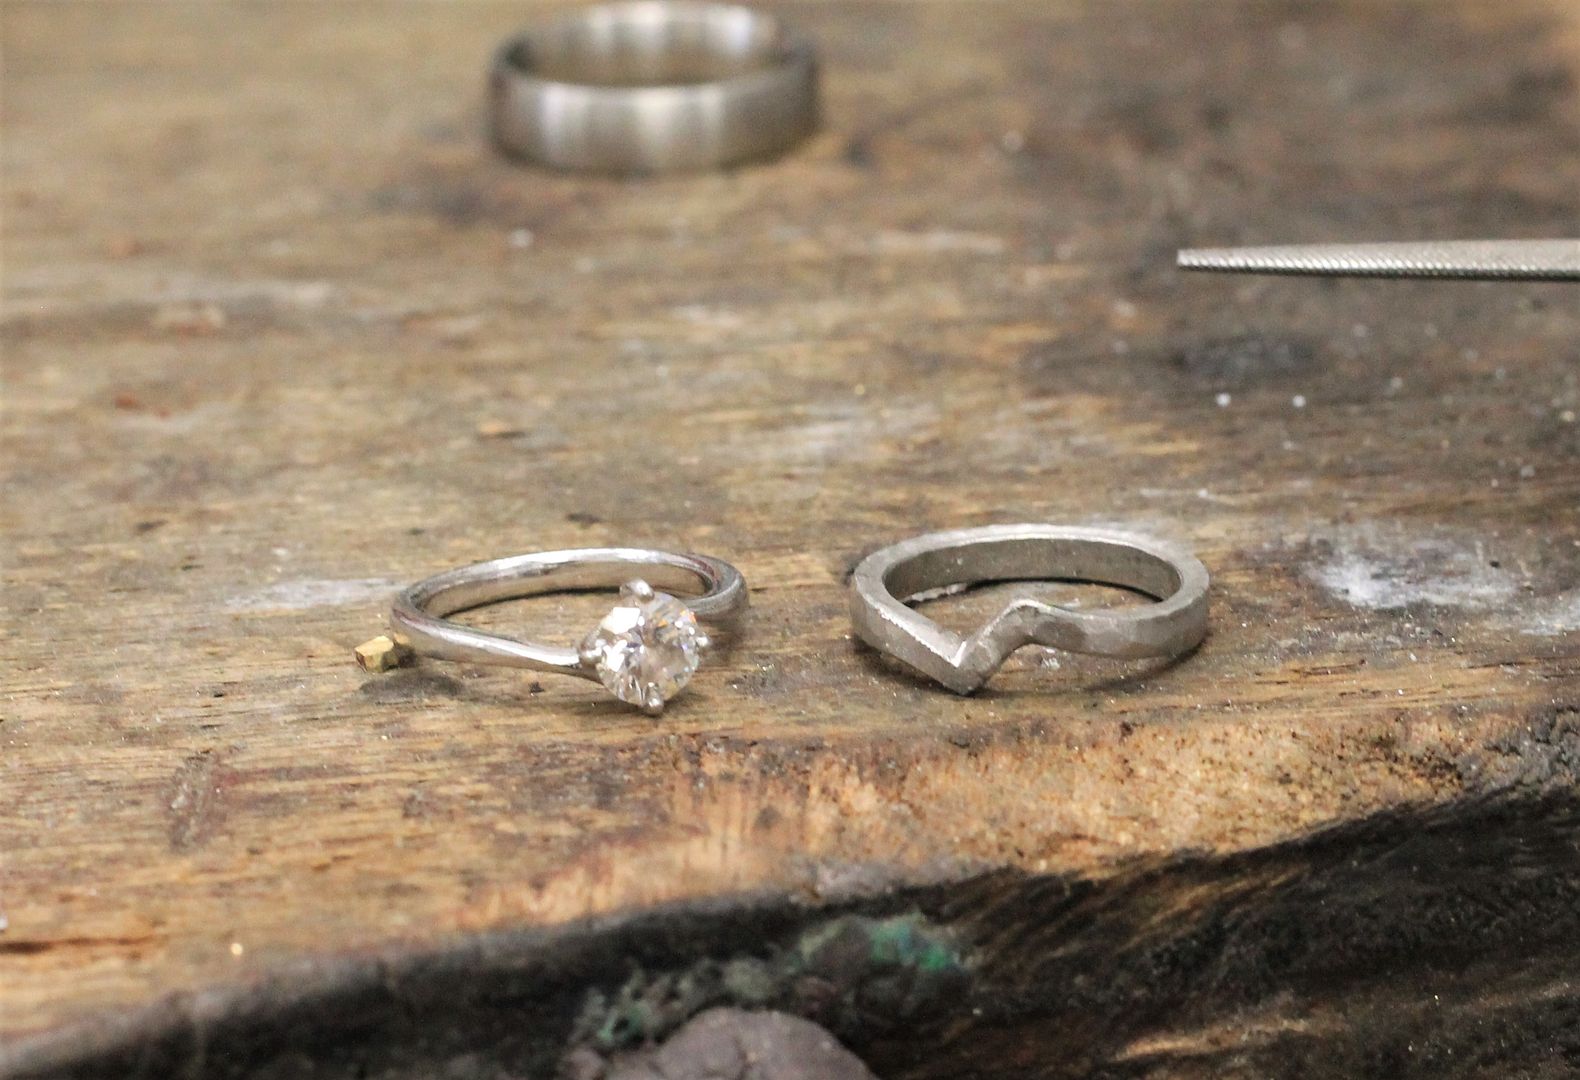
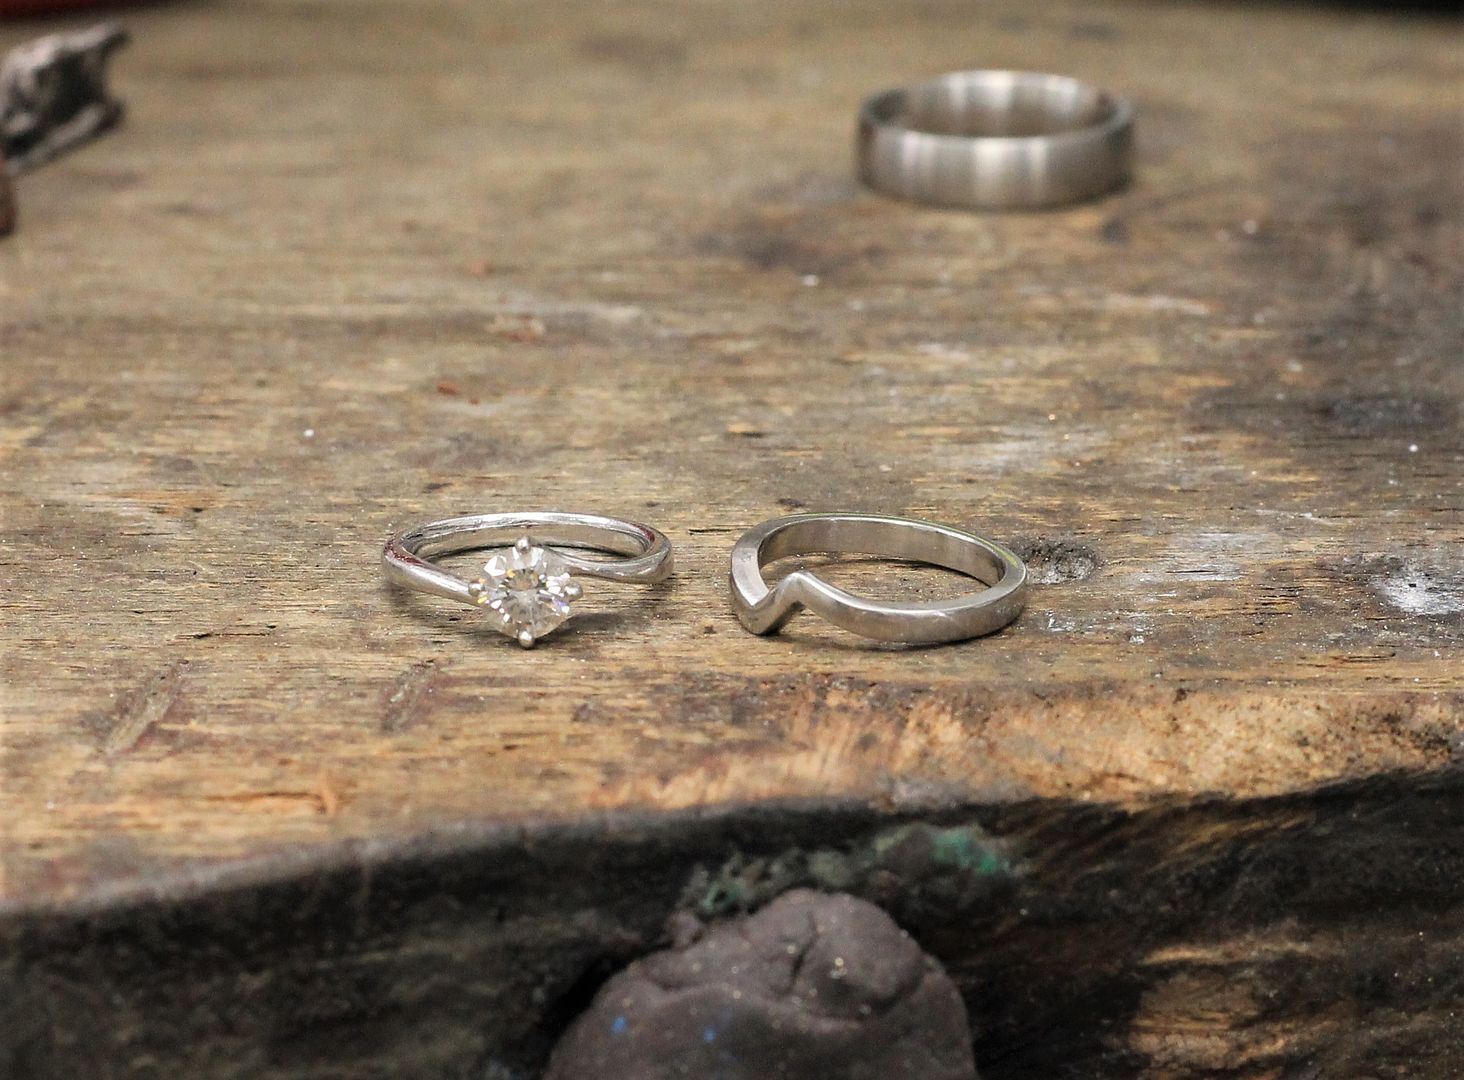
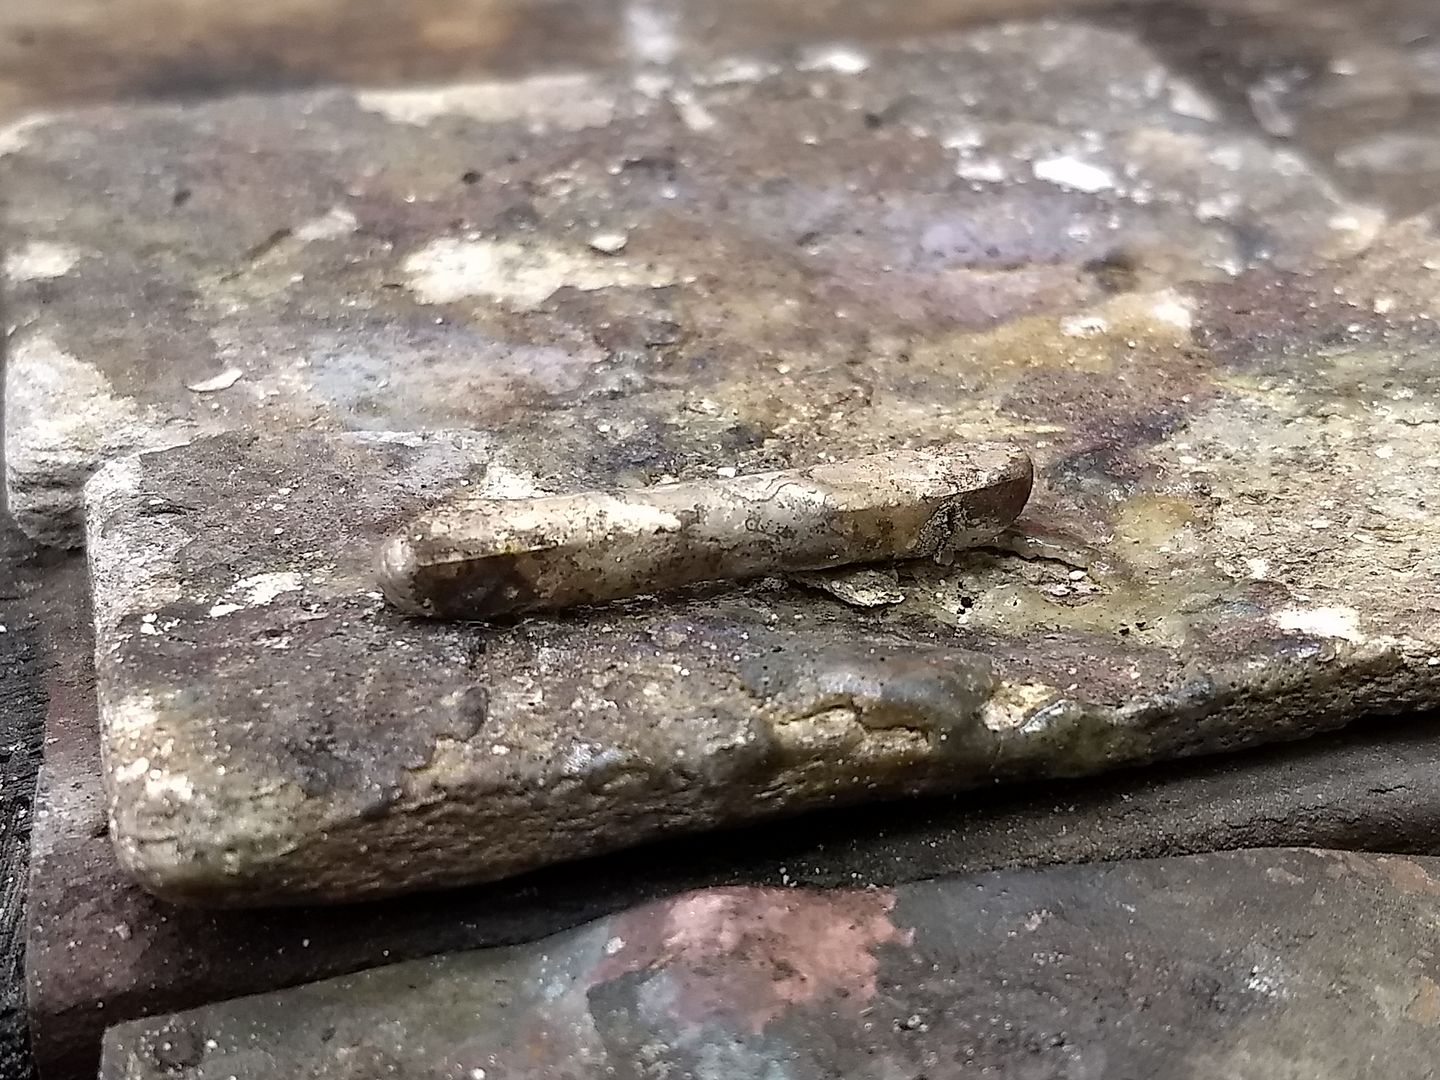
As you can see, in the pic you have 3 items. The original engagement ring top left which I made last year. Top right is a new 5mm court shaped blank in platinum. Bottom is a 3mm square bar of platinum, which is what we'll spend most of our time on here,
So the bar gets rolled out to 2mm square ready for bending. The engagement ring is 1.6 x 2.15 at the base so once hammered out we'll achieve what we need with a 2mm square.
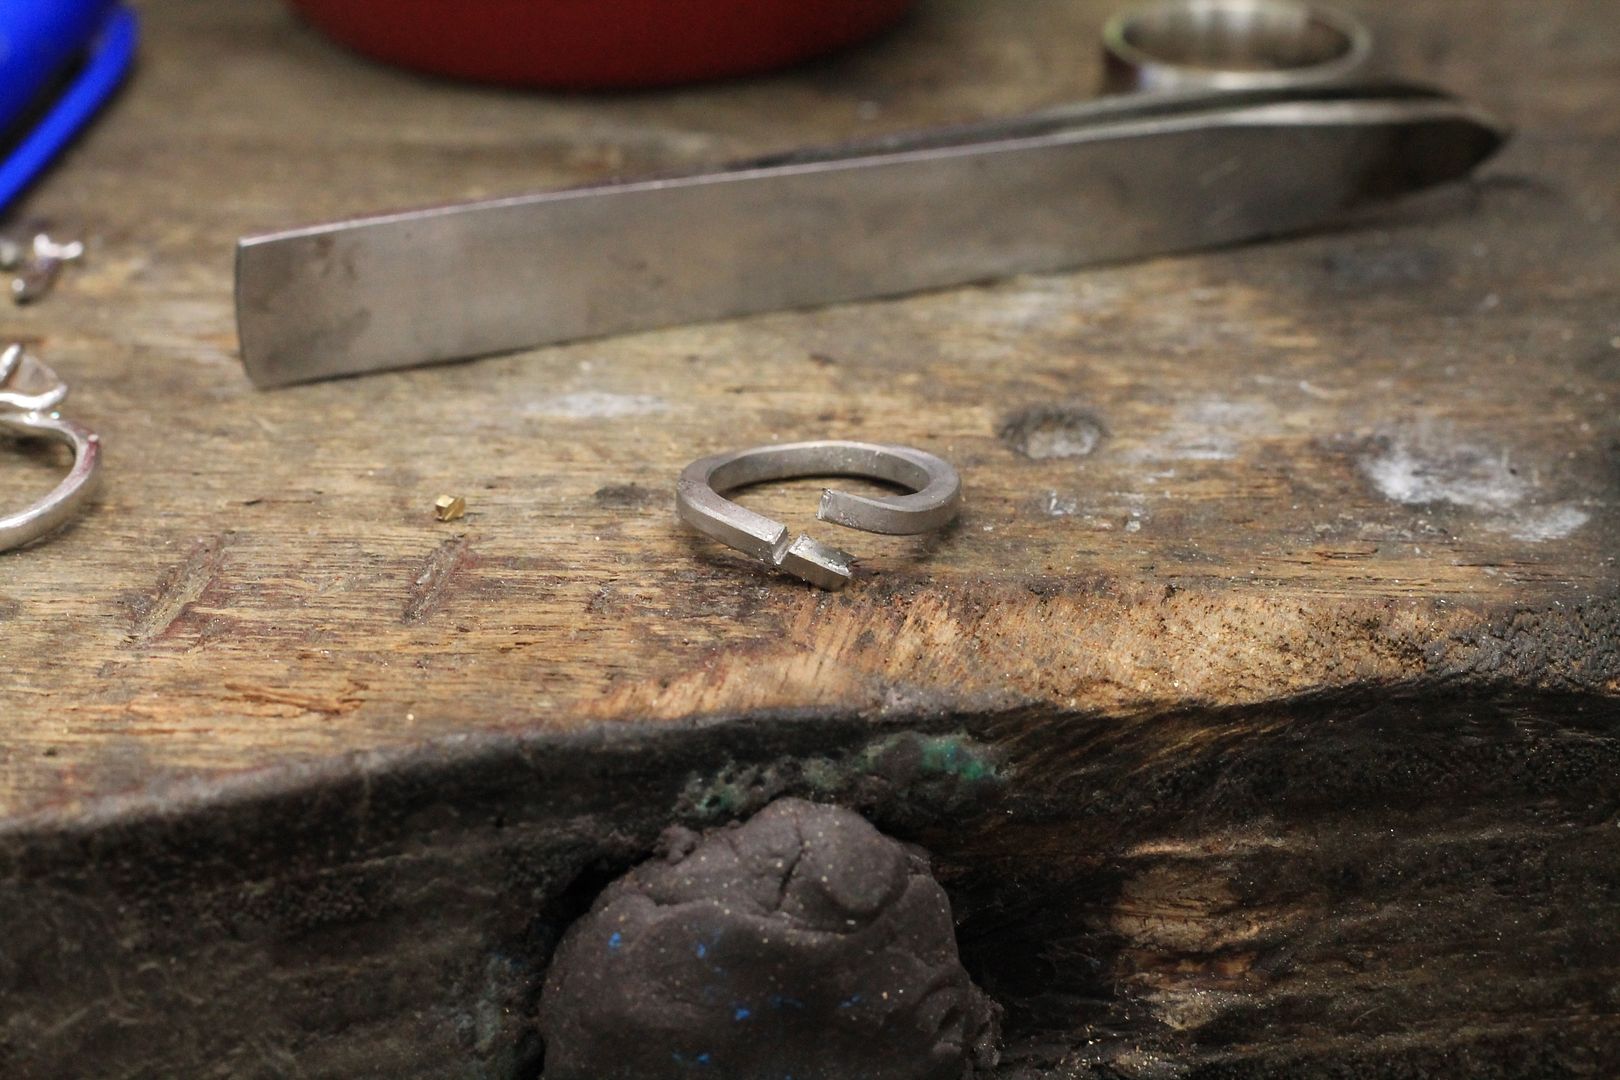
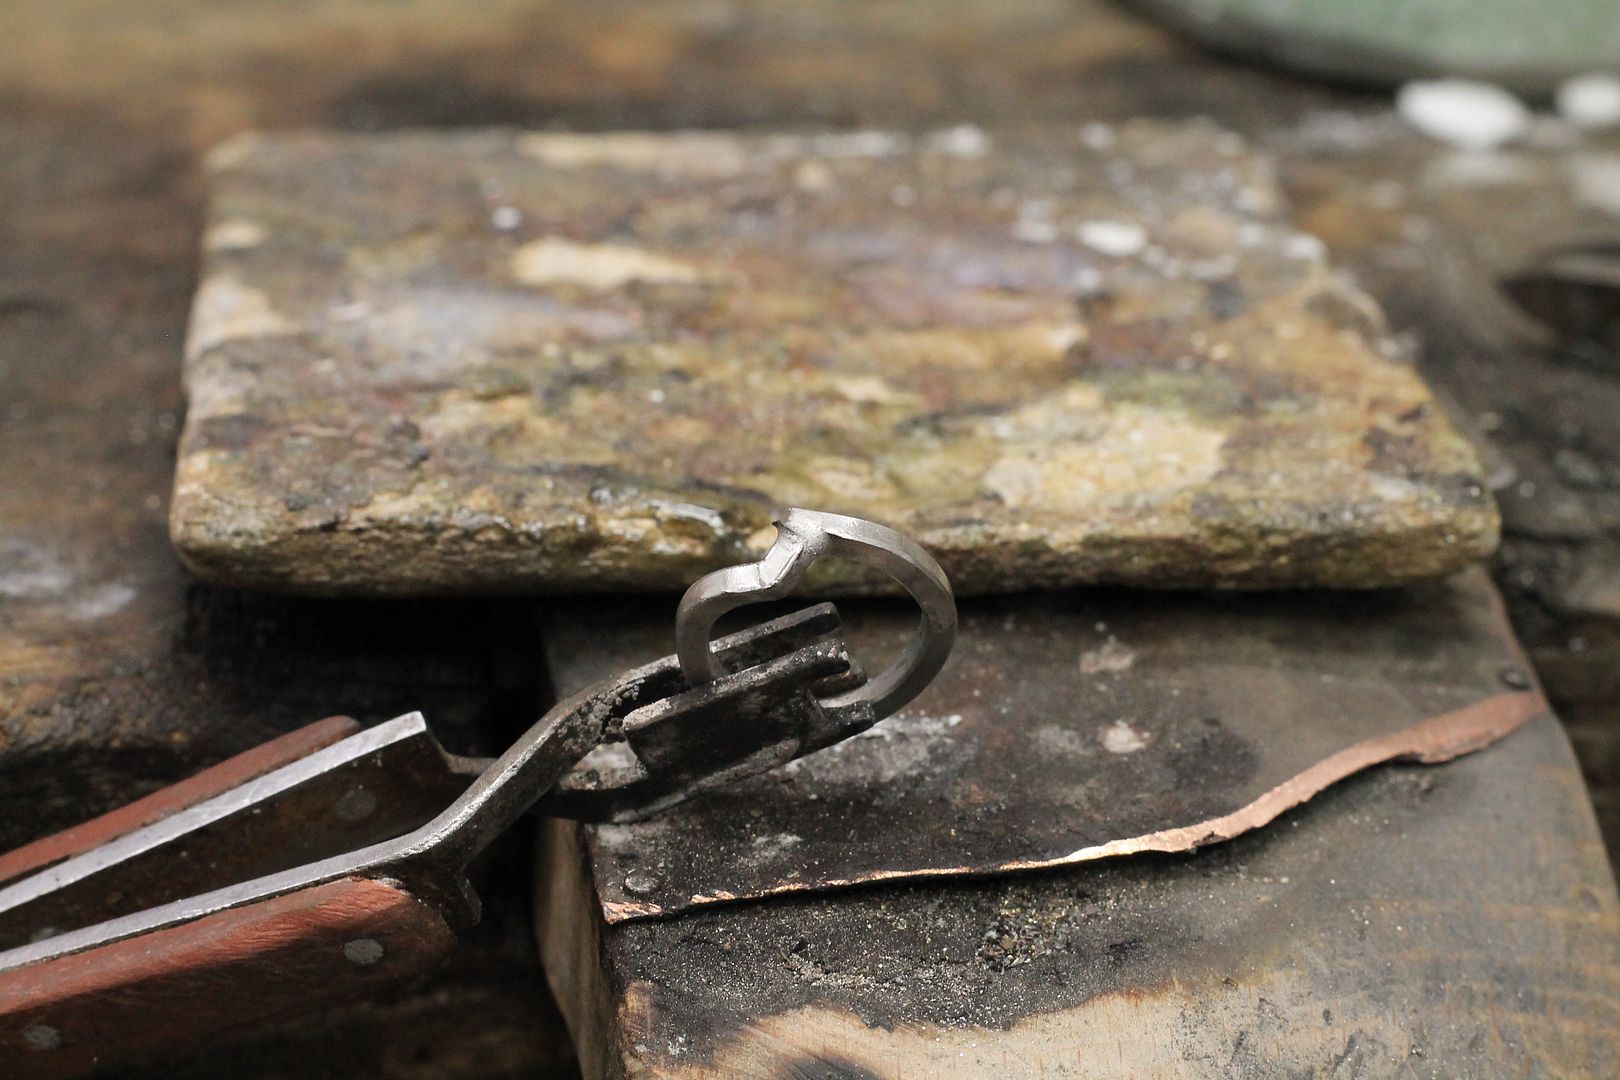
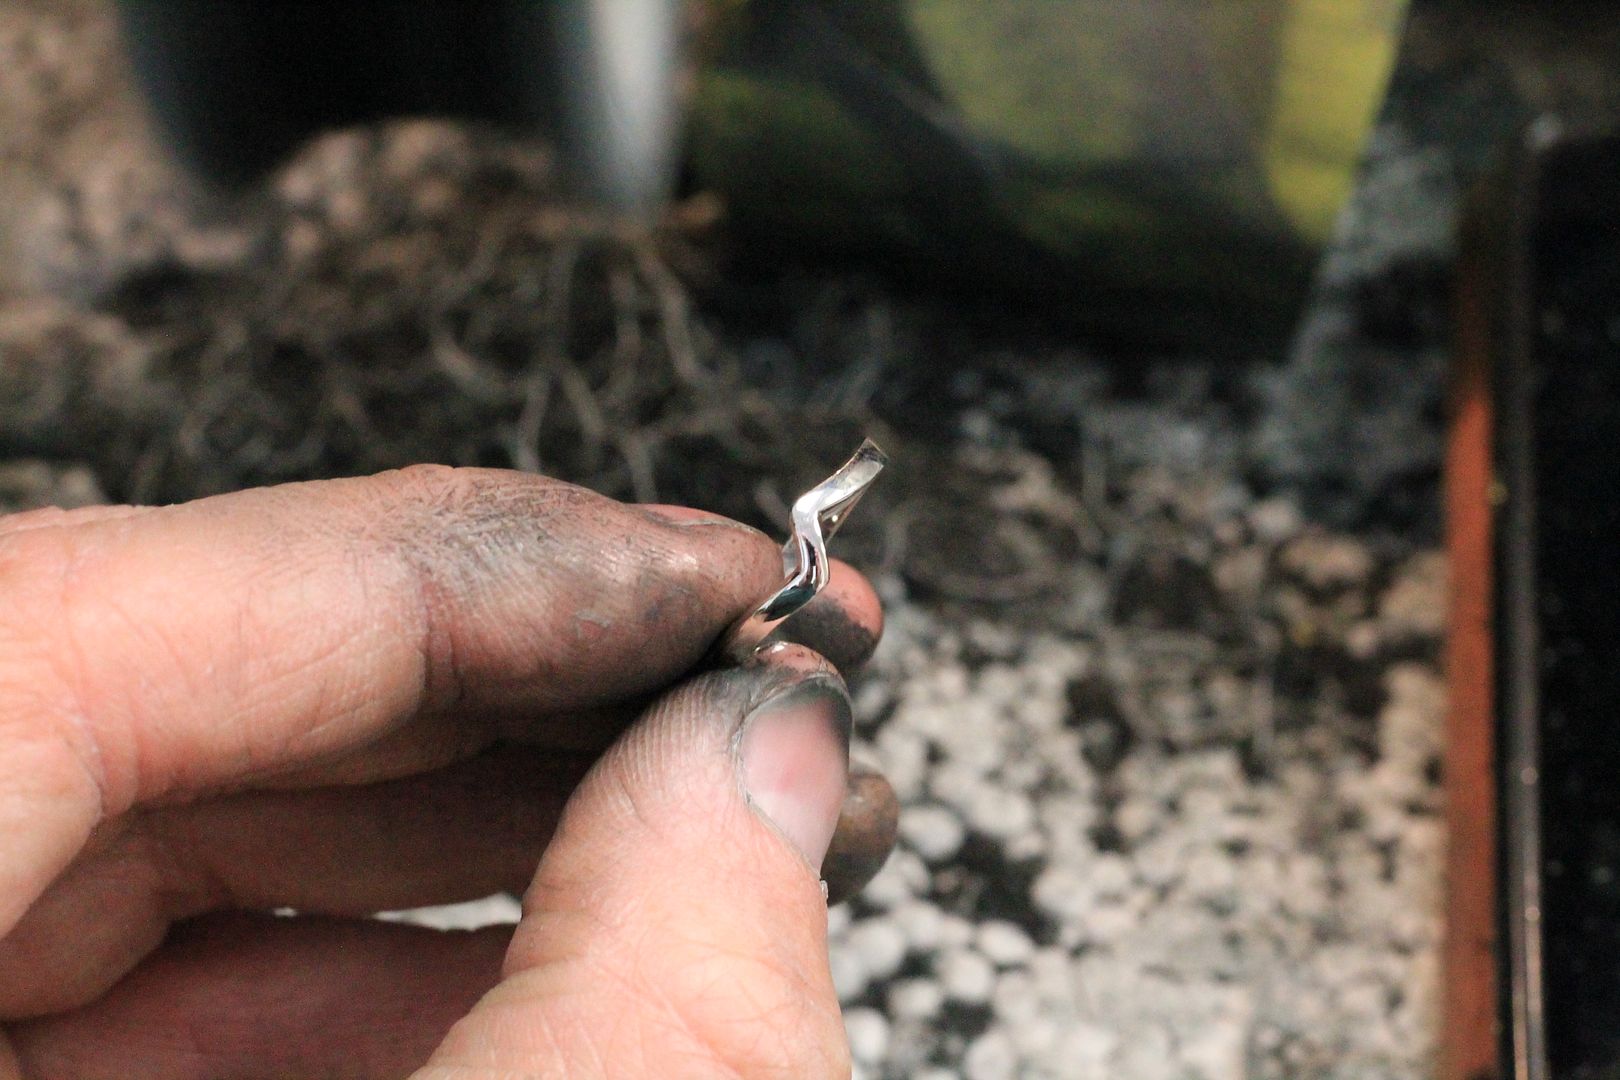
The bar is then turned to form a loose band and twisted to start the shaping process.

A little more twisting and you can see the shape forming.
The overhang on the outside is notched.....
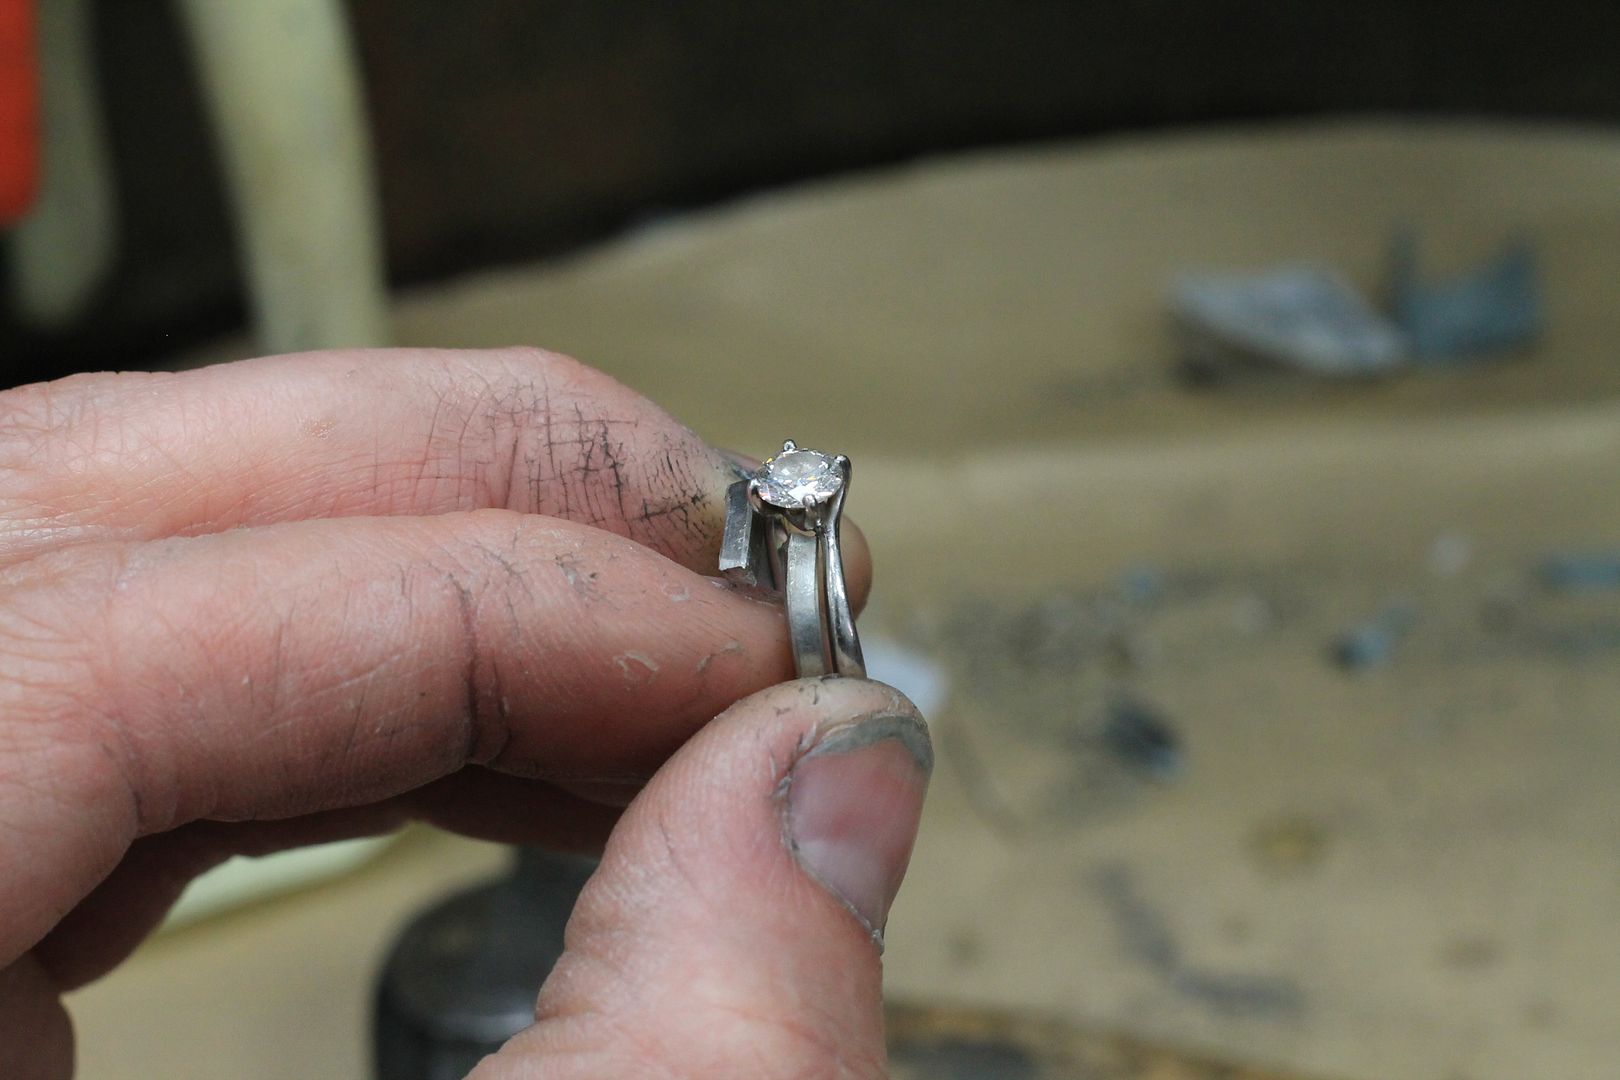
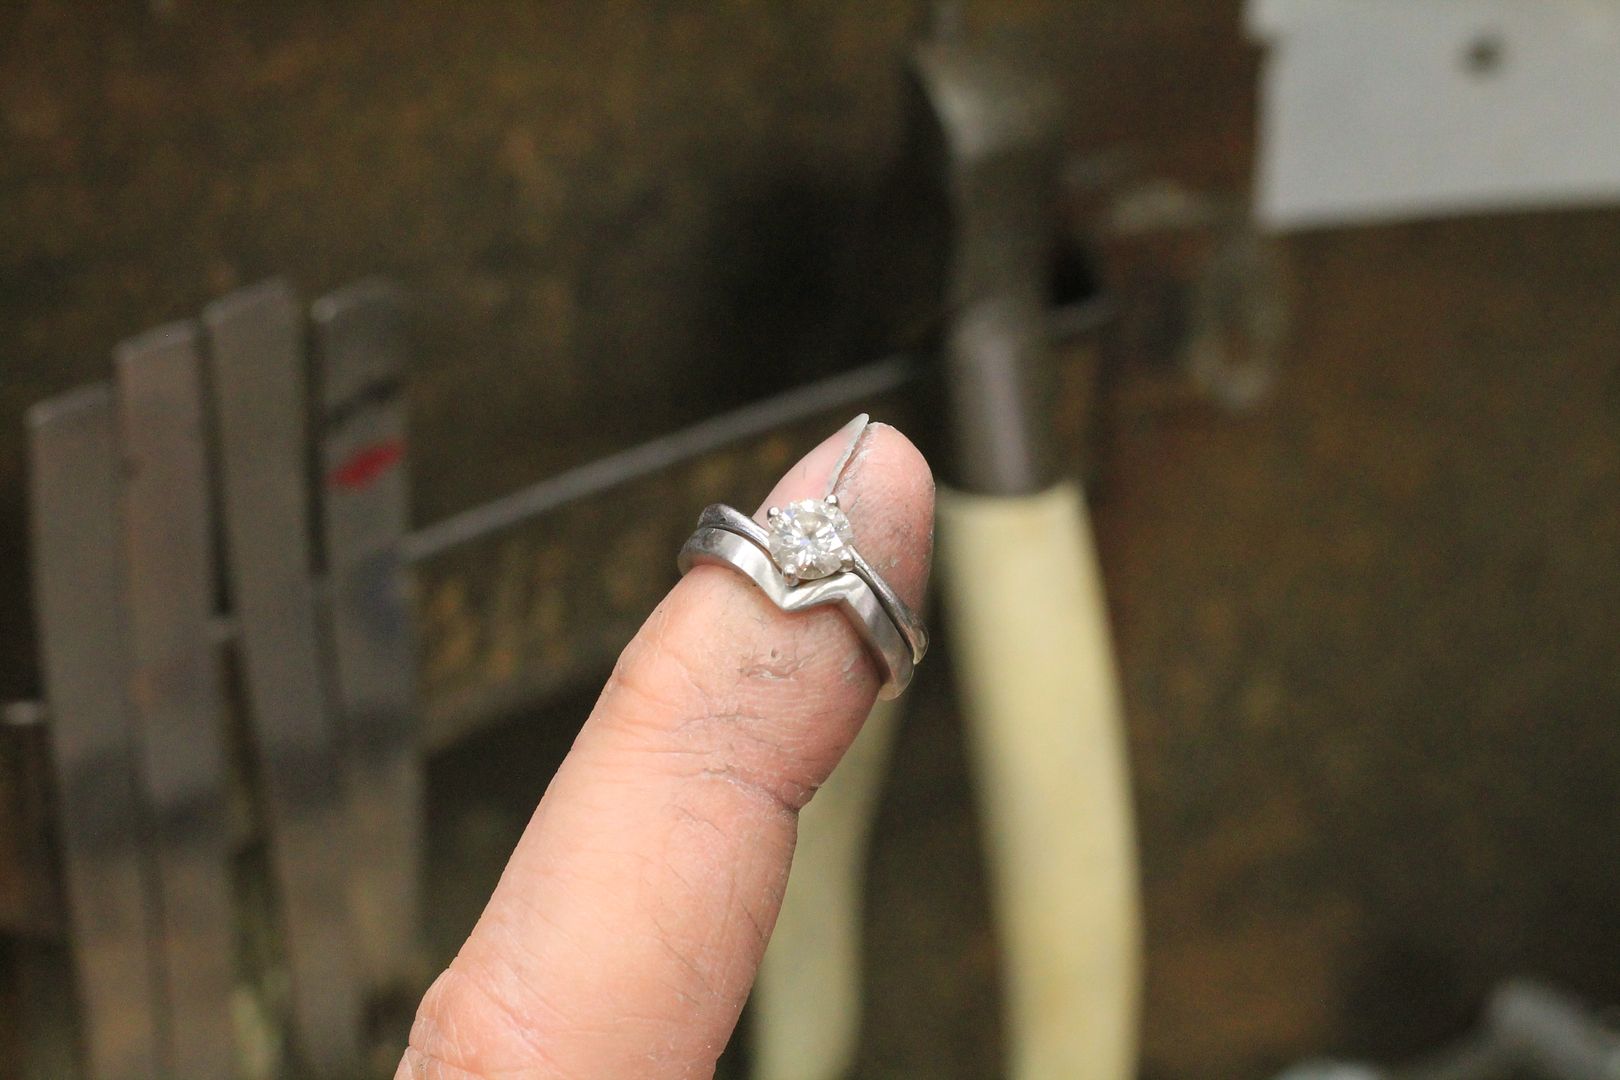
And then bent round the head of the engagement ring to create the wraparound shape.
To fill the cuts and gaps I use a platinum solder. Platinum solder is a bit of a sod and you'll find many goldsmiths will only use a low temperature (called "easy" or "extra easy") solder because they are scared of the heat required to melt the hard stuff. The low temperature material will not polish well though and because it's not as dense as the platinum bar it polishes out leaving a ridge. Some of you with platinum rings may have experienced this ridge showing after sizing?? It can happen on other metals too.
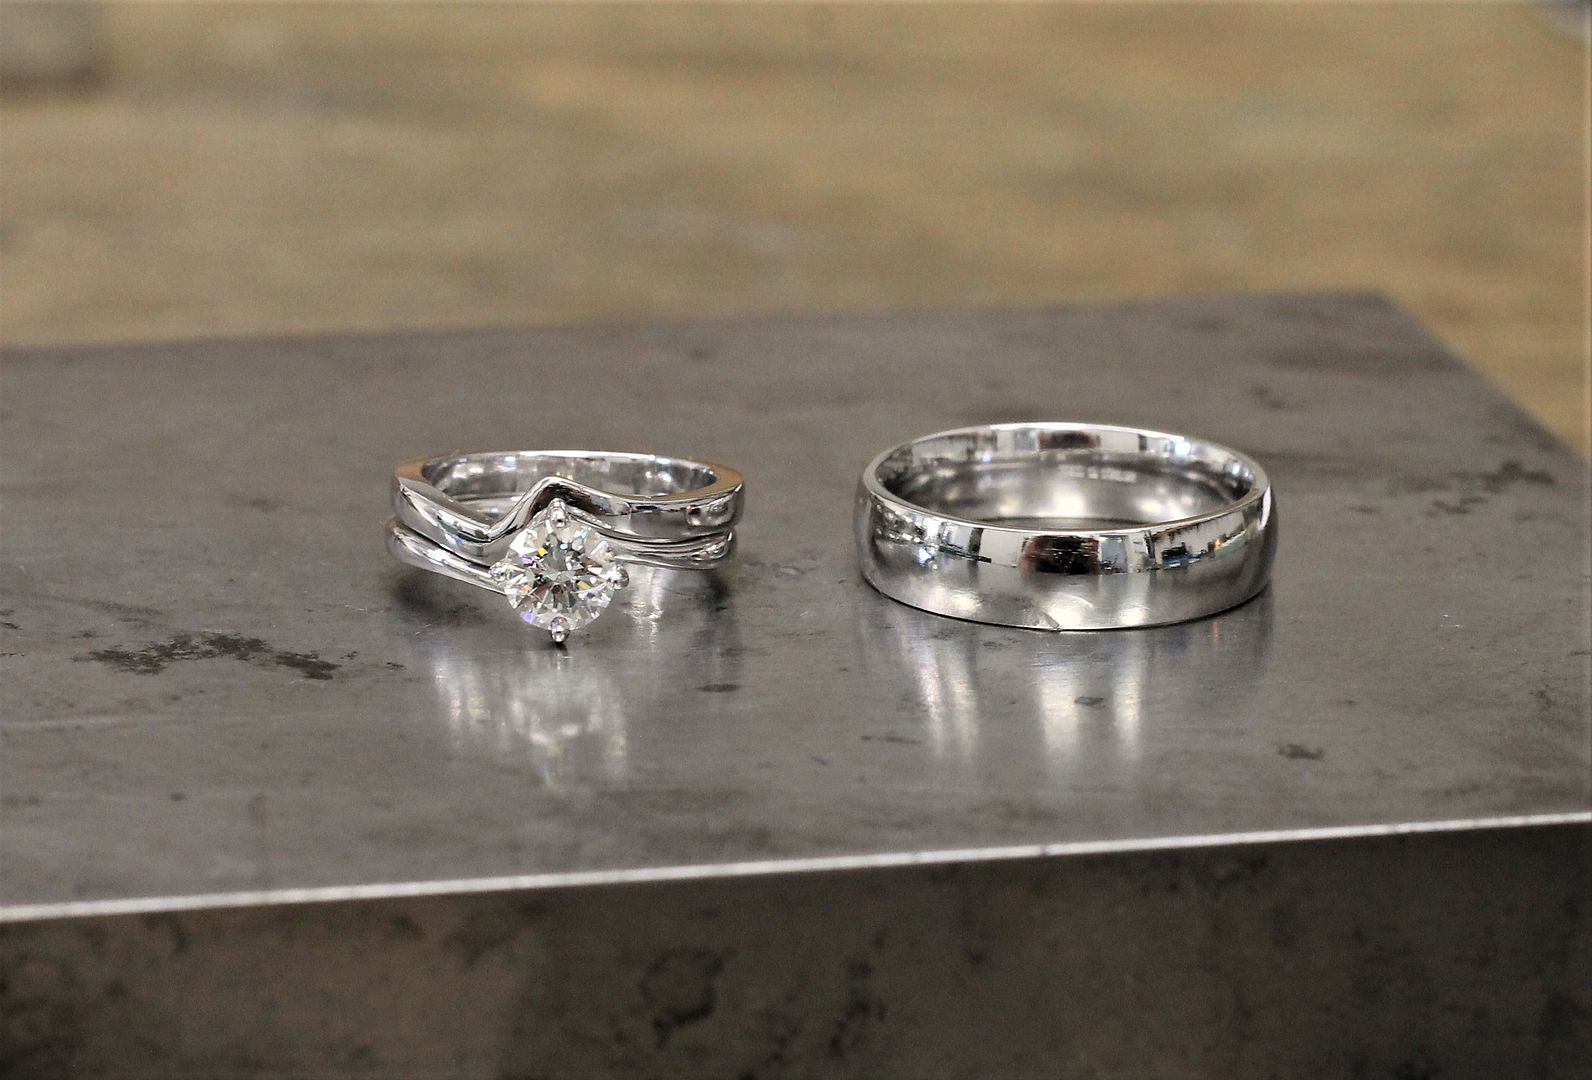
After the joints are soldered the excess is filed away and the shape finalised....
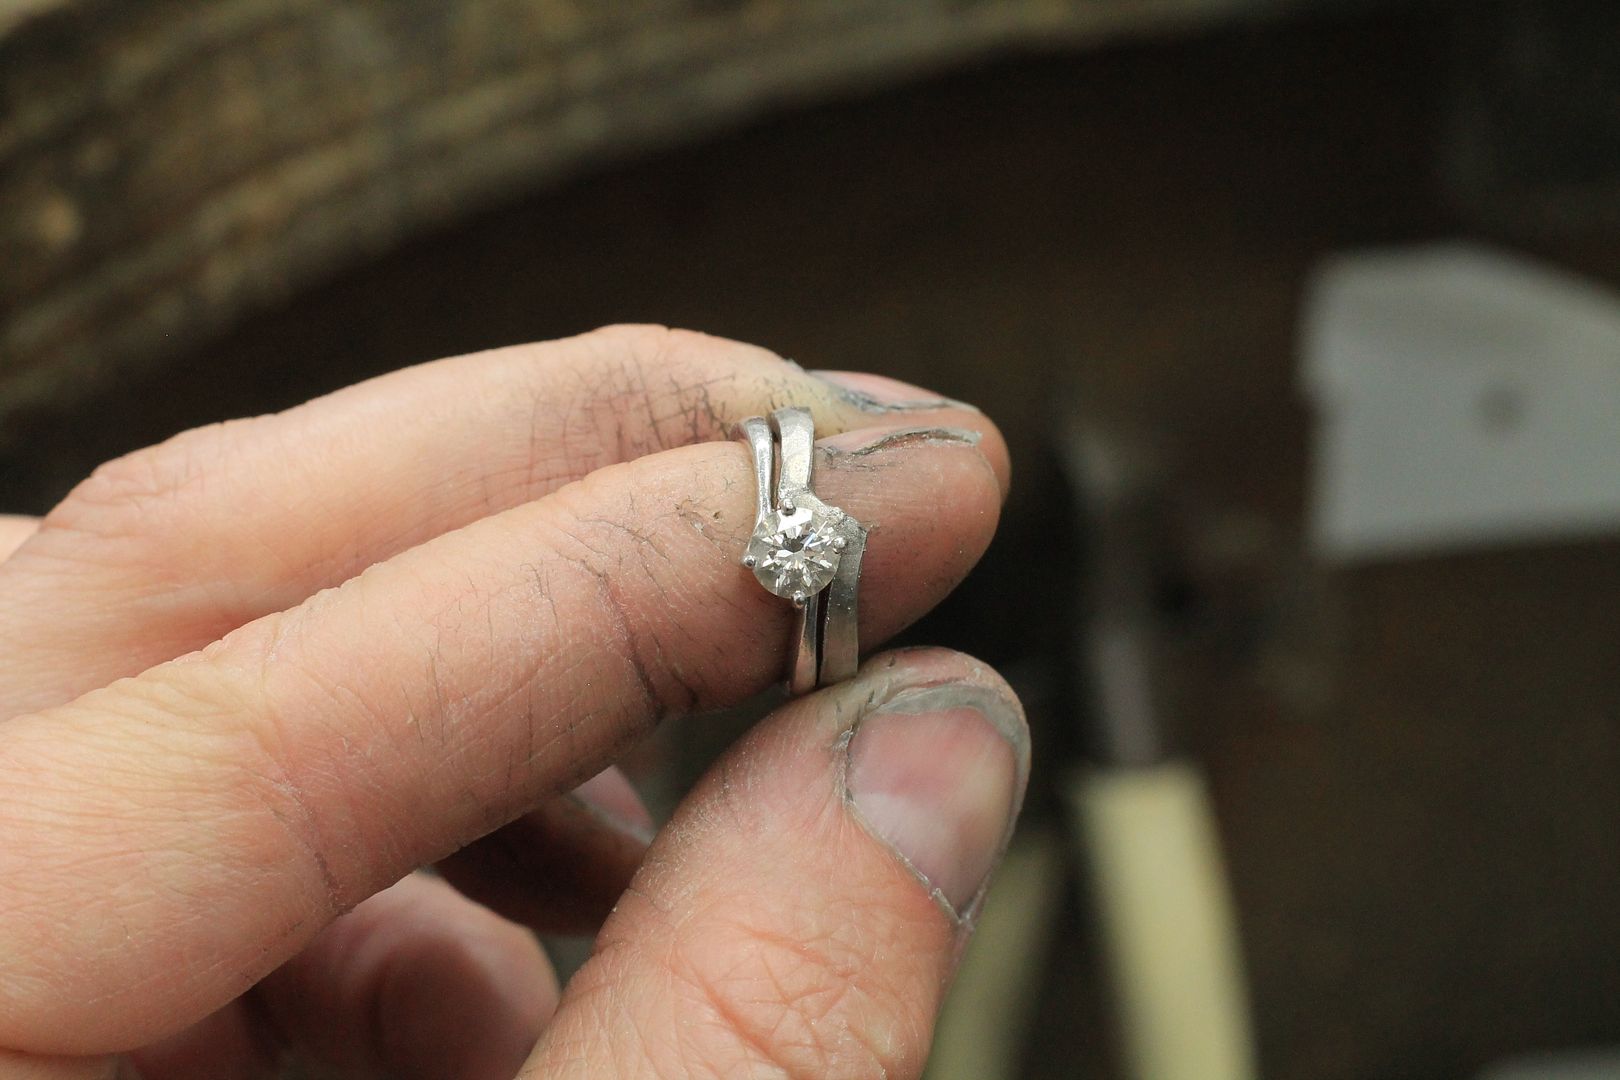
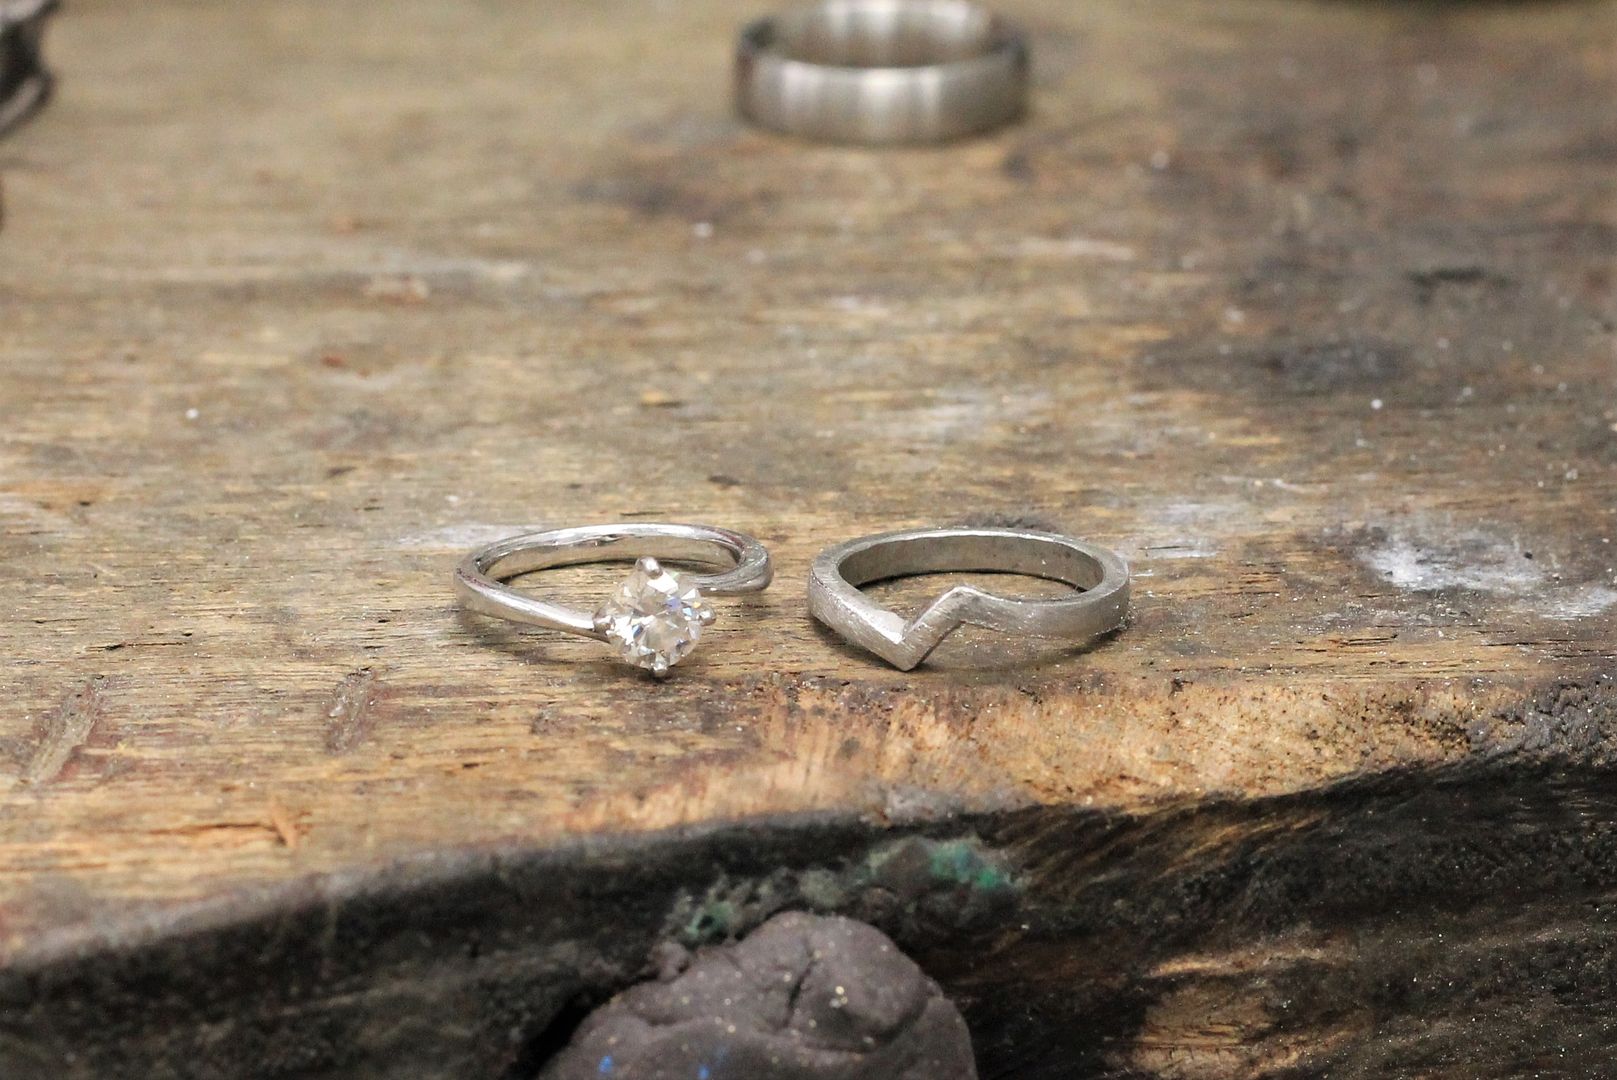
With the hard bit done it's now time to clean up the bands, both his and hers (his also needed taking up a size). The bands are then polished along with the engagement ring and it's all good to go
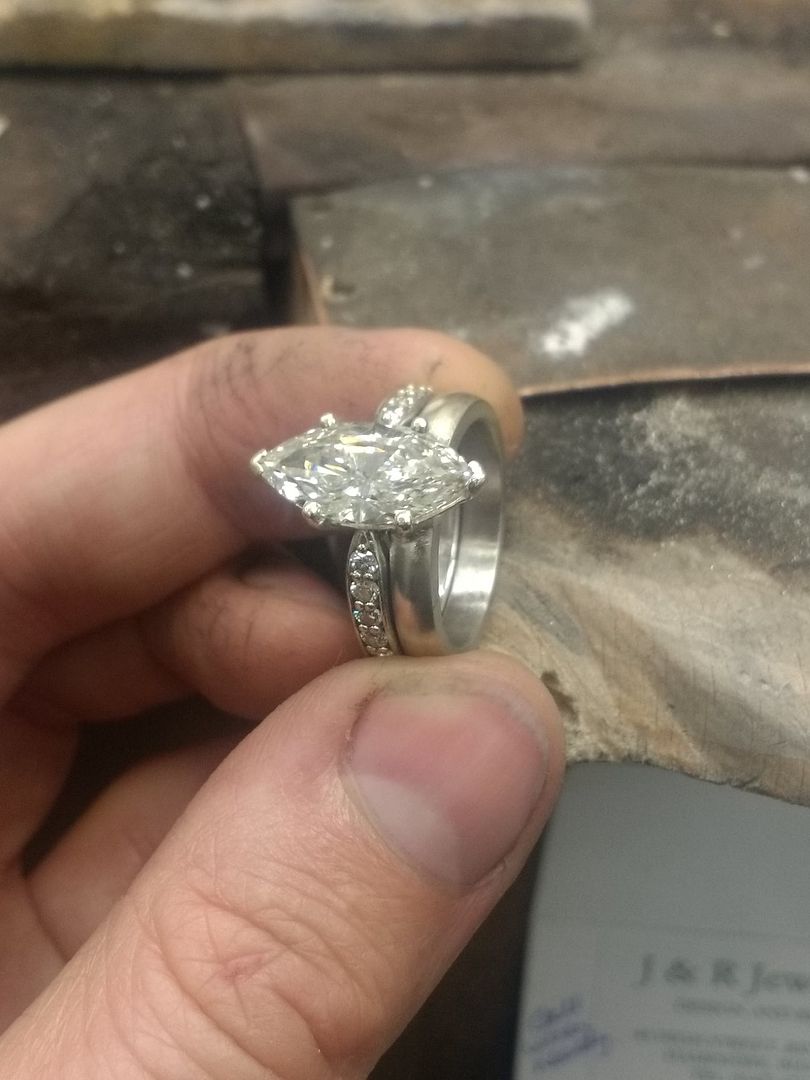
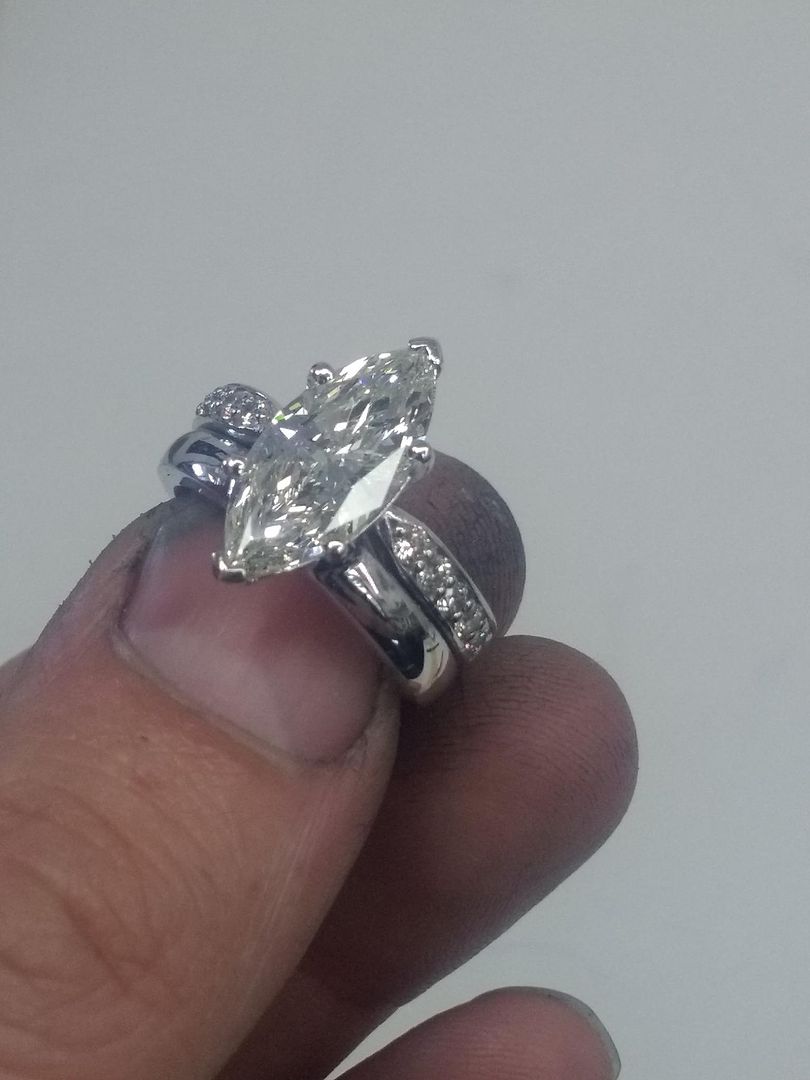
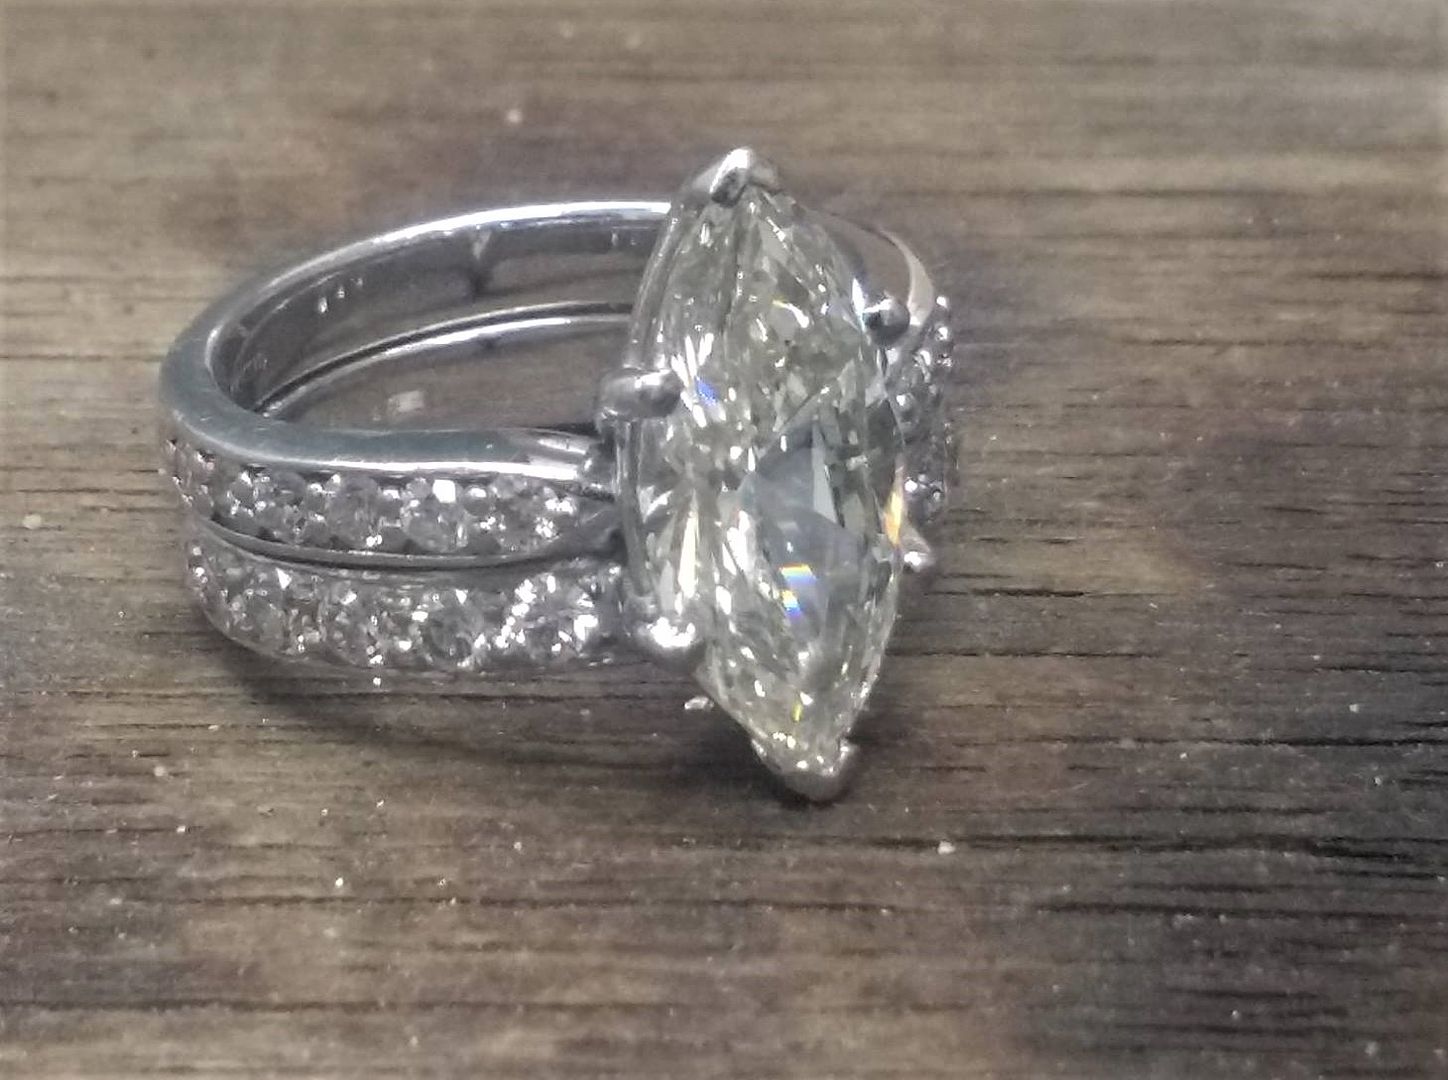
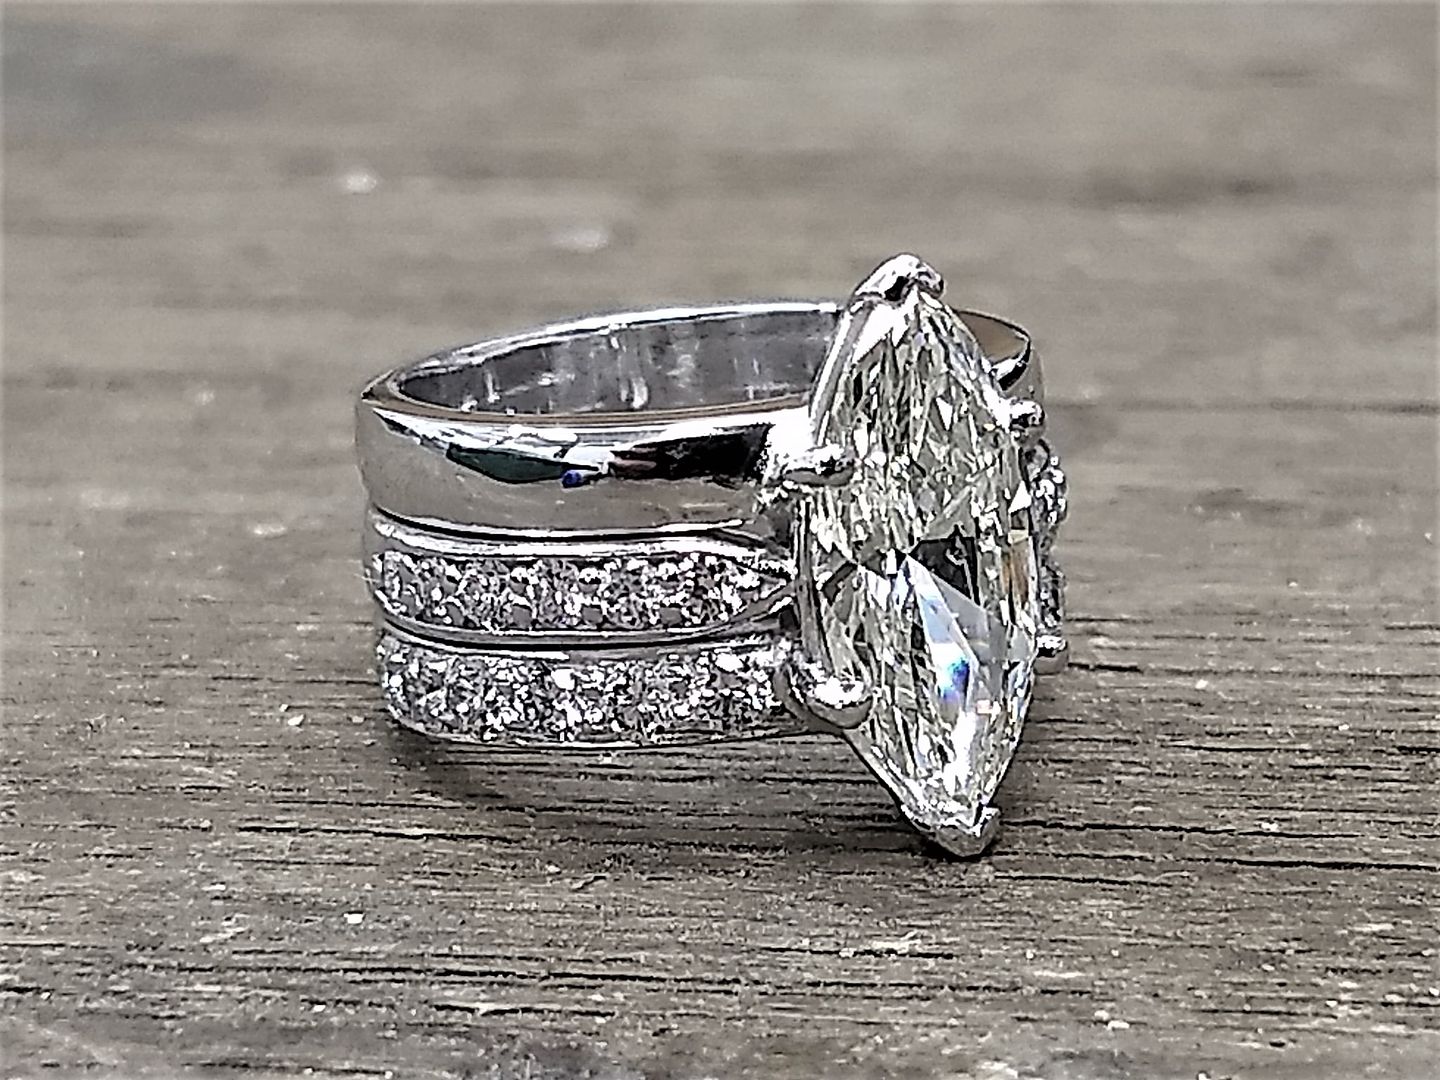
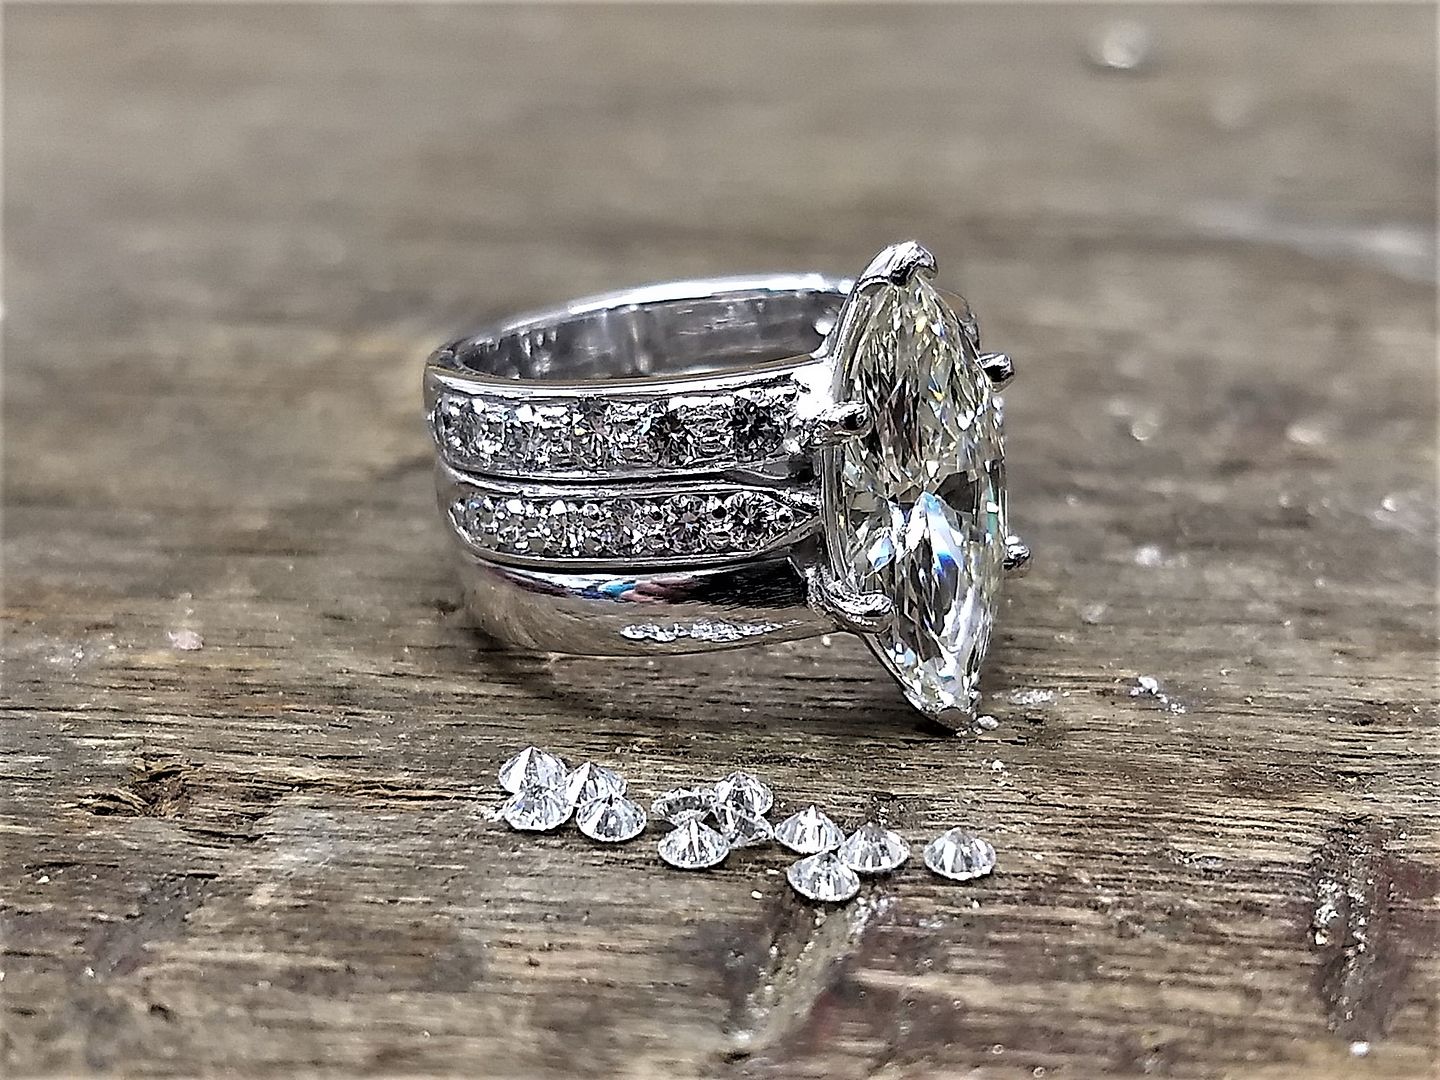
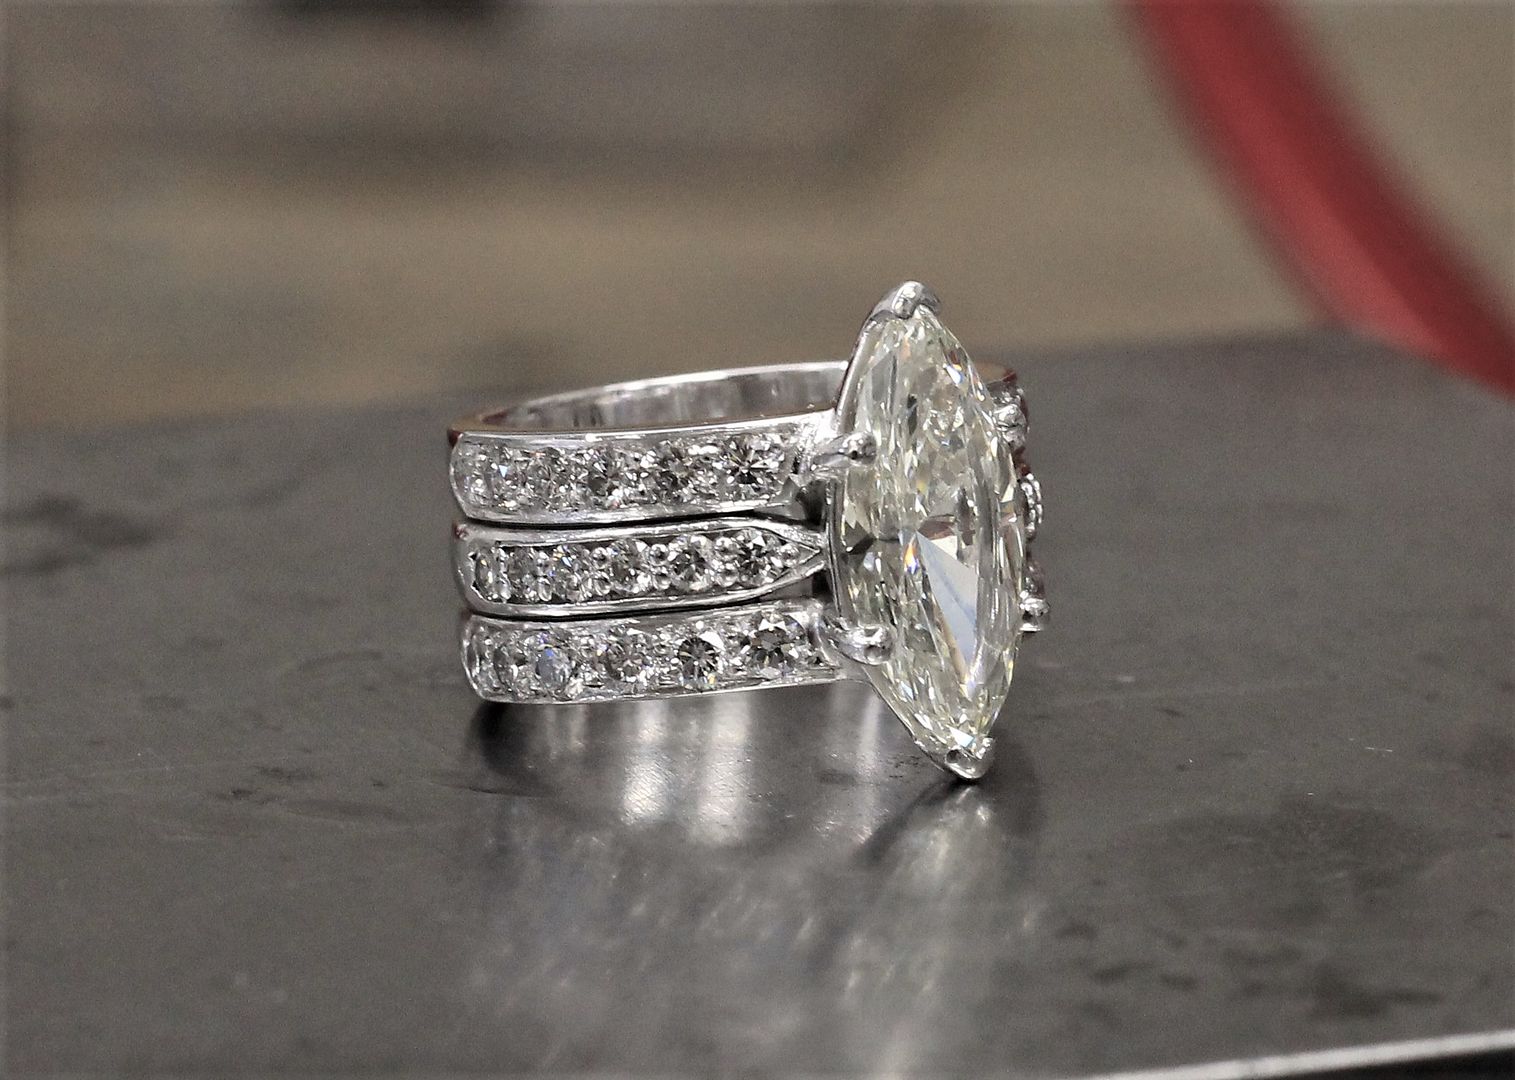
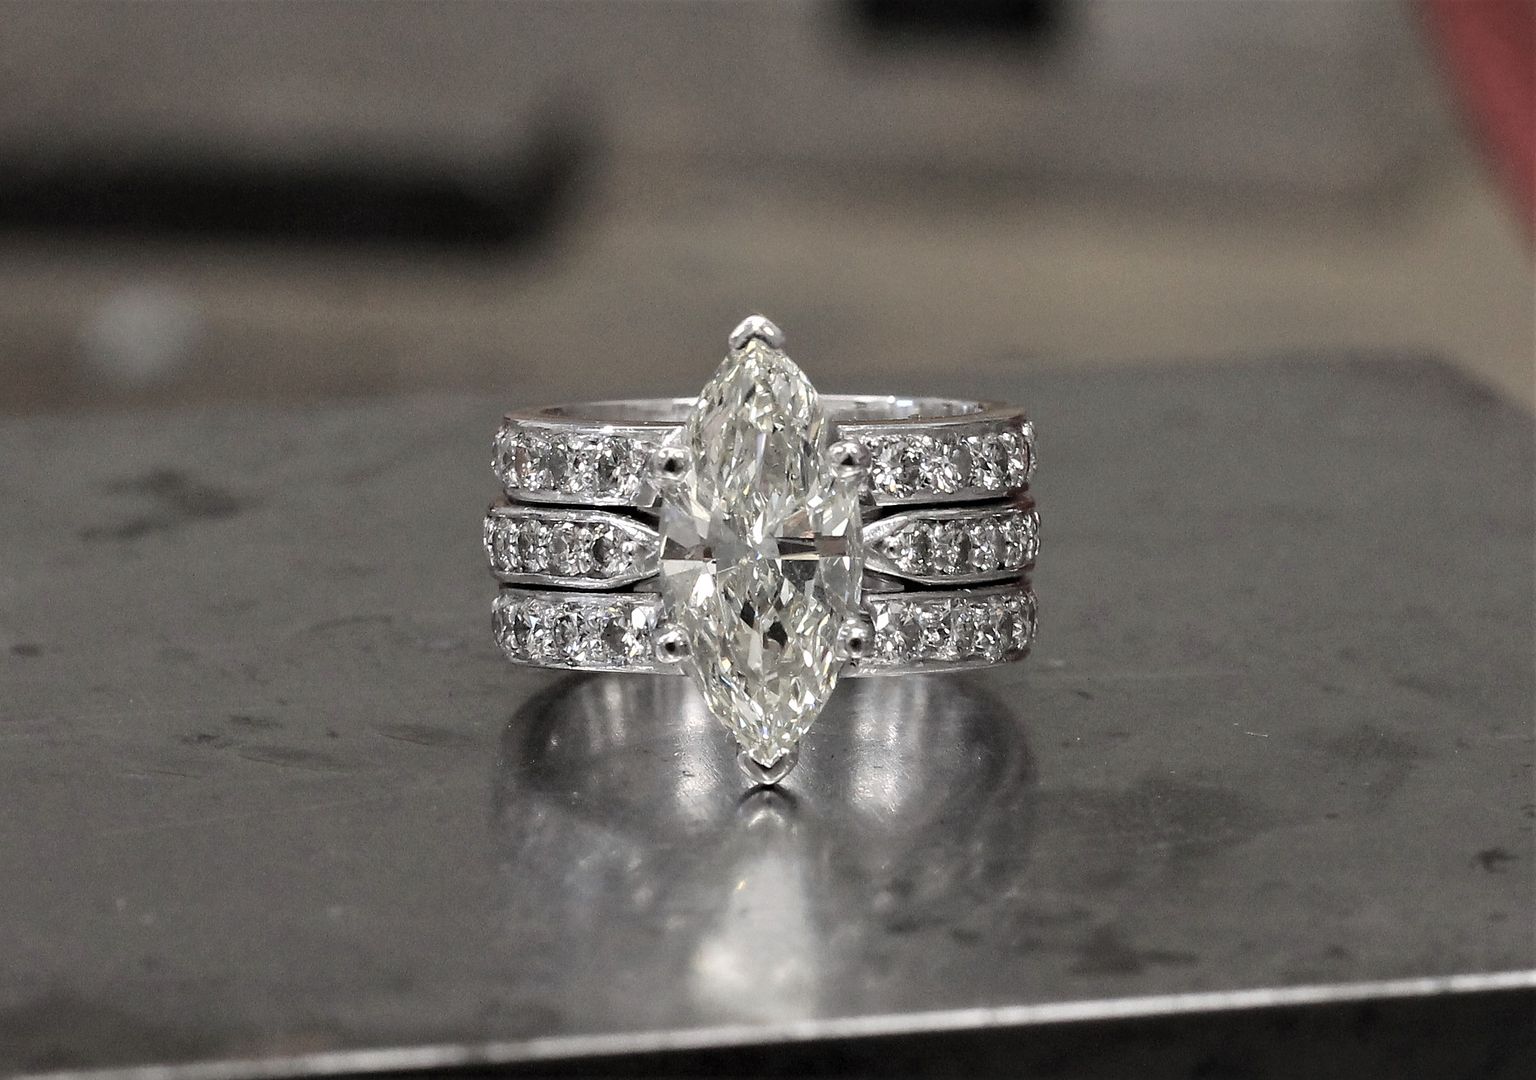
Another one we keep getting back is this marquis shaped engagement ring. Originally on a single, diamond set band we have (last year) added a diamond set, integral wedding band and this week another to match. Bit of a corker!
Just waved off the happy couple after making this shaped platinum band for them this morning (and supplying a gents platinum band)
Any questions on the processes just ask
As you can see, in the pic you have 3 items. The original engagement ring top left which I made last year. Top right is a new 5mm court shaped blank in platinum. Bottom is a 3mm square bar of platinum, which is what we'll spend most of our time on here,

So the bar gets rolled out to 2mm square ready for bending. The engagement ring is 1.6 x 2.15 at the base so once hammered out we'll achieve what we need with a 2mm square.

The bar is then turned to form a loose band and twisted to start the shaping process.

A little more twisting and you can see the shape forming.

The overhang on the outside is notched.....

And then bent round the head of the engagement ring to create the wraparound shape.


To fill the cuts and gaps I use a platinum solder. Platinum solder is a bit of a sod and you'll find many goldsmiths will only use a low temperature (called "easy" or "extra easy") solder because they are scared of the heat required to melt the hard stuff. The low temperature material will not polish well though and because it's not as dense as the platinum bar it polishes out leaving a ridge. Some of you with platinum rings may have experienced this ridge showing after sizing?? It can happen on other metals too.


After the joints are soldered the excess is filed away and the shape finalised....


With the hard bit done it's now time to clean up the bands, both his and hers (his also needed taking up a size). The bands are then polished along with the engagement ring and it's all good to go


Another one we keep getting back is this marquis shaped engagement ring. Originally on a single, diamond set band we have (last year) added a diamond set, integral wedding band and this week another to match. Bit of a corker!


Edited by ecain63 on Sunday 8th July 20:58
Morning all.....
On the 6th of next month I'll be having my 3 year post treatment scan, which according to my nurse specialist is a bit of a milestone. Most oncology units are now looking at a 3 year surveillance plan as opposed to the old 5 year system so in theory that could be me signed off in a month or so Luckily my local hospital and its partners are going to continue the 5 years of scans etc but even so, 3 years is a good box to tick. I told my nurse specialist ("other wife", as she's known) that if I made it through this crap I'd make her something in the workshop...... and that time has arrived..... fingers crossed!
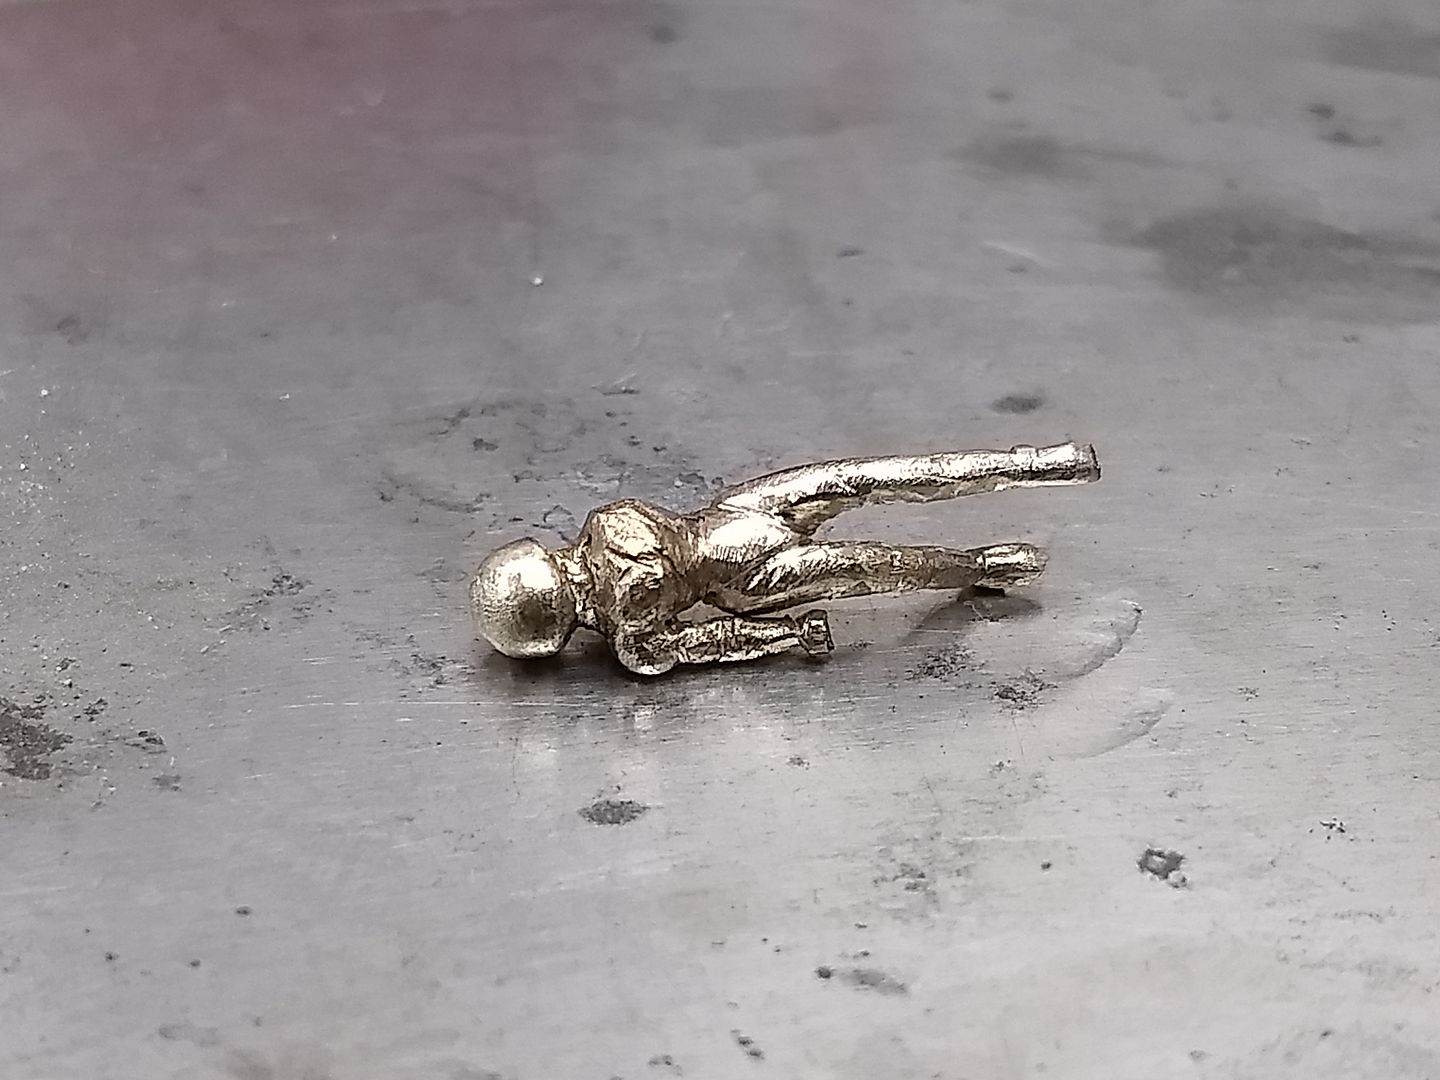
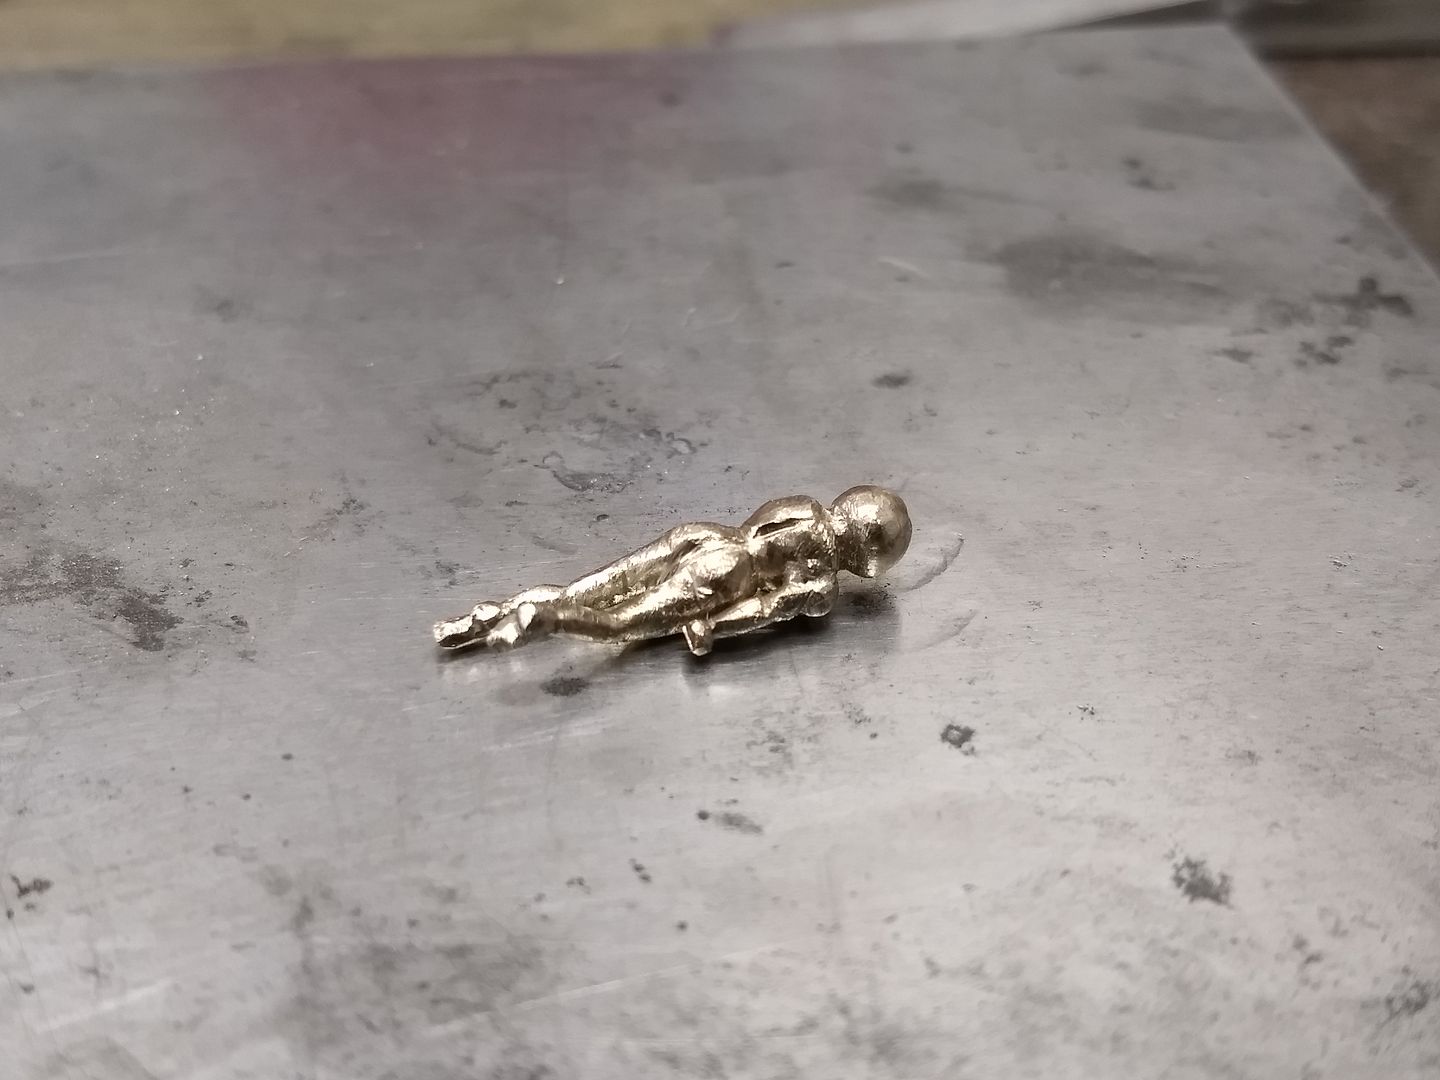
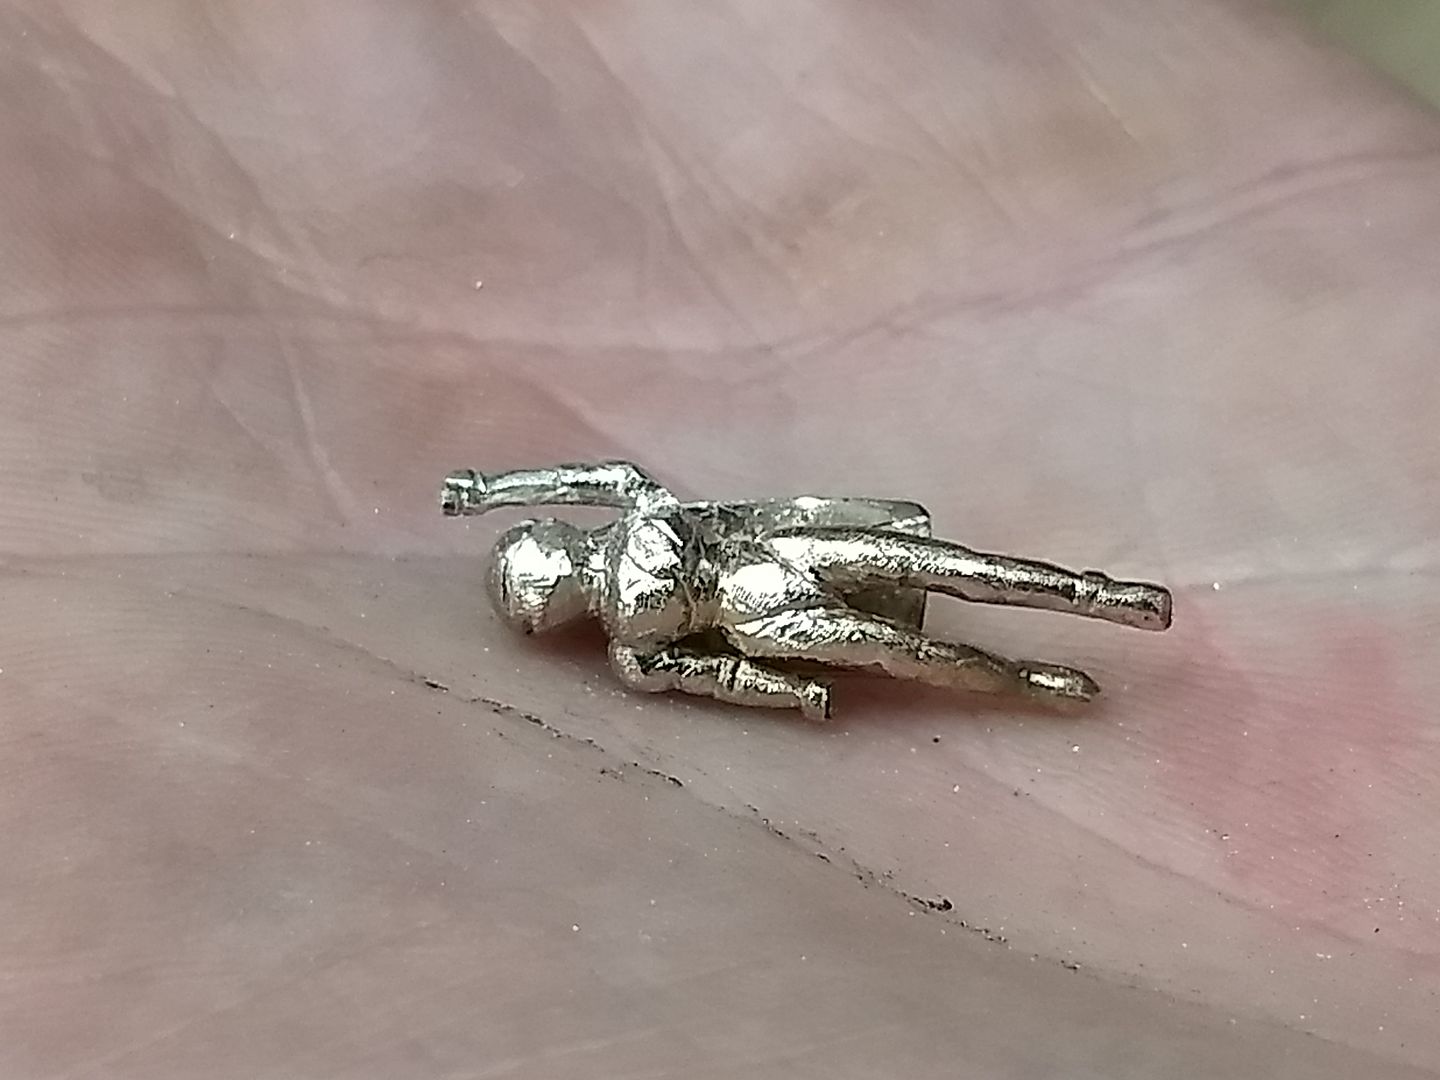
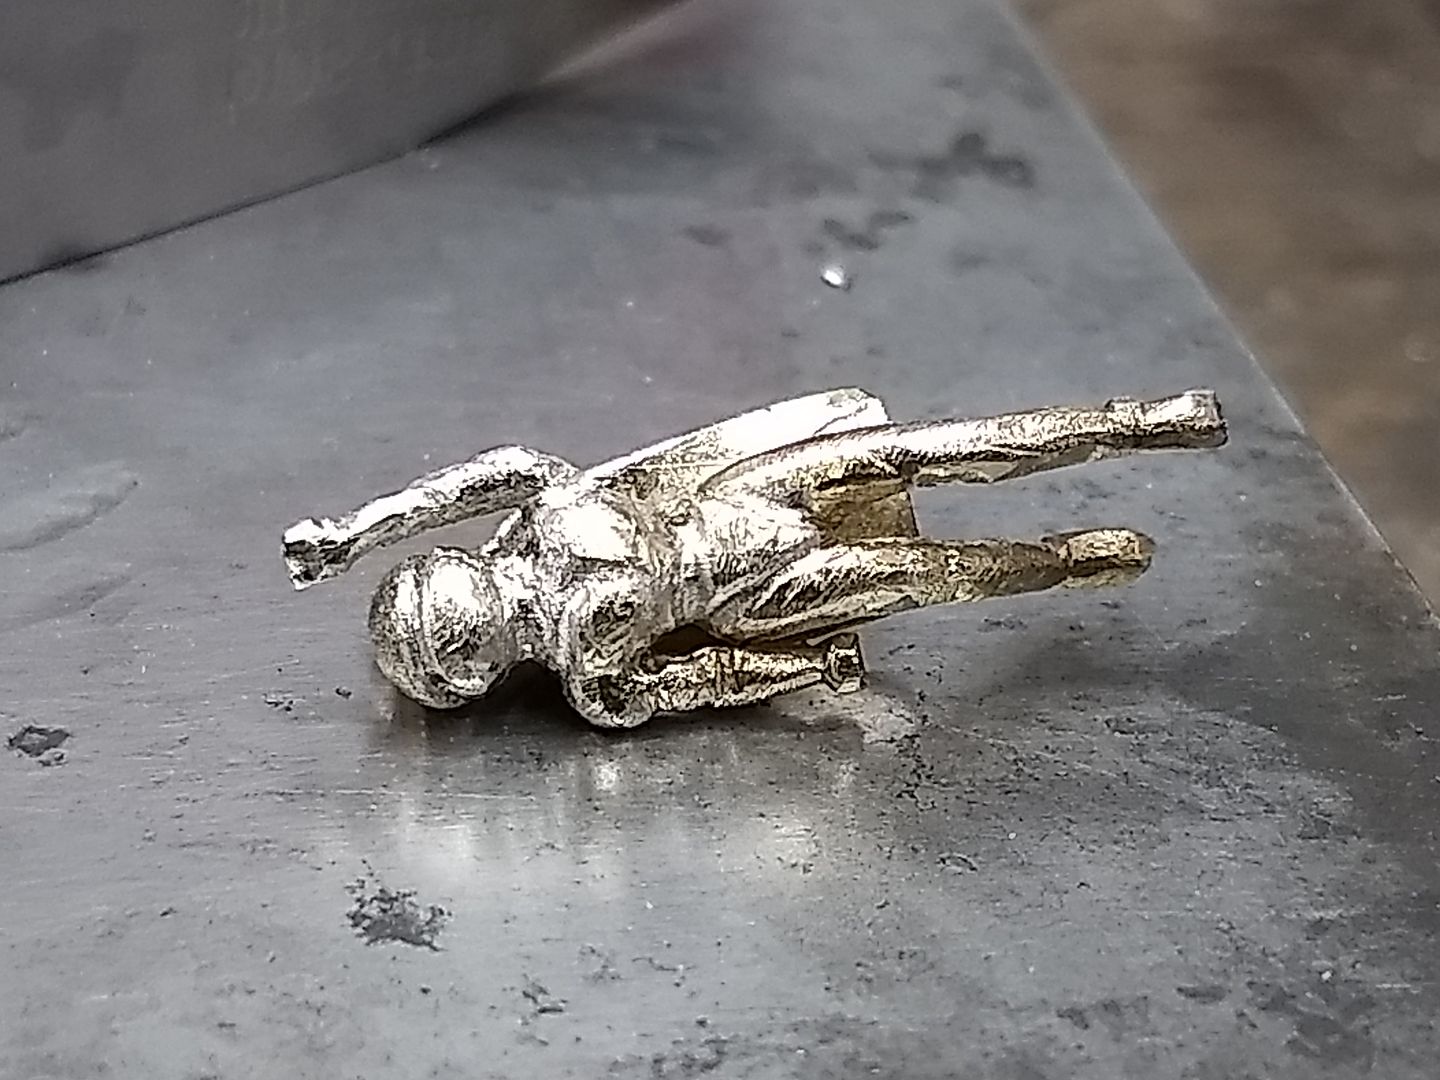
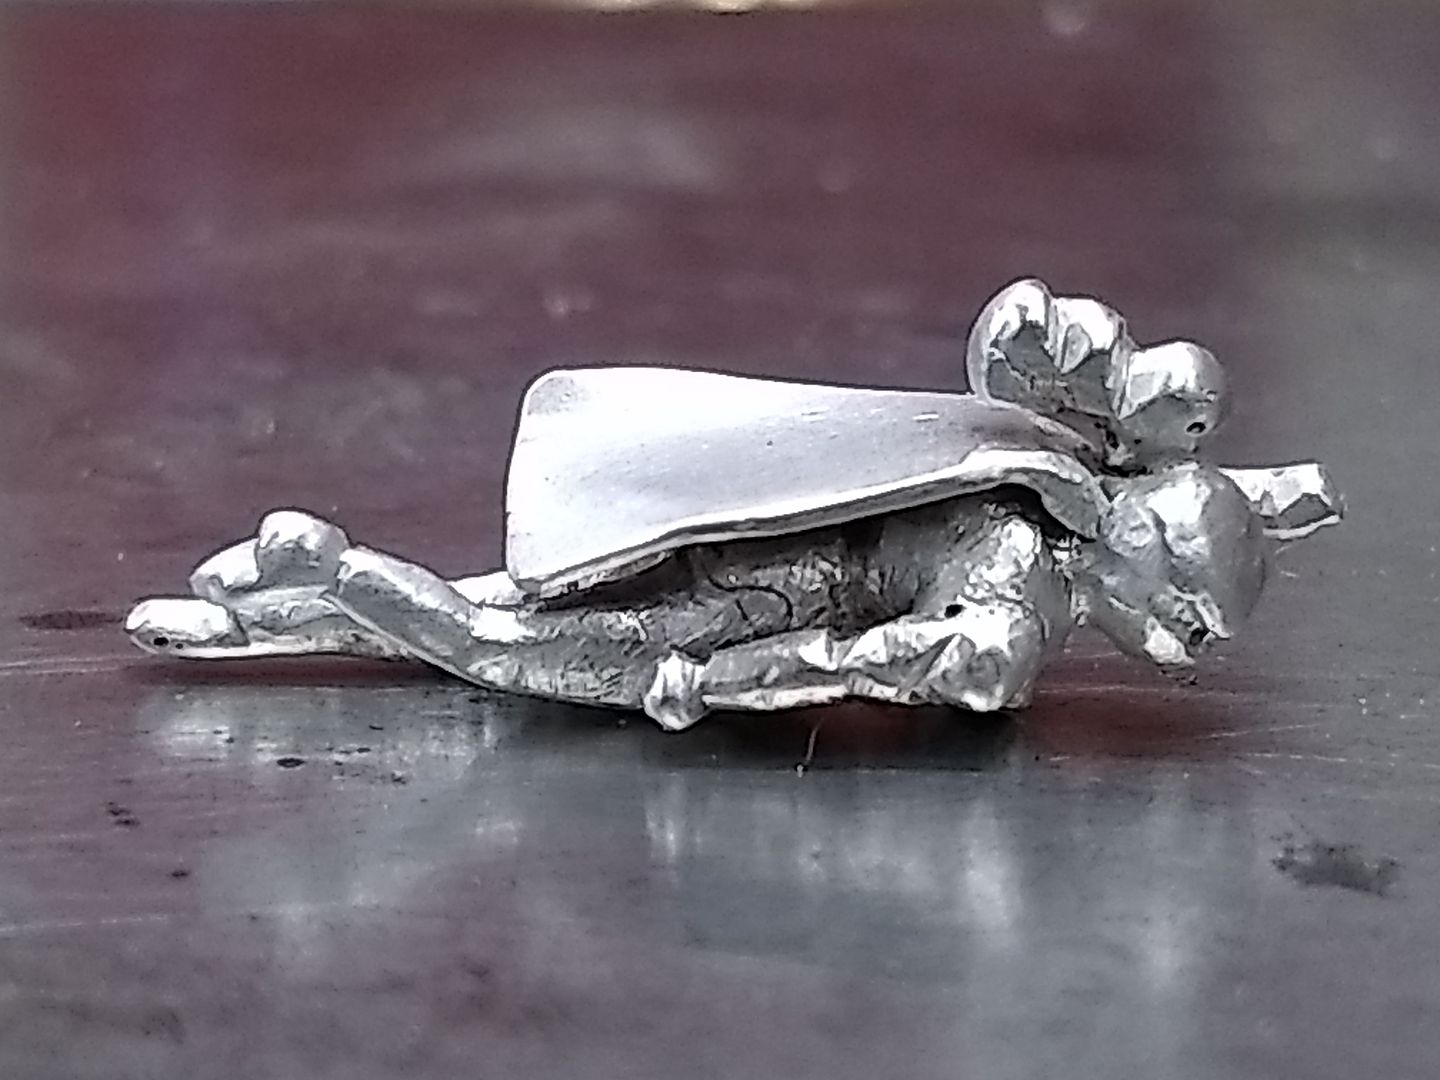
Having created a tag-line for the hospital earlier this year, "superheroes do exist, they work at RBCH" I thought I'd keep with the theme and make this: The material is 14ct white gold (i had an excess of it) and I used no imagery or casts to make it, just the minds eye and and a couple if files / drills.
Enjoy......
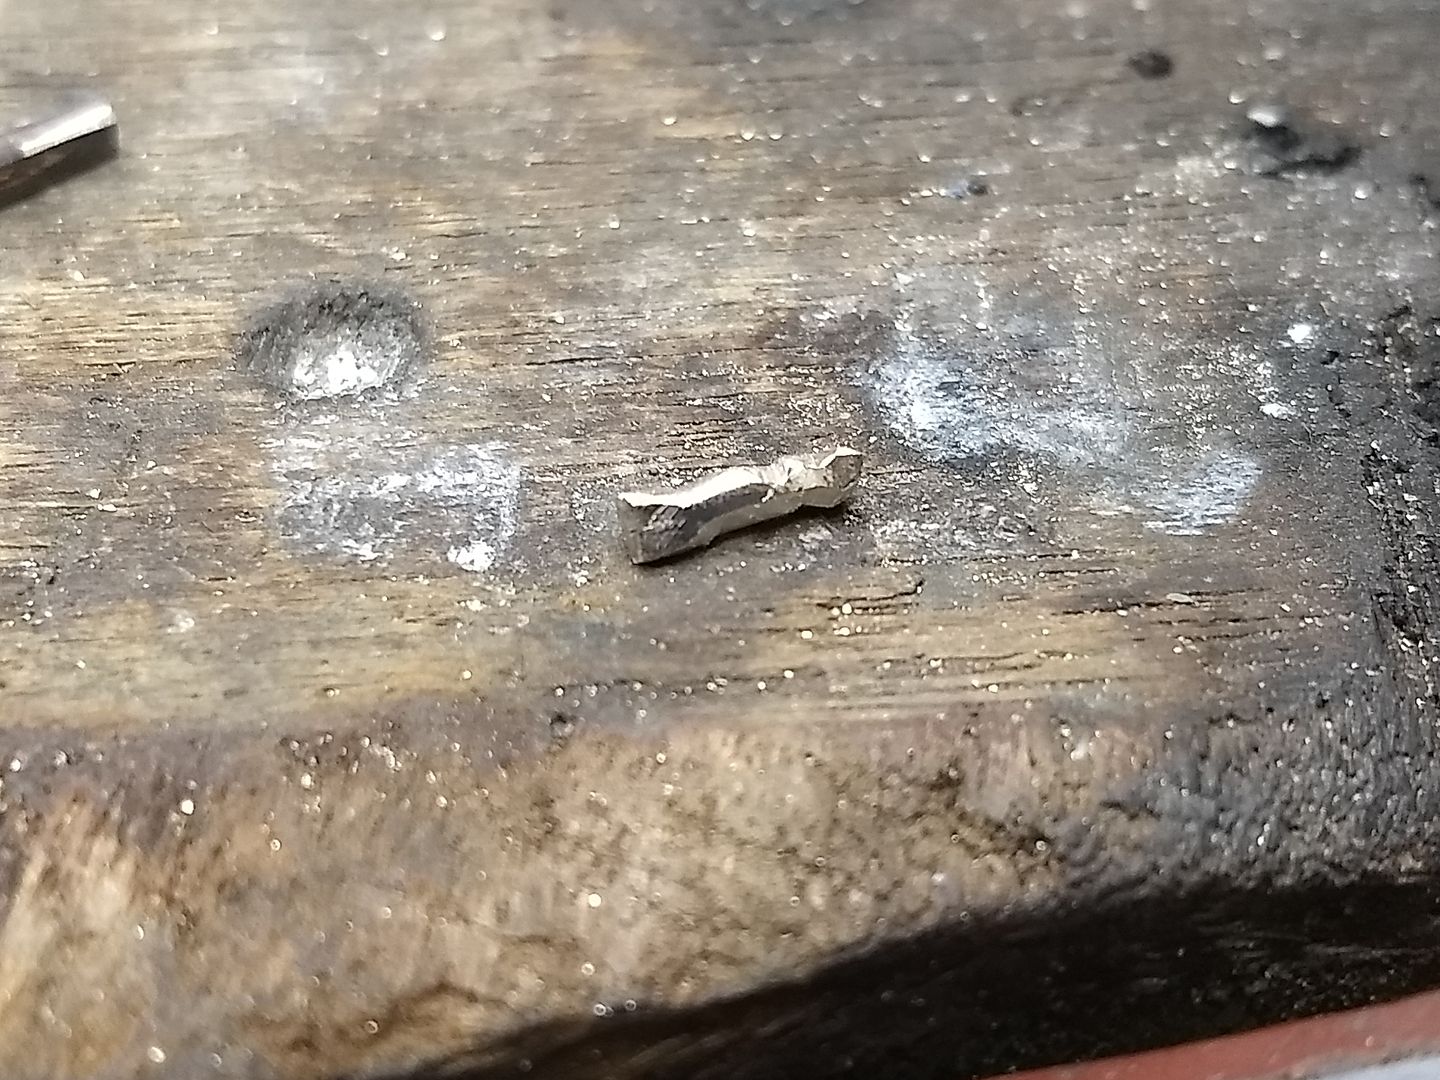
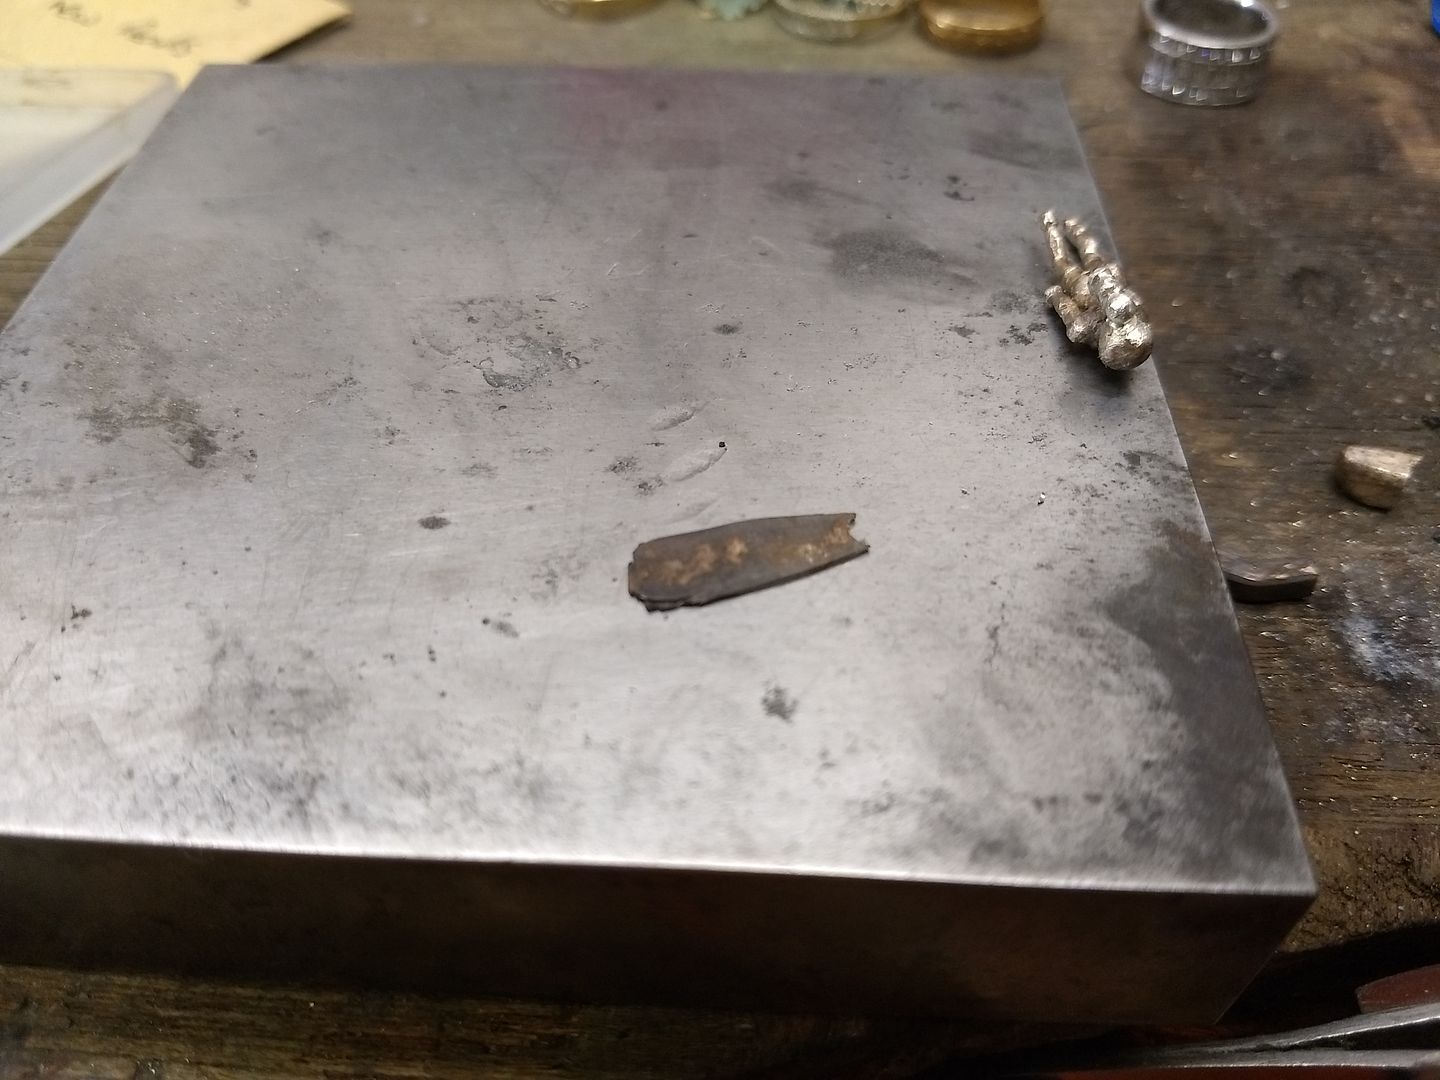
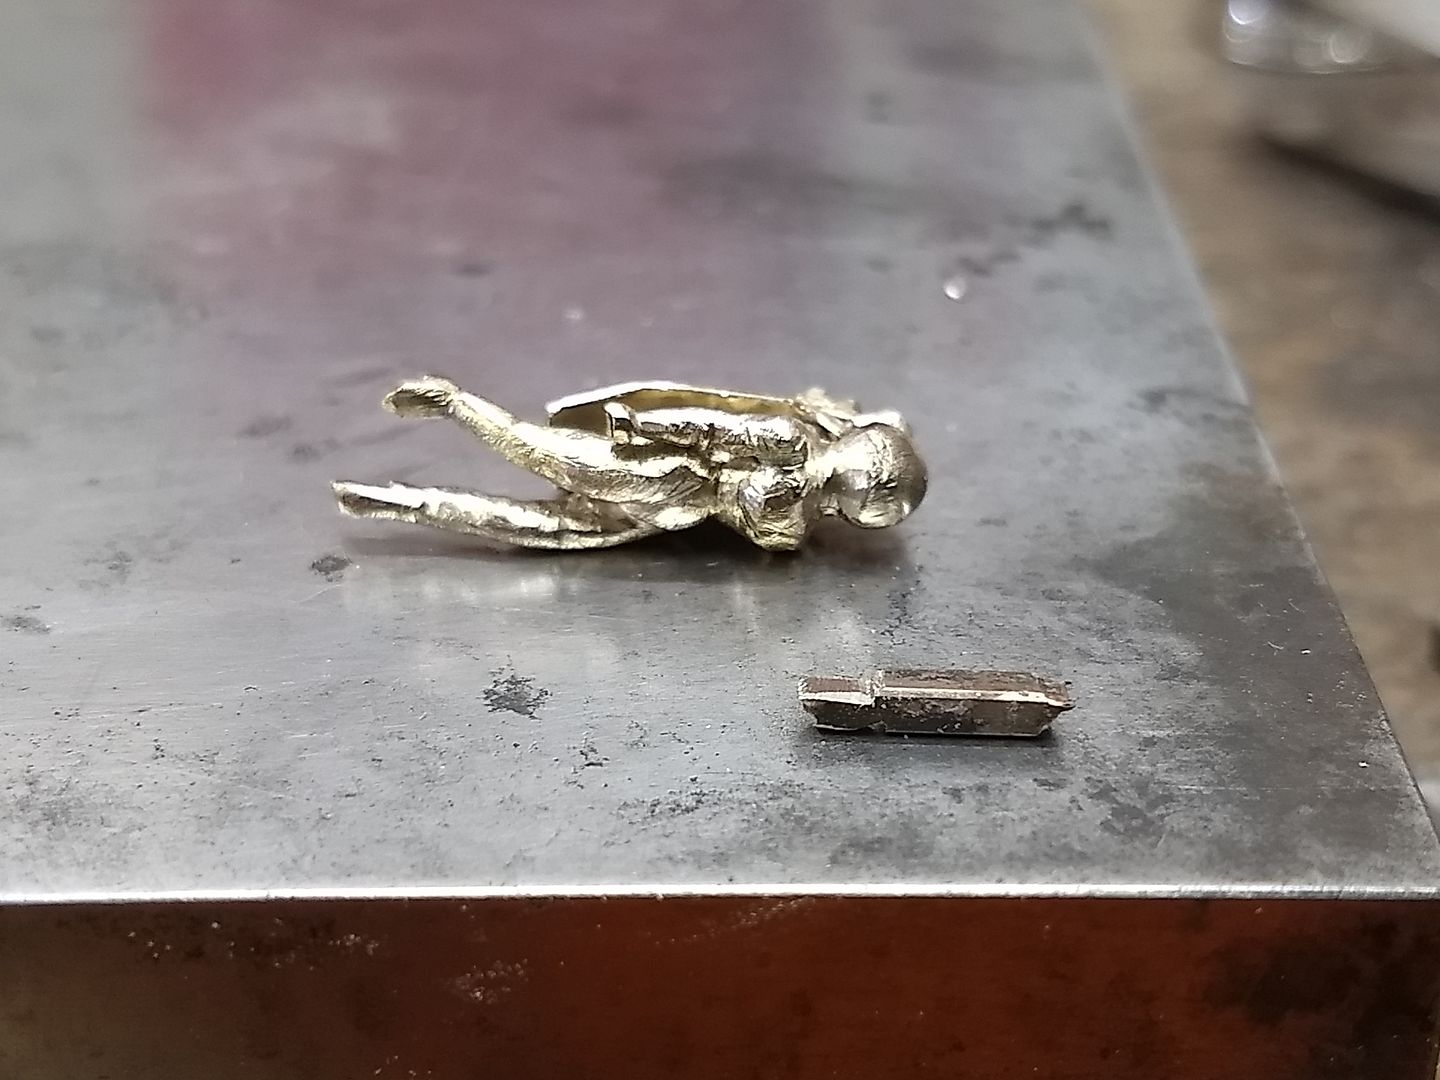
The offending metal, a lump of 14ct white gold that I had in scrap. It's not a material that we use much in the UK so rather than send it off for refining / cash I have found it a good home. The metal is rolled and different gauges made to fit the needs of the project:

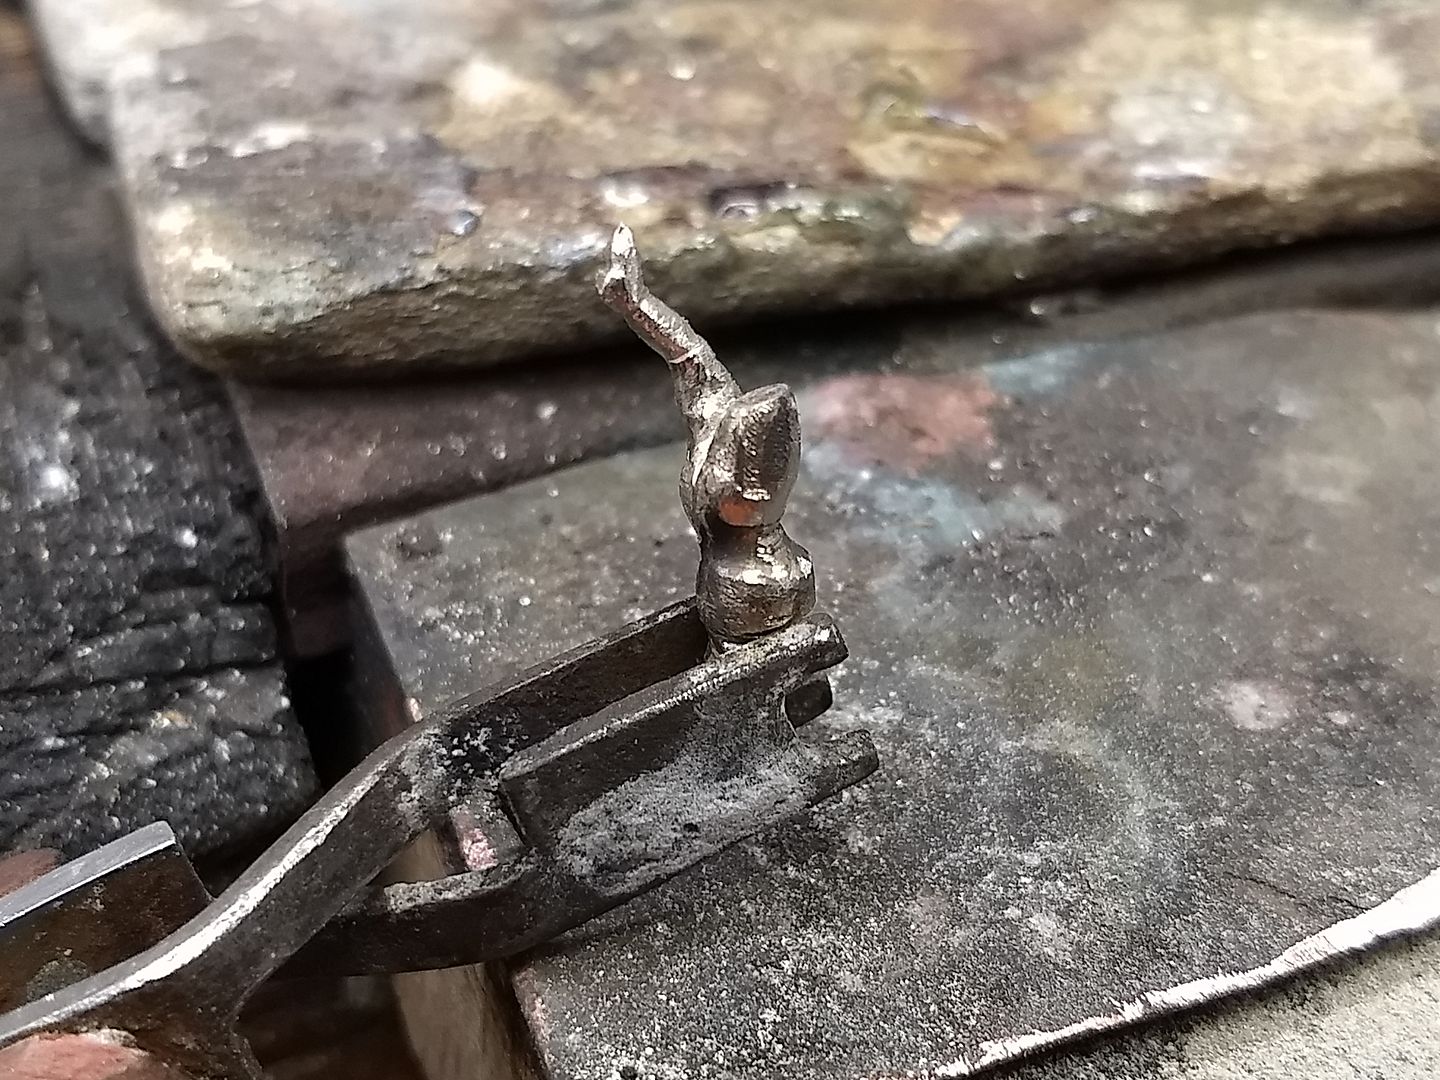
With the wires made the files now come out. I'll not say what it is yet, but hopefully the images should make it obvious......
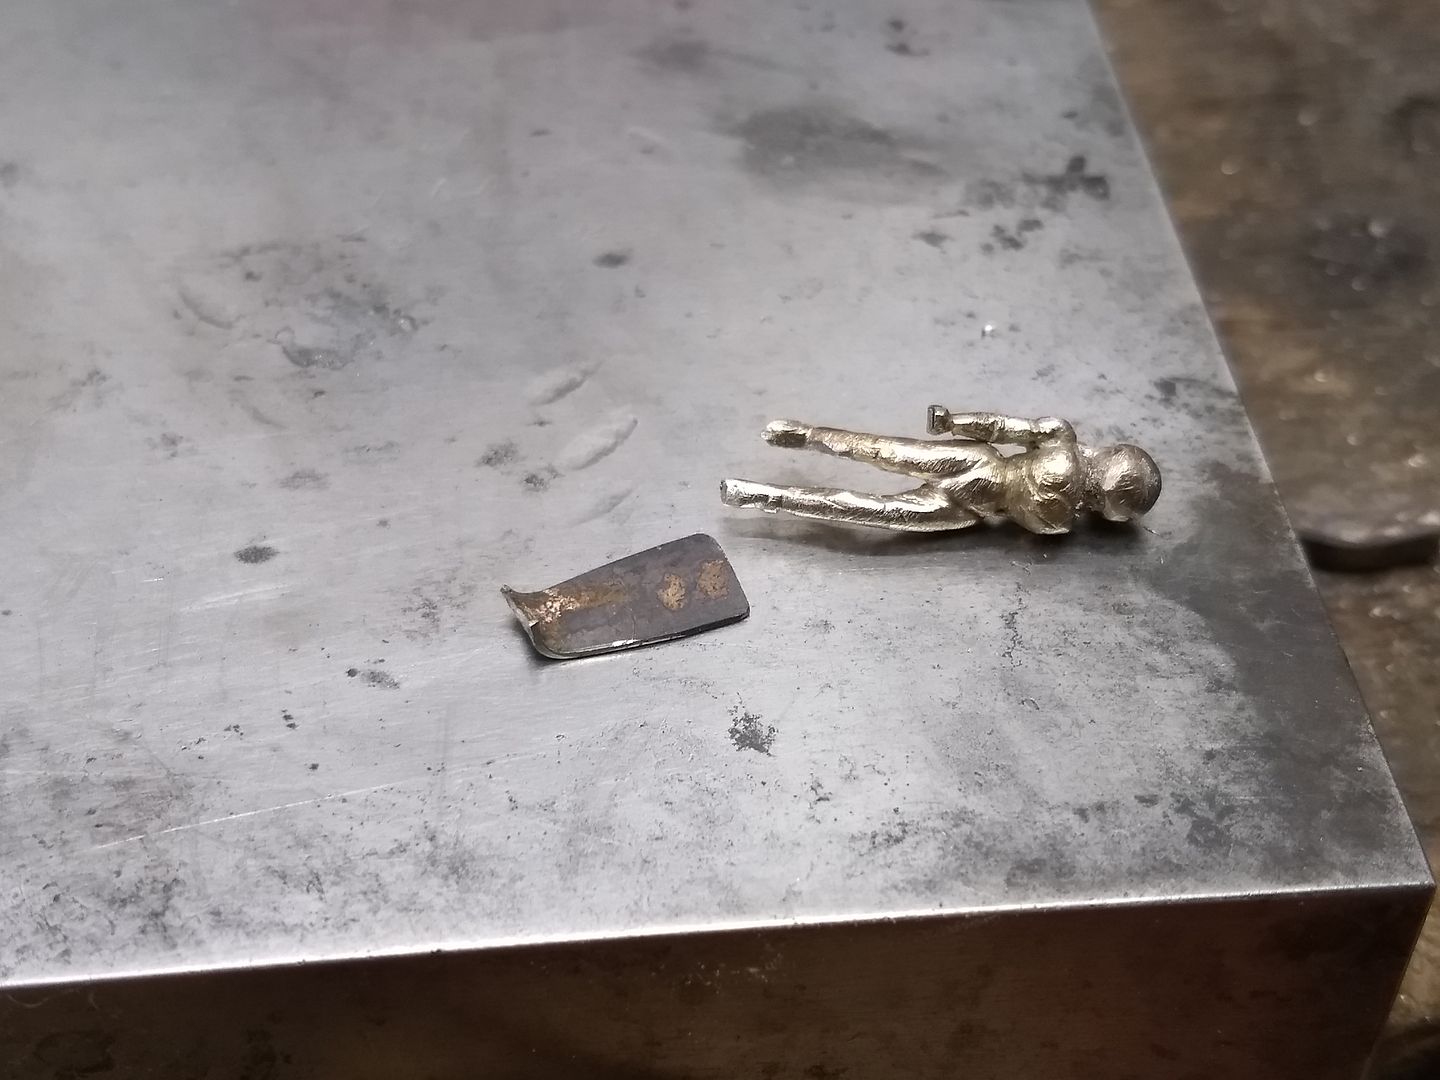
With the largest section roughly filed to shape the wires now come into play. I use a mid level white solder for this as the metal has a higher melting temperature than 9ct but lower than 18ct so i need to exercise a little caution with the heat.....
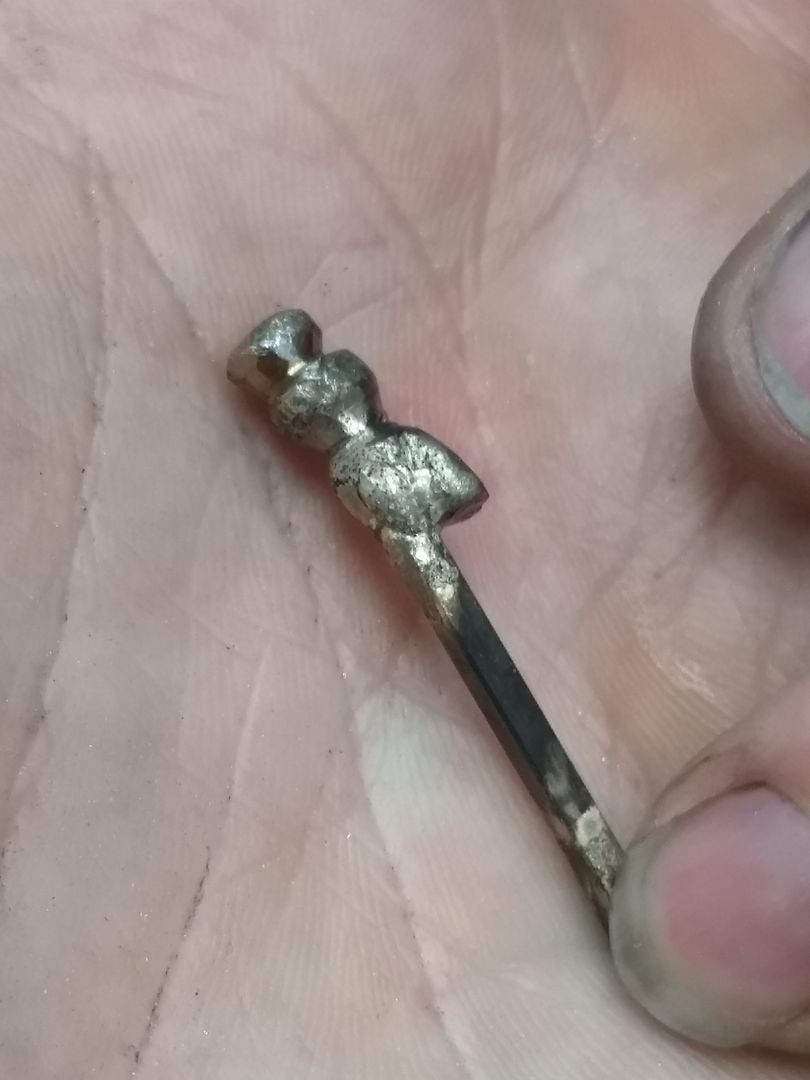
This next pic should make sense now....
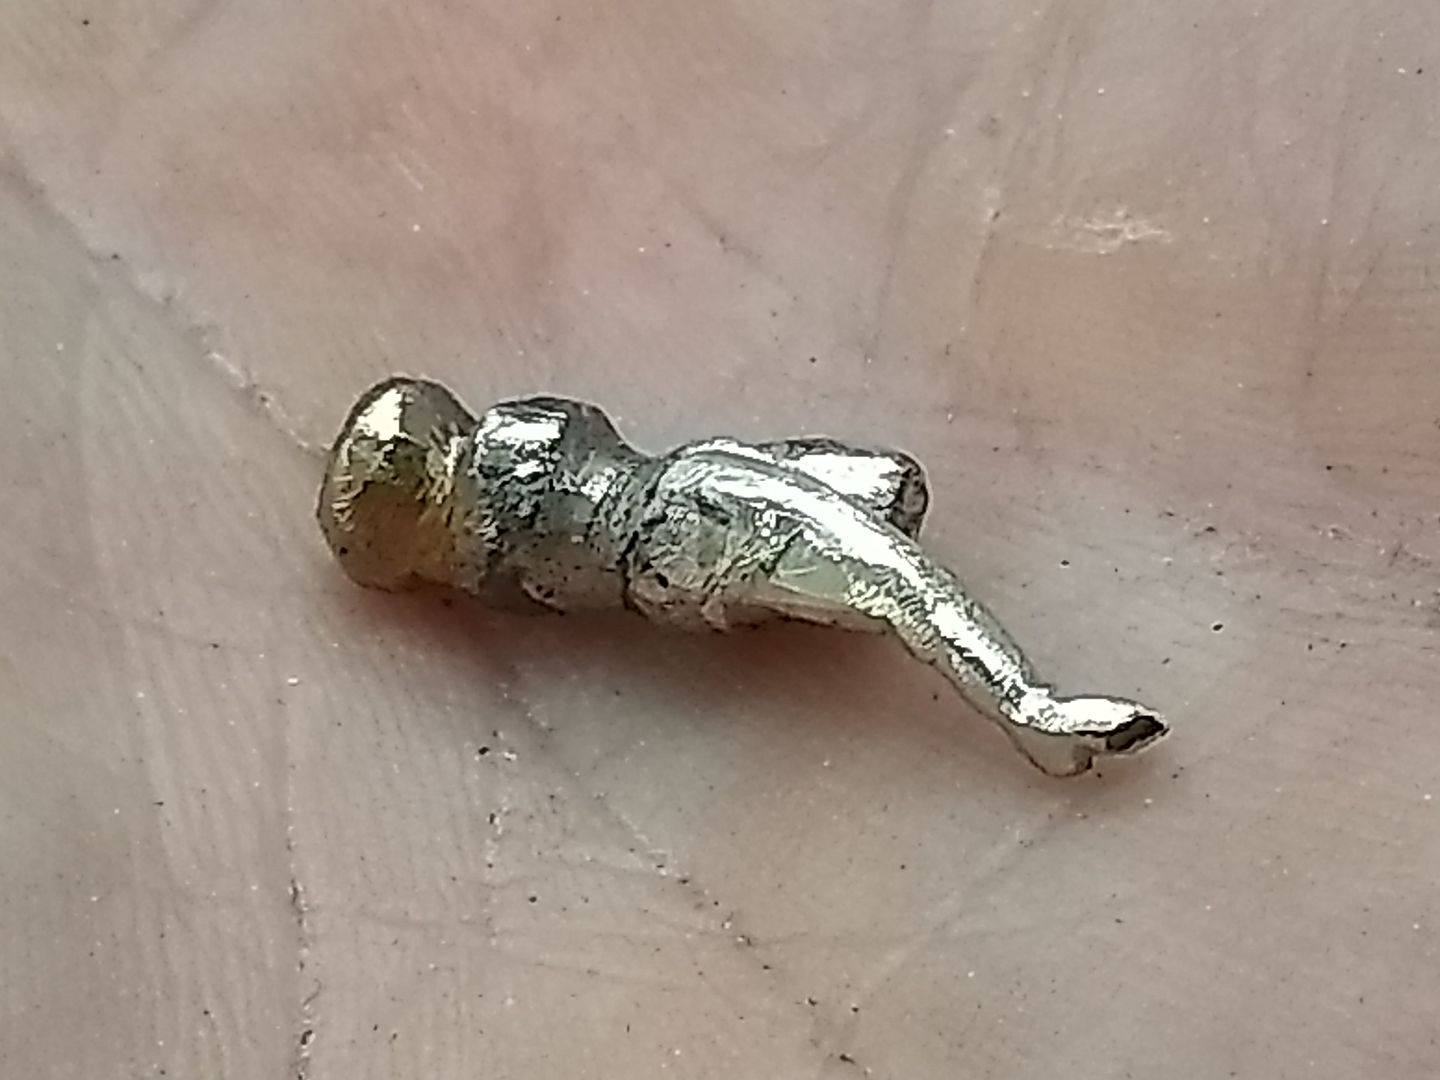
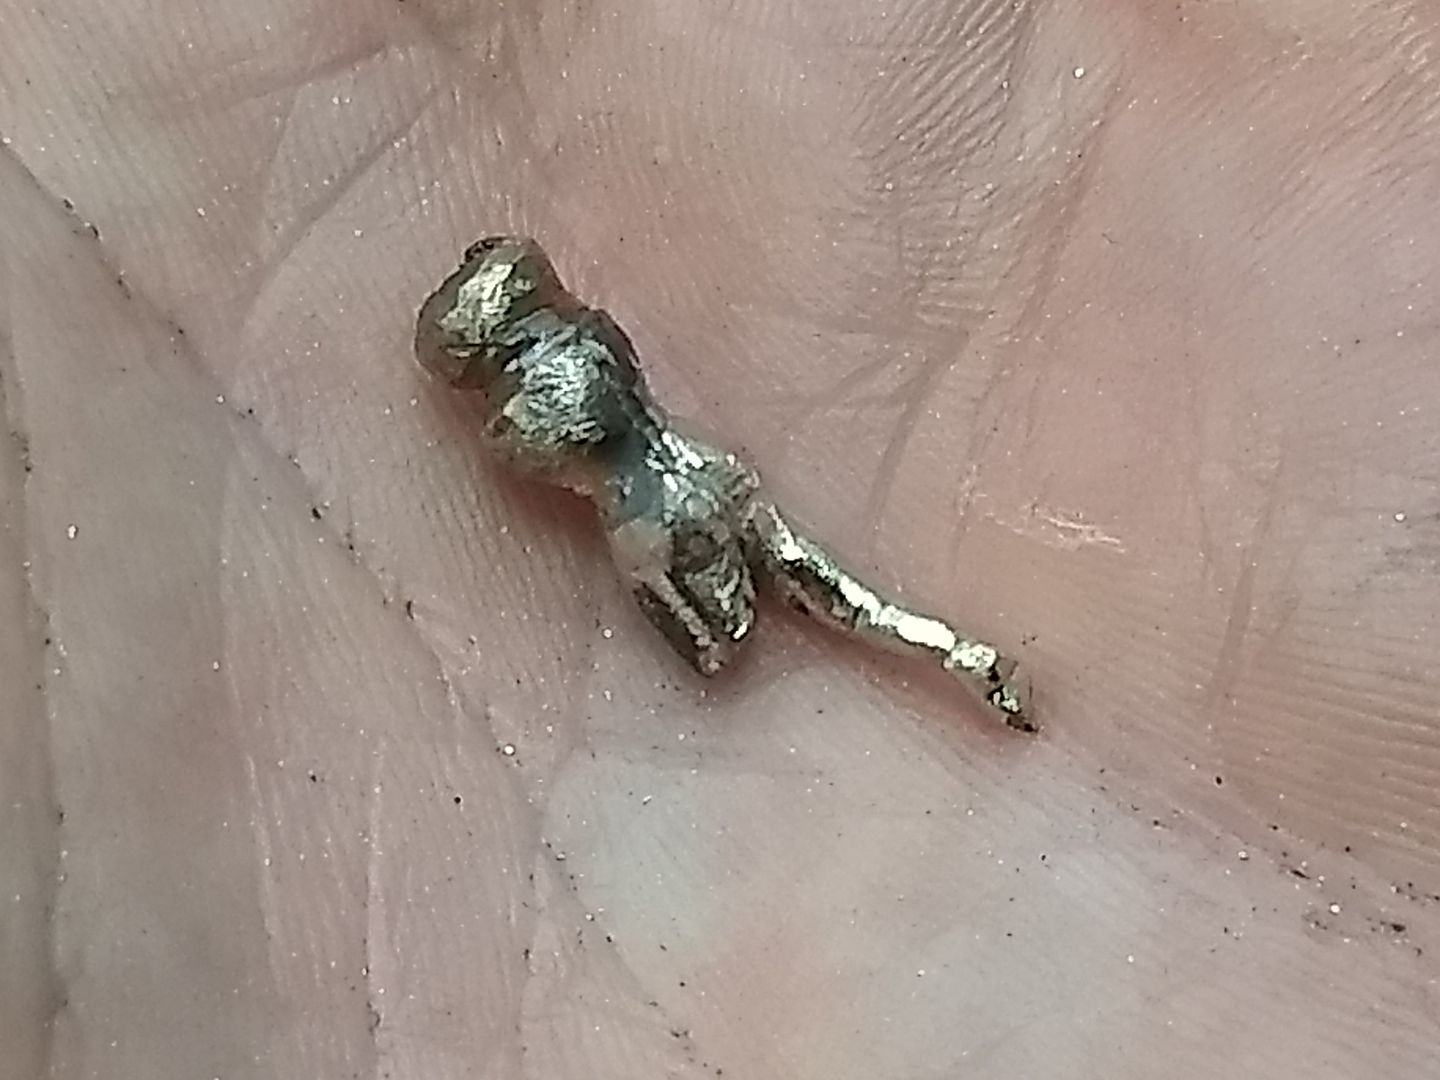
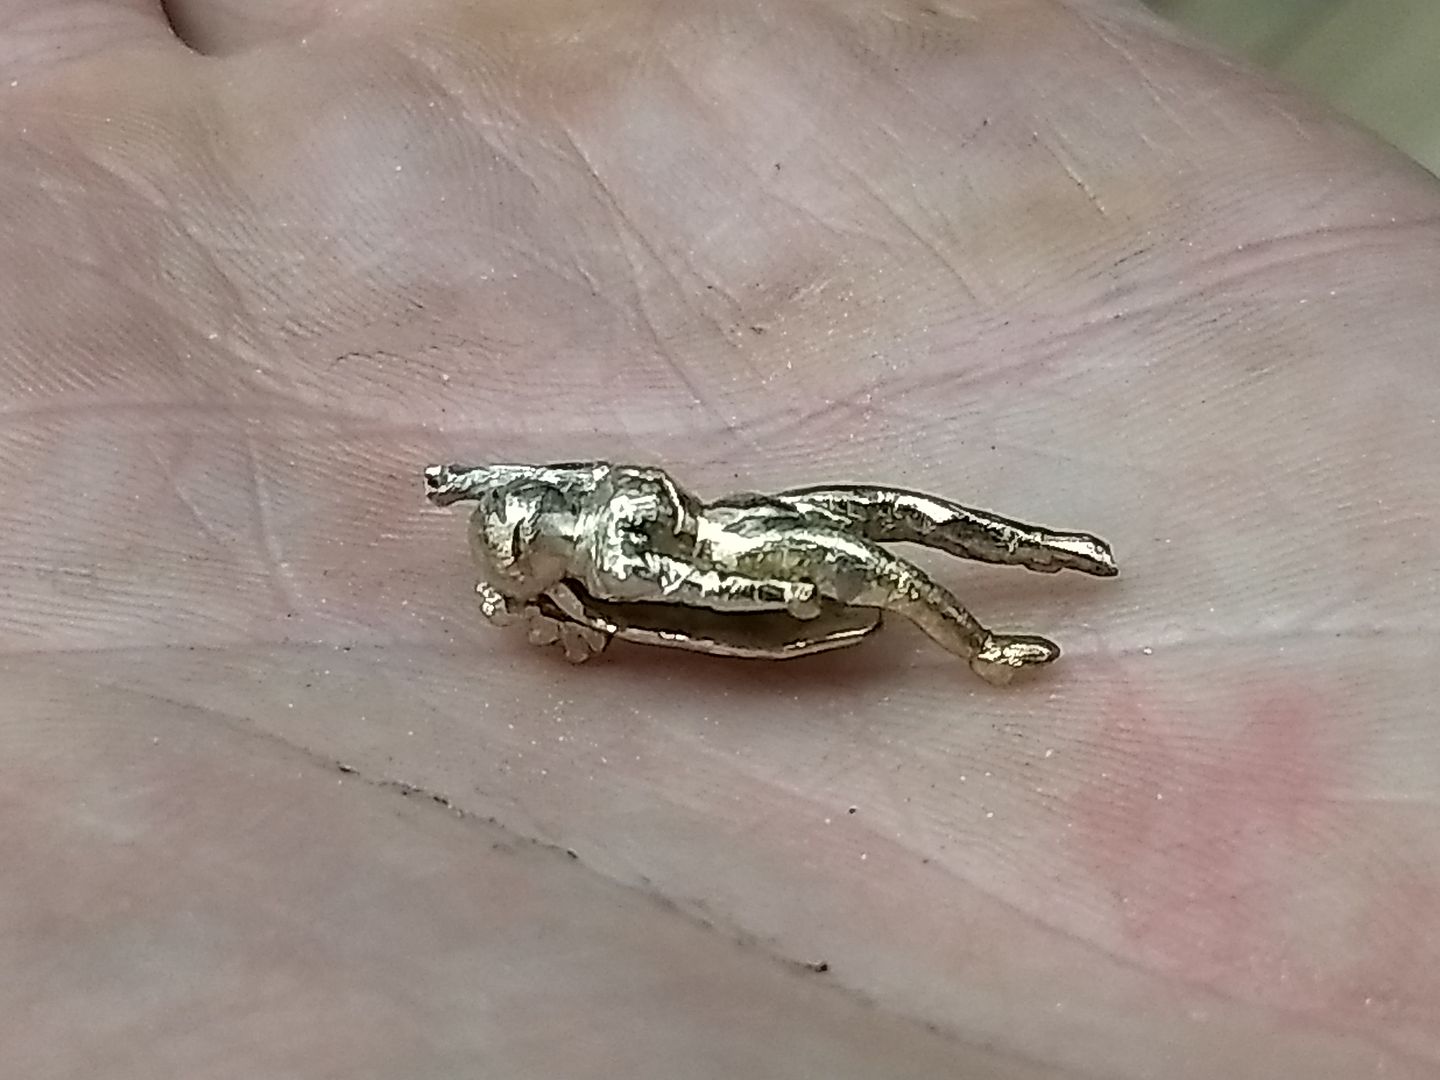
Because space is tight i have to try to profile the remaining limbs before they are soldered. This is a challenge in itself because they are so small.
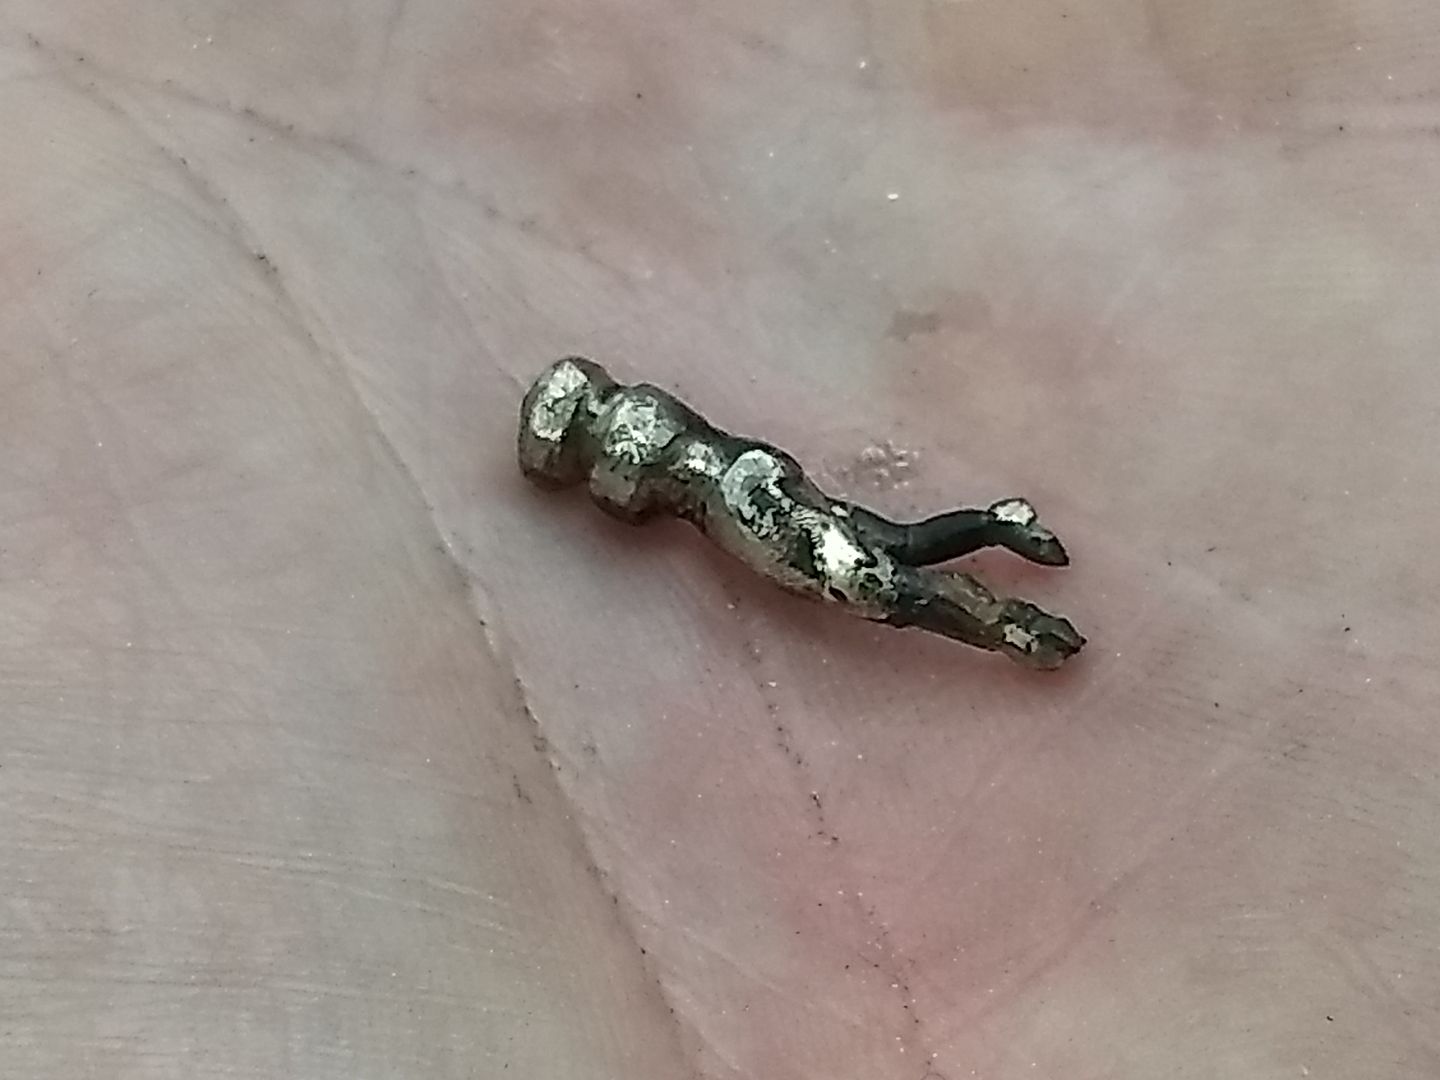

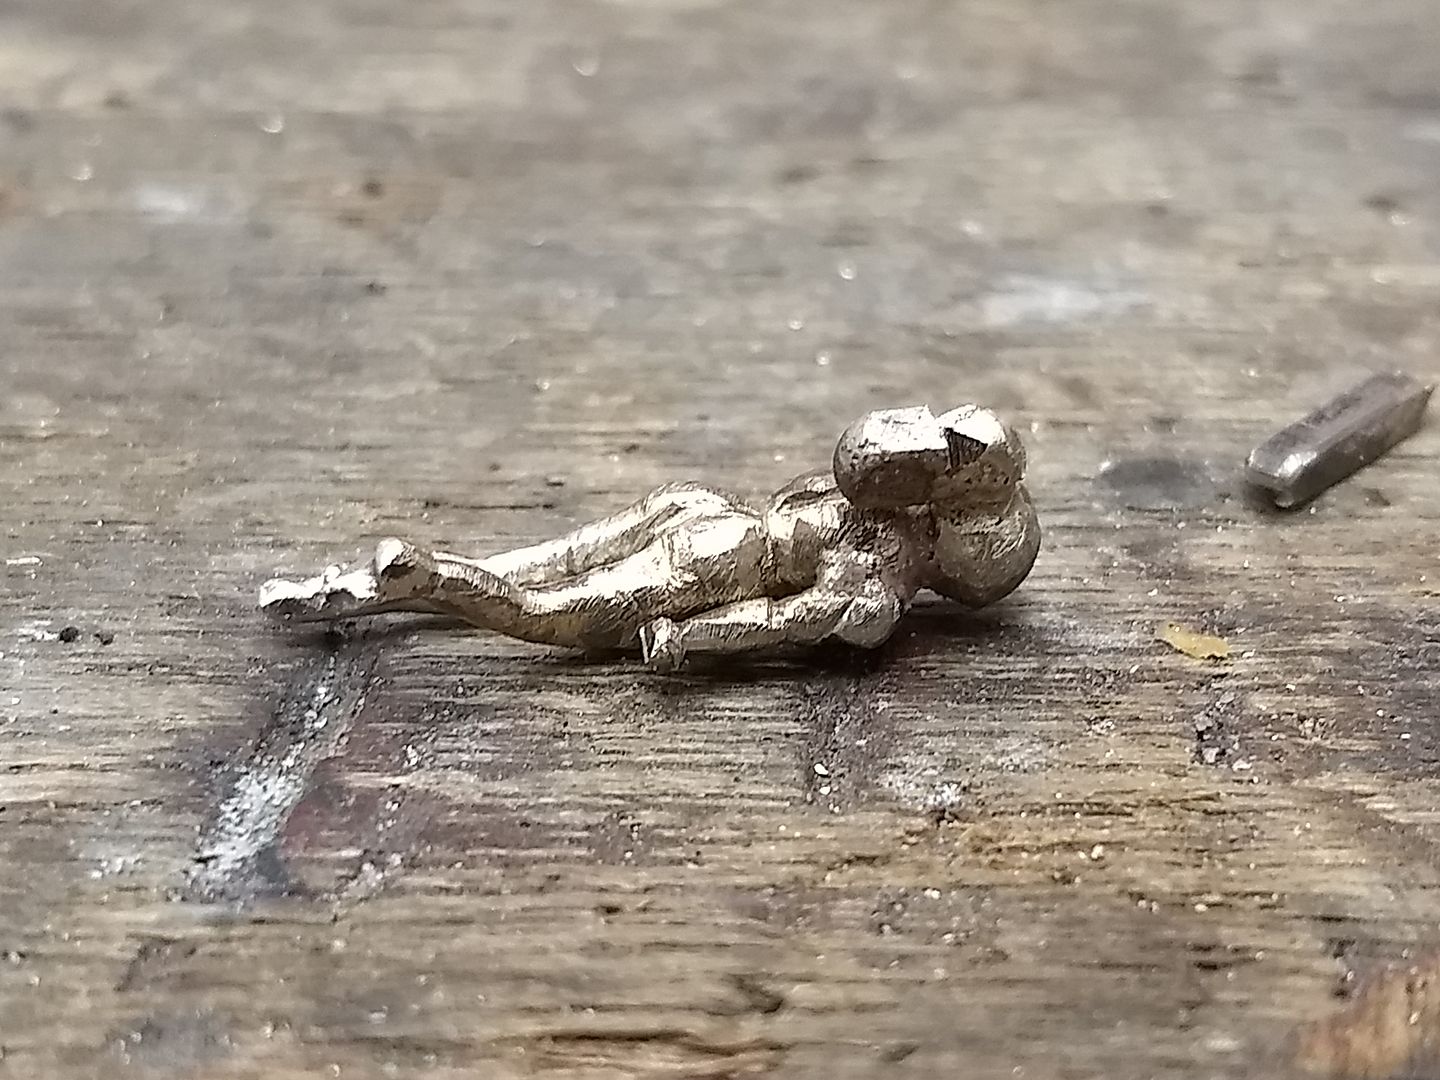
Before we move to the arms i just want to say something about womens bottoms and the issue of flattery
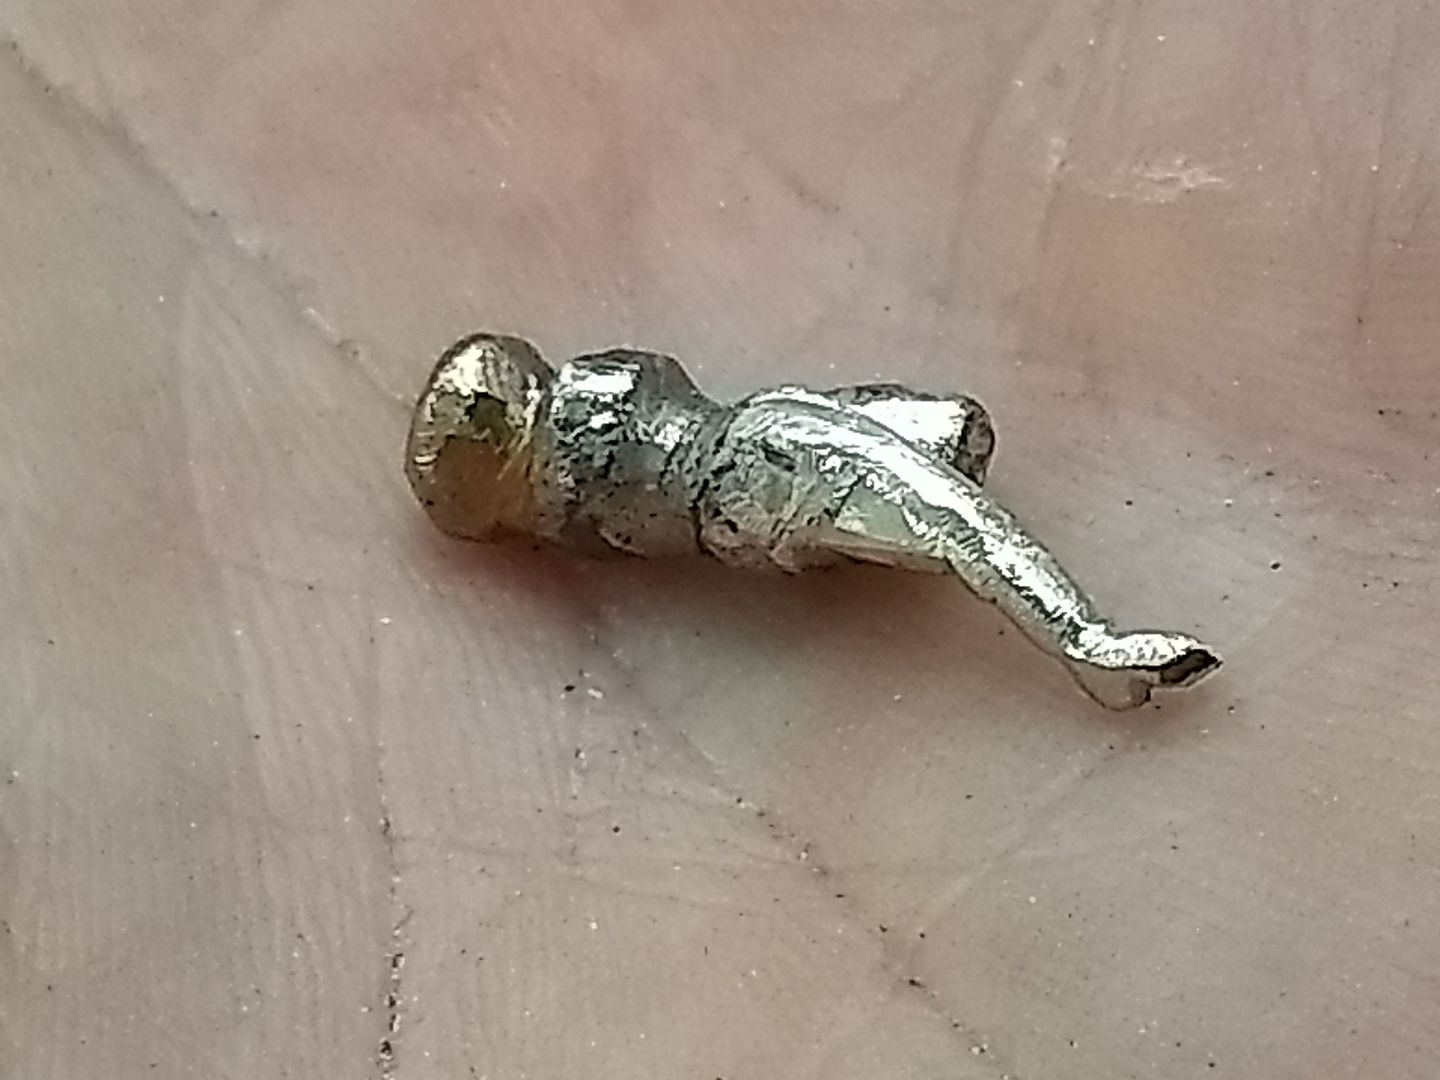
I had not foreseen the potential to get this wrong and it's incredibly difficult to sculpt a womans arse without getting into hot water. Luckily my file worked in tune with my eye and I think i did it some justice. The things that you have to overcome in this job.......
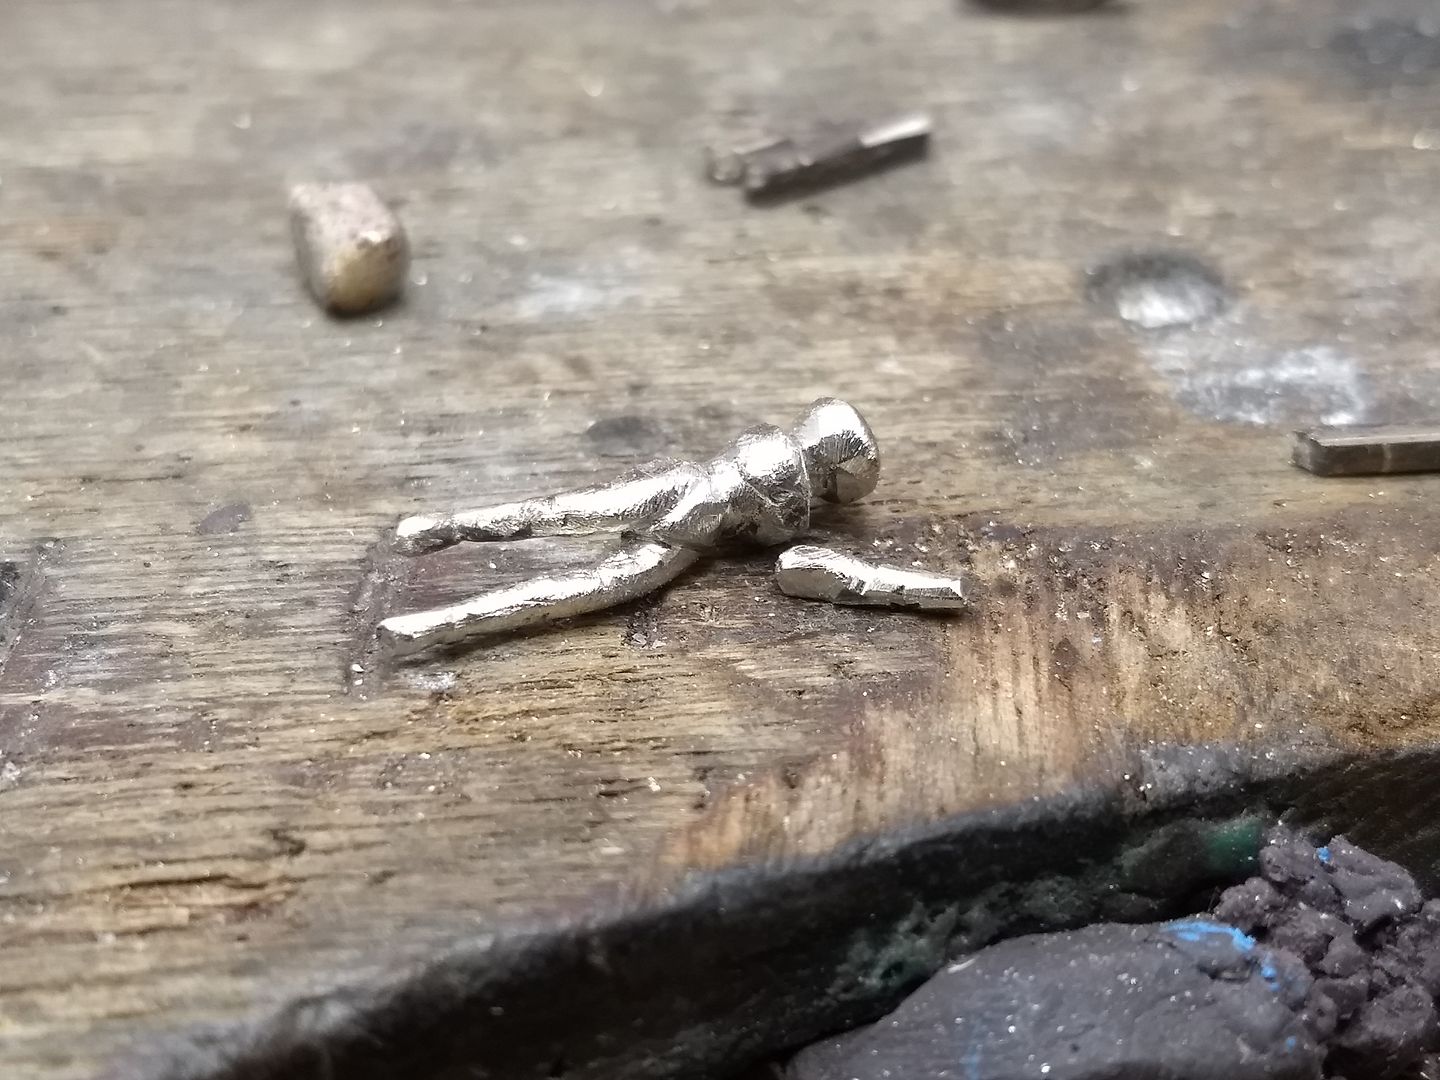
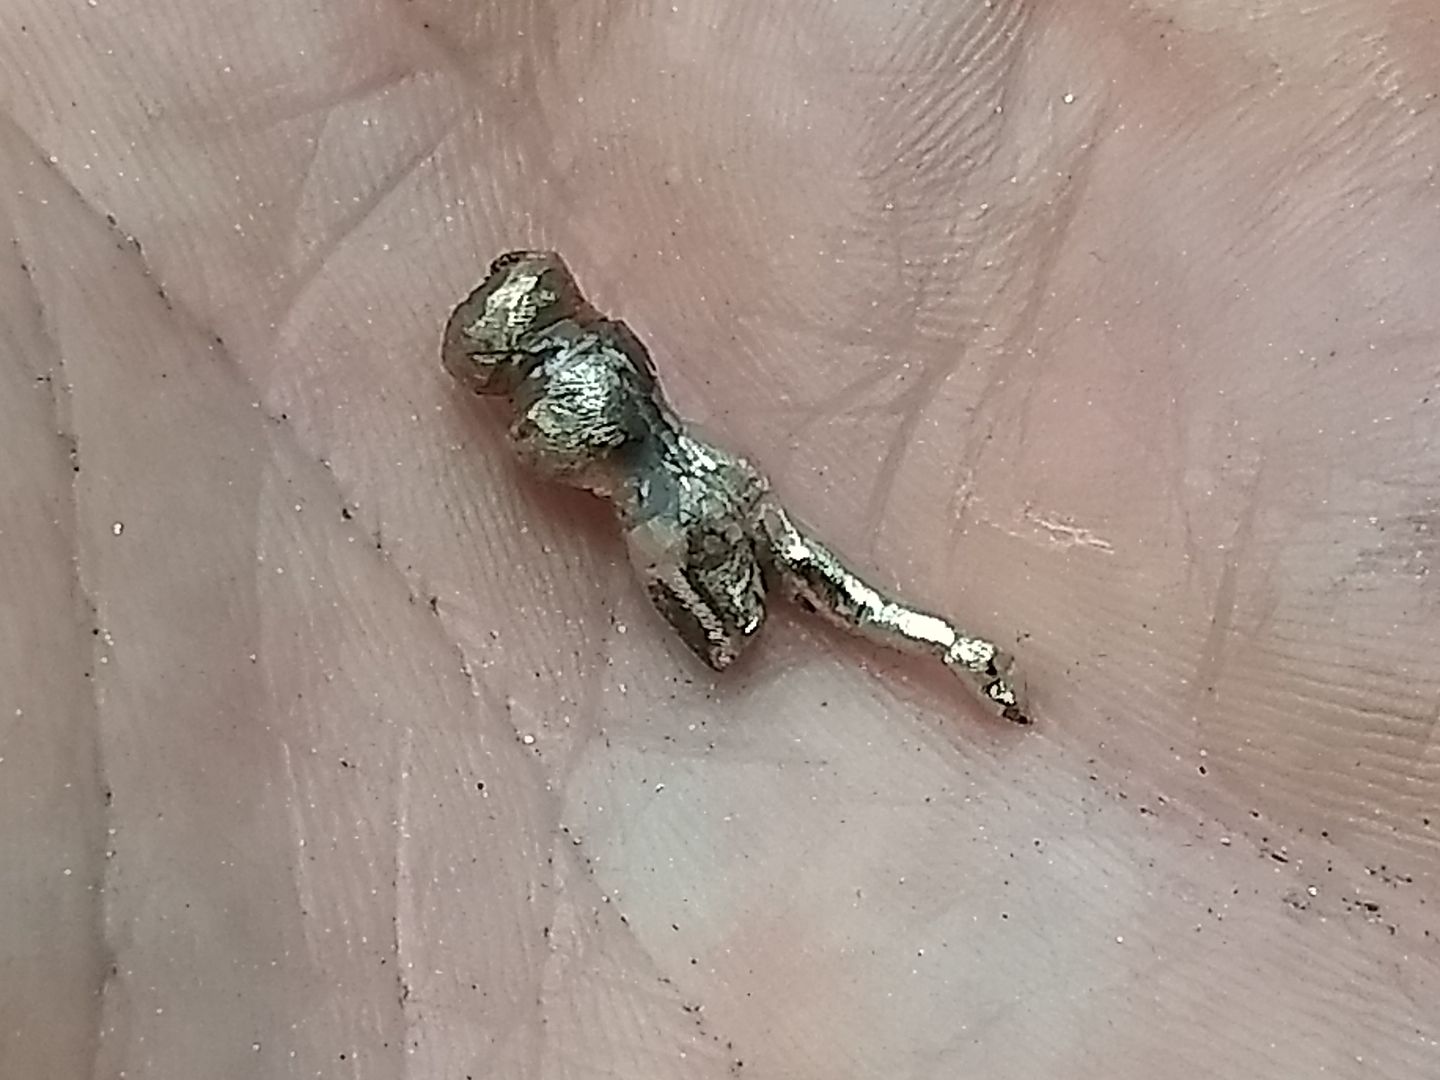
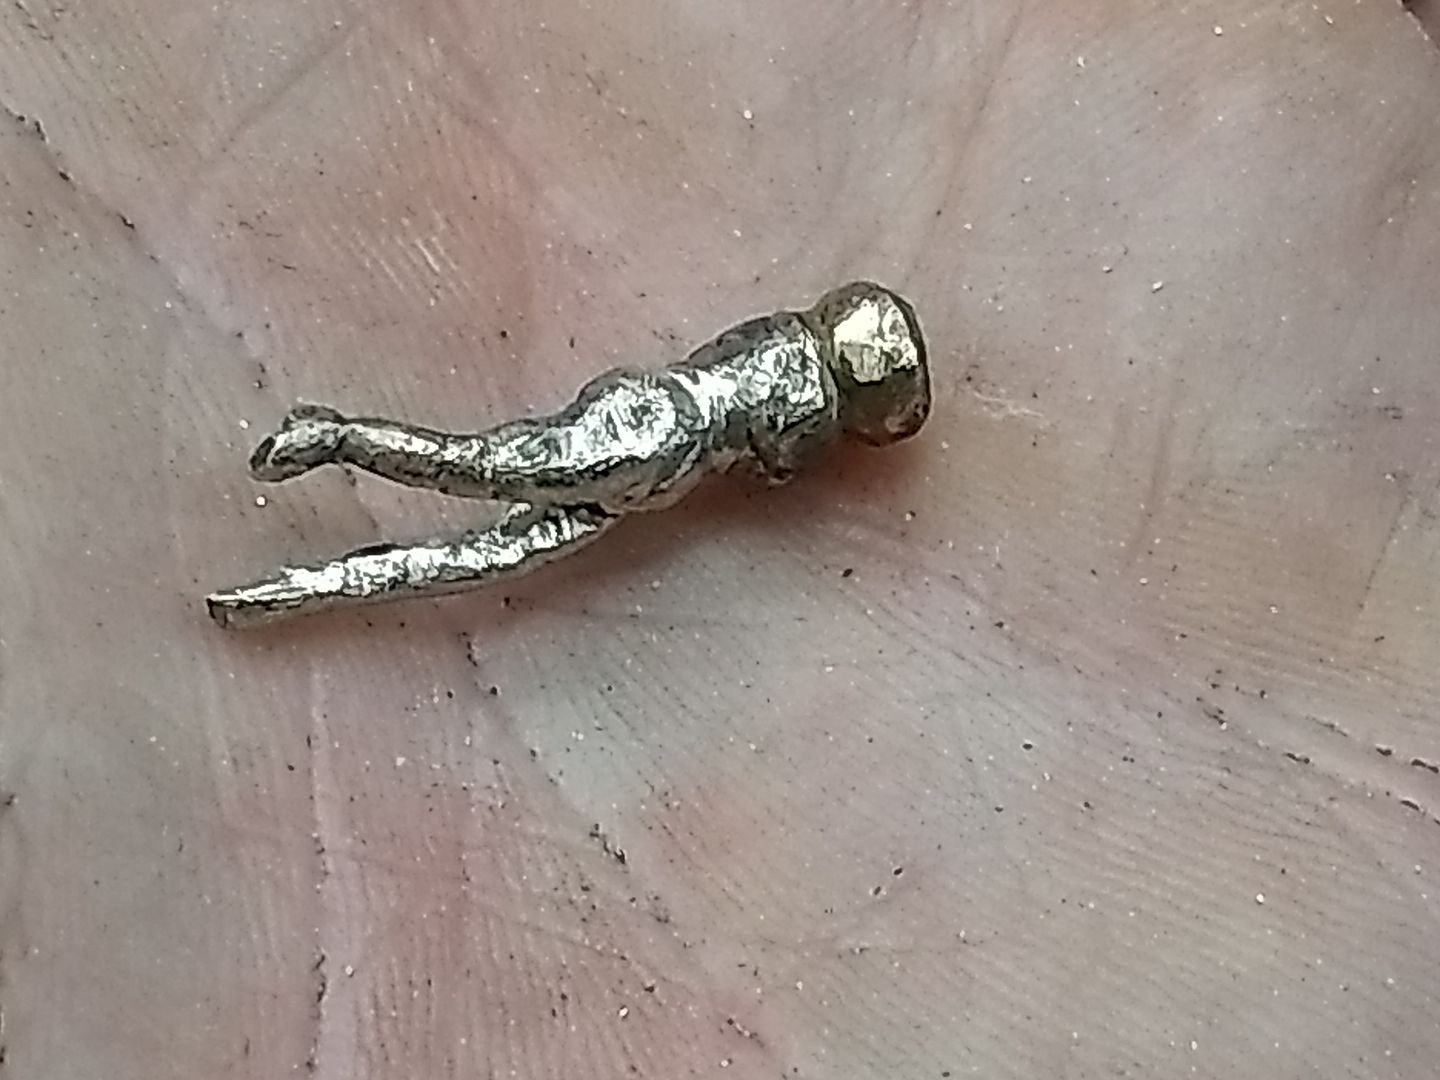
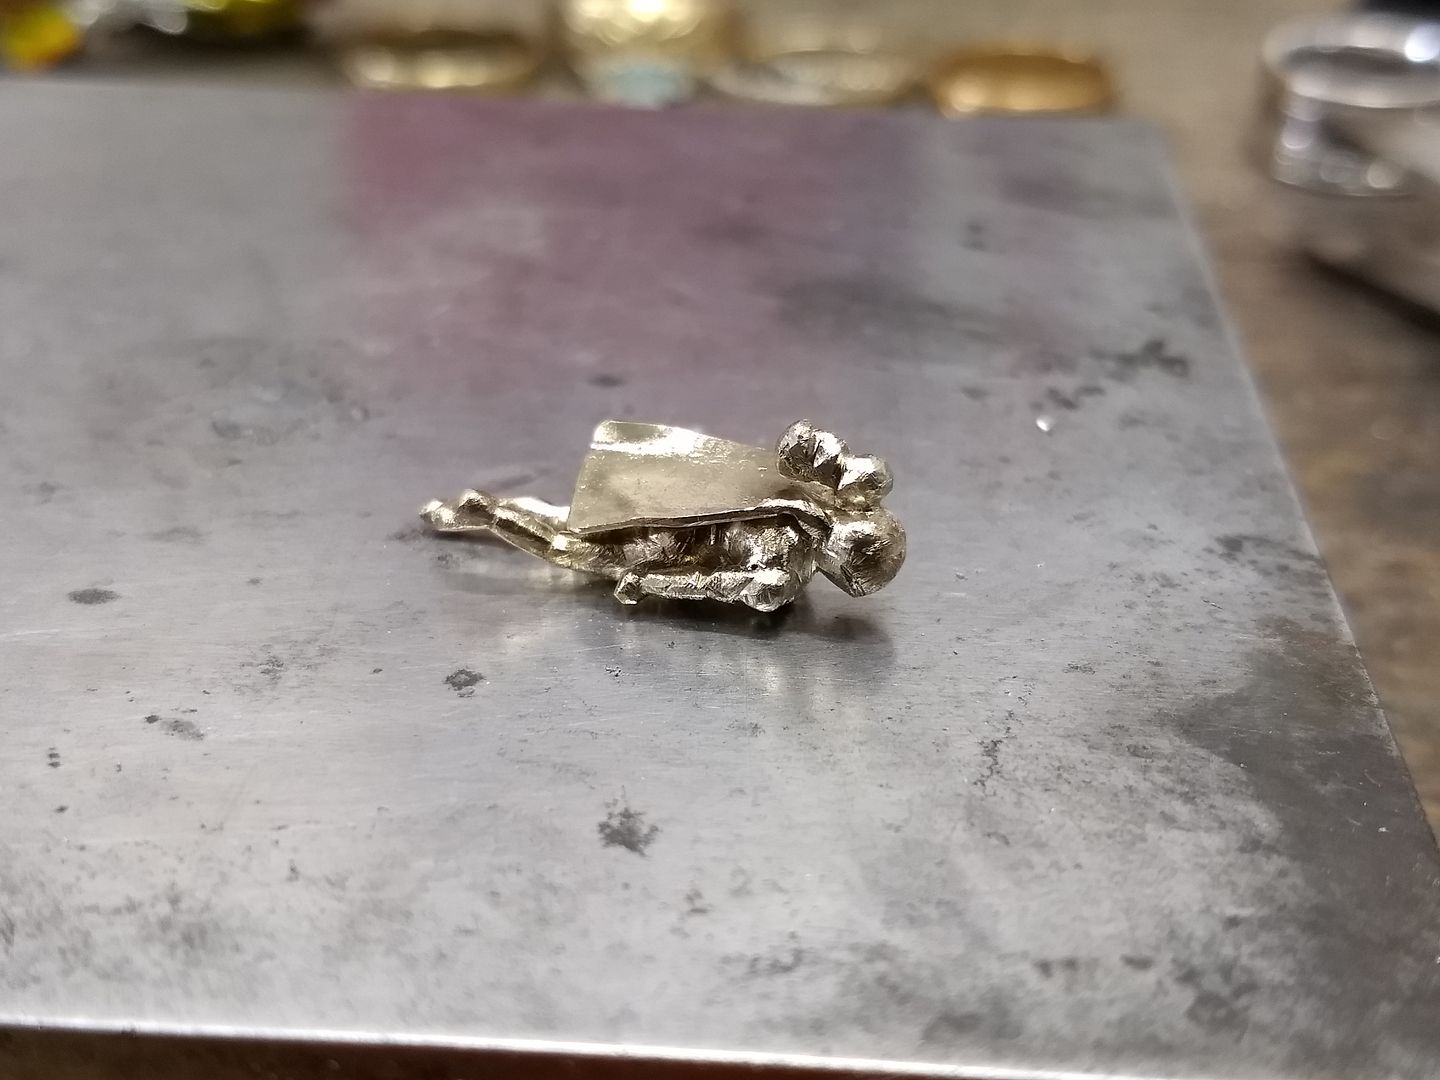
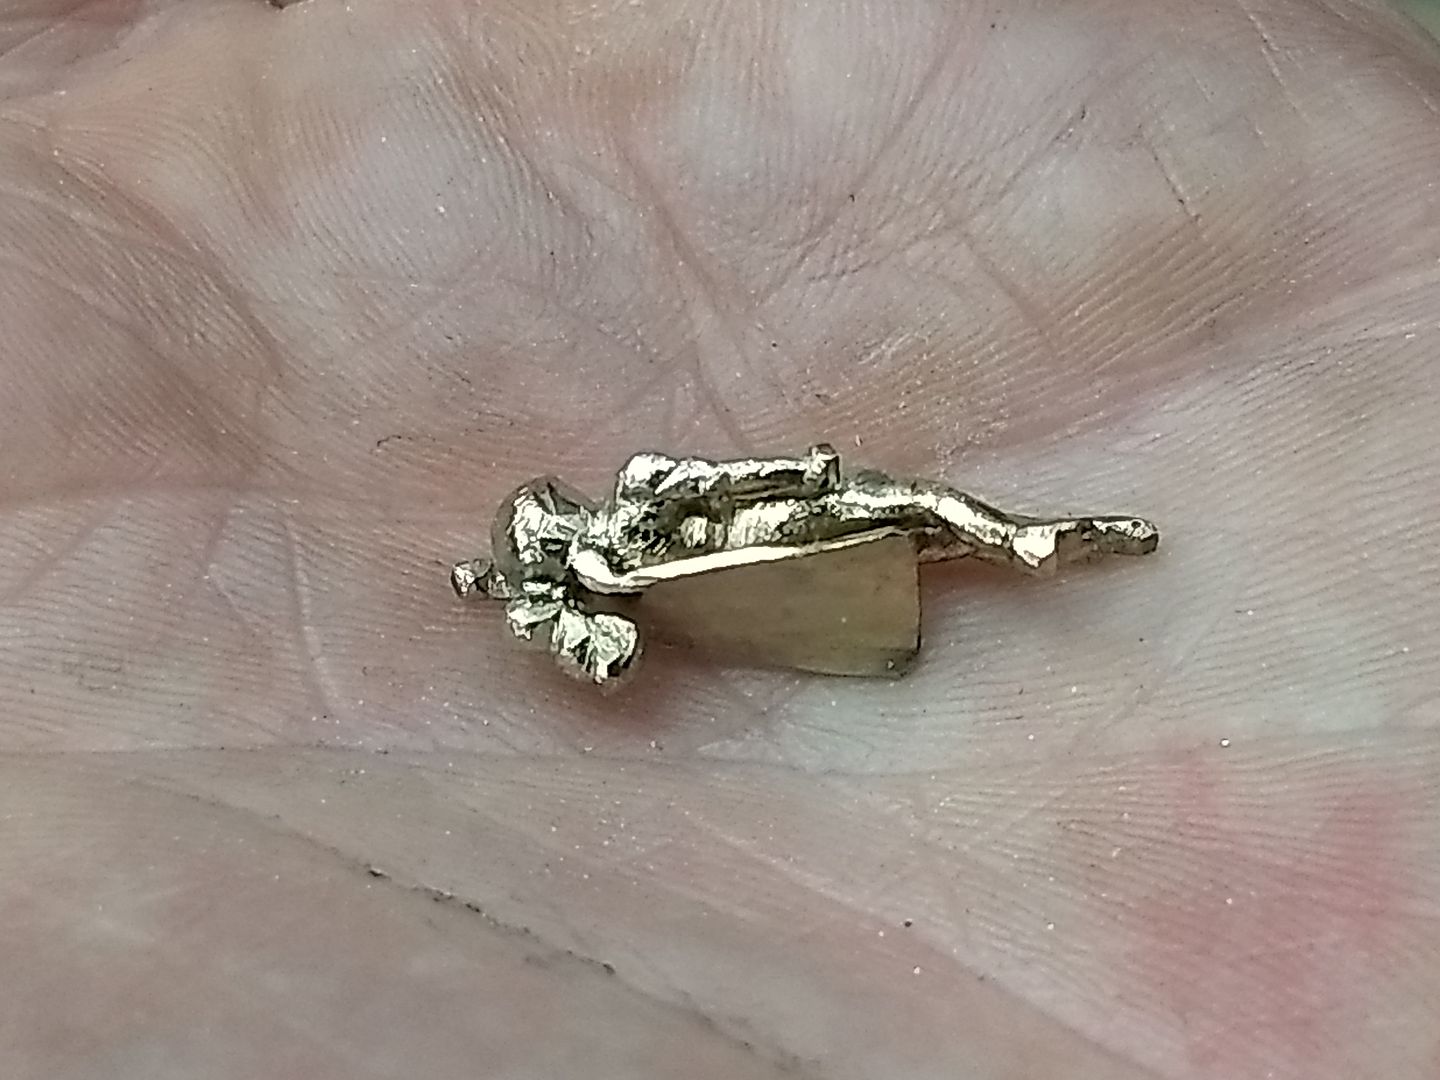
With the downward arm on, the next thing to do is the head and hair. I remelted the head section and made a ball of gold.
Bum picture lol
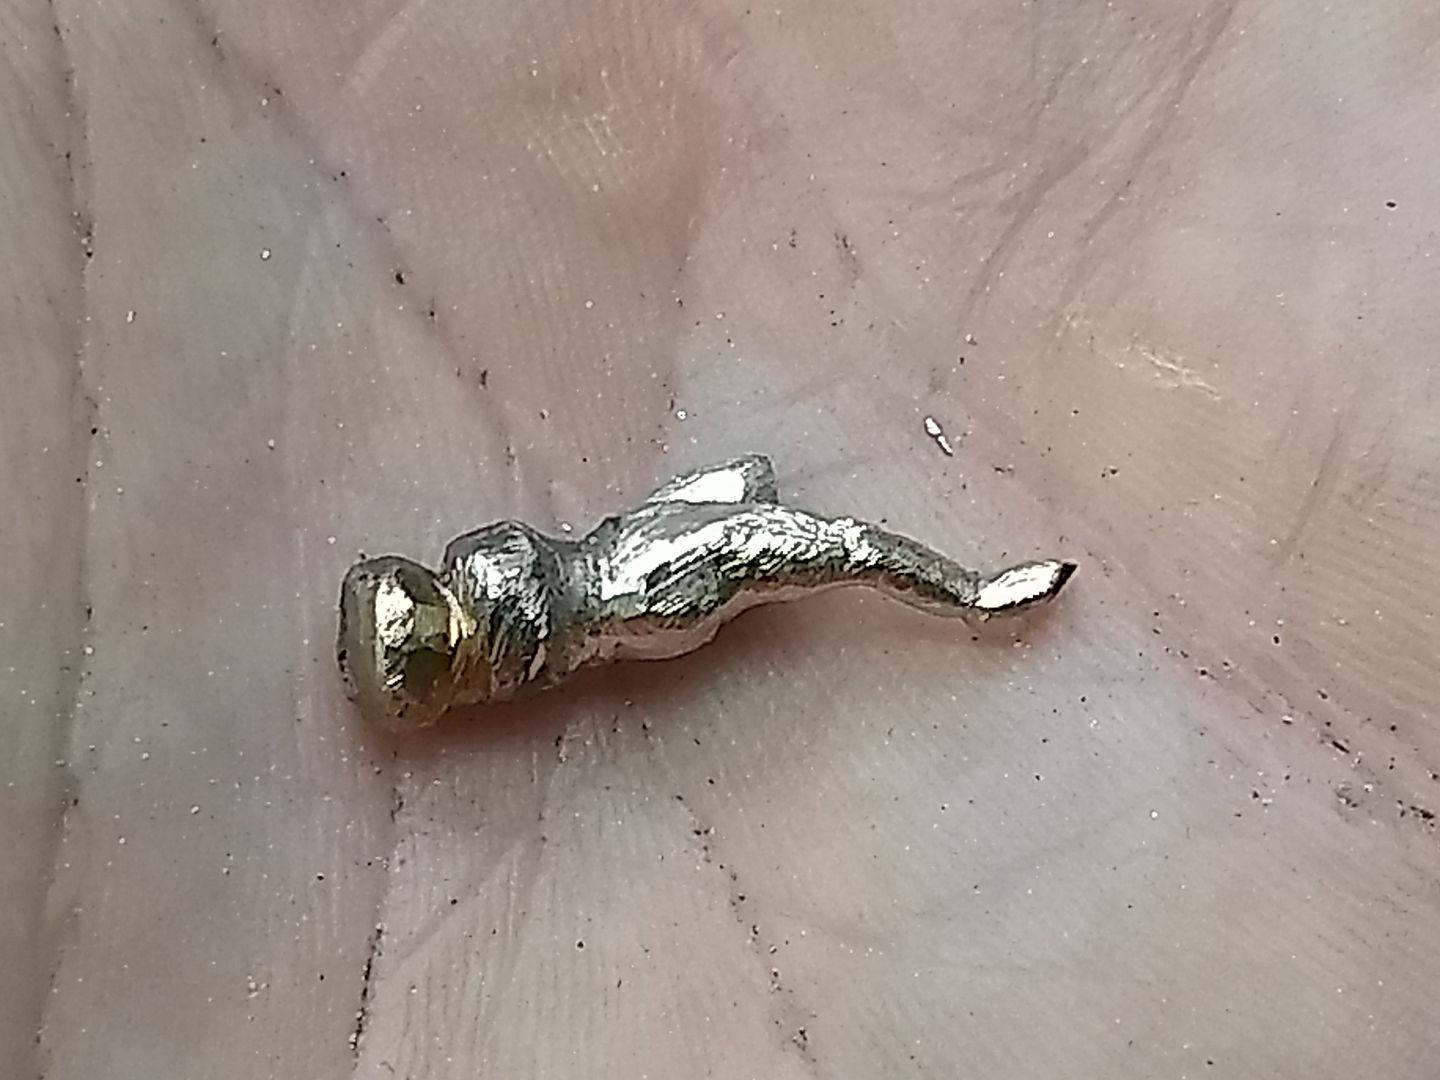
The hair will go on first. Simply a section of rectangular wire that will be shaped to a ponytail....
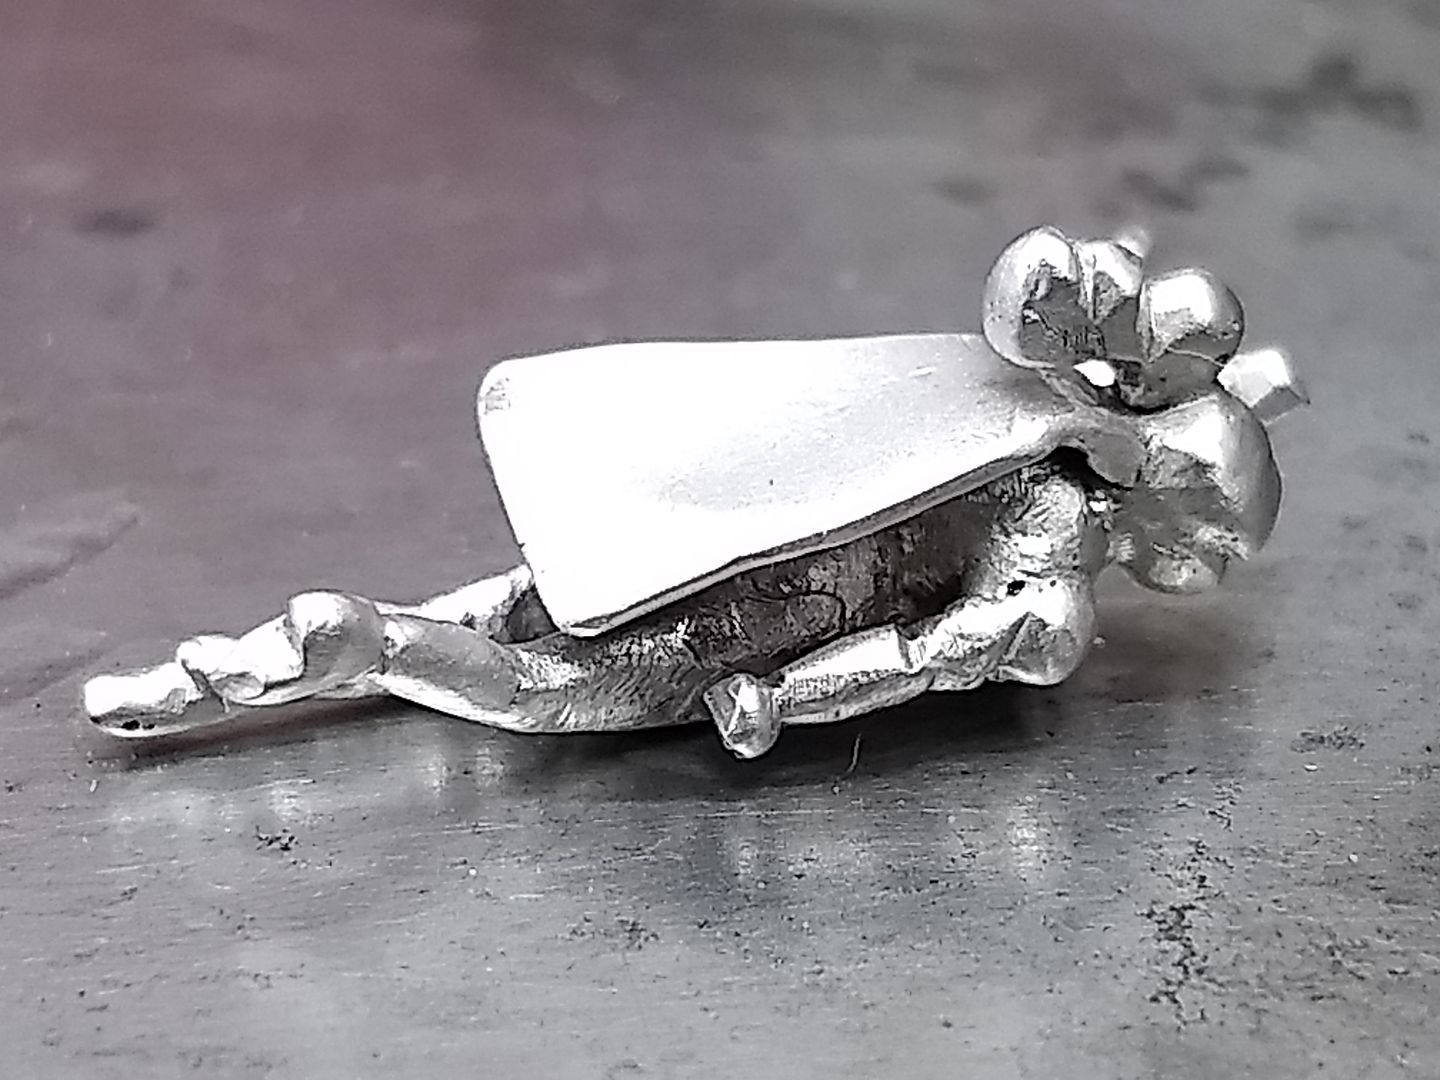
Superheroes wear capes..... apparently. A section of gold is rolled flat:
And then cut and shaped:
This is then soldered under the hair line and the cape bent a bit to show a breeze
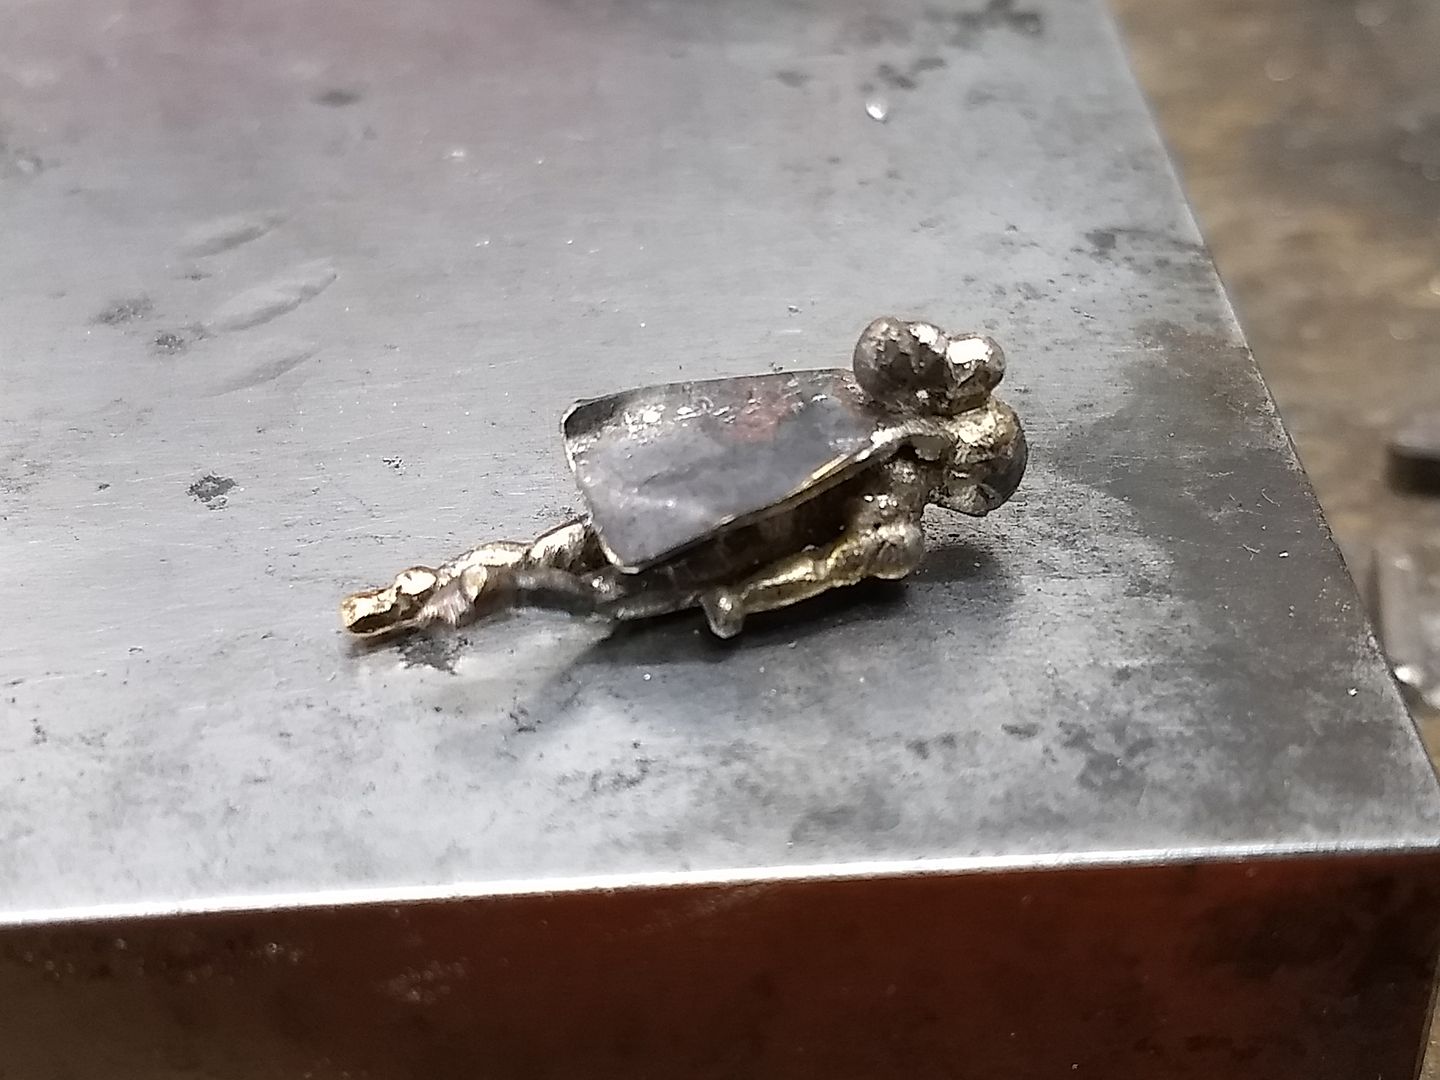
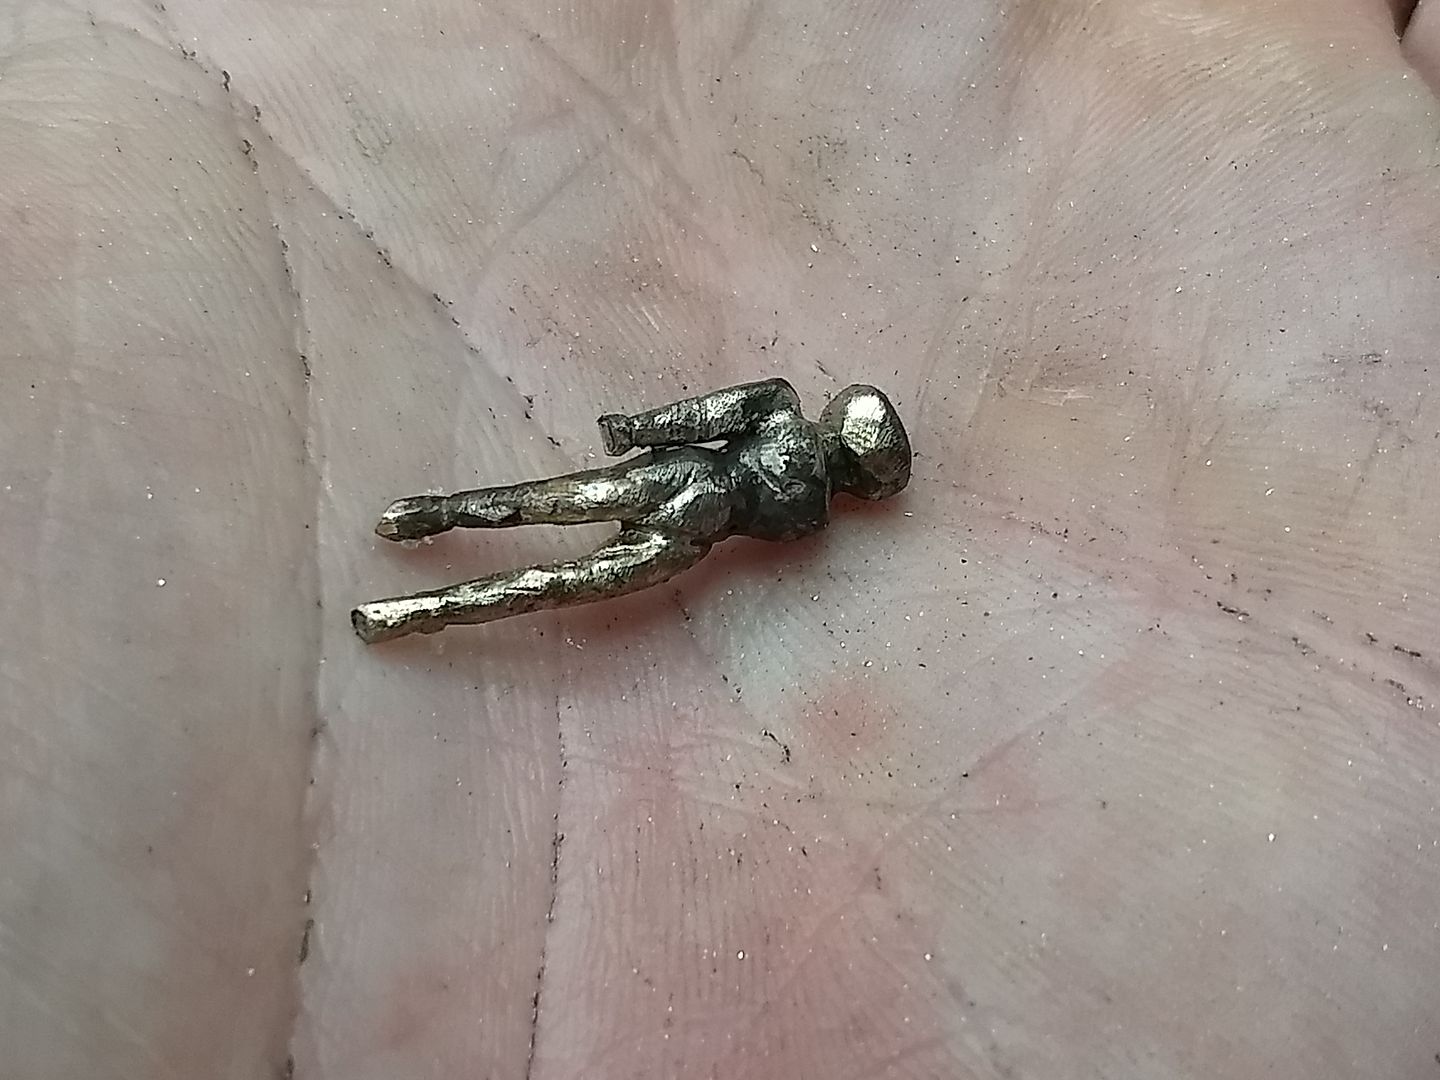
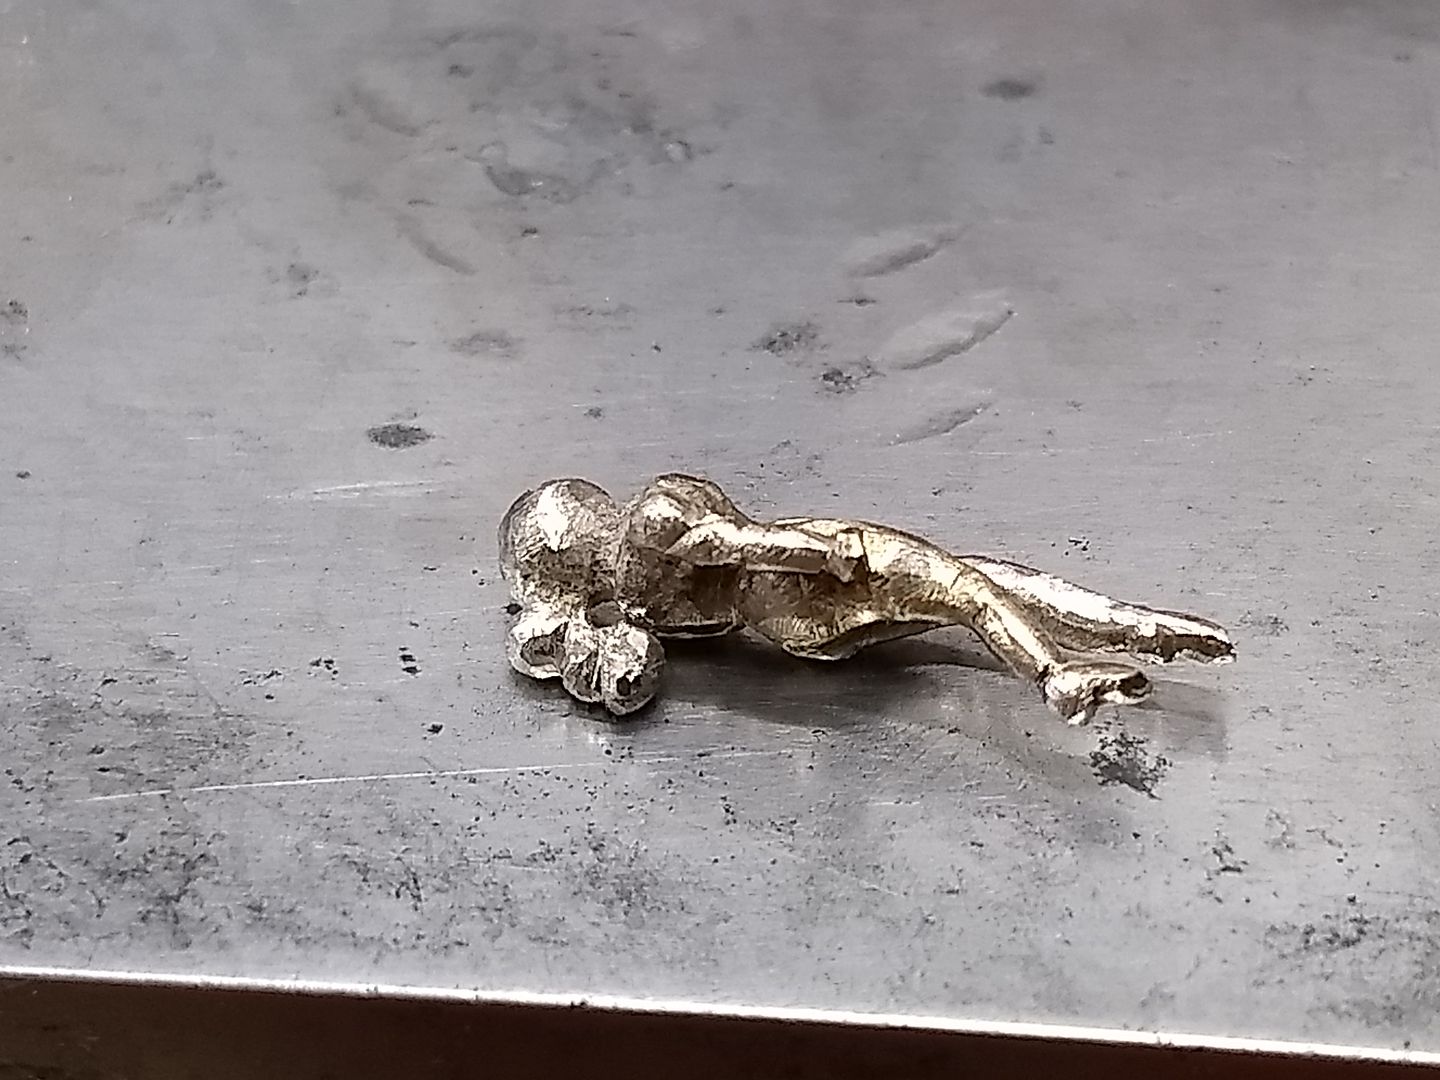
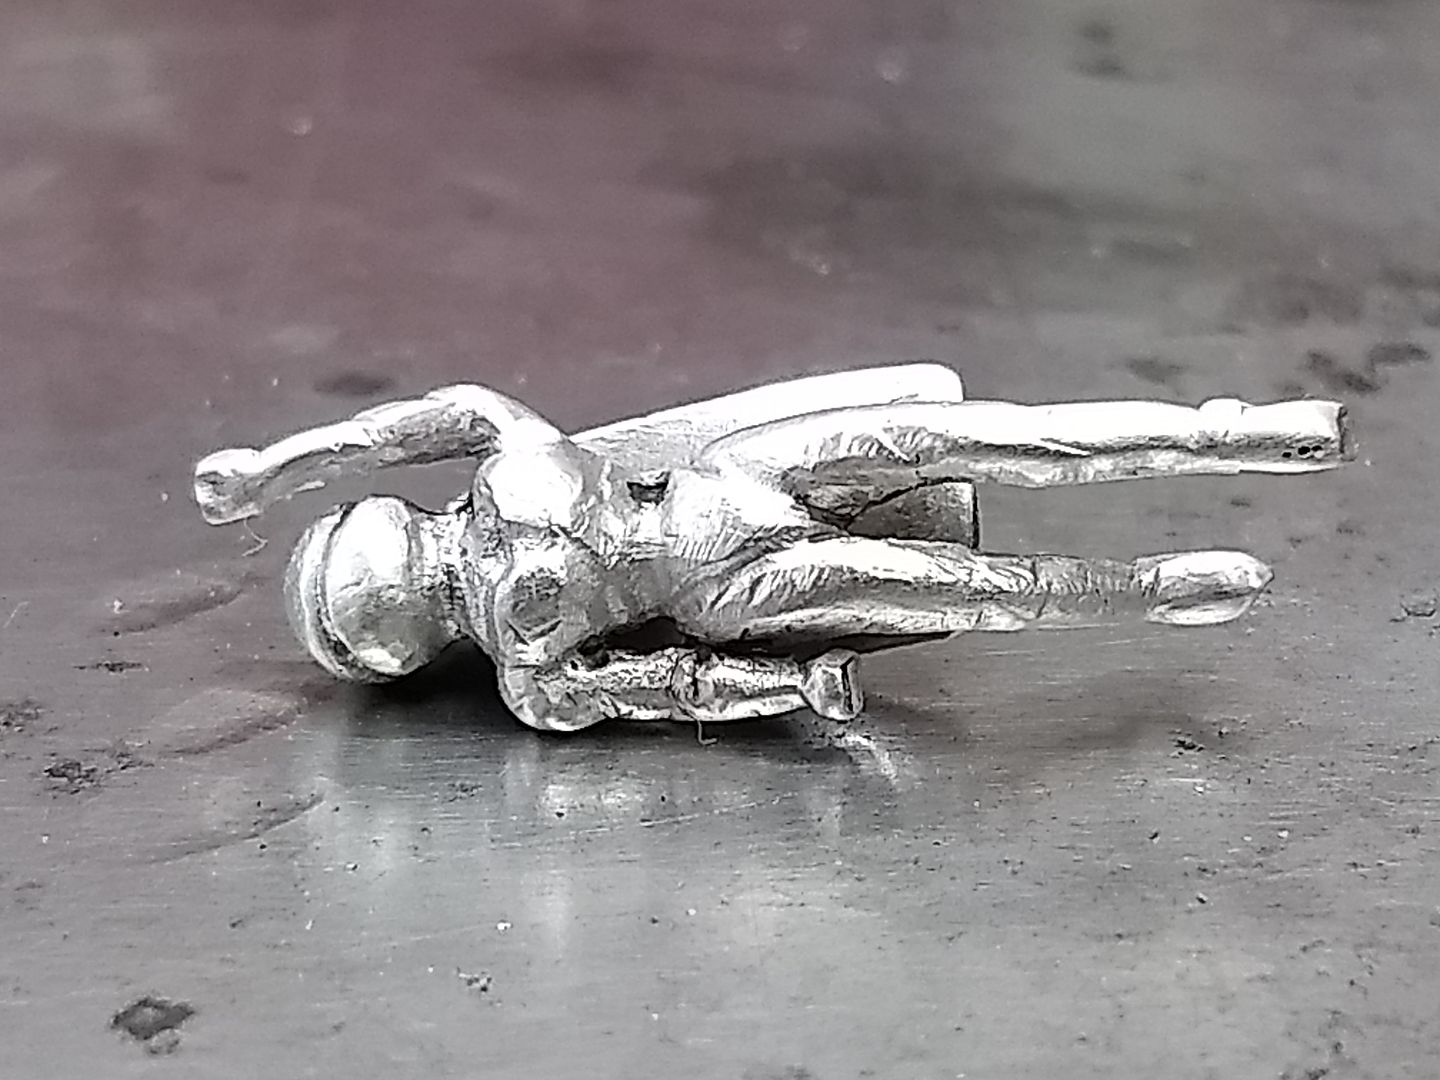
Arm number 2: Again to avoid damaging the head area i profile it before it's soldered:
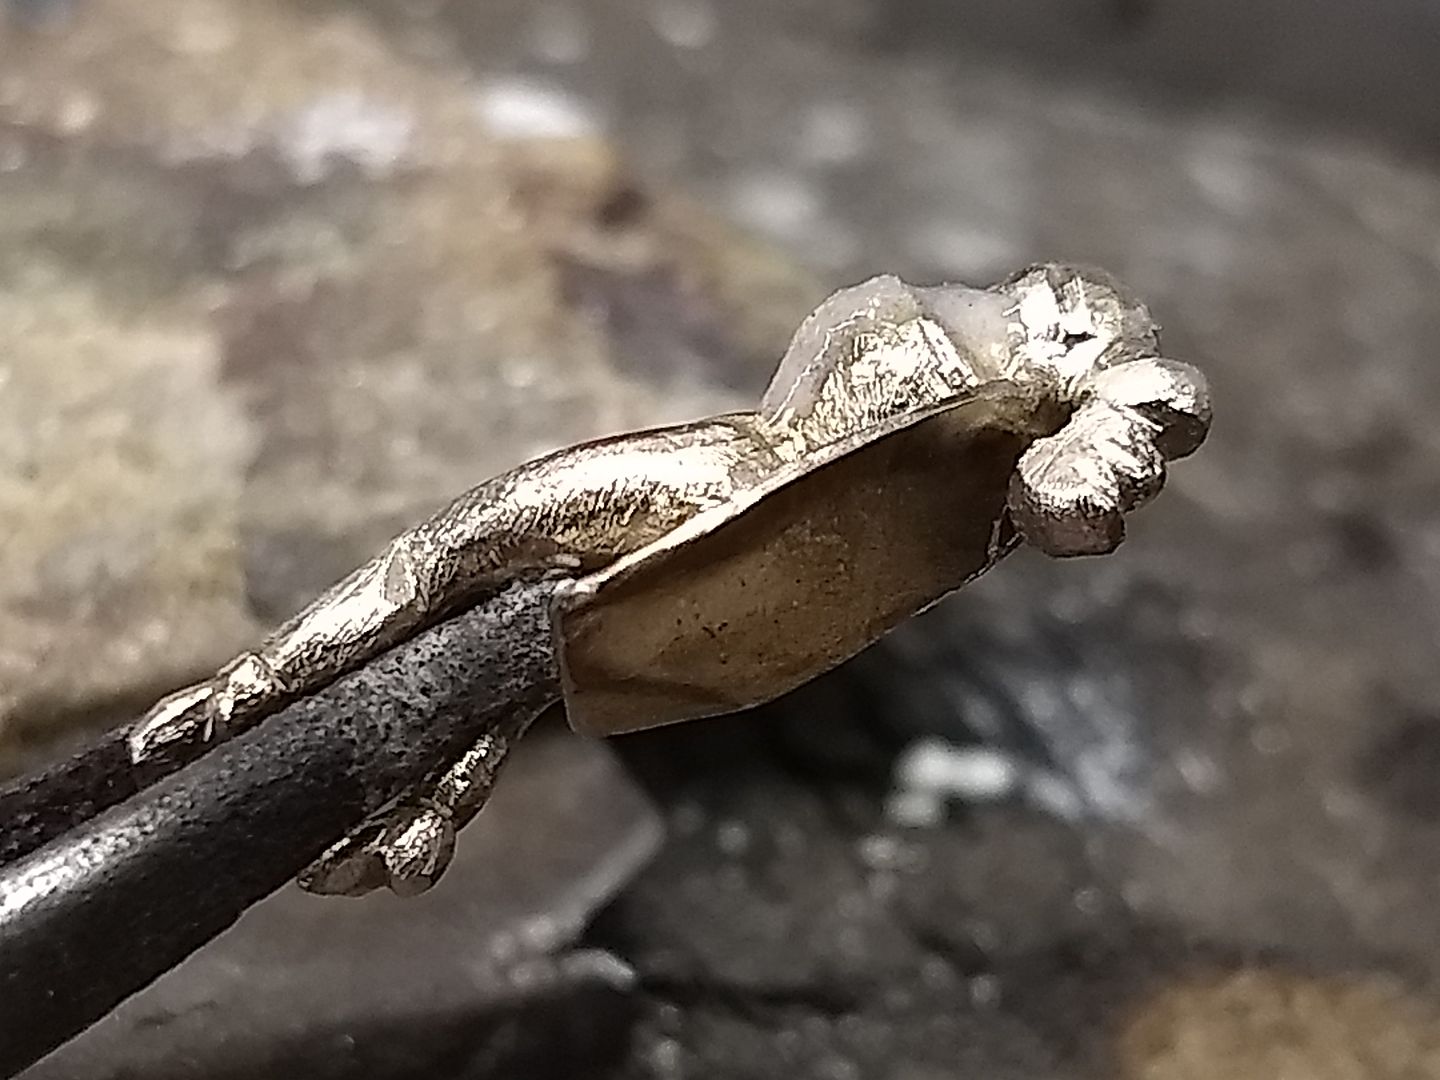
The underwear and chest area is next
I won't go too mad here, but effectively a bit of cleavage and some loose detailing to show an armoured suit:
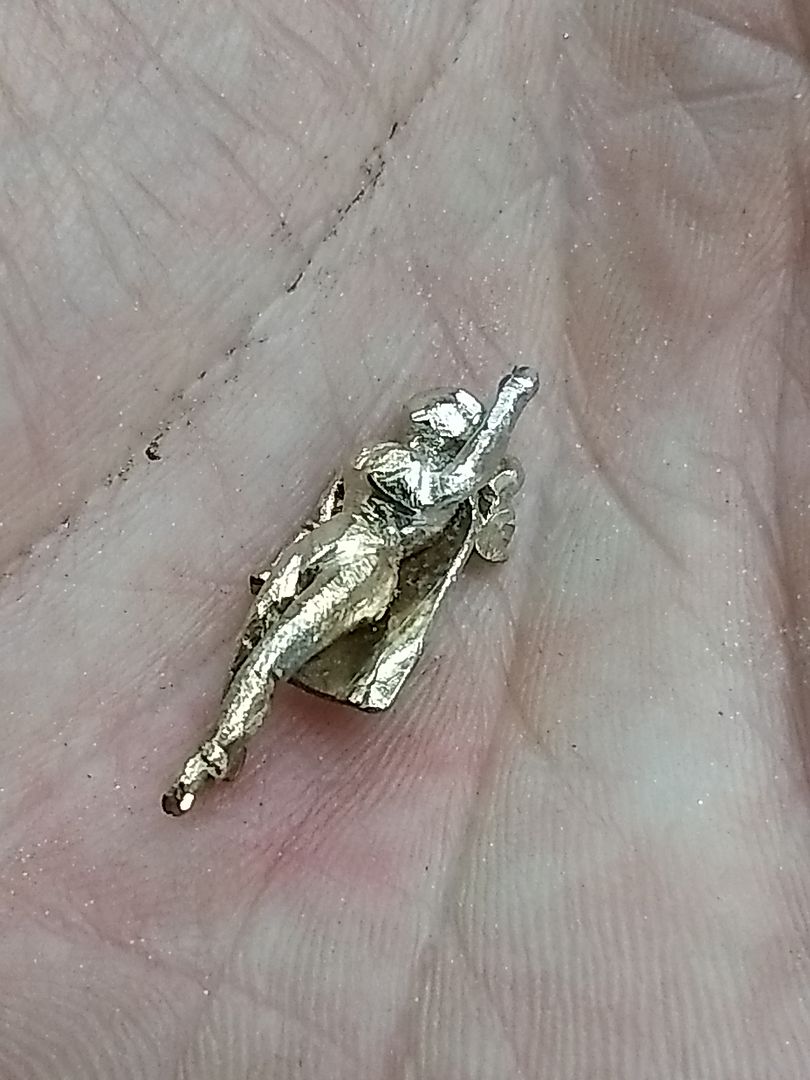
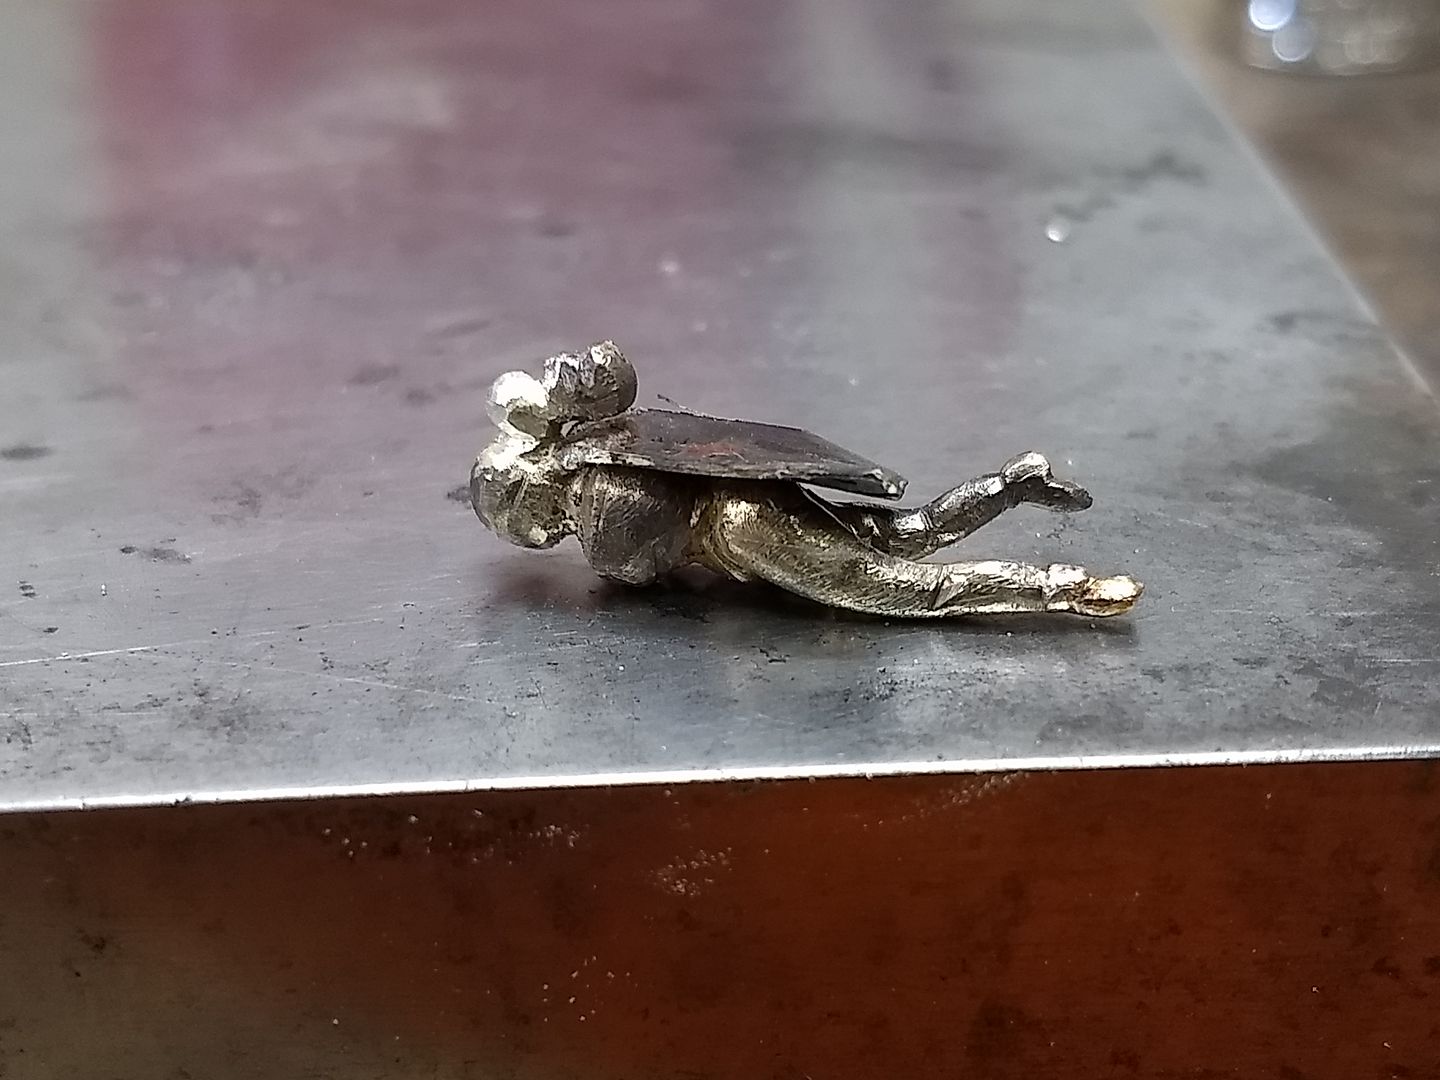
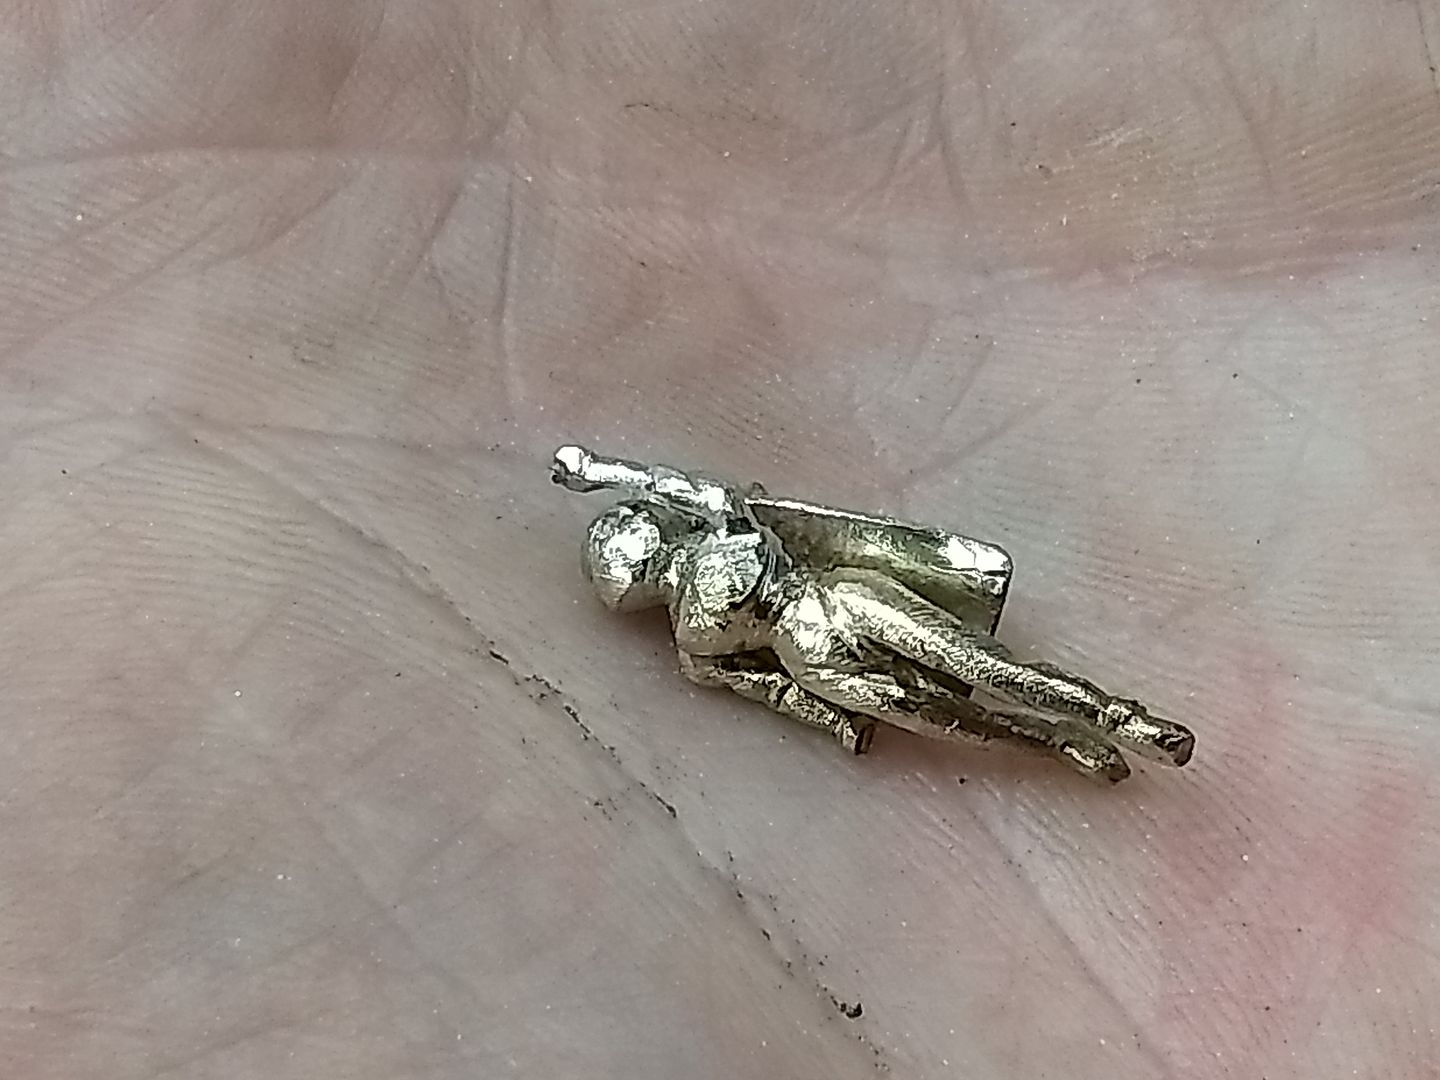
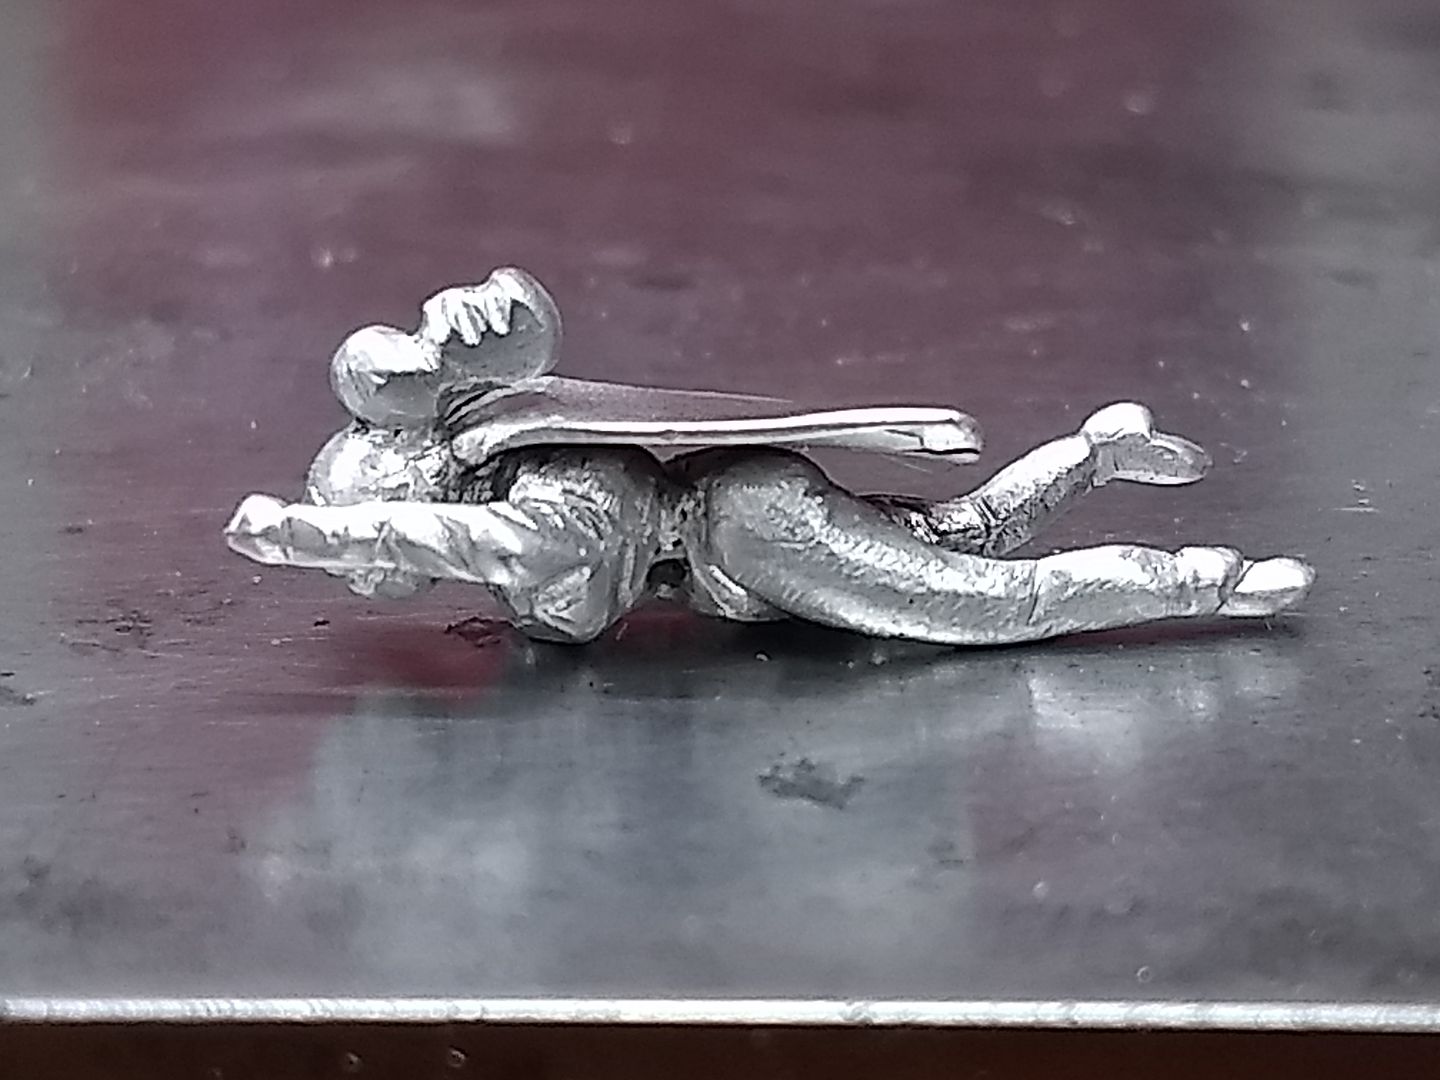
Faces ruin pieces like this (in my opinion) so I'm leaving it in a kind of cartoon state with a sort of helmet visor finish. It's effective and doesn't complicate things. I won't polish it because it needs to be low-key so have gone over it with a course mop and cleaned it up. I still need to fill a couple of pores and add a badge / lapel pin but you get the picture.
Eddie

On the 6th of next month I'll be having my 3 year post treatment scan, which according to my nurse specialist is a bit of a milestone. Most oncology units are now looking at a 3 year surveillance plan as opposed to the old 5 year system so in theory that could be me signed off in a month or so
Luckily my local hospital and its partners are going to continue the 5 years of scans etc but even so, 3 years is a good box to tick. I told my nurse specialist ("other wife", as she's known) that if I made it through this crap I'd make her something in the workshop...... and that time has arrived..... fingers crossed! Having created a tag-line for the hospital earlier this year, "superheroes do exist, they work at RBCH" I thought I'd keep with the theme and make this: The material is 14ct white gold (i had an excess of it) and I used no imagery or casts to make it, just the minds eye and and a couple if files / drills.
Enjoy......

The offending metal, a lump of 14ct white gold that I had in scrap. It's not a material that we use much in the UK so rather than send it off for refining / cash I have found it a good home. The metal is rolled and different gauges made to fit the needs of the project:


With the wires made the files now come out. I'll not say what it is yet, but hopefully the images should make it obvious......


With the largest section roughly filed to shape the wires now come into play. I use a mid level white solder for this as the metal has a higher melting temperature than 9ct but lower than 18ct so i need to exercise a little caution with the heat.....

This next pic should make sense now....


Because space is tight i have to try to profile the remaining limbs before they are soldered. This is a challenge in itself because they are so small.


Before we move to the arms i just want to say something about womens bottoms and the issue of flattery
I had not foreseen the potential to get this wrong and it's incredibly difficult to sculpt a womans arse without getting into hot water. Luckily my file worked in tune with my eye and I think i did it some justice. The things that you have to overcome in this job.......


With the downward arm on, the next thing to do is the head and hair. I remelted the head section and made a ball of gold.

Bum picture lol

The hair will go on first. Simply a section of rectangular wire that will be shaped to a ponytail....


Superheroes wear capes..... apparently. A section of gold is rolled flat:

And then cut and shaped:

This is then soldered under the hair line and the cape bent a bit to show a breeze


Arm number 2: Again to avoid damaging the head area i profile it before it's soldered:


The underwear and chest area is next
I won't go too mad here, but effectively a bit of cleavage and some loose detailing to show an armoured suit:


Faces ruin pieces like this (in my opinion) so I'm leaving it in a kind of cartoon state with a sort of helmet visor finish. It's effective and doesn't complicate things. I won't polish it because it needs to be low-key so have gone over it with a course mop and cleaned it up. I still need to fill a couple of pores and add a badge / lapel pin but you get the picture.
Eddie


Edited by ecain63 on Saturday 14th July 10:04


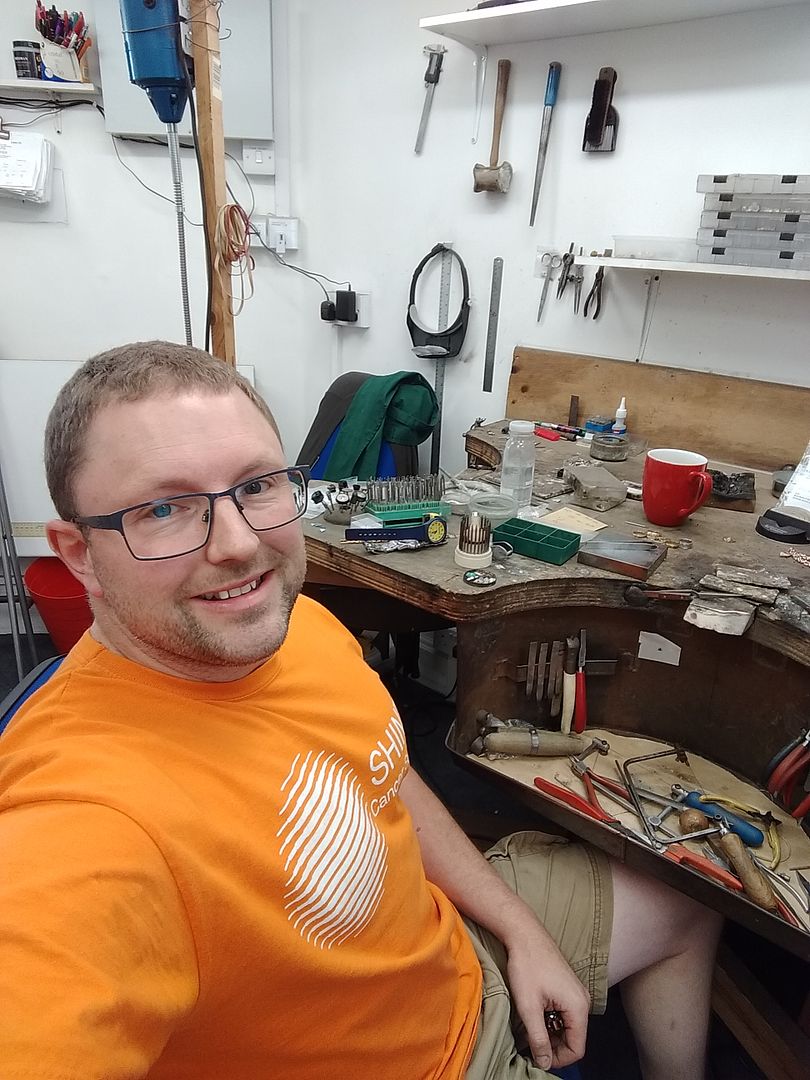
h0b0 said:
Anyone else disappointed by how normal Eddie looks? Based on only seeing thumb pictures previously I’ve always assumed he had already received a telegram from the Queen due to his age and his facial features were not visible due to an excessively bushy beard/face. Perhaps, something similar to Hagrid from Harry Potter.
Seriously though, good luck with the scan and good to see you back posting.
Ha! Post of the day!Seriously though, good luck with the scan and good to see you back posting.
Sorry to disappoint
I'll take it as a compliment though. Thank you for all your kind words.. I'll let you know how I get on with my scan
V8_Fastback said:
A massive thank you to Eddie - he sorted my mums broken watch strap when others wouldn’t touch it.
Excellent work, made her very happy not to have to shell out on a replacement strap.
Much appreciated - certainly gets my recommendation.
Excellent news and glad she was happy. As you know, the repair might see out her strap so if you keep an eye on the 2nd hand strap market it might be worth getting another if one comes up for a good price. Excellent work, made her very happy not to have to shell out on a replacement strap.
Much appreciated - certainly gets my recommendation.
Happy to help as always.
Dibble said:
Eddie, you might have some competition here!
Bloke builds miniature Ford Escort from precious metals and gemstones (not nearly as tacky as it sounds, not even remotely).
Hmm! Truly a remarkable project. He's clearly got some skills. Bloke builds miniature Ford Escort from precious metals and gemstones (not nearly as tacky as it sounds, not even remotely).
I've often thought about making my own watch from raw materials, but as busy person there's just no way I could do it with what time off I have. Really a job for the retired or someone who has more time and money than they know what to do with. That Ford Escort is something else. Top marks.
ctrph said:
Russell Lord is known as one of the best diamond setters in the business.
That escort is an amazing work of art! Bet it will go for stupid money when he sells it.
I hope it does. The show is a good place to punt it, or if that fails to bring a good figure I'd be looking to somewhere like Harrods to sell it for him. Plenty of money in London and Harrods can pretty much charge whatever.That escort is an amazing work of art! Bet it will go for stupid money when he sells it.
Morning....
2 things........
1st thing: Scan results. Despite a little scare with my CT showing something on my liver again the MRI found it to be nothing more than scarring / fibrosis from the chemo. So, I'm all good and signed off until next year
2nd thing: My nurse specialist loved the SuperWoman badge I made her and now proudly sports it on her uniform. Happy days!
Back to the thread...... (edited to add comentary )
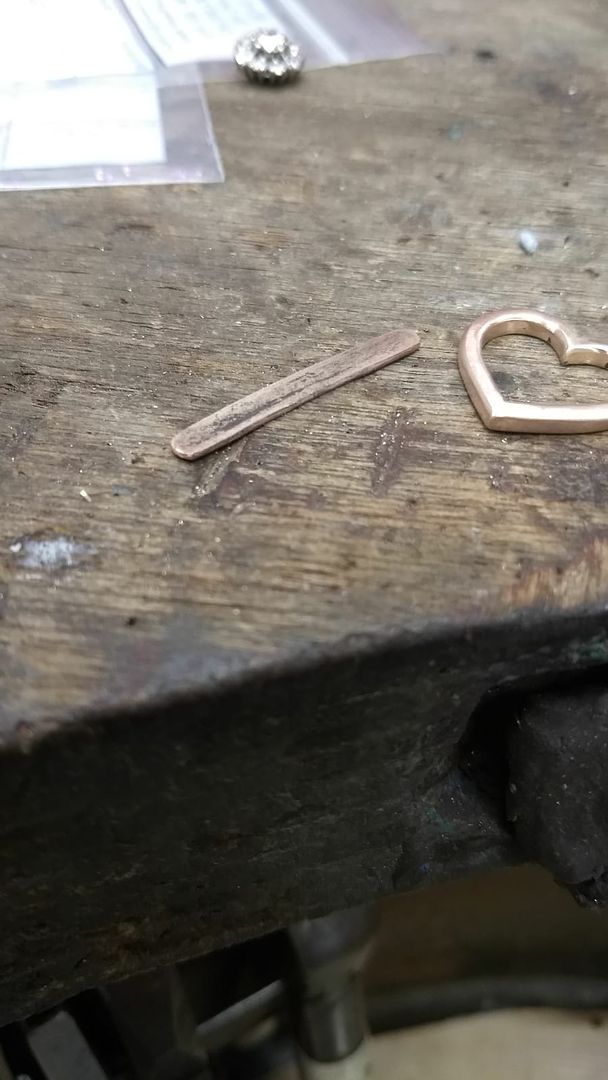
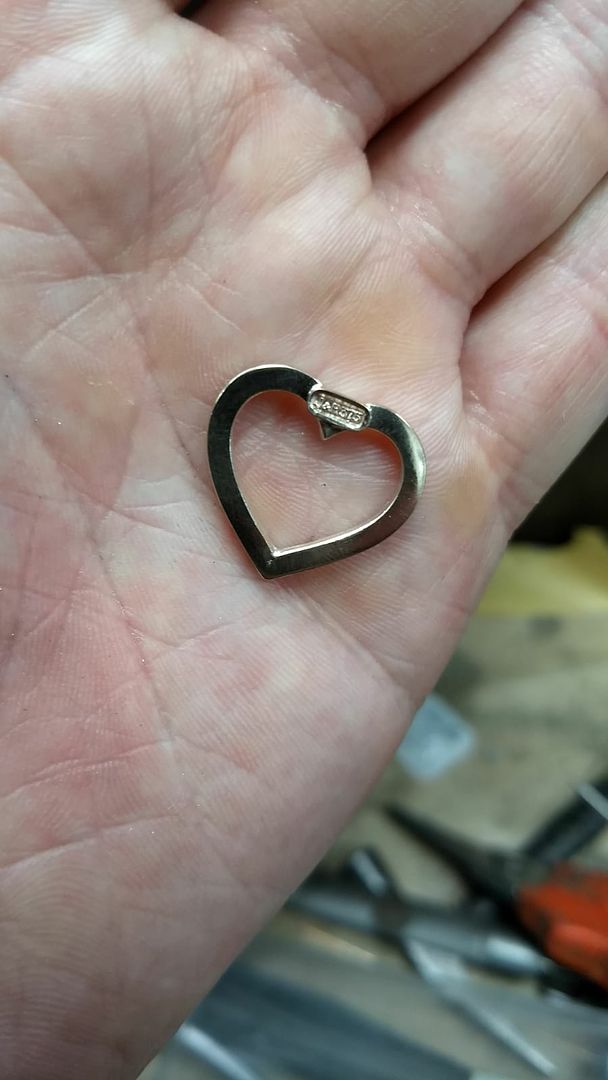
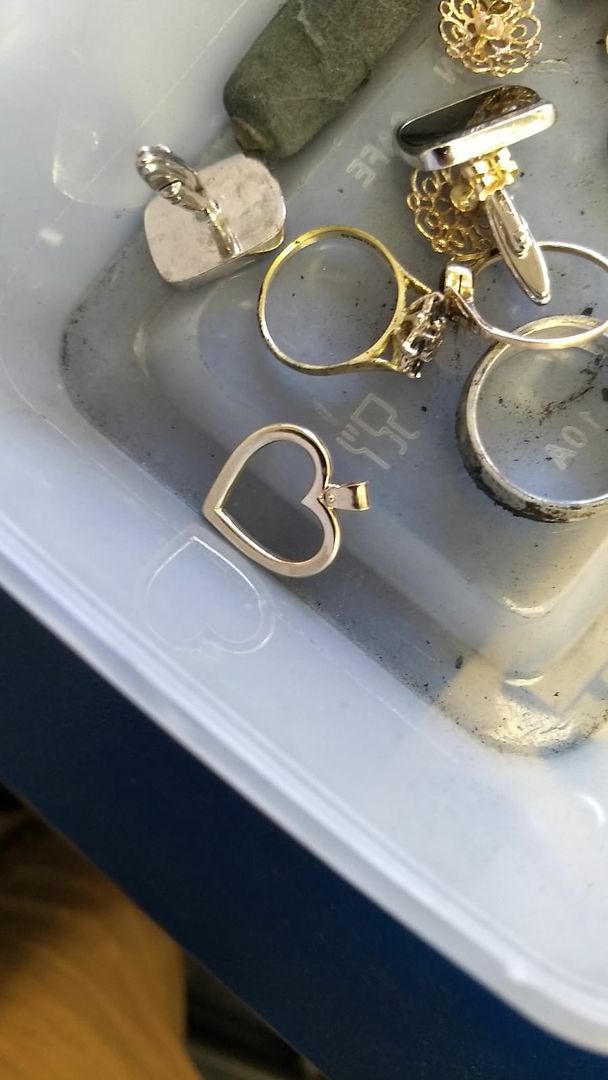
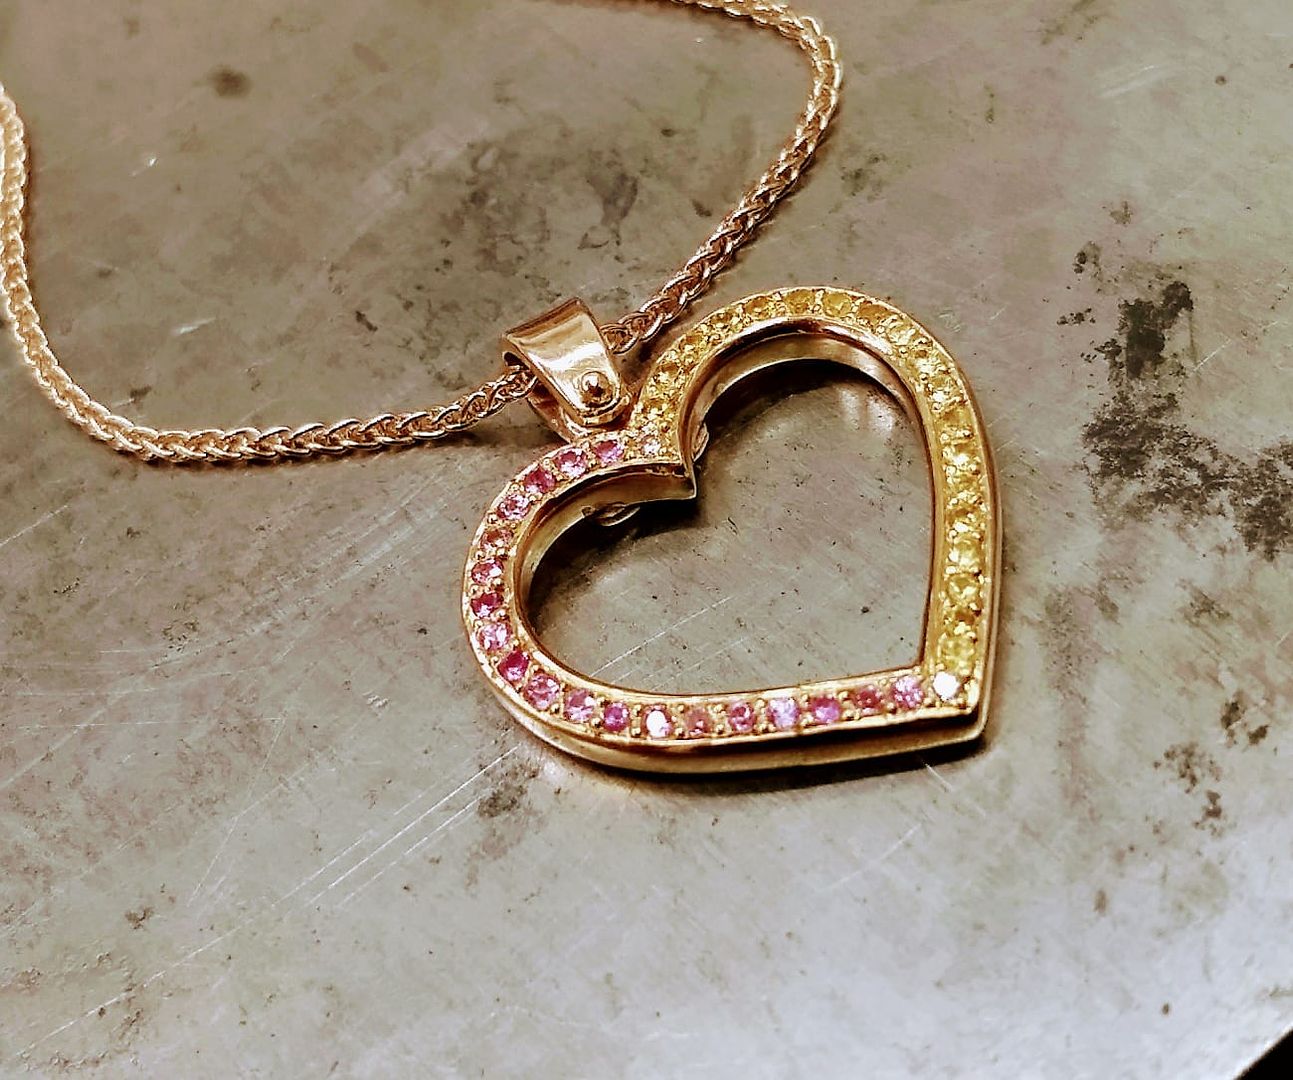
9ct rose gold heart pendent set with pink and yellow sapphires (and a diamond top and bottom) on a 9ct rose gold spiga chain. All to the customers spec.
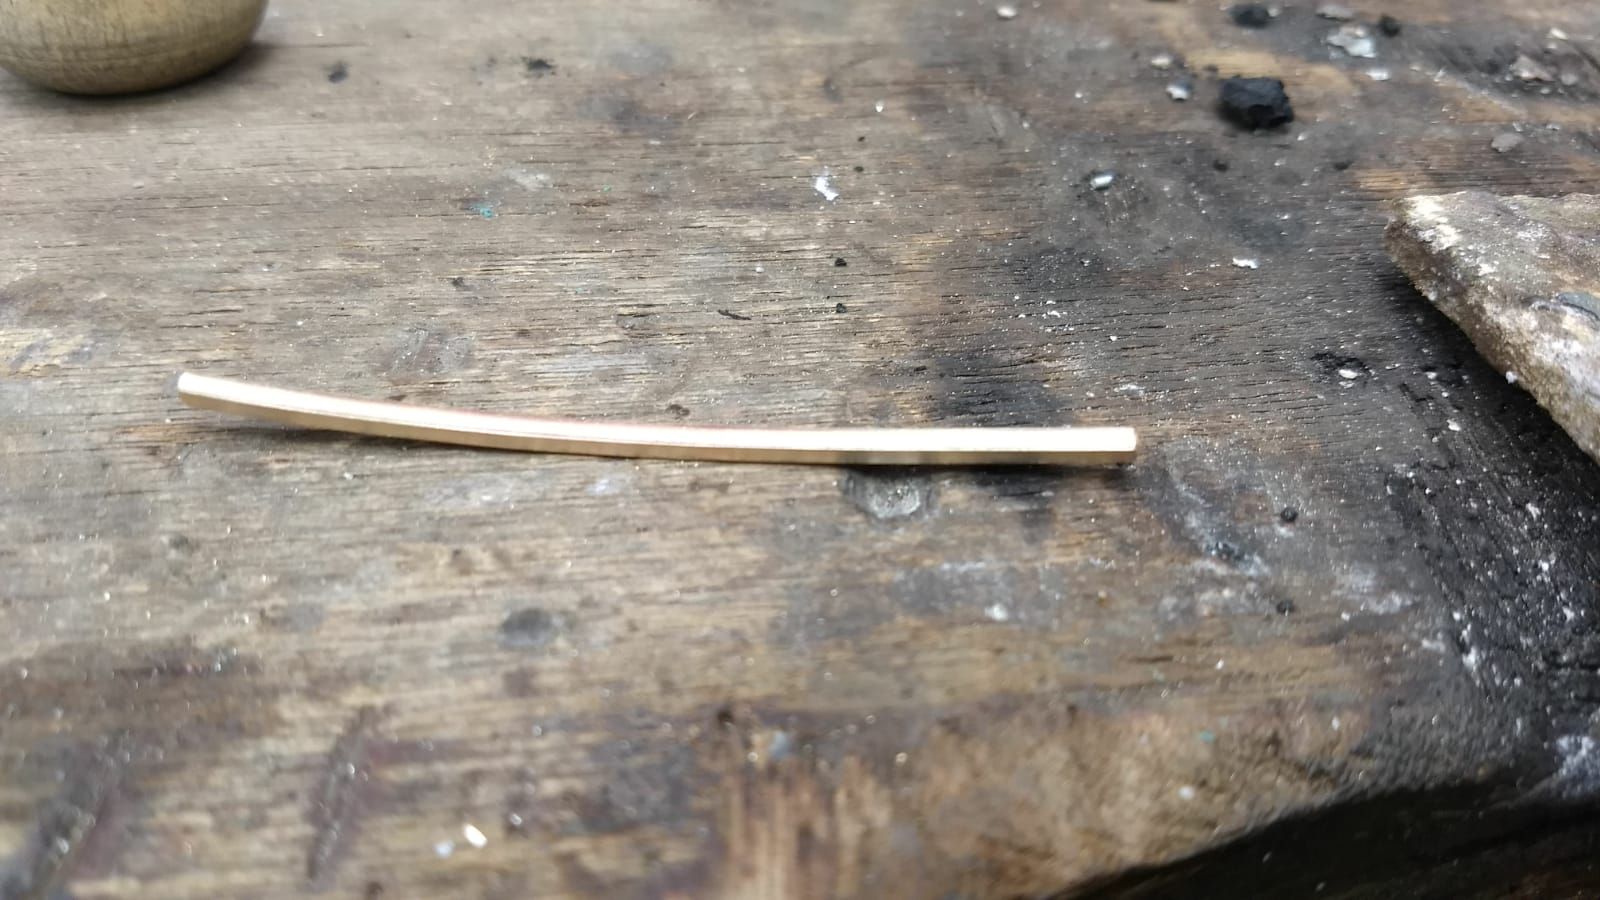
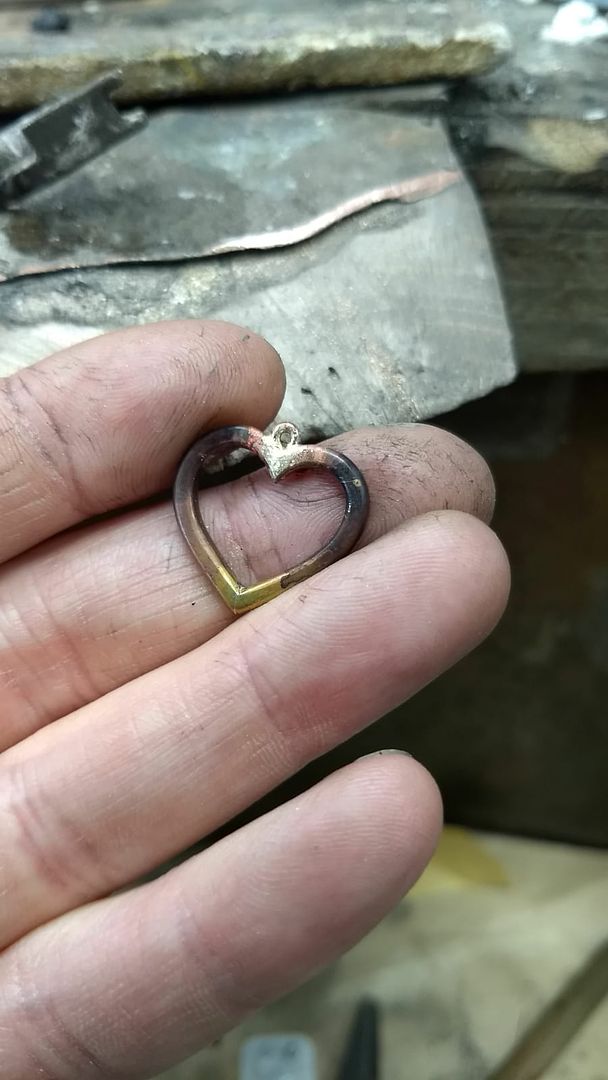
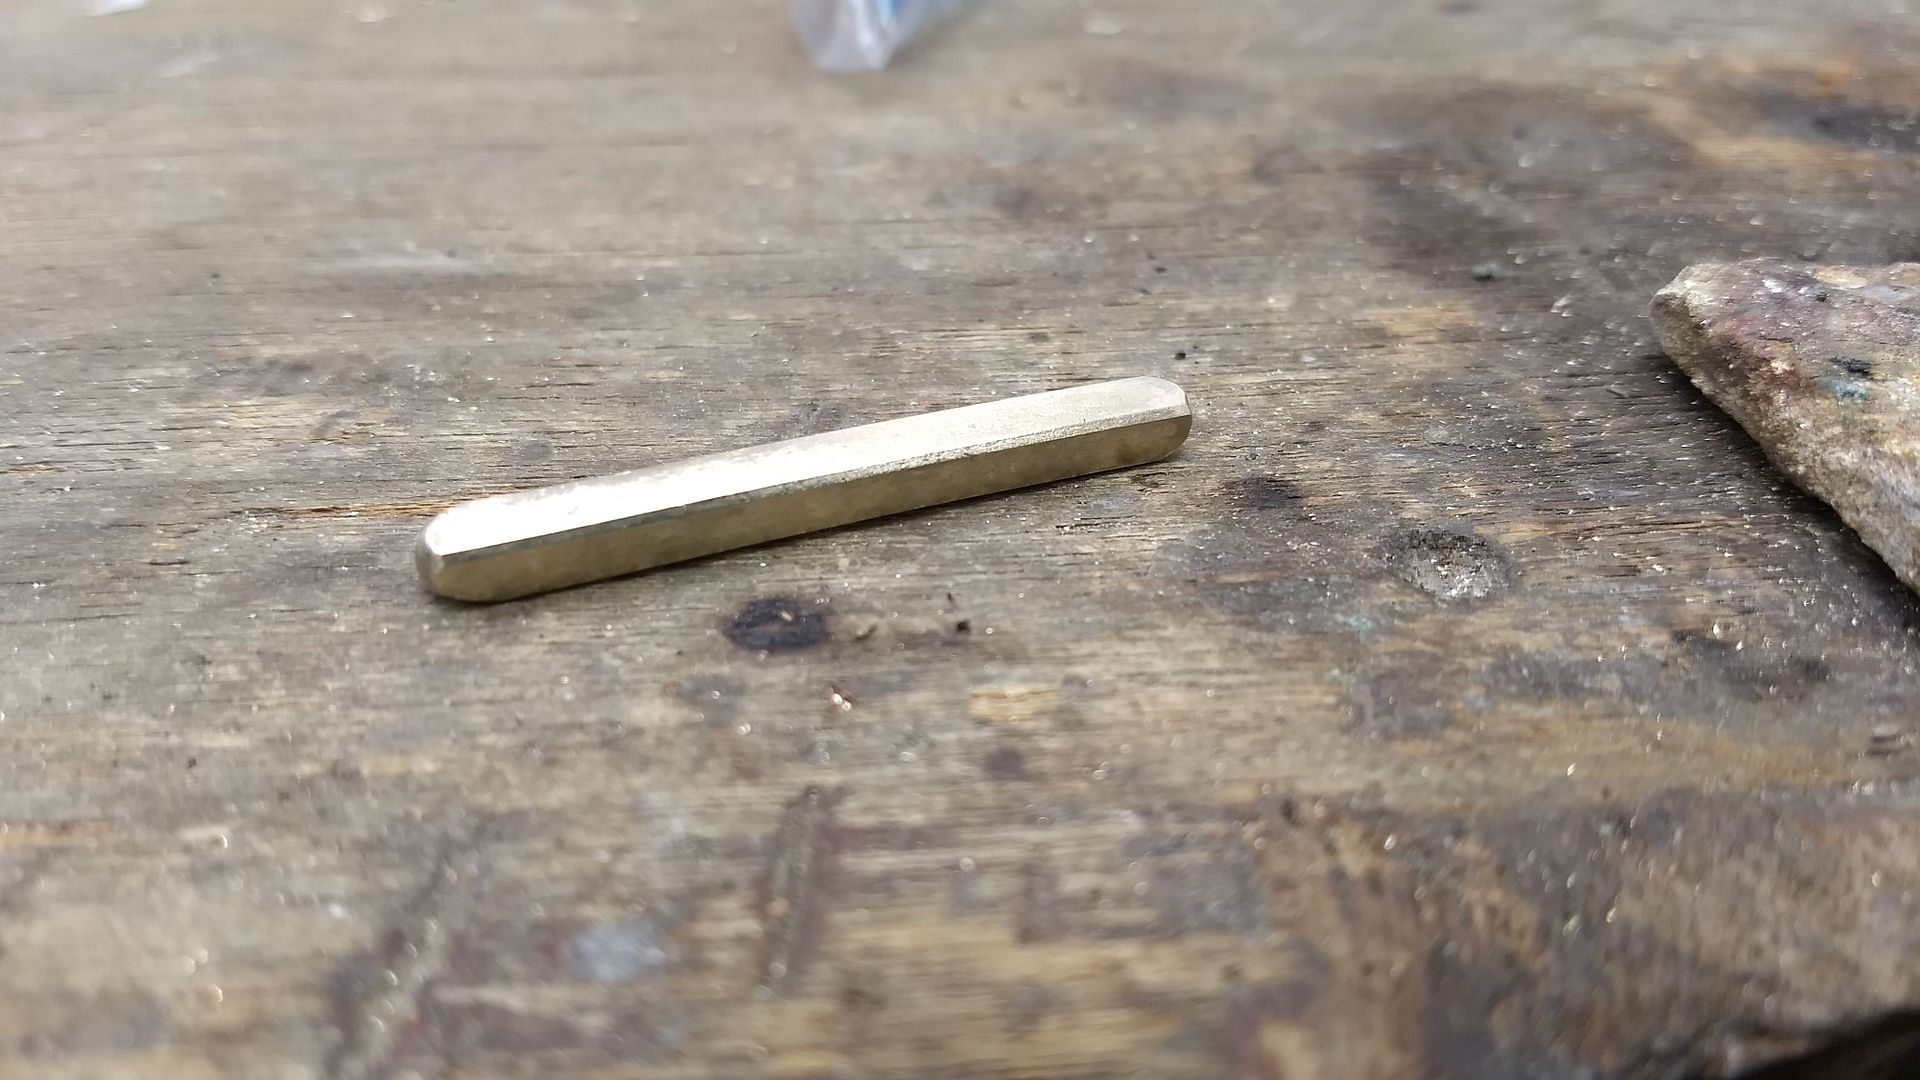
So, we took a bar of 2.5mm d-shaped wire...
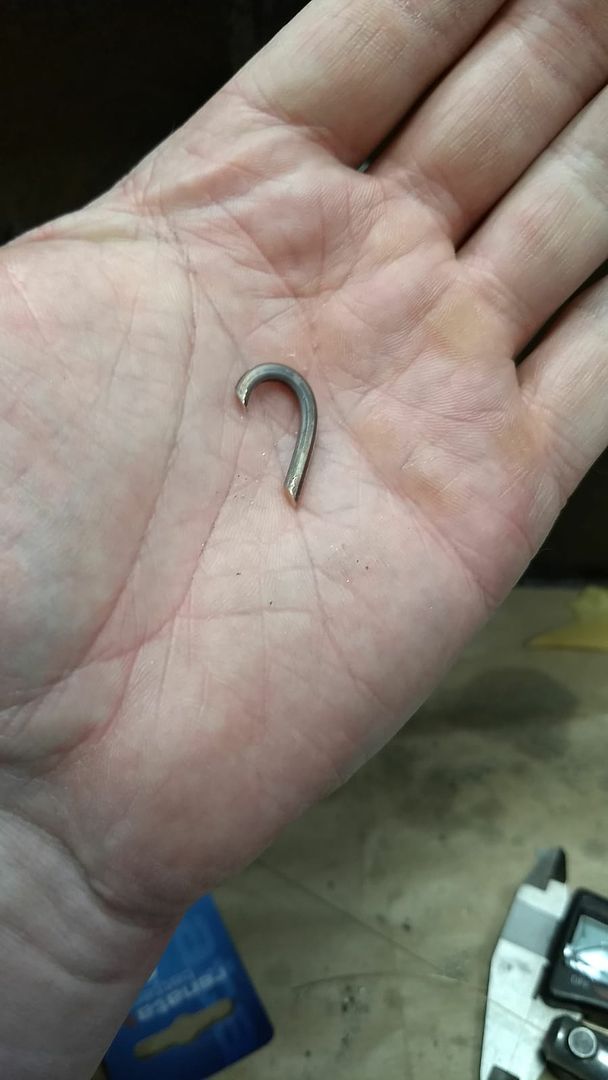
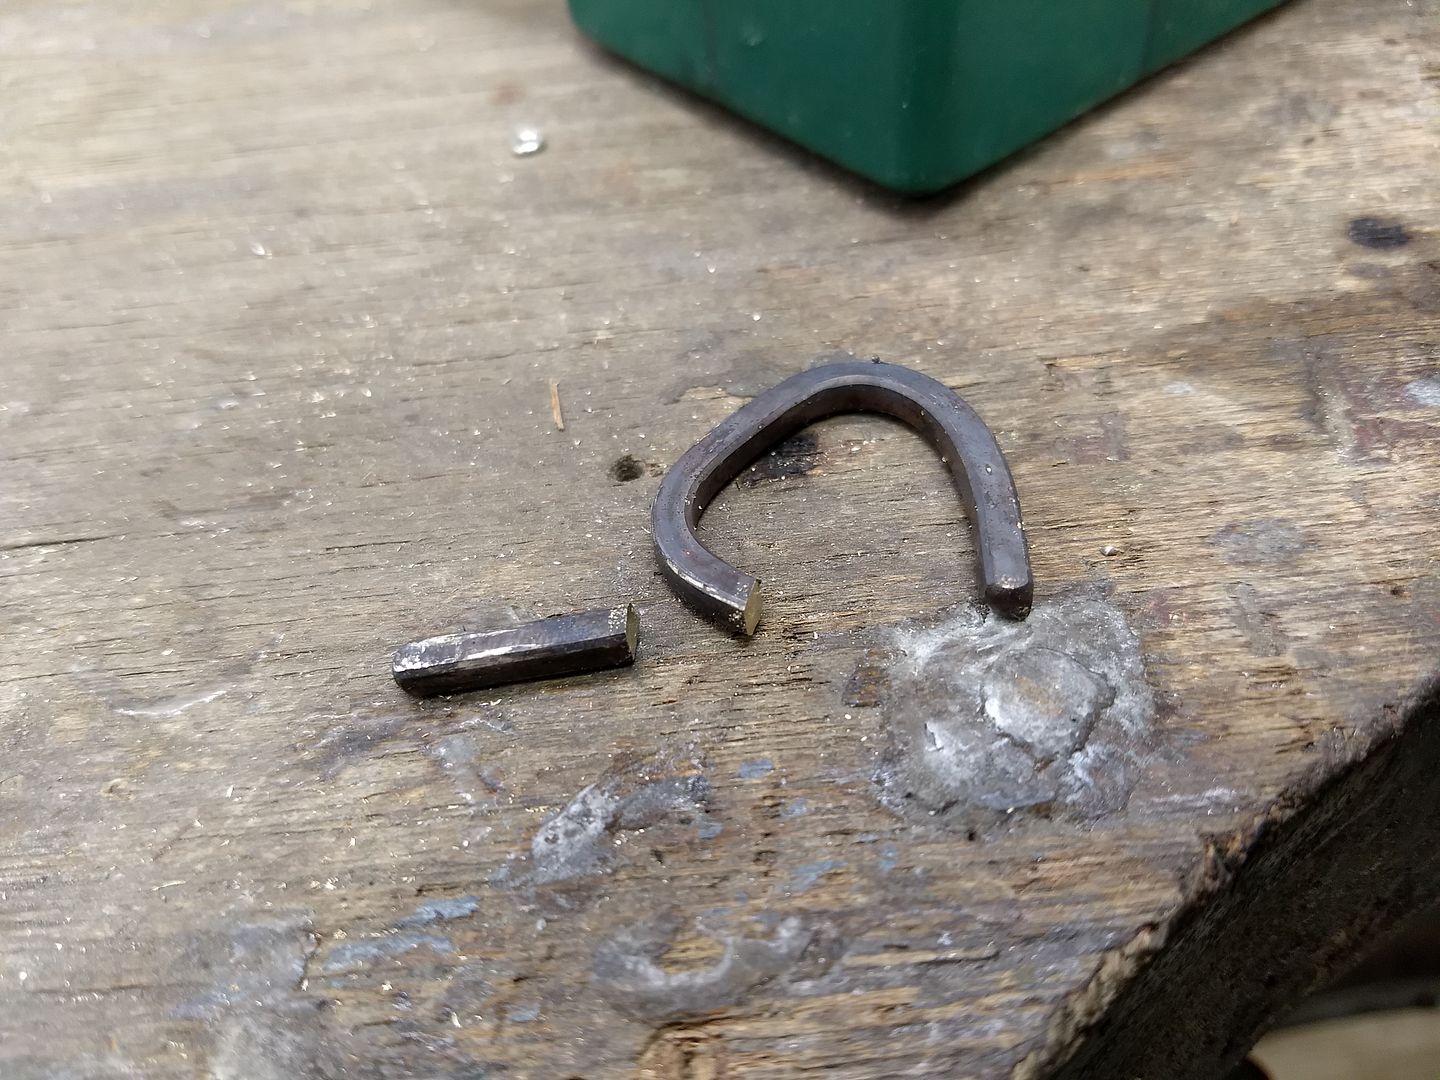
And bent one curved piece to make one half of a heart.
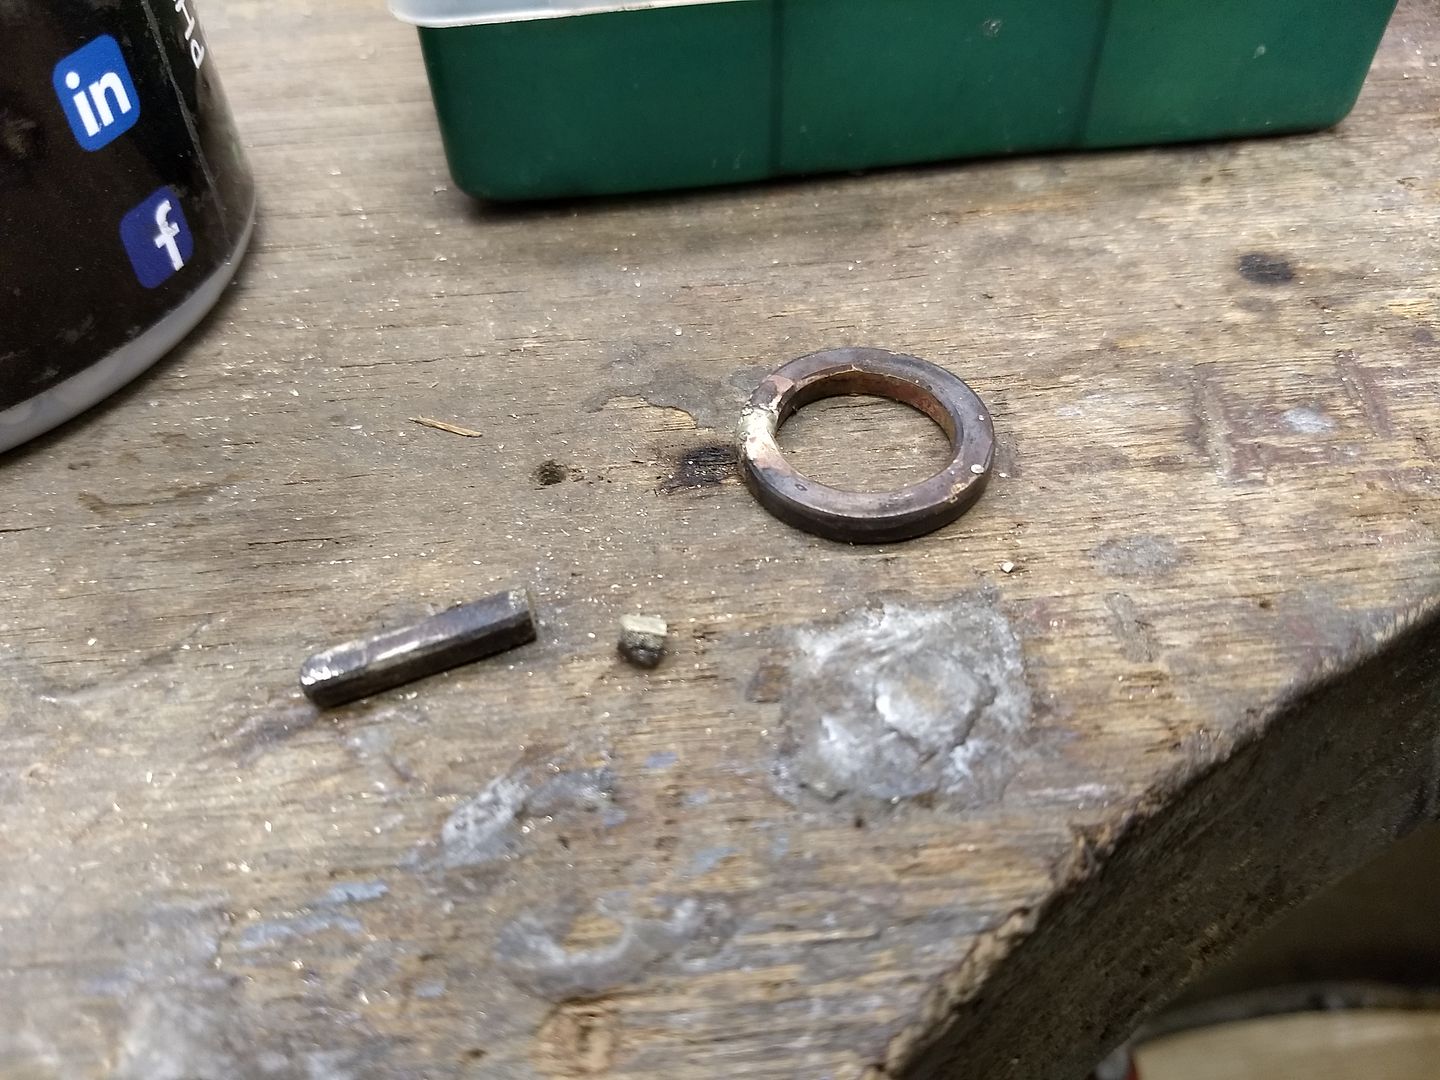
With that half we turned it back to front to make a mirrored version of the first.... and hey presto!
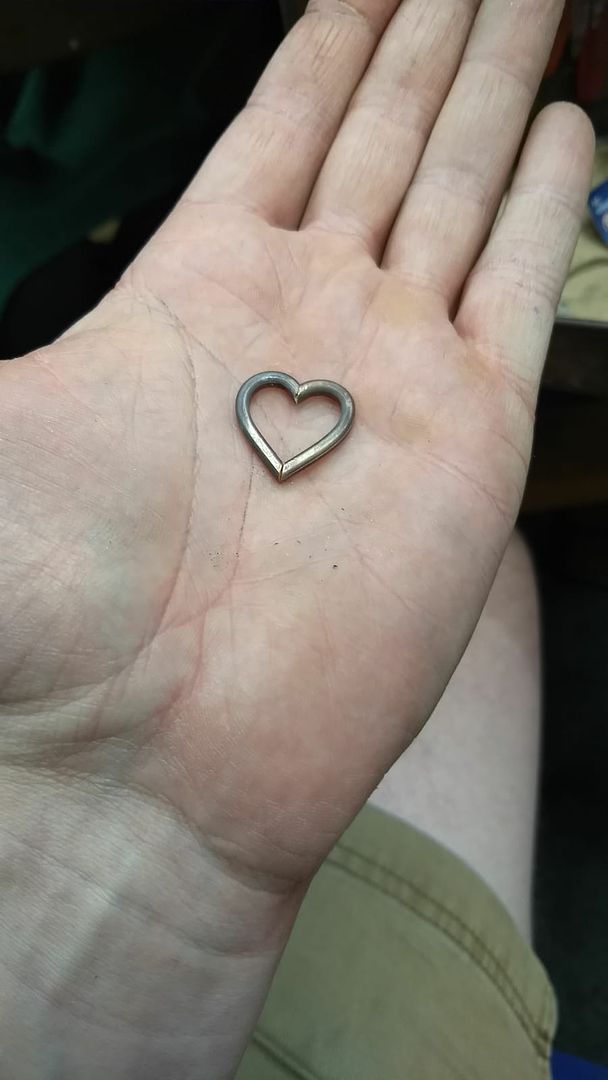
Which we then soldered.
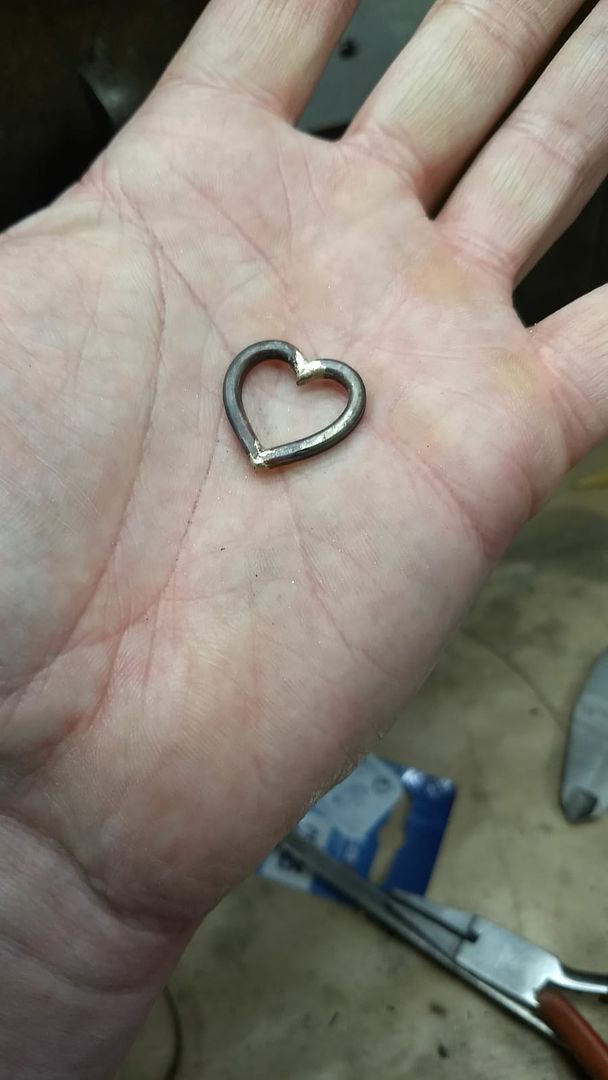
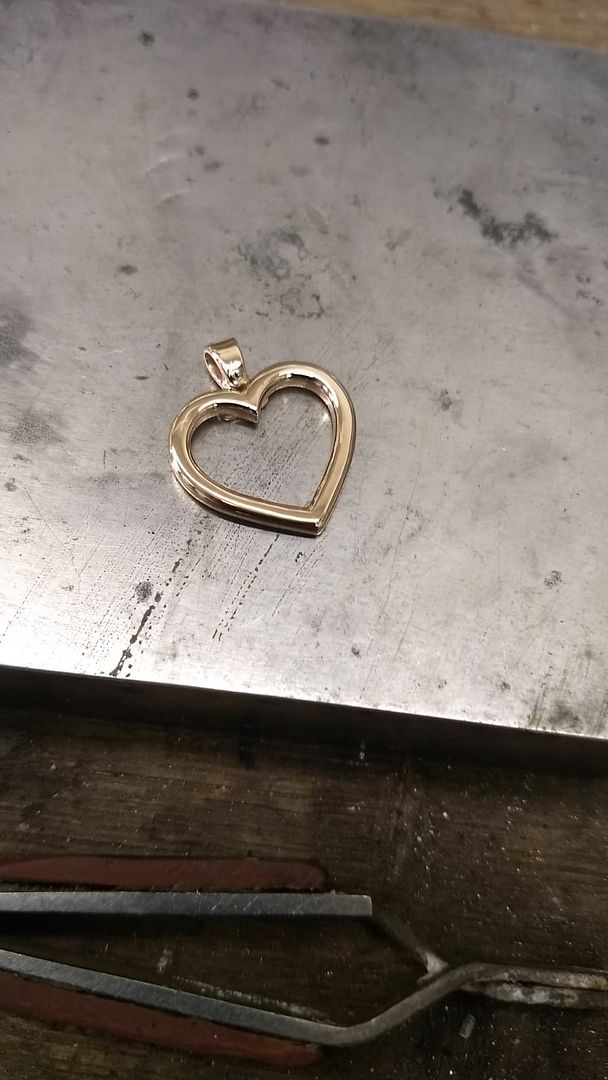
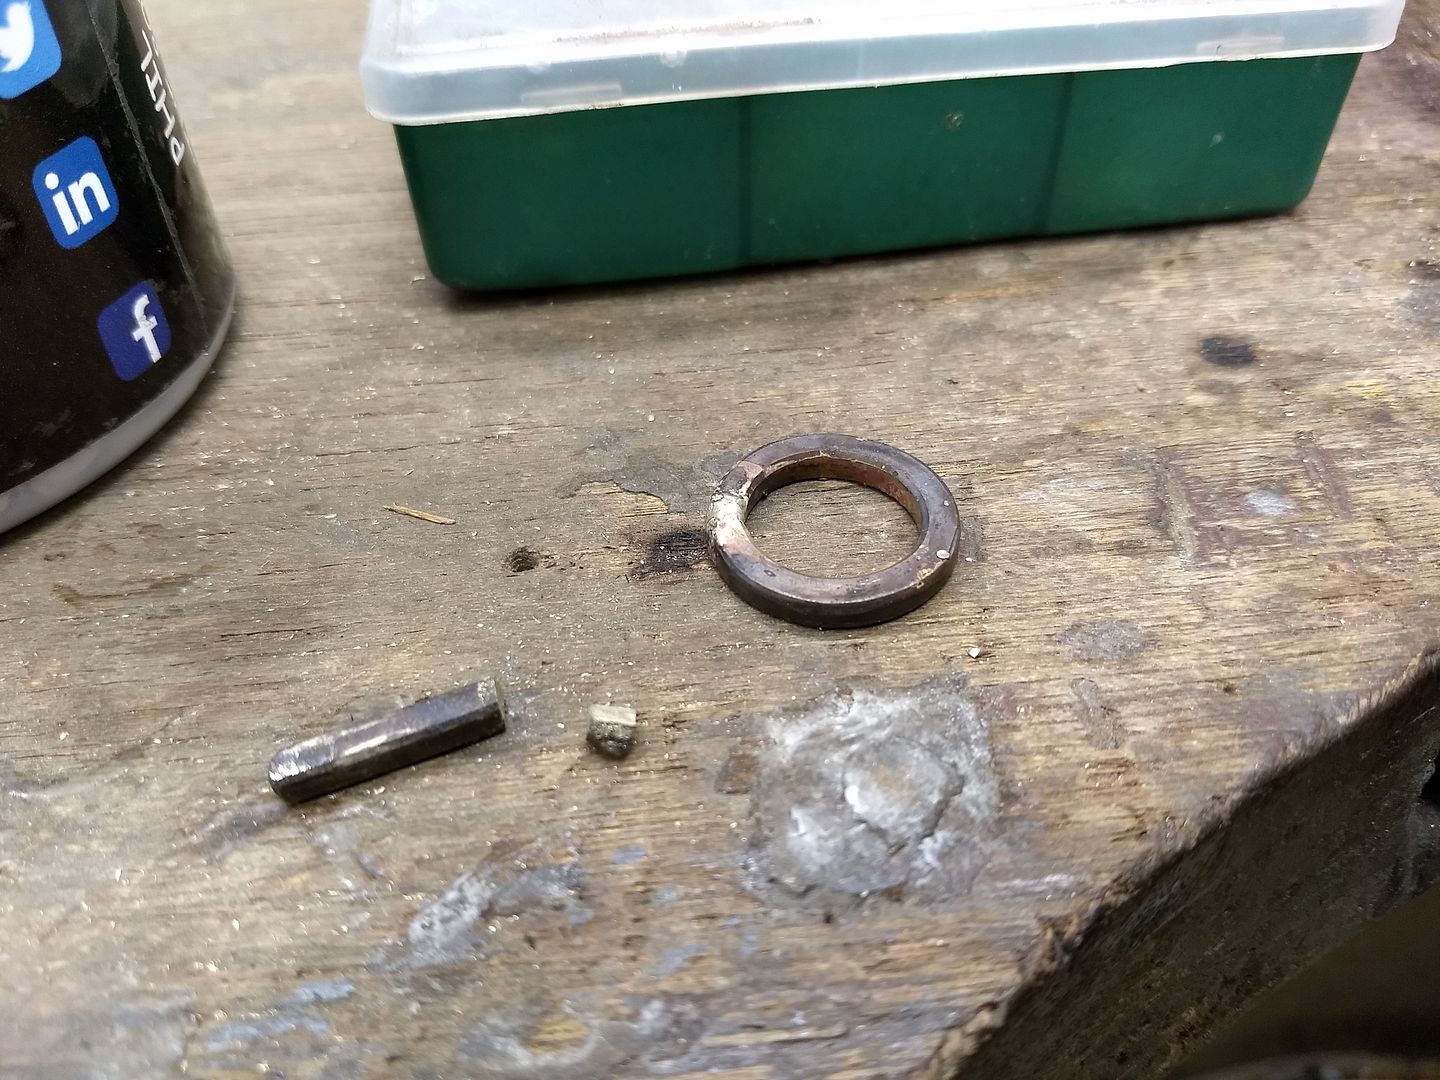
The heart was then cleaned up and made ready for the next phase...
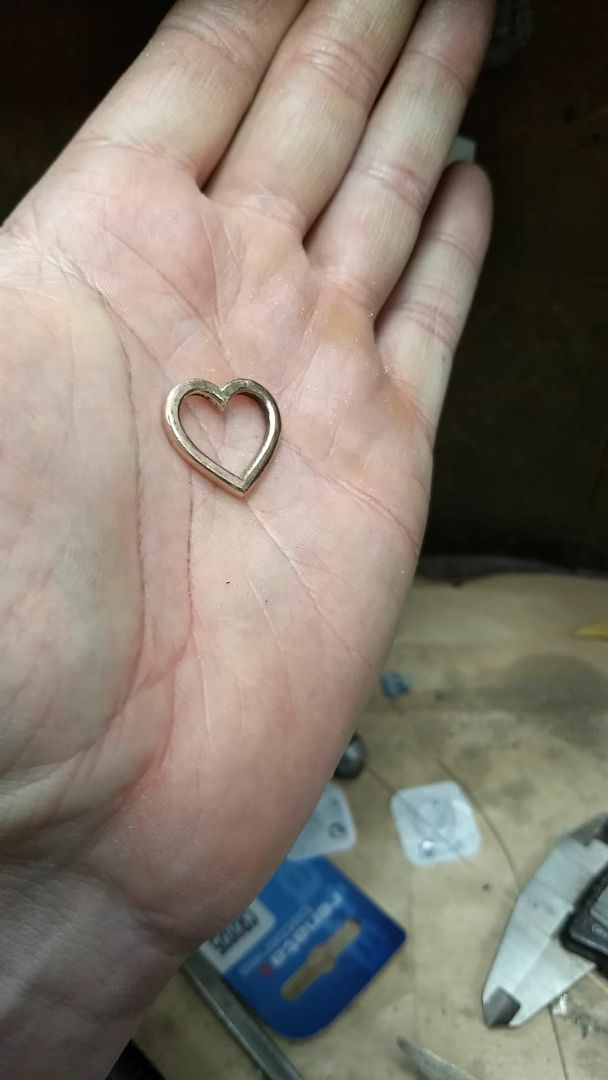
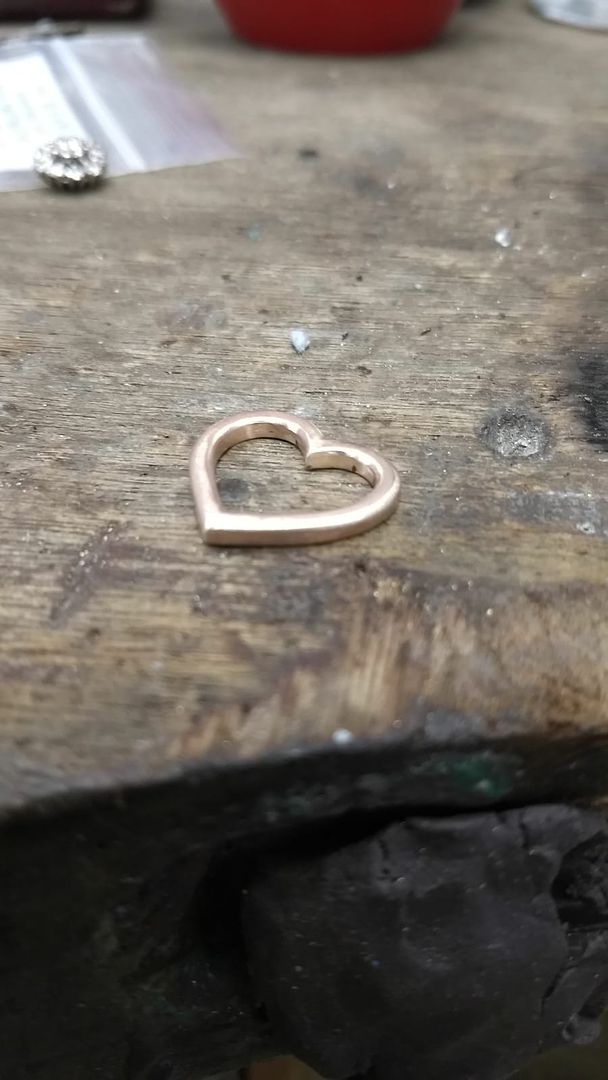
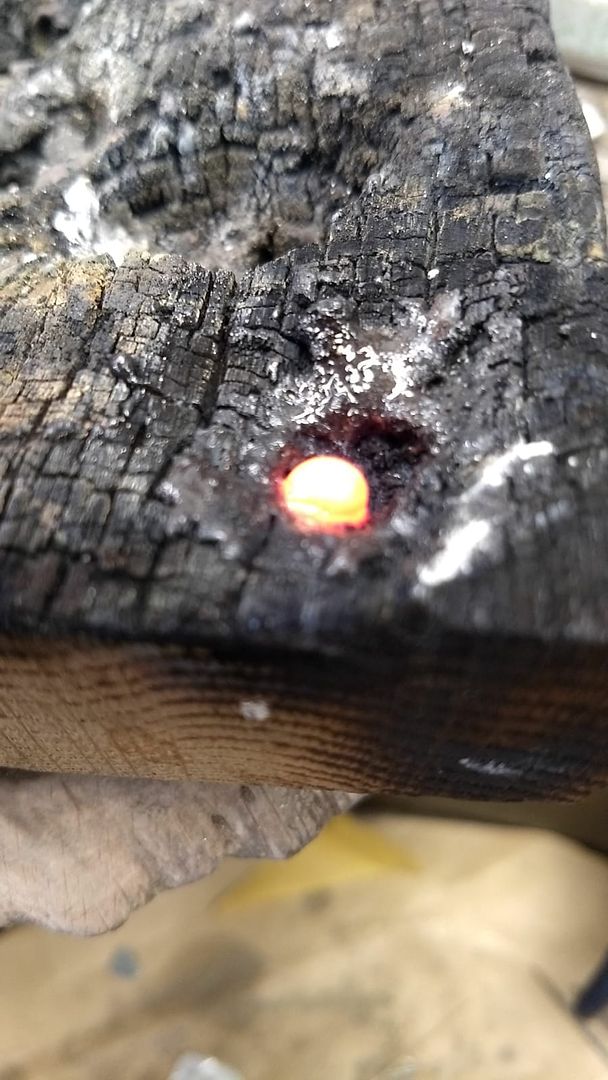
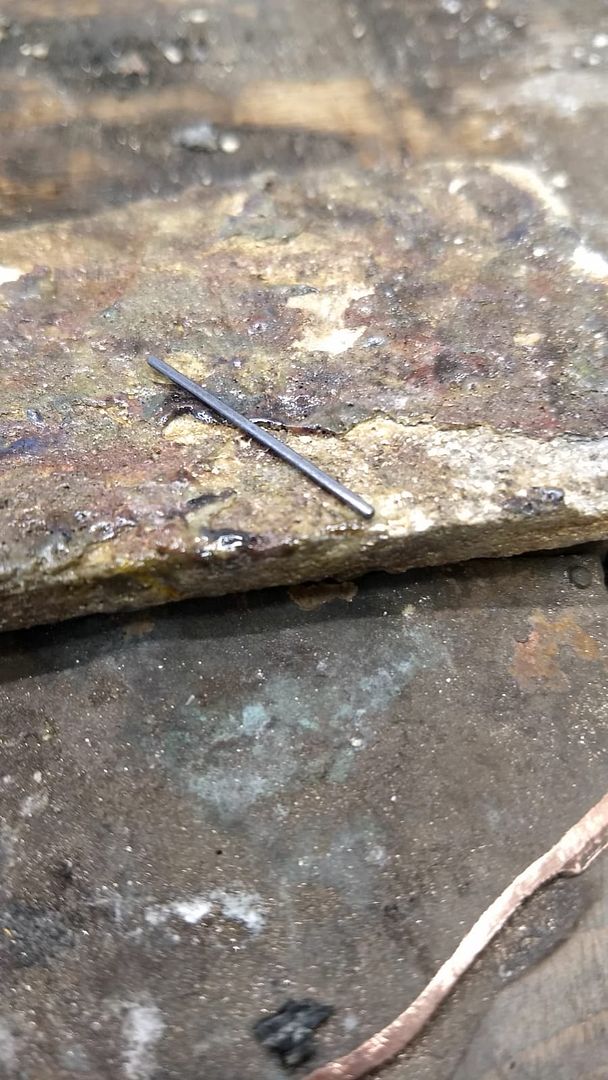
The off-cuts from the heart are remelted and from that we make some flat bar to use as a bail...

The bar is turned to the required profile and cut to length....
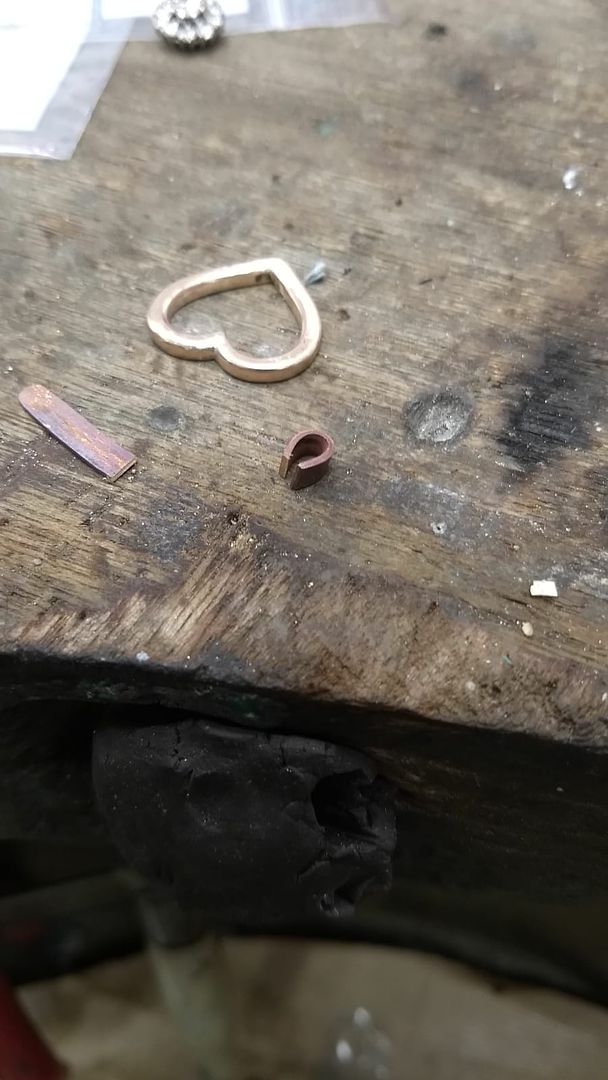
And filed to a V shape...
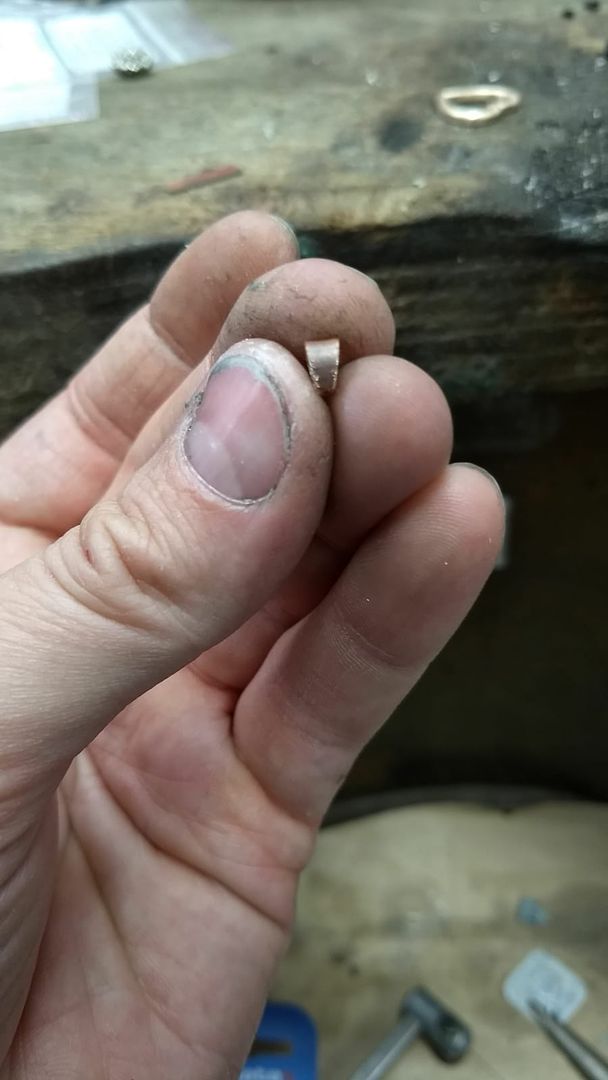
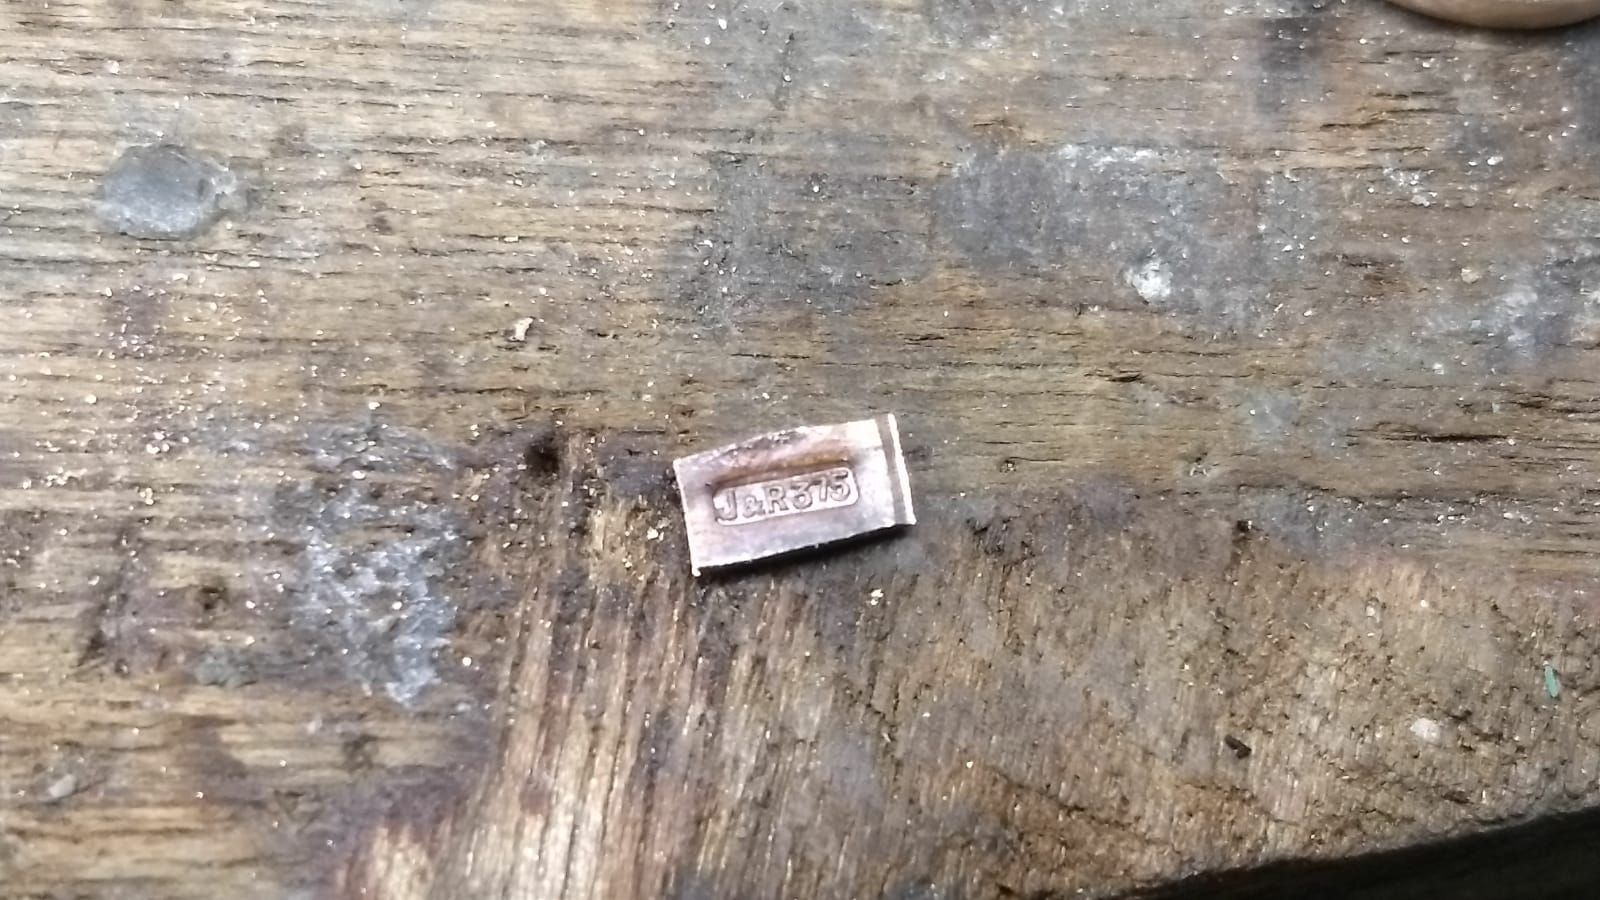
The manufacturers mark and carat weight are produced from the same piece of bar and this is shaped and then soldered to the rear of the heart...
The off-cuts are melted again and some fine wire is made to be used as a jump ring for the bail and a pin to secure it.
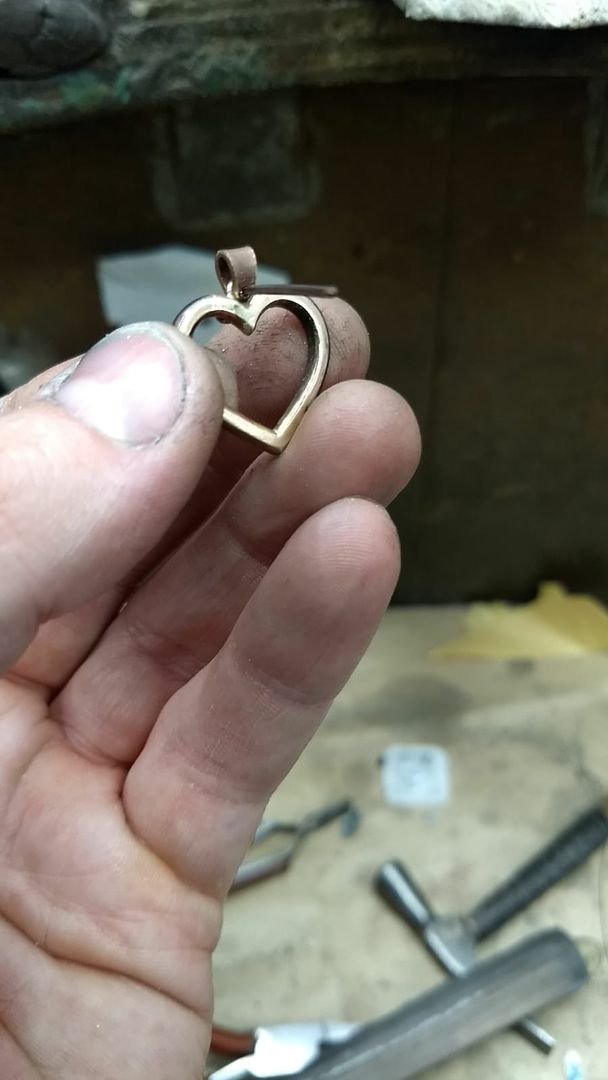
The heart then goes in for finishing and polishing with its mates
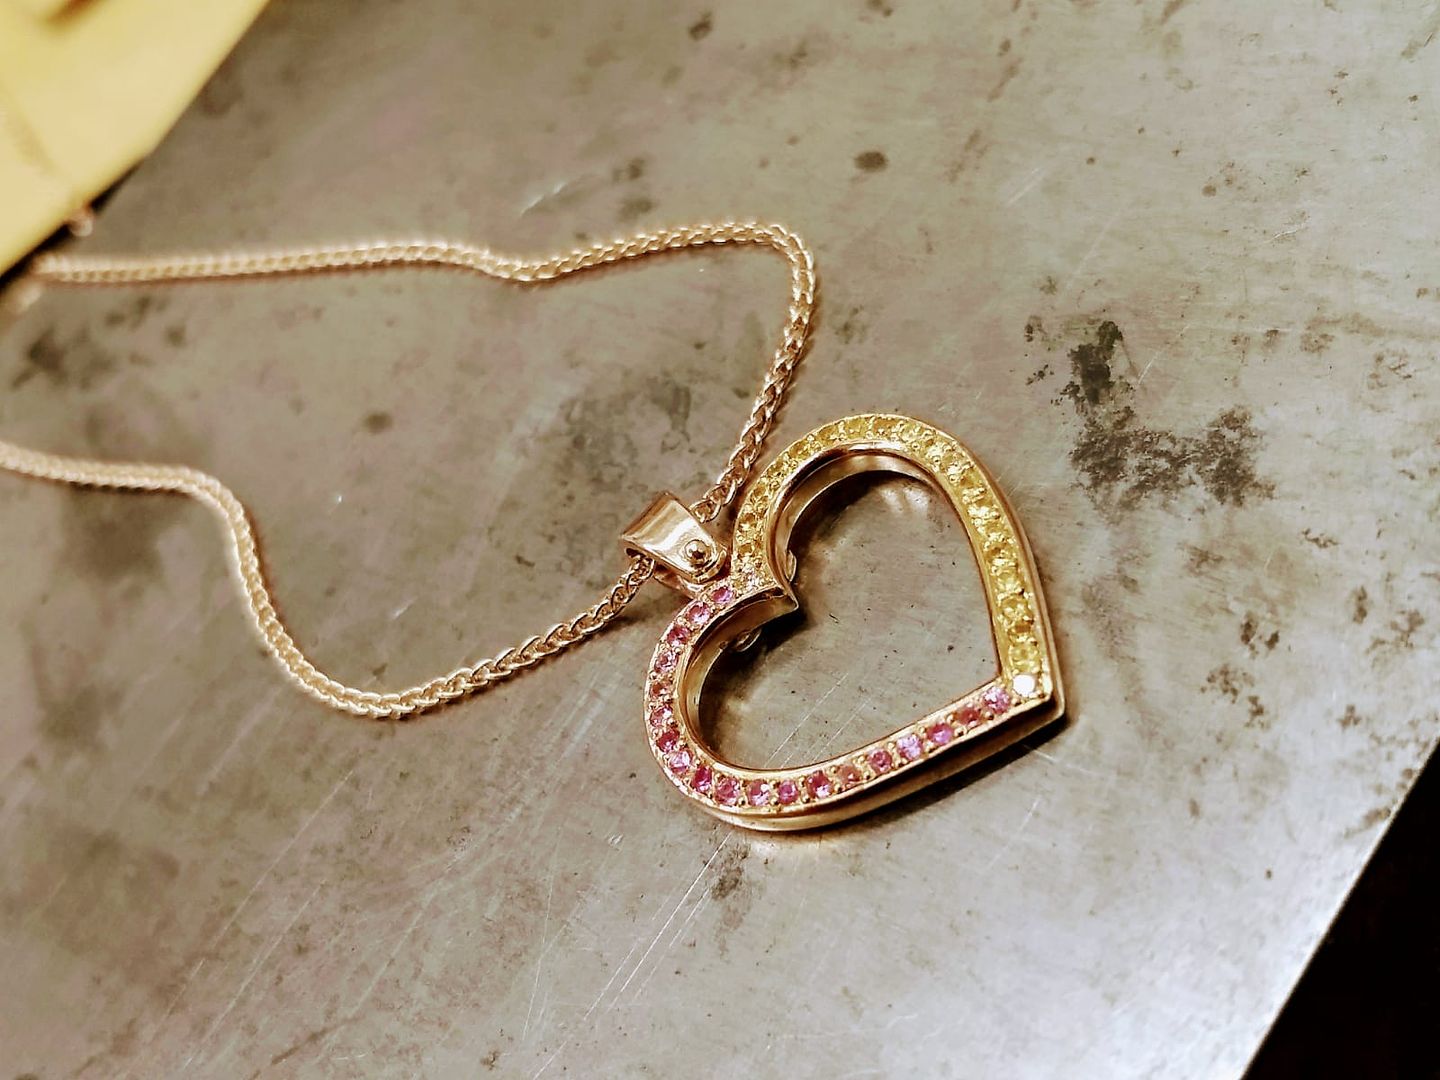
The stones to be set are mainly pink and yellow sapphires with the addition of a small diamond to match at the top and bottom.
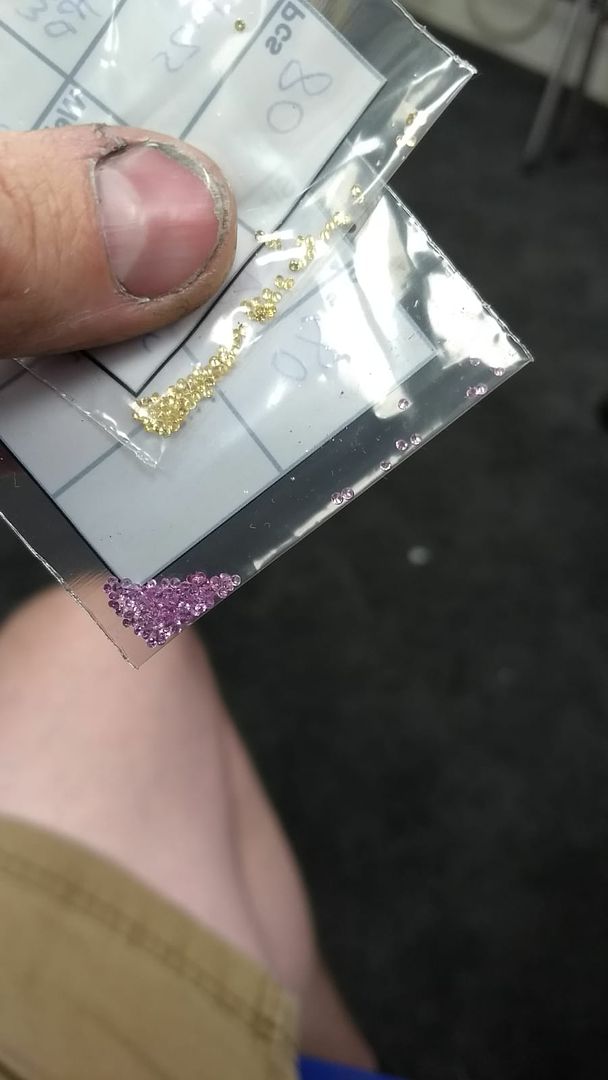
With the stones set the heart goes onto its chain and all is complete. Hopefully one happy customer
2 things........
1st thing: Scan results. Despite a little scare with my CT showing something on my liver again the MRI found it to be nothing more than scarring / fibrosis from the chemo. So, I'm all good and signed off until next year
2nd thing: My nurse specialist loved the SuperWoman badge I made her and now proudly sports it on her uniform. Happy days!
Back to the thread...... (edited to add comentary
)9ct rose gold heart pendent set with pink and yellow sapphires (and a diamond top and bottom) on a 9ct rose gold spiga chain. All to the customers spec.
So, we took a bar of 2.5mm d-shaped wire...

And bent one curved piece to make one half of a heart.

With that half we turned it back to front to make a mirrored version of the first.... and hey presto!

Which we then soldered.

The heart was then cleaned up and made ready for the next phase...


The off-cuts from the heart are remelted and from that we make some flat bar to use as a bail...


The bar is turned to the required profile and cut to length....

And filed to a V shape...

The manufacturers mark and carat weight are produced from the same piece of bar and this is shaped and then soldered to the rear of the heart...


The off-cuts are melted again and some fine wire is made to be used as a jump ring for the bail and a pin to secure it.


The heart then goes in for finishing and polishing with its mates


The stones to be set are mainly pink and yellow sapphires with the addition of a small diamond to match at the top and bottom.

With the stones set the heart goes onto its chain and all is complete. Hopefully one happy customer


Edited by ecain63 on Wednesday 15th August 16:18
Dibble said:
Great news on the scan results, Eddie. Despite never having met you, I’m chuffed to bits things continue to go well for you on that front. I’m sure the rest of us here feel the same too.
And another great post showing stuff getting made. I wouldn’t choose it for me (obviously!) or my GF, the same with some other stuff, but I never tire of seeing the actual process.
Apologies if it’s been asked before, but do you sketch stuff befor you make it, or is it all in your head? I know some customers may well turn up with a sketch or picture themselves, or you might sketch stuff out when at the unutial “design stage” with a customer, but do you ever make stuff from scratch without drawn/written plans?
All the time. I very rarely draw or sketch what I'm making because for me the job should be individual and with the materials you often find you're adjusting as you go. I've done so many now that I can pretty much do it all by eye or memory. The only things I measure are the gauges of wire or sheet to make sure the job can be completed without stones being too big or too small, or to make sure I've budgeted correctly.And another great post showing stuff getting made. I wouldn’t choose it for me (obviously!) or my GF, the same with some other stuff, but I never tire of seeing the actual process.
Apologies if it’s been asked before, but do you sketch stuff befor you make it, or is it all in your head? I know some customers may well turn up with a sketch or picture themselves, or you might sketch stuff out when at the unutial “design stage” with a customer, but do you ever make stuff from scratch without drawn/written plans?
I've said to many customers over the years..... sometimes to their dismay but usually sparking a curiosity, "I'm crap at designing jewellery but awesome at fixing my mistakes and making it up as I go along".
Good morning PHers What's news?
It continues to be busy here at 'the bench' and there are plenty of ongoing and future projects to keep myself and my colleagues entertained. It's been a funny old year in the trade and we continue to fight the growing tide that is modern consumer demand and expectations. They are modern day business perks I know, but I feel more than ever that there will come a time when my tolerance runs out and I go looking for new and less emotionally demanding employment. That's a whole other topic so I will just crack on with the latest 'stuff' to leave the workshop.......
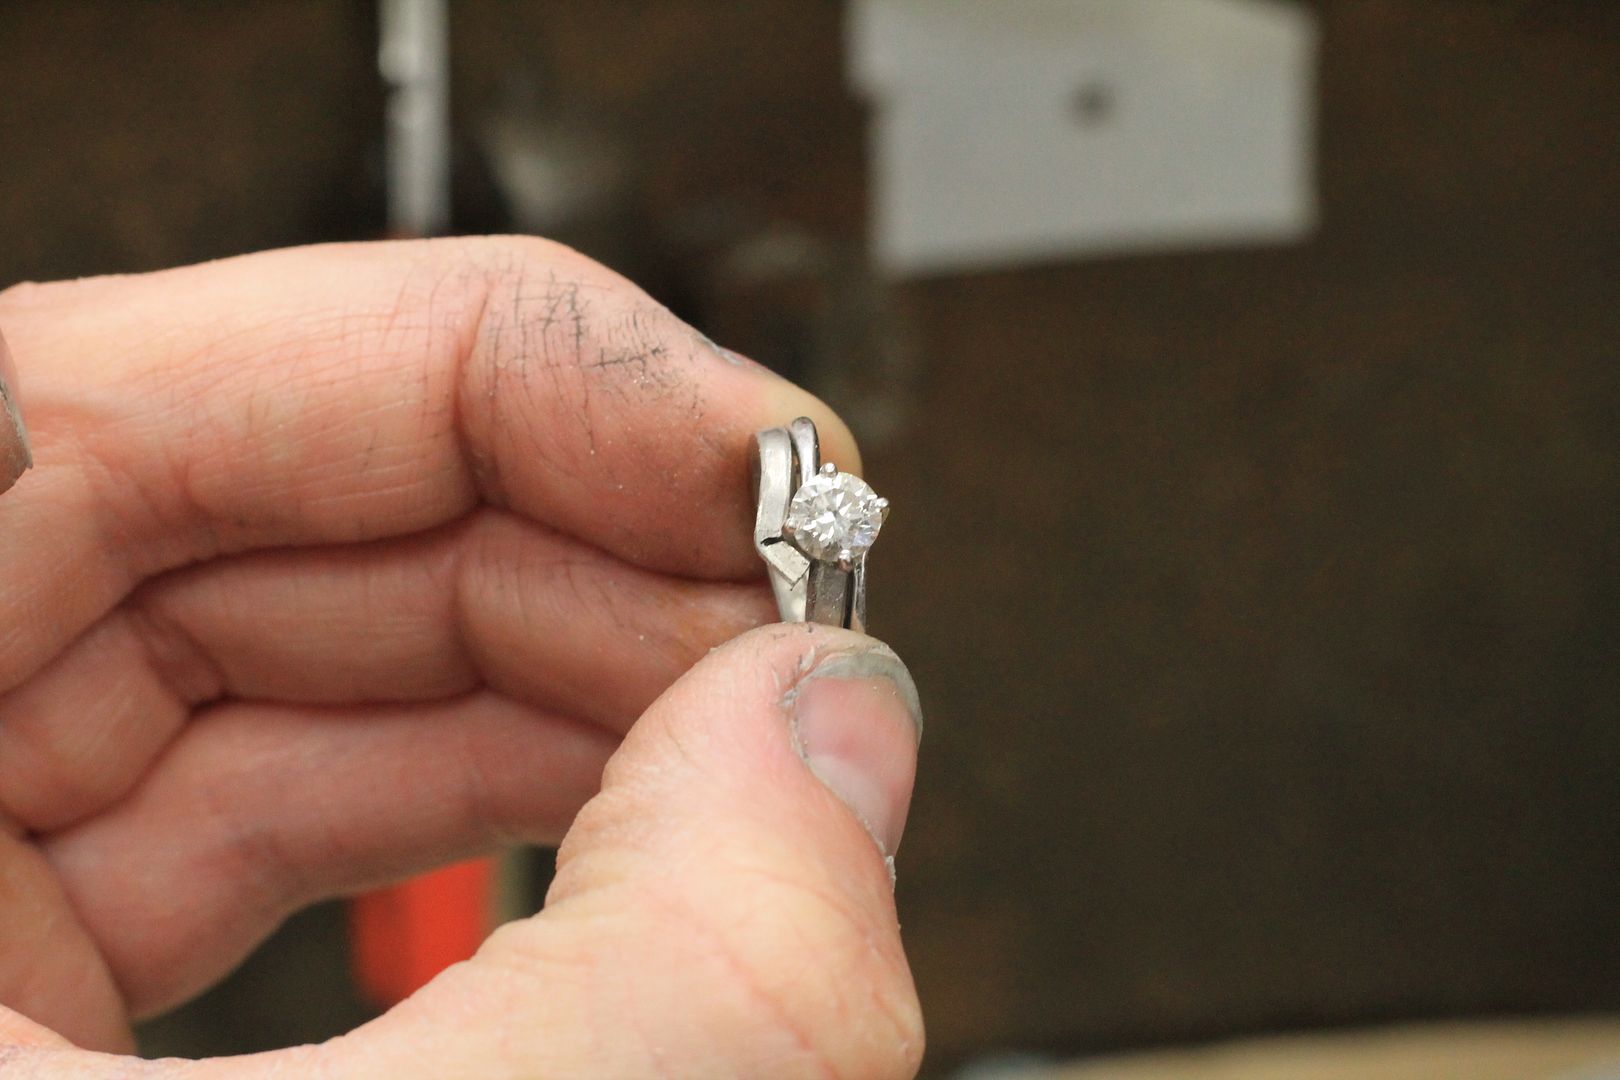
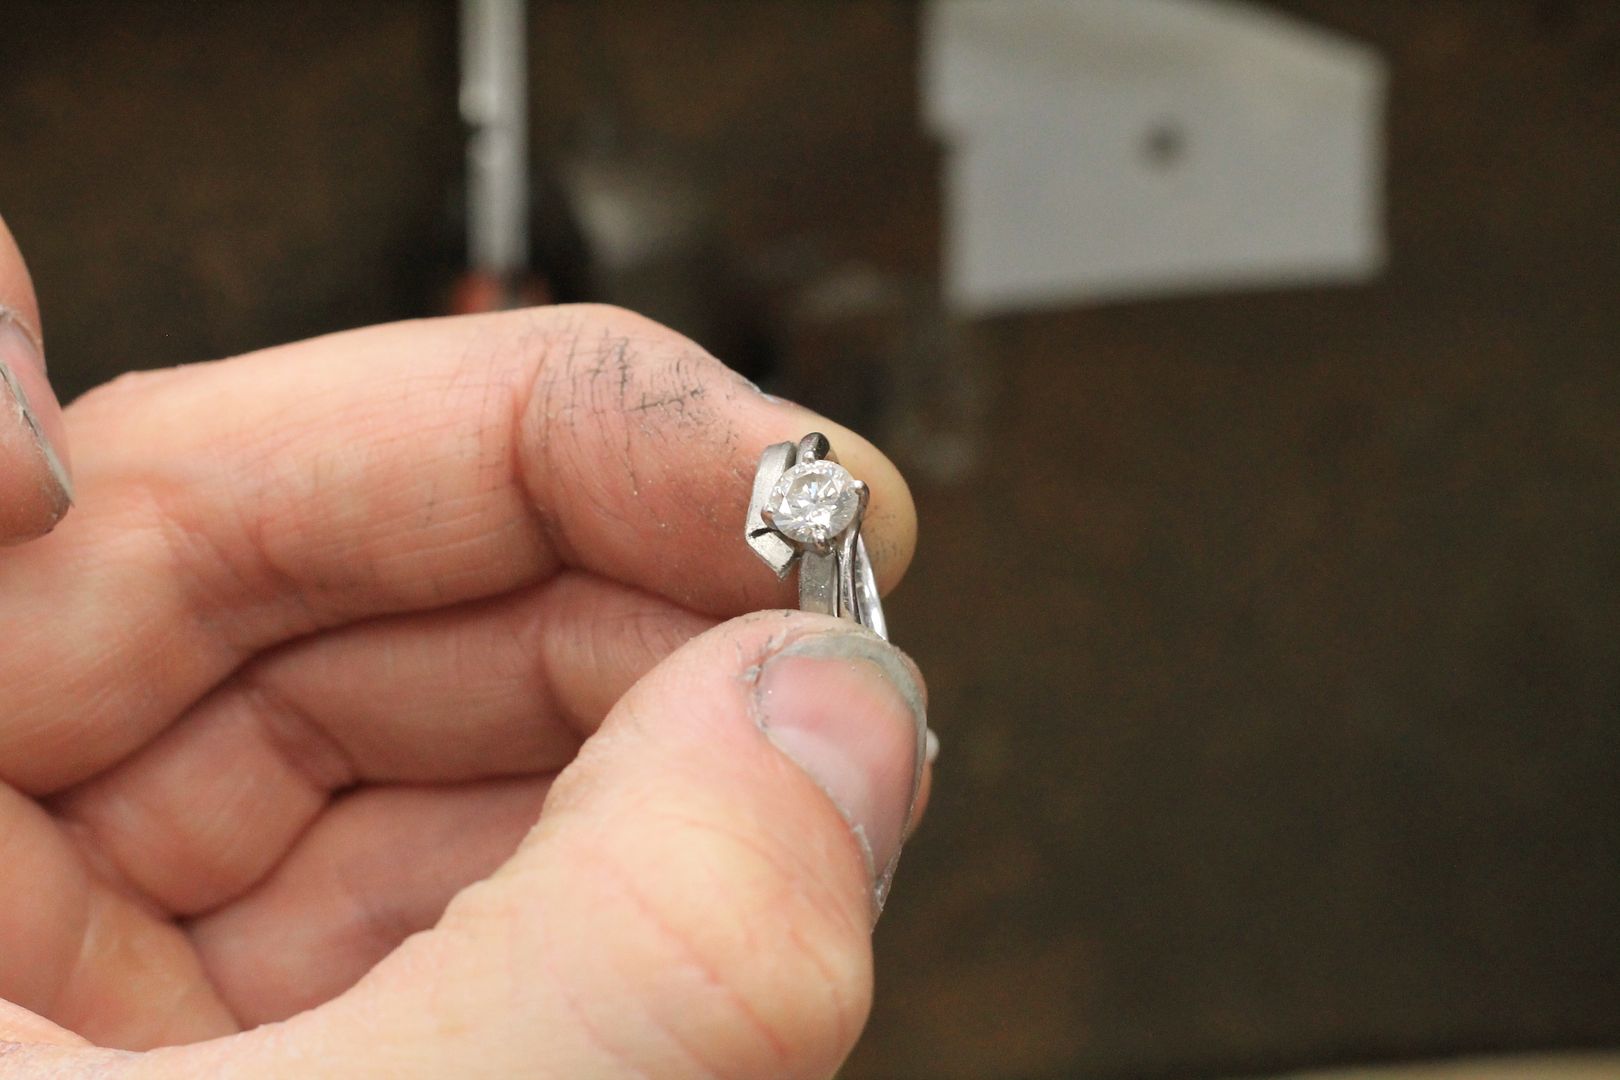
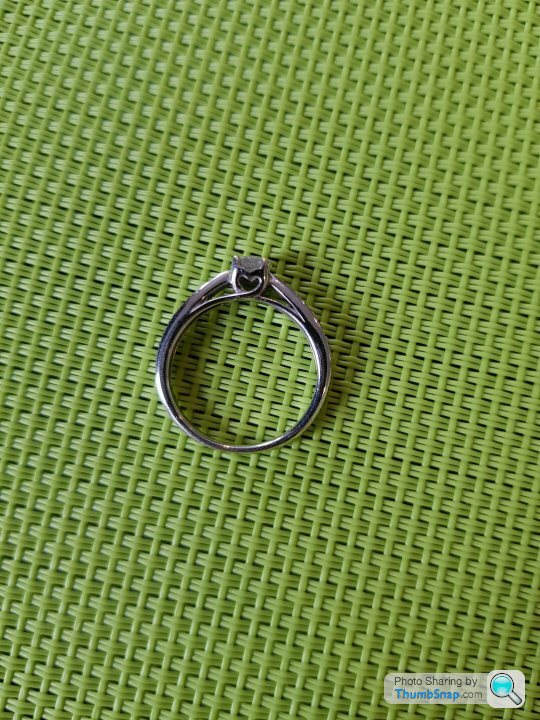
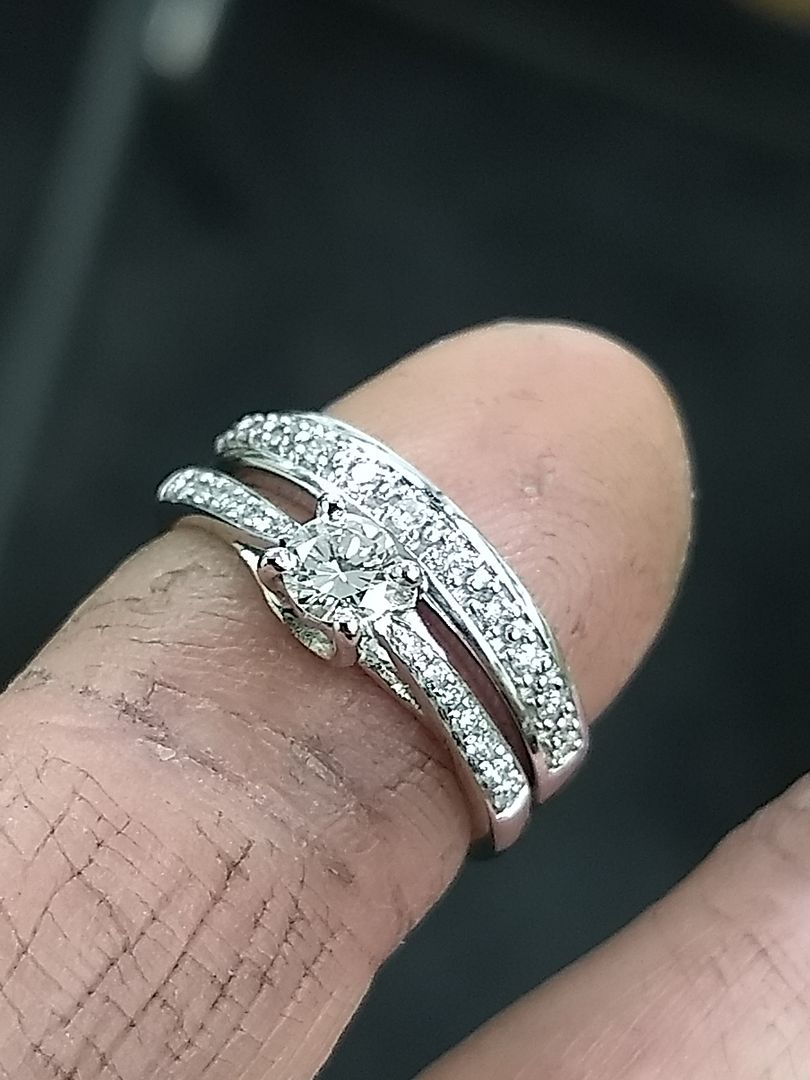
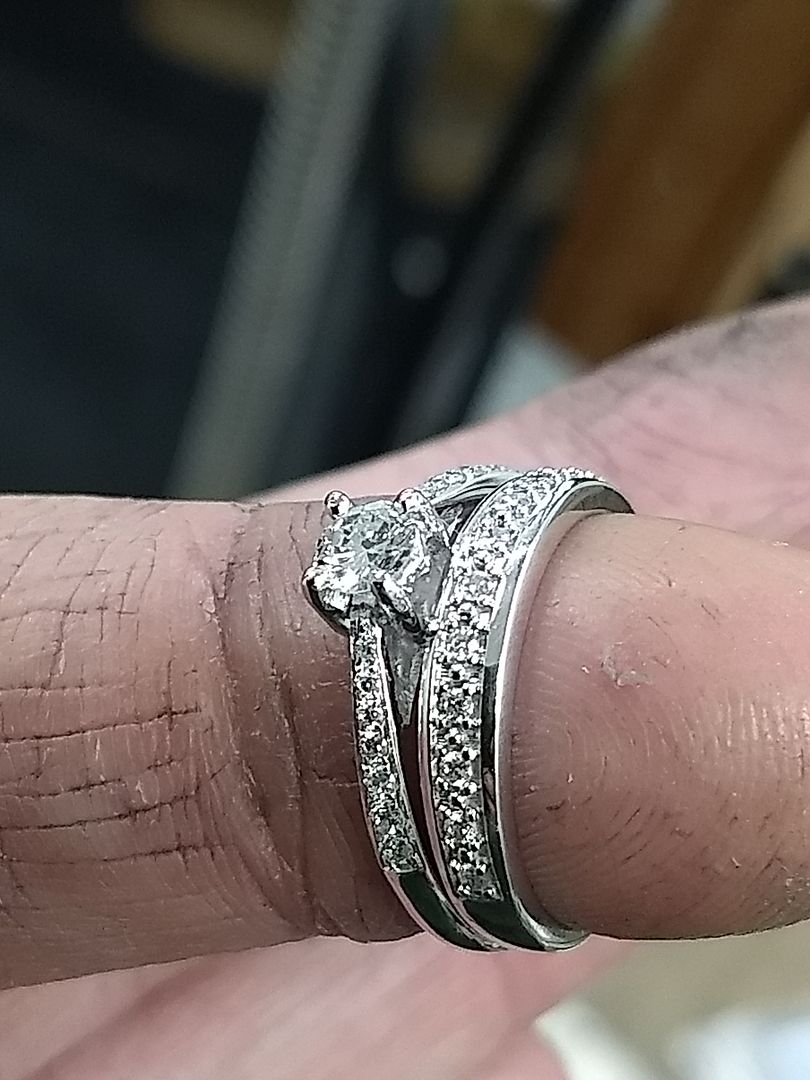
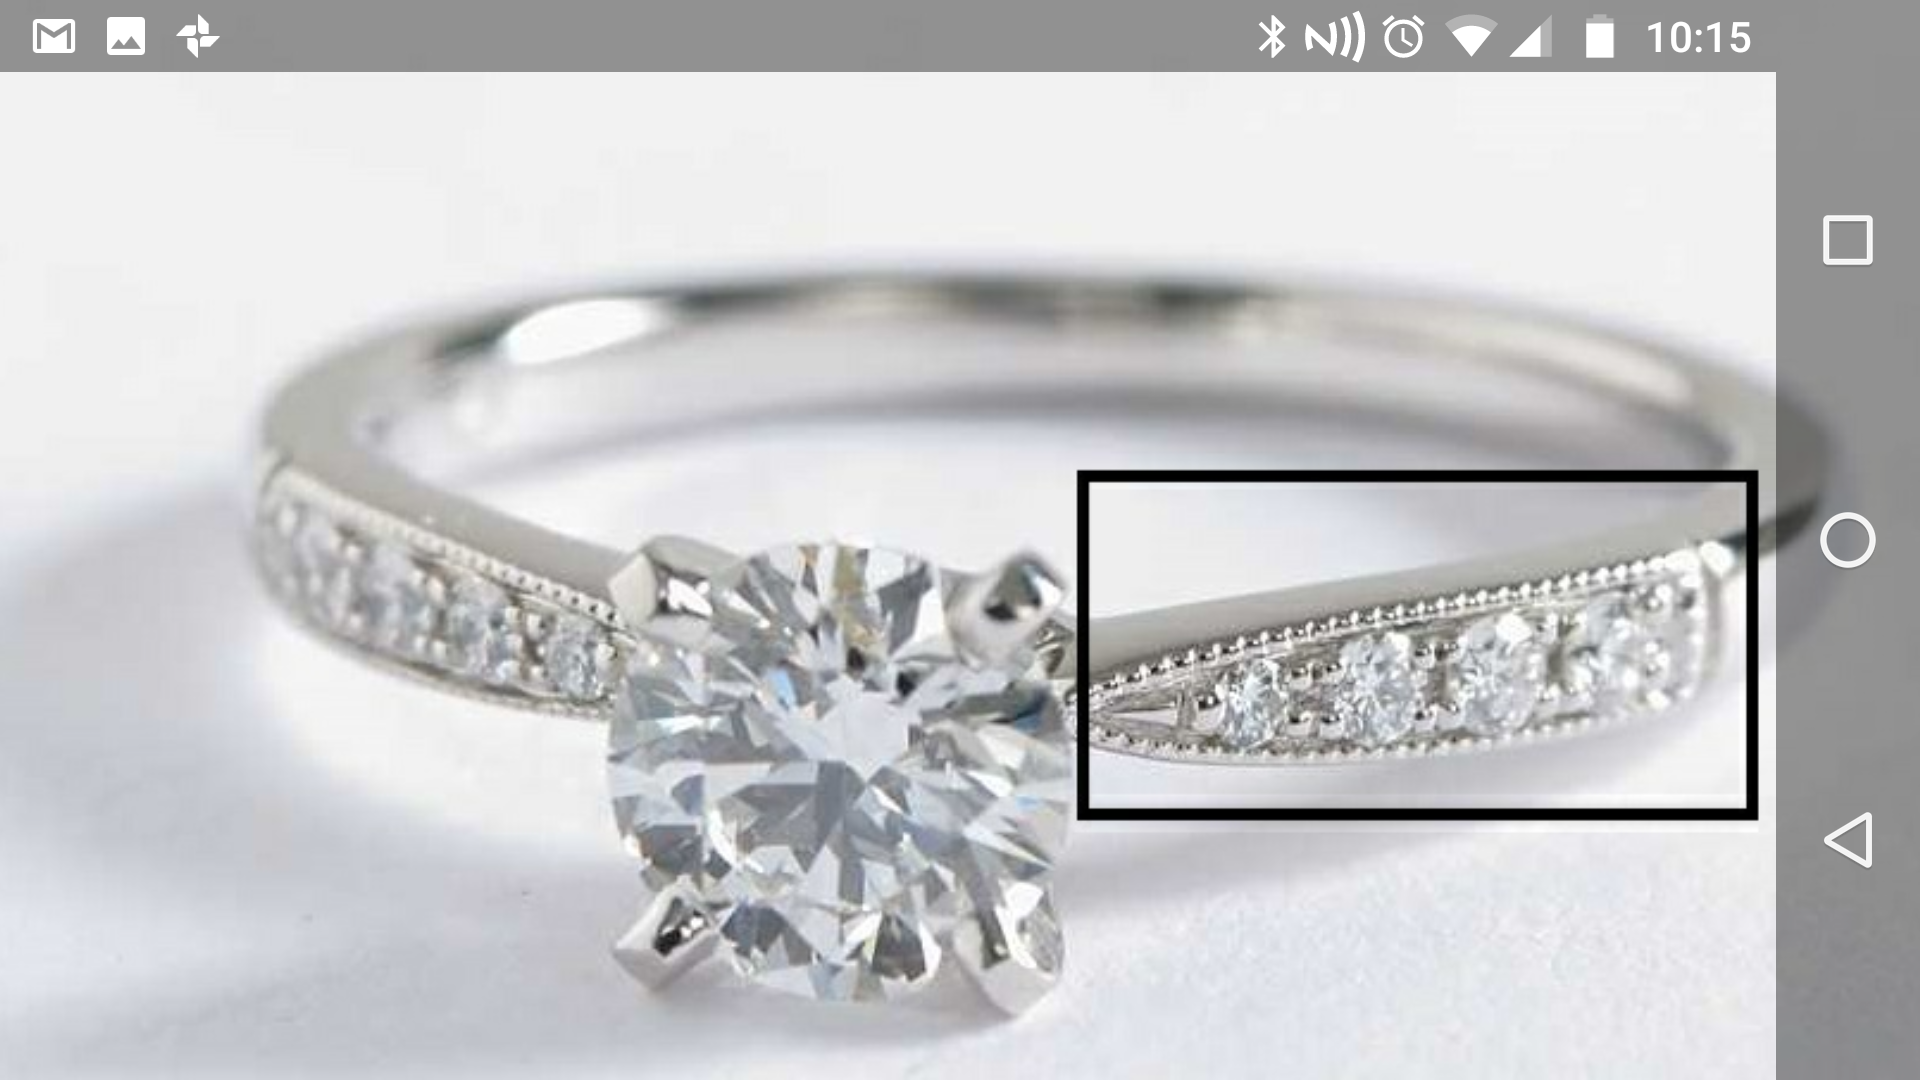
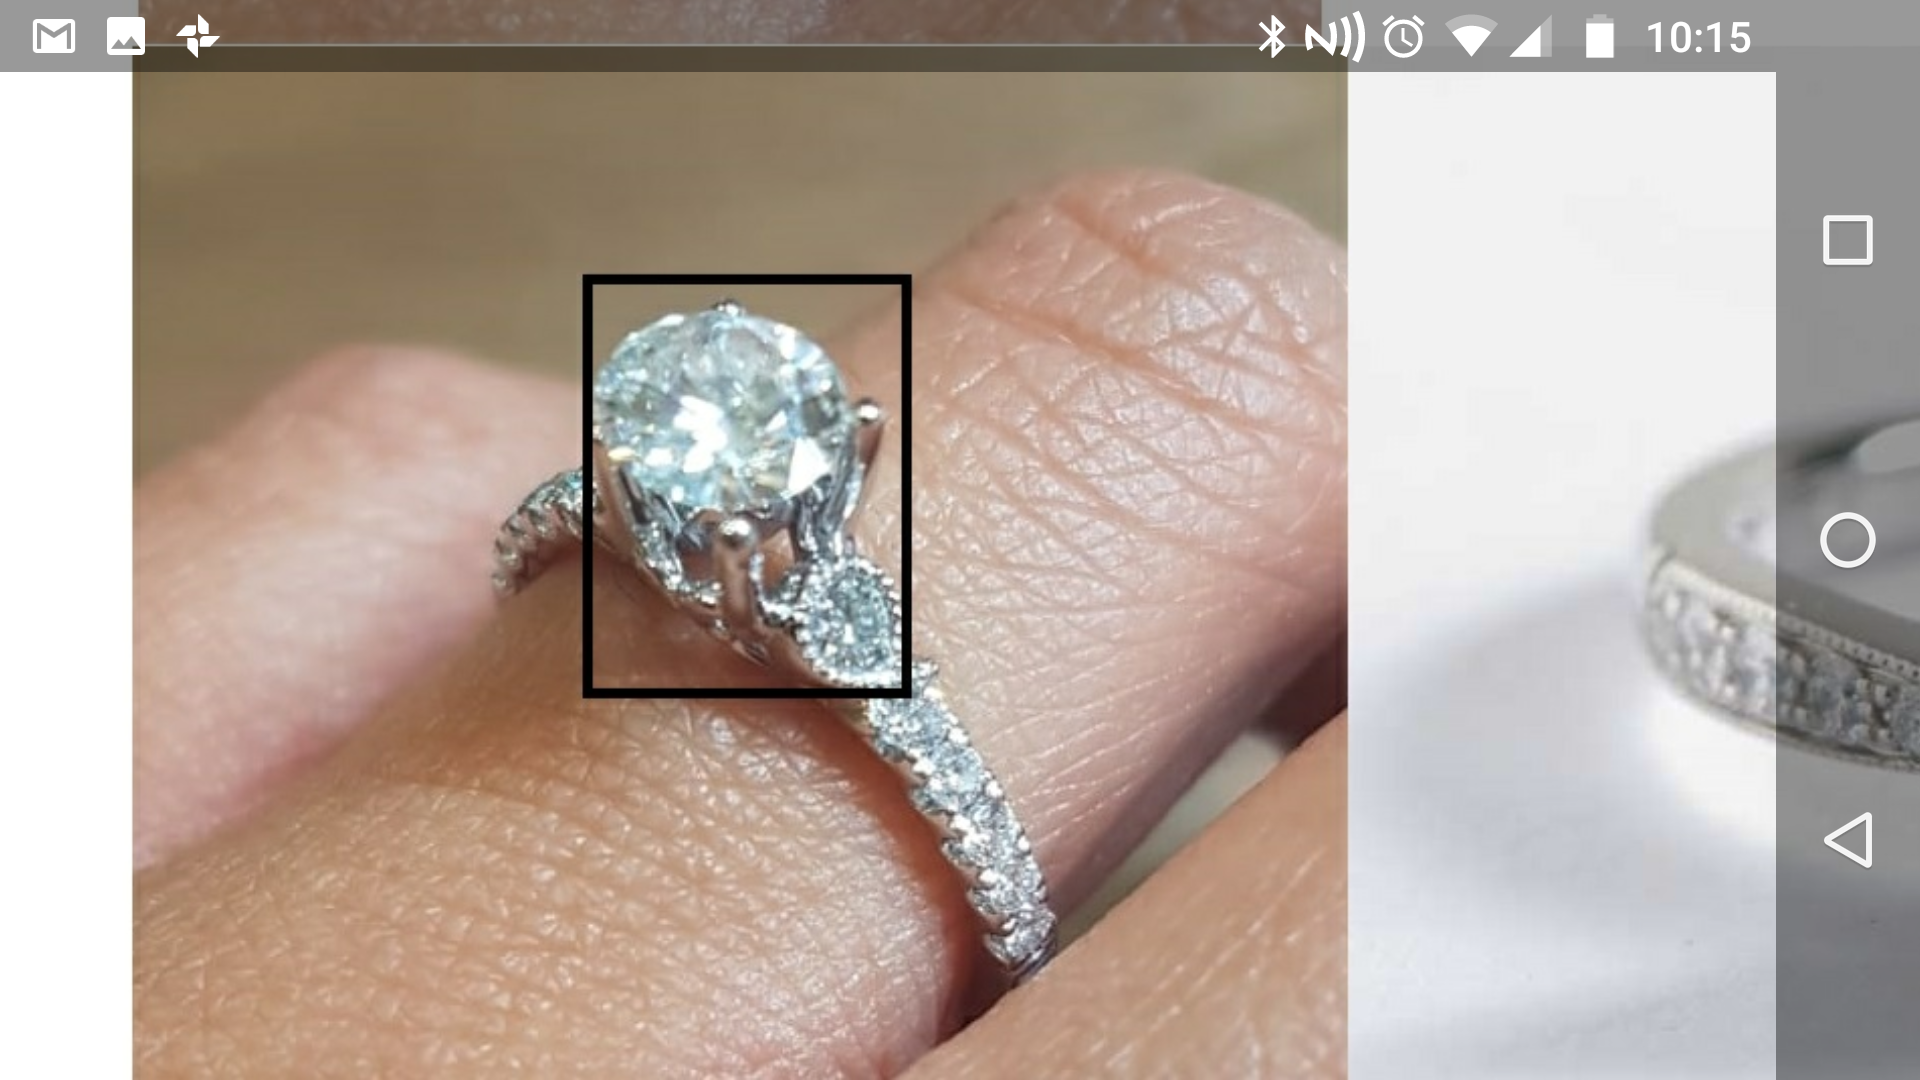
Job number 1 has been popping in and out of my sight for a while and is a result of a customers unhappiness with another outlet. He bought what was a 9ct white gold and diamond (only just) engagement ring and as expected it's not lasted long and they've gone around the houses to recover the money that was spent at sale. In a nutshell the cheap and cheerful thing came and bit them. So, where do I come in? I wrote the report that secured the refund and as a reward they have instructed me to produce a new one, in platinum. The budget was tight coming out of a 9ct ring so I suggested that to achieve a near replica of the old ring we needed to buy an off-the-shelf mount and modify it to suit.
Here's the original item:

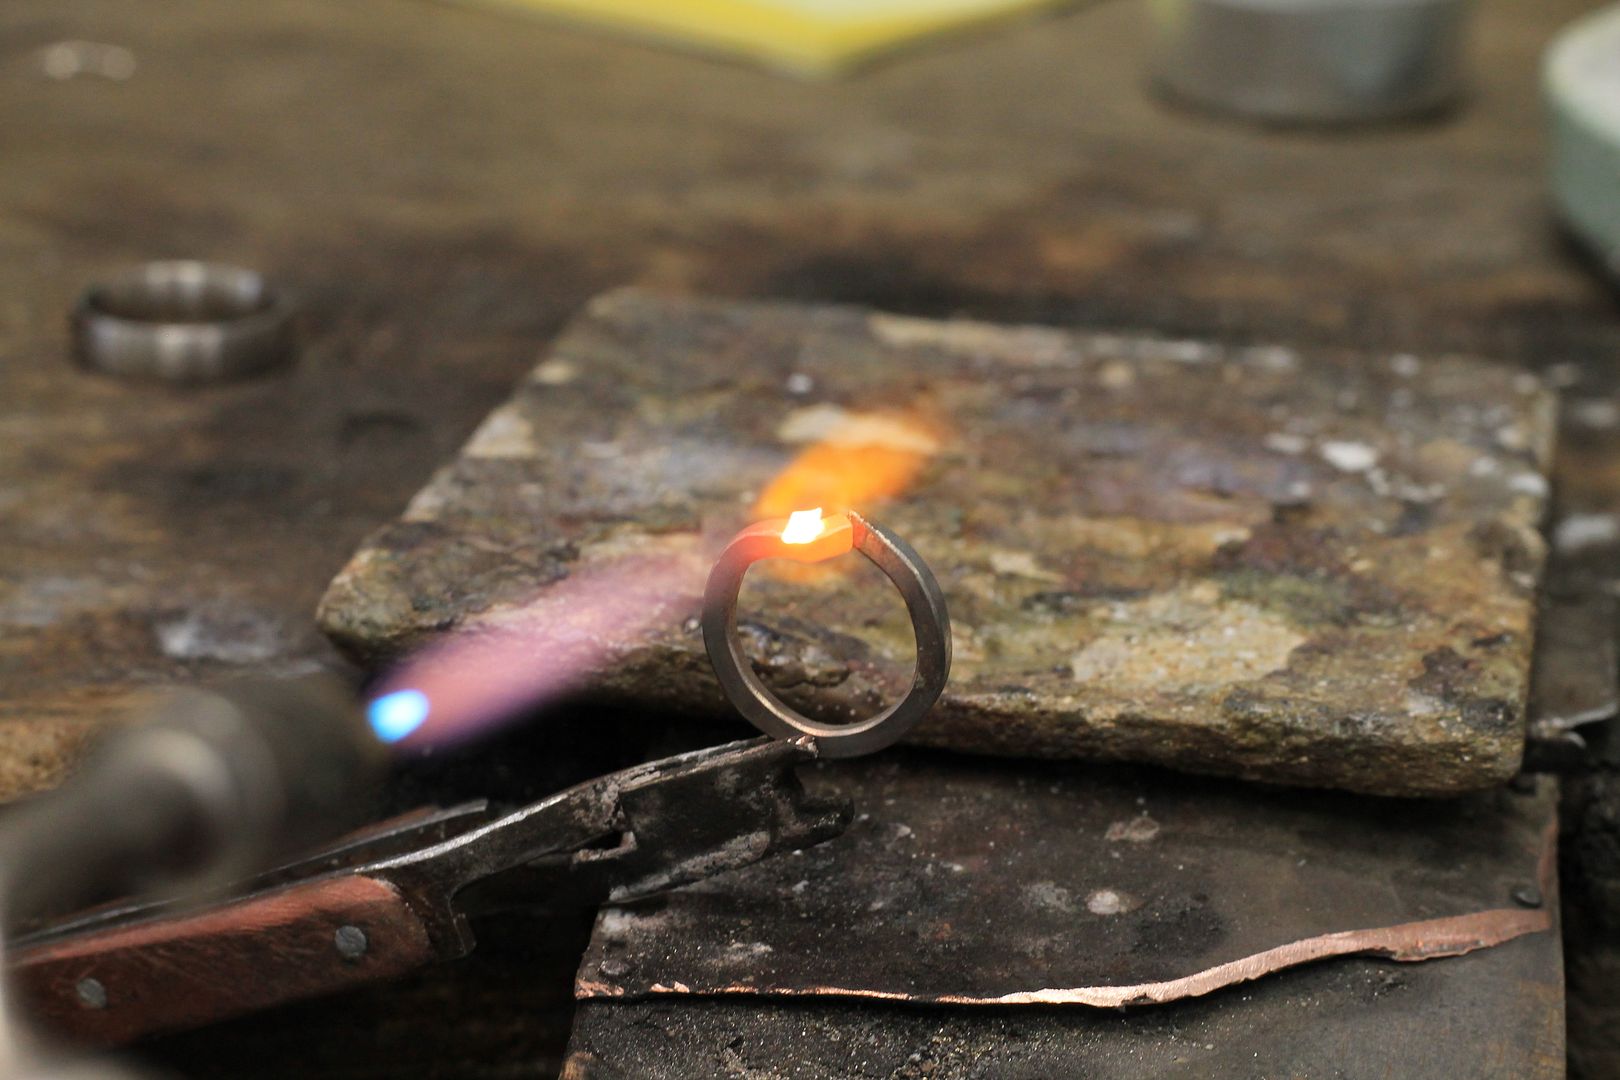
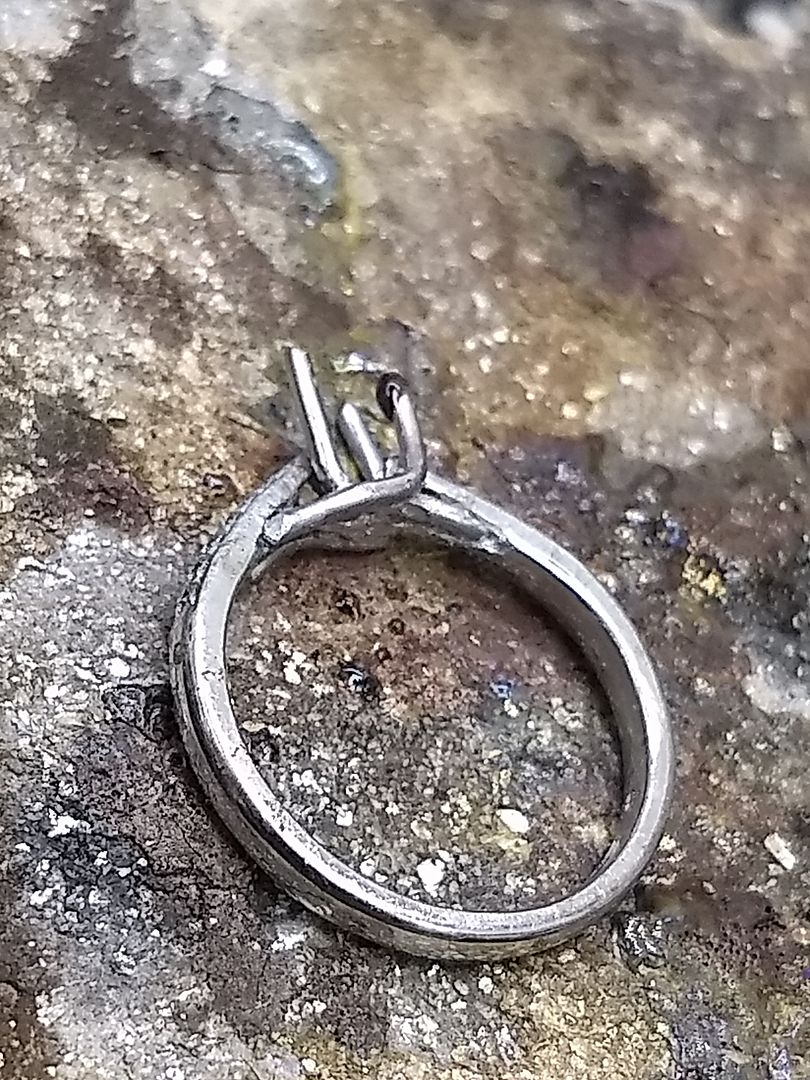
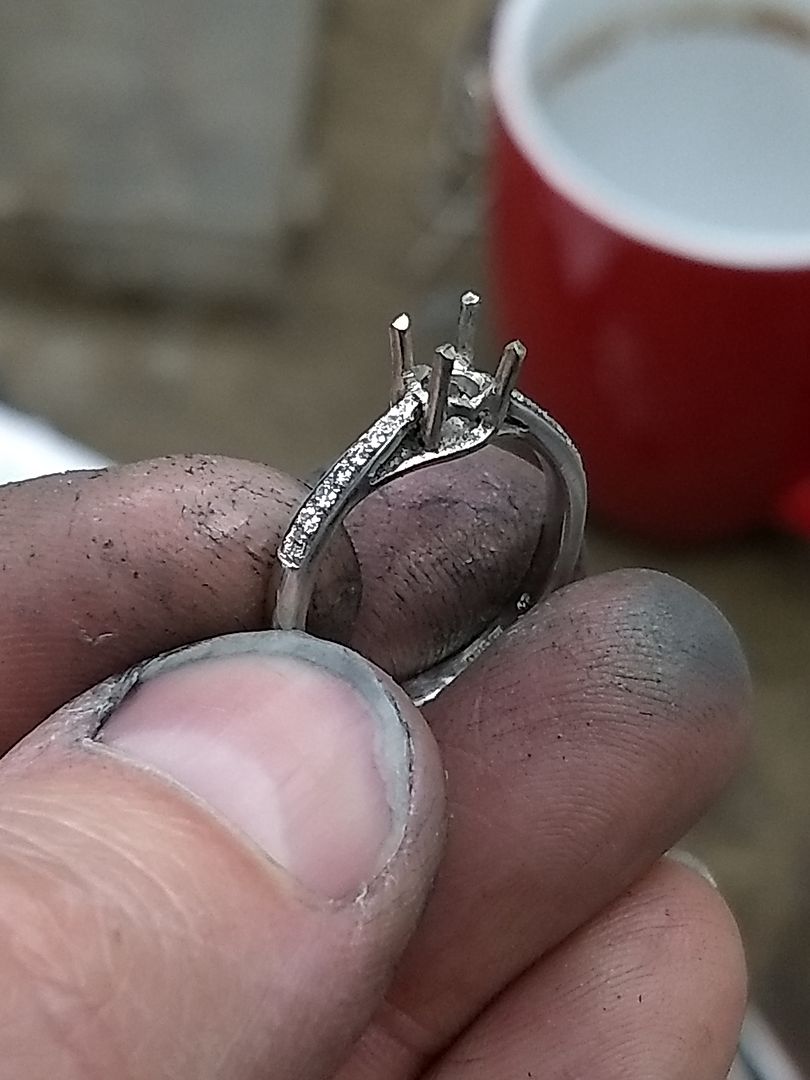
She was really keen to keep the heart details on the sides so we set to work. I got hold of a pre set mount (diamonds already in the shoulders) and rolled some platinum wire. This is shaped and tacked into place to begin the makings of a new setting:

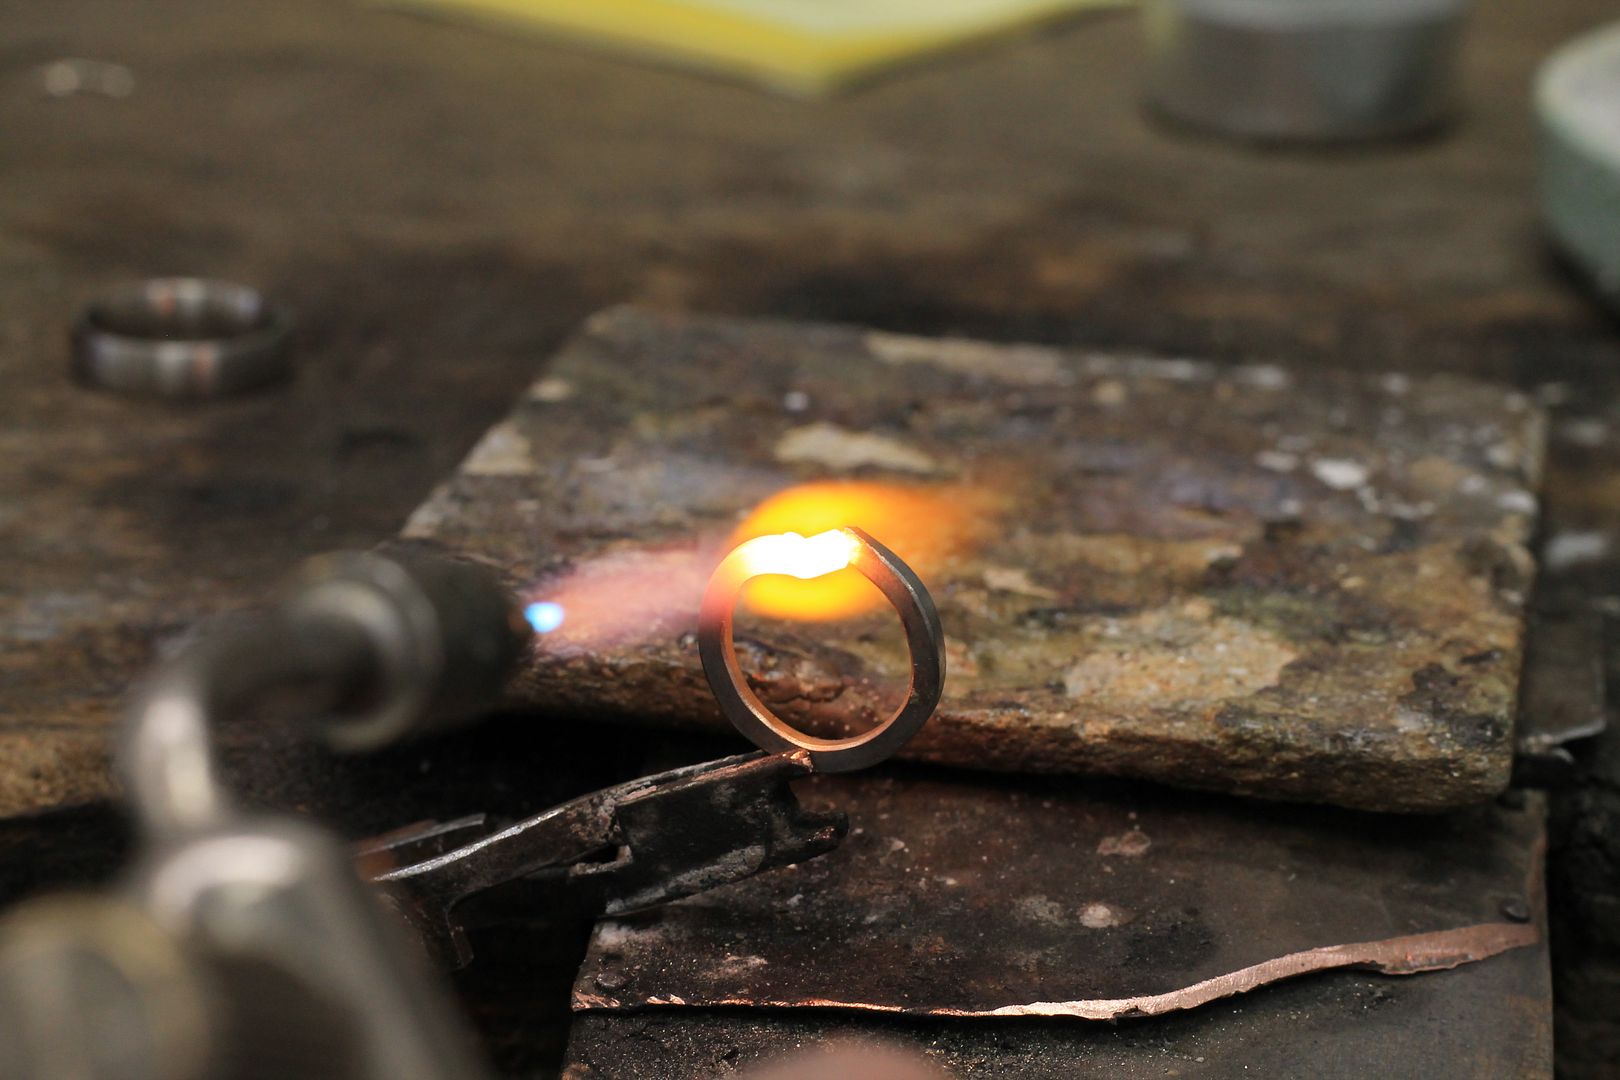
A few more light welds and the wires are in place:
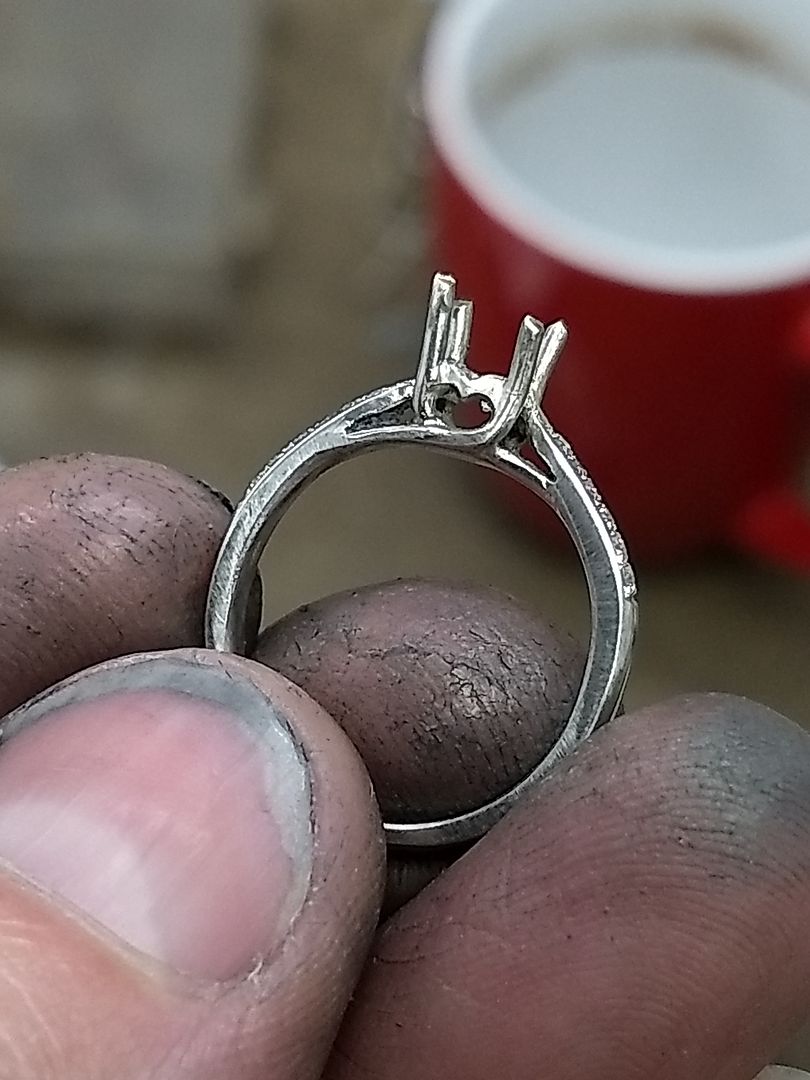
A piece of 2.5mm platinum tube is then cut and notched at the 4 corners before being slipped into the middle of the 4 wires and soldered in place. This is the middle rim of the setting.
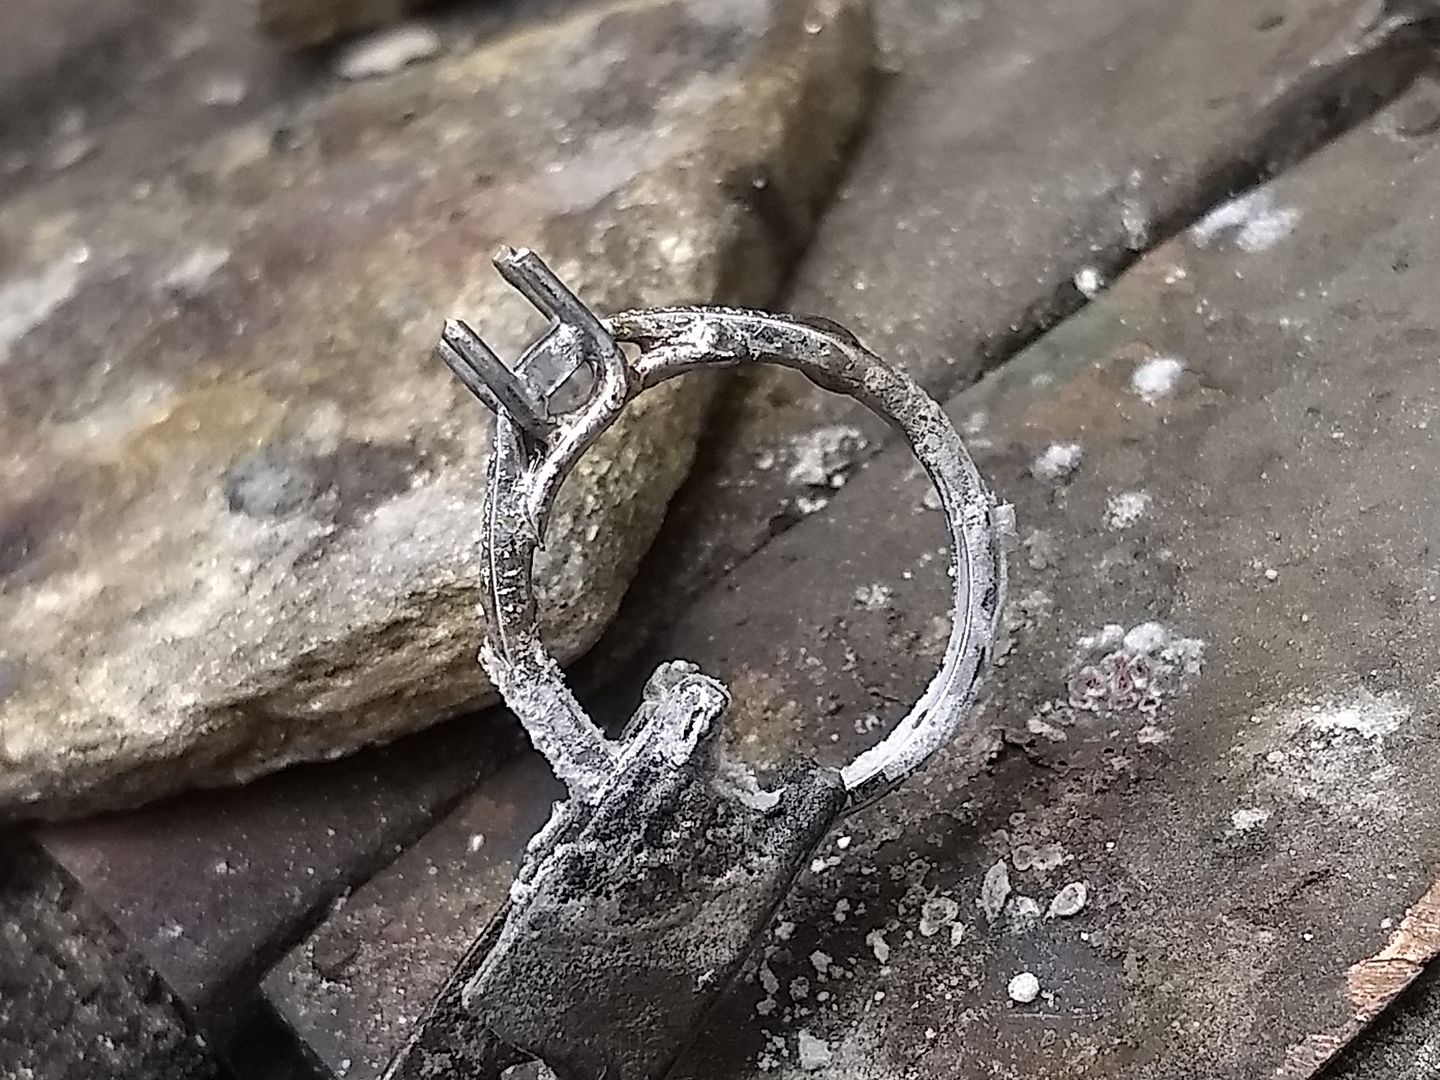
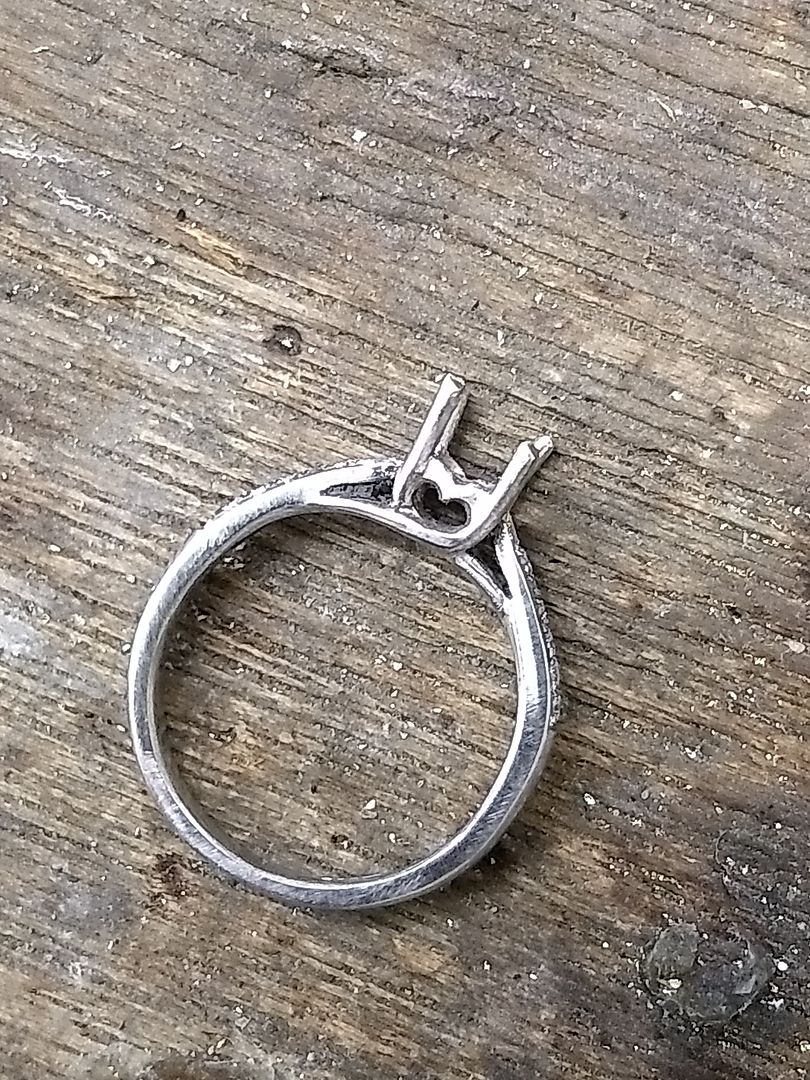
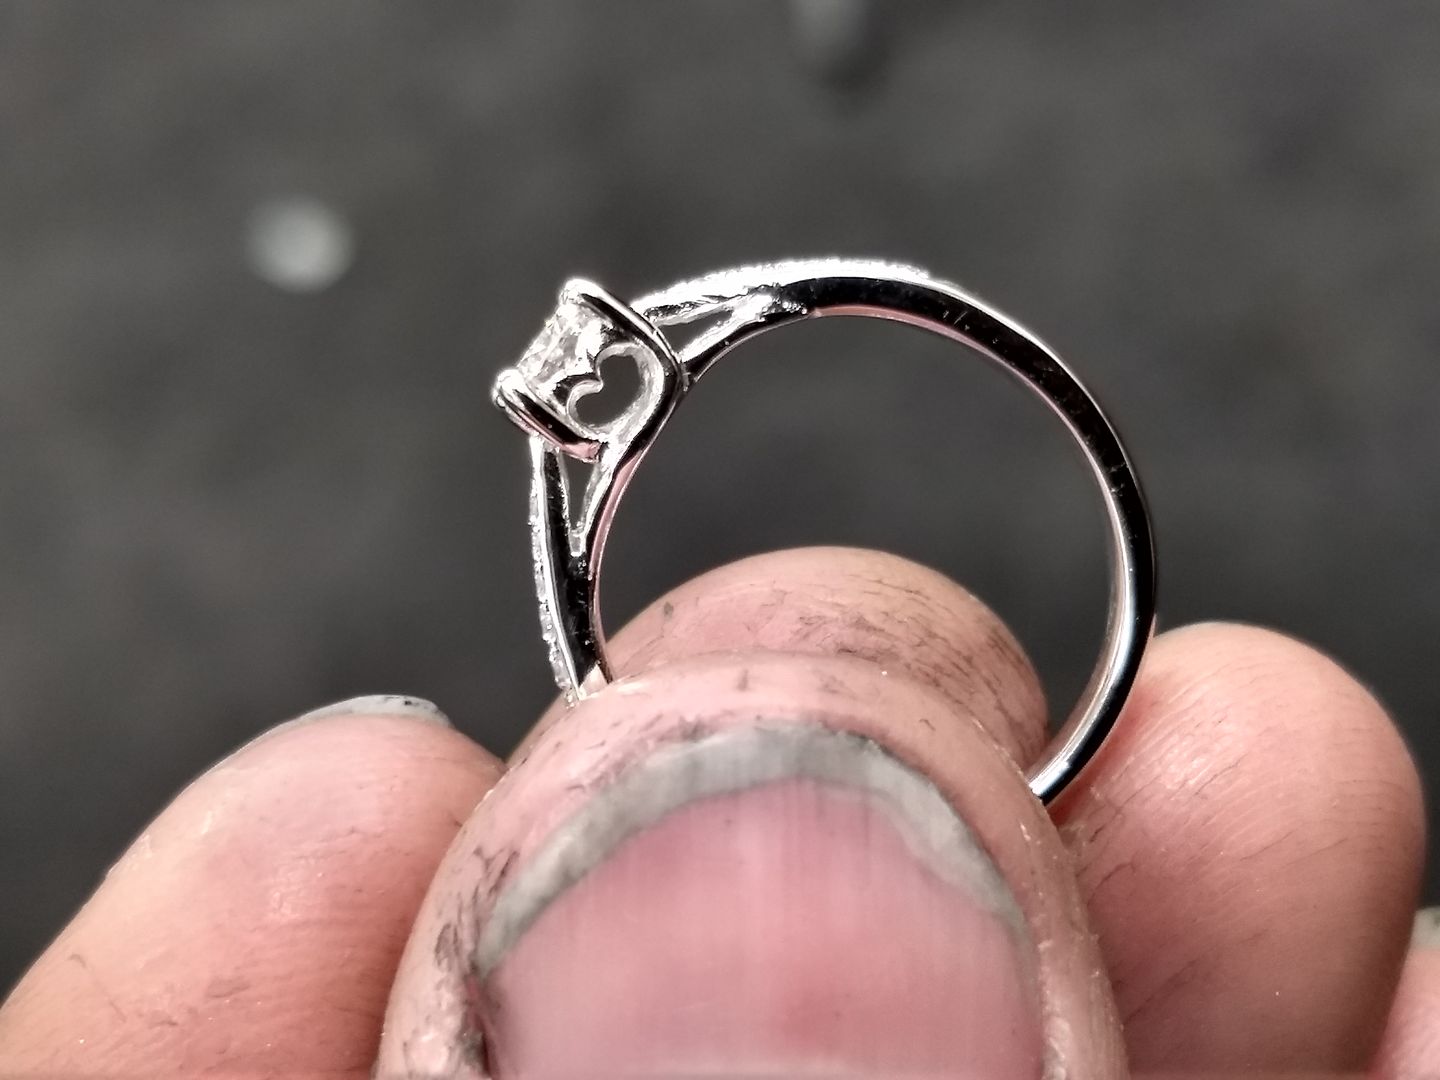
With a bore I shape this inner rim and you see the heart appear.
Some filing and grinding later (and soldering to fill joints and gaps) the sides are profiled to suit.
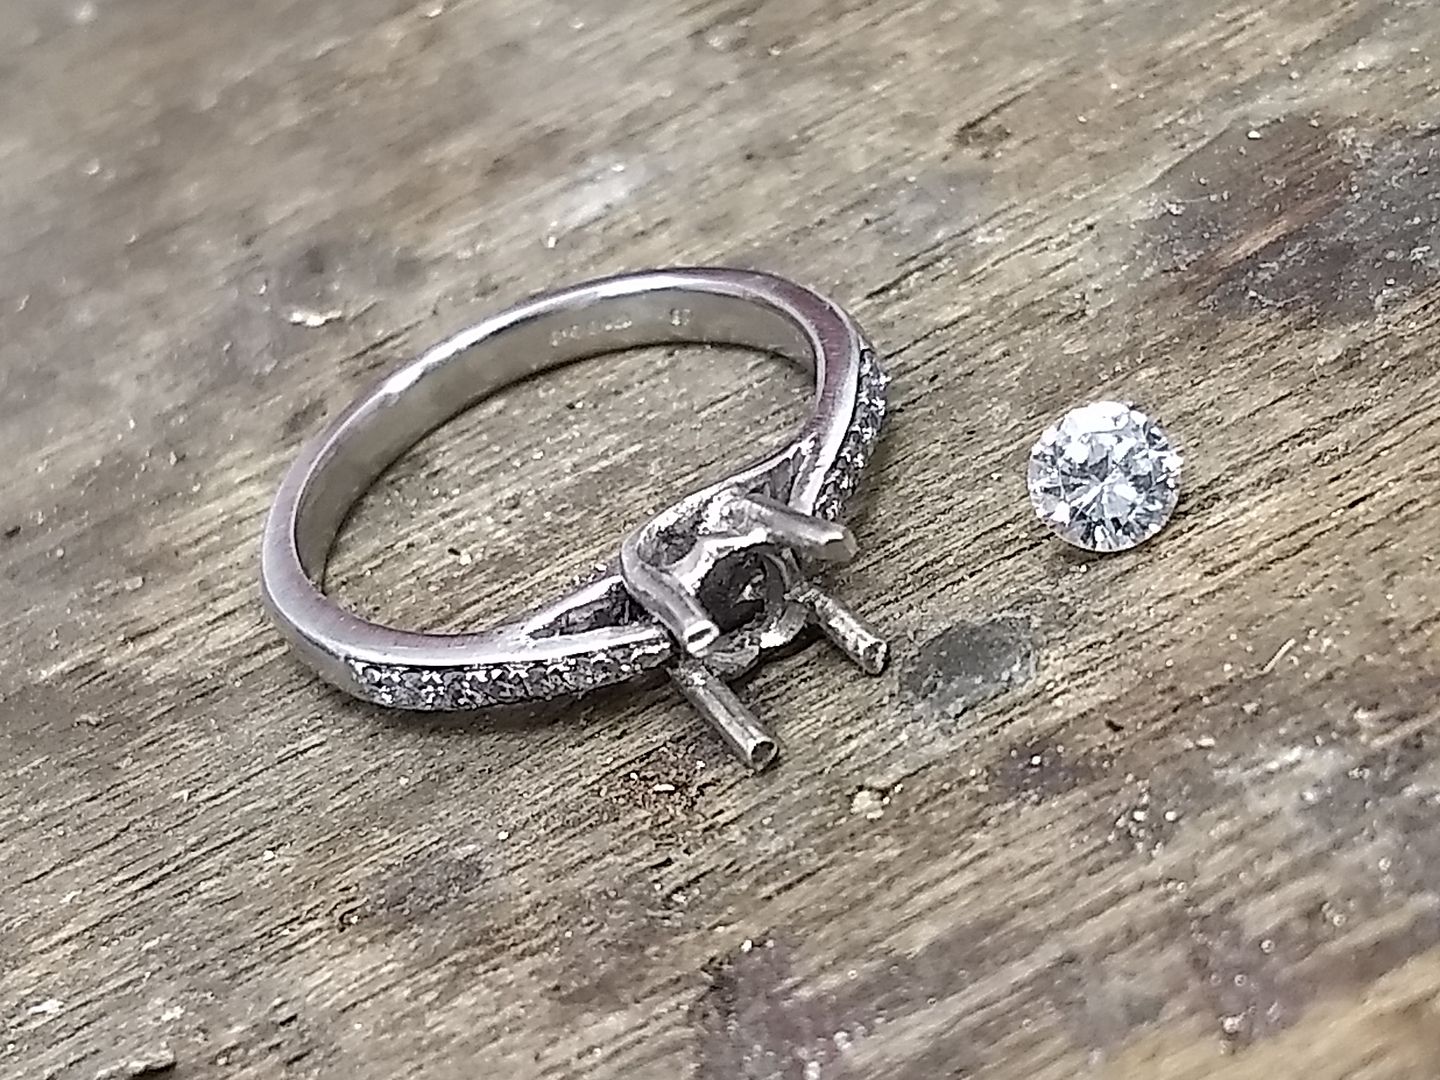
The metal is tidied up and then checked for anything that might cause issues later on:
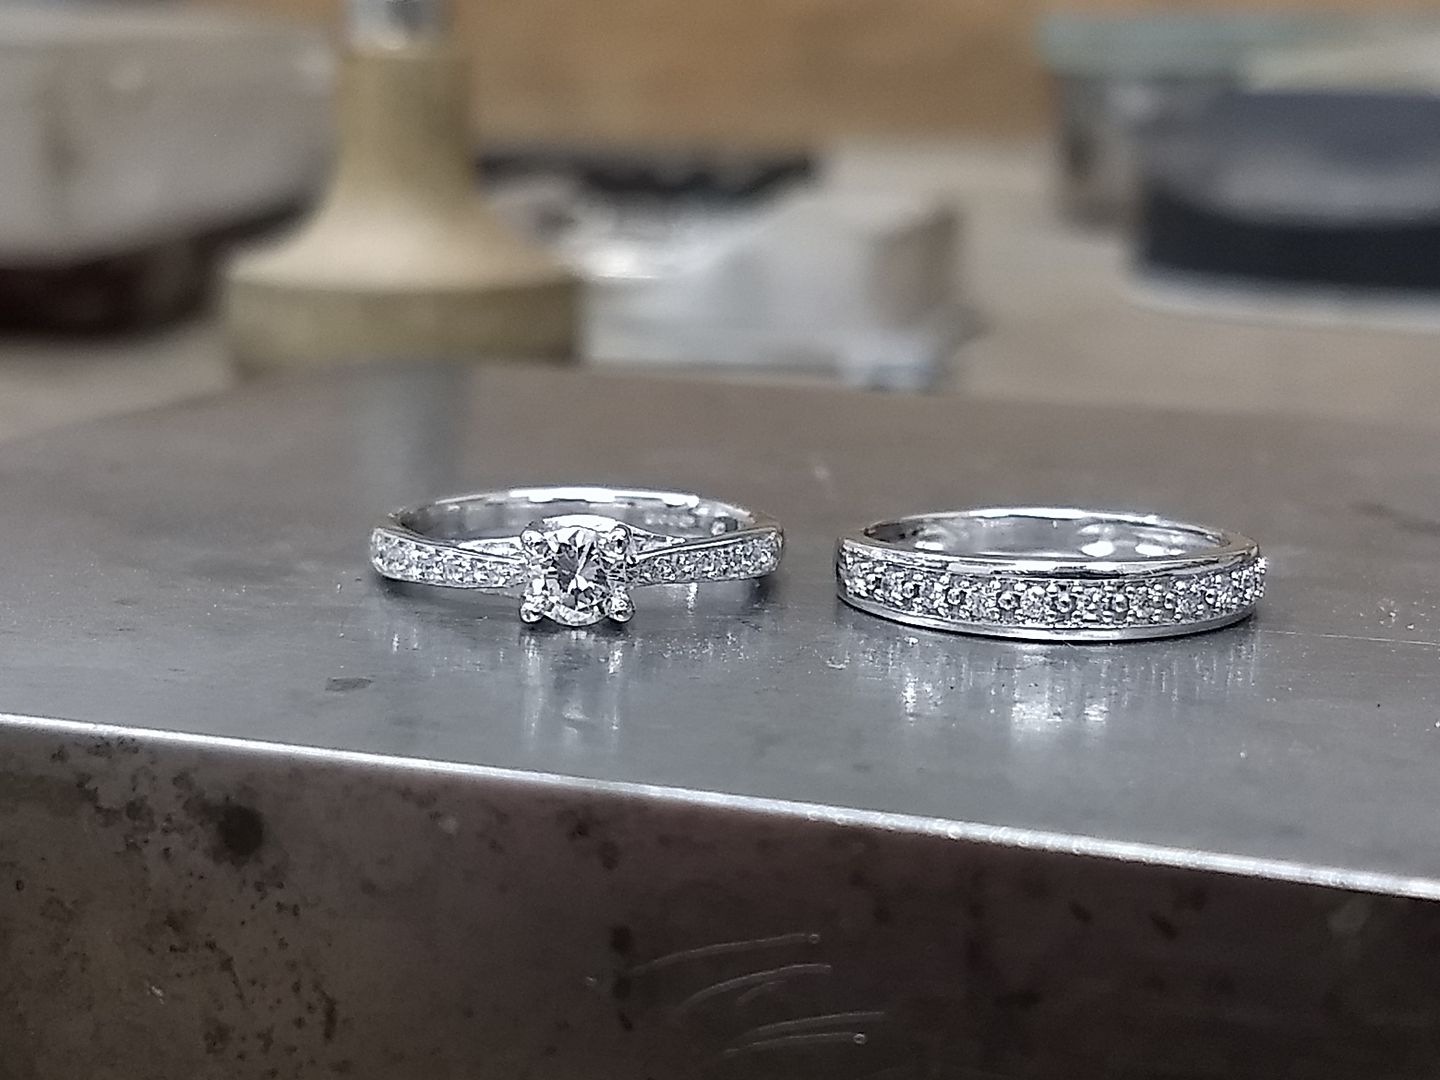
A nice G VS quality 0.25ct brilliant cut diamond will finish off the piece and is the biggest upgrade over the original stone. They were sold a J SI3 in the 9ct ring. When I started the job 11 years ago I don't think there even was an SI3, that's how much the market has changed. Diamonds of such quality were termed as PK or industrial grade, the same goes for the now fashionable chocolate diamonds. They used to be the crap nobody wanted,
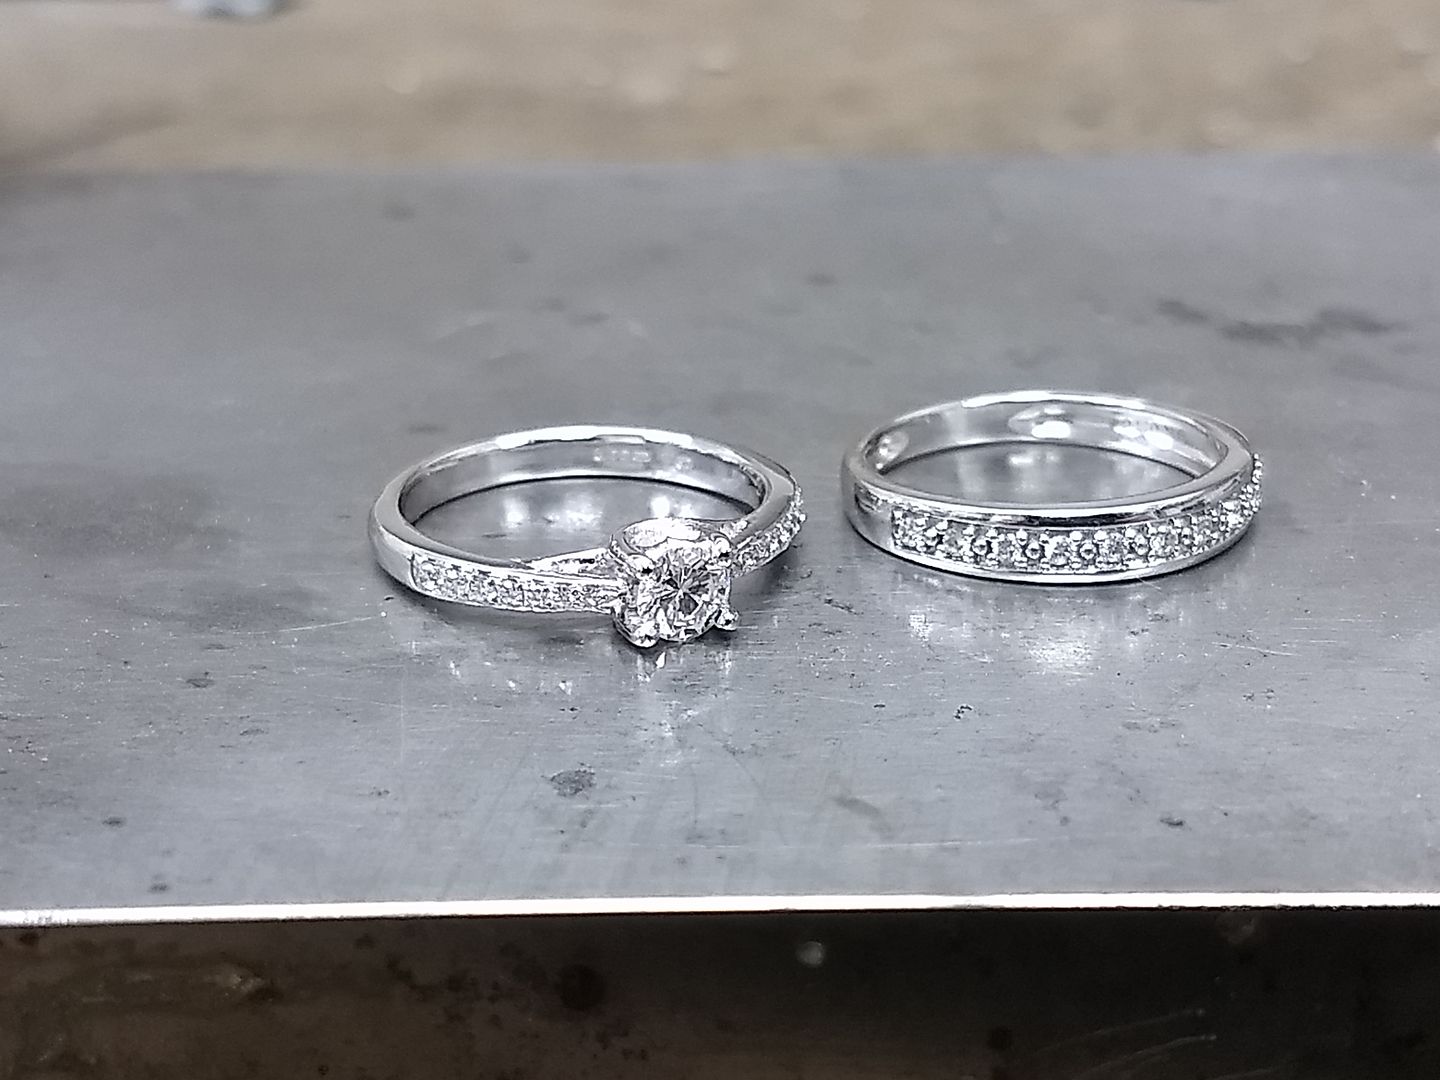
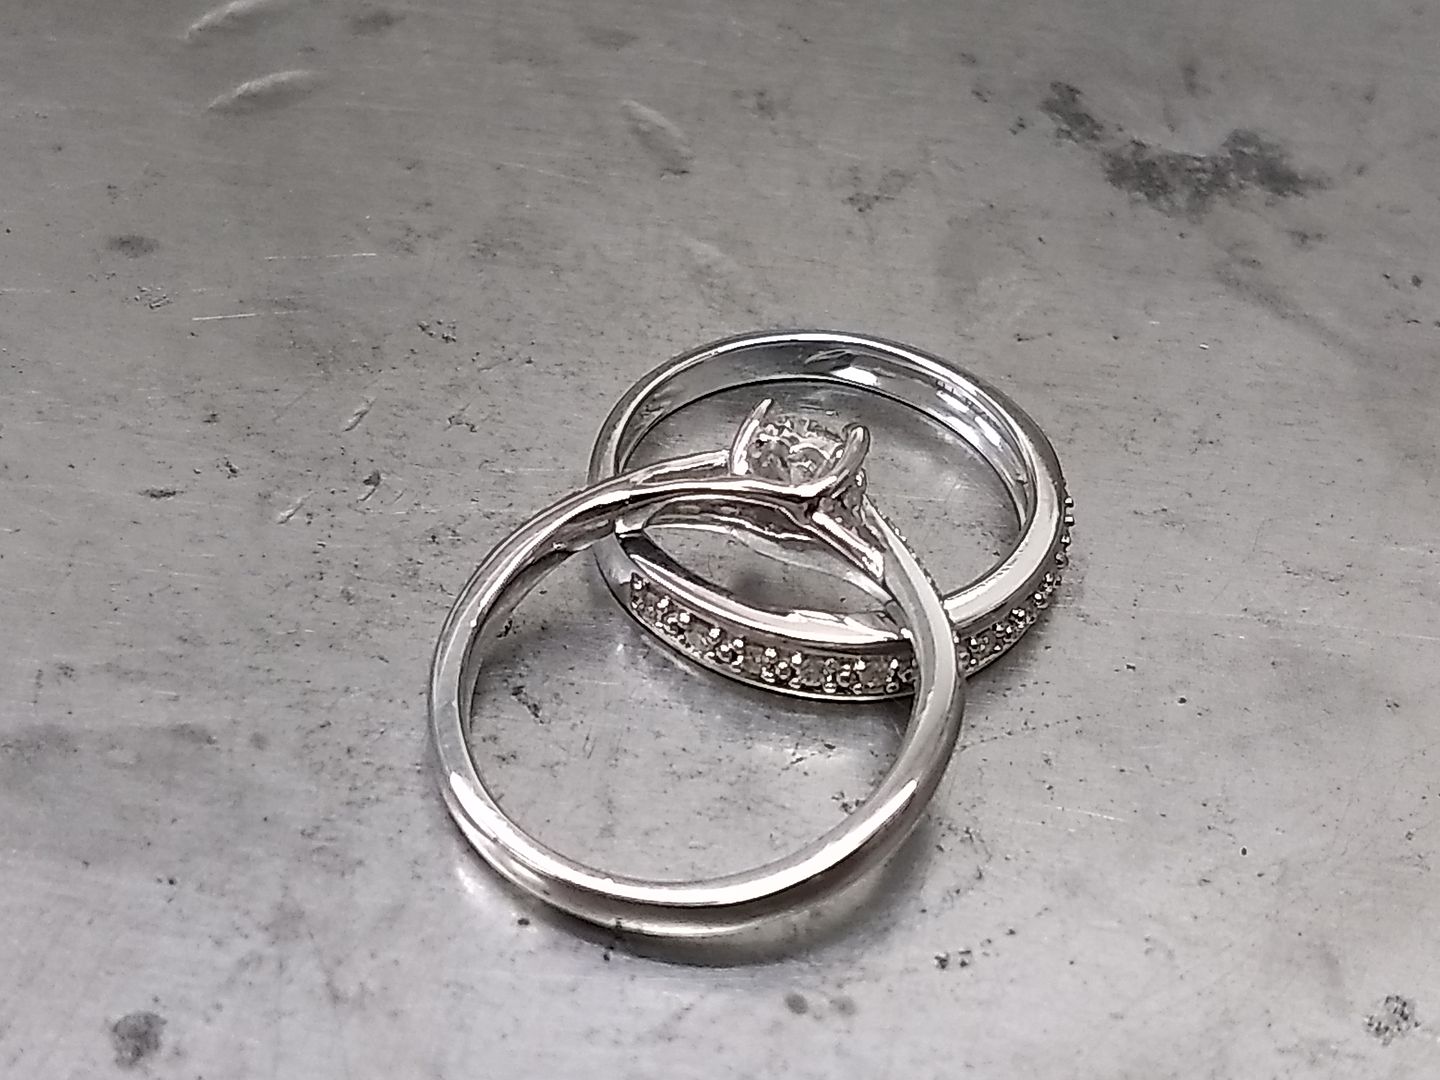
We had her wedding ring to size with the job so once the engagement ring was set and complete the 2 rings were polished and given a good rhodium plating to show them off to their fullest:
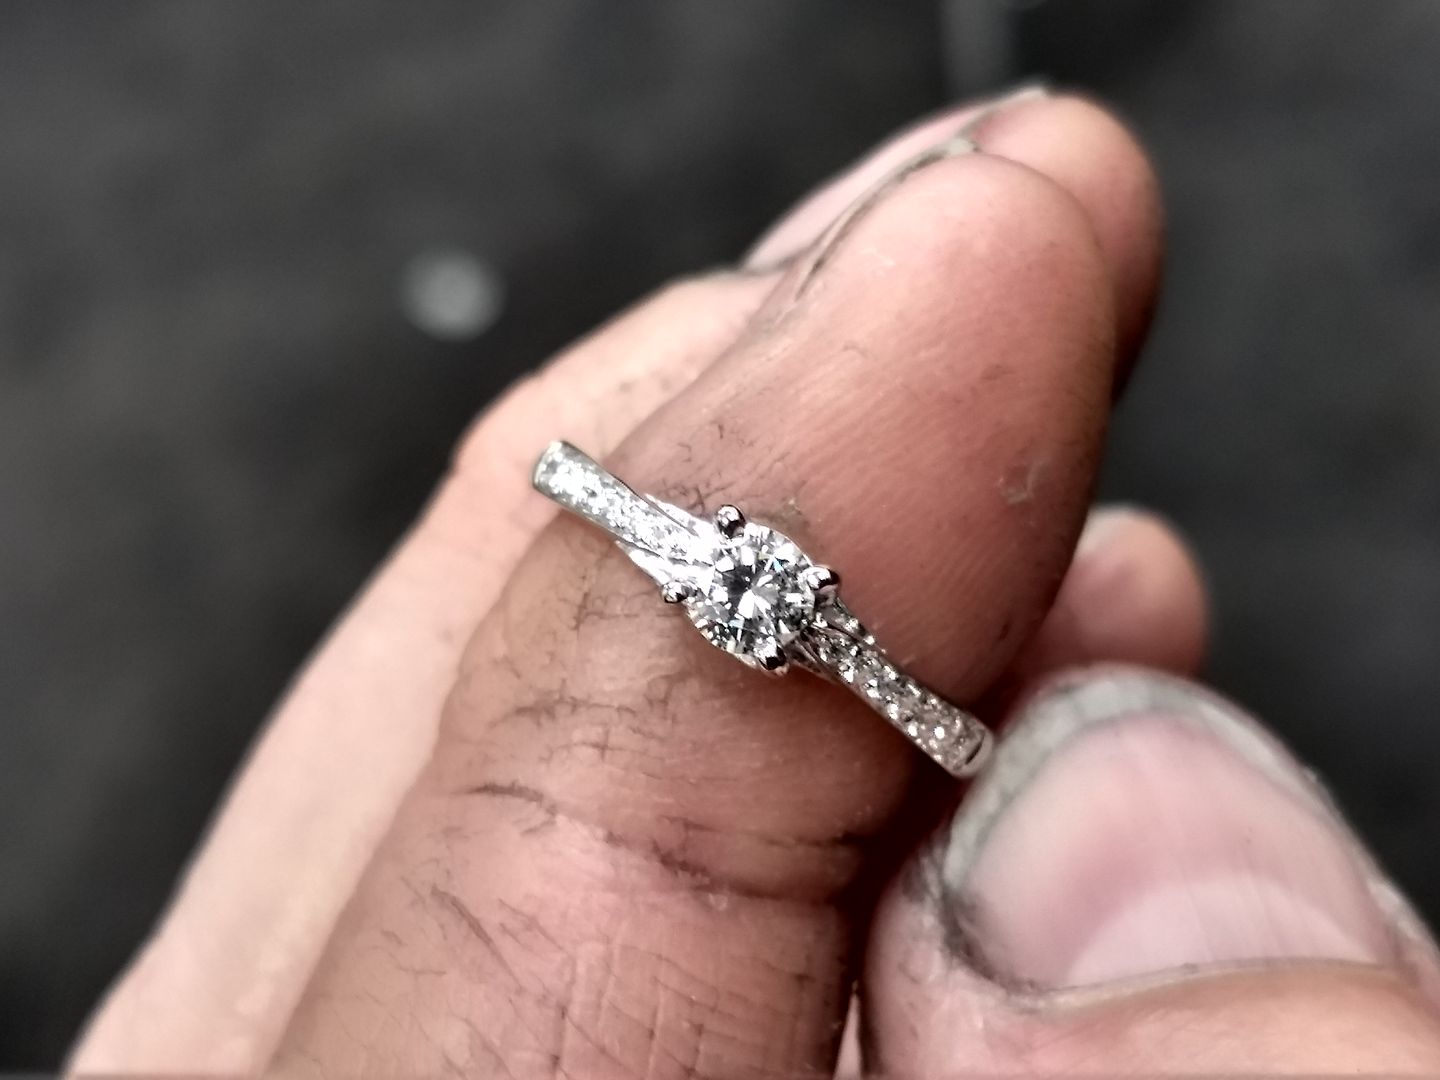
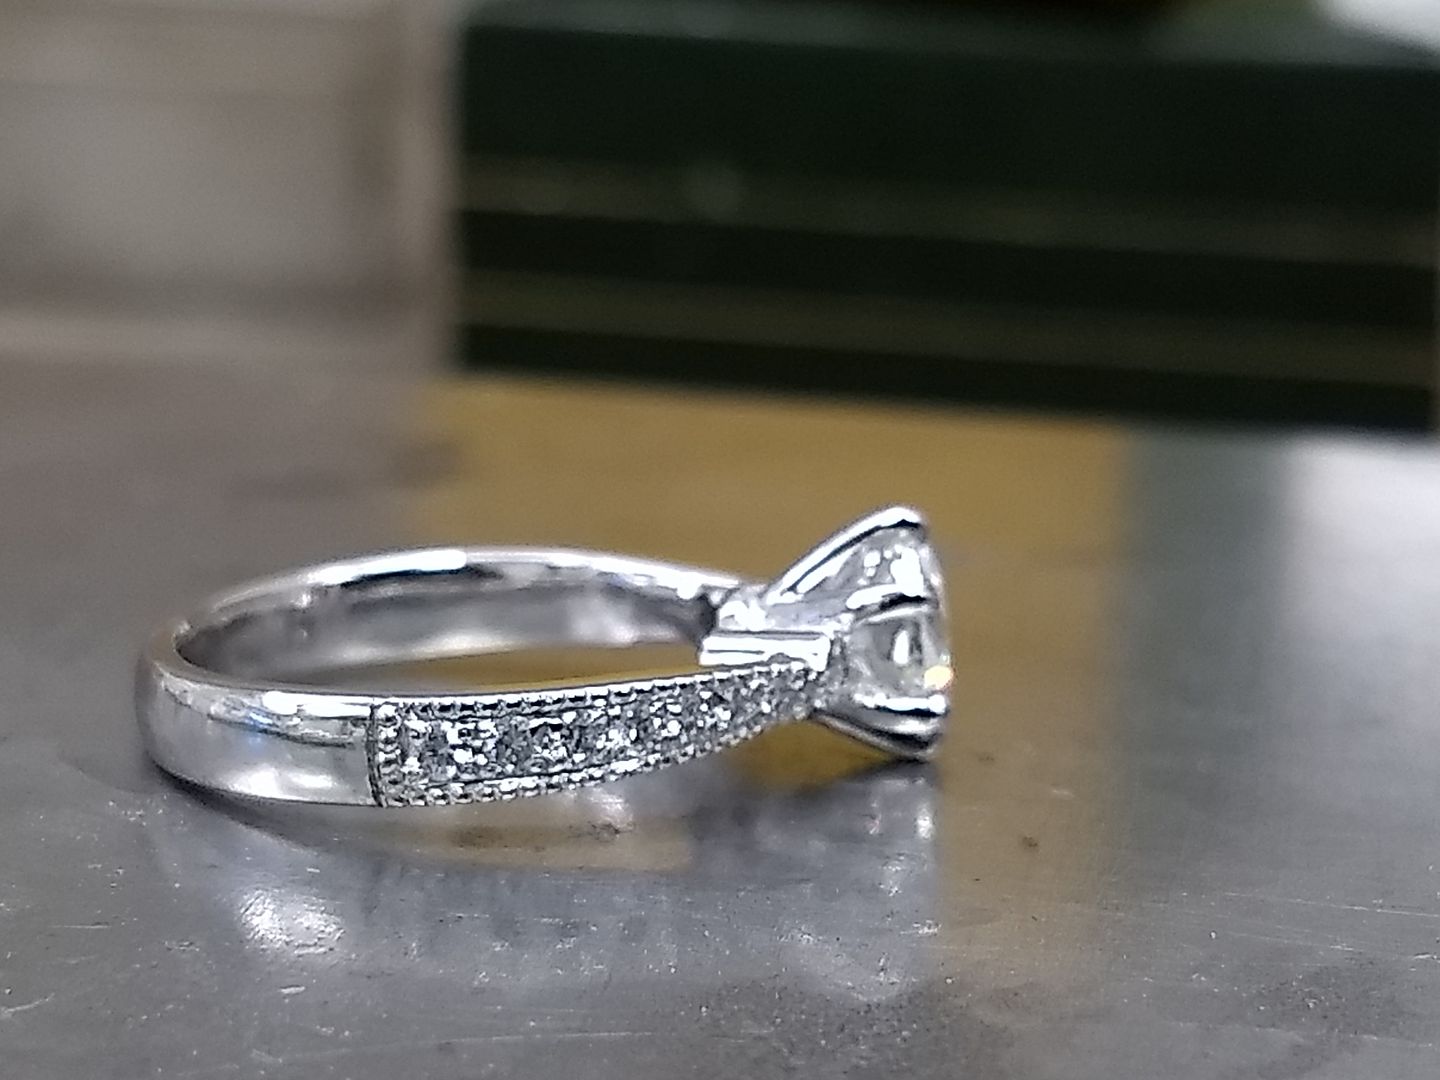
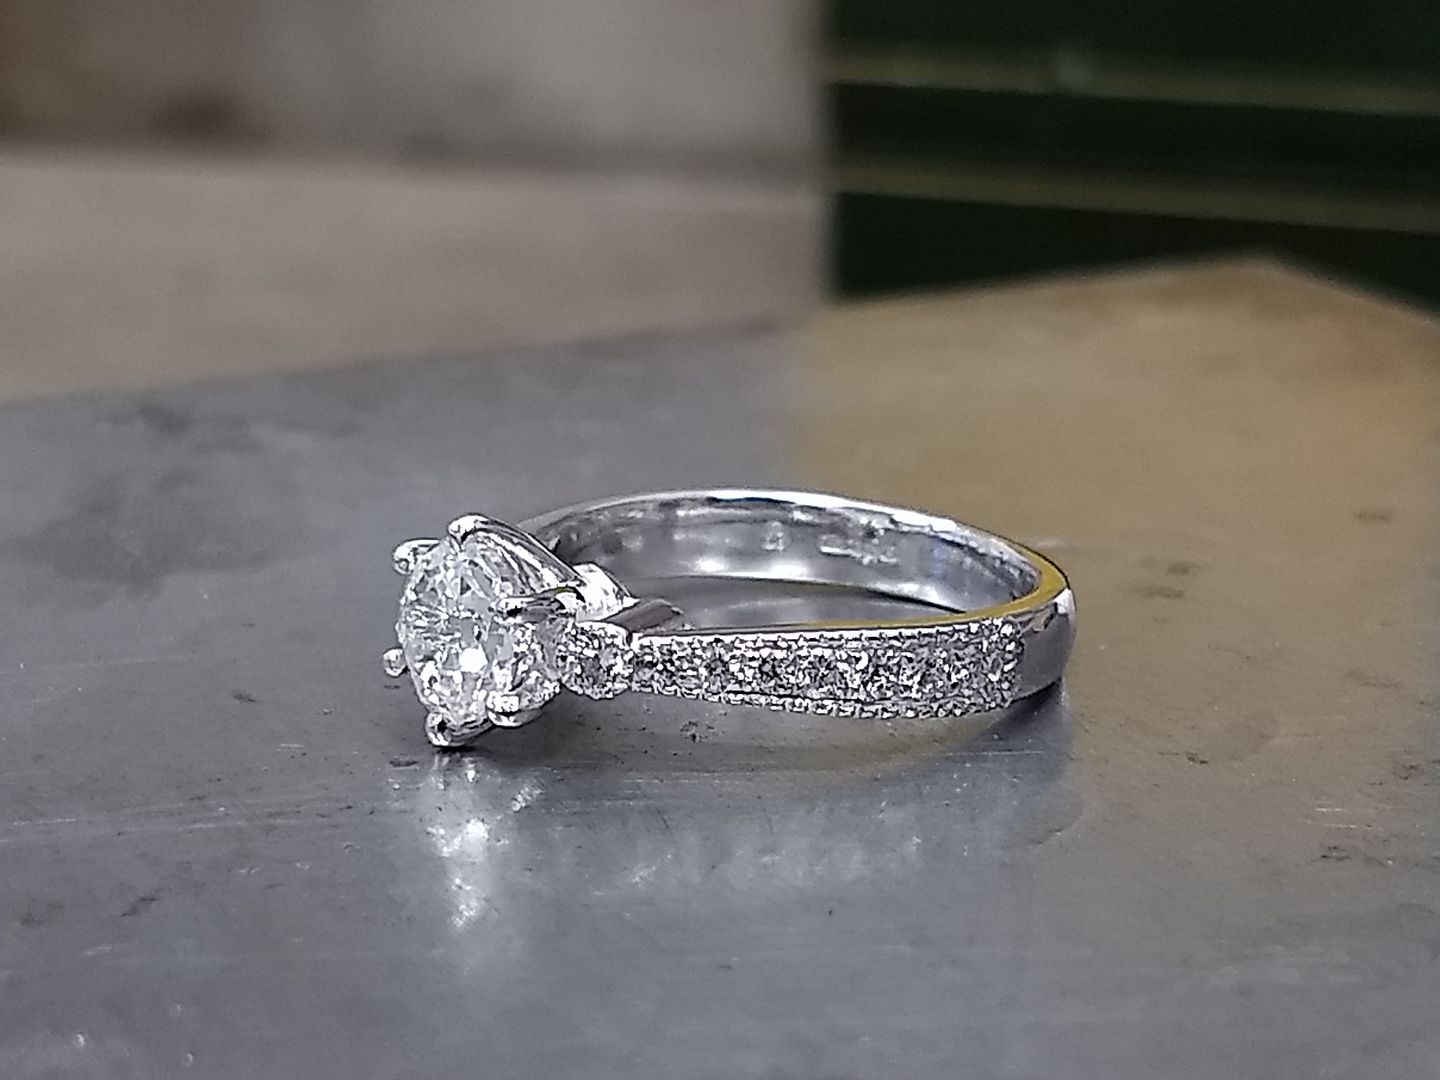
Job 2 is of a similar style. The customer wants something different to the norm but is too similar to an existing style to warrant spending large sums on a custom scratch build. Here is the spec: Regular tapered diamond set shoulder but with a round setting at the top and millgrained edges.
Here's what I did:
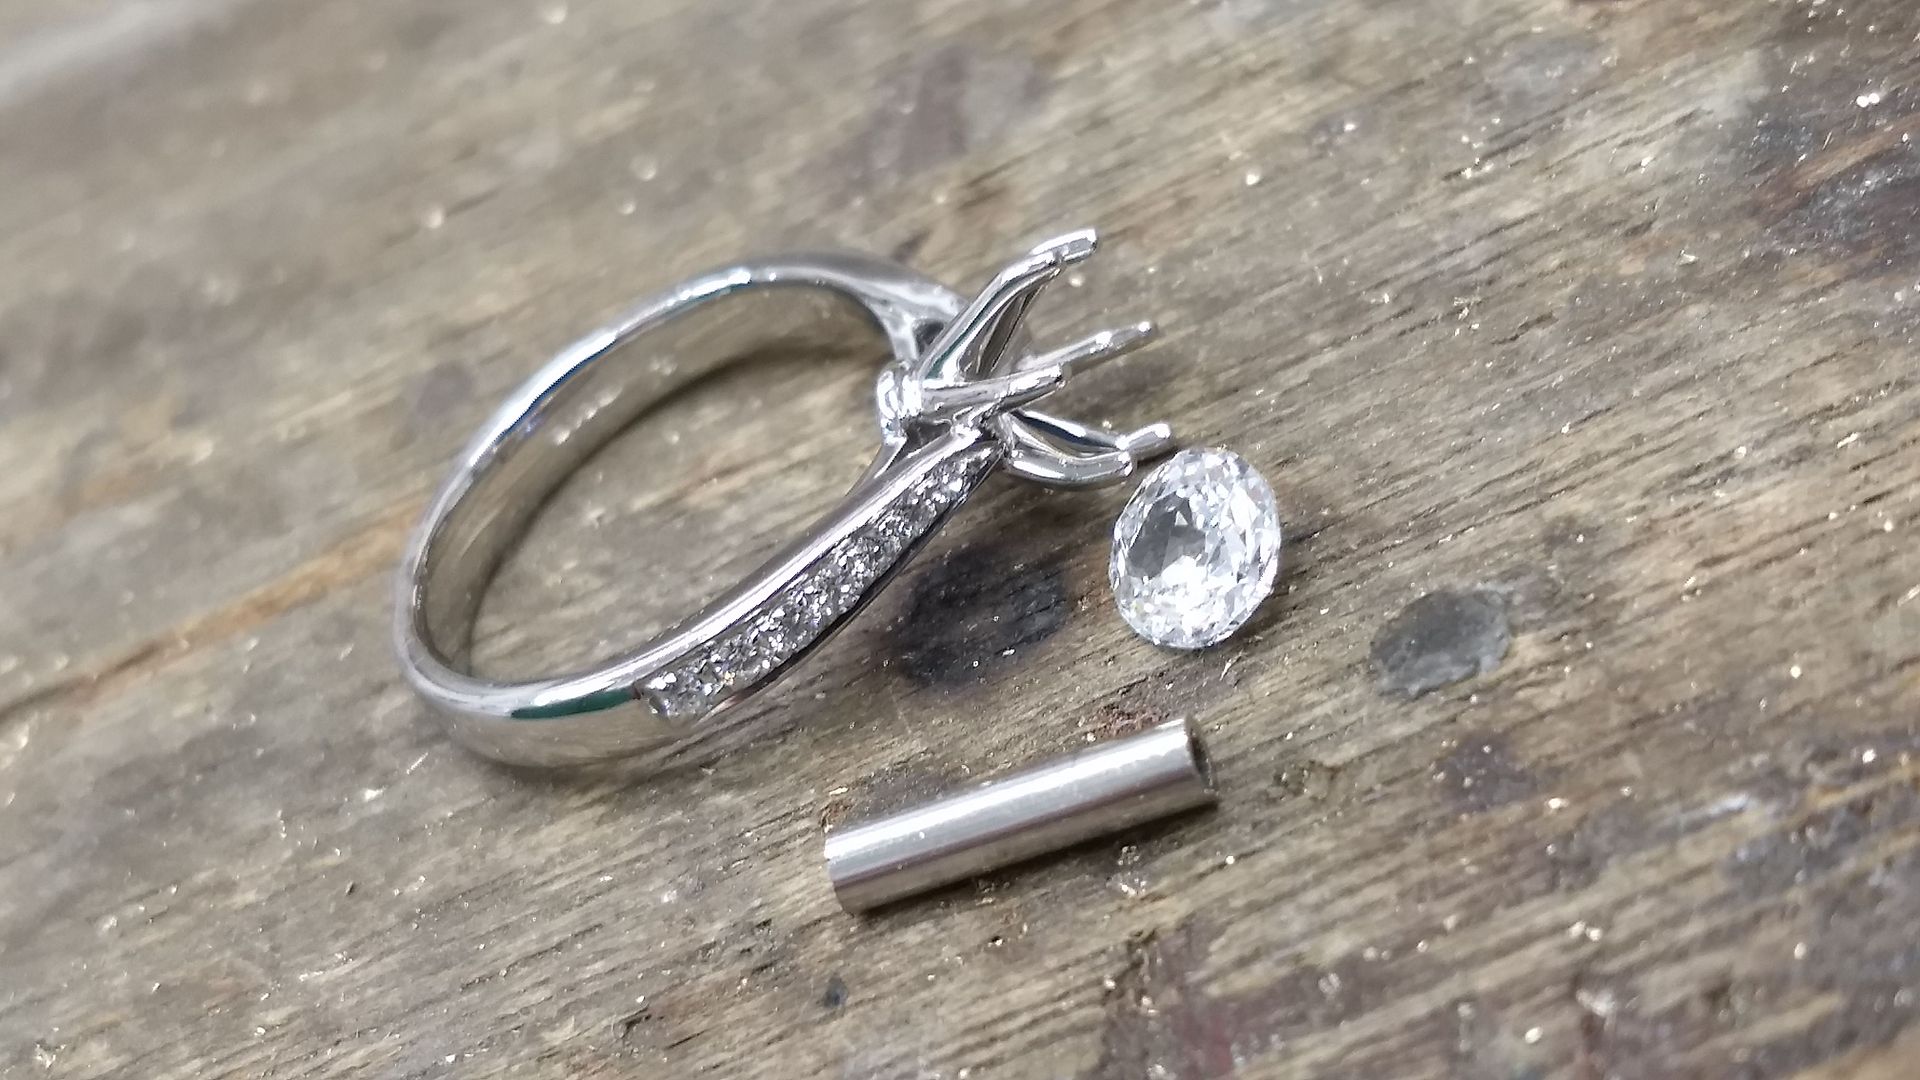
The customer had spent a while with us and had chosen a nice 0.70ct old cut diamond. It's got a good spread and is lovely and white with a characterful 'eye' in the middle. A platinum mount was ordered and some 2.5mm platinum tubing:
The shoulder is cut at the setting and the ends rounded off (concave) to accept the tube. The tube is then soldered in place:
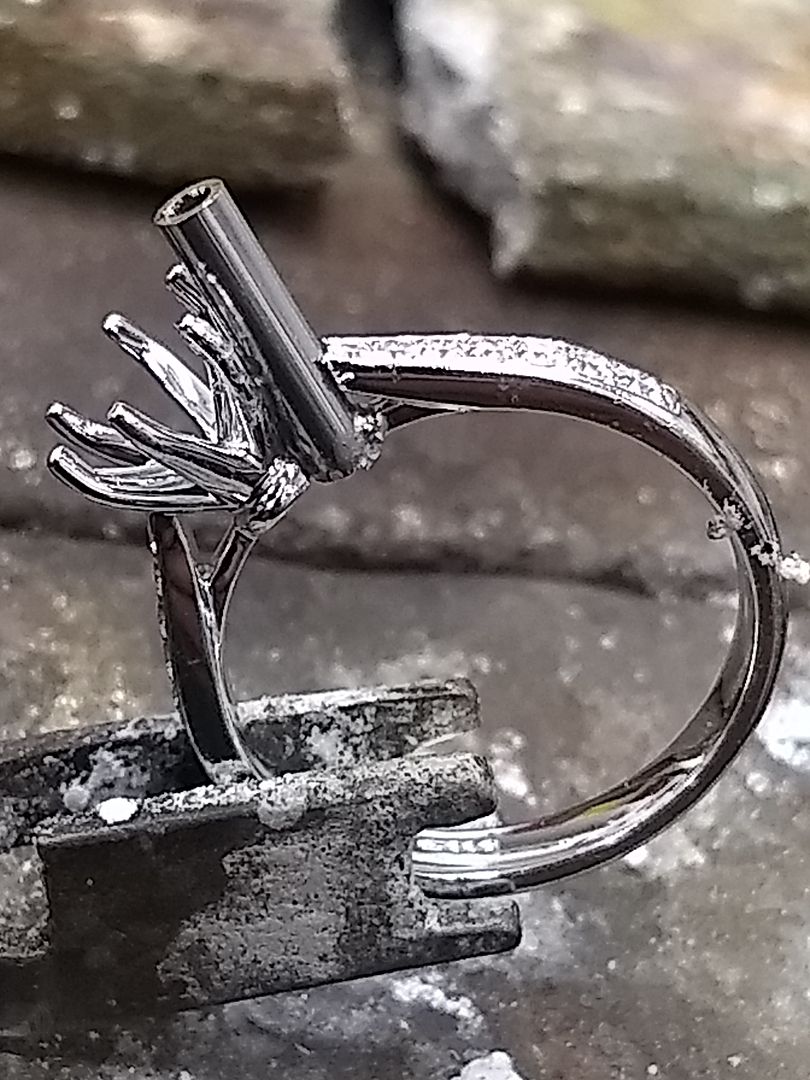
The tube is cut down to length and the other piece soldered in exactly the same way:
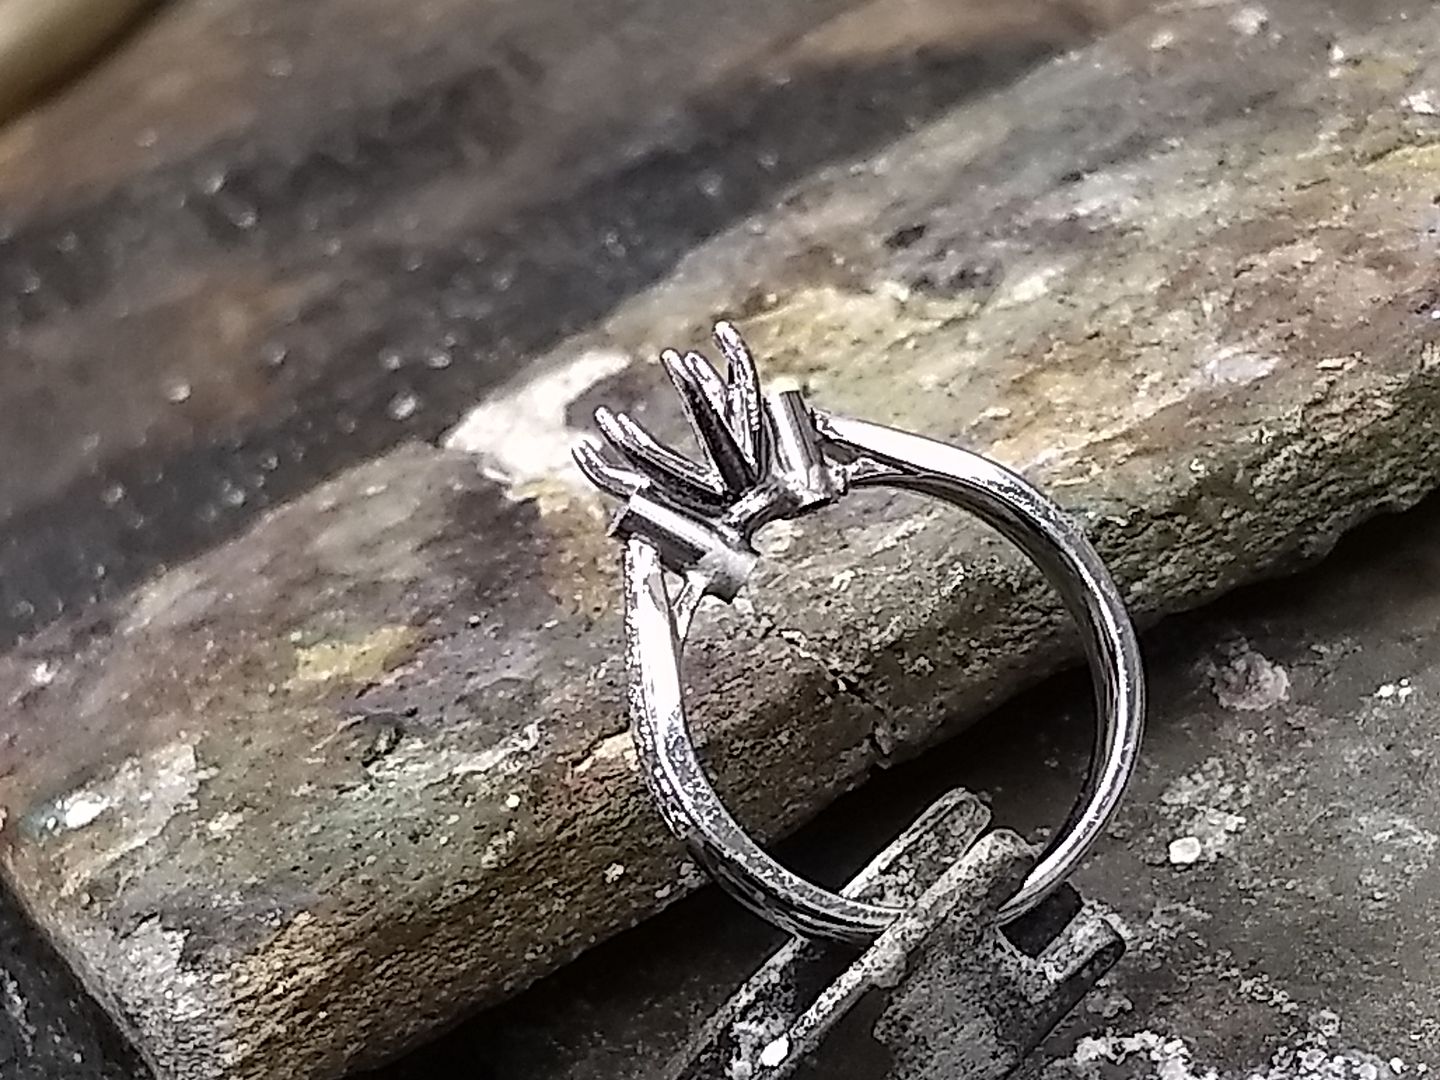
This is then tidied up and the ring sized for the customers finger:
A pair of 2mm diamonds are set in the round settings and I get on with the millgrain finish (personally not a fan): The tool I use is literlly just a graining tool, which is a hollow tipped pointer thing that we use for setting small stones. It makes nice round marks

The centre stone is set (you can see the eye in this pic) and then the ring is finished by polishing and rhodium plating:
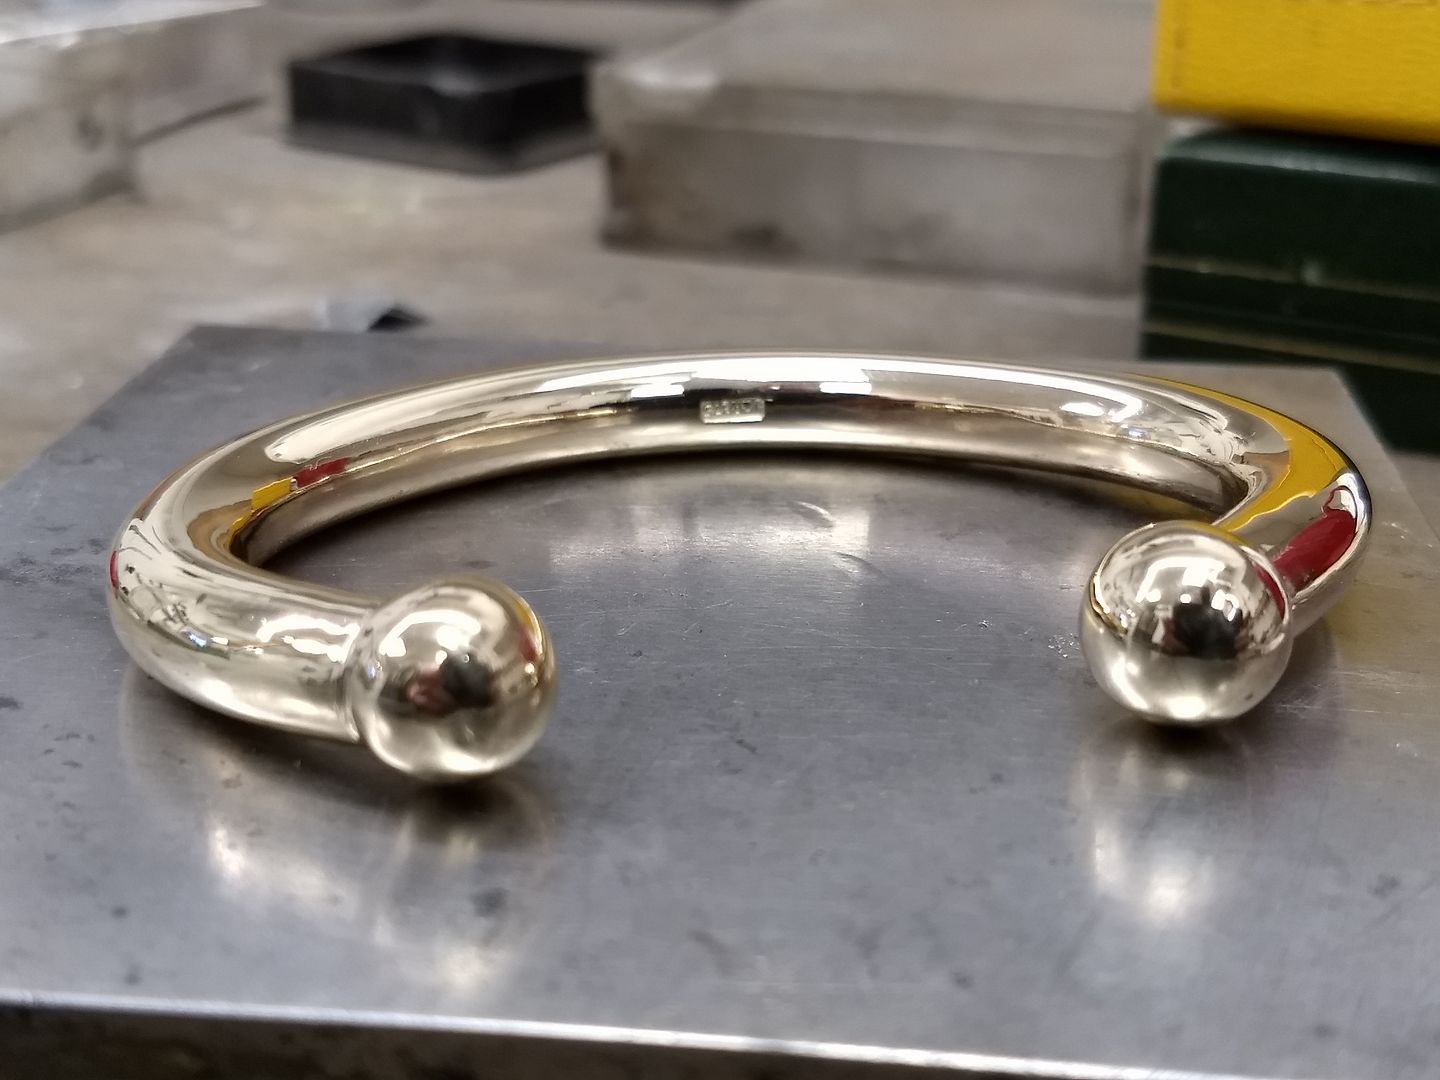
Ok, that's the rings done. Here is the bruiser bangle.
Remember the huge, 50g+ solid 9ct heart I made last year for the lady who already had the really heavy chain?

This year she's getting a bangle:
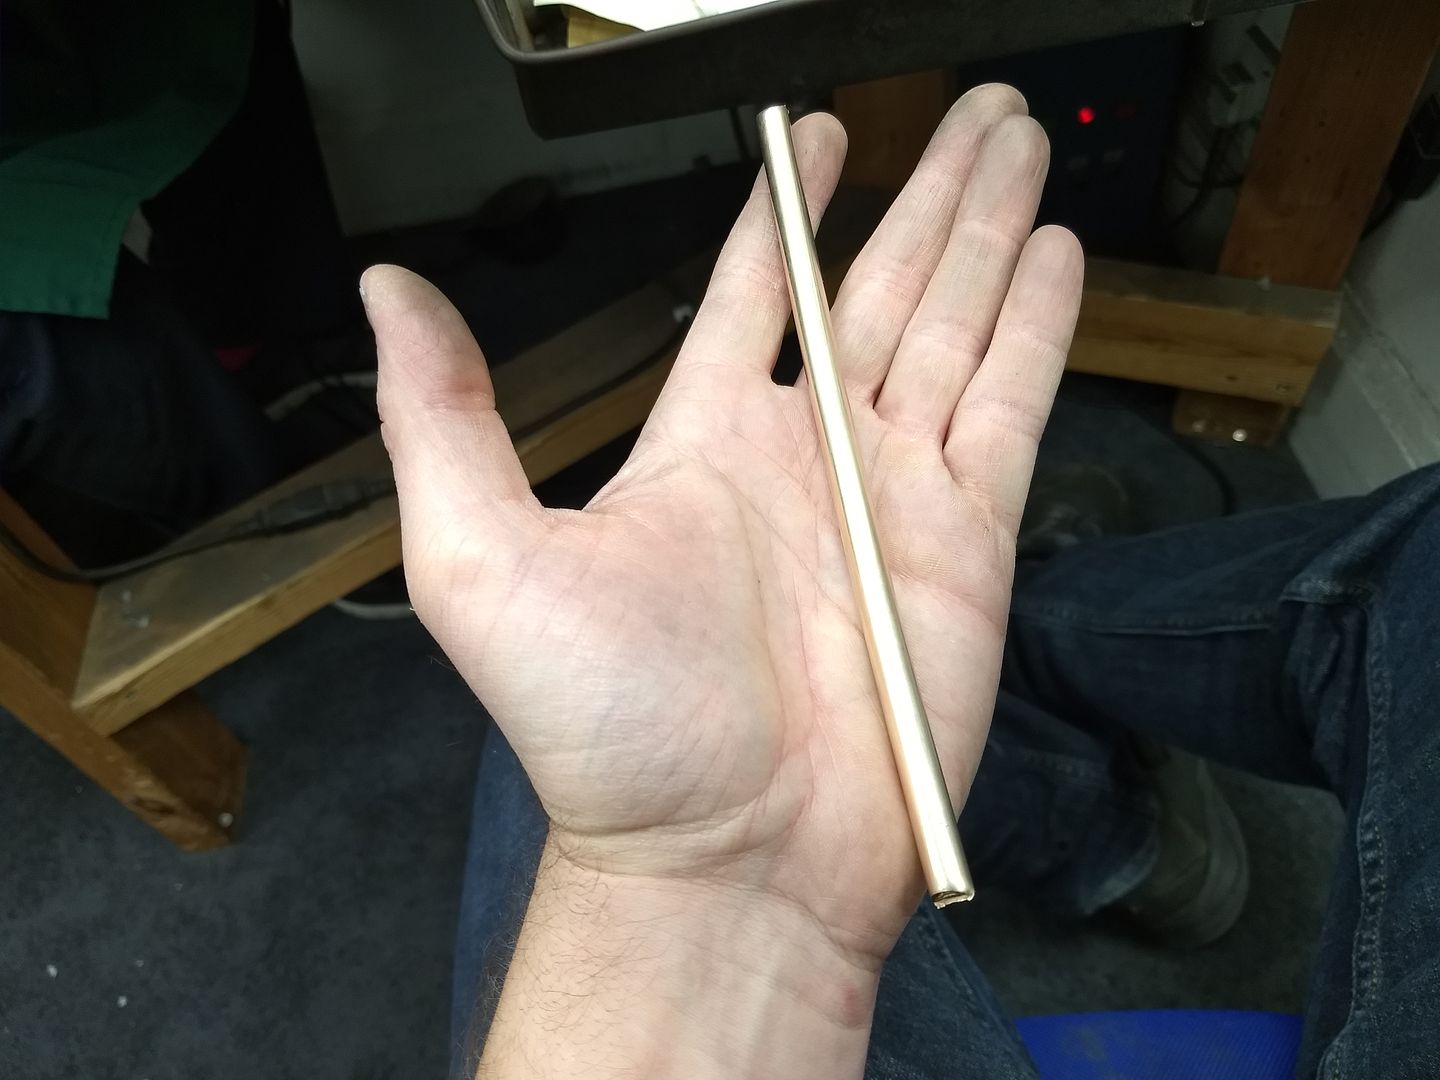
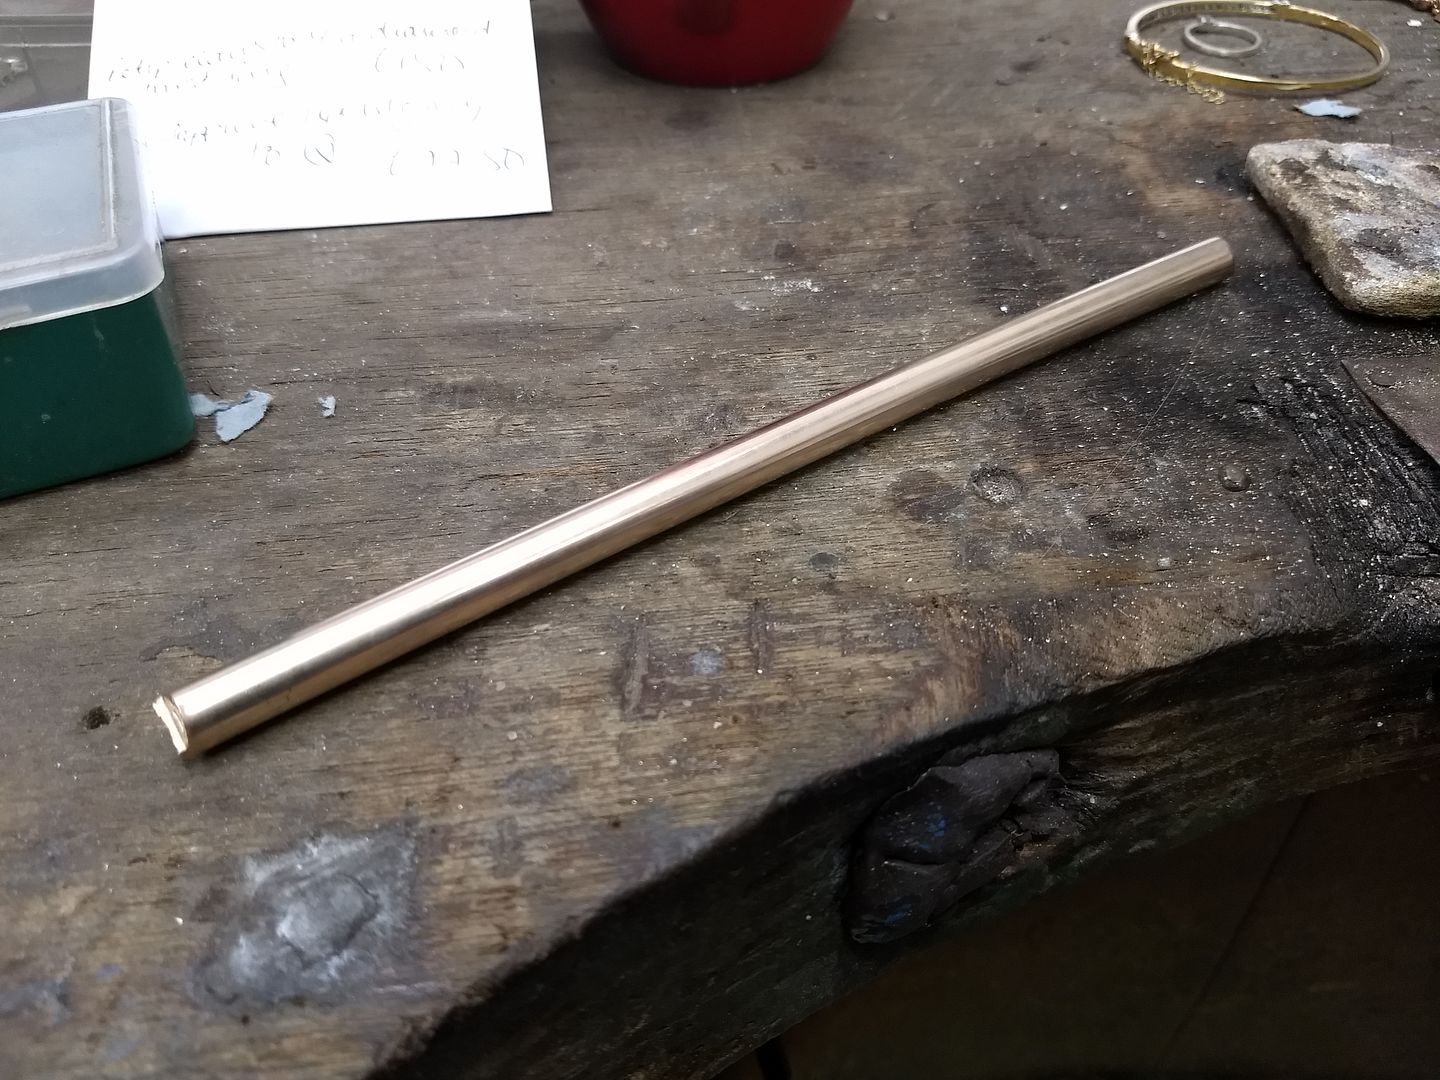
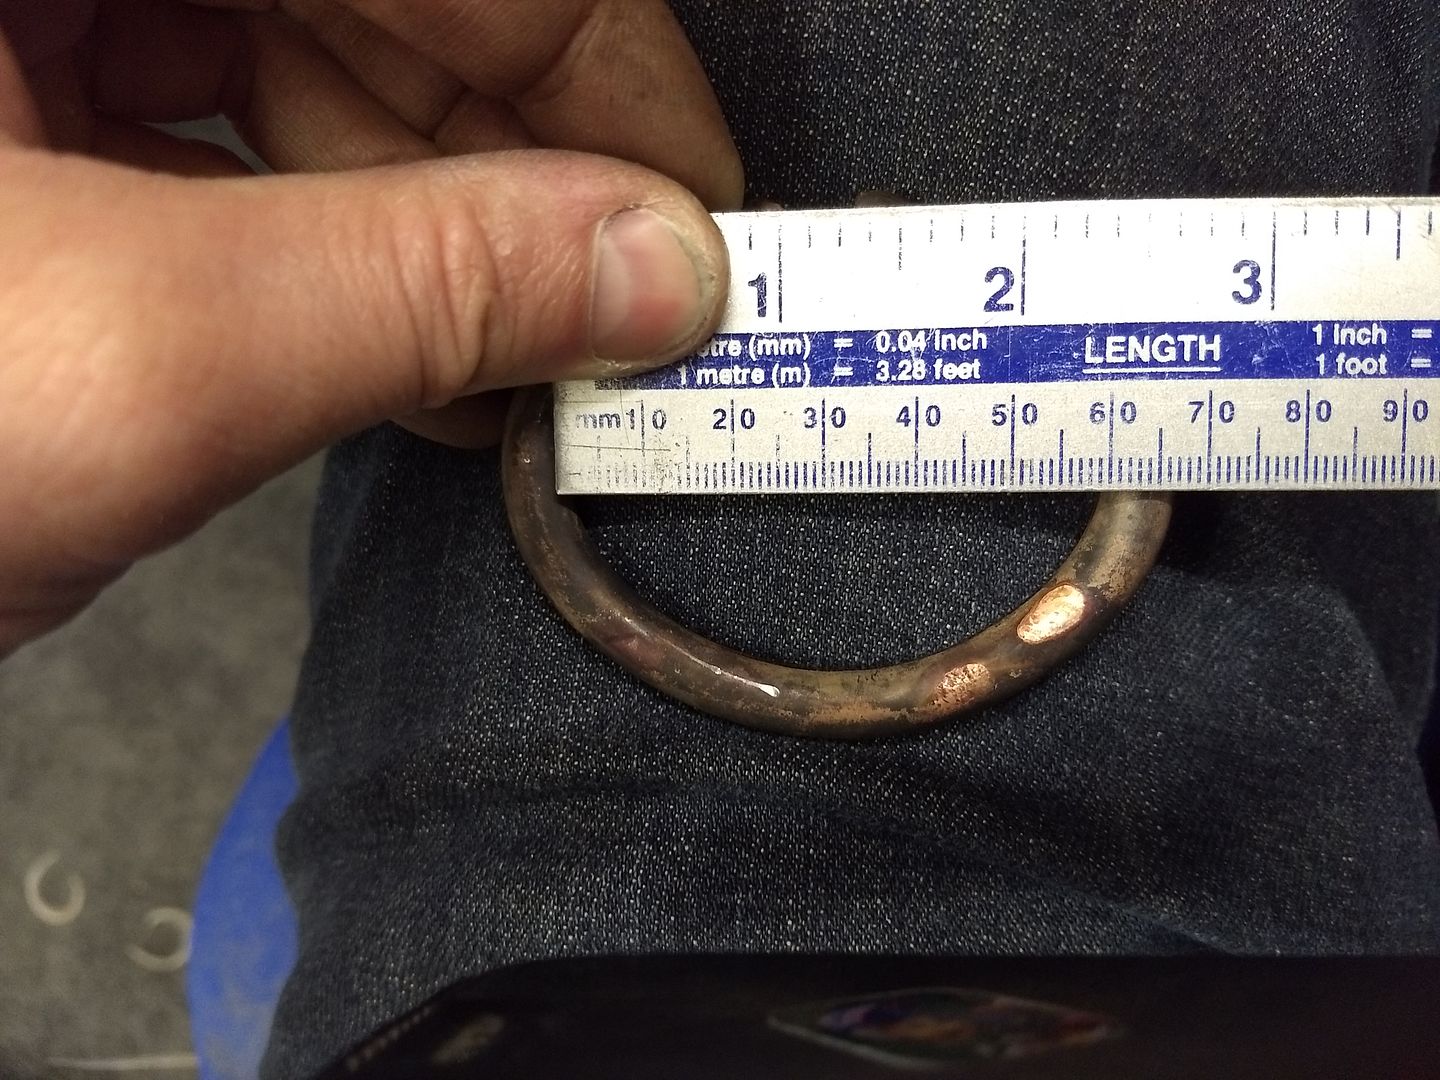
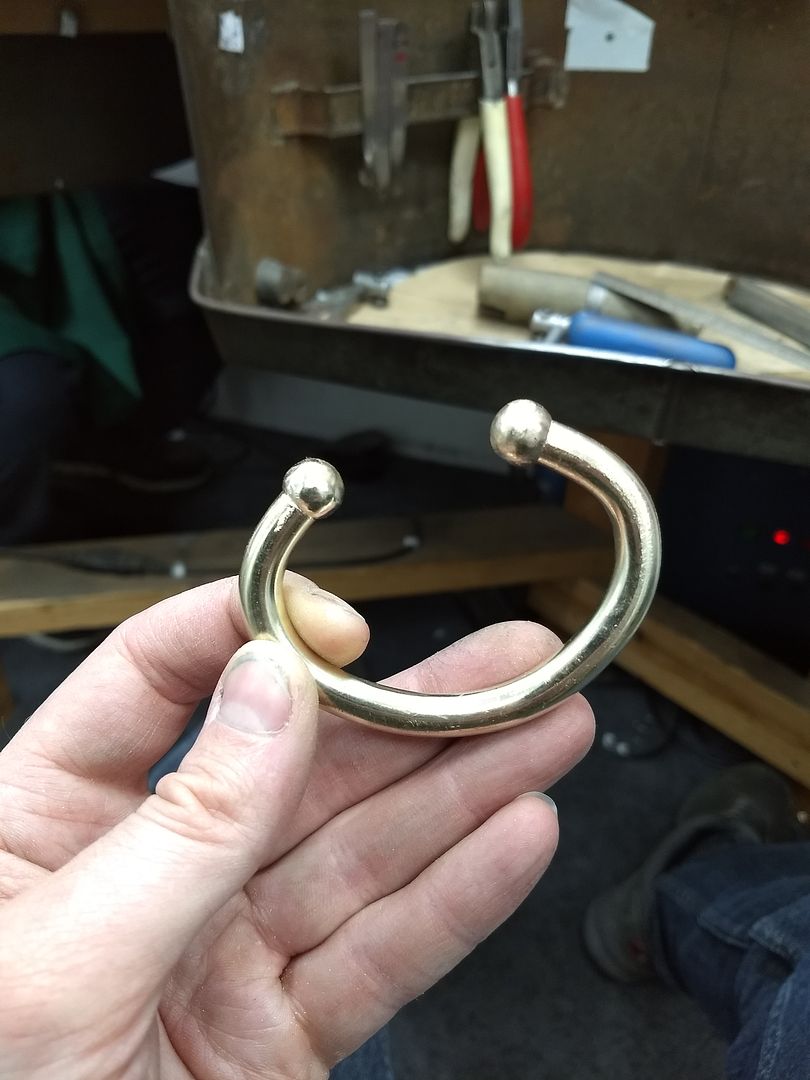
Take 1 x 8mm round wire bar. All 102g of it:
And the idea:
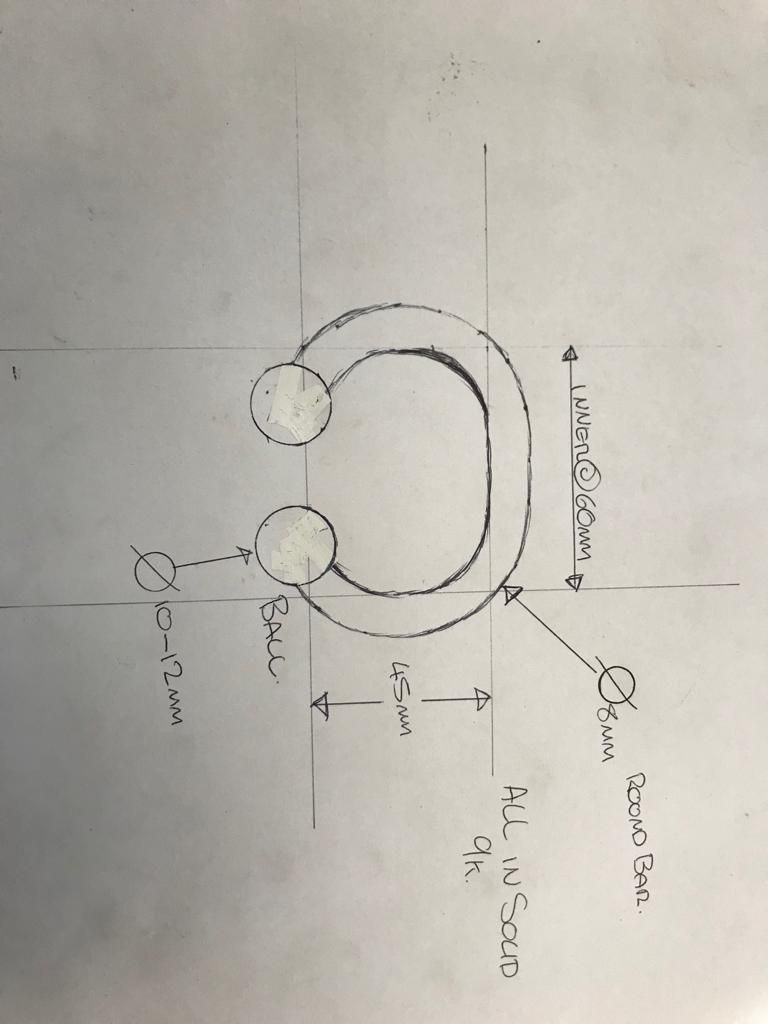
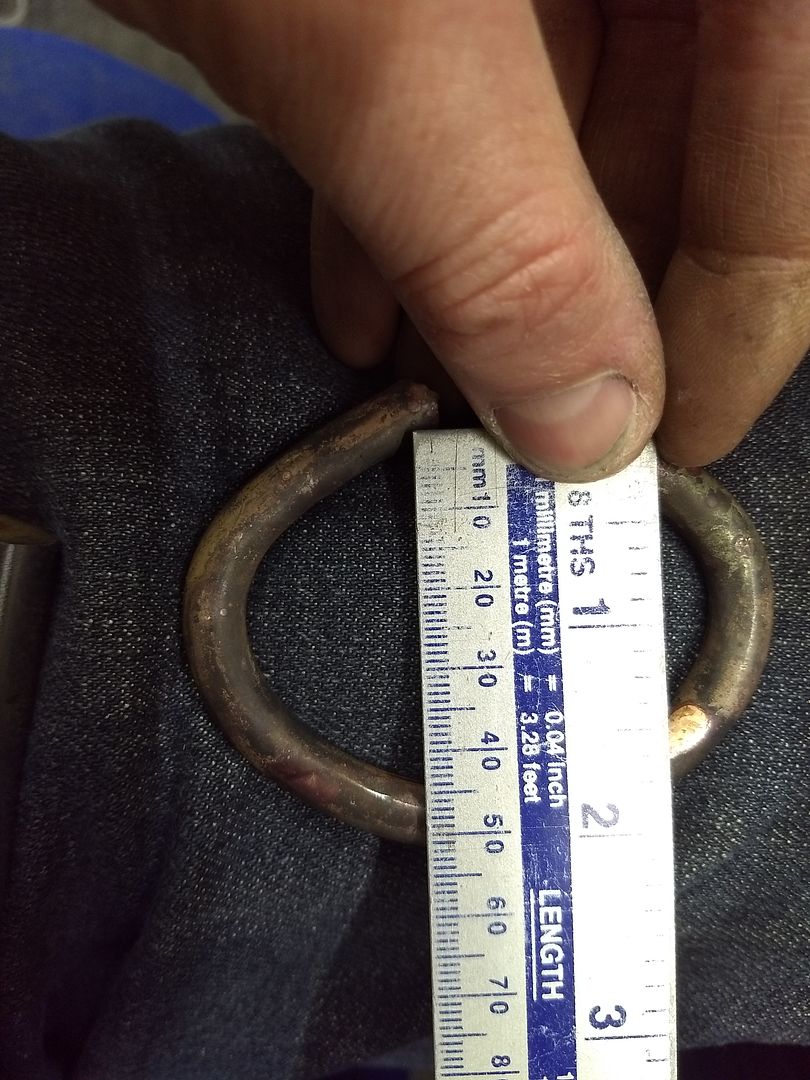
9ct gold is bloody hard even with heating so I had to employ the vice for the bending:
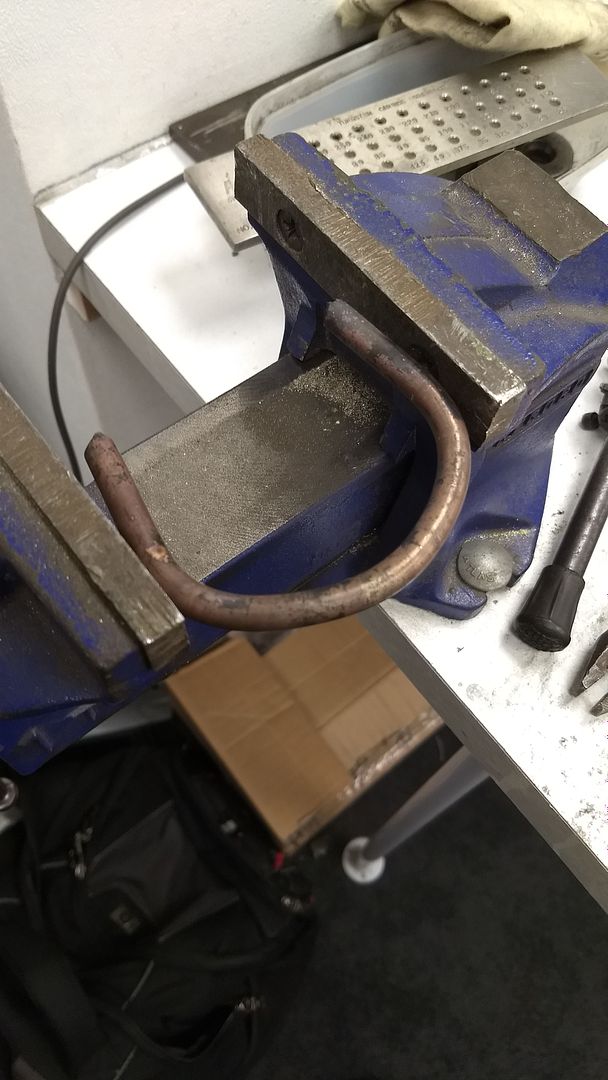
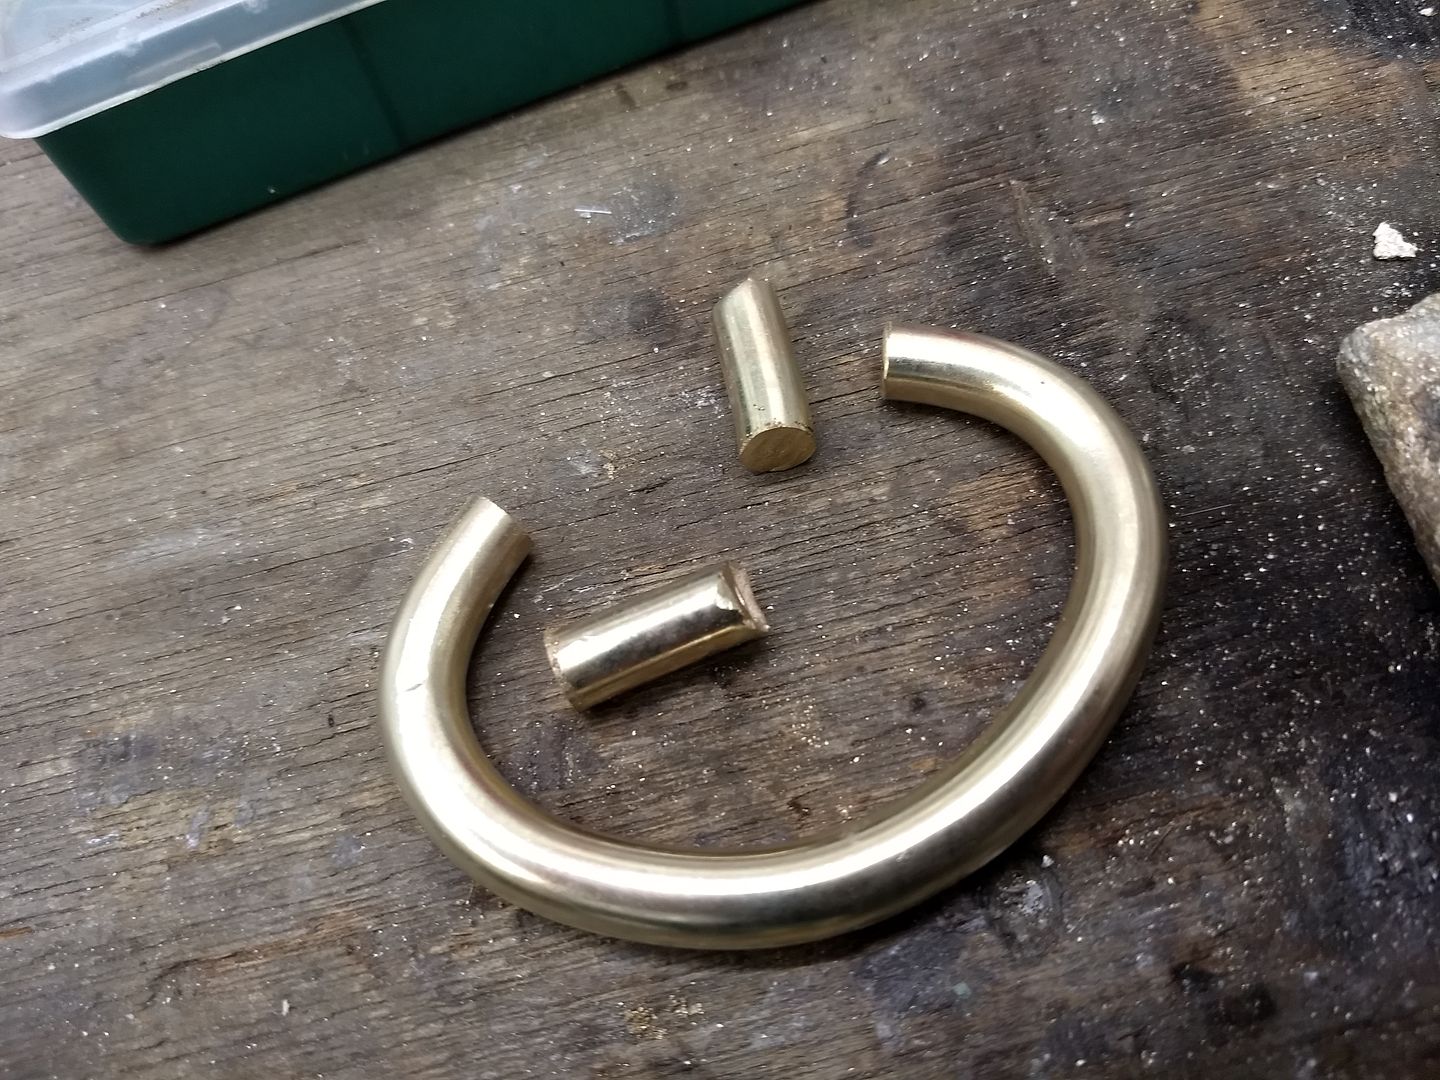
The excess length is removed and these will be used to produce the balls on the ends:
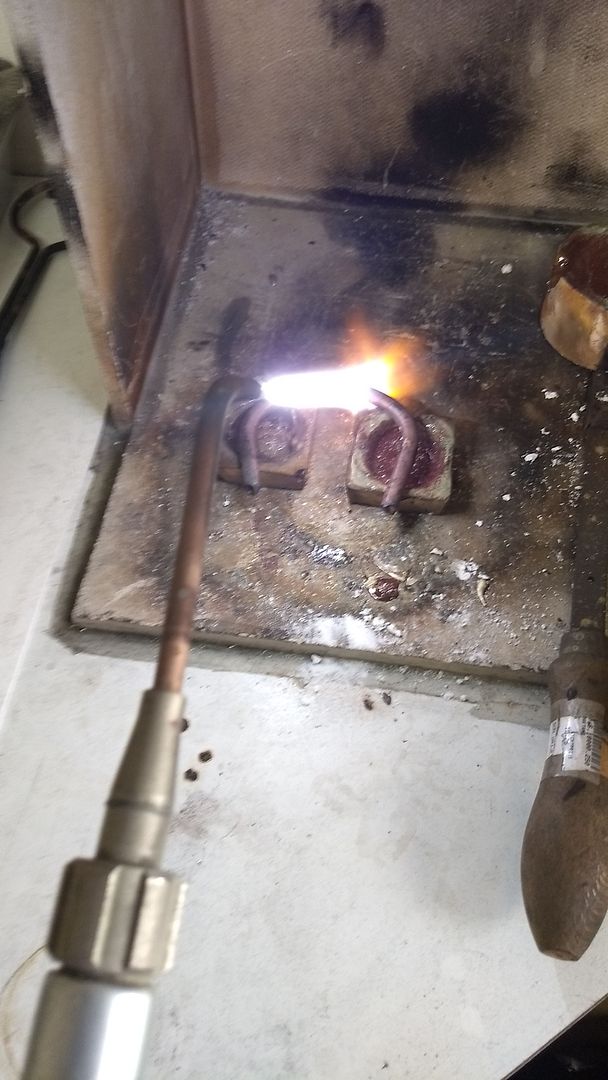
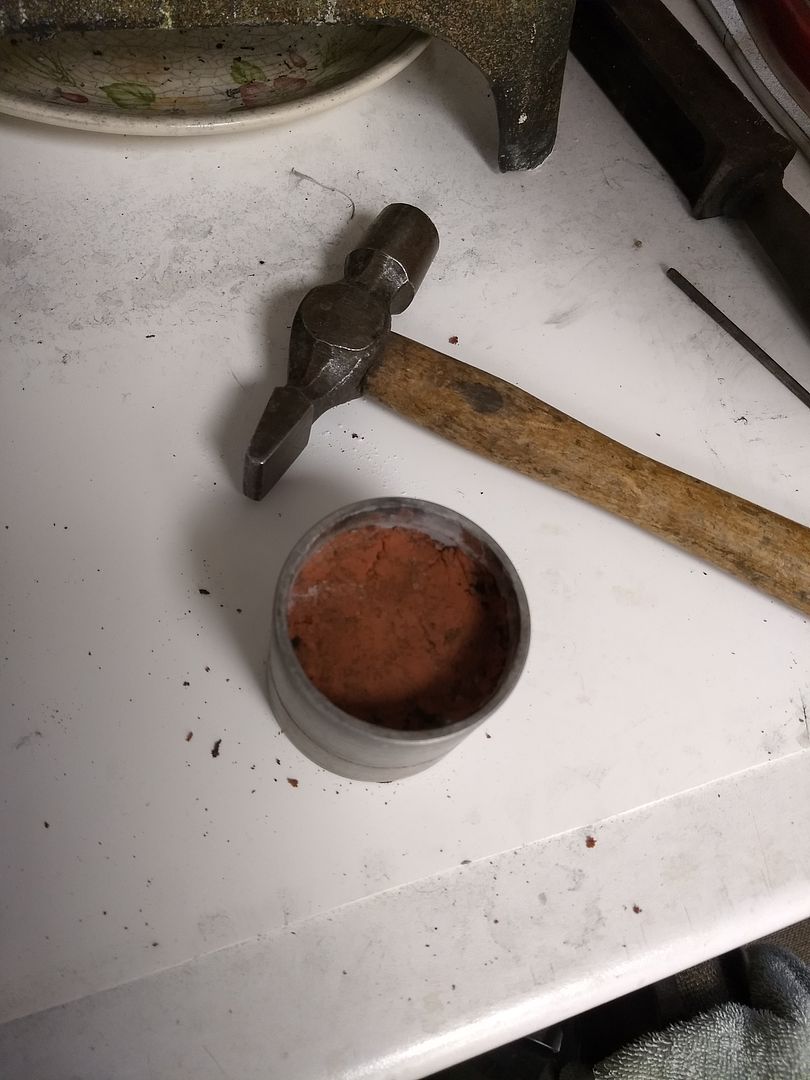
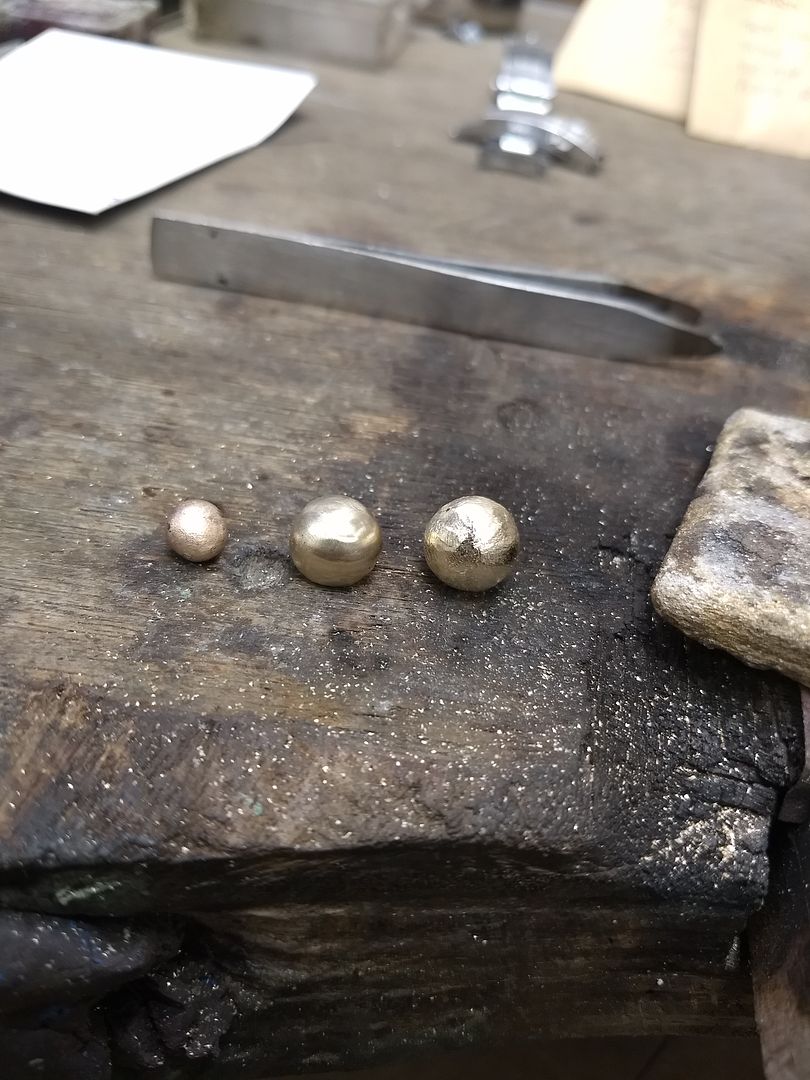
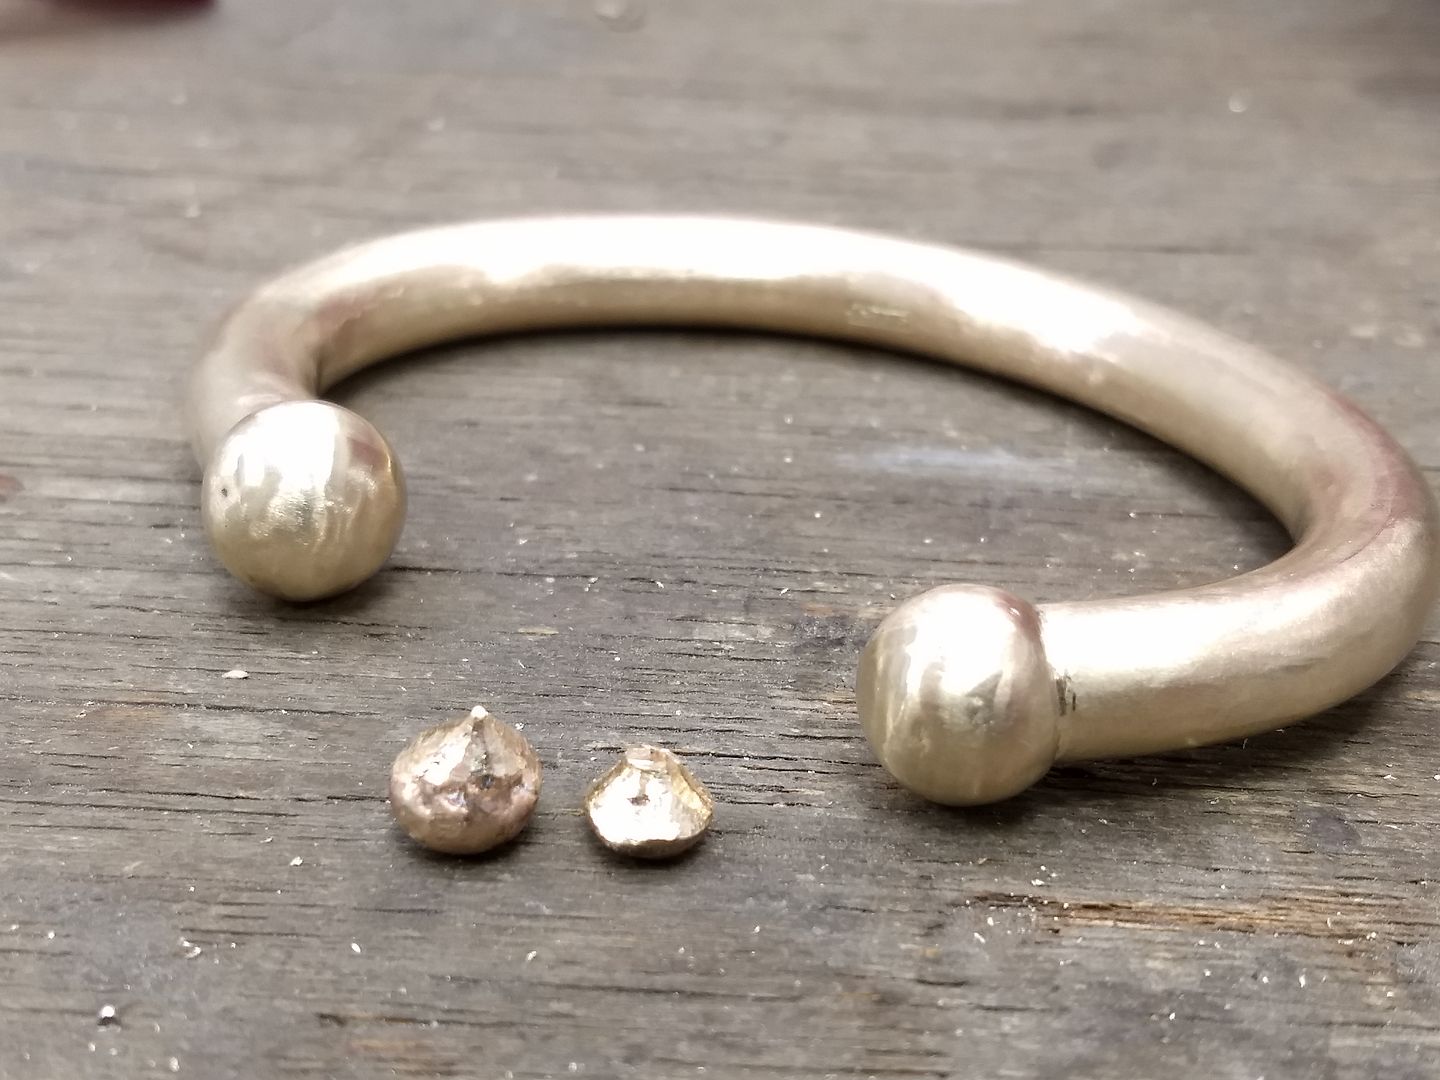
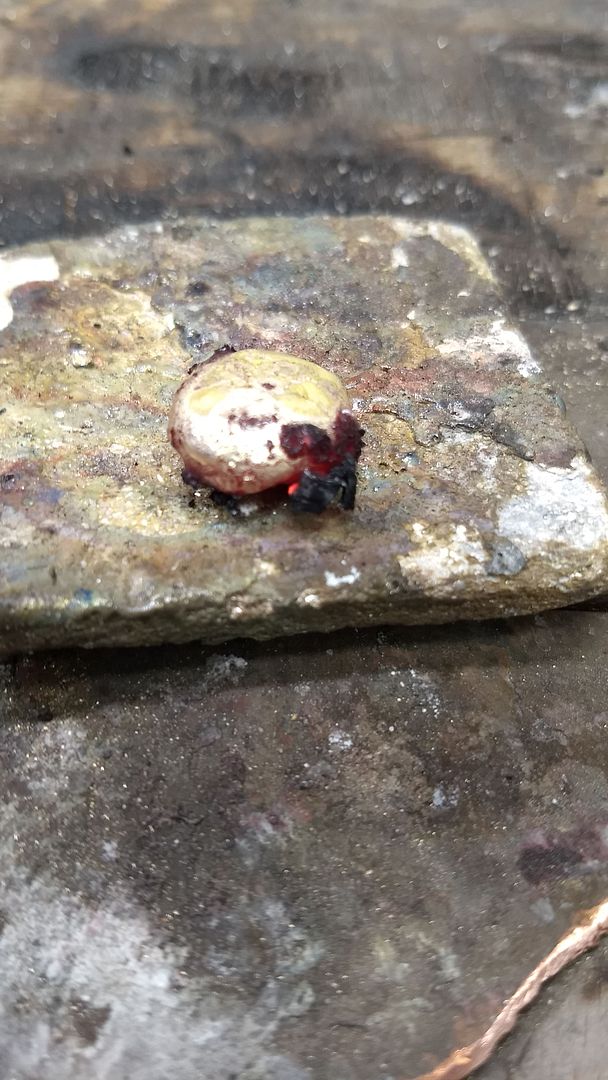
Out comes the casting clay and with a 12mm ball I turn the 2 x 10g cut offs into 2 x 10g casts:
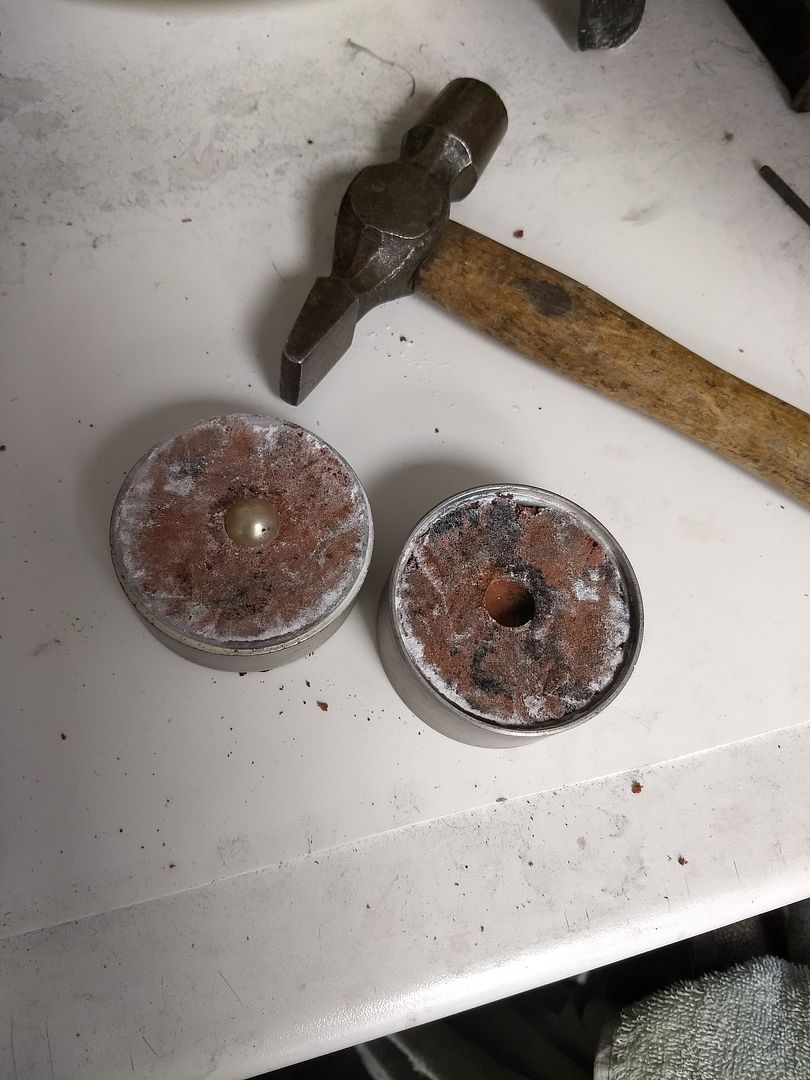
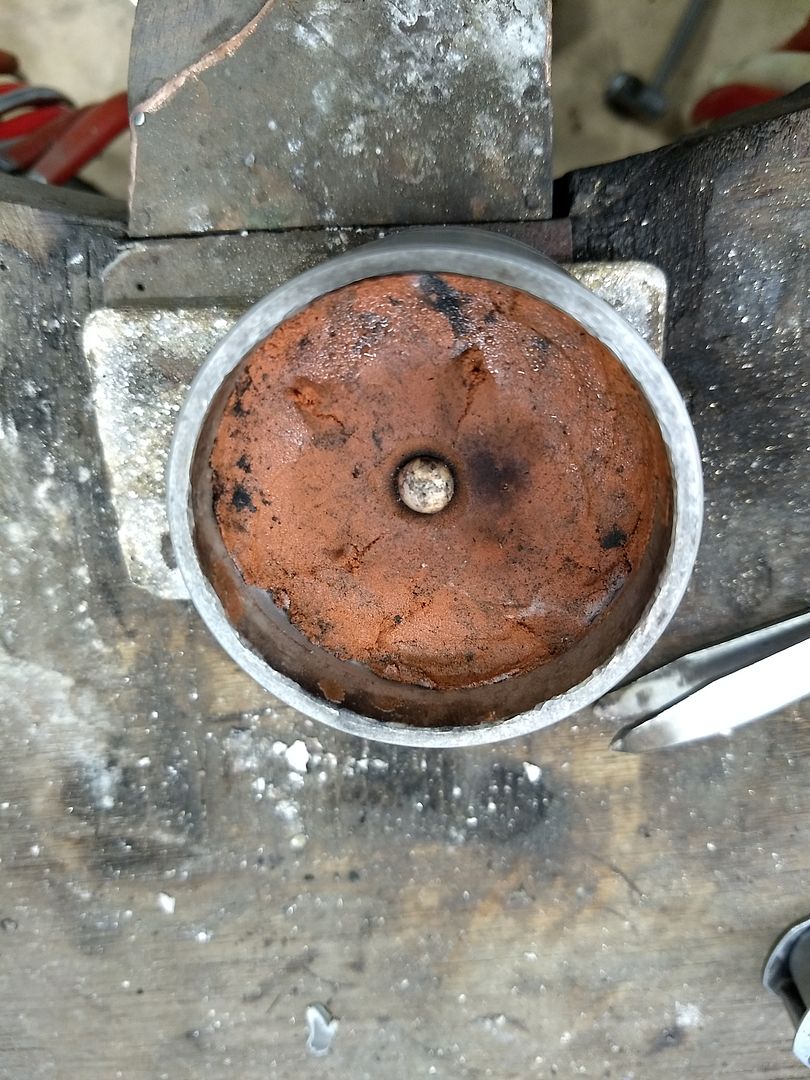
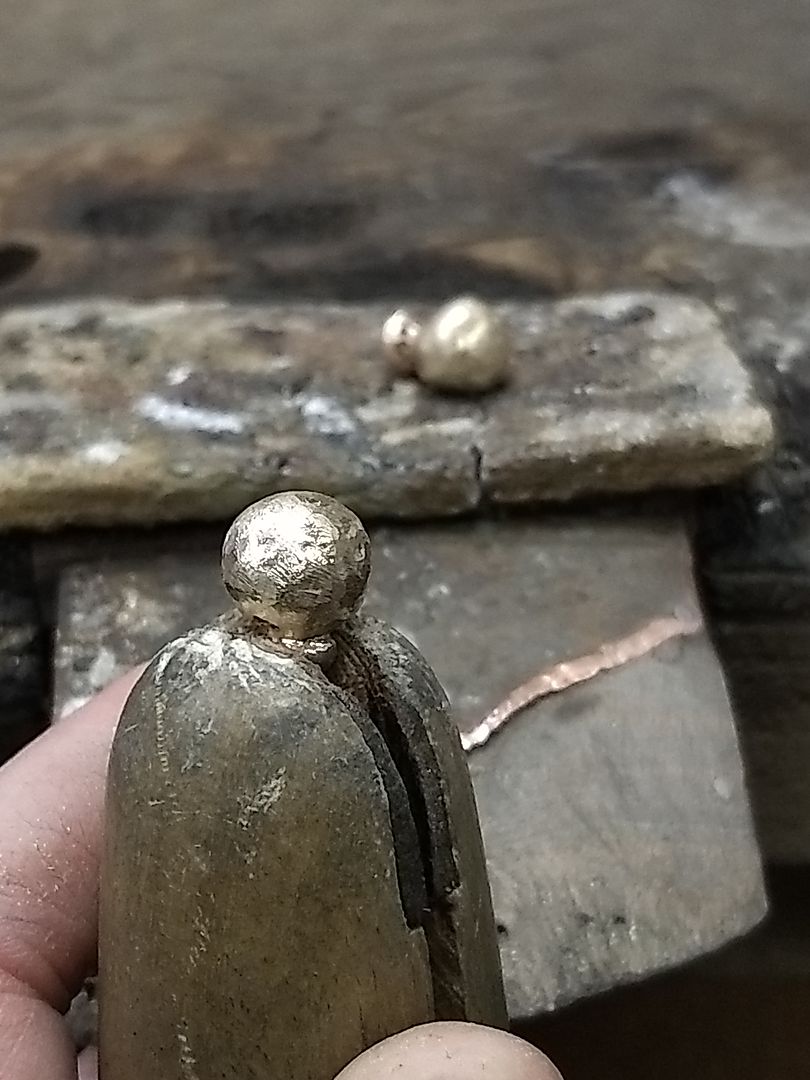
The balls are filed to a rough shape and size and the excess / sprue removed:
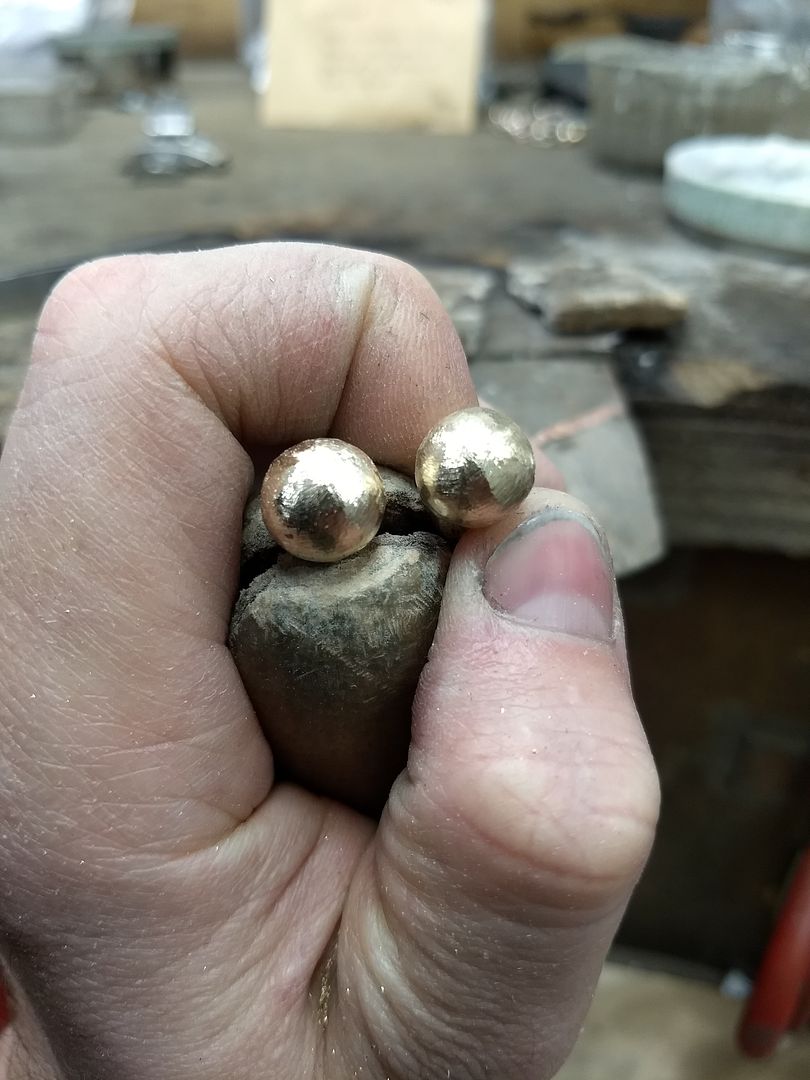
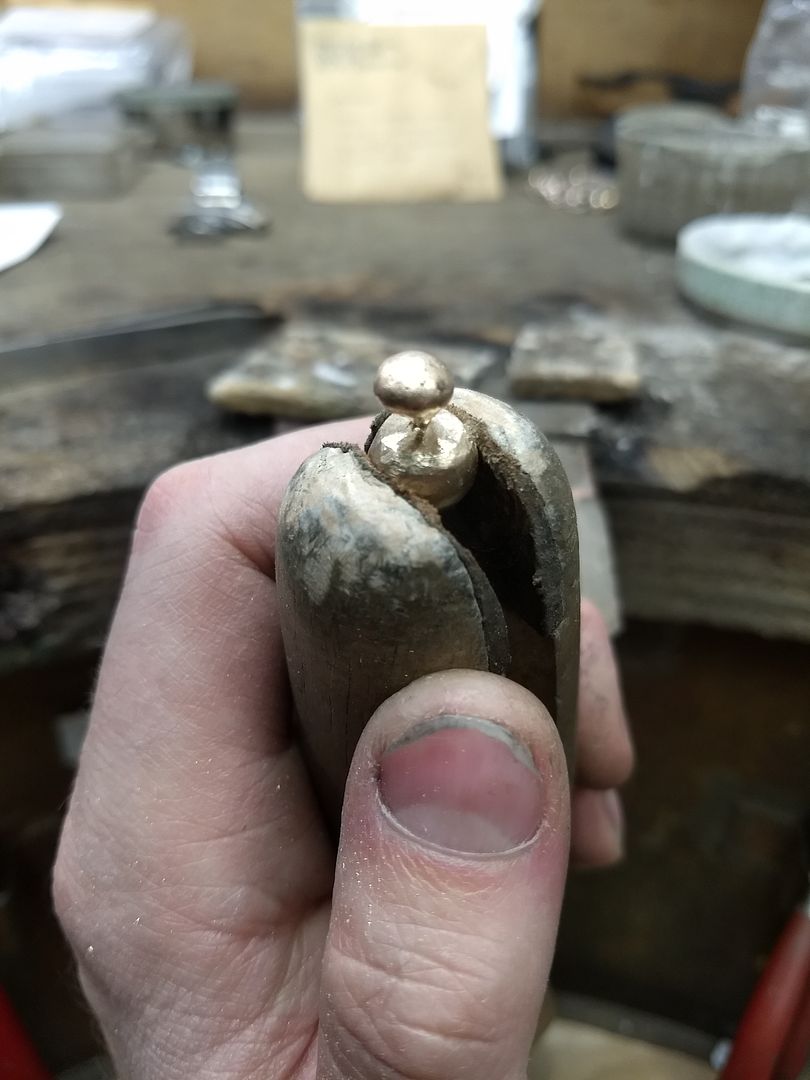
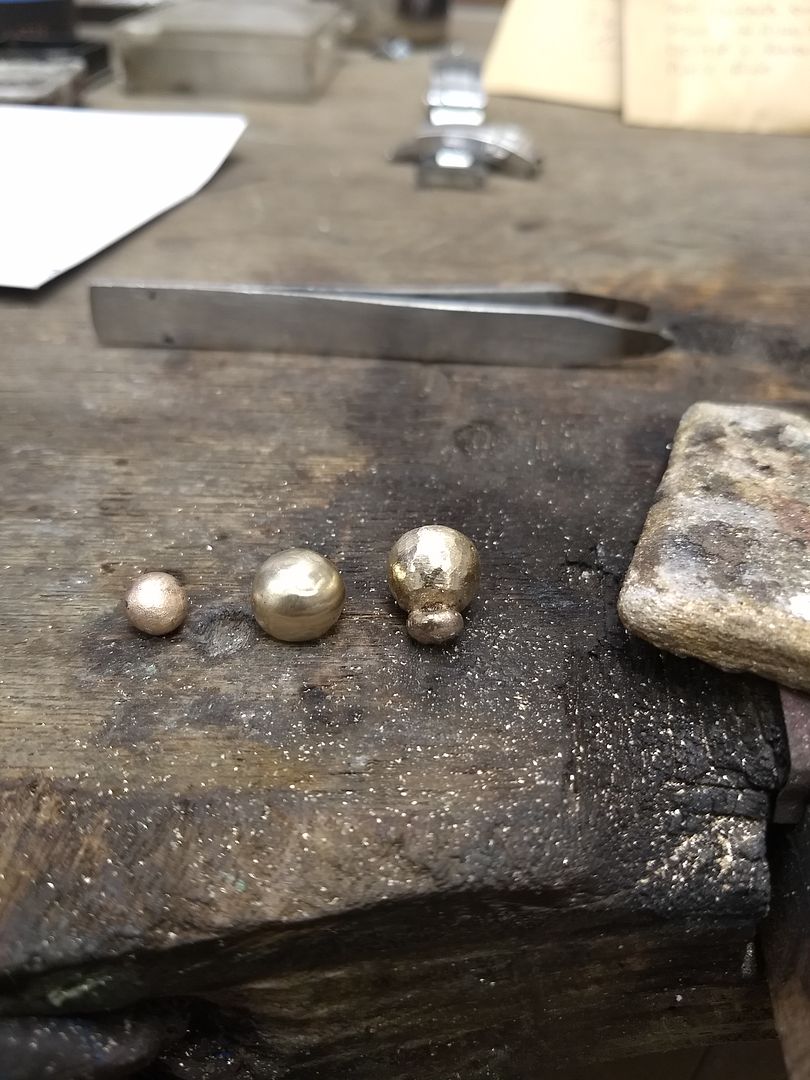
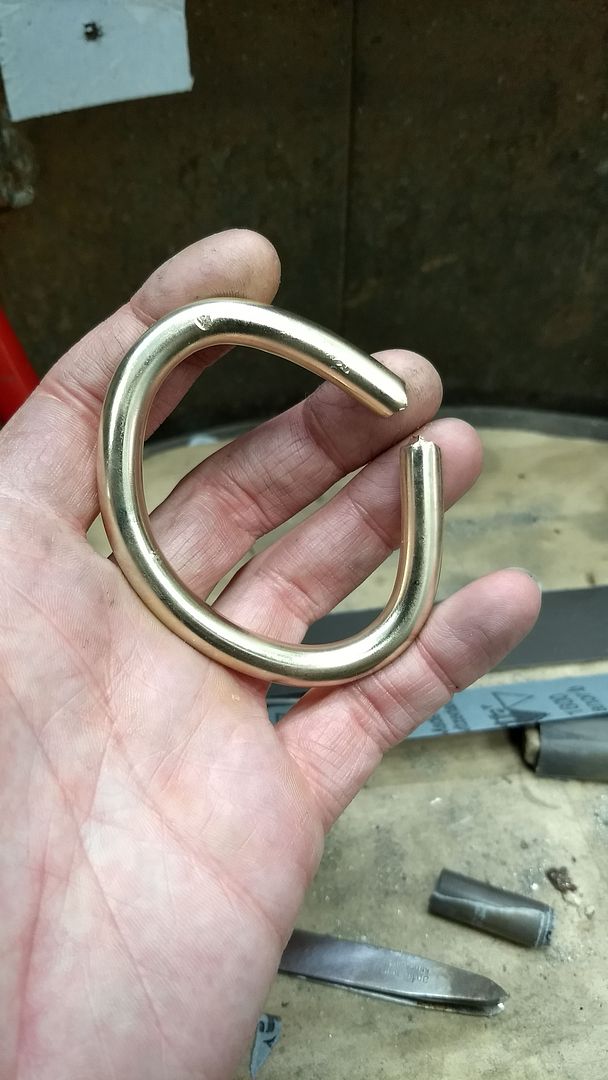
Once the balls are the required shape and size I flatted and then hollow out one end so the joint will be solid when it comes to soldering:
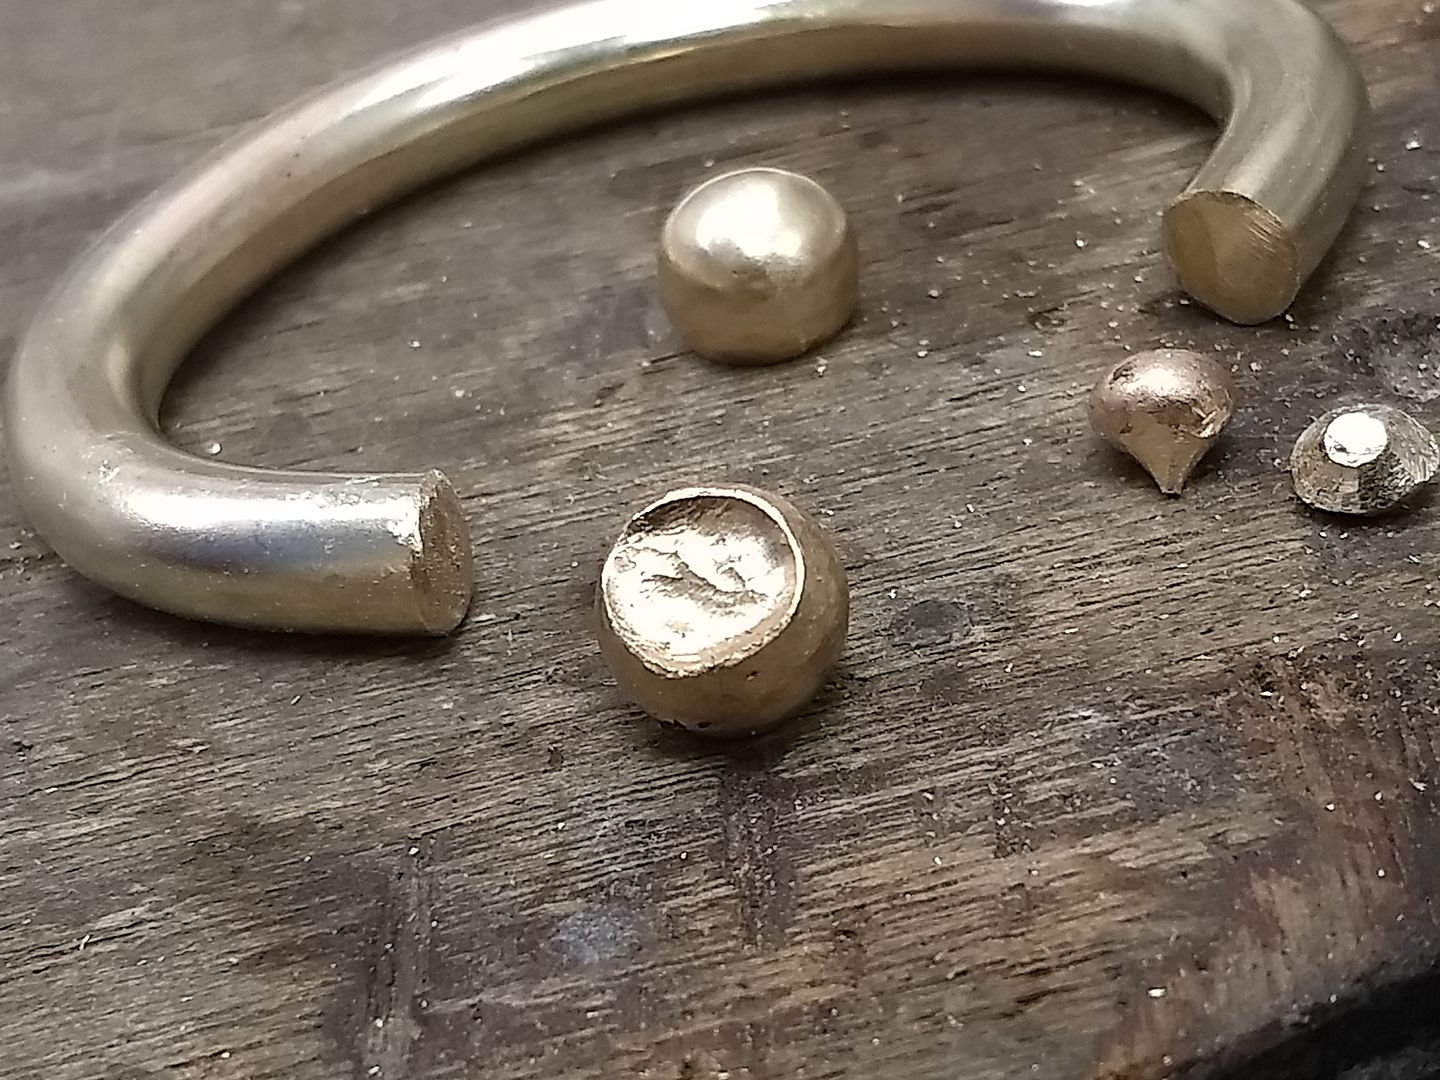
Soldered and cleaned:
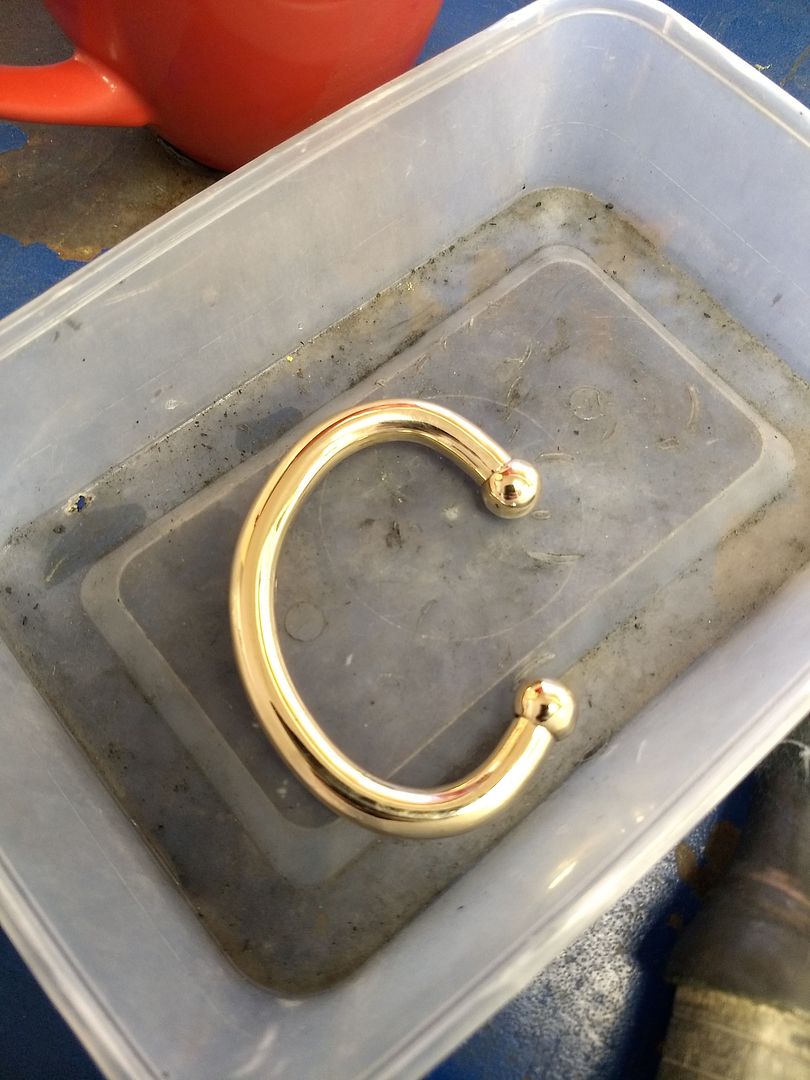
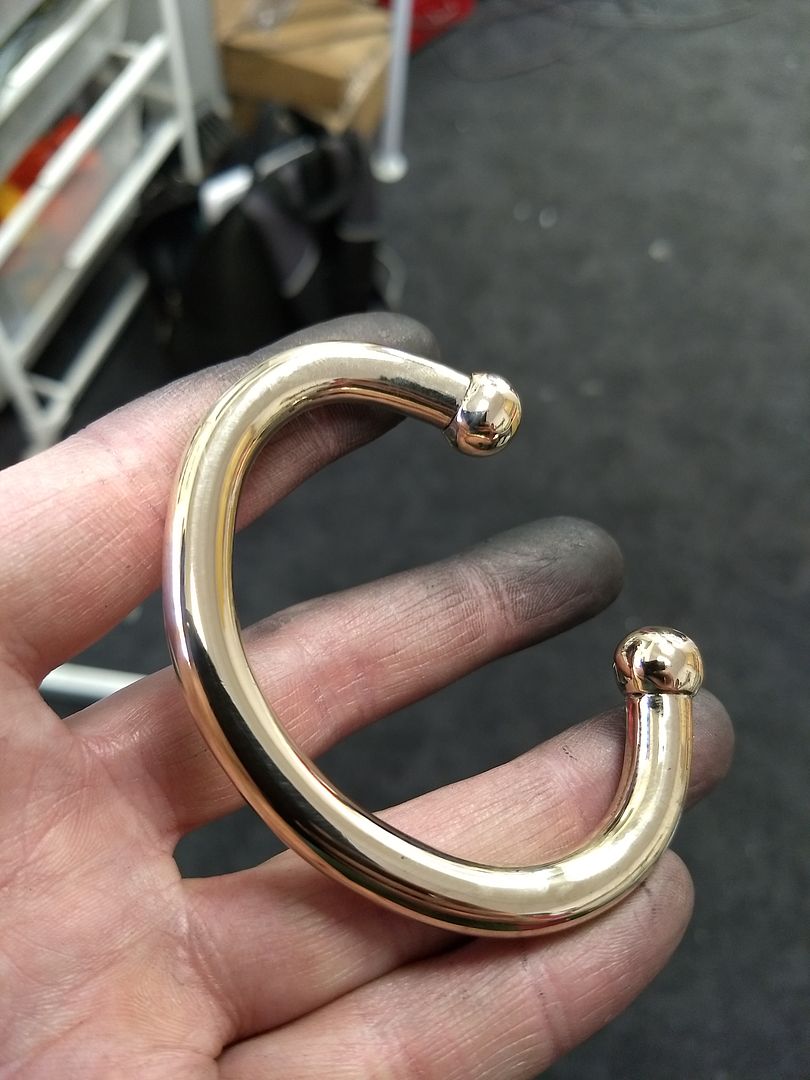
I'll buff it to remove any dents or marks from manufacture. You ideally want to do as little of this as possible so you don't lose weight. Of the 102g in the original bar the finished item weighed in at 93g and there was 3.5g in the 2 bits left over from the balls. That's pretty decent considering the filing, sawing and polishing that went on.
The bangle is then polished and it's job done for that little beauty. I'm half tempted to make a platinum one for stock

Eddie
What's news? It continues to be busy here at 'the bench' and there are plenty of ongoing and future projects to keep myself and my colleagues entertained. It's been a funny old year in the trade and we continue to fight the growing tide that is modern consumer demand and expectations. They are modern day business perks I know, but I feel more than ever that there will come a time when my tolerance runs out and I go looking for new and less emotionally demanding employment. That's a whole other topic so I will just crack on with the latest 'stuff' to leave the workshop.......
Job number 1 has been popping in and out of my sight for a while and is a result of a customers unhappiness with another outlet. He bought what was a 9ct white gold and diamond (only just) engagement ring and as expected it's not lasted long and they've gone around the houses to recover the money that was spent at sale. In a nutshell the cheap and cheerful thing came and bit them. So, where do I come in? I wrote the report that secured the refund and as a reward they have instructed me to produce a new one, in platinum. The budget was tight coming out of a 9ct ring so I suggested that to achieve a near replica of the old ring we needed to buy an off-the-shelf mount and modify it to suit.
Here's the original item:
She was really keen to keep the heart details on the sides so we set to work. I got hold of a pre set mount (diamonds already in the shoulders) and rolled some platinum wire. This is shaped and tacked into place to begin the makings of a new setting:
A few more light welds and the wires are in place:

A piece of 2.5mm platinum tube is then cut and notched at the 4 corners before being slipped into the middle of the 4 wires and soldered in place. This is the middle rim of the setting.

With a bore I shape this inner rim and you see the heart appear.

Some filing and grinding later (and soldering to fill joints and gaps) the sides are profiled to suit.

The metal is tidied up and then checked for anything that might cause issues later on:


A nice G VS quality 0.25ct brilliant cut diamond will finish off the piece and is the biggest upgrade over the original stone. They were sold a J SI3 in the 9ct ring. When I started the job 11 years ago I don't think there even was an SI3, that's how much the market has changed. Diamonds of such quality were termed as PK or industrial grade, the same goes for the now fashionable chocolate diamonds. They used to be the crap nobody wanted,

We had her wedding ring to size with the job so once the engagement ring was set and complete the 2 rings were polished and given a good rhodium plating to show them off to their fullest:


Job 2 is of a similar style. The customer wants something different to the norm but is too similar to an existing style to warrant spending large sums on a custom scratch build. Here is the spec: Regular tapered diamond set shoulder but with a round setting at the top and millgrained edges.


Here's what I did:
The customer had spent a while with us and had chosen a nice 0.70ct old cut diamond. It's got a good spread and is lovely and white with a characterful 'eye' in the middle. A platinum mount was ordered and some 2.5mm platinum tubing:

The shoulder is cut at the setting and the ends rounded off (concave) to accept the tube. The tube is then soldered in place:

The tube is cut down to length and the other piece soldered in exactly the same way:


This is then tidied up and the ring sized for the customers finger:


A pair of 2mm diamonds are set in the round settings and I get on with the millgrain finish (personally not a fan): The tool I use is literlly just a graining tool, which is a hollow tipped pointer thing that we use for setting small stones. It makes nice round marks


The centre stone is set (you can see the eye in this pic) and then the ring is finished by polishing and rhodium plating:


Ok, that's the rings done. Here is the bruiser bangle.
Remember the huge, 50g+ solid 9ct heart I made last year for the lady who already had the really heavy chain?

This year she's getting a bangle:
Take 1 x 8mm round wire bar. All 102g of it:


And the idea:

9ct gold is bloody hard even with heating so I had to employ the vice for the bending:


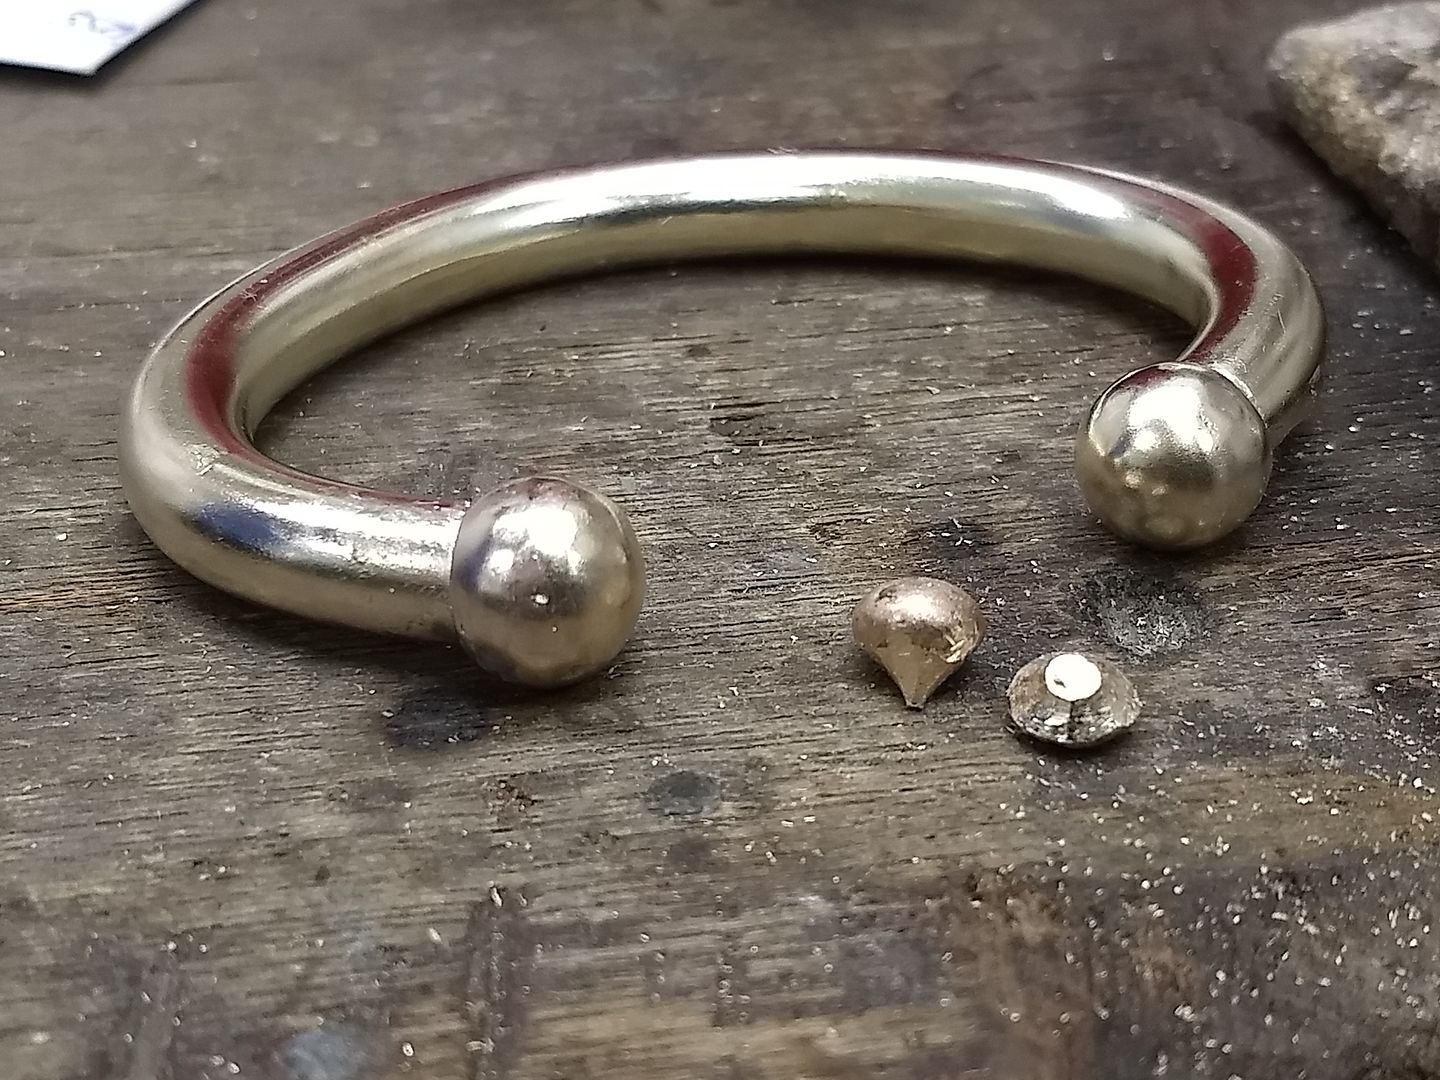
The excess length is removed and these will be used to produce the balls on the ends:

Out comes the casting clay and with a 12mm ball I turn the 2 x 10g cut offs into 2 x 10g casts:


The balls are filed to a rough shape and size and the excess / sprue removed:


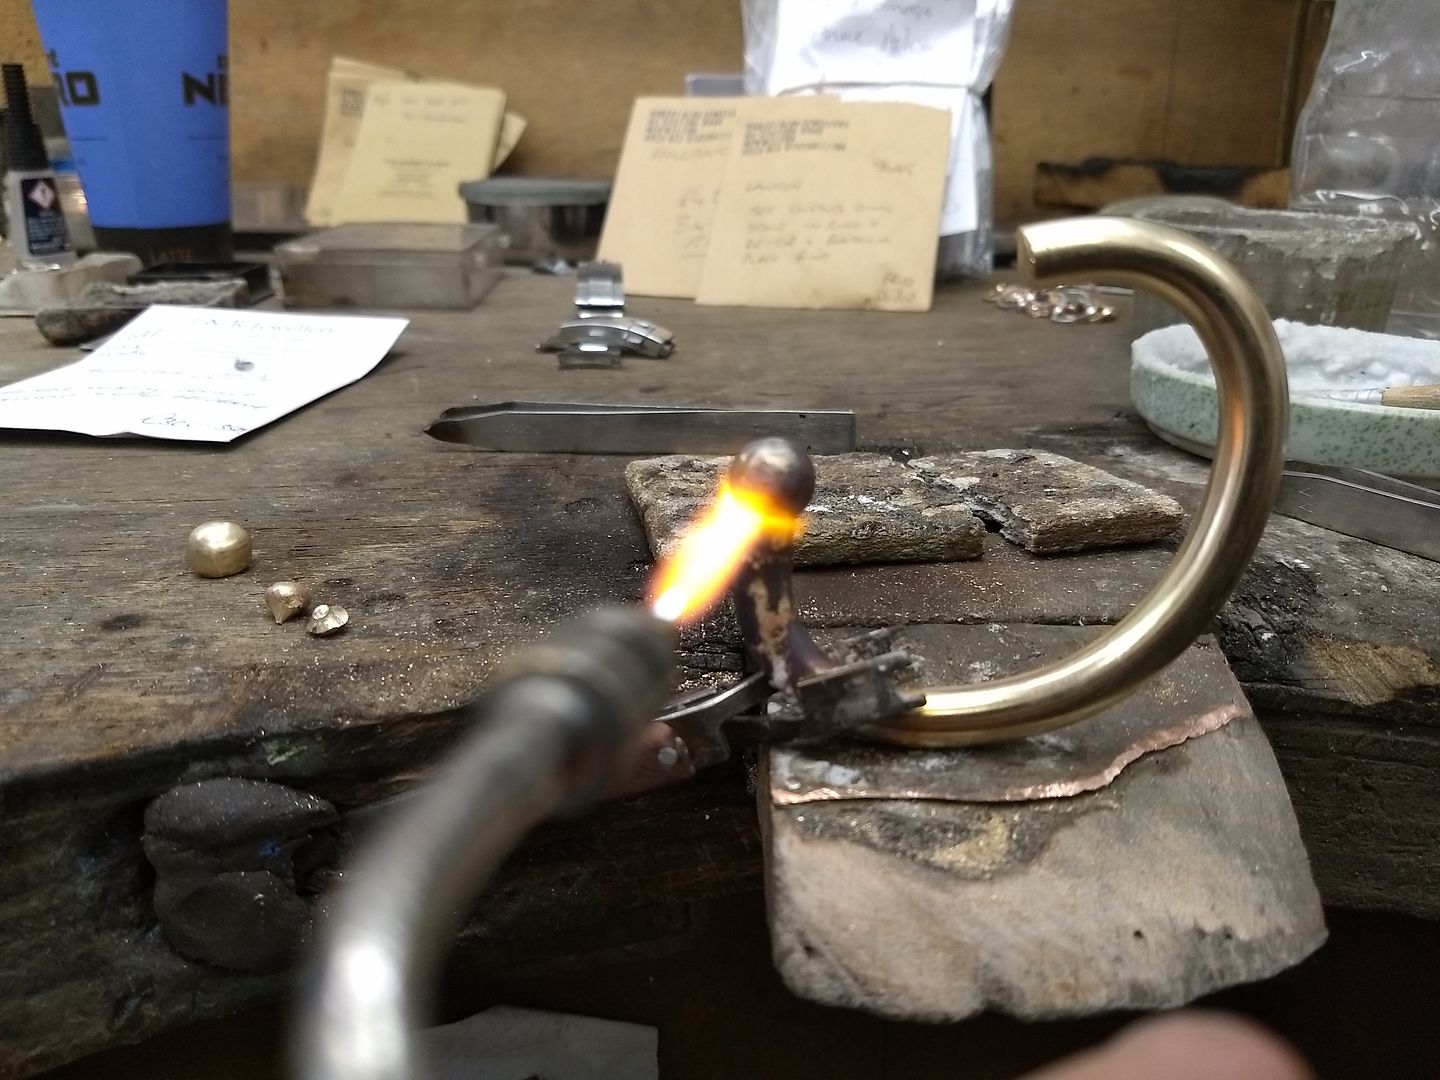
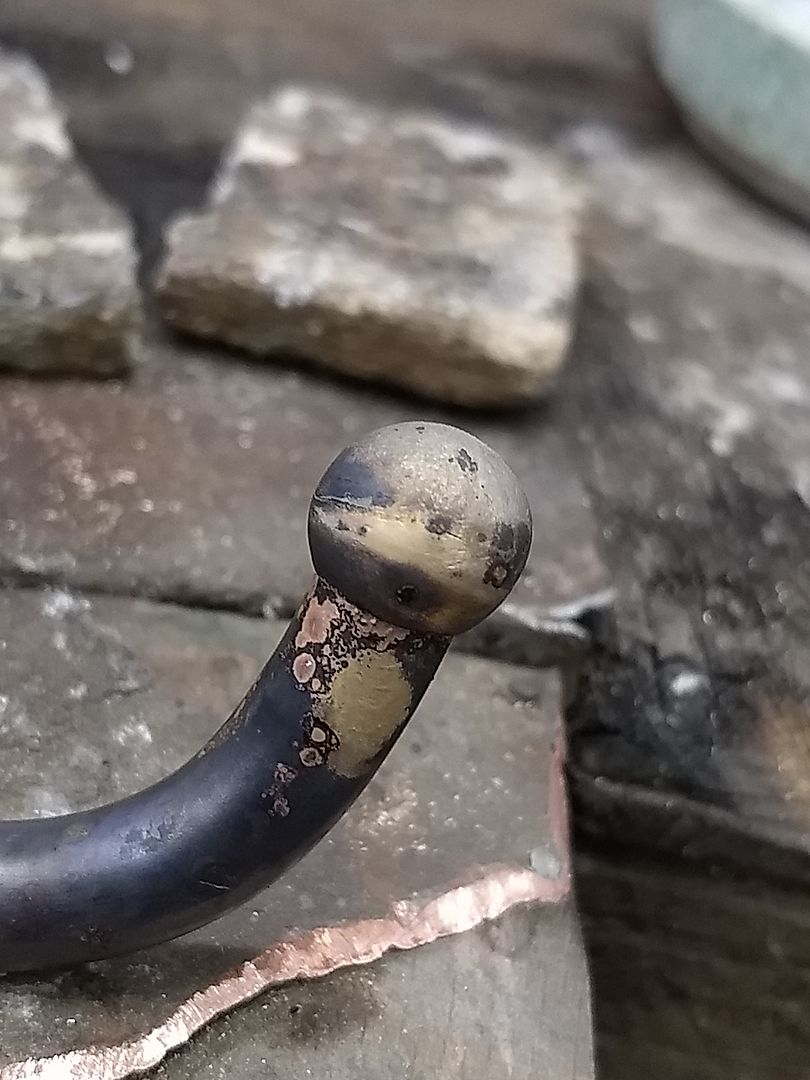
Once the balls are the required shape and size I flatted and then hollow out one end so the joint will be solid when it comes to soldering:


Soldered and cleaned:

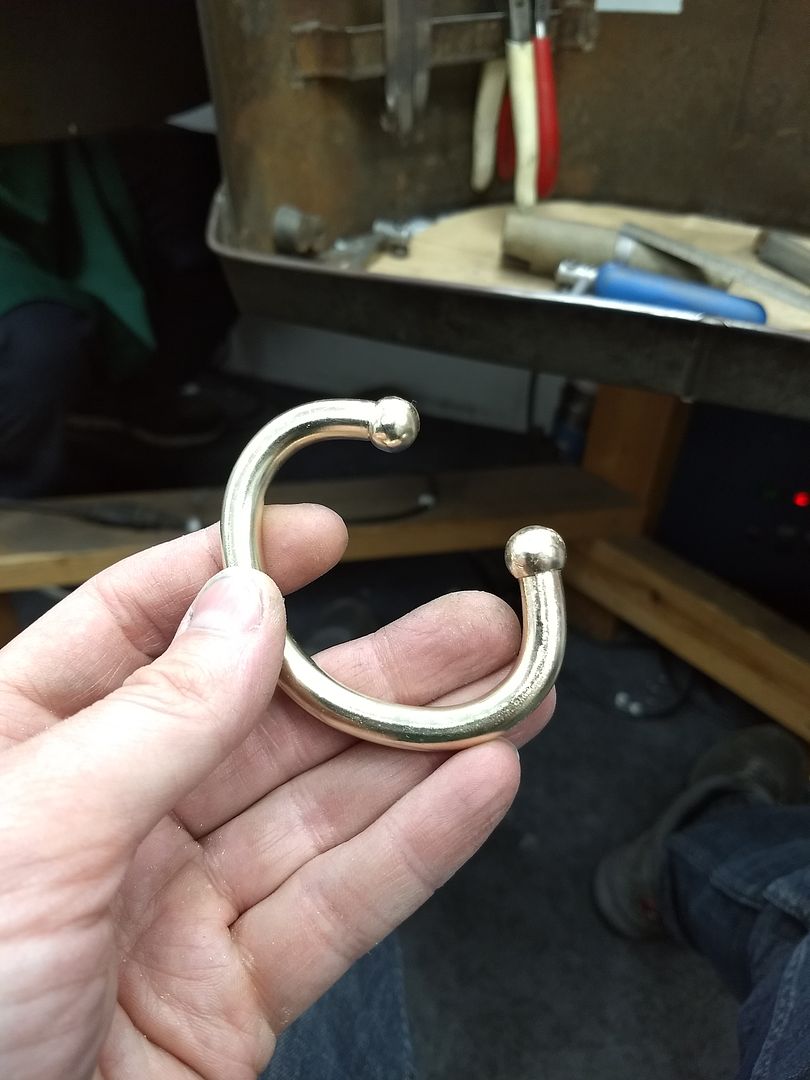
I'll buff it to remove any dents or marks from manufacture. You ideally want to do as little of this as possible so you don't lose weight. Of the 102g in the original bar the finished item weighed in at 93g and there was 3.5g in the 2 bits left over from the balls. That's pretty decent considering the filing, sawing and polishing that went on.


The bangle is then polished and it's job done for that little beauty. I'm half tempted to make a platinum one for stock


Eddie
pincher said:
Lovely work as always Eddie 
Do you always document the ‘build’ with photos, or only if the client requests it? And how much notice do you need to make something custom - weeks or months?
It depends what it is really. If it's an interesting or unusual job then i may take a few pics for our facebook page or for the customer to use as a reference. But it's not a given with every item. Obviously if the customer asks at the beginning then I'll do a full set.Do you always document the ‘build’ with photos, or only if the client requests it? And how much notice do you need to make something custom - weeks or months?
Turnaround times are also job and material dependant. If it's easy then a few days will sometimes do, occasionally quicker. For engagement rings and other projects that require building or designing then anything from a couple of weeks to a couple of months with a bit of notice needed initially to get diamonds in for viewing or a customer visit. I have been known to do jobs very quickly if the circumstances dictate, but that's always a price vs family life negotiation as I value my time at home given it's so limited these days.
Oh you lucky people. 2 updates in a week 
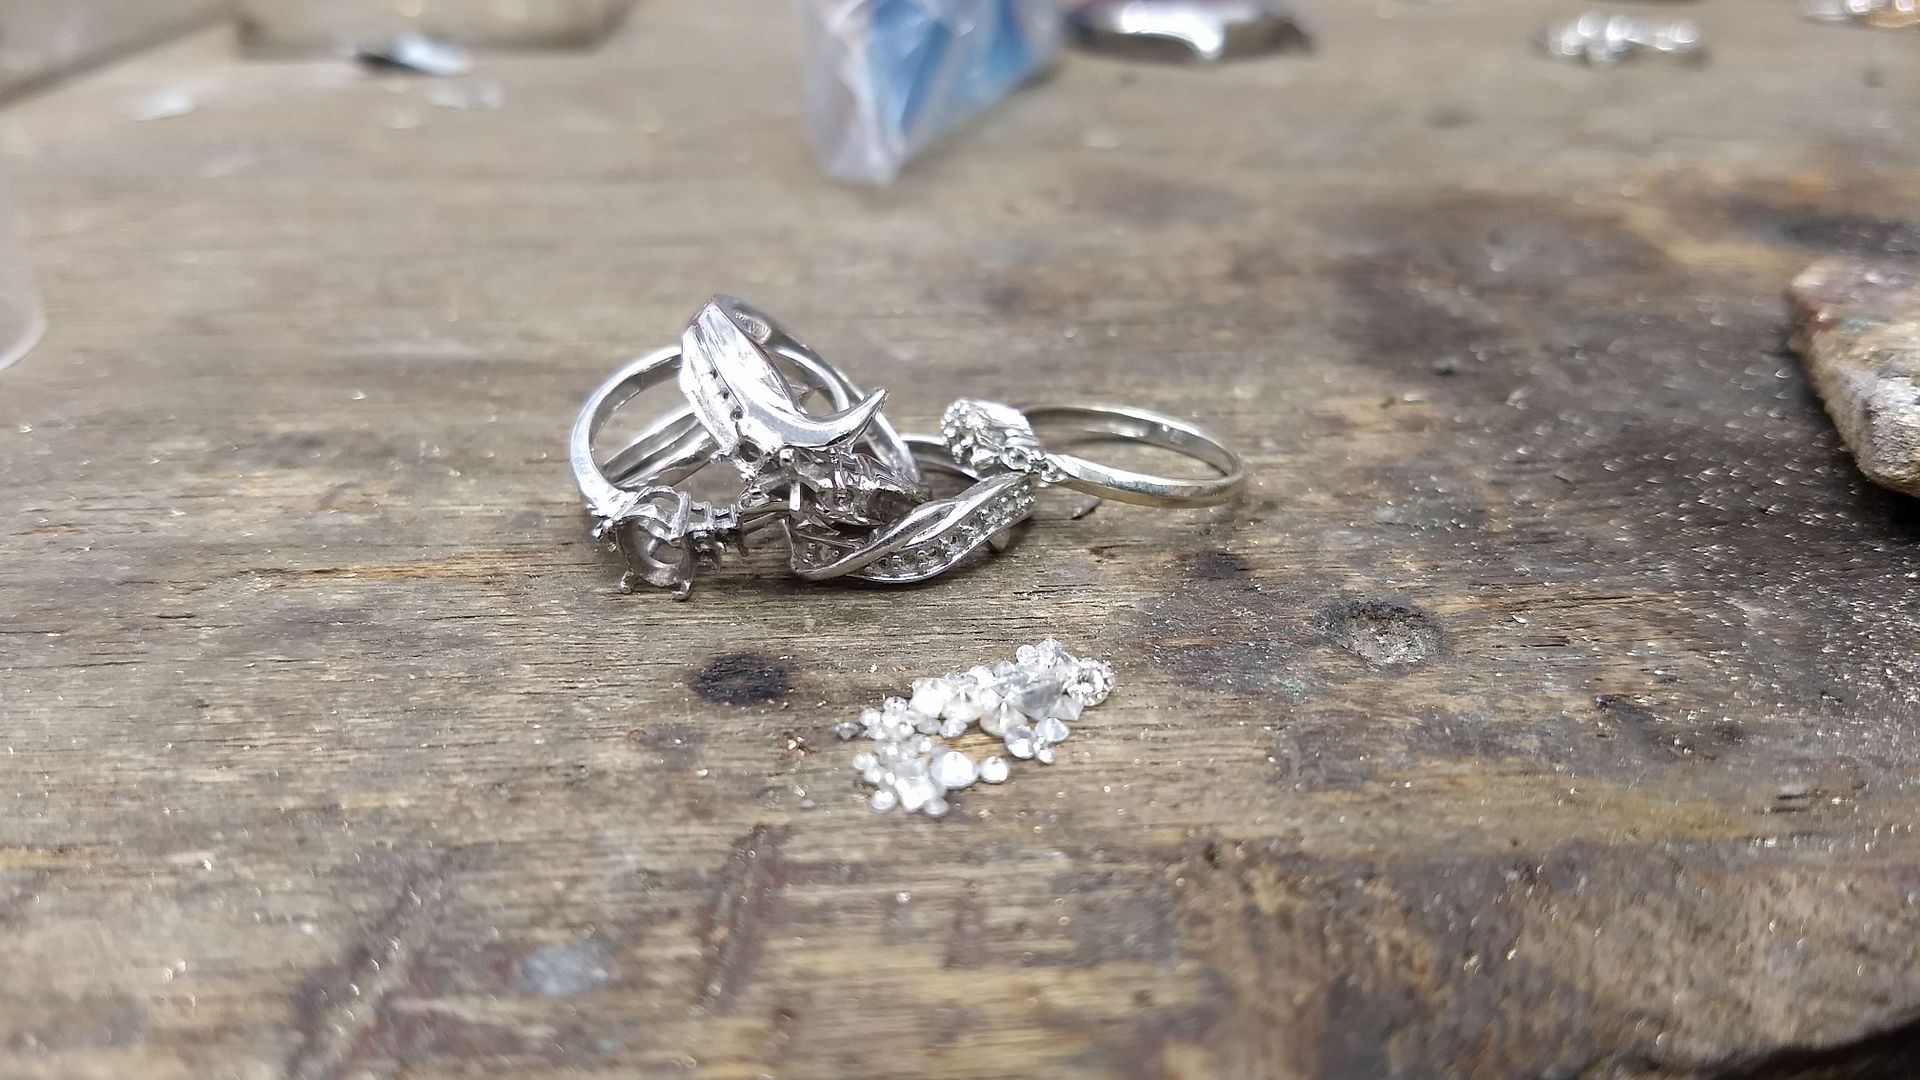
So, what do we have this time? A job that I enjoyed for a change, and one that I feel proud of and am sure the owner will appreciate. It's for the better half of a fellow PHer btw. As was mentioned before they came in to see me with children and crisps. The good lady had some white gold and diamond rings and wanted to melt them down to make something new. This was the (rough-ish) guide:
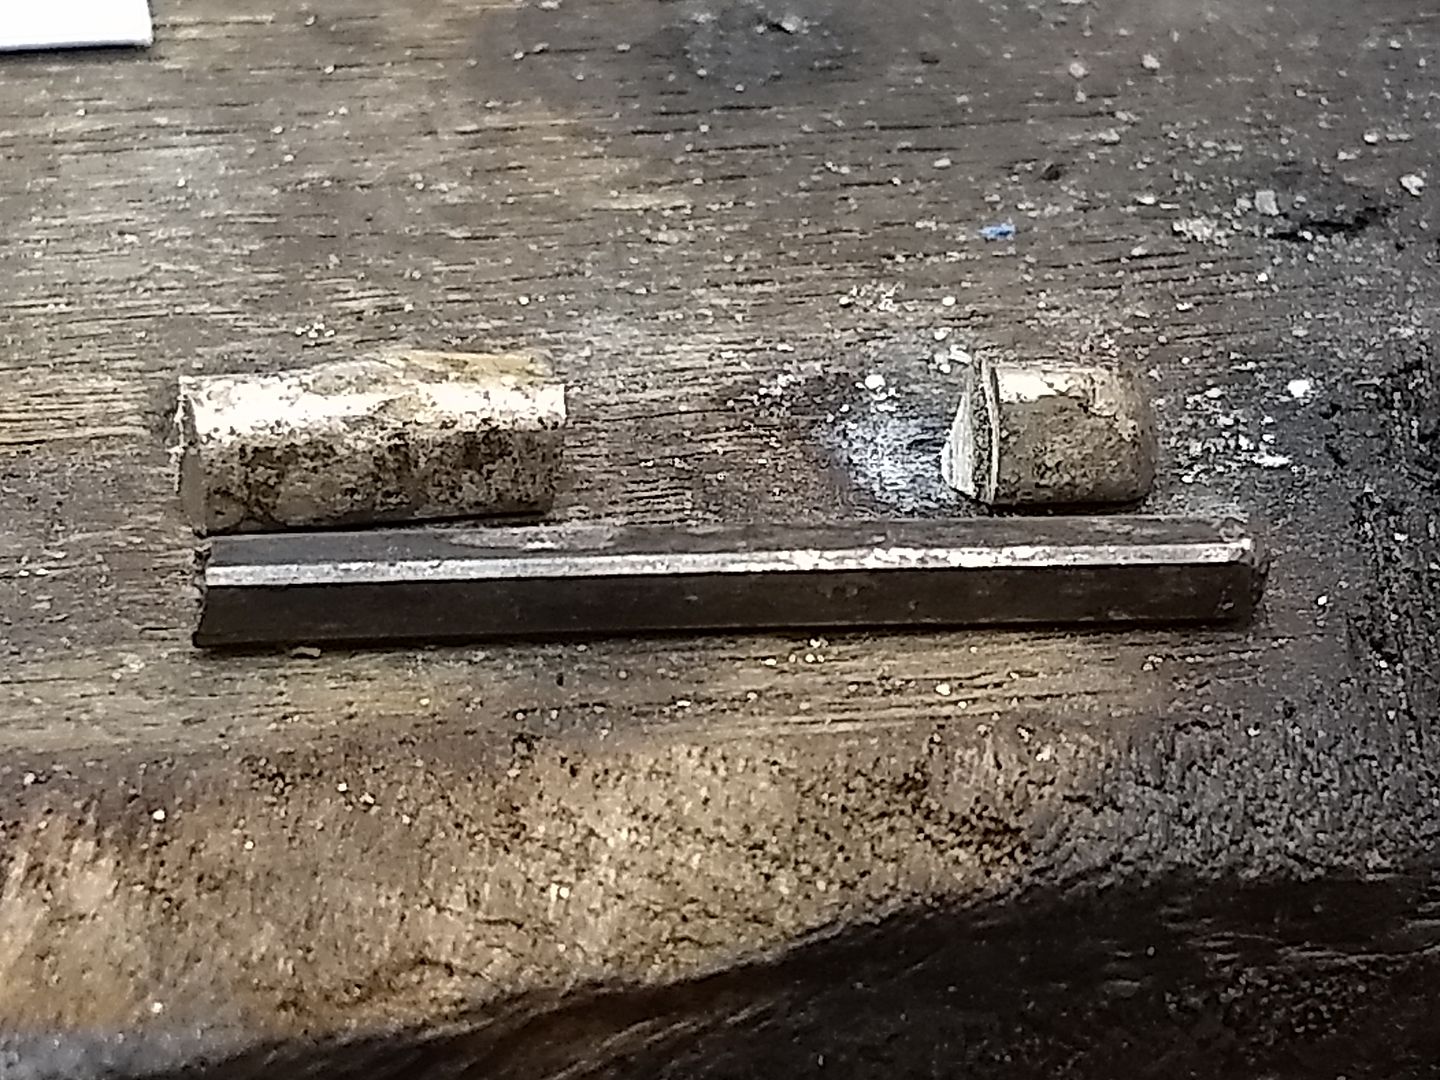
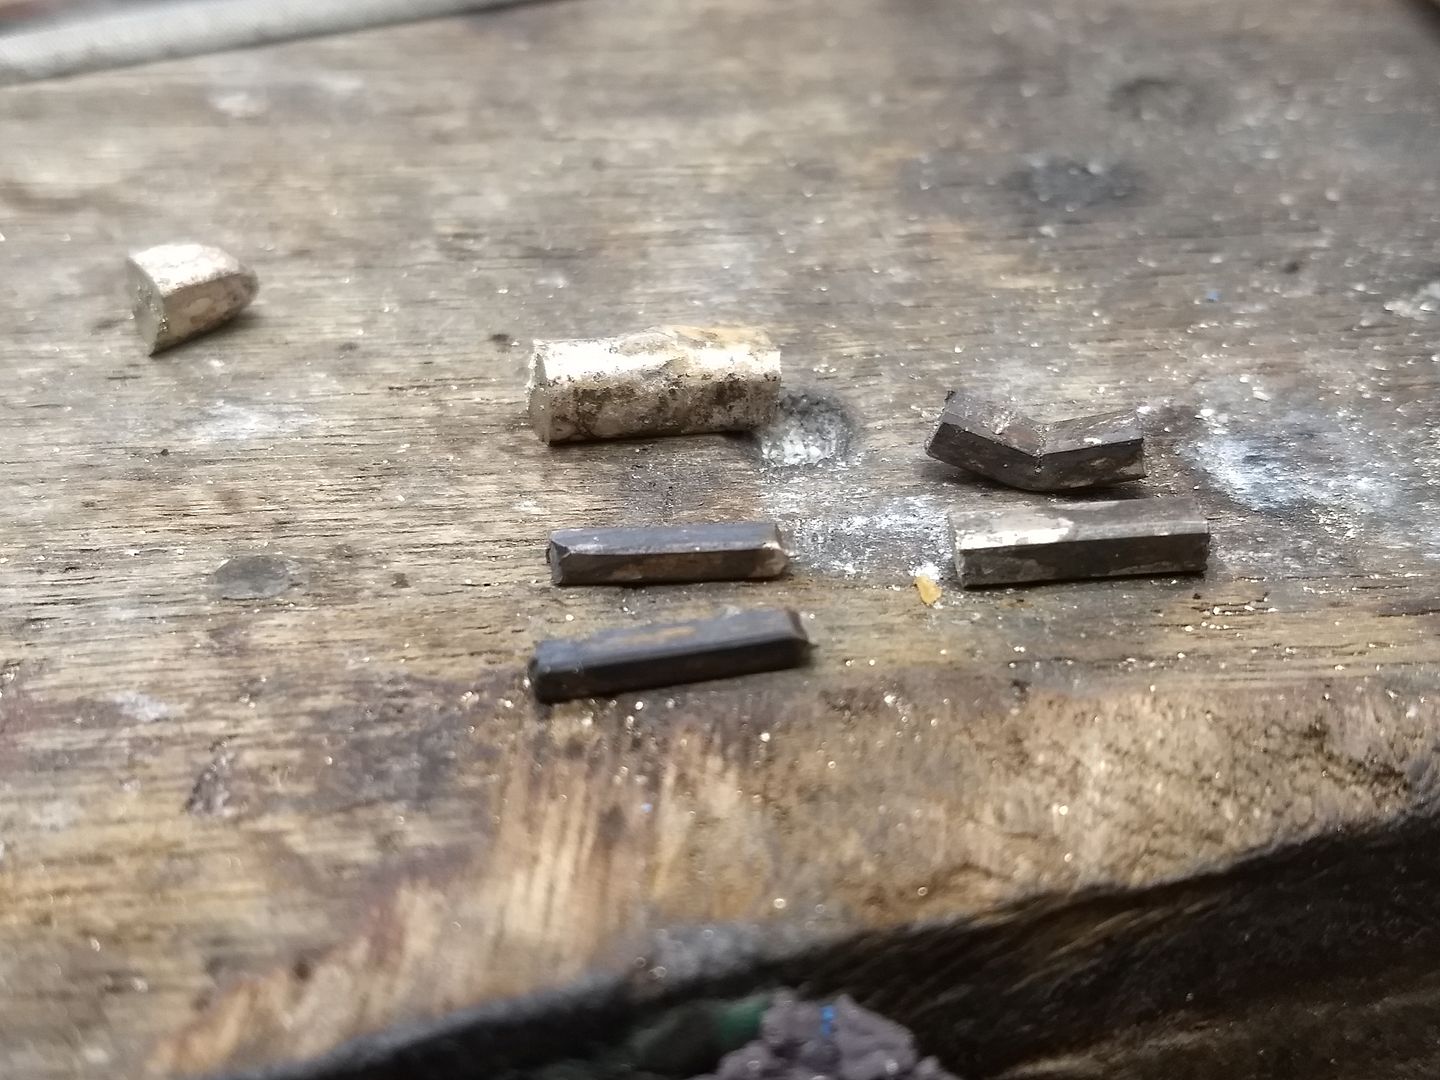
And here are the deconstructed rings we'll use:
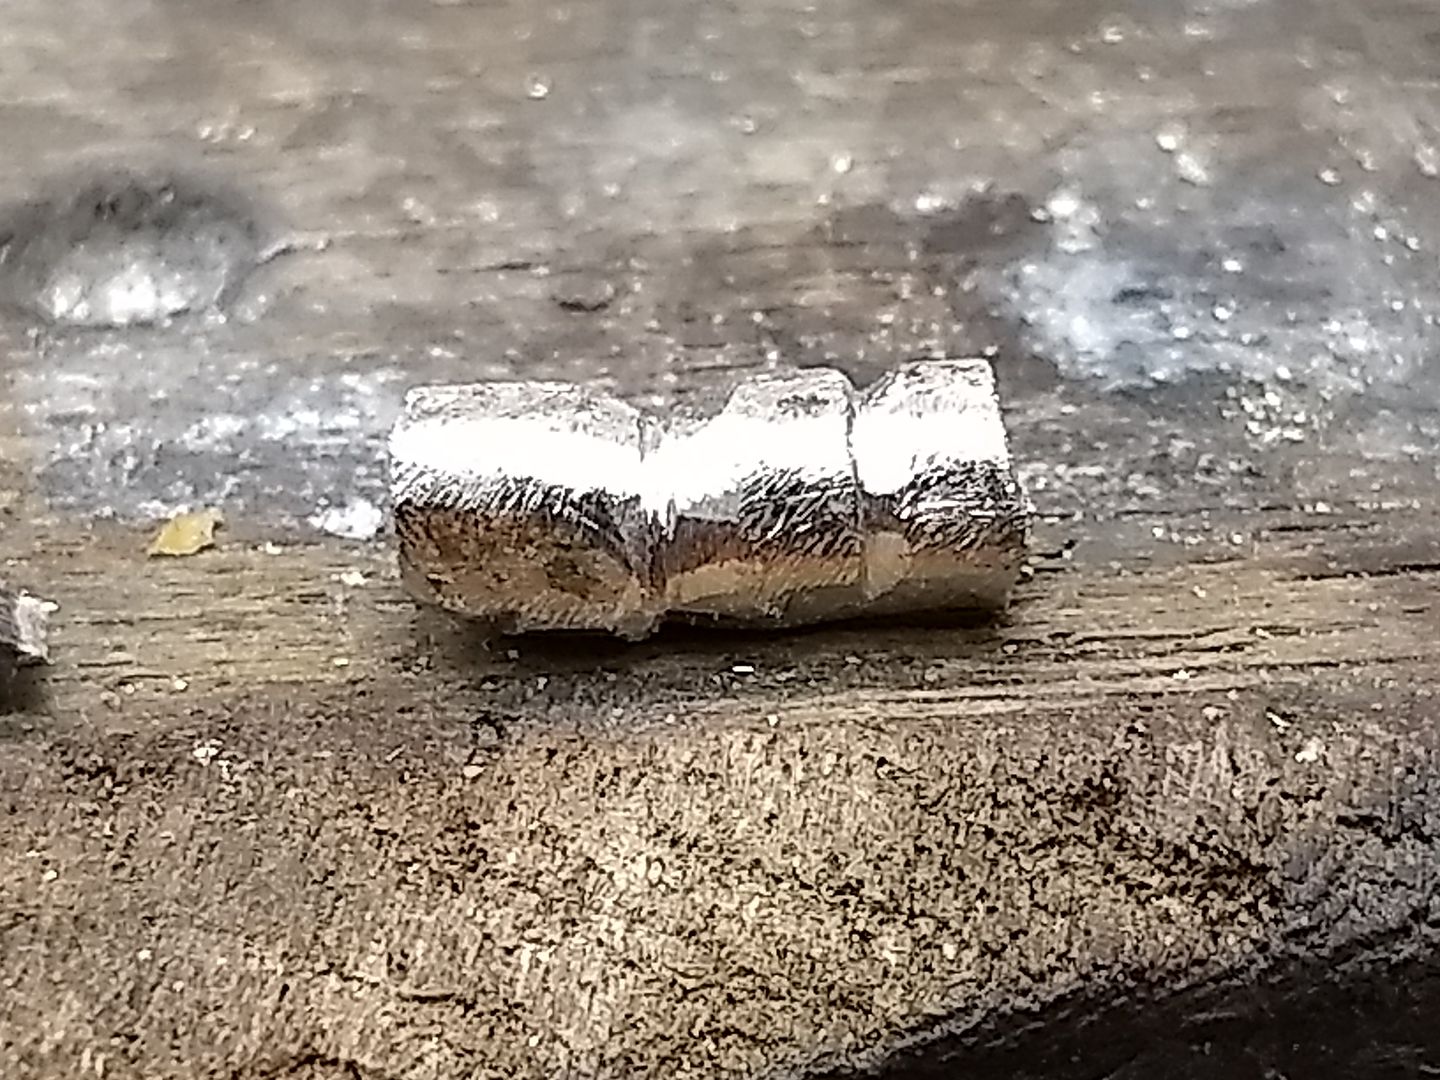
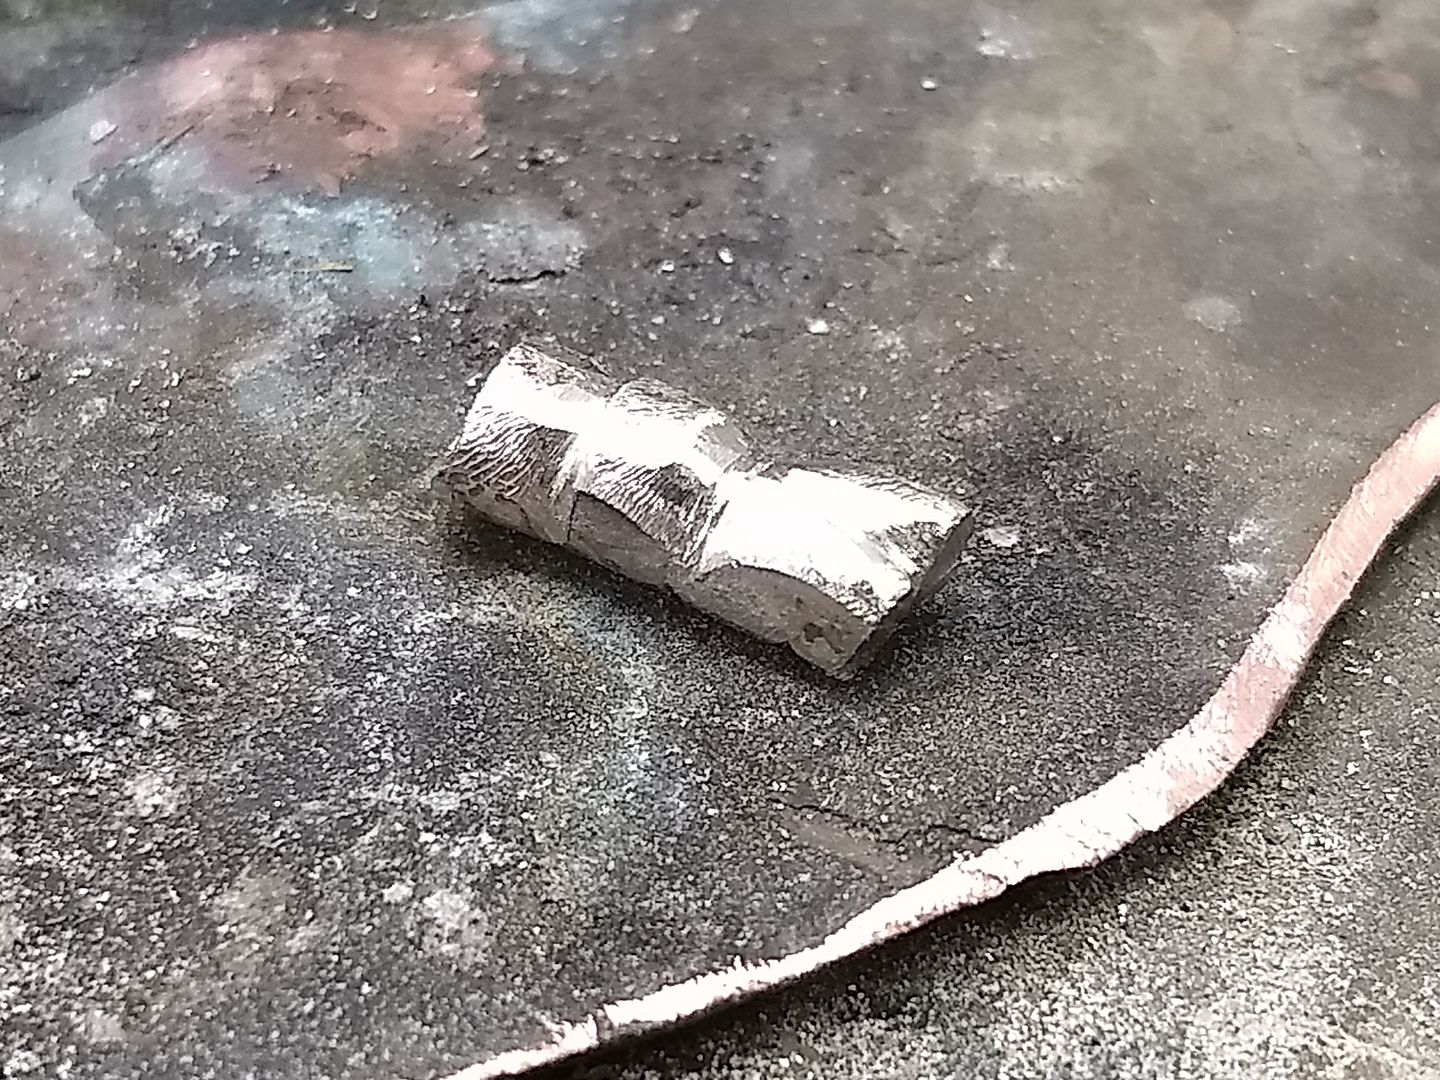
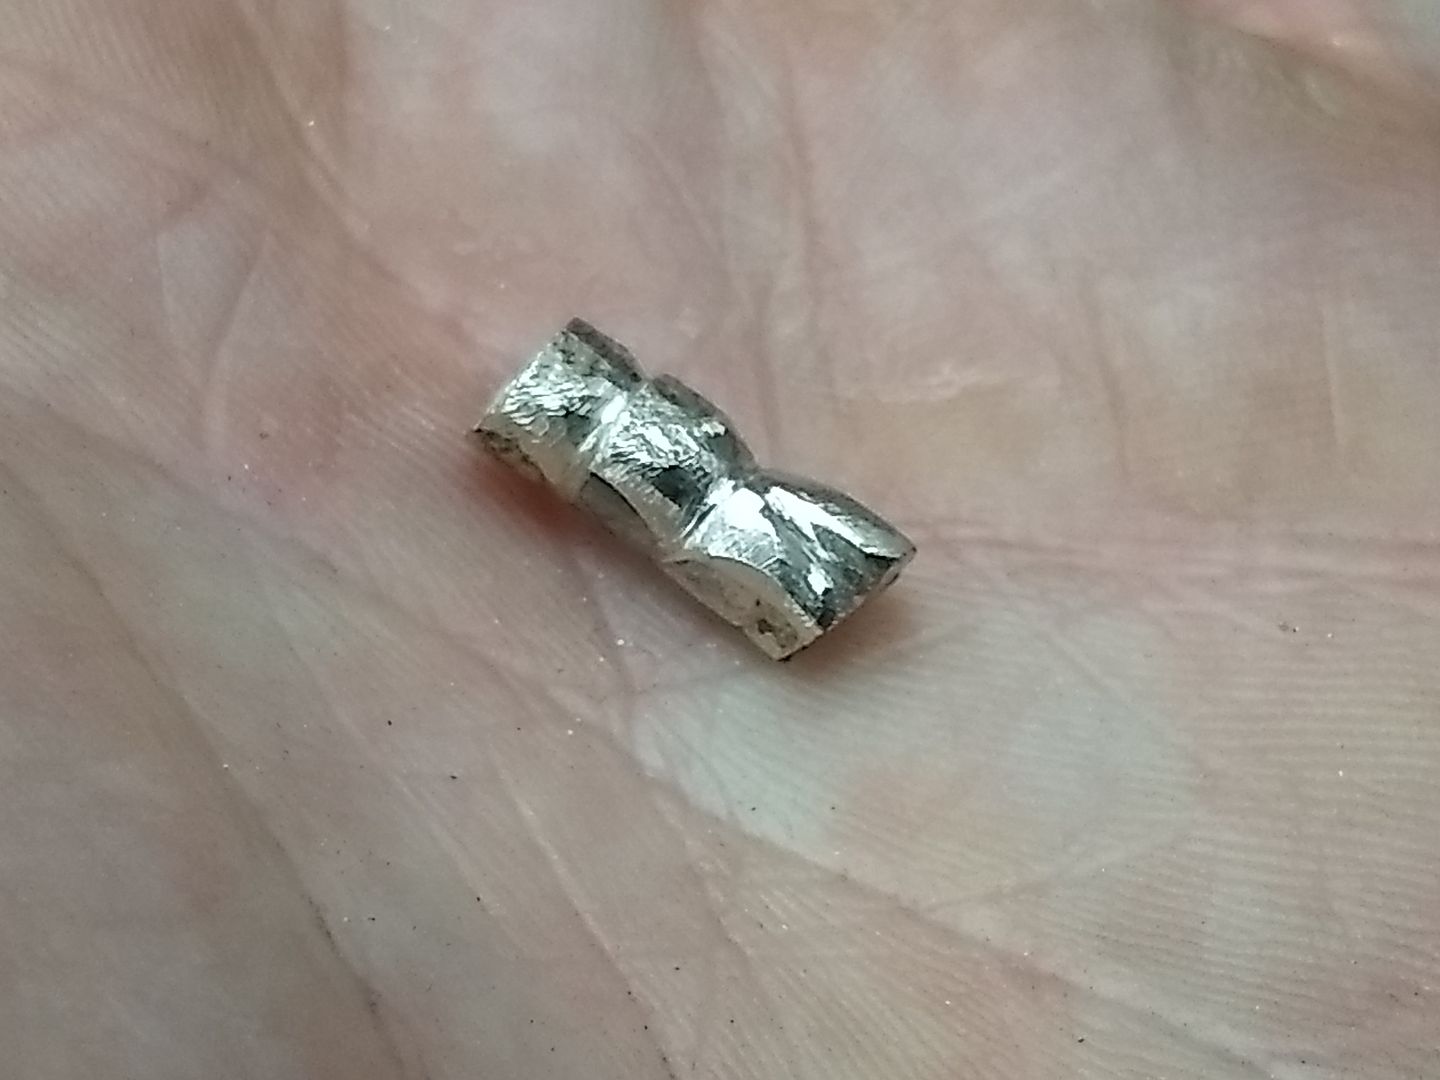
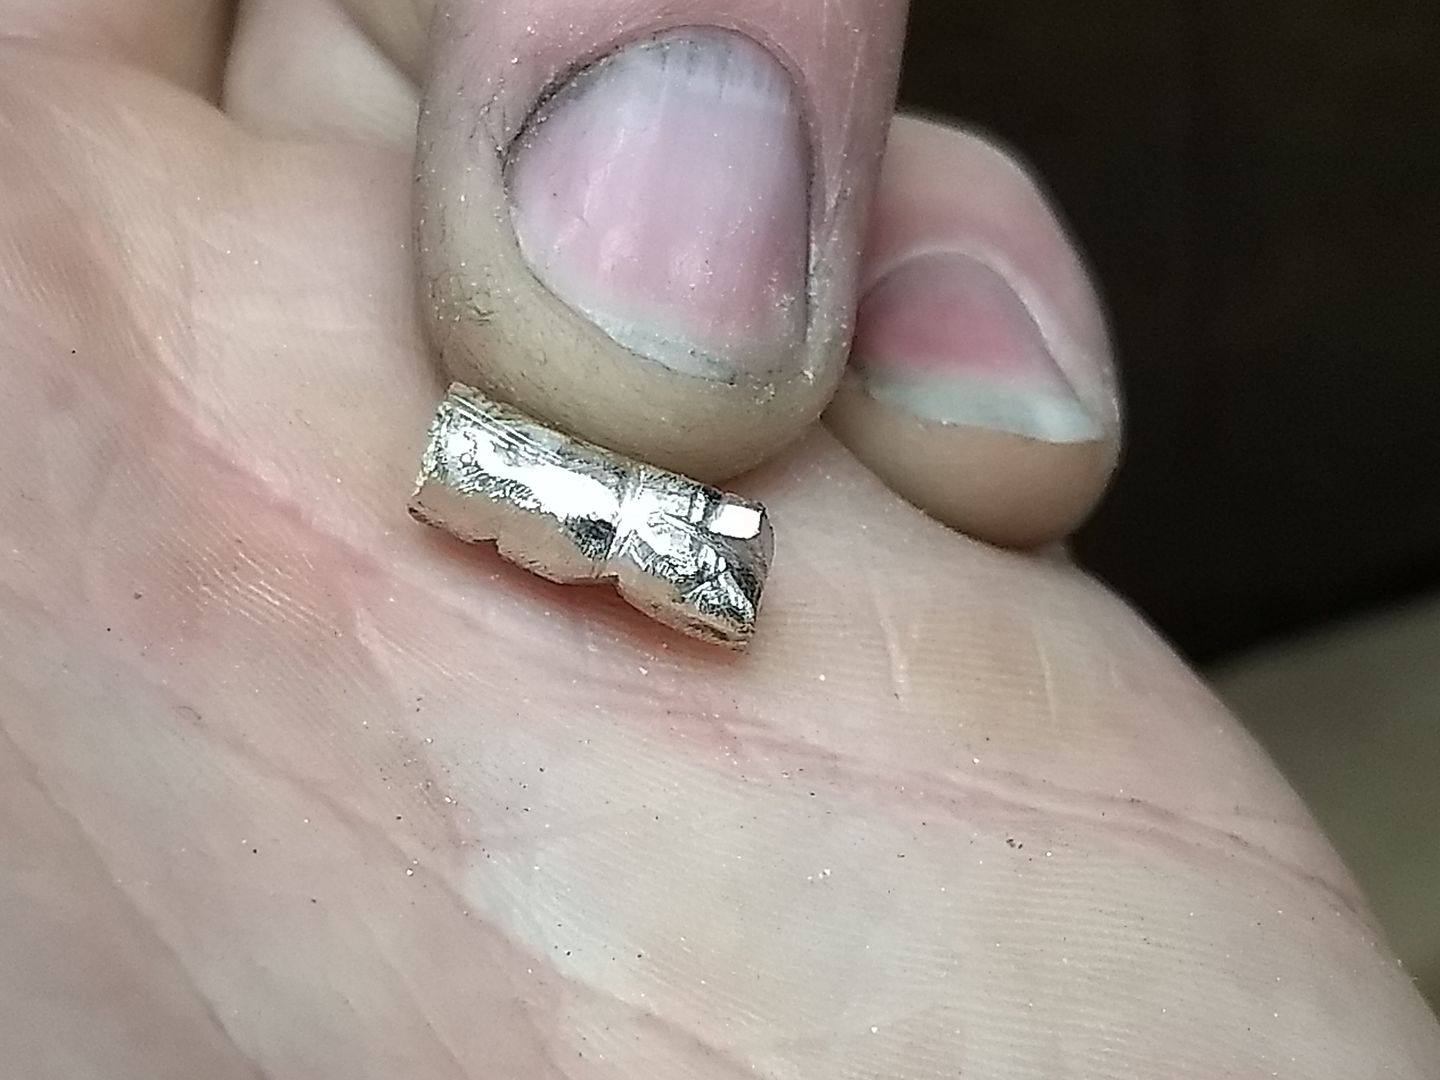
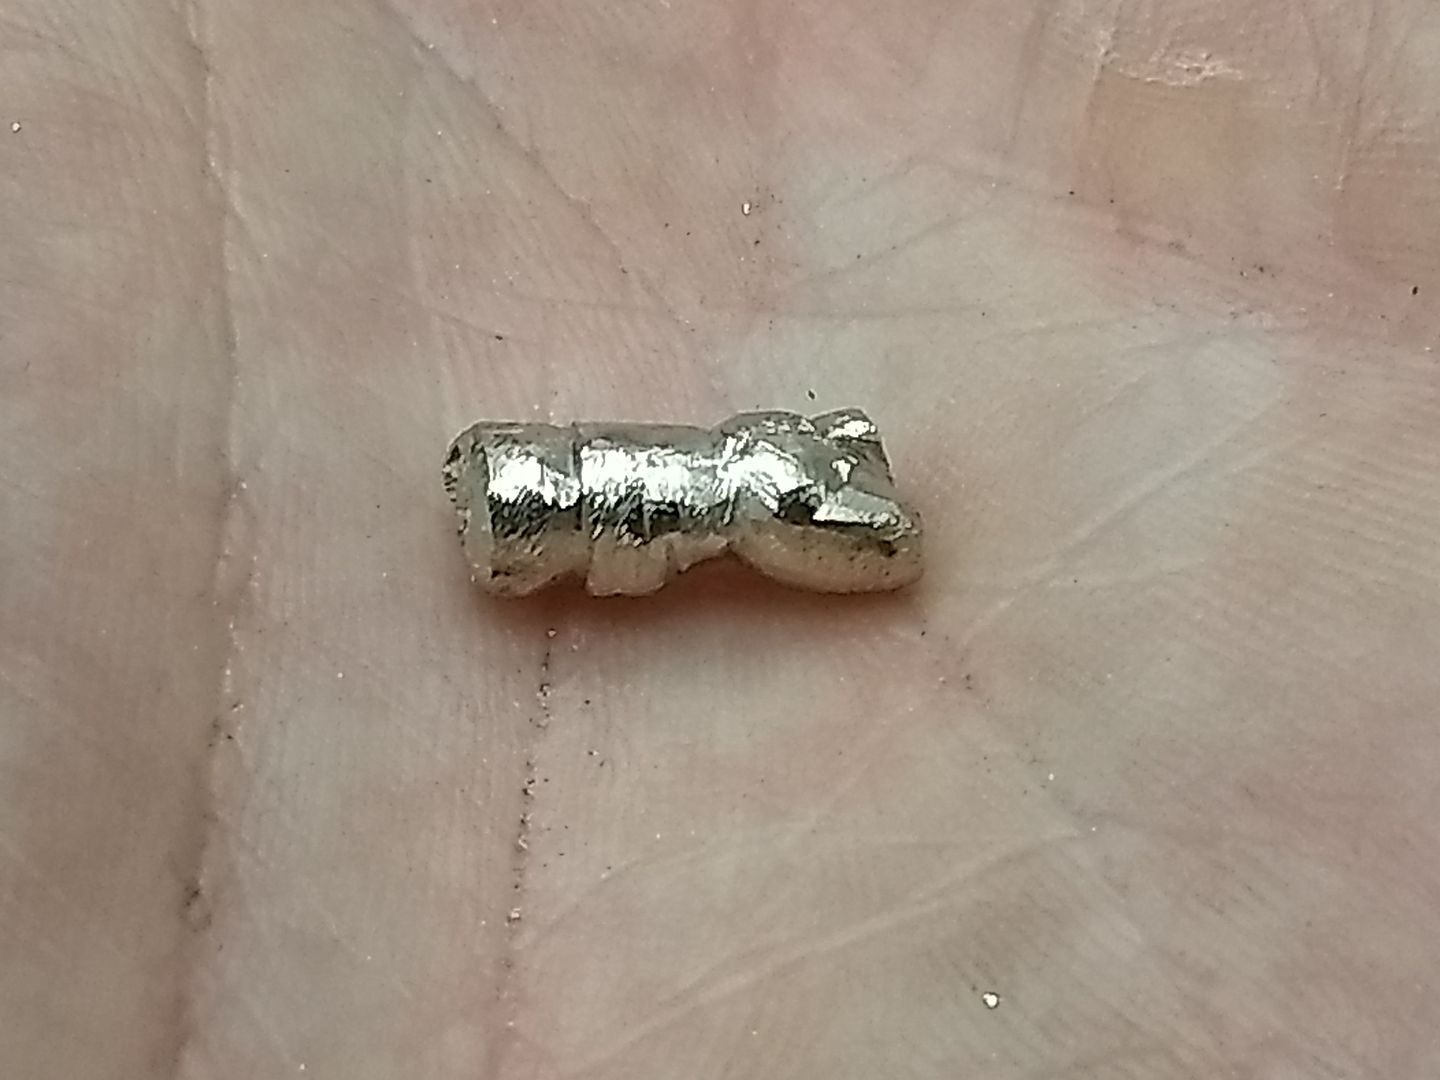
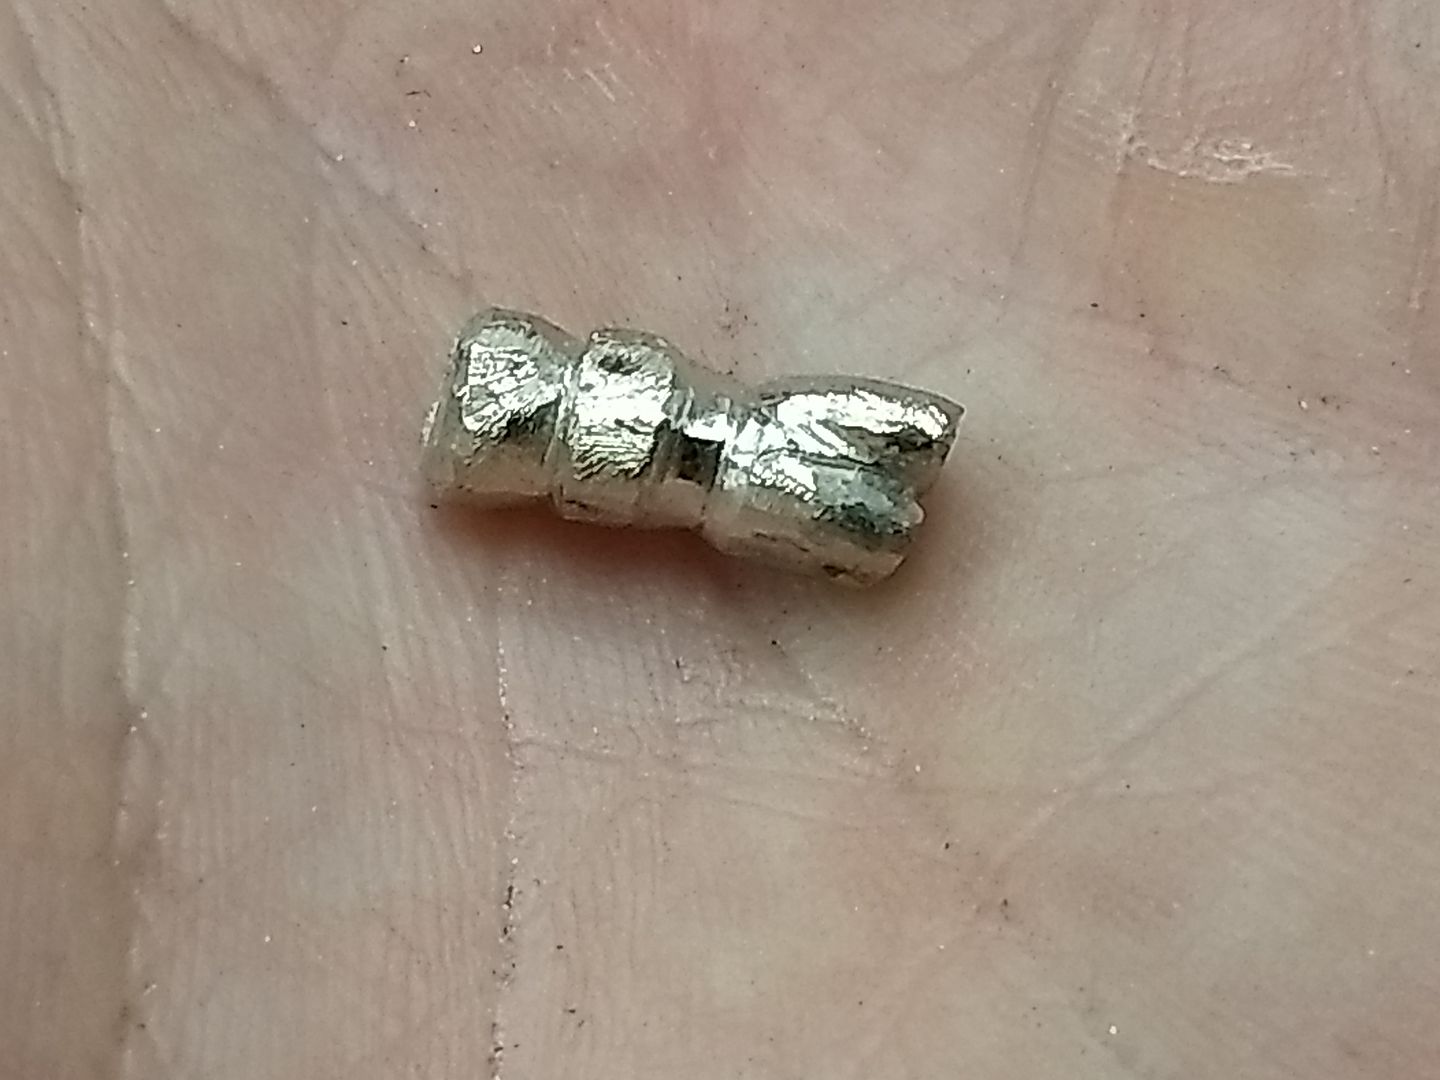
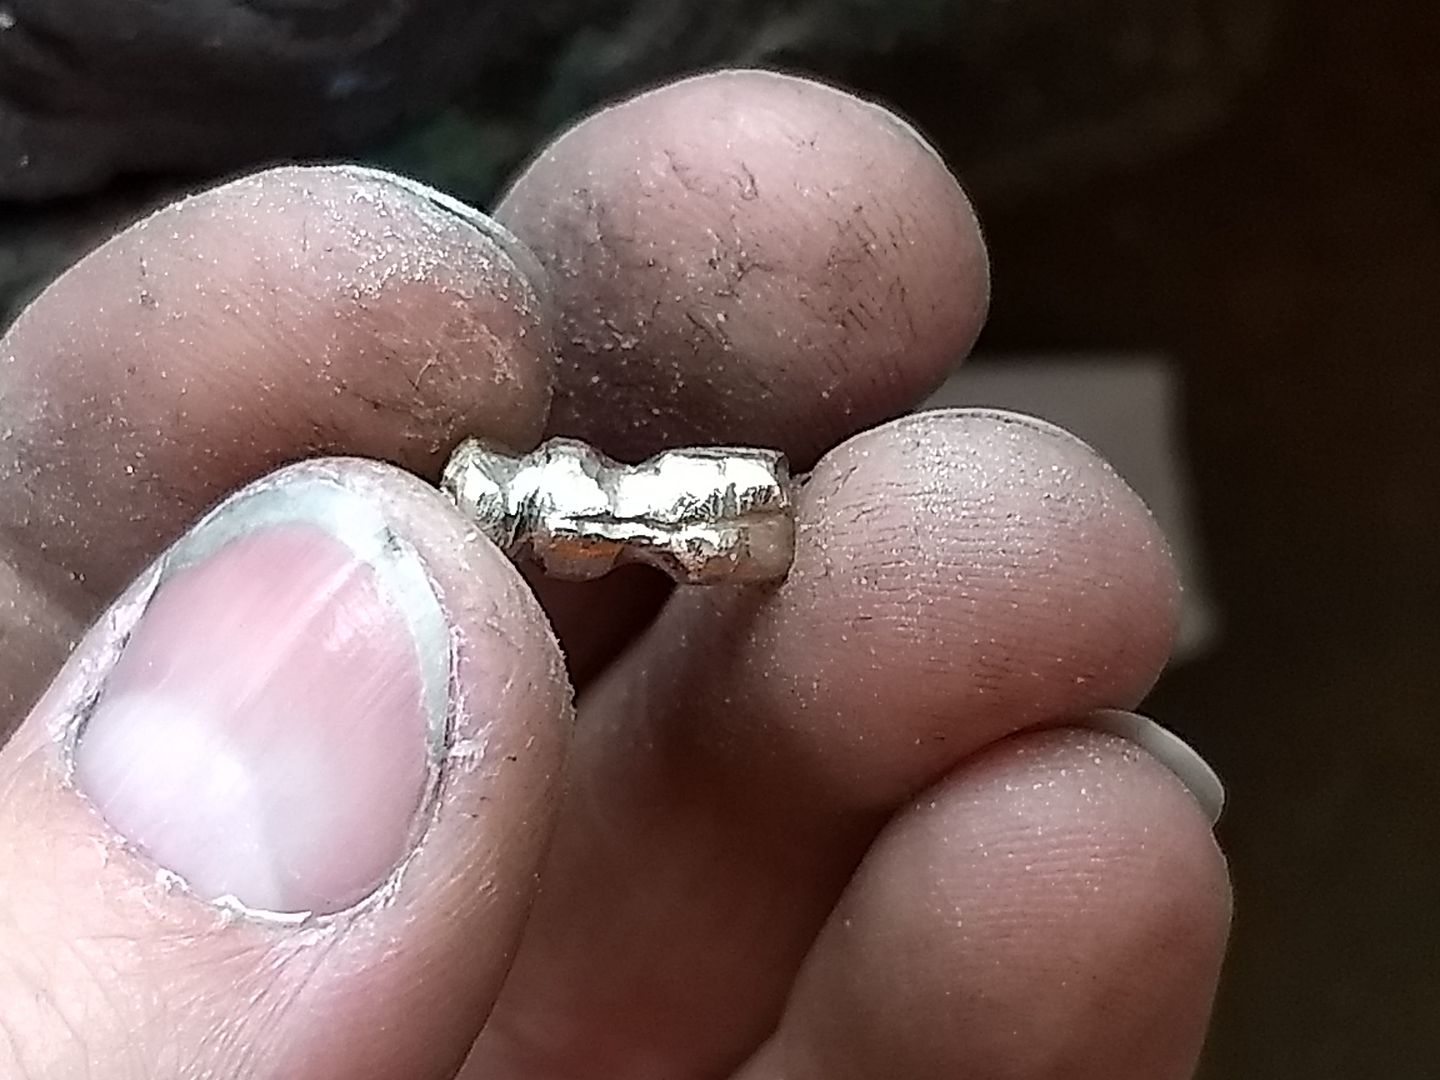
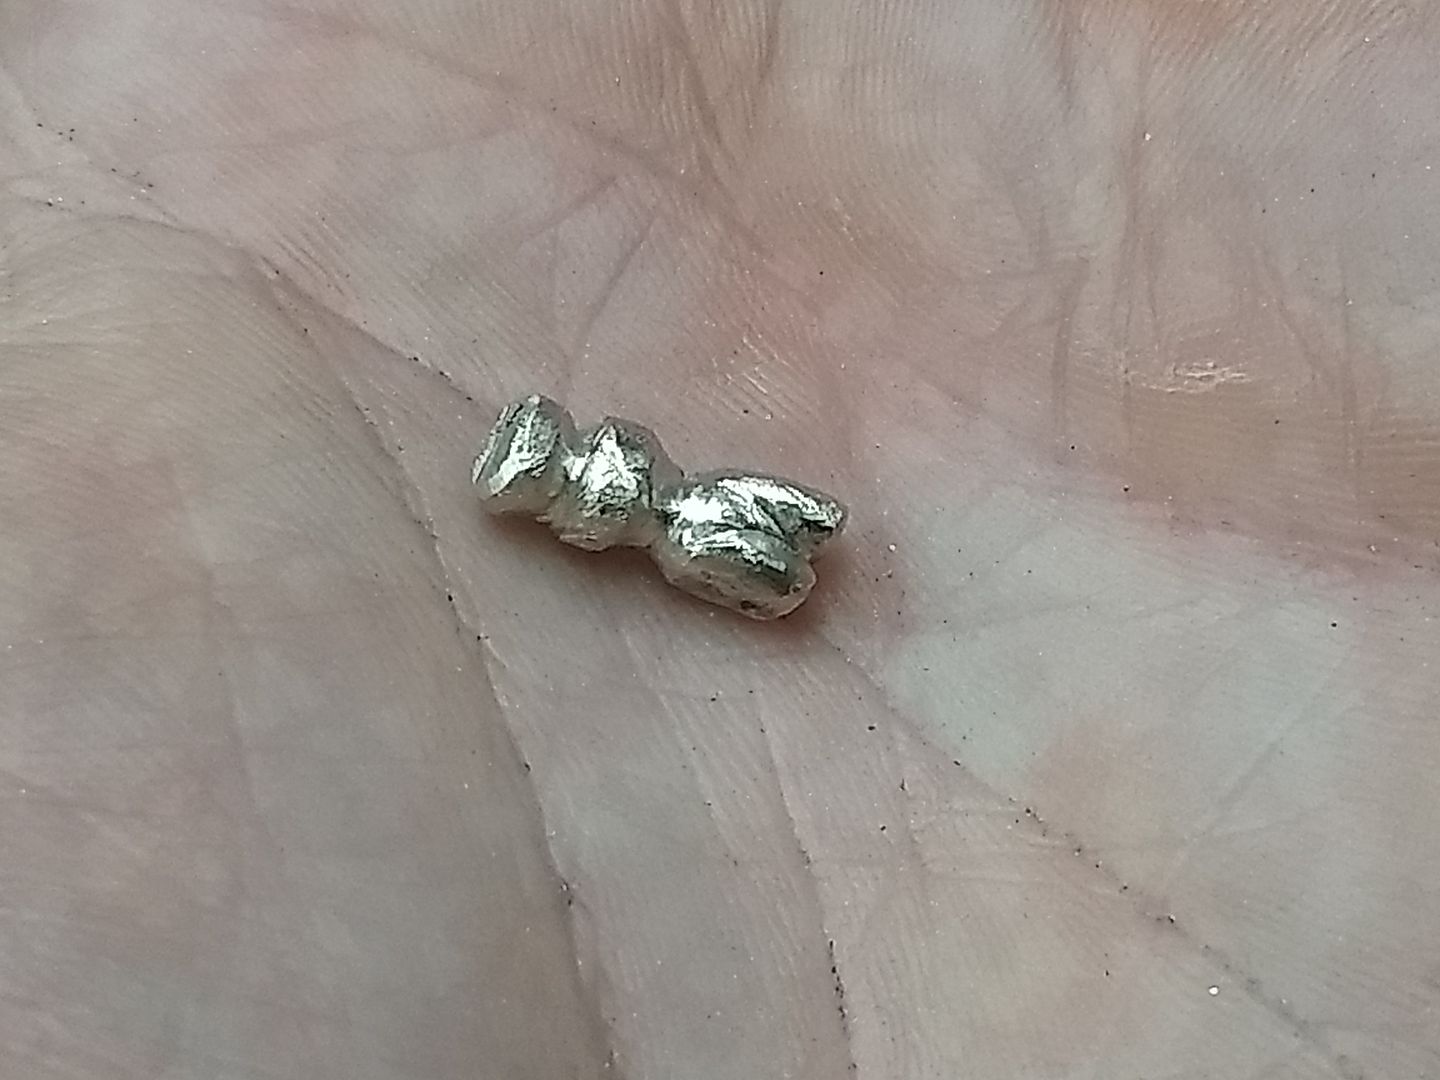
The gold was melted and turned into a bar. I'm always a little wary melting white gold to use in a new item as it doesn't always produce a usable material. Often its brittle or porous, but in this case it melted fine and was only a little hard if anything:
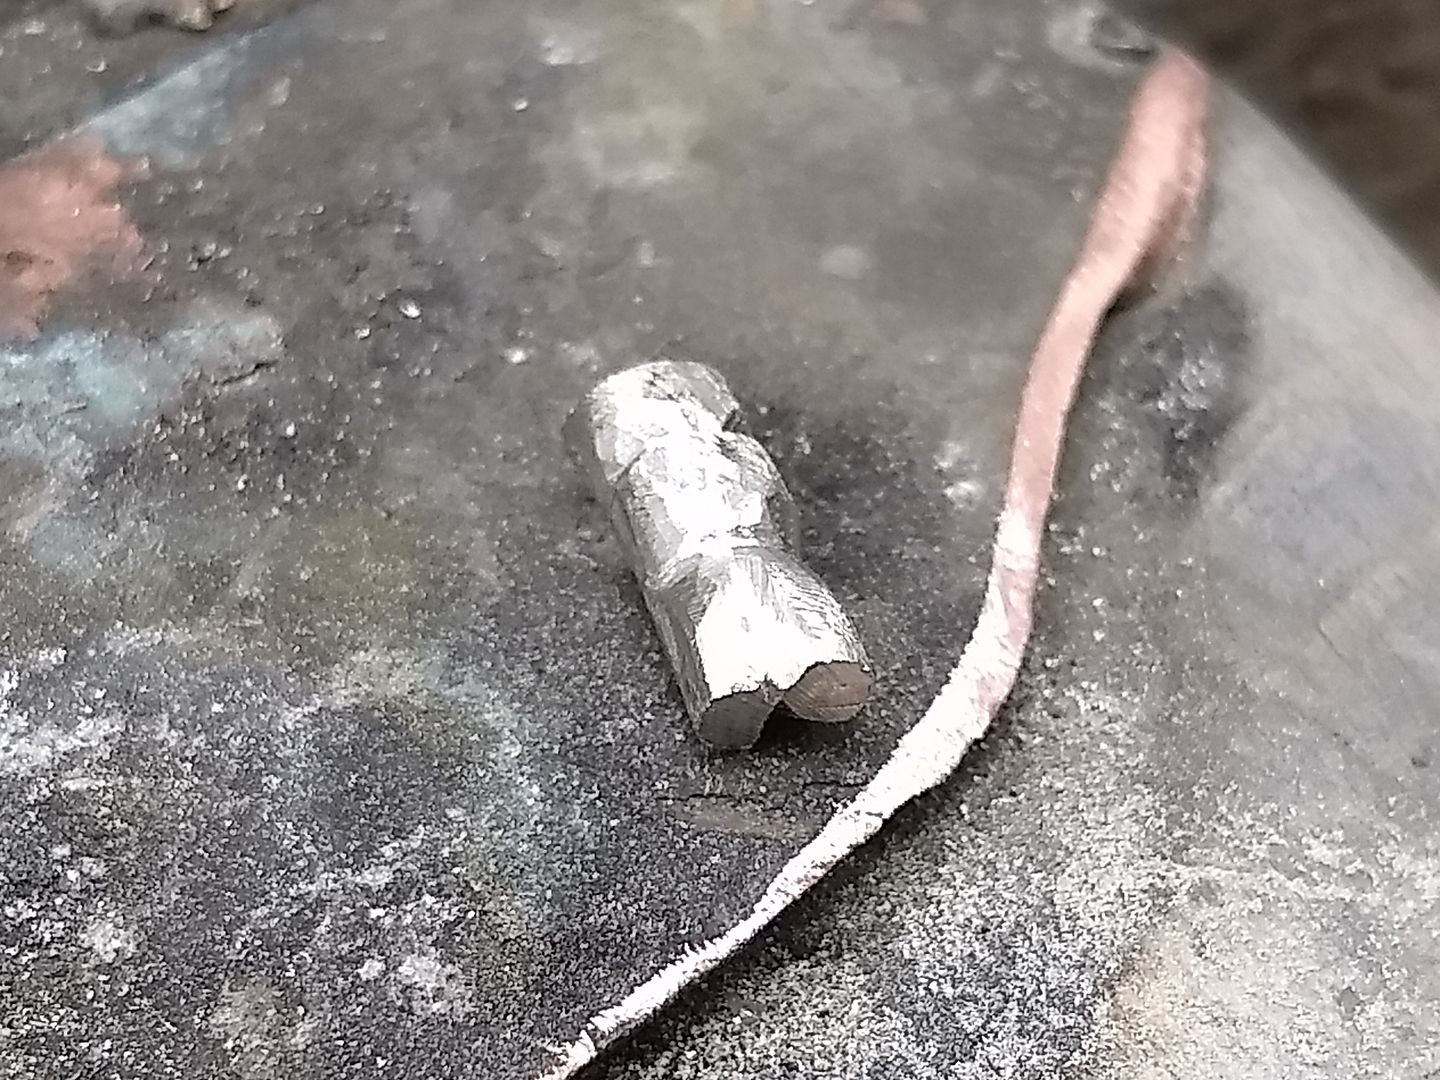
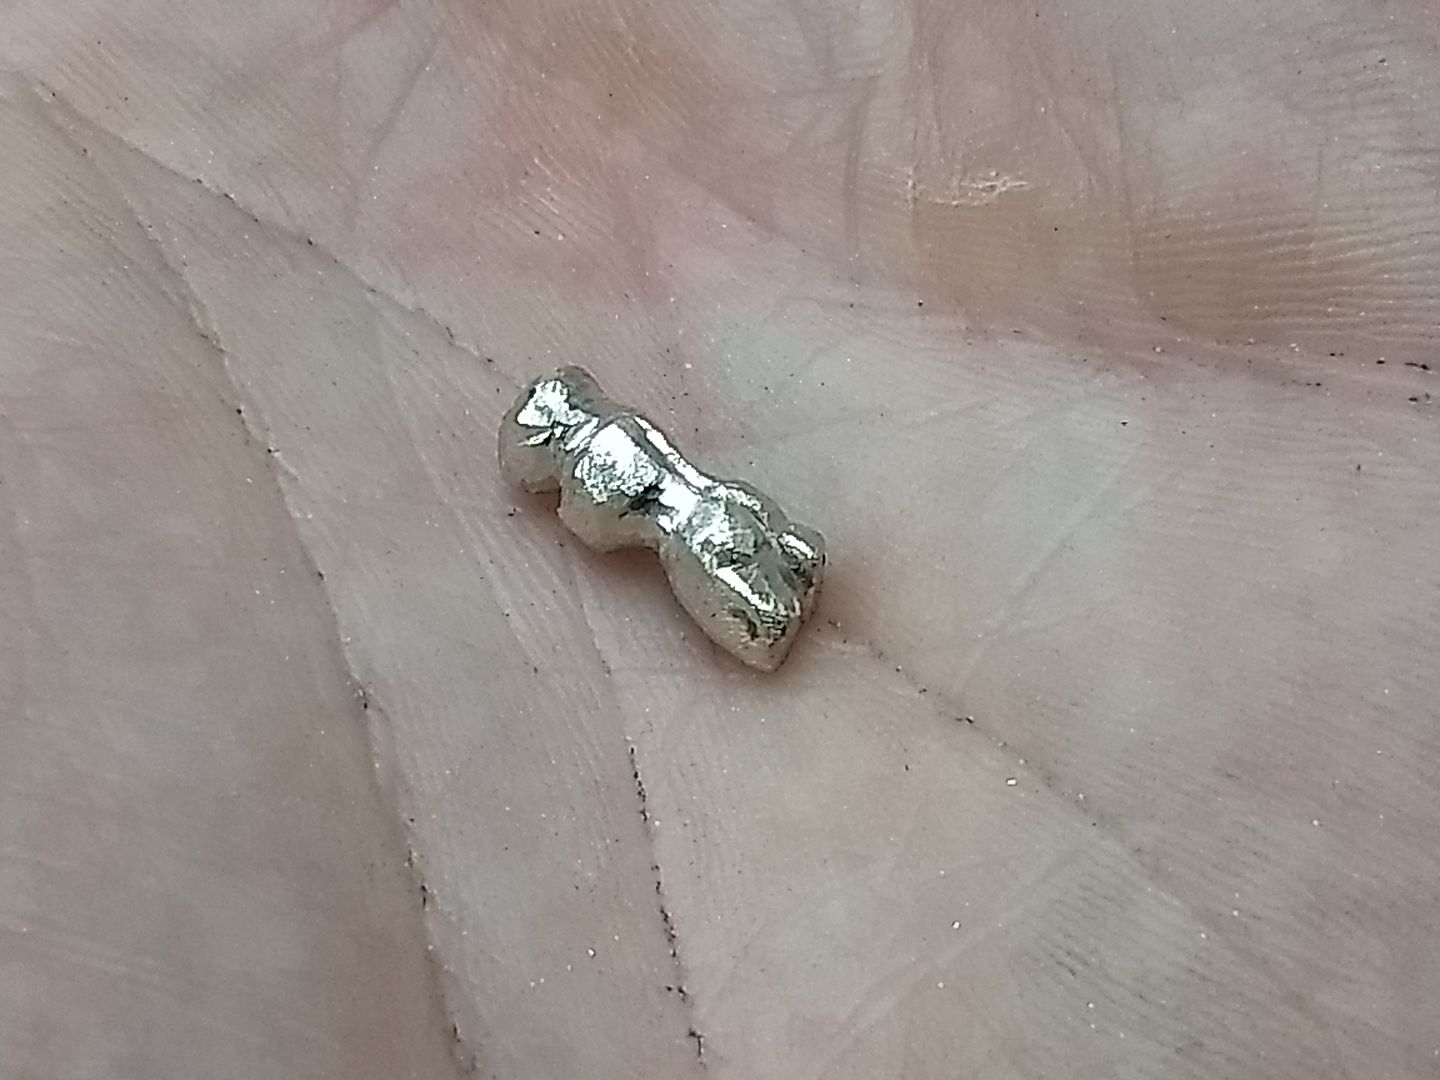
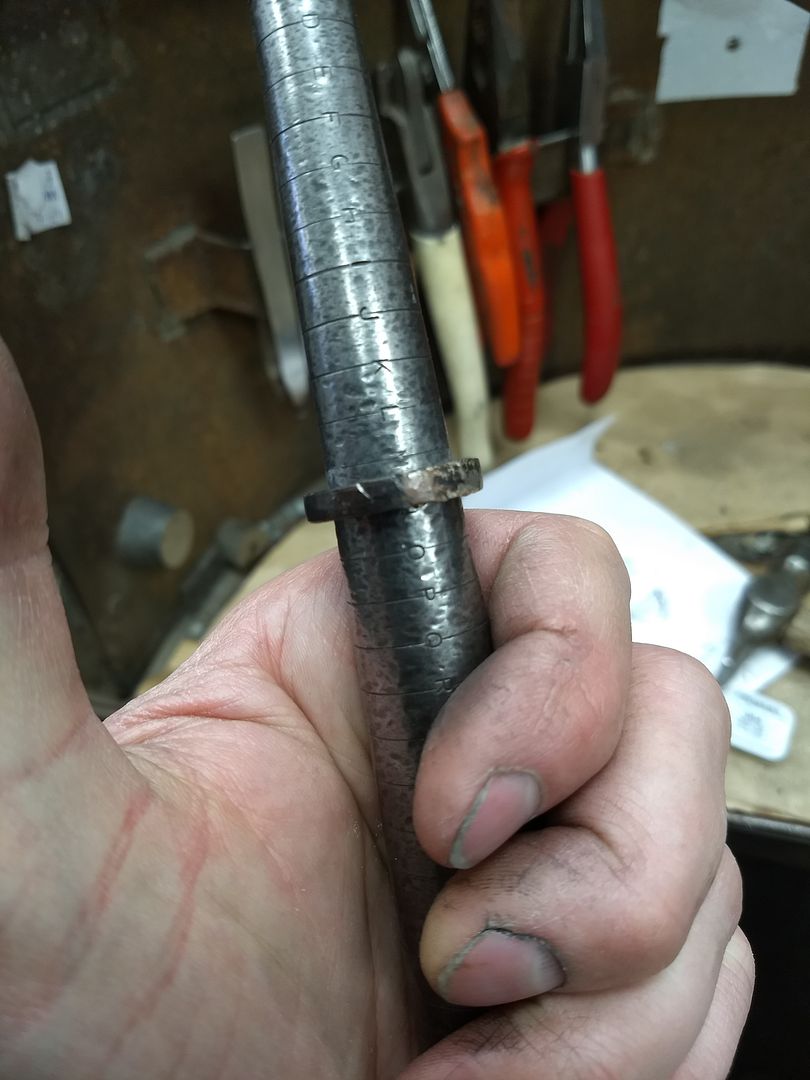
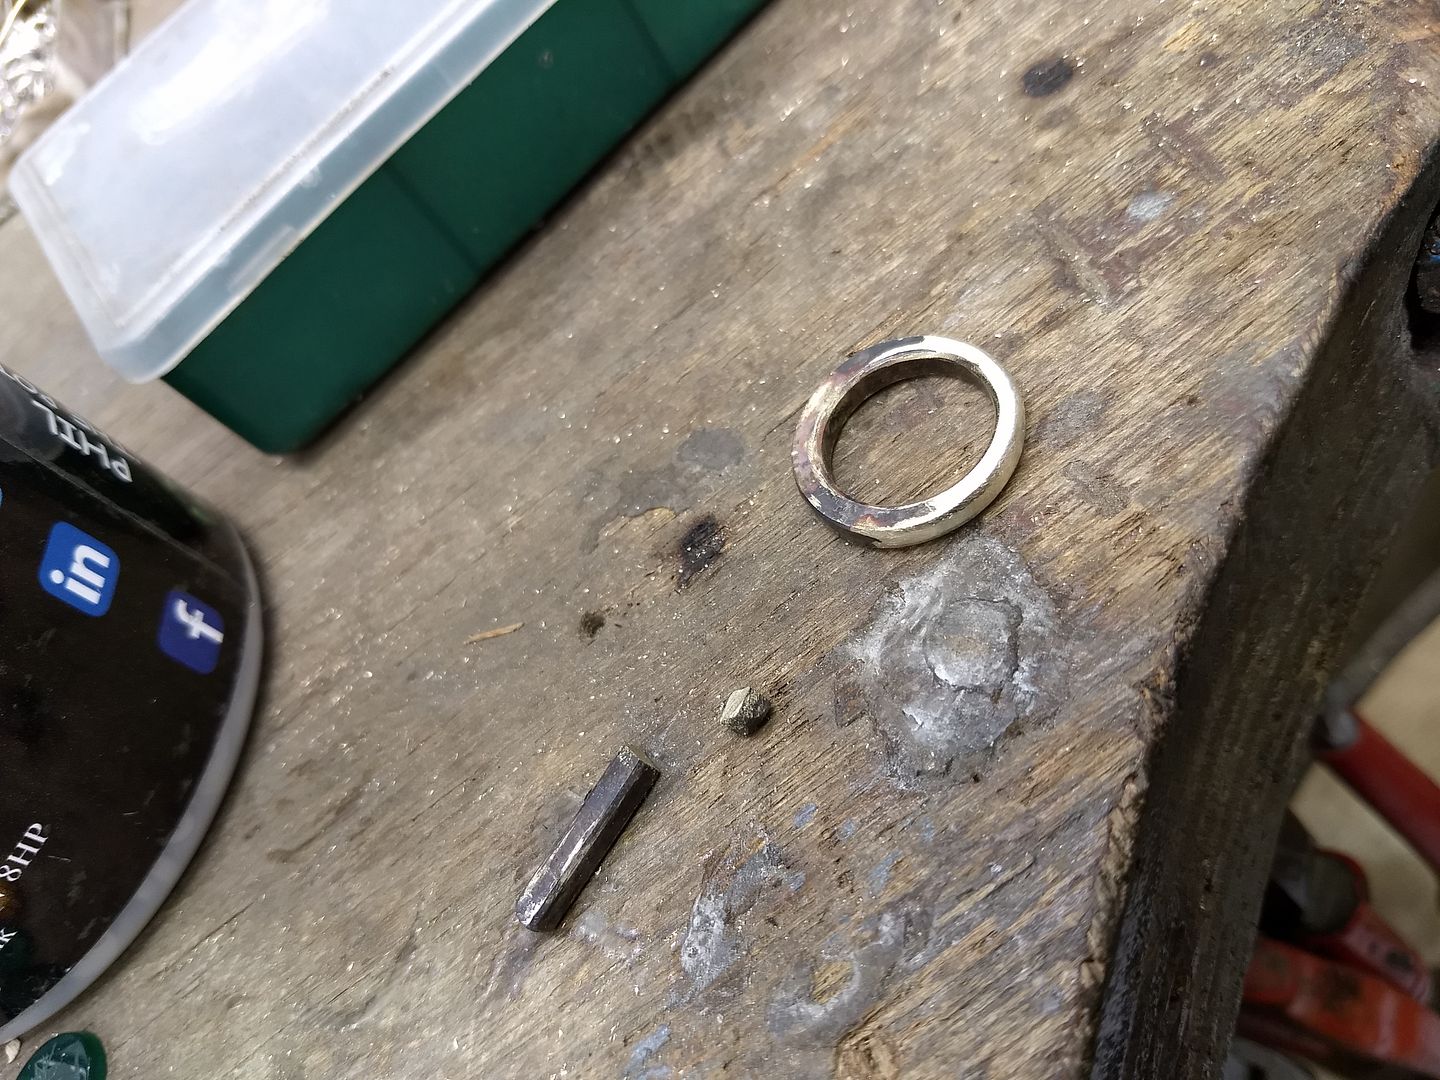
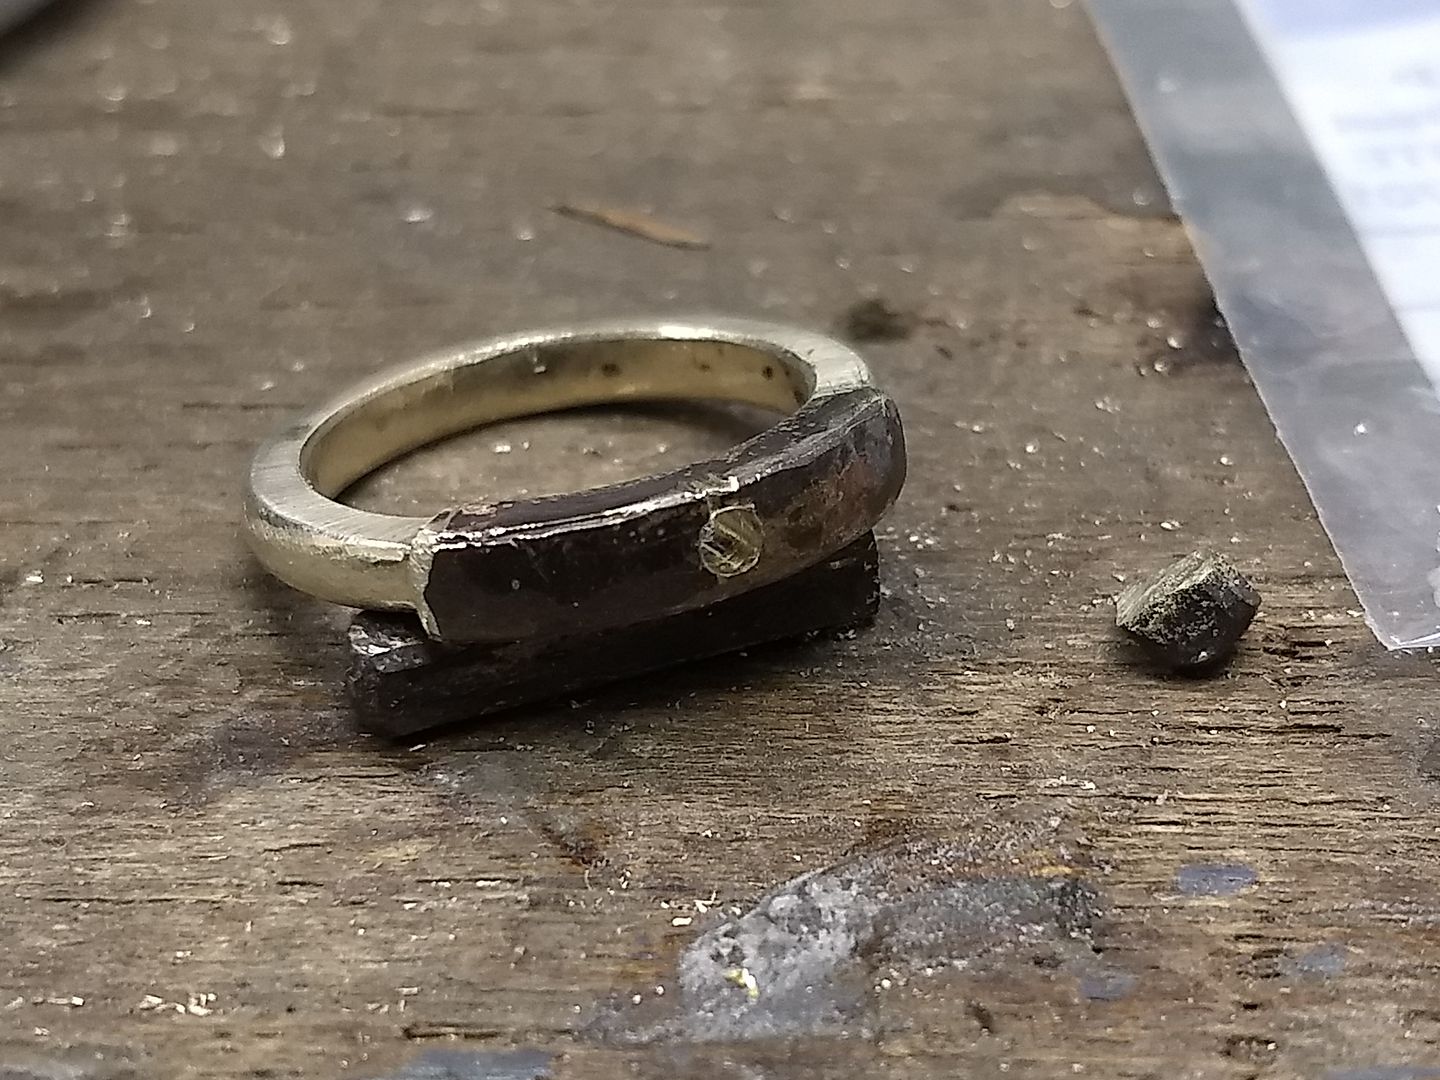
The bar was rolled out a bit more and after bending it I cut it to roughly the length needed for the job. I'll mention now that this is one of my 'measure nothing' jobs and it's all done off the cuff, by eye:
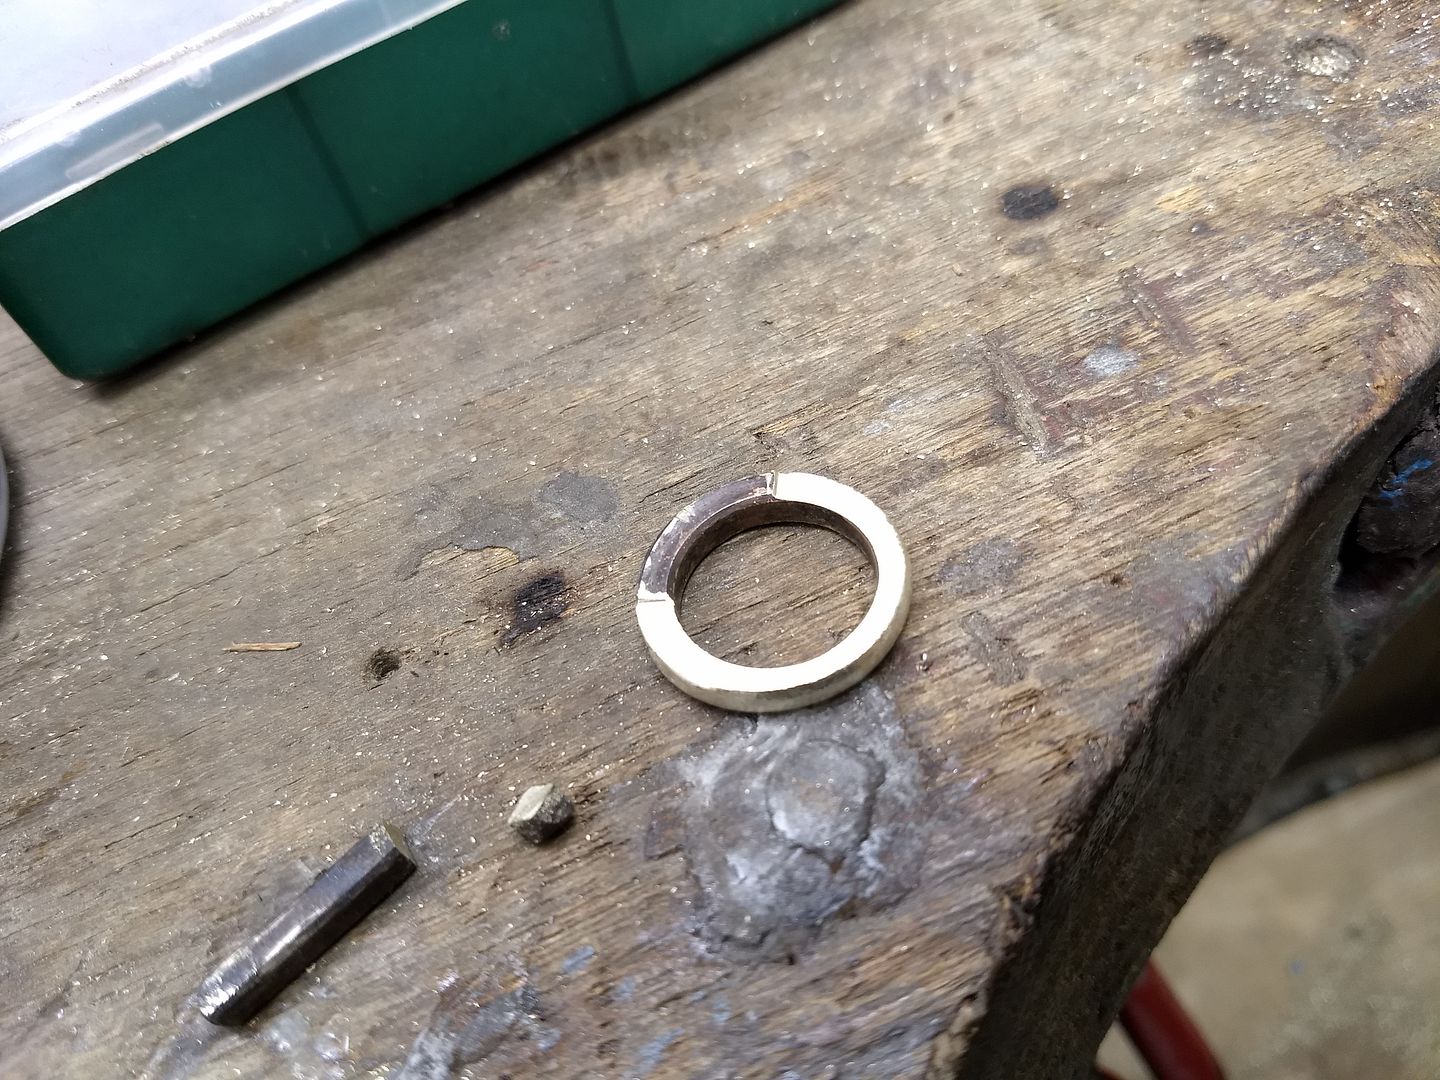
This is where I make my one solitary solder on this job. The band is joined and then made round and to the correct size:
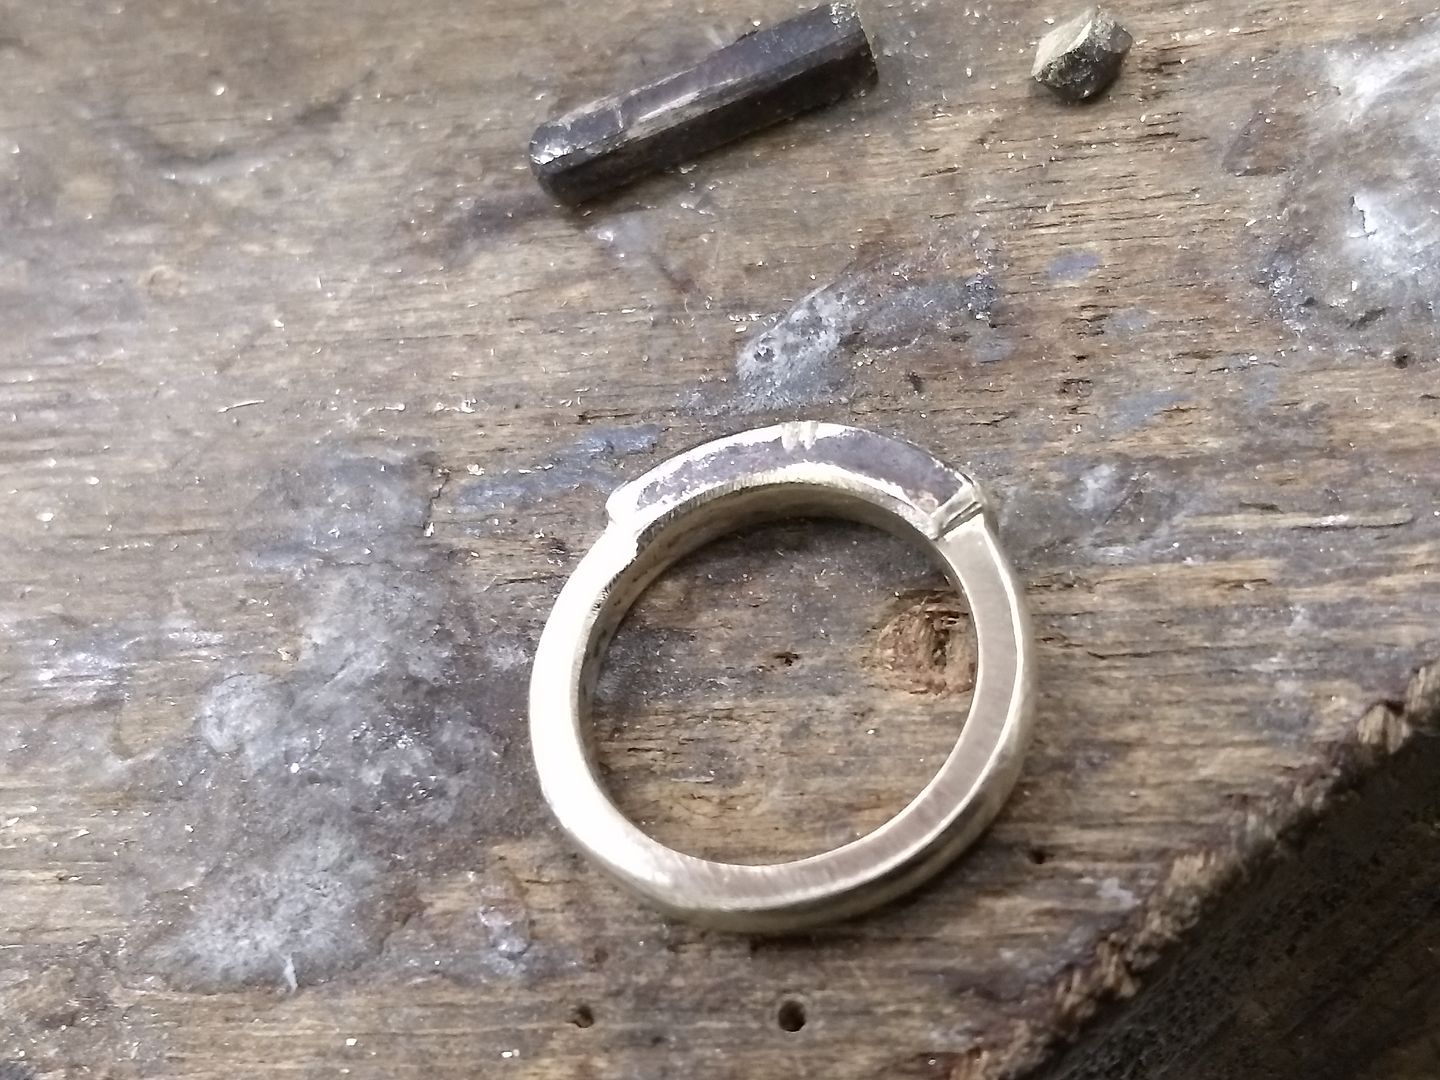
The ring will effectively be filed out of the solid band. It's not something I usually do but seeing as it's playing ball for now I would rather not be soldering this white metal too much. Also, any off cuts / filings will go against the cost of the job so the customer isn't out of pocket as a result. The filing begins with the shank:
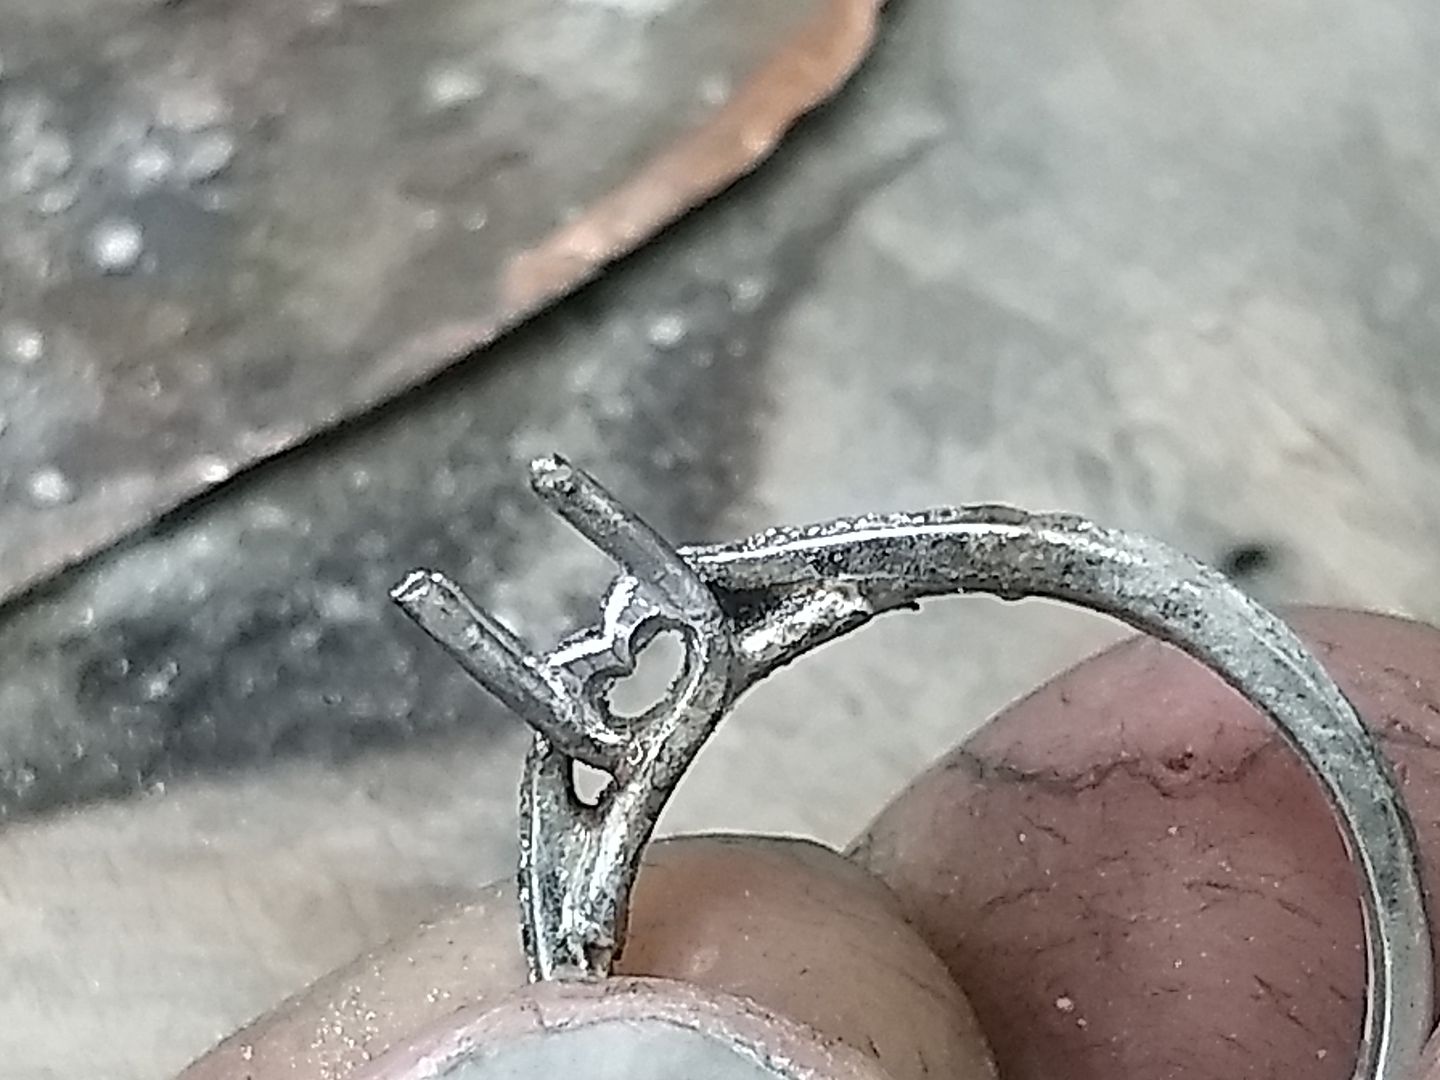
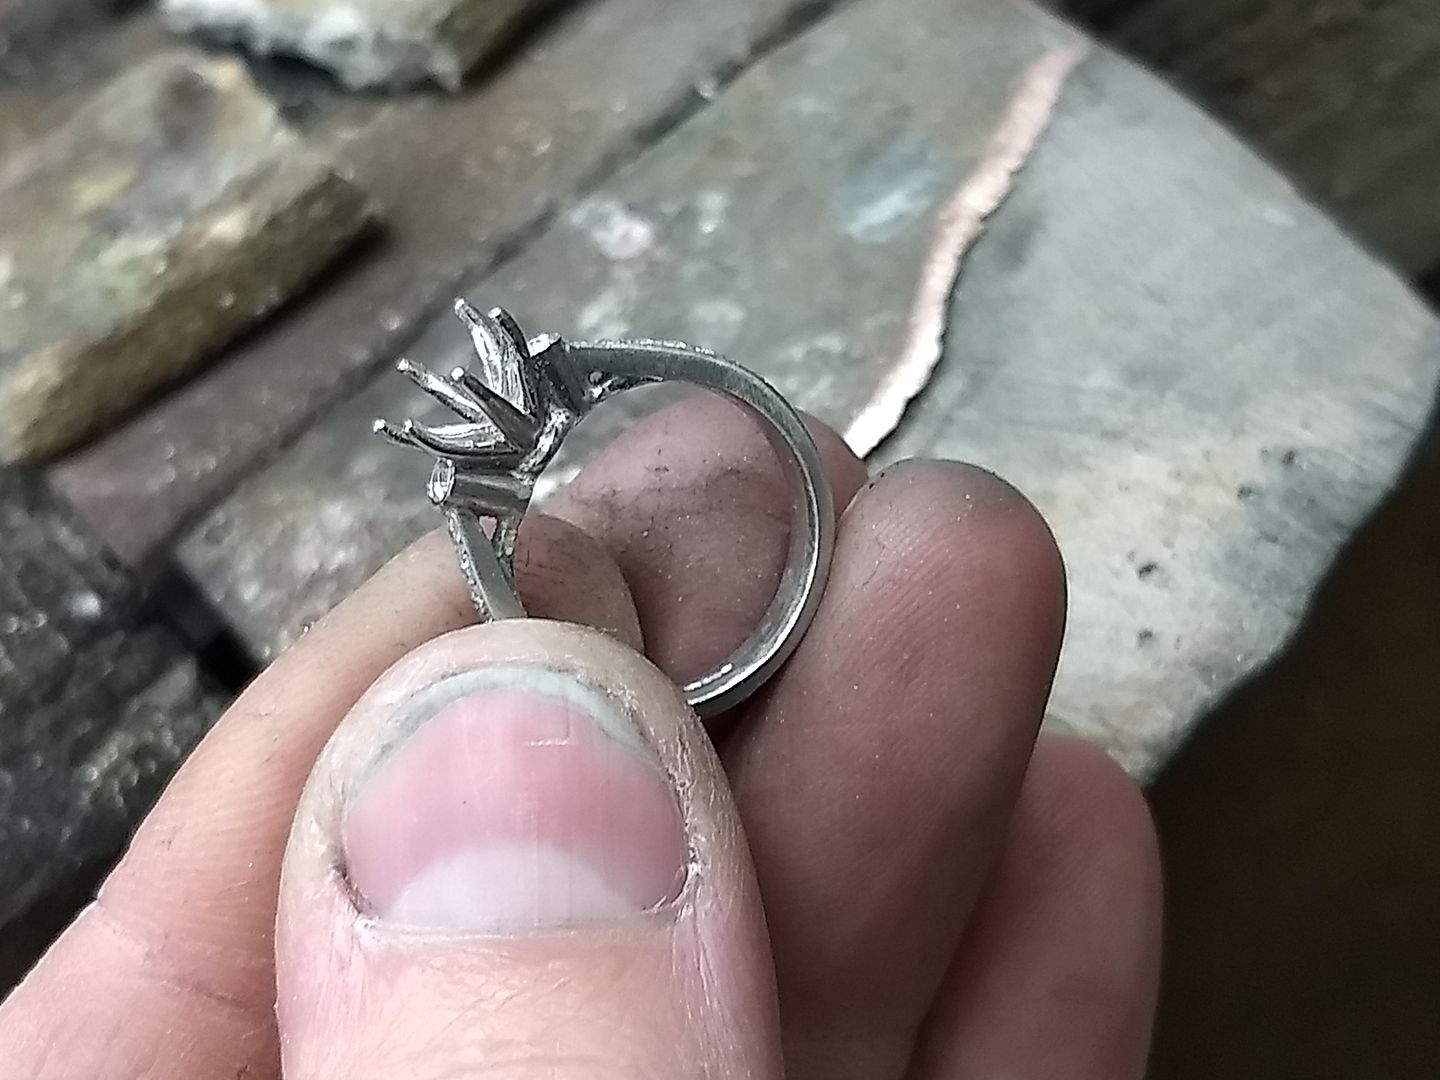
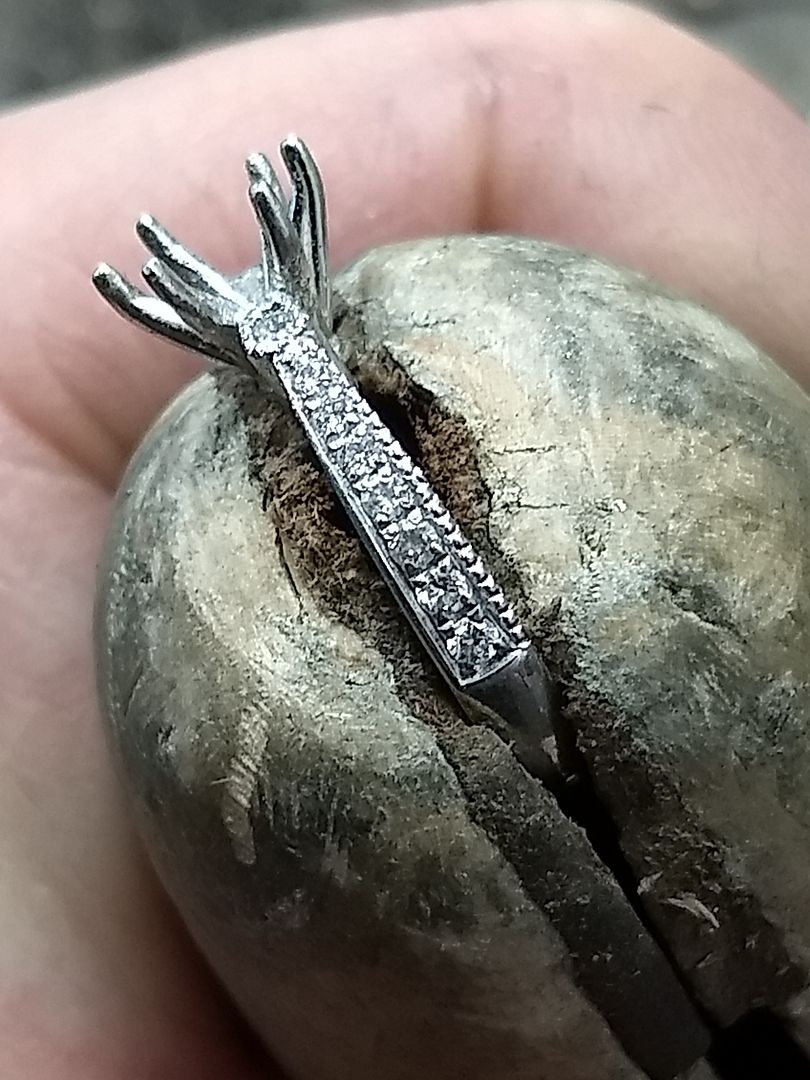
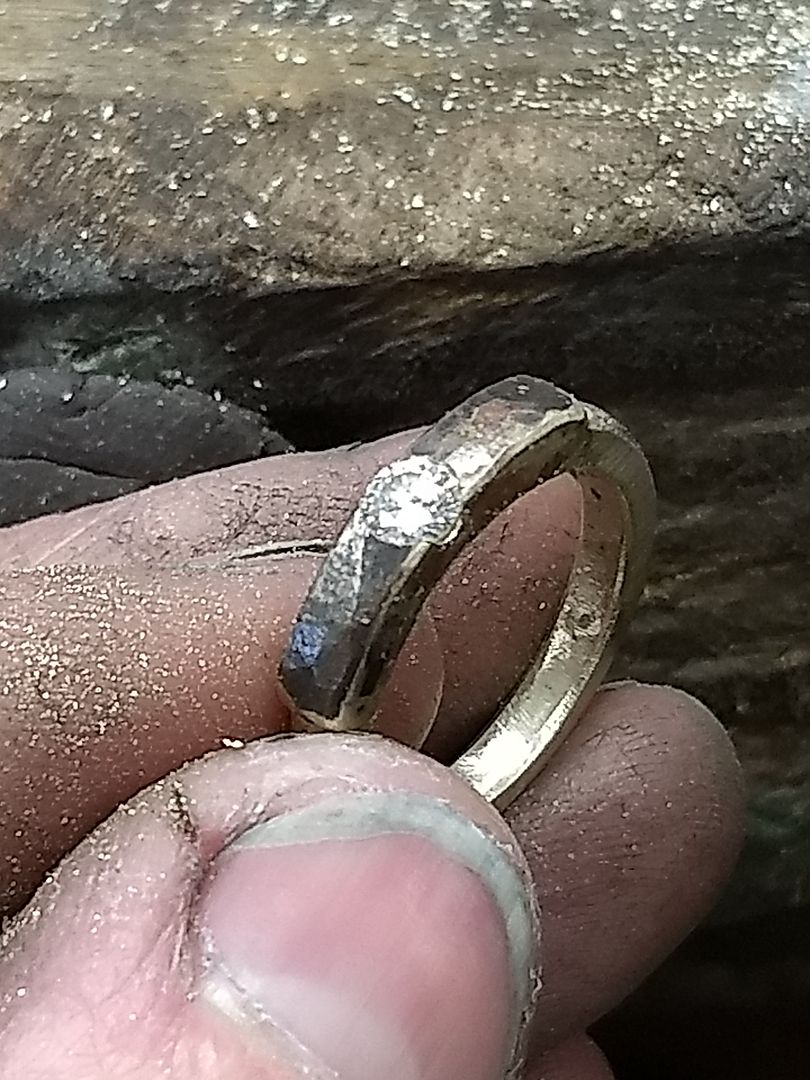
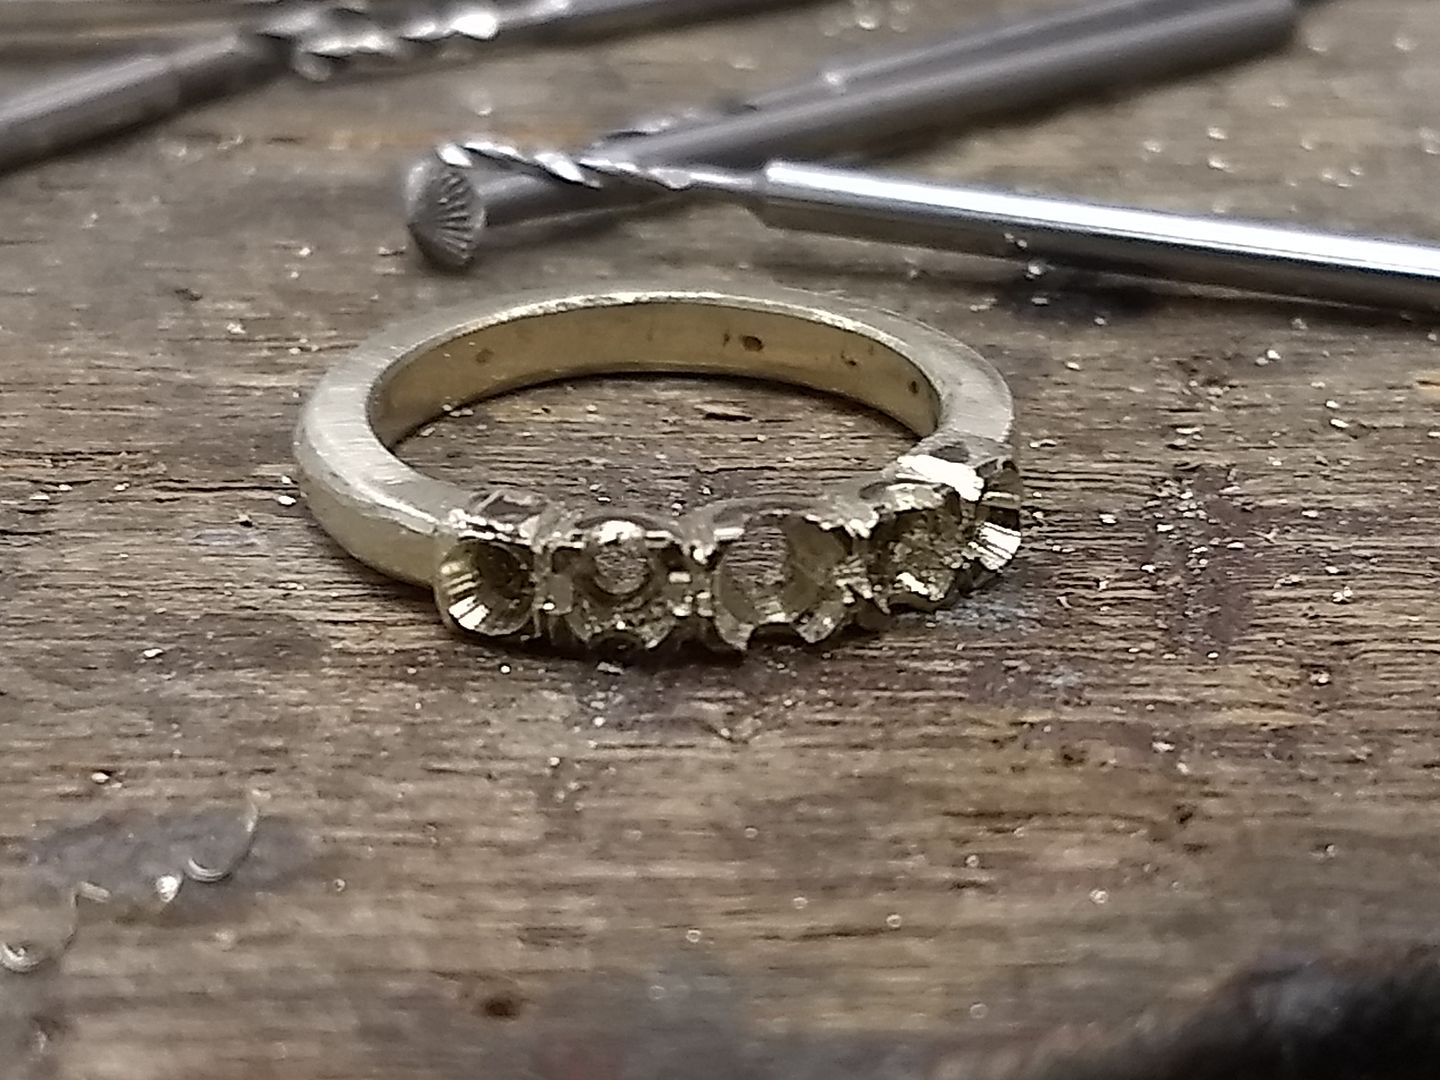
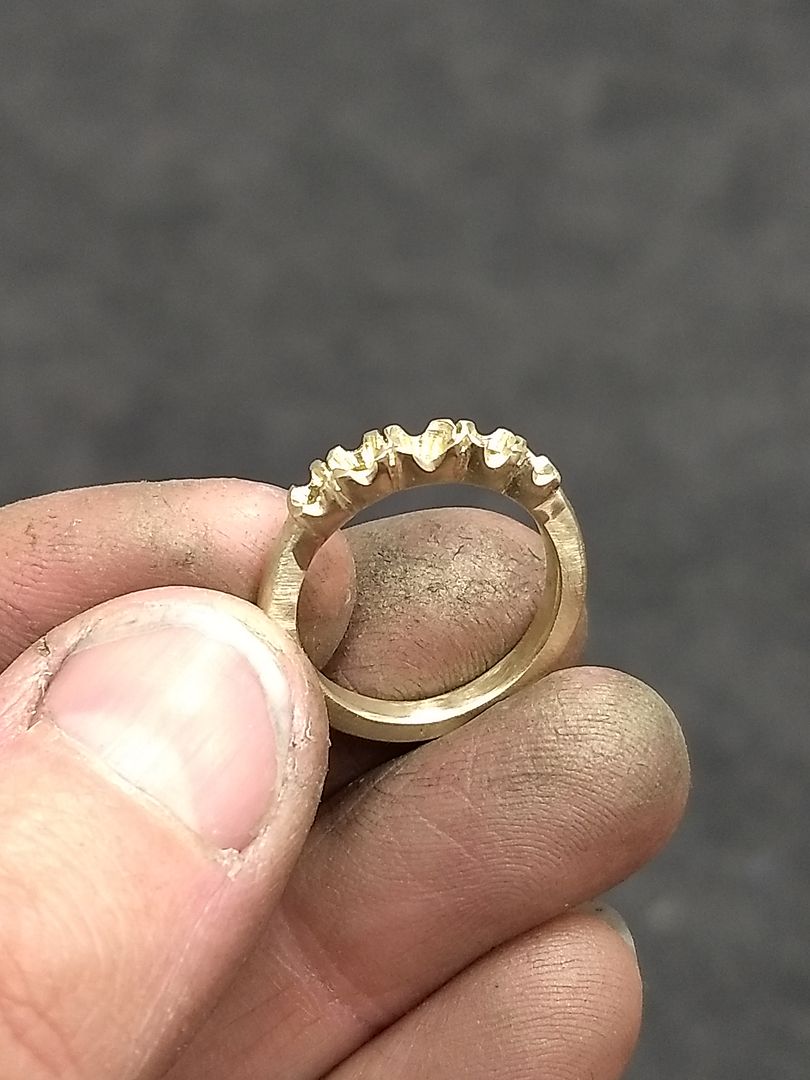
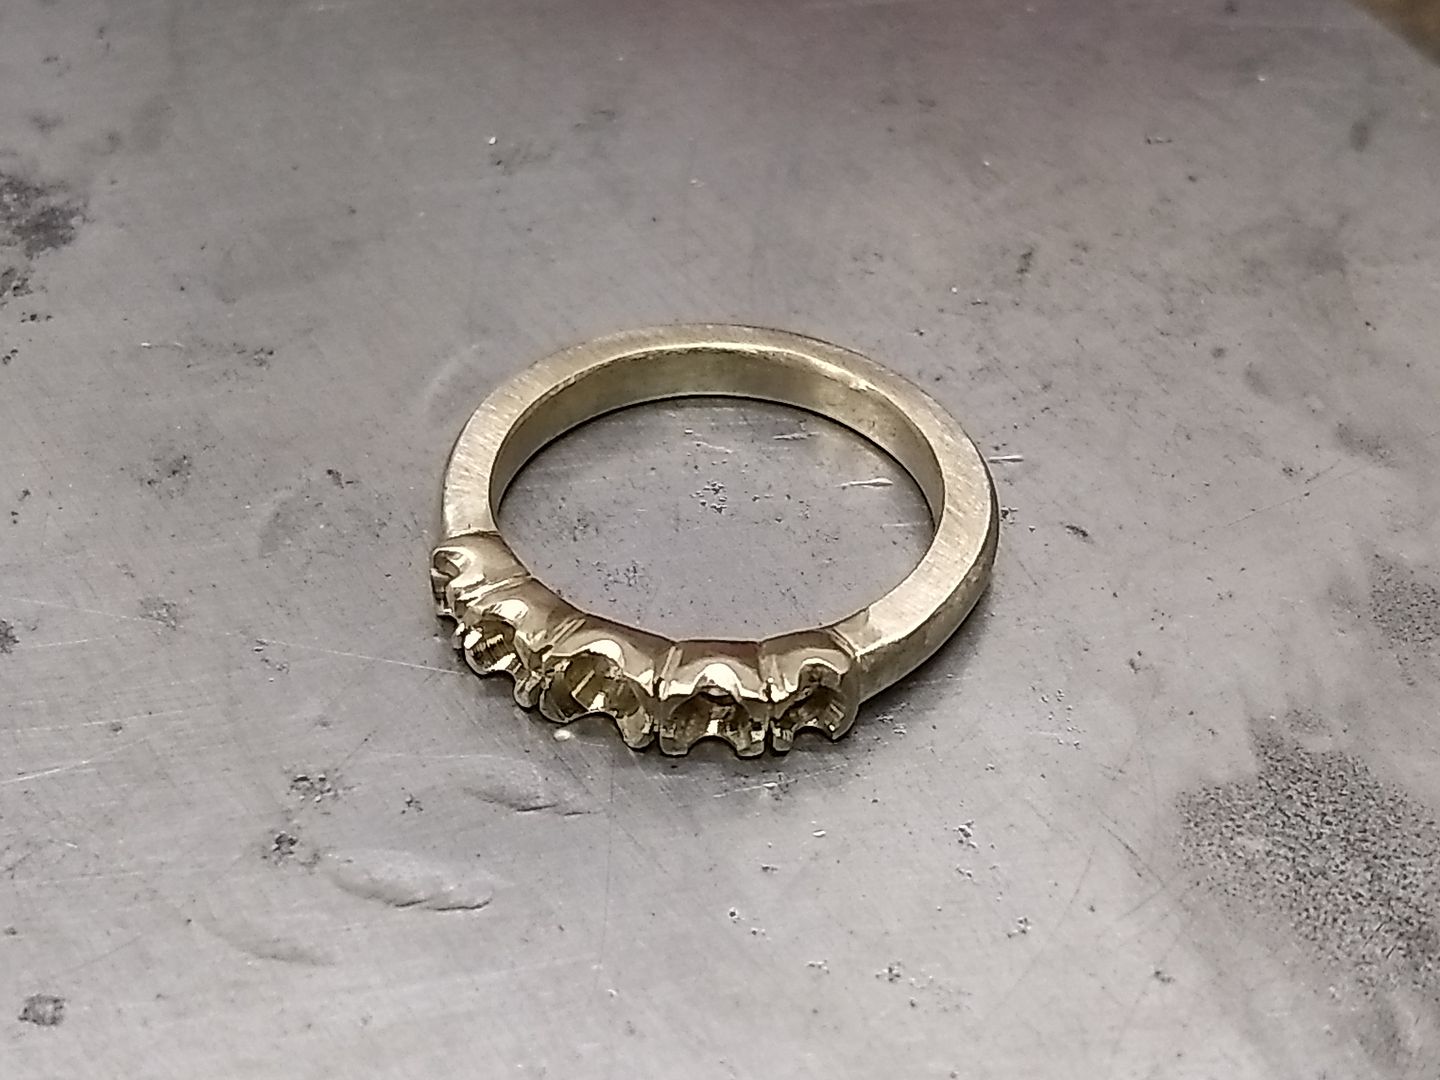
Which progresses to making a rough head section:

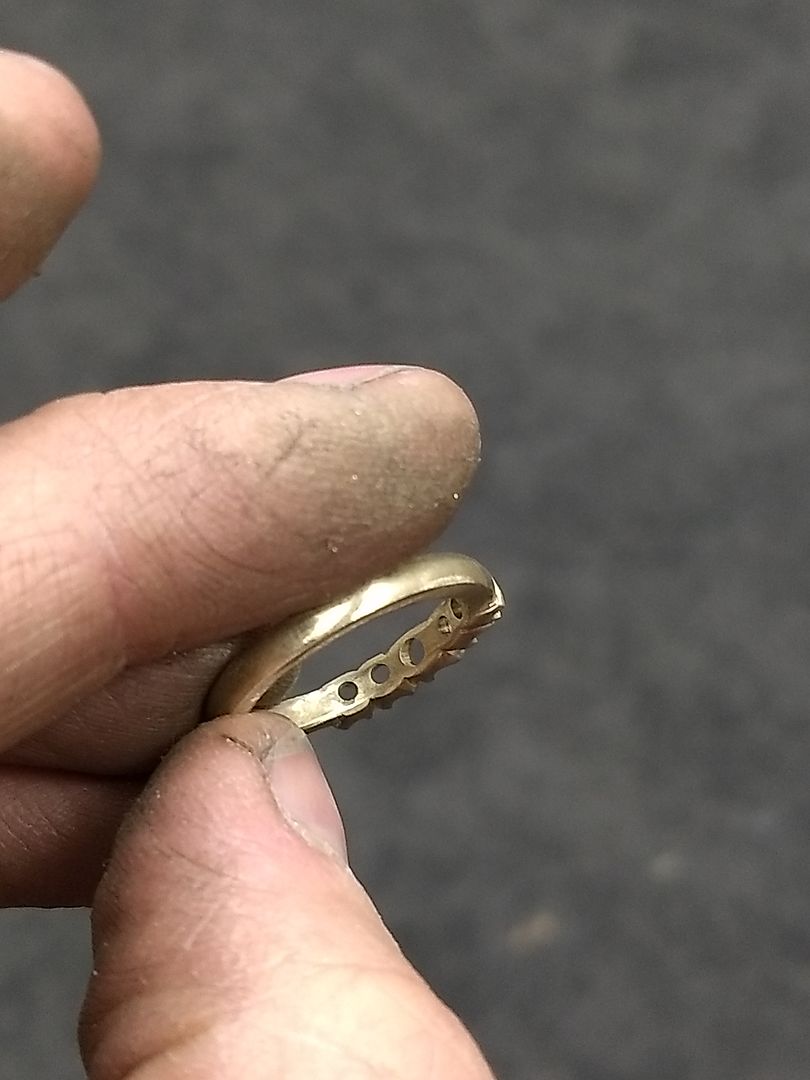
With that done I mark out the centre and where the main diamond will sit. This will be the guide for everything around it:
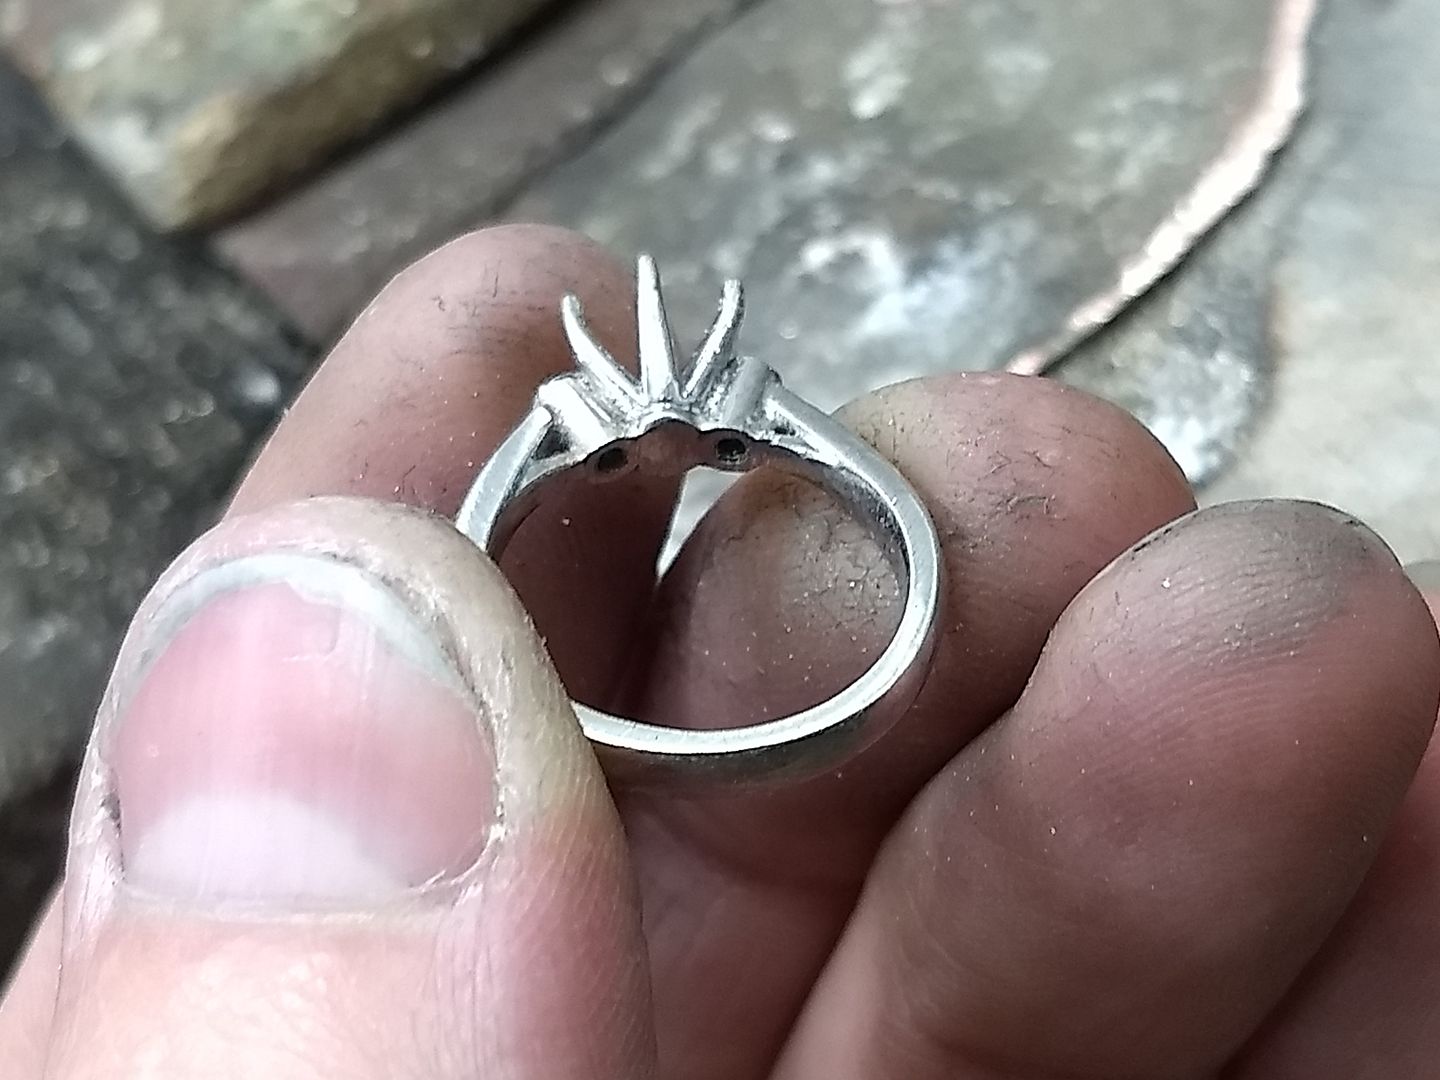
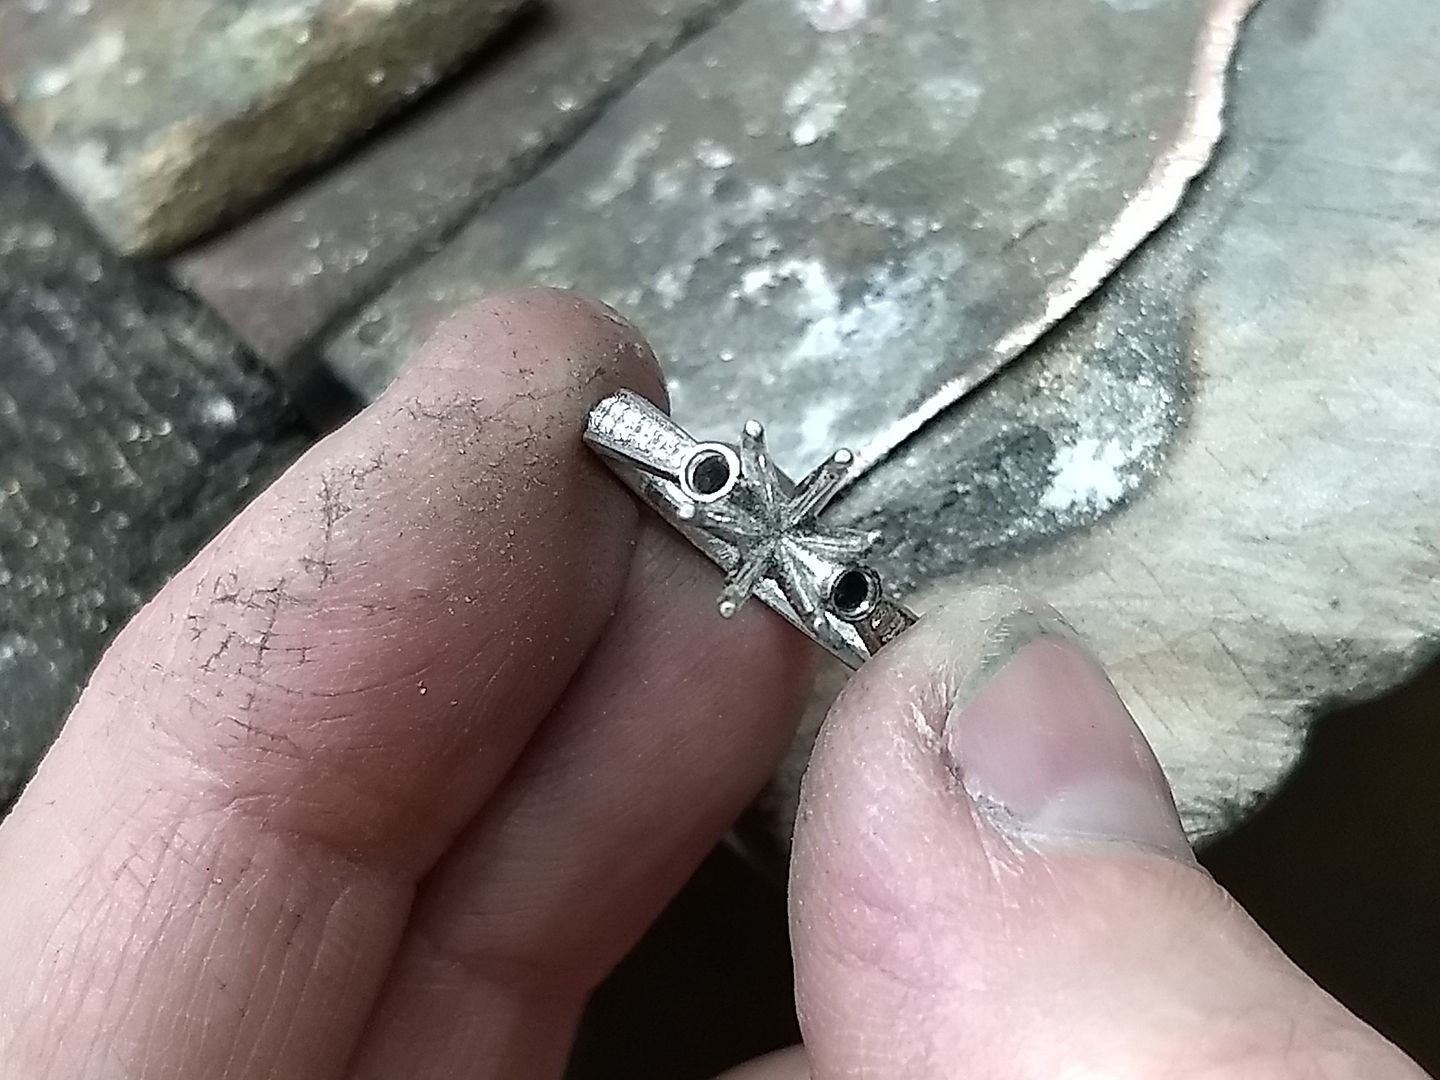
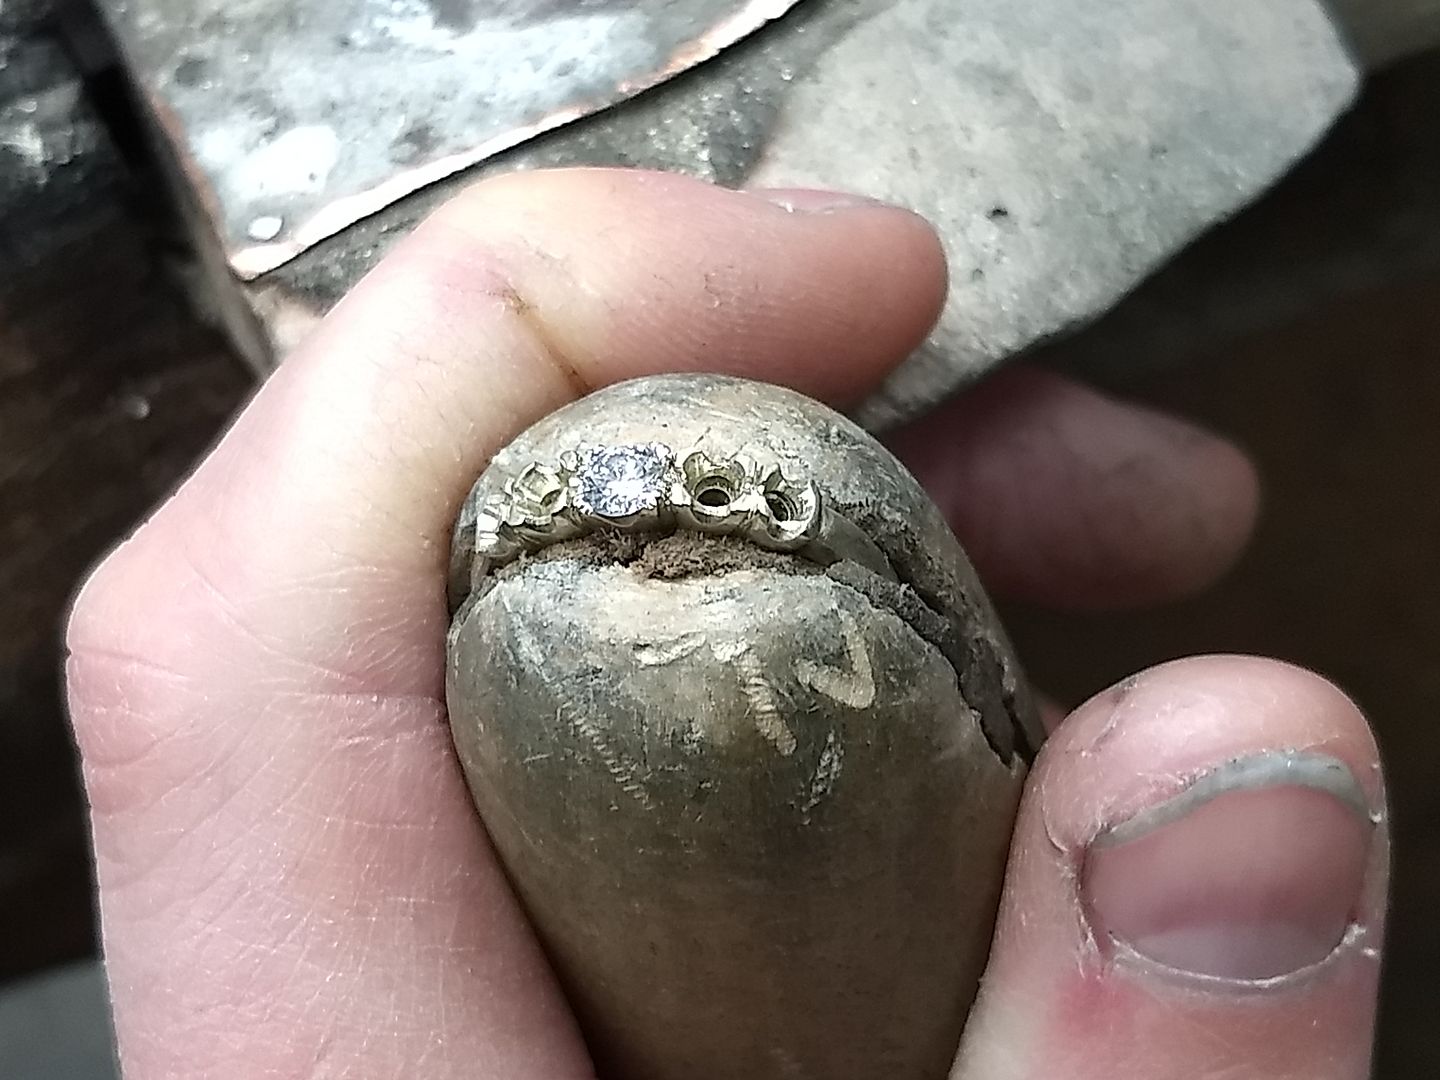
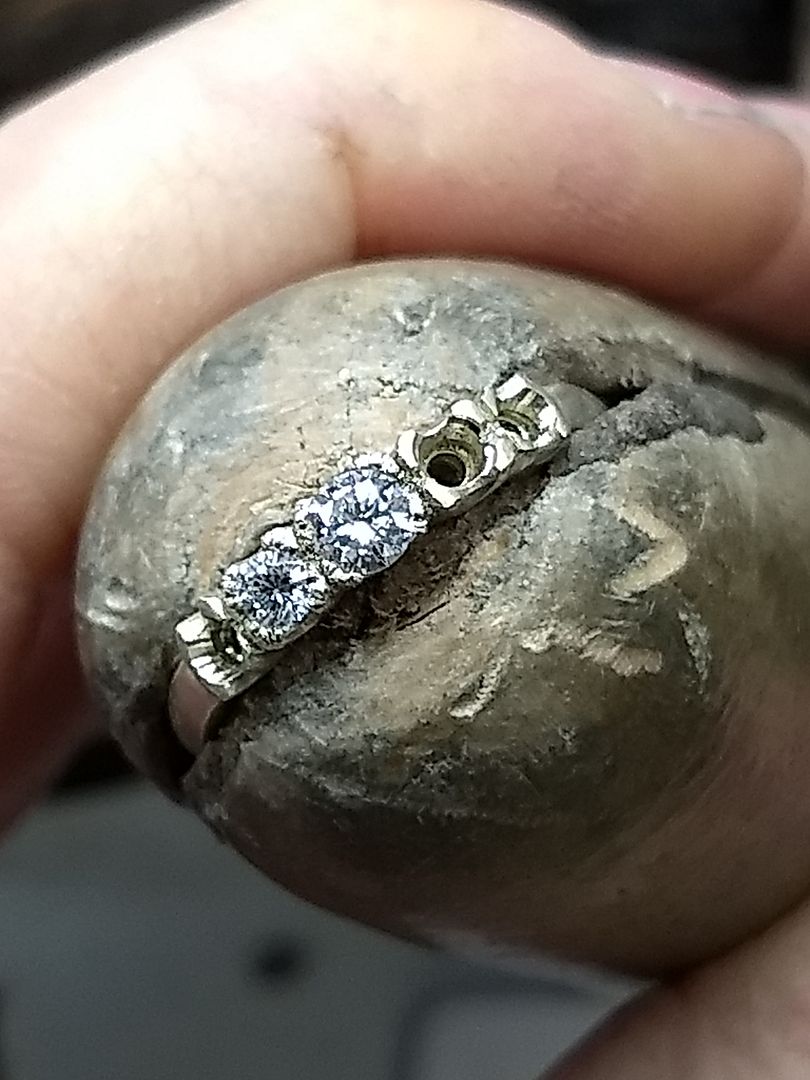
The positioning of the adjacent stones is then marked and drilled:
These stones are slightly smaller.... so have smaller holes:
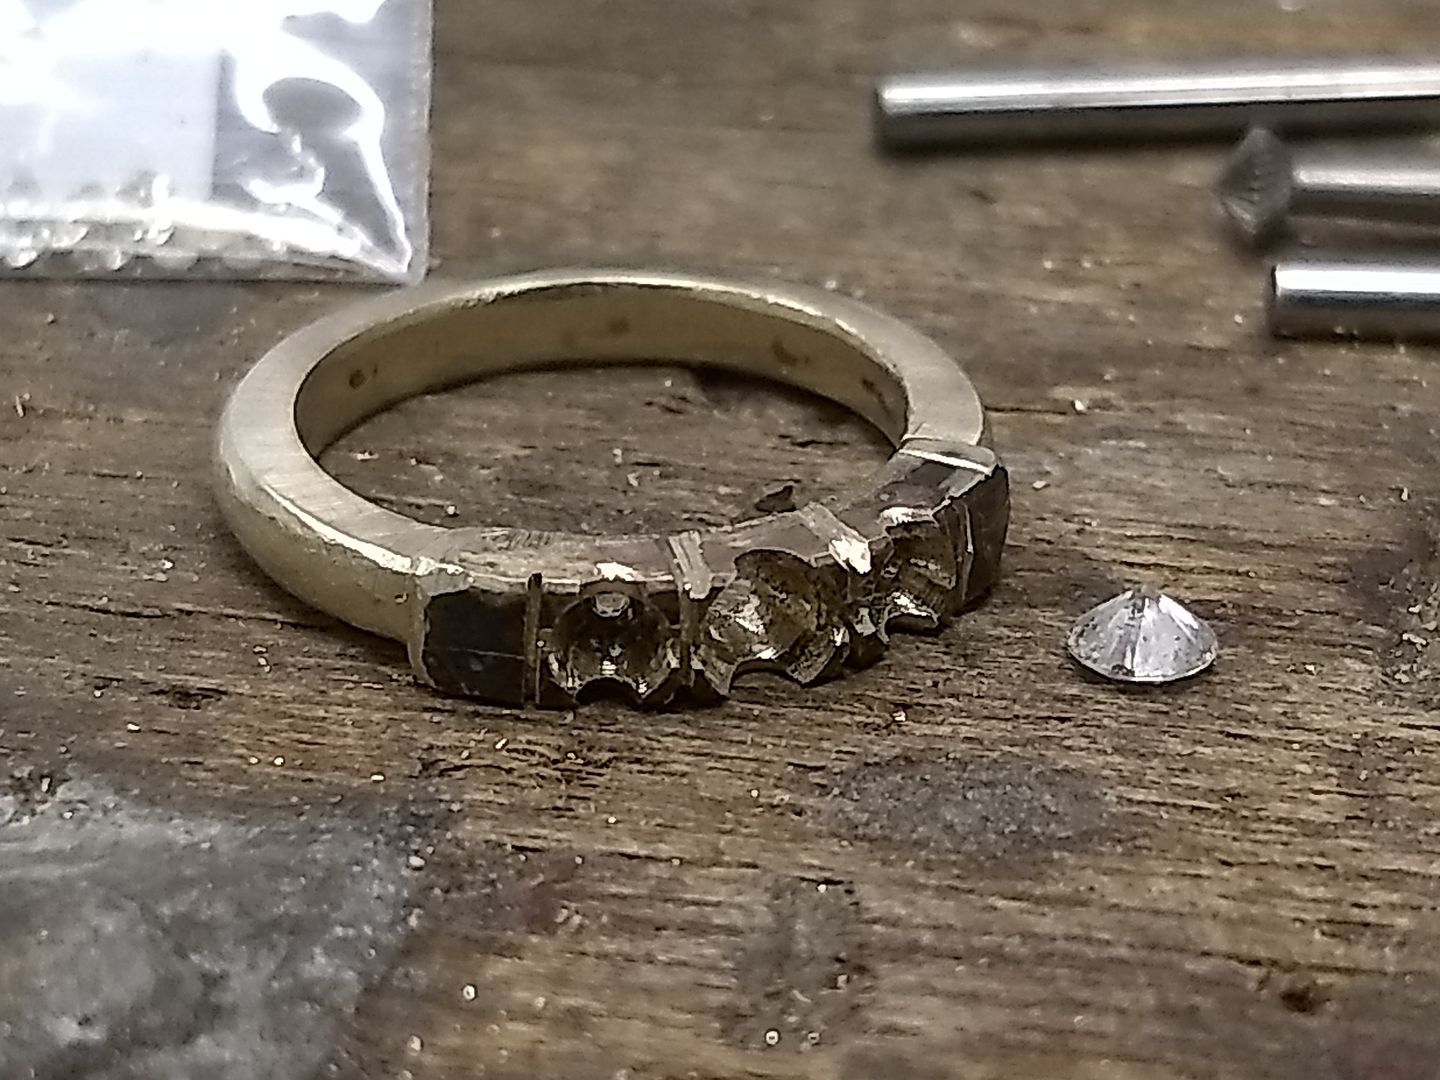
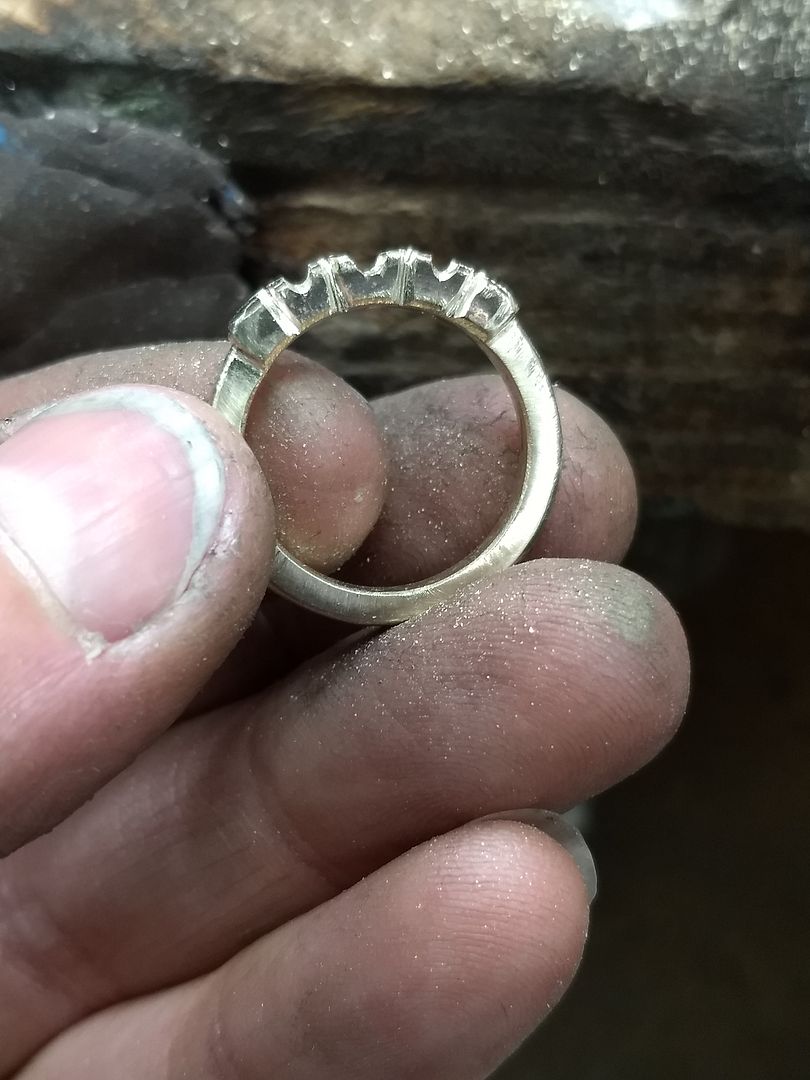

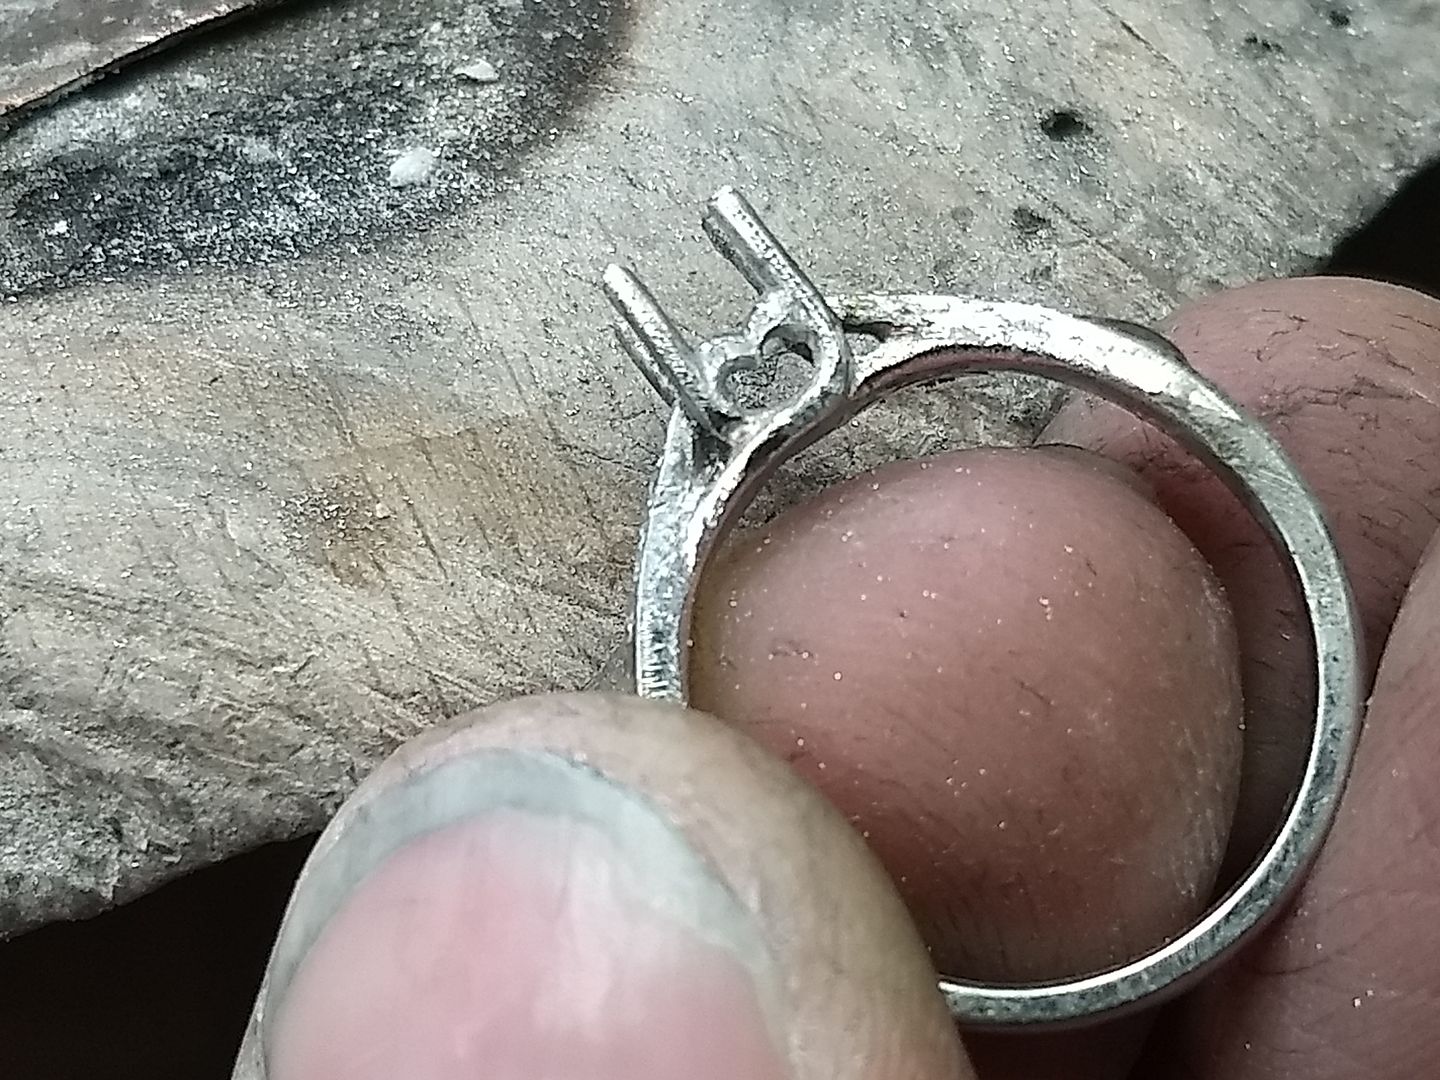
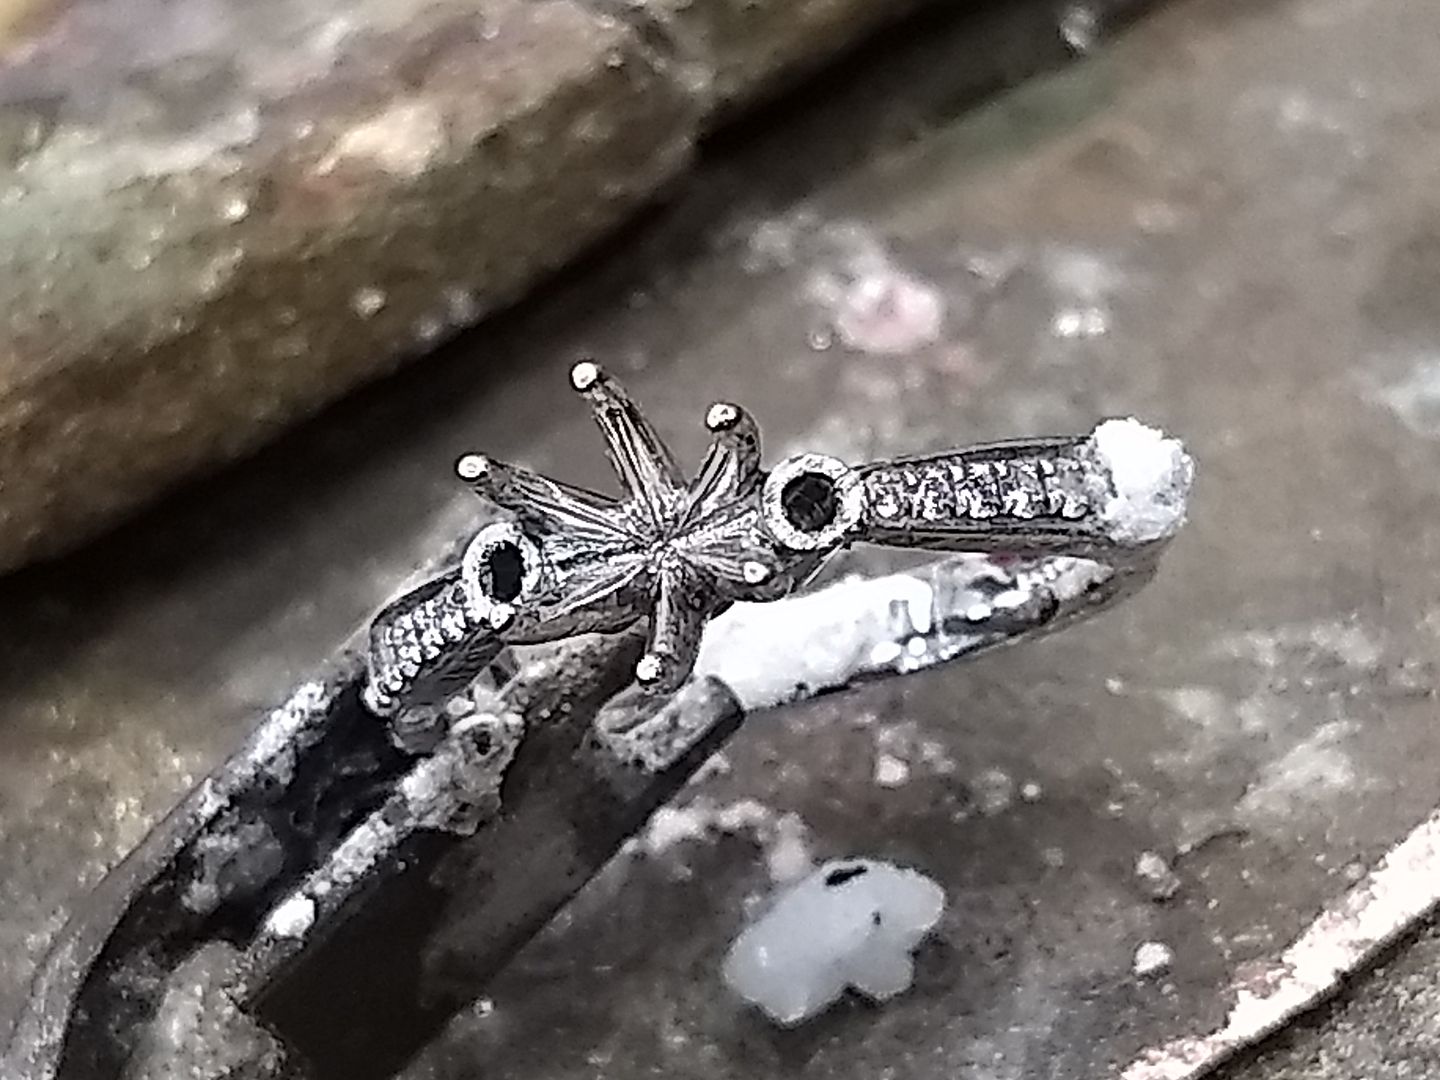
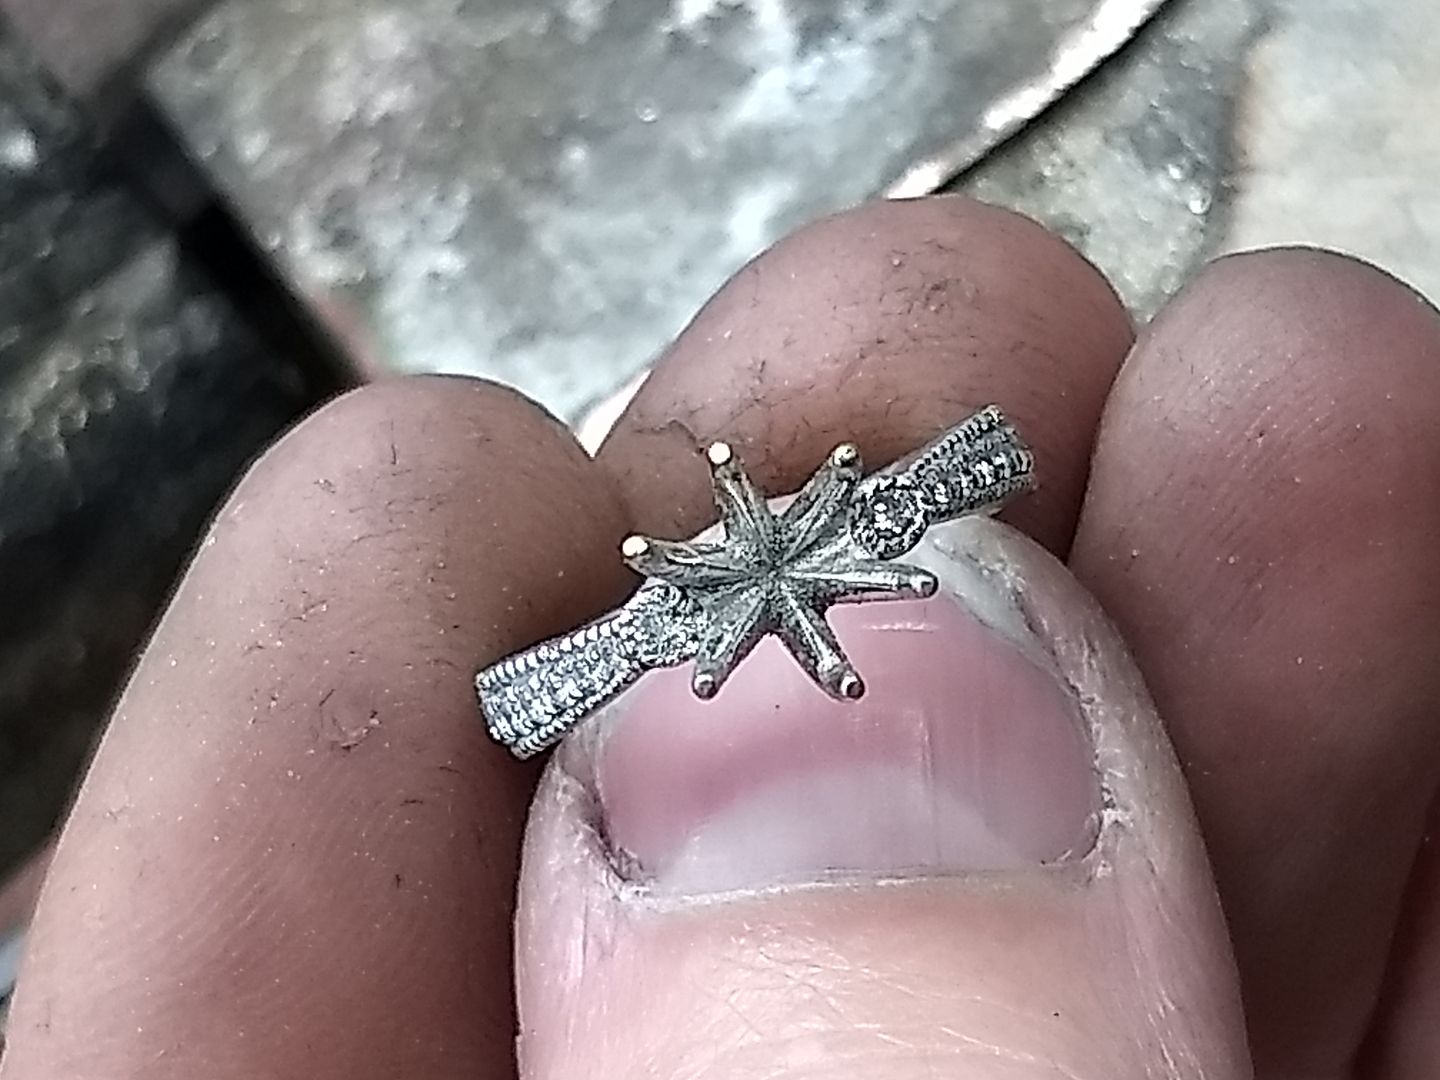
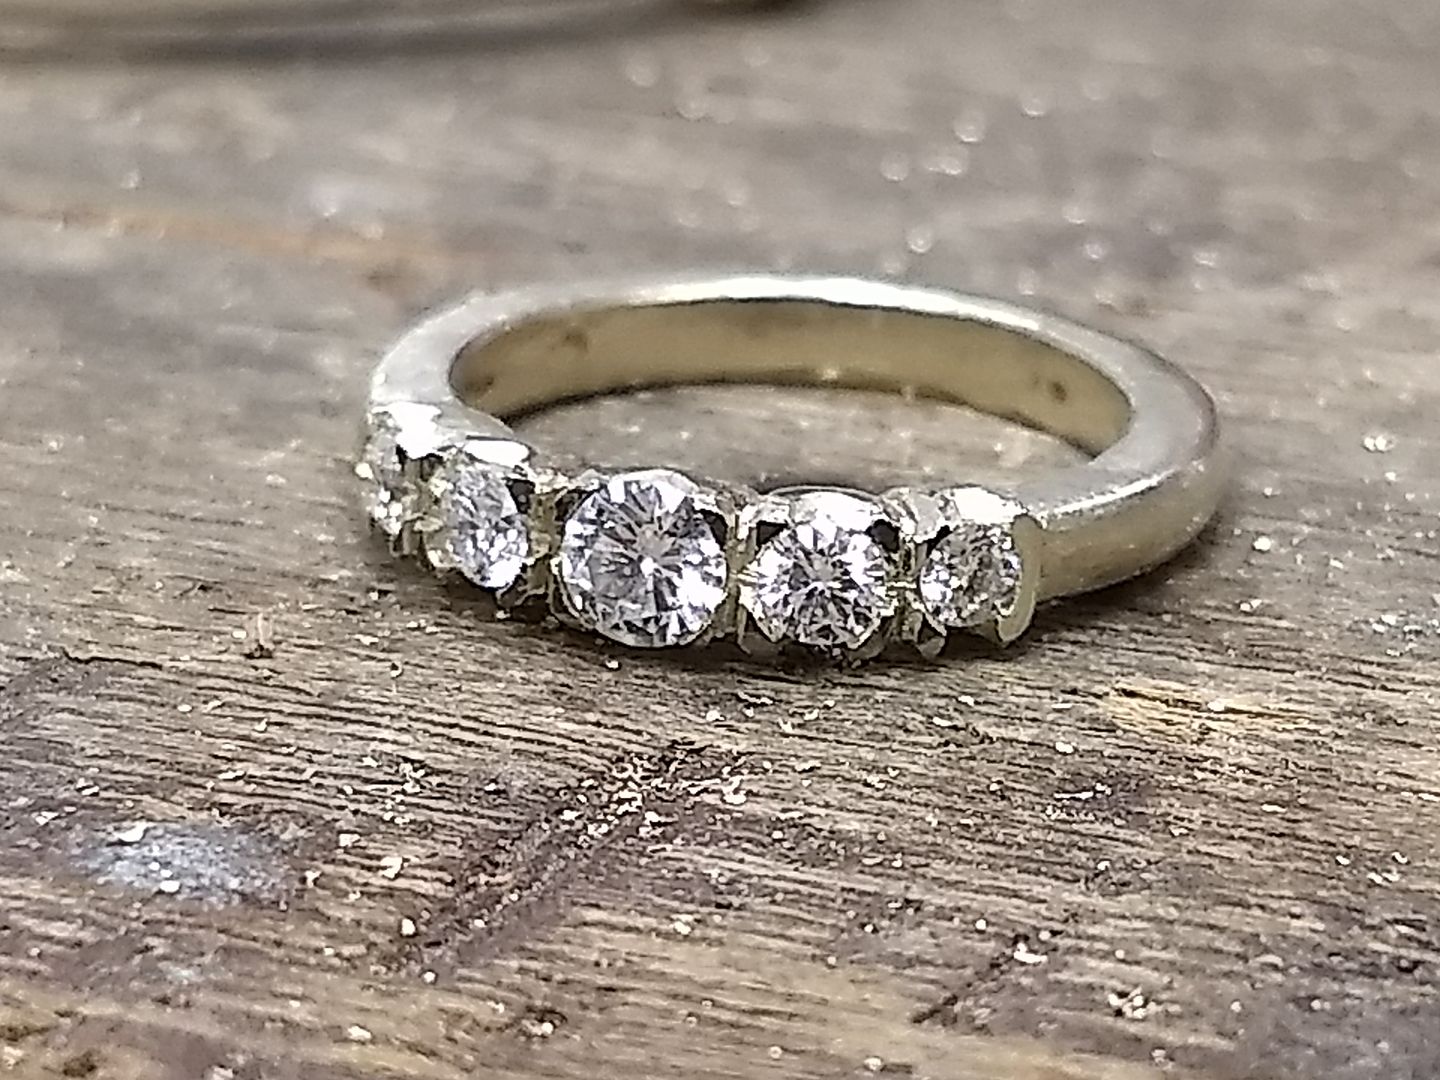
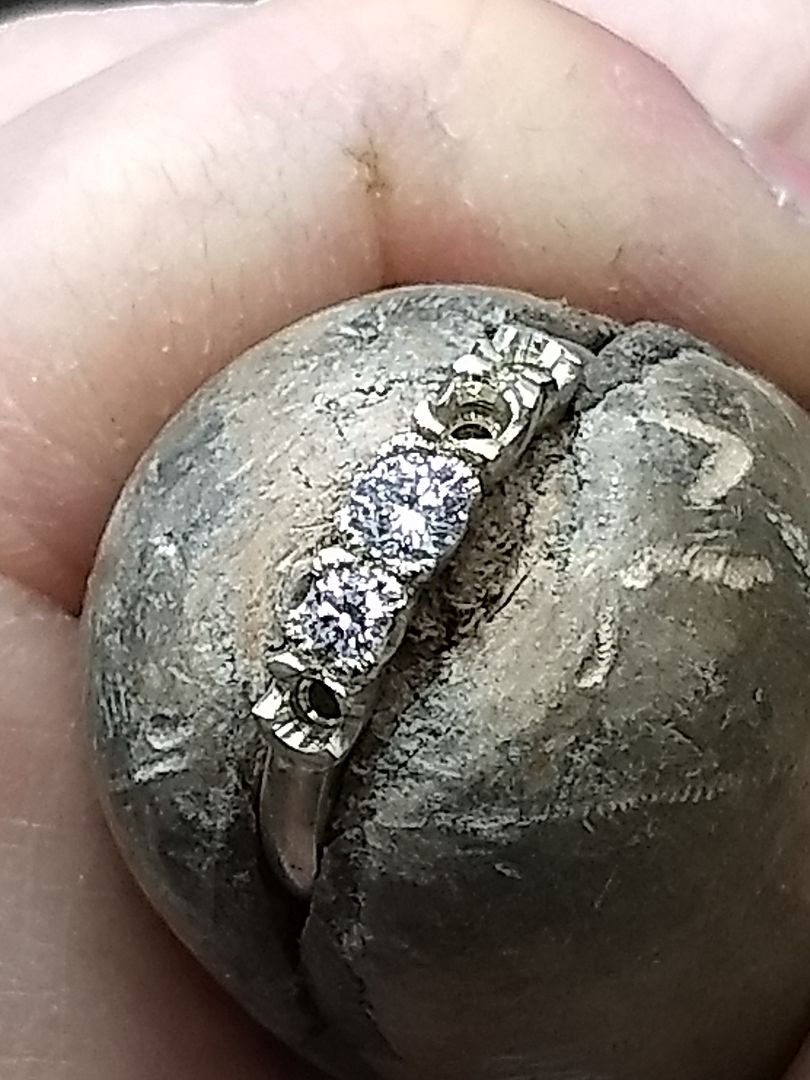
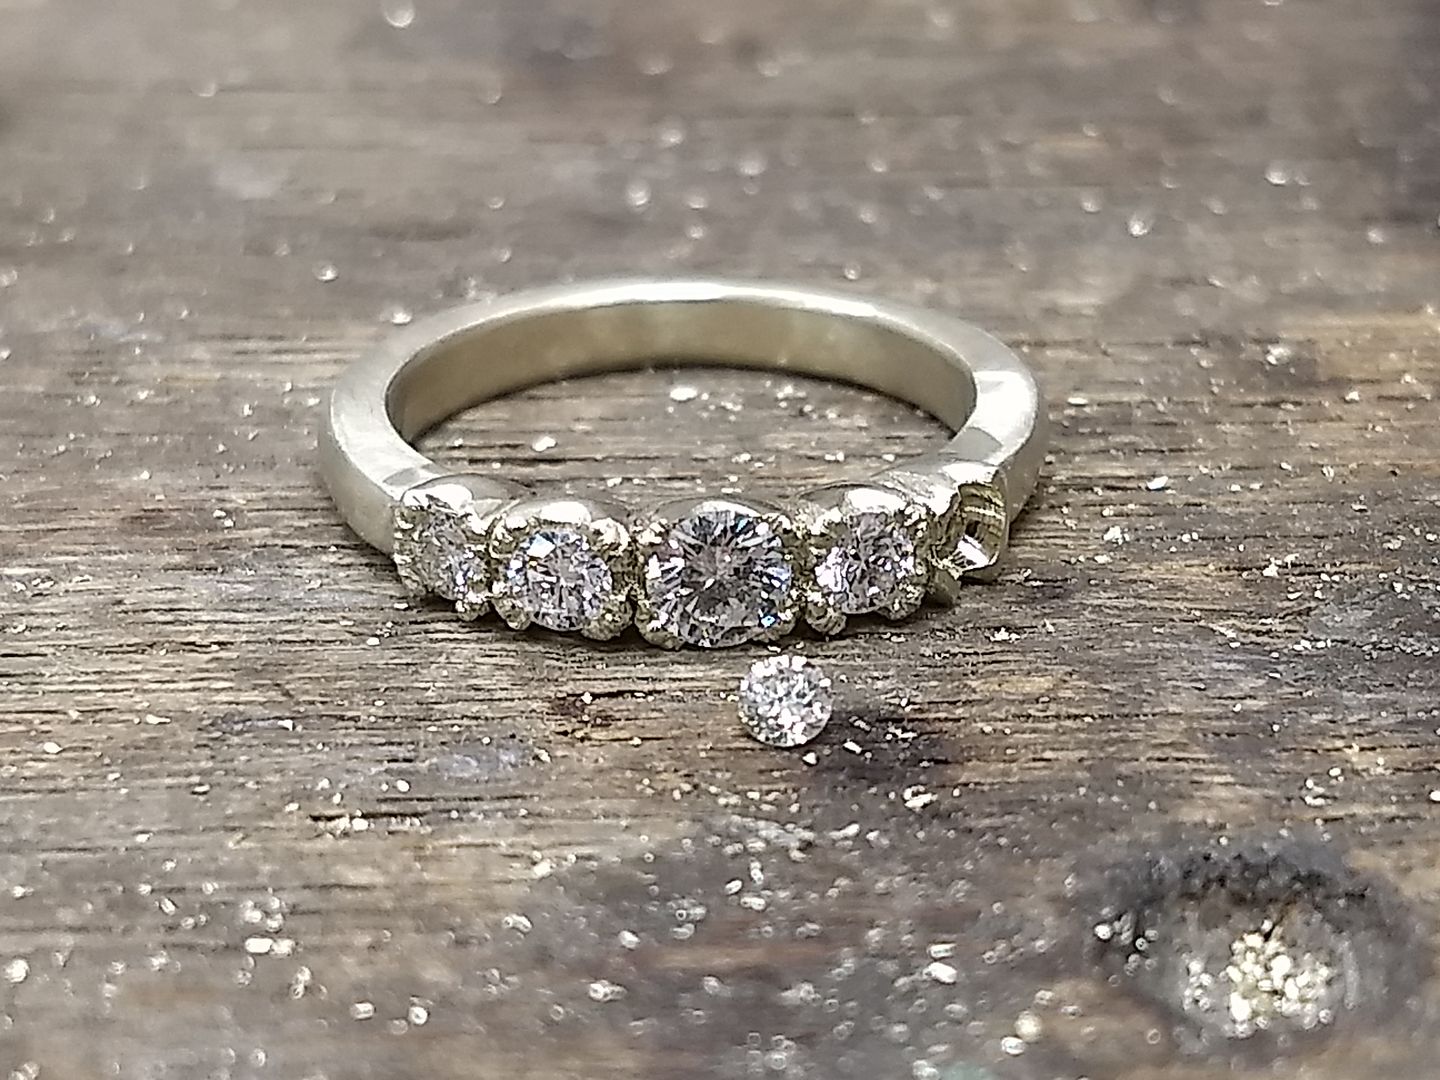
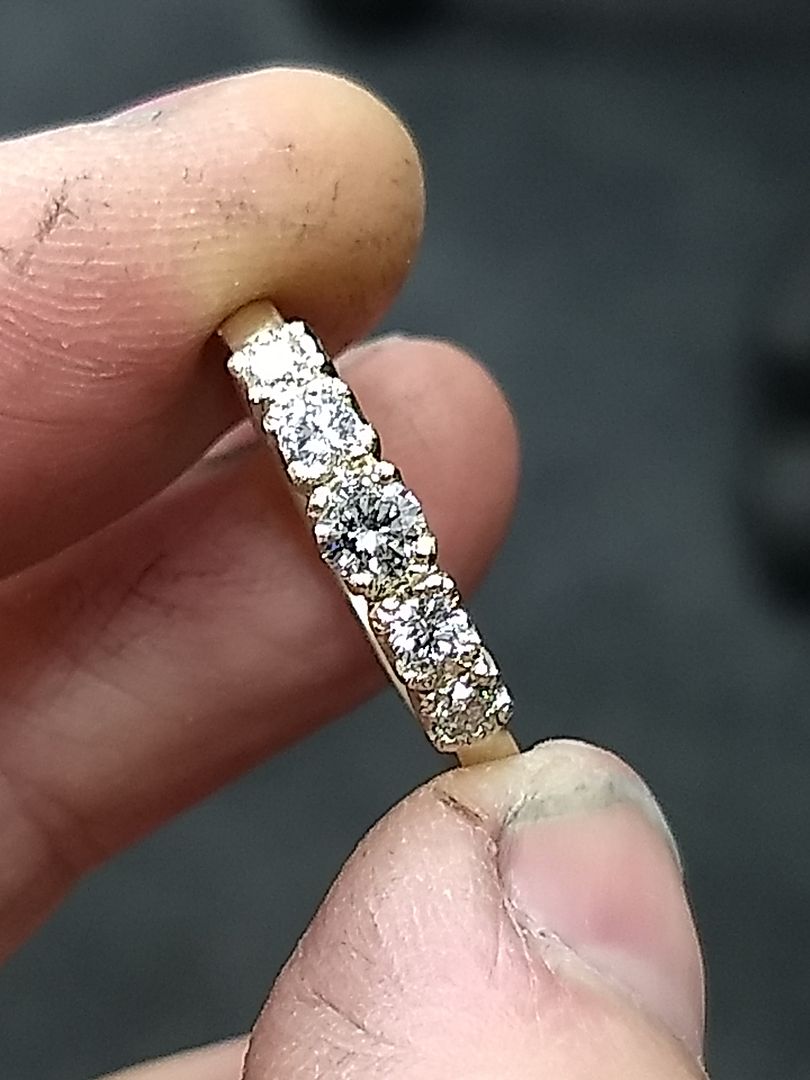
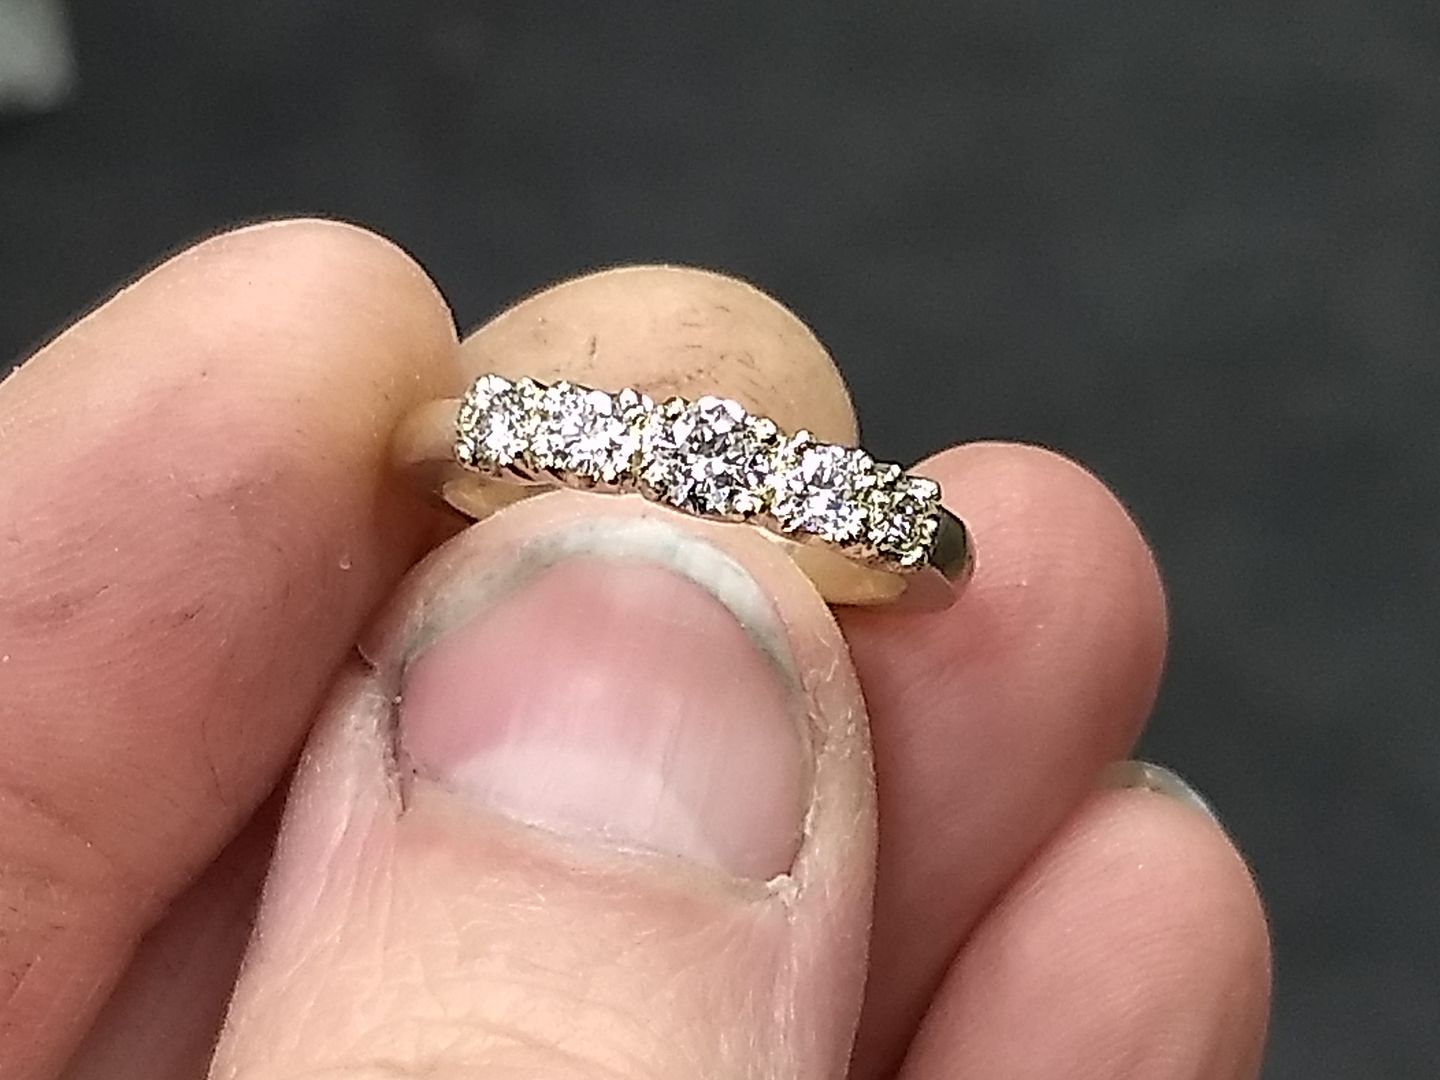
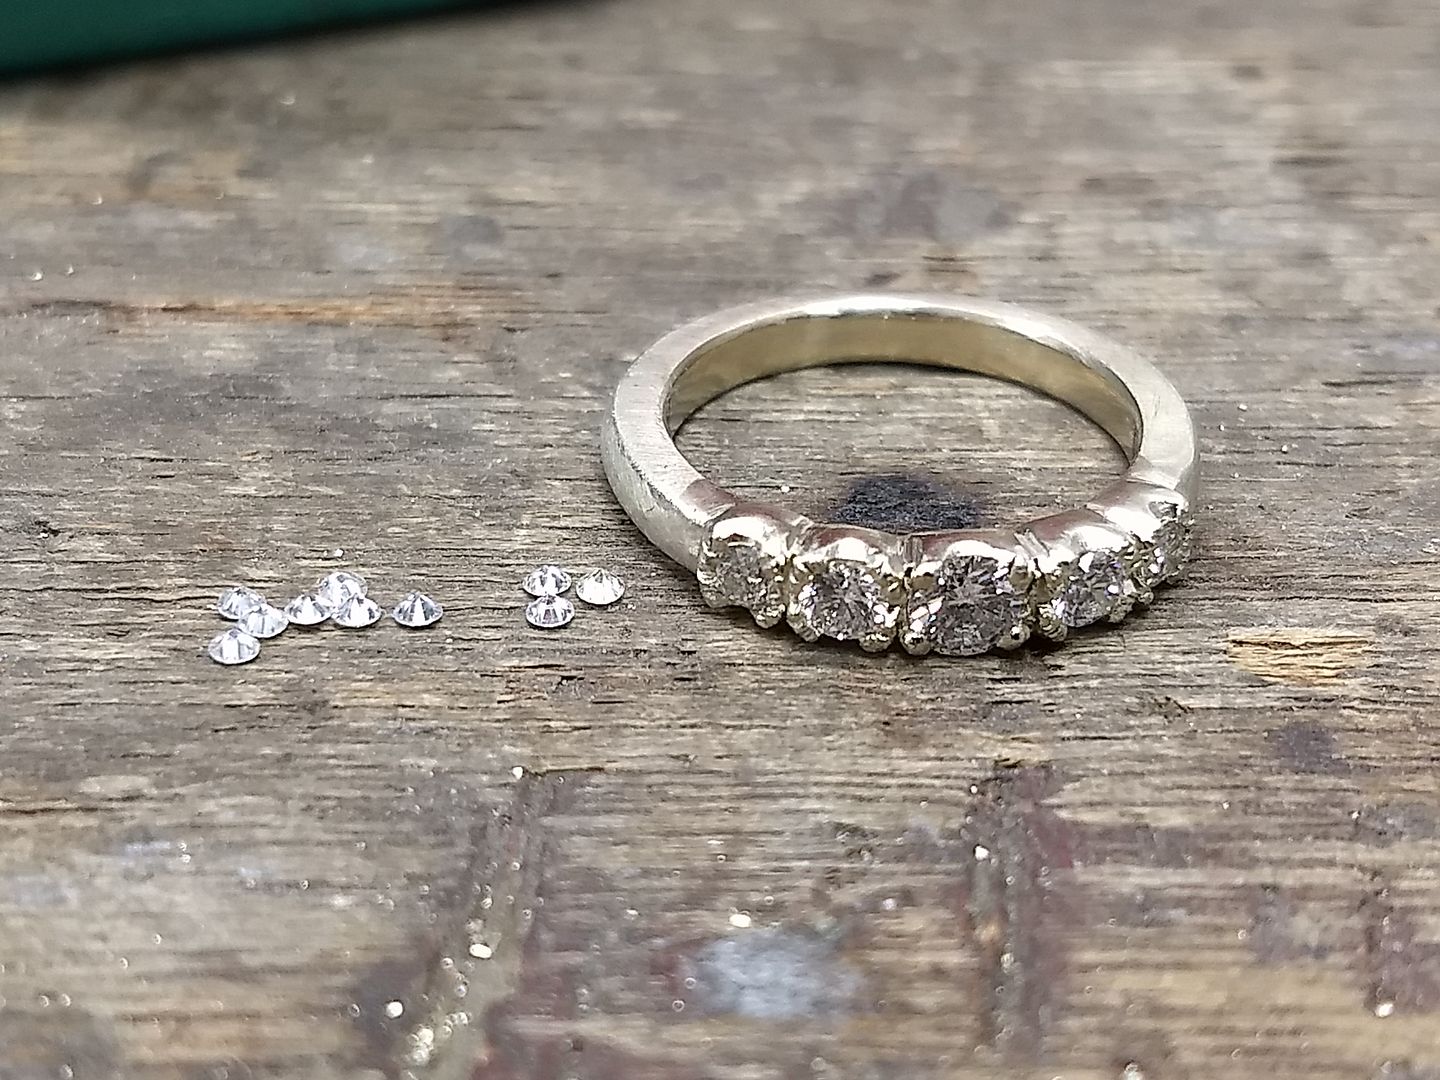
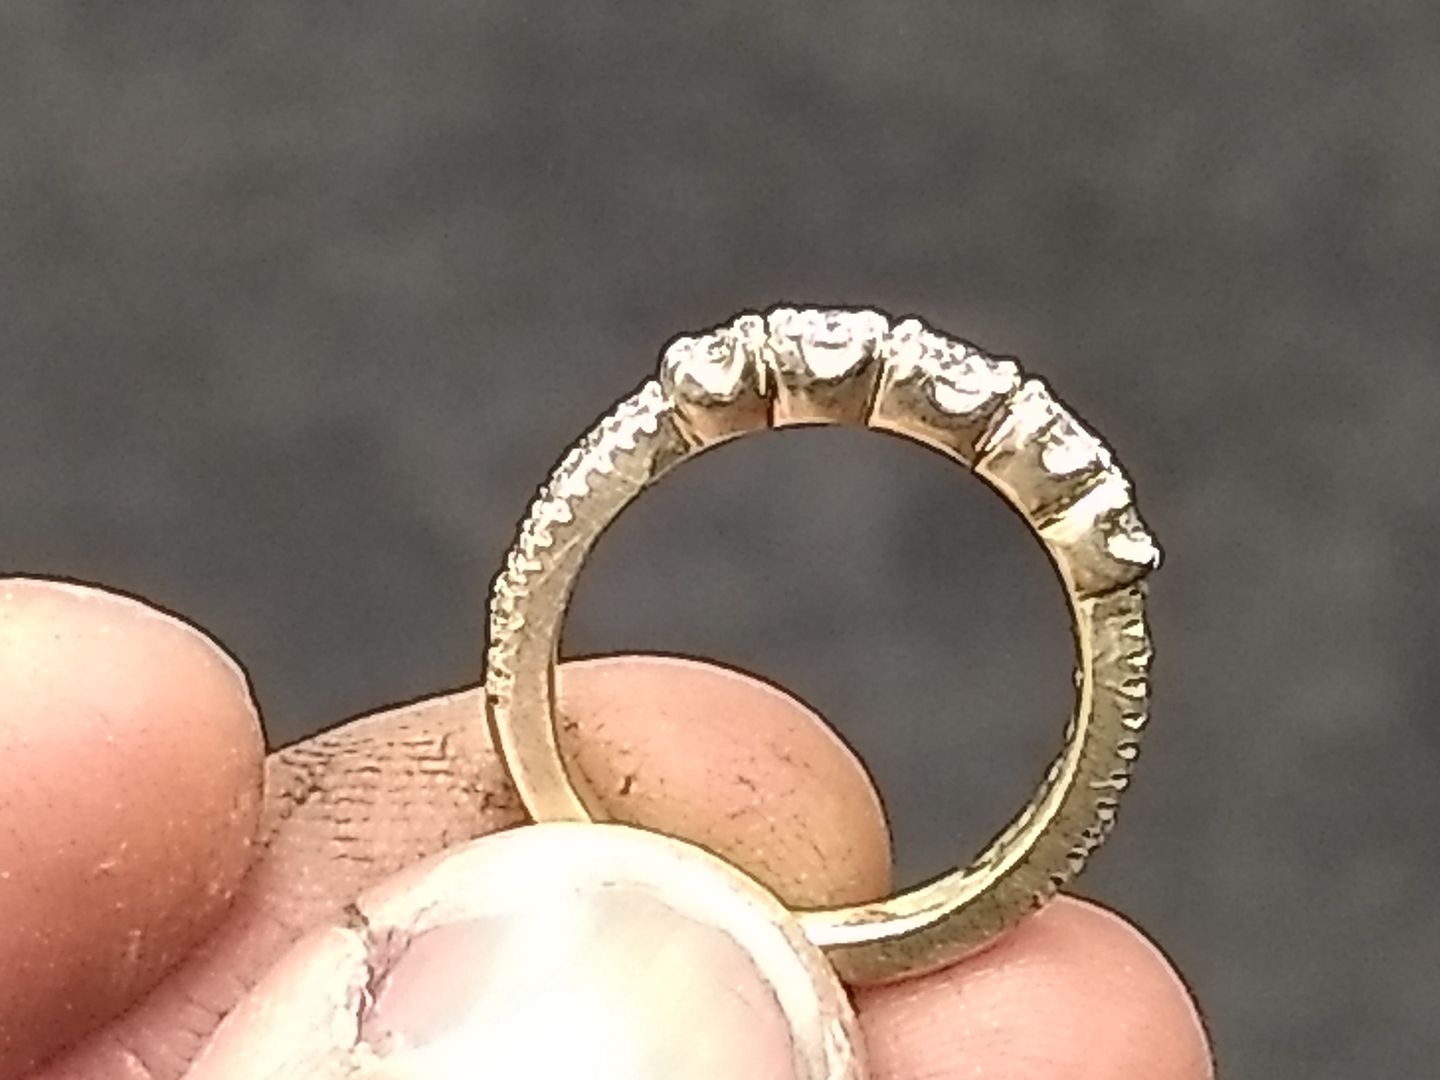
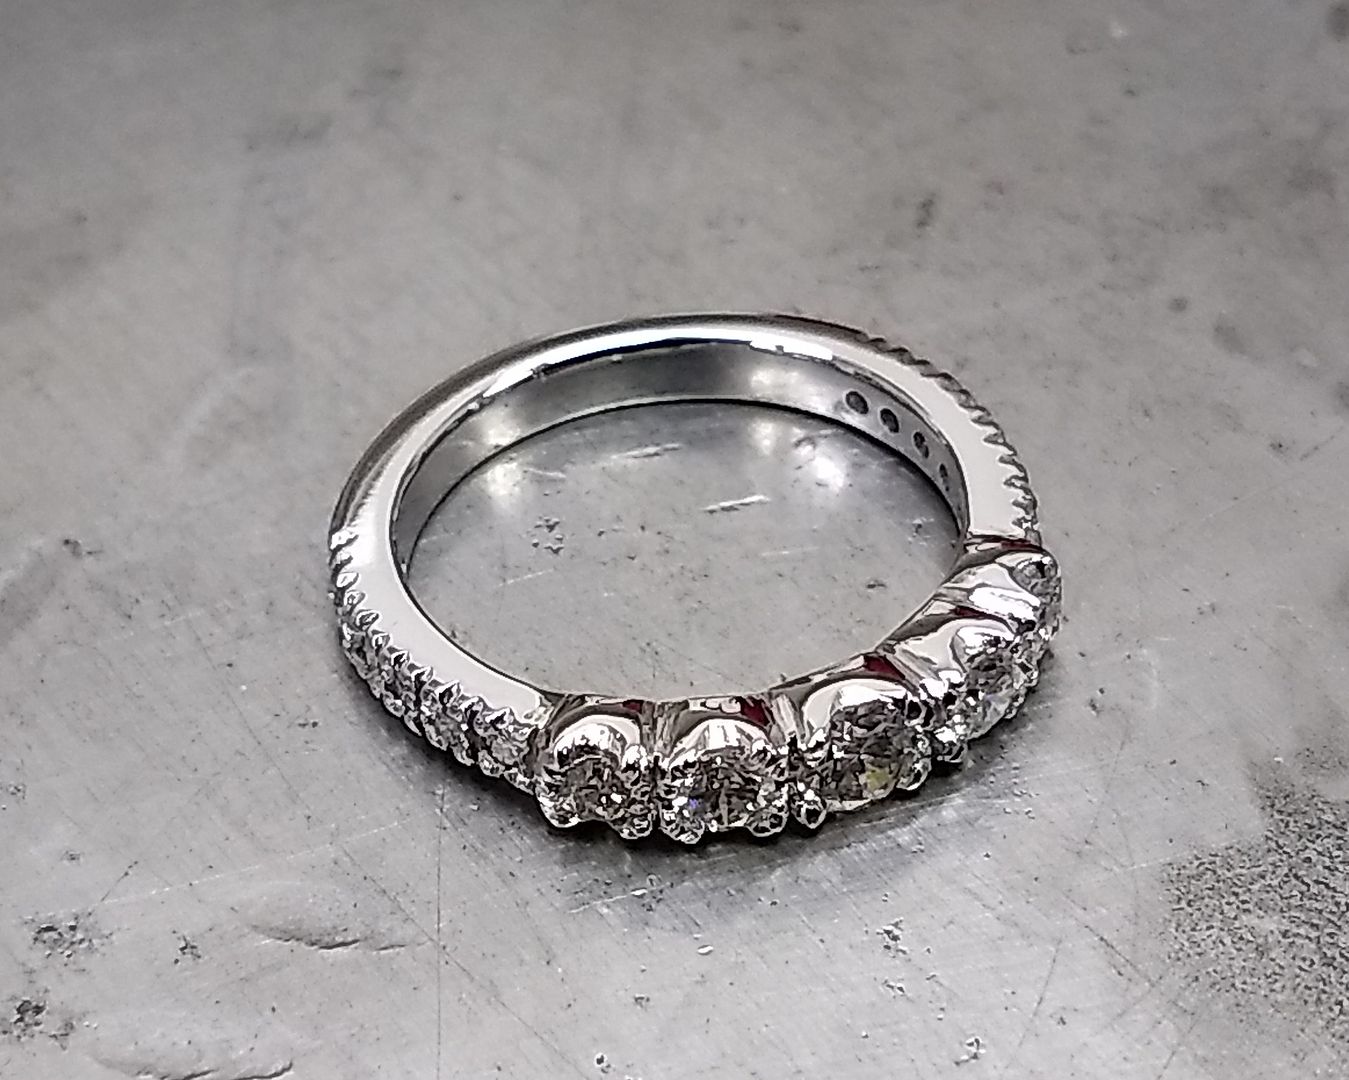
The ring was originally to have 3 main stones but the excess I left was too perfect to not incorporate another 2 to make 5. She agreed and hey presto:
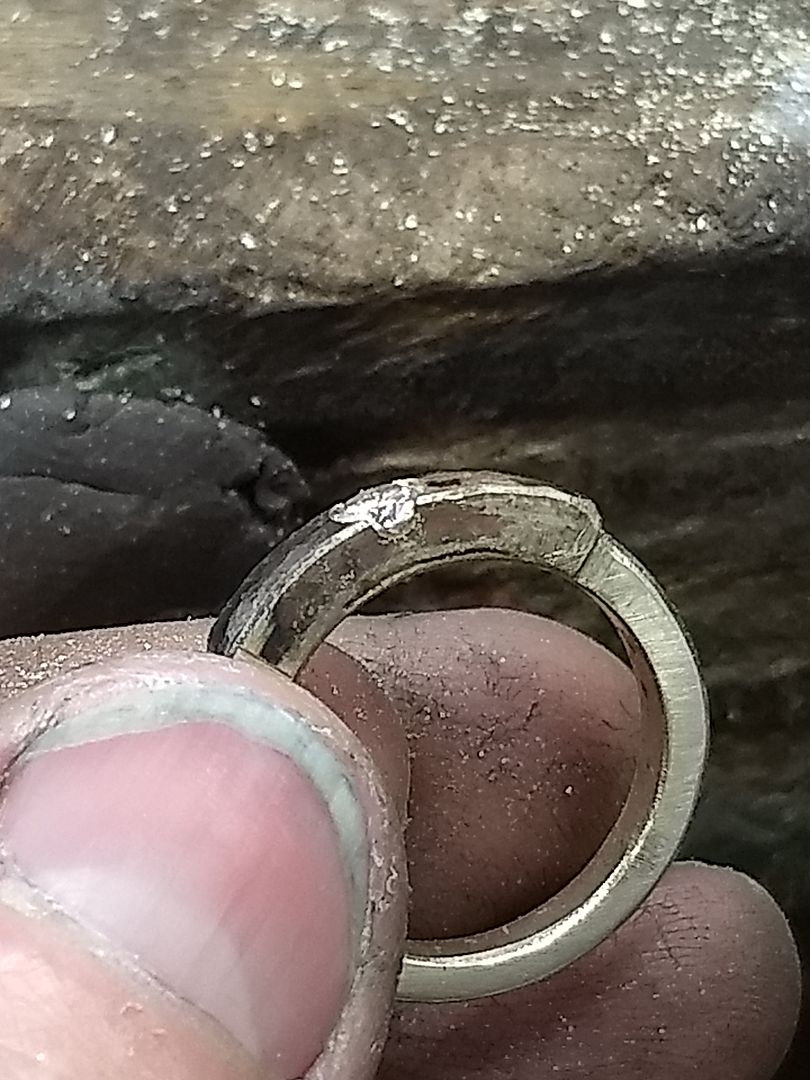
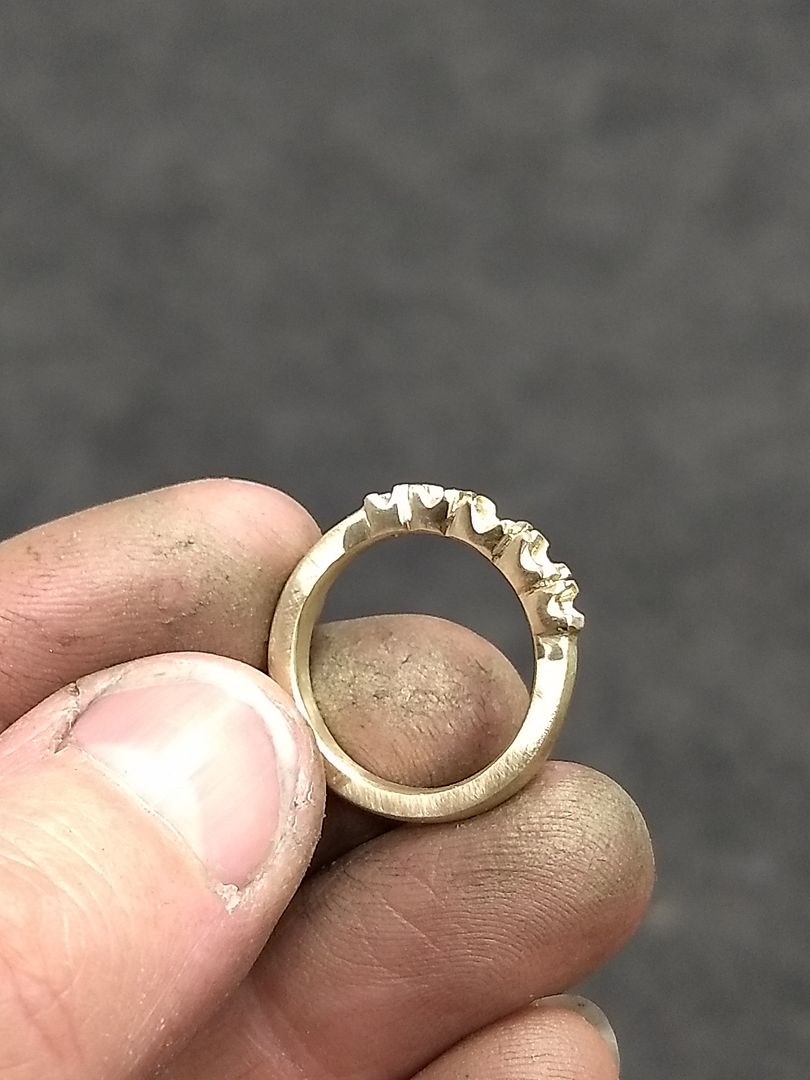
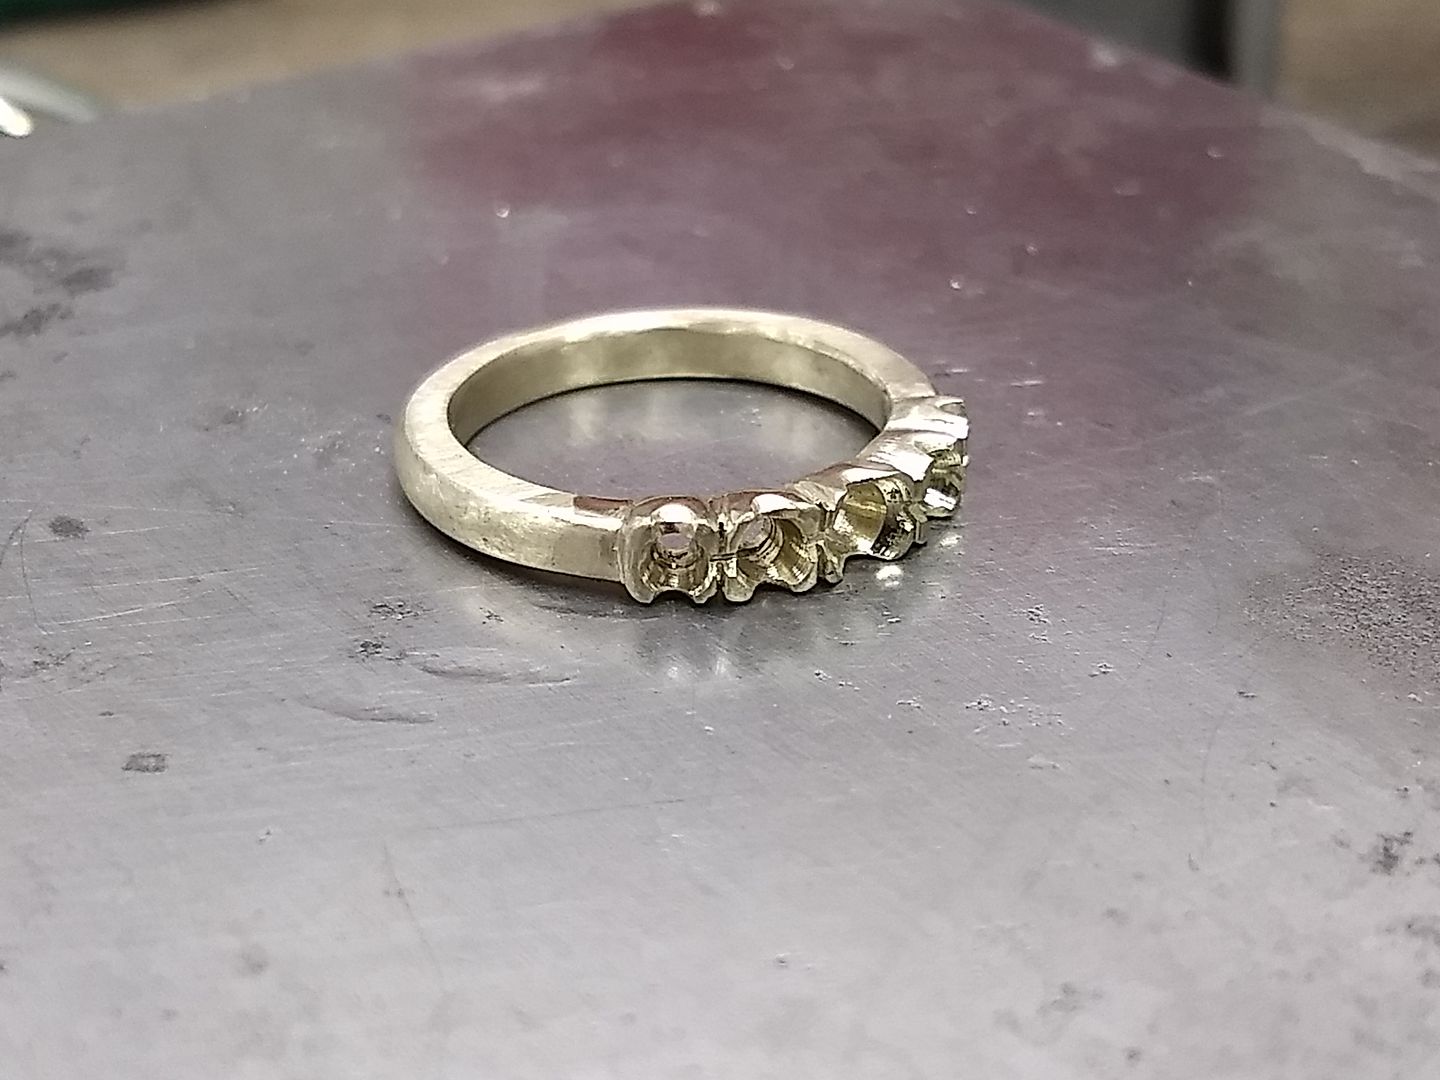
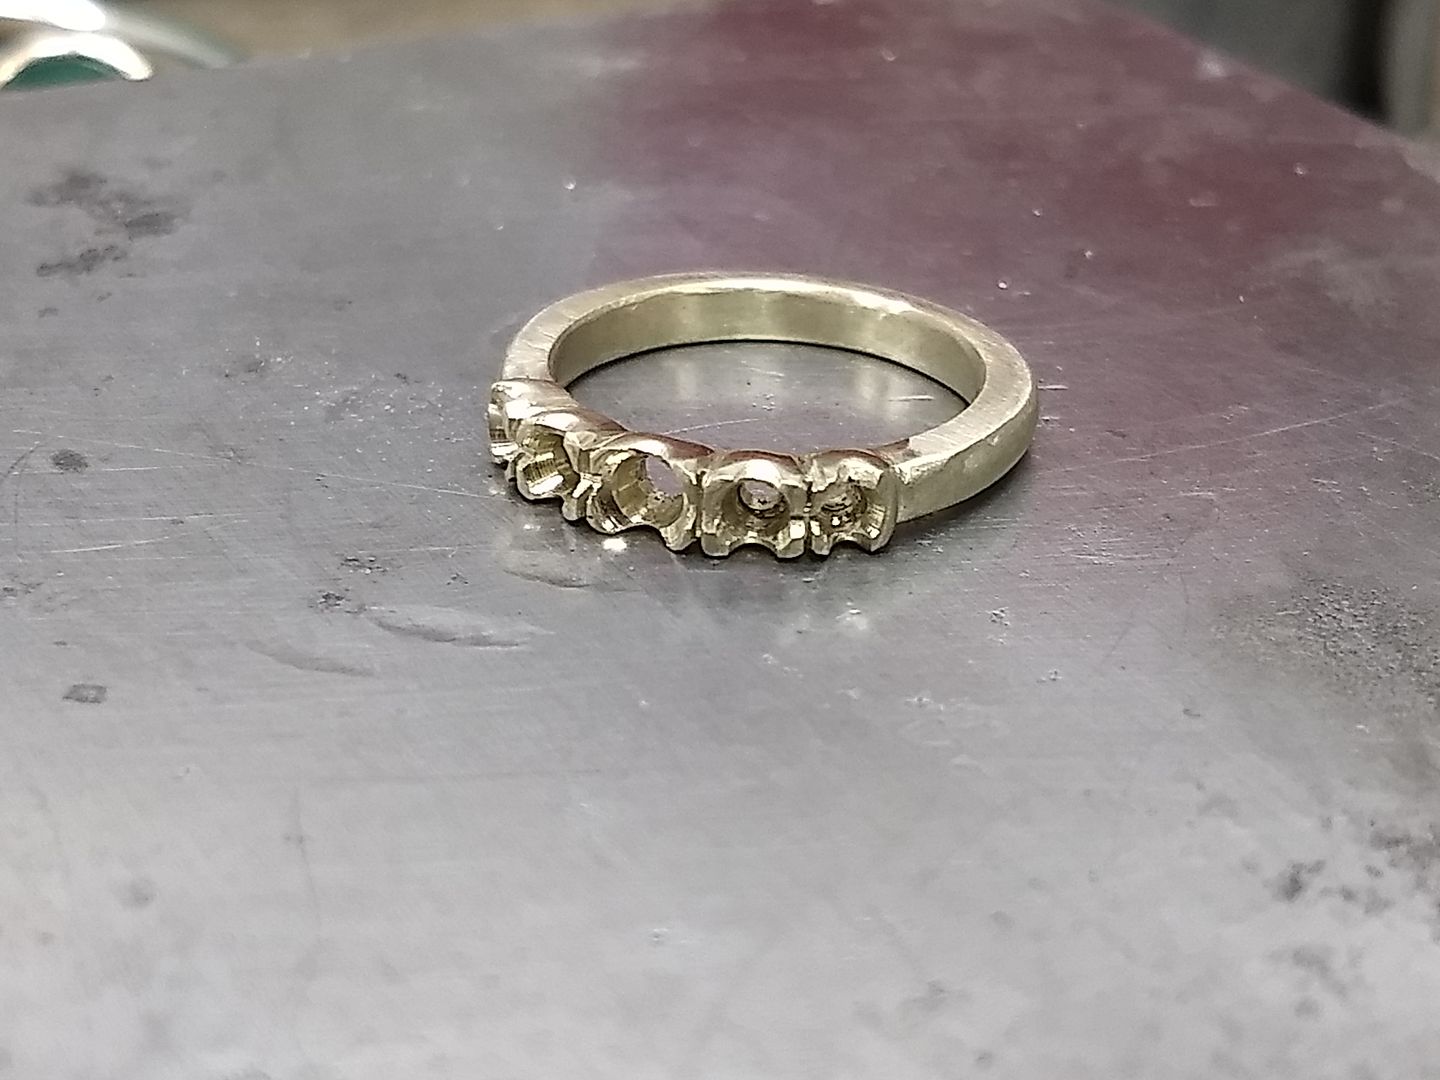
Nice little test fit:

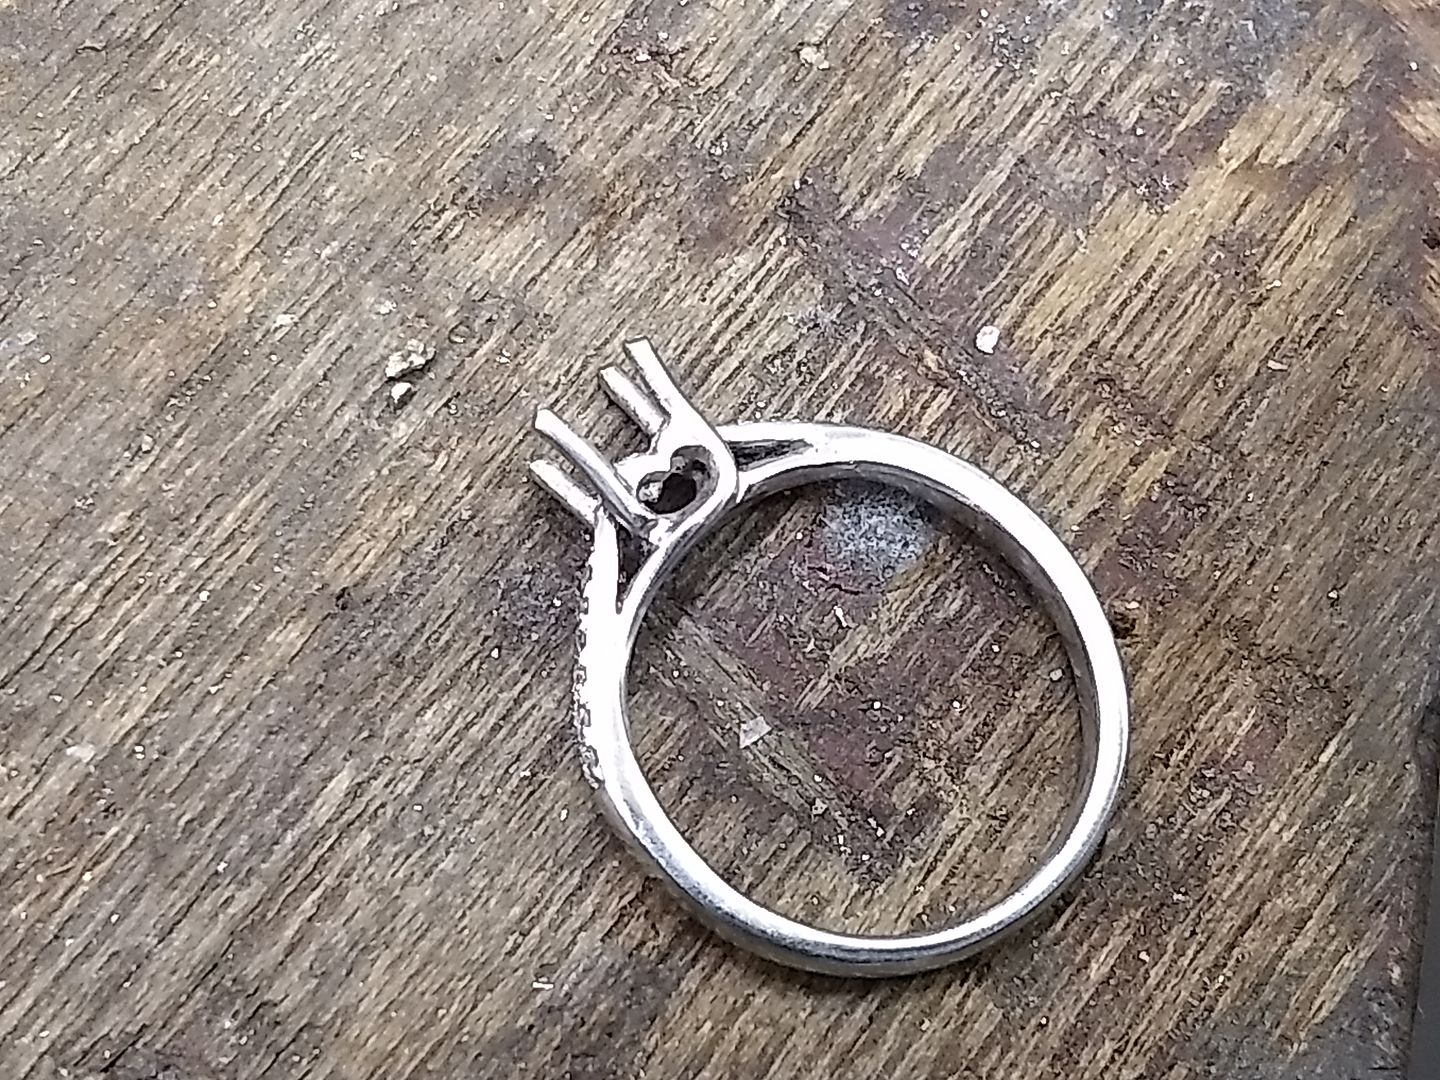
The mount is cleaned up ready for the next phase (at this point I'm thinking "s t, this might actually be quite good"):

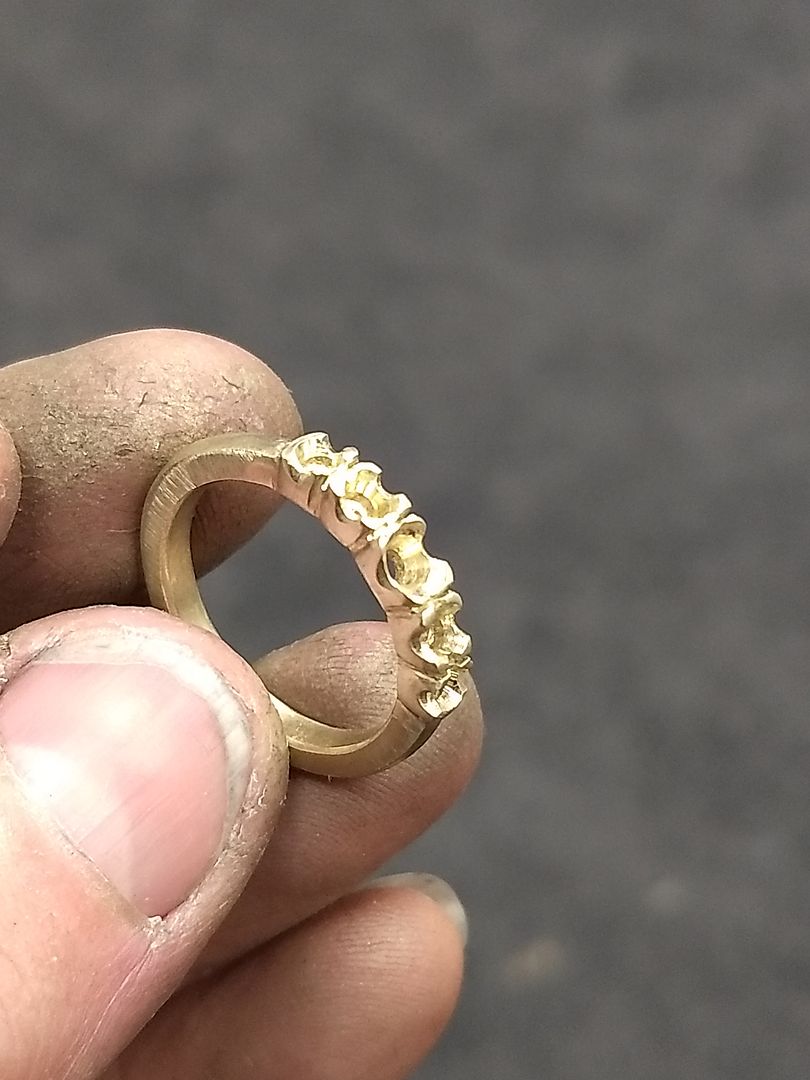
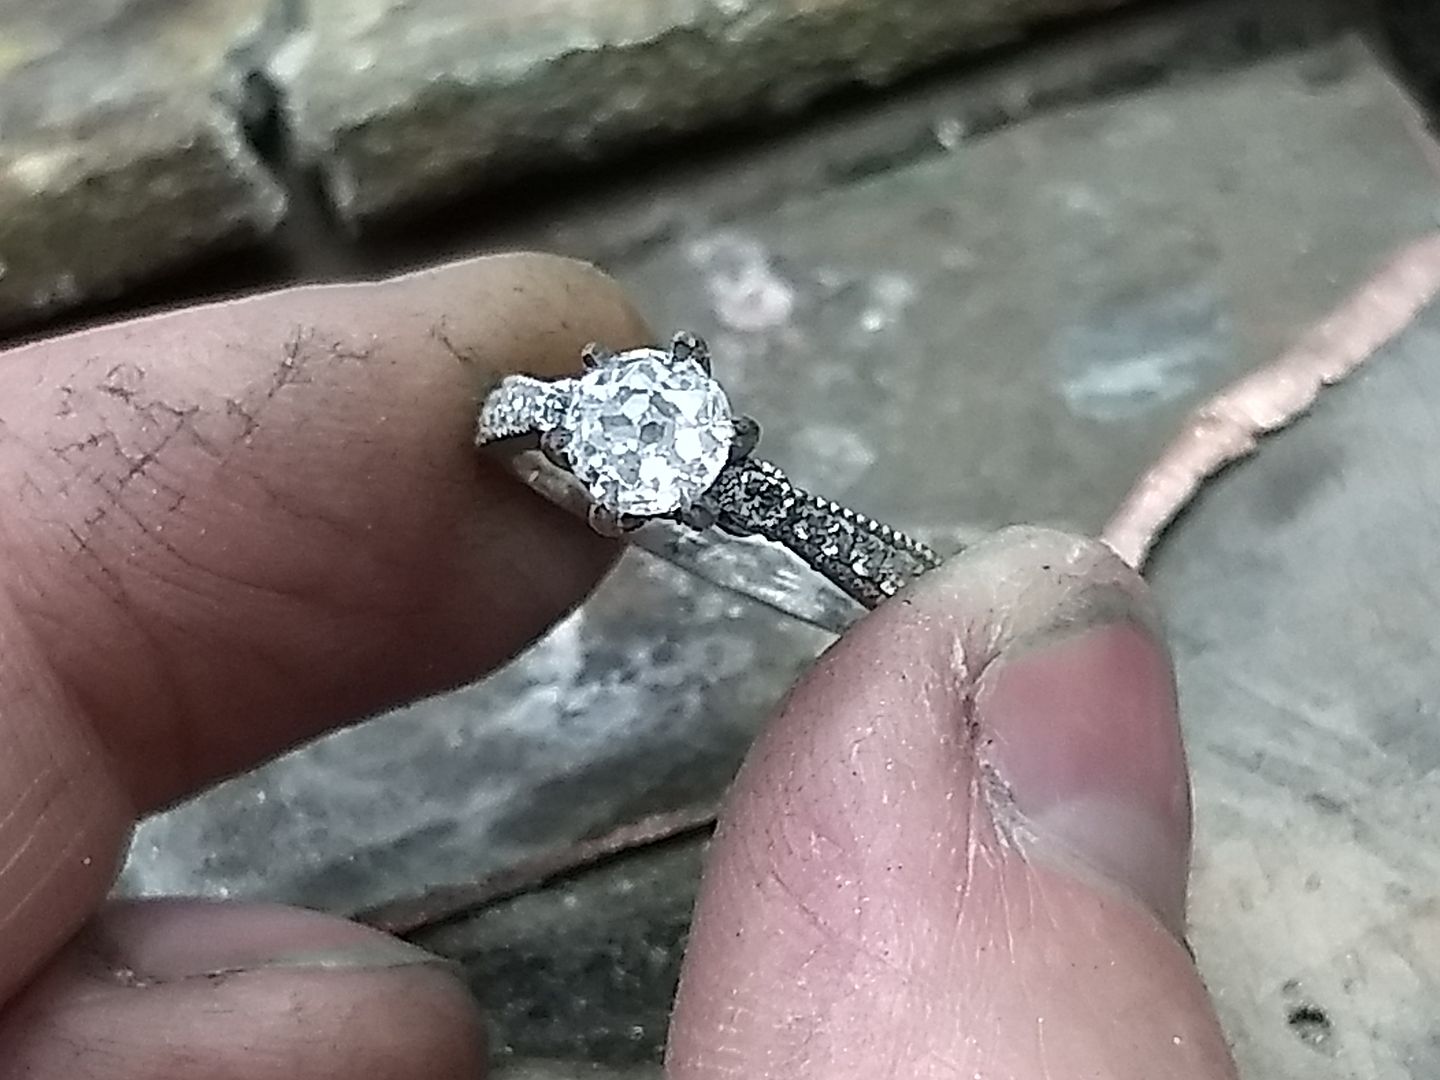
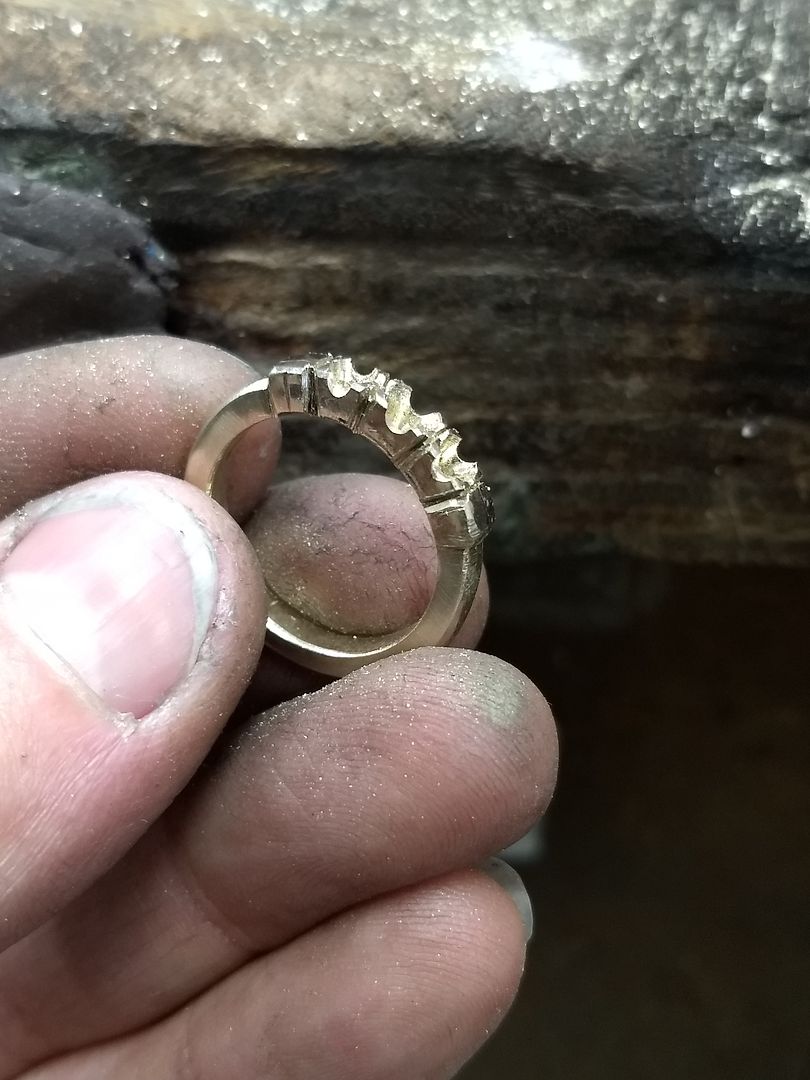
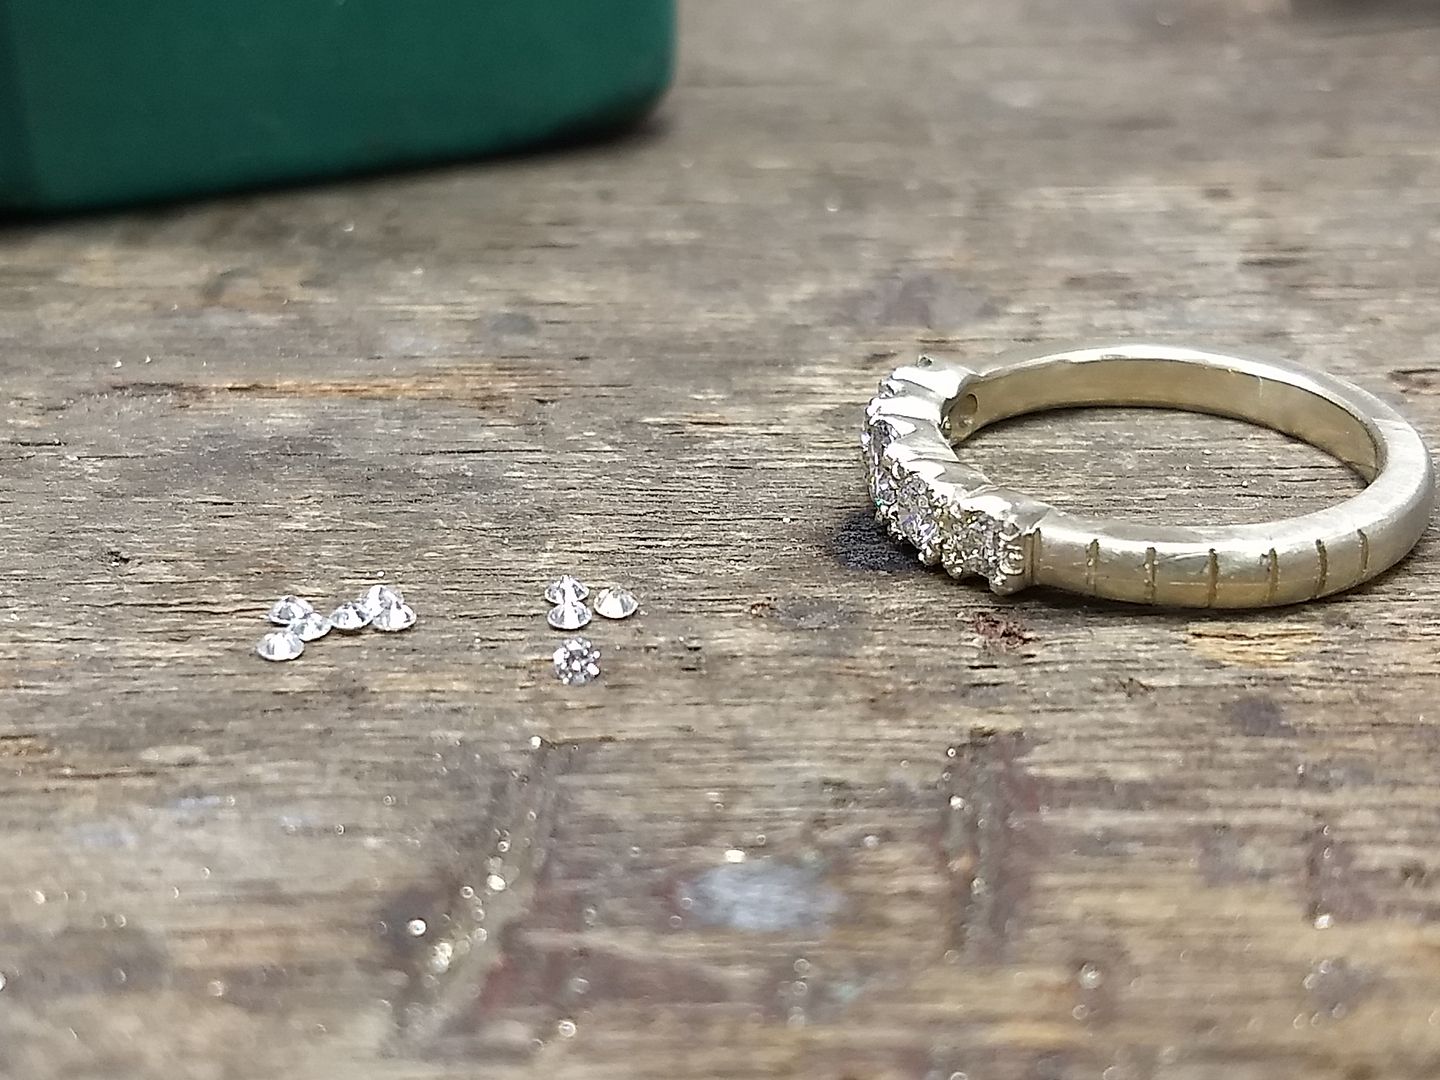
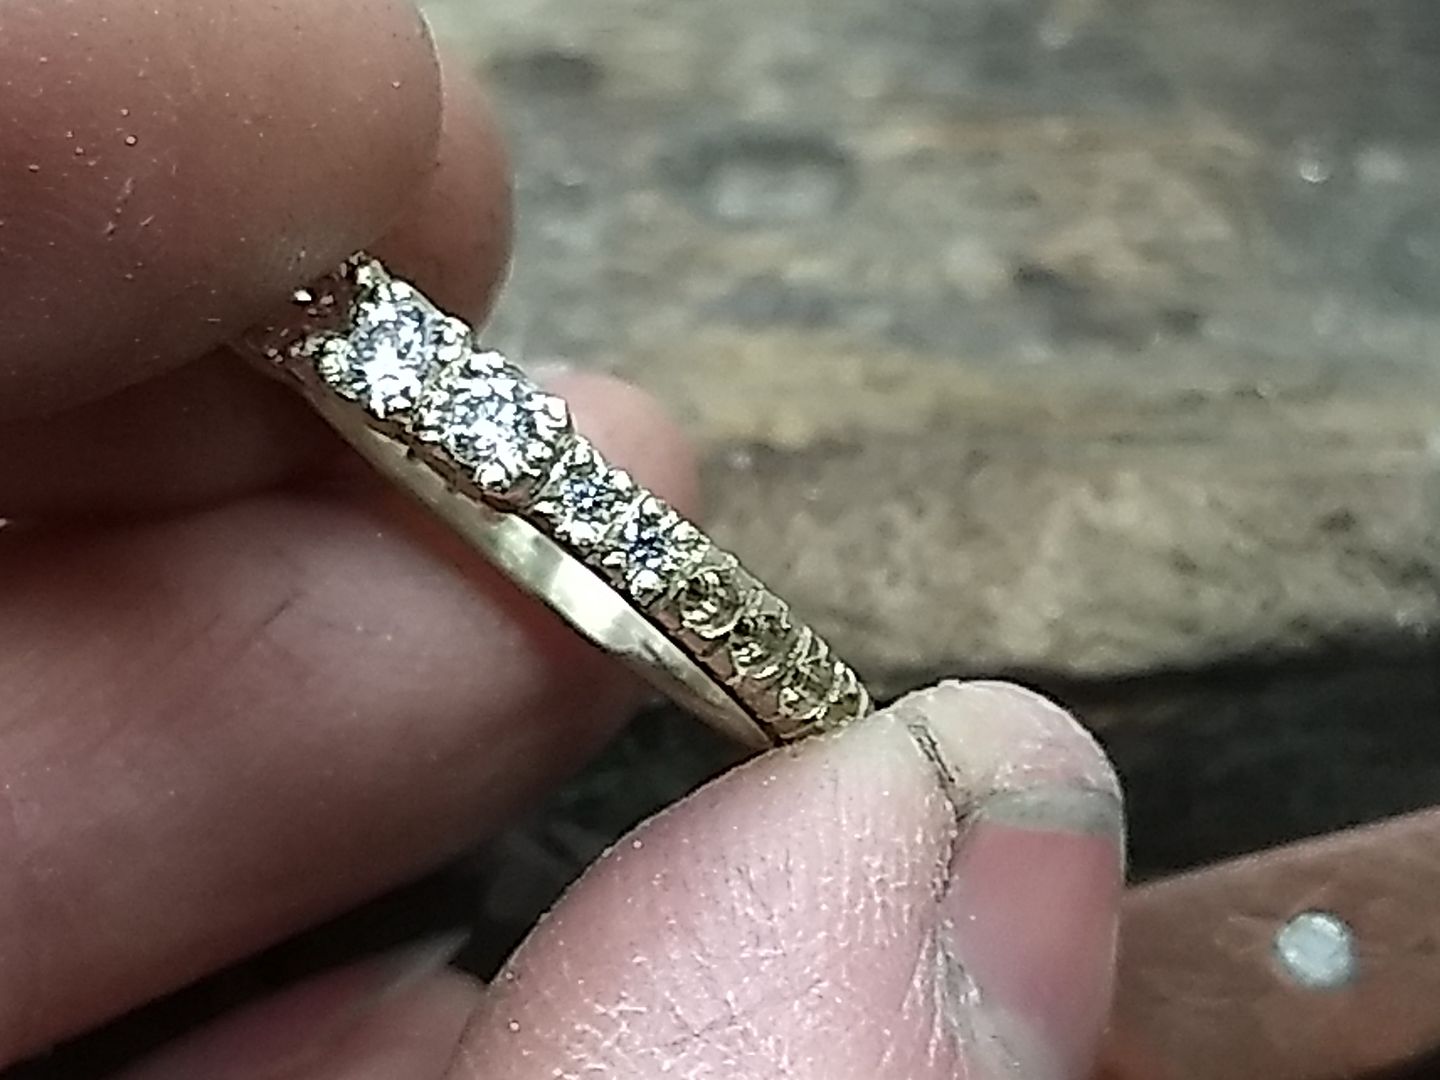
The next bit is to set the main diamonds. Middle first and then so on:
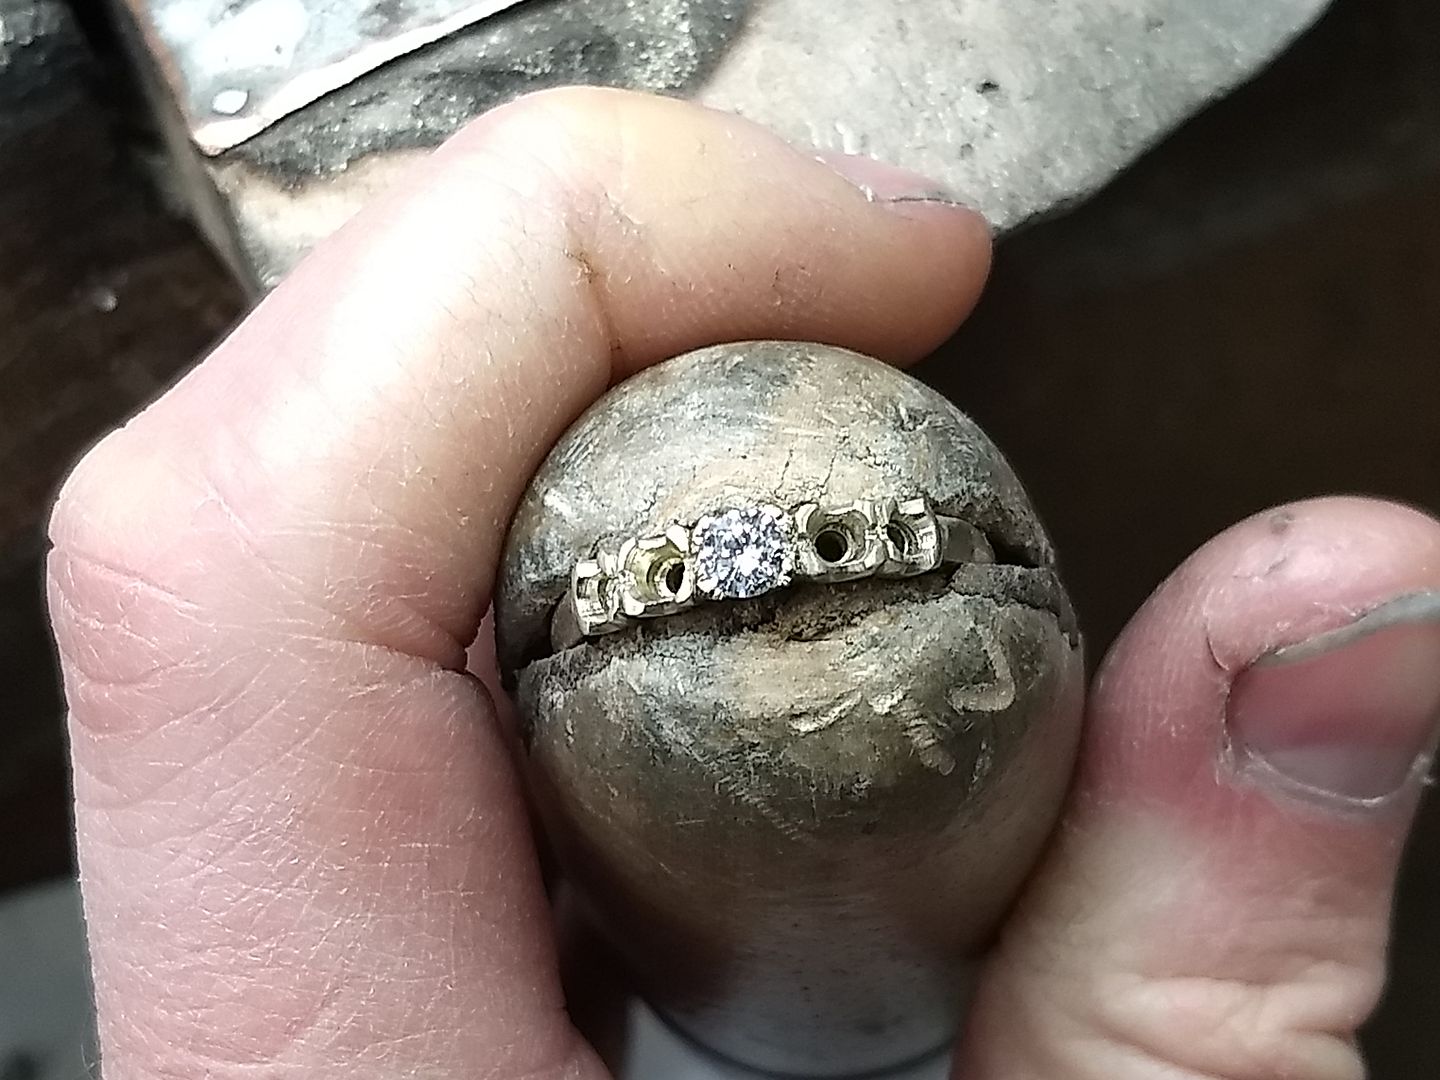
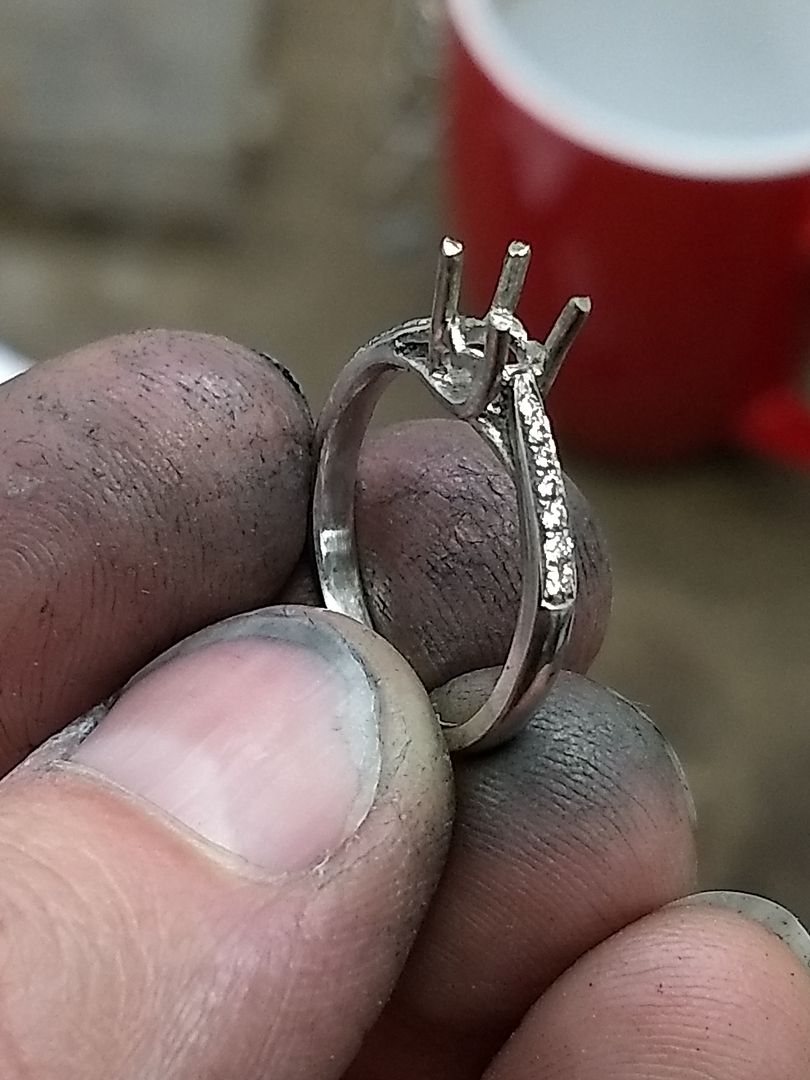
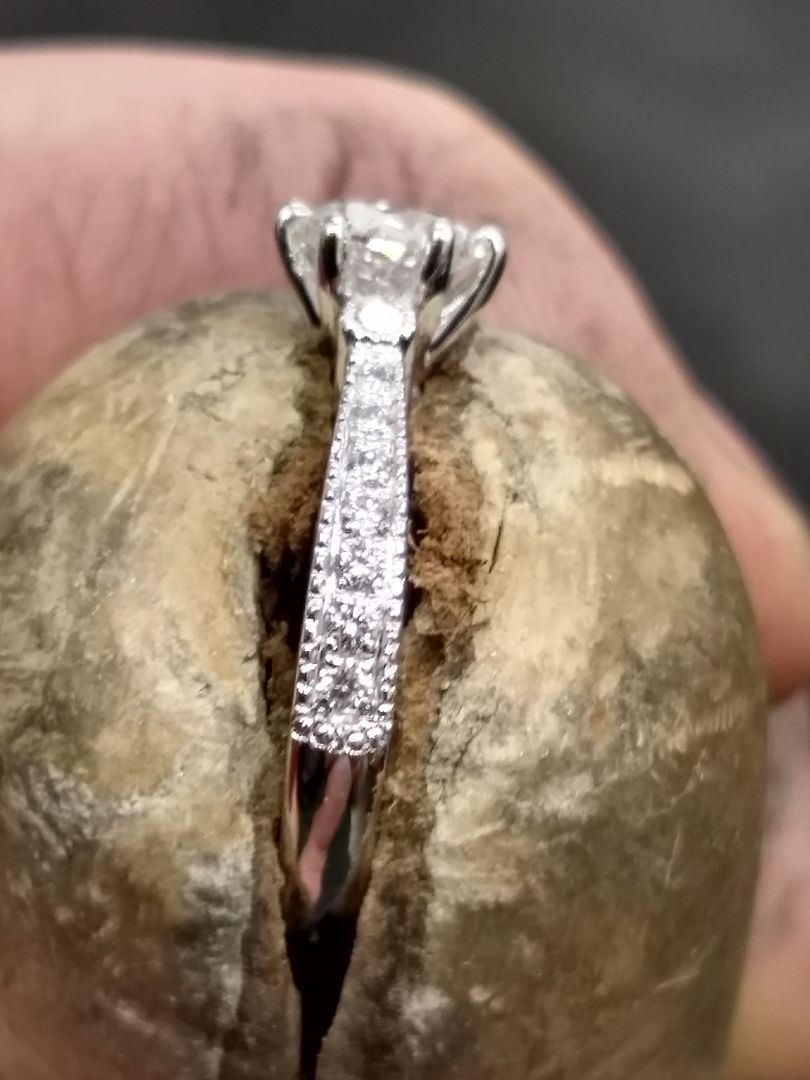
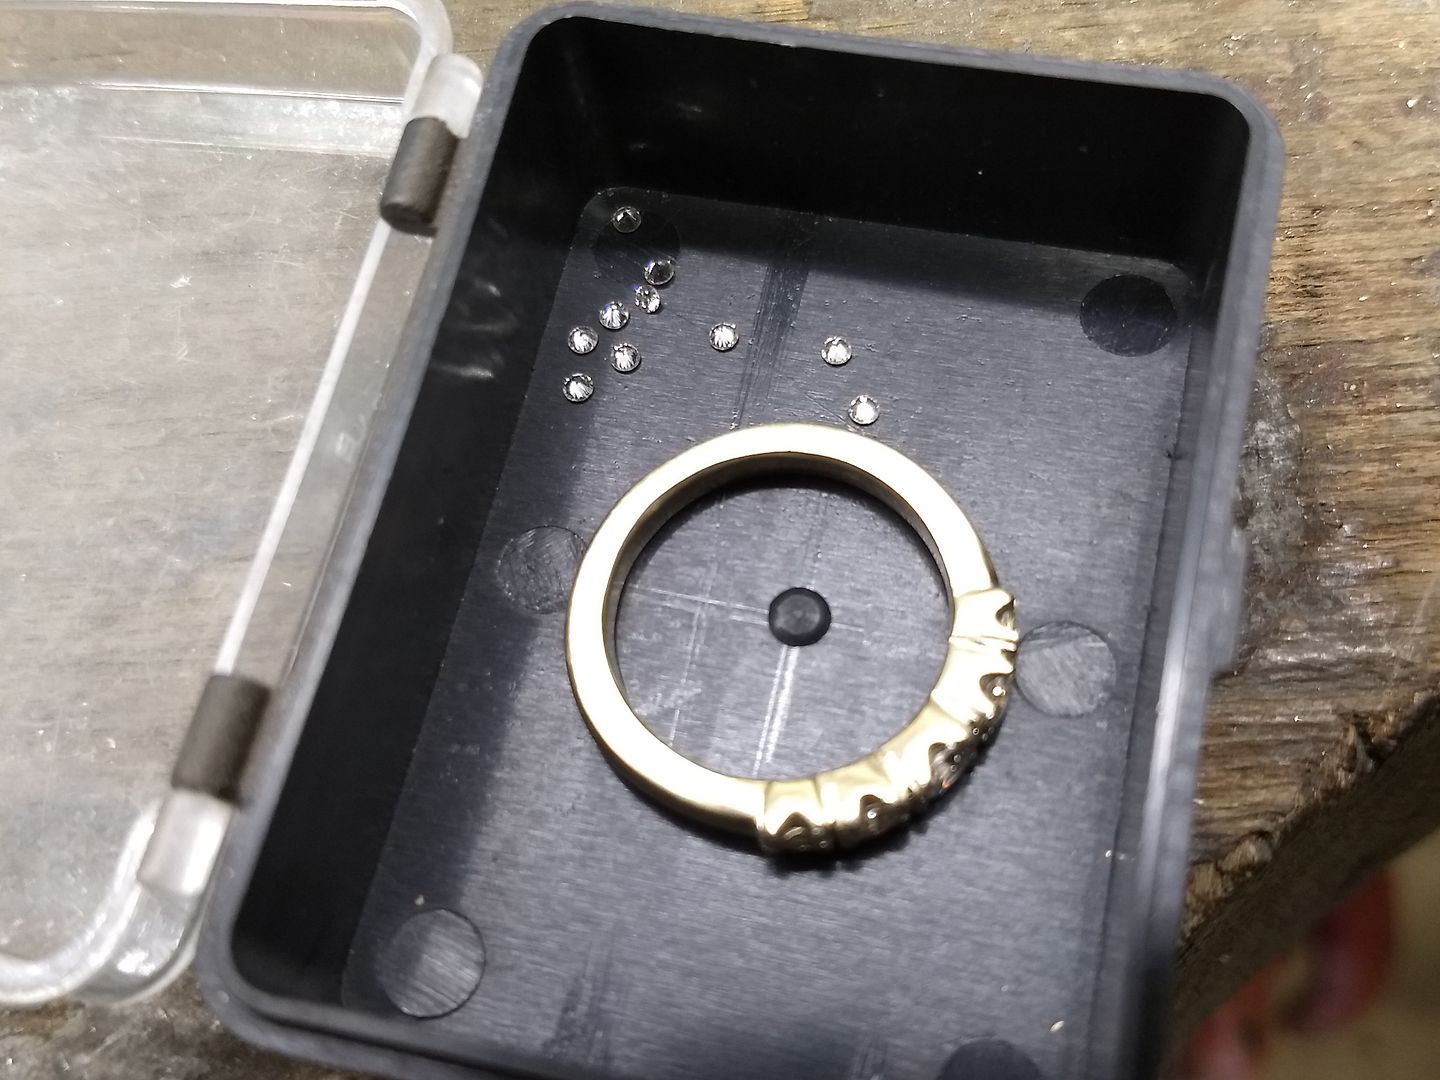
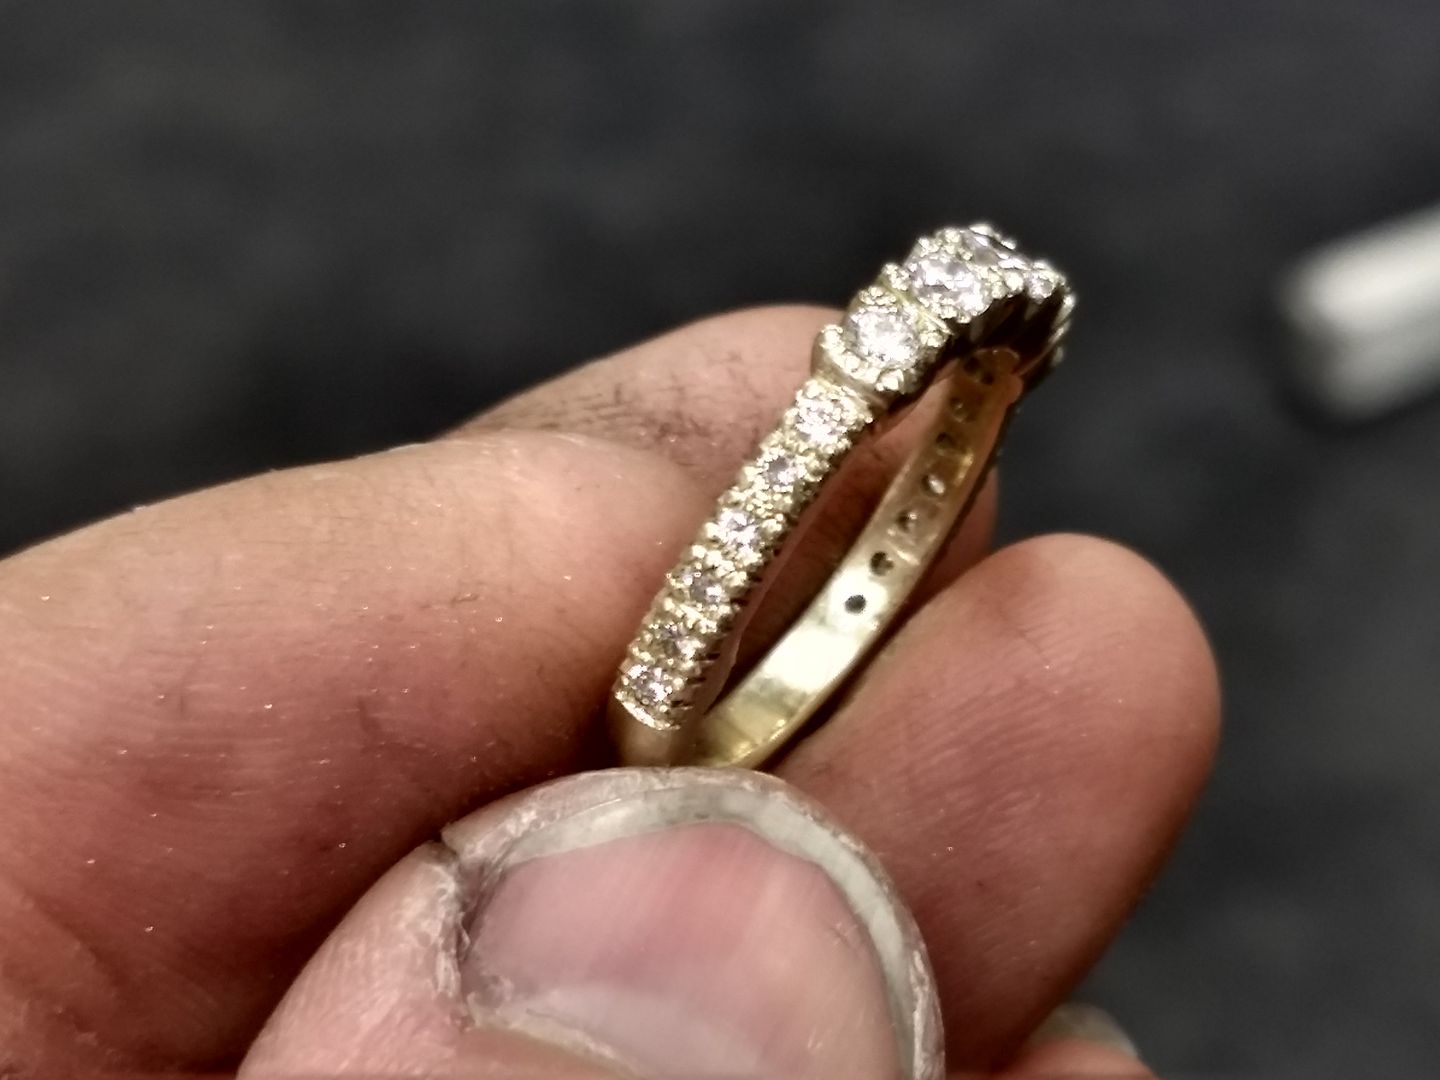
The shoulders are the next area to get stuck into. 12 small diamonds measuring 1.65mm each have either been selected from the stones in the pile or swapped with stones from the pile to make sure they all match: The total carat weight of all the stones is 0.80ct:
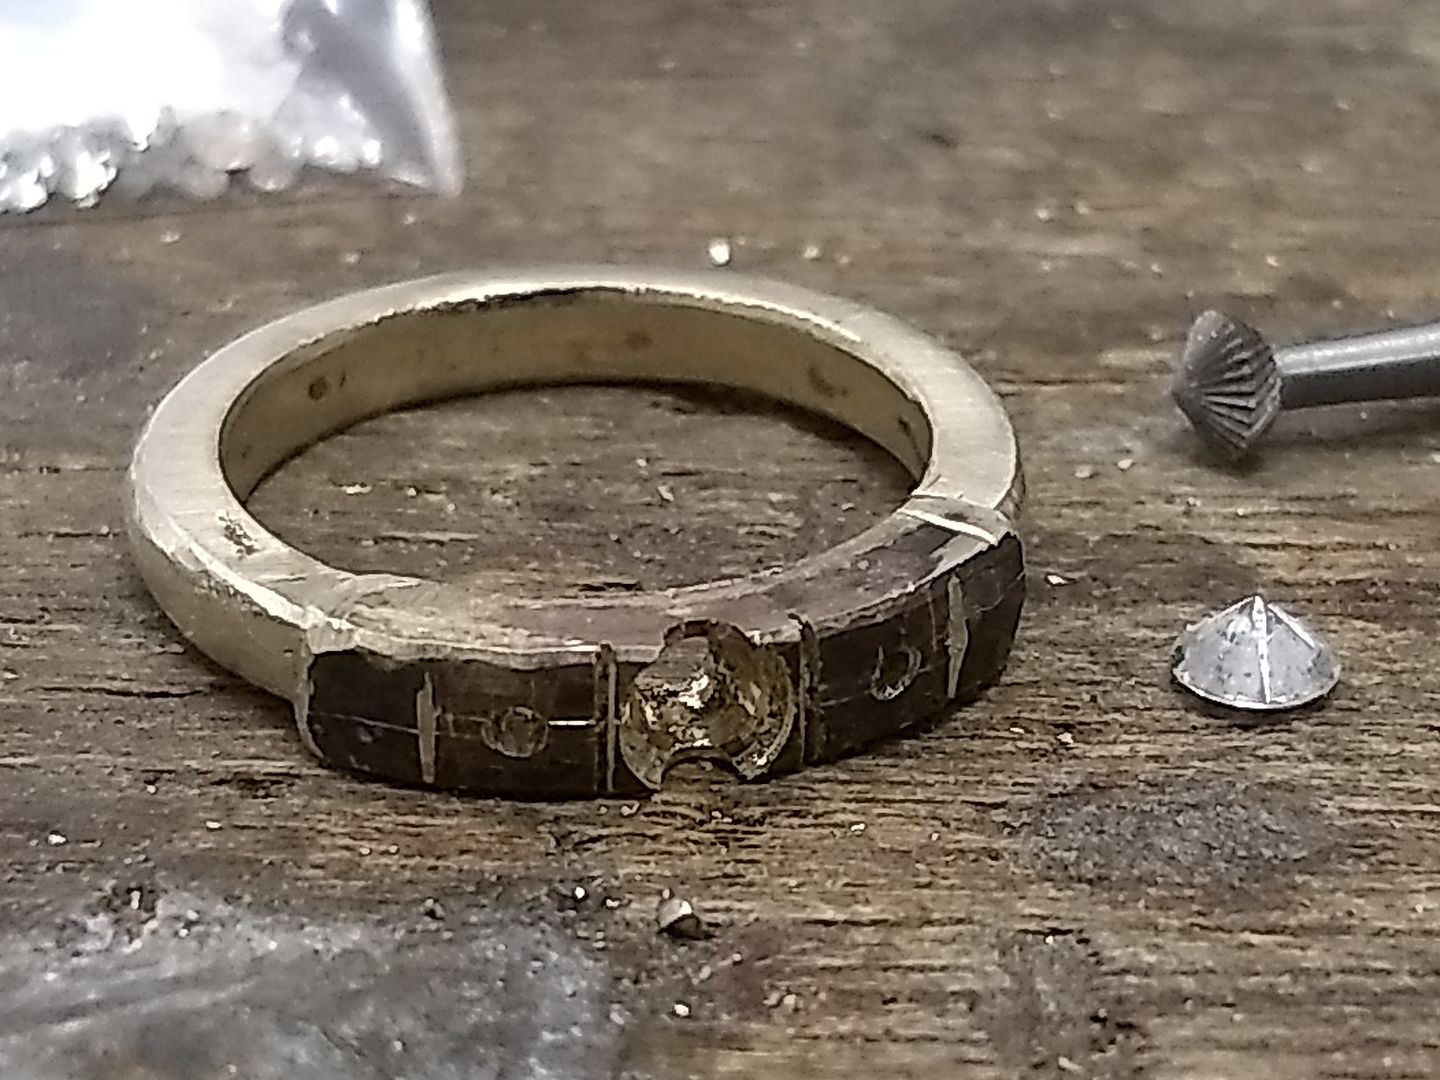
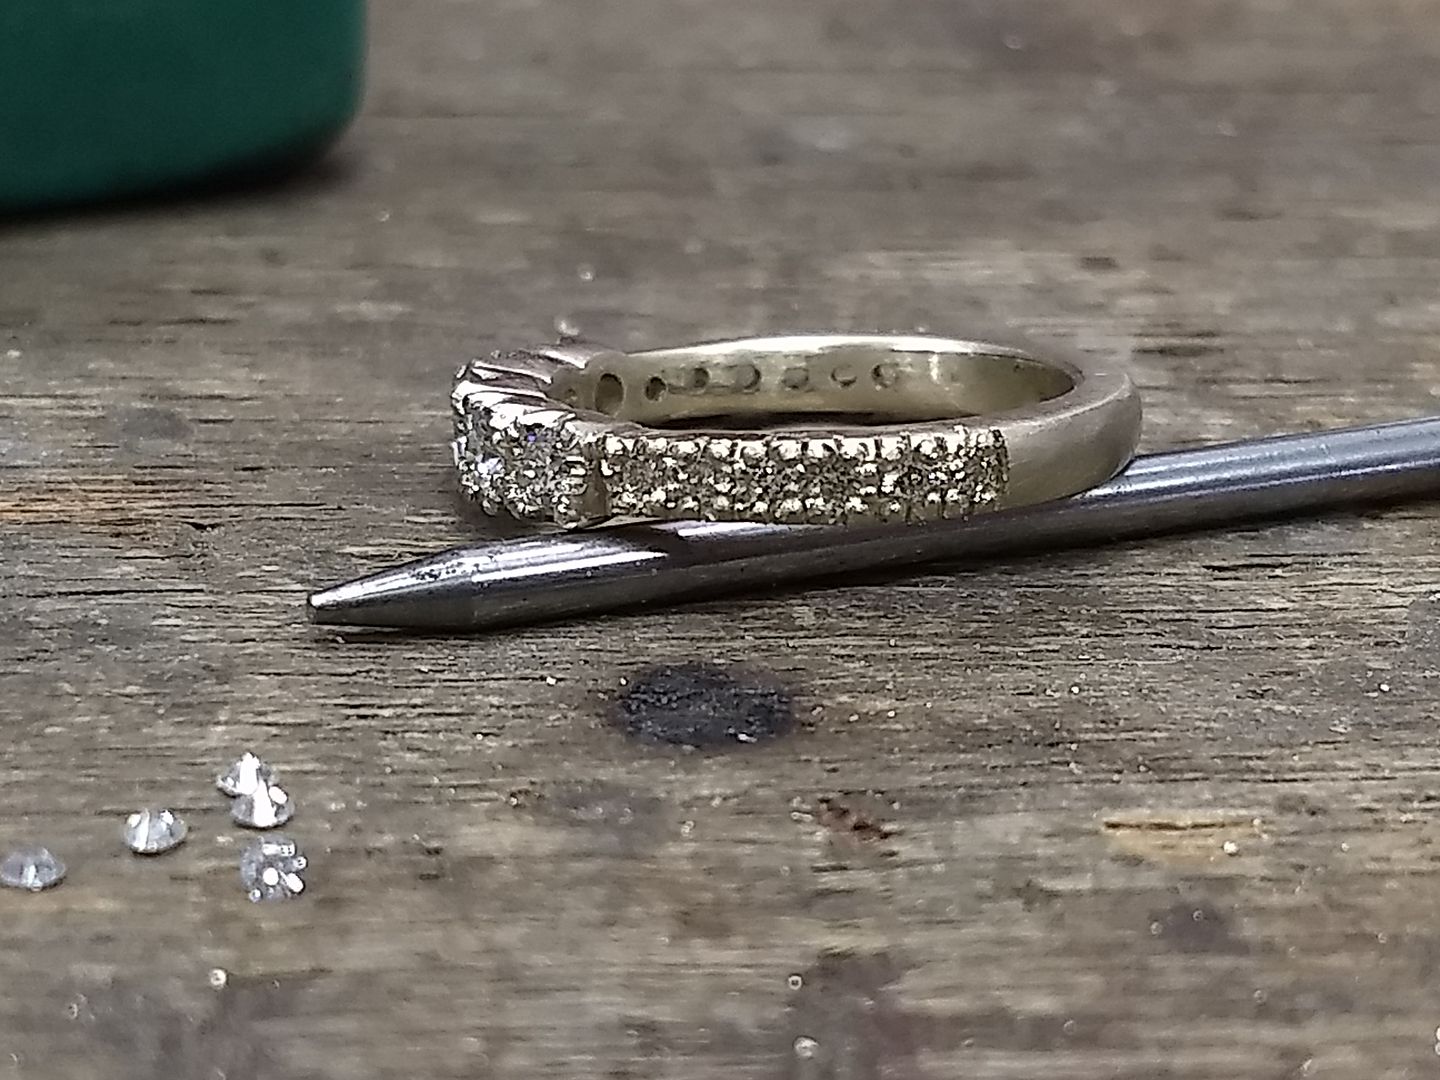
The spacing is marked out with a fine saw at 2.2mm approx:
And then with a 1mm drill I make the pilot holes. First one side then the next:
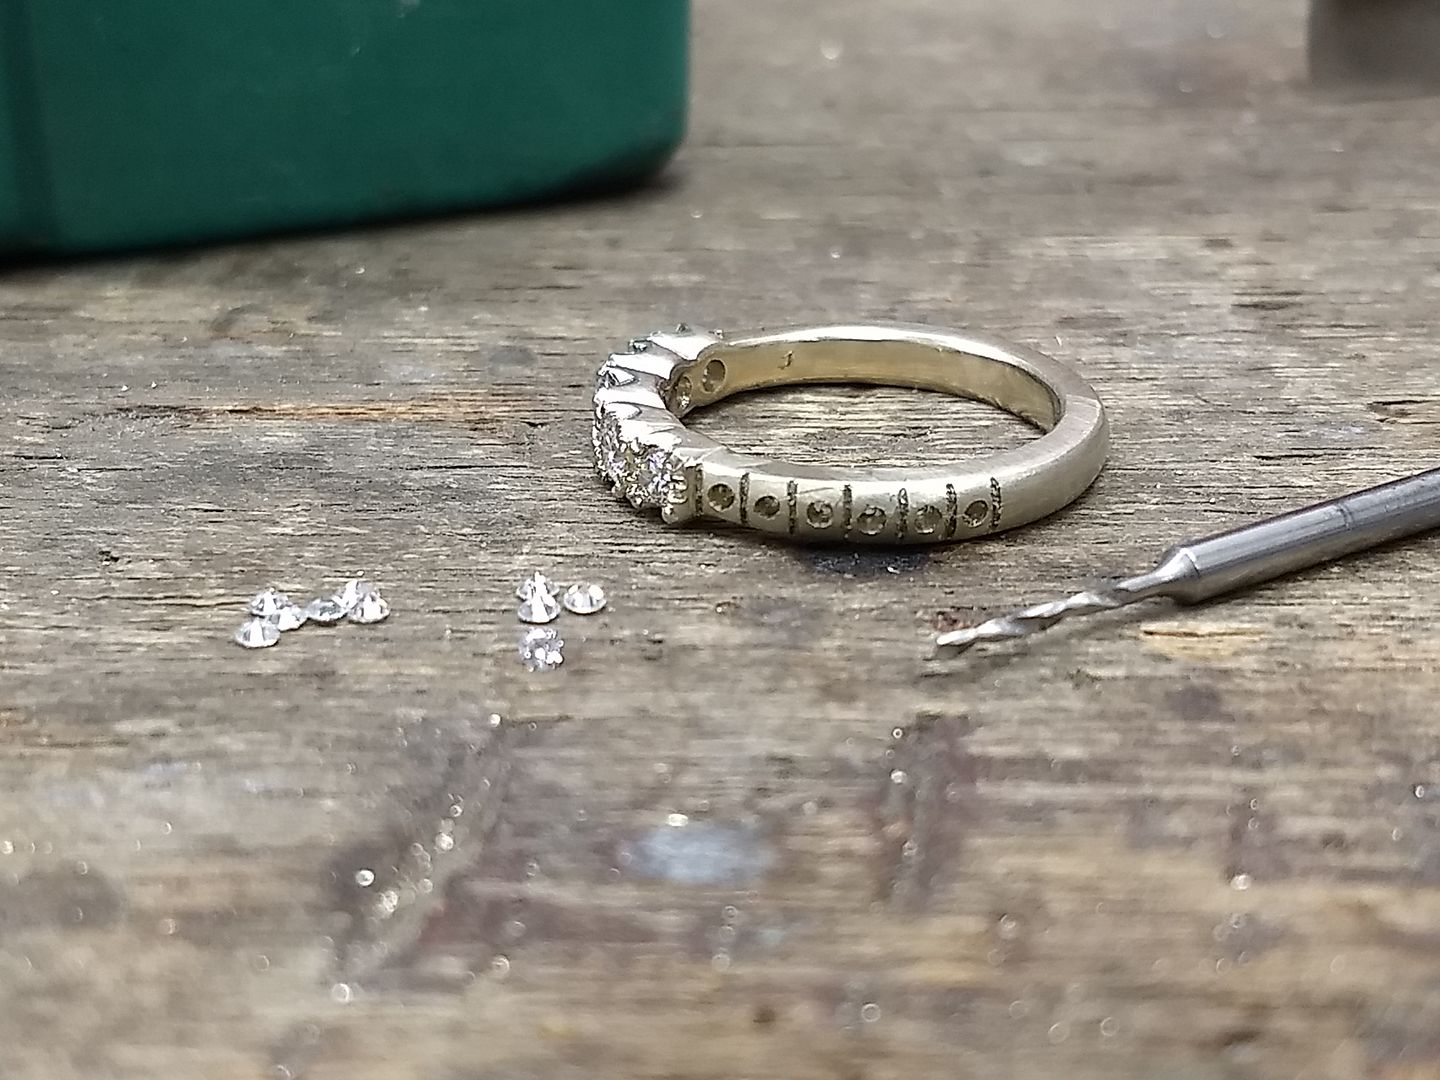
The holes are bored out to 1.5mm at half depth with another drill and then 1.6mm to the desired depth with a setters drill. I also cut the settings across the middle to make the claws:

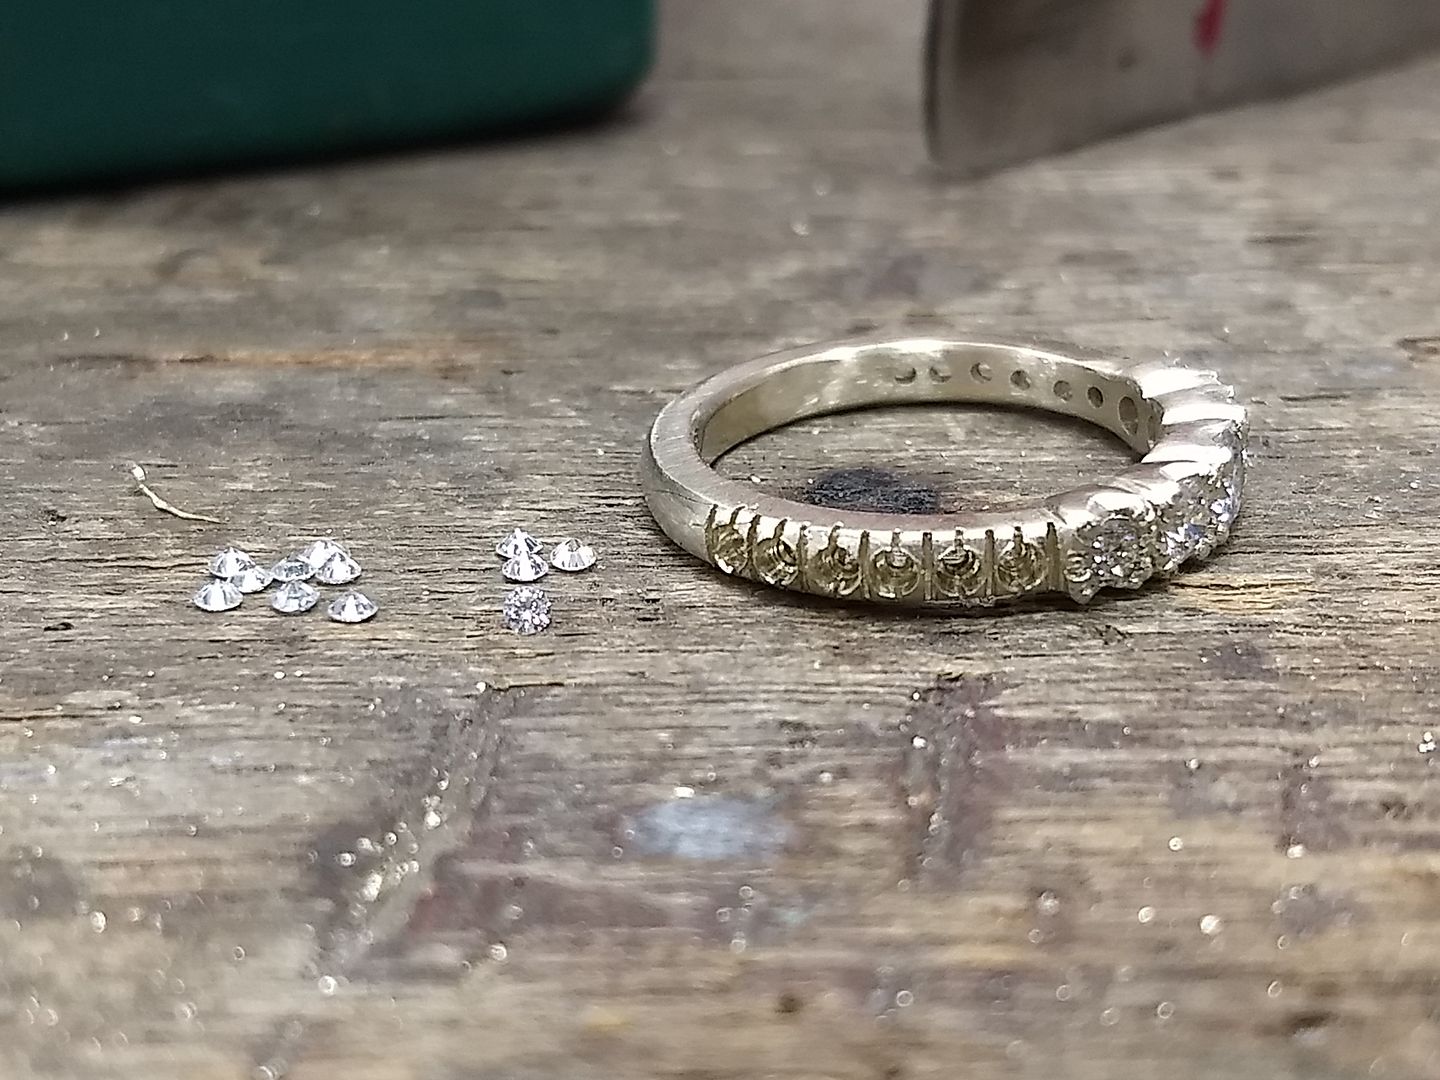
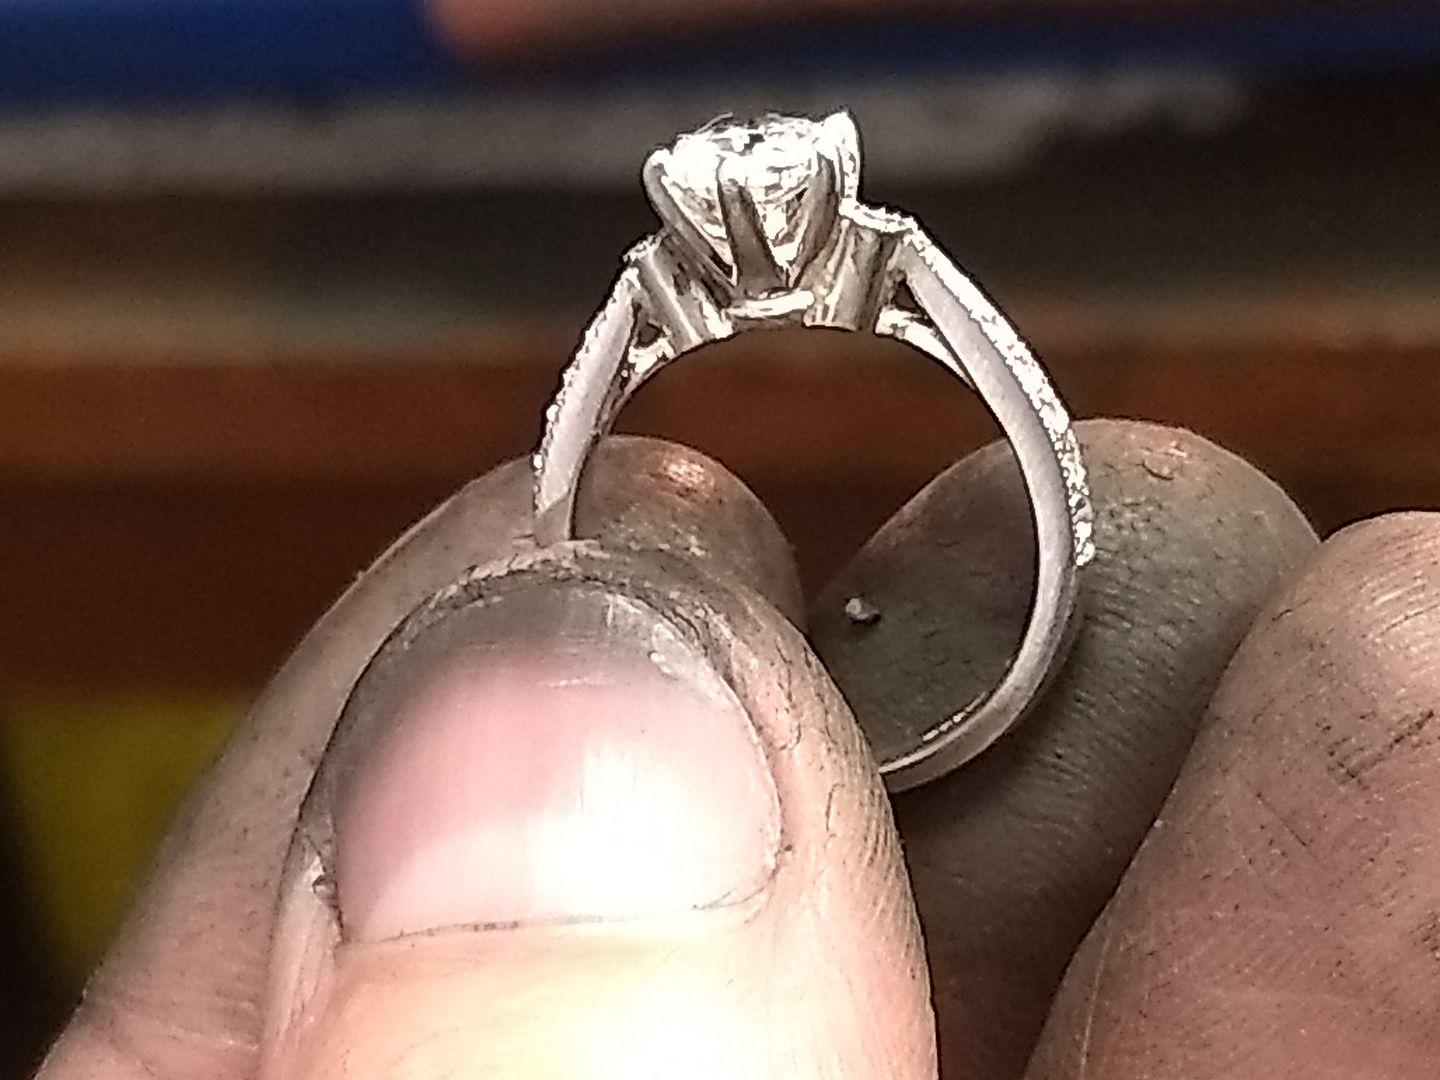
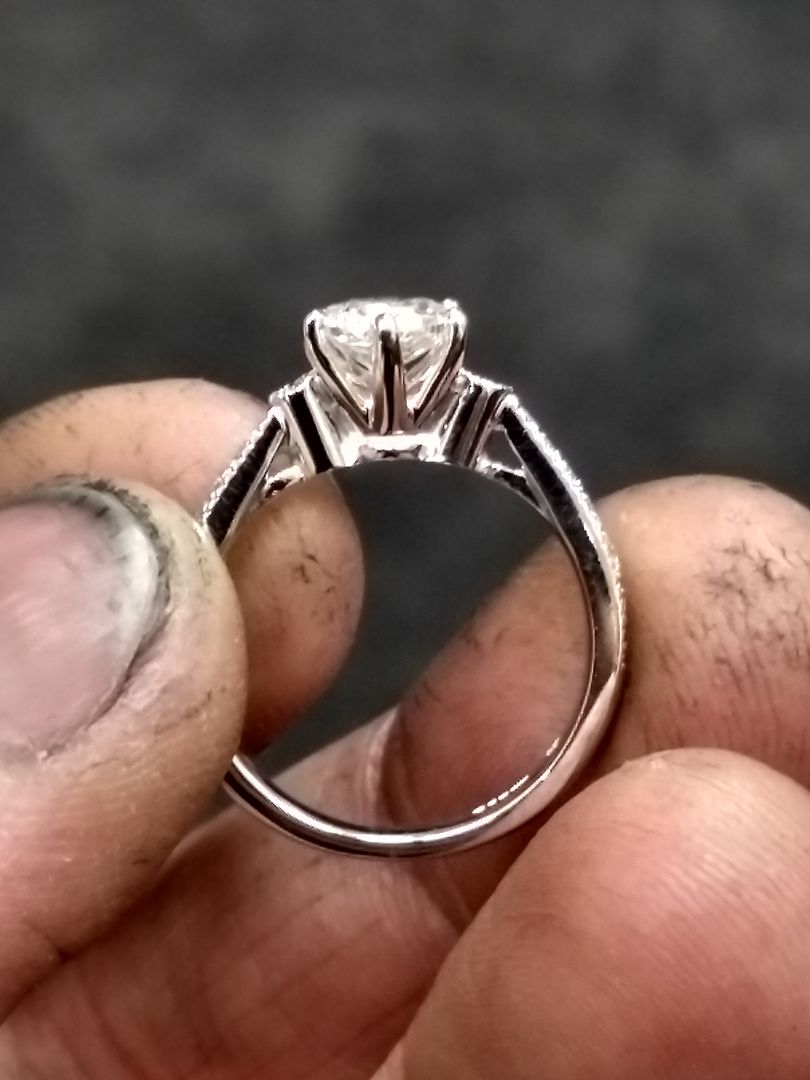
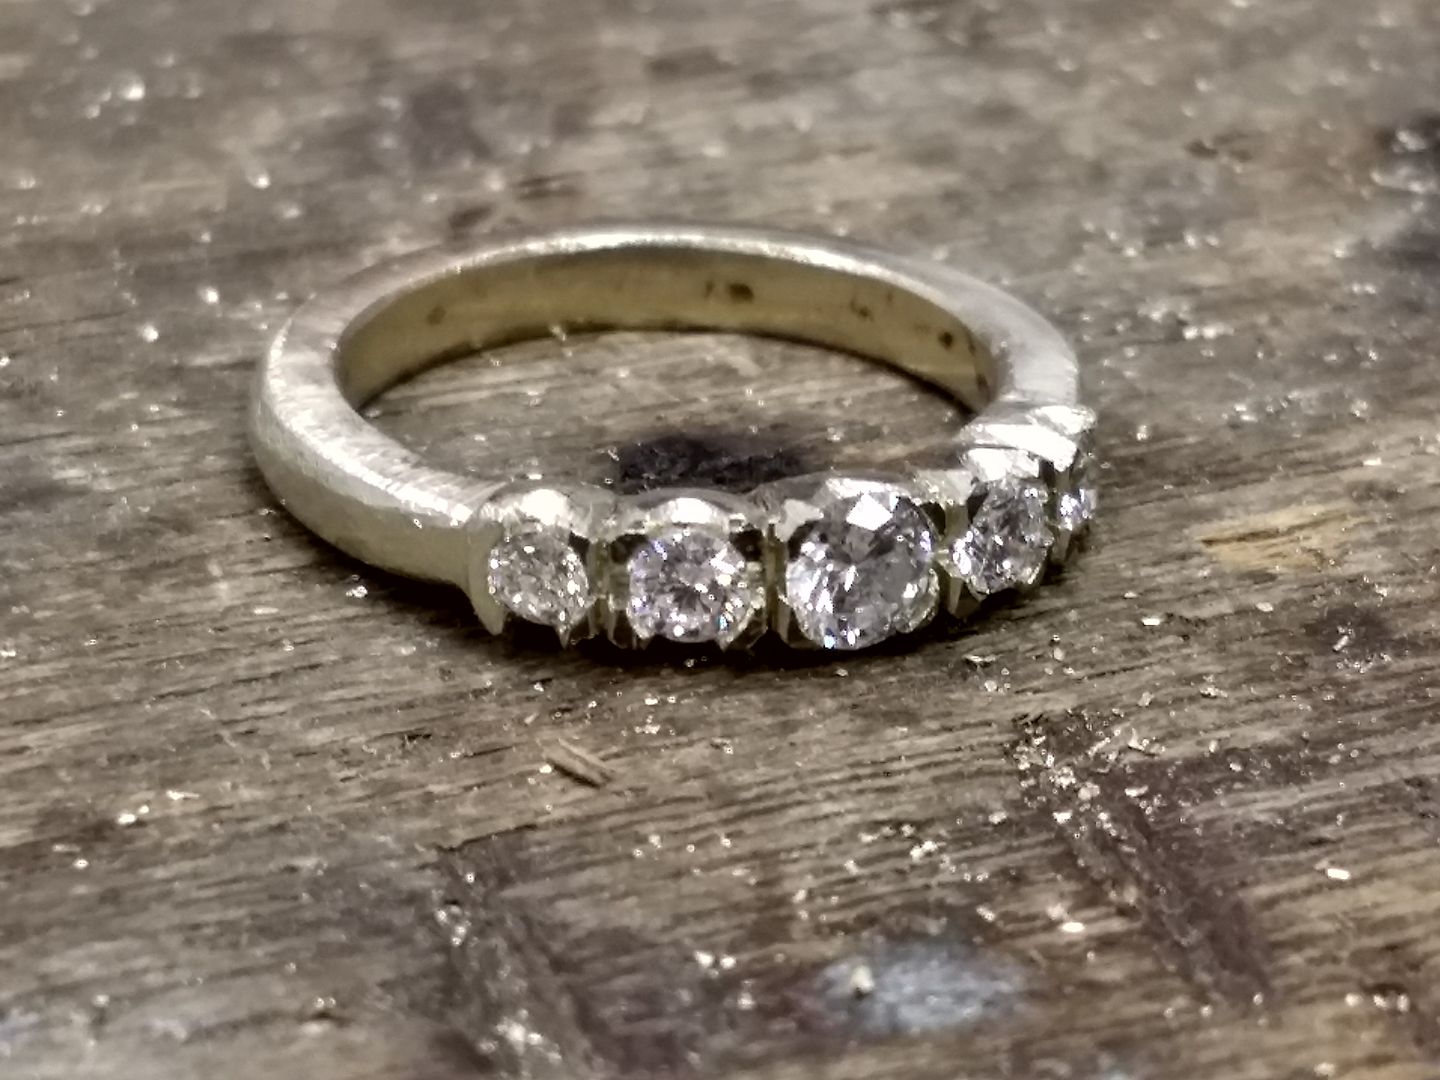
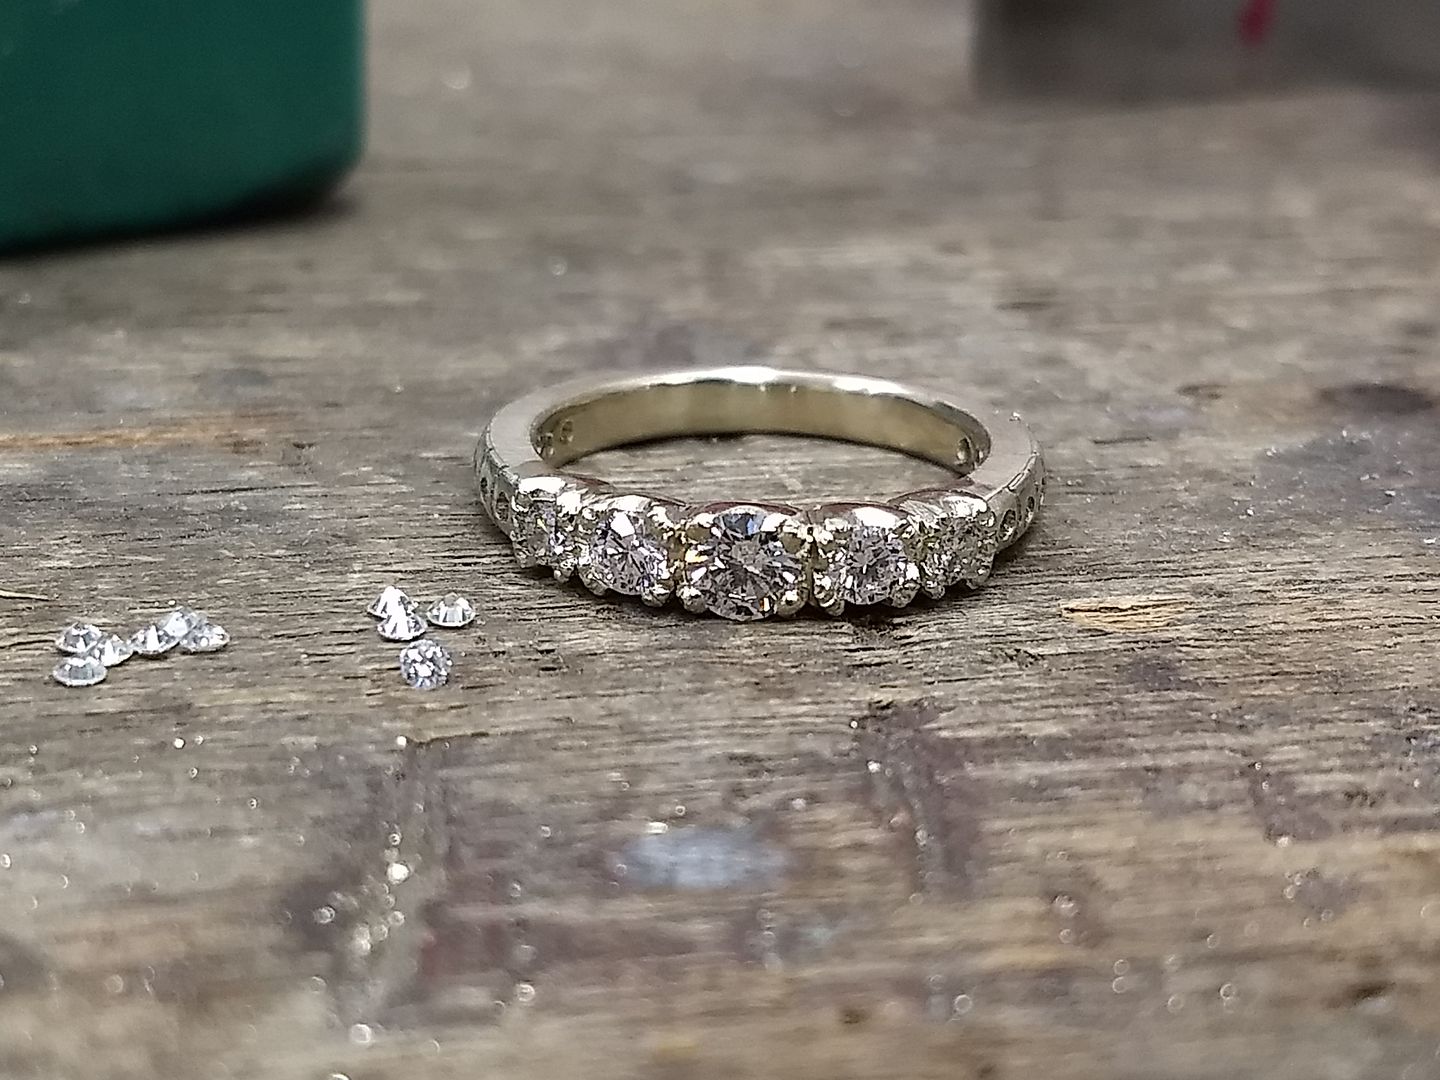
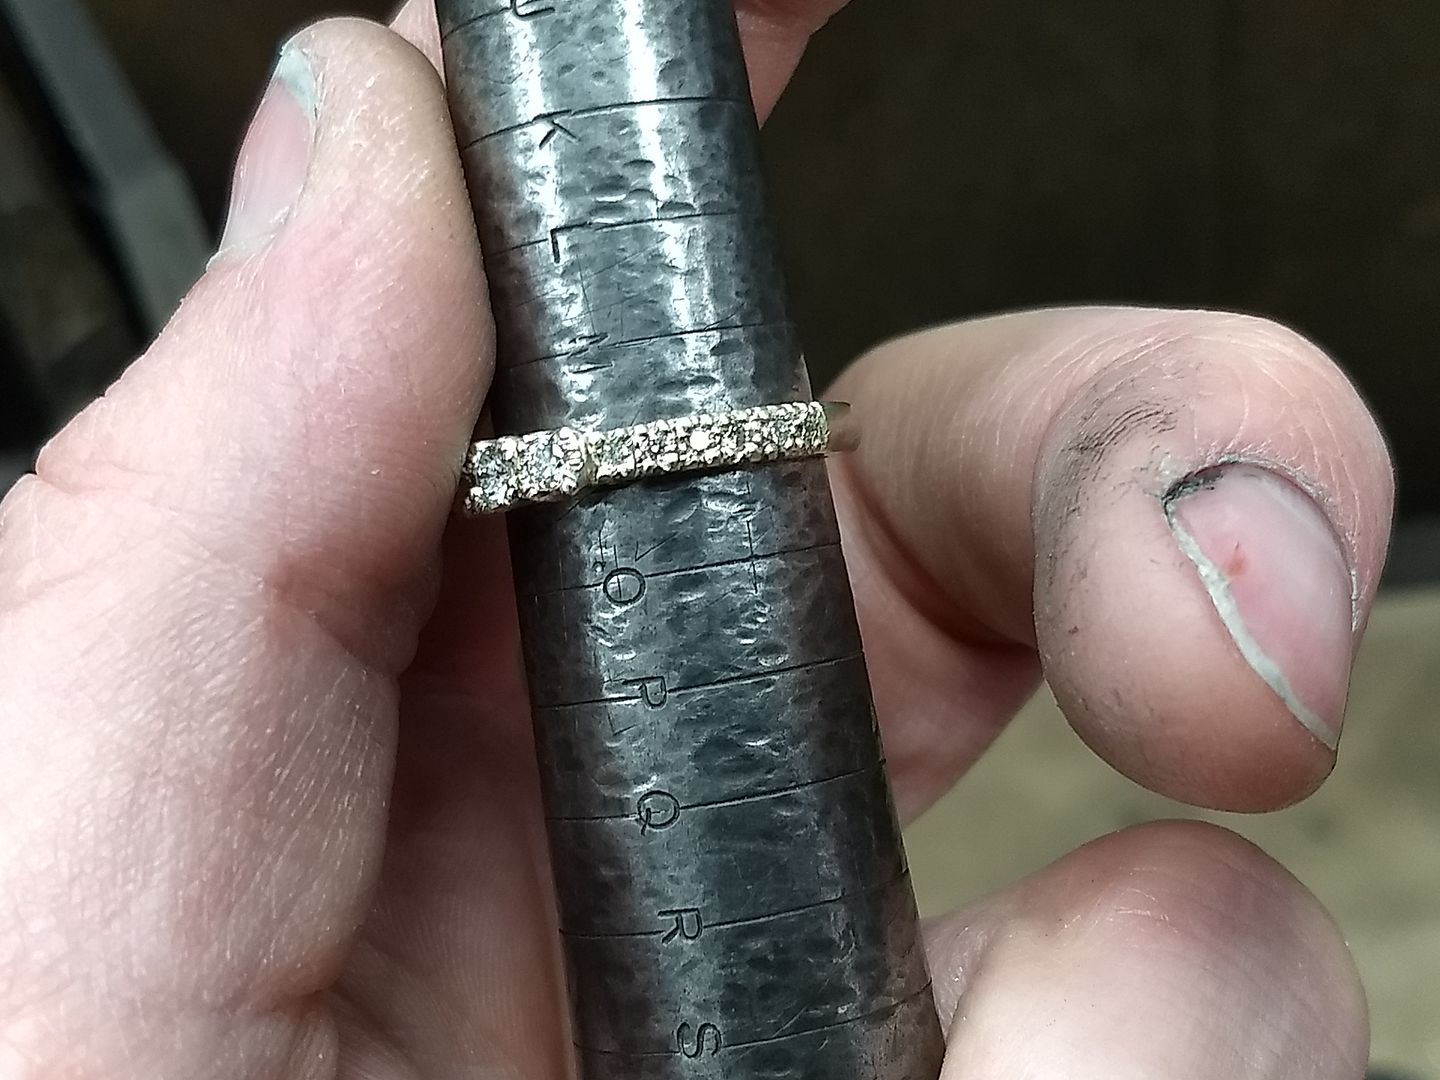
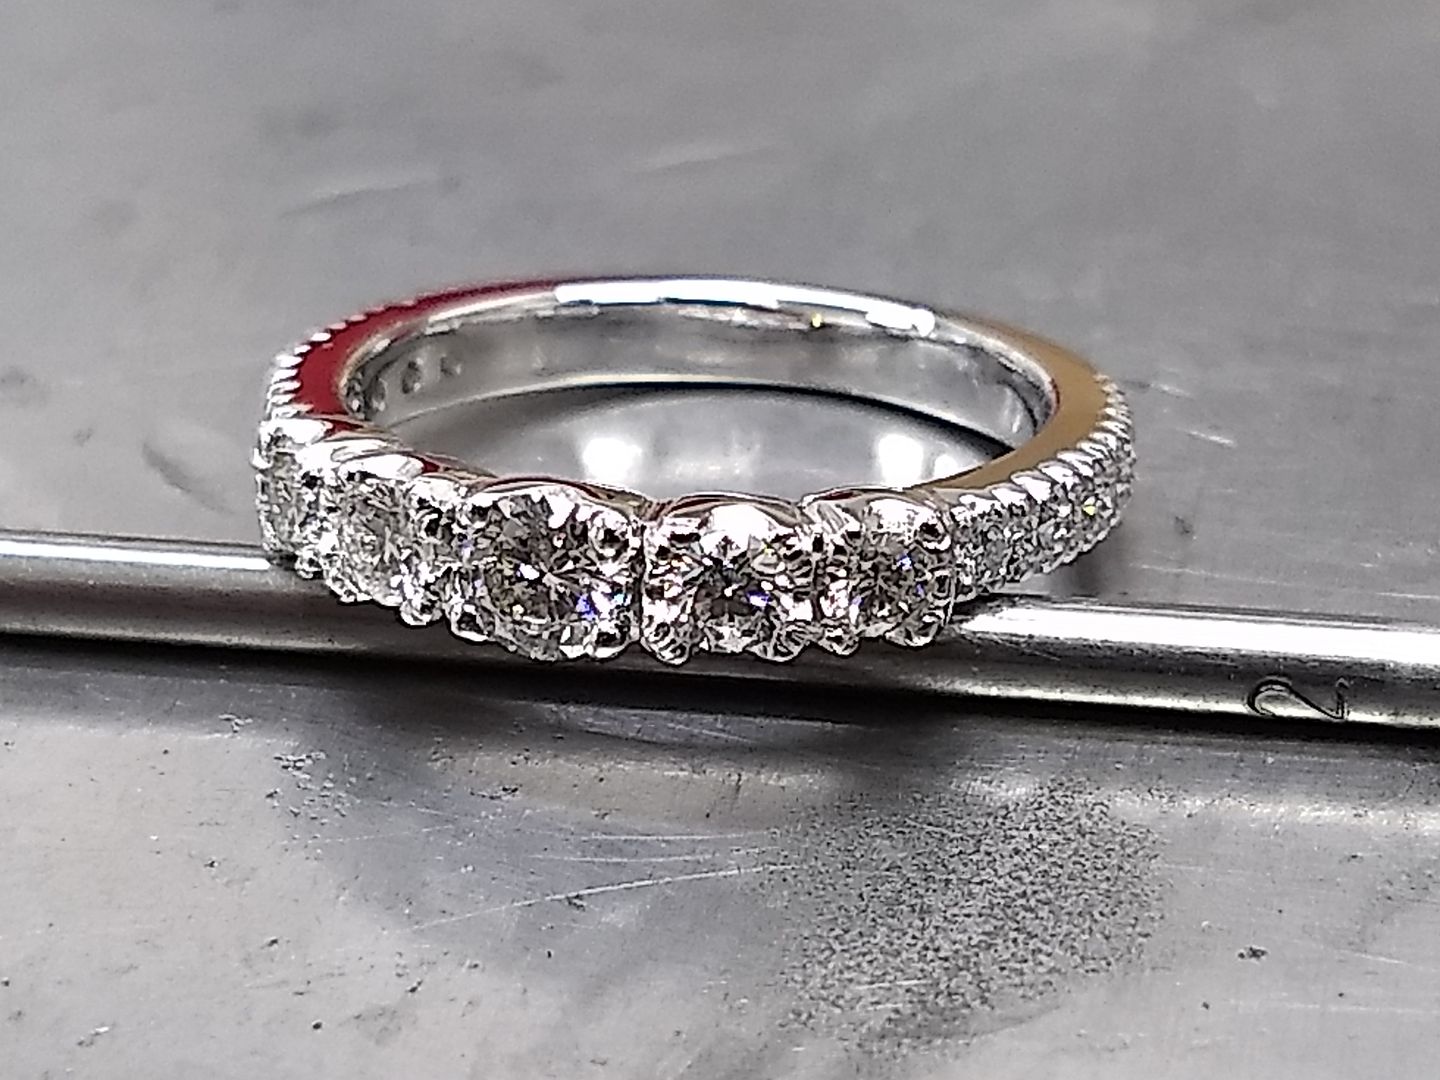
Now it's time to start setting. Using a couple of graining tools the claws are pressed over the edges of the stones. 1.65mm stones are a snug fit in the 1.6mm holes but as gold is soft they go in with a light push:
Check size again:
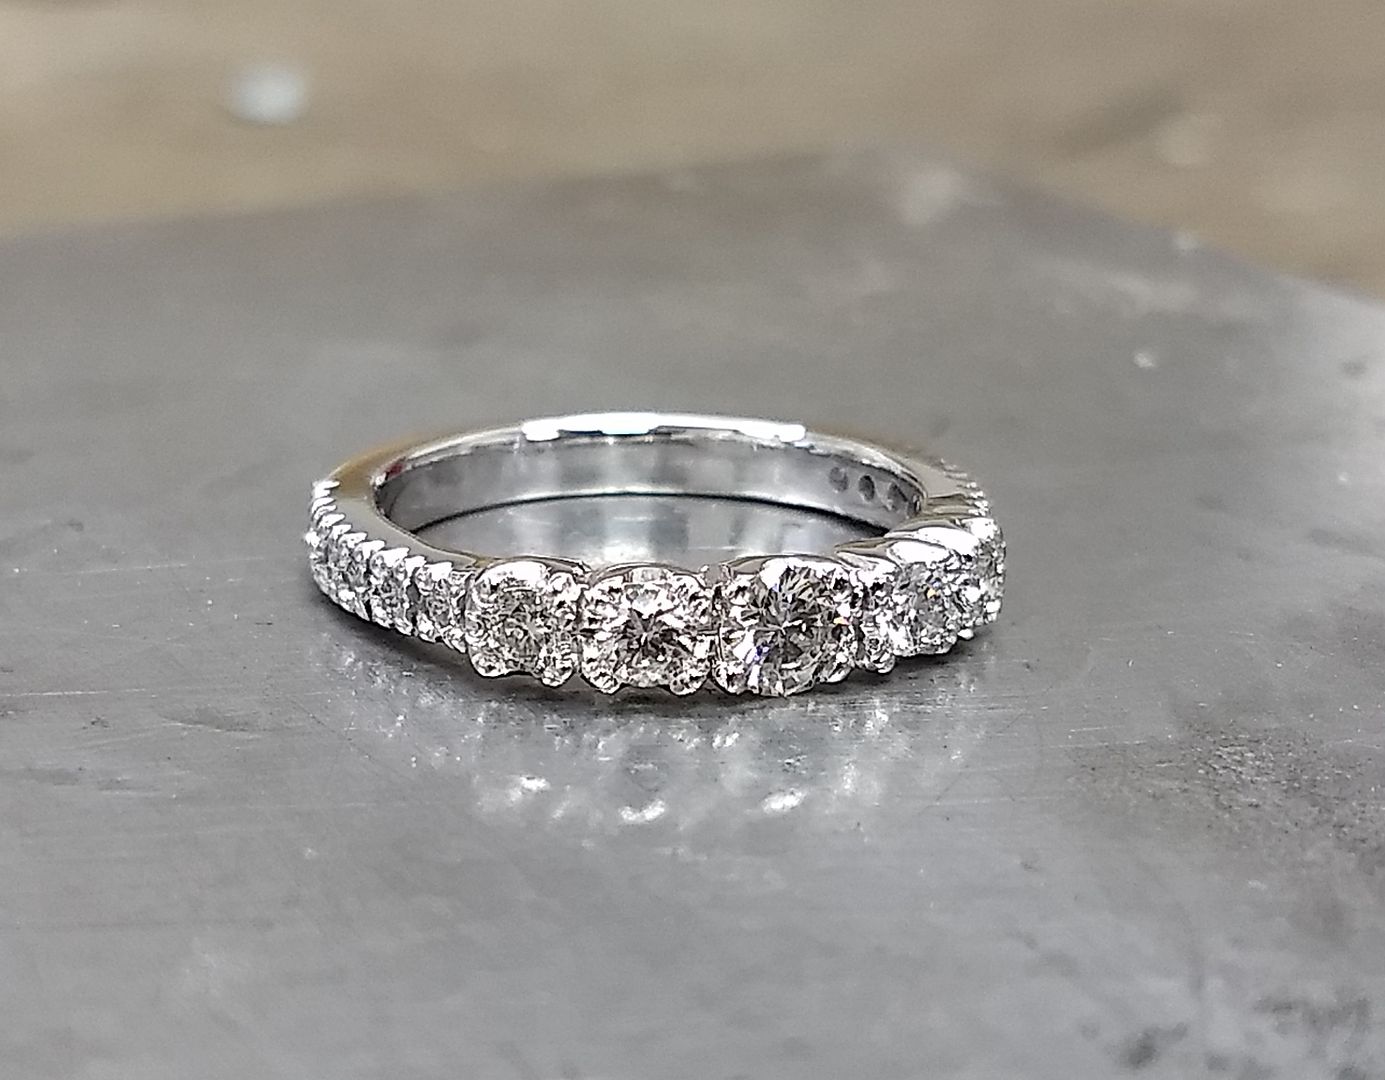
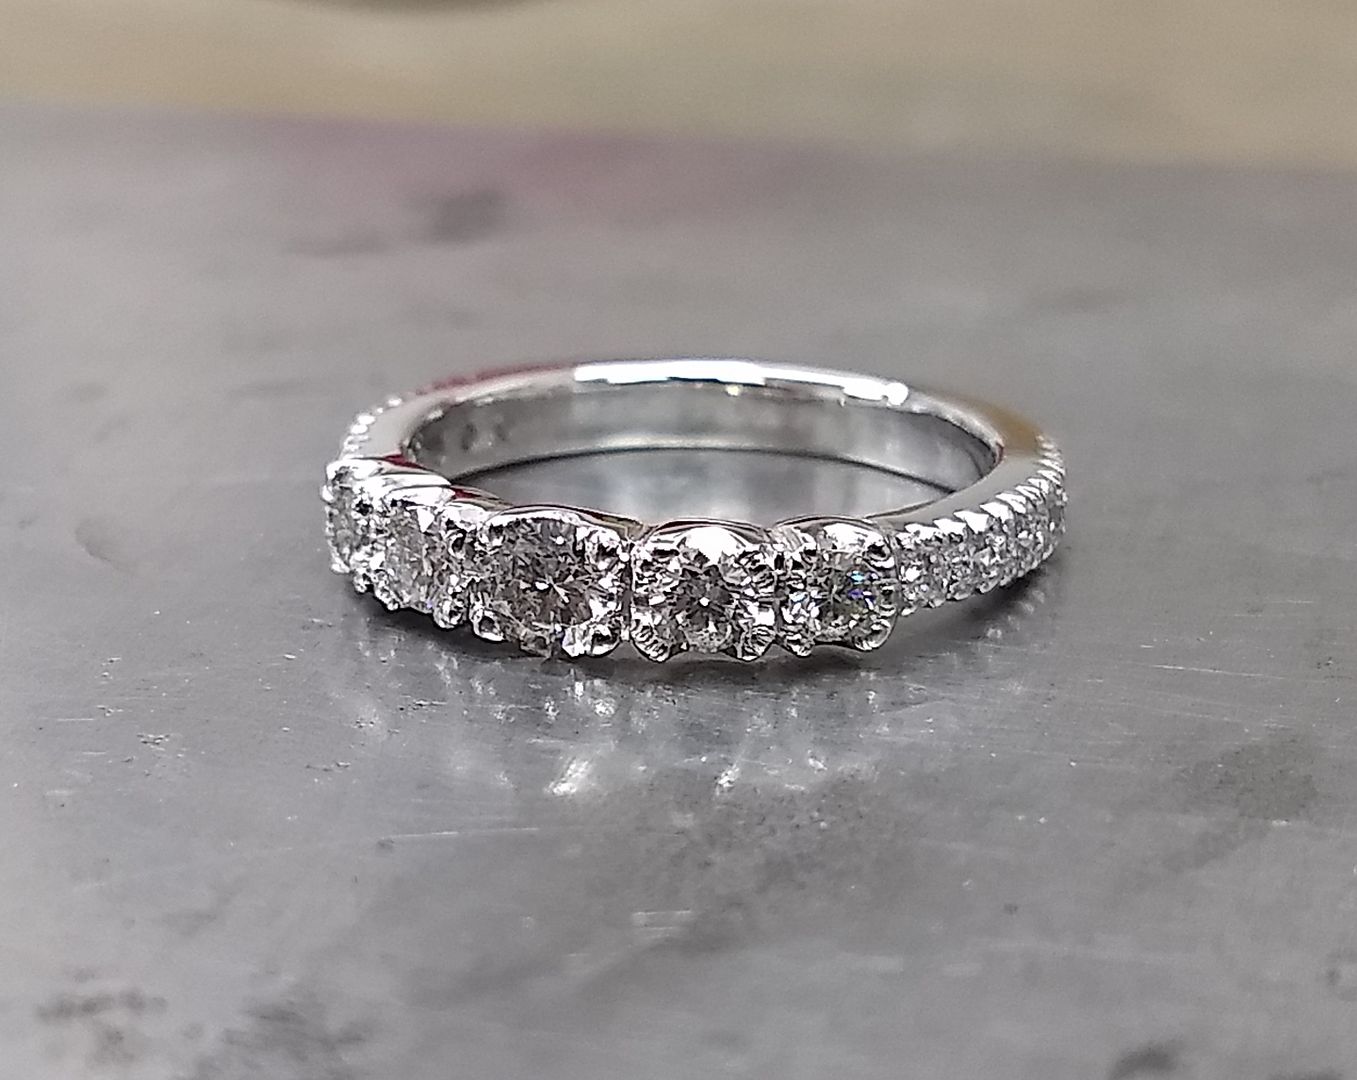
And all set:
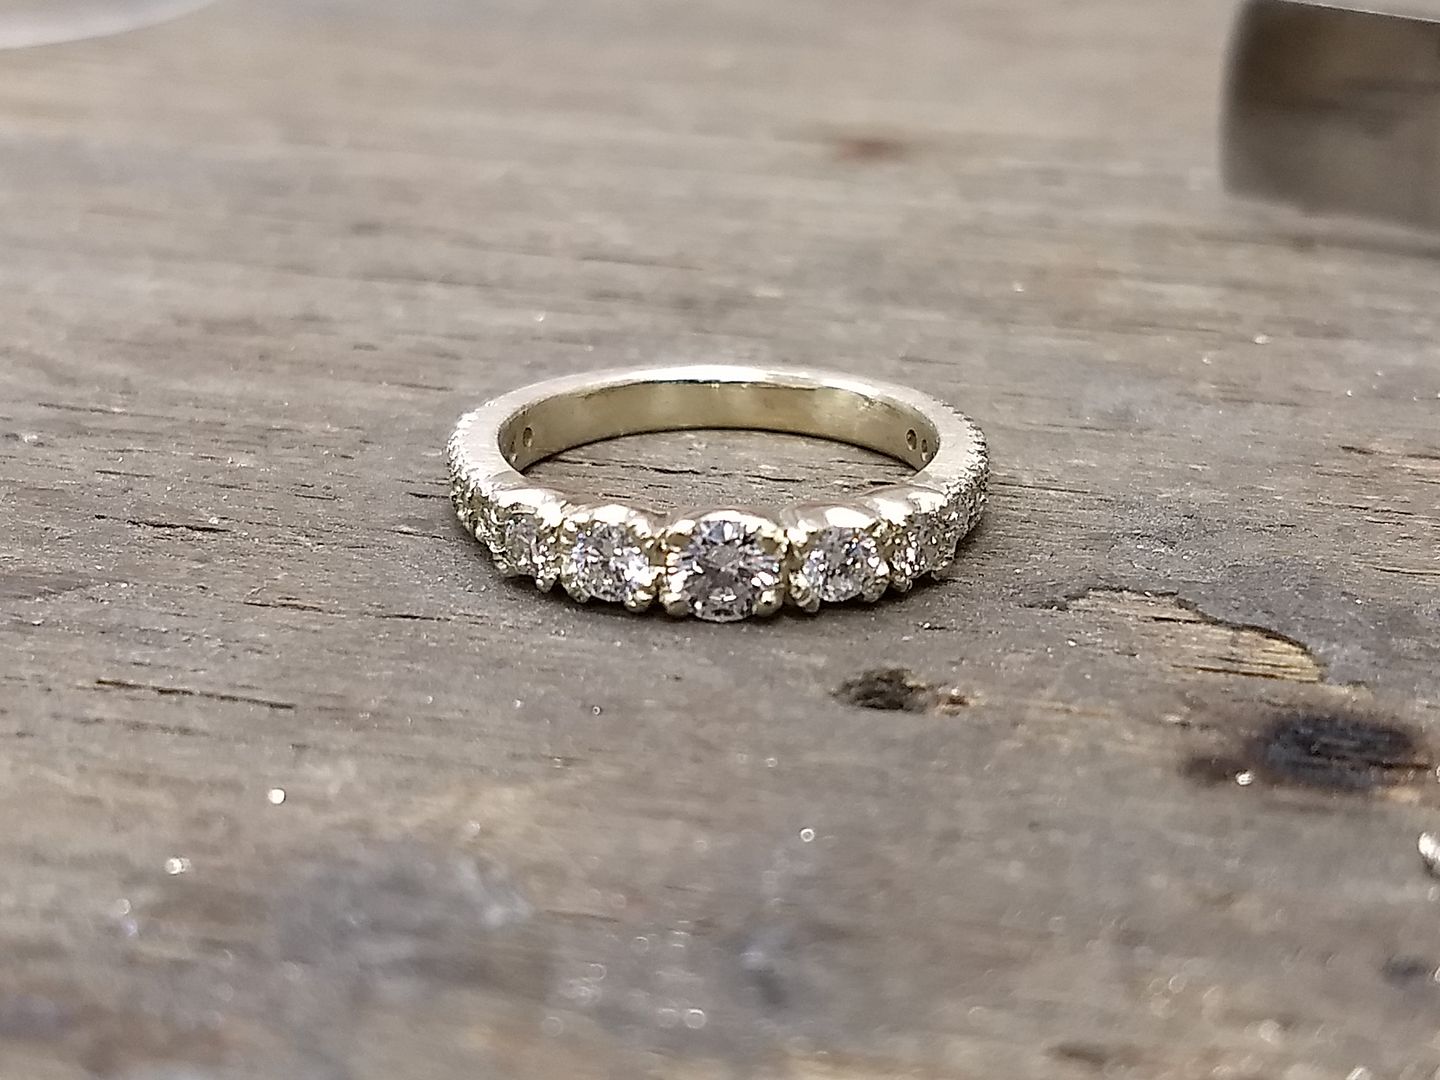
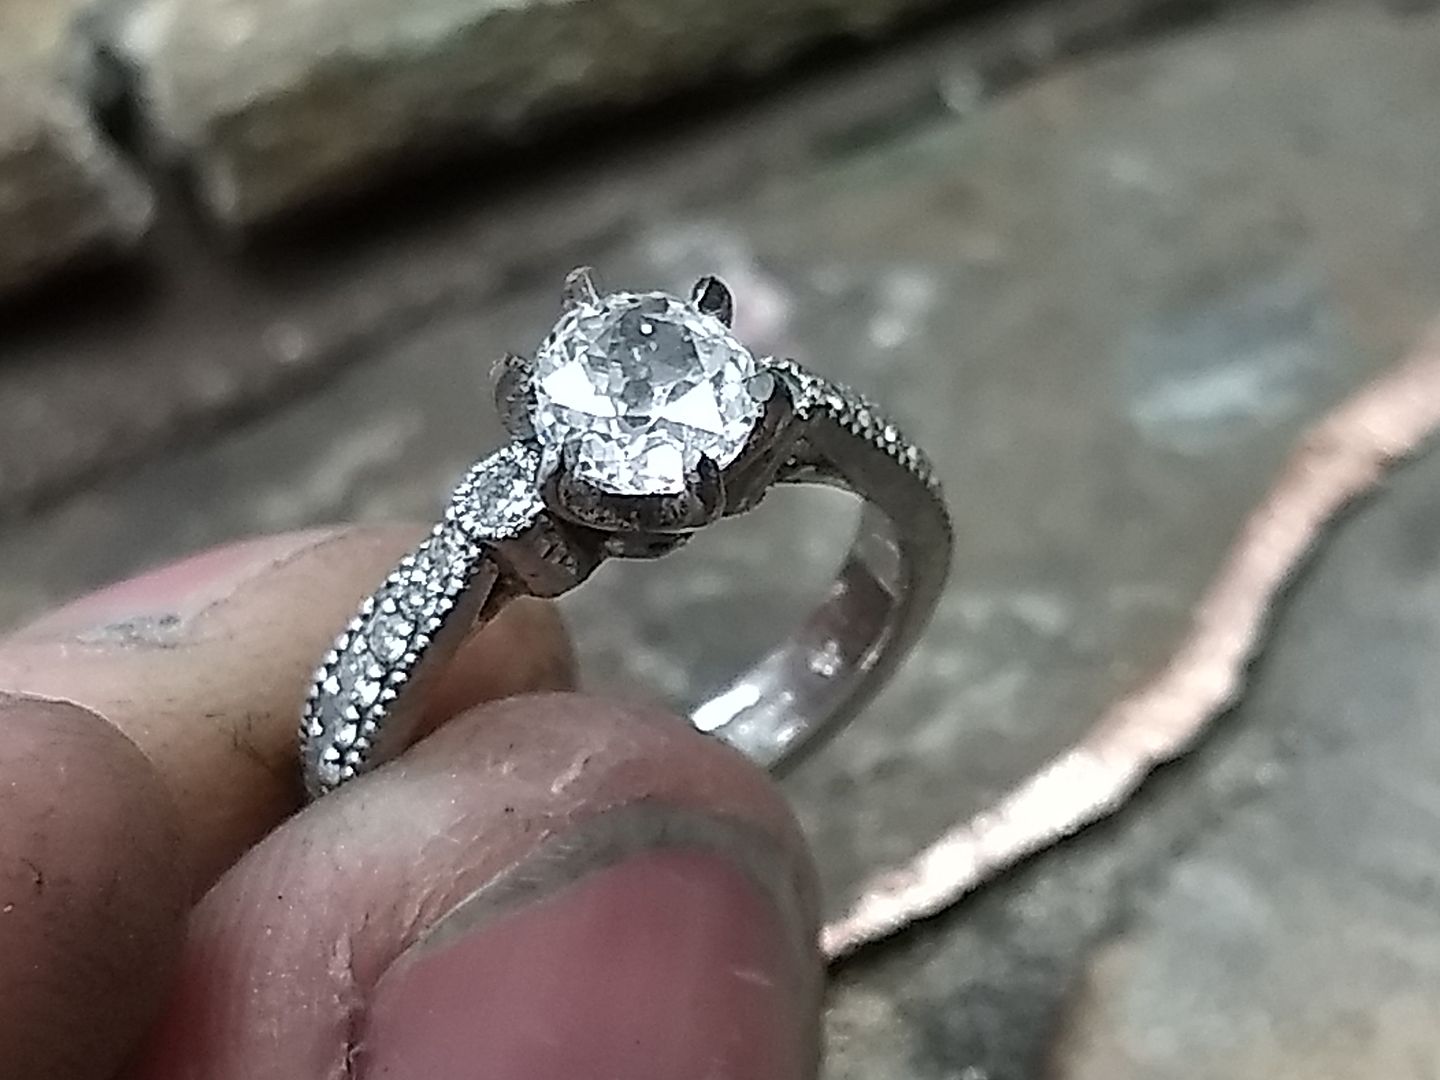
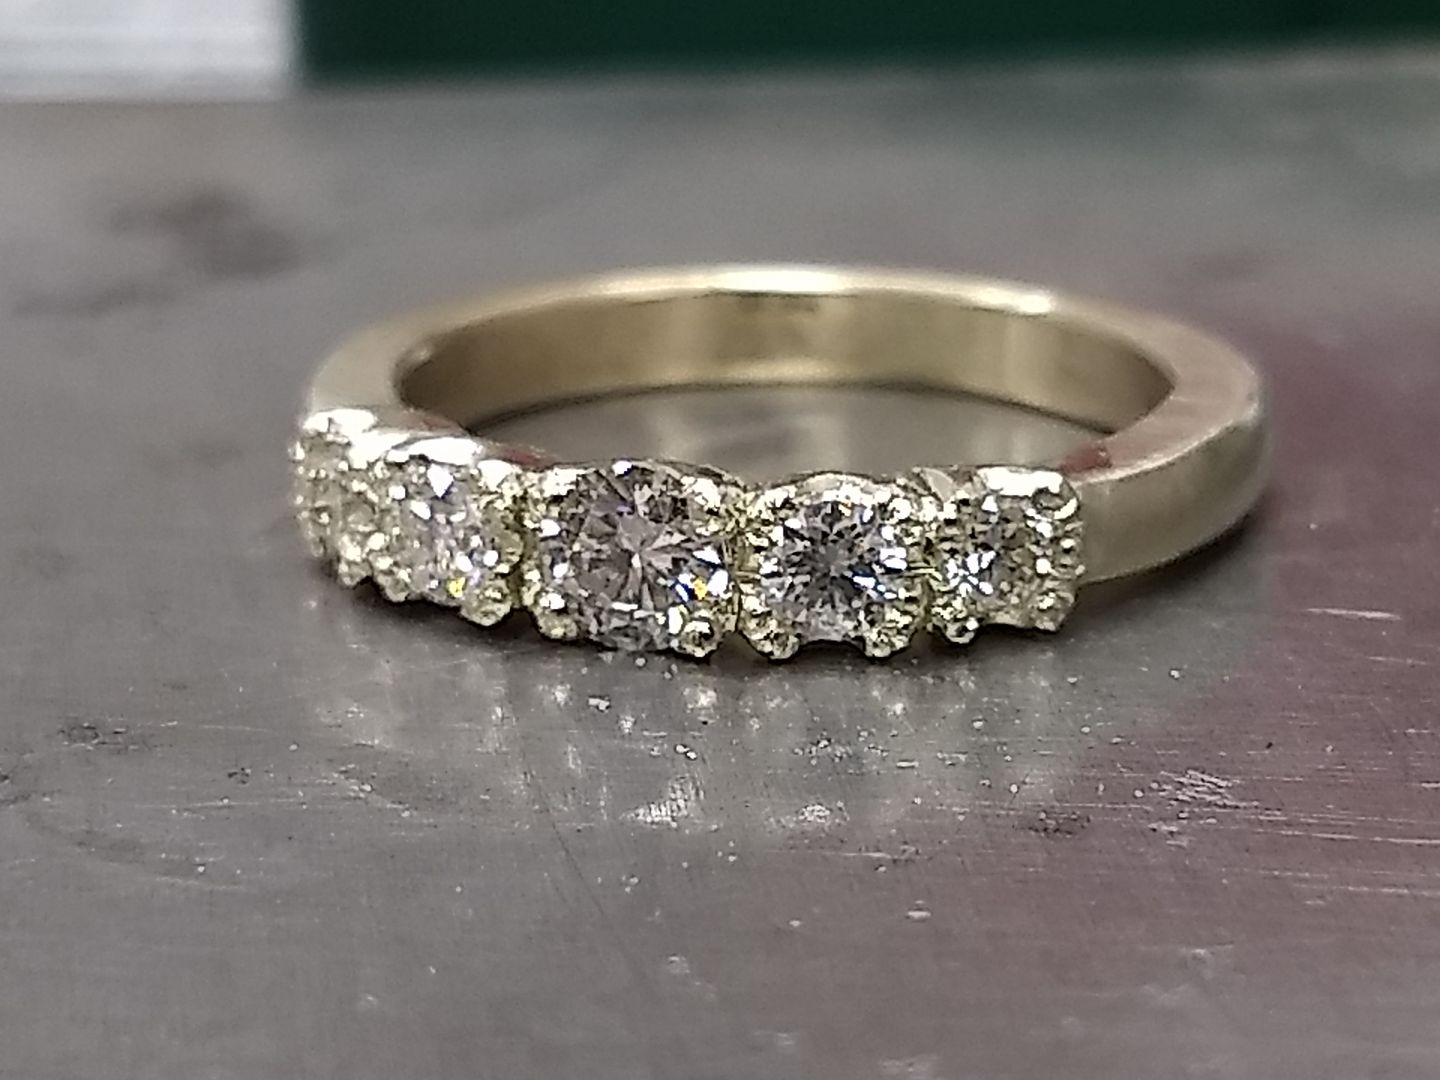
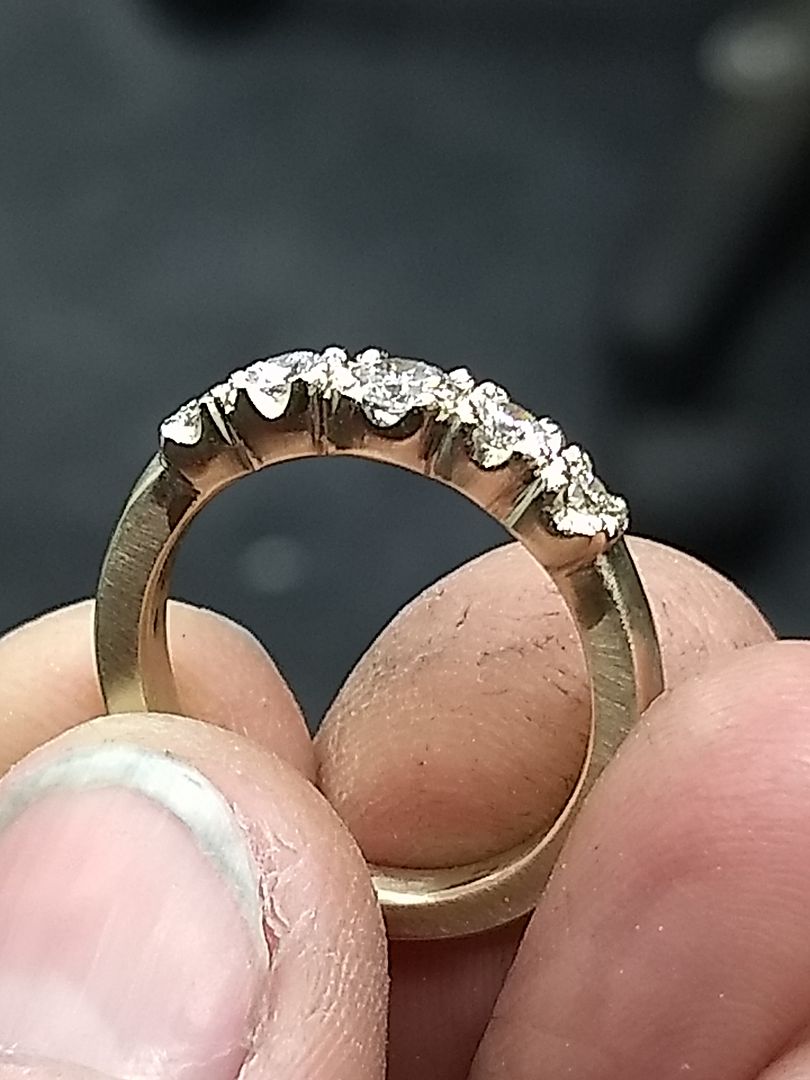
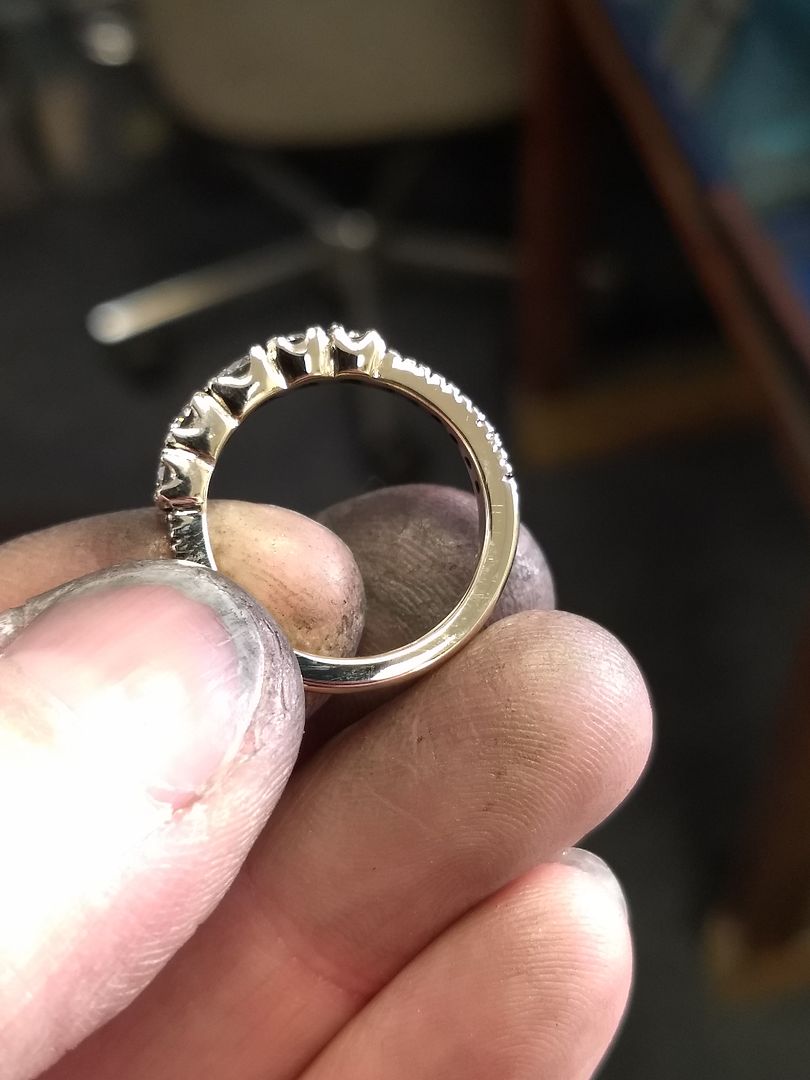
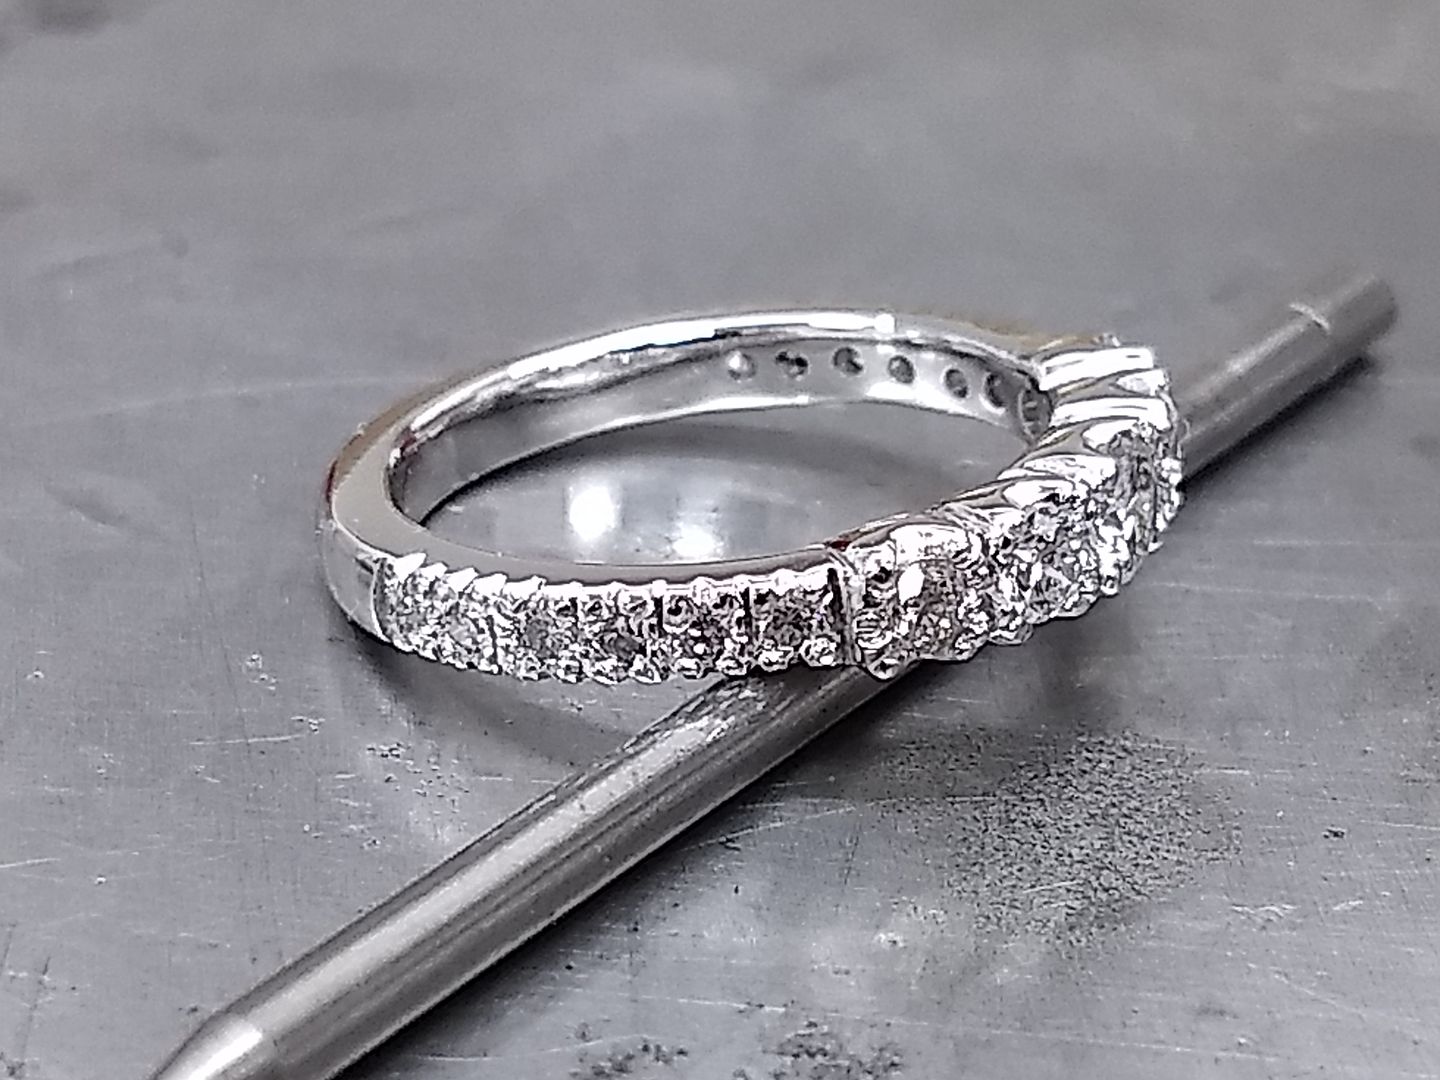
The sides are given a light file to bring the width in and the settings some definition:
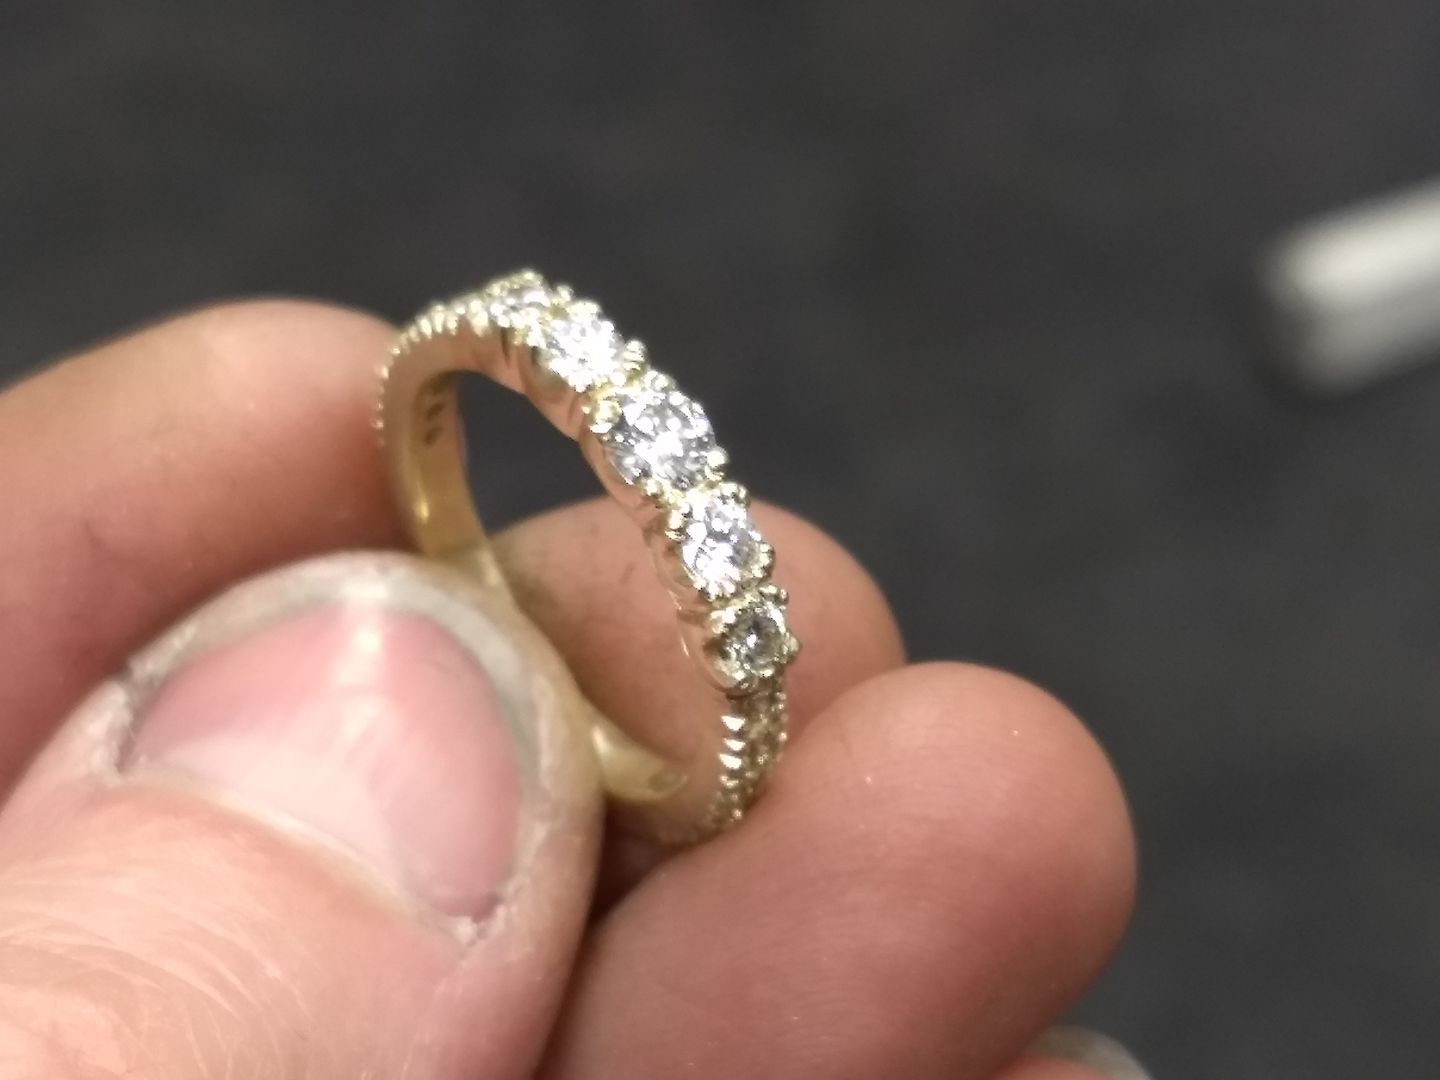
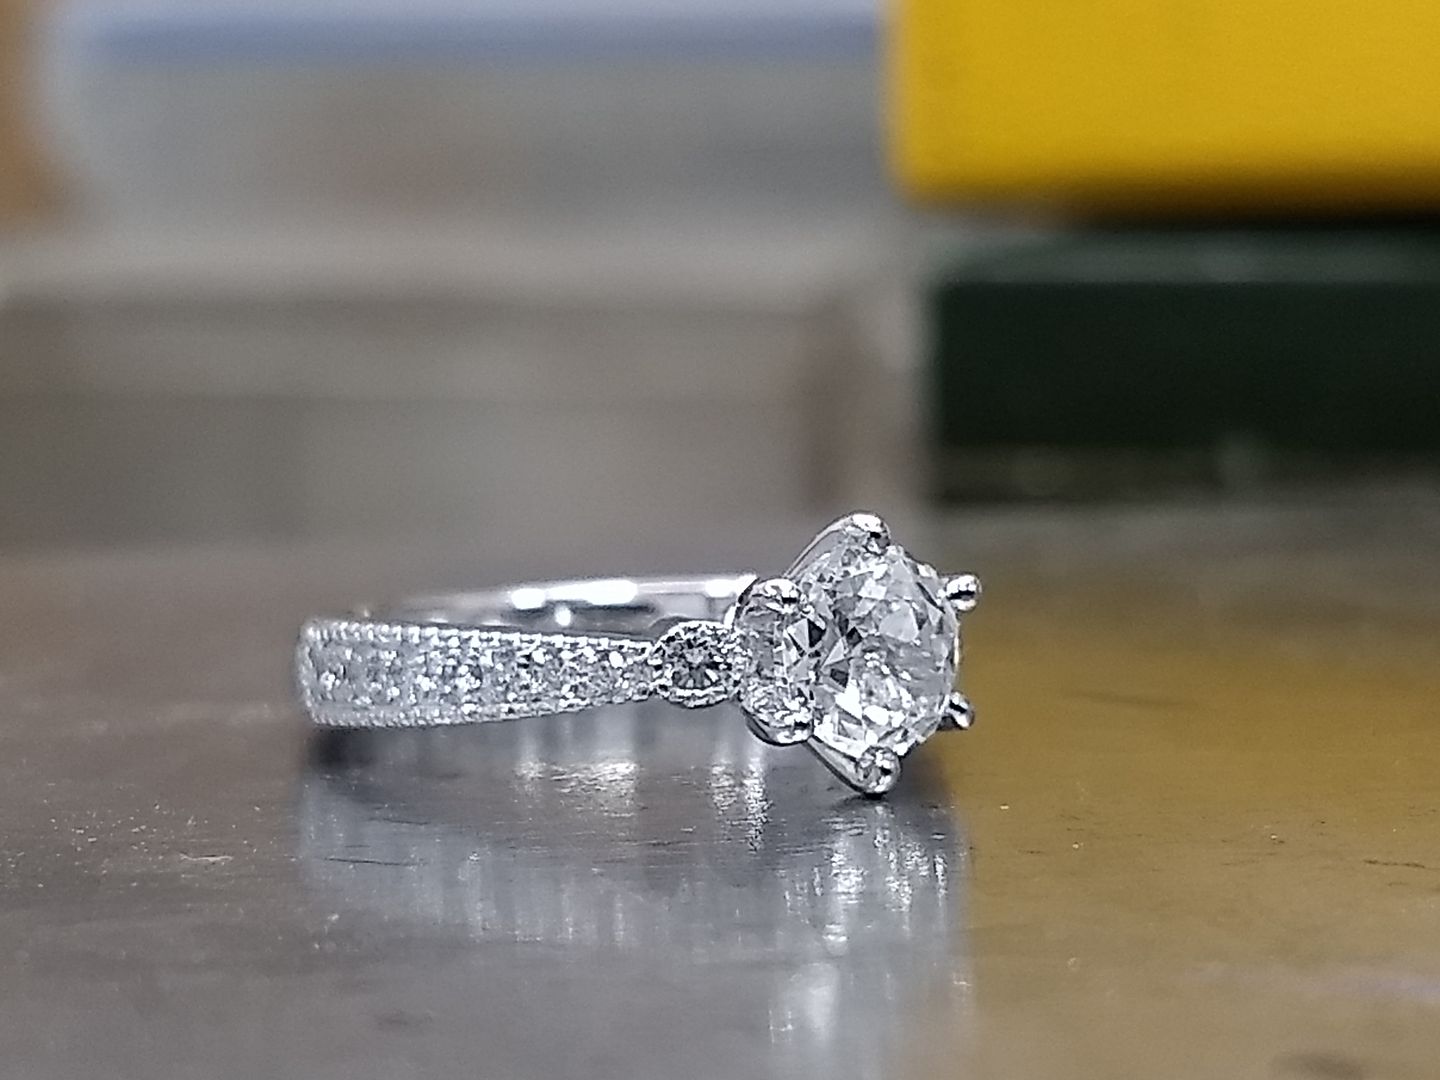
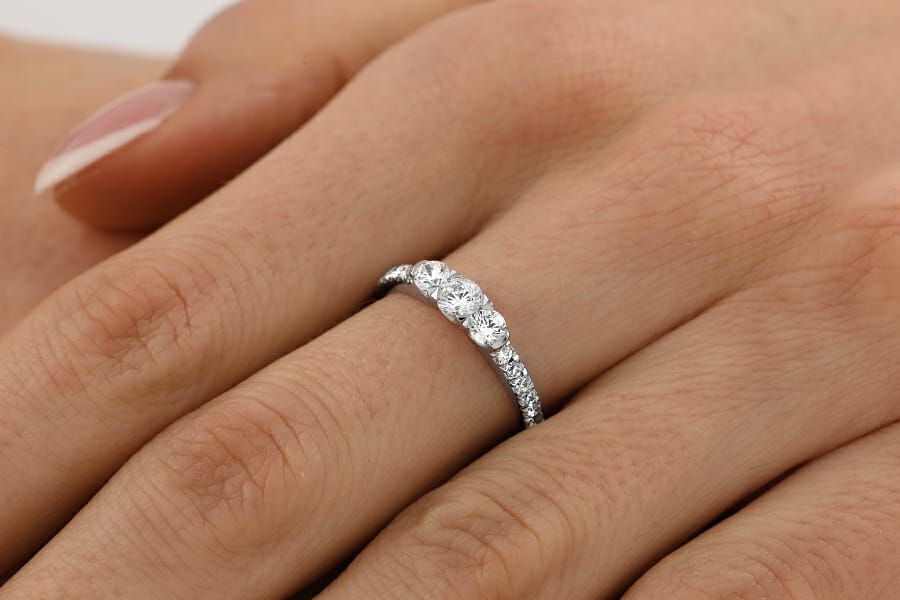
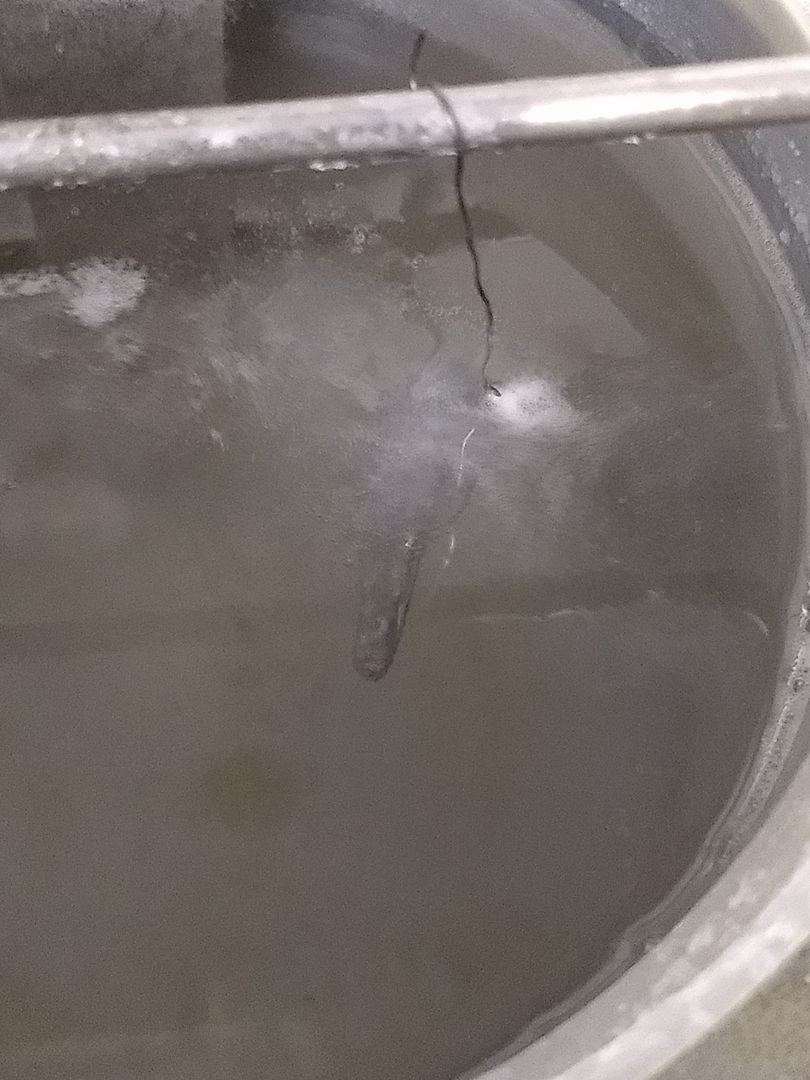
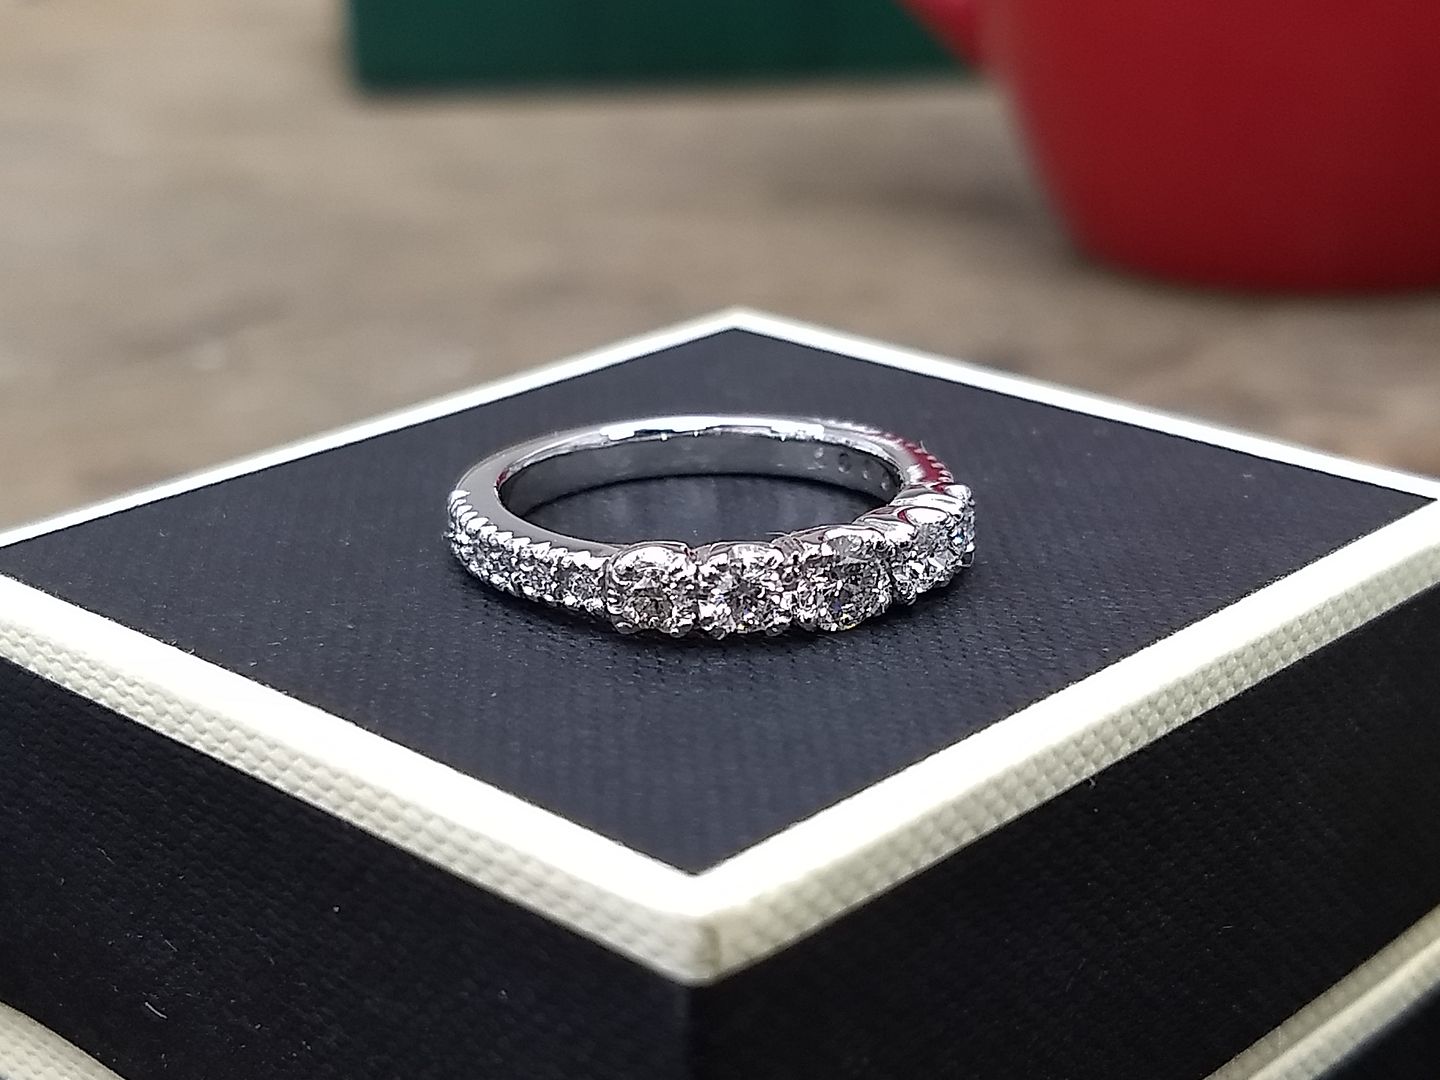
With that done the ring is polished, cleaned in the ultrasonic and then rhodium plated. In my opinion it's one of the best jobs I've had this year and I really hope Rachael loves it:

(salt cleaning bath)
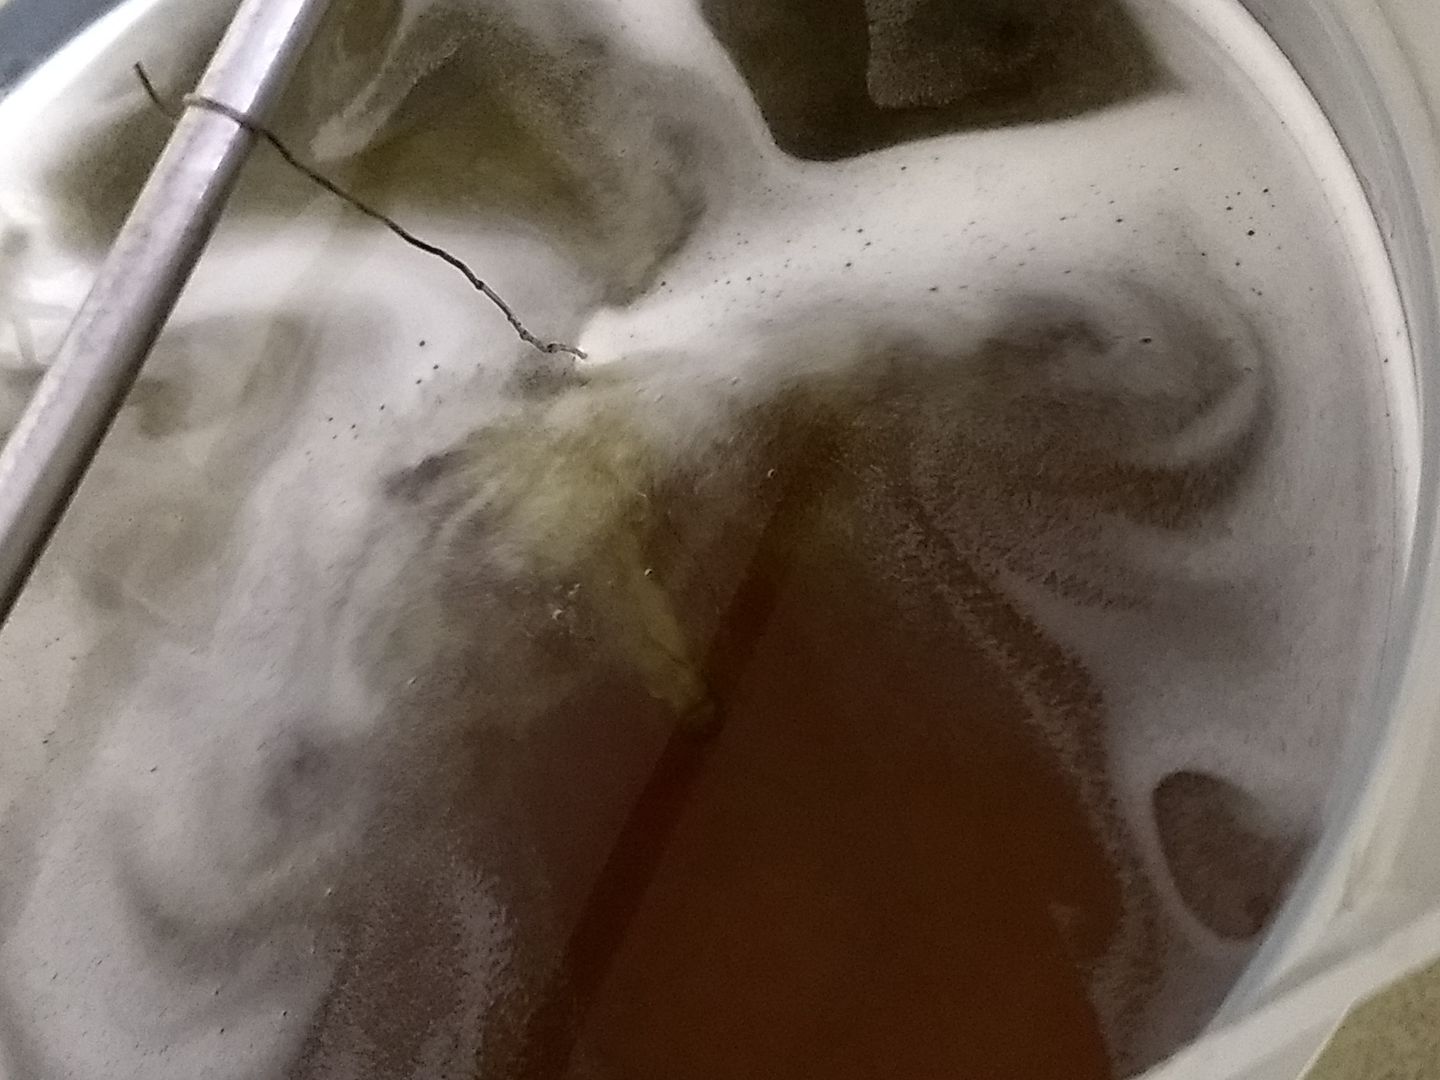
(rhodium plating bath)
So, what do we have this time? A job that I enjoyed for a change, and one that I feel proud of and am sure the owner will appreciate. It's for the better half of a fellow PHer btw. As was mentioned before they came in to see me with children and crisps. The good lady had some white gold and diamond rings and wanted to melt them down to make something new. This was the (rough-ish) guide:

And here are the deconstructed rings we'll use:

The gold was melted and turned into a bar. I'm always a little wary melting white gold to use in a new item as it doesn't always produce a usable material. Often its brittle or porous, but in this case it melted fine and was only a little hard if anything:


The bar was rolled out a bit more and after bending it I cut it to roughly the length needed for the job. I'll mention now that this is one of my 'measure nothing' jobs and it's all done off the cuff, by eye:

This is where I make my one solitary solder on this job. The band is joined and then made round and to the correct size:


The ring will effectively be filed out of the solid band. It's not something I usually do but seeing as it's playing ball for now I would rather not be soldering this white metal too much. Also, any off cuts / filings will go against the cost of the job so the customer isn't out of pocket as a result. The filing begins with the shank:

Which progresses to making a rough head section:


With that done I mark out the centre and where the main diamond will sit. This will be the guide for everything around it:


The positioning of the adjacent stones is then marked and drilled:

These stones are slightly smaller.... so have smaller holes:


The ring was originally to have 3 main stones but the excess I left was too perfect to not incorporate another 2 to make 5. She agreed and hey presto:

Nice little test fit:


The mount is cleaned up ready for the next phase (at this point I'm thinking "s
t, this might actually be quite good"):


The next bit is to set the main diamonds. Middle first and then so on:


The shoulders are the next area to get stuck into. 12 small diamonds measuring 1.65mm each have either been selected from the stones in the pile or swapped with stones from the pile to make sure they all match: The total carat weight of all the stones is 0.80ct:


The spacing is marked out with a fine saw at 2.2mm approx:

And then with a 1mm drill I make the pilot holes. First one side then the next:


The holes are bored out to 1.5mm at half depth with another drill and then 1.6mm to the desired depth with a setters drill. I also cut the settings across the middle to make the claws:


Now it's time to start setting. Using a couple of graining tools the claws are pressed over the edges of the stones. 1.65mm stones are a snug fit in the 1.6mm holes but as gold is soft they go in with a light push:


Check size again:

And all set:

The sides are given a light file to bring the width in and the settings some definition:


With that done the ring is polished, cleaned in the ultrasonic and then rhodium plated. In my opinion it's one of the best jobs I've had this year and I really hope Rachael loves it:


(salt cleaning bath)

(rhodium plating bath)


Gassing Station | Watches | Top of Page | What's New | My Stuff