Unusual job on the bench today
Discussion


NDA said:
Looks great....
I always love how your work seems, to the casual observer, to come together at the last minute!
Scrap
Scrap
Scrap with scratches
Scrap with scratches and holes...
POW!
Beautiful ring!
Amazing - I just don't have the dexterity and patience you have. Lovely stuff.
Possibly the best description of my job ever I always love how your work seems, to the casual observer, to come together at the last minute!
Scrap
Scrap
Scrap with scratches
Scrap with scratches and holes...
POW!
Beautiful ring!
Amazing - I just don't have the dexterity and patience you have. Lovely stuff.
QuickQuack said:
I've been following this thread for a while and I'm fascinated by the craftsmanship and skill on display.
Now that it's my turn to need a special item (for Mrs. QQ for a significant age birthday...), Eddie, is it best to email you on the address in your profile or send a pm via the forum?
Howdy. PM on here if you can. I'll get the email and then respond when I get 5 minutes Now that it's my turn to need a special item (for Mrs. QQ for a significant age birthday...), Eddie, is it best to email you on the address in your profile or send a pm via the forum?

I just wanted to thank all on PH for their support in 2018 and especially to all those who have put their faith in me and what I do. Have a great Christmas and a fantastic New Year. I'll be hard at it in the office over the weekend but will most likely update the thread in January. Regards,
Eddie
Eddie
HannsG said:
Eddie! Just the man we need....
Wife has a wedding and engagement ring and rather than have two seperate rings. We want them combined into one. Diamonds mainly. And a new setting
I gather this is something you could do?
EDIT: JUST READ THE THREAD FULLY
Amazing work, hopefully you are still doing this work and i will send a PM accordingly.
No worries, I'll be at the end of the internet when you need me. If there is a delay in responding don't worry, I'm absolutely snowed under this month. I will get to you though Wife has a wedding and engagement ring and rather than have two seperate rings. We want them combined into one. Diamonds mainly. And a new setting
I gather this is something you could do?
EDIT: JUST READ THE THREAD FULLY
Amazing work, hopefully you are still doing this work and i will send a PM accordingly.
Edited by HannsG on Wednesday 20th February 15:08
Morning all
Sorry for the long delay in updating this thread. I've had a really busy year so far and being honest I've needed to overcome a few personal hurdles, emotionally and physically. Nothing major, I've just been a bit tired and off the boil. Anyway, the long awaited super-post has arrived and I'll try to explain as I go. There's a lot of photos so bear with me.
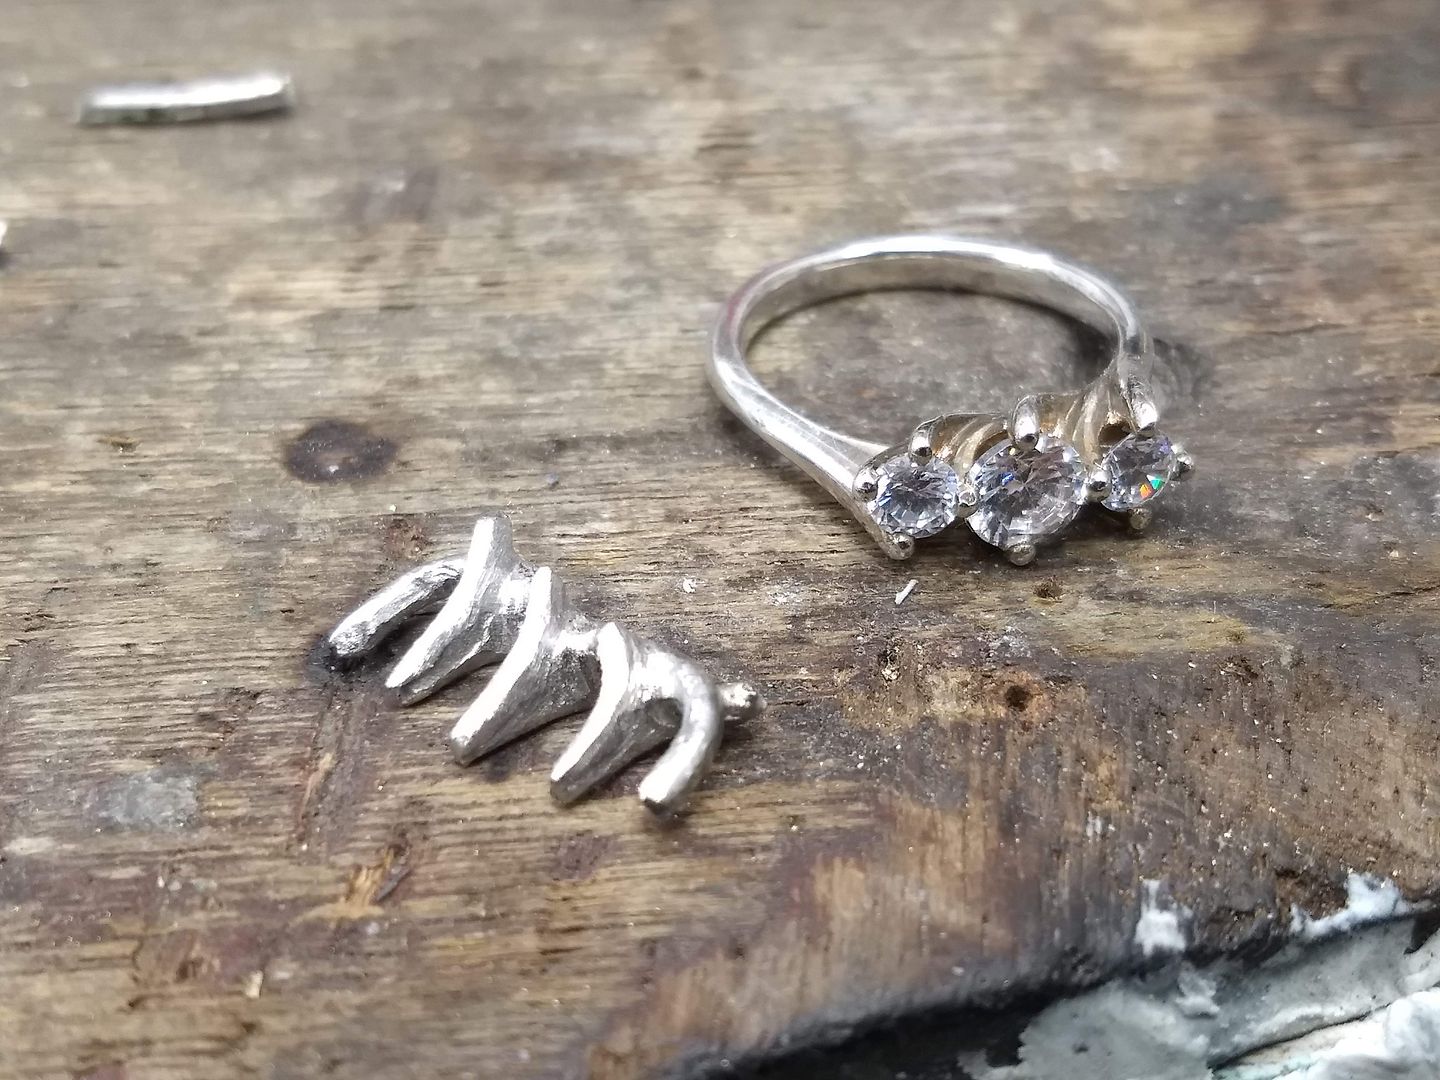
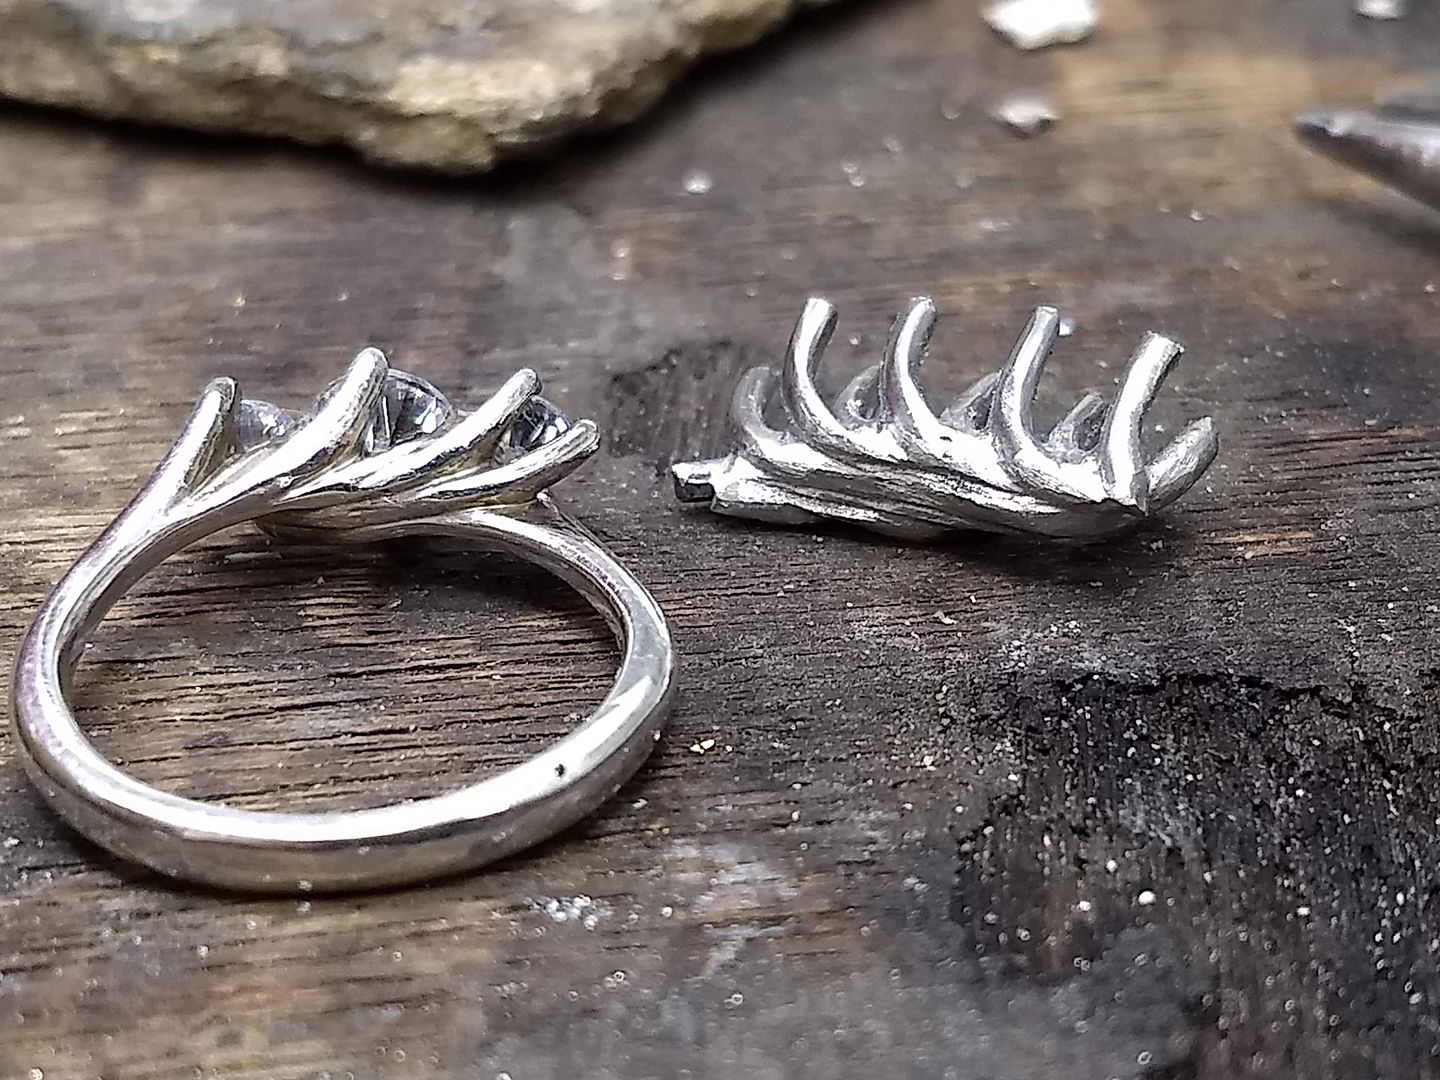
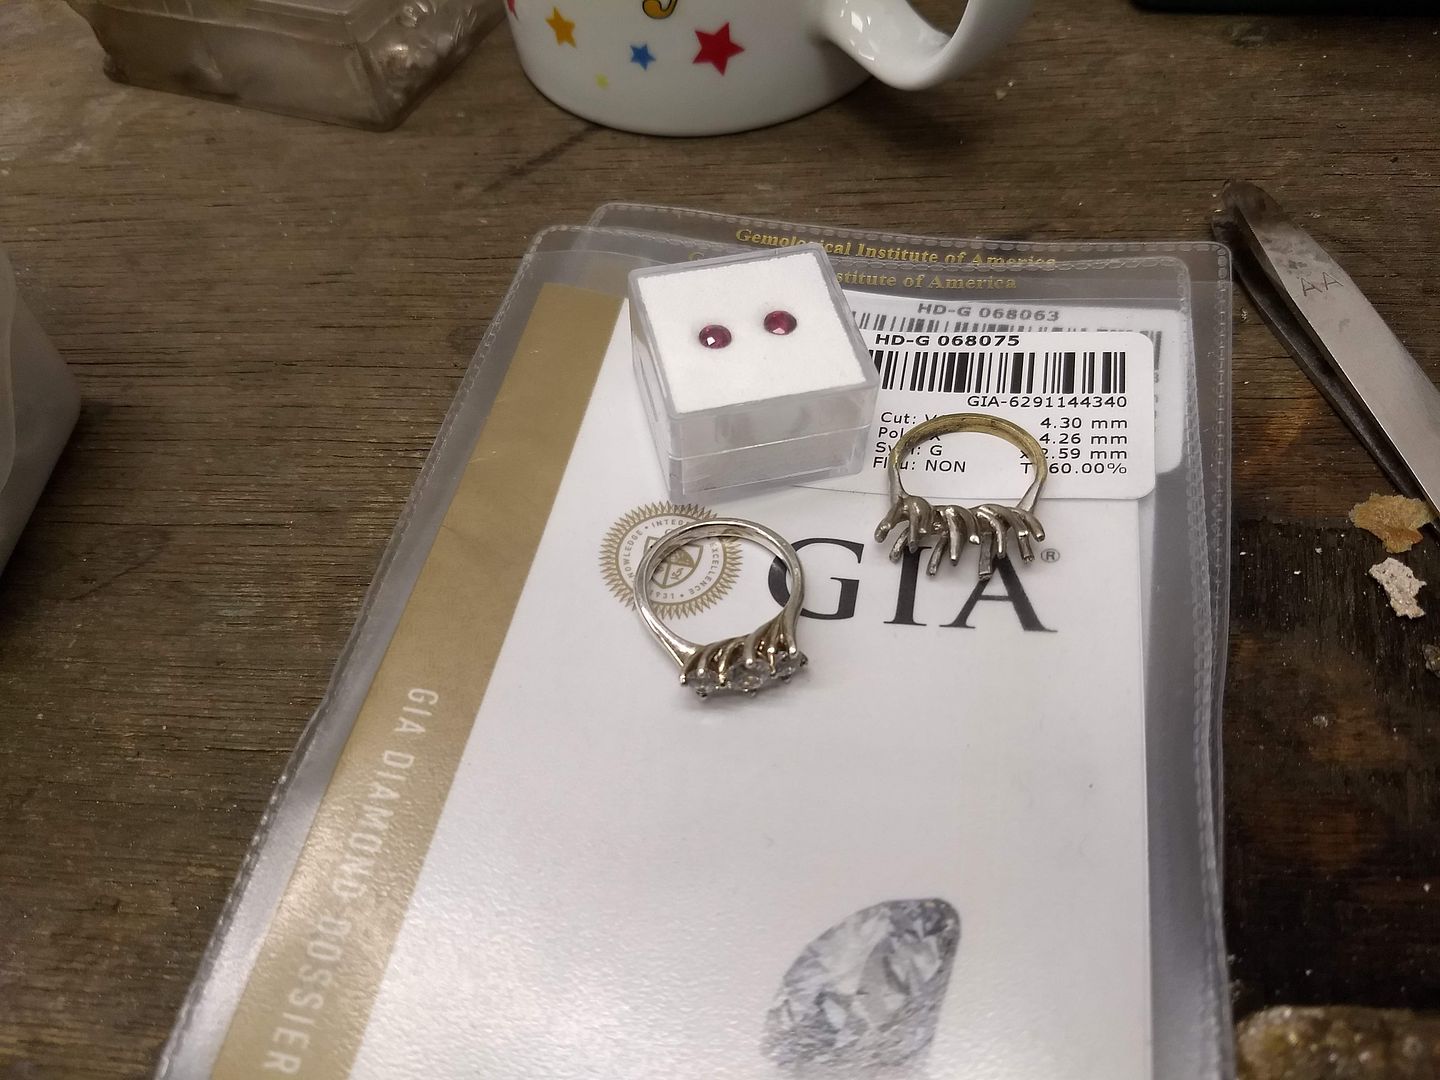
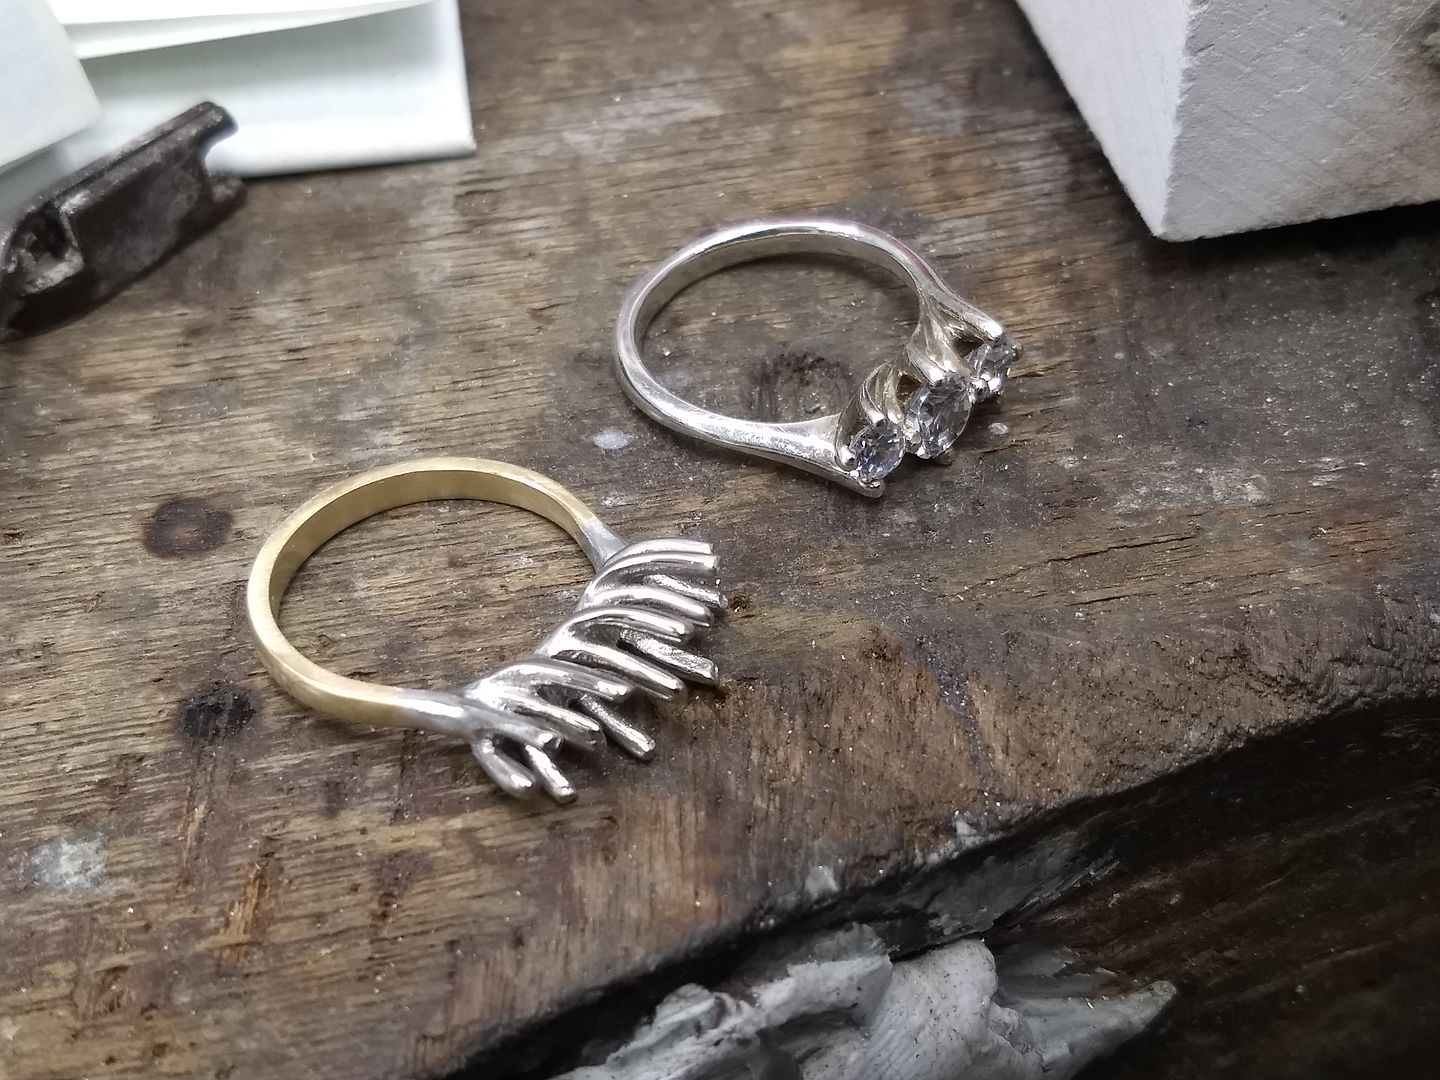
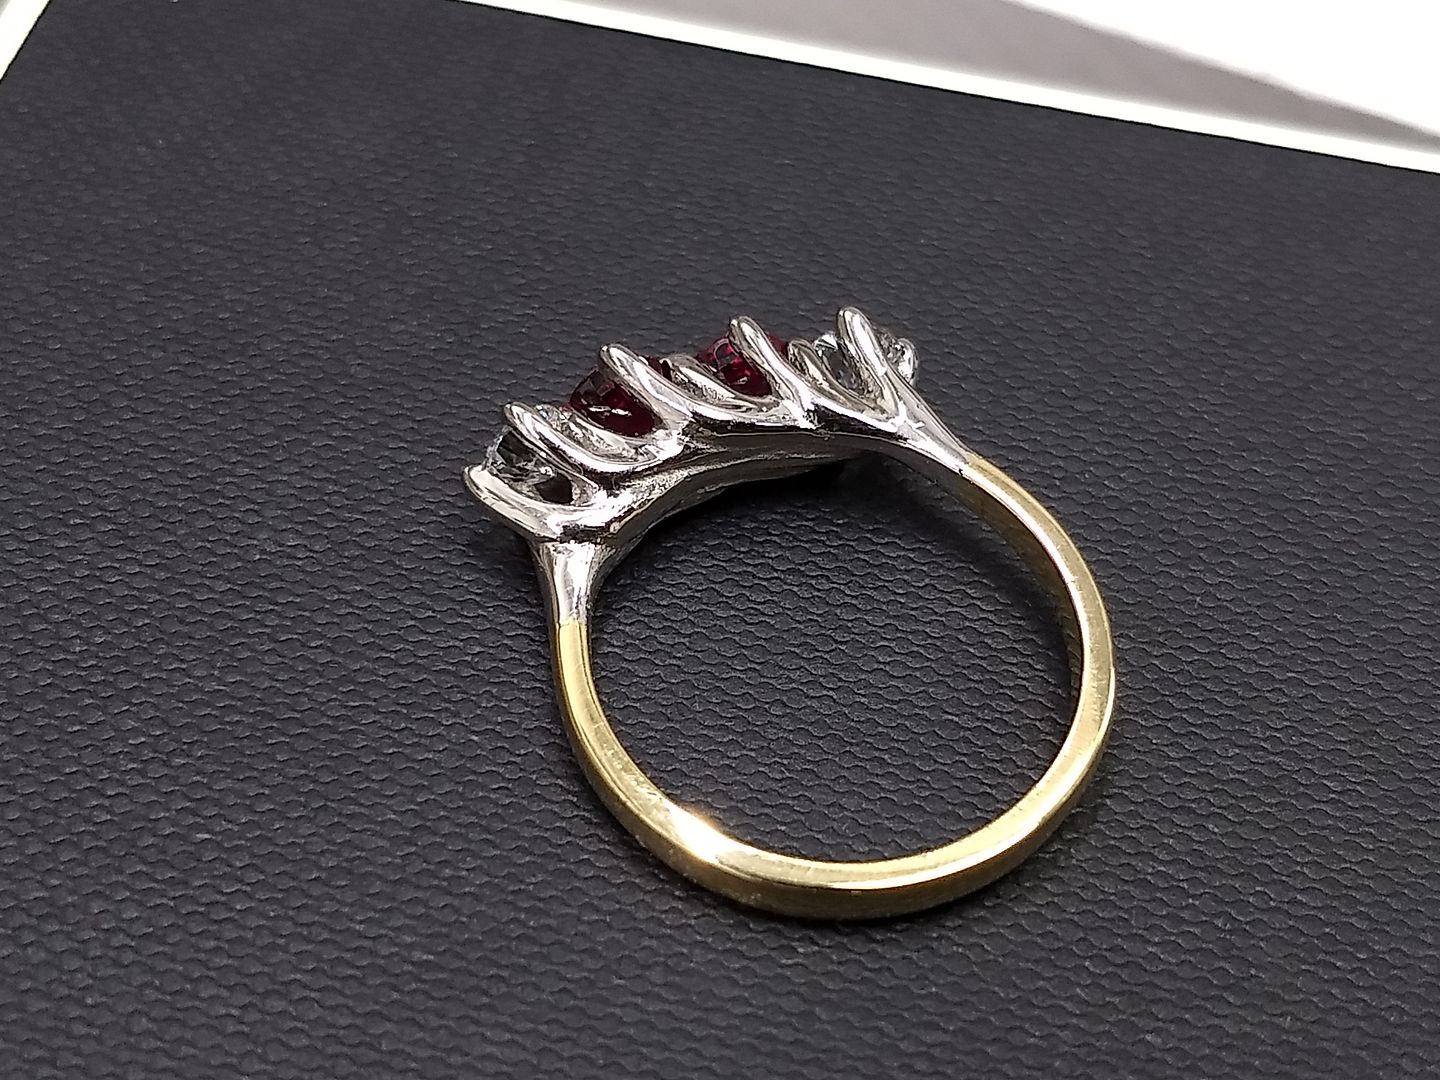
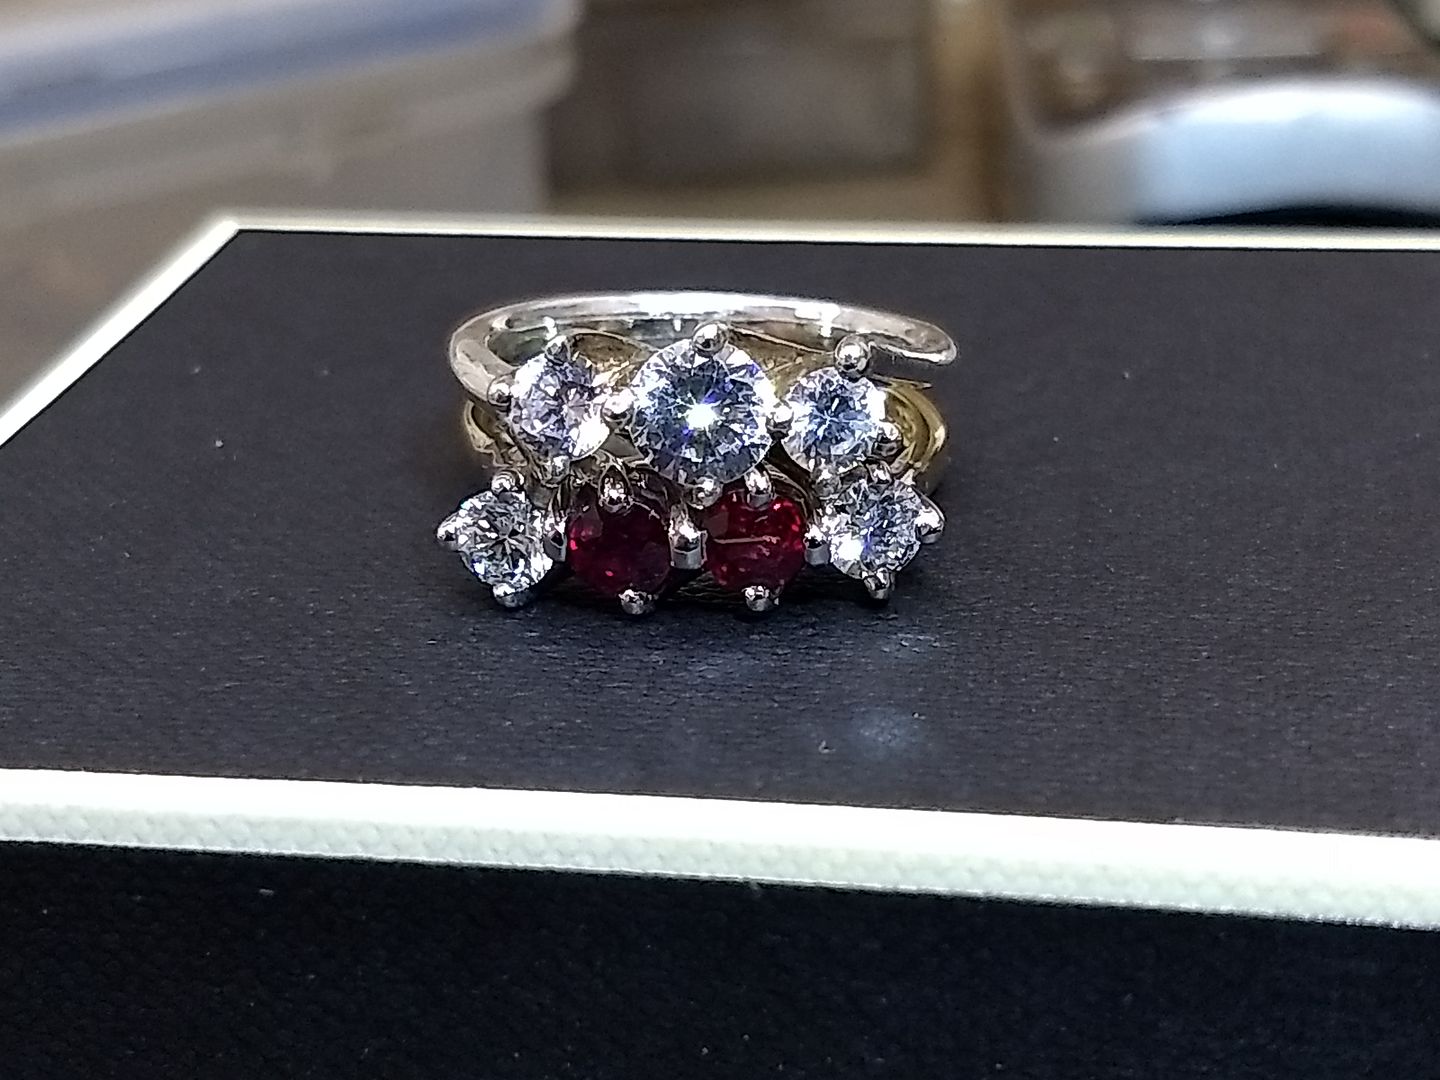
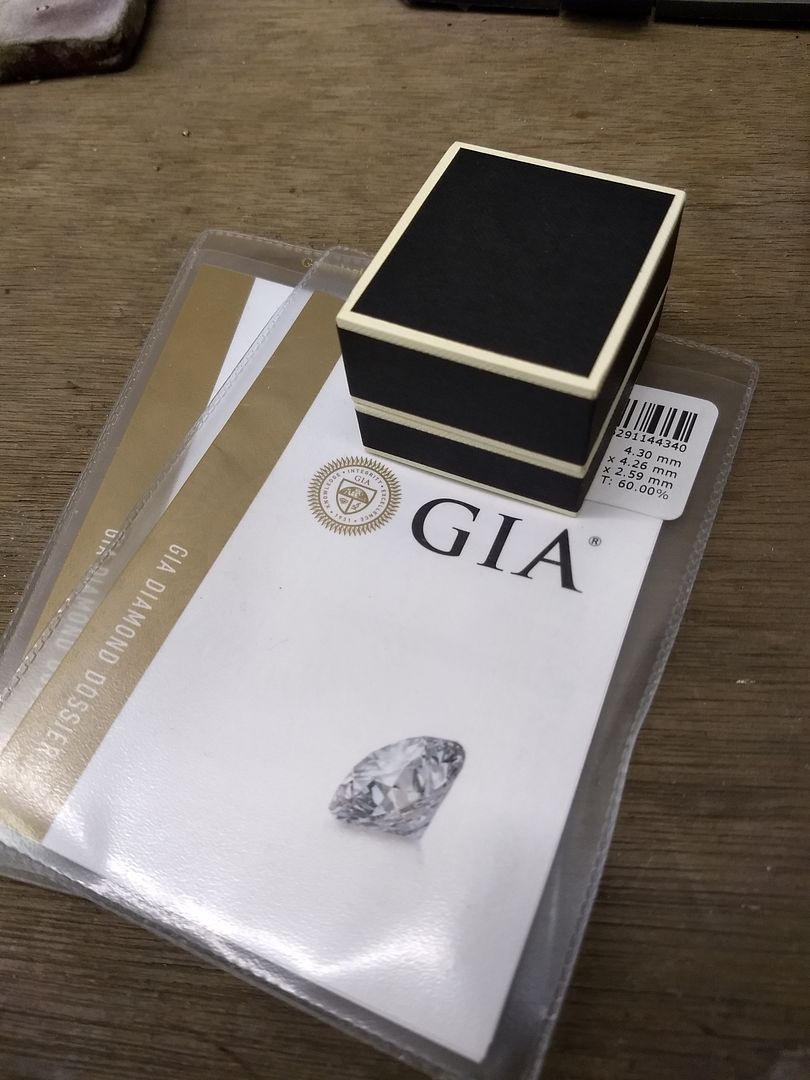
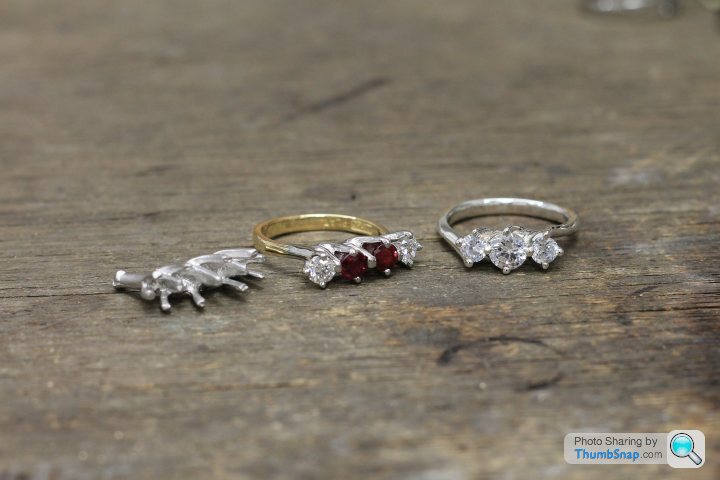
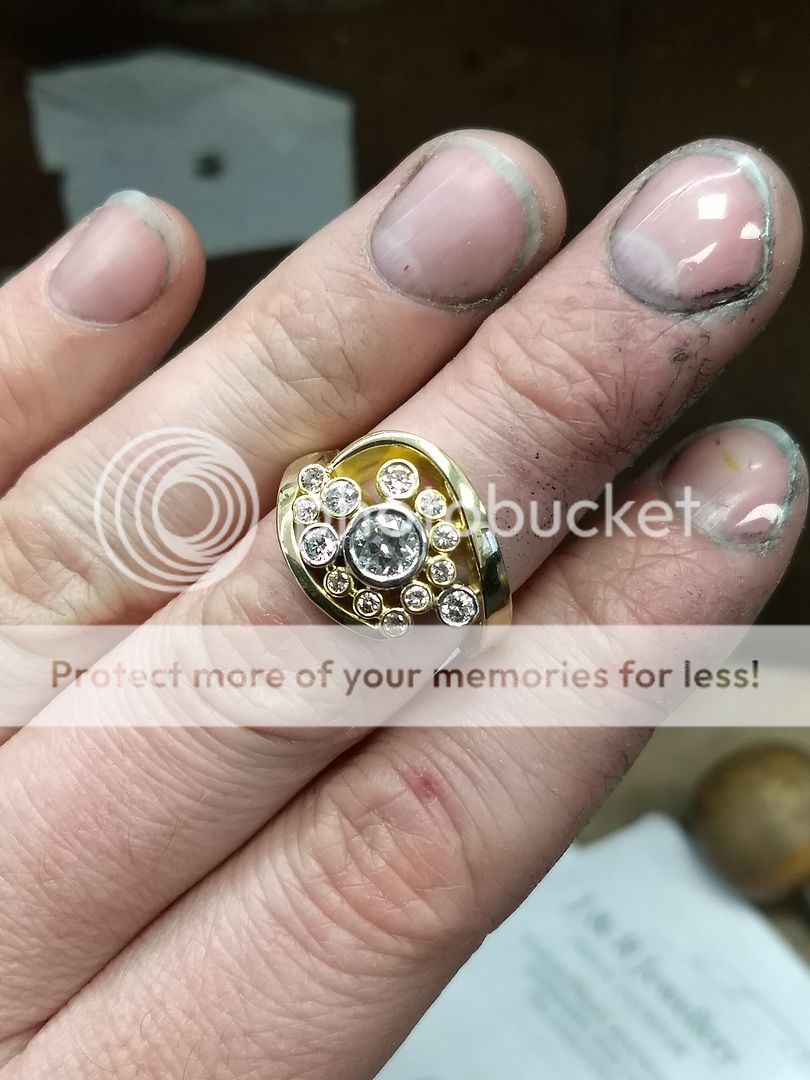
Back in the later part of 2018 a gentleman emailed me with the idea that he wanted a ring for his wife that could sit with another that he had commissioned some years ago. The original is a 3 stone diamond ring set in 18ct yellow gold and platinum. The twist here is the new one needs to be a 4 stone and because of the way the original is made we'll need to not just copy it, but also mirror it with an extra stone. The requirements for the stones were: pair of GIA certified D colour rounds and a matching pair of high end natural rubies. Game on (I was dreading this job actually. As far as bespoke goes, this is probably the most difficult. Platinum is a difficult material to work in this way and an expensive metal if you cock up).
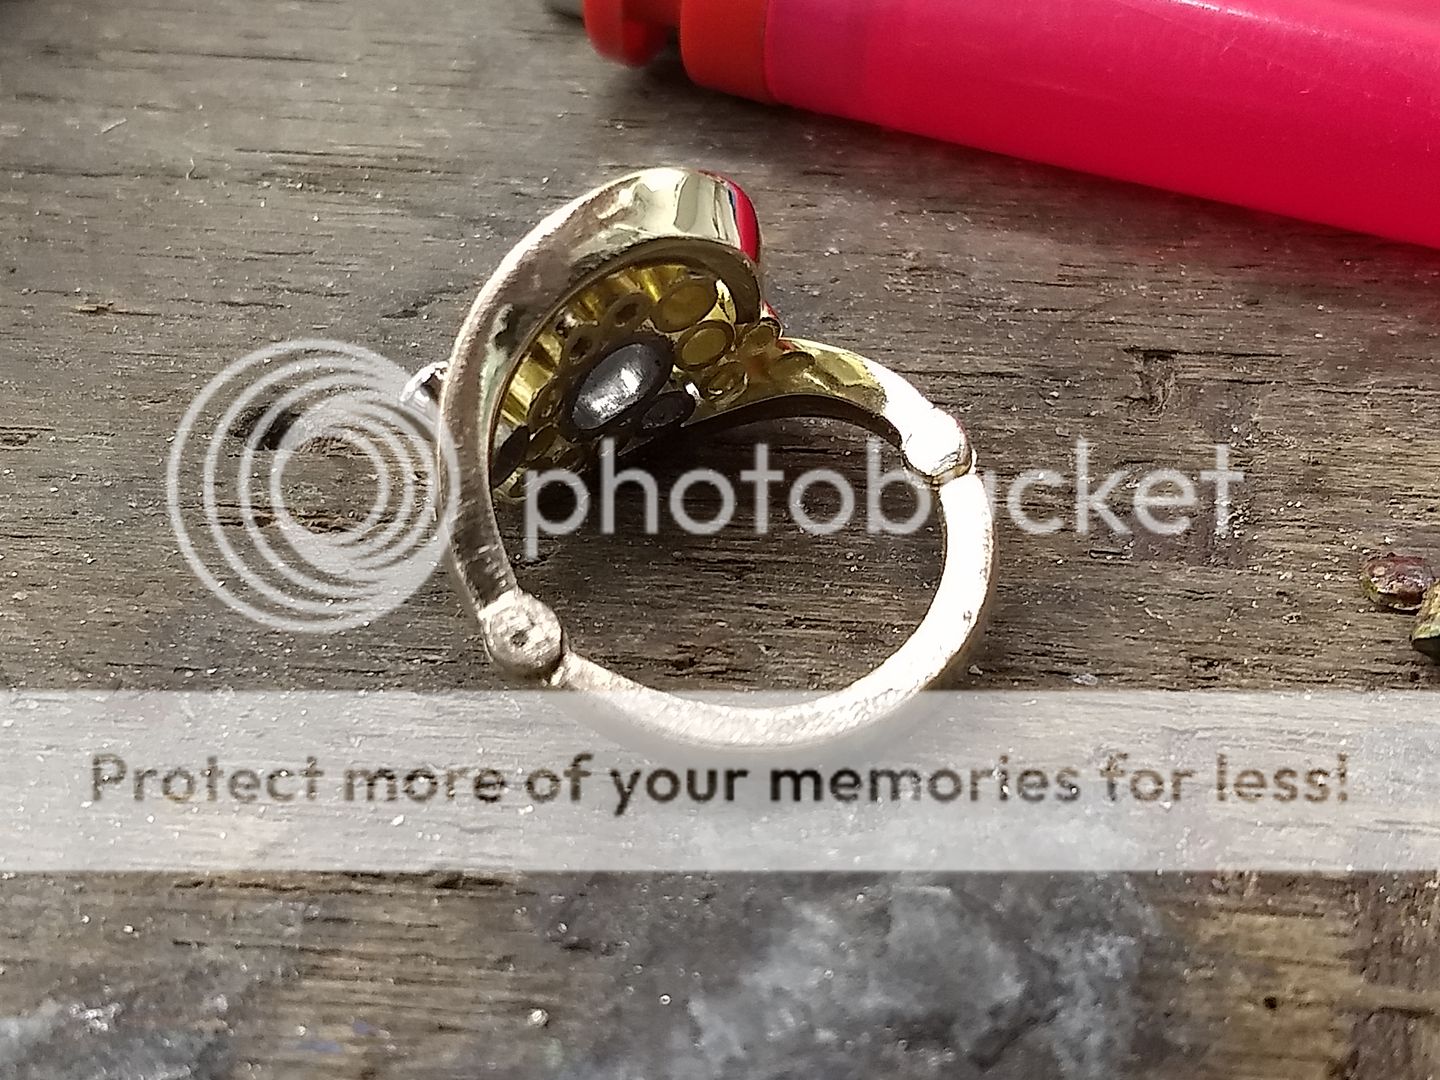
The original item:
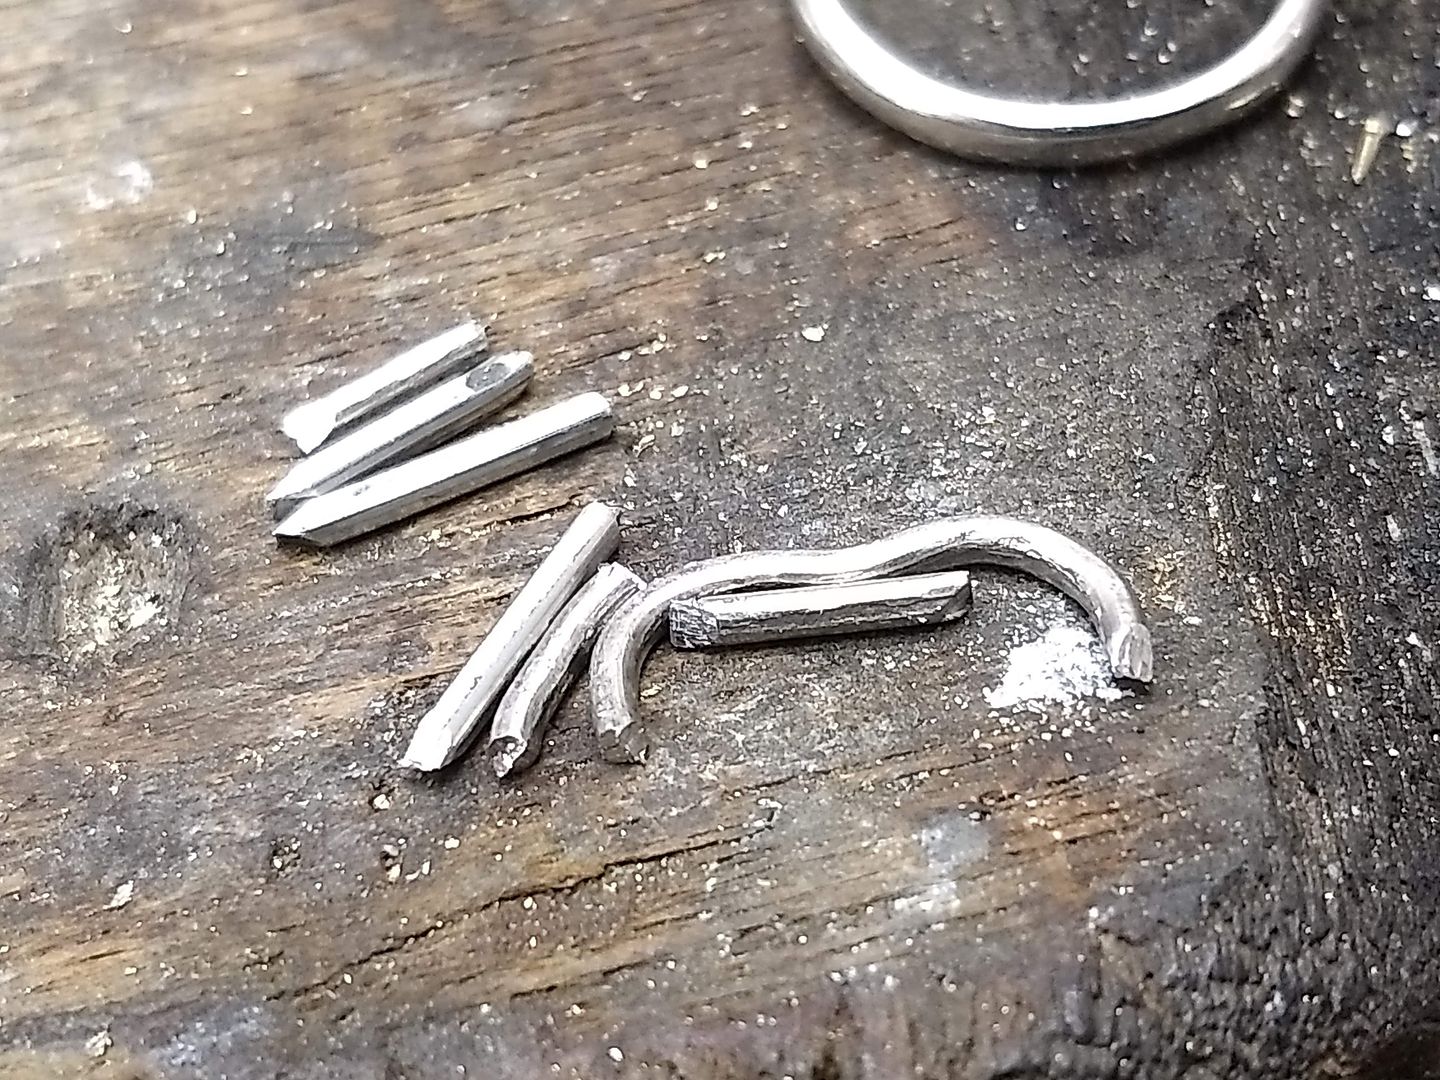
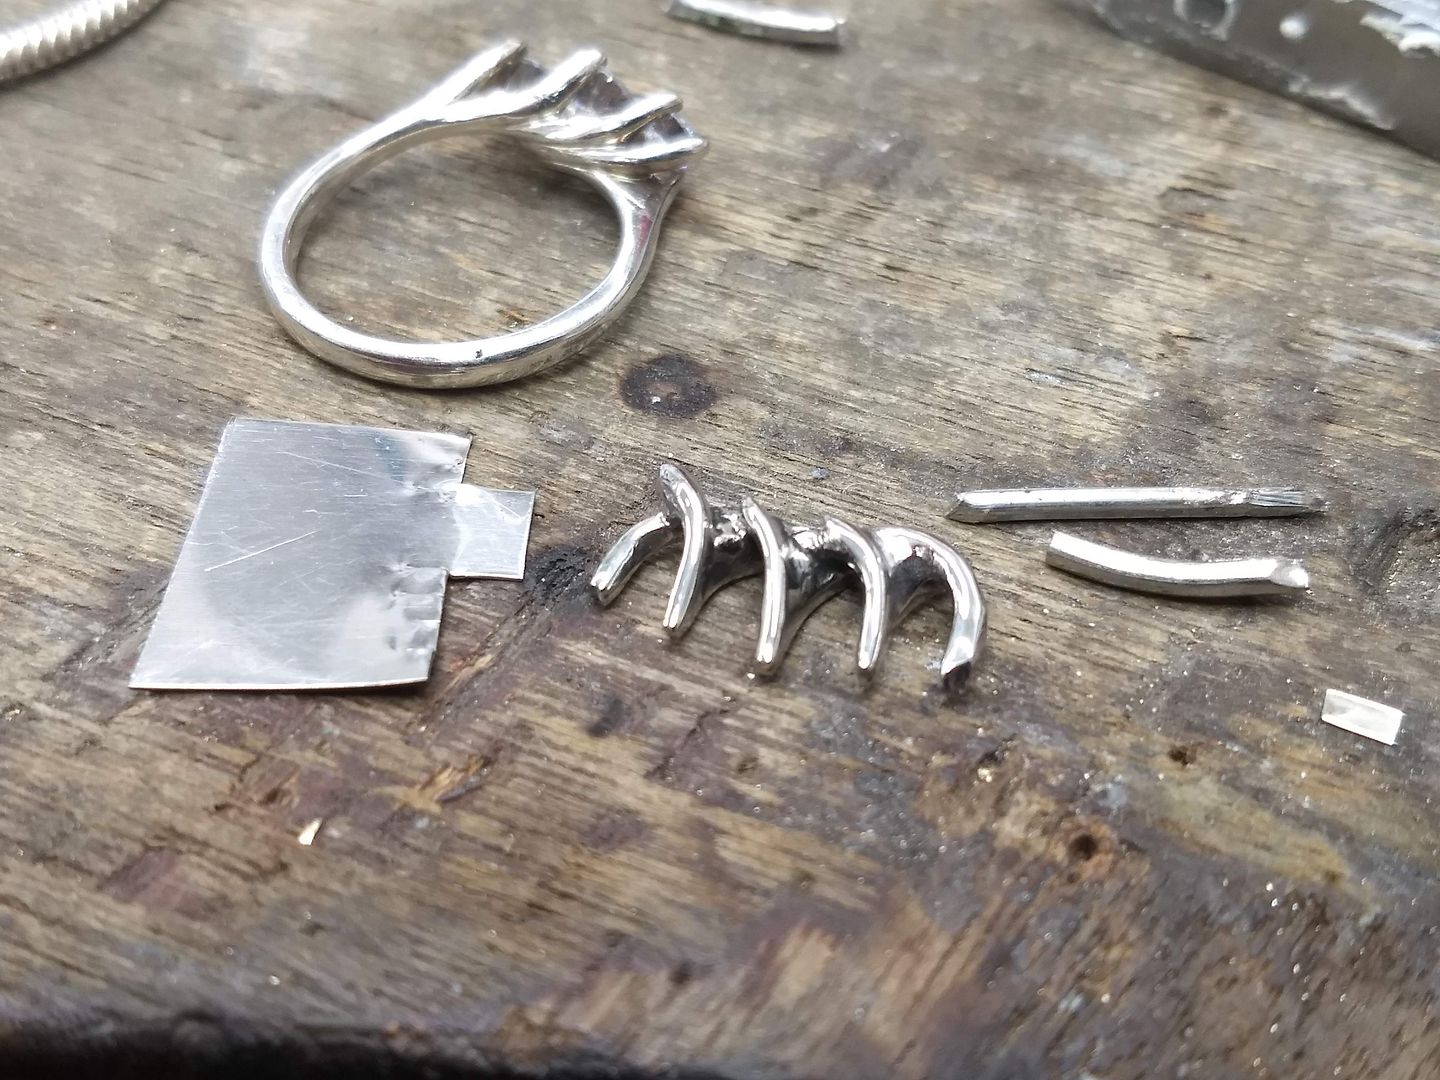
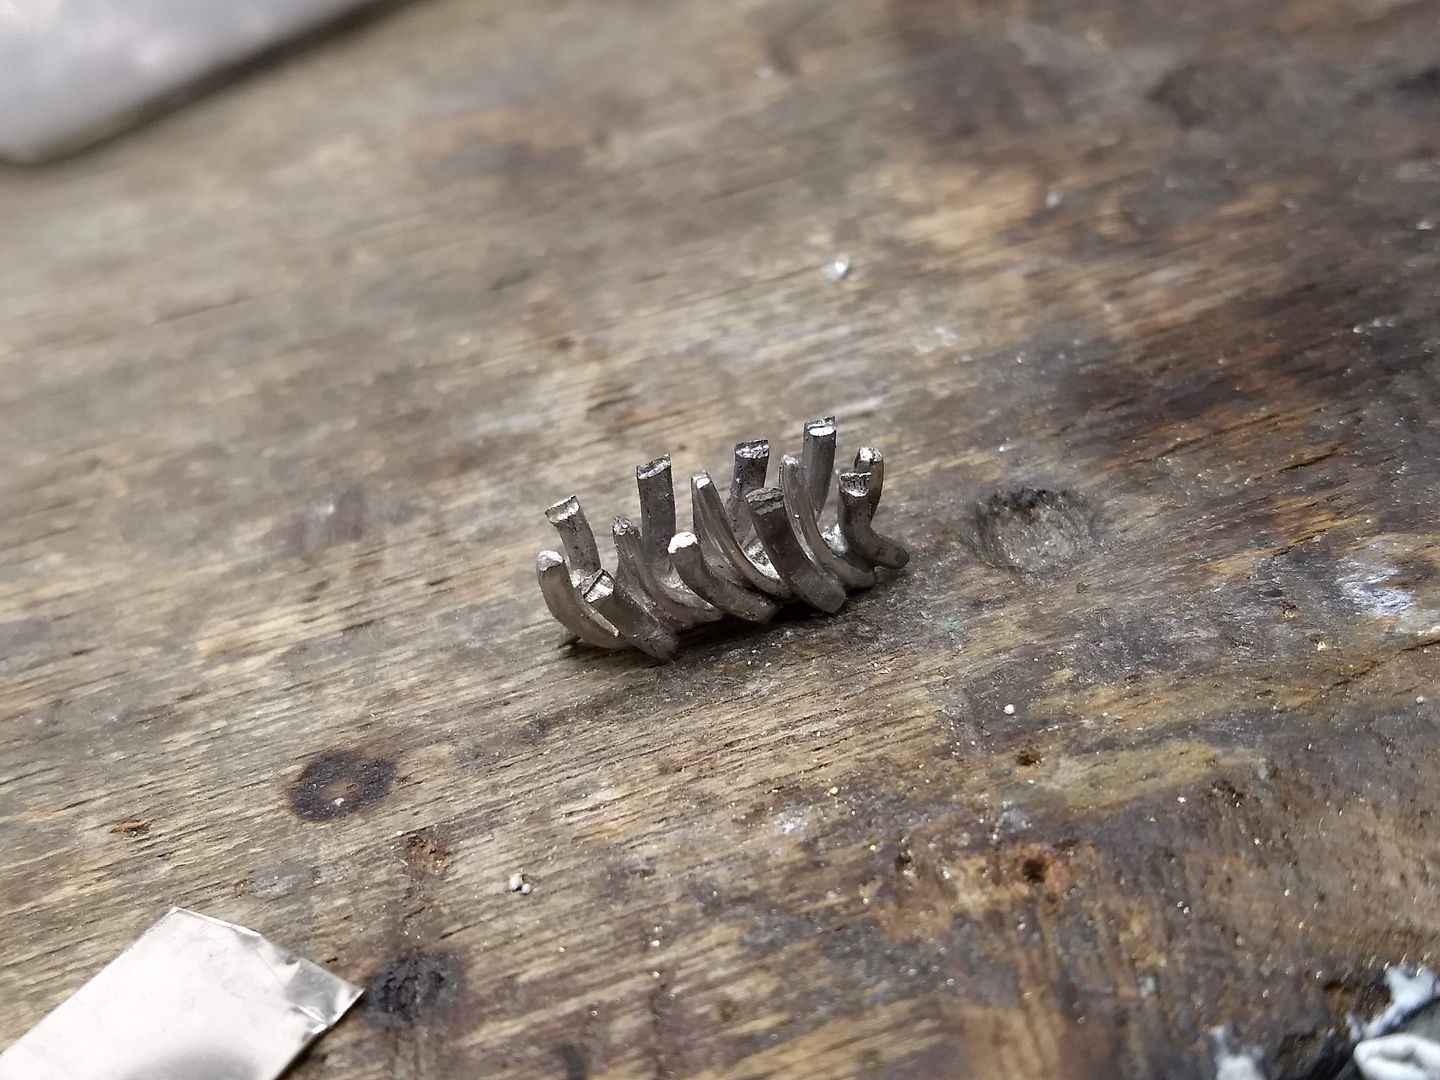
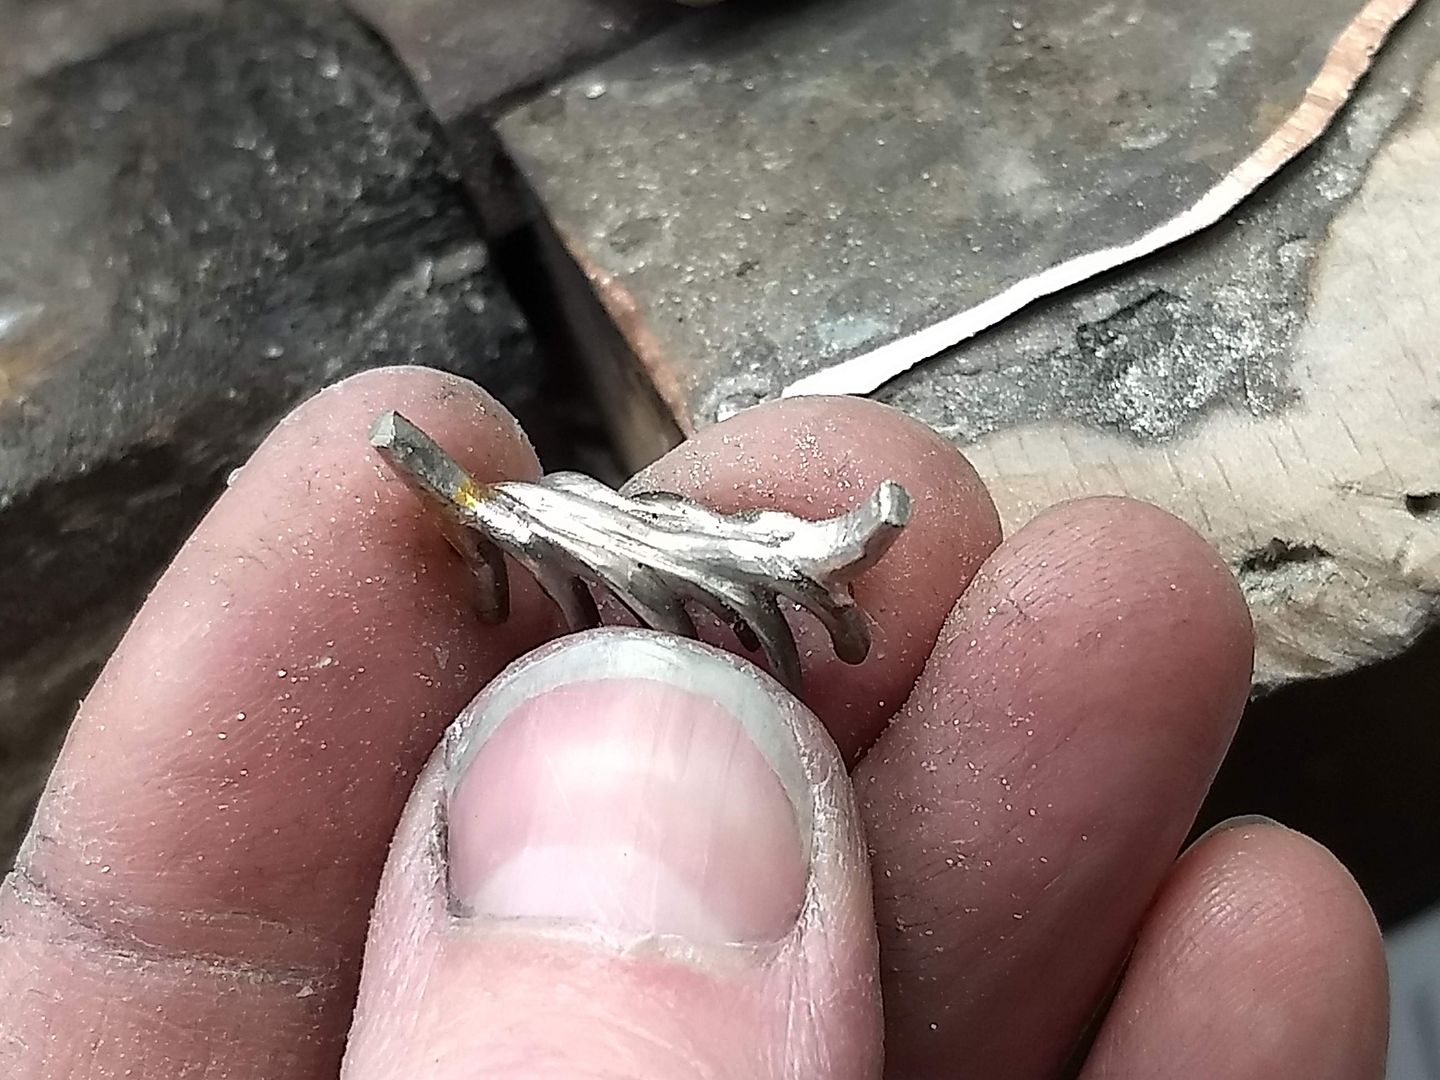
The first step is to make the inner section of the setting. It's a very interesting setting in that it has a middle carcass and outer claws as well as an undersetting that shows the arms flowing together. We start with some platinum wire and lots of medium solder (high enough melting temperature to be safe over time but low enough that we won't go blind heating it).
There is one middle arm of the inner carcass and this is the first piece of metal we bend. Remember, like all my jobs I measure very little. It's all by eye and experience / judgement.
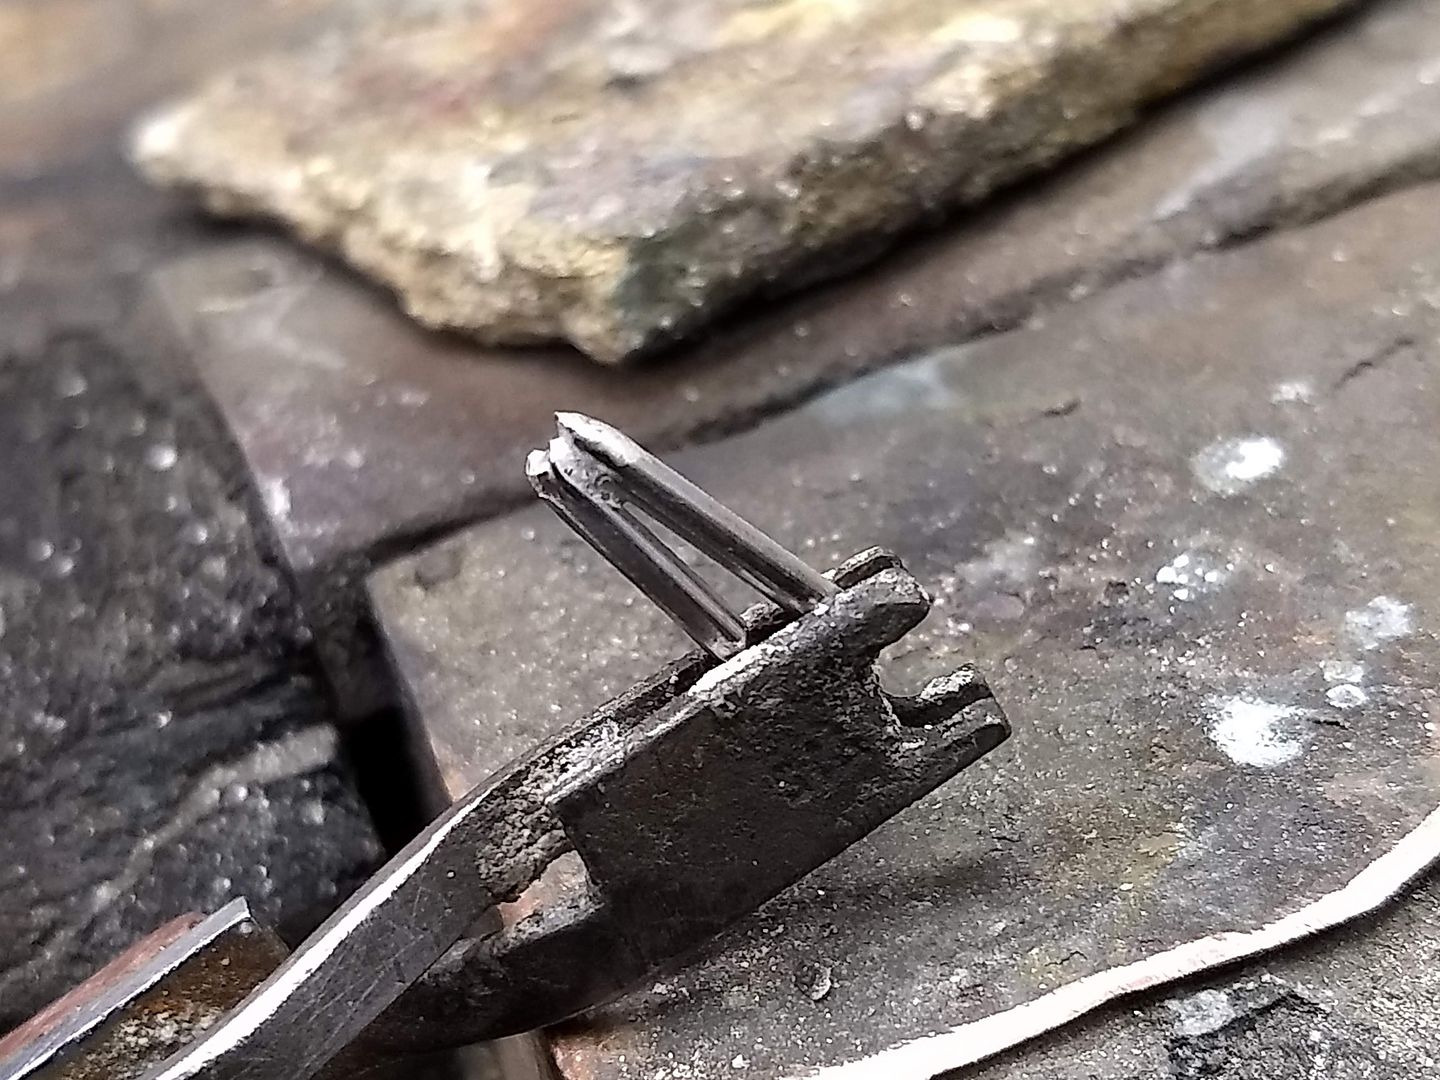
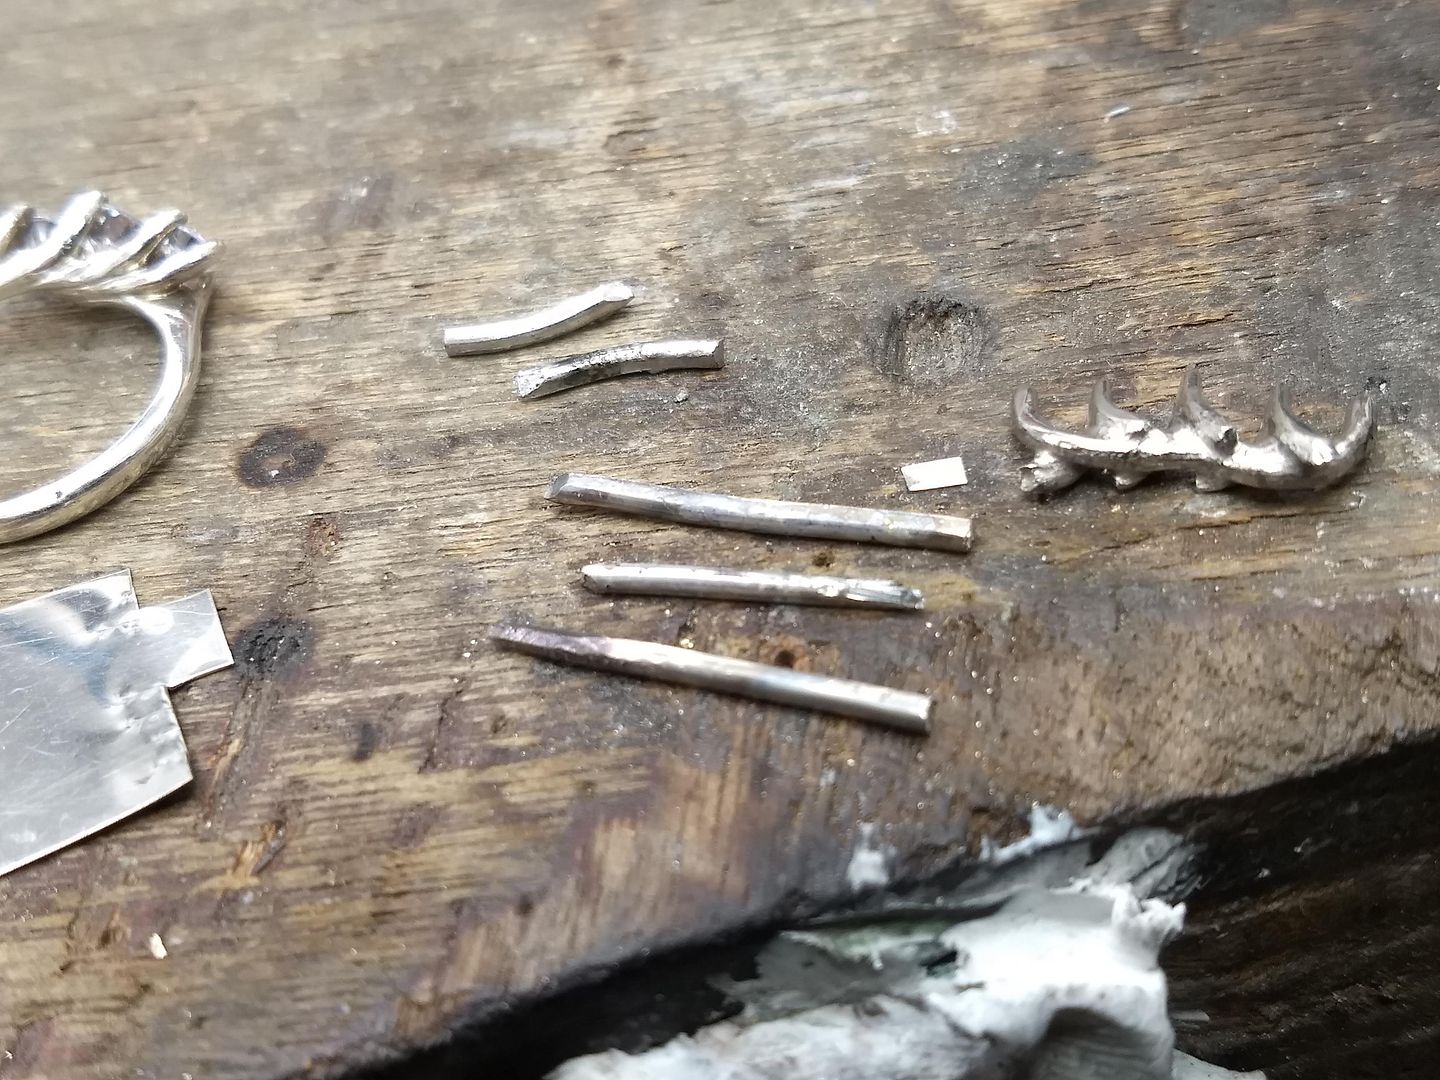
With the inner bar done I cut some more sections of wire.
Pinned together I begin the soldering process. :/

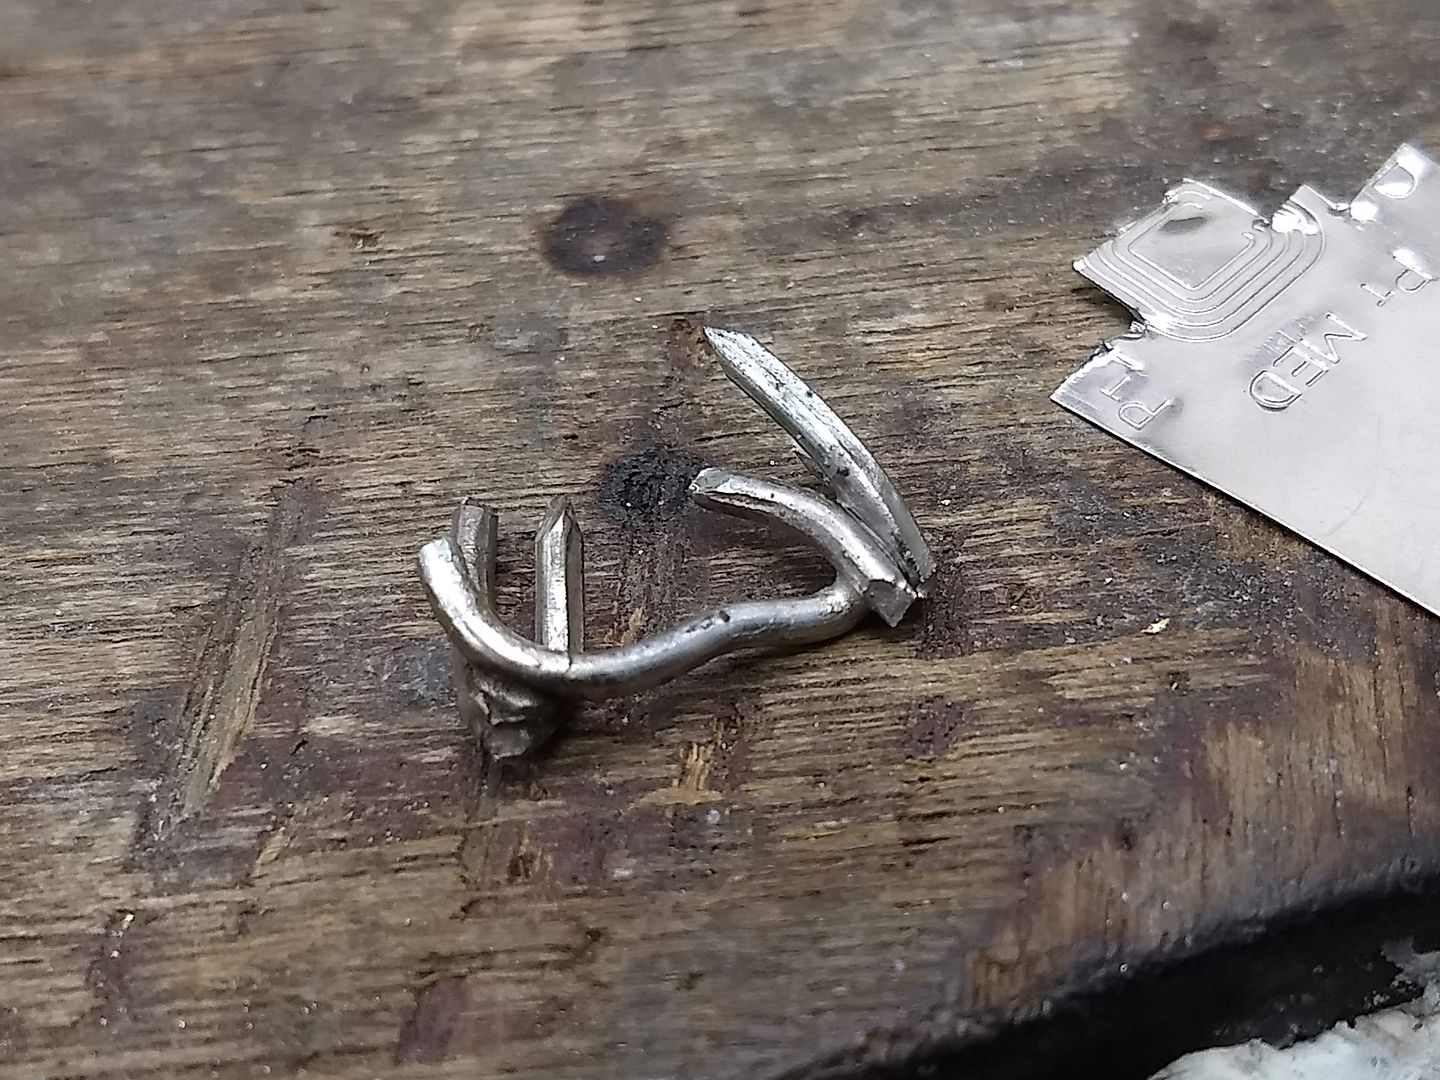
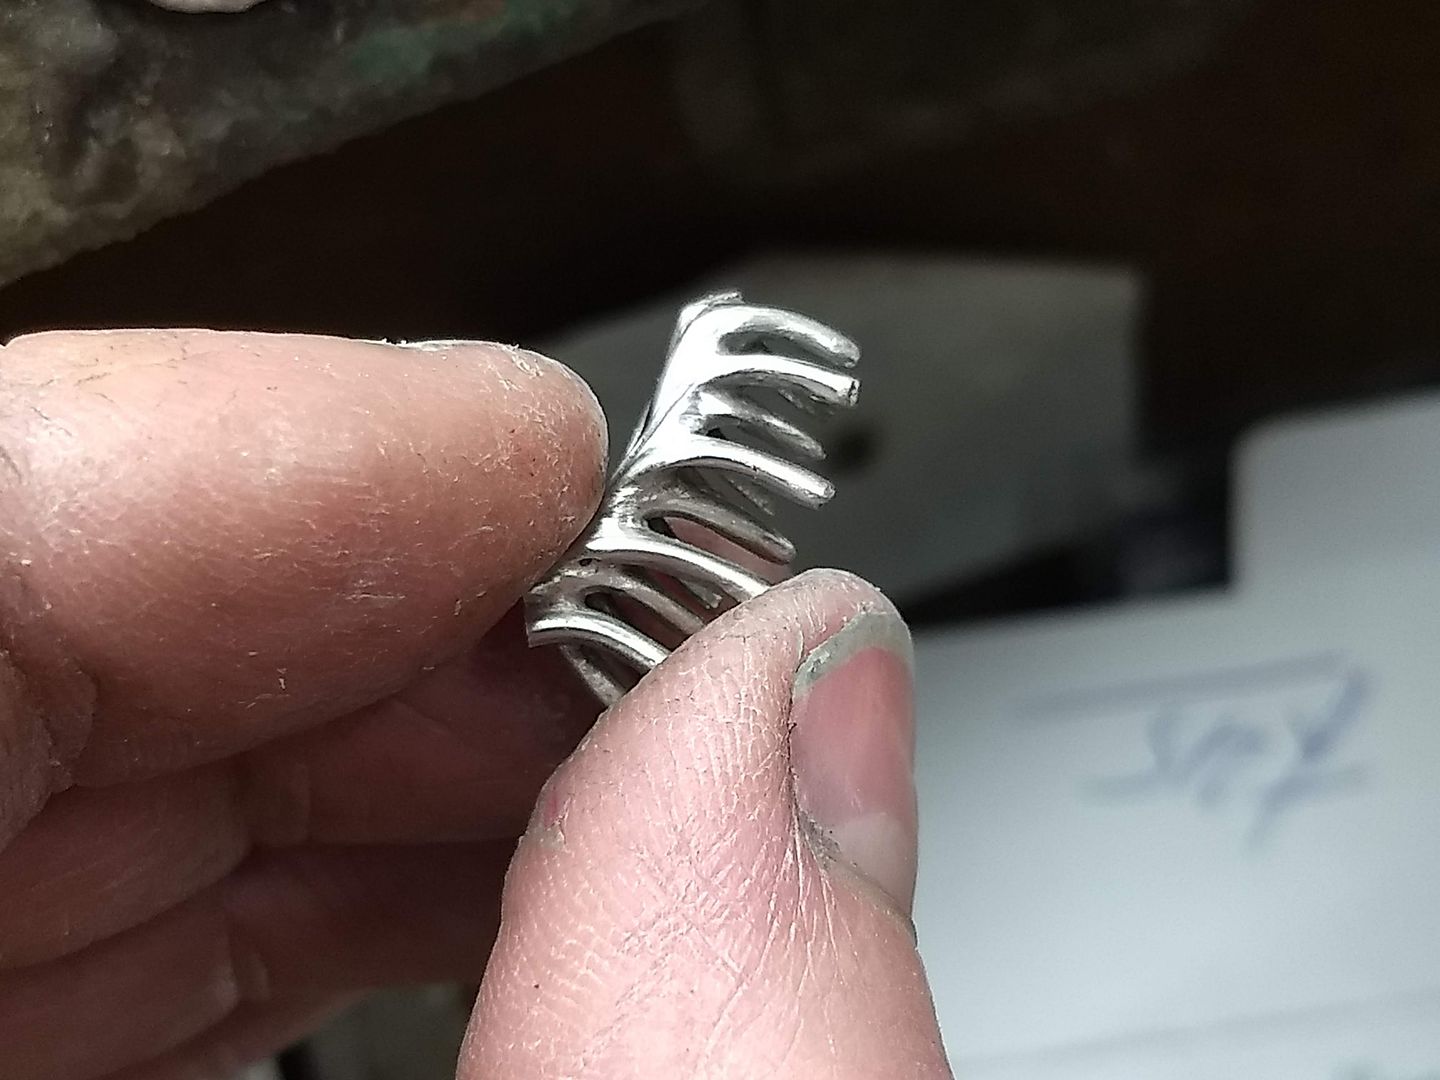
The first inner claw is then bent to shape:
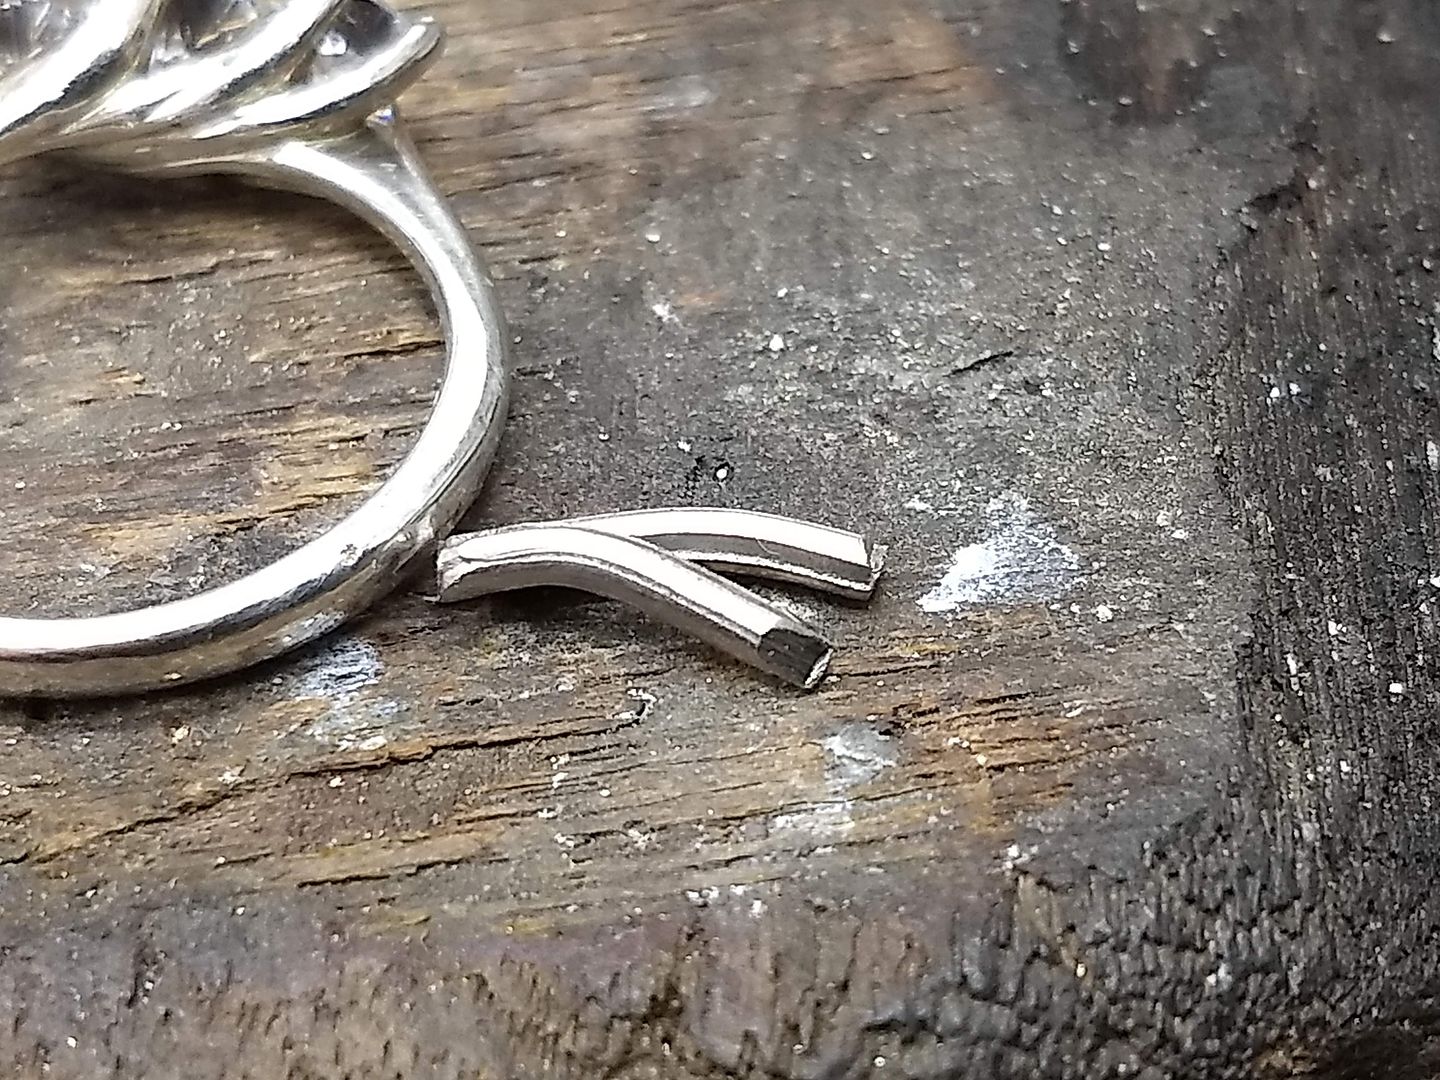
And is soldered in position to the middle bar / wire:

And then the next one:
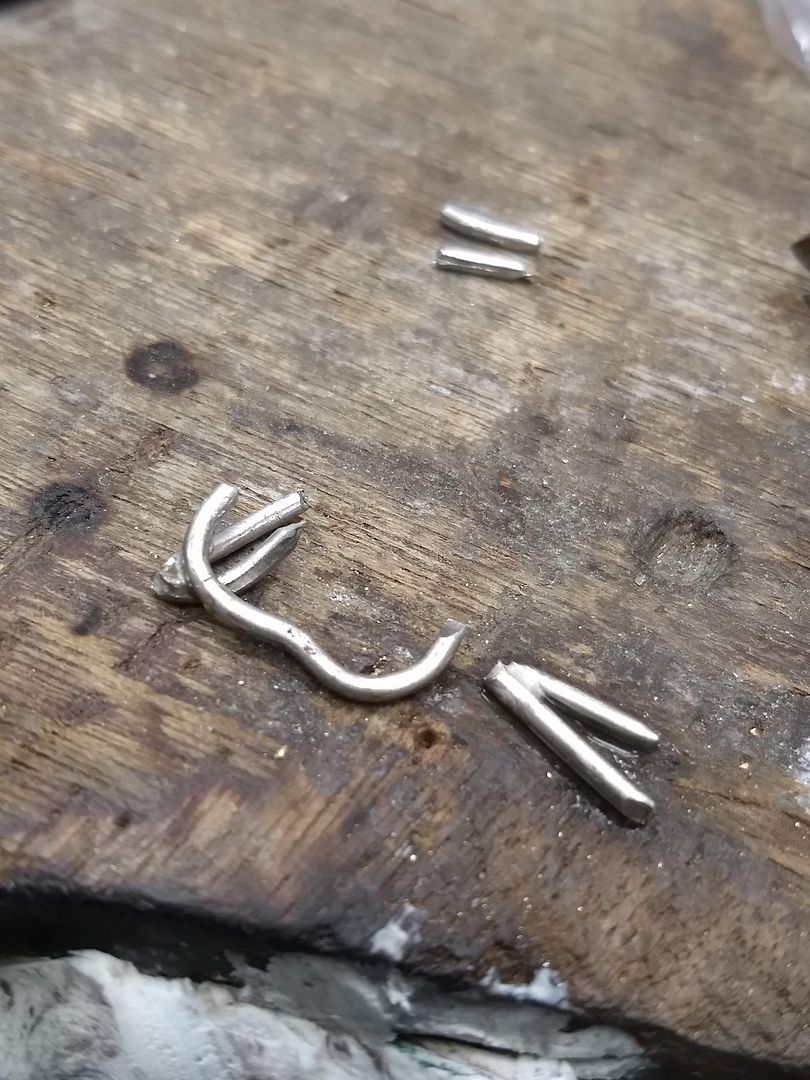
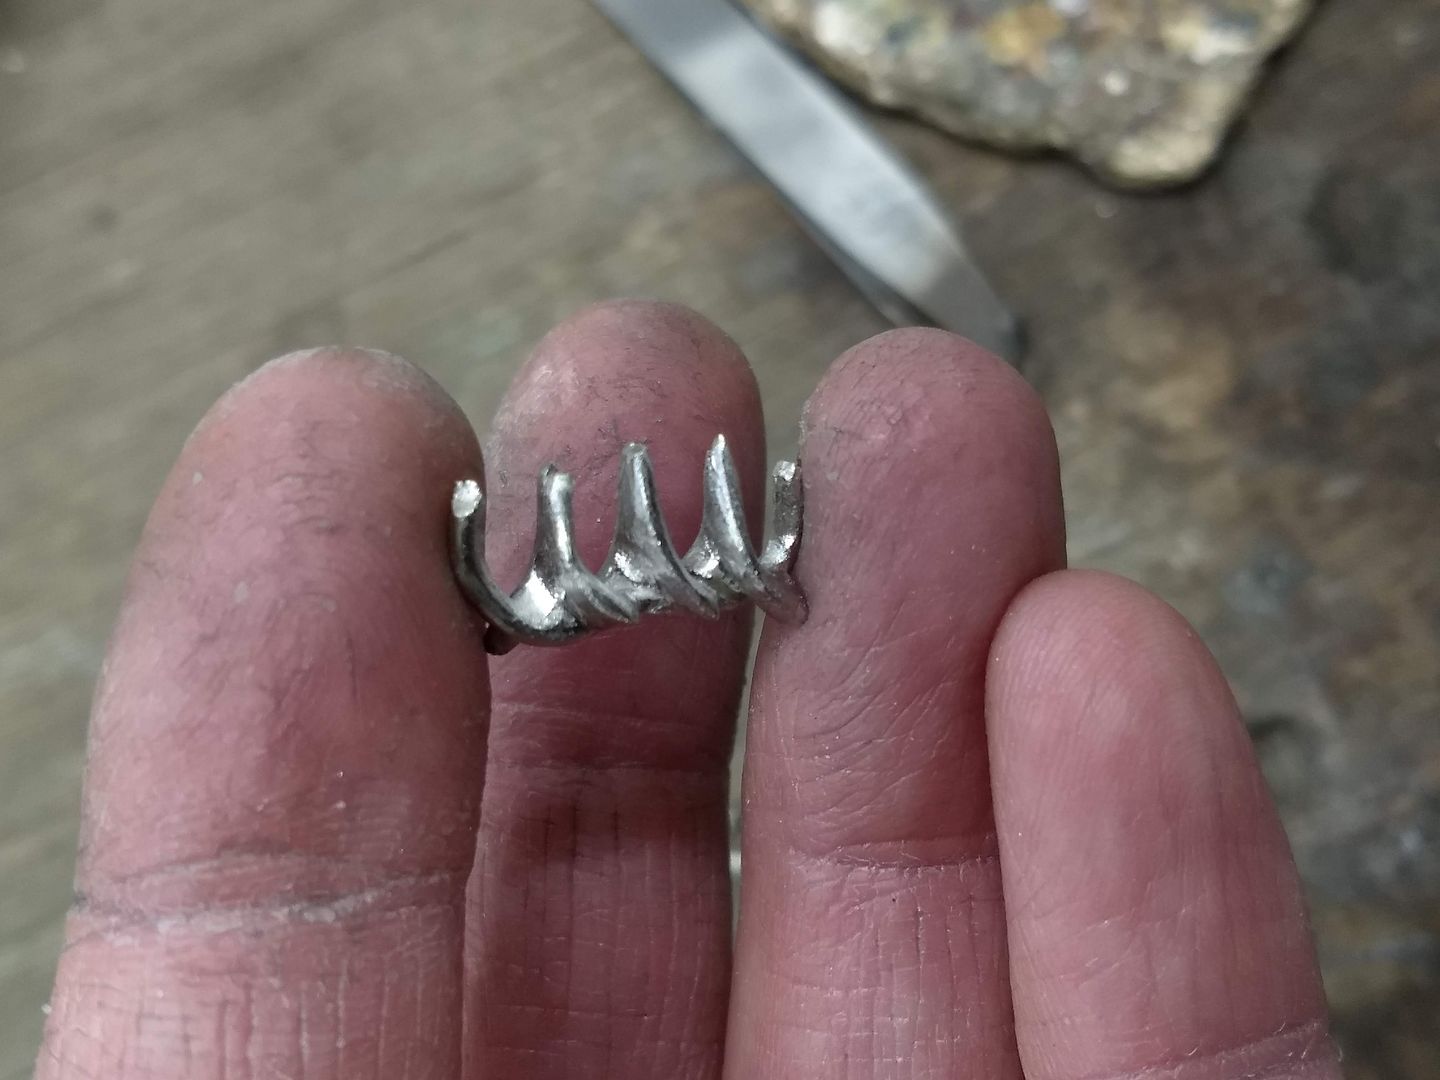
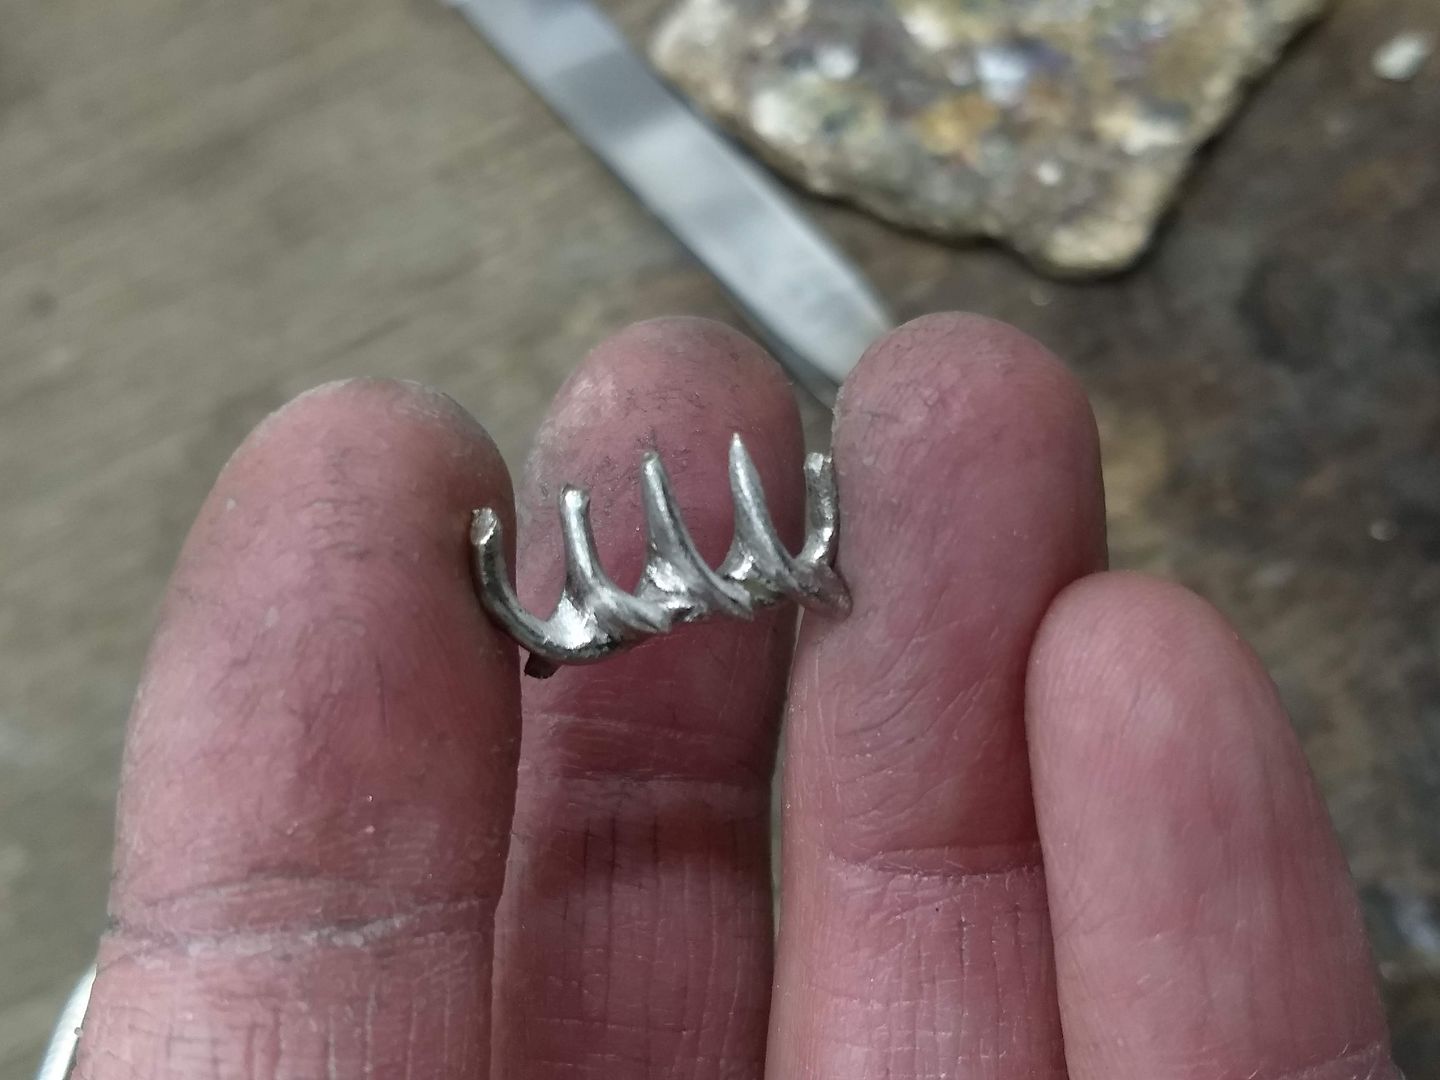
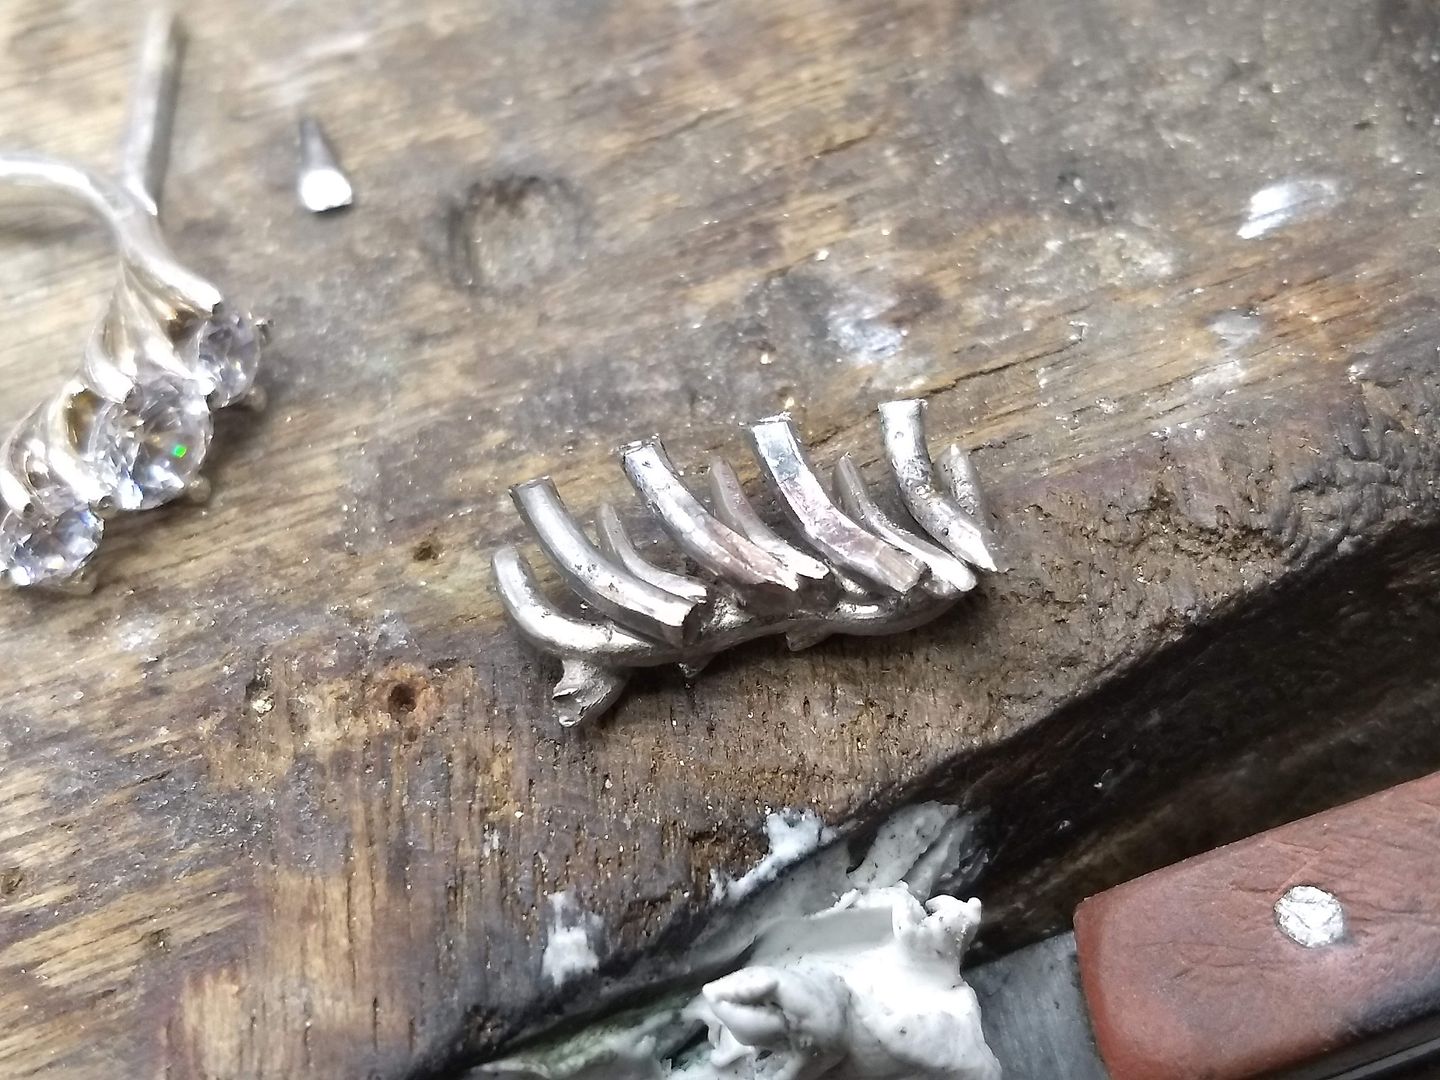
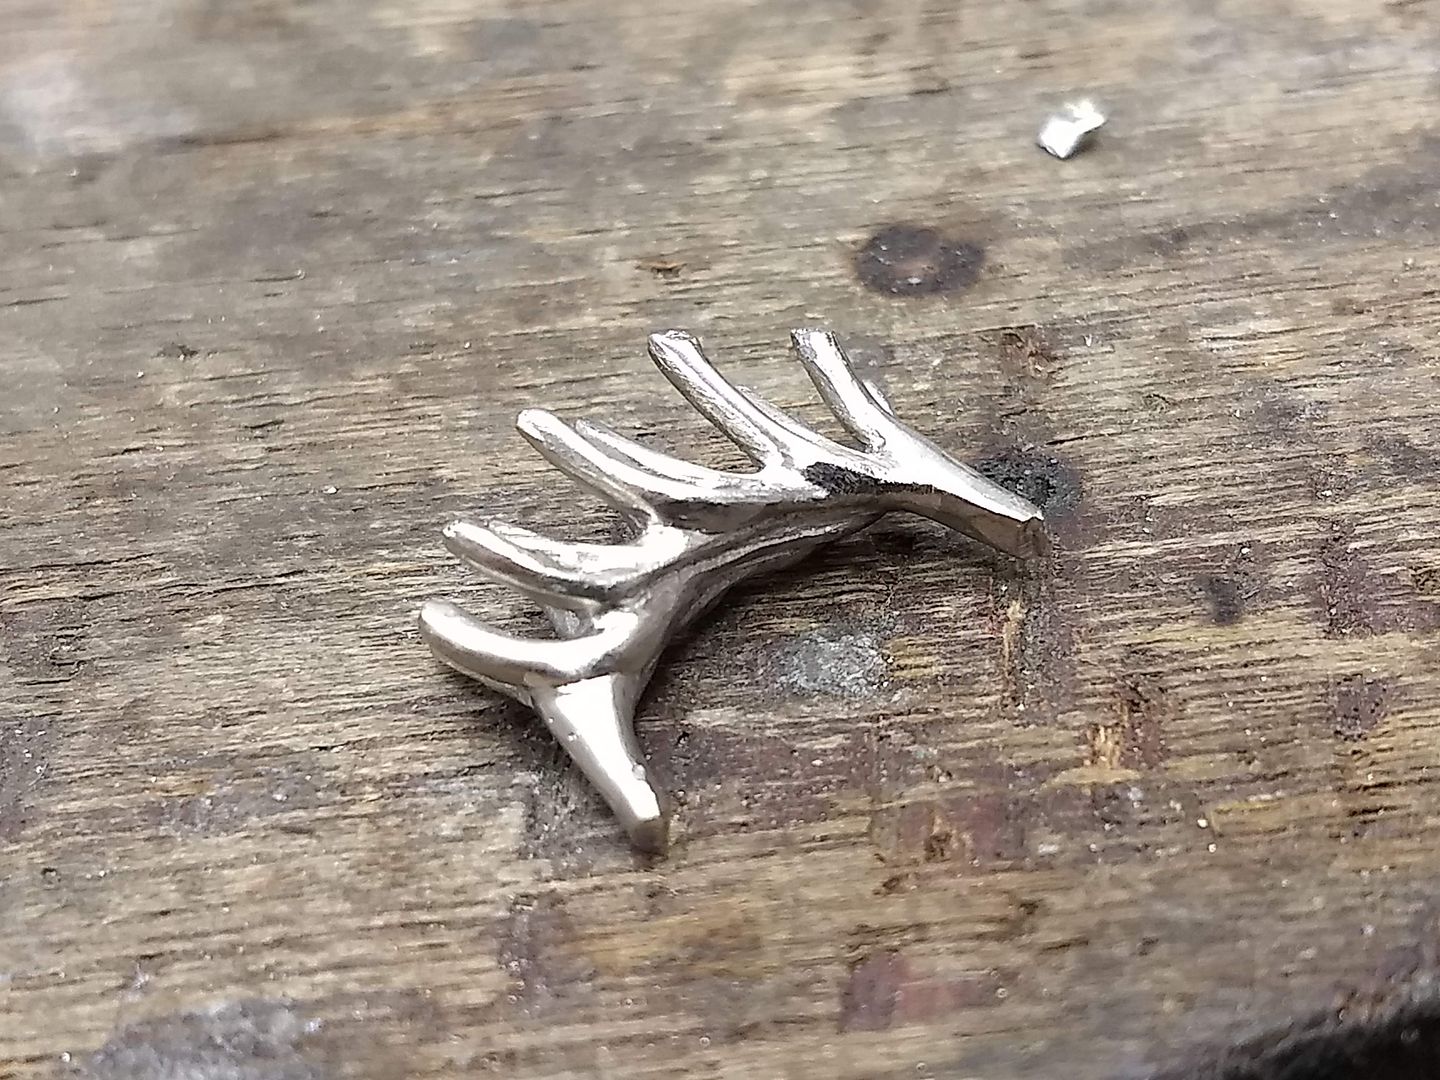
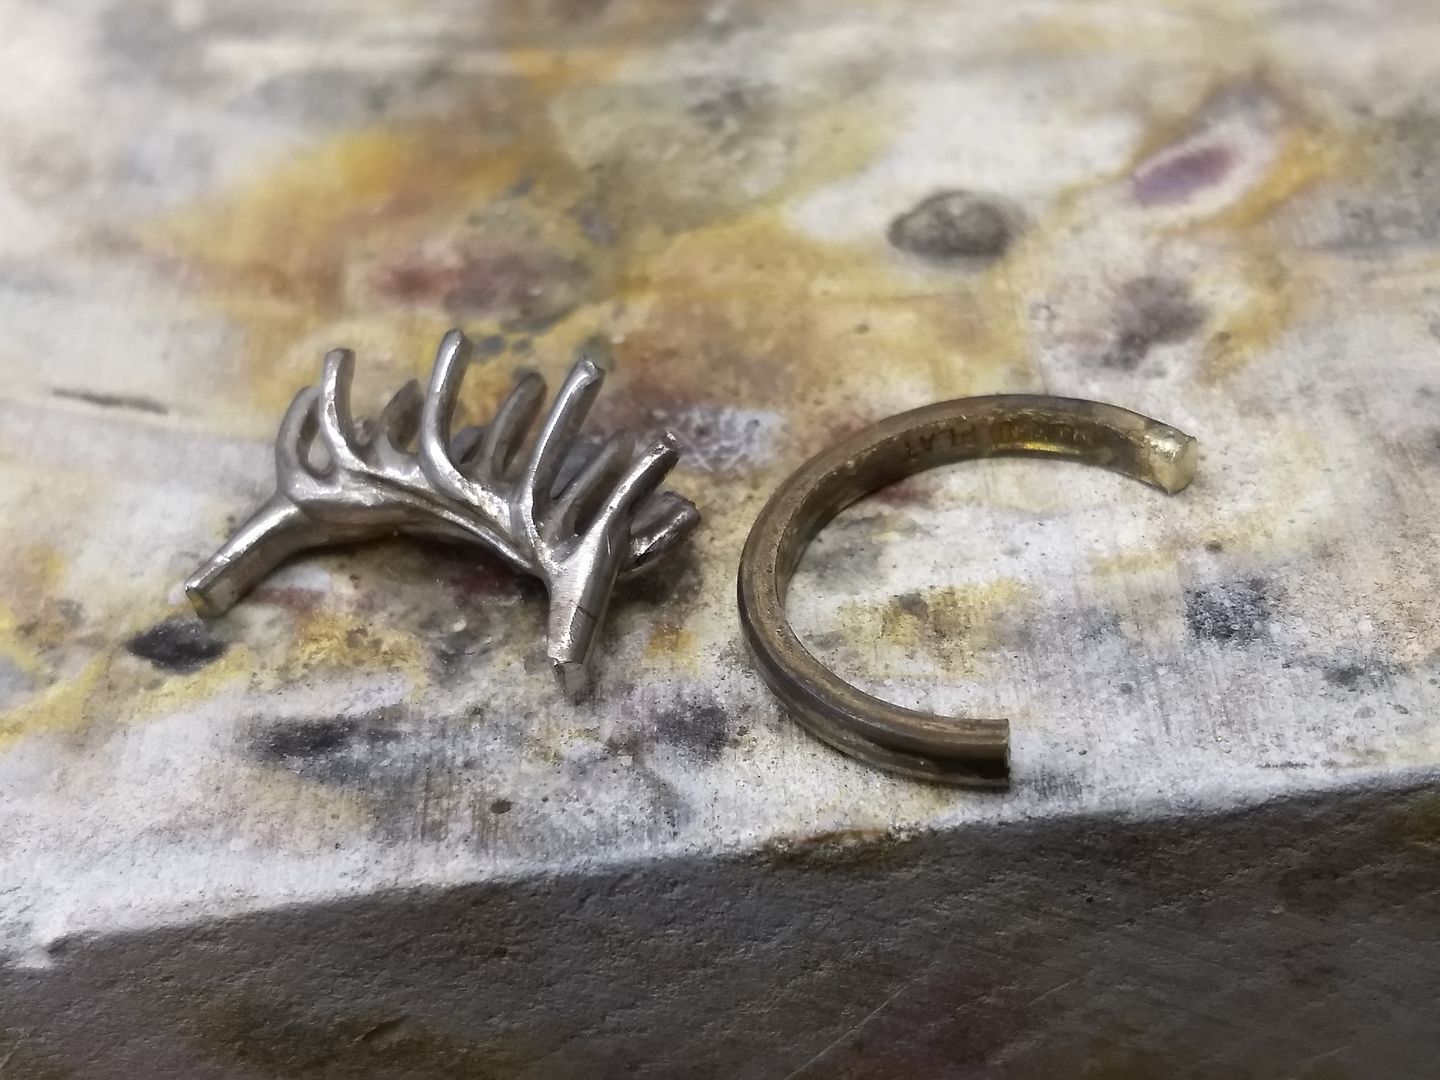
Which creates what is starting to look like a stages head:
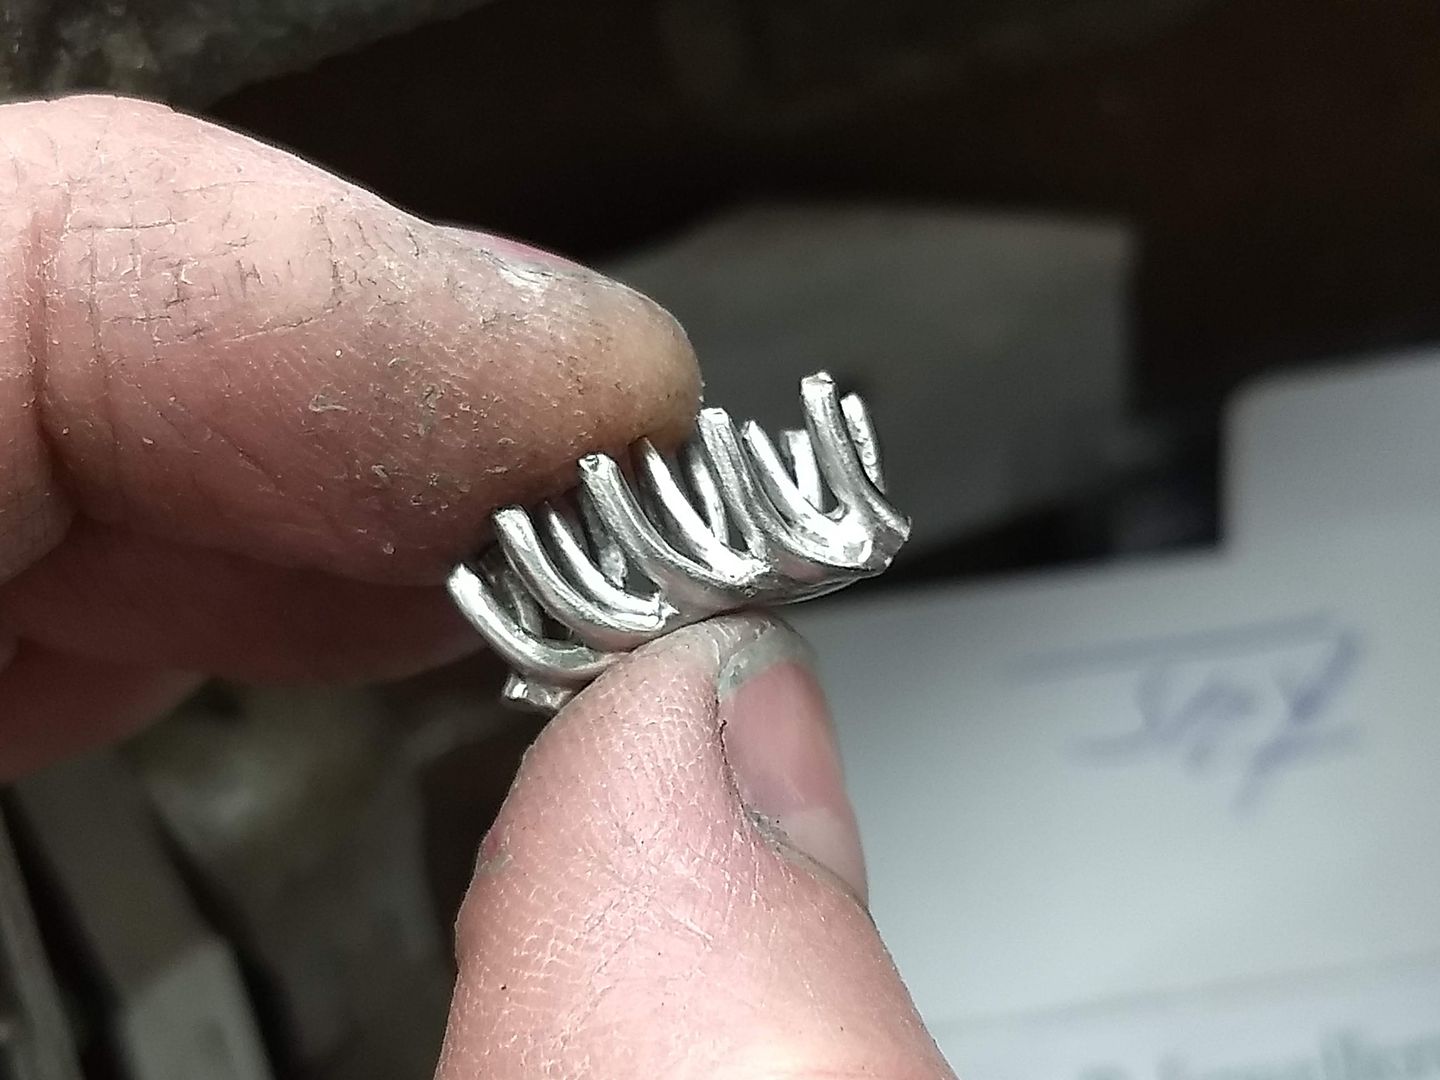
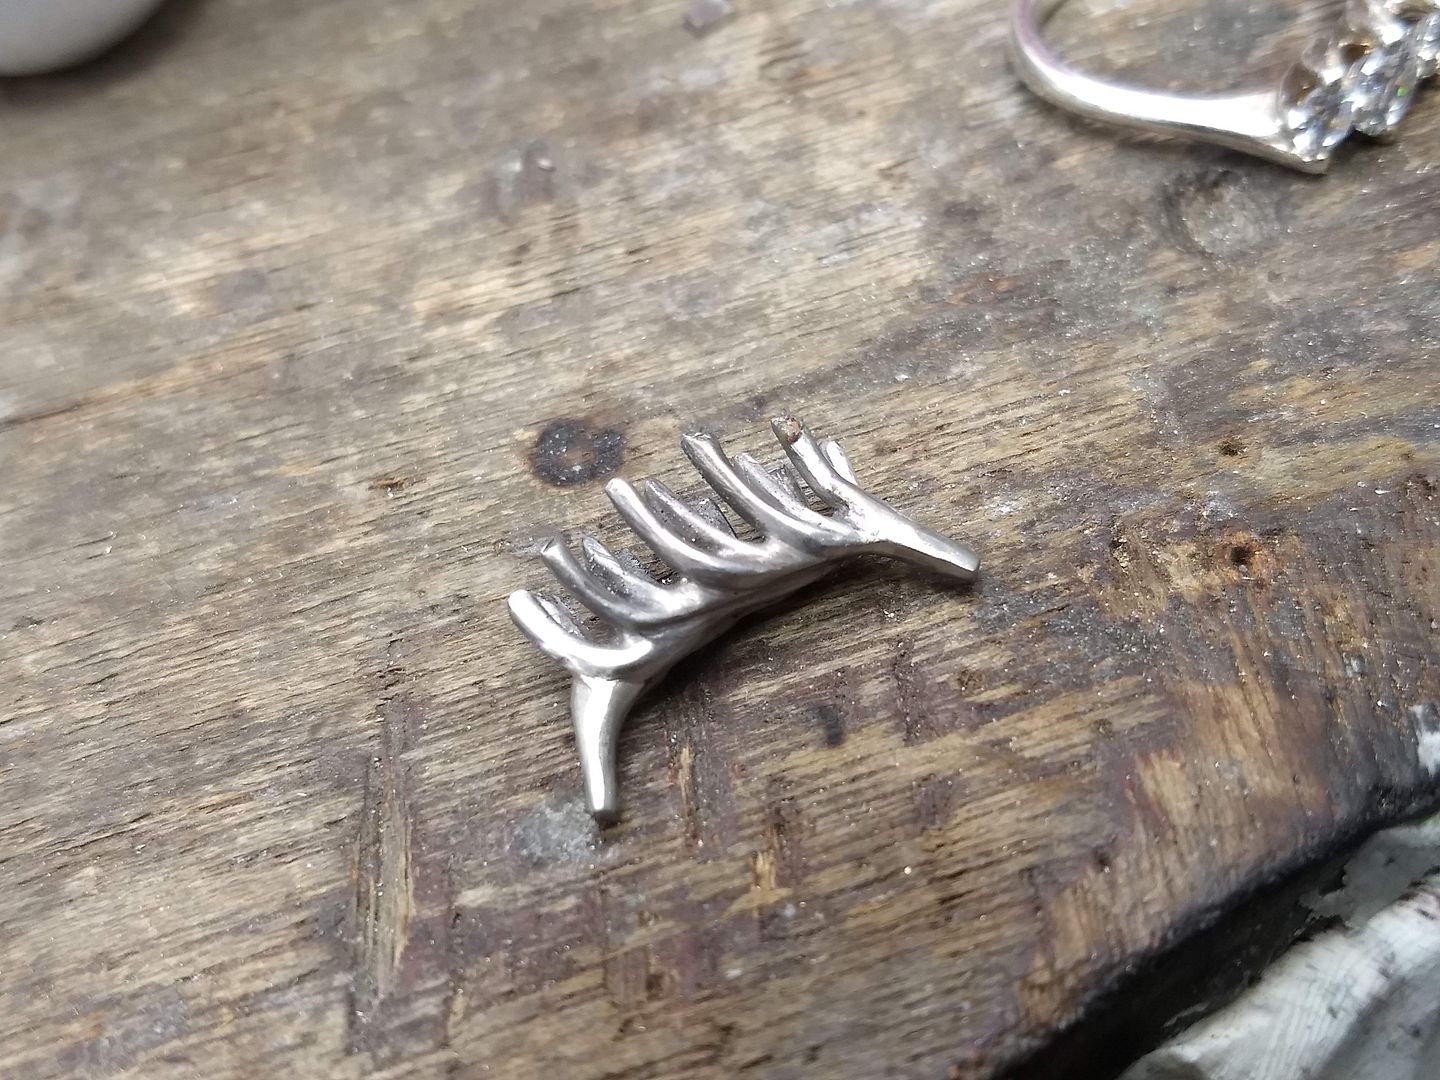
From here we add a few more wires to the carcass and slowly build the picture of what we are aiming for:
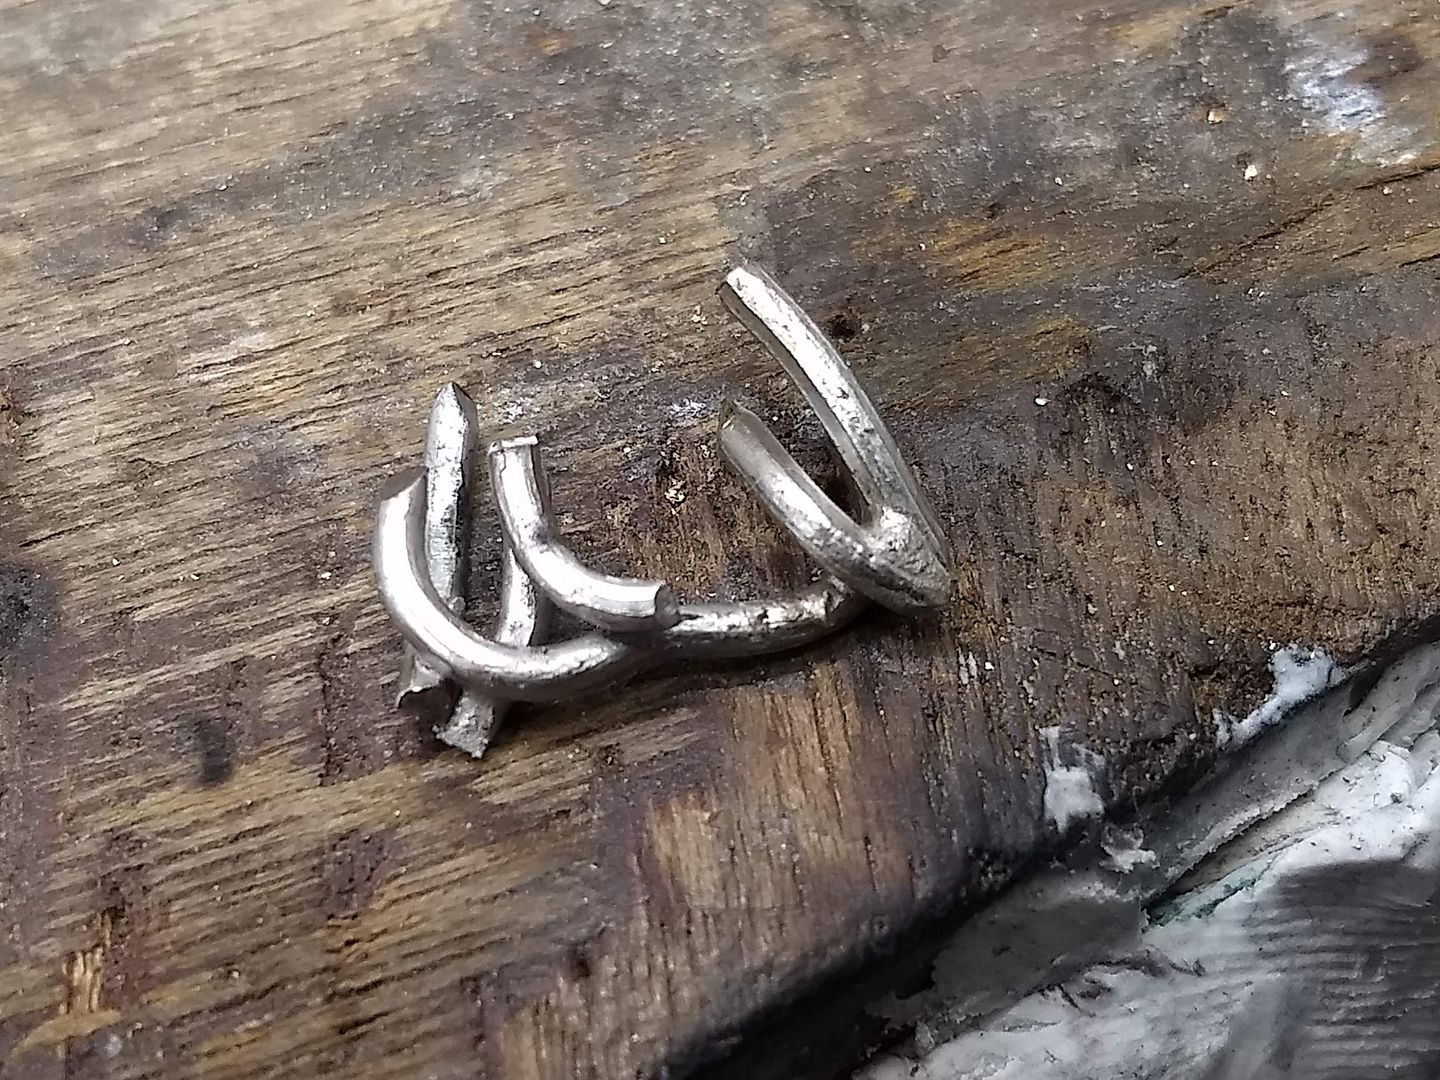
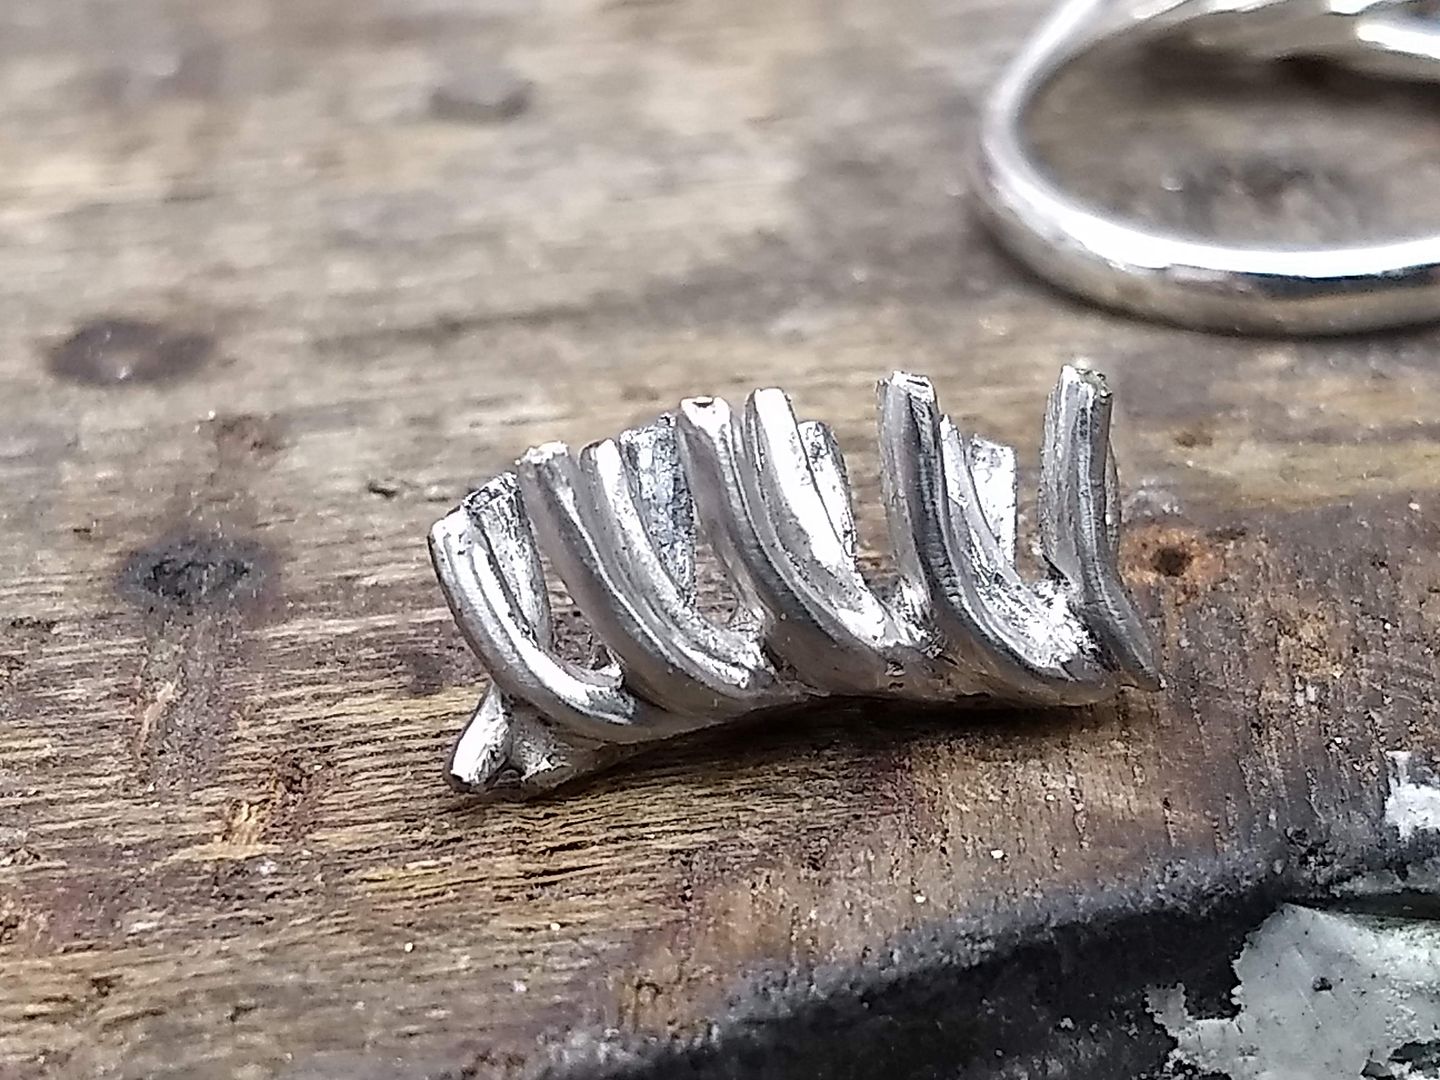
With all the wires in roughly the right place I add solder to fill gaps and generally bulk up the frame. With platinum being a soft metal I can still bend it a bit with the solder applied so I can still make minor adjustments from this point. I can't move anything though and bigger changes mean either cutting sections out or starting again:
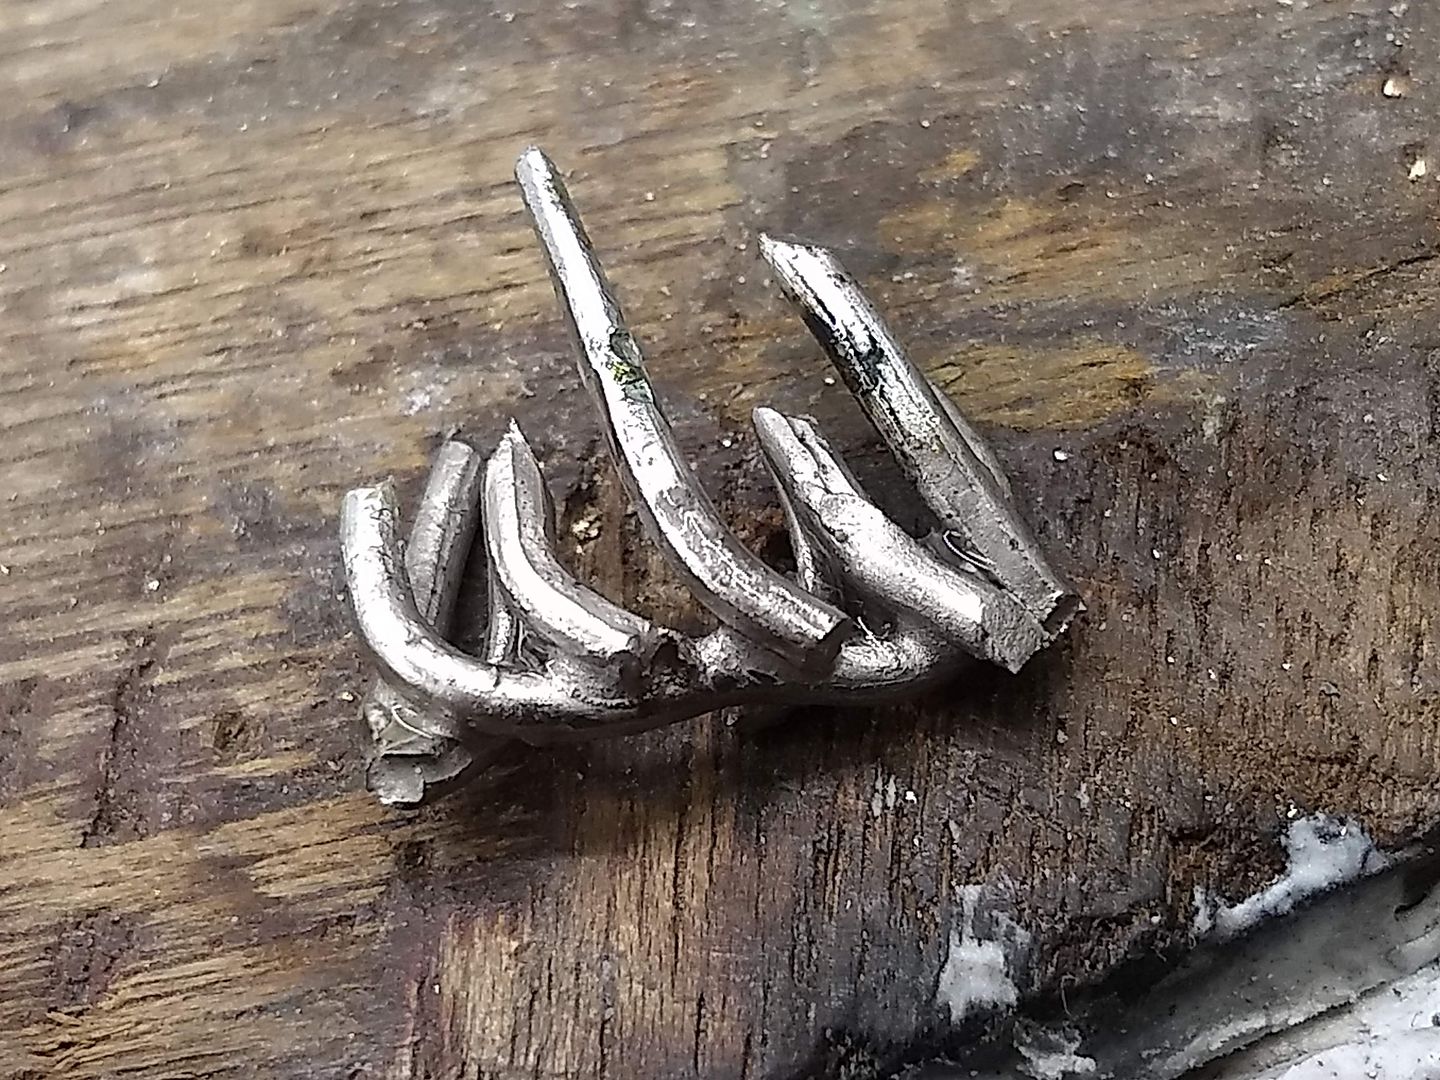
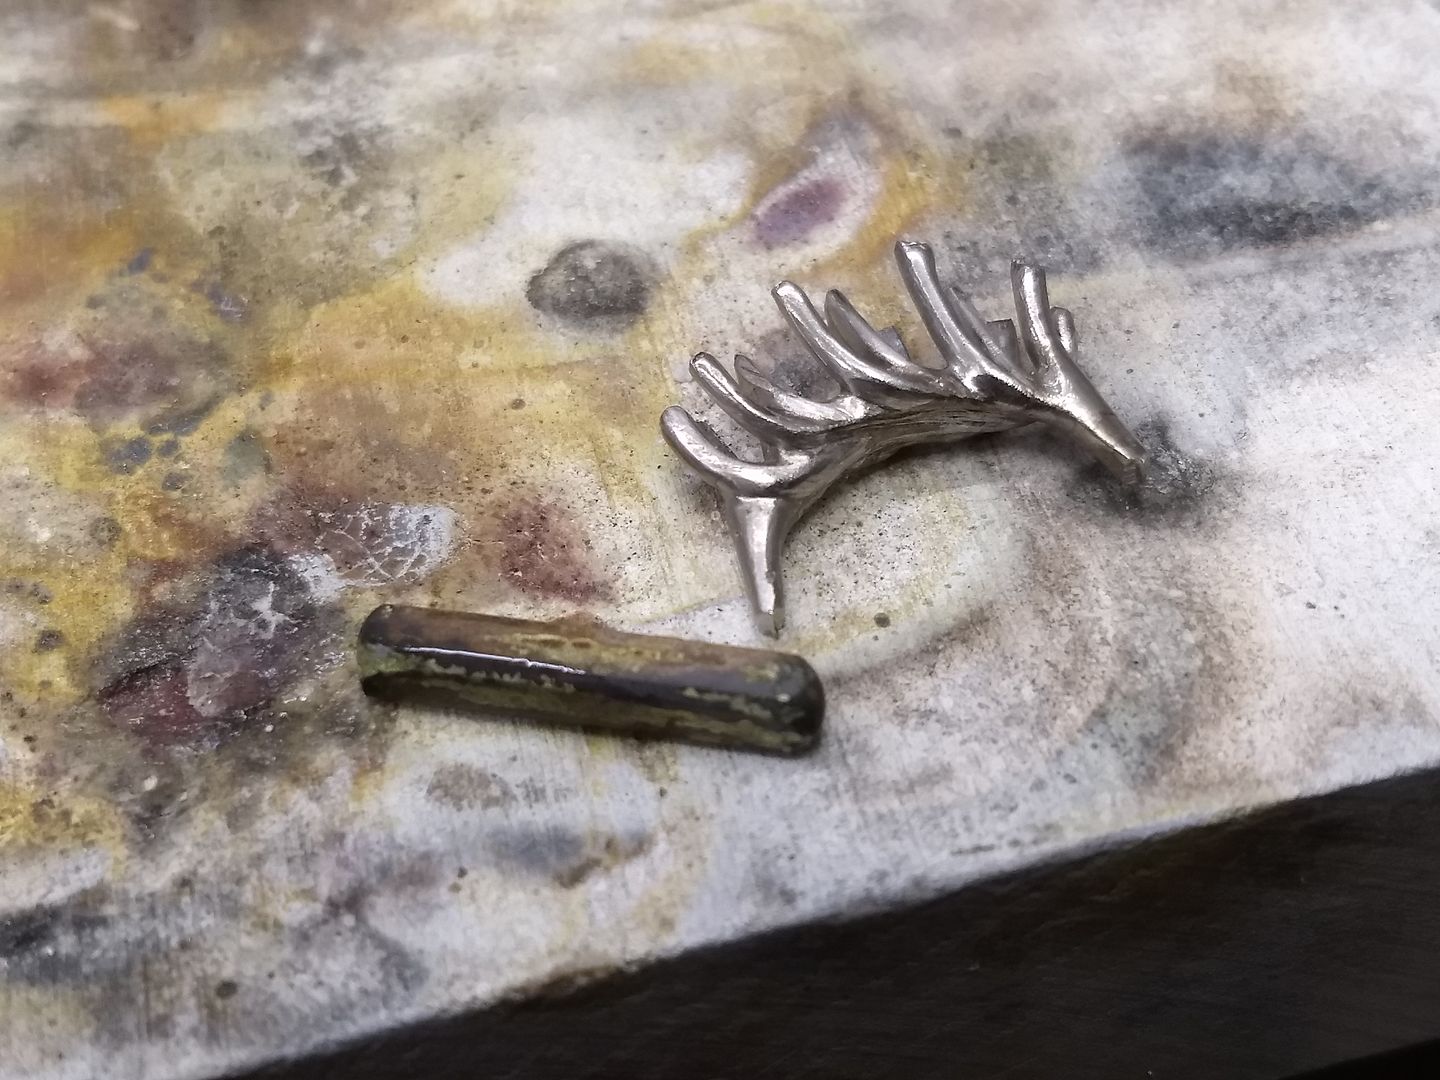
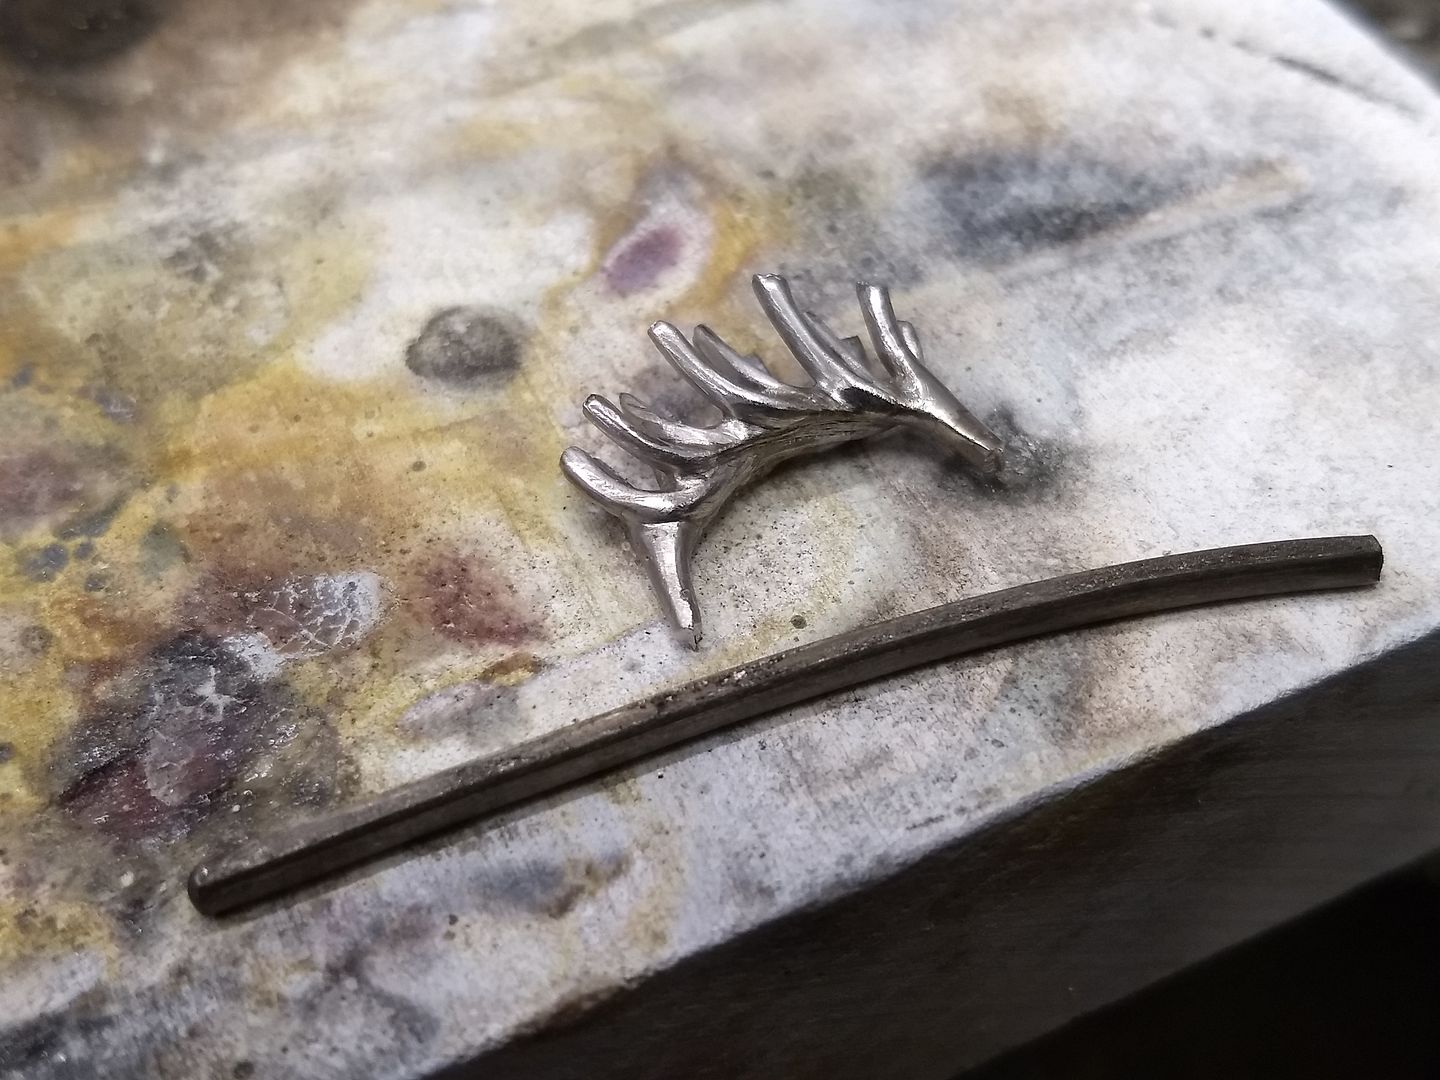
After a bit of filing and soldering the centre carcass is taking shape and will soon be ready to clean up ready for the outer claws:
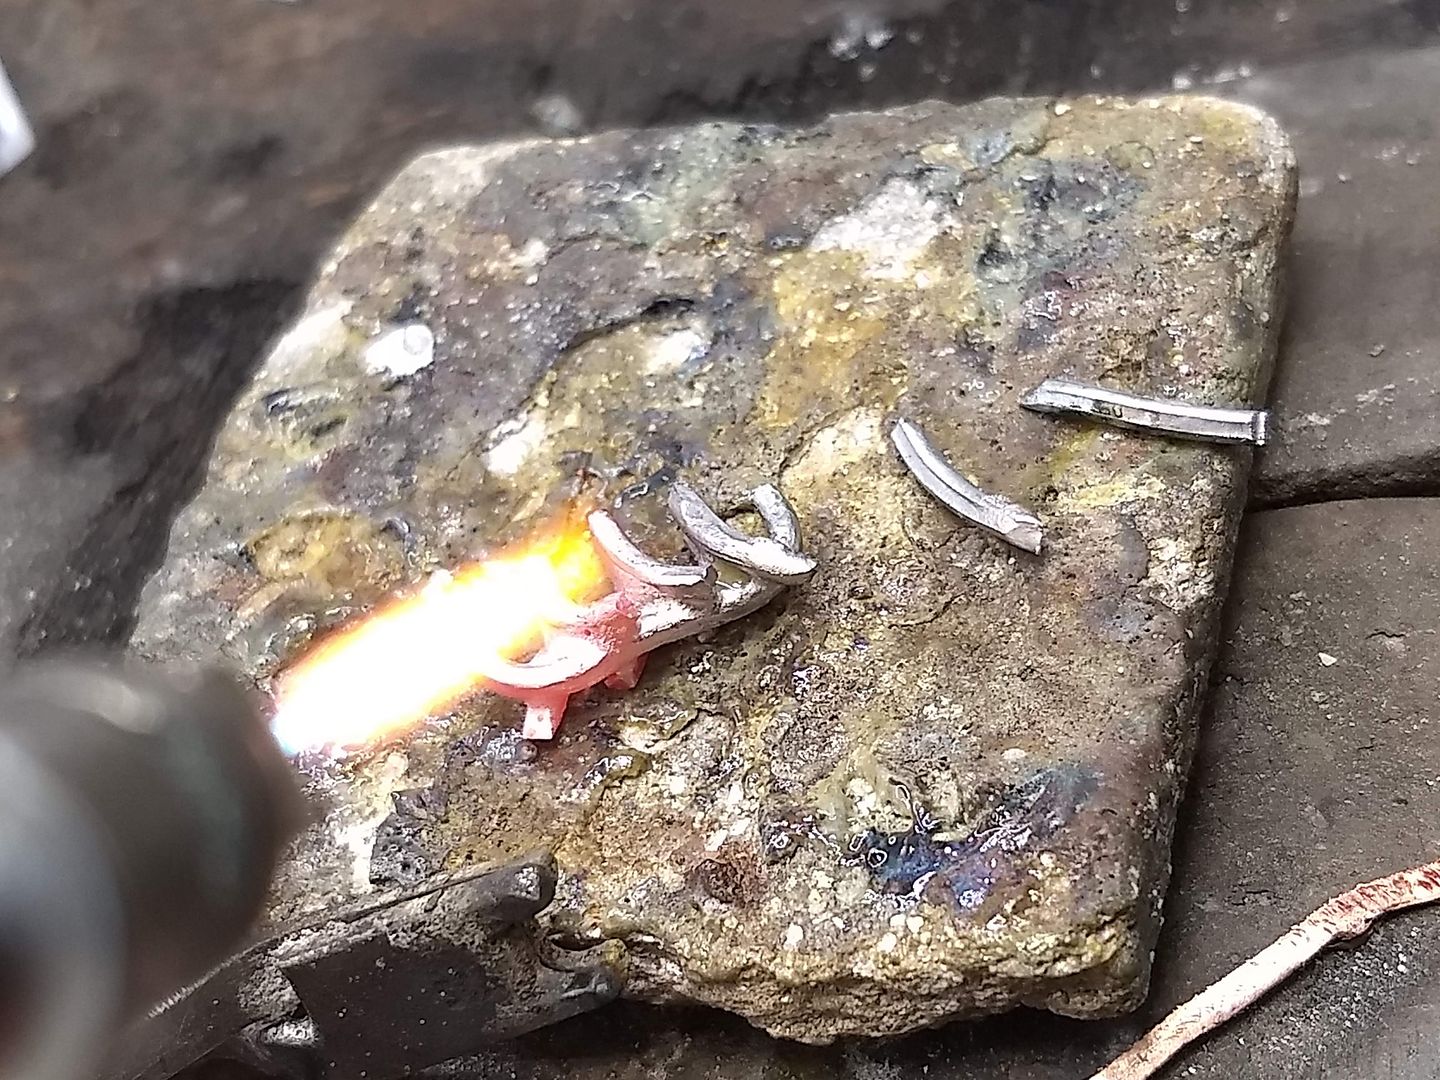
I cut some more wire and grab some more solder. More wire is also rolled as I need it:
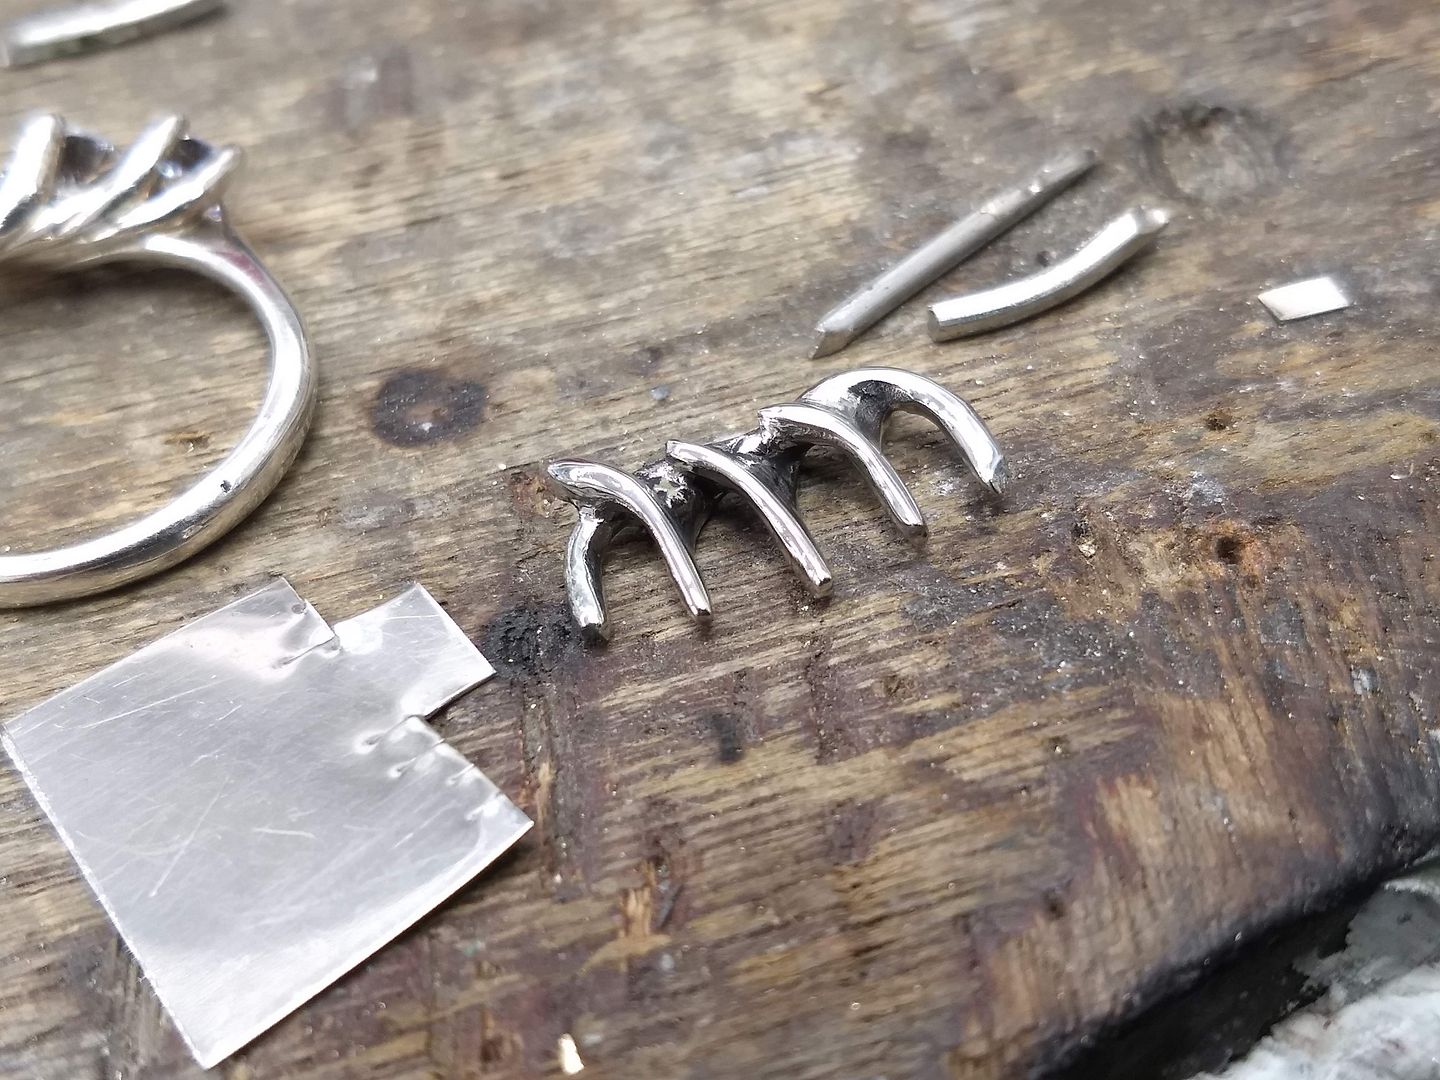
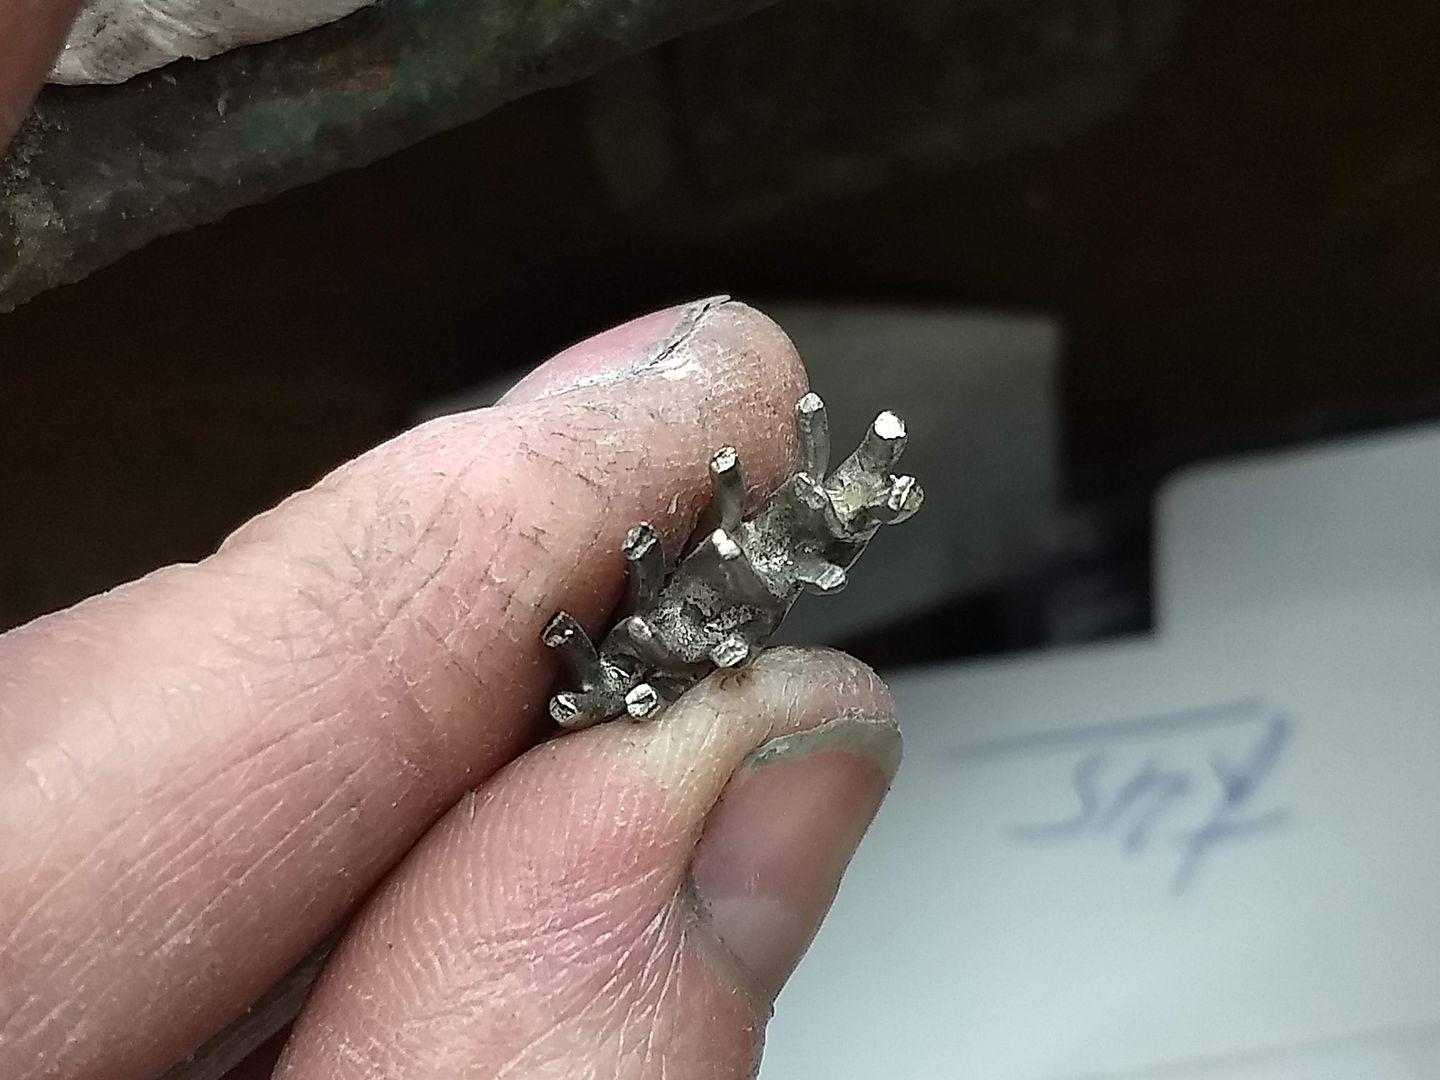
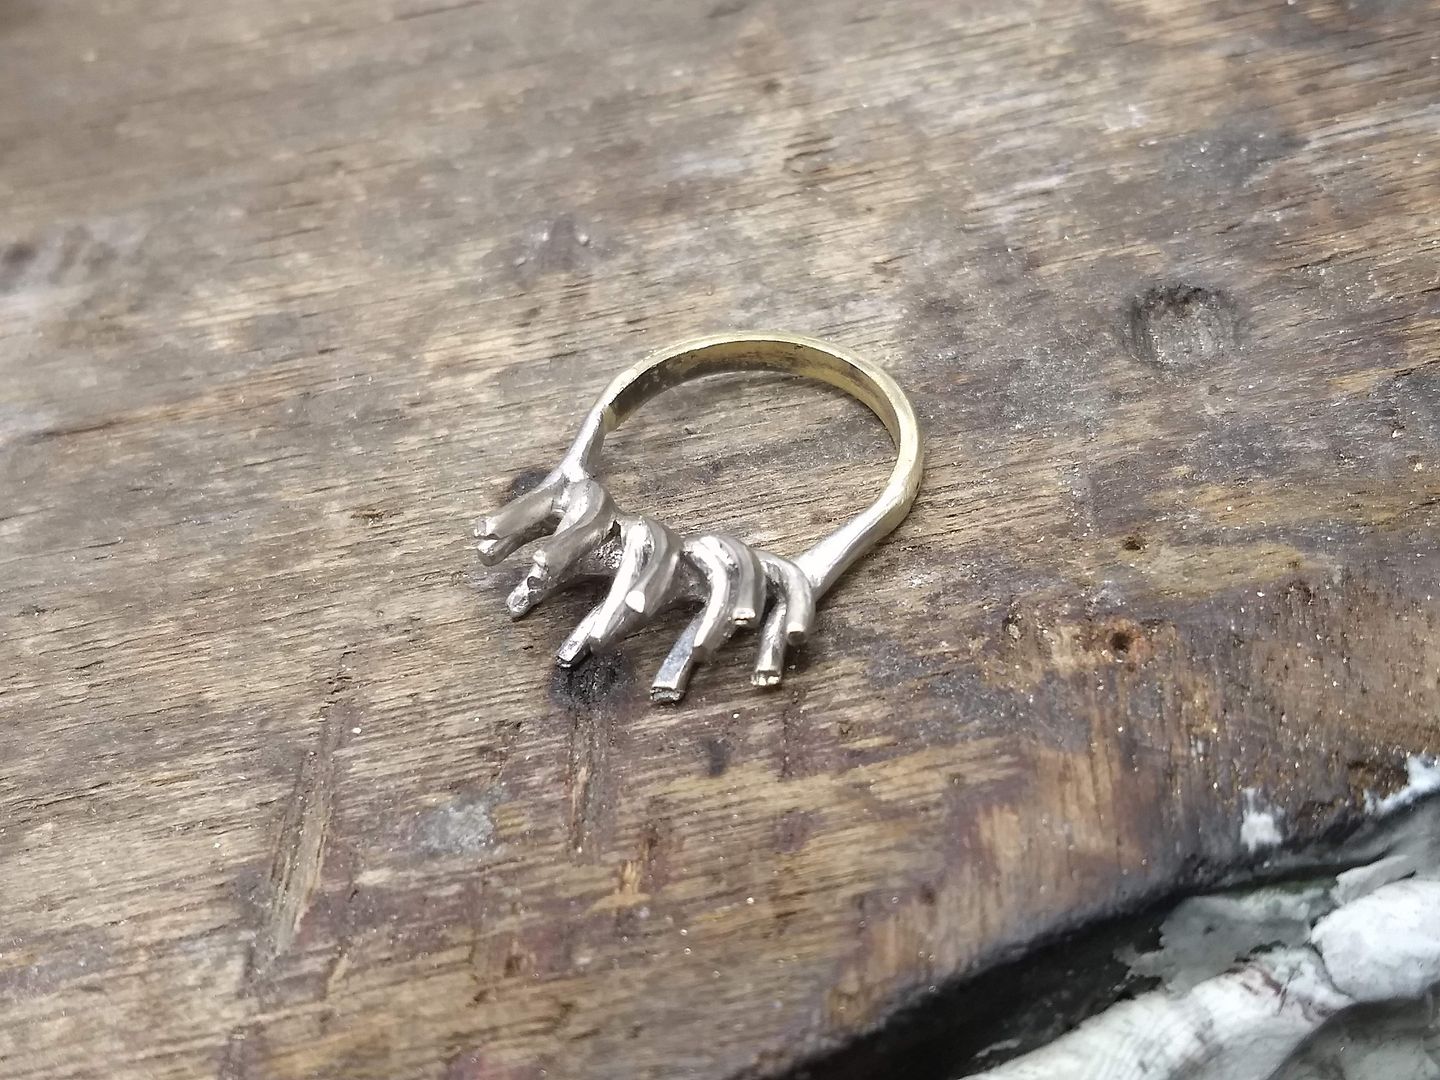
Being careful not to upset the solder already in the setting I start to add the outer claws. They are bent first and then tacked in place:
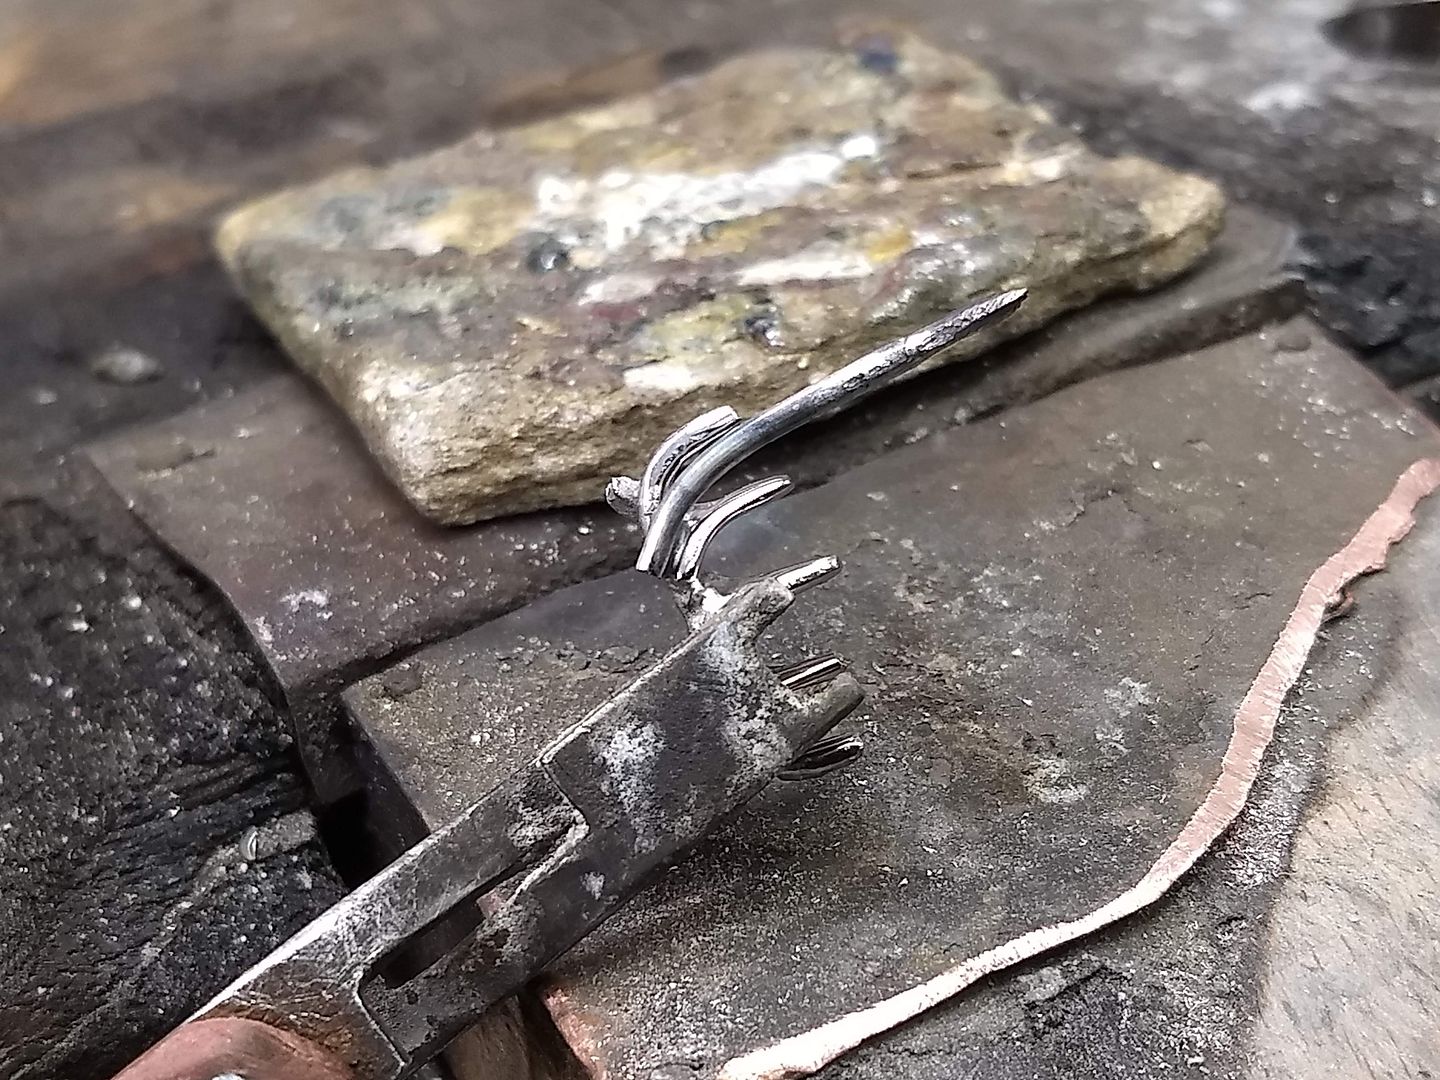
One side done:
And then the other:
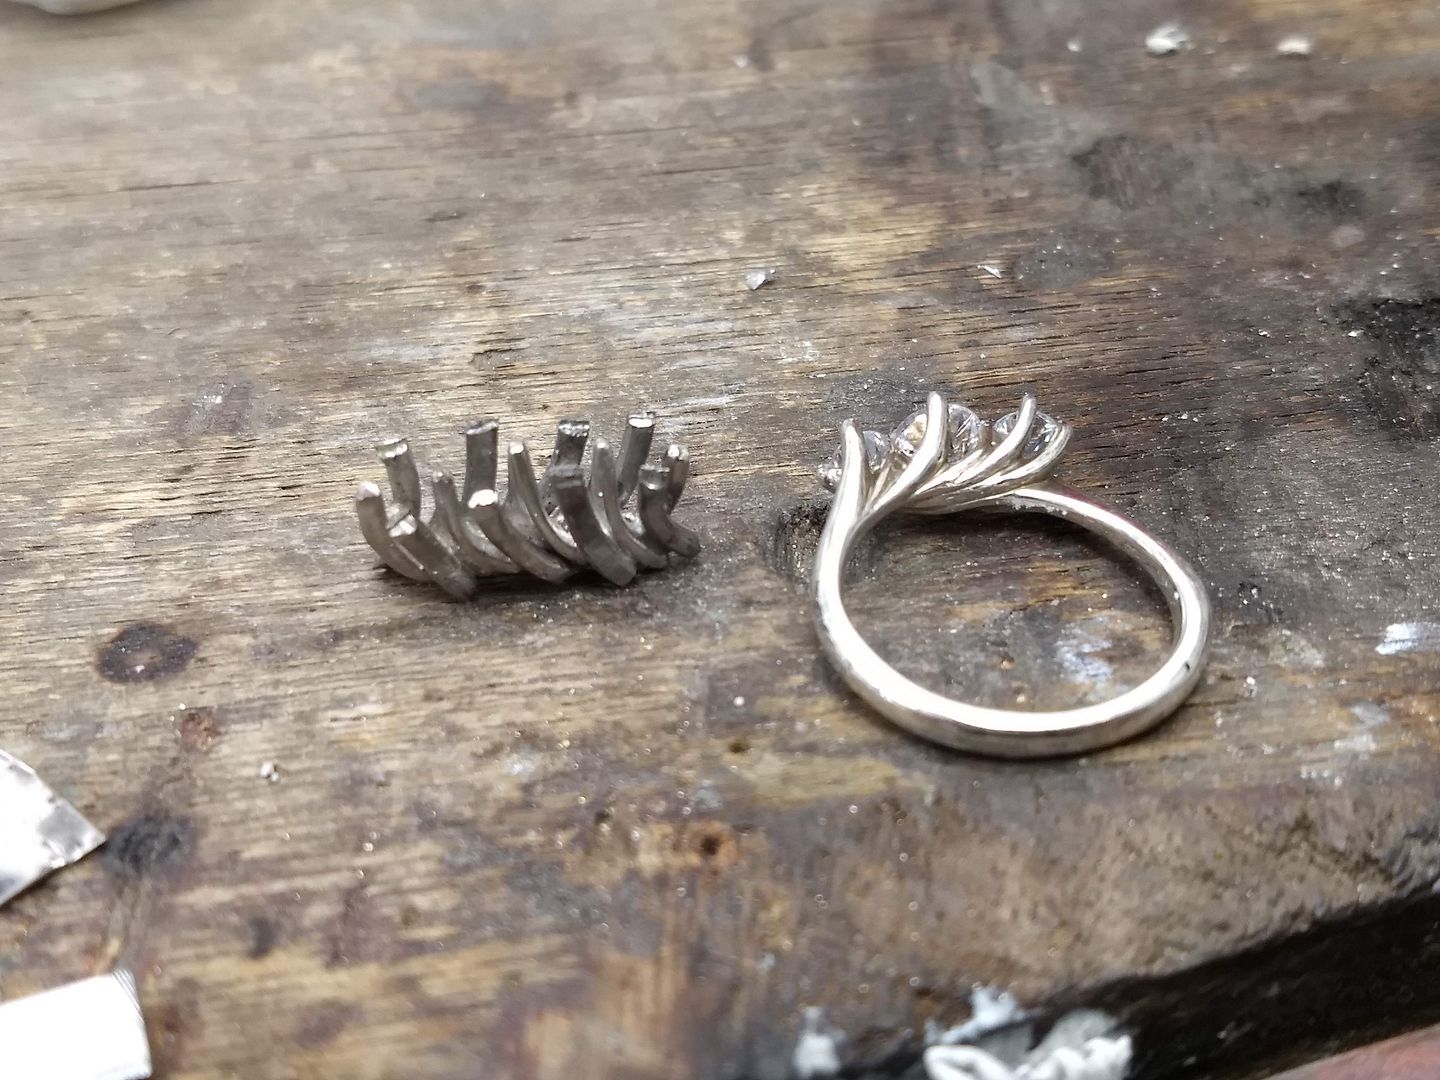
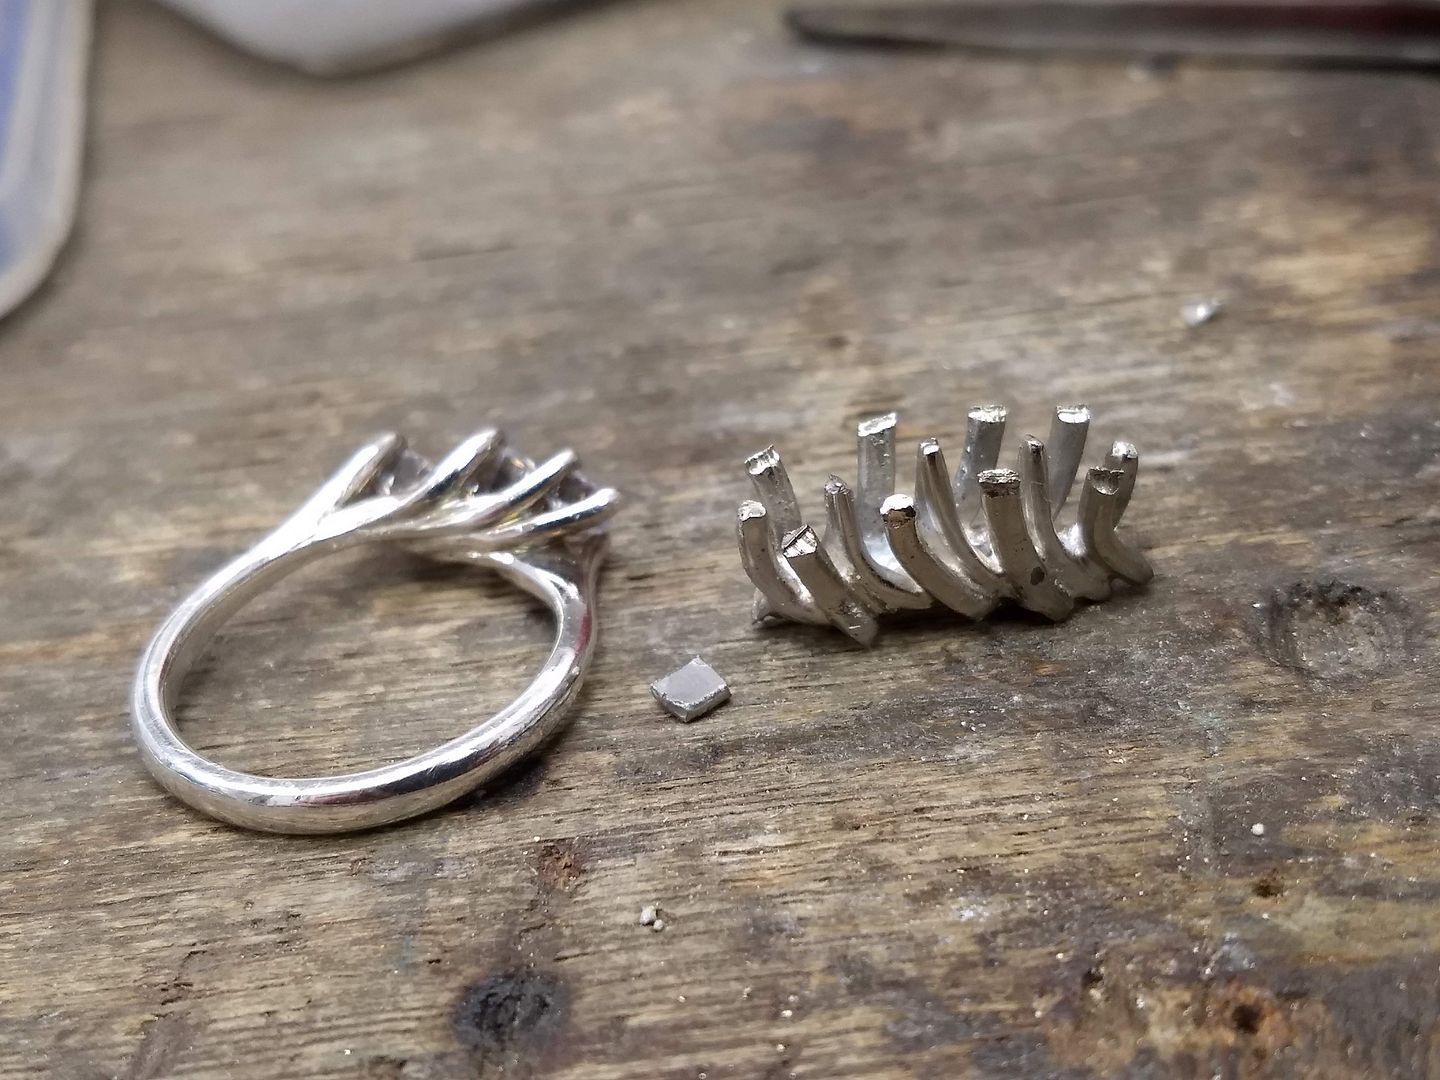
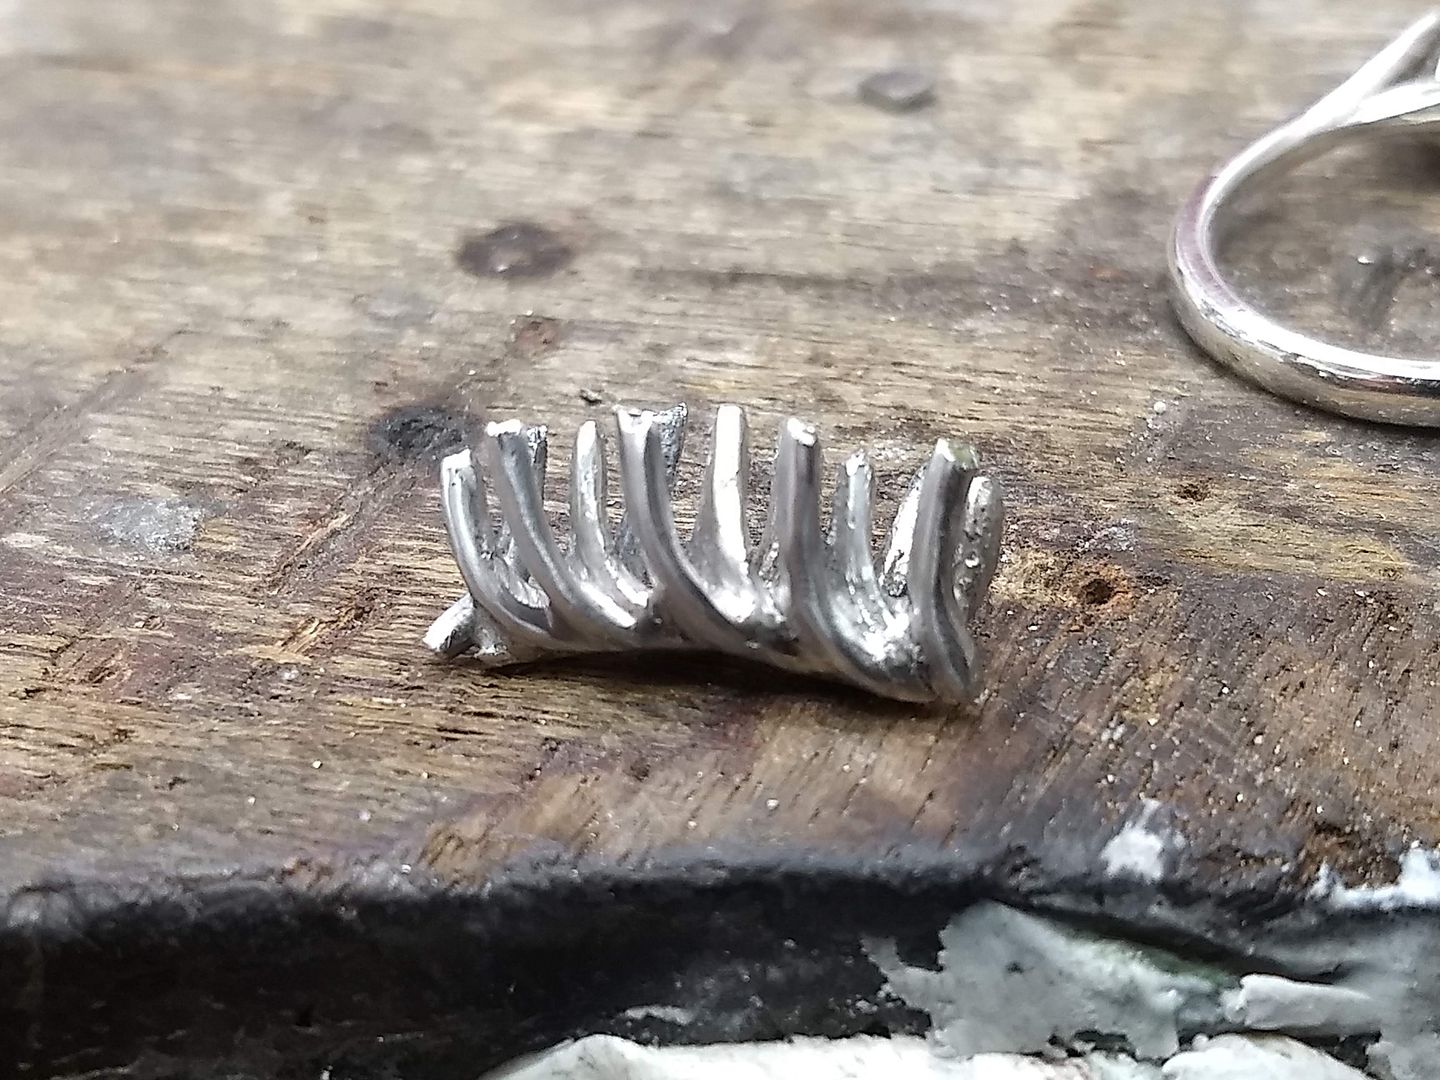
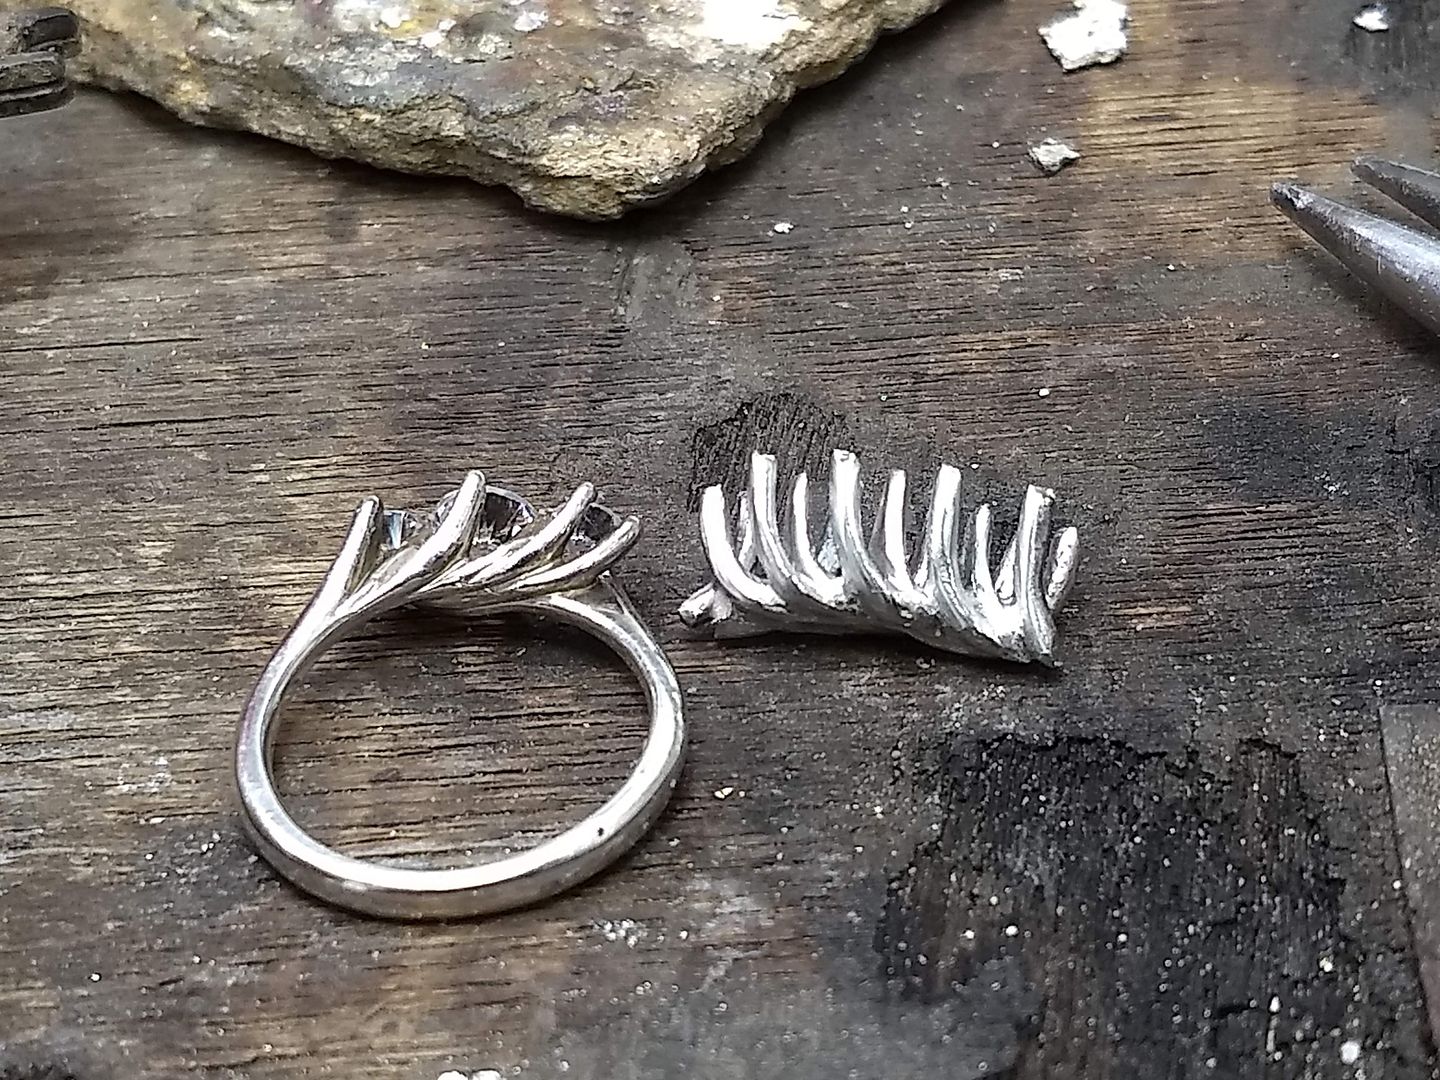
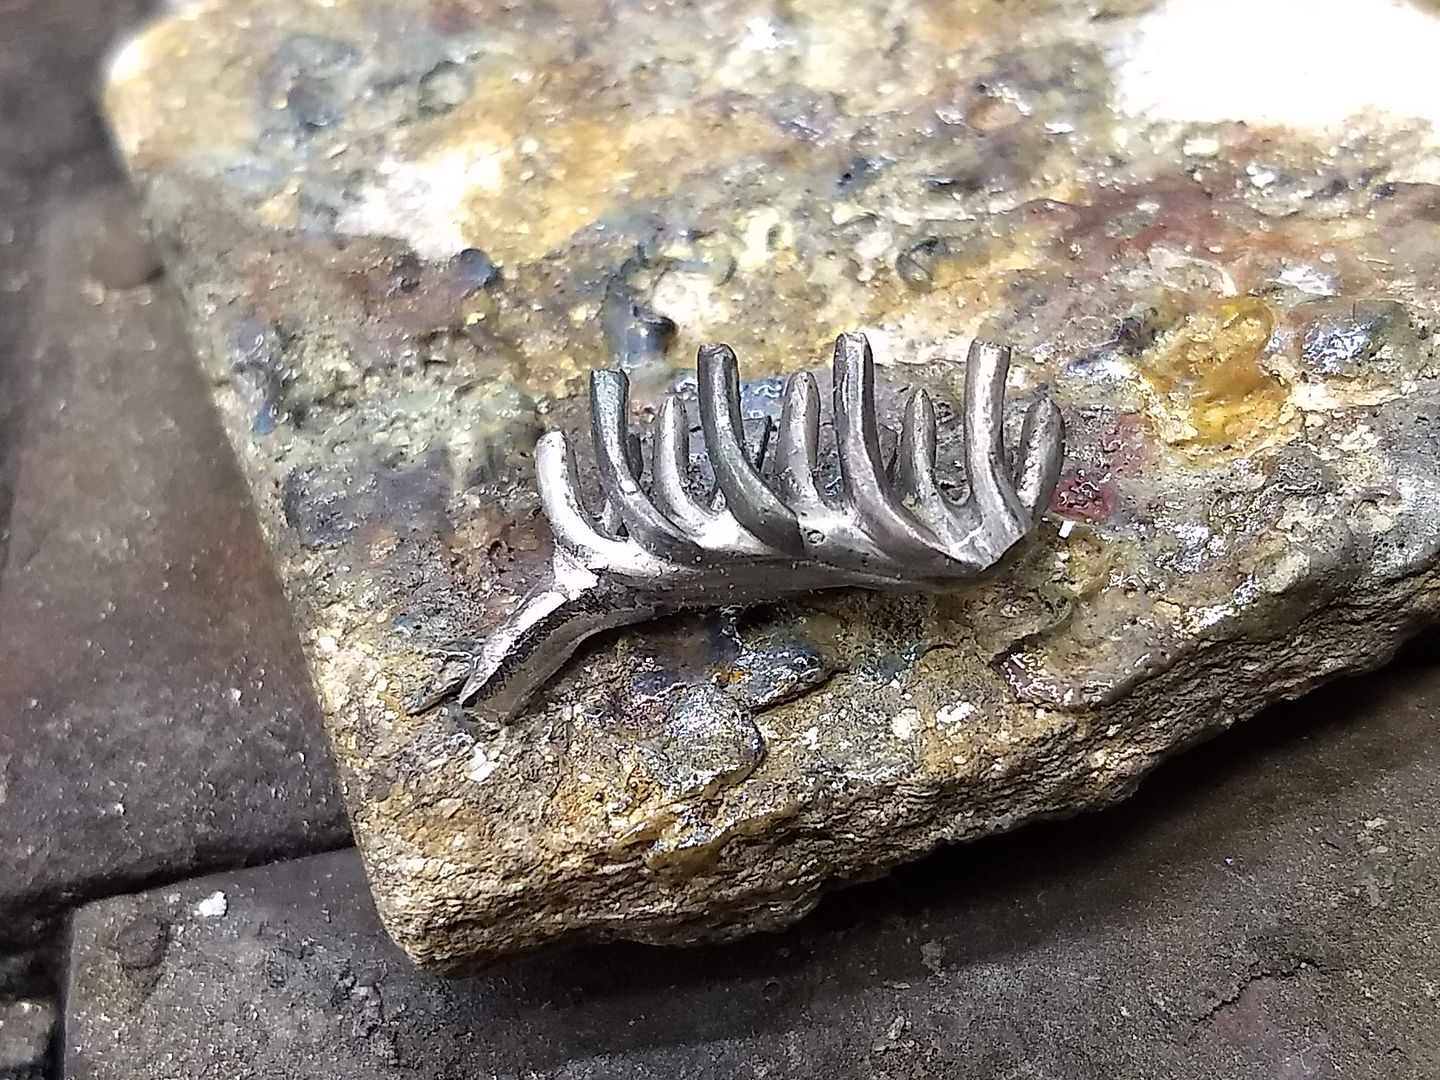
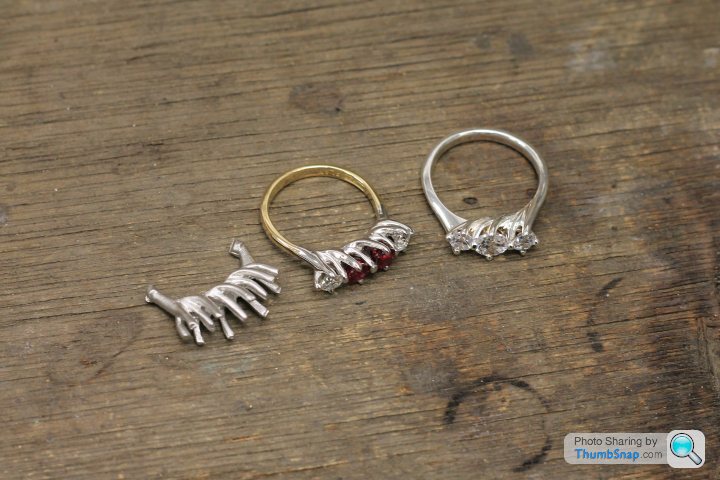
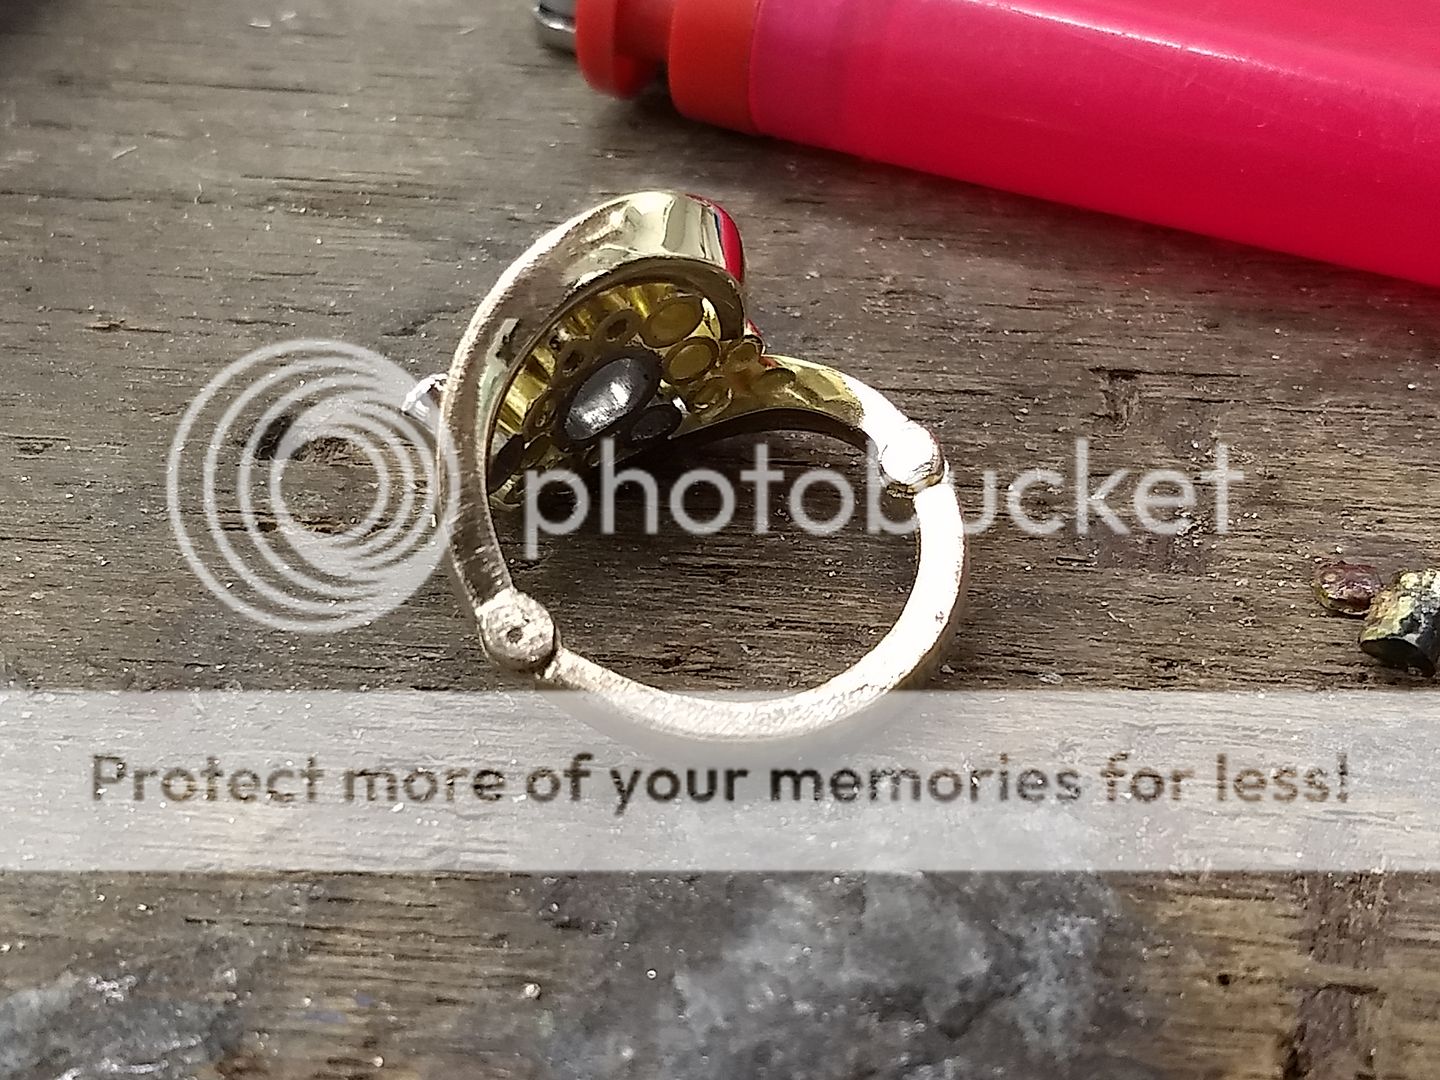
At this point the aim is to shape the setting to match the original. As you may have guessed, the customer has provided us with a silver sample to work from so we know the scale and layout. I use files and grinding tools to shape and trim the wires I have soldered in place:
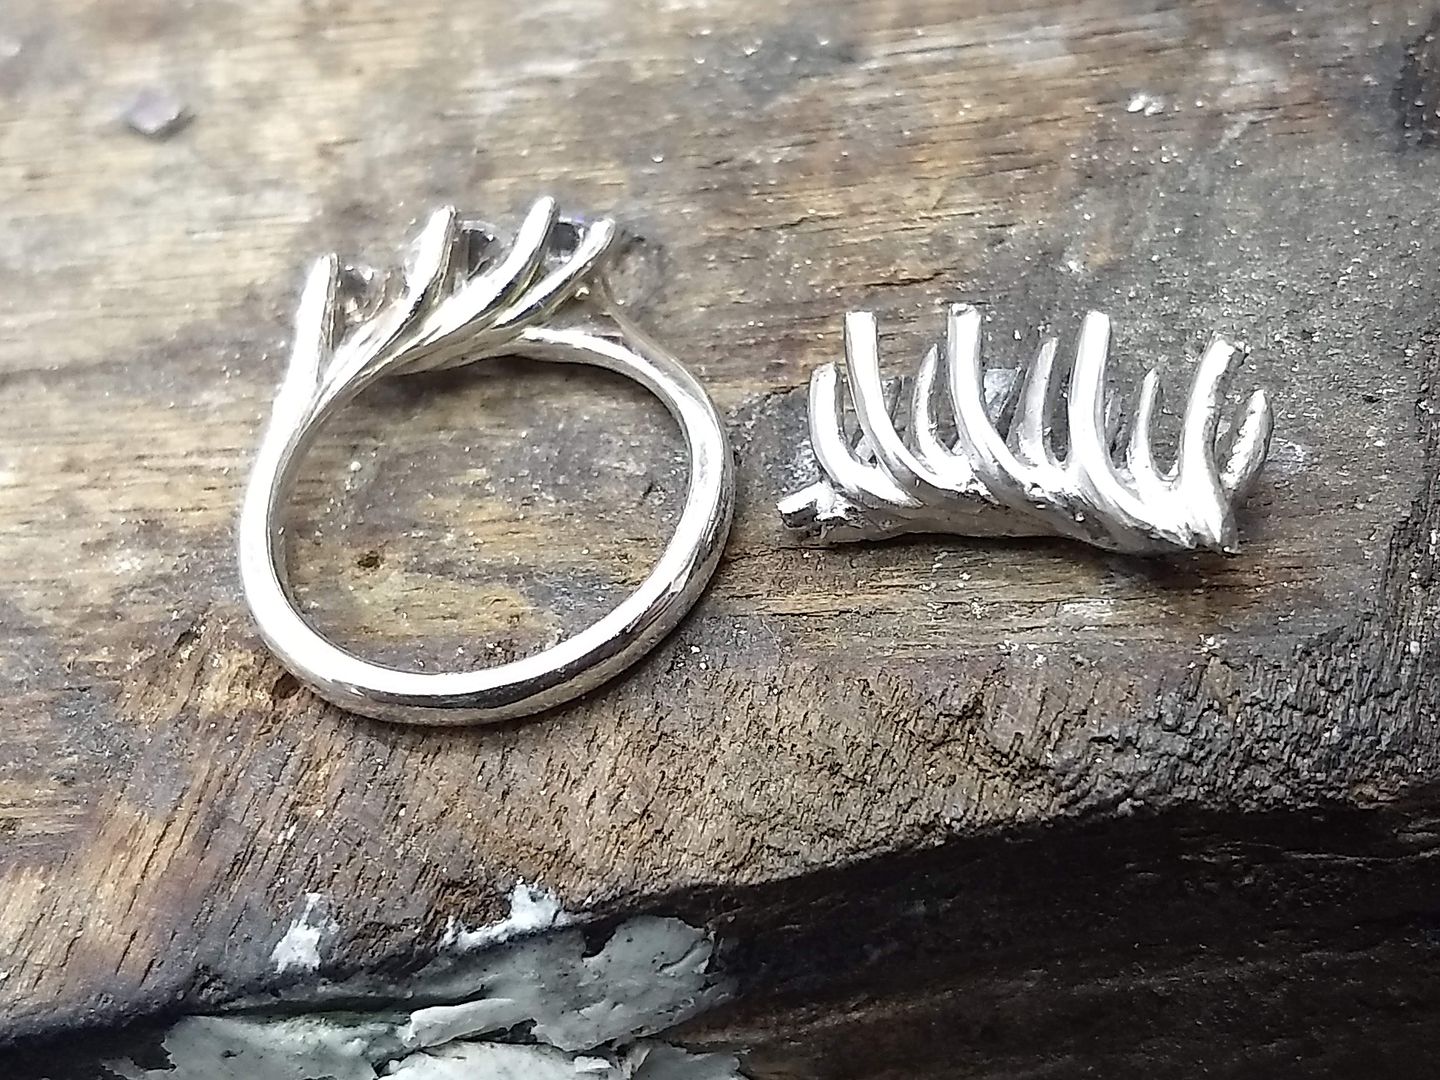
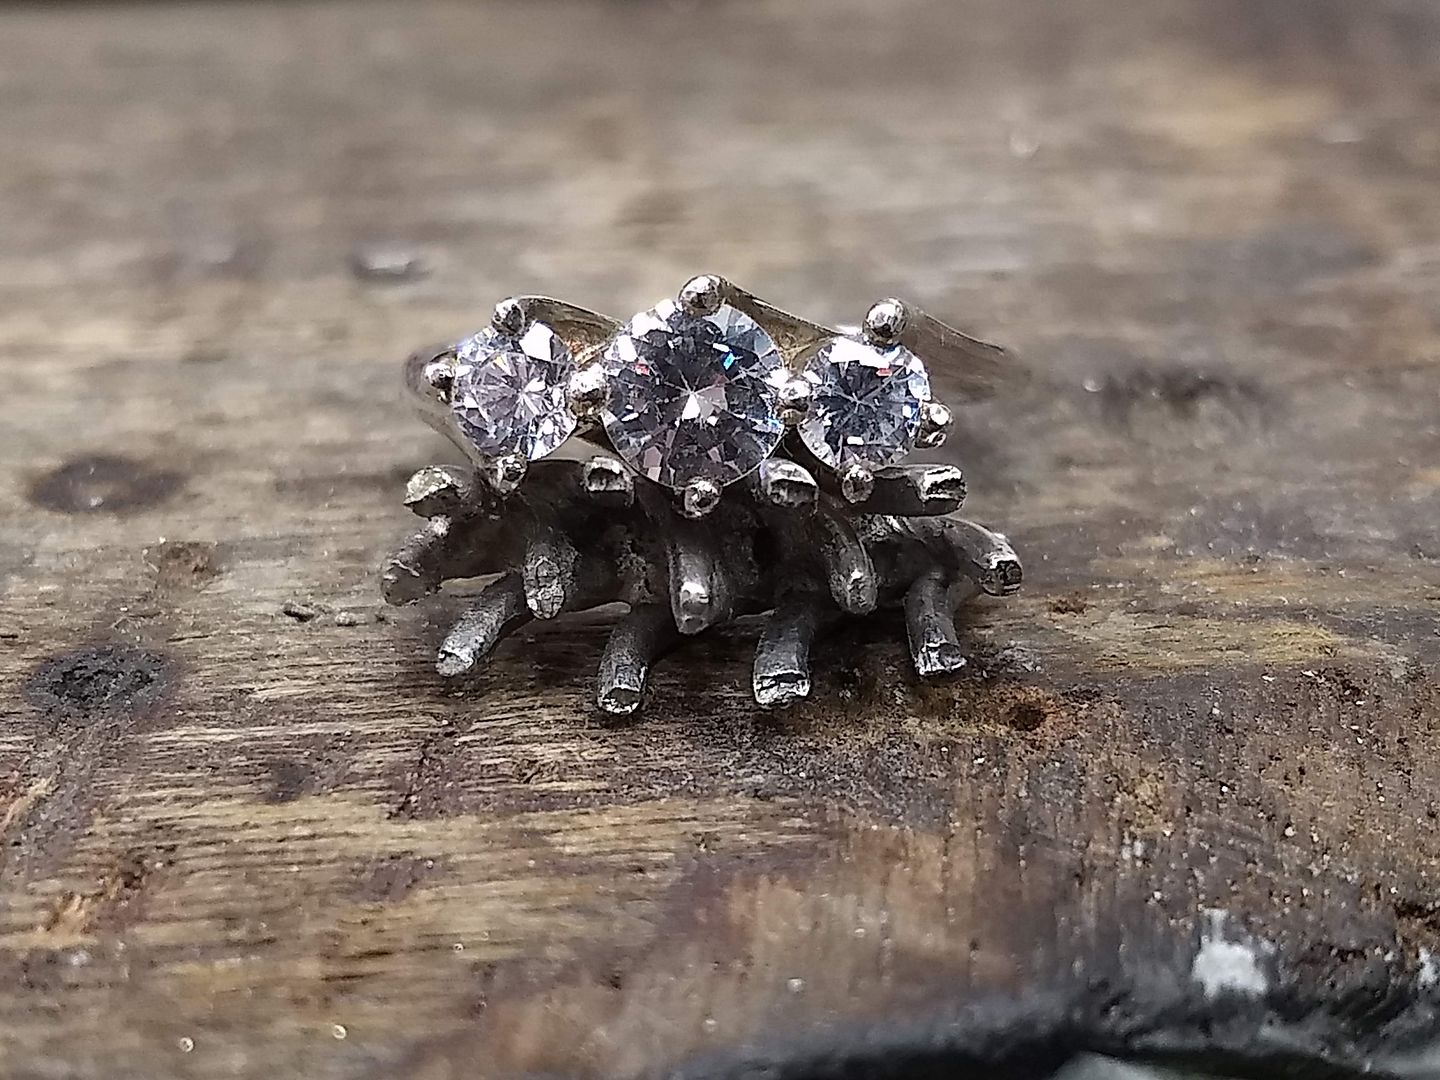
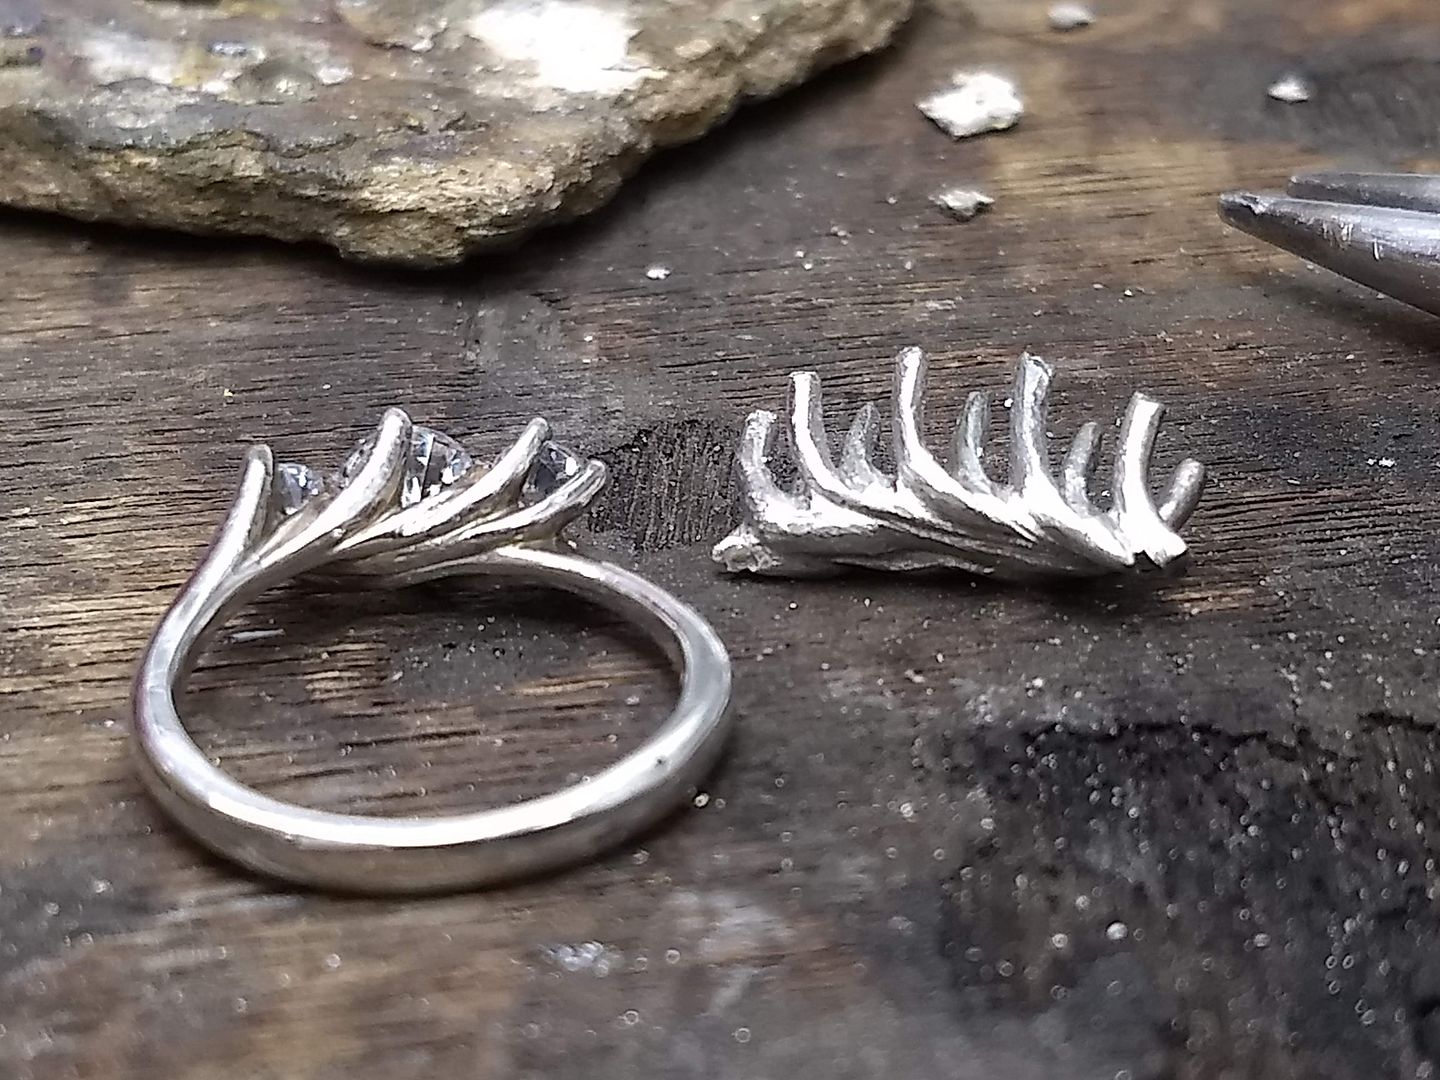
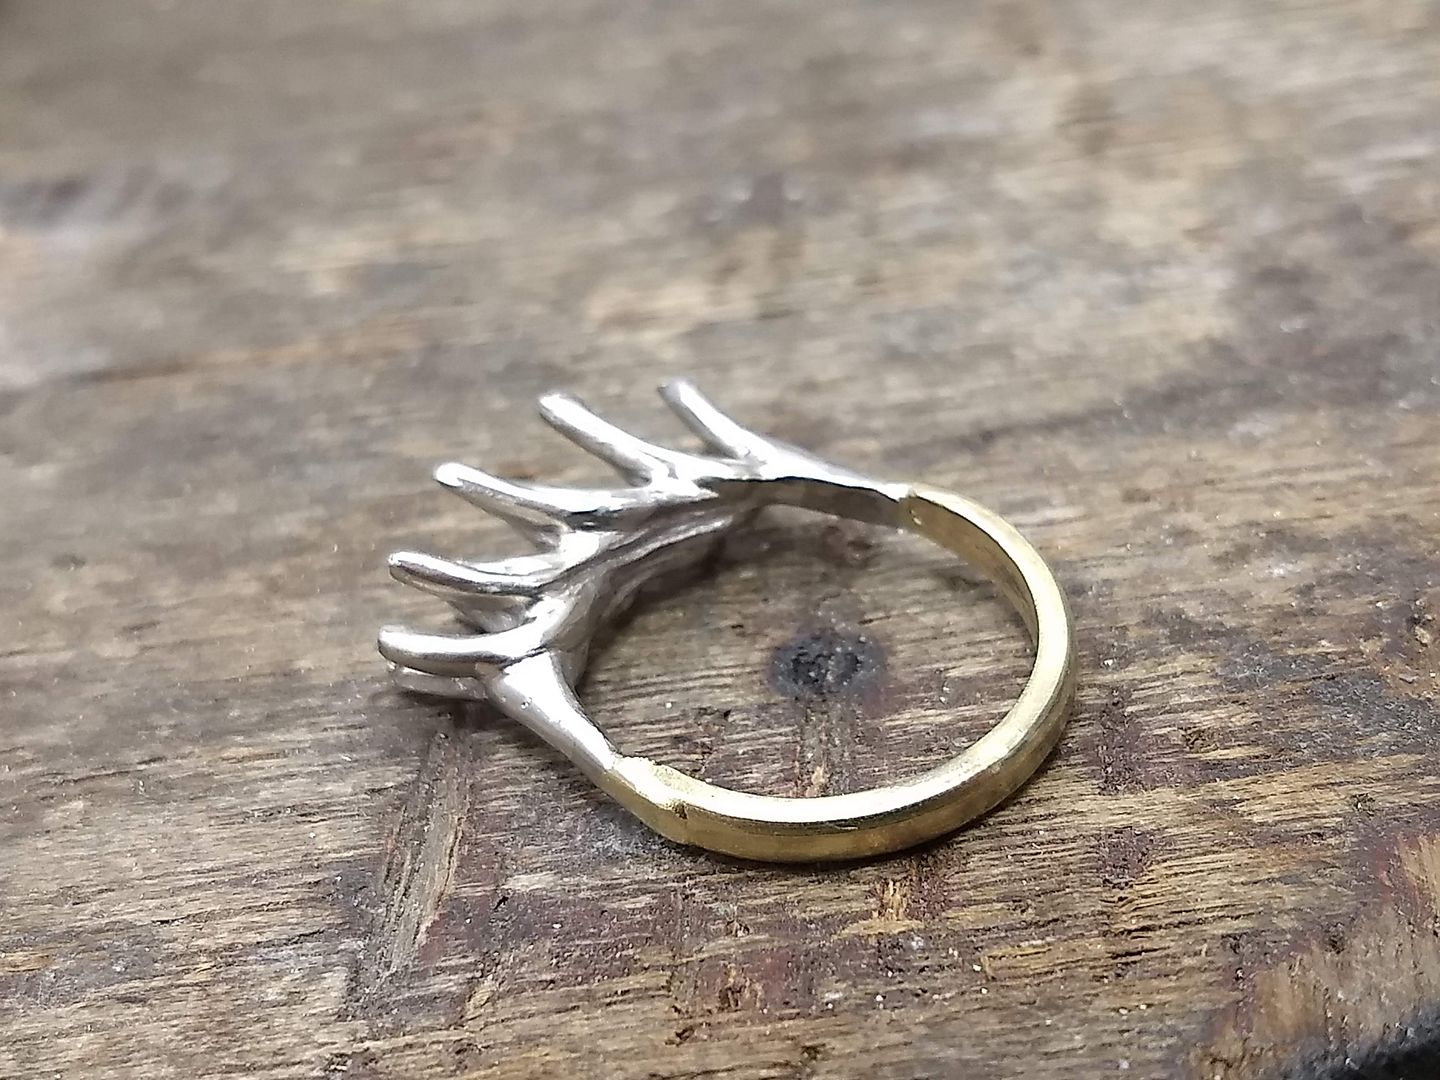
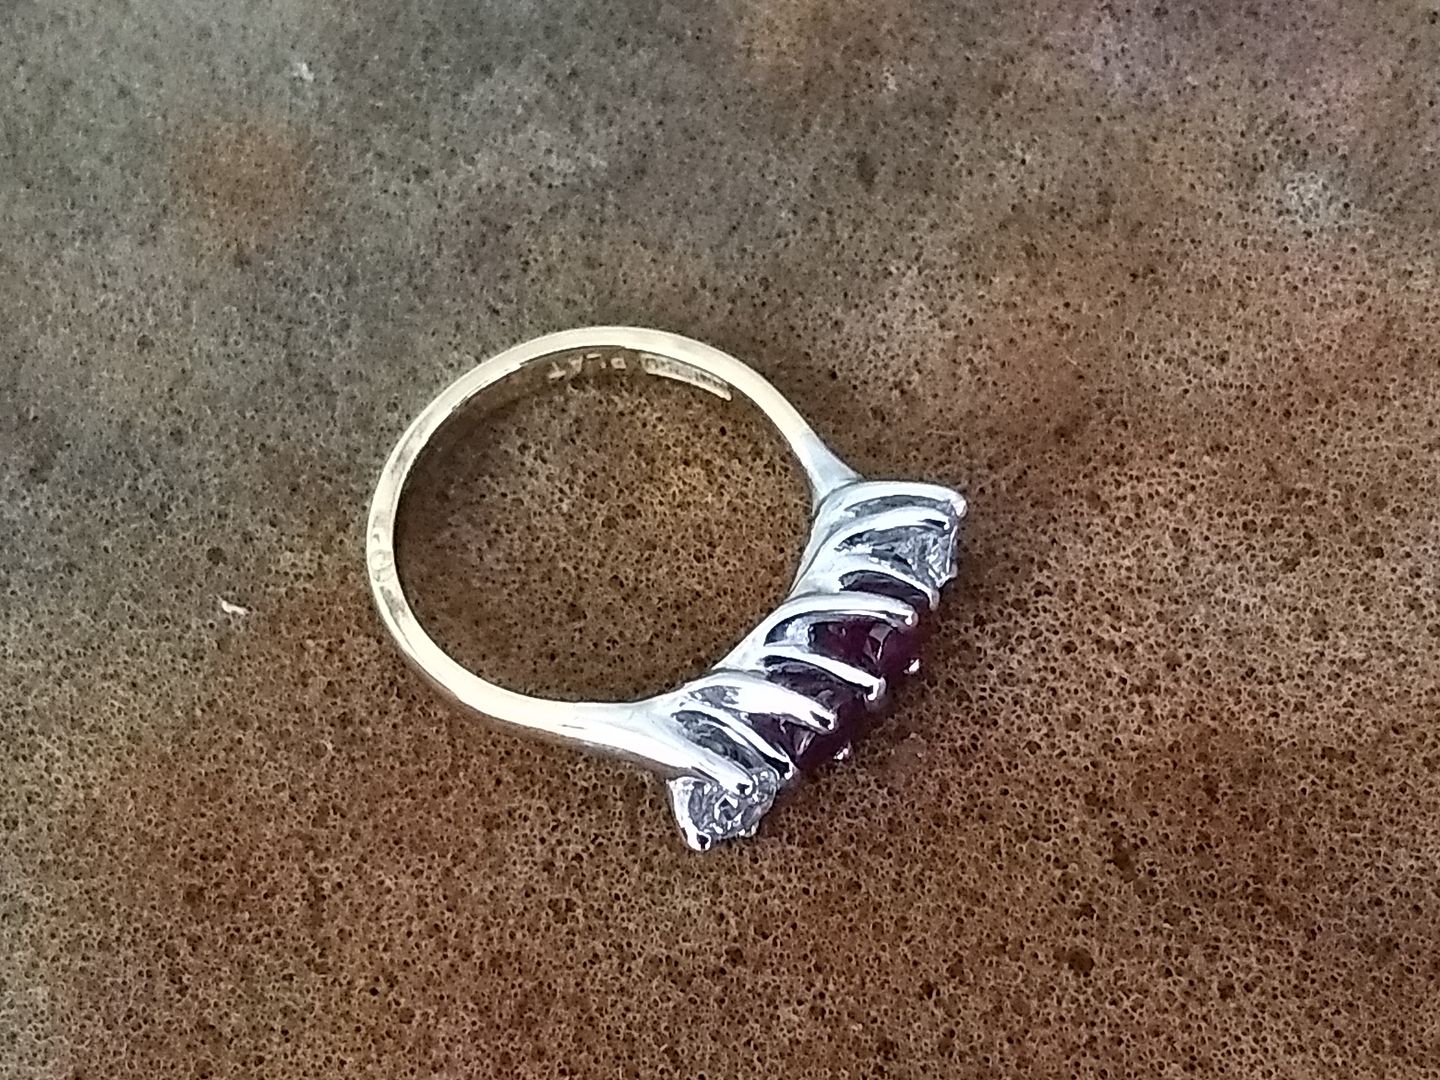
Another twist is that the customer wants the rings to interlock. They can never sit perfect because of the positioning of the shank but I have made the setting so that they sit comfortably side by side:
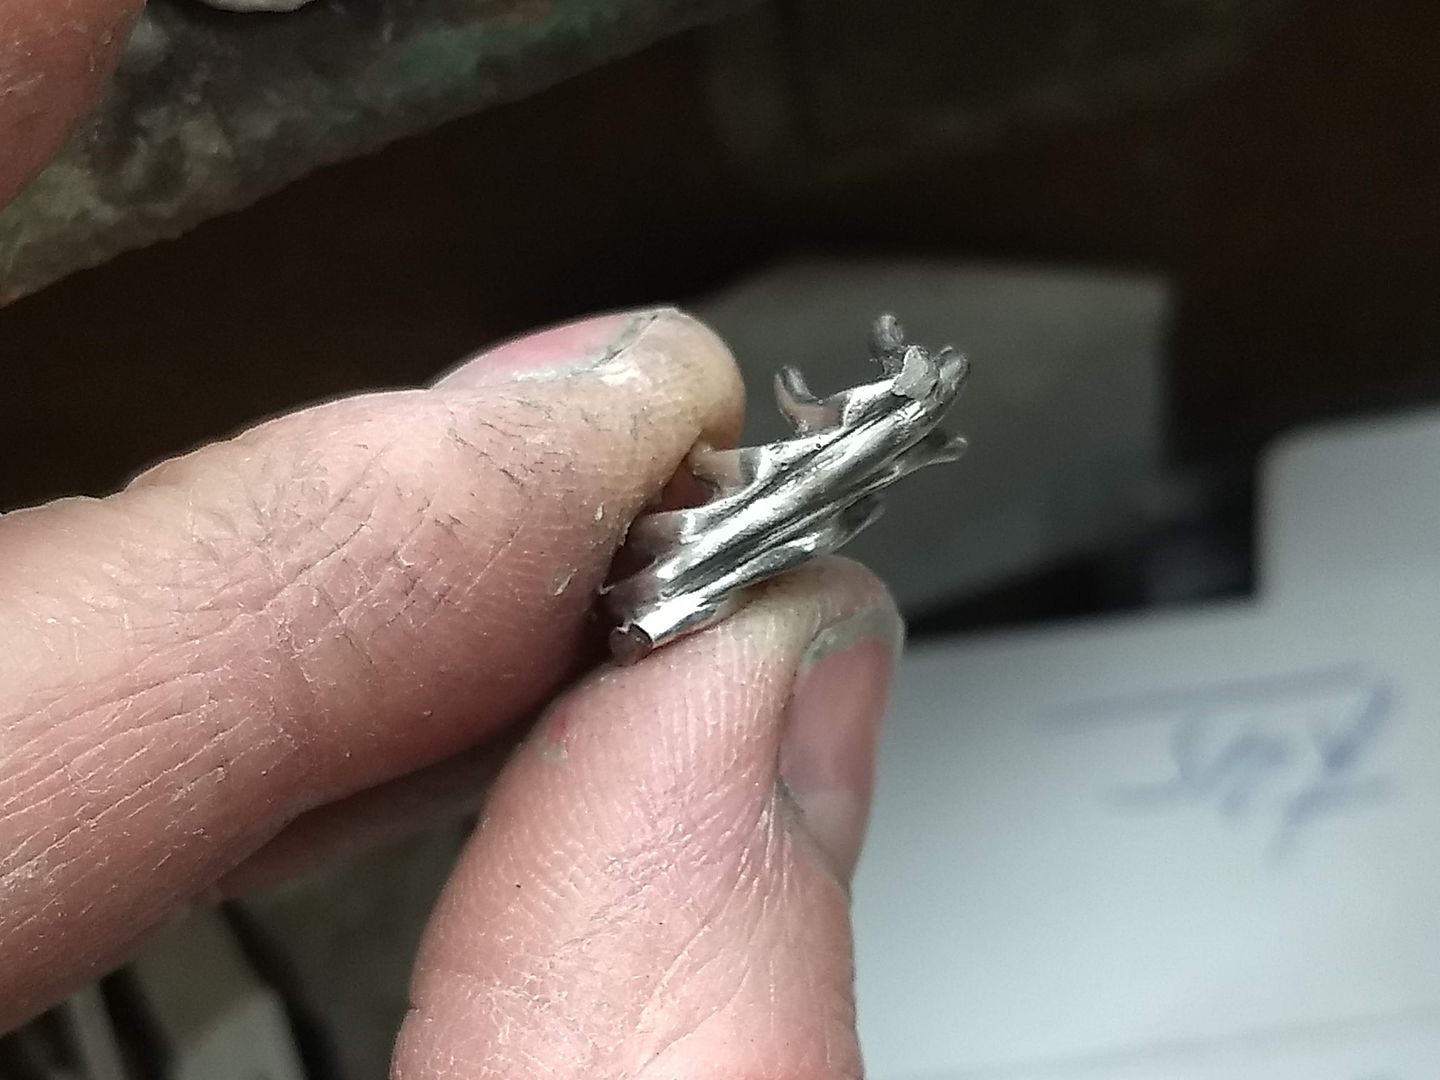
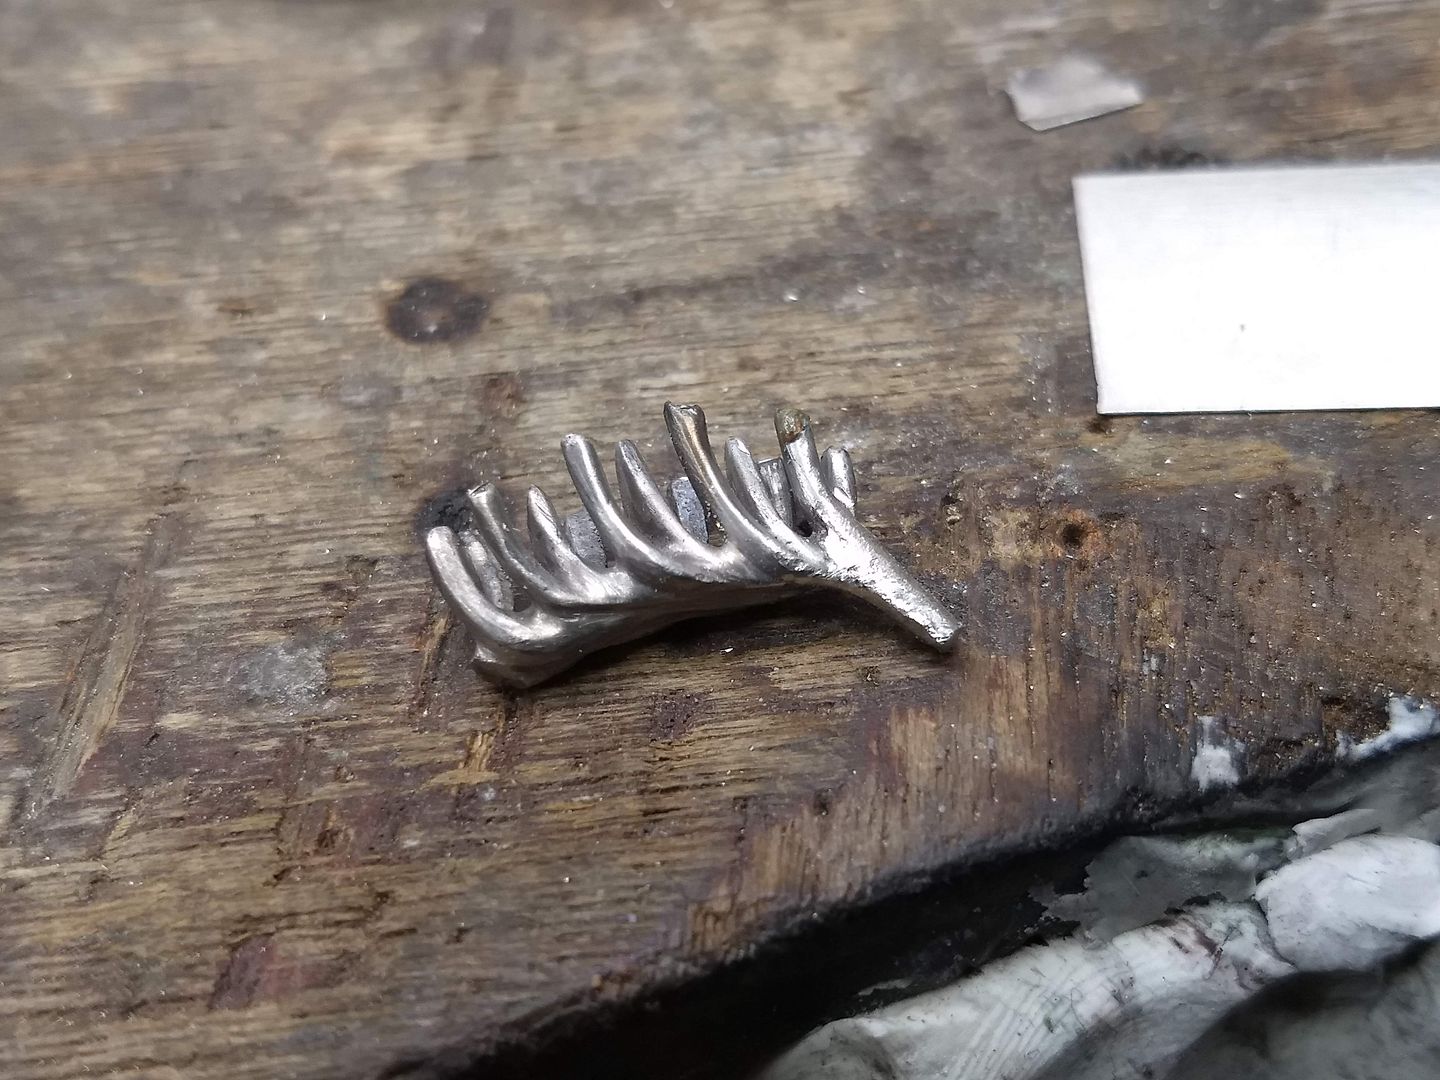
A little view from under the new head. You can see it now starting to come together:
The head / setting is given a bit of a tidy and a check over to make sure there are no major errors:
The setting joins the shank with platinum shoulders in between. These are soldered in and filed to shape:

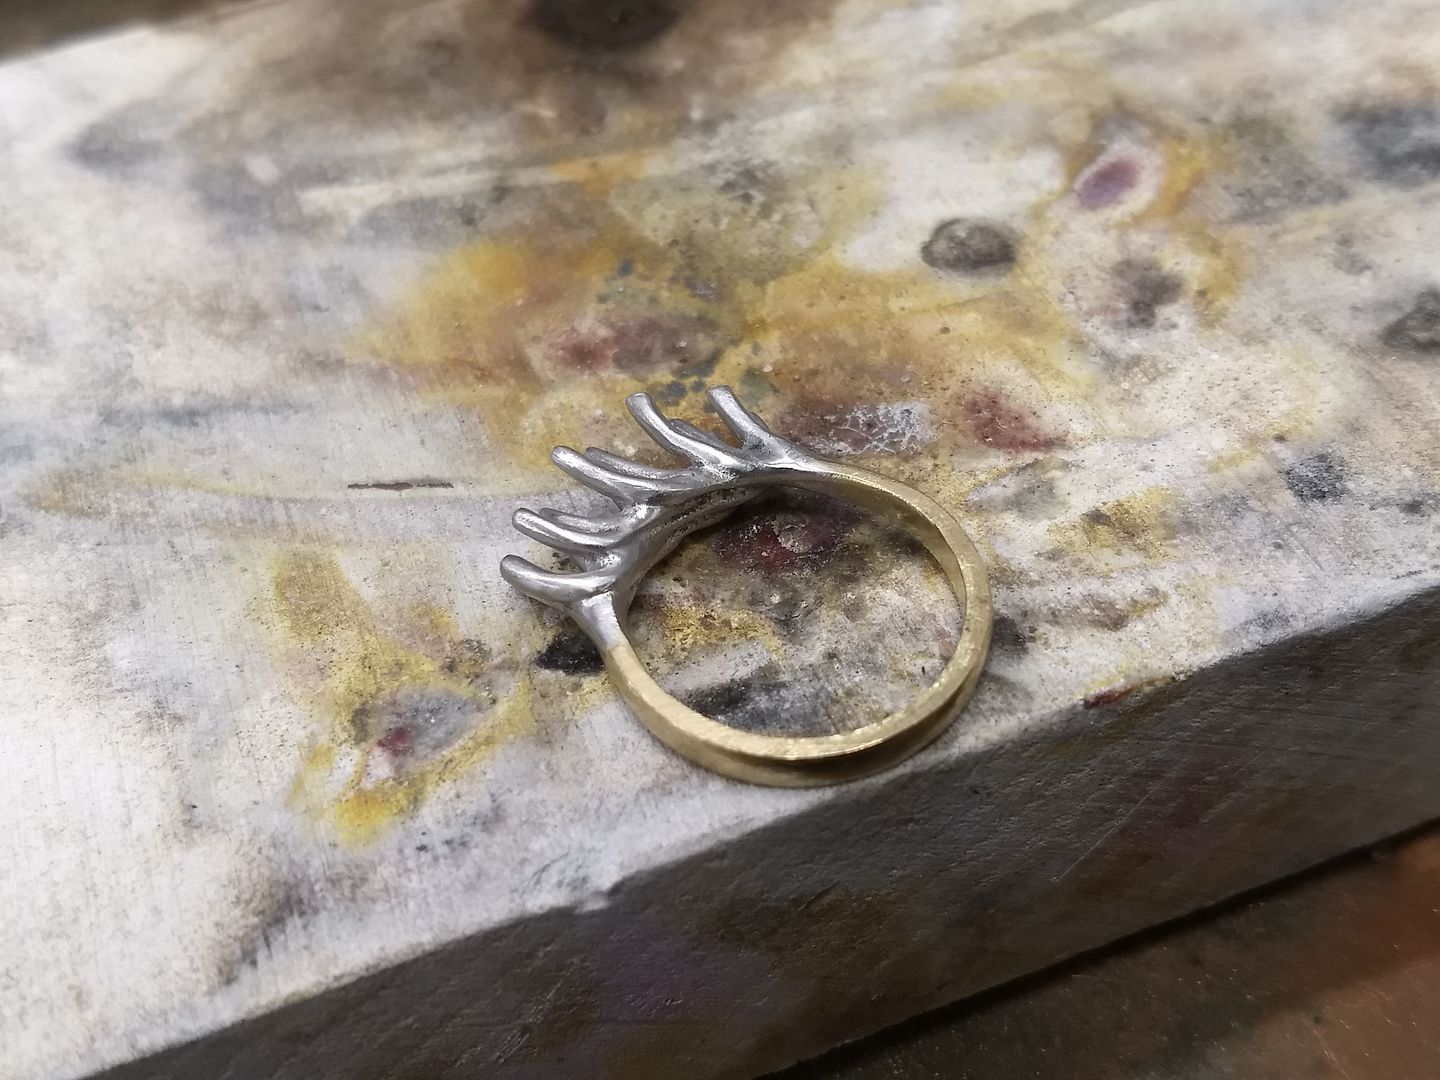
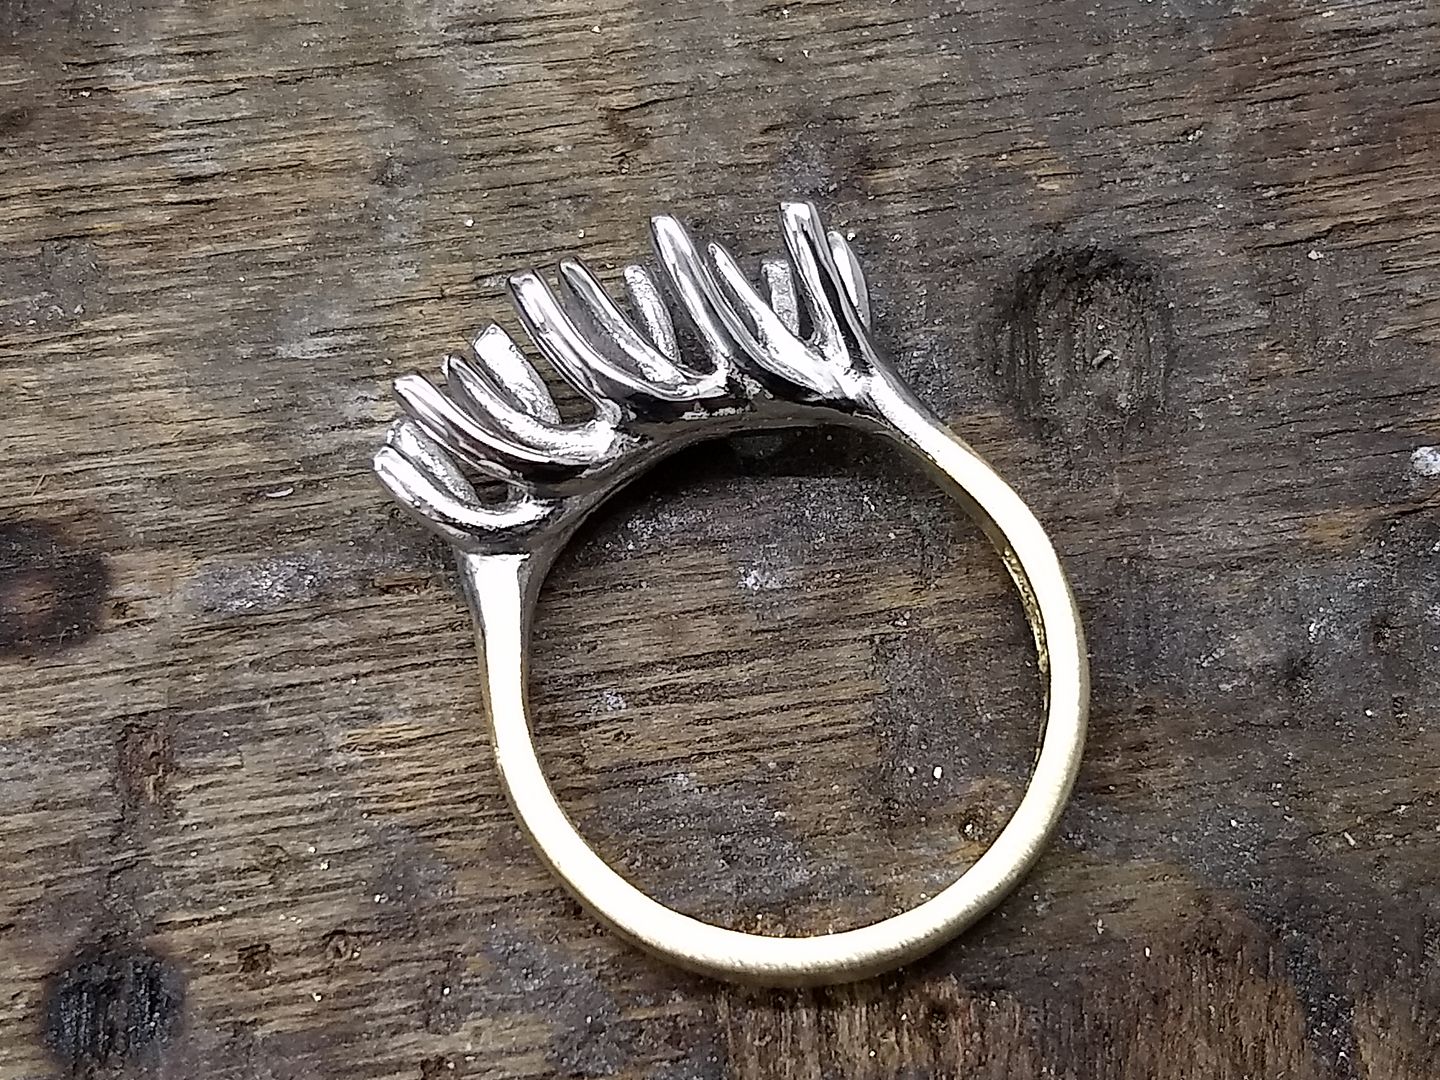
Another clean up after filing and it's looking like a ring component. The setting is made of something like 17 or 18 individual pieces and a whole lot of solder. The customer and I have decided that in the interests of my mental health and my eyes we should have this cast to produce a solid format so that If he decides to have another made in future we can do so without having to spend a good many hours and pounds doing it all again in wire. Before i get it off to our casting company (platinum casting is something we don't do in house) I attach a yellow shank so the customer can see what it might look like at the end.
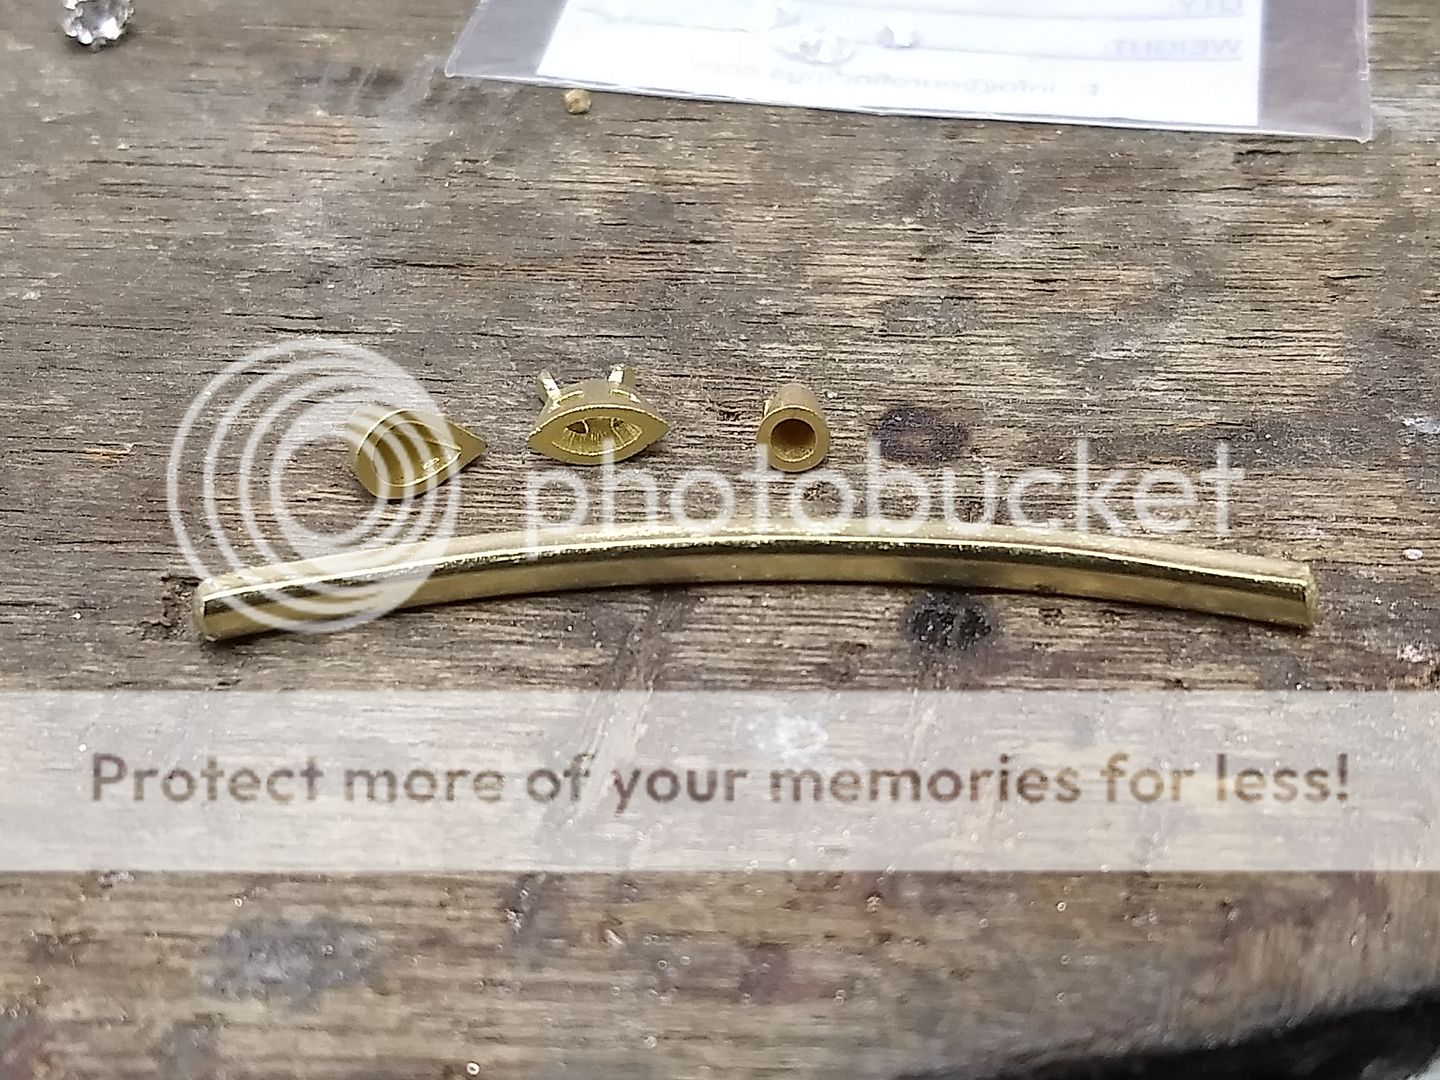
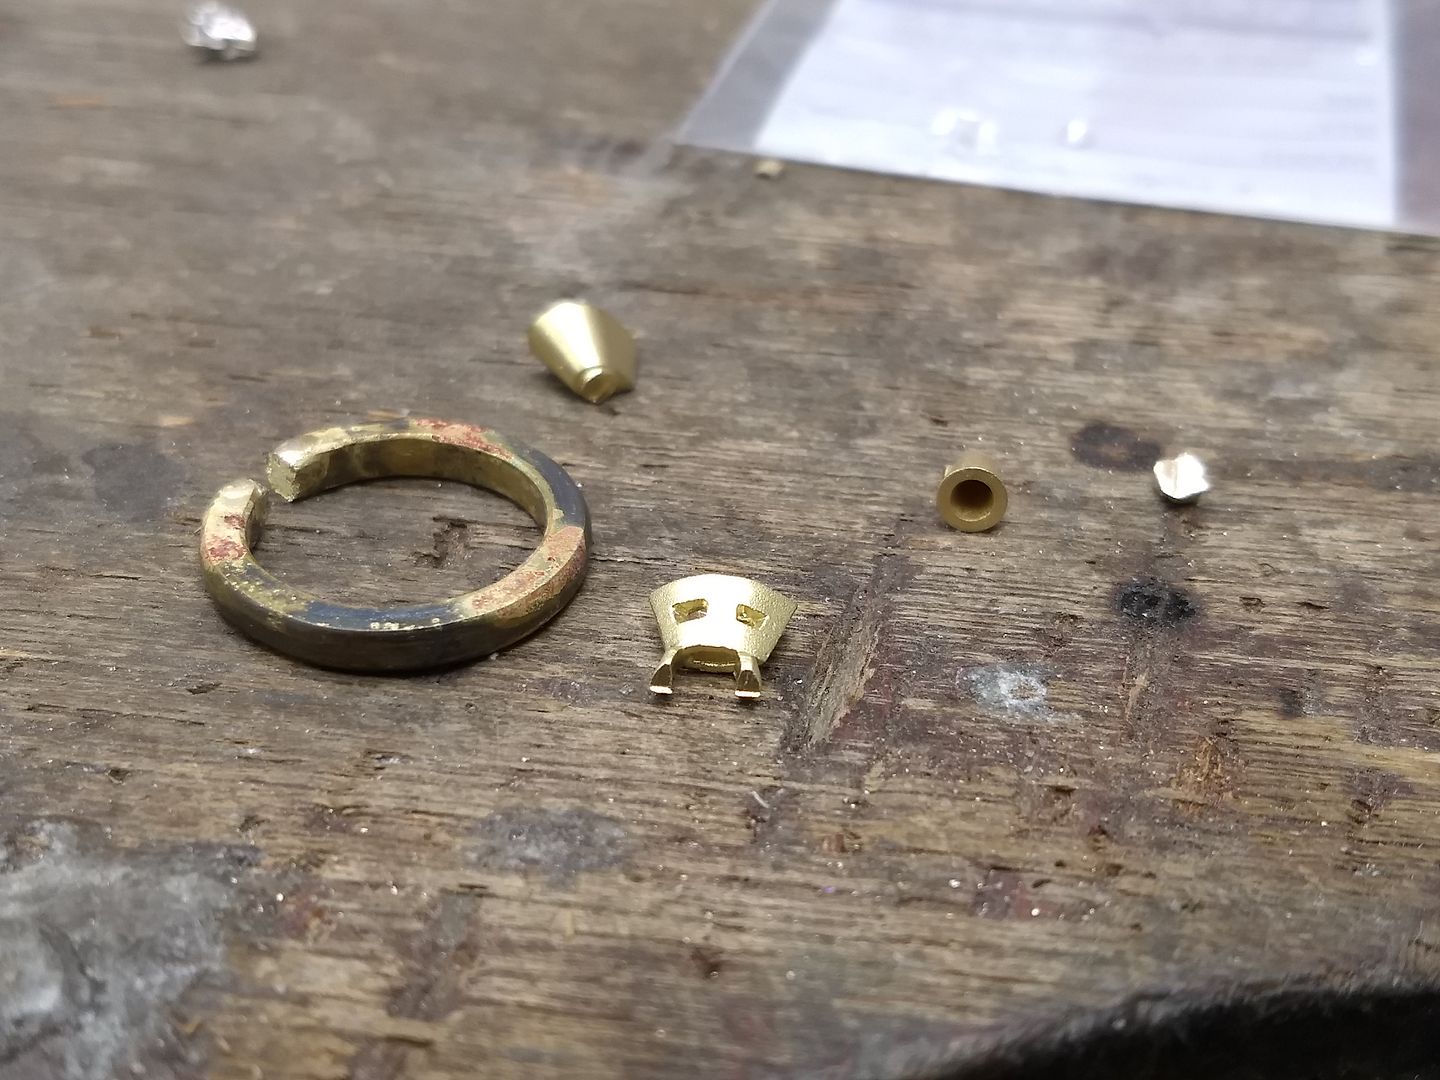
Here are all the elements in the equation.
The cast came back after a couple of weeks and we can now get on with the rest of the build and setting the stones:
Original head and a nice lump of 18ct yellow gold:
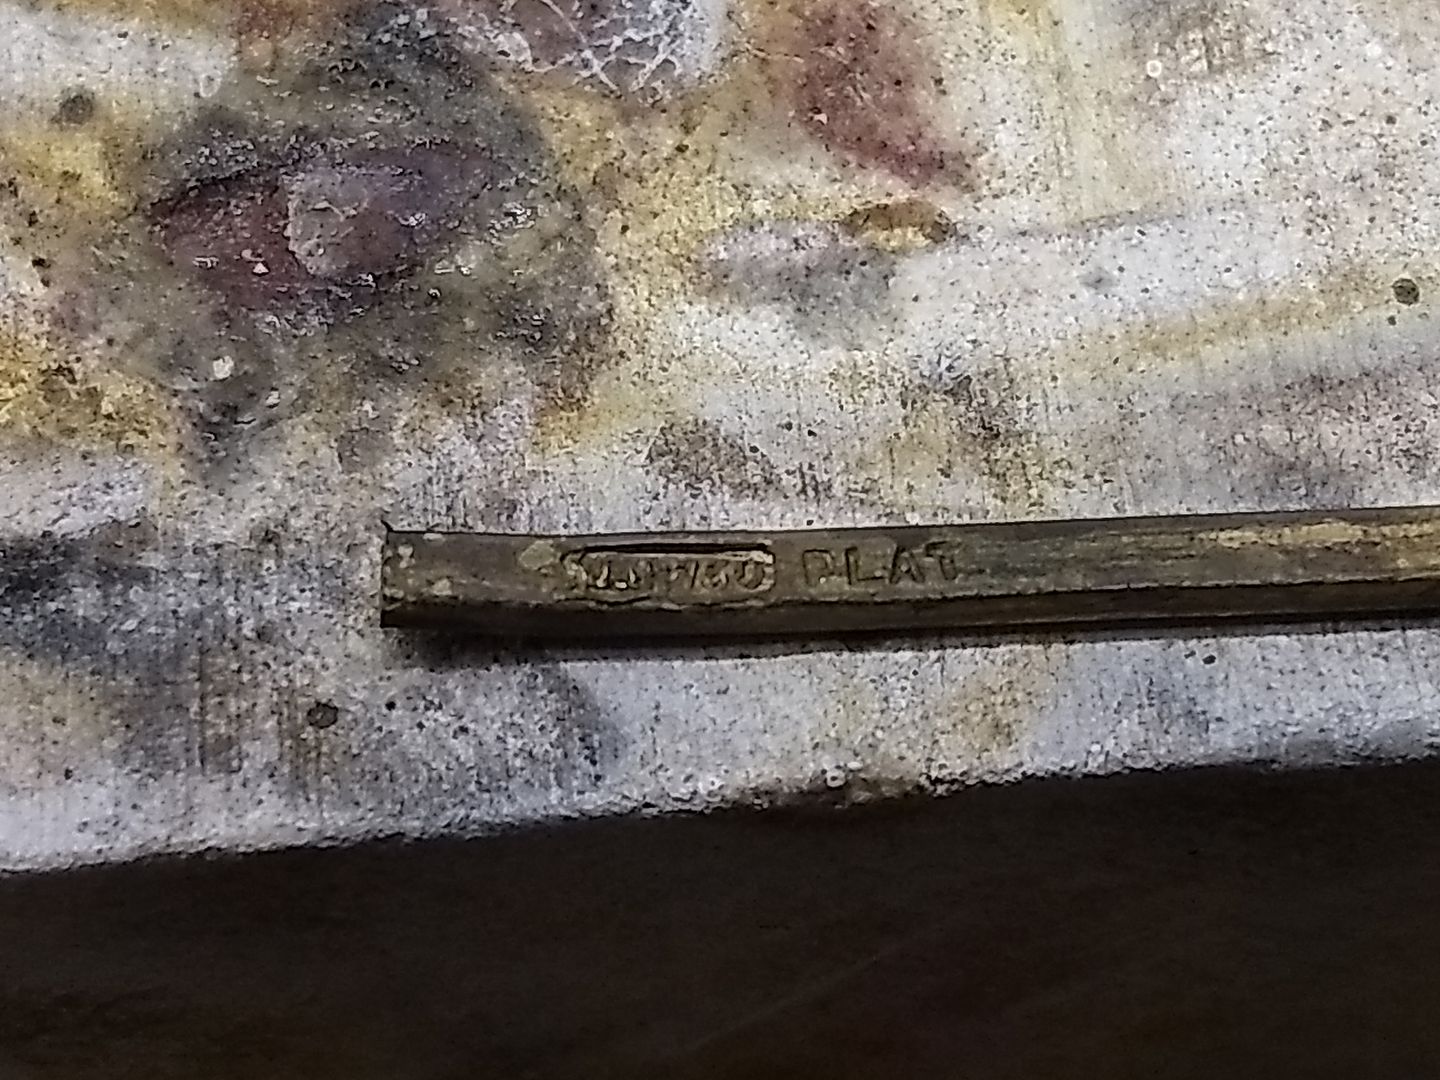
The 18ct wire is rolled down to make the material for the shank, which is stamped to show the materials used (18ct is 750) :
The wire is cut to length and turned to the correct shape:
And then soldered on and sized to fit:
The ring is now a mount It's cleaned up and I prepare myself to set the stones:
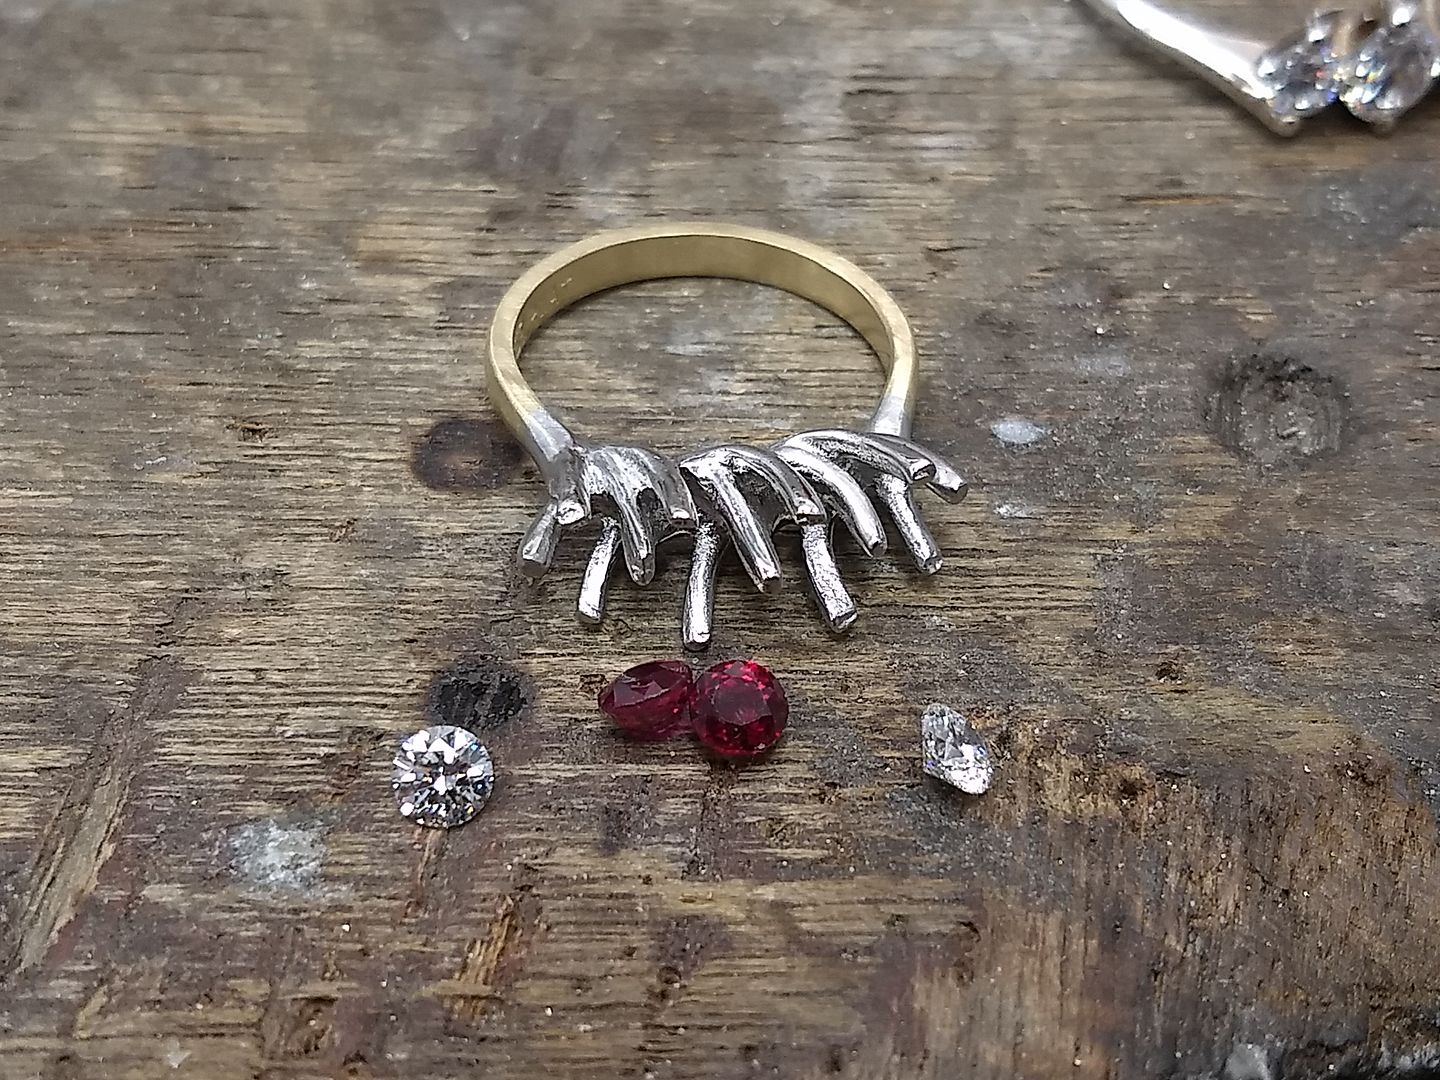
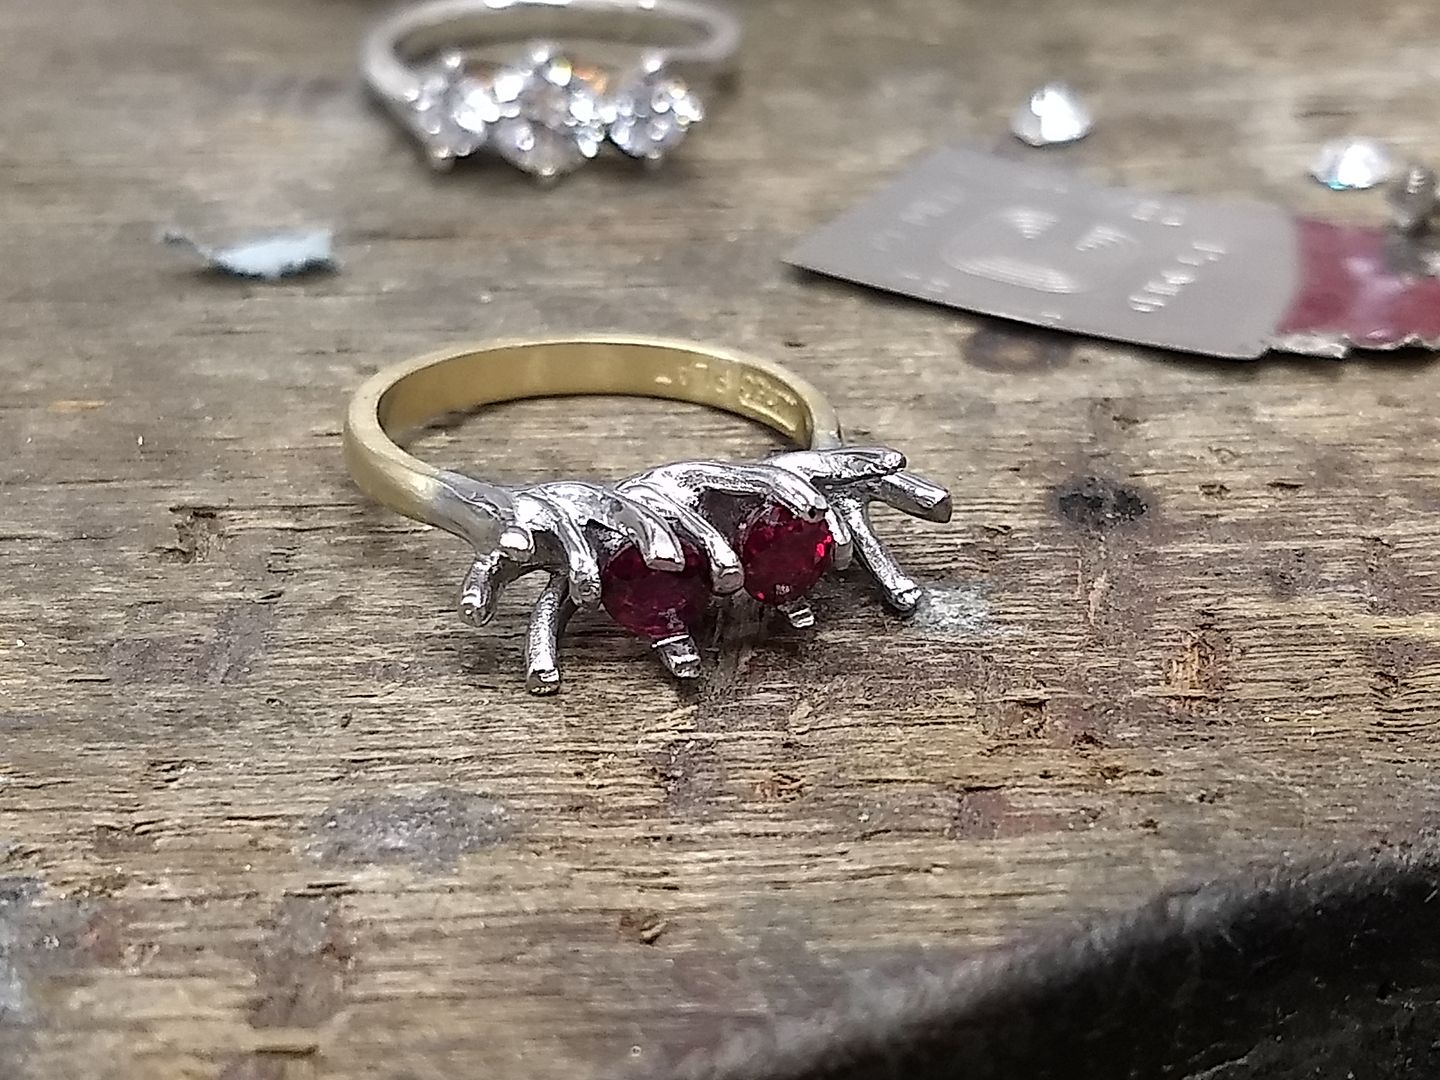
The rubies go in first so I know how much room I have to play with and to set the heights. The inner claws are notched first and the rubies dropped in. The tops of the inner claws are then pressed before the outer claws get notched and pressed into position:
Diamond number one is in:
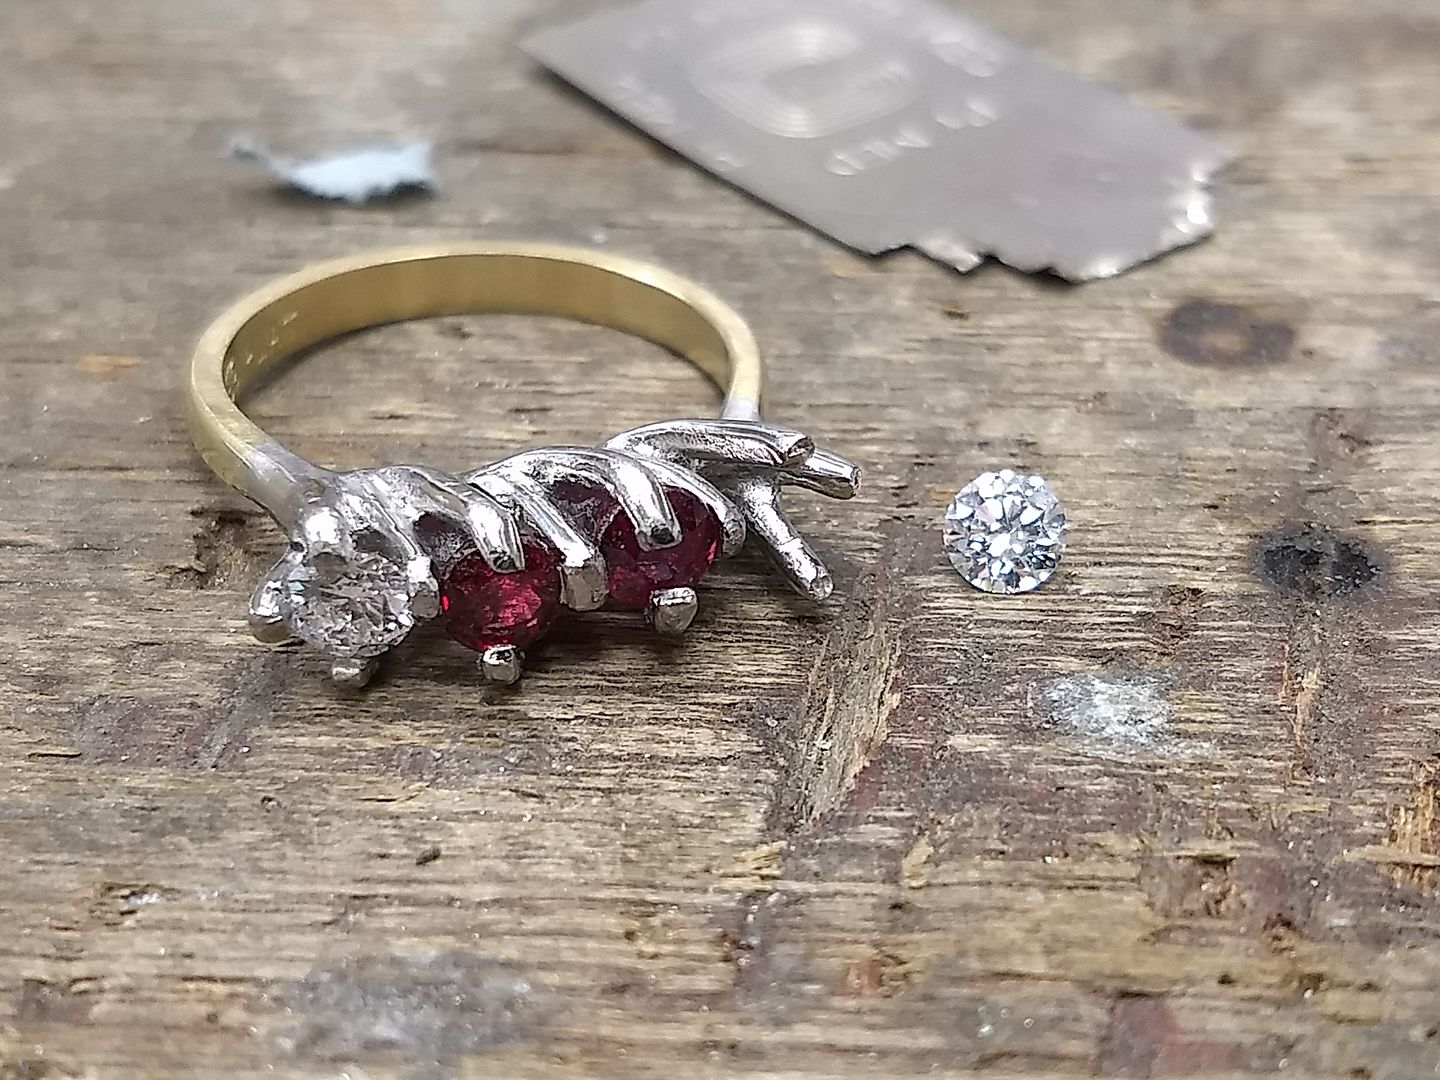
And then both:
The claws are then cut to length and adjusted for position:
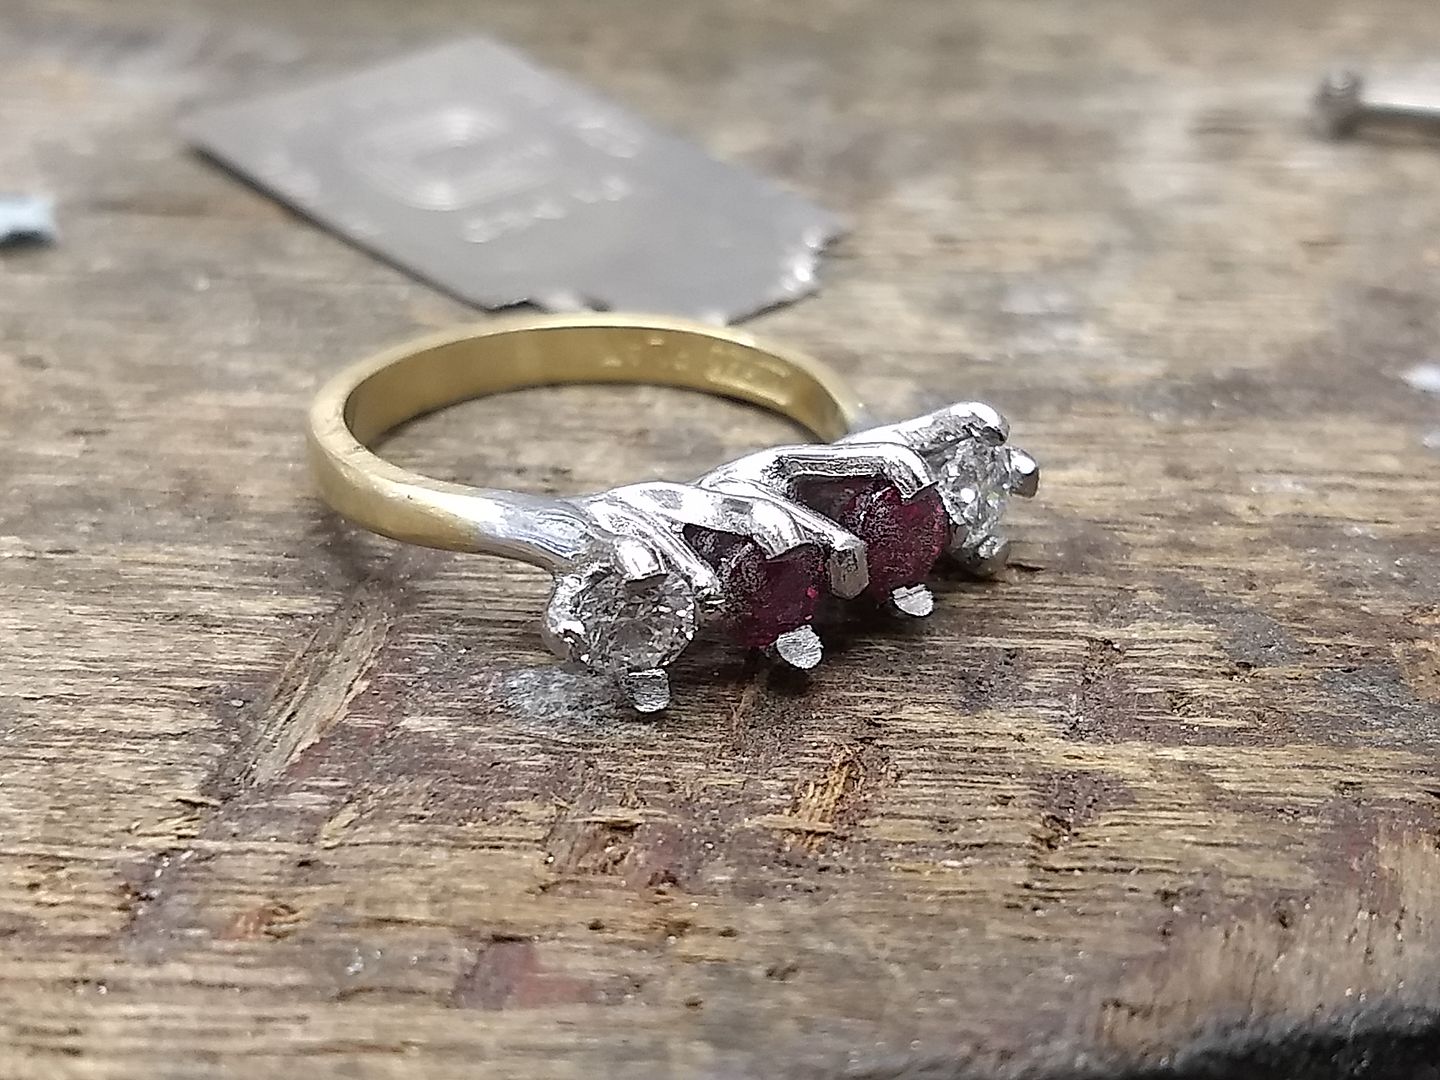
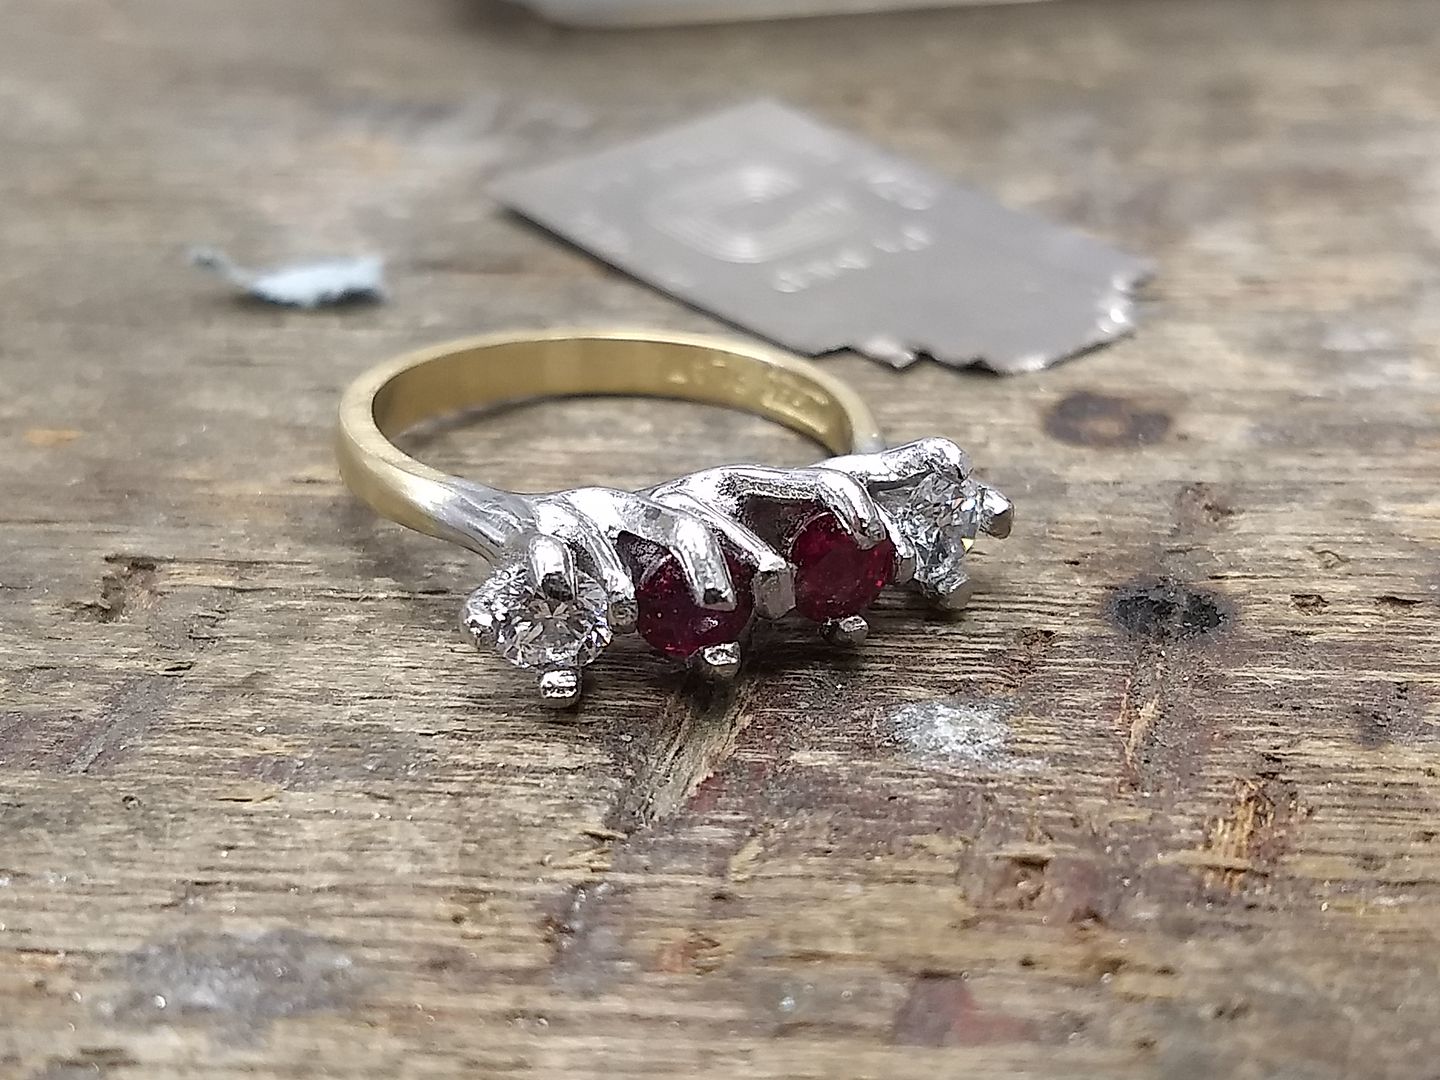
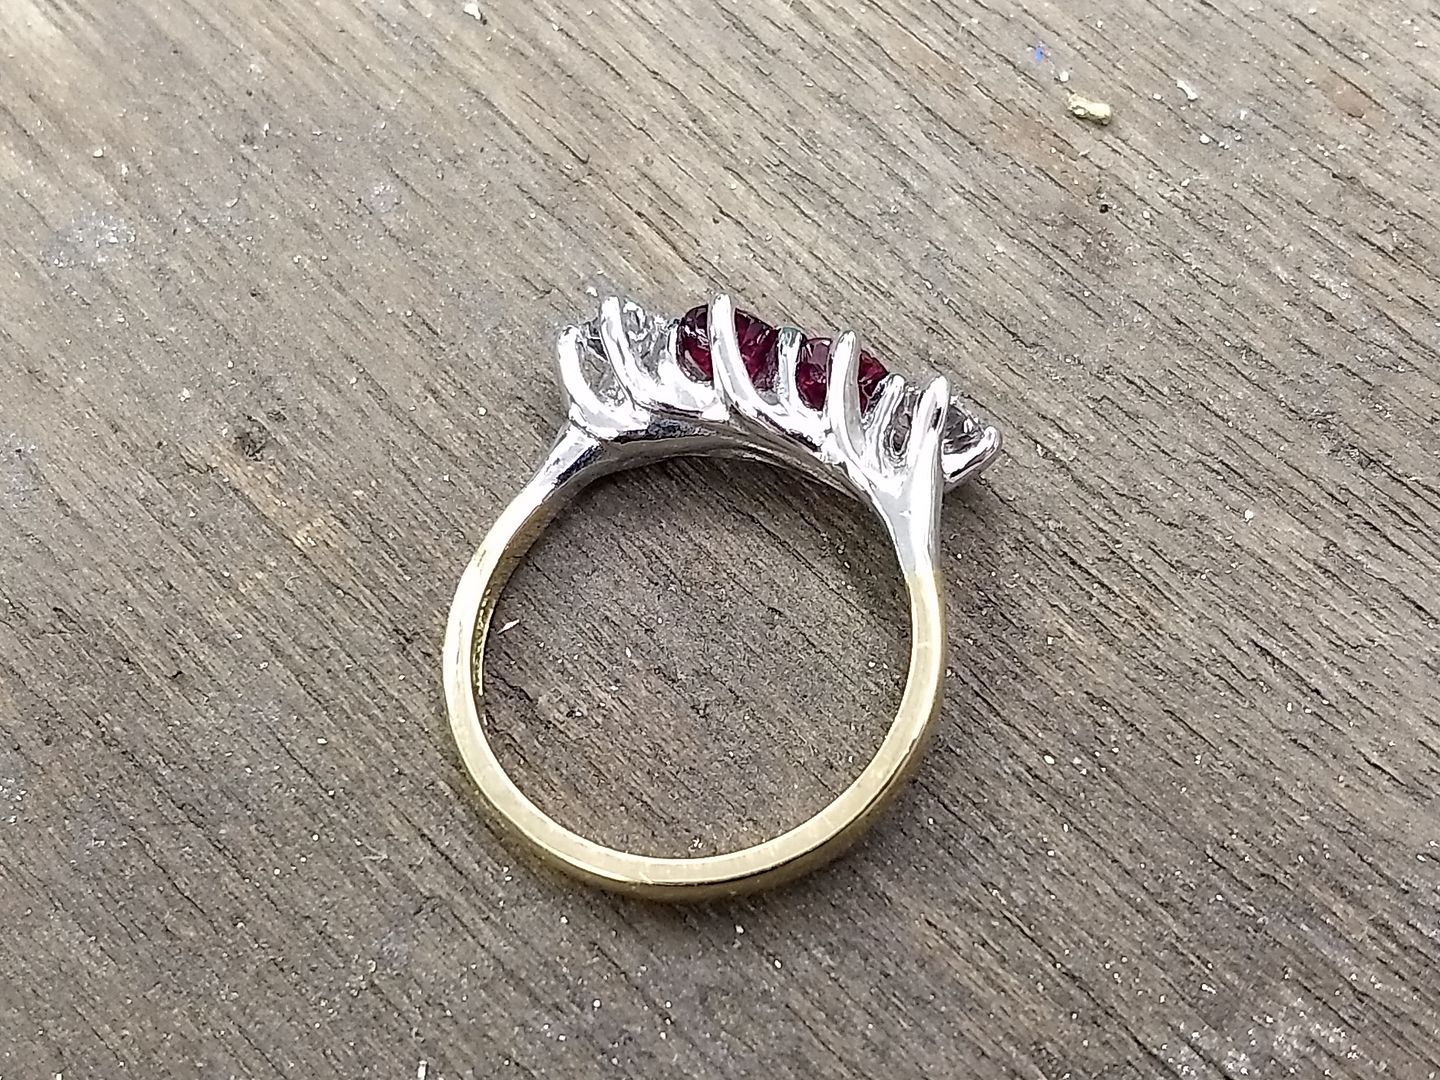
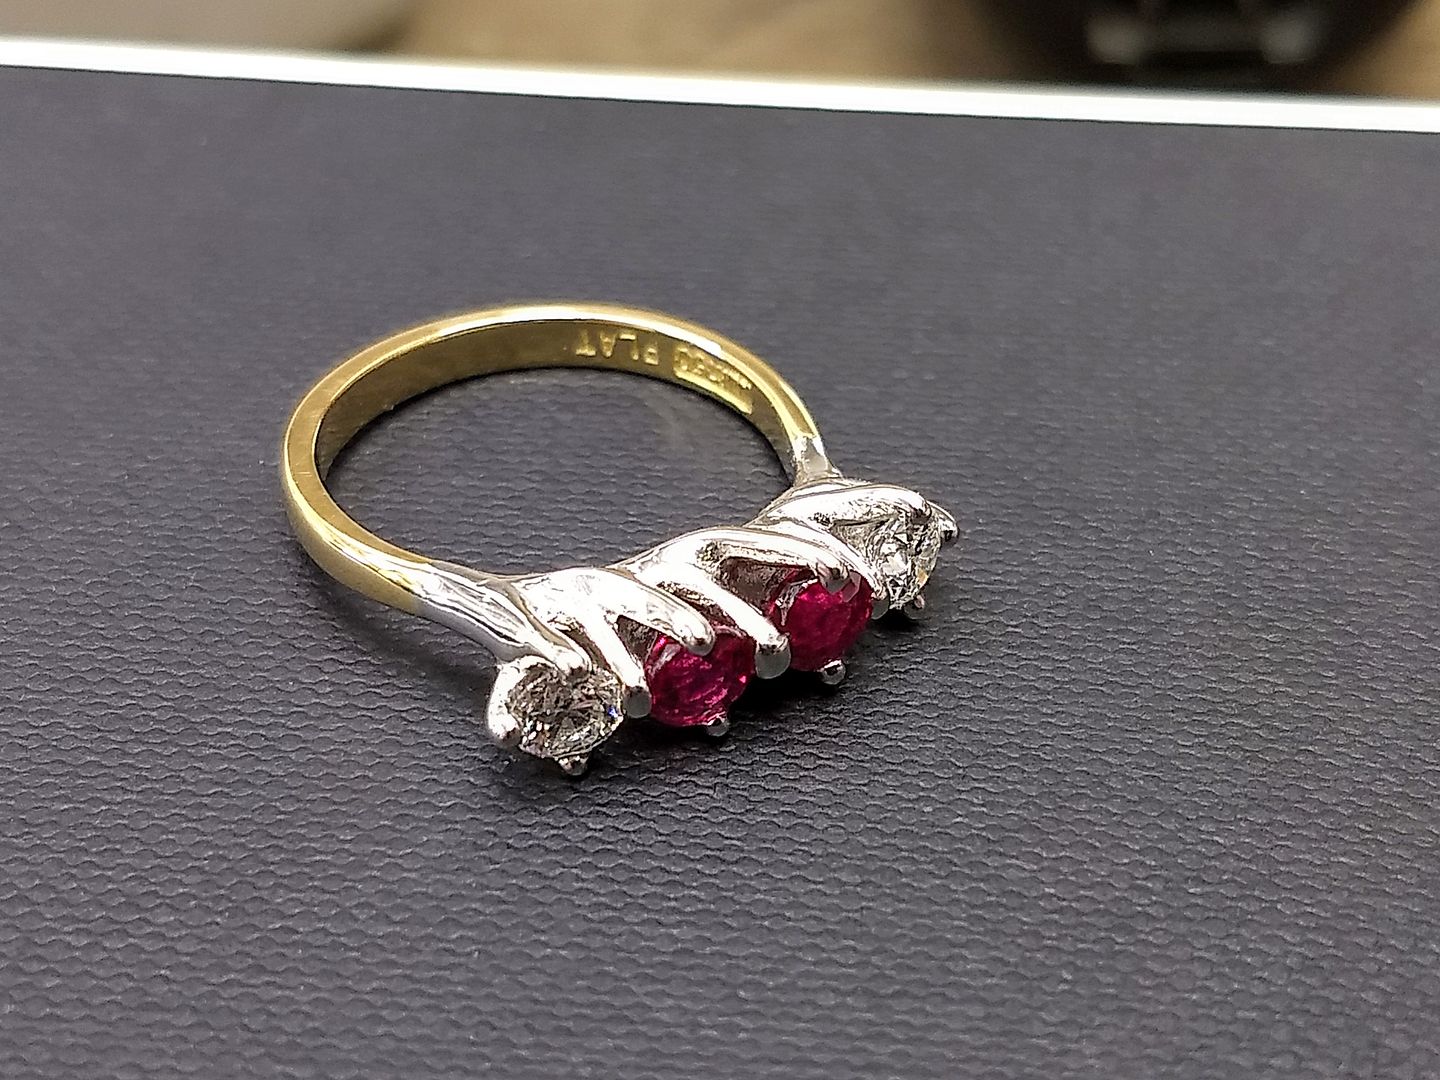
Some gentle filing takes place and the stones are 99% the way there to being set. The pictures don't do them justice but the rubies are stunning.

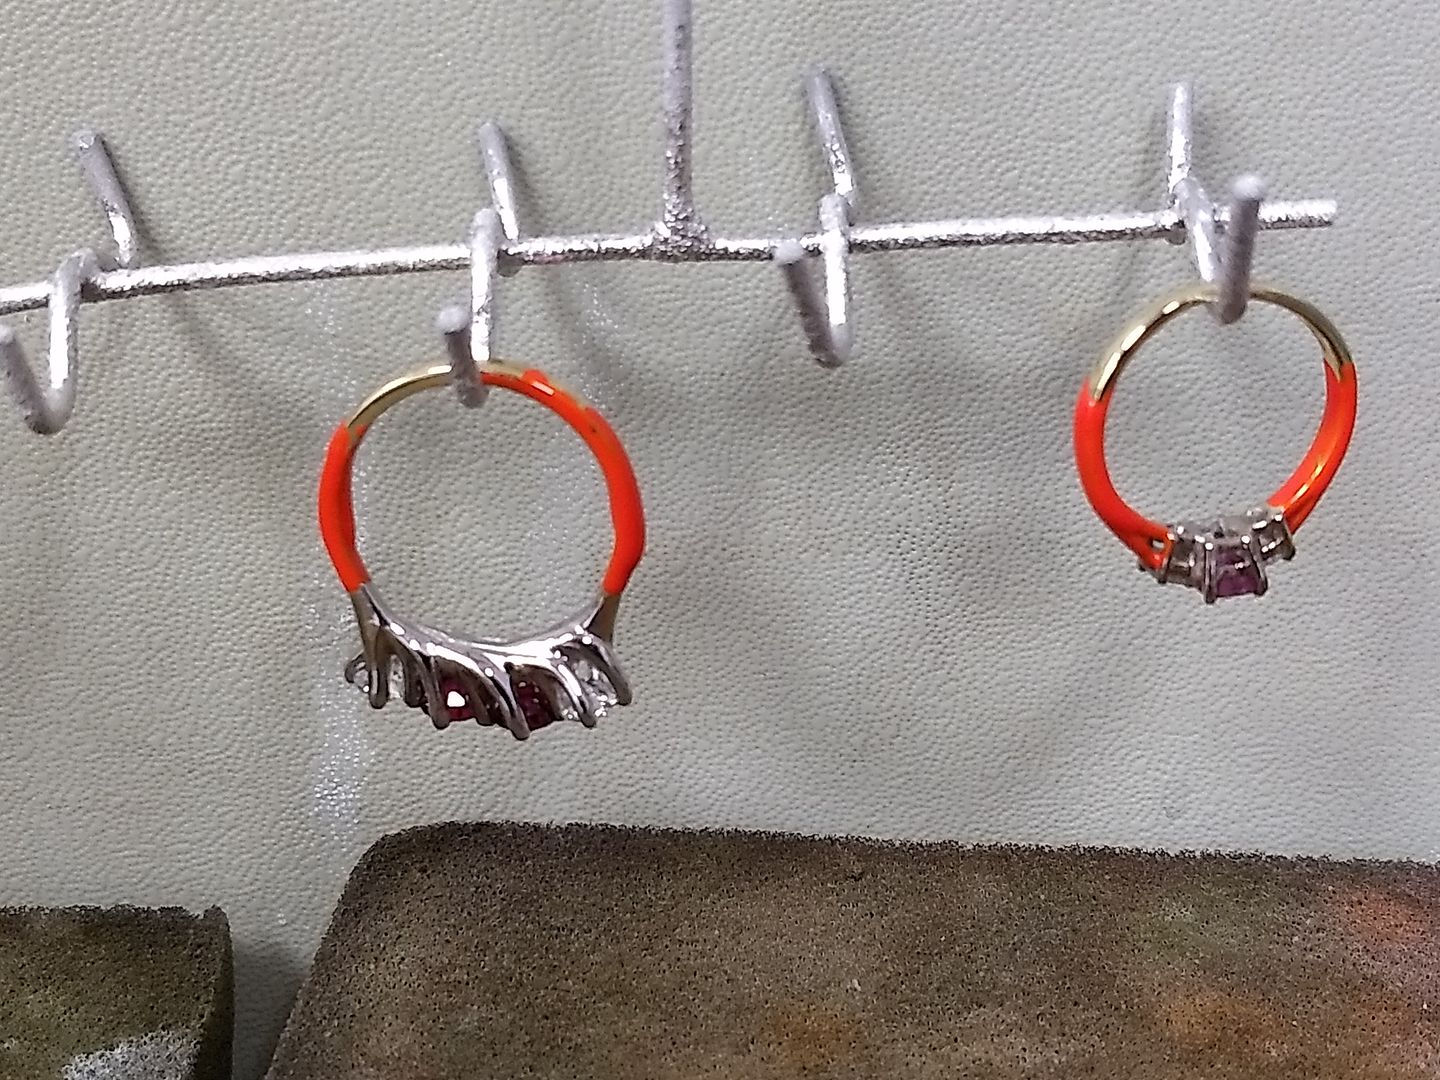
Polishing is the next thing to happen. Platinum is a hard metal to polish because it's so dense. Marks are incredibly hard to remove from the nooks and crannies of a setting and if polished too hard will quickly show solder lines and drag our 18ct shank at the joint. This is why most rings are cast complete and machine finished. This is hand made in every way so I take my time and exercise great care:
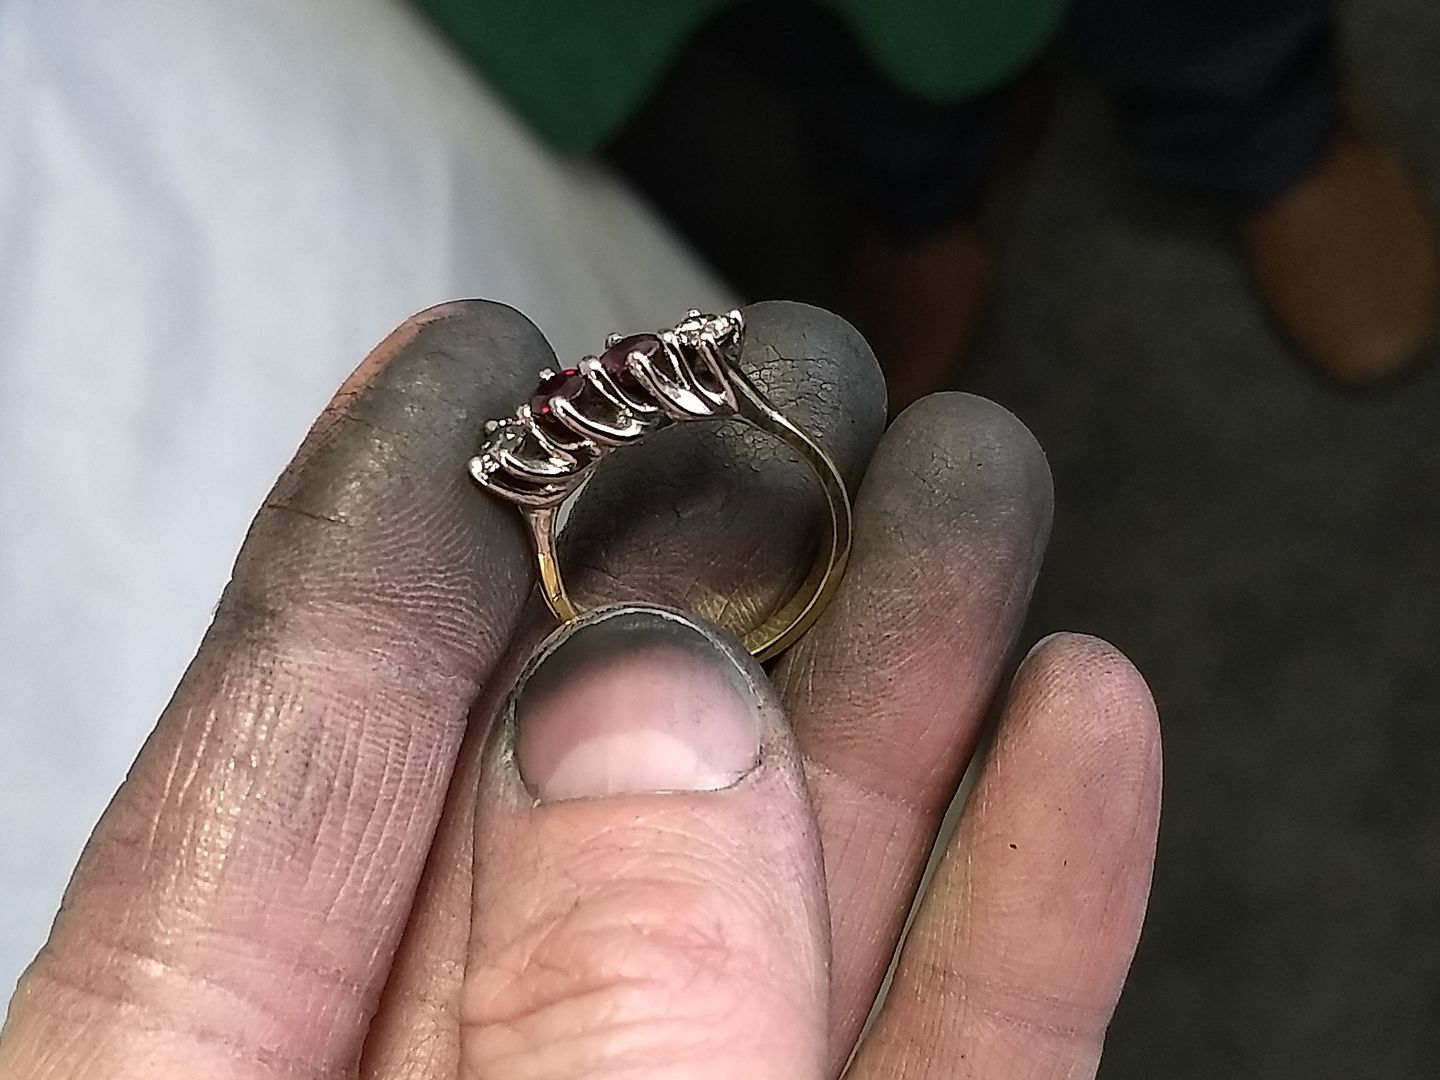
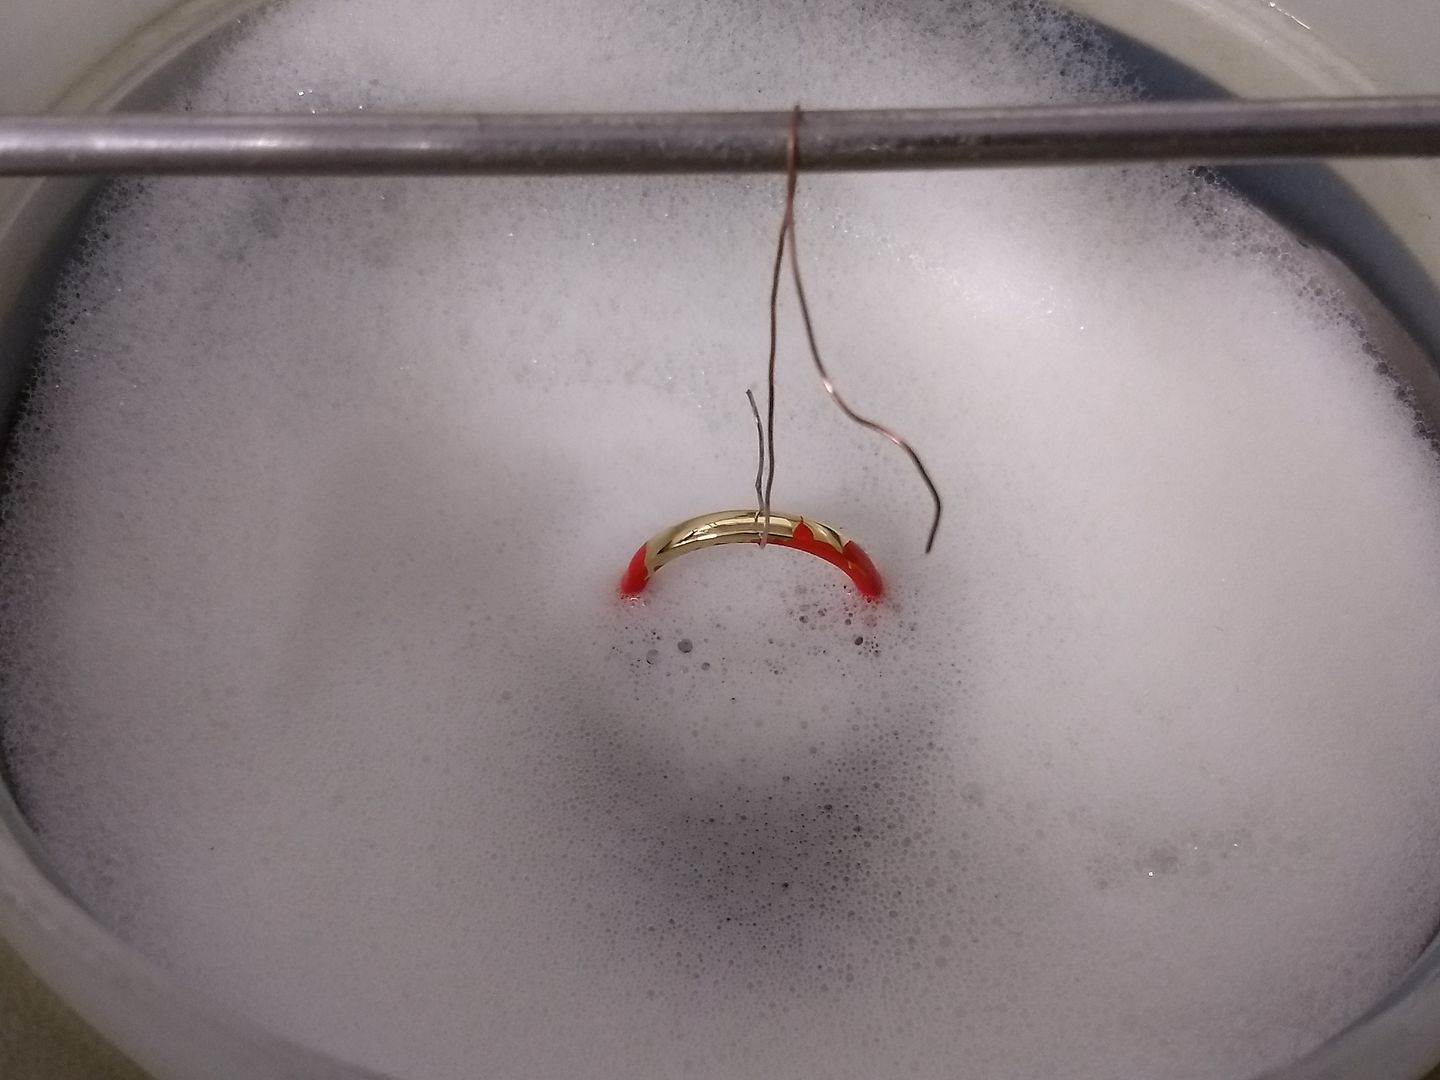
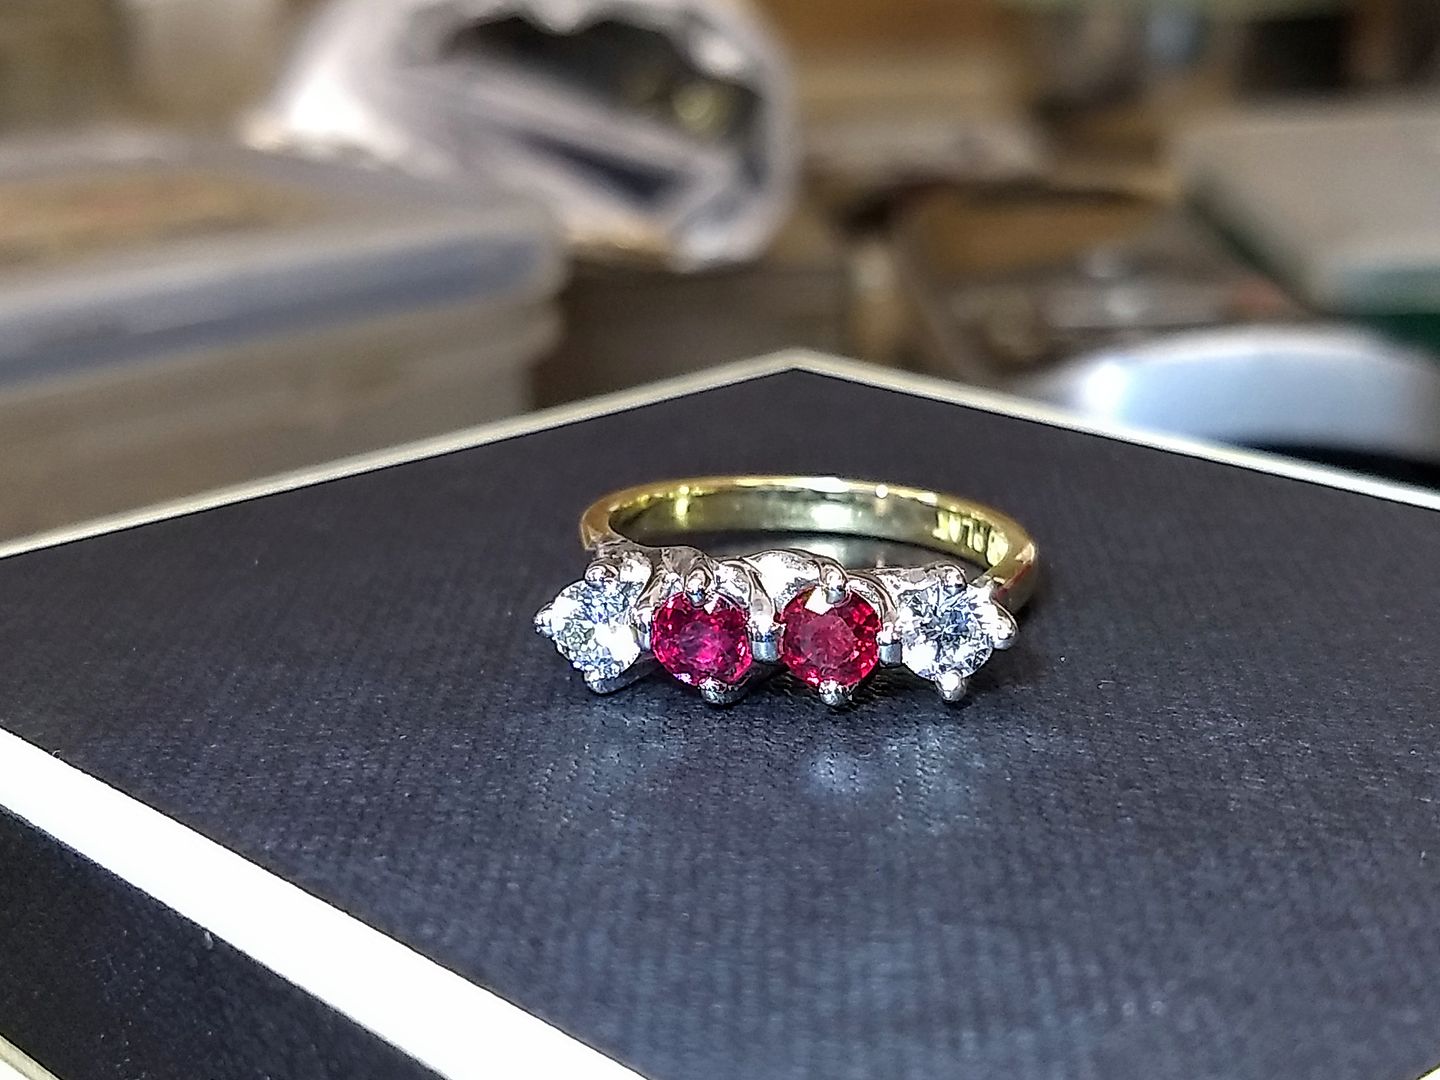
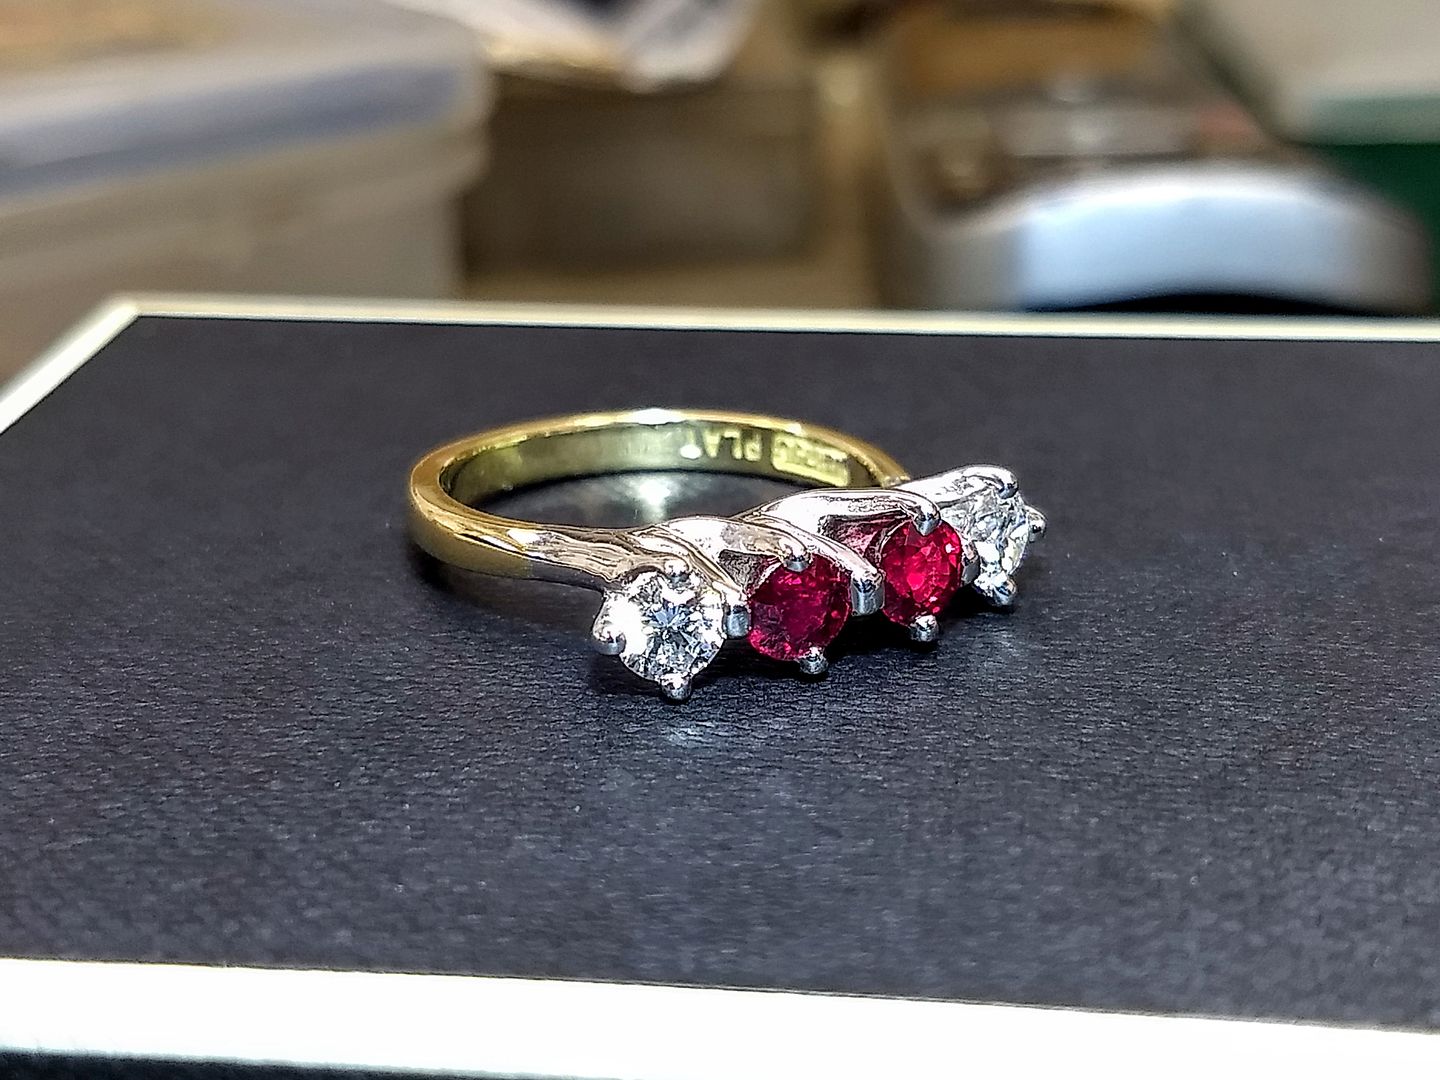
Even though it's a platinum head I still rhodium the metal to give it that last sparkle. It also hides any stains that the polishing couldn't get to.
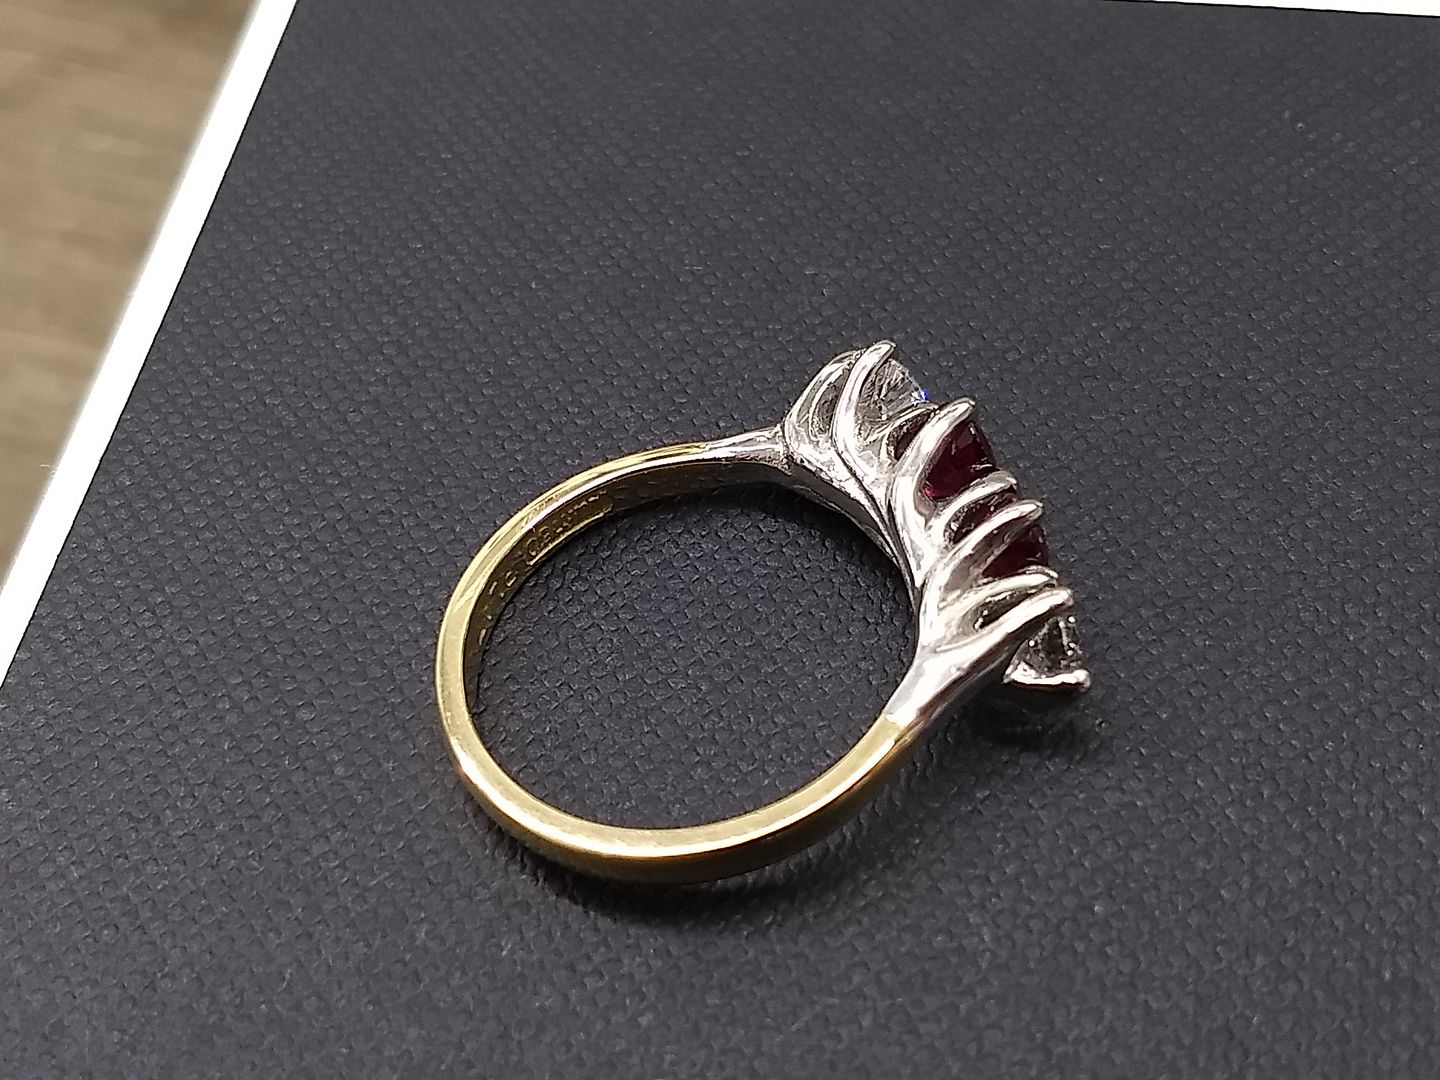
And there it is. I took some better pics on the DSLR that I have yet to upload. I'll do that this week and hopefully that will show the quality of the stones. The next job is to engrave the inside of the shank and hopefully the customer will get to see the ring in person next week. Have a great day all
Sorry for the long delay in updating this thread. I've had a really busy year so far and being honest I've needed to overcome a few personal hurdles, emotionally and physically. Nothing major, I've just been a bit tired and off the boil. Anyway, the long awaited super-post has arrived and I'll try to explain as I go. There's a lot of photos so bear with me.
Back in the later part of 2018 a gentleman emailed me with the idea that he wanted a ring for his wife that could sit with another that he had commissioned some years ago. The original is a 3 stone diamond ring set in 18ct yellow gold and platinum. The twist here is the new one needs to be a 4 stone and because of the way the original is made we'll need to not just copy it, but also mirror it with an extra stone. The requirements for the stones were: pair of GIA certified D colour rounds and a matching pair of high end natural rubies. Game on (I was dreading this job actually. As far as bespoke goes, this is probably the most difficult. Platinum is a difficult material to work in this way and an expensive metal if you cock up).
The original item:

The first step is to make the inner section of the setting. It's a very interesting setting in that it has a middle carcass and outer claws as well as an undersetting that shows the arms flowing together. We start with some platinum wire and lots of medium solder (high enough melting temperature to be safe over time but low enough that we won't go blind heating it).

There is one middle arm of the inner carcass and this is the first piece of metal we bend. Remember, like all my jobs I measure very little. It's all by eye and experience / judgement.

With the inner bar done I cut some more sections of wire.

Pinned together I begin the soldering process. :/


The first inner claw is then bent to shape:

And is soldered in position to the middle bar / wire:

And then the next one:

Which creates what is starting to look like a stages head:

From here we add a few more wires to the carcass and slowly build the picture of what we are aiming for:


With all the wires in roughly the right place I add solder to fill gaps and generally bulk up the frame. With platinum being a soft metal I can still bend it a bit with the solder applied so I can still make minor adjustments from this point. I can't move anything though and bigger changes mean either cutting sections out or starting again:

After a bit of filing and soldering the centre carcass is taking shape and will soon be ready to clean up ready for the outer claws:


I cut some more wire and grab some more solder. More wire is also rolled as I need it:


Being careful not to upset the solder already in the setting I start to add the outer claws. They are bent first and then tacked in place:

One side done:

And then the other:


At this point the aim is to shape the setting to match the original. As you may have guessed, the customer has provided us with a silver sample to work from so we know the scale and layout. I use files and grinding tools to shape and trim the wires I have soldered in place:


Another twist is that the customer wants the rings to interlock. They can never sit perfect because of the positioning of the shank but I have made the setting so that they sit comfortably side by side:

A little view from under the new head. You can see it now starting to come together:


The head / setting is given a bit of a tidy and a check over to make sure there are no major errors:


The setting joins the shank with platinum shoulders in between. These are soldered in and filed to shape:


Another clean up after filing and it's looking like a ring component. The setting is made of something like 17 or 18 individual pieces and a whole lot of solder. The customer and I have decided that in the interests of my mental health and my eyes we should have this cast to produce a solid format so that If he decides to have another made in future we can do so without having to spend a good many hours and pounds doing it all again in wire. Before i get it off to our casting company (platinum casting is something we don't do in house) I attach a yellow shank so the customer can see what it might look like at the end.


Here are all the elements in the equation.

The cast came back after a couple of weeks and we can now get on with the rest of the build and setting the stones:

Original head and a nice lump of 18ct yellow gold:

The 18ct wire is rolled down to make the material for the shank, which is stamped to show the materials used (18ct is 750) :


The wire is cut to length and turned to the correct shape:

And then soldered on and sized to fit:

The ring is now a mount
It's cleaned up and I prepare myself to set the stones:


The rubies go in first so I know how much room I have to play with and to set the heights. The inner claws are notched first and the rubies dropped in. The tops of the inner claws are then pressed before the outer claws get notched and pressed into position:

Diamond number one is in:

And then both:

The claws are then cut to length and adjusted for position:

Some gentle filing takes place and the stones are 99% the way there to being set. The pictures don't do them justice but the rubies are stunning.

Polishing is the next thing to happen. Platinum is a hard metal to polish because it's so dense. Marks are incredibly hard to remove from the nooks and crannies of a setting and if polished too hard will quickly show solder lines and drag our 18ct shank at the joint. This is why most rings are cast complete and machine finished. This is hand made in every way so I take my time and exercise great care:


Even though it's a platinum head I still rhodium the metal to give it that last sparkle. It also hides any stains that the polishing couldn't get to.


And there it is. I took some better pics on the DSLR that I have yet to upload. I'll do that this week and hopefully that will show the quality of the stones. The next job is to engrave the inside of the shank and hopefully the customer will get to see the ring in person next week. Have a great day all


Edited by ecain63 on Tuesday 19th March 08:20
Edited by ecain63 on Tuesday 19th March 08:28
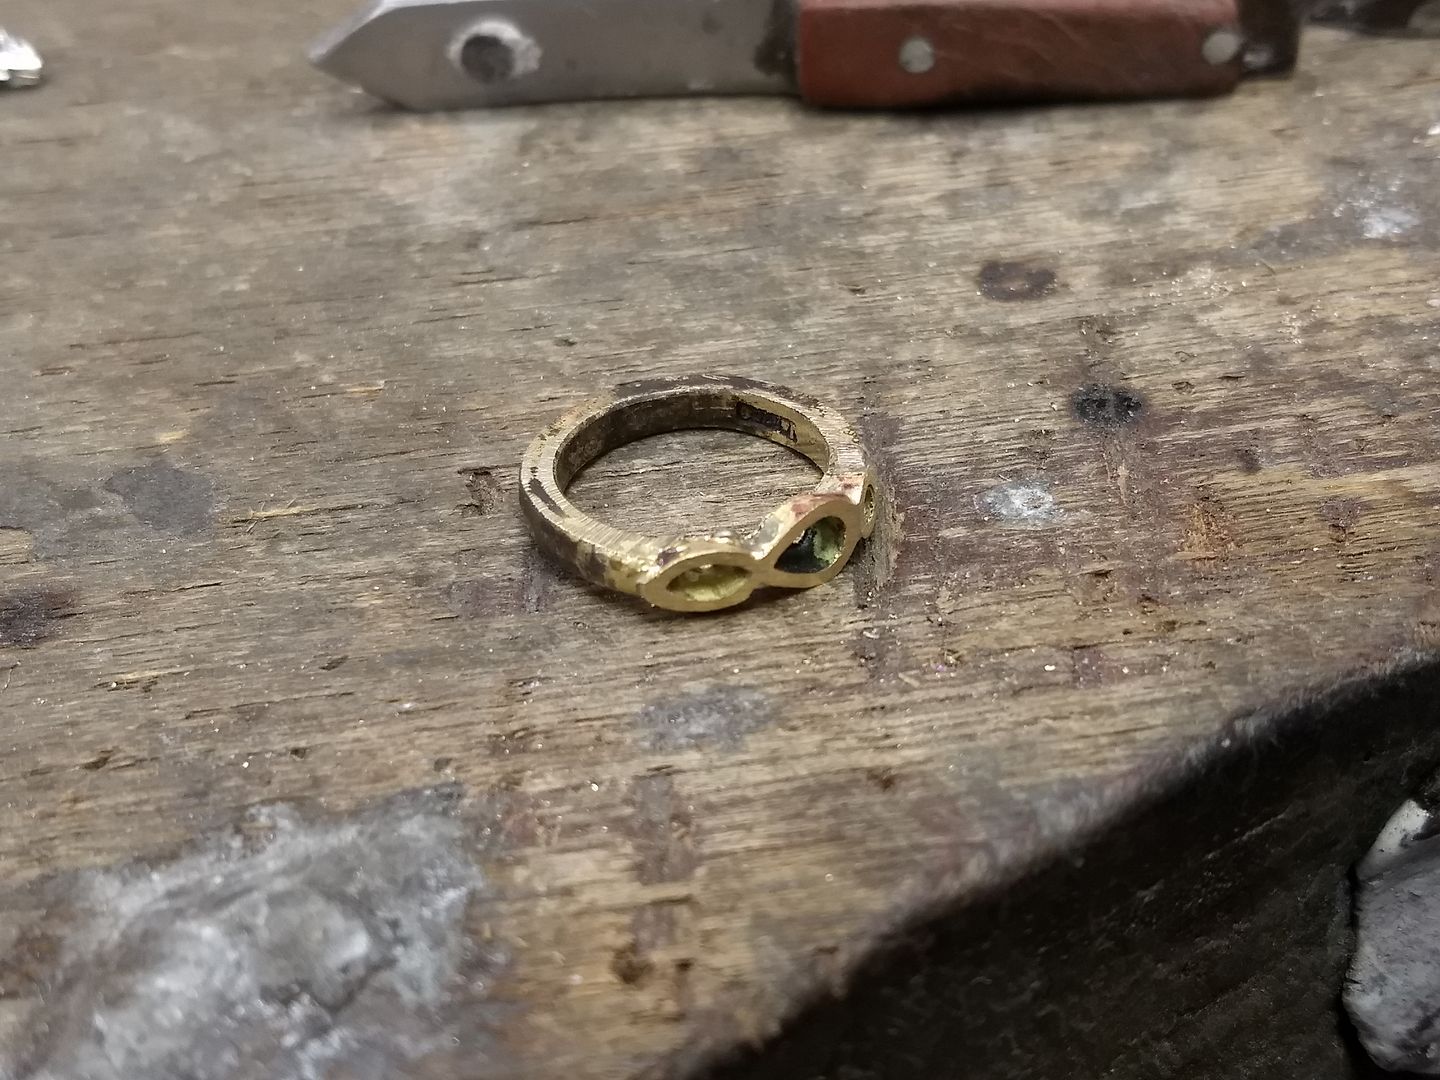
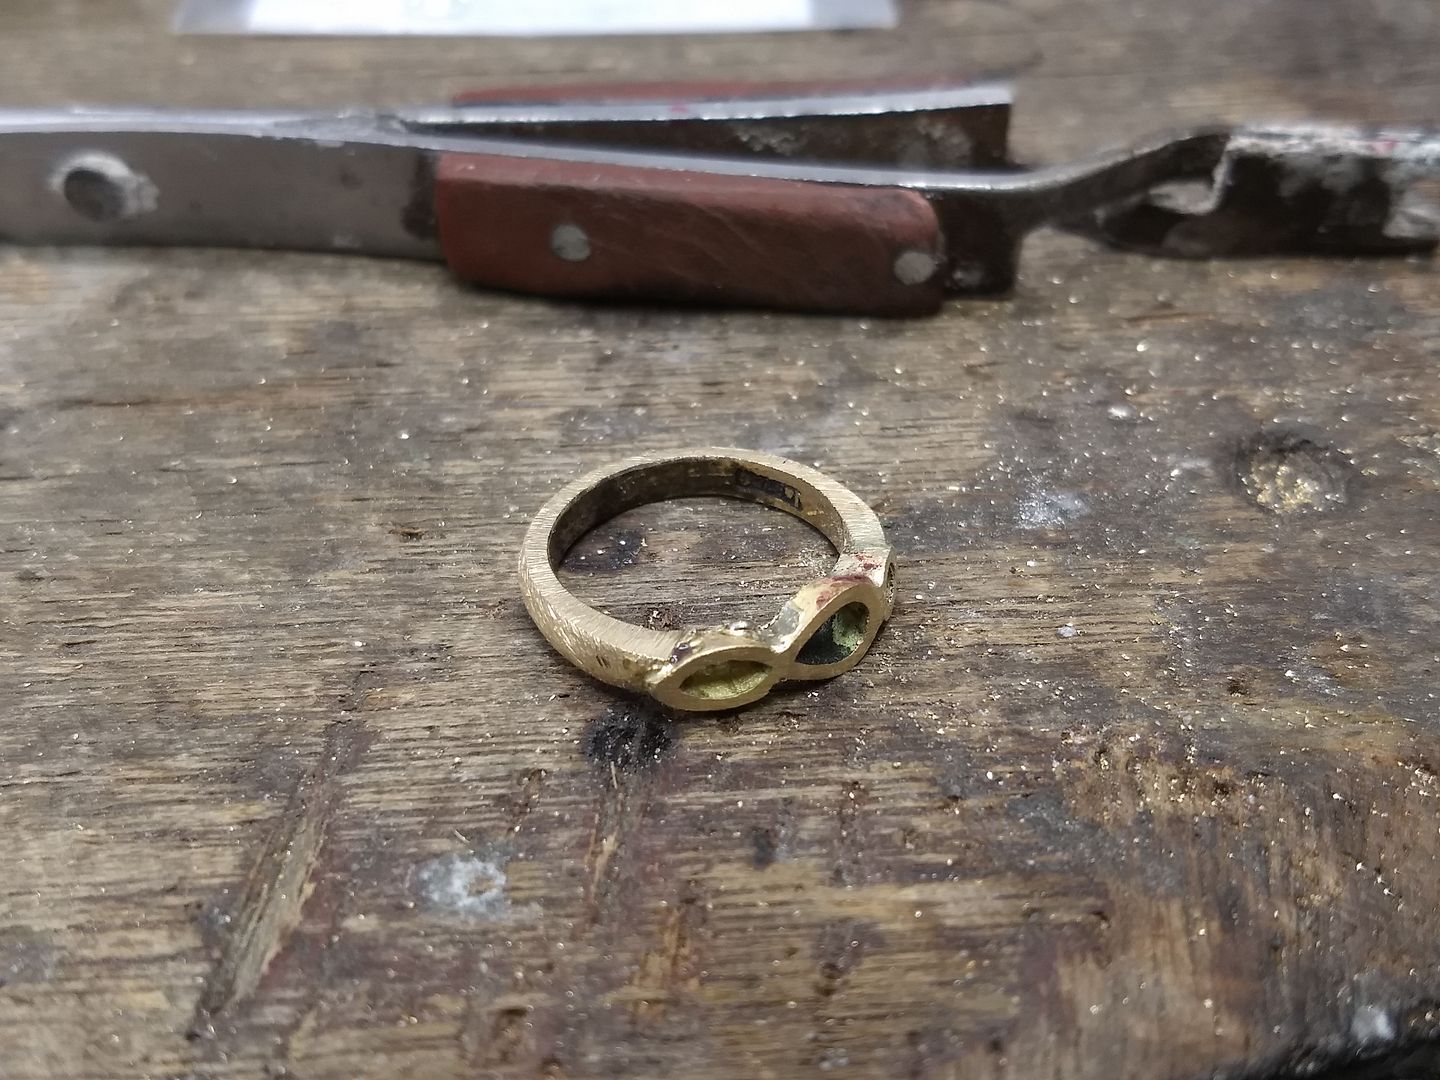
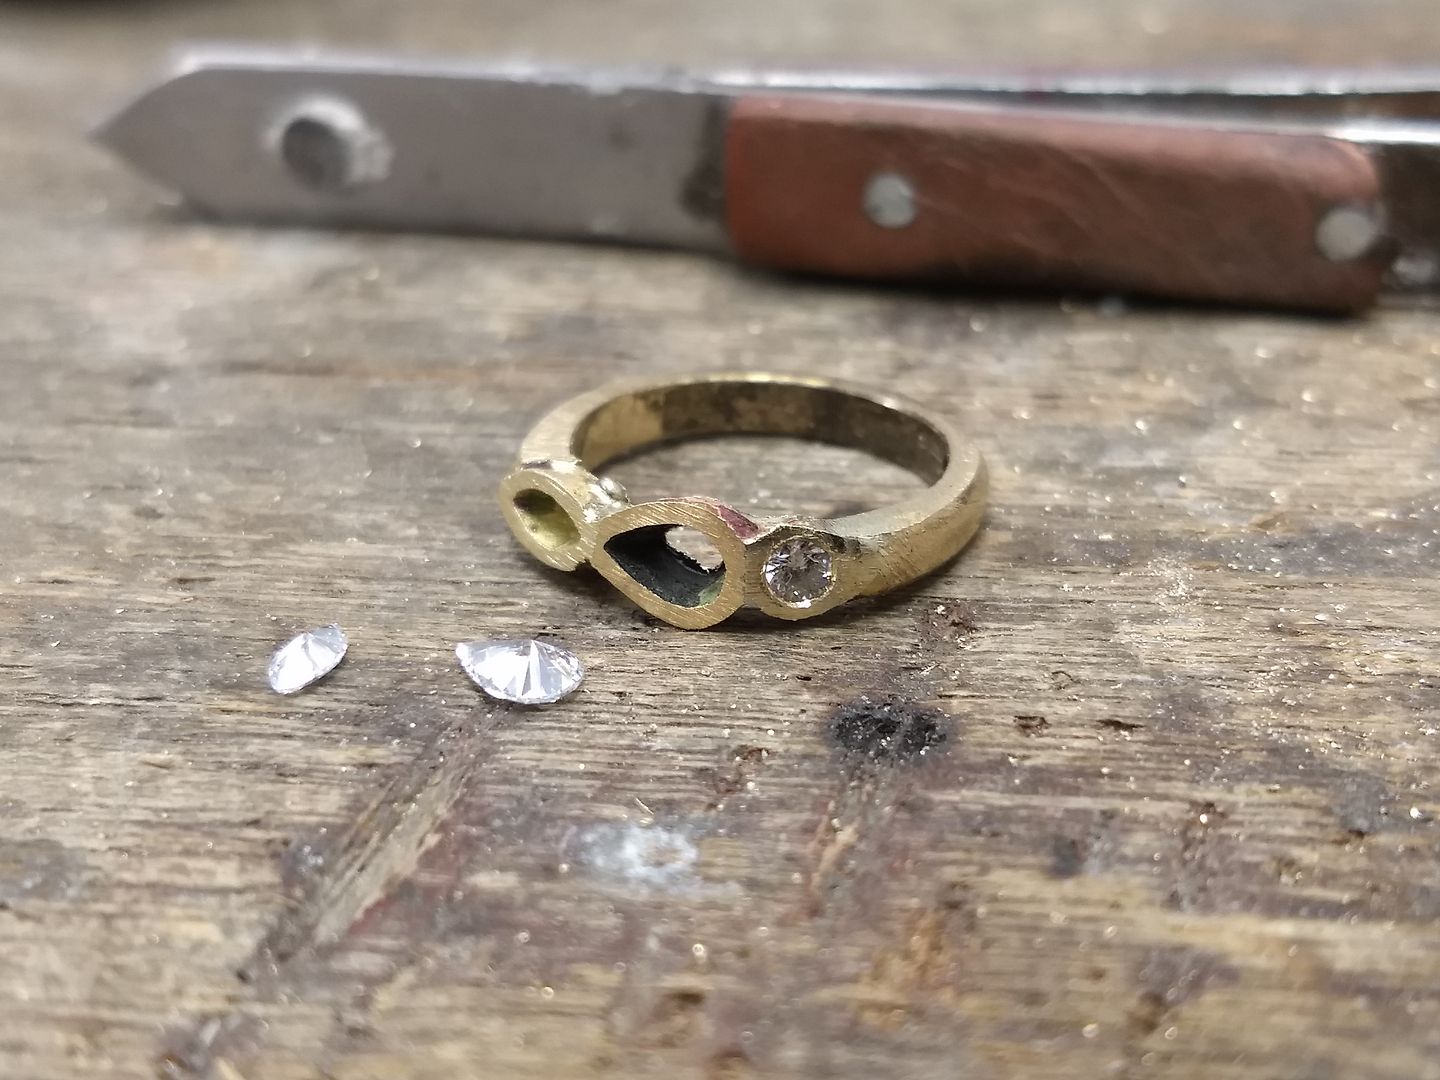
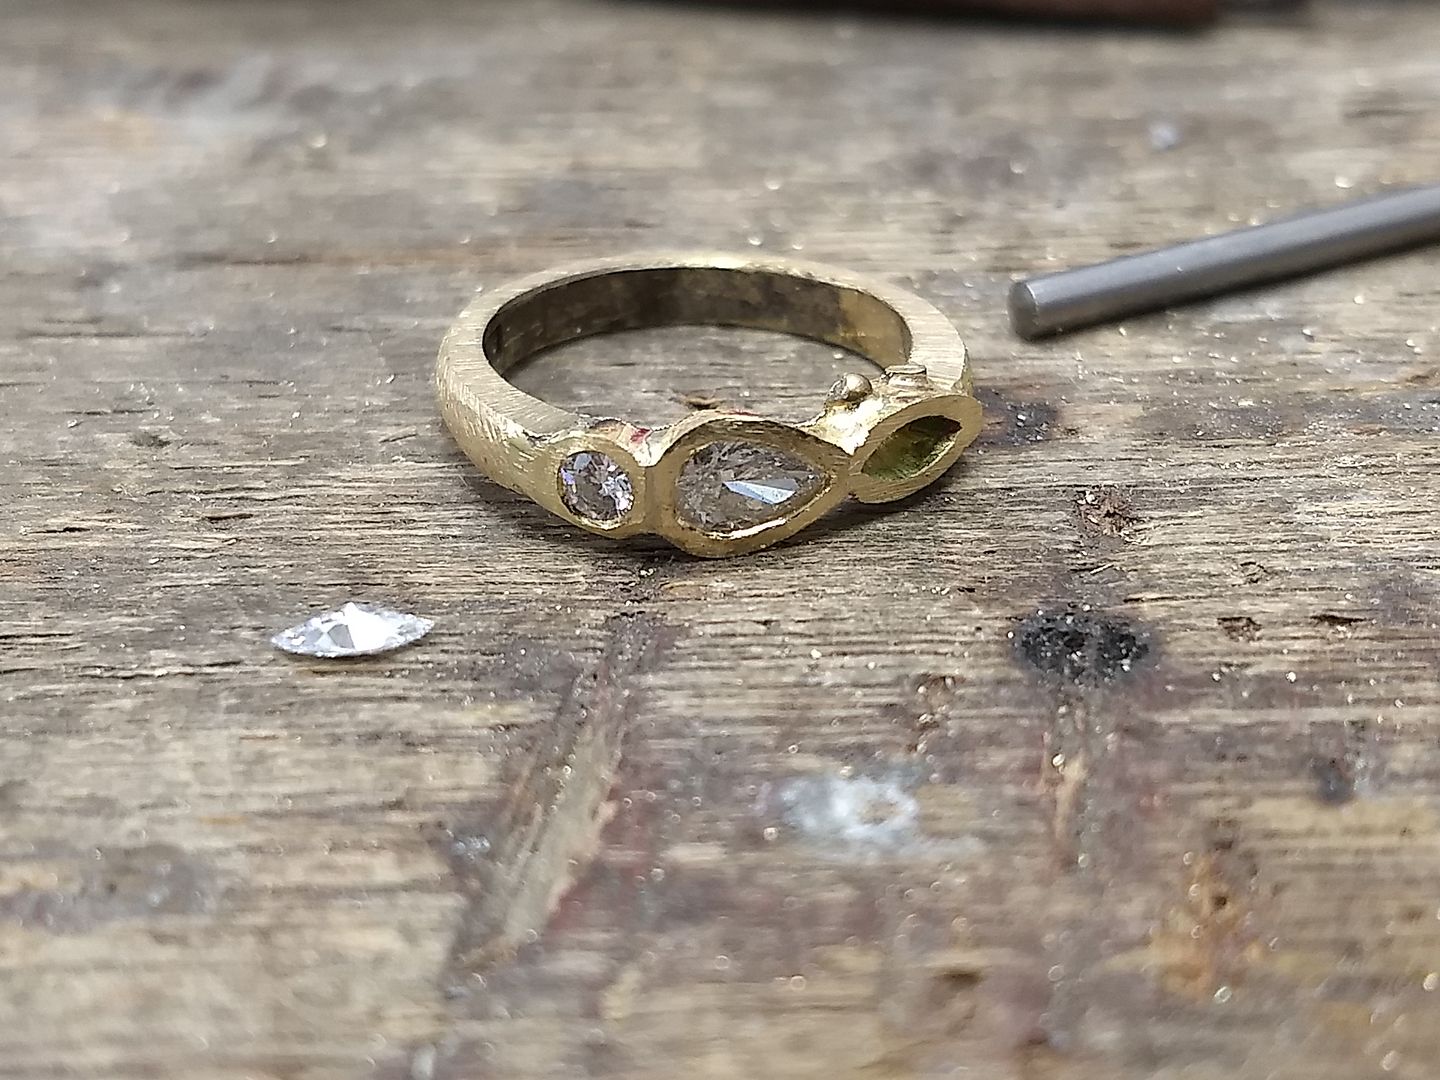
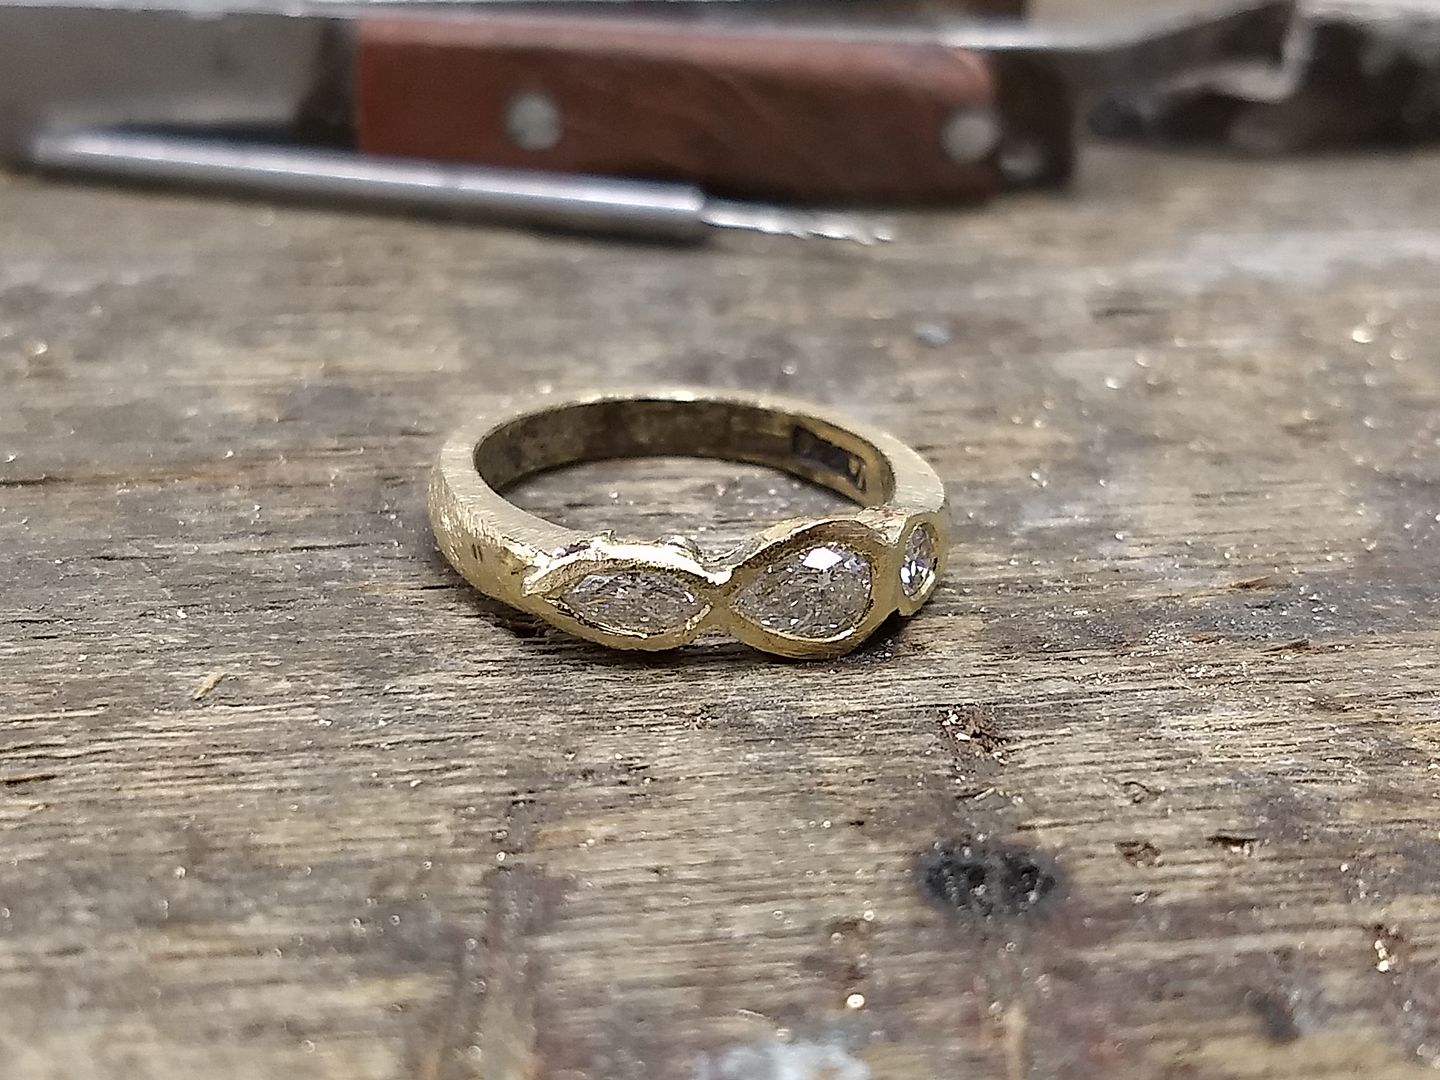
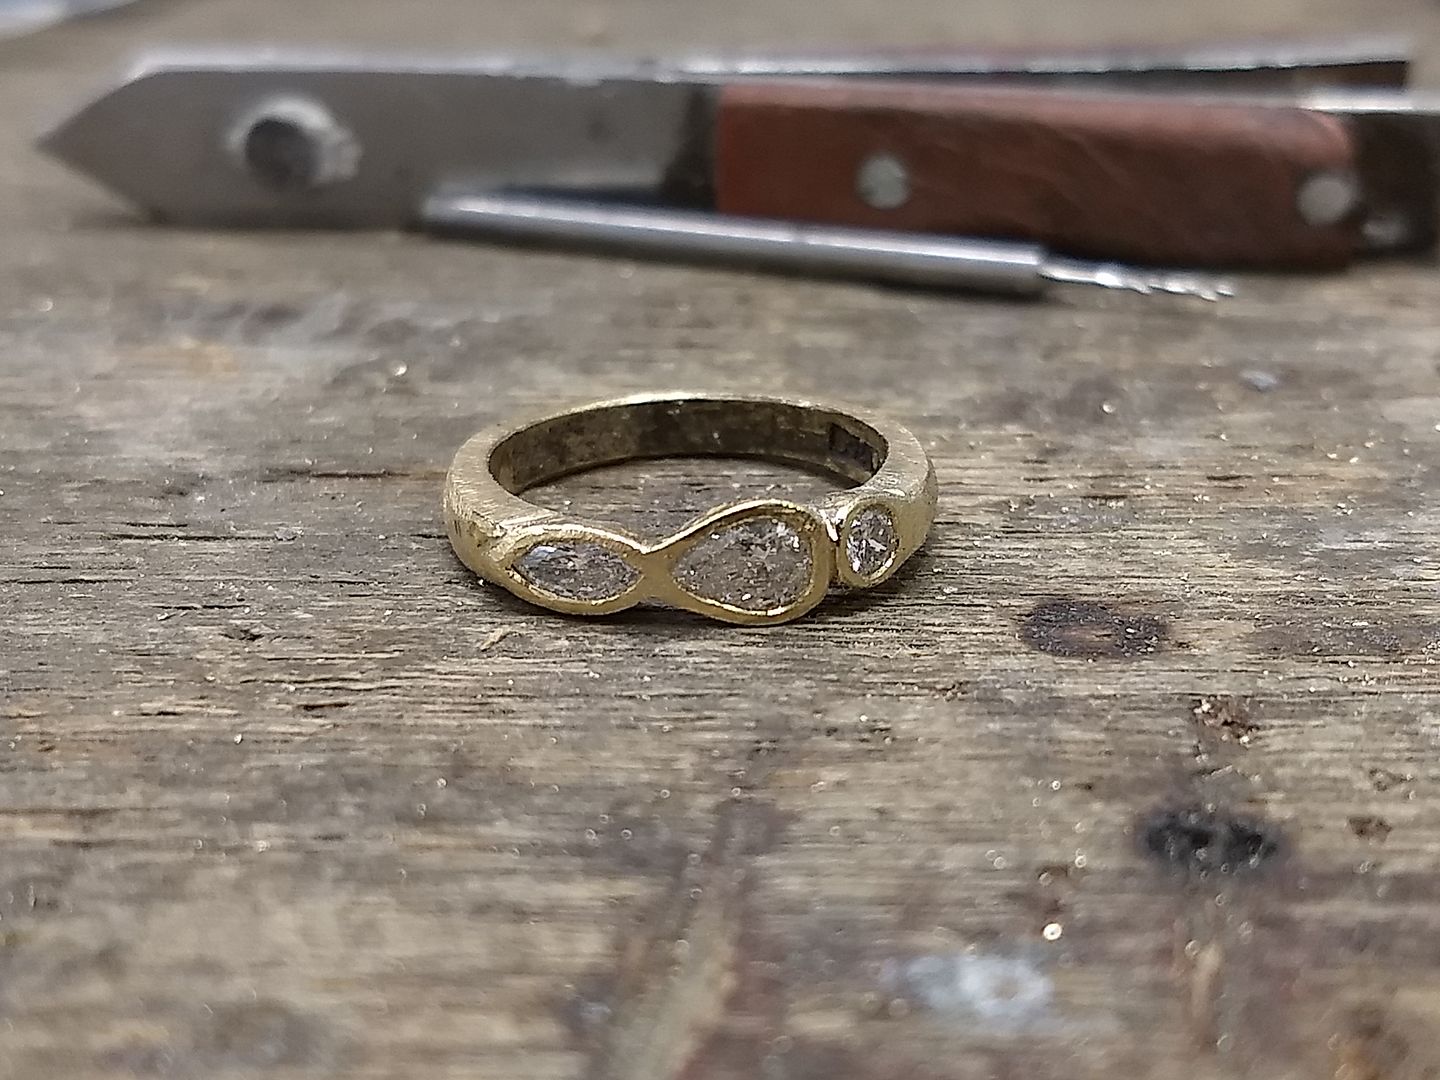
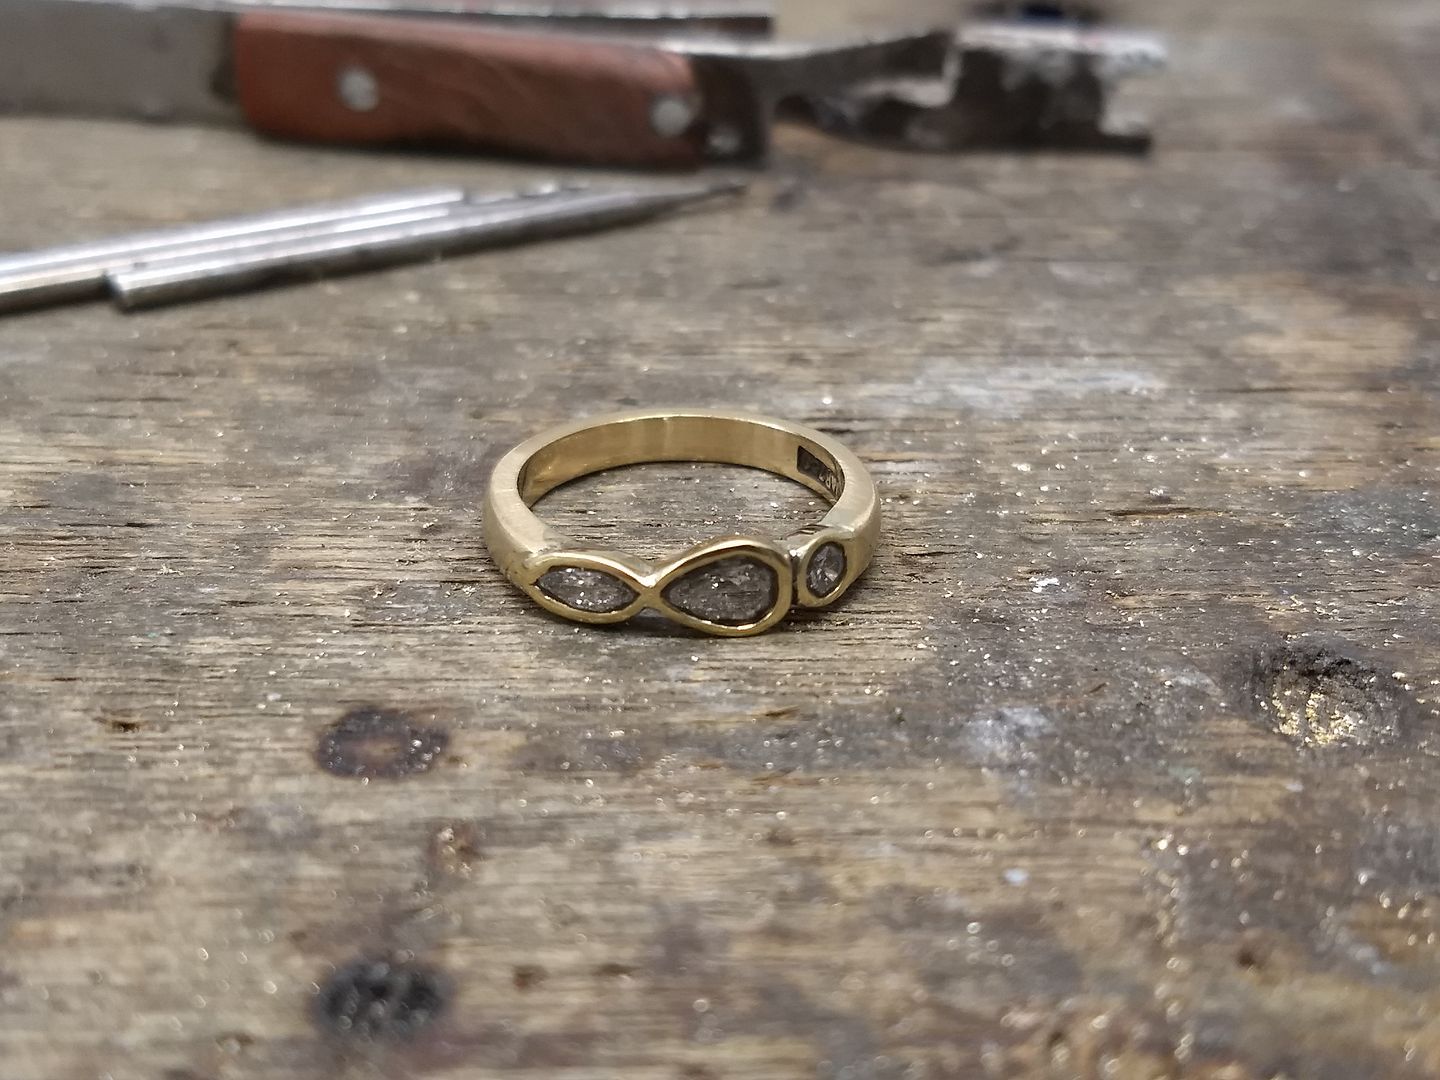
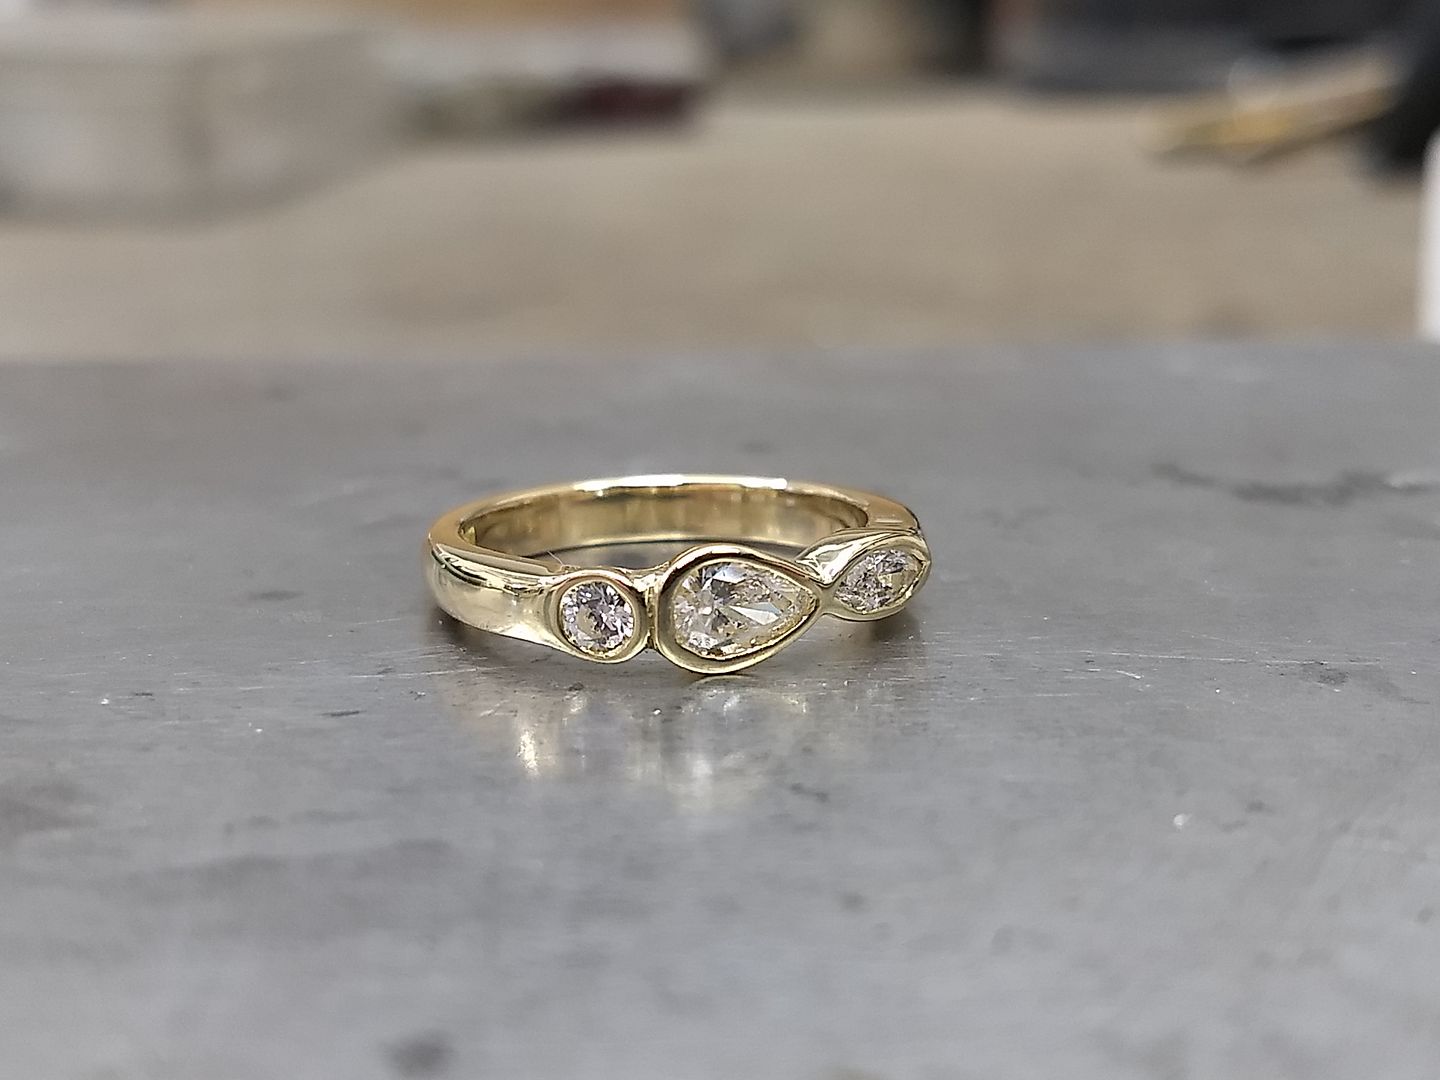
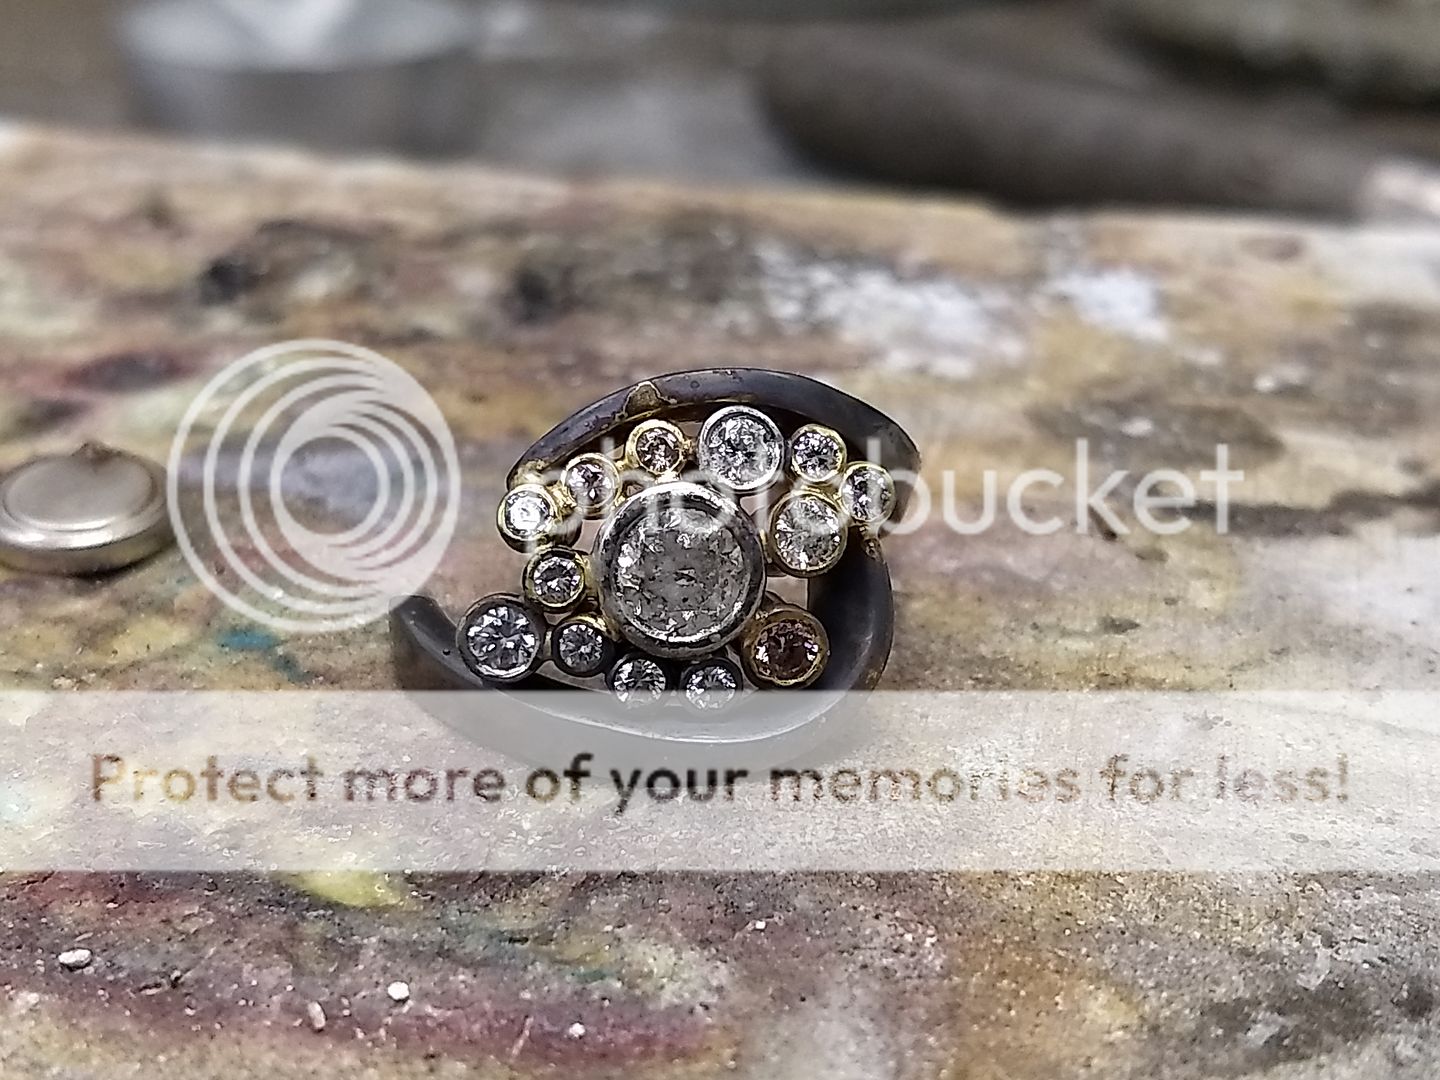
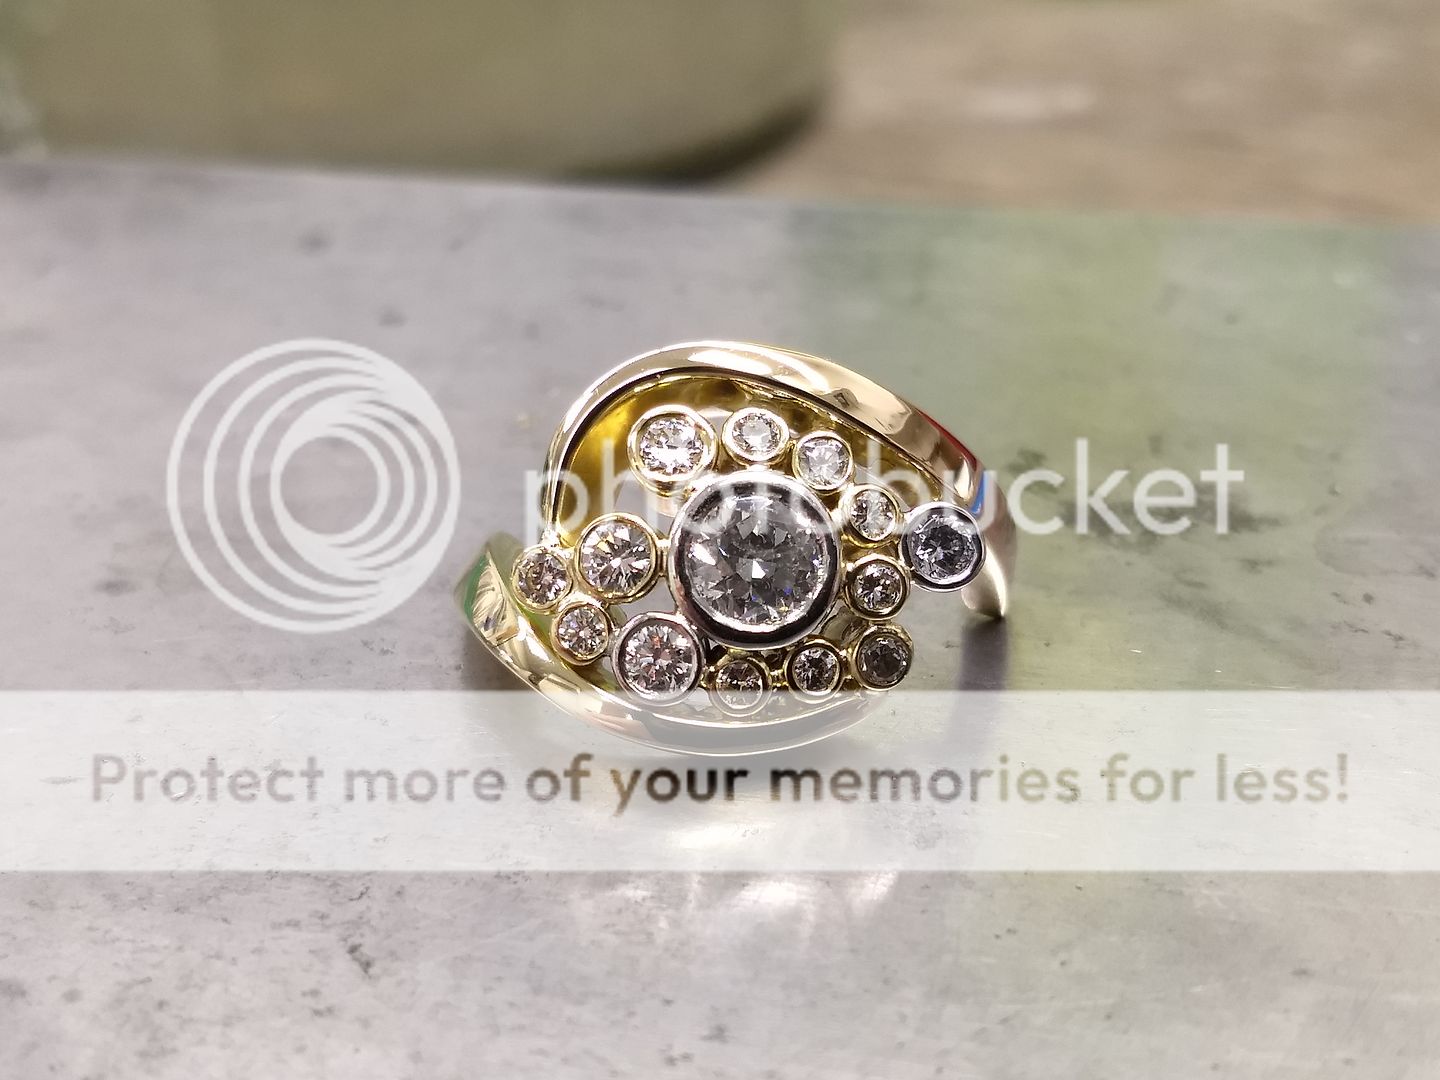
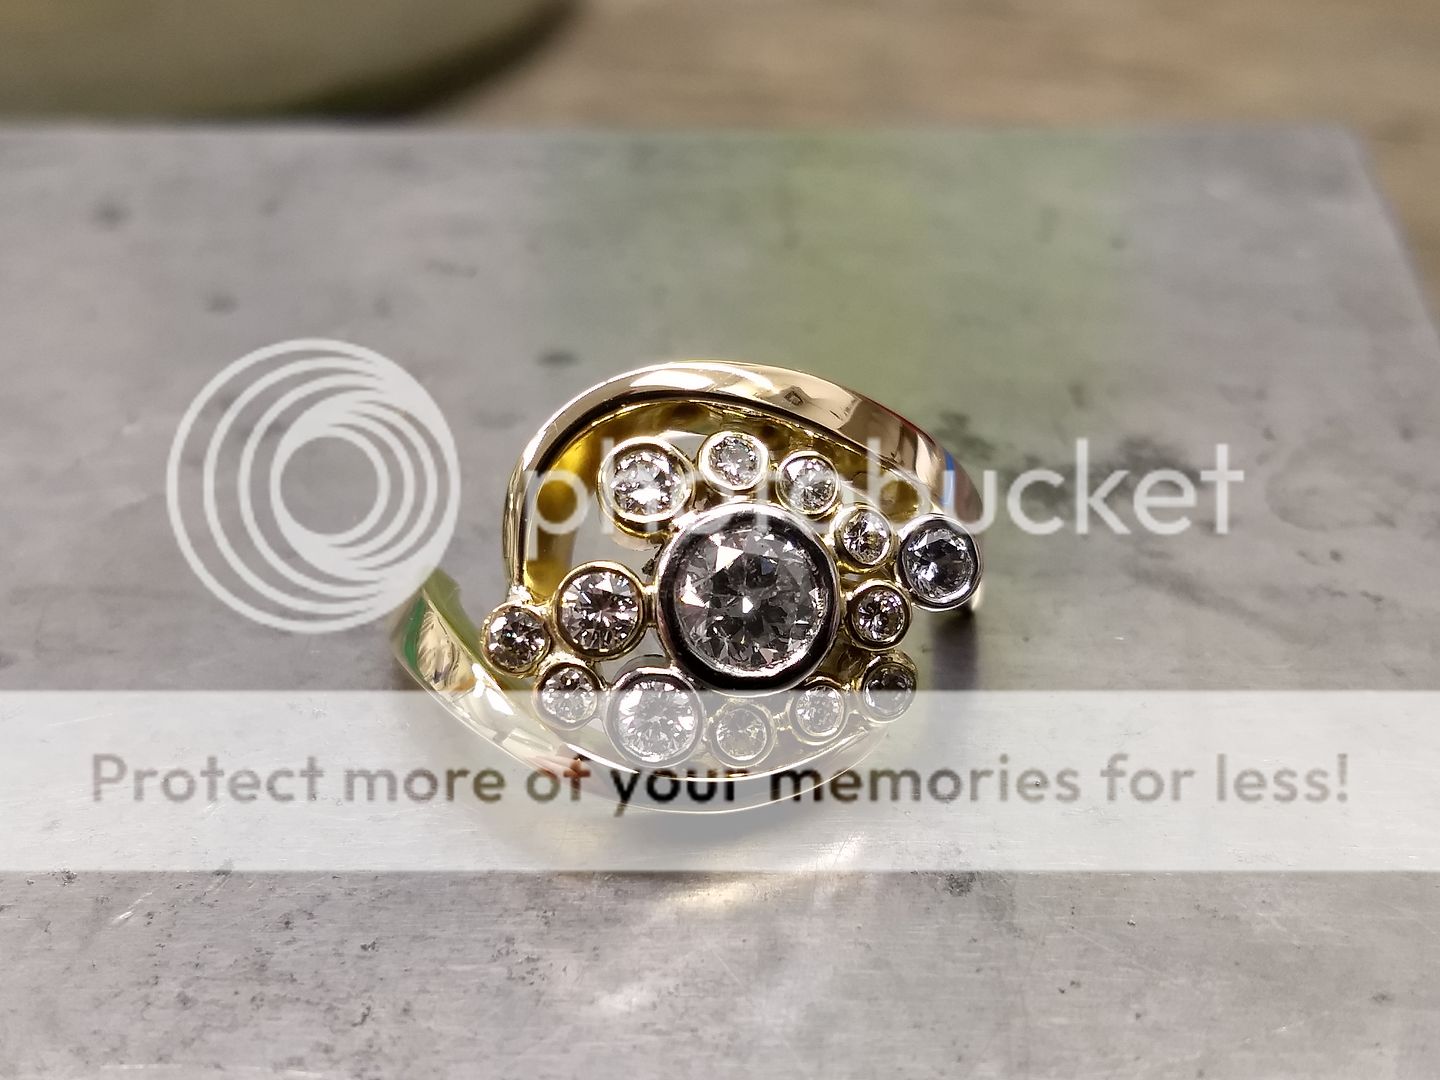
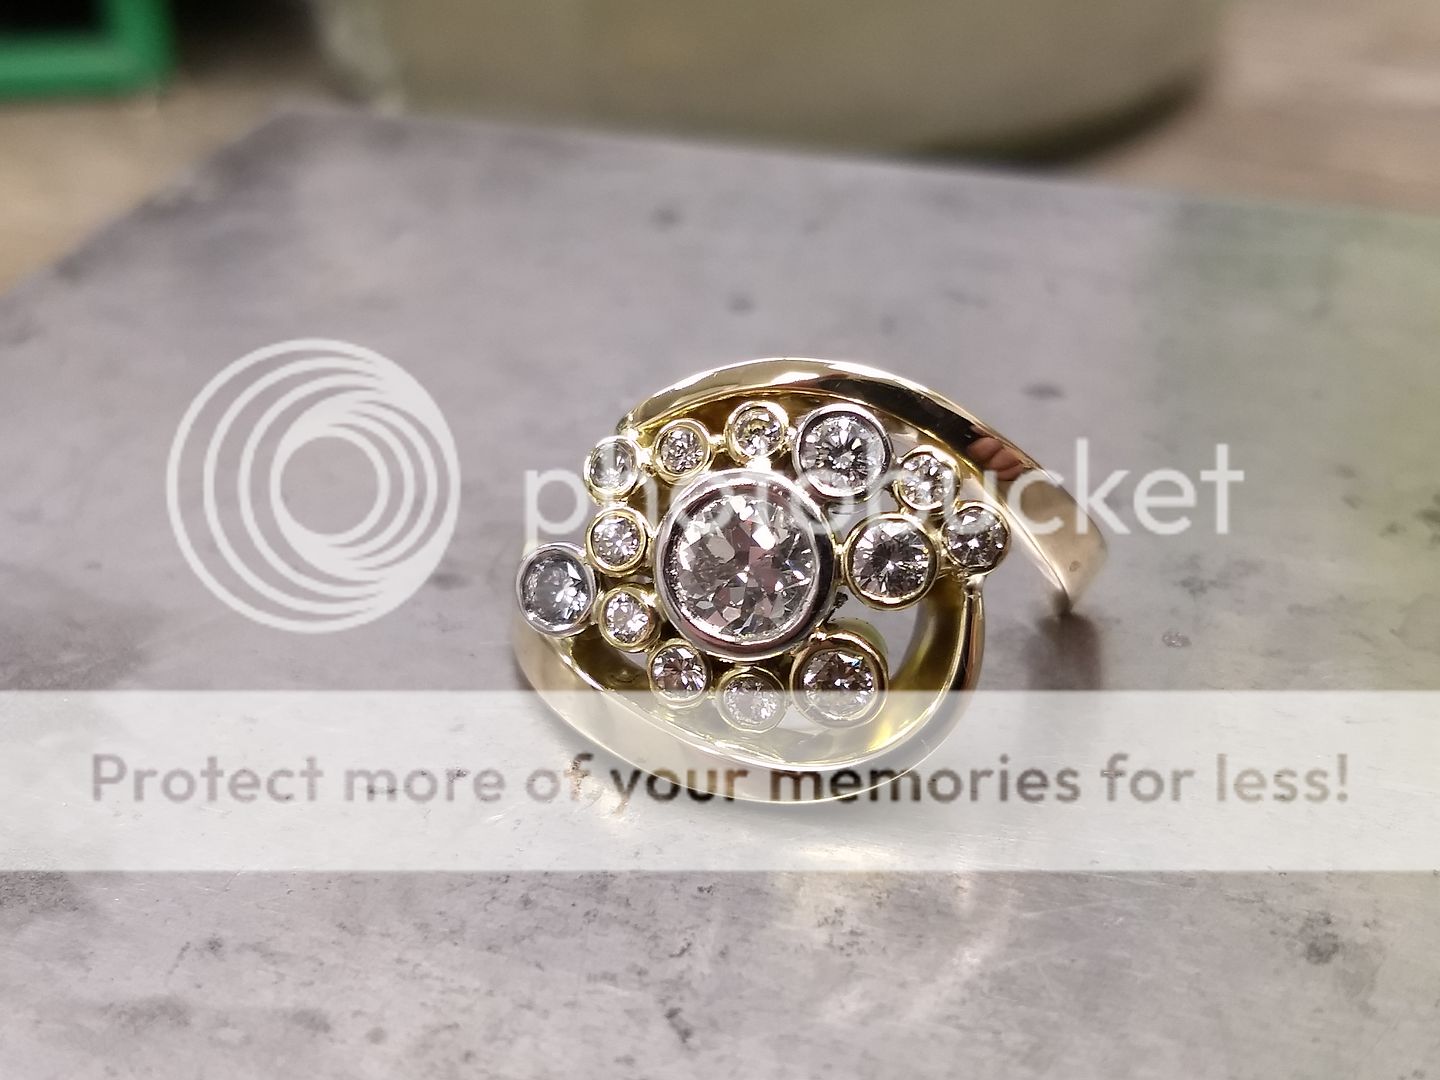
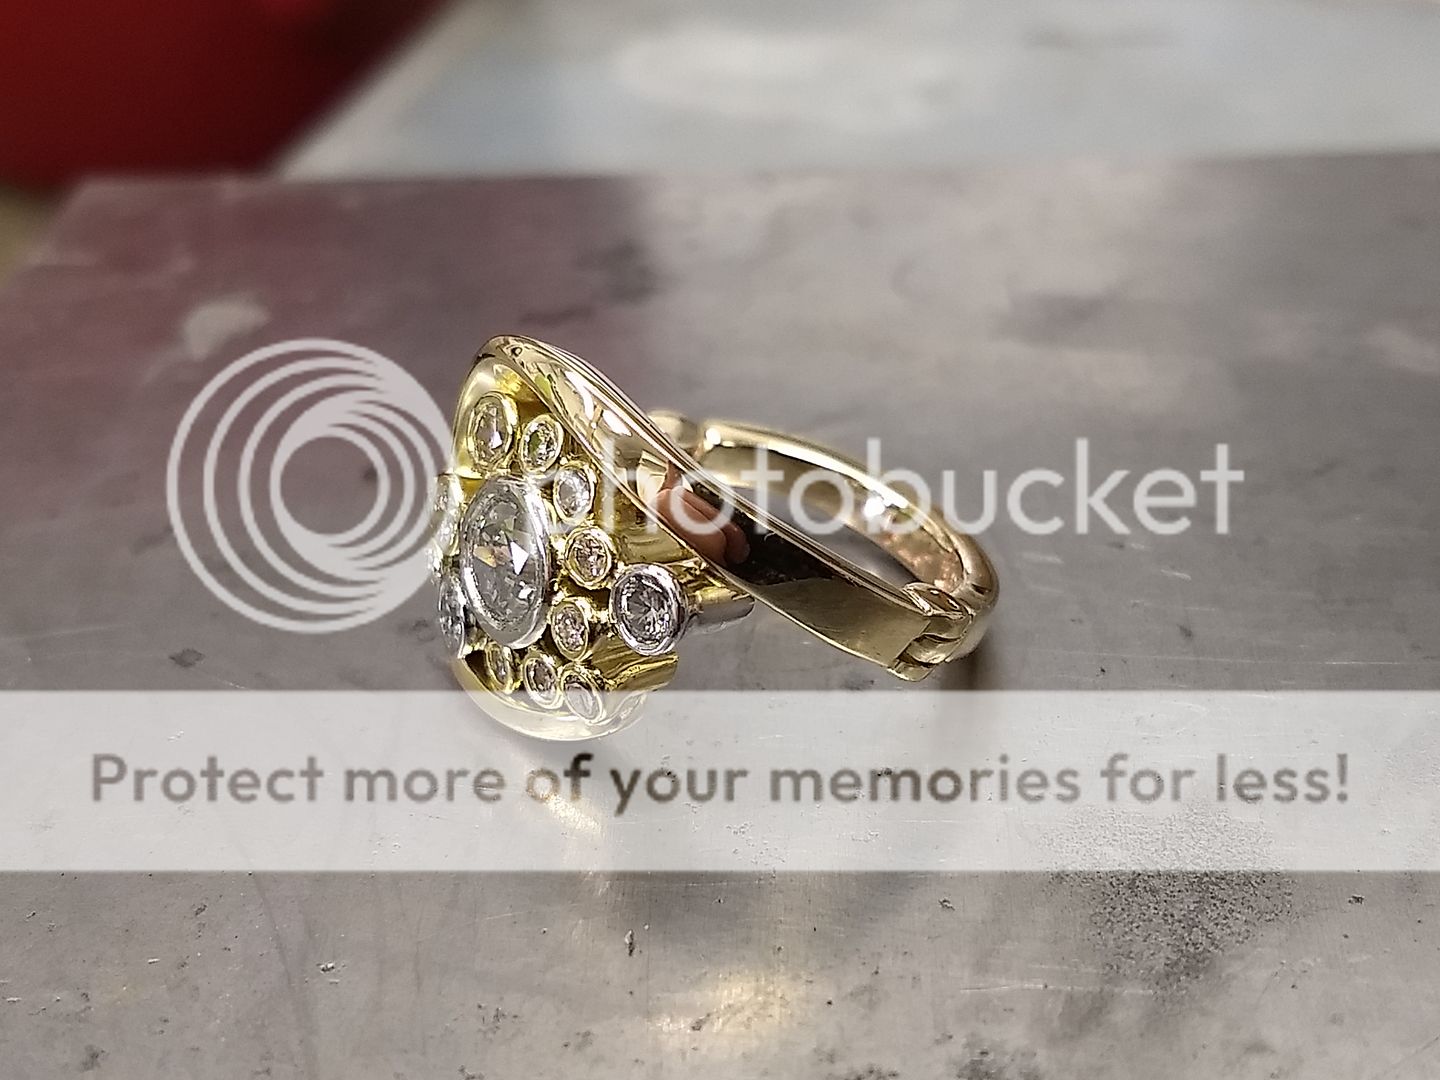
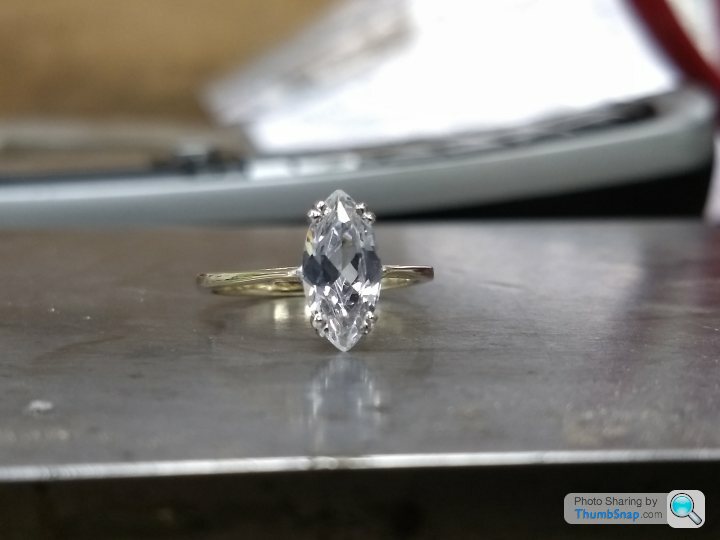
This is a job I did on Monday for one of my regulars. They supplied a brilliant cut diamond (her original engagement ring stone) and some 18ct yellow gold from the old mount. We supplied a 0.25ct pear cut diamond and an 0.11ct marquis cut diamond. The ring is constructed using cast component settings in 18ct yellow gold and a mix of 18ct yellow gold for the shank that included her own original ring.


illmonkey said:
I do love this thread. It's akin to me doing DIY, I just love seeing something being made or fixed. But these are prettier!
Tell me, do you have your fingers insured, they've got to be worth several G with all those precious metal filings embedded in them
Ha! Yeah i probably should insure them. After having cancer I'm not the most insurance friendly guy so need to wait a couple of years before I can look for cover. Tell me, do you have your fingers insured, they've got to be worth several G with all those precious metal filings embedded in them
ctrph said:
Amazing work as always. Hope you don't mind if I ask a couple of setting questions.
1. Did you use a ball or a hart burr to do the undercuts on the claws?
2. What did you use to do the bezel setting a pusher or hammer handpiece?
For the undercuts on the middle laws I used a burr. Easy way to make a nice groove. For the outers I use a hand saw to cut the grooves.1. Did you use a ball or a hart burr to do the undercuts on the claws?
2. What did you use to do the bezel setting a pusher or hammer handpiece?
On round stones you can use a hammer handpiece without too many issues and a sharp pusher for the inner edge. For stones like the pear and marquis you have to be wary of the fragile points so a pusher and hammer combo is used to avoid too many shed tears. I'm not a dedicated setter so I'm sure there are flaws in my methods, but on the flipside a setter would struggle with the metalwork so unless I farm it out i have to the do the best I can with my own abilities and skills. Always learning, it never ends.
ctrph said:
Thanks for the reply. I haven't had the opportunity to use a hammer handpiece yet but really want to, still doing all my bezel settings the old fashioned way with a pusher. I agree with the always learning and the more you learn, the more you seem to need to learn. Or maybe that is just me!
If you don't mind me asking, where are you doing your bench training? Did you find a job at a workshop or are you at college or doing courses?Is it something you want to do yourself as a business one day?
ctrph said:
I'm doing a course at the School of Jewellery in Birmingham. It is something I have wanted to learn for a while, I am a gemmologist and wanted to put my knowledge to use in a practical environment.
I have set stones in silver that I have sold on but that is just to help cover my costs for equipment etc. My main business is bespoke jewellery at the higher end of the market but not sure I will have the confidence to set the more expensive stones.
If I can lend one bit of advice about the last bit of your comment: it's not confidence you need, it's the neck to just try it and see. There's always risk, no matter your experience but the more you wing it the better you get at flying close to the edge. I have set stones in silver that I have sold on but that is just to help cover my costs for equipment etc. My main business is bespoke jewellery at the higher end of the market but not sure I will have the confidence to set the more expensive stones.
Good luck with it
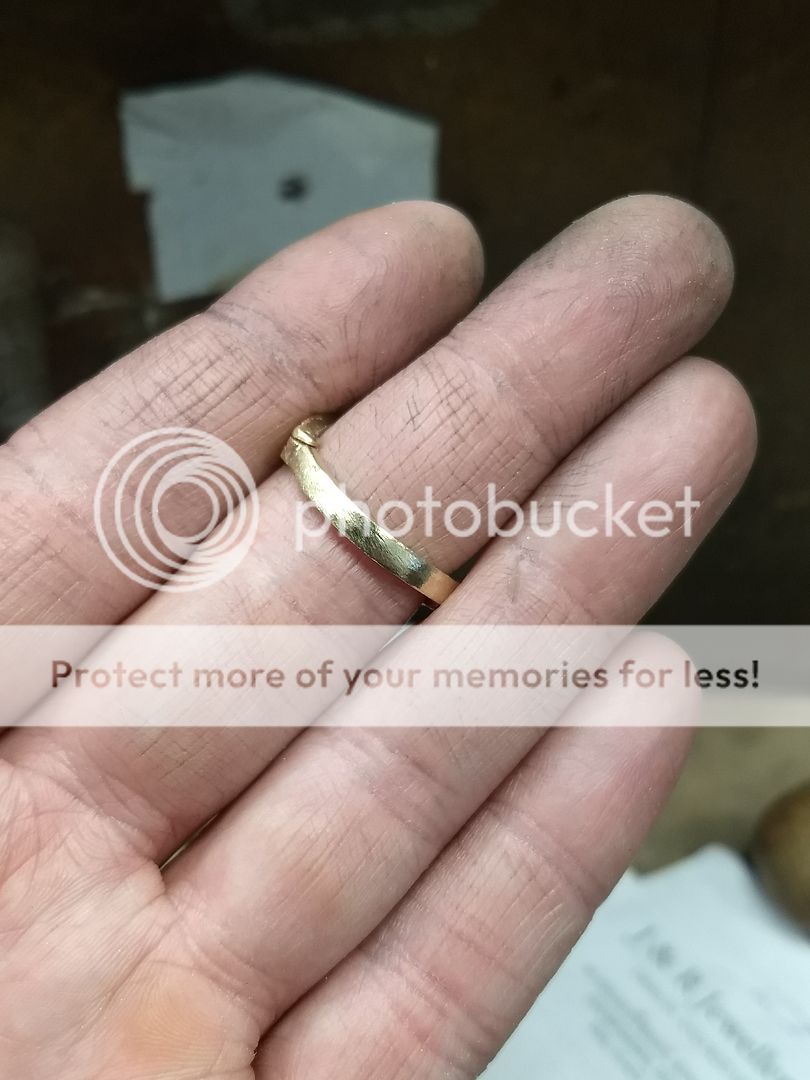
Morning
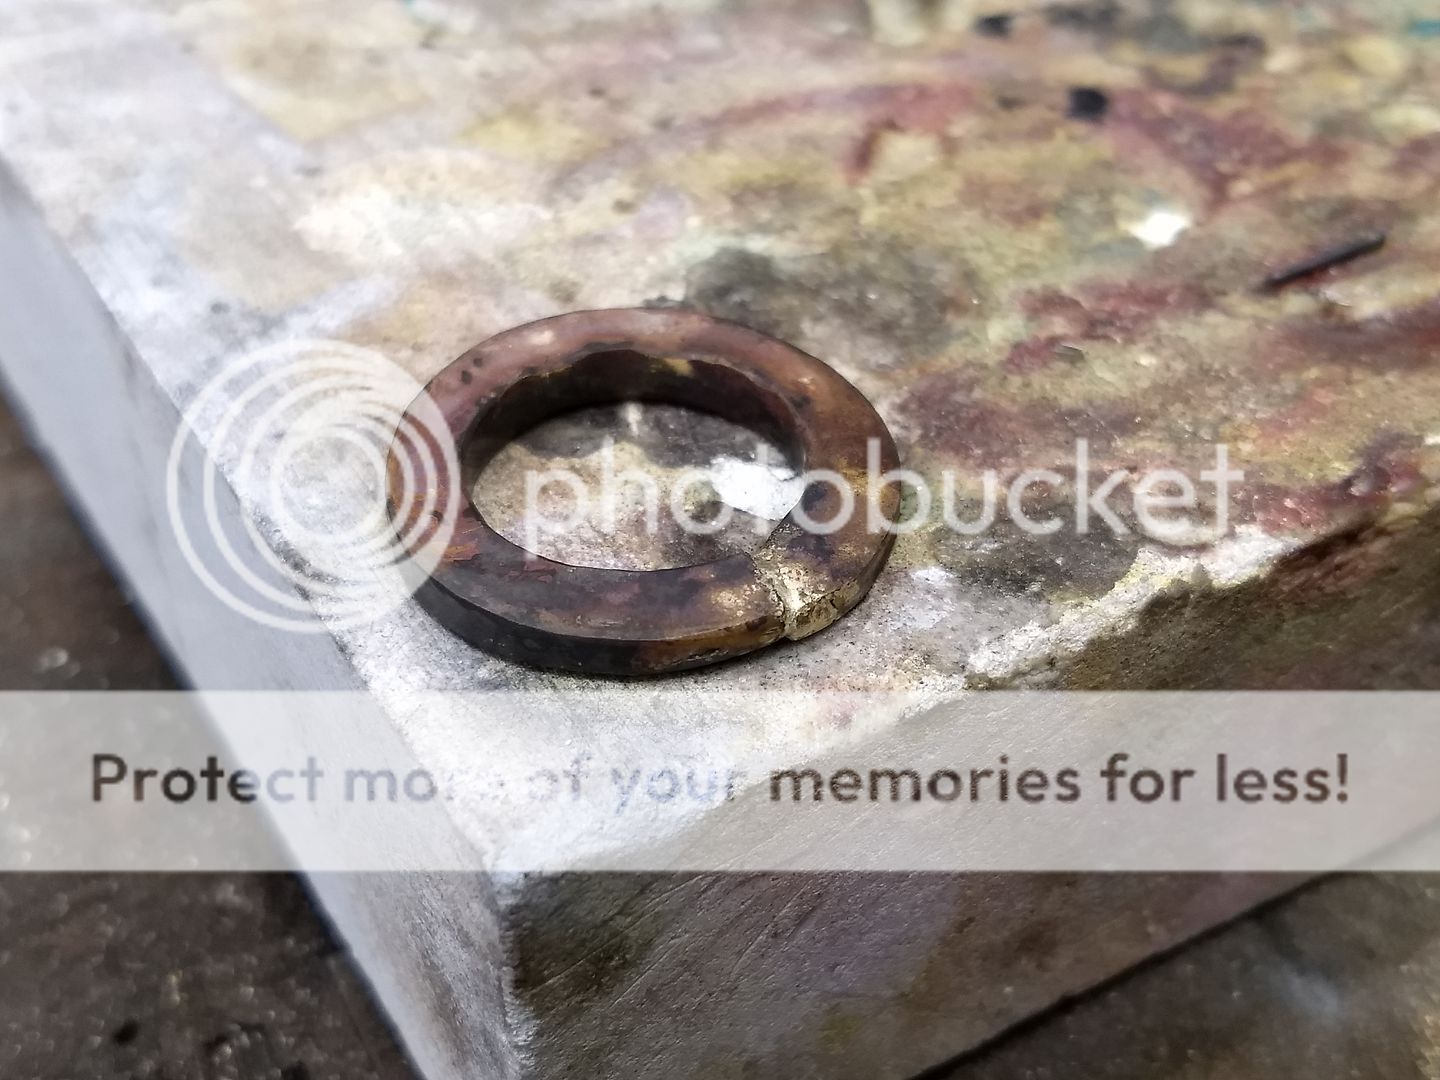
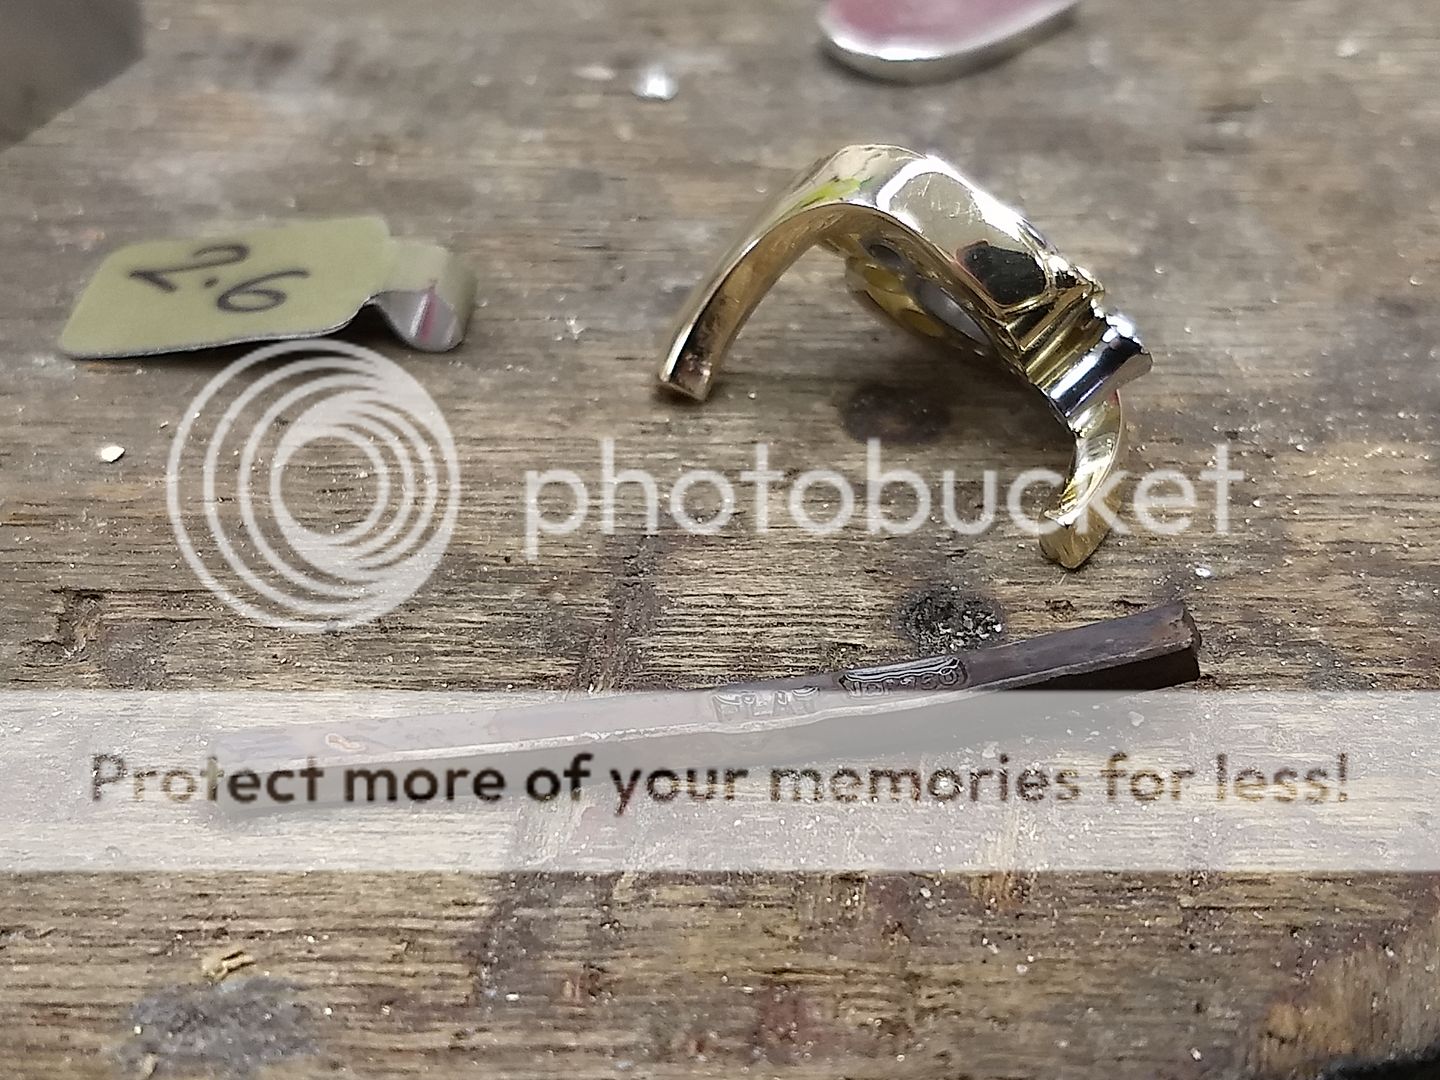
This one is quite pic heavy so apologies if your internet takes a hit. Brief outline: Customer has very arthritic knuckles and is resigned to never wearing a ring again, unless it's made so big it swings round the finger. Queue the next job for ecain63 and his dirty fingers.
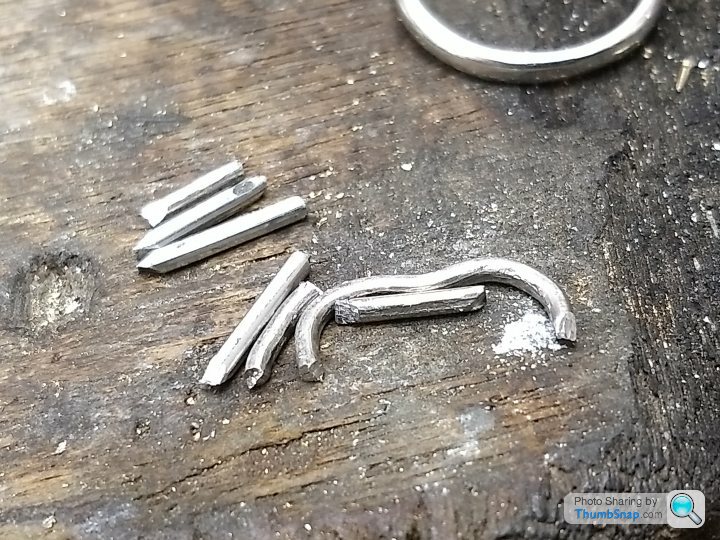
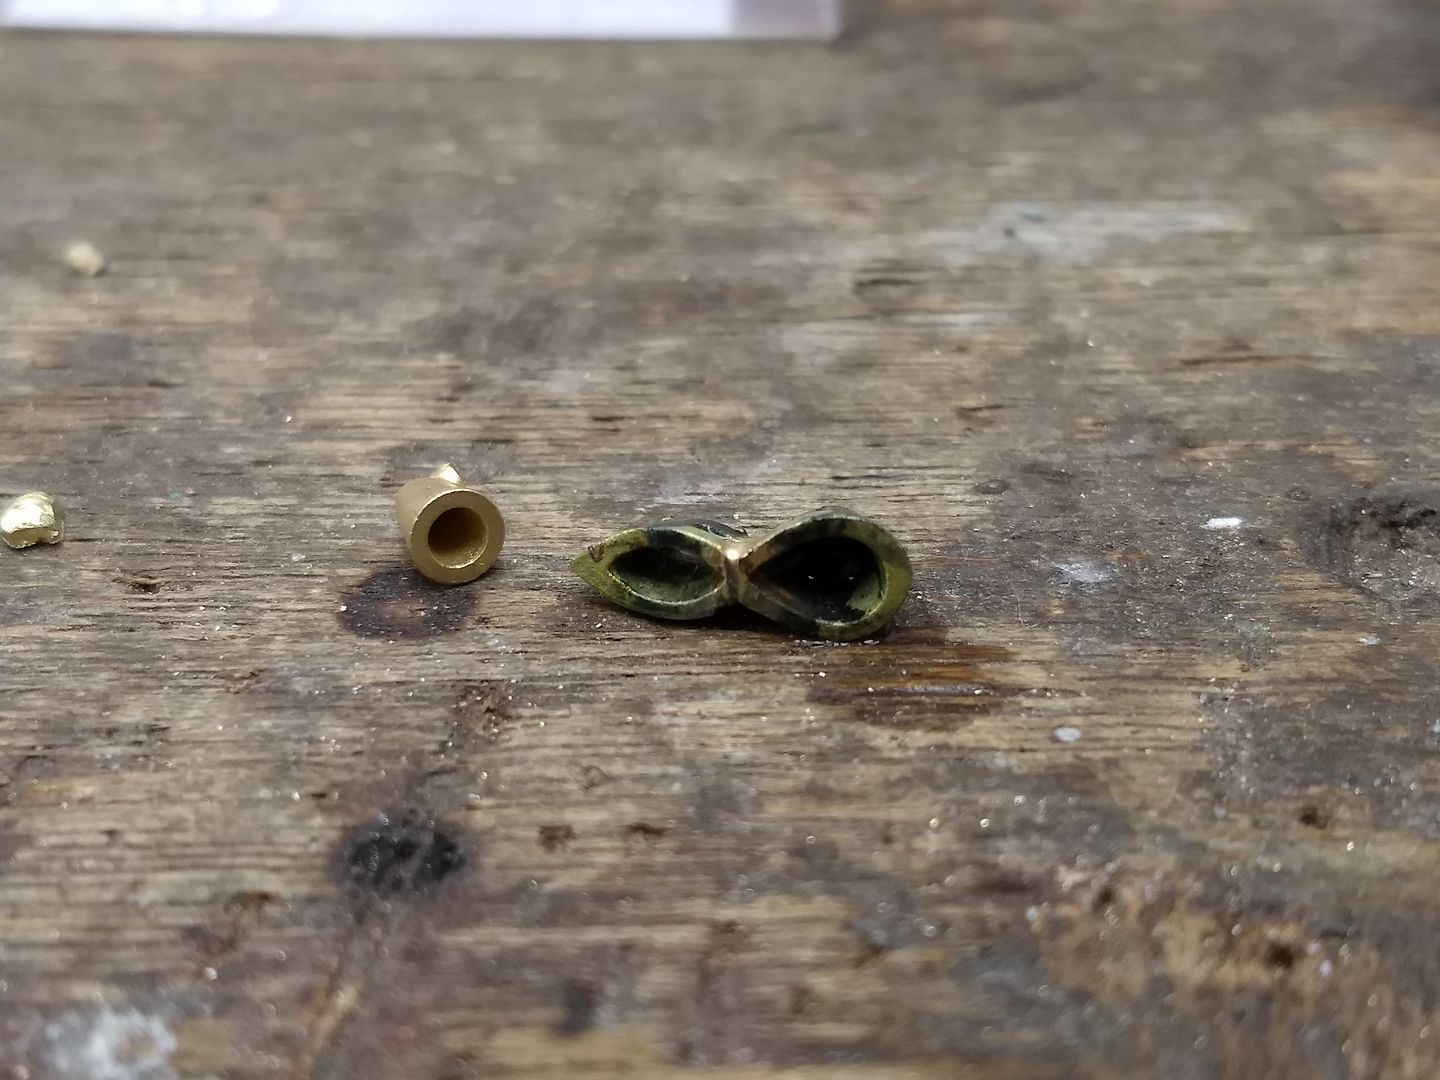
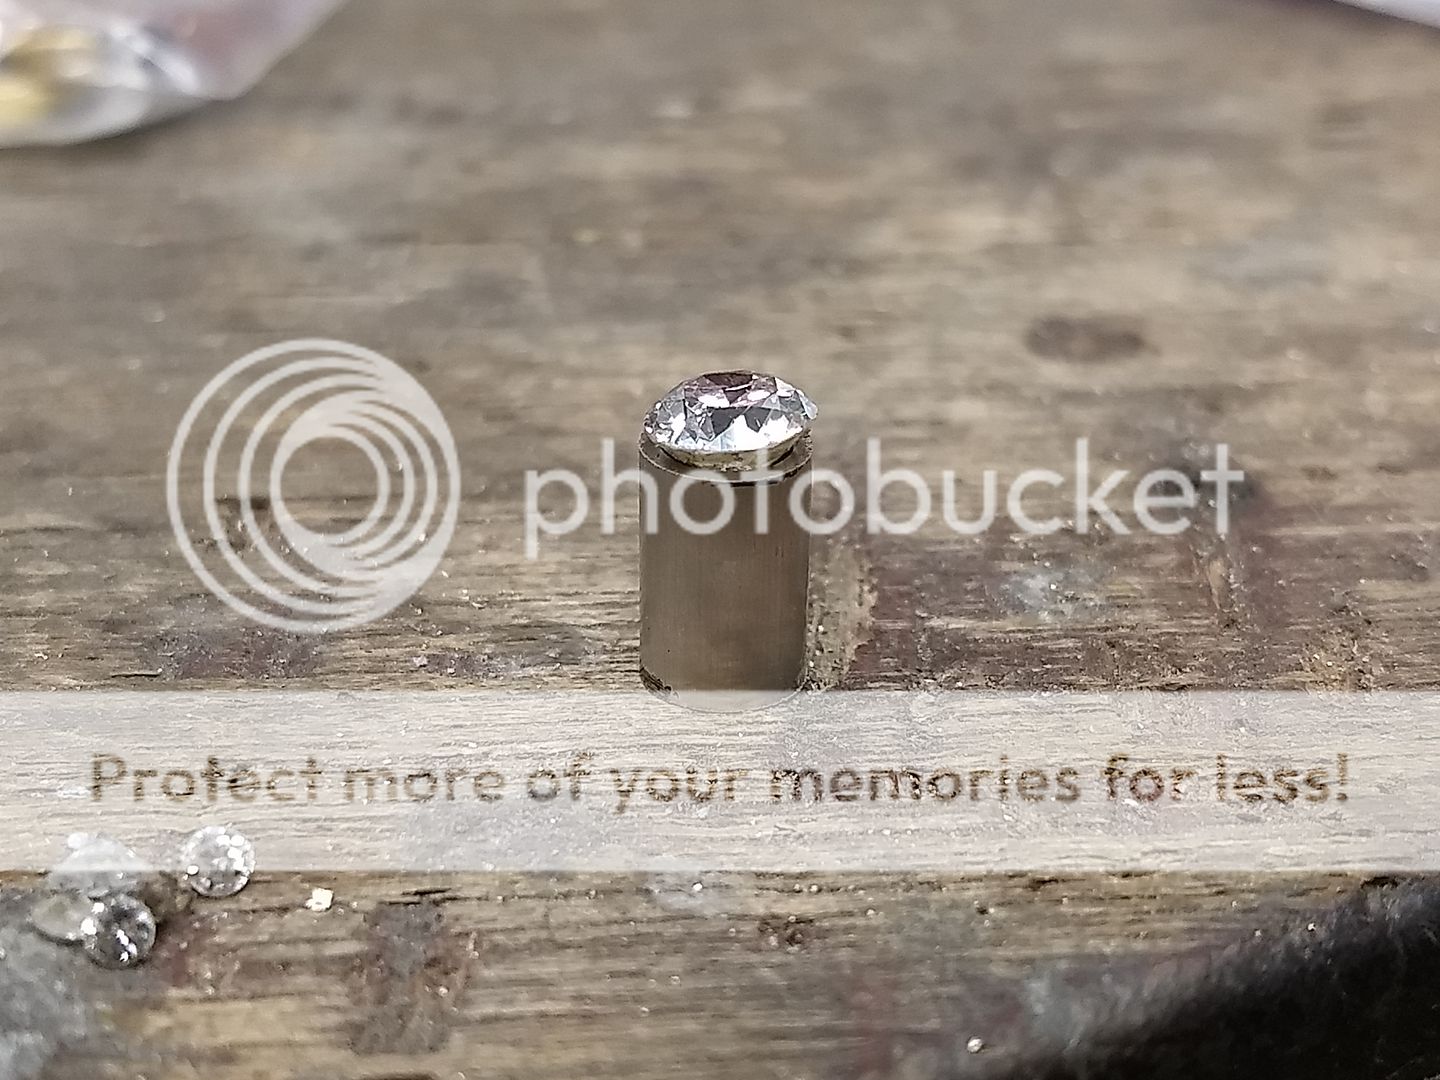
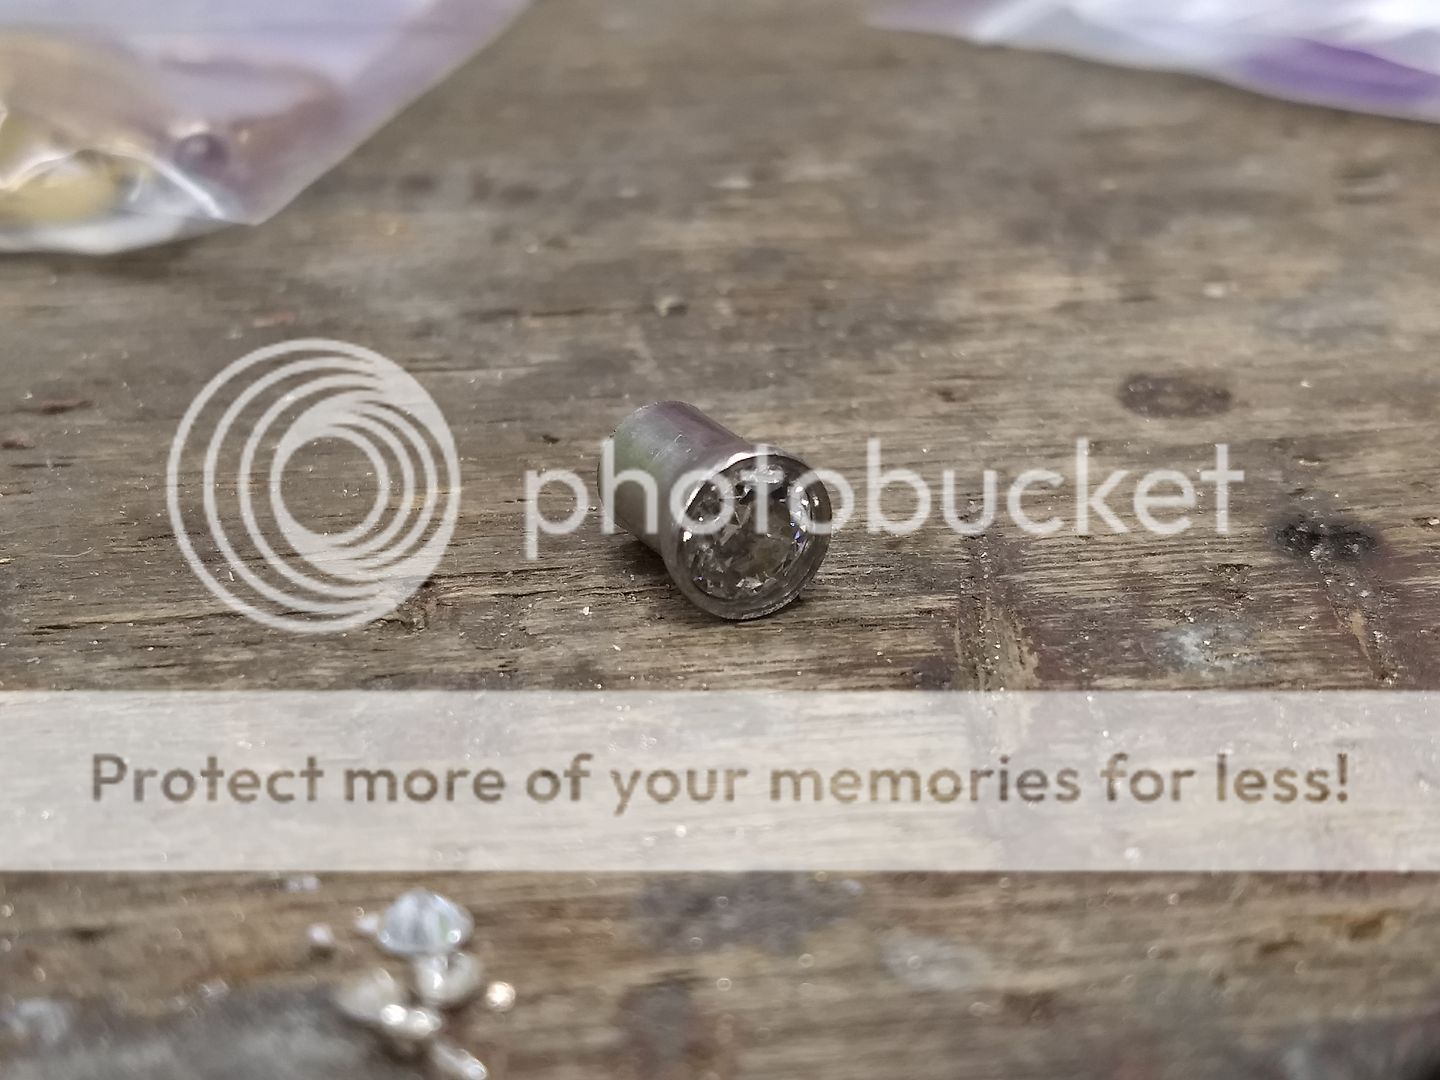
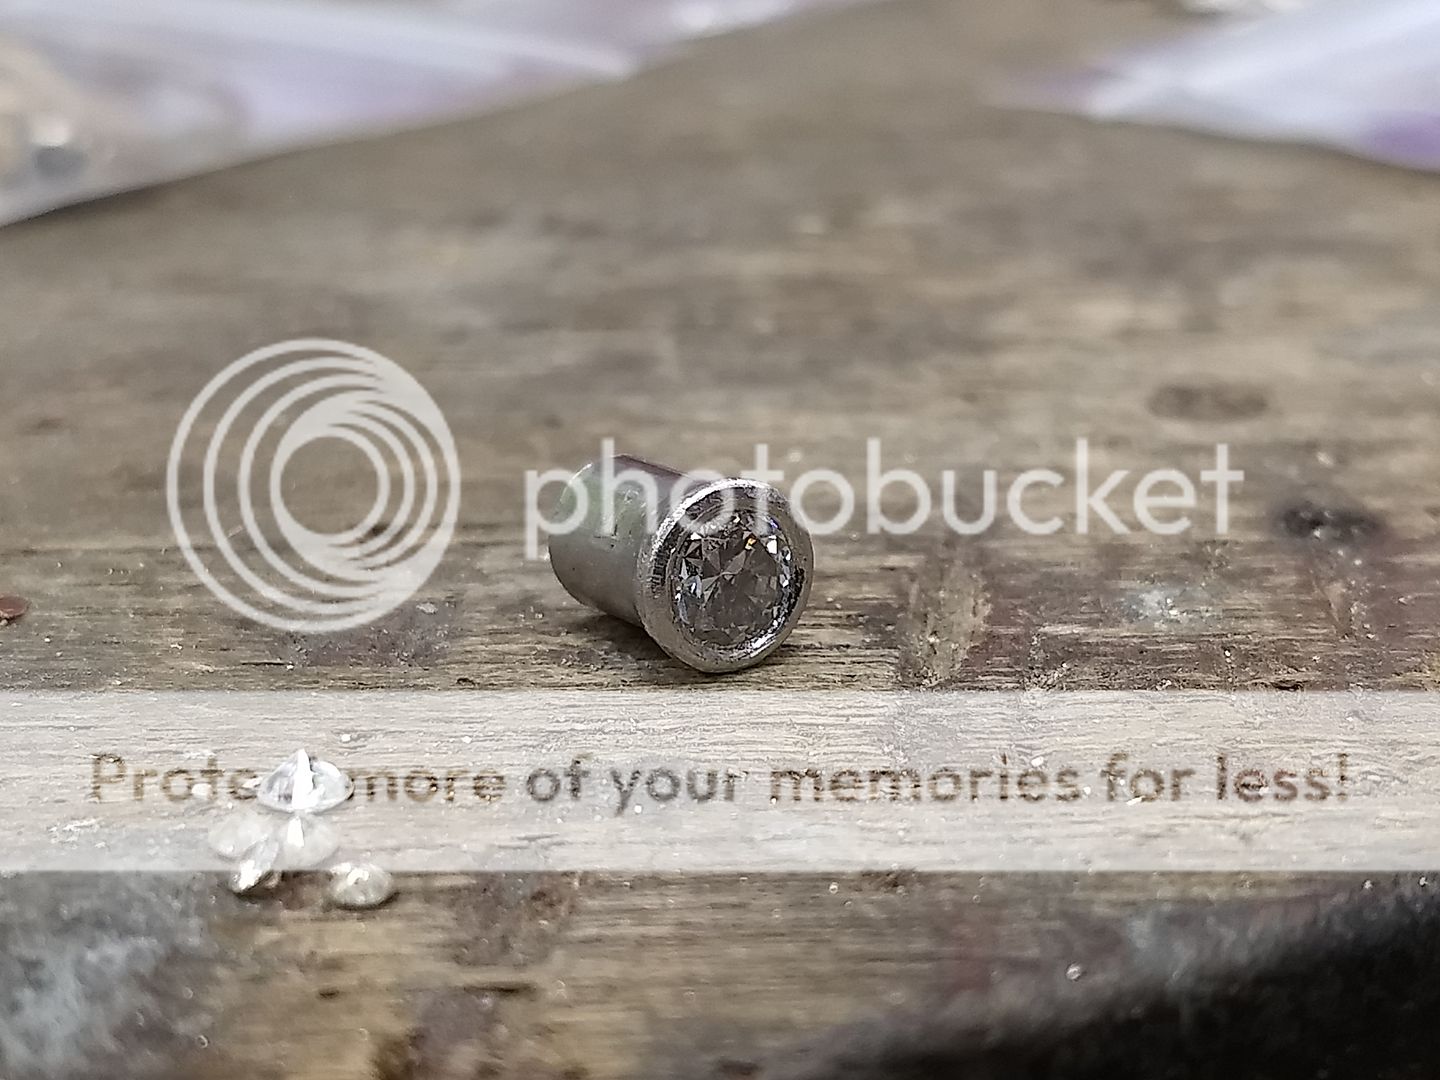
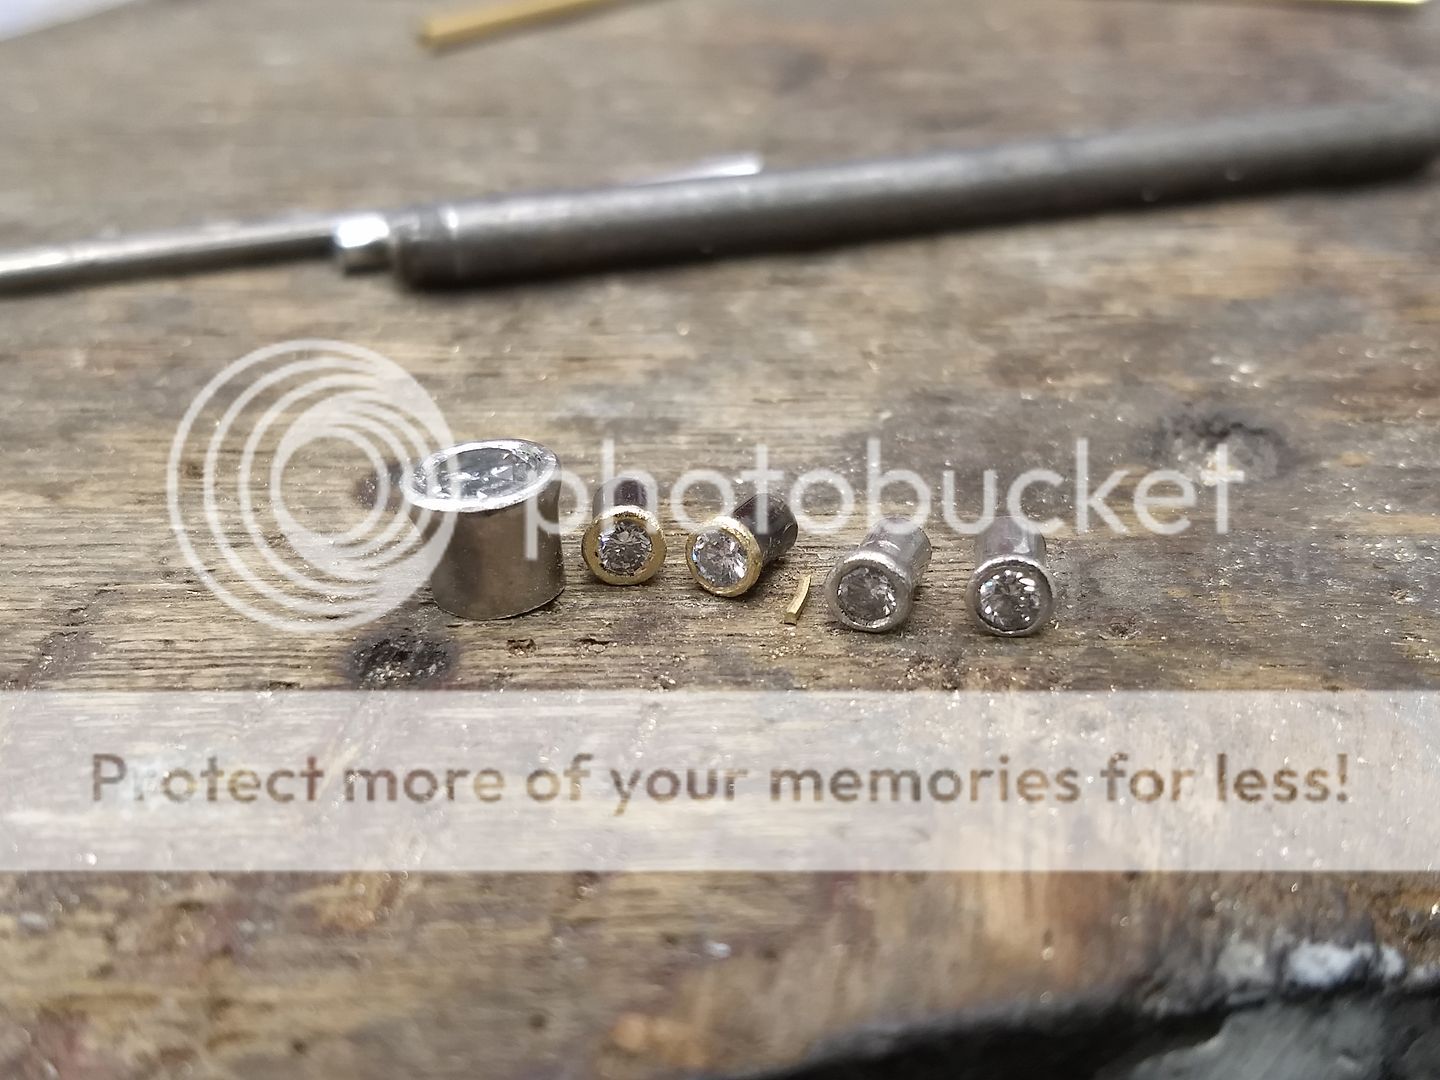
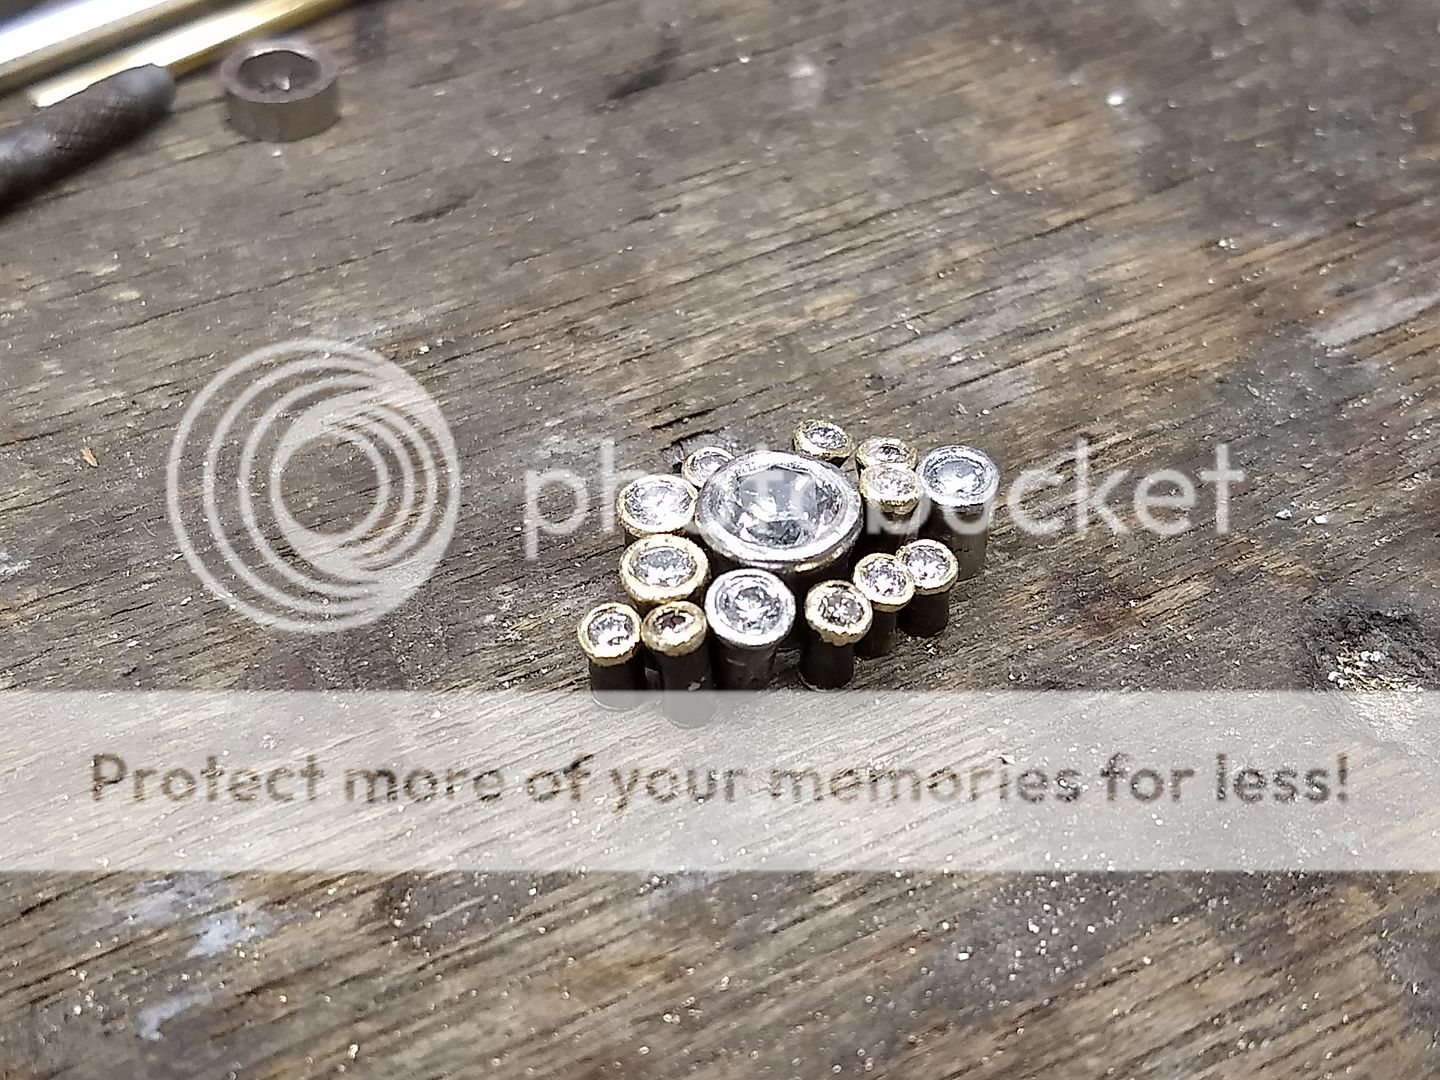
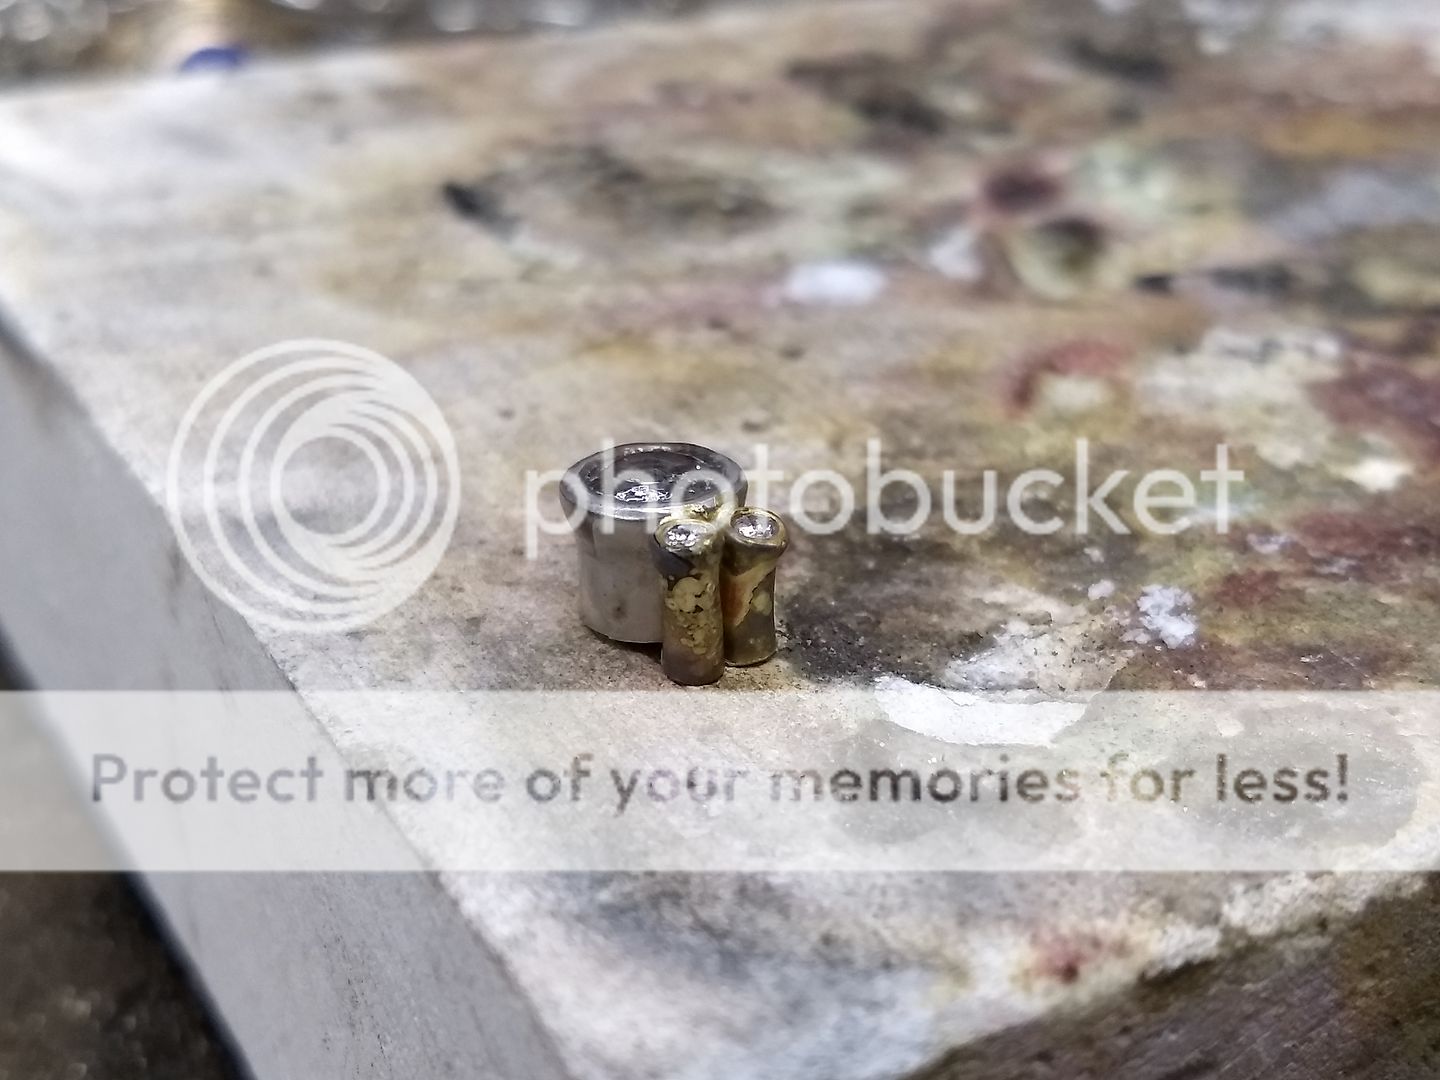
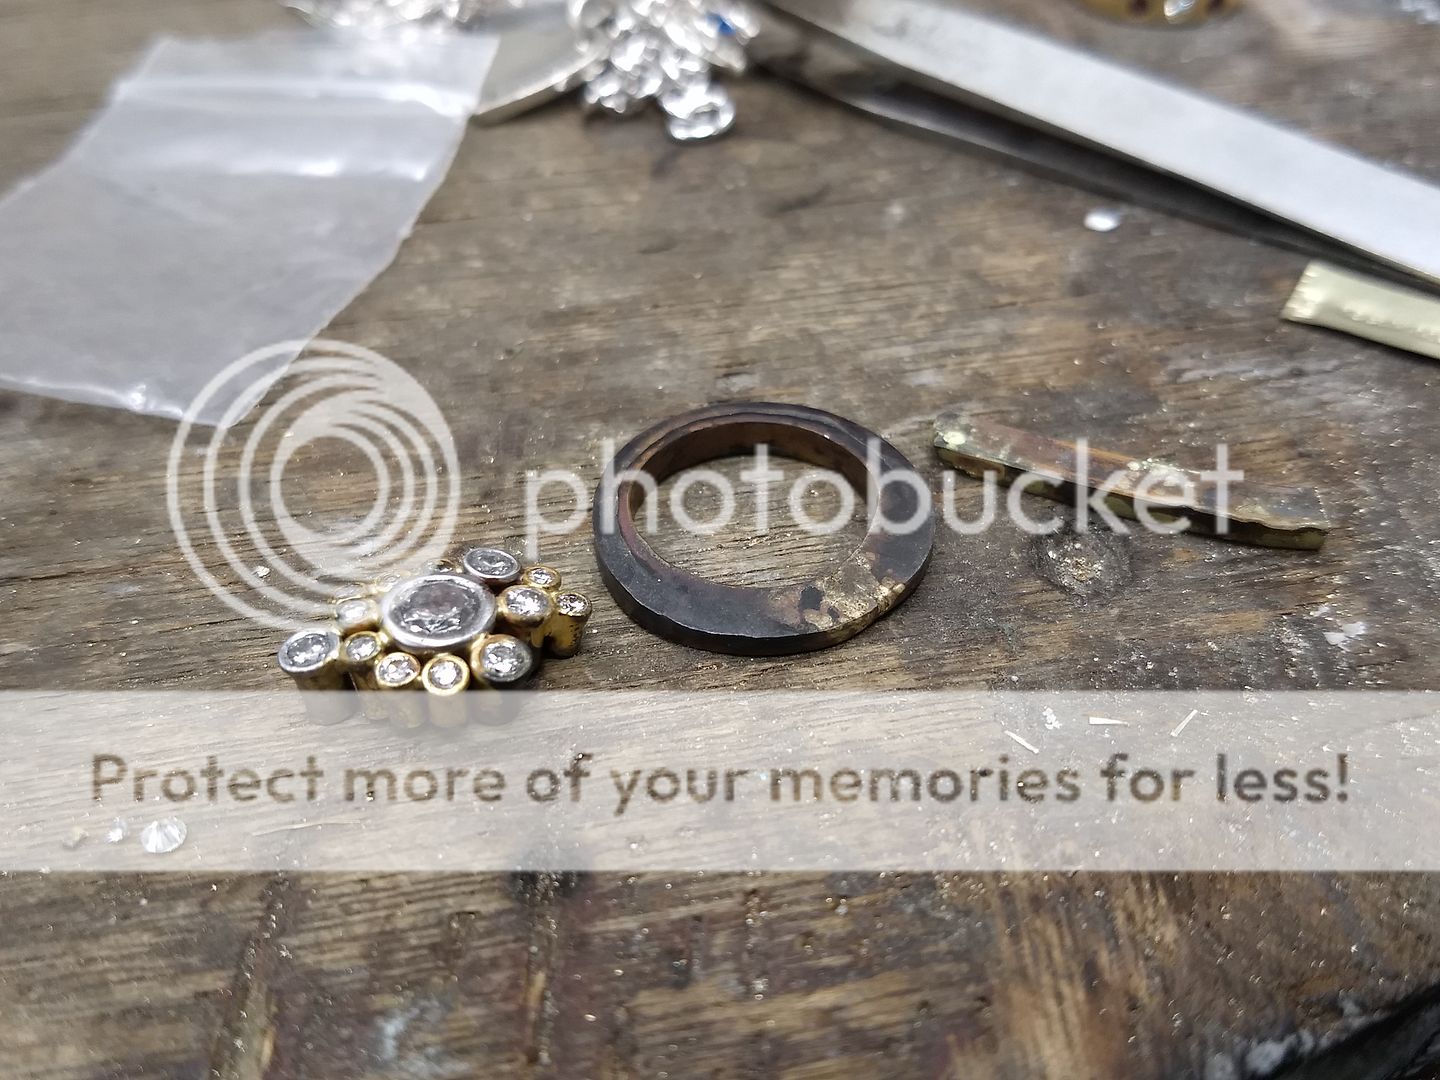
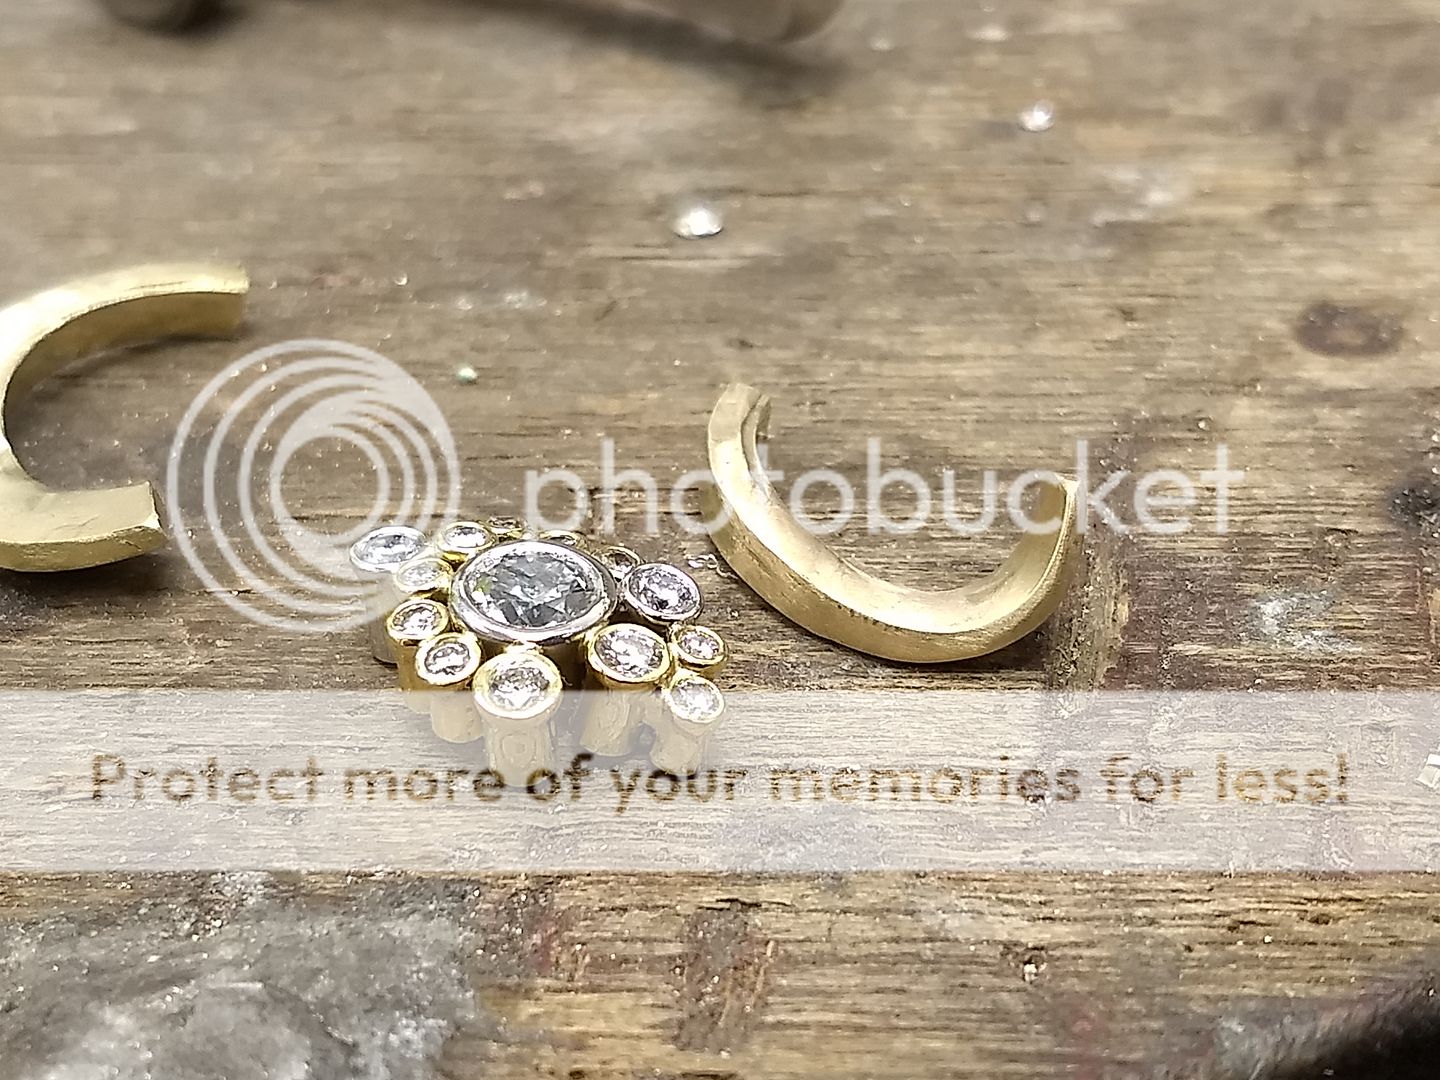
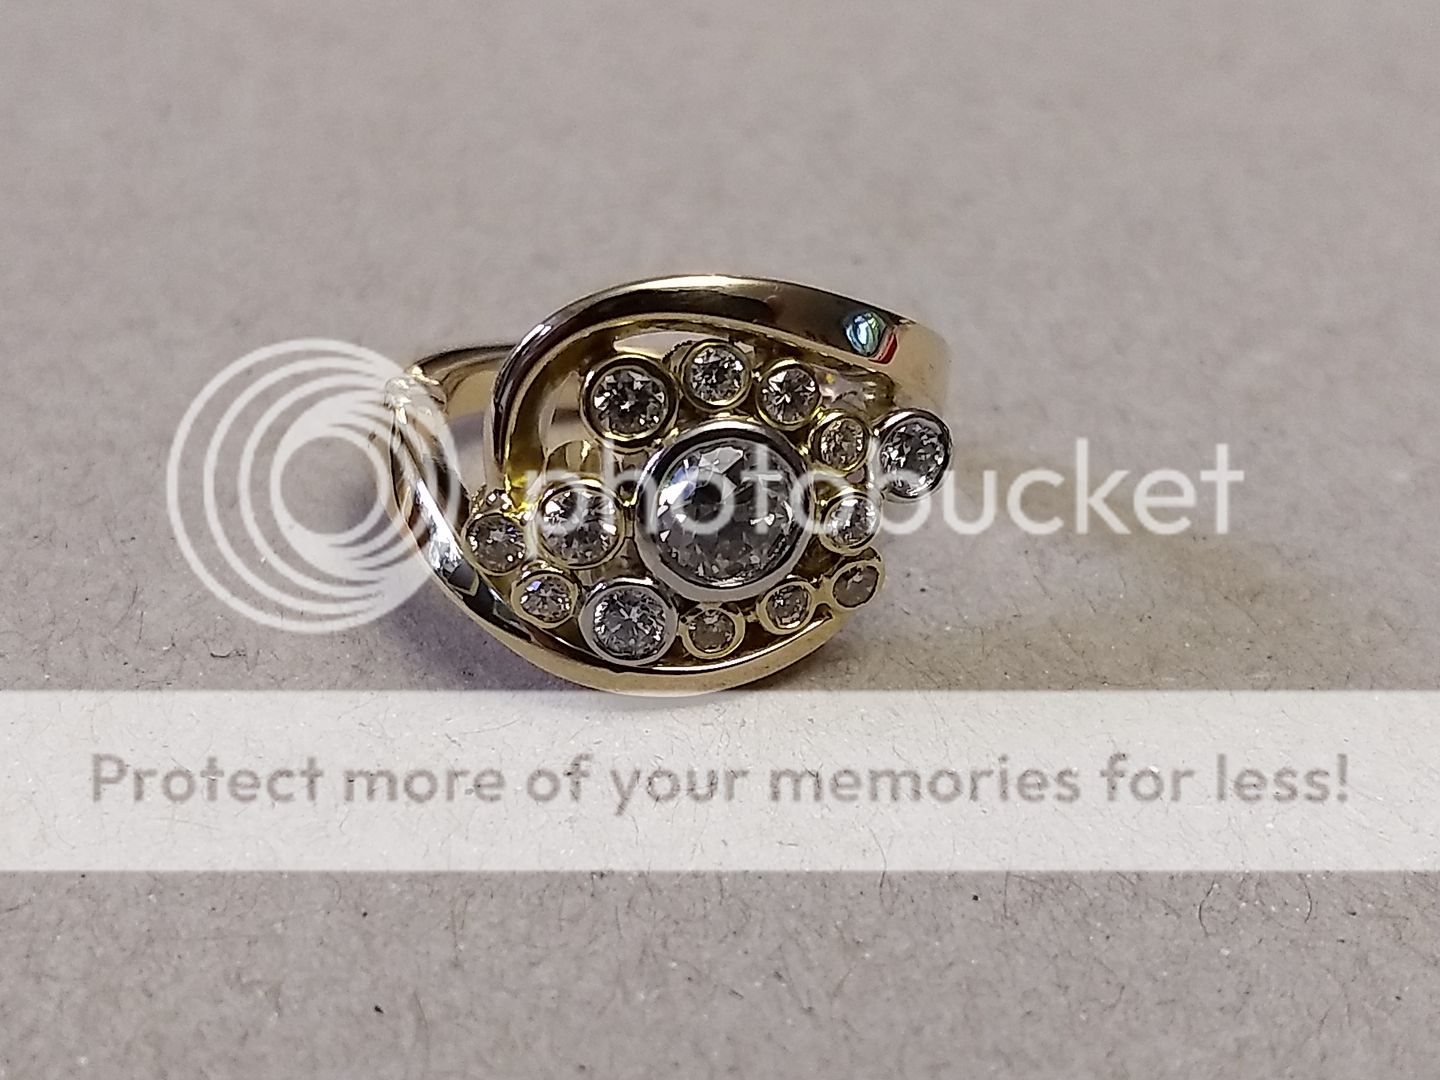
The lady has some rings left by her mother and grandmother, including one with a 0.75ct old cut diamond. There are half a dozen other small stones too as well as a mix of 18ct and 9ct yellow gold. We agree to keep the 18ct yellow to make the ring and swap / px the 9ct for another 0.50ct of small stone, making 14 stones in all. I bought some platinum and 18ct yellow tube and away we went. Here's the head building process:
Reminds me of when that setting company did the diamonds on the inside of that Rolls Royce a couple of years back.
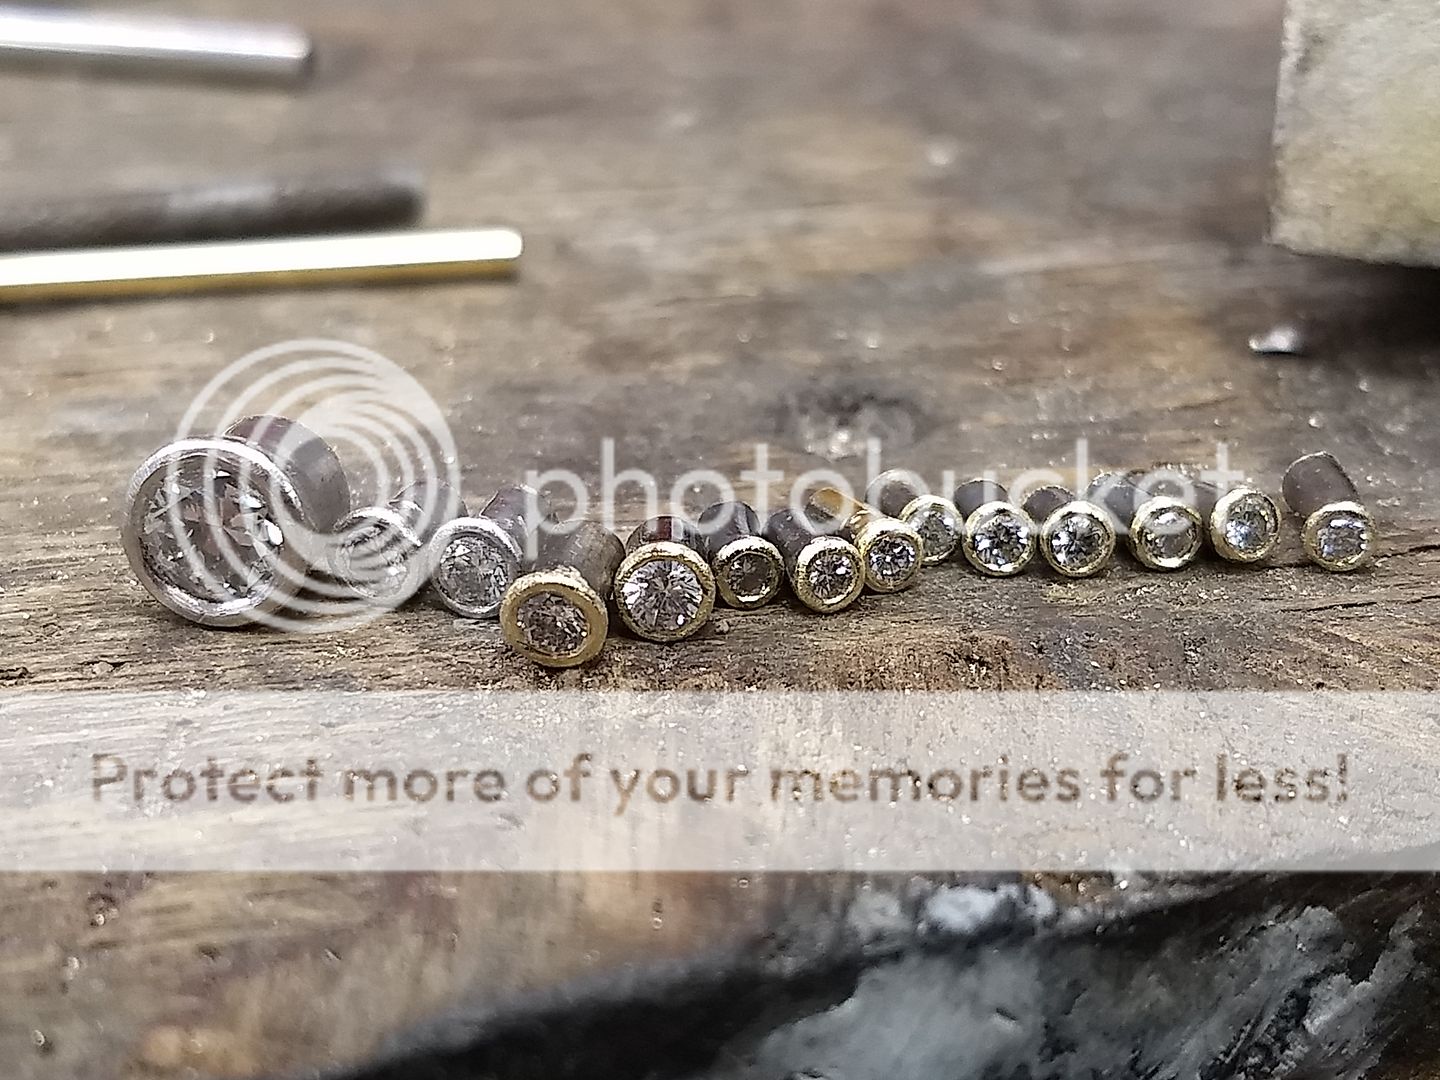
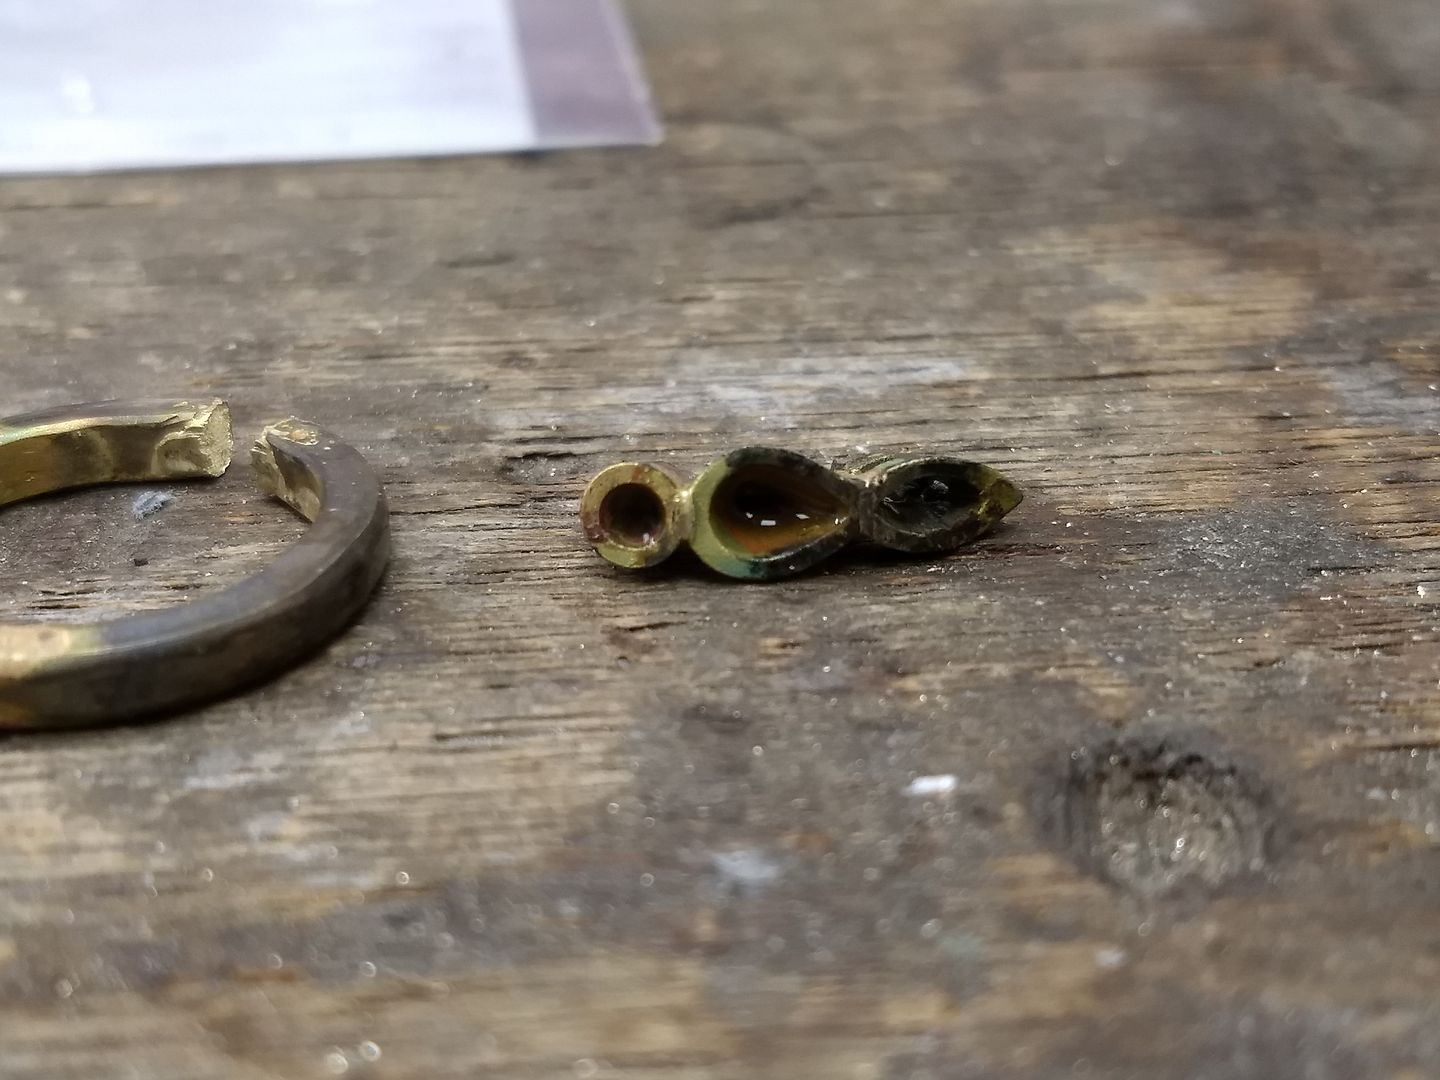
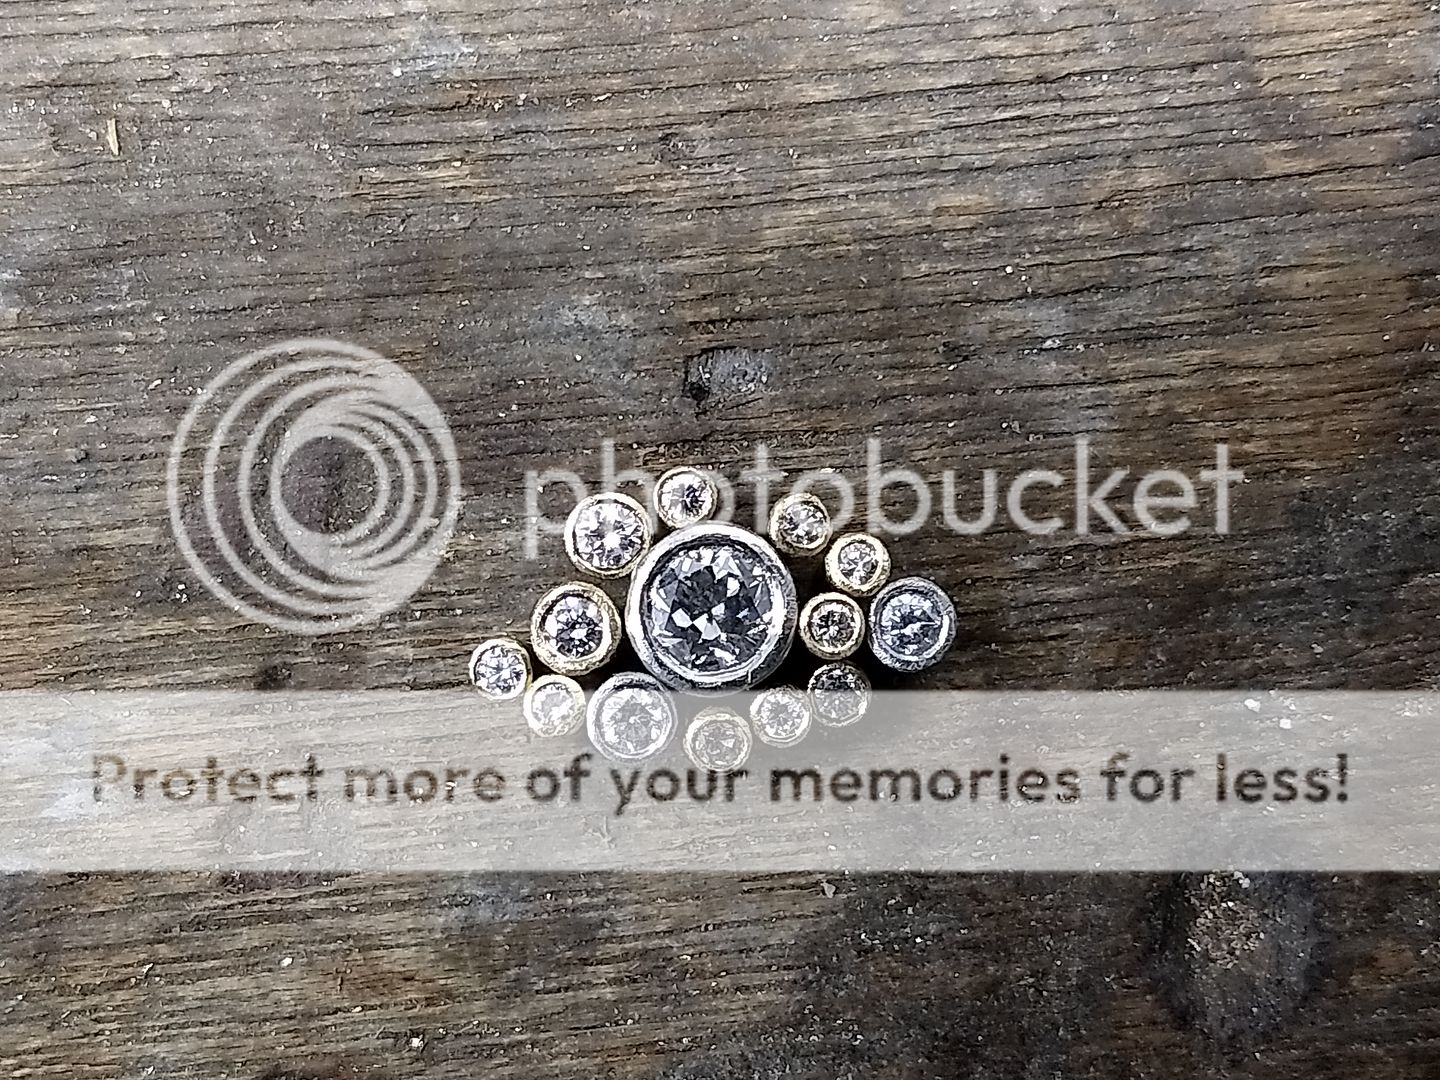
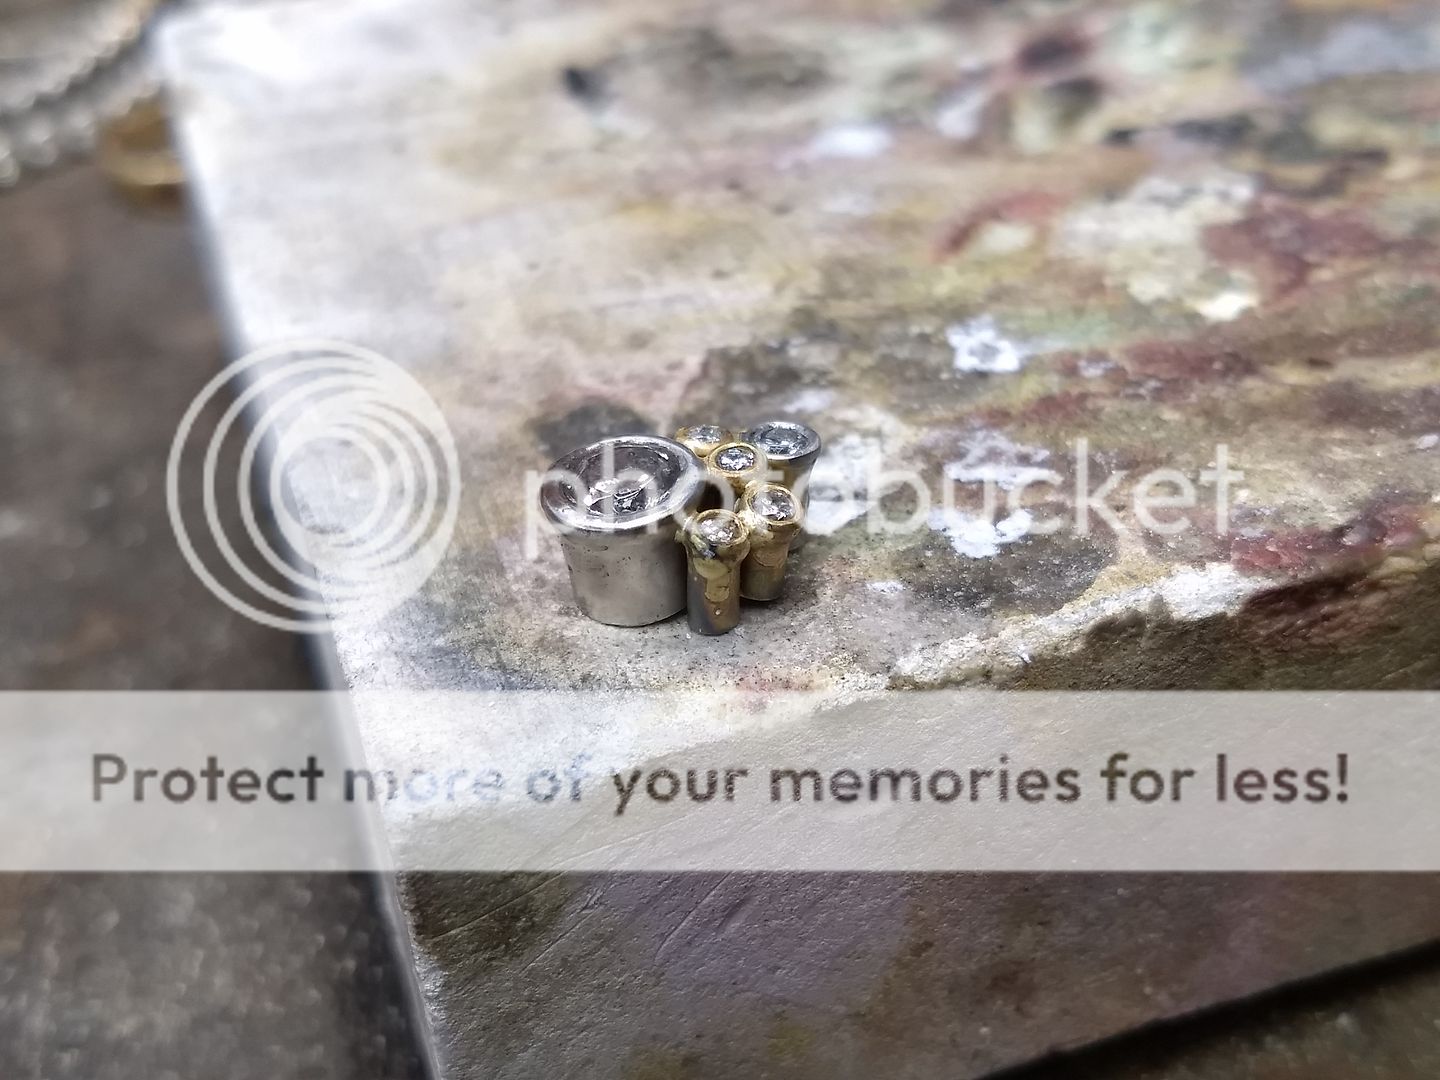
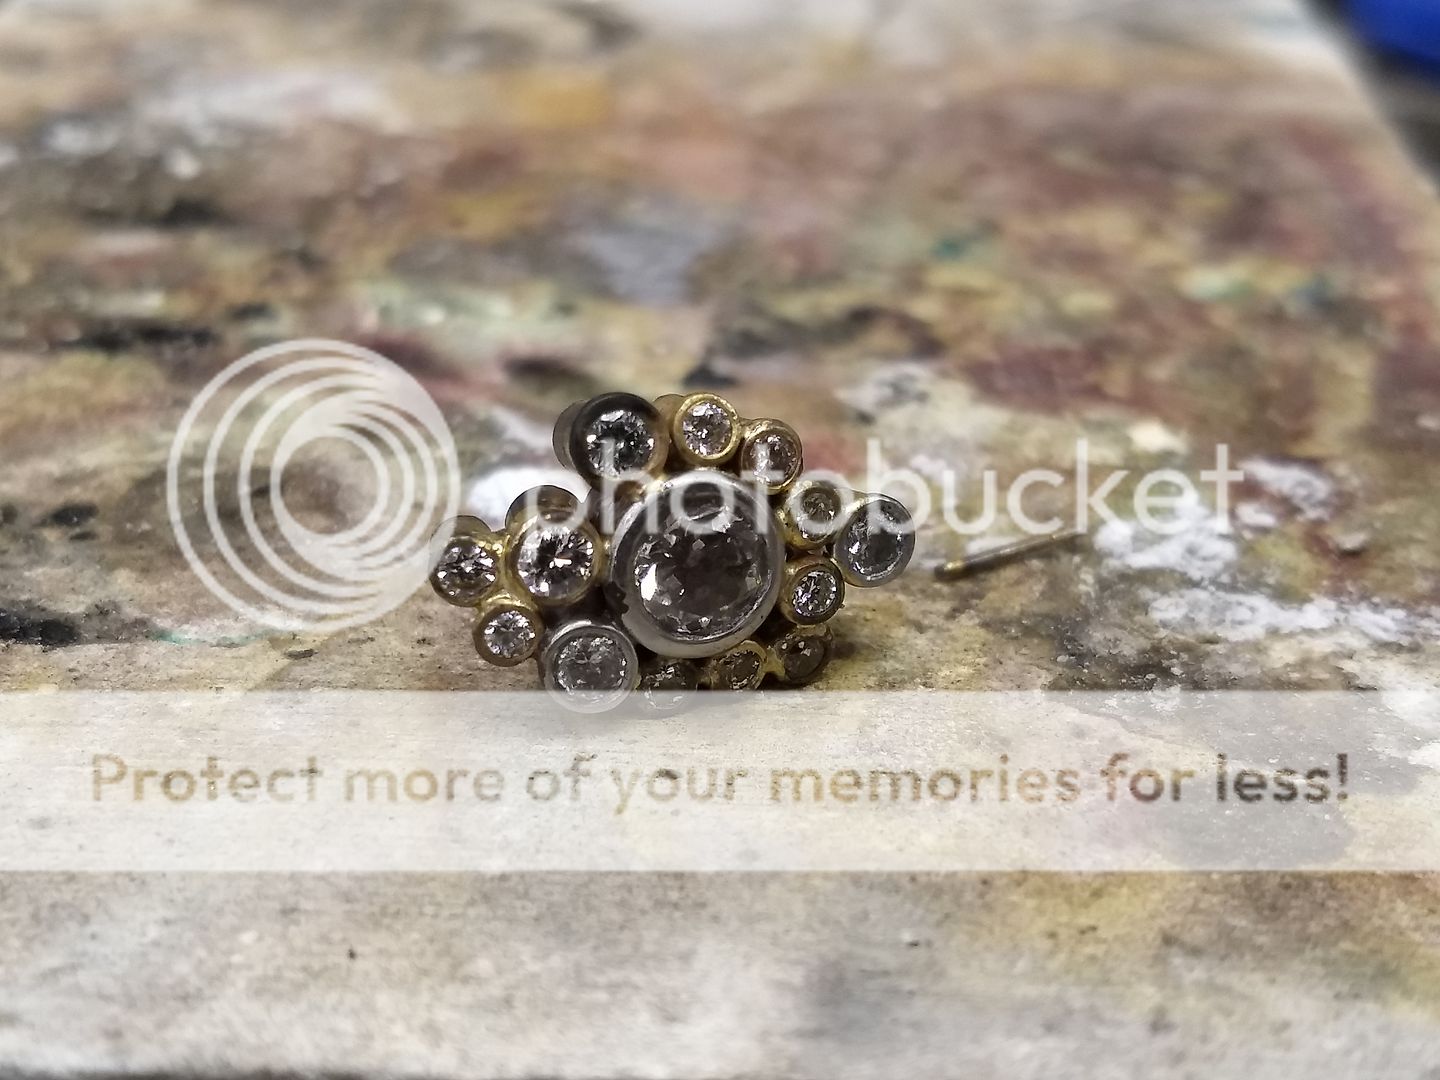
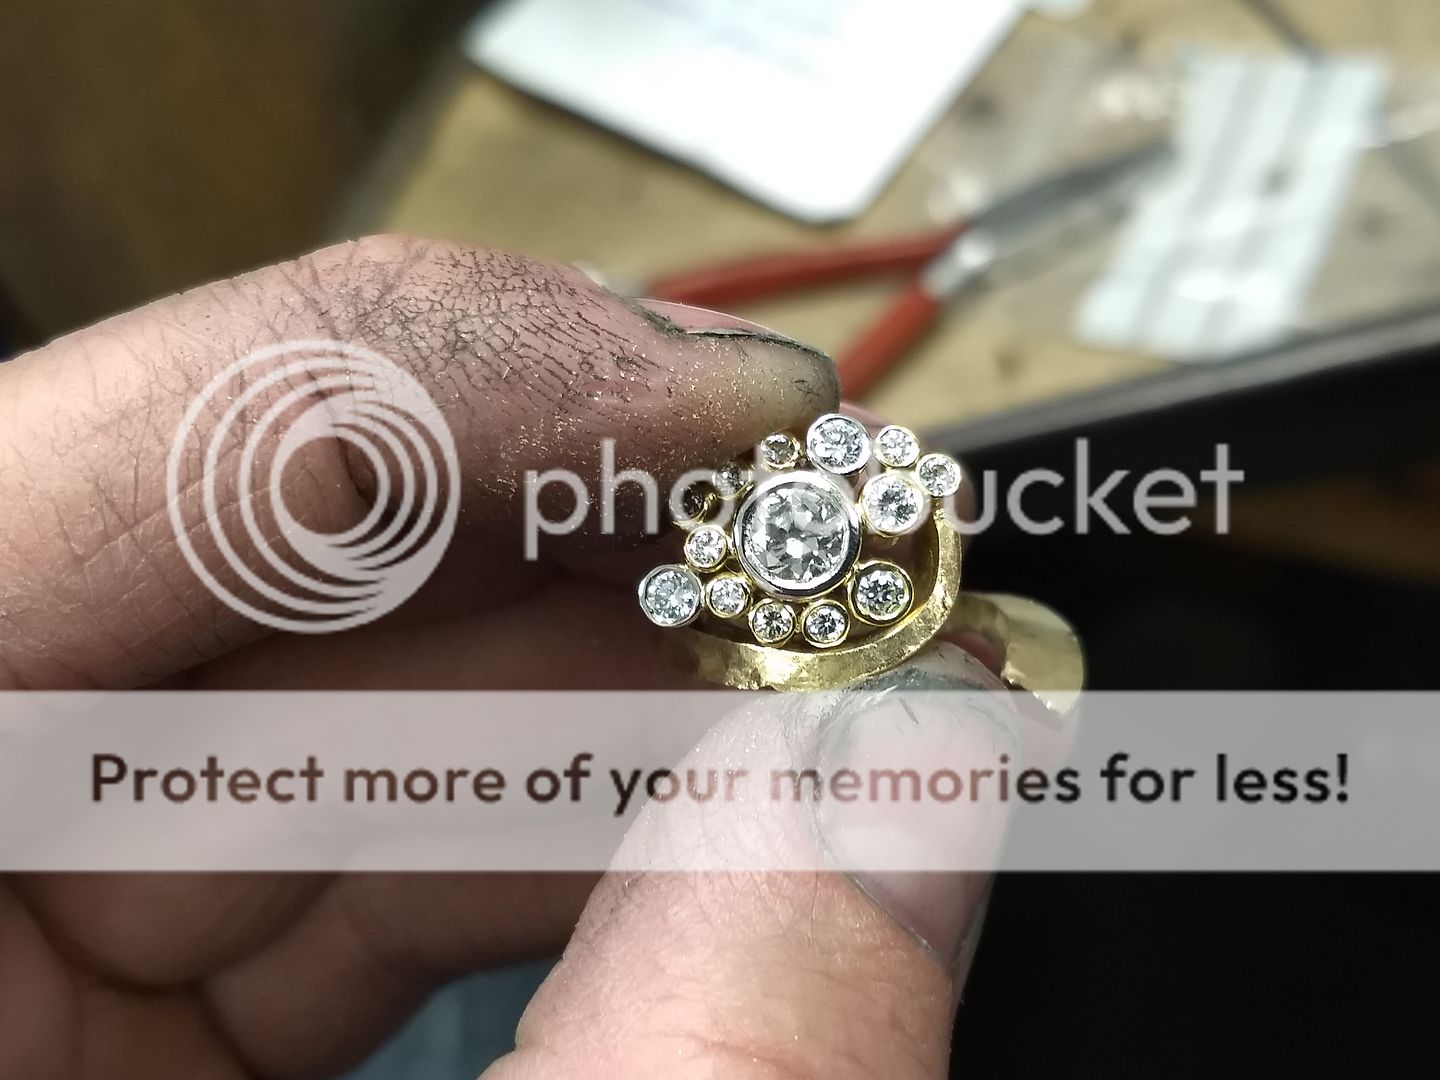
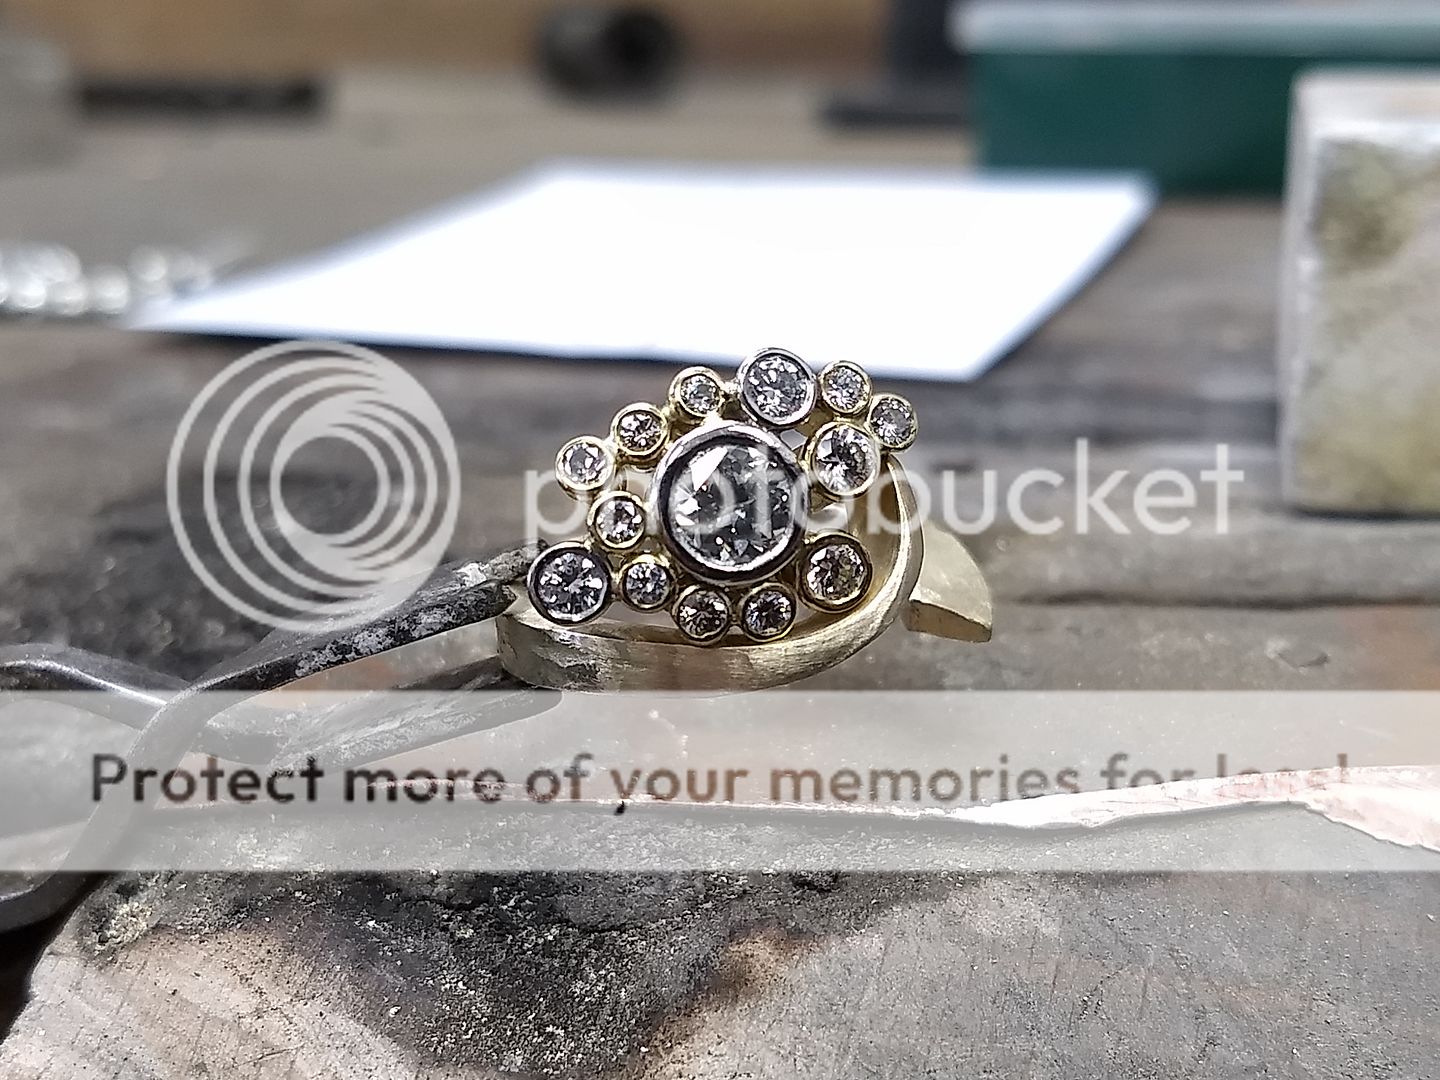
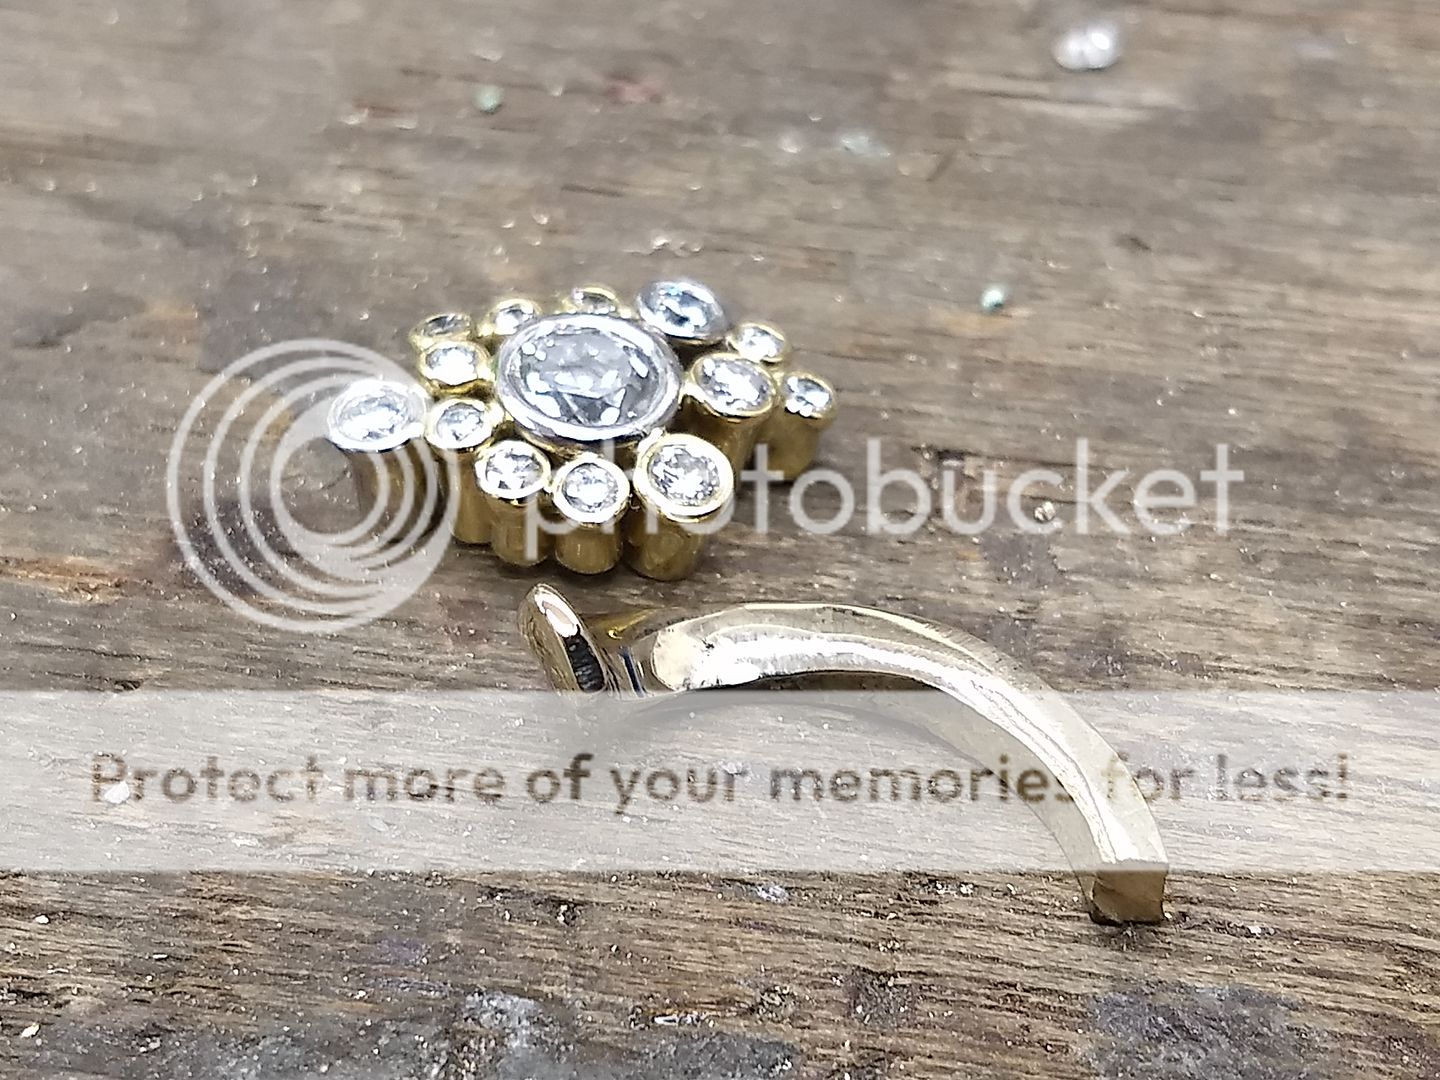
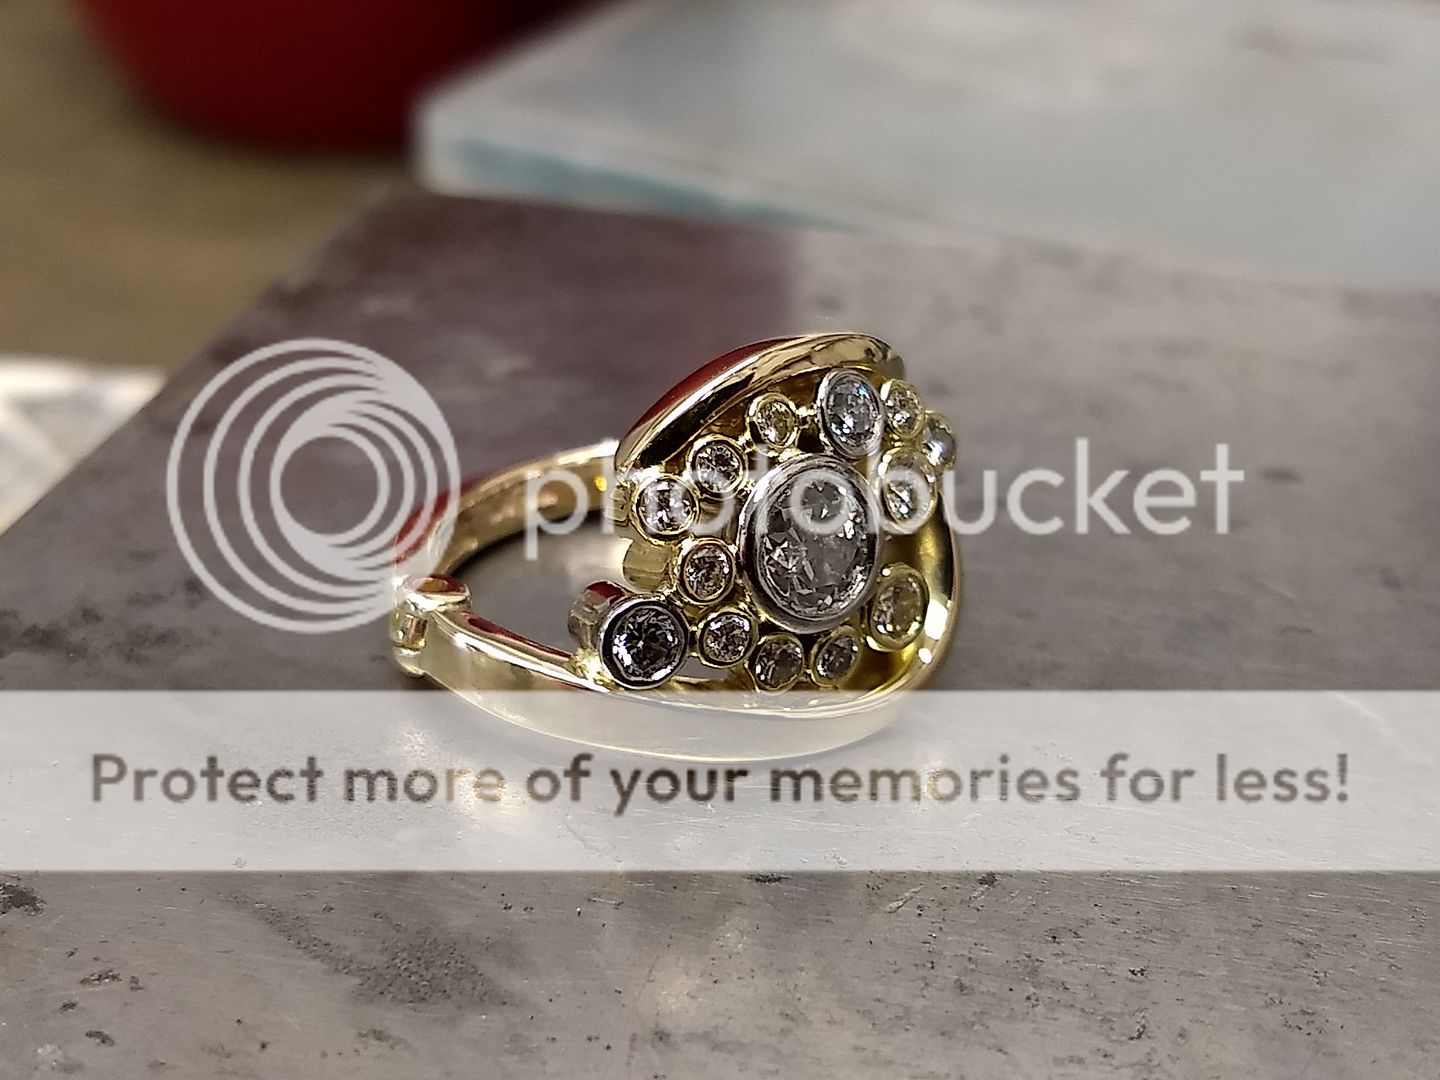
With the stones all set in their tubes we agree on a rough design:
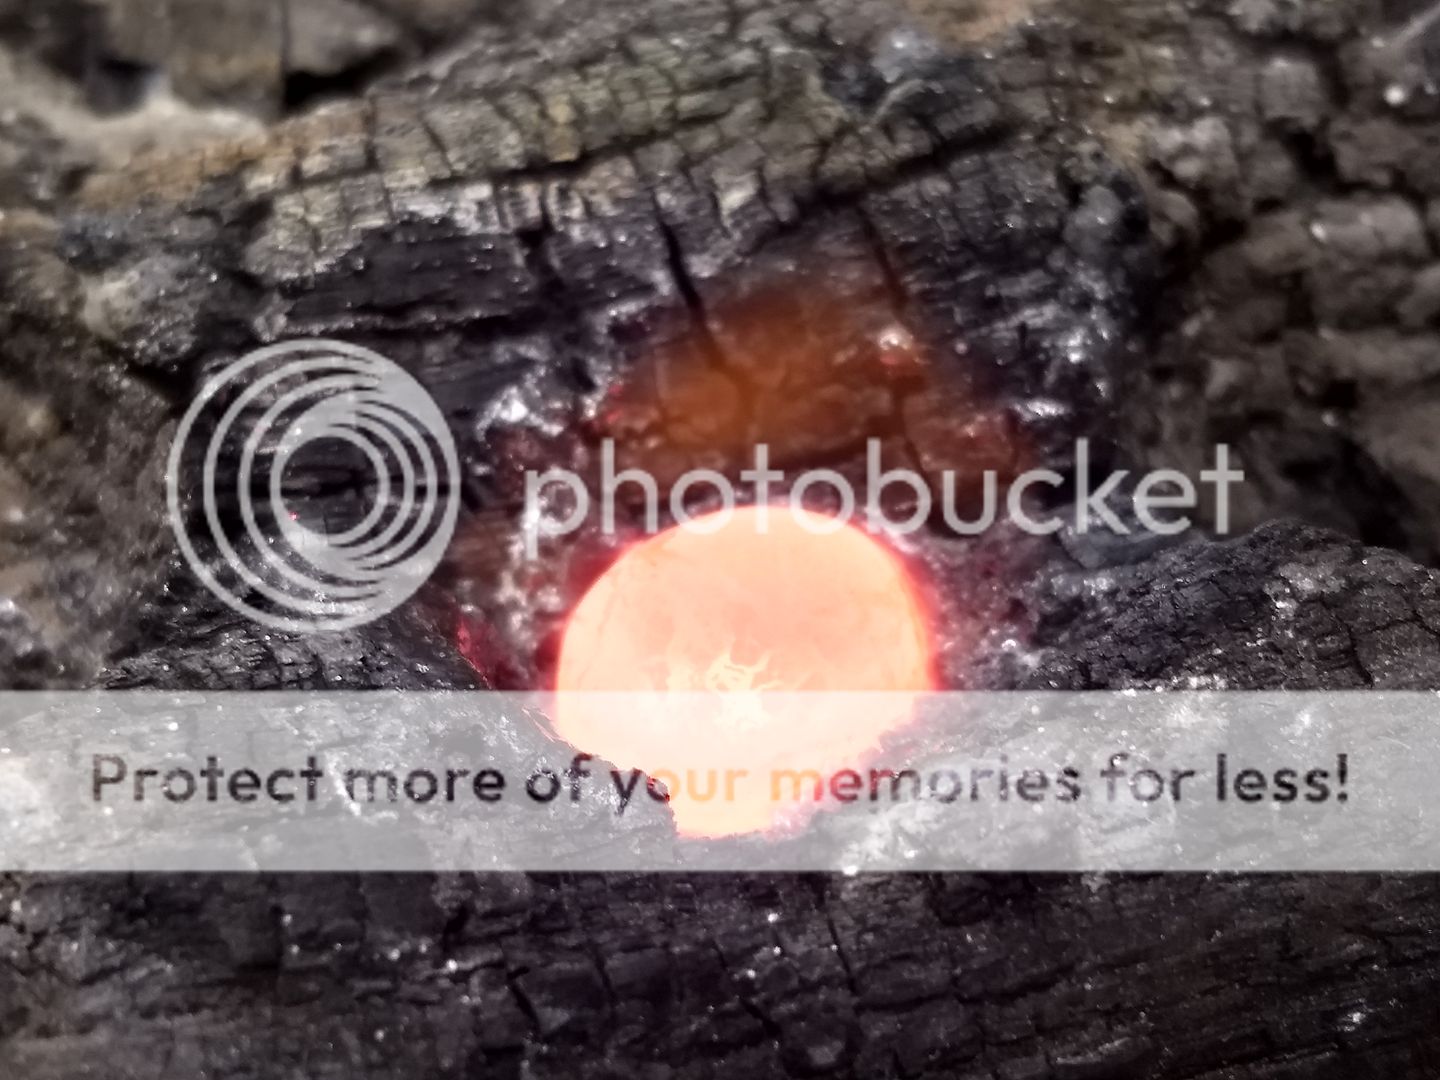
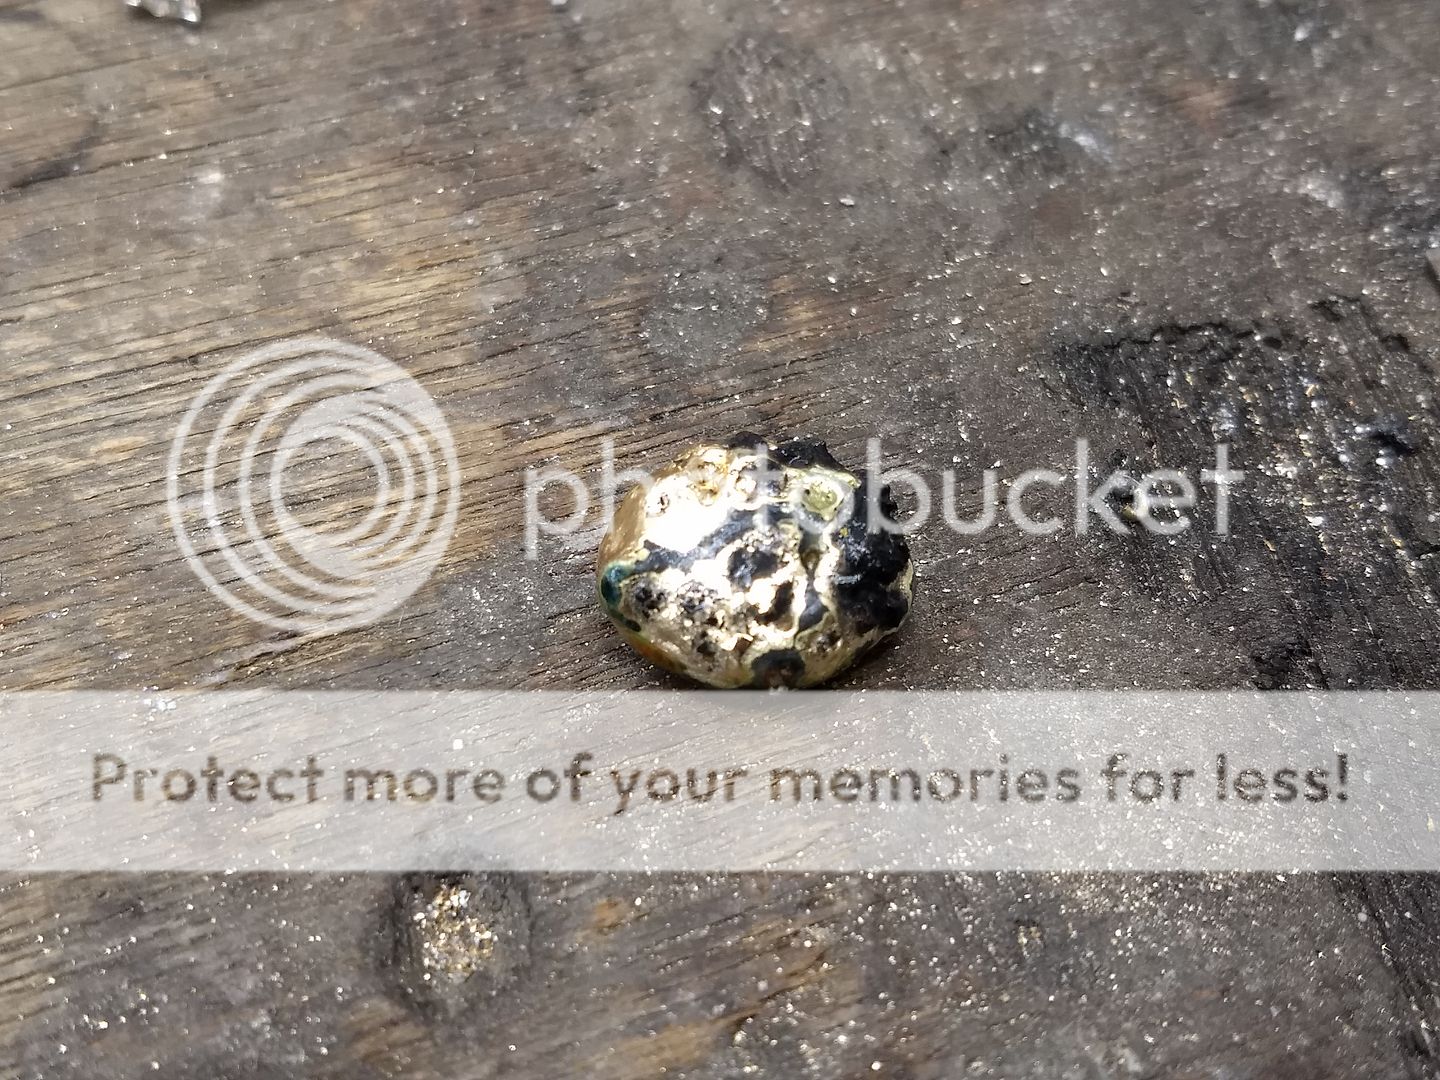
The next job is to make the shoulders and produce a complete head. Here we melt the 18ct scrap and begin the assembly process:
Skipped a pic here for some reason. The above is cleaned up and then split at the centre. The shoulders are shaped to make a twist:
And test fitted on one side after a light file and clean up:
This shoulder is then removed from the other as they are both individually shaped and positioned:
And it's then soldered in place:
Shoulder number 2 is next:
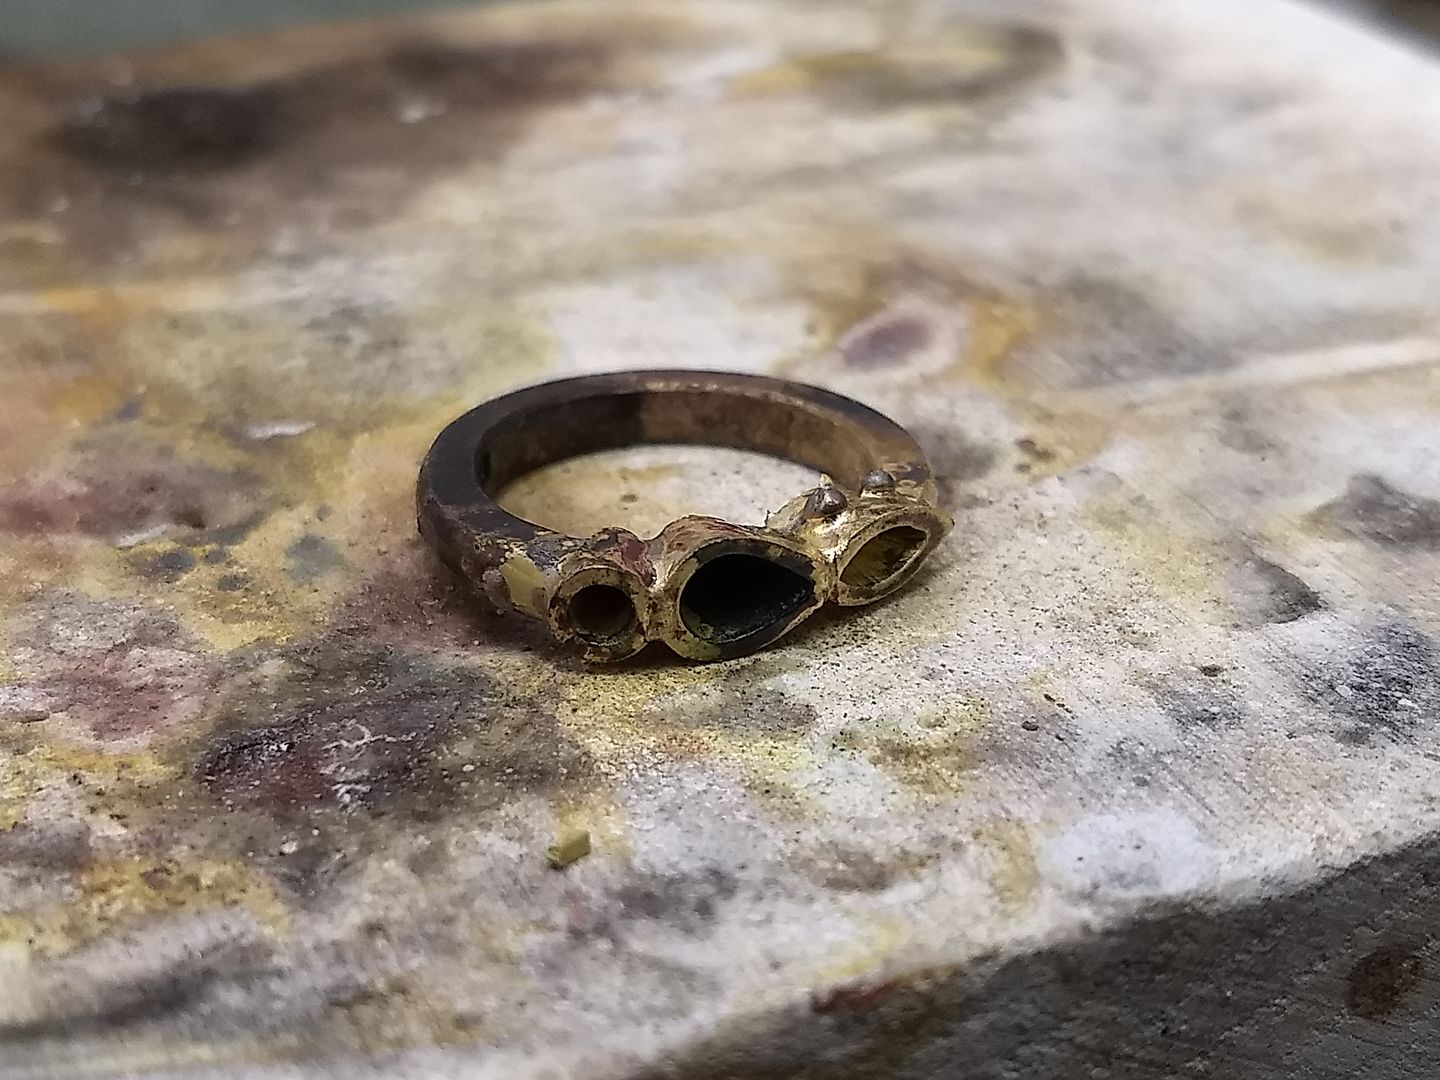
Almost looks like a ring now:
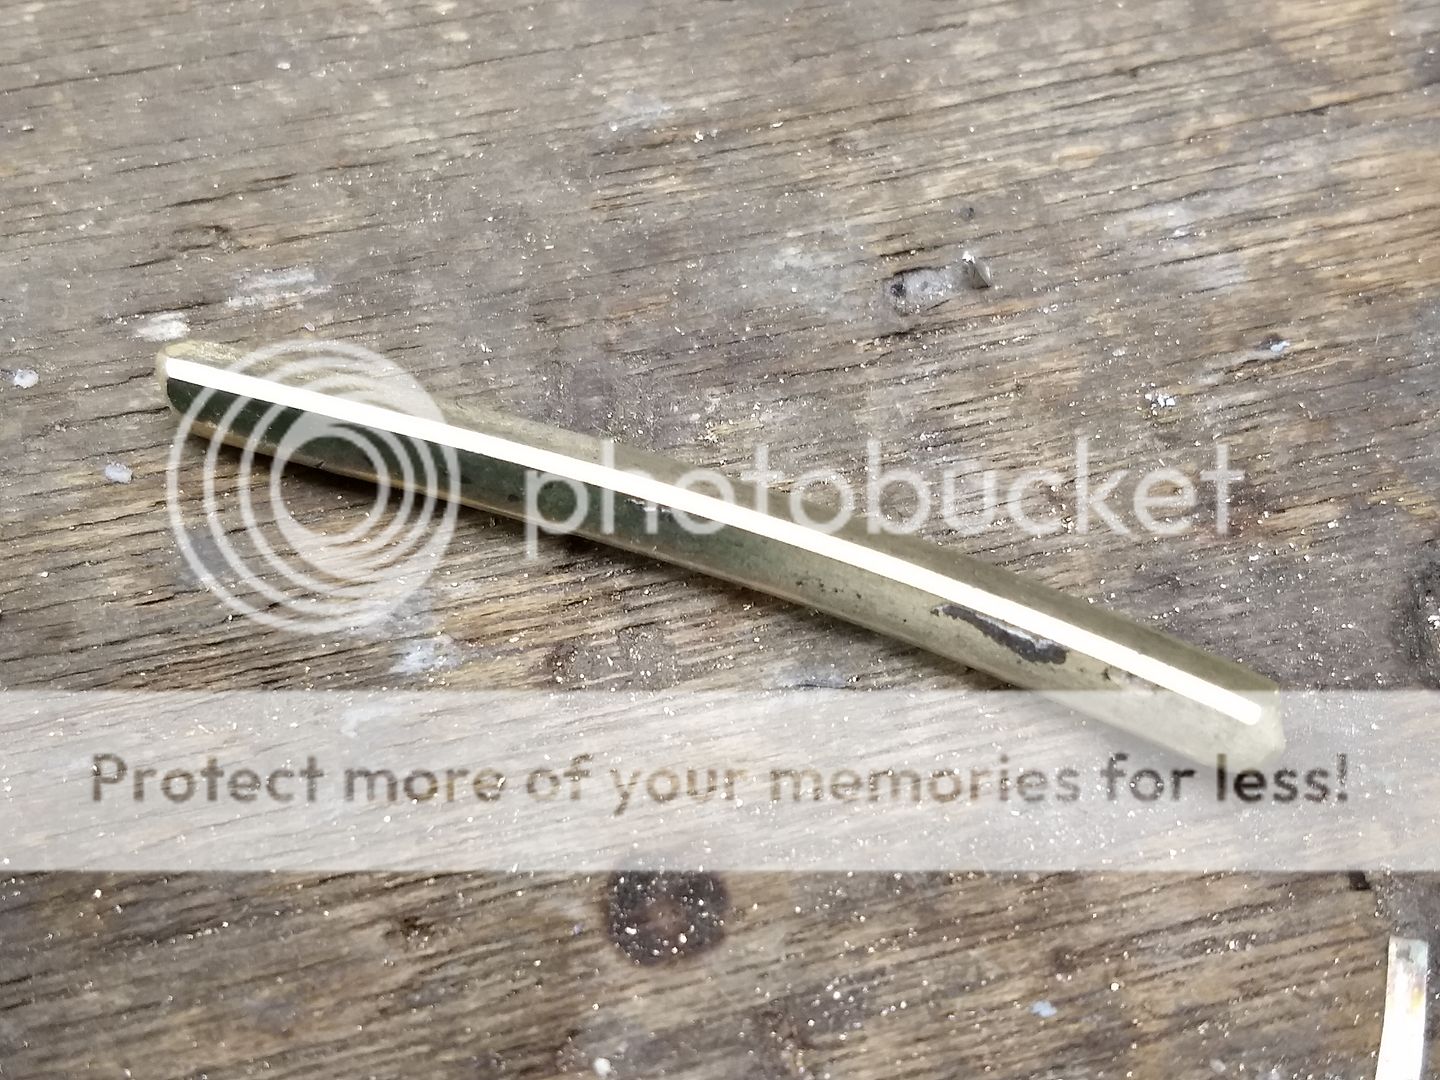
The remaining bar is then rolled out and marked with the material content.
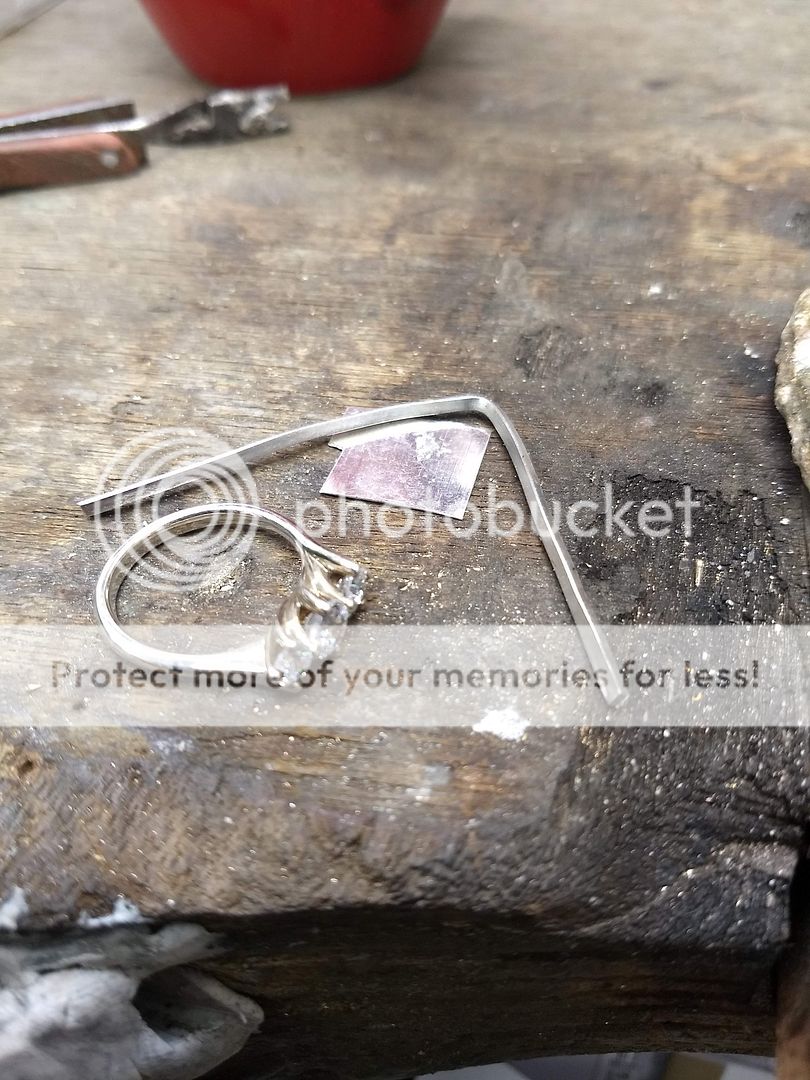
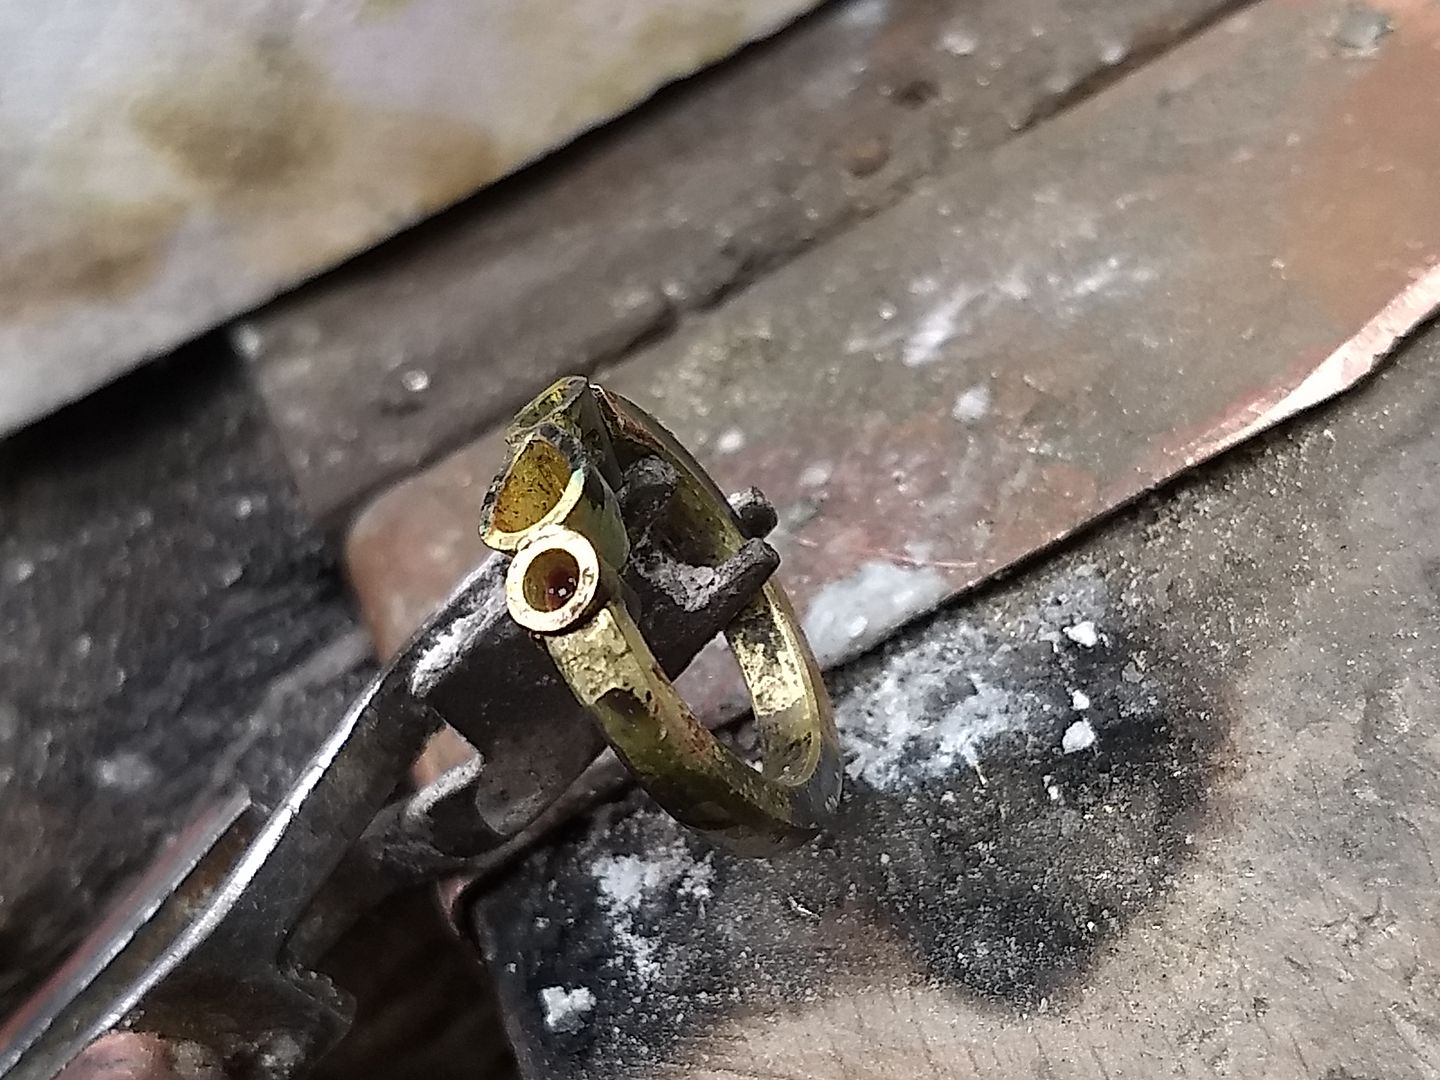
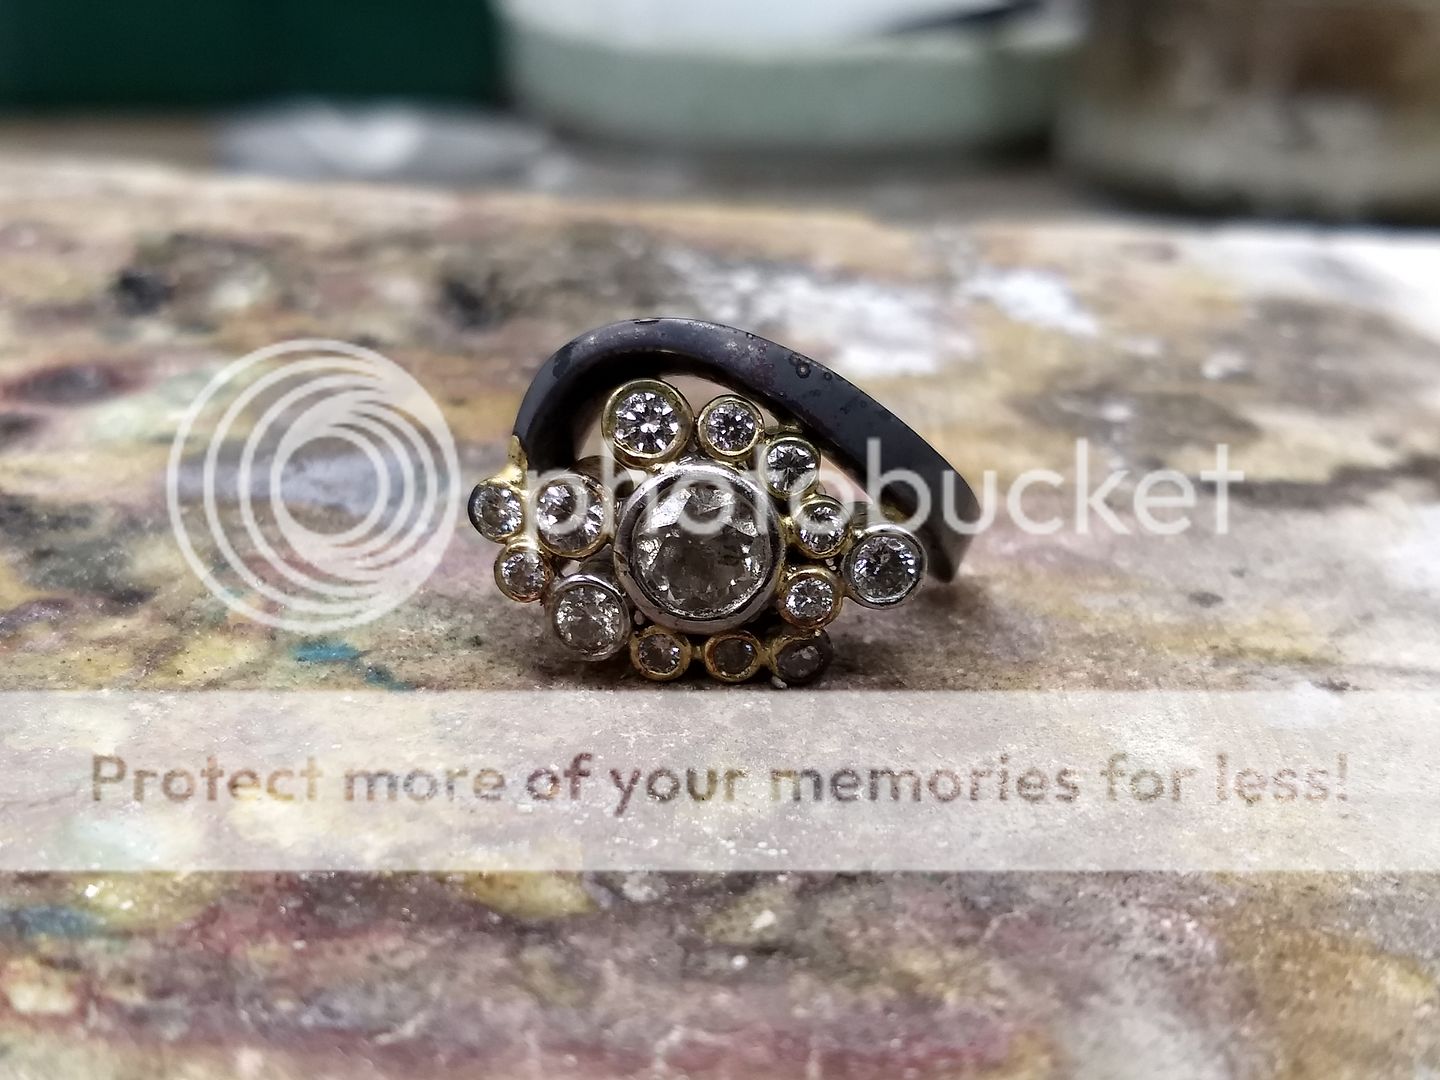
Using a digital gauge I worked out she's roughly a size N at the finger (not the knuckle) so bent the new shank to suit:
And then soldered it to the head so I could hammer it to the correct shape all round:
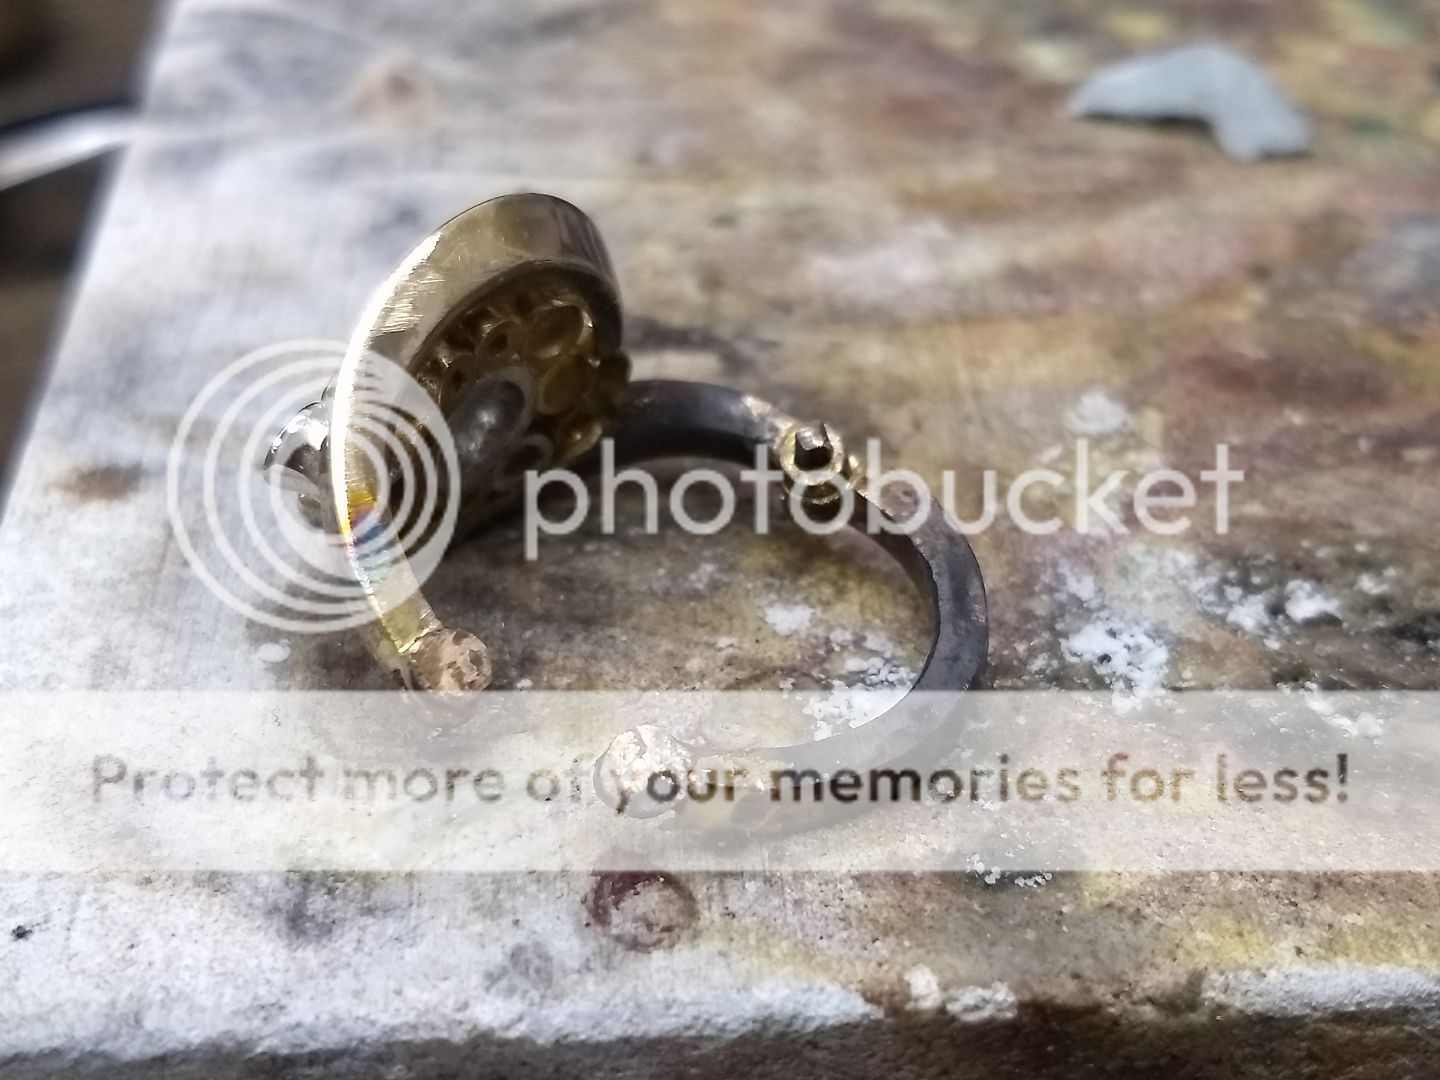
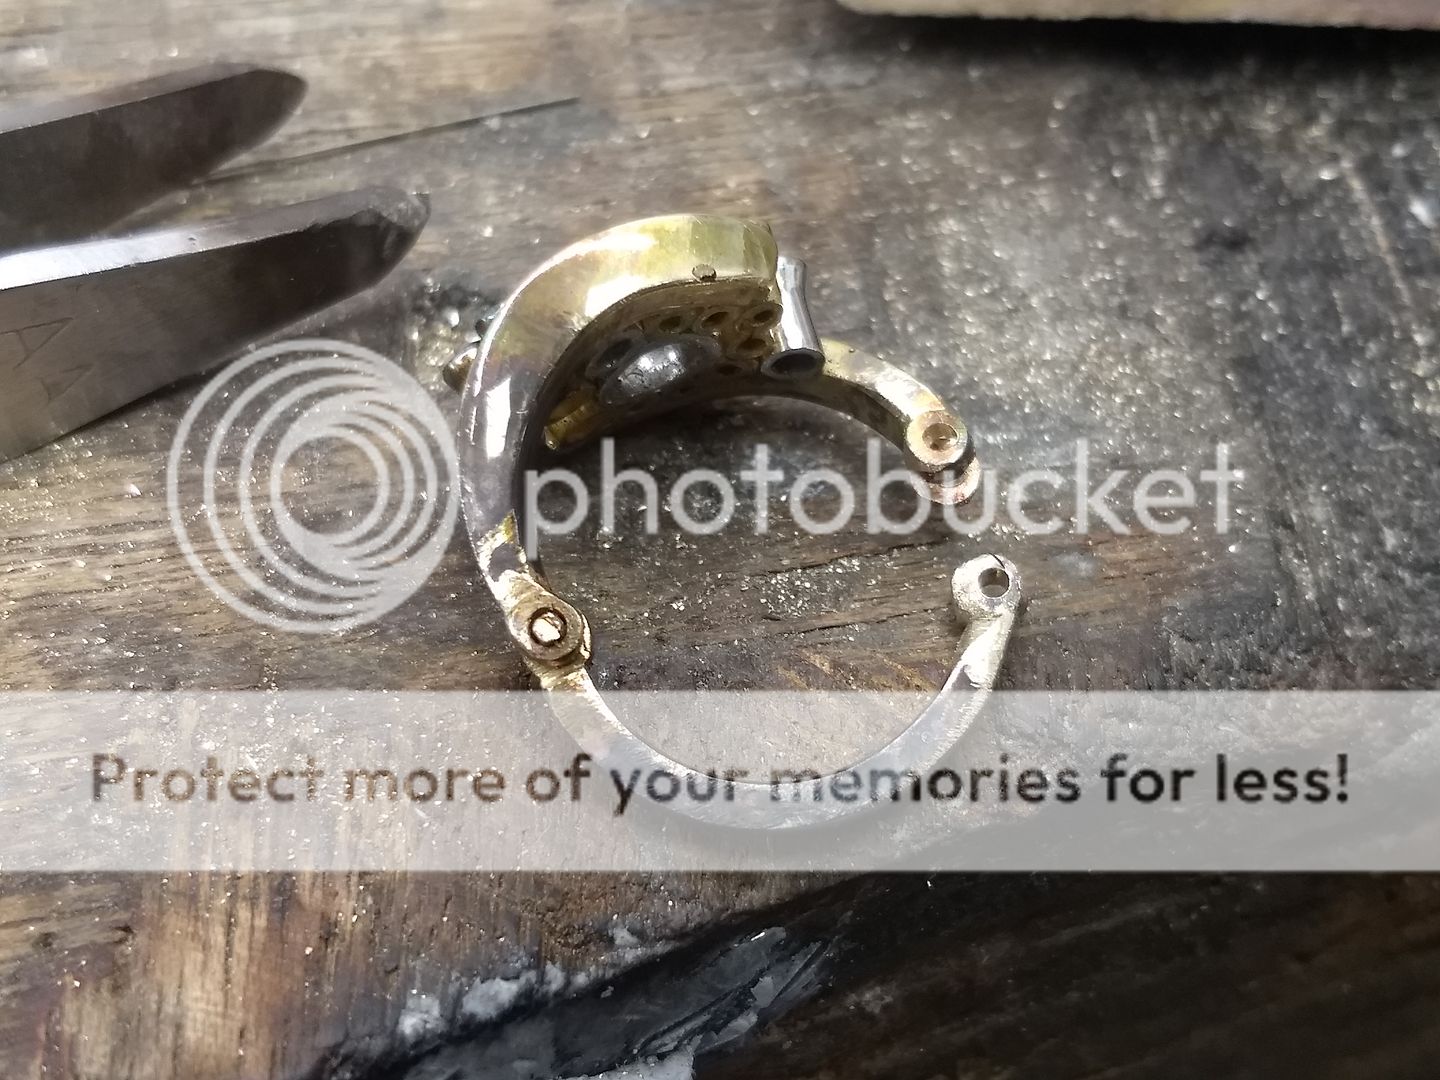
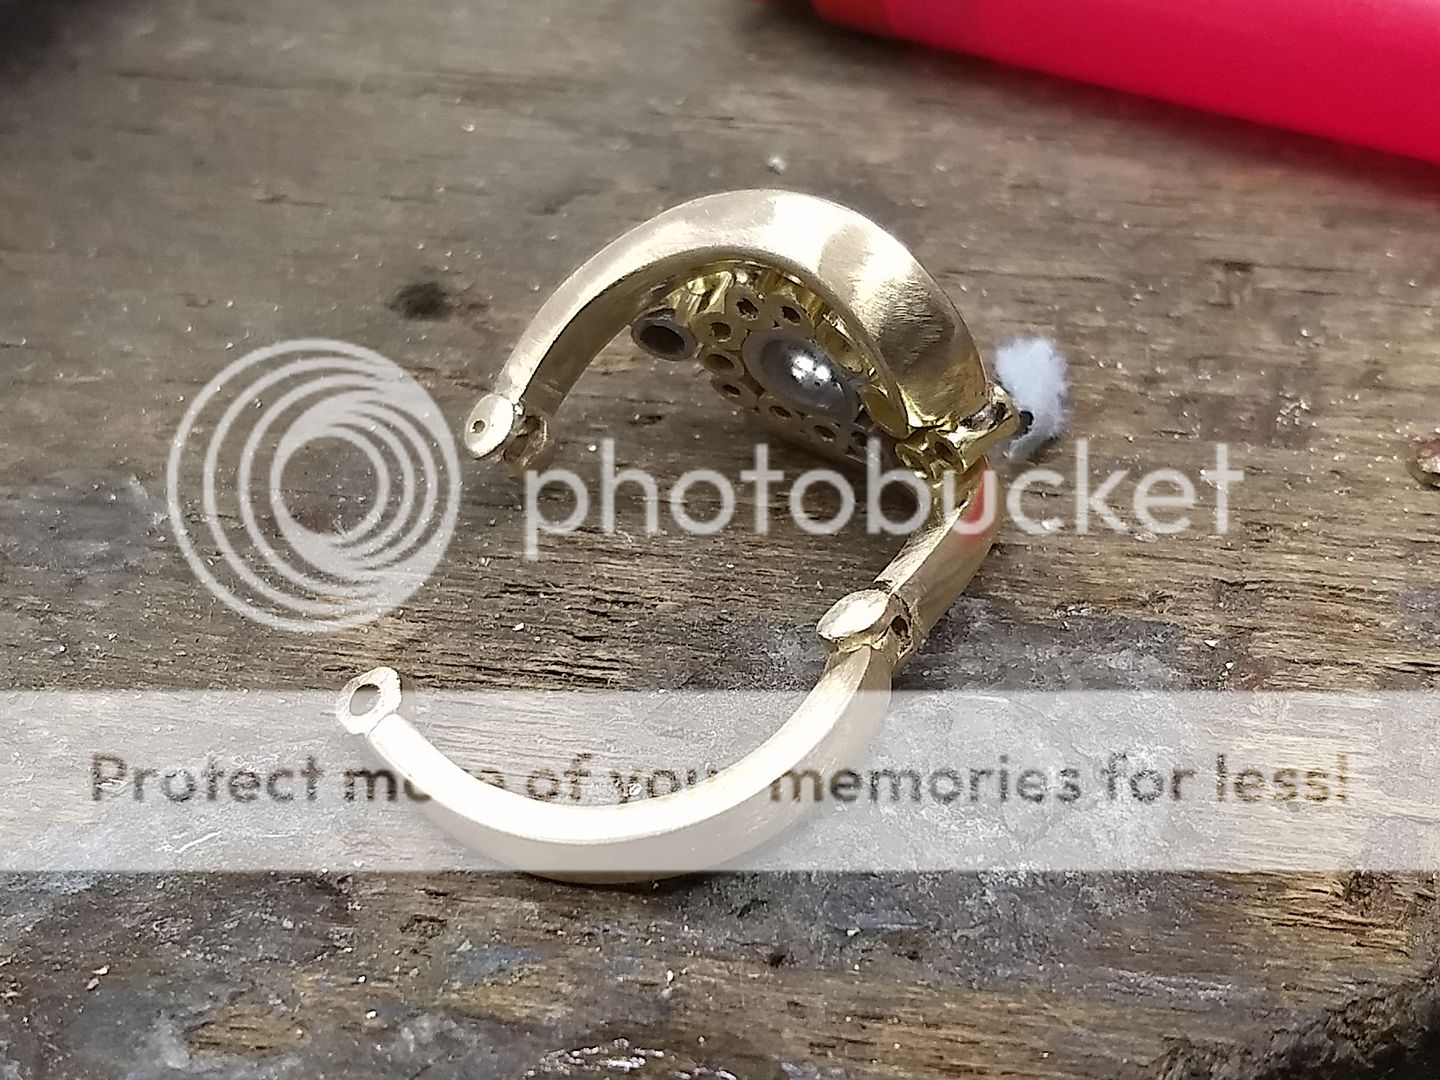
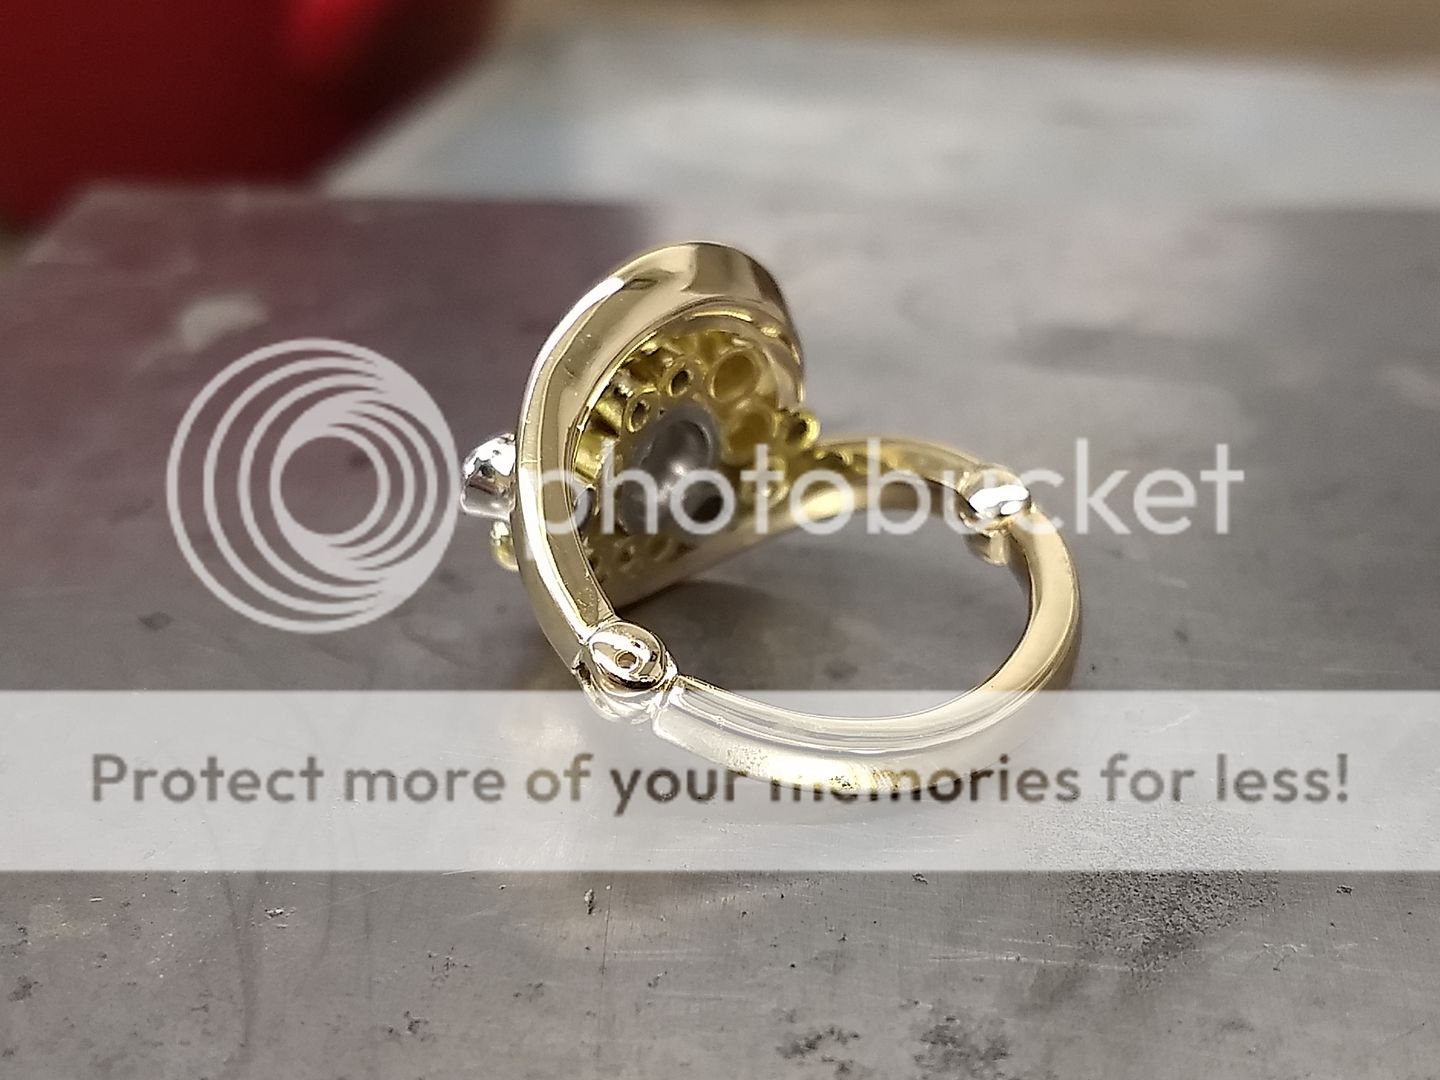
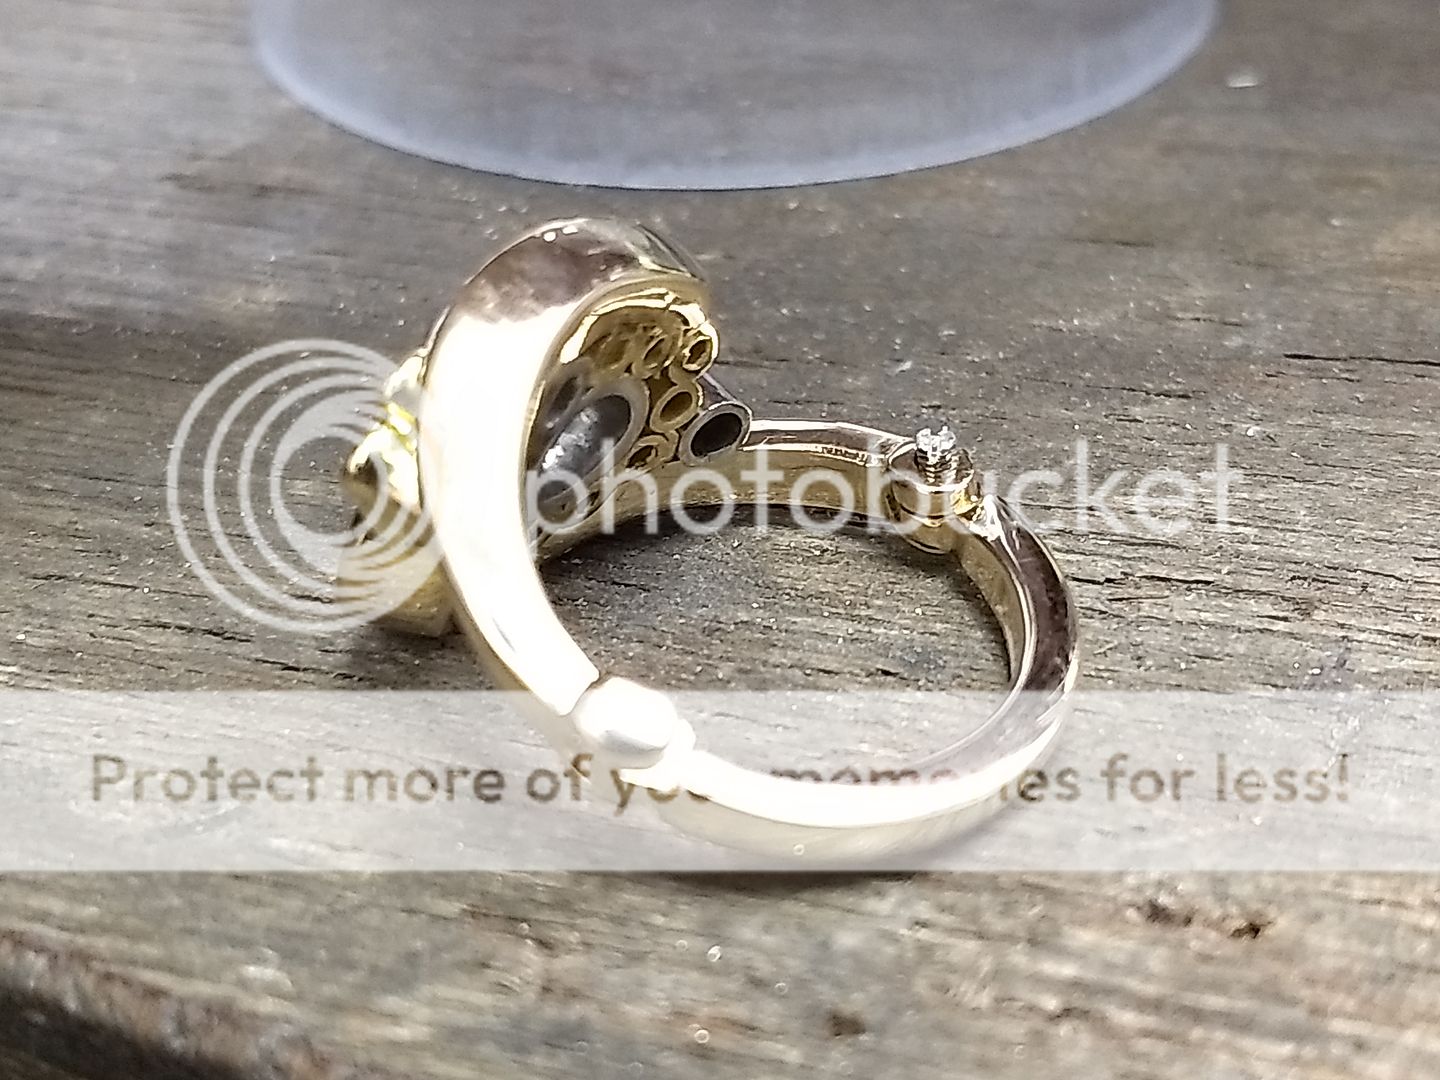
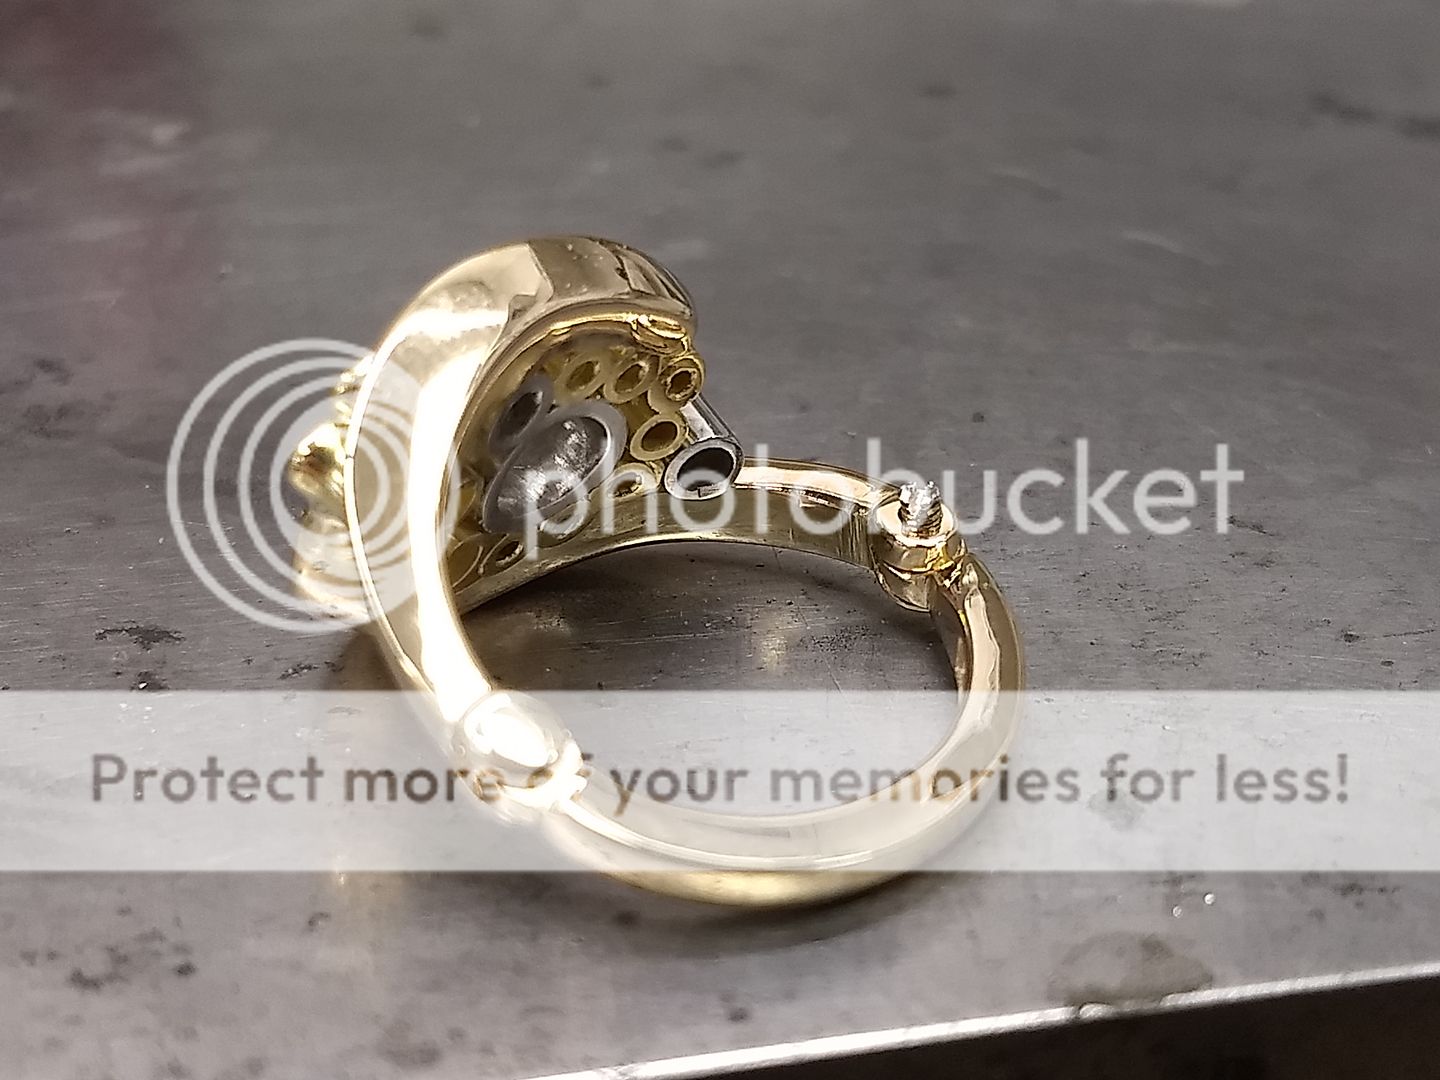
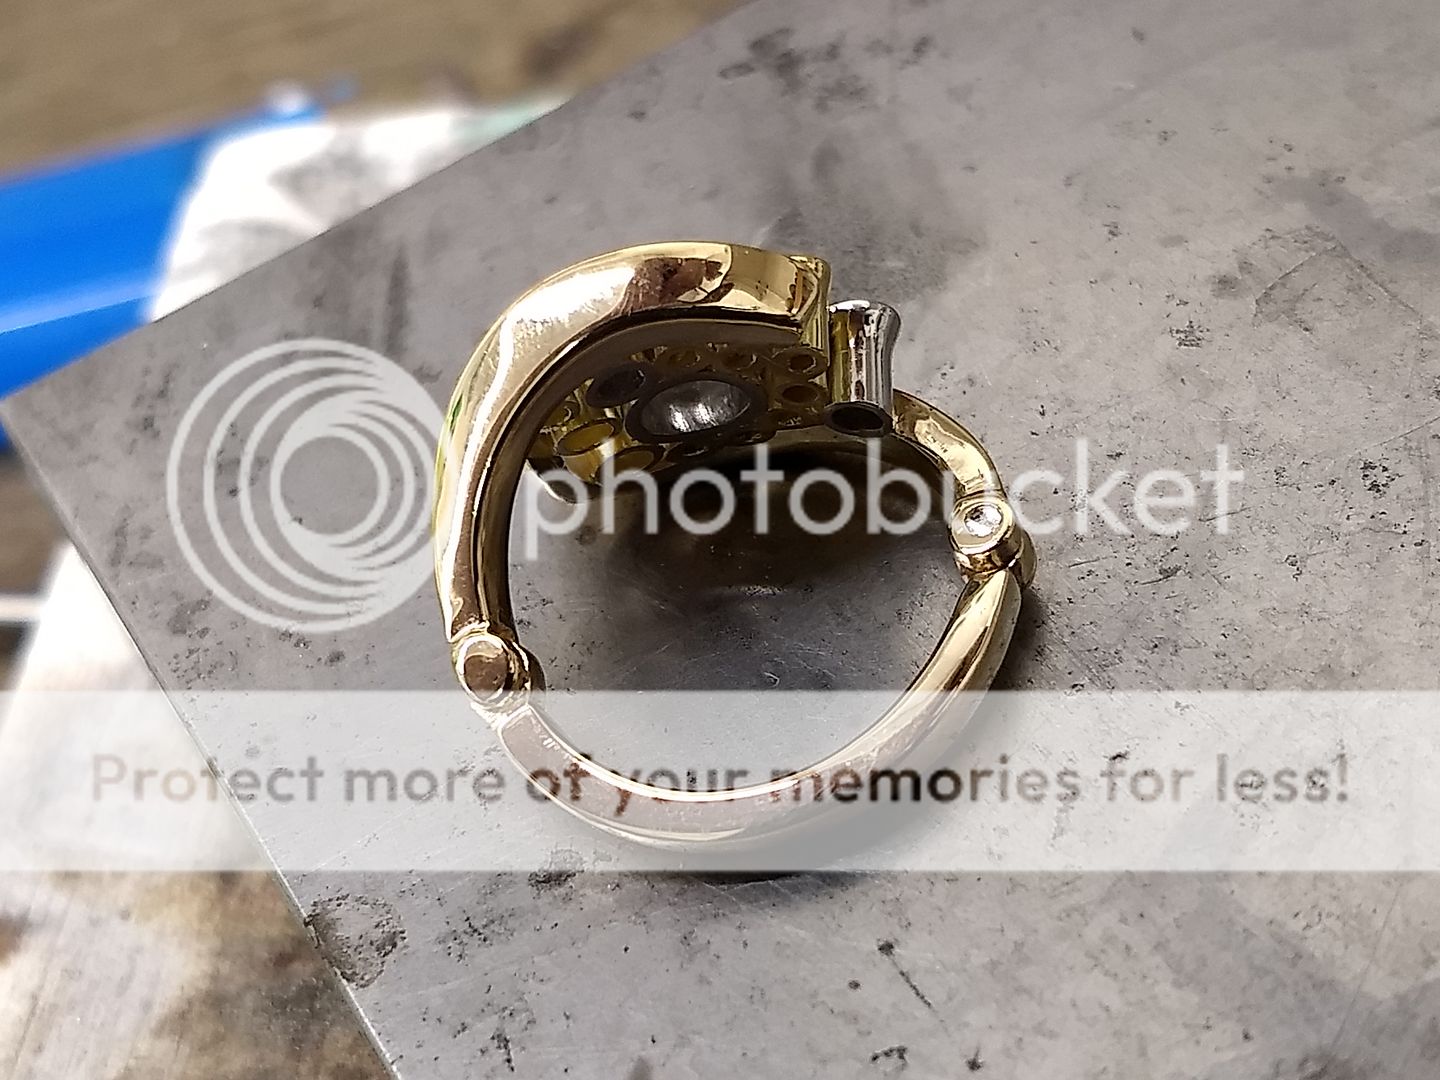
Now, obviously the ring won't go over her knuckle like this so I had to spend a while working out how the hell I was going to get it to fit. The clear answer was to hinge it, but how do we then secure the other end and make it durable?? Here's the hinge first:
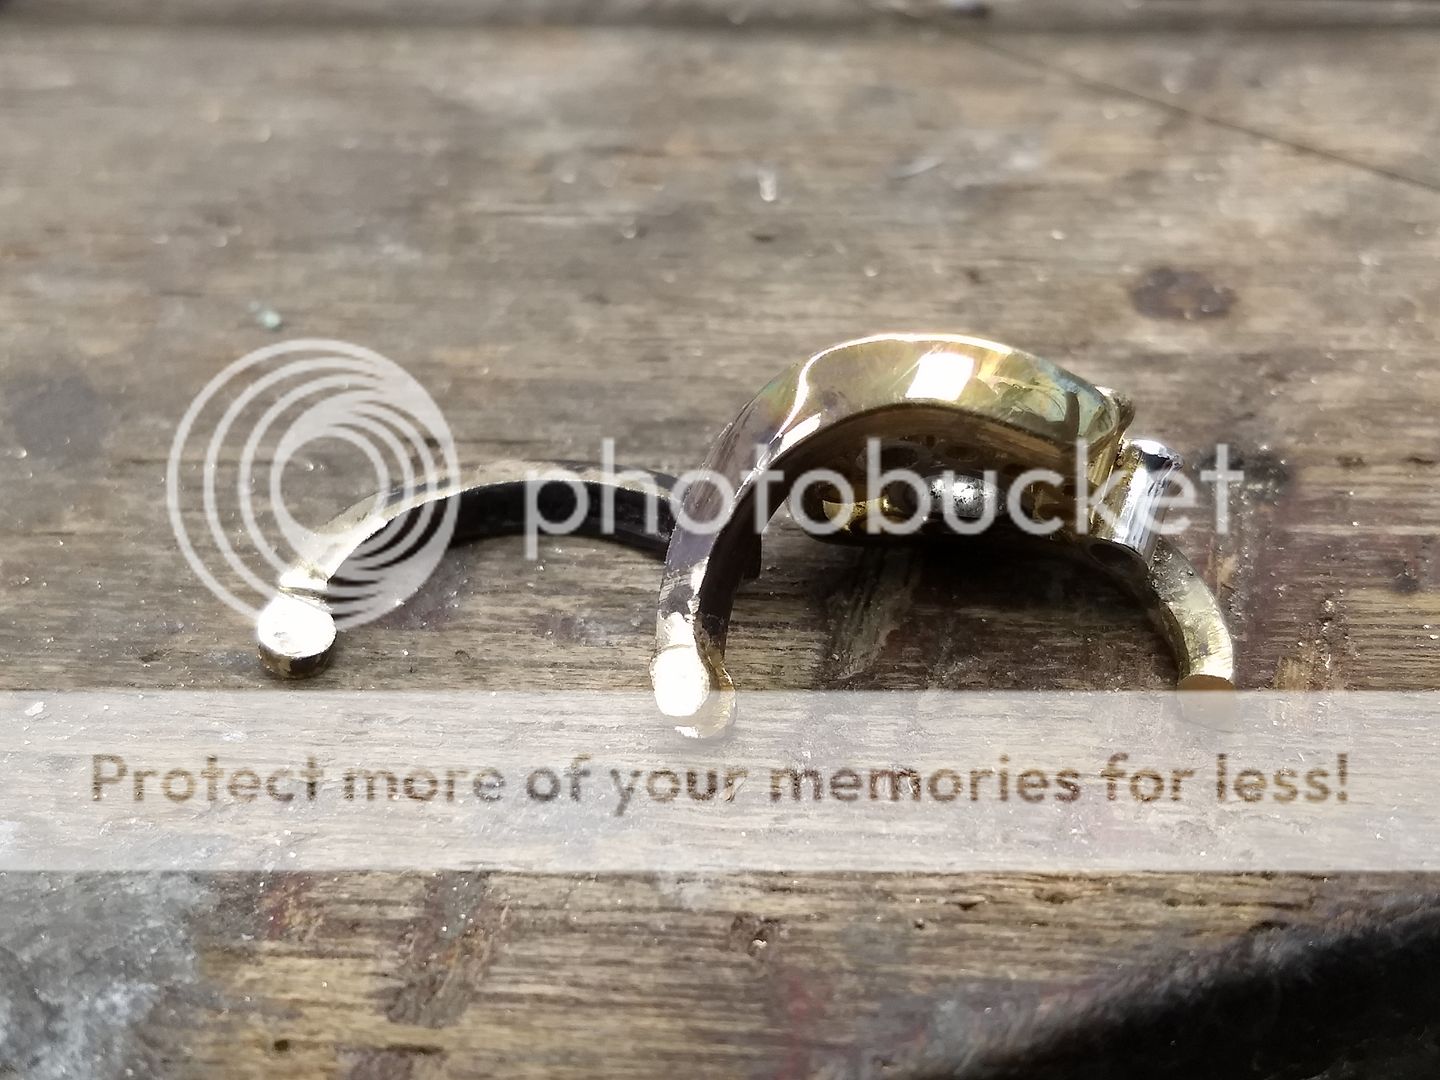
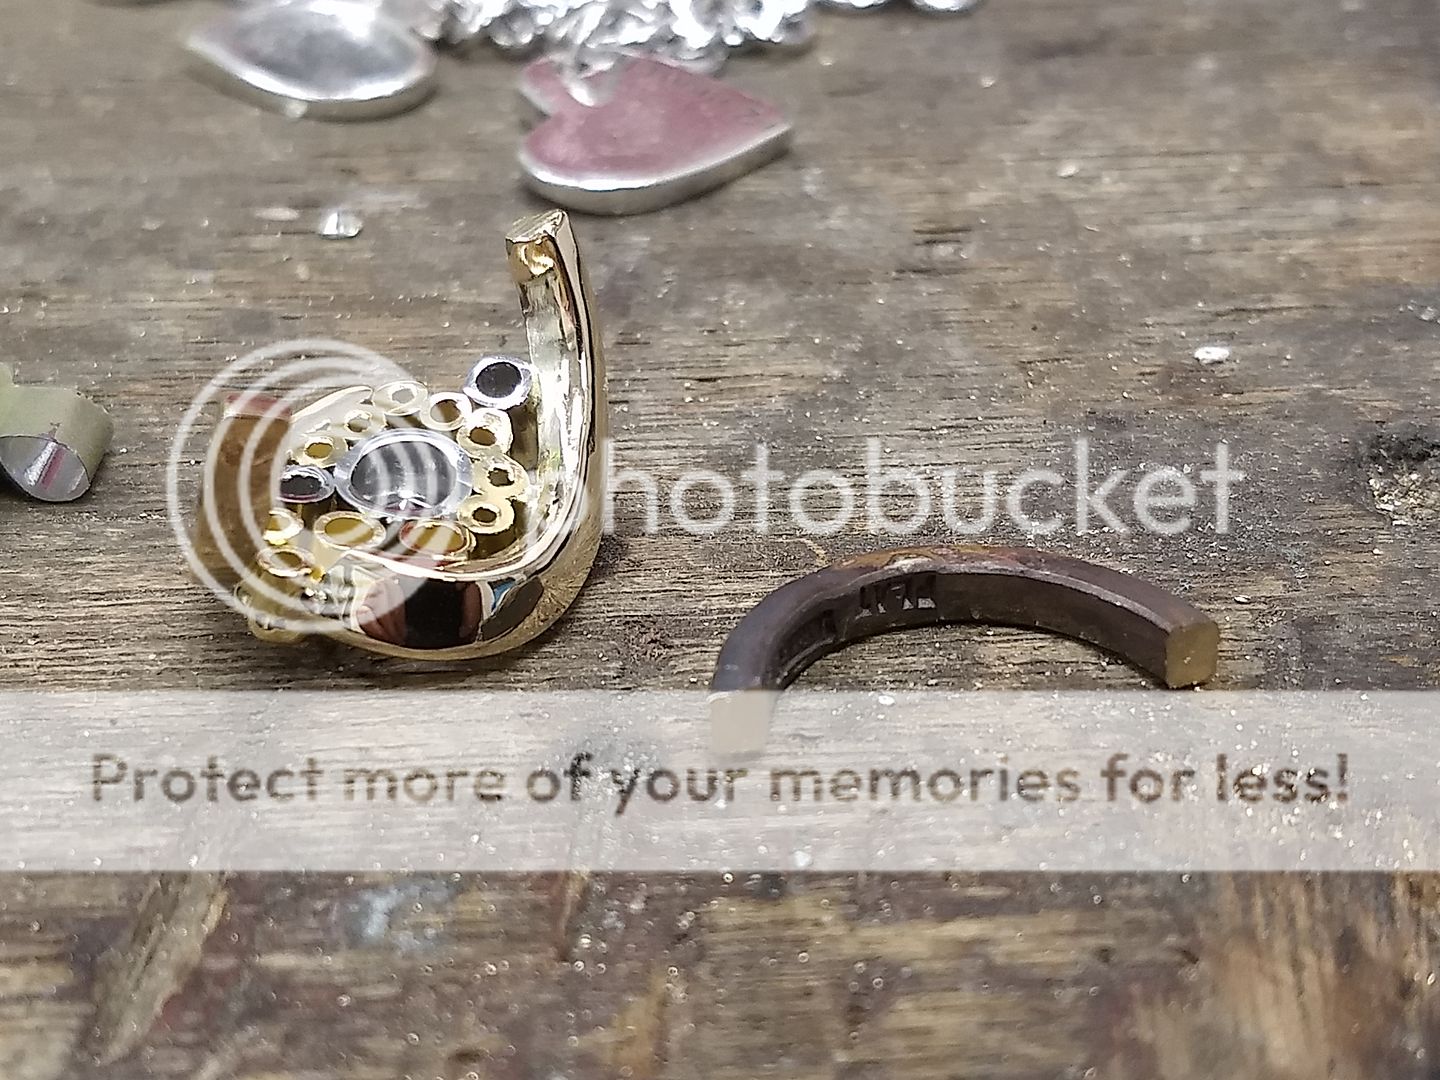
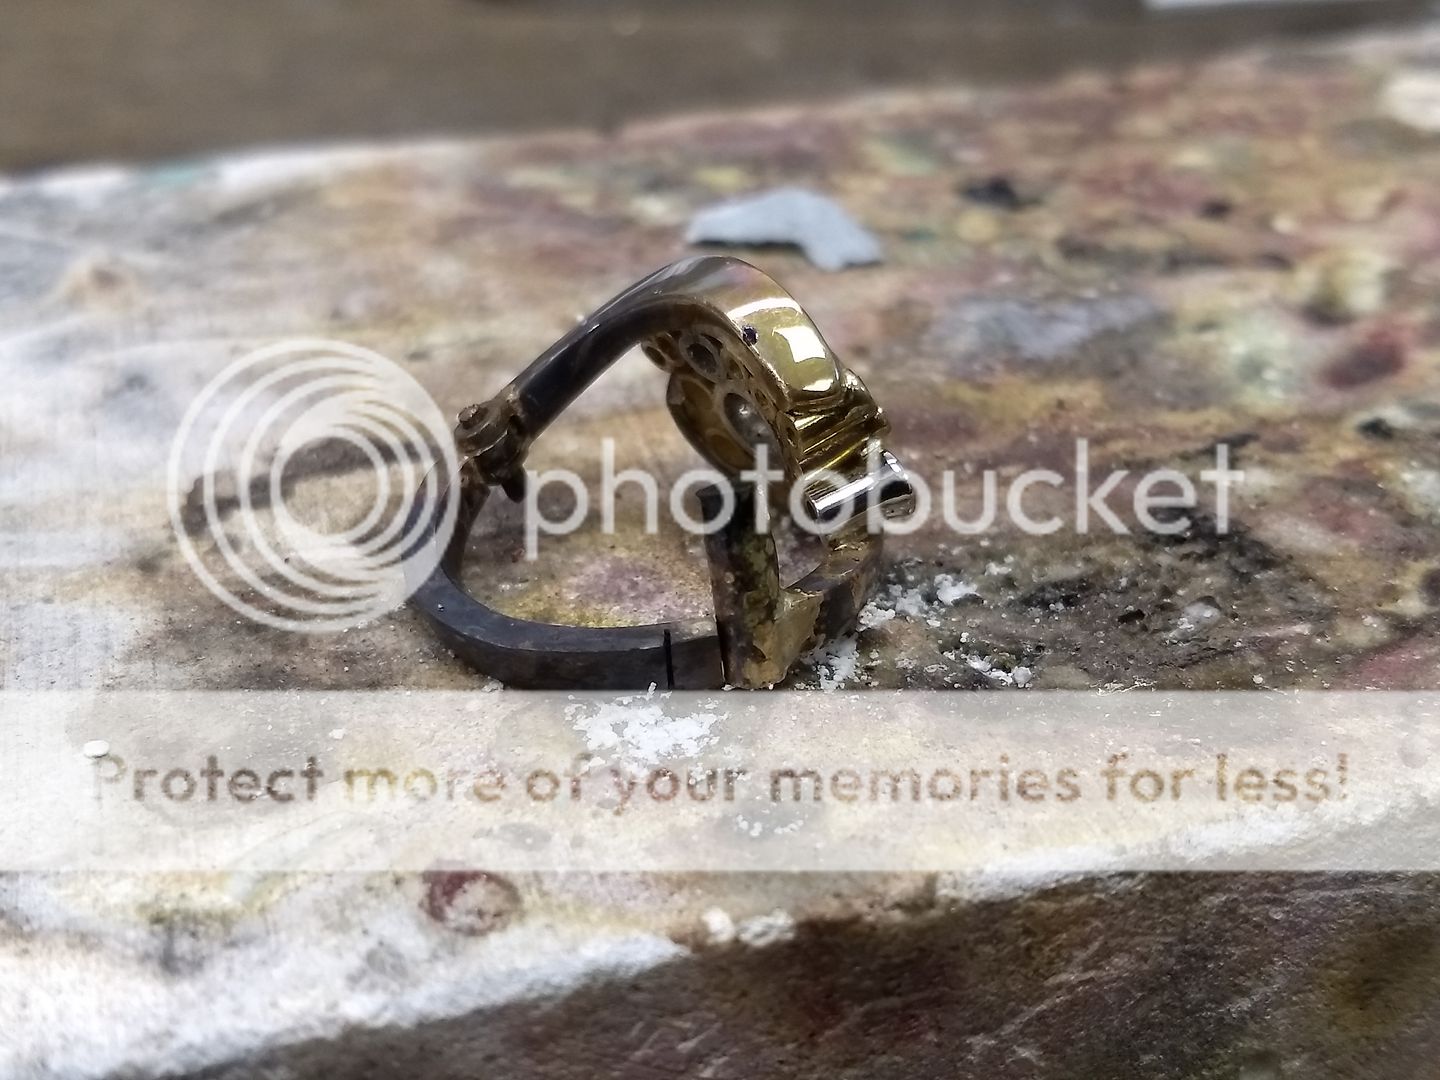
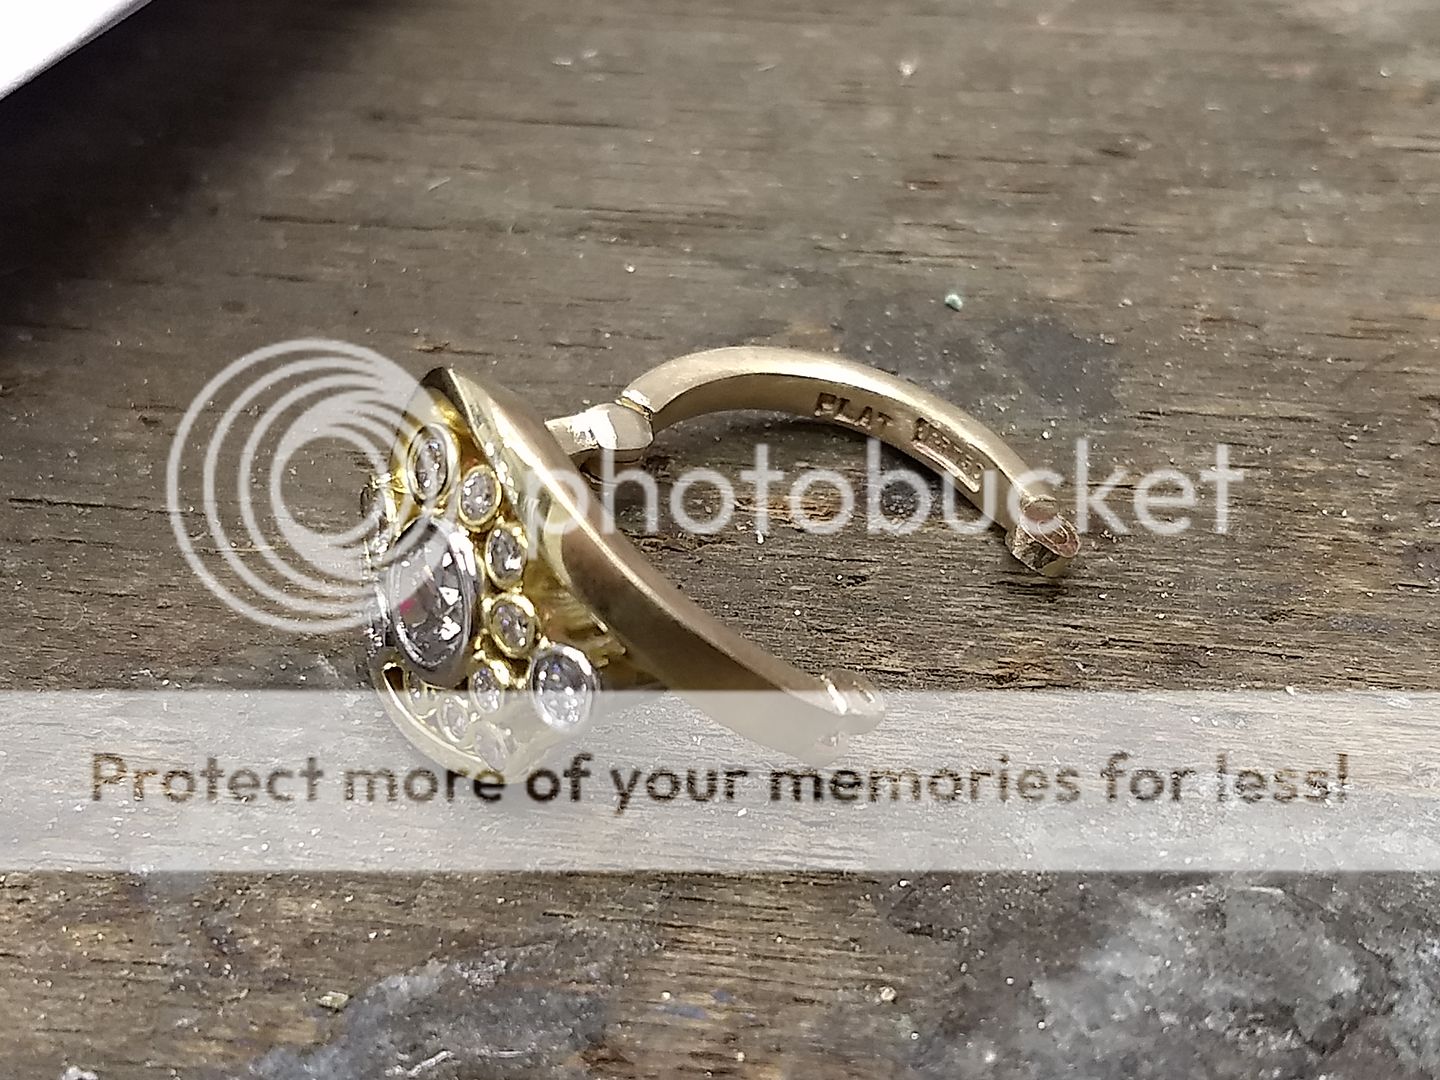
So, with the hinge fitted and functional what do we do about the other end? The shank is curved and doesn't come together in a way that a catch would work.... not reliably anyway. The only way to do it without worrying is to screw it shut. The solution: Make another hinge at the other end, but an angled one to allow for the way it closes and then instead of a hinge pin I'll use a grub screw to secure it. At this point it's trial and error but it's my best hope
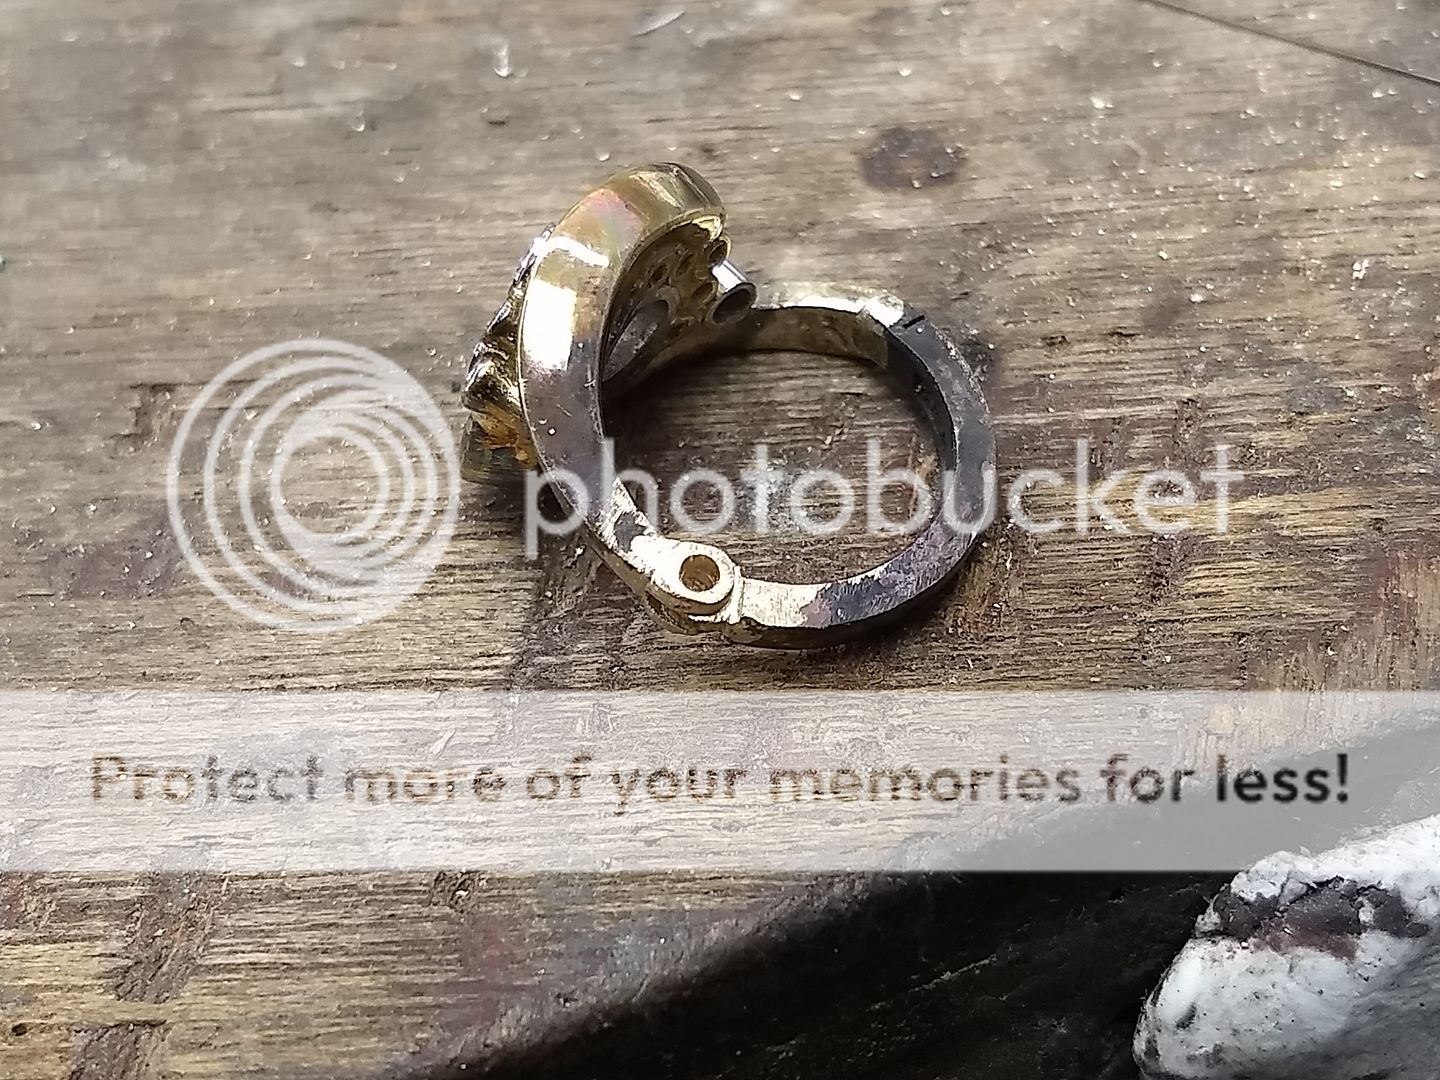
The hole is drilled only 4/5 the way through to stop the screw coming out.
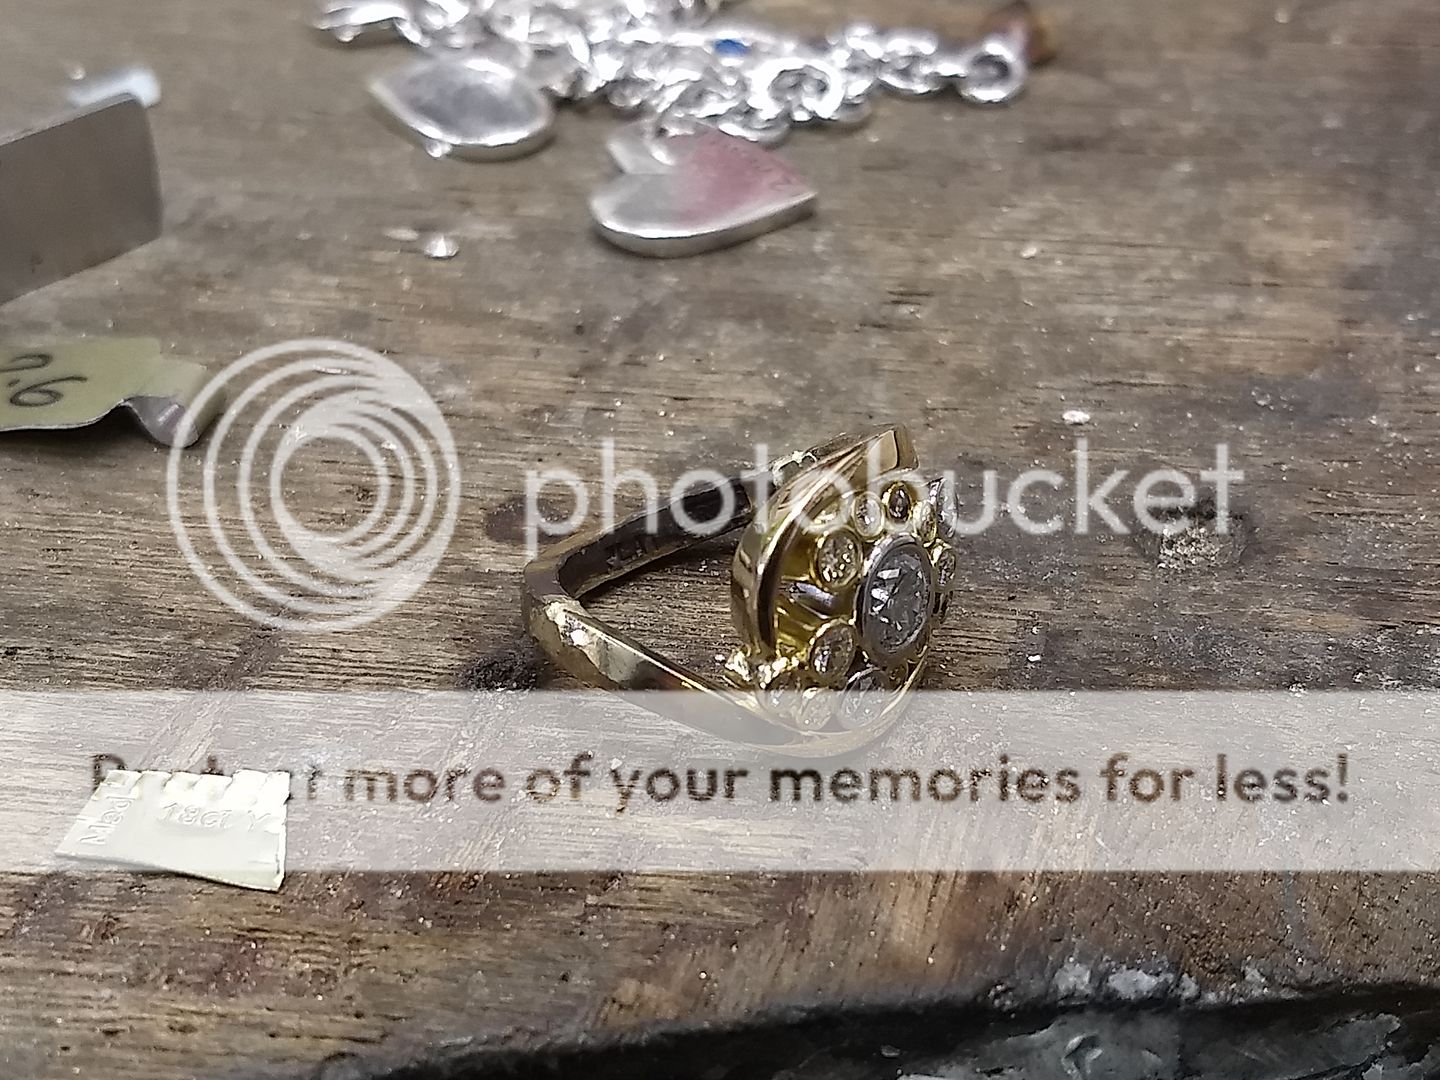
Test fit:
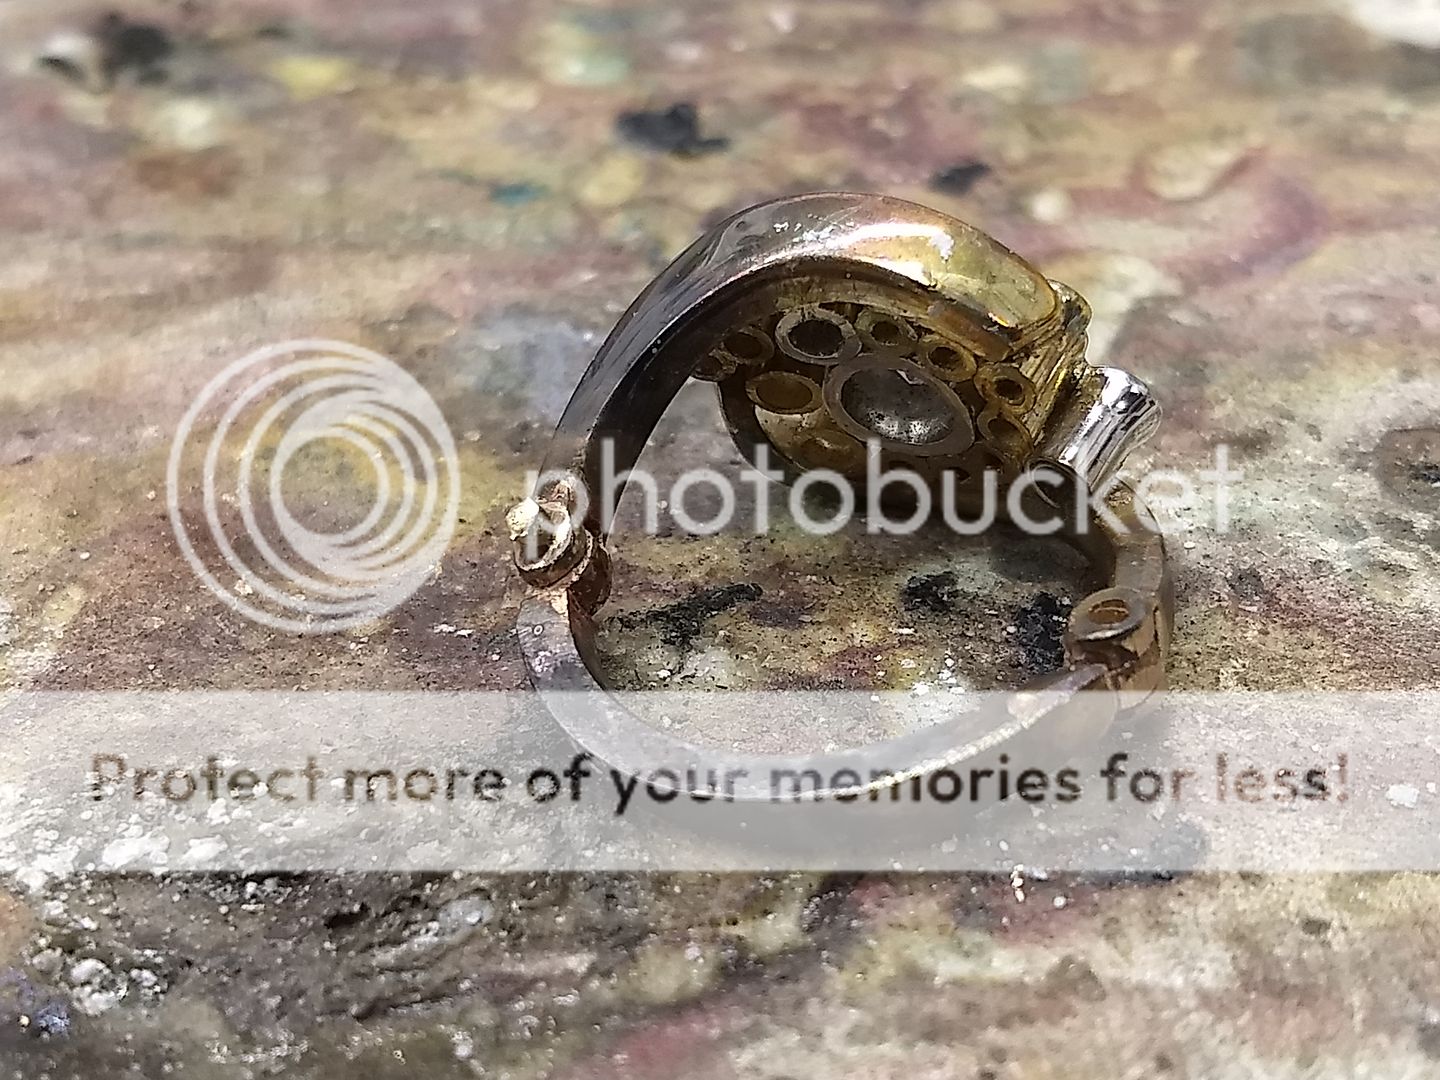
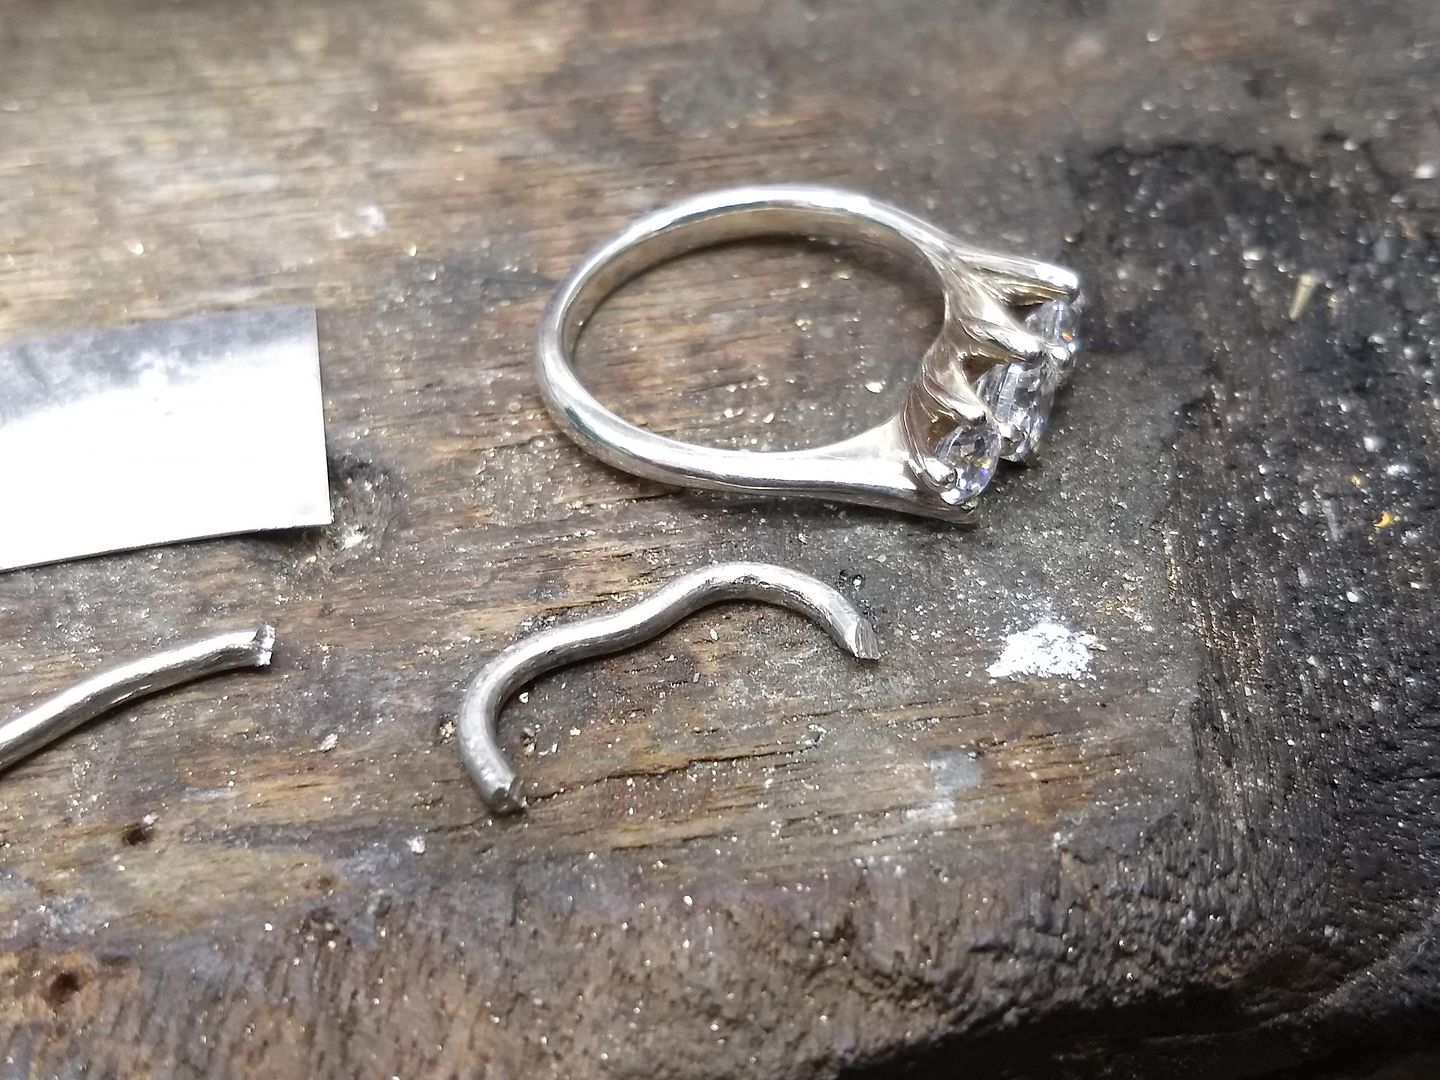
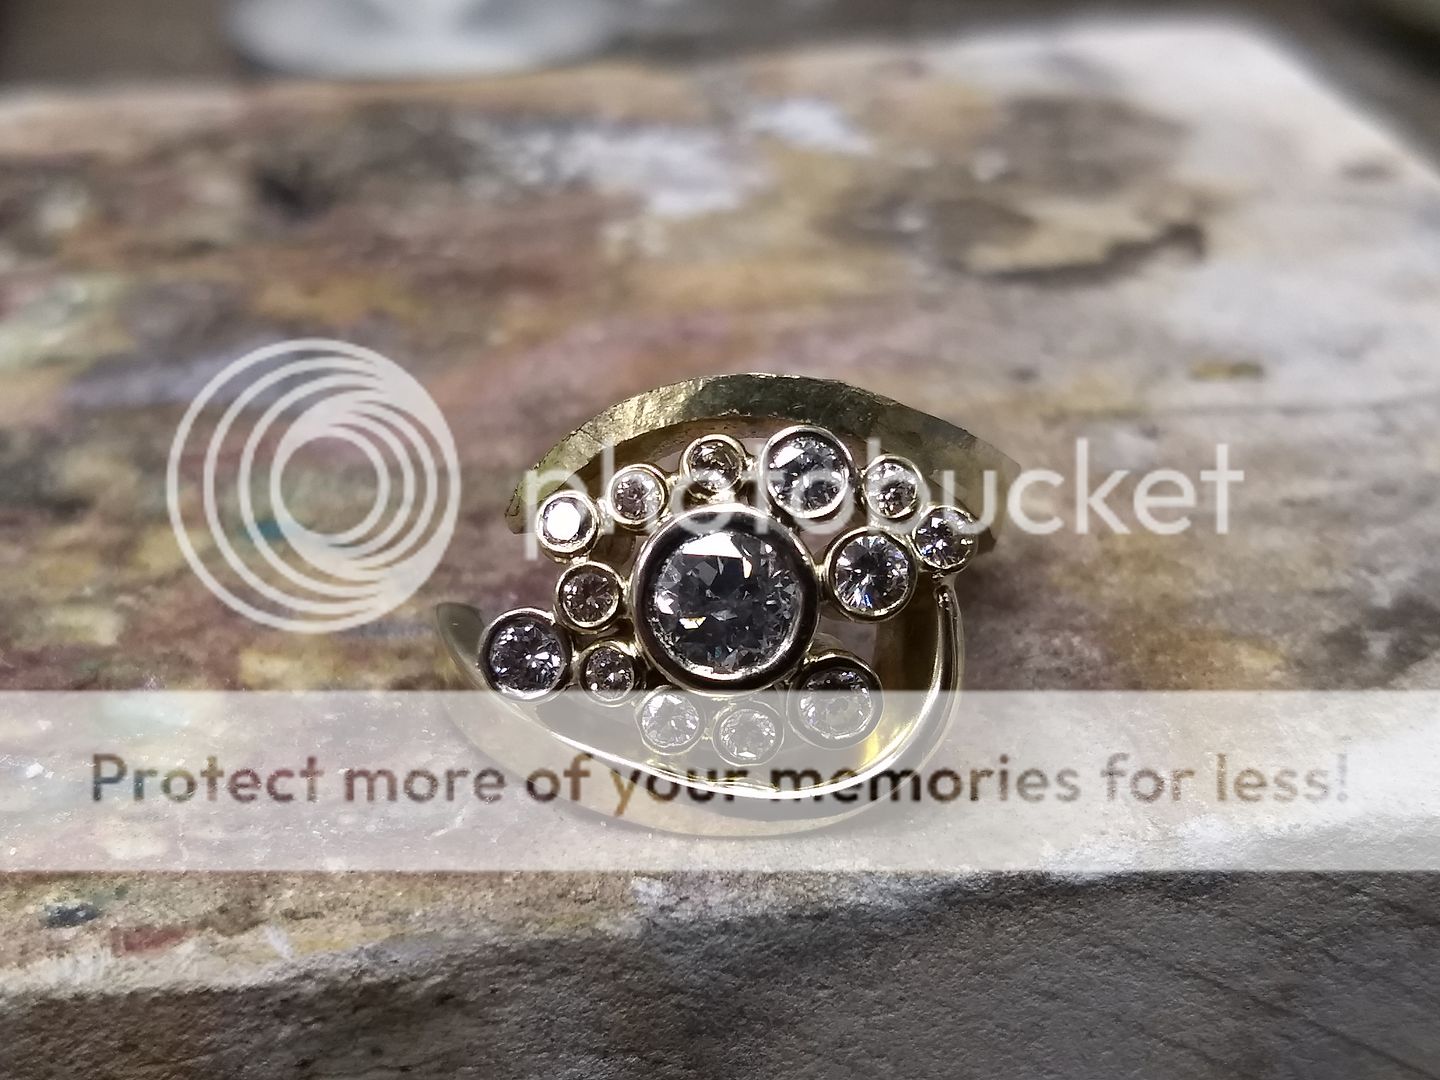
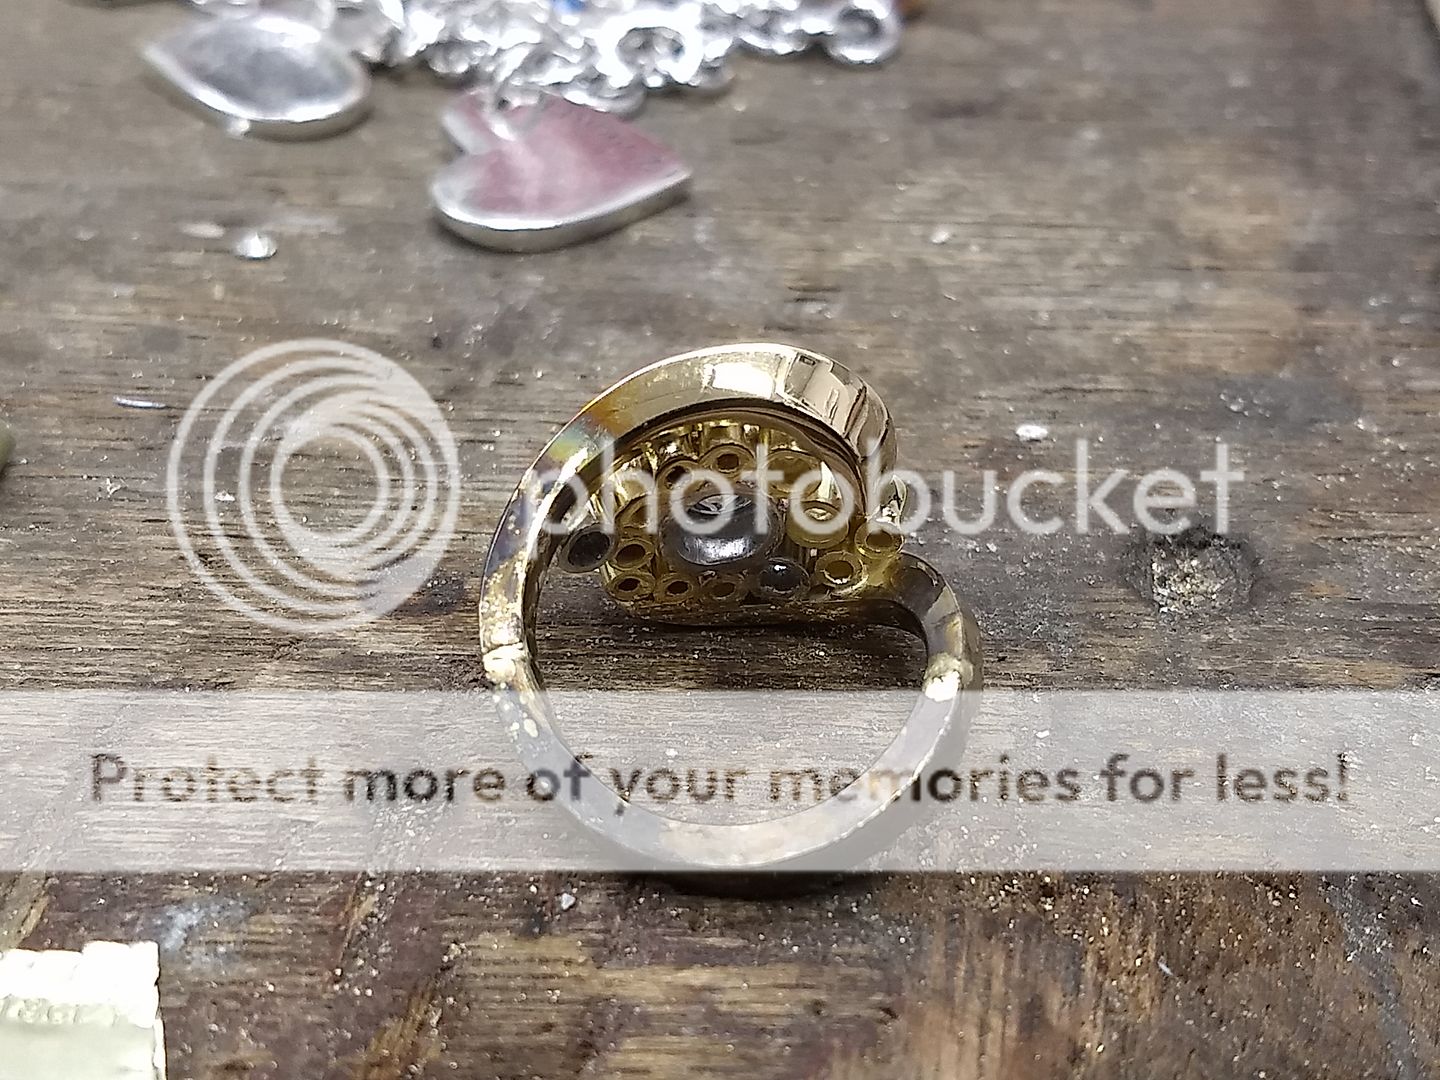
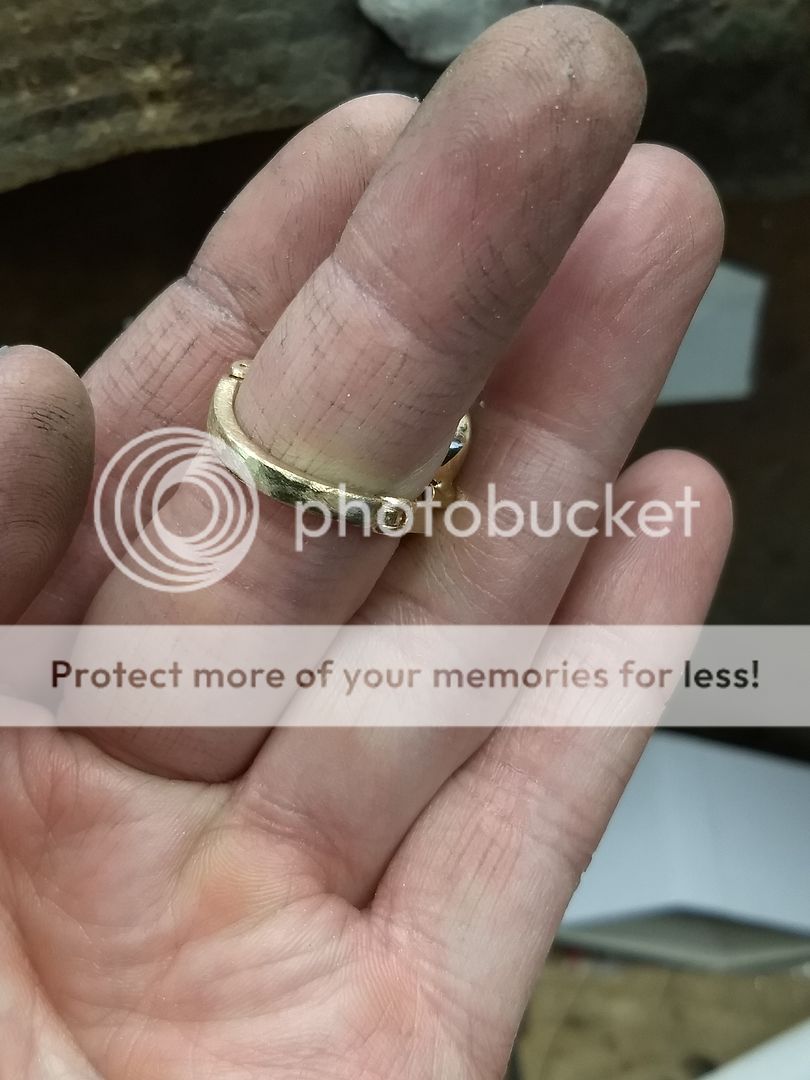
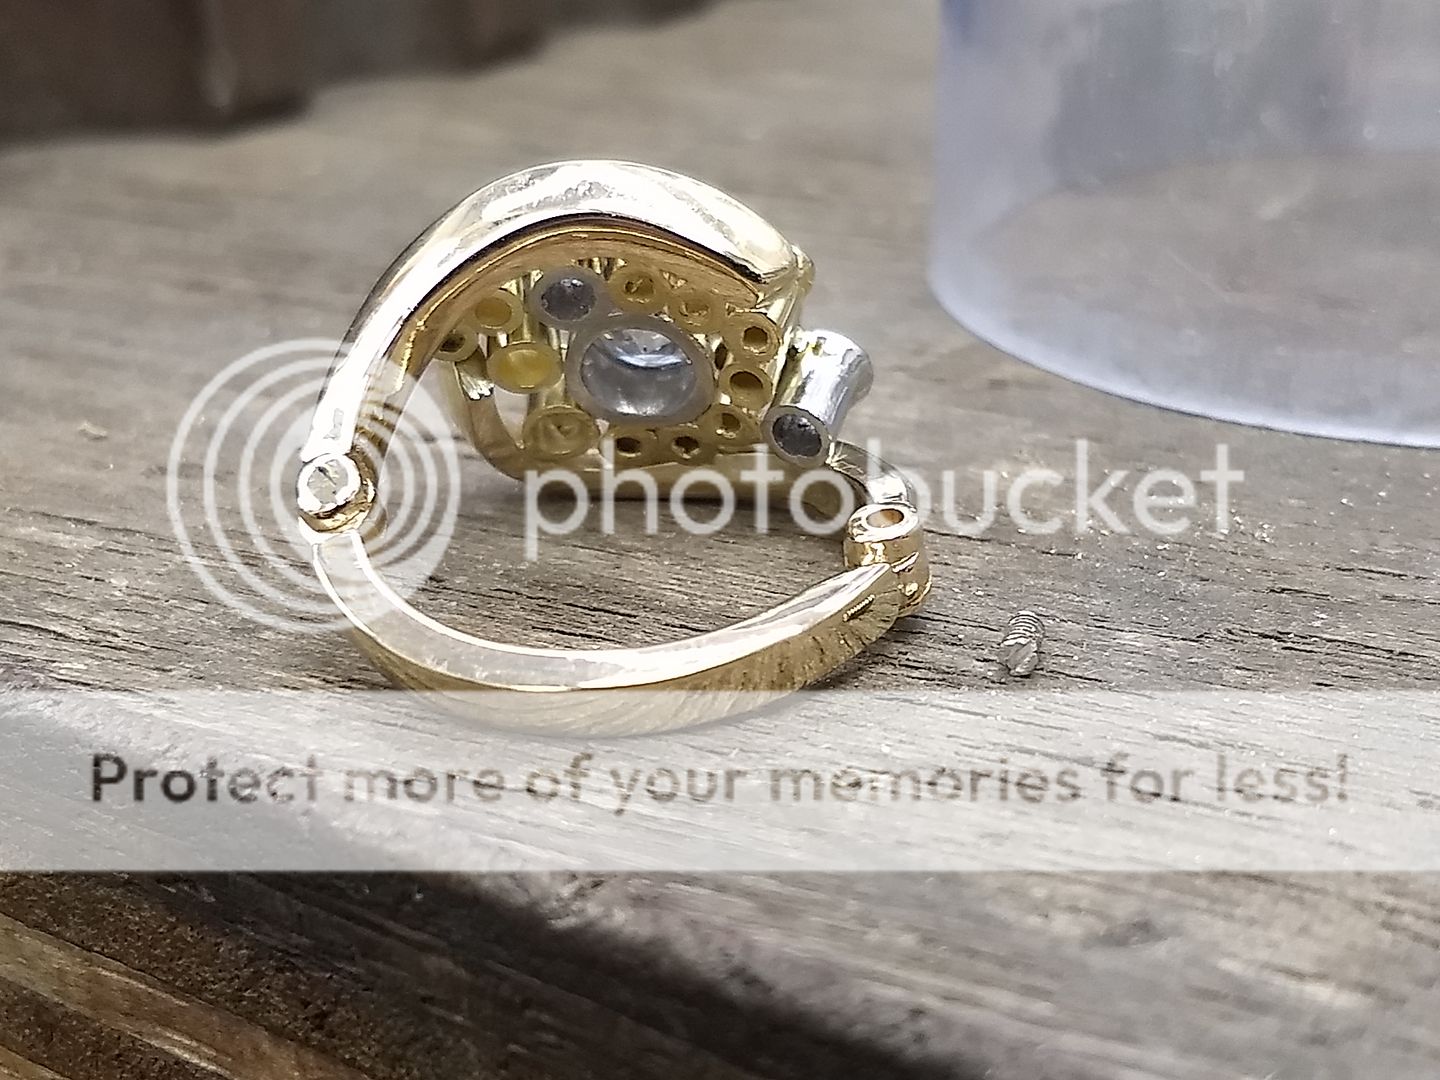
The hinge is then soldered to secure and the ring cleaned up:
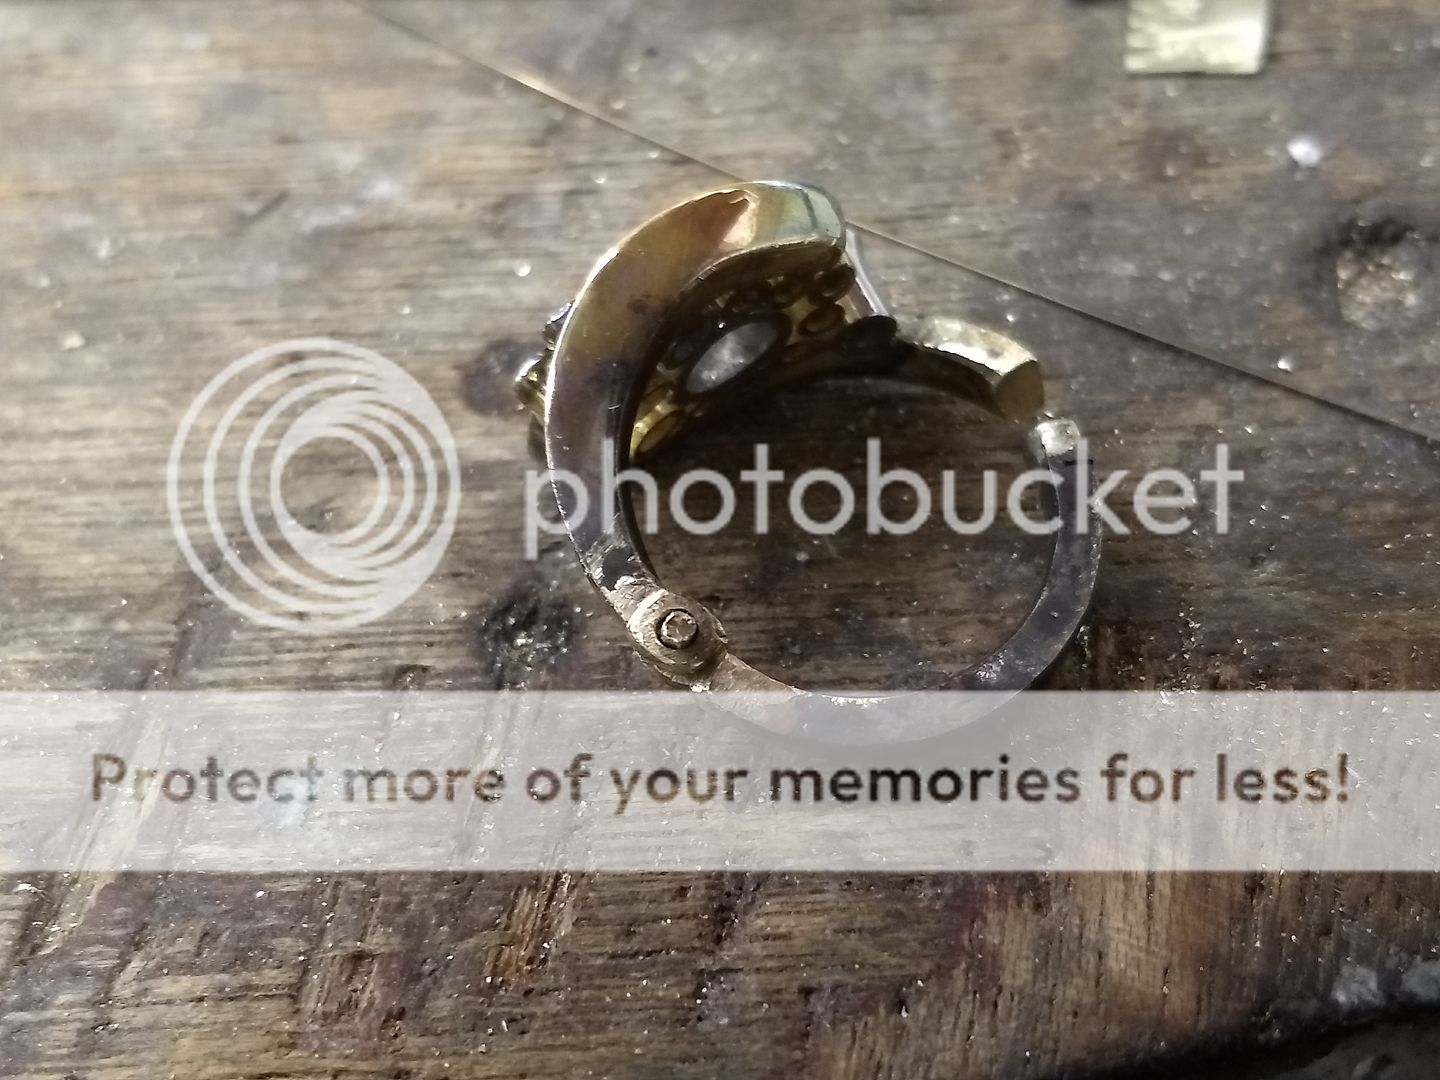
The little hole in the other end is there for a reason. I'll explain in a bit:
Sits ok
 wrmc.jpg' target='_blank'/>


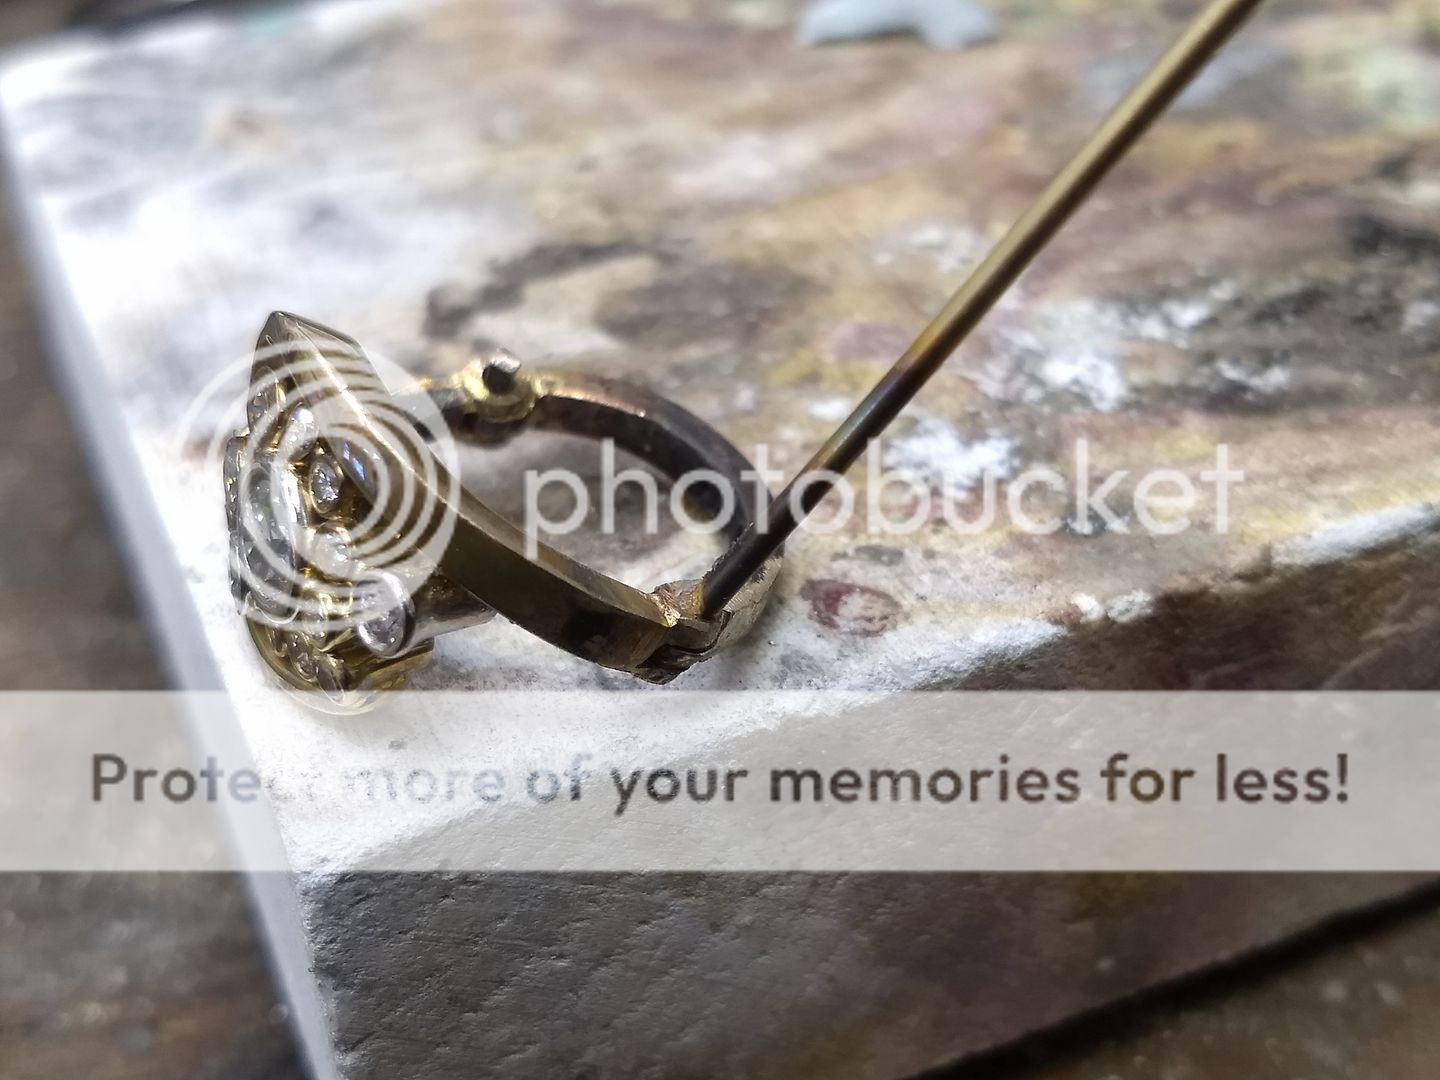
The grub screw: With the gold being soft I wanted something that wasn't going to damage the important bit..... the ring. So, I threaded some silver wire to make what is effectively a sacrificial, single use screw. She'll rarely take it off and as she's local she can come in to see me if it needed removing and refitting. It screws in fine and is snug enough to not come out, but once it's in the threads are destroyed. That little hole in the other side? It's to poke in a little threadlock to keep it secure long term. It's not strong enough that I can't screw it back out but it is firm enough that she and I don't have to worry about it. Pretty clever I reckon
Thanks for looking
This one is quite pic heavy so apologies if your internet takes a hit. Brief outline: Customer has very arthritic knuckles and is resigned to never wearing a ring again, unless it's made so big it swings round the finger. Queue the next job for ecain63 and his dirty fingers.
The lady has some rings left by her mother and grandmother, including one with a 0.75ct old cut diamond. There are half a dozen other small stones too as well as a mix of 18ct and 9ct yellow gold. We agree to keep the 18ct yellow to make the ring and swap / px the 9ct for another 0.50ct of small stone, making 14 stones in all. I bought some platinum and 18ct yellow tube and away we went. Here's the head building process:


Reminds me of when that setting company did the diamonds on the inside of that Rolls Royce a couple of years back.

With the stones all set in their tubes we agree on a rough design:


The next job is to make the shoulders and produce a complete head. Here we melt the 18ct scrap and begin the assembly process:


Skipped a pic here for some reason. The above is cleaned up and then split at the centre. The shoulders are shaped to make a twist:

And test fitted on one side after a light file and clean up:

This shoulder is then removed from the other as they are both individually shaped and positioned:


And it's then soldered in place:

Shoulder number 2 is next:


Almost looks like a ring now:


The remaining bar is then rolled out and marked with the material content.

Using a digital gauge I worked out she's roughly a size N at the finger (not the knuckle) so bent the new shank to suit:

And then soldered it to the head so I could hammer it to the correct shape all round:


Now, obviously the ring won't go over her knuckle like this so I had to spend a while working out how the hell I was going to get it to fit. The clear answer was to hinge it, but how do we then secure the other end and make it durable?? Here's the hinge first:


So, with the hinge fitted and functional what do we do about the other end? The shank is curved and doesn't come together in a way that a catch would work.... not reliably anyway. The only way to do it without worrying is to screw it shut. The solution: Make another hinge at the other end, but an angled one to allow for the way it closes and then instead of a hinge pin I'll use a grub screw to secure it. At this point it's trial and error but it's my best hope


The hole is drilled only 4/5 the way through to stop the screw coming out.

Test fit:


The hinge is then soldered to secure and the ring cleaned up:

The little hole in the other end is there for a reason. I'll explain in a bit:


Sits ok


 wrmc.jpg' target='_blank'/>


The grub screw: With the gold being soft I wanted something that wasn't going to damage the important bit..... the ring. So, I threaded some silver wire to make what is effectively a sacrificial, single use screw. She'll rarely take it off and as she's local she can come in to see me if it needed removing and refitting. It screws in fine and is snug enough to not come out, but once it's in the threads are destroyed. That little hole in the other side? It's to poke in a little threadlock to keep it secure long term. It's not strong enough that I can't screw it back out but it is firm enough that she and I don't have to worry about it. Pretty clever I reckon


Thanks for looking
Edited by ecain63 on Friday 24th May 08:48
Edited by ecain63 on Friday 24th May 08:53
Edited by ecain63 on Friday 24th May 08:58
Dibble said:
Great work as always.
A question from me, having seen what looks like you melting gold on some fairly burnt/carbonised wood; does the molten gold not pick up imperfections/carbon/bits of wood when it’s in its molten state? If so, how do you get rid of the “bits”, or is it just on the surface, so easy enough to file/polish away?
Sorry, that was more like two and a half questions!
Ha, yeah that's definitely more than one question A question from me, having seen what looks like you melting gold on some fairly burnt/carbonised wood; does the molten gold not pick up imperfections/carbon/bits of wood when it’s in its molten state? If so, how do you get rid of the “bits”, or is it just on the surface, so easy enough to file/polish away?
Sorry, that was more like two and a half questions!
To answer:it doesn't pick anything up from the wood. At that temperature, with borax thrown in the burn is very clean and if anything will burn off a tiny amount of the other metals, possibly increasing the carat slightly. Any surface rubbish will come off when quenching the metal and anything more stubborn will come off in the acid. Happy to help

s2tommi said:
Wow, that is incredible!
Do you cater for the man with a more modest budget?
So long as you're not in a rush, ha! Do you cater for the man with a more modest budget?
Work is absolutely bonkers at the moment. Lots on and even a waiting list. Send me a message and I'll take a look. Might take me a day or two to respond so apologies in advance if that's the case. I will respond though.
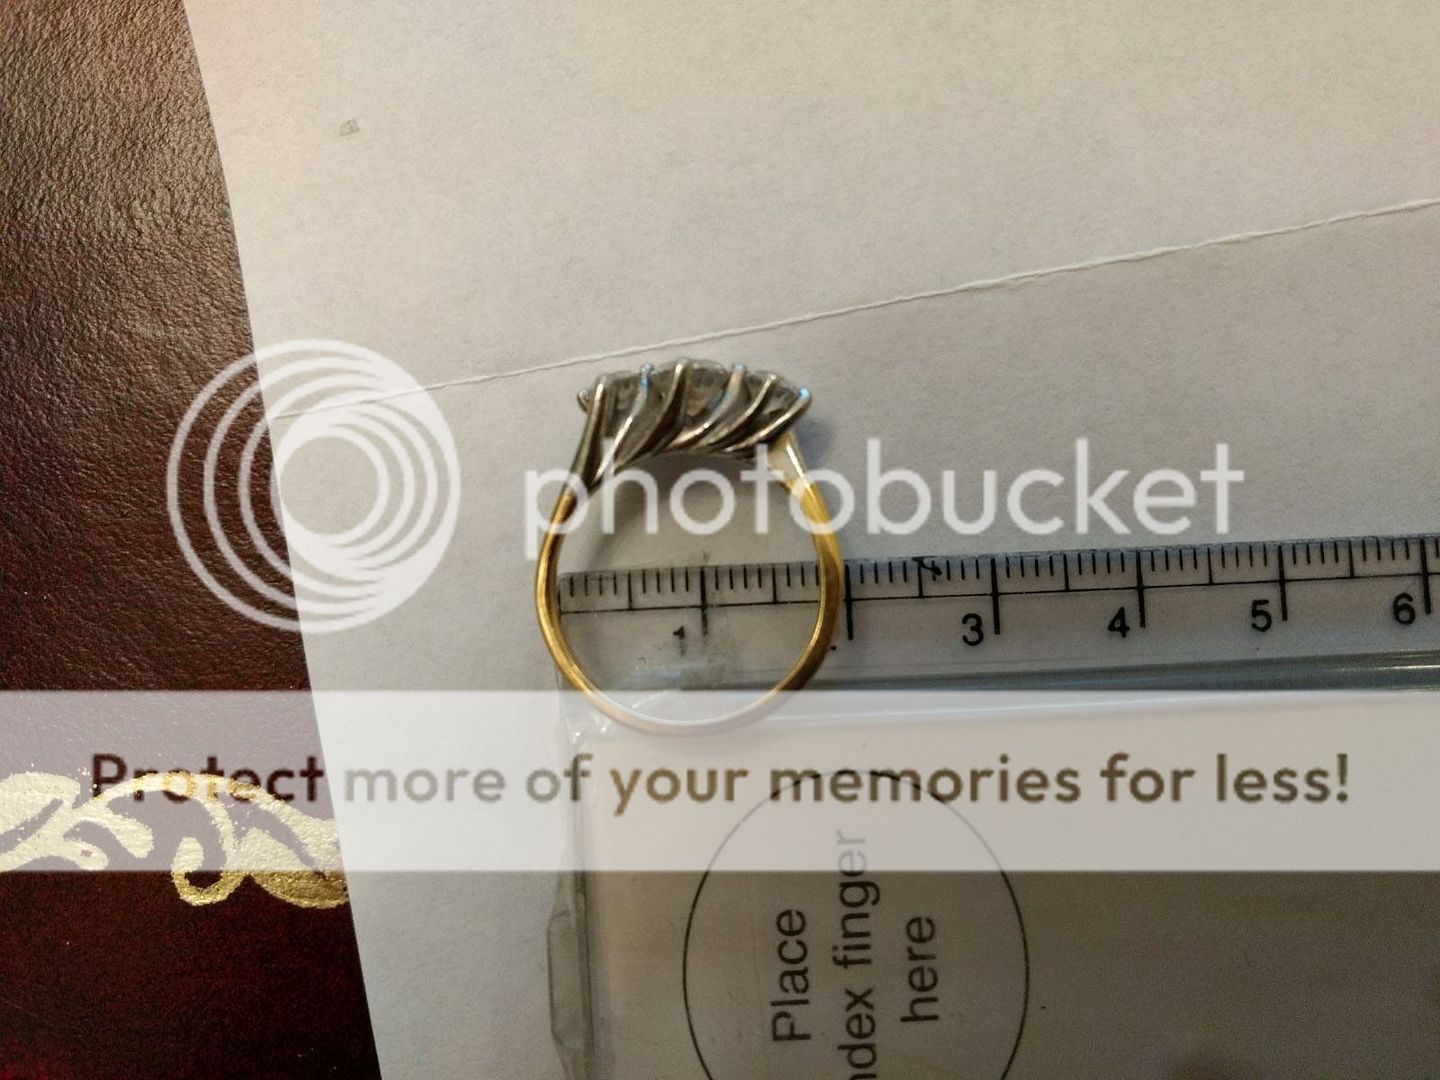
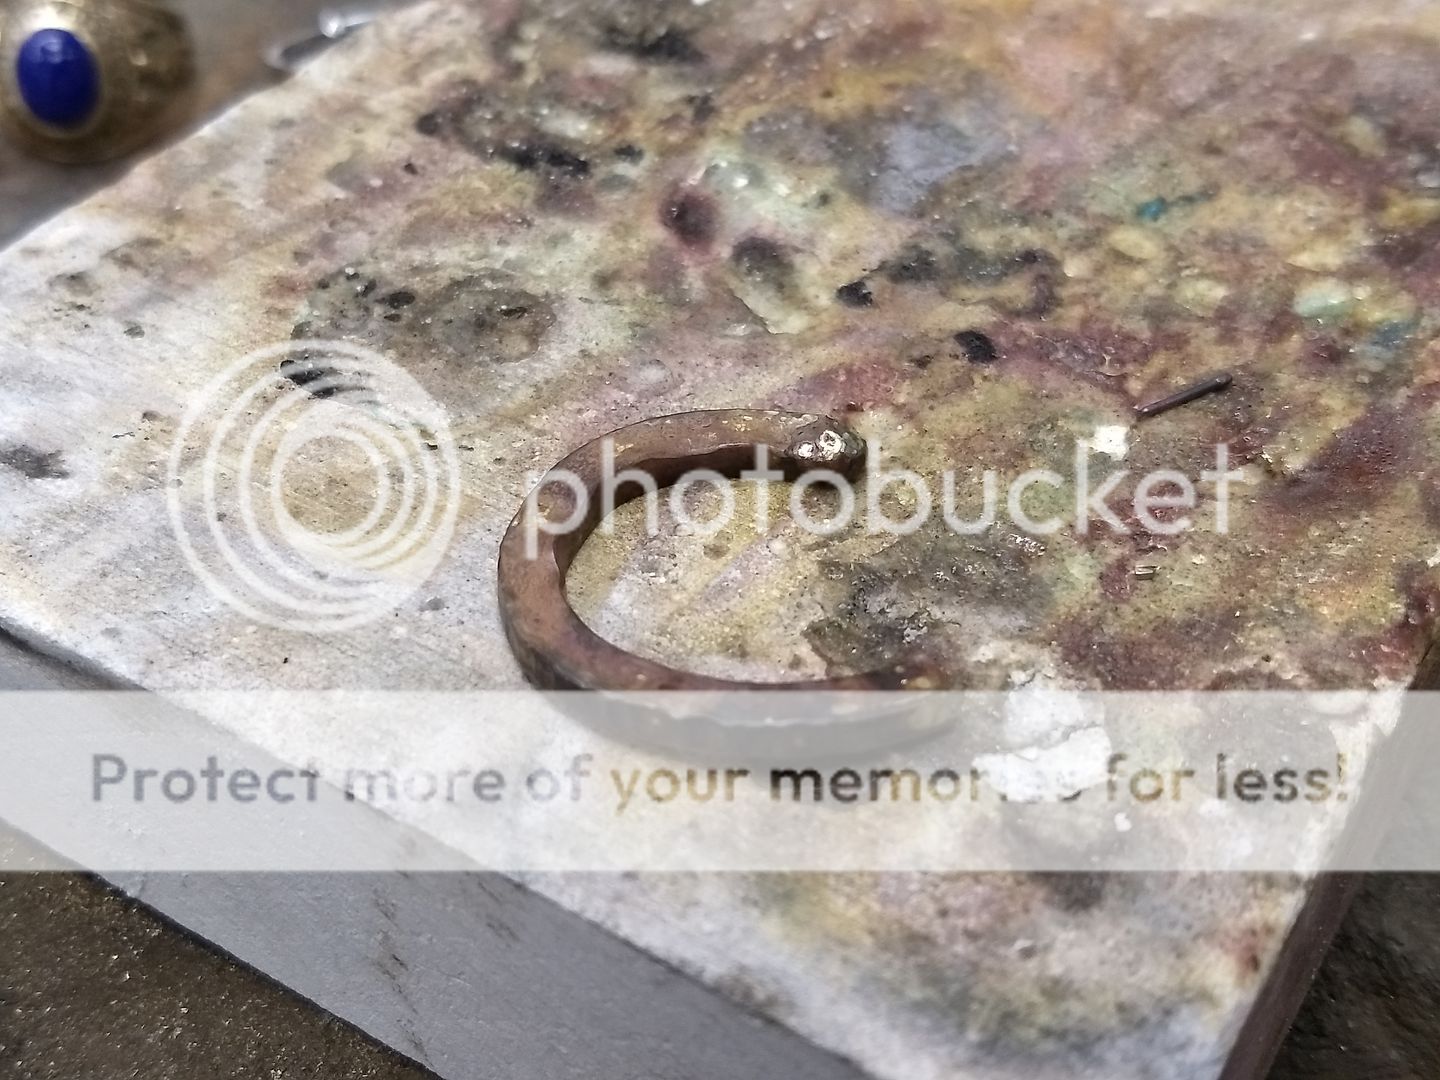
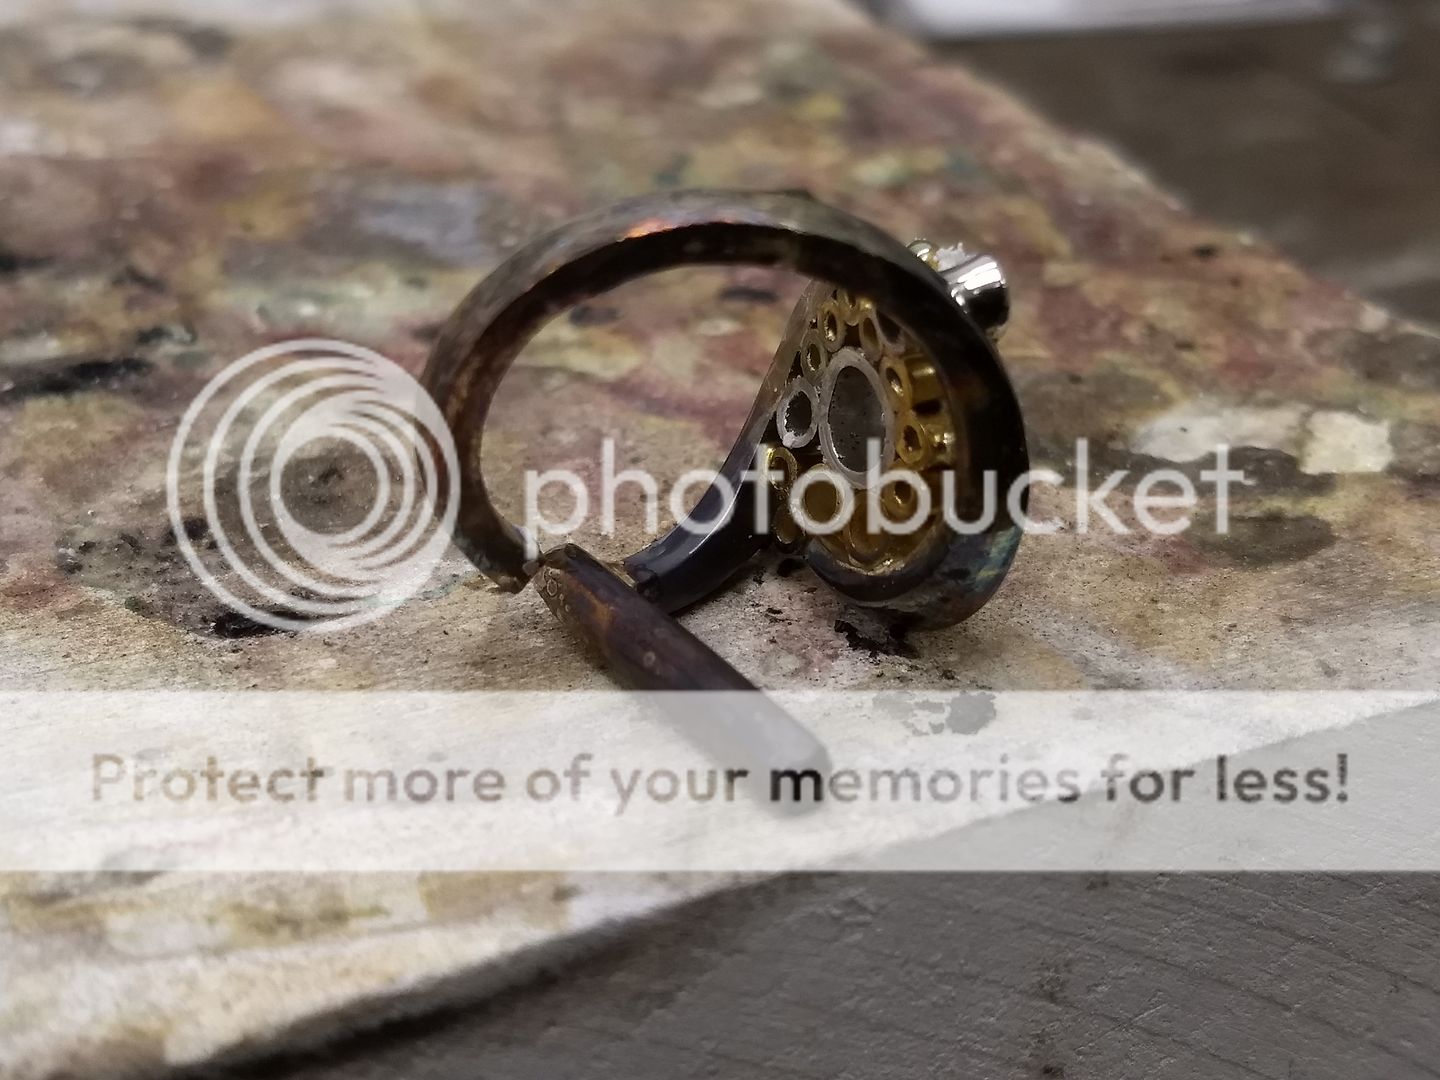
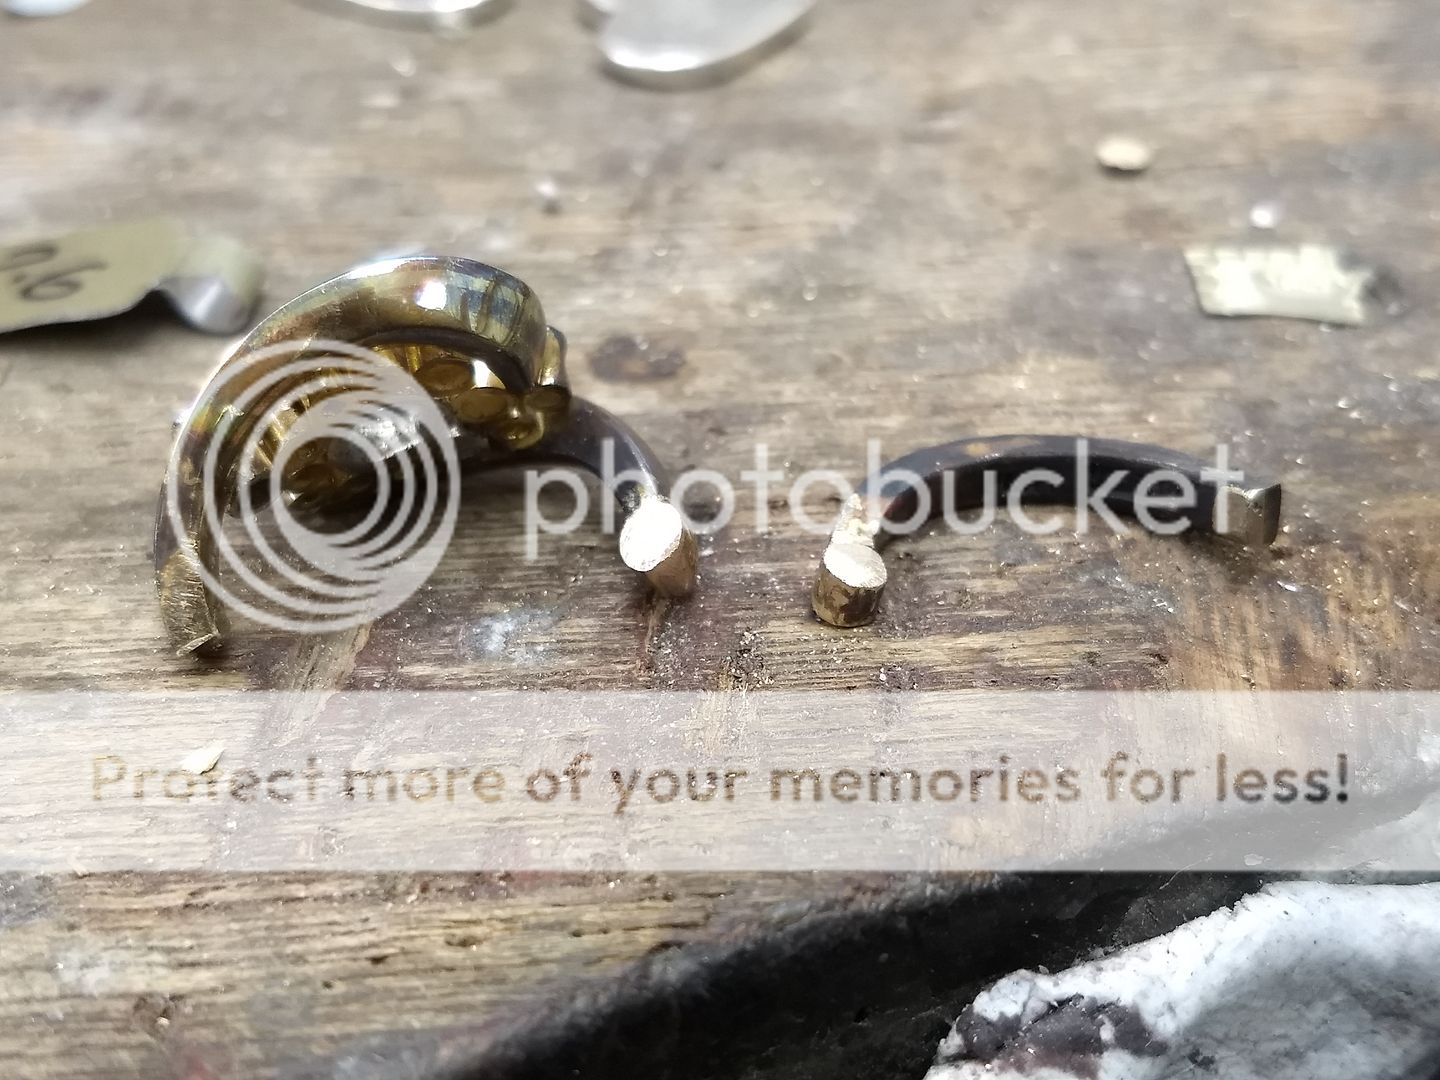
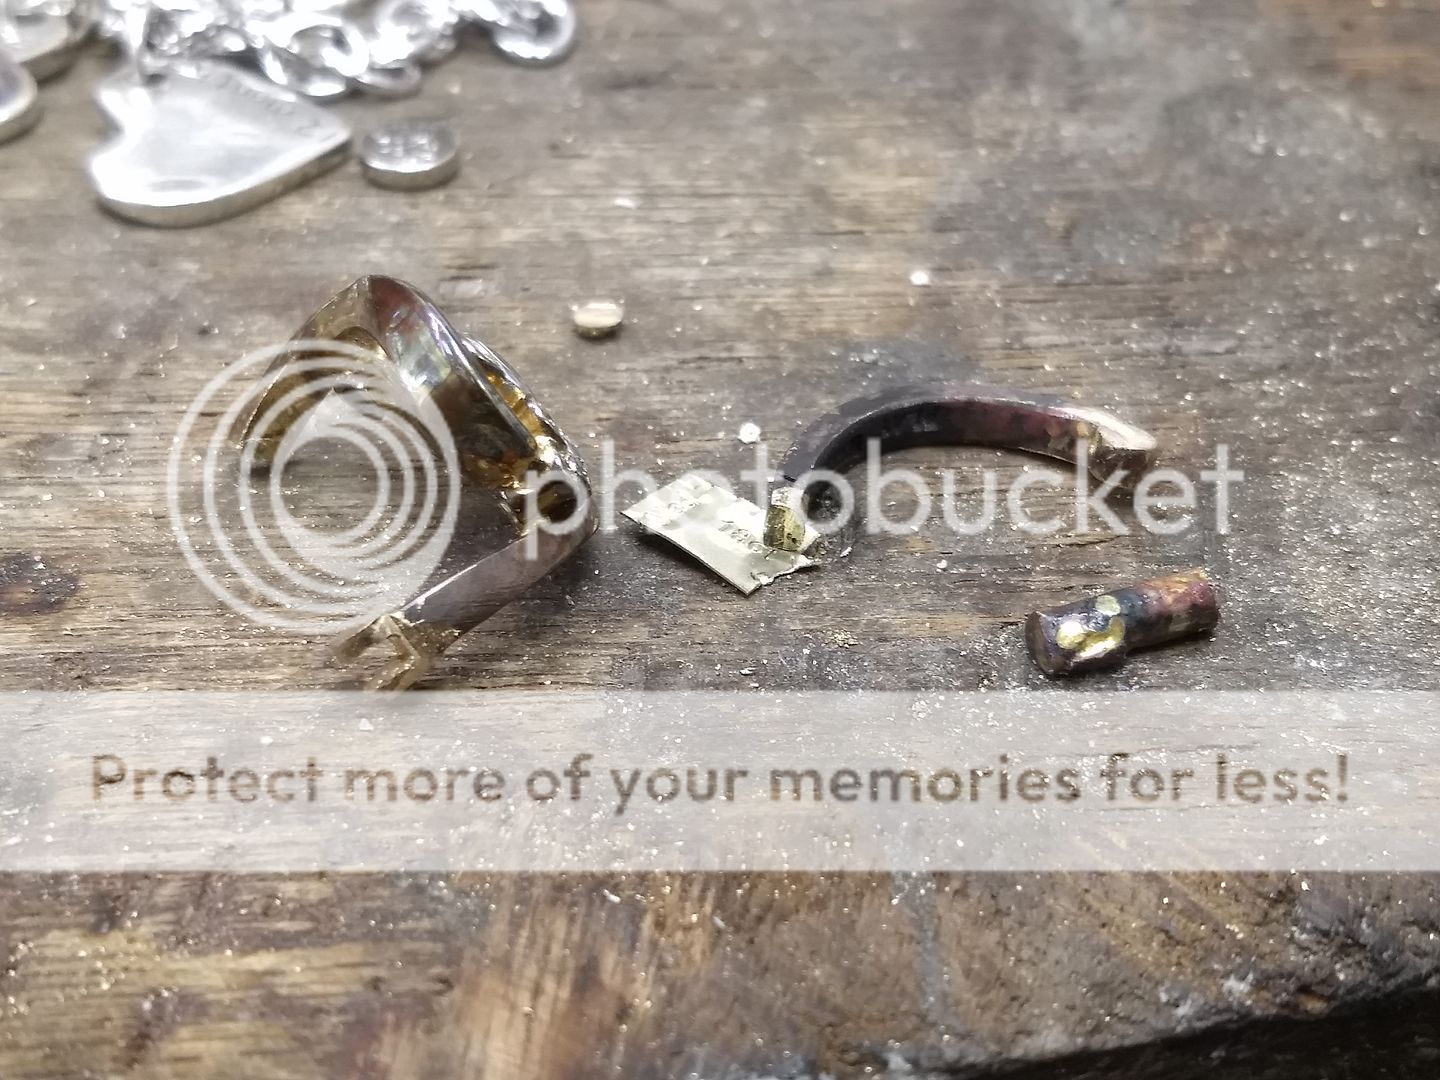
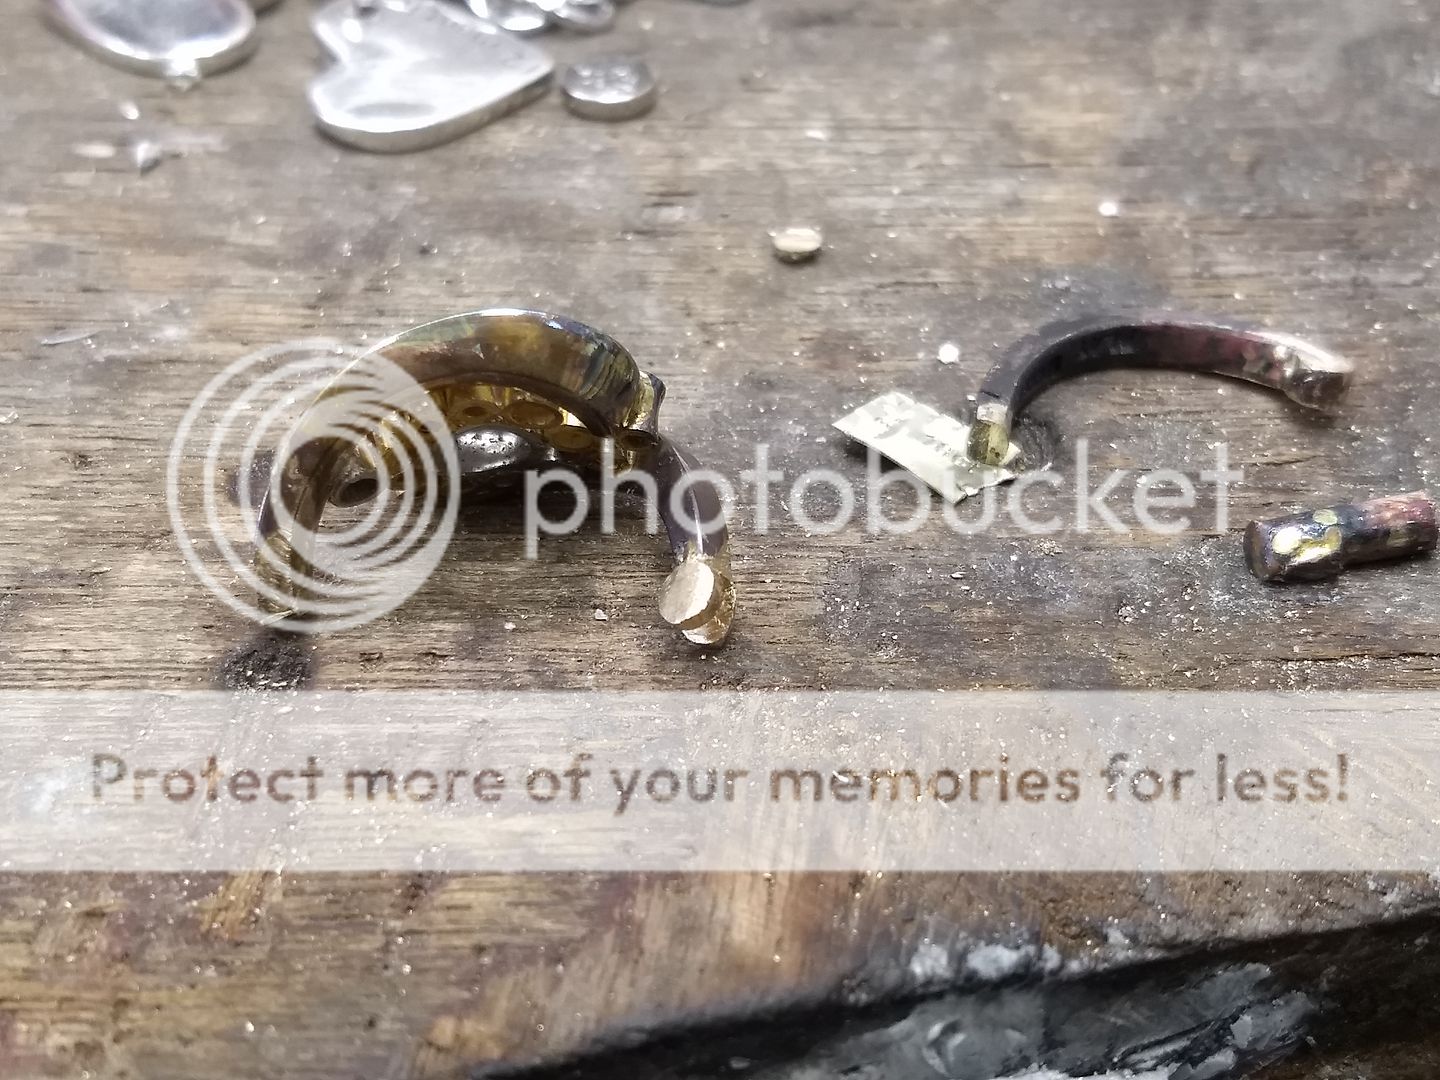
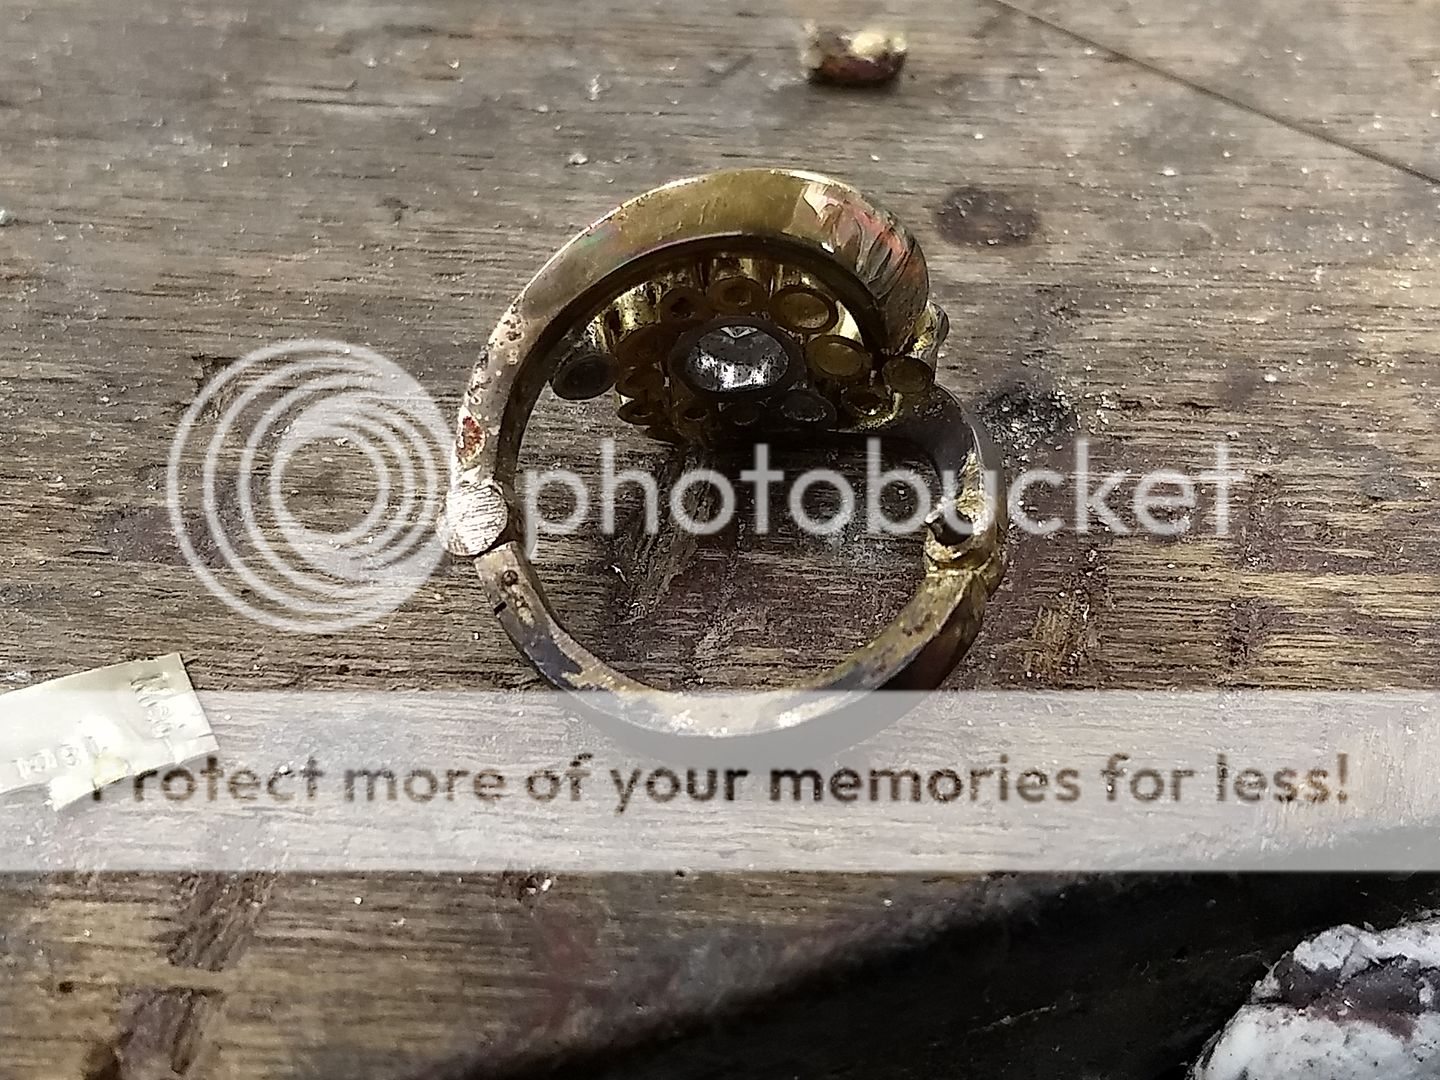
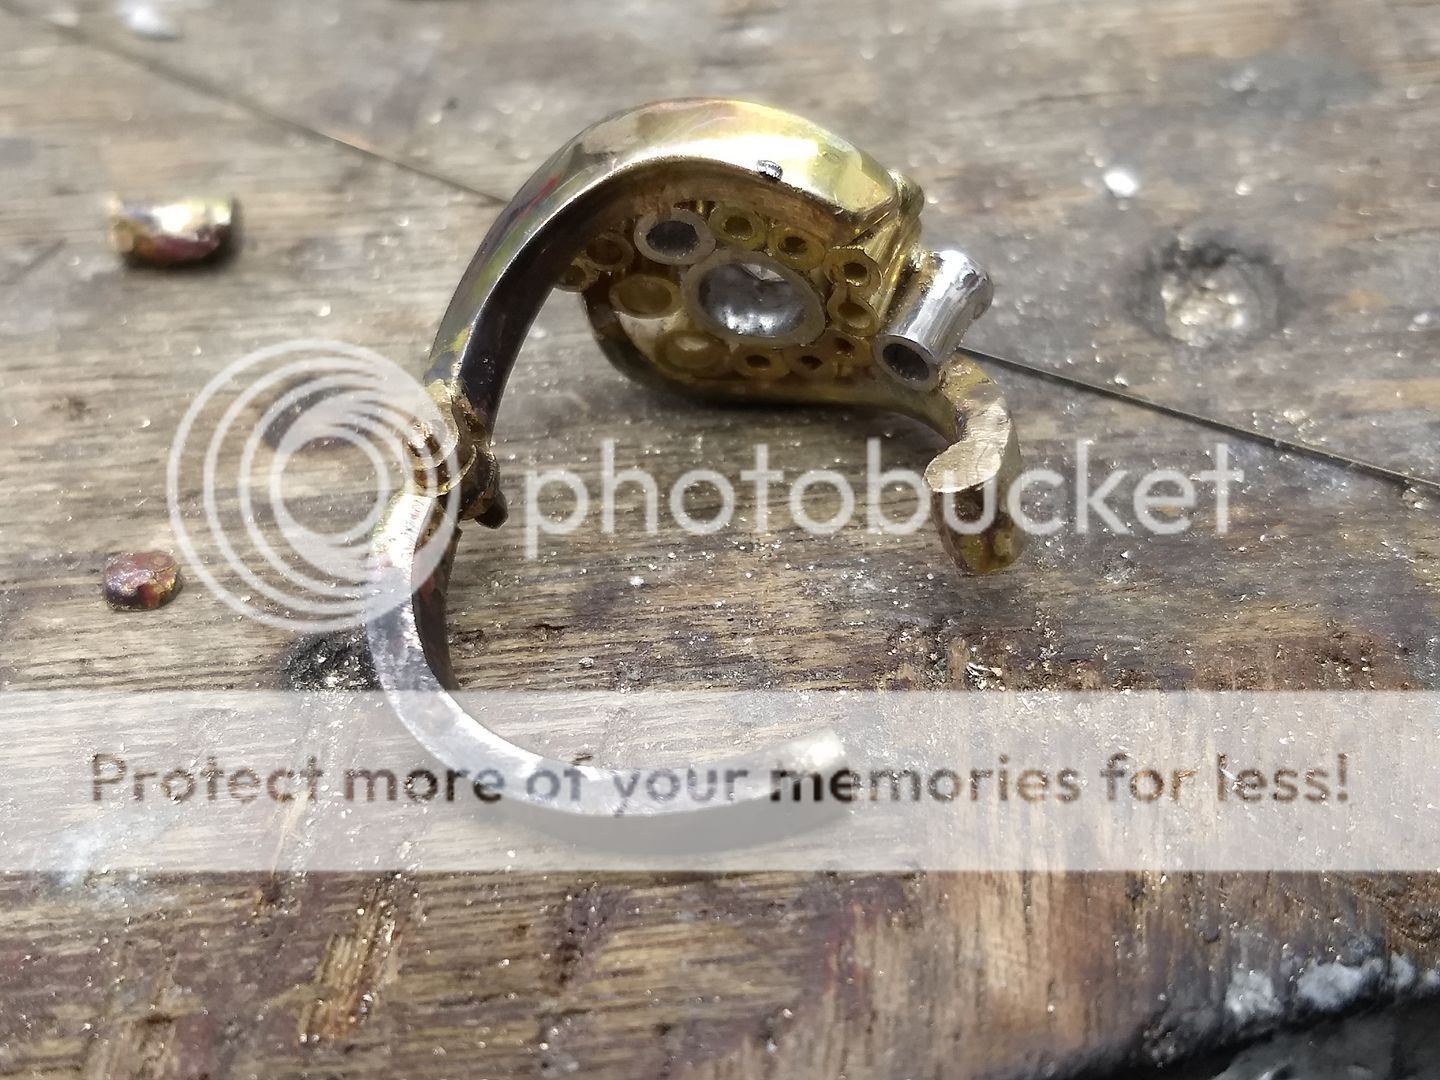
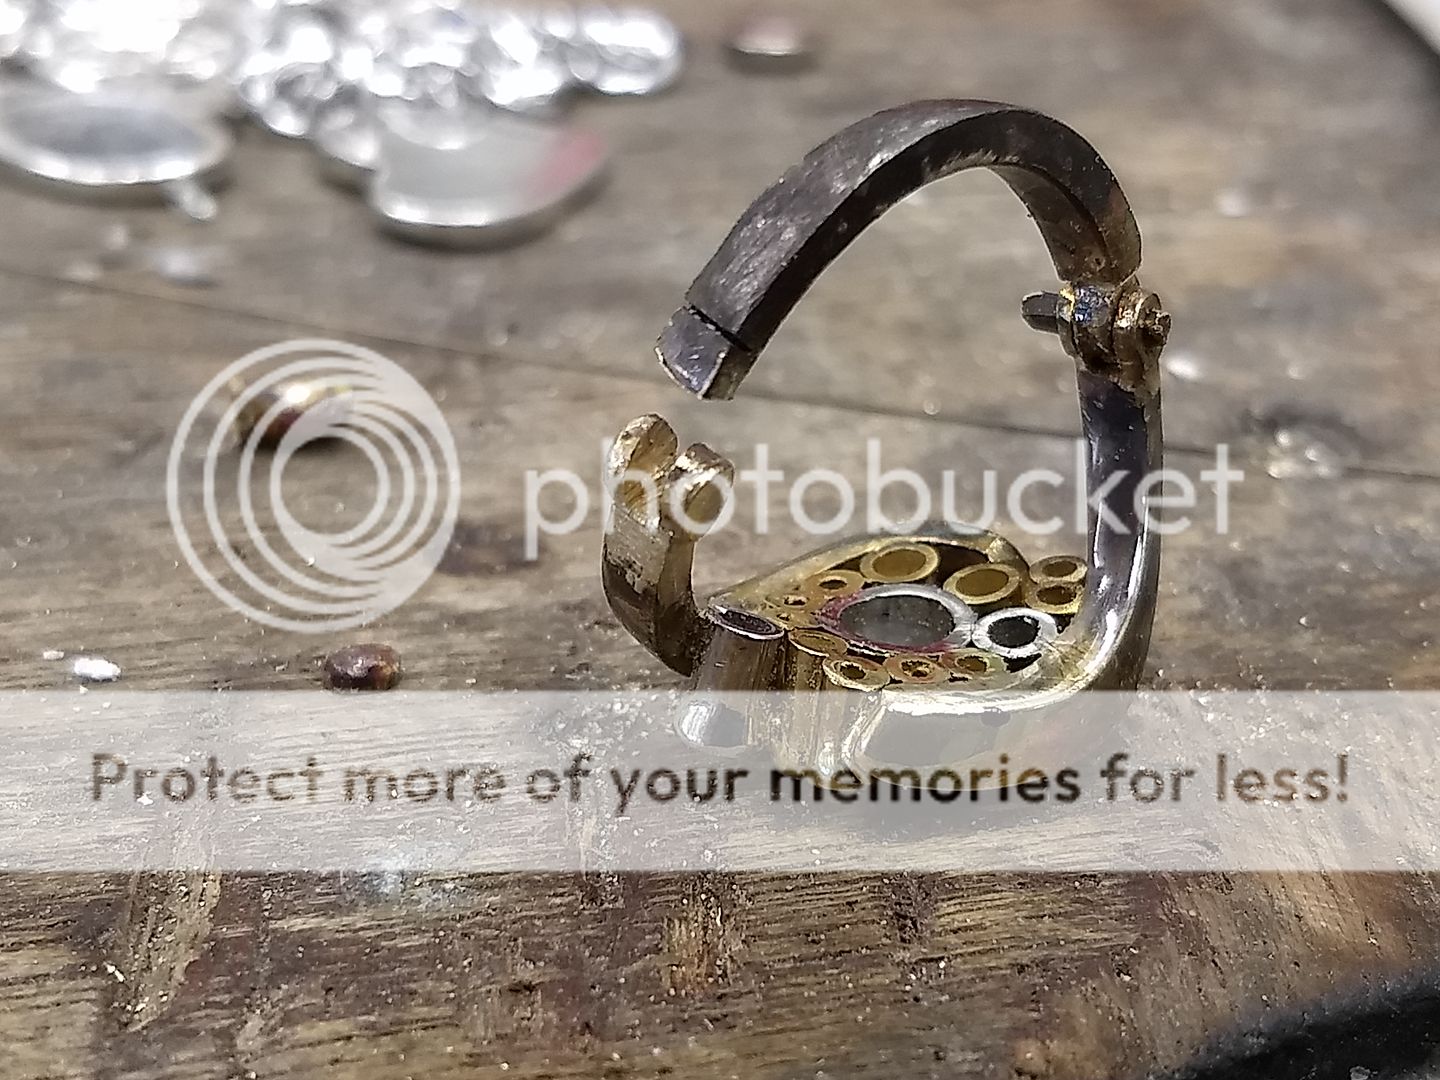
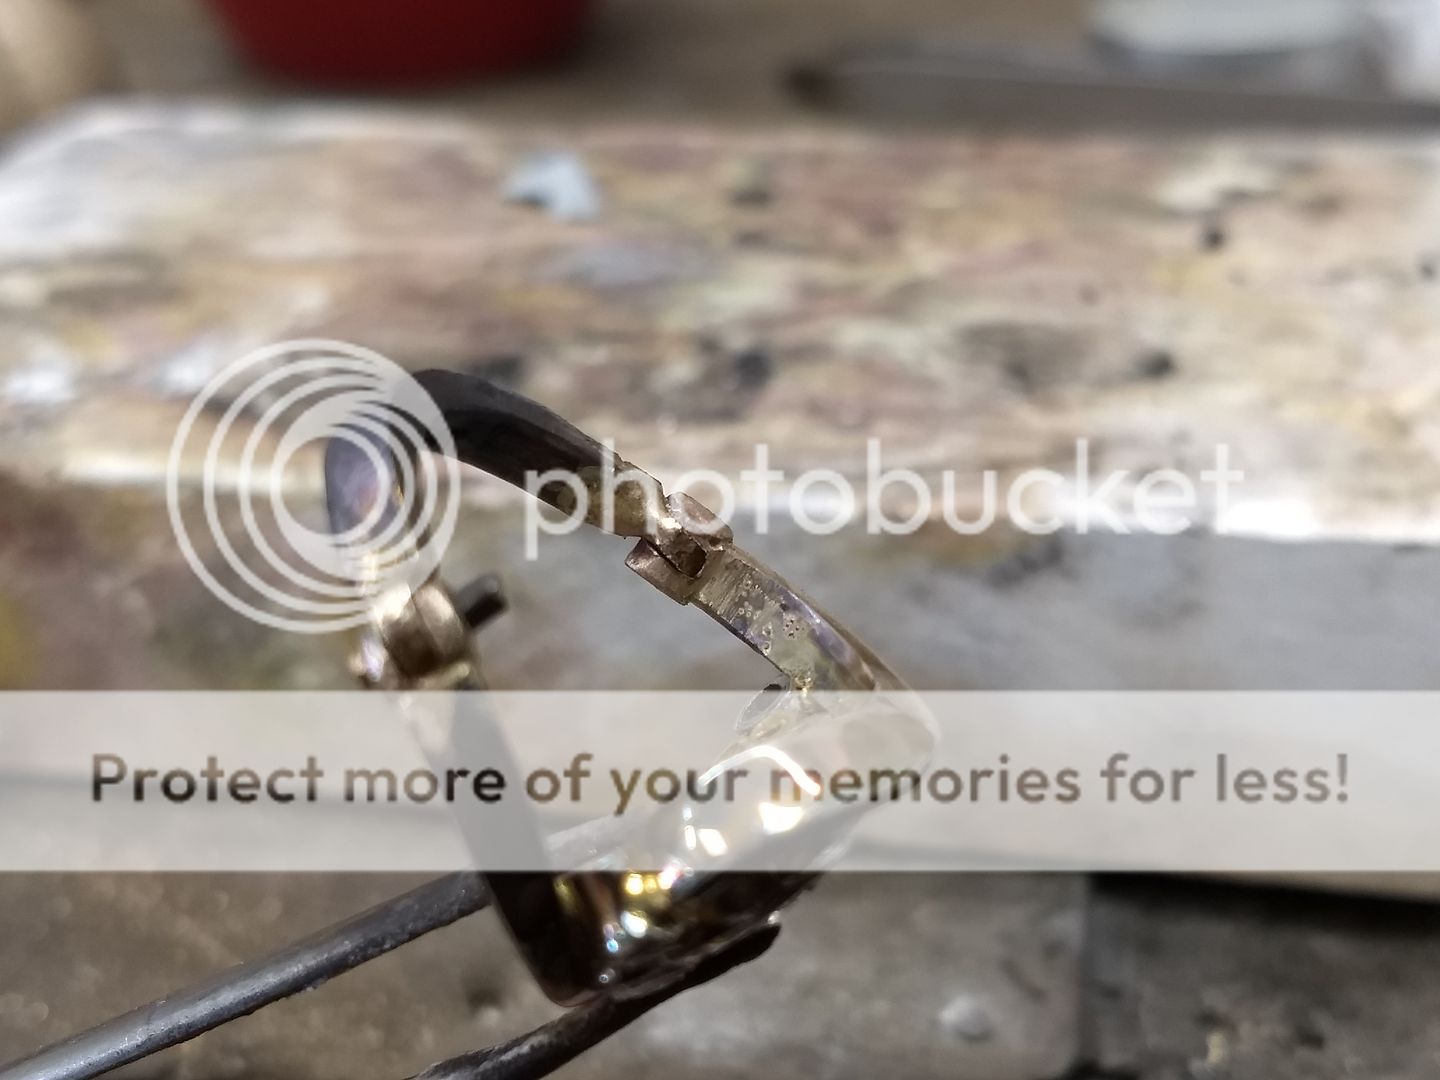
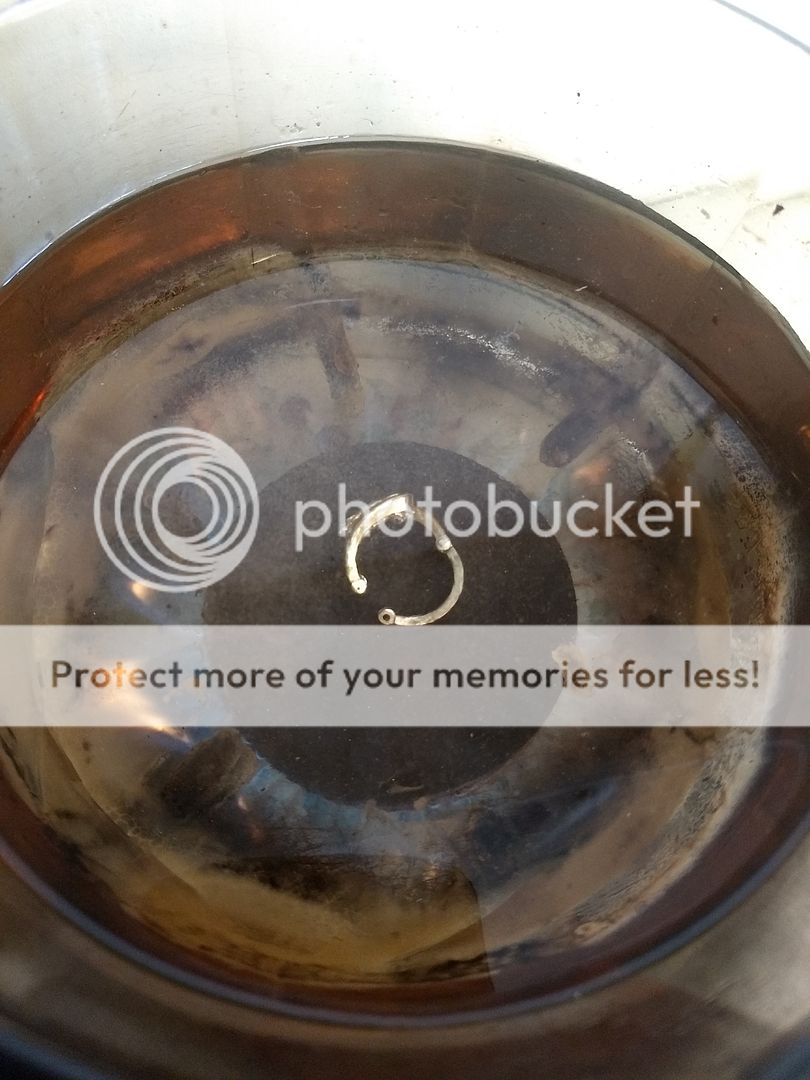
Here's a ring that I repaired today. Had been run over by a car and totally squashed. Full pics are on my Facebook

NDA said:
I can only assume the diamond was undamaged? They can chip can't they - despite their inherent strengths?
Diamonds do indeed chip and fracture. Hard as they are they are also brittle, more so in some cuts. Luckily this was a CZ ring so a cheap replacement if it did break. Fortunately the cz survived the experience Gassing Station | Watches | Top of Page | What's New | My Stuff