Discussion


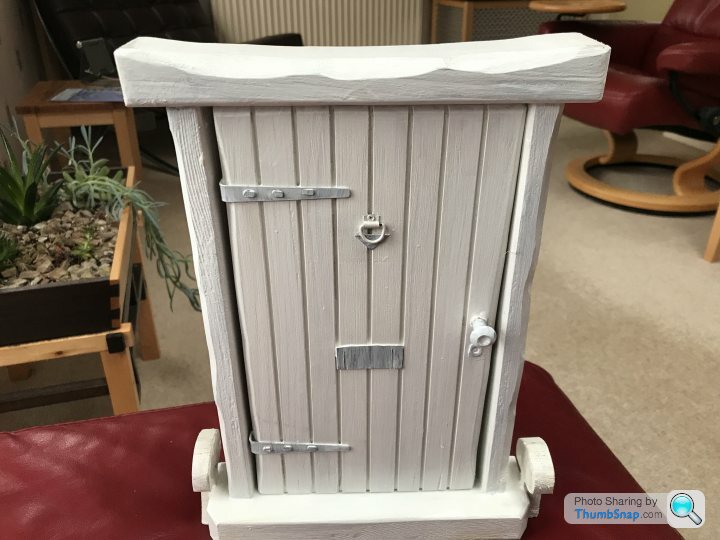
Latest project I’ve been volunteered for, ‘fairy doors’, who knew? They’re going to the same place as a Story Chair I made a while back, that going to be scattered around a local forest on a family trail. Made of decking scraps, Siberian larch and western red cedar, the ironmongery made from various odds and sods lying around, though the door knocker is a re-purposed picture hook. All in white primer at the moment prior to being painted.


Cats_pyjamas said:
Not half as skilled as some people on here, but this is today's project.
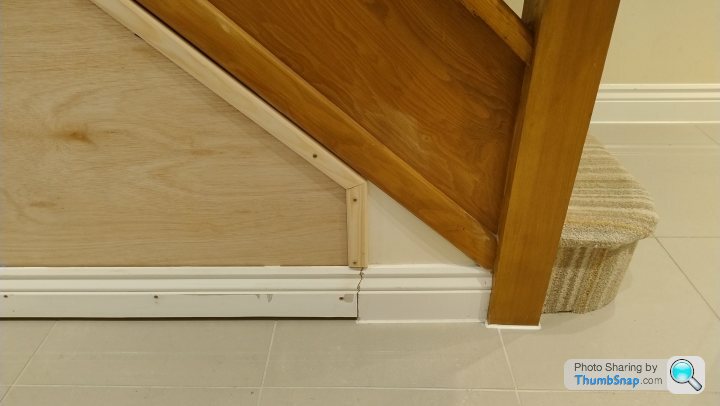
Sorting the unusable space under the stairs, and the shoe collection. Smoothly pulls out on 30" roller beating rails. There was a locking device on this, so the rail need some minor modification with my multitool to remove the latch.
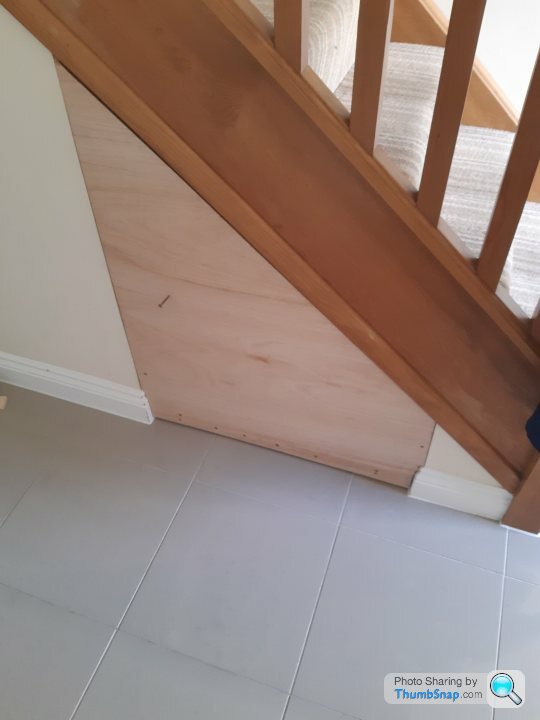
We intend on decorating over the winter, maybe with some sort of panelling, which should conceal it further. Going to have to steal the skirting out of the spare bedroom as I am struggling to find a match.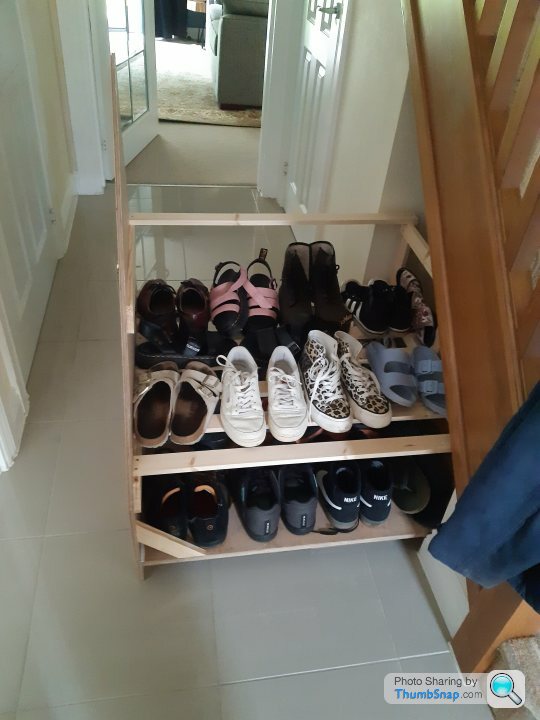
Also need some more wood for a 3rd shelf!
Had another play, with finishing this off.Sorting the unusable space under the stairs, and the shoe collection. Smoothly pulls out on 30" roller beating rails. There was a locking device on this, so the rail need some minor modification with my multitool to remove the latch.
We intend on decorating over the winter, maybe with some sort of panelling, which should conceal it further. Going to have to steal the skirting out of the spare bedroom as I am struggling to find a match.
Also need some more wood for a 3rd shelf!
Edited by Cats_pyjamas on Tuesday 26th September 17:37
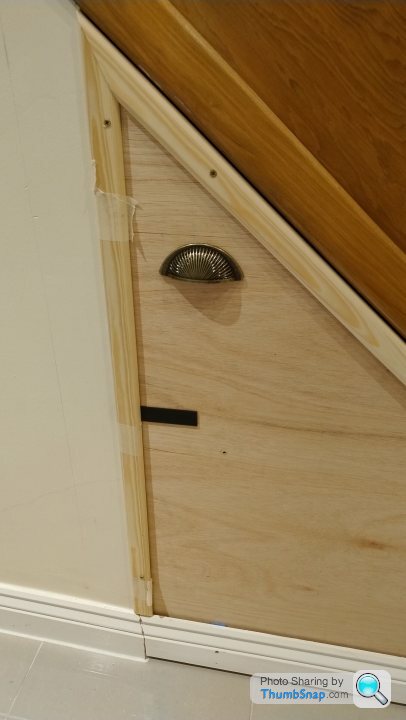
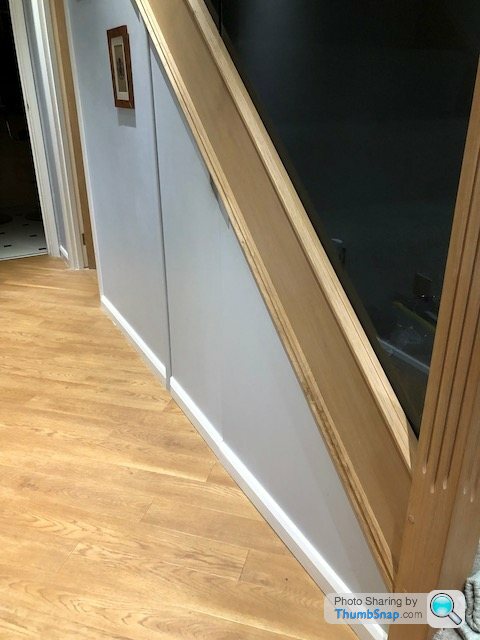
Scribed in a bit of skirting to the original skirting...that was fun. Also put some edge beading on to tidy it up. Turns out my mitre saw doesn't cut angles greater than 50 degrees. So had to overcome that (and try not to lose any fingers).
Screws are just holding the beading in place so I could adjust it, will be glued on and screw holes filled in the week.
Also window frame packers are sublime for this kind of job.
Edited by Cats_pyjamas on Sunday 28th January 19:27
Looking good.
Couple of hints...
Your Mitre can cut more than 45°. Just make a precut of 45 on a scrap and use that as the starting point. e.g. https://www.anikasdiylife.com/angles-greater-than-...
I would have used MDF for the facing sheet so that when you paint it it'll be smooth rather than the plysheet which will possibly show grain.
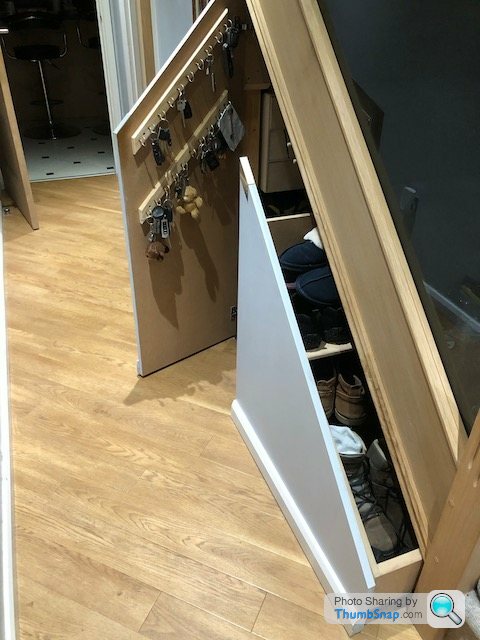
Here's my own sliding and storage effort.
Couple of hints...
Your Mitre can cut more than 45°. Just make a precut of 45 on a scrap and use that as the starting point. e.g. https://www.anikasdiylife.com/angles-greater-than-...
I would have used MDF for the facing sheet so that when you paint it it'll be smooth rather than the plysheet which will possibly show grain.
Here's my own sliding and storage effort.
Edited by crmcatee on Monday 29th January 07:48
That looks like fairly decent ply. If you sand it and then paint it with primer and then egg shell emulsion with a roller you can make it look exactly like your wall.
If it has marks in it then you can fill them with car body filler and sand them back. If you wanted a super smooth finish, they're are grain filters that will let you get glass smooth and zero grain with a bit of work.
I find MDF a pain, it is smoother out of the box, but so much more prone to dents and marks, I always use ply.
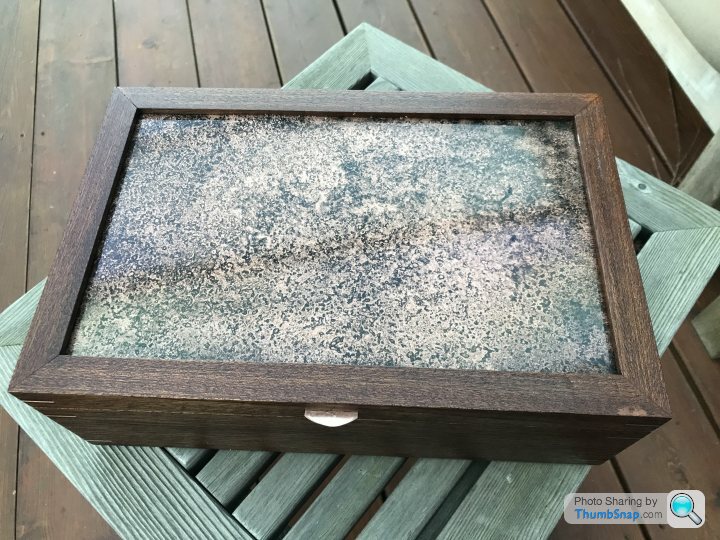
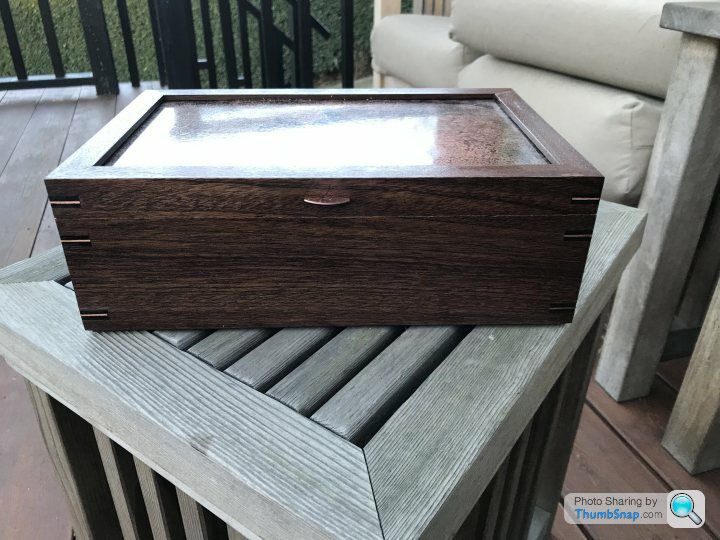
Another box off the production line, I think my best one yet. Delighted with the Blackwood/copper spline detail, I’m sure it’s been done before but I’ve not seen it and didn’t copy anyone else’s idea(for once! ). Also happy with the lid, it’s also copper but happened upon this finish by accident: I was trying to get a blue/green verdigris finish but couldn’t get it consistent, so after one attempt I sanded the finish off with wet n dry and thought ‘that might look good with some lacquer on it’. I think it looks awesome, so . Still lots of little details I need to take care more care over but each one seems better than the last.
. Still lots of little details I need to take care more care over but each one seems better than the last.Following a trip to my local mill, I sourced a lovely big board to build a new desk for the home office. While I was there, I couldn't help but rake through some of the nicer burrs, and ended up taking a few home. There's a couple of smaller bits and pieces I'd like to use these for, however I did a test scrape / water-pop on one area tonight to get an idea of colour... It's near enough amber!
I think they must be elm burrs. The figuring is amazing but the colour ruins it for me... Any suggestions on how best to minimise the orange hue? Seems sacrilege to stain this sort of wood but I don't know how else to deal with the colour.
I think they must be elm burrs. The figuring is amazing but the colour ruins it for me... Any suggestions on how best to minimise the orange hue? Seems sacrilege to stain this sort of wood but I don't know how else to deal with the colour.
wolfracesonic said:
Another great looking jewellery box Mr Wolfrace, the finish on the copper is remarkable and it looks to have a nice sheen. Is that a piece of copper for the handle to match the splines ?drab said:
Following a trip to my local mill, I sourced a lovely big board to build a new desk for the home office. While I was there, I couldn't help but rake through some of the nicer burrs, and ended up taking a few home. There's a couple of smaller bits and pieces I'd like to use these for, however I did a test scrape / water-pop on one area tonight to get an idea of colour... It's near enough amber!
I think they must be elm burrs. The figuring is amazing but the colour ruins it for me... Any suggestions on how best to minimise the orange hue? Seems sacrilege to stain this sort of wood but I don't know how else to deal with the colour.
I'm slightly nonplussed by this. Mainly because that colour you describe, the orangey brown, is a common feature... of wood. I think they must be elm burrs. The figuring is amazing but the colour ruins it for me... Any suggestions on how best to minimise the orange hue? Seems sacrilege to stain this sort of wood but I don't know how else to deal with the colour.

Don't despair though, wood can be persuaded to be a little less amber. Waterbased finishes are often non yellowing when compared to polyurethane/oil/Osmo, or you could lime the timber, basically rub a white pigment into it, or bleach it with a proprietary wood bleach. (although Ive never had that much success with wood bleach.)
Do you have a photo of the burrs ?
As for me, I'm spending the morning getting my head round a pocket door mechanism. It's nicely made and reassuringly expensive...you're looking at a grand... but needs cutting here and there so I'm taking my time. I have four to do.


^ What is that going into? I’ll have a guess at an AV cabinet. Measure twice and cut once, not my method of measure once, buy twice The handle is from the same sheet as the splines, I made a mushroom shape, cut a thin slot in the lid with my multi tool and gently hammered the ‘stem’ of the mushroom into the slot for a friction fit. Good look with the pocket mechanism!
The handle is from the same sheet as the splines, I made a mushroom shape, cut a thin slot in the lid with my multi tool and gently hammered the ‘stem’ of the mushroom into the slot for a friction fit. Good look with the pocket mechanism!wolfracesonic said:
Another box off the production line, I think my best one yet. Delighted with the Blackwood/copper spline detail, I’m sure it’s been done before but I’ve not seen it and didn’t copy anyone else’s idea(for once! ). Also happy with the lid, it’s also copper but happened upon this finish by accident: I was trying to get a blue/green verdigris finish but couldn’t get it consistent, so after one attempt I sanded the finish off with wet n dry and thought ‘that might look good with some lacquer on it’. I think it looks awesome, so. Still lots of little details I need to take care more care over but each one seems better than the last.
That looks great - I actually just came into this thread to ask some questions because I want to build some cigar humidors. . Still lots of little details I need to take care more care over but each one seems better than the last.I wanted to use a black wood with that appearance - where did you buy from please? Did you need to join two planks together to make it wide enough? I don’t have many tools yet so whilst I don’t mind buying, it would be easier if I could get wide enough planks to avoid jointing.
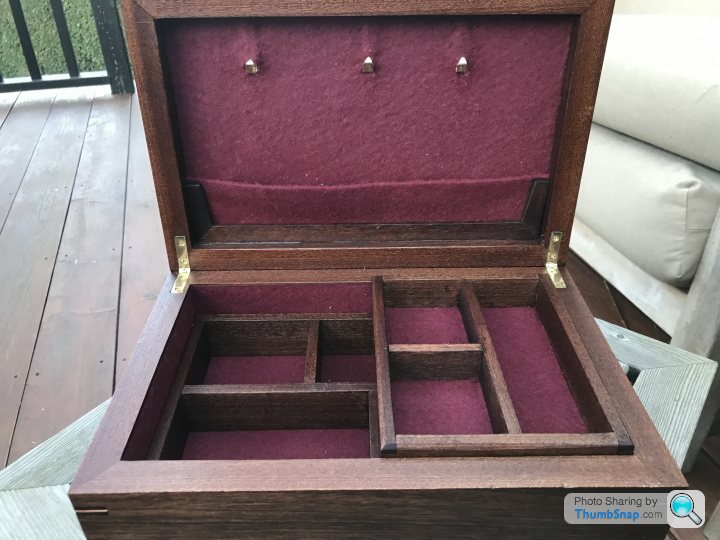
I will line it with Spanish cedar which I’ve found online.
What method have you used to join the corners? I was considering buying a table router (mainly cos I’ve been itching to get one) to make dovetail joints but yours looks great, what is that method called please? Would be good to find a YouTube video of how that was done
Thanks
Loughran is your man for professional guidance but as for wot I done:
Wood is from here Surrey timbers, they’ll supply whatever size you want within reason. The box in the picture is made out of sapele, quite a reddish hue, I stained it using ‘copper’ stain from Woodeedoo.
The corners are just a 45 degree mitre, I used epoxy to glue them so the splines are probably more as decoration in this instance. I used one of these to make the actual cuts in conjunction with a digital angle finder box and an engineers square.
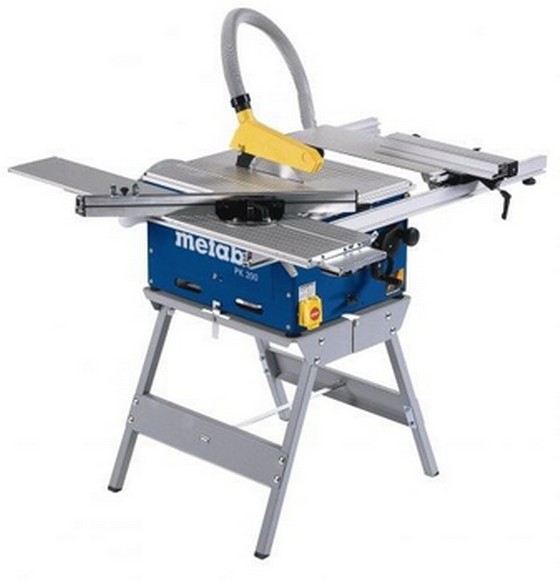
I used this method to cut the splines, no need for jigs cutting splines on a table saw. Use a rip blade if you can without
a bevel to the top of the teeth.

There’s loads of videos on the Tube re. box making, take your pic.
Wood is from here Surrey timbers, they’ll supply whatever size you want within reason. The box in the picture is made out of sapele, quite a reddish hue, I stained it using ‘copper’ stain from Woodeedoo.
The corners are just a 45 degree mitre, I used epoxy to glue them so the splines are probably more as decoration in this instance. I used one of these to make the actual cuts in conjunction with a digital angle finder box and an engineers square.
I used this method to cut the splines, no need for jigs cutting splines on a table saw. Use a rip blade if you can without
a bevel to the top of the teeth.
There’s loads of videos on the Tube re. box making, take your pic.


crmcatee said:
I quite fancy making a box for stuff but I think I'll have to open it using the table saw as I don't have a band saw.
Given the choice, I'd rather split a box with a table saw, shimming the kerf as I cut each side, than a bandsaw which I find to be inherently inaccurate. (That might just be my shonky bandsaw tho'.  )
)drab said:
That's really lovely quality burr, very even and mellow. Timber like this often gets snapped up for veneers.Looking at your second and third photos and that darker patch I'd guess Oak but the camera often lies and it could well be Elm.
Putting the amber colour aside for a moment, do you have an idea of how you'd like to use the burr ?
Gassing Station | Homes, Gardens and DIY | Top of Page | What's New | My Stuff