Discussion


It is lovely! I'm going to use it for shelving in a hifi rack. I'm yet to sketch out a design but either a mini ladder shelf type thing, or a Z shape, using black legs / framing.
The timber is a little warped / uneven clearly due to shape, so depending on size I'll use some epoxy to fill in the areas to make level it up and make rectangular shapes.
The timber is a little warped / uneven clearly due to shape, so depending on size I'll use some epoxy to fill in the areas to make level it up and make rectangular shapes.
Make cuts on three sides of the box, then before doing the fourth side, put some shims in the cuts you’ve just made, thickness same as your saw blade, I usually use lightweight clamps to hold everything in place. The shims stop the box folding up on itself and bad things happening near the scary, spinny blade.
Exactly that.
Here's a nice video showing the process using tape instead of light clamps but achieving the same ends.
https://www.youtube.com/watch?v=lzlFOwY8JtU
Here's a nice video showing the process using tape instead of light clamps but achieving the same ends.
https://www.youtube.com/watch?v=lzlFOwY8JtU
Well I finally bit the bullet. This was a bit of a gamble on eBay but turned out to be a real bargain. I've wanted one forever and almost bought a modern copy. Glad I held out now.
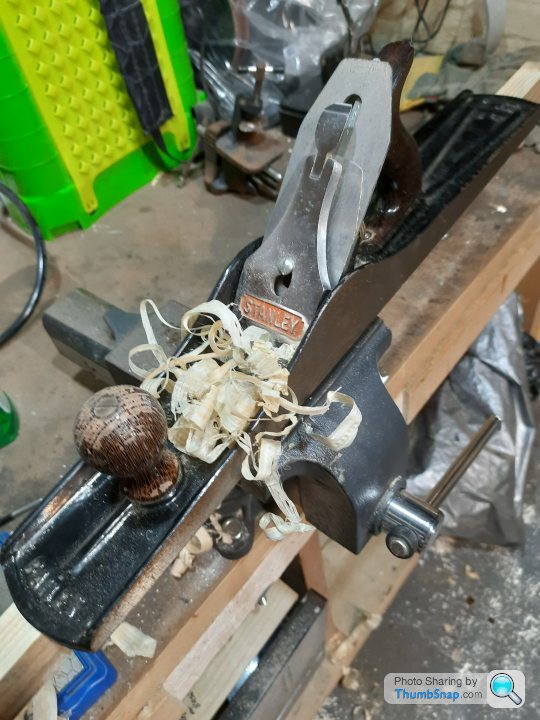
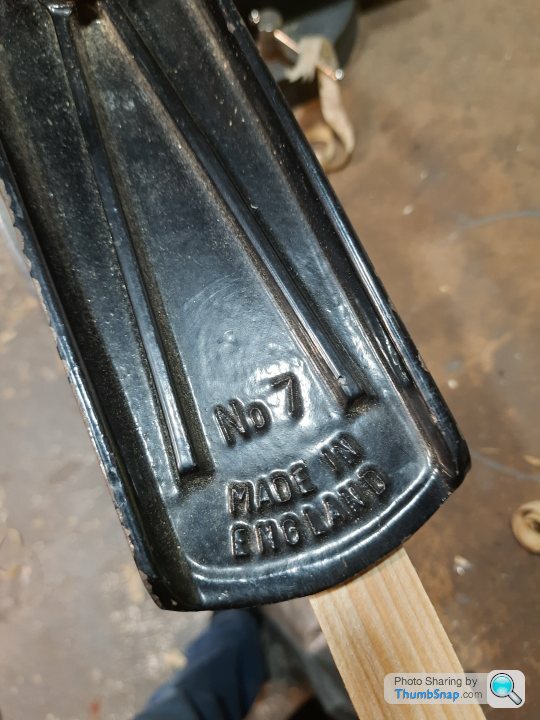
The iron and cap iron were rather chewed up but weren't hard to correct. The sole is clean and flat and dead square to the cheeks, which is fairly unusual in a looong plane. Otherwise it's really clean with ( almost) no corrosion, which is nice.
Just gave it a quick test on some random scrap.
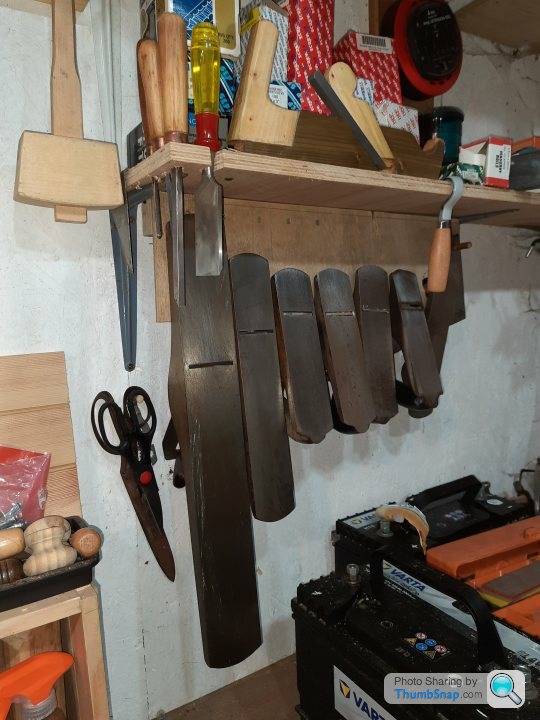
Hanging out with its brothers!
Next task will be to remove all the cracked and flaking varnish from the tote and knob, polish them up with synthetic wire wool and refinish them with Danish Oil.
The iron and cap iron were rather chewed up but weren't hard to correct. The sole is clean and flat and dead square to the cheeks, which is fairly unusual in a looong plane. Otherwise it's really clean with ( almost) no corrosion, which is nice.
Just gave it a quick test on some random scrap.
Hanging out with its brothers!
Next task will be to remove all the cracked and flaking varnish from the tote and knob, polish them up with synthetic wire wool and refinish them with Danish Oil.

loughran said:
Exactly that.
Here's a nice video showing the process using tape instead of light clamps but achieving the same ends.
https://www.youtube.com/watch?v=lzlFOwY8JtU
Thanks Wolfrace and Loughran. One for the future for me. Here's a nice video showing the process using tape instead of light clamps but achieving the same ends.
https://www.youtube.com/watch?v=lzlFOwY8JtU


Error_404_Username_not_found said:
By the way I'm not sure if I ever posted this device:
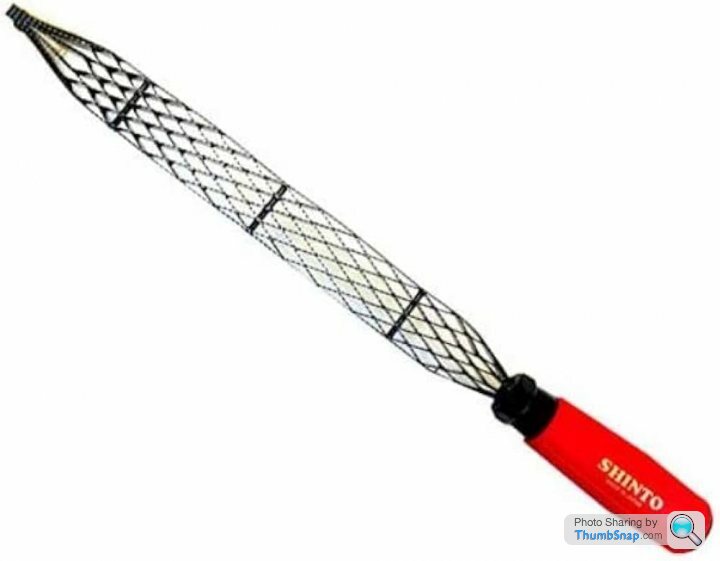
The Shinto rasp. Coarse one side and fine the other. I've been using it for a couple of years now and it's staggeringly good for shaping, even on endgrain. Very controllable despite being fast.
I recommend it to the House.
Yep, for the price one of the best tools you can buy.The Shinto rasp. Coarse one side and fine the other. I've been using it for a couple of years now and it's staggeringly good for shaping, even on endgrain. Very controllable despite being fast.
I recommend it to the House.
I make guitars and it's invaluable.
This should be in the "Tools I wish I'd bought sooner" thread!
Small project I completed this weekend to create myself a charging station for the bedside:
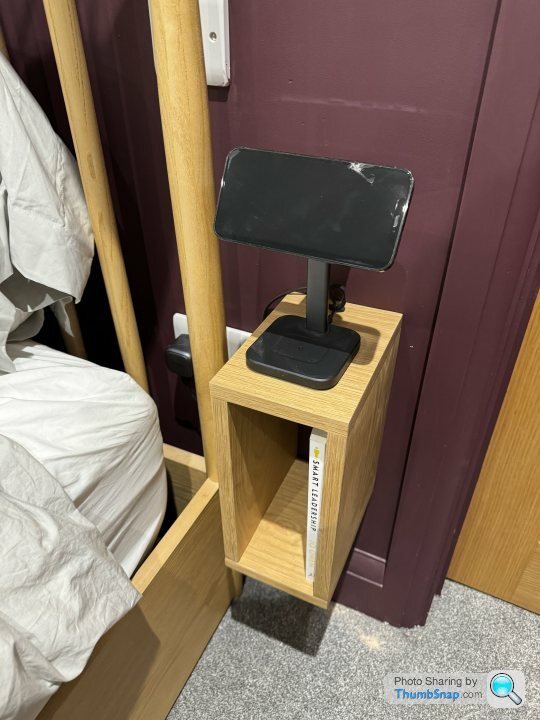
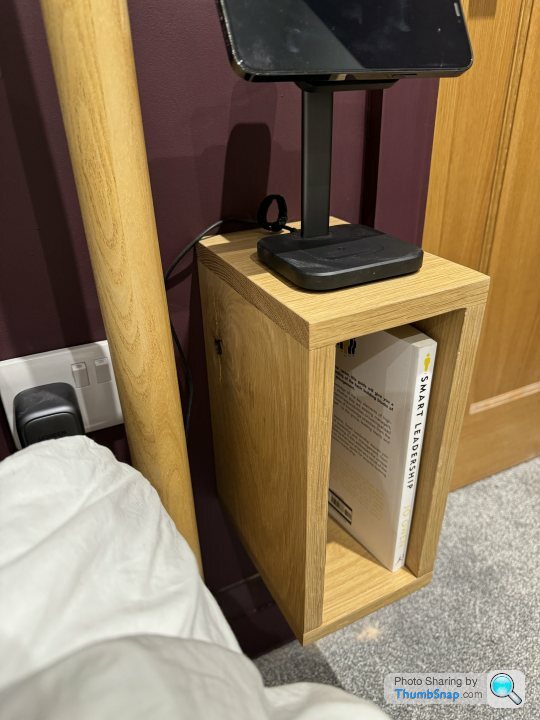
A bit of scrap from north laine timber (Brighton)’s odds and sods bin, some dowels and a mitre saw. Definitely not perfect - a bit of cupping meaning it doesn’t sit perfectly flat on one side, and I only had one decent clamp, but a bit of sanding later and I think it’s a fairly decent result given it cost less than a fiver.
Would love to have given dovetails or similar a go but 1) I don’t have the skills to be that accurate yet! 2) time is against me
Only problem now is my other half would like one but that was the only bit of wood! Will have to go hunting again.
Pheo said:
Small project I completed this weekend to create myself a charging station for the bedside:
A bit of scrap from north laine timber (Brighton)’s odds and sods bin, some dowels and a mitre saw. Definitely not perfect - a bit of cupping meaning it doesn’t sit perfectly flat on one side, and I only had one decent clamp, but a bit of sanding later and I think it’s a fairly decent result given it cost less than a fiver.
Would love to have given dovetails or similar a go but 1) I don’t have the skills to be that accurate yet! 2) time is against me
Only problem now is my other half would like one but that was the only bit of wood! Will have to go hunting again.
Reckon that’s a win. Especially given the re-order! A bit of scrap from north laine timber (Brighton)’s odds and sods bin, some dowels and a mitre saw. Definitely not perfect - a bit of cupping meaning it doesn’t sit perfectly flat on one side, and I only had one decent clamp, but a bit of sanding later and I think it’s a fairly decent result given it cost less than a fiver.
Would love to have given dovetails or similar a go but 1) I don’t have the skills to be that accurate yet! 2) time is against me
Only problem now is my other half would like one but that was the only bit of wood! Will have to go hunting again.

Dear 101 team, I’ve bought myself a bag of exotic hardwood off cuts. My skills are very limited. All I want to do is have a go and make something as simple as a key rack that I can then use the dowel holes (where the little six or 8mm metal plugs sit, for shelves) in our new kitchen. I intend to use the wooden dowels as a non permanent fixing.
A load of sanding and likely some Osmo oil …
But I wonder if I “need” a Japanese pull saw. If so, where’s a modest place to start, please?
Or tell me to stick with my tenon if I’m just wasting money. Cheers, Austin.
A load of sanding and likely some Osmo oil …
But I wonder if I “need” a Japanese pull saw. If so, where’s a modest place to start, please?
Or tell me to stick with my tenon if I’m just wasting money. Cheers, Austin.
Buying tools is rarely a waste of money IMO. It's worth it for the pure enjoyment alone, if you can afford the tool.
I don't think pull saws give any benefit over good tenon saws and gents saws for joint cutting personally, but the one pull saw I have kept is good for flush cutting dowels . Nothing else.
I also feel they're too flexible to be accurate.
TBF that's probably more my failing than the saw's. I'm sure a proper woodworker will be along soon to give better advice.
Gassing Station | Homes, Gardens and DIY | Top of Page | What's New | My Stuff