Discussion


wolfracesonic said:
Turning the bowls is not when you want a glue joint to let go, I wouldn’t have thought! They do look very effective.
Thank you, I'm very methodical about my preparation with the bowl blanks because as you say you dont want it coming apart at 3000rpm 18 inches from your boat race. I've had natural timber fail while on the lathe and it deffinelty raises your pulse a bit!
Drive it fix it repeat][url said:
I love this, there's loads of time and effort spent here, it's practically coopered. 
 The wire management is a nice touch, is it finished in these photos, what did you polish it with ?
I love the bowls too. I've done a little turning in my time but don't have a lathe in the workshop and prefer to outsource the round work.... only because I'd spend much too much time enjoying myself, messing about turning stuff.
I look forward to a time when the workload lessens and I can spend more time suiting myself. The nice thing about turning bowls like this from laminated/composite blanks is the possibilities are endless and it can become a bit addictive. I look forward to seeing what you work on next.
loughran said:
I love this, there's loads of time and effort spent here, it's practically coopered. The wire management is a nice touch, is it finished in these photos, what did you polish it with ?
I love the bowls too. I've done a little turning in my time but don't have a lathe in the workshop and prefer to outsource the round work.... only because I'd spend much too much time enjoying myself, messing about turning stuff. I look forward to a time when the workload lessens and I can spend more time suiting myself.
The nice thing about turning bowls like this from laminated/composite blanks is the possibilities are endless and it can become a bit addictive. I look forward to seeing what you work on next.
That's high praise from someone with your talents, thank you. A deceptive amount of time in the TV stand as you say, a relatively simple design on the face of it but quite a bit of work to do it well. Its unfinished in the photos, sanded to 400 grit, may have given it a polish with wire wool, cant remember to be entirely honest. The wire management is a nice touch, is it finished in these photos, what did you polish it with ?I love the bowls too. I've done a little turning in my time but don't have a lathe in the workshop and prefer to outsource the round work.... only because I'd spend much too much time enjoying myself, messing about turning stuff.
I look forward to a time when the workload lessens and I can spend more time suiting myself. The nice thing about turning bowls like this from laminated/composite blanks is the possibilities are endless and it can become a bit addictive. I look forward to seeing what you work on next.
The bowls are very time consuming, as much time getting the blanks as I want them as goes into the turning. Fortunately as its only for my own enjoyment the time isnt important, I give most of it away and do some craft fairs aswell. Sanded to 2000 grit, generously oiled with tung oil (food safe), polished with Yorkshire grit (woodturners polishing paste) and buffed with natural bees wax.
I'm becoming more interested in spiral form work so I'll post some pics when I've created something other than sawdust.
Began work on the Dovecote today. 6' x 4' sheet of 12mm OSB, some 20mmx20mm batten, some planed 96x18 mm, glue and paint purchased.
Wind caught the OSB as picked it up from the trolly and went to load it into the van. That ended up on the ground and was promptly run over but not one but two cars.
This is clearly a good omen for DIY.
The design is for 6 generous bird boxes across two levels
Couldn't visualise the size needed and so cardboard mock up to begin with and get my eye in.
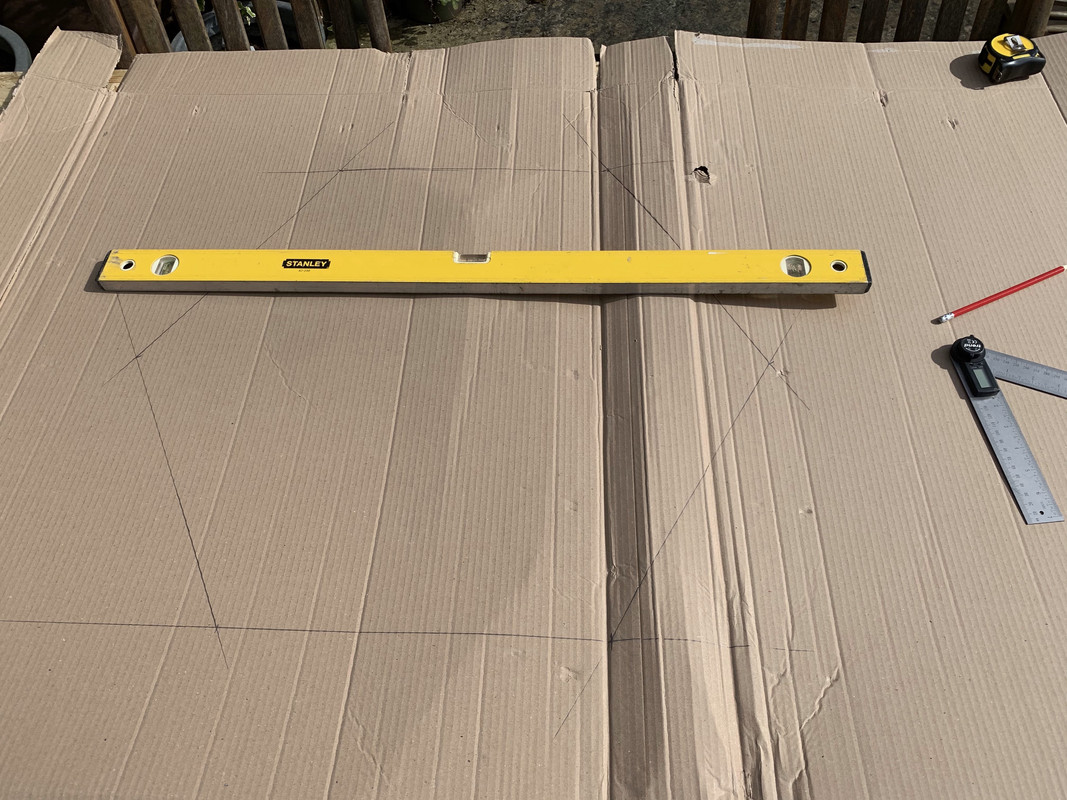
Decided on hexagonal shape, each side 14". Cut out each floor

Next, add a ring to each floor to mount the cladding

The design I'm copying has a 4" x 4" hole in the centre where it will mount on a fence post and sit against the first floor. Mark it out

Build a receiver for the fence post, 10" height for each floor.

Mount and partition into 3rds

Dry fit the firstfloor and mark out for fixing to the partitions and the post receiver

Offset the partitions on the next floor, glue and mount to partitions below. Notches cut out to cater for the rings on the floor to mount cladding
Glued and screwed lid on.


Enough for today, tomorrow start work on the roof. Planning a 50o pitch. More to follow, all comments, feedback and criticism welcome.
Wind caught the OSB as picked it up from the trolly and went to load it into the van. That ended up on the ground and was promptly run over but not one but two cars.
This is clearly a good omen for DIY.
The design is for 6 generous bird boxes across two levels
Couldn't visualise the size needed and so cardboard mock up to begin with and get my eye in.
Decided on hexagonal shape, each side 14". Cut out each floor
Next, add a ring to each floor to mount the cladding
The design I'm copying has a 4" x 4" hole in the centre where it will mount on a fence post and sit against the first floor. Mark it out
Build a receiver for the fence post, 10" height for each floor.
Mount and partition into 3rds
Dry fit the firstfloor and mark out for fixing to the partitions and the post receiver
Offset the partitions on the next floor, glue and mount to partitions below. Notches cut out to cater for the rings on the floor to mount cladding
Glued and screwed lid on.
Enough for today, tomorrow start work on the roof. Planning a 50o pitch. More to follow, all comments, feedback and criticism welcome.
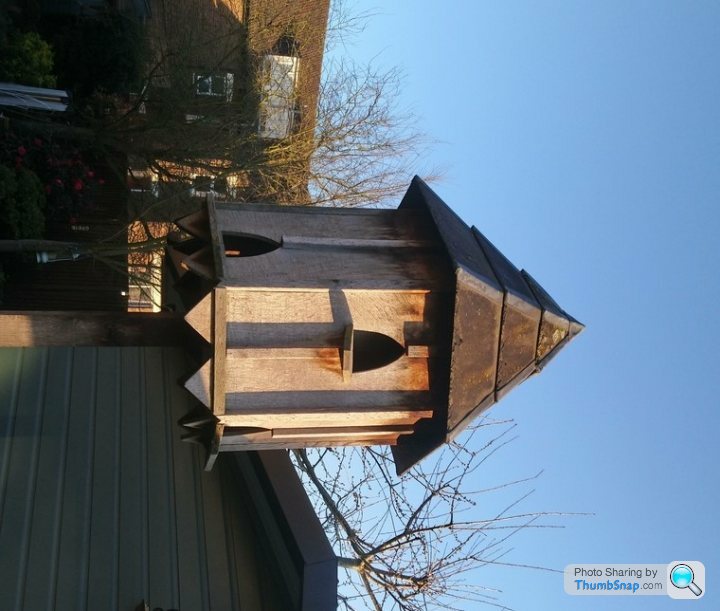
Goodluck. I built this 10 years ago. The doves, pigeons and everything else has landed on it, walked into it, crapped on it but NOTHING has nested in it. I did read you have to net it and put some doves in for couple of weeks feeding etc. When you eventualy take the net off they assume that is where they live and come back.
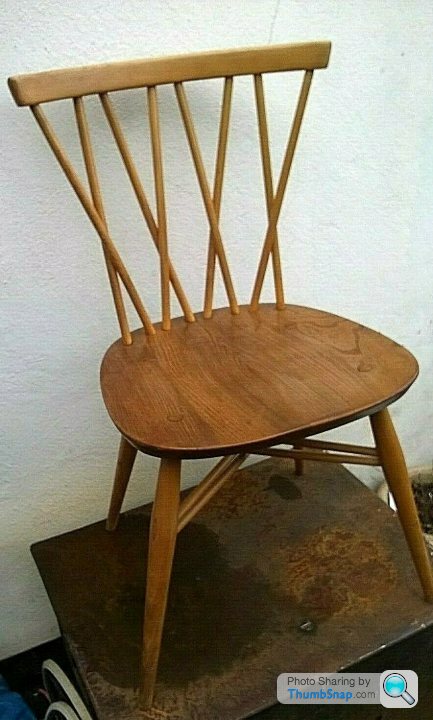
All, I collected some old ercol dining chairs last week and it looks like I may have some spare time to fettle them quite soon.....
They are beech backs and legs and the current finish is quite yellow. I've sanded this back and it looks ok in its matt finish but I'm aware I need to put some sort of seal on it.
John Lewis have a slightly updated version on heir site and it has a completely matt finish so any suggestions how I achieve this?
https://www.johnlewis.com/ercol-for-john-lewis-sha...
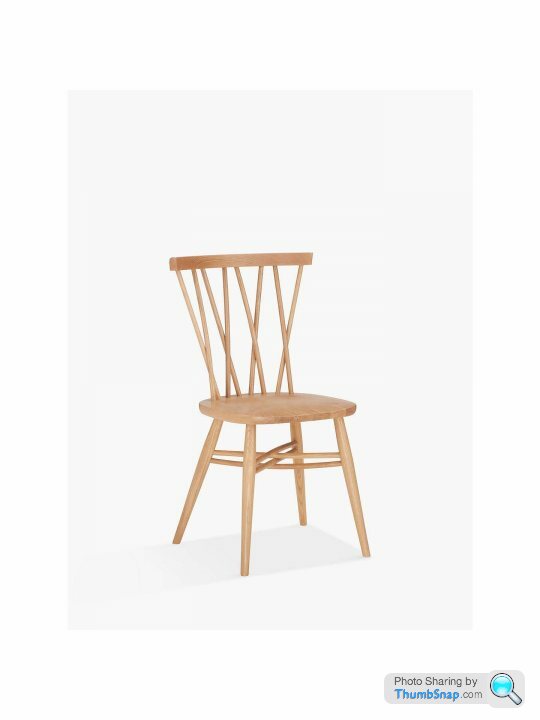
Actually it's not matt but its isn't the older yellow "varnish" finish either. It's quite a lot lighter. Mine originally looked like this
I could oil it but it will be shiny, wax maybe?
Any suggestions gratefully received. Thanks
They are beech backs and legs and the current finish is quite yellow. I've sanded this back and it looks ok in its matt finish but I'm aware I need to put some sort of seal on it.
John Lewis have a slightly updated version on heir site and it has a completely matt finish so any suggestions how I achieve this?
https://www.johnlewis.com/ercol-for-john-lewis-sha...
Actually it's not matt but its isn't the older yellow "varnish" finish either. It's quite a lot lighter. Mine originally looked like this
I could oil it but it will be shiny, wax maybe?
Any suggestions gratefully received. Thanks
Lovely chairs, Ercol furniture is at last becoming appreciated for it's excellent design and use of really high quality native timbers, especially beautiful elm which after the dutch elm disease crisis and the great storm of 1987 has become a rarity.
As for finishing your chairs I suggest the Polyvine range of water based finishes. Two or three coats of the 'waxed finish varnish' in either satin or dead flat finish would be my choice. I've used it many times when I need a finish that doesn't darken the wood like an oil or a polyurethane type varnish does but offers plenty of day to day protection.
https://polyvine.com/index.php/en/varnishes
If you PM me your address, I'll try and get a bit of the satin wax finish to you to have a trial run and see what you think.
(I've just polished a run of wardrobes with it and have a bit left over.)
loughran said:
Lovely chairs, Ercol furniture is at last becoming appreciated for it's excellent design and use of really high quality native timbers, especially beautiful elm which after the dutch elm disease crisis and the great storm of 1987 has become a rarity.
As for finishing your chairs I suggest the Polyvine range of water based finishes. Two or three coats of the 'waxed finish varnish' in either satin or dead flat finish would be my choice. I've used it many times when I need a finish that doesn't darken the wood like an oil or a polyurethane type varnish does but offers plenty of day to day protection.
https://polyvine.com/index.php/en/varnishes
If you PM me your address, I'll try and get a bit of the satin wax finish to you to have a trial run and see what you think.
(I've just polished a run of wardrobes with it and have a bit left over.)
Very kind chap, much appreciated especially as things are a little fraught at present (as we all are) with impending business doom..As for finishing your chairs I suggest the Polyvine range of water based finishes. Two or three coats of the 'waxed finish varnish' in either satin or dead flat finish would be my choice. I've used it many times when I need a finish that doesn't darken the wood like an oil or a polyurethane type varnish does but offers plenty of day to day protection.
https://polyvine.com/index.php/en/varnishes
If you PM me your address, I'll try and get a bit of the satin wax finish to you to have a trial run and see what you think.
(I've just polished a run of wardrobes with it and have a bit left over.)
PM incoming
Wondering if I can ask you chaps a question.
I plan on making a bench for the back end of my garage, just a basic frame with space for boxes and a work top. It's 3.05m in width, and I wondered if I made a frame with 2x4 or similar, if I just purchased a wooden worktop from B&Q (other DIY stores available), which come in 3m runs, screwed it on to the frame, if it'd be ok?
I'm not worried about look or it staying pristine, I will be using this to work on the cars, DIY etc. But for £140 for a 3m run of Oak, seems a no brainer.
Only work I'd need to do is cut one of the corners off as it's close to the door, just to make it easier to get in the passenger entrance.
Thoughts? TIA
singlecoil said:
Sounds strong enough as long as it is well fixed to the wall (which will stop the structure racking, and the legs at the front are protected from being accidentally knocked sideways. Best way to do that is to have a lower shelf.
Yea, I've been looking at some guides to building them. I'd be doing 6-8 uprights over the 3 meters, then lower horizontal's to also hold up a shelf. then screwing to the rear wall for stabilityI was more after advise on the worktop. Is oak (at 28mm) going to be up to much? etc
Was going to do the frame like this, so I don't need to buy a router to recess the wood at all.

Edited by illmonkey on Monday 23 March 09:57
For reference I used a 6" x 2" over a 5m span to lash up a quick bench when I started renovating my house. I used 4 x 2s to support an 18mm ply top and used no additional leg supports. It was fine for working on and standing on, but had slightly too much bounce to hammer stuff on without an additional post.
I think a solid oak top over 3m would be about as strong on it's own, with a 4 x 2 frame it'll be fine. If it's not, add a post to the floor in the middle at the front.
If you want storage underneath and given you're happy spending £140 on the top rather than the £40 that a laminate top costs, why not get some cheap kitchen cabinets to fill the space, then drop the frame on top of that so the span is well supported as well as being solid in it's own right?
illmonkey said:
singlecoil said:
Sounds strong enough as long as it is well fixed to the wall (which will stop the structure racking, and the legs at the front are protected from being accidentally knocked sideways. Best way to do that is to have a lower shelf.
Yea, I've been looking at some guides to building them. I'd be doing 6-8 uprights over the 3 meters, then lower horizontal's to also hold up a shelf. then screwing to the rear wall for stabilityI was more after advise on the worktop. Is oak (at 28mm) going to be up to much? etc
Was going to do the frame like this, so I don't need to buy a router to recess the wood at all.
Edited by illmonkey on Monday 23 March 09:57
Gassing Station | Homes, Gardens and DIY | Top of Page | What's New | My Stuff