Damp, bay window. Solutions?
Discussion


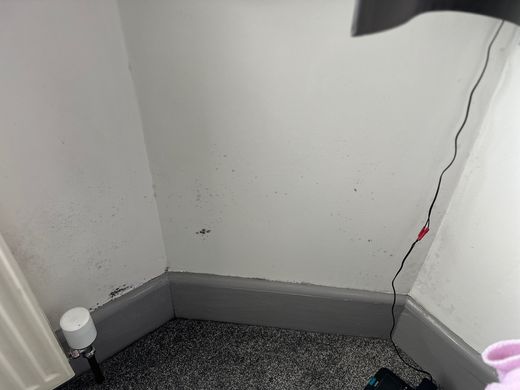
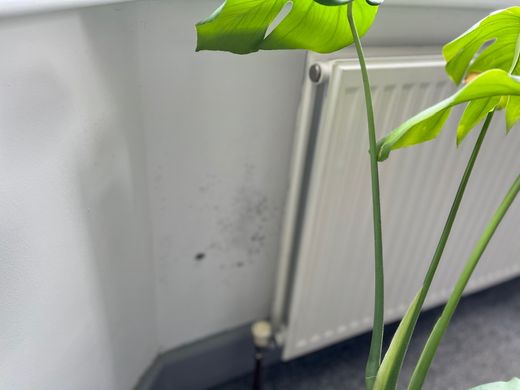
Upper floor bedroom bay window attracts damp inside on the walls see pics despite radiator. I can only assume this is condensation even though a dehumidifier has been used regularly and all windows opened very frequently too. (Bathroom has no extractor which needs to be sorted as probably won t help with the showers). It s front of the house and doesn t get any rain from outside hitting it (always blows onto the back of the house) so I m sure it s not external.
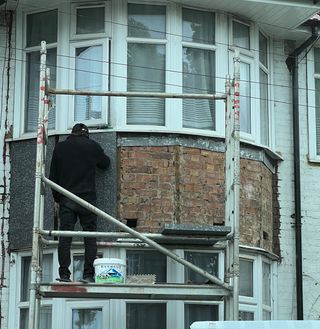
I m thinking insulated plasterboard dot and dabbed inside? That was my main thought. Otherwise just saw local house having exterior insulated, would that be better (only on the bay area). I remember from having the room replastered once the interior wall quality was a bit s t I ve a vague memory it was like some kind of board (probably asbestos knowing my luck
  )
)
tldr insulated plasterboard or exterior insulation if we have render knocked off?
Bit blurry:
Local house having exterior:
I m thinking insulated plasterboard dot and dabbed inside? That was my main thought. Otherwise just saw local house having exterior insulated, would that be better (only on the bay area). I remember from having the room replastered once the interior wall quality was a bit s
t I ve a vague memory it was like some kind of board (probably asbestos knowing my luck )tldr insulated plasterboard or exterior insulation if we have render knocked off?
Bit blurry:
Local house having exterior:
Edited by CoolHands on Sunday 27th July 12:48
Edited by CoolHands on Sunday 27th July 13:23
Definitely looks like a condensation problem. EWI should perform better than internal insulation but more expense and can sometimes look a bit odd. Is your’s brickwork behind the render, like in the pic? In my neck of the woods I’ve only ever seen timber studs with metal lathing fixed to it.
Nobody:
Me:
Well I made my choices and here s my solution after looking around a bit. I will put pics here as when searching I couldn’t find many other pics of the wooden framework for bay windows, so this might help someone else thinking of insulating their bay window with PIR and insulated plasterboard.
It took 8 days overall, partly slowed down by drying times of filler, then painting skirting etc. Removed radiator a weekend prior to not be bogged down when the time came. Finished result means there is now 3” of insulation (50mm + 25mm).
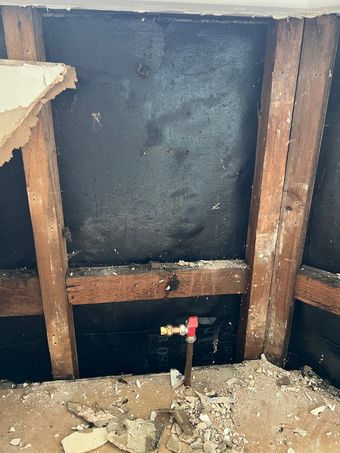
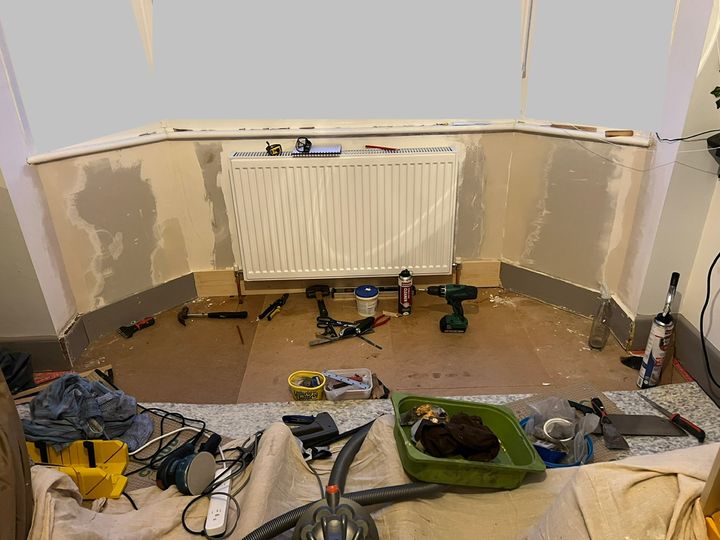
Pulled old plasterboard out as cleanly as possible
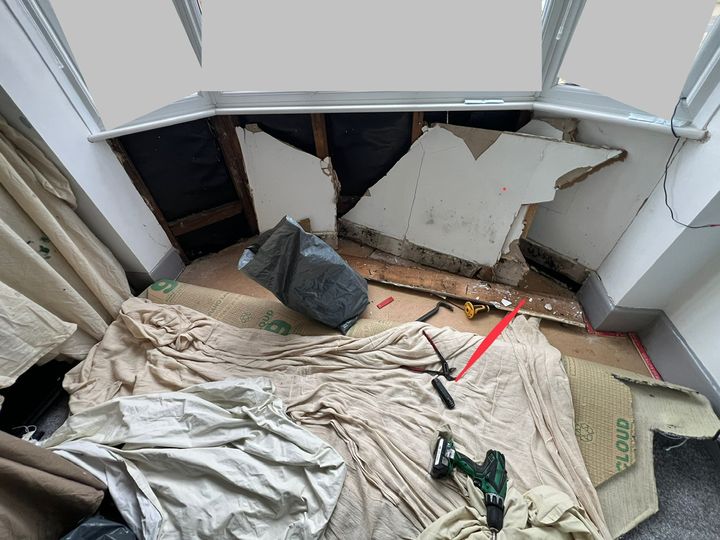
Inside was cavities in between the wooden studs. The depth was 3” so I bought 2” (50mm) PIR as I wanted to leave an air gap on the exterior side. (It was bone dry so mold definitely created by humidity / condensation plus tado radiator control). Also it turned out trying to fit 75mm PIR would have been nearly impossible as some areas varied a little bit and also had the odd nail sticking through etc so worth keeping in mind if you do similar.

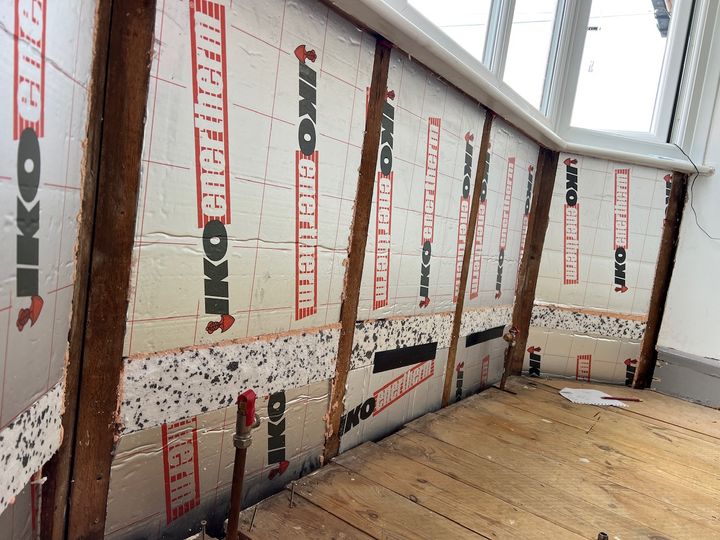
Cut (using ordinary wood saw, outdoors as messy) and installed insulation. Measured each rectangle to size as all varied. Then used slim 25mm jabwall (basically polystyrene to line the cross members (noggins) as not deep enough for PIR, only 1” gap. Filled any small gaps with adhesive spray foam (which doesn t expand much) and trimmed once dry:
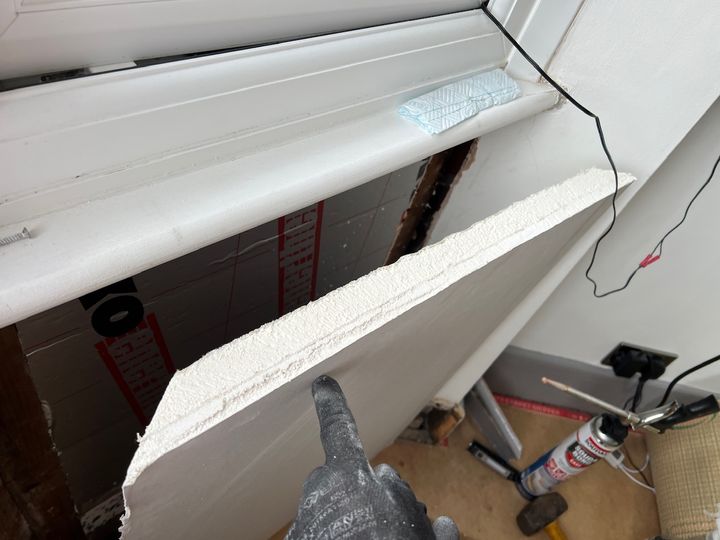
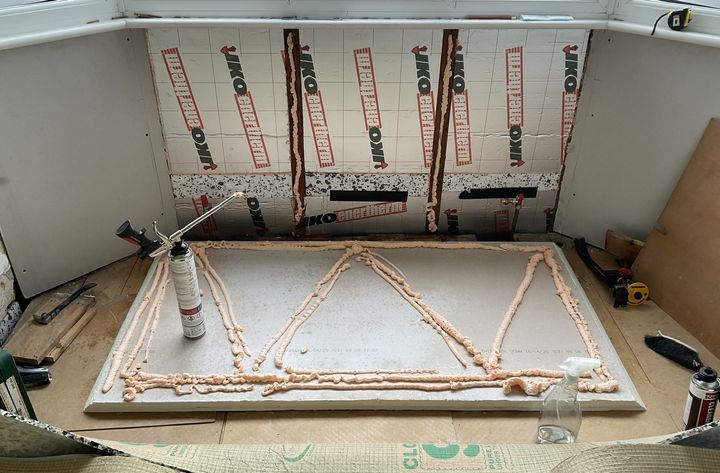
Cut 37.5mm insulated plasterboard (depth limited by window board ie didn’t want plasterboard to to stick out) using 45 degree mitres to allow board to fit flush to side walls
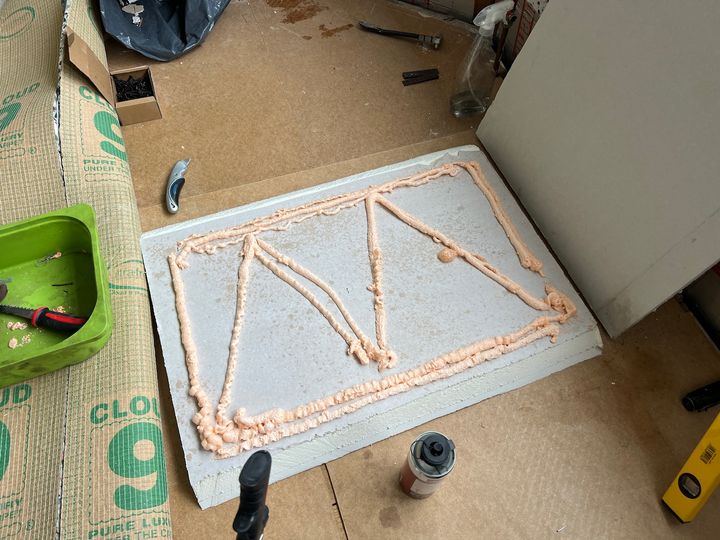
Adhesive spray foam to attach (worked well) as well as plasterboard screws. Then taped and filled joints after watching a few videos (I used gyproc). I wanted to do entire job without having to find a plasterer.
I also painted the finished result with zinsser cover all to make sure filler / plasterboard stripes wouldn t show through paint
Adapted original skirting and had to fit new along back of (new) double radiator
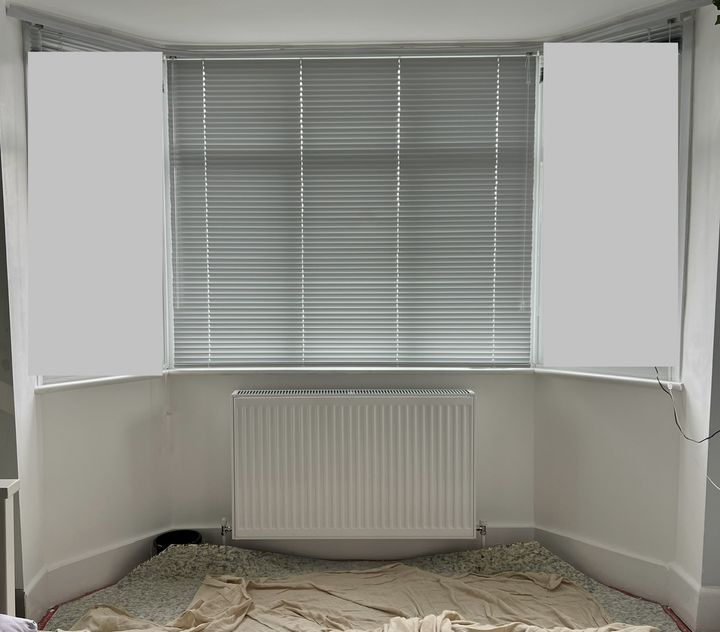
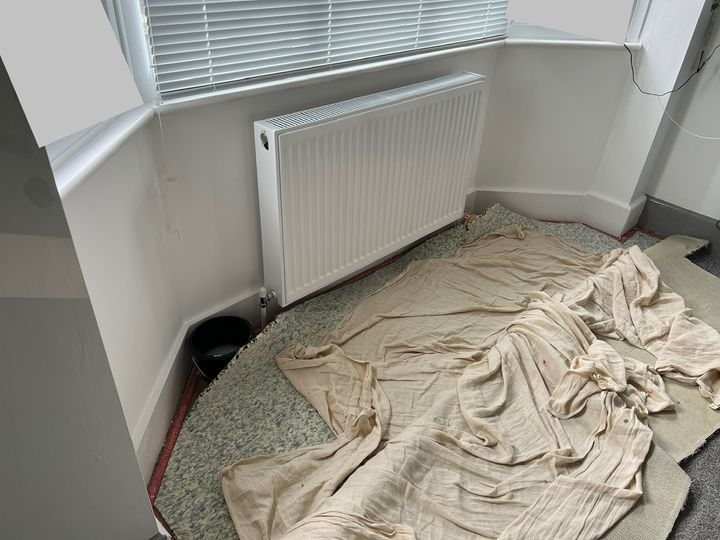
Much painting and drying later: (just waiting for skirting to dry then can lay carpet back down)
Fitting new rad meant altering pipework, floorboards etc so that all took a lot of time (emptying and refilling the system etc), + as wall now 1” into the room had to cut carpet and so on. All of these things eat up a lot of time.
Me:
Well I made my choices and here s my solution after looking around a bit. I will put pics here as when searching I couldn’t find many other pics of the wooden framework for bay windows, so this might help someone else thinking of insulating their bay window with PIR and insulated plasterboard.
It took 8 days overall, partly slowed down by drying times of filler, then painting skirting etc. Removed radiator a weekend prior to not be bogged down when the time came. Finished result means there is now 3” of insulation (50mm + 25mm).
Pulled old plasterboard out as cleanly as possible
Inside was cavities in between the wooden studs. The depth was 3” so I bought 2” (50mm) PIR as I wanted to leave an air gap on the exterior side. (It was bone dry so mold definitely created by humidity / condensation plus tado radiator control). Also it turned out trying to fit 75mm PIR would have been nearly impossible as some areas varied a little bit and also had the odd nail sticking through etc so worth keeping in mind if you do similar.
Cut (using ordinary wood saw, outdoors as messy) and installed insulation. Measured each rectangle to size as all varied. Then used slim 25mm jabwall (basically polystyrene to line the cross members (noggins) as not deep enough for PIR, only 1” gap. Filled any small gaps with adhesive spray foam (which doesn t expand much) and trimmed once dry:
Cut 37.5mm insulated plasterboard (depth limited by window board ie didn’t want plasterboard to to stick out) using 45 degree mitres to allow board to fit flush to side walls
Adhesive spray foam to attach (worked well) as well as plasterboard screws. Then taped and filled joints after watching a few videos (I used gyproc). I wanted to do entire job without having to find a plasterer.
I also painted the finished result with zinsser cover all to make sure filler / plasterboard stripes wouldn t show through paint
Adapted original skirting and had to fit new along back of (new) double radiator
Much painting and drying later: (just waiting for skirting to dry then can lay carpet back down)
Fitting new rad meant altering pipework, floorboards etc so that all took a lot of time (emptying and refilling the system etc), + as wall now 1” into the room had to cut carpet and so on. All of these things eat up a lot of time.
Edited by CoolHands on Sunday 27th July 13:25
 , should sort the condensation issues..
Forums | Homes, Gardens and DIY | Top of Page | What's New | My Stuff