Toms Garden Shed / Workshop / Office Build
Discussion


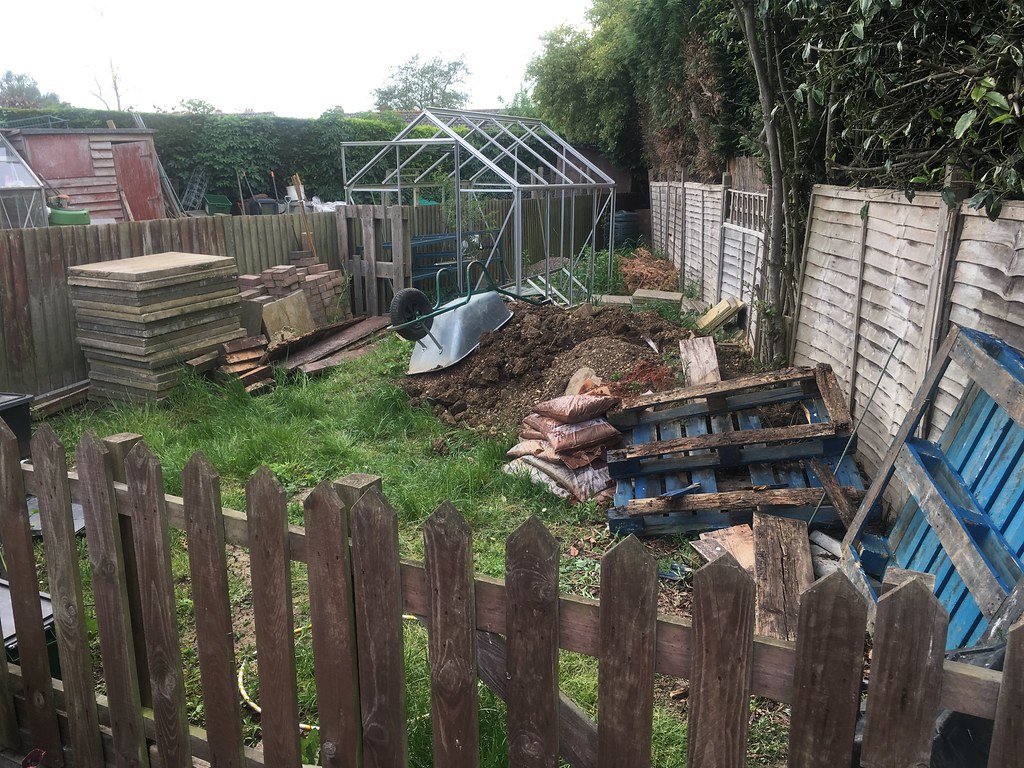
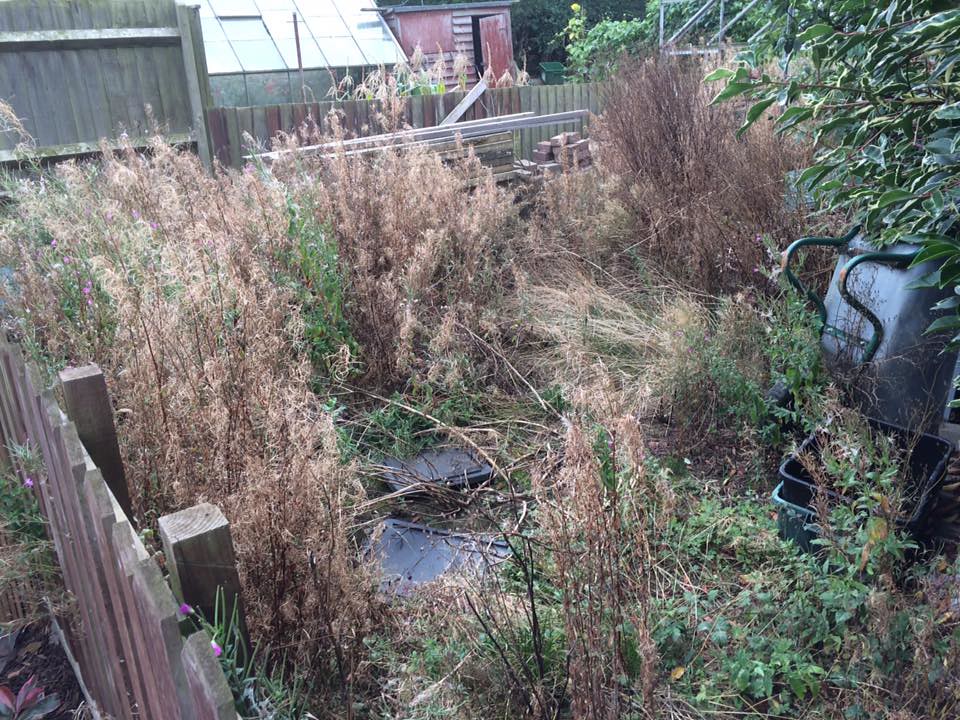
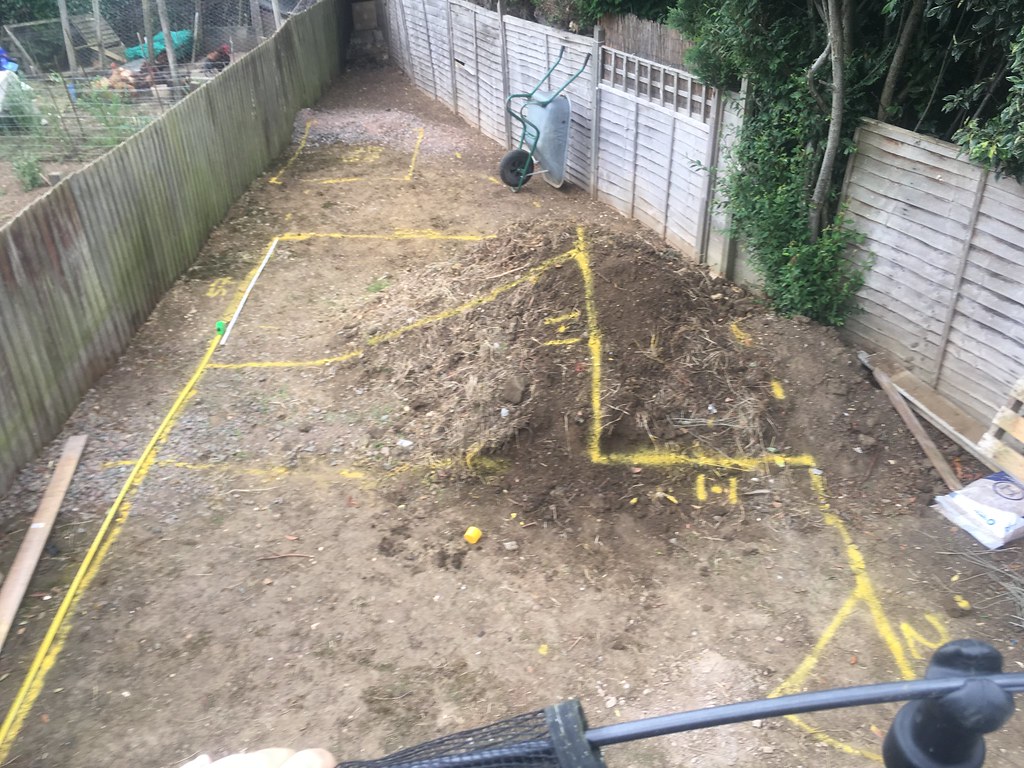
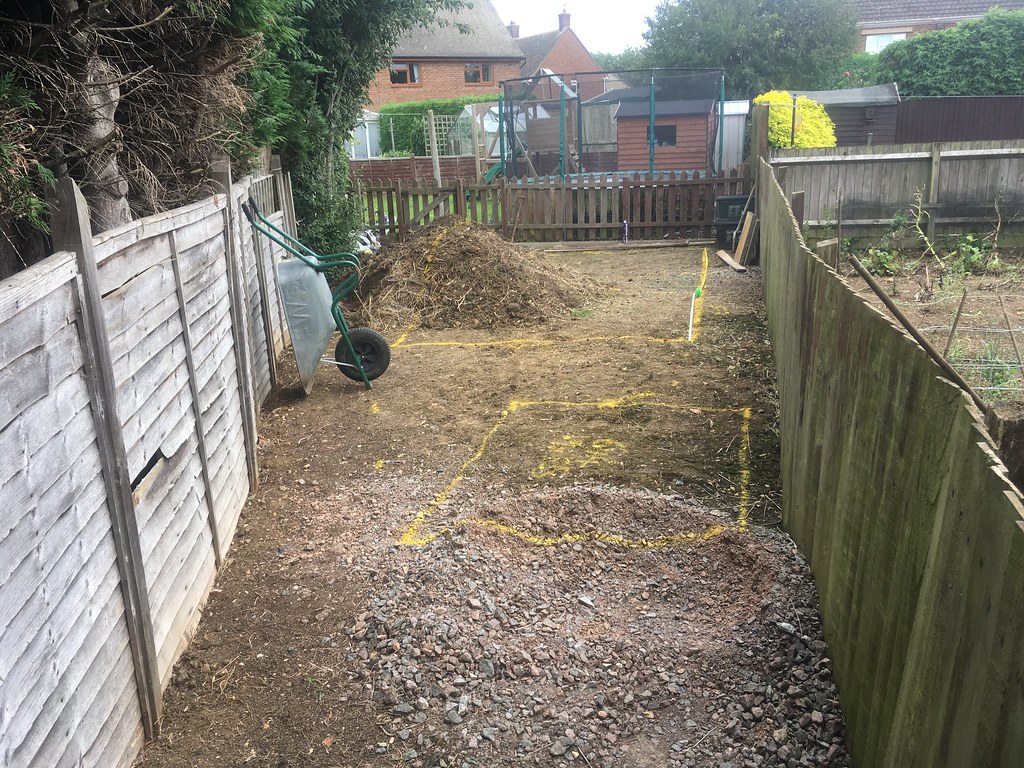
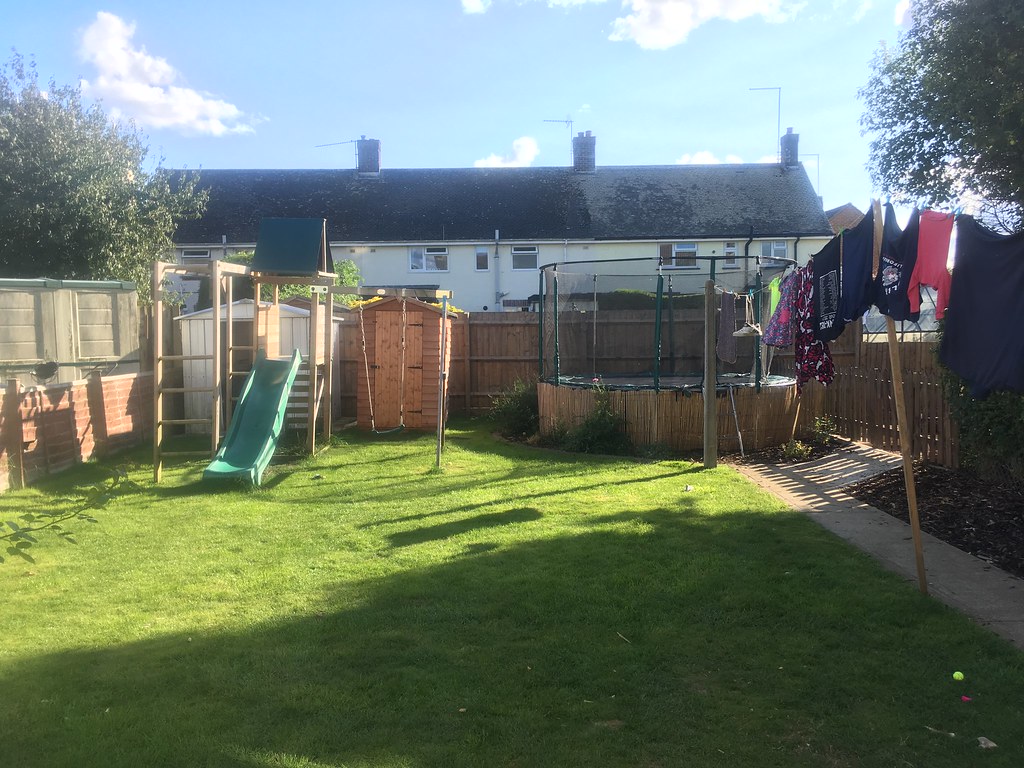
My garden is a funny shape, square back from the house in the usual fashion, but then there is a triangle that extends the width of my neighbours plot too, very odd. Needless to say this area of the garden has been fenced off and forgotten about since we moved in and the time has come to do something about it.
The area in question:
 IMG_1694 by Tomoose85
 14199687_10153892795637217_5116596725614945606_n by Tomoose85
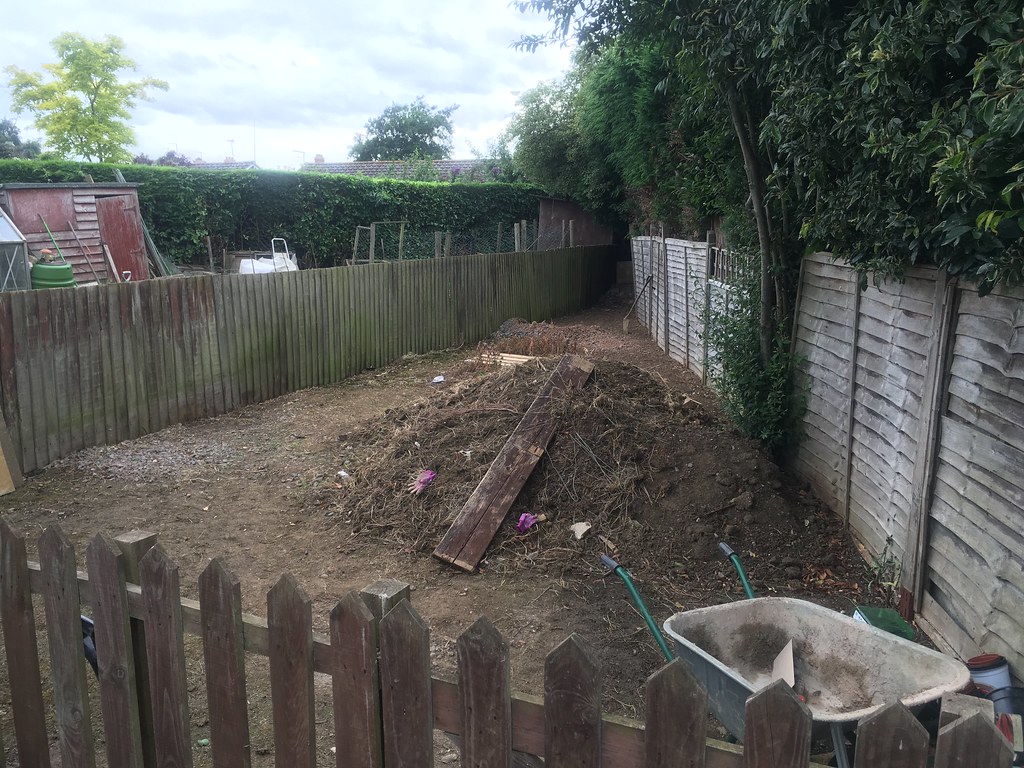
A few tip runs and a fire later had it looking a bit more usable as a space.
 14232482_10153892795912217_2852233478329350976_n by Tomoose85
The hosepipe was on standby, don't worry folks.
 14192577_10153892795902217_2323713340873142958_n by Tomoose85
 IMG_2386 by Tomoose85
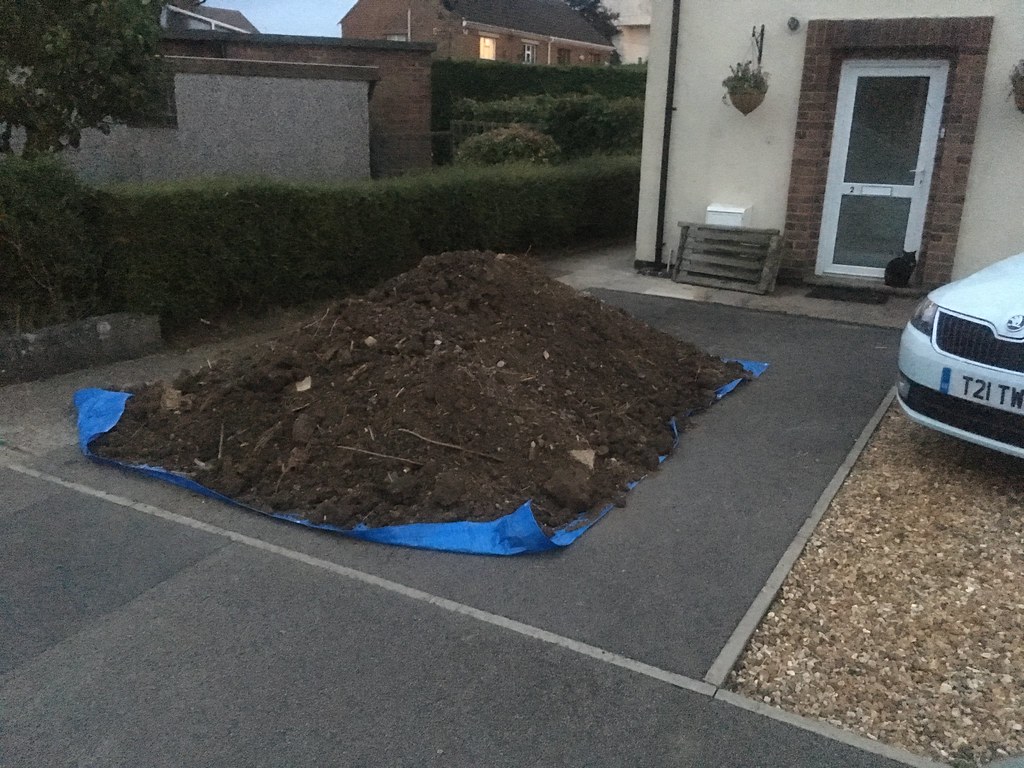
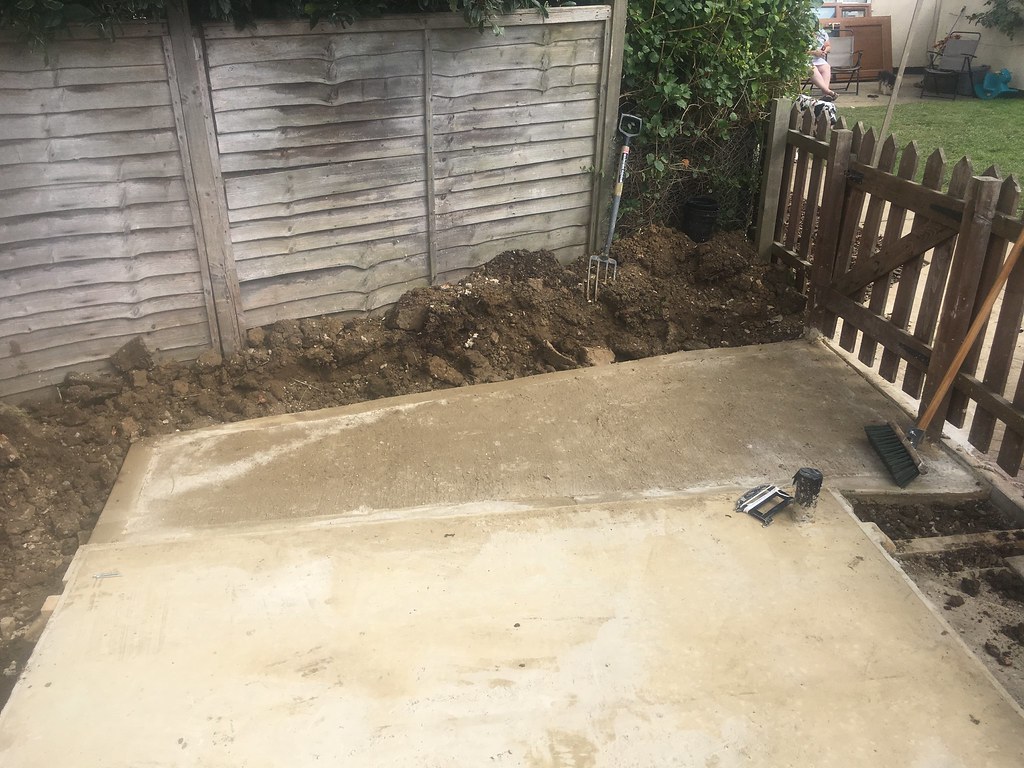
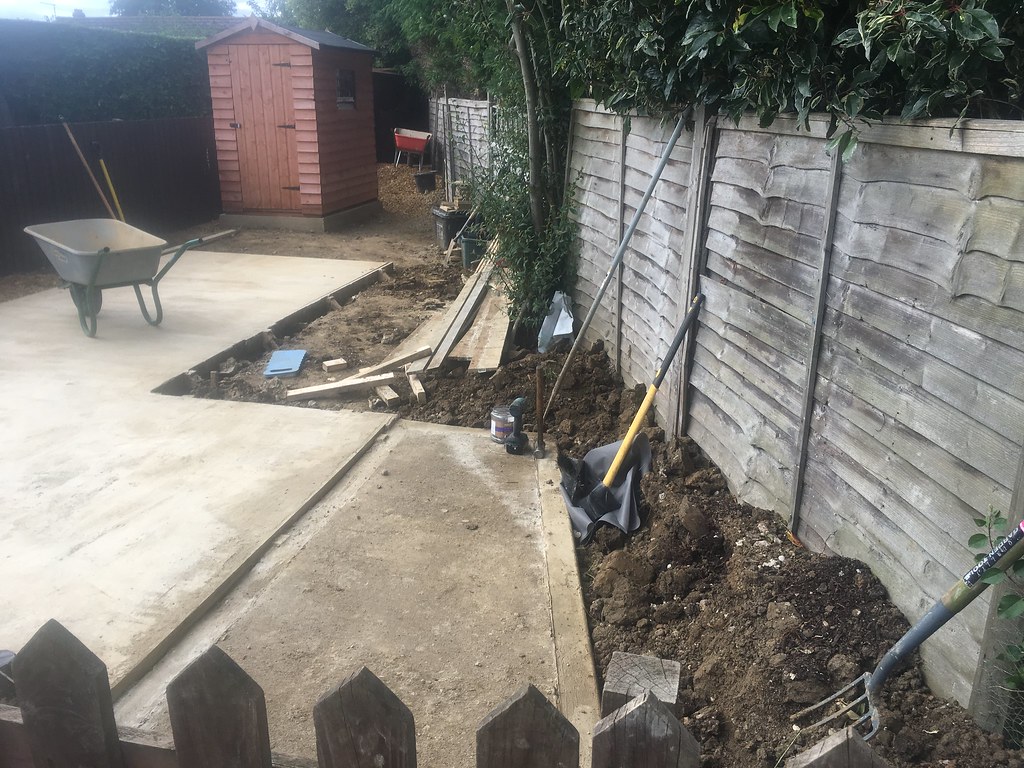
I stripped the ground to get it somewhere near level, and ended up having this lot taken away:
 IMG_2447 by Tomoose85
The area in question:
IMG_1694 by Tomoose8514199687_10153892795637217_5116596725614945606_n by Tomoose85A few tip runs and a fire later had it looking a bit more usable as a space.
14232482_10153892795912217_2852233478329350976_n by Tomoose85The hosepipe was on standby, don't worry folks.
14192577_10153892795902217_2323713340873142958_n by Tomoose85IMG_2386 by Tomoose85I stripped the ground to get it somewhere near level, and ended up having this lot taken away:
IMG_2447 by Tomoose85I started playing around with some ideas. I wanted to keep a nearly new 6x4 shed for garden crap, so that was put as far into the triangle as possible, and then started seeing what I could fit in the space that was left.
 IMG_2427 by Tomoose85, on Flickr
 IMG_2436 by Tomoose85, on Flickr
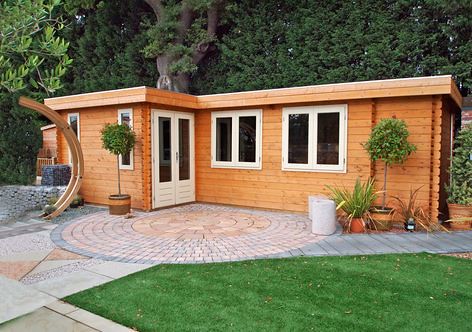
A few evenings researching and I decided I wanted to build a garden office that could also be used for my tools and 'man stuff'. This is approximately the same dimensions, but circa £9k, so I thought I'd build my own. "How hard could it be?"
 IMG_2395 by Tomoose85, on Flickr
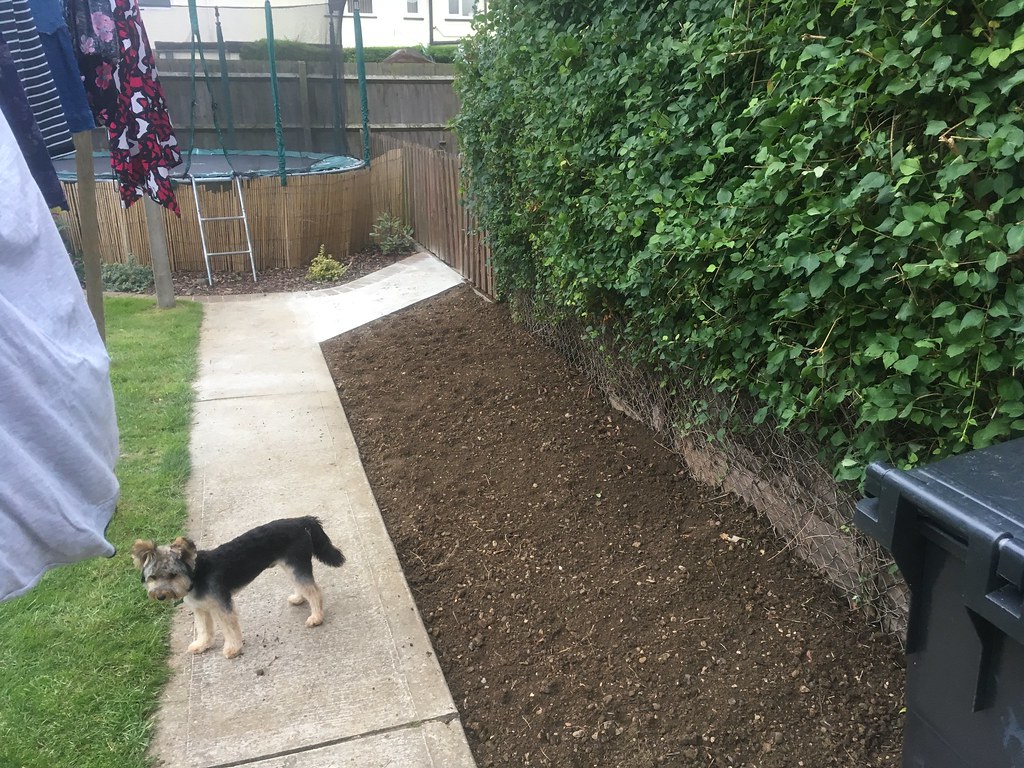
The area of garden was separated from the rest of the garden with a raised planter area, so this was removed and replaced with a concrete path.
Shuttering in
 IMG_2381 by Tomoose85, on Flickr
Stone in and compacted - MOT type-1 sub base
 IMG_2382 by Tomoose85, on Flickr
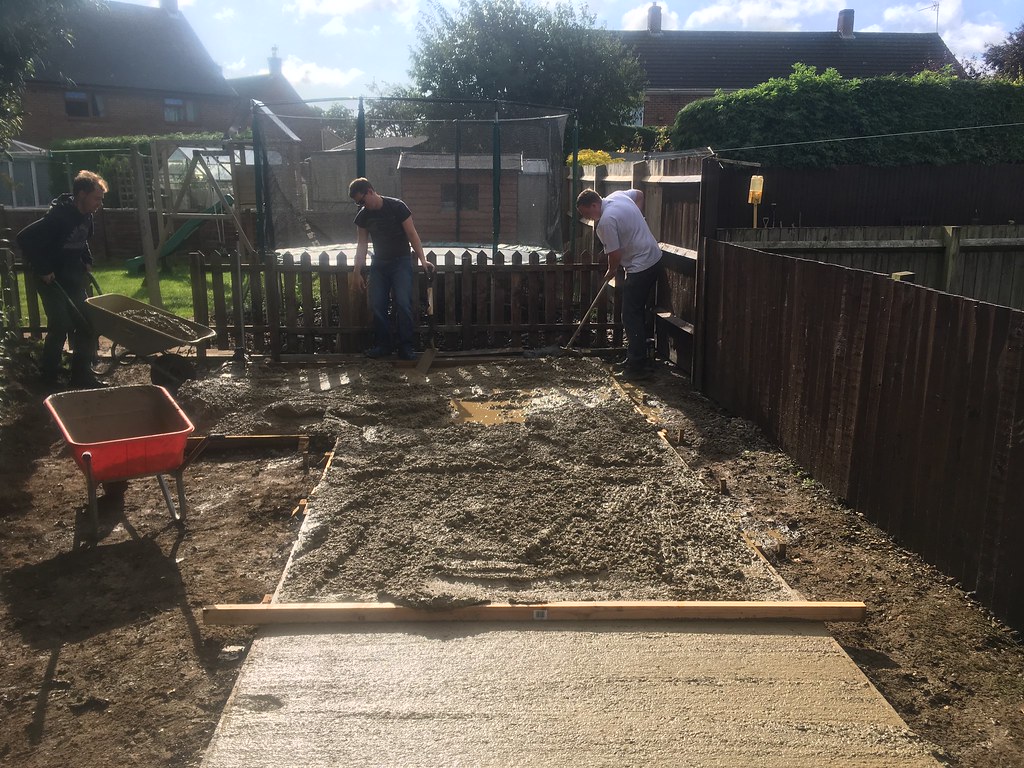
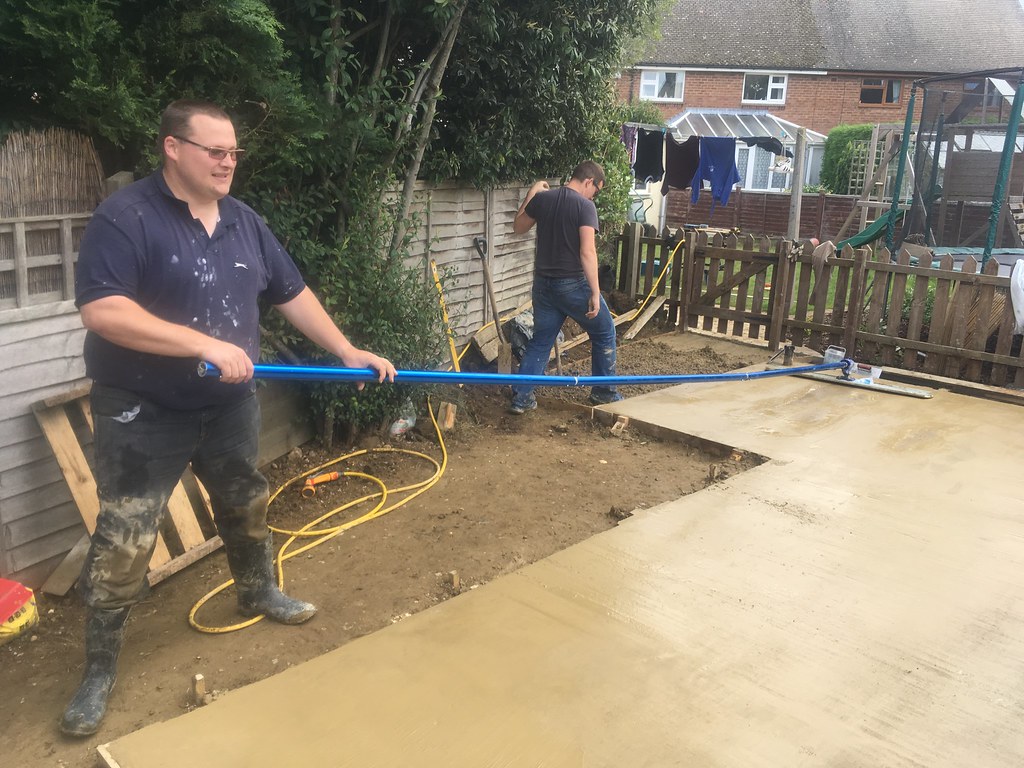
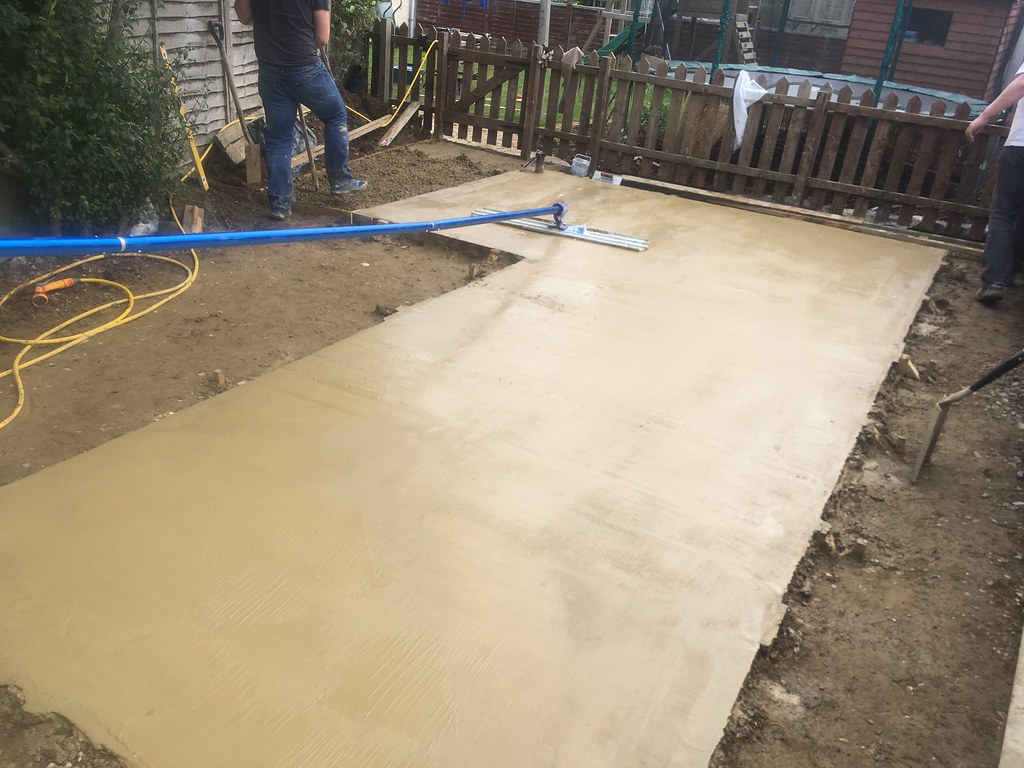
4 barrow fulls of concrete mixed, laid, tamped, floated and brush and trowel finish applied just in time for the heavens to open
 IMG_2388 by Tomoose85, on Flickr
I did cover it with a tarp, and it'd look perfect, if only my daughter hadn't let the dogs out to play.
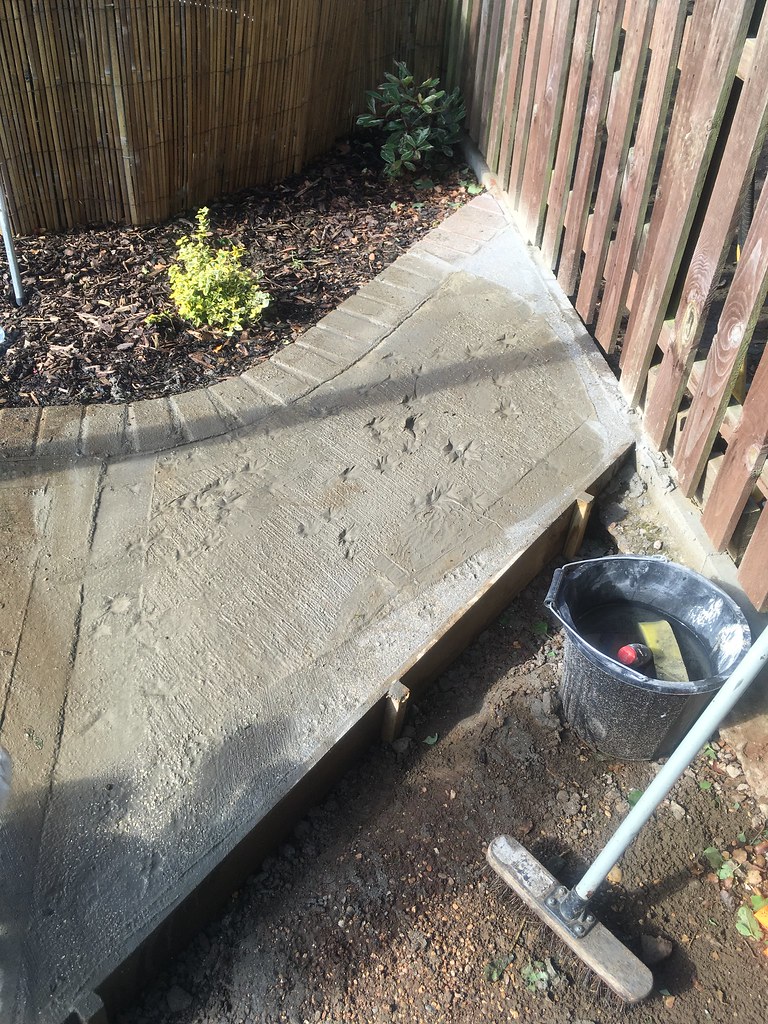 IMG_2399 by Tomoose85, on Flickr
Oh well, it adds character I suppose!
IMG_2427 by Tomoose85, on FlickrIMG_2436 by Tomoose85, on FlickrA few evenings researching and I decided I wanted to build a garden office that could also be used for my tools and 'man stuff'. This is approximately the same dimensions, but circa £9k, so I thought I'd build my own. "How hard could it be?"
IMG_2395 by Tomoose85, on FlickrThe area of garden was separated from the rest of the garden with a raised planter area, so this was removed and replaced with a concrete path.
Shuttering in
IMG_2381 by Tomoose85, on FlickrStone in and compacted - MOT type-1 sub base
IMG_2382 by Tomoose85, on Flickr4 barrow fulls of concrete mixed, laid, tamped, floated and brush and trowel finish applied just in time for the heavens to open
IMG_2388 by Tomoose85, on FlickrI did cover it with a tarp, and it'd look perfect, if only my daughter hadn't let the dogs out to play.
IMG_2399 by Tomoose85, on FlickrOh well, it adds character I suppose!
I managed to screen enough topsoil from the muck away pile to fill the area that the raised planter was in, just needs a few plants
 IMG_2440 by Tomoose85, on Flickr
 IMG_2441 by Tomoose85, on Flickr
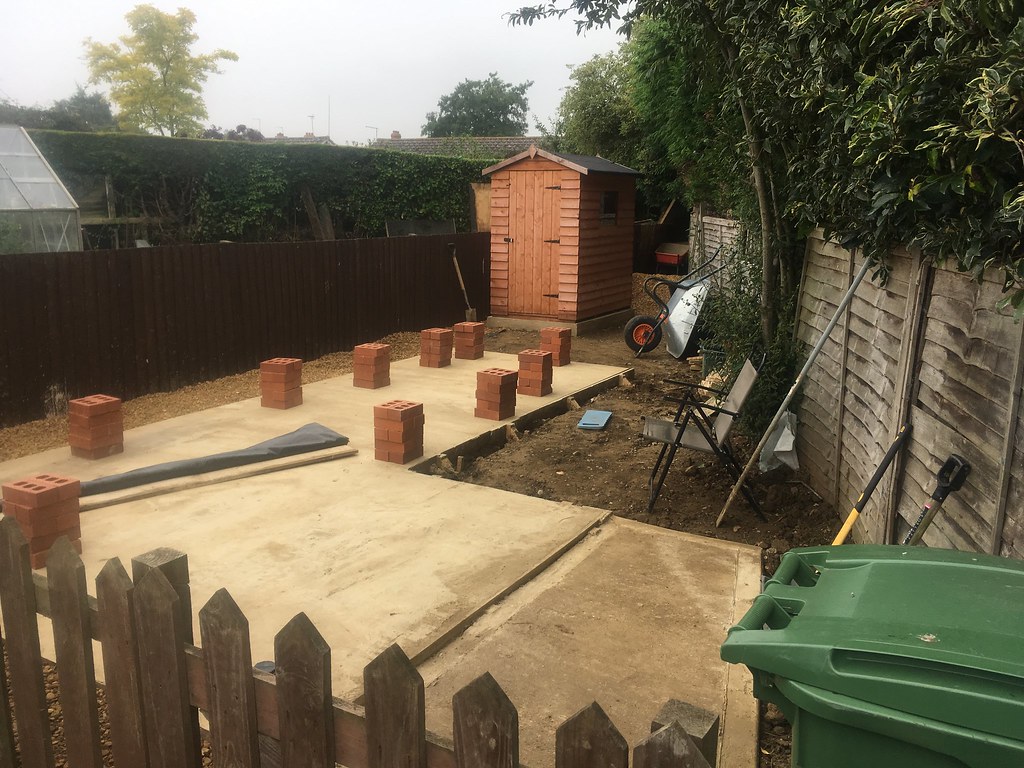
I thought I'd better research what was allowed. It seems <15m2 is permitted development, so mine is 14.95m2 The plan is to have an L-shaped office/shed for me, and separate the bottom part of the L to replace a crusty metal shed for the kids bikes etc. This would free up a nice part of the garden for another garden room in the future
This is a quick sketch of the internal dimensions of my bit of the building
 IMG_2453 by Tomoose85, on Flickr
There is an additional 2m x 2m section at the end of the shed for the kids crap.
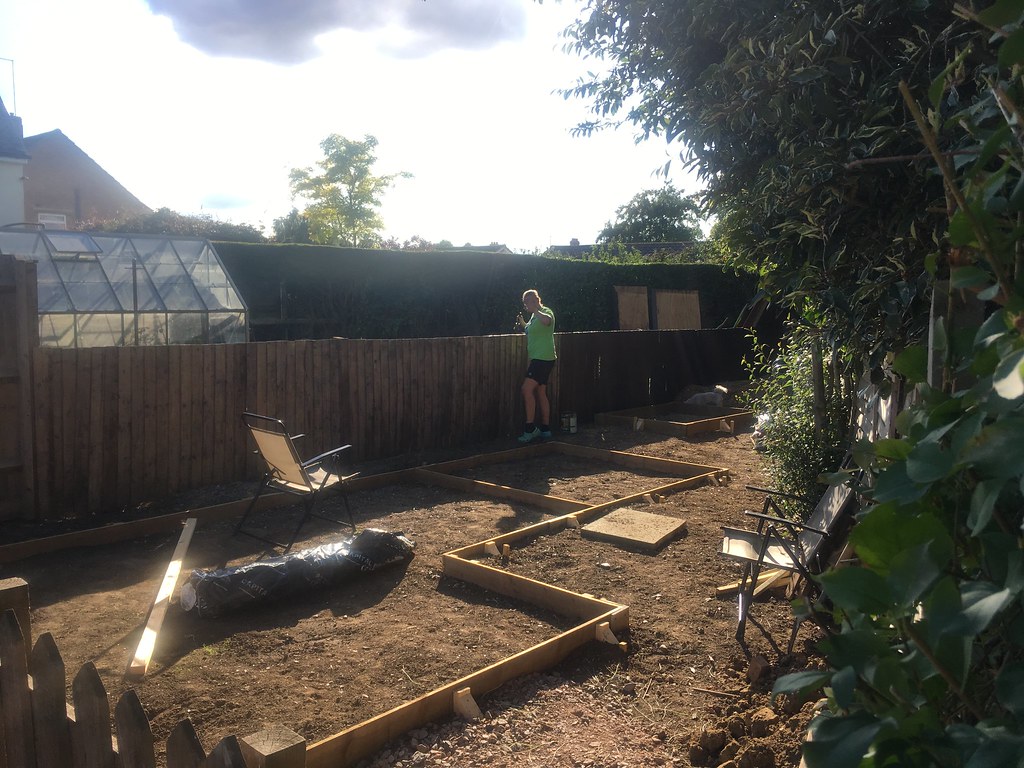
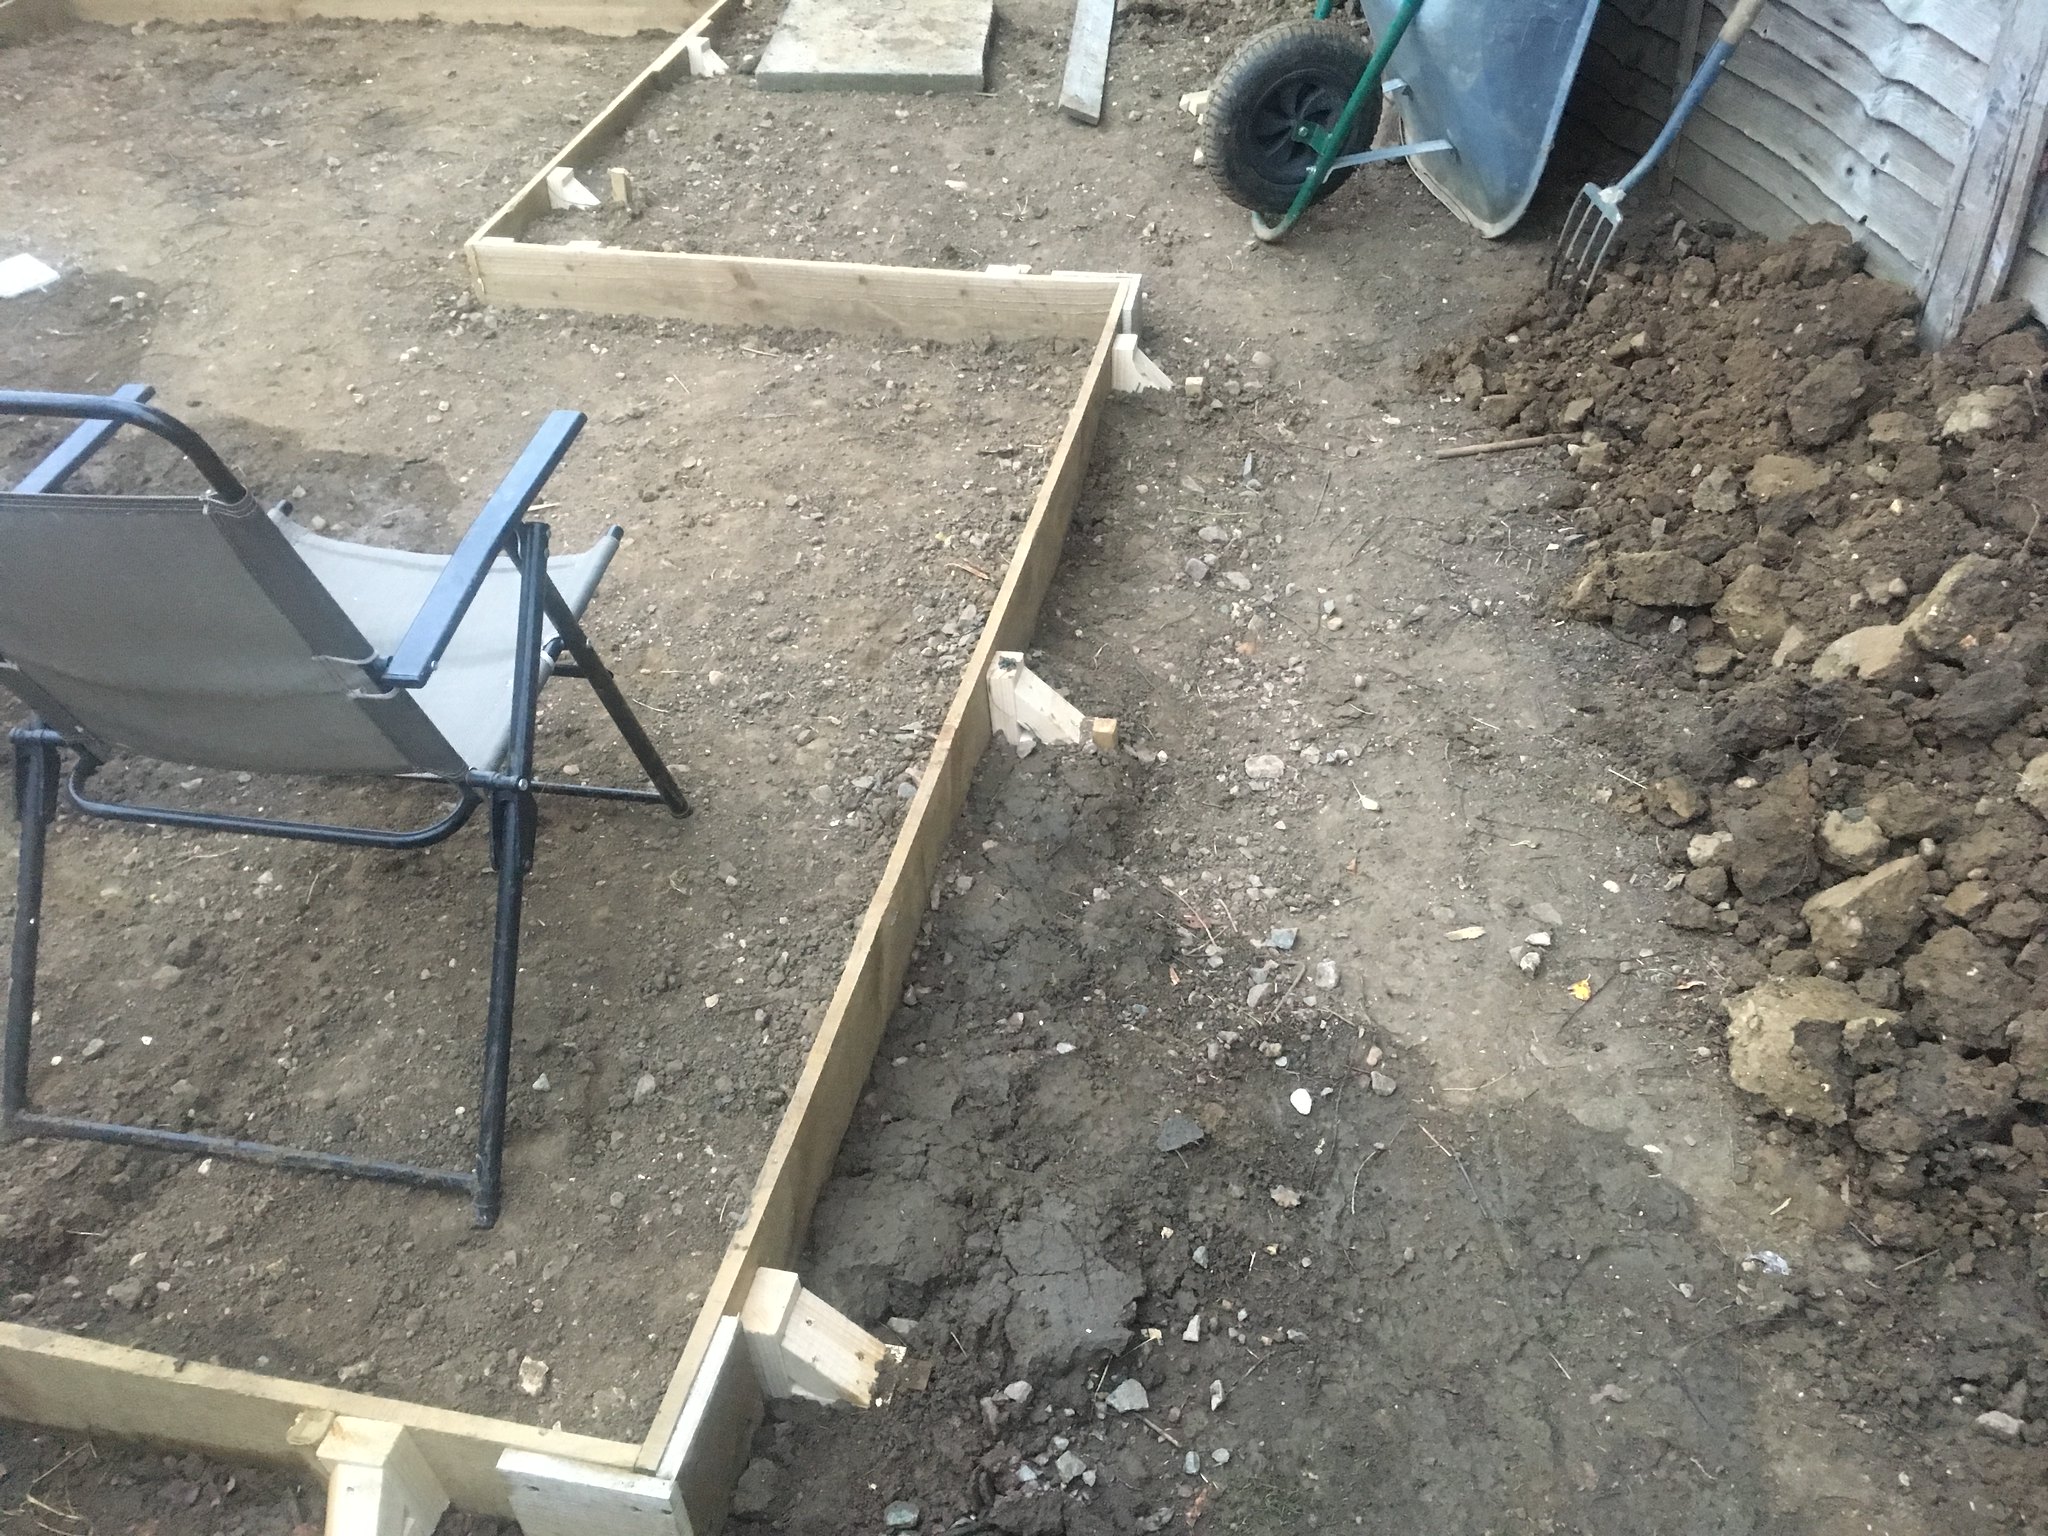
So a bit of tweaking things to get the max footprint possible without needing planning permission, and the shuttering could be knocked up. I used 19mm x 150mm timber for this, with some bracing and pegs. Part of it is dug into the ground. The plan is to have a gravel surround to the slab, and a bit of a man-patio in the space thats left next to the L.
In progress, lots of levelling still to do at this point.
 IMG_2452 by Tomoose85, on Flickr
Levelled, braced and pegged:
 IMG_2513 by Tomoose85, on Flickr
I aimed for 150mm deep, but its only 120mm in places. Perfectly good enough I think!
Eldest daughter was bribed into painting the fences
 IMG_2546 by Tomoose85, on Flickr
 IMG_2555 by Tomoose85, on Flickr
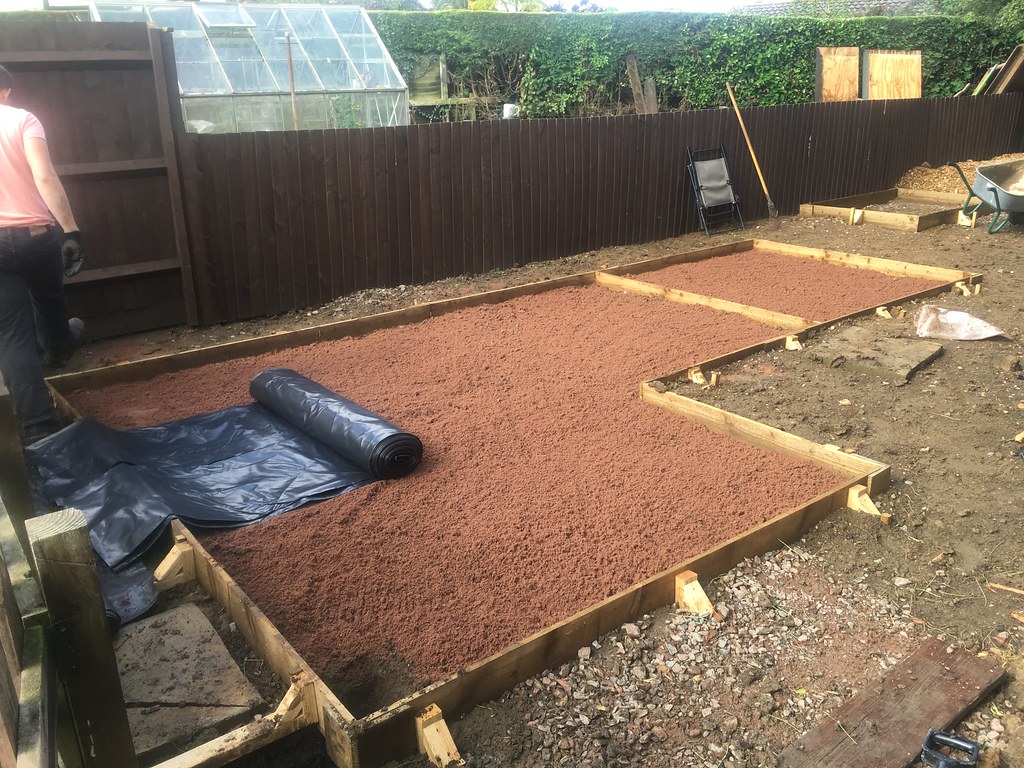
Sand in as blinding for a damp proof membrane
 IMG_2575 by Tomoose85, on Flickr
At which point I thought 's t the concrete is coming on Saturday and I haven't put a duct in for power!!'
IMG_2440 by Tomoose85, on FlickrIMG_2441 by Tomoose85, on FlickrI thought I'd better research what was allowed. It seems <15m2 is permitted development, so mine is 14.95m2
The plan is to have an L-shaped office/shed for me, and separate the bottom part of the L to replace a crusty metal shed for the kids bikes etc. This would free up a nice part of the garden for another garden room in the future This is a quick sketch of the internal dimensions of my bit of the building
IMG_2453 by Tomoose85, on FlickrThere is an additional 2m x 2m section at the end of the shed for the kids crap.
So a bit of tweaking things to get the max footprint possible without needing planning permission, and the shuttering could be knocked up. I used 19mm x 150mm timber for this, with some bracing and pegs. Part of it is dug into the ground. The plan is to have a gravel surround to the slab, and a bit of a man-patio in the space thats left next to the L.
In progress, lots of levelling still to do at this point.
IMG_2452 by Tomoose85, on FlickrLevelled, braced and pegged:
IMG_2513 by Tomoose85, on FlickrI aimed for 150mm deep, but its only 120mm in places. Perfectly good enough I think!
Eldest daughter was bribed into painting the fences
IMG_2546 by Tomoose85, on FlickrIMG_2555 by Tomoose85, on FlickrSand in as blinding for a damp proof membrane
IMG_2575 by Tomoose85, on FlickrAt which point I thought 's
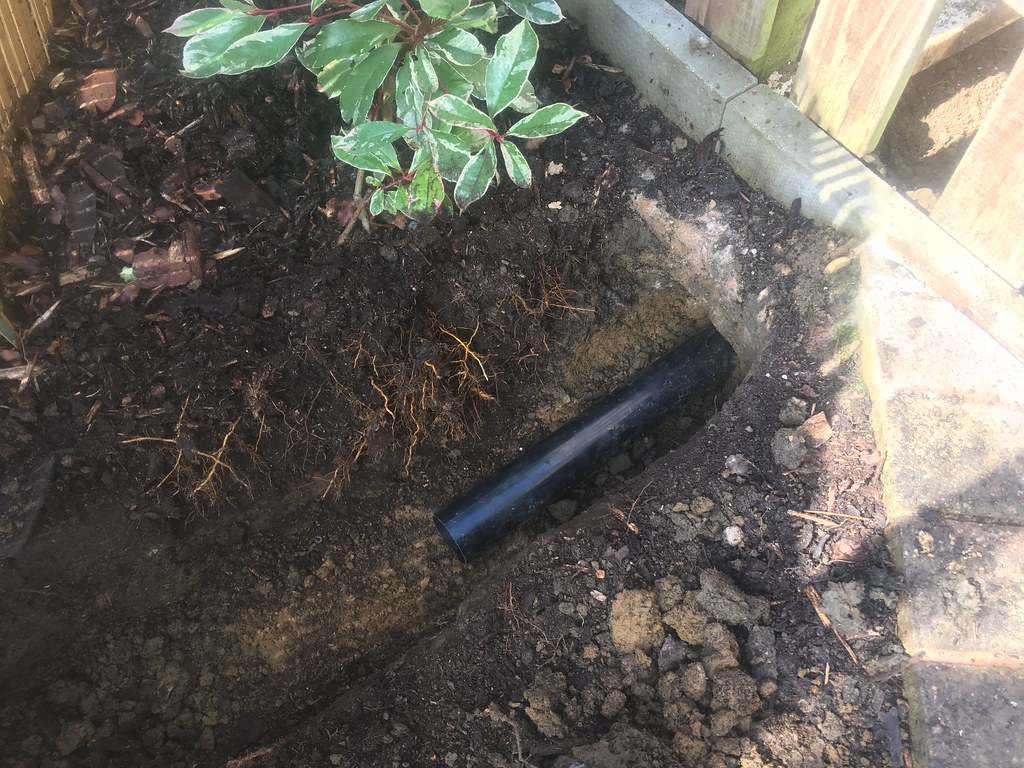
t the concrete is coming on Saturday and I haven't put a duct in for power!!'I have a brick built shed with power, so thought I'd run a duct to it. I used 68mm downpipe at about 600mm depth, which should do the job nicely. I put a little duct chamber in, and coincidentally this will tie in with the location for the future garden room
So, from the new office/shed towards the power source...
Duct poking up bottom right, under a concrete edging.
 IMG_2582 by Tomoose85, on Flickr
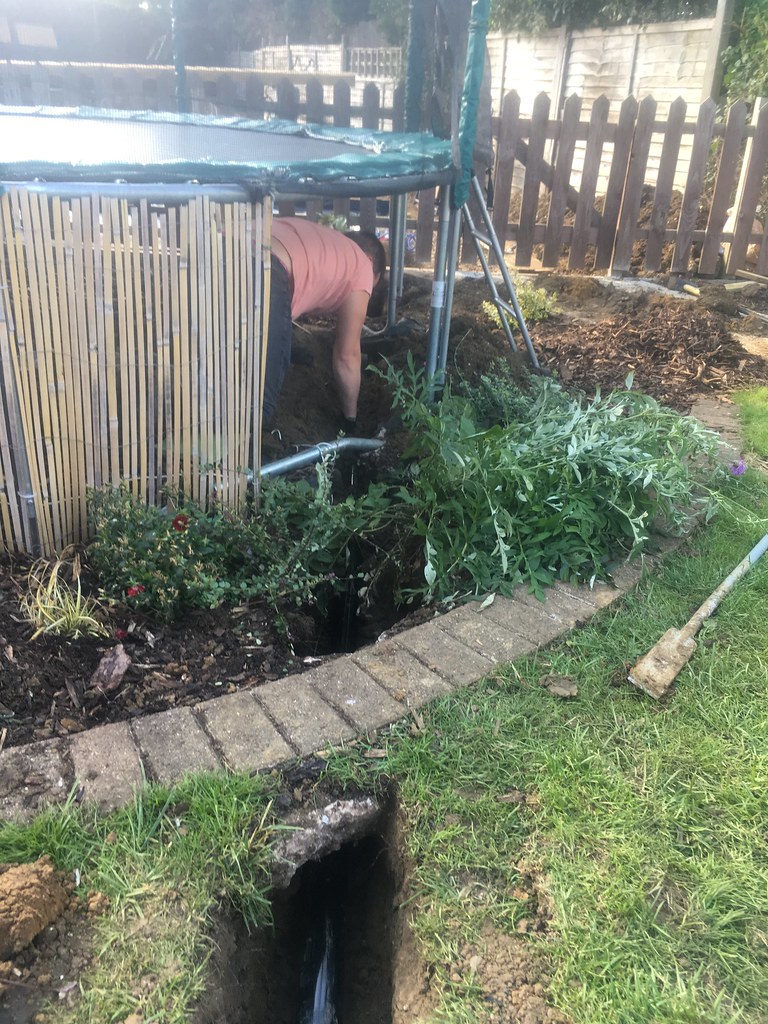
Under the trampoline
 IMG_2579 by Tomoose85, on Flickr
 IMG_2581 by Tomoose85, on Flickr
 IMG_2592 by Tomoose85, on Flickr
Under the brick edgings (why did I put them on a foot of concrete?
 IMG_2596 by Tomoose85, on Flickr
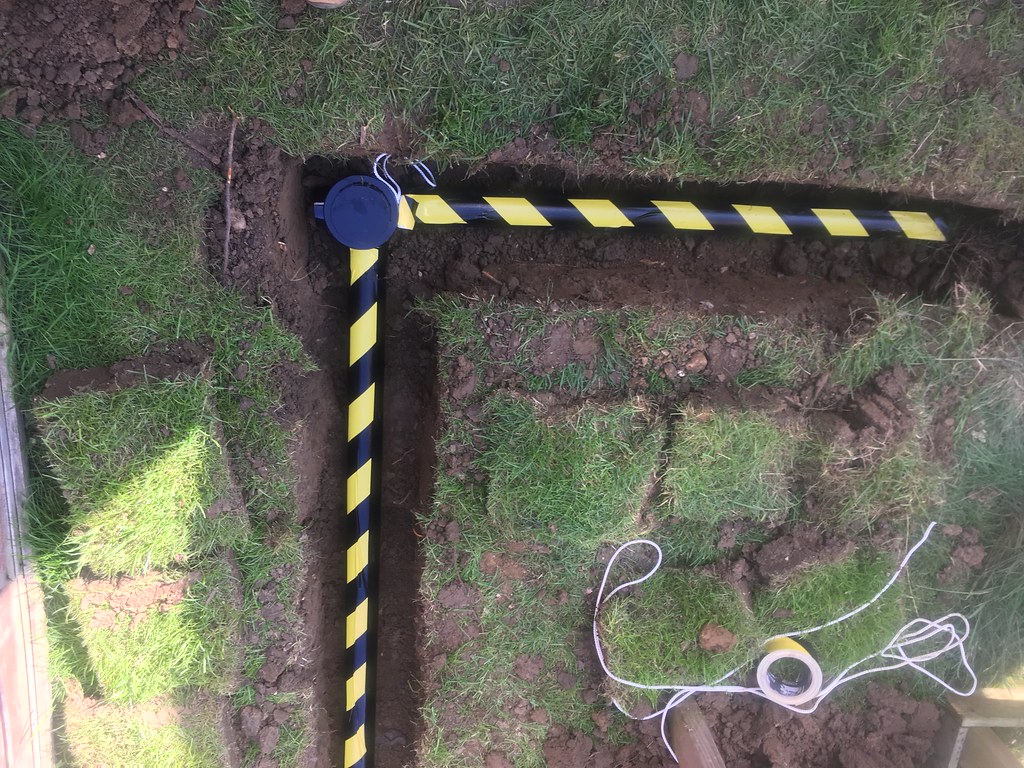
Across the garden to a duct box (soil stack section with a screw on blanking plug!)
 IMG_2606 by Tomoose85, on Flickr
 IMG_2610 by Tomoose85, on Flickr
 IMG_2612 by Tomoose85, on Flickr
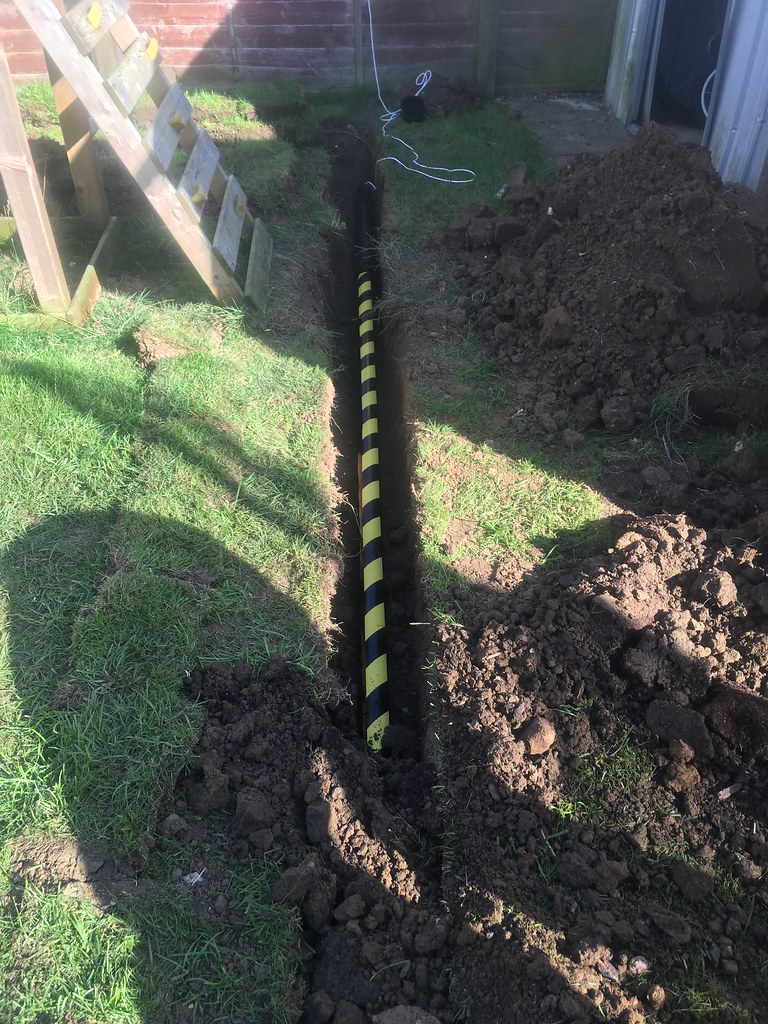
Down the garden towards the brick built shed
 IMG_2614 by Tomoose85, on Flickr
Under another concrete edging.
 IMG_2620 by Tomoose85, on Flickr
All ducting was roped and ready for a sparky once the building is water tight
So, from the new office/shed towards the power source...
Duct poking up bottom right, under a concrete edging.
IMG_2582 by Tomoose85, on FlickrUnder the trampoline
IMG_2579 by Tomoose85, on FlickrIMG_2581 by Tomoose85, on FlickrIMG_2592 by Tomoose85, on FlickrUnder the brick edgings (why did I put them on a foot of concrete?
IMG_2596 by Tomoose85, on FlickrAcross the garden to a duct box (soil stack section with a screw on blanking plug!)
IMG_2606 by Tomoose85, on FlickrIMG_2610 by Tomoose85, on FlickrIMG_2612 by Tomoose85, on FlickrDown the garden towards the brick built shed
IMG_2614 by Tomoose85, on FlickrUnder another concrete edging.
IMG_2620 by Tomoose85, on FlickrAll ducting was roped and ready for a sparky once the building is water tight
The turf (well, manky old grass) was salvaged, didn't look too shabby a job. A few days of rain later and you can hardly tell
 IMG_2549 by Tomoose85, on Flickr
Next was to get the damp proof membrane down:
Sand
IMG_2575 by Tomoose85, on Flickr
Membrane. Temporarily stapled to the shuttering as it was put down a few days early, but I did cut the edges off before the pour to ensure a nicely compacted edge to the concrete
 IMG_2625 by Tomoose85, on Flickr
Just under 3m3 of C28/30 50mm slump concrete was used, as well as the help of a few mates Getting on for 90 barrow fulls. I did hire a long float which was money well spent, as the finish is really first class.
I'm the fat bloke incase anyone was wondering!
 IMG_2670 by Tomoose85, on Flickr
 IMG_2685 by Tomoose85, on Flickr
 IMG_2689 by Tomoose85, on Flickr
I had a good heap of concrete left over, so I quickly knocked up a bit of shuttering for a small length of path. Its not the best finish, but I could screed this in the future if desired.
 IMG_2709 by Tomoose85, on Flickr
A bloody hard day's work, but very satisfying too!
More to follow if people are interested?
IMG_2549 by Tomoose85, on FlickrNext was to get the damp proof membrane down:
Sand
IMG_2575 by Tomoose85, on FlickrMembrane. Temporarily stapled to the shuttering as it was put down a few days early, but I did cut the edges off before the pour to ensure a nicely compacted edge to the concrete
IMG_2625 by Tomoose85, on FlickrJust under 3m3 of C28/30 50mm slump concrete was used, as well as the help of a few mates
Getting on for 90 barrow fulls. I did hire a long float which was money well spent, as the finish is really first class.I'm the fat bloke incase anyone was wondering!
IMG_2670 by Tomoose85, on FlickrIMG_2685 by Tomoose85, on FlickrIMG_2689 by Tomoose85, on FlickrI had a good heap of concrete left over, so I quickly knocked up a bit of shuttering for a small length of path. Its not the best finish, but I could screed this in the future if desired.
IMG_2709 by Tomoose85, on FlickrA bloody hard day's work, but very satisfying too!
More to follow if people are interested?
Edited by PartOfTheProblem on Tuesday 5th September 22:31

The following day I couldn't resist but remove some shuttering. I took off the edge for the 6x4 shed base, and was seriously impressed with the compaction. The shed was promptly moved in a flurry of excitement at seeing some progress.
 IMG_2727 by Tomoose85, on Flickr
I don't think this is going anywhere!!
 IMG_2710 by Tomoose85, on Flickr
Then it was a case of striking the shuttering:
 IMG_2713 by Tomoose85, on Flickr
Levelling the ground as much as possible
 IMG_2719 by Tomoose85, on Flickr
Down with Terram (cut by my 5 year old daughter and a spoon, I think):
 IMG_2720 by Tomoose85, on Flickr
And then gravel:
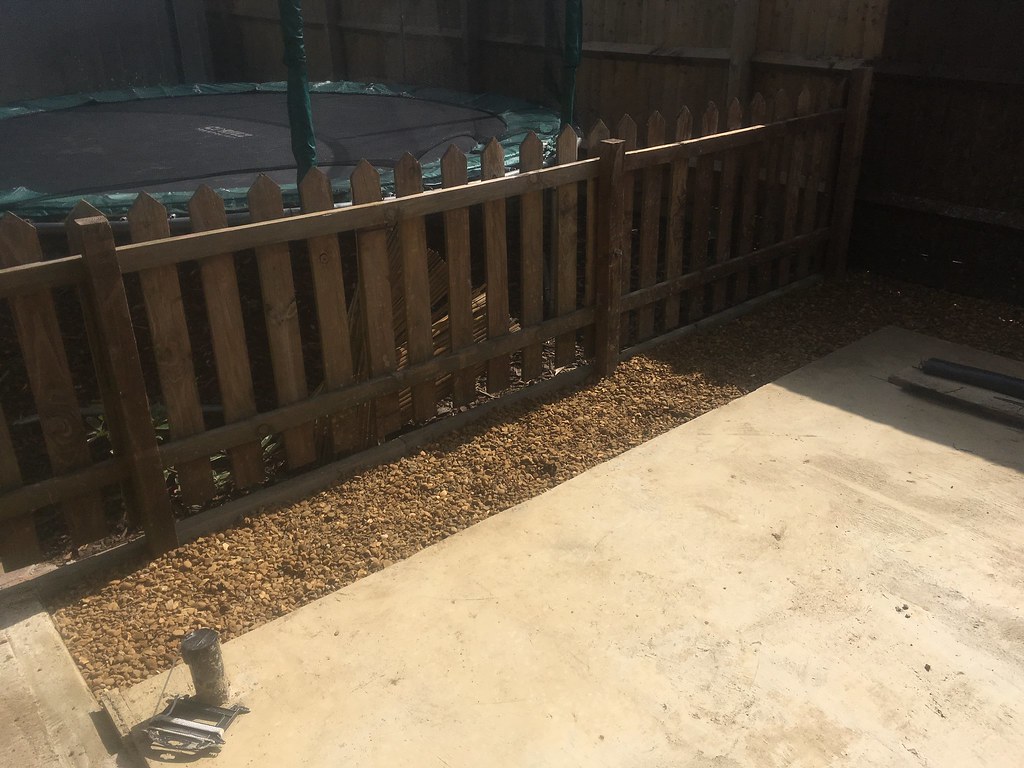 IMG_2722 by Tomoose85, on Flickr
 IMG_2726 by Tomoose85, on Flickr
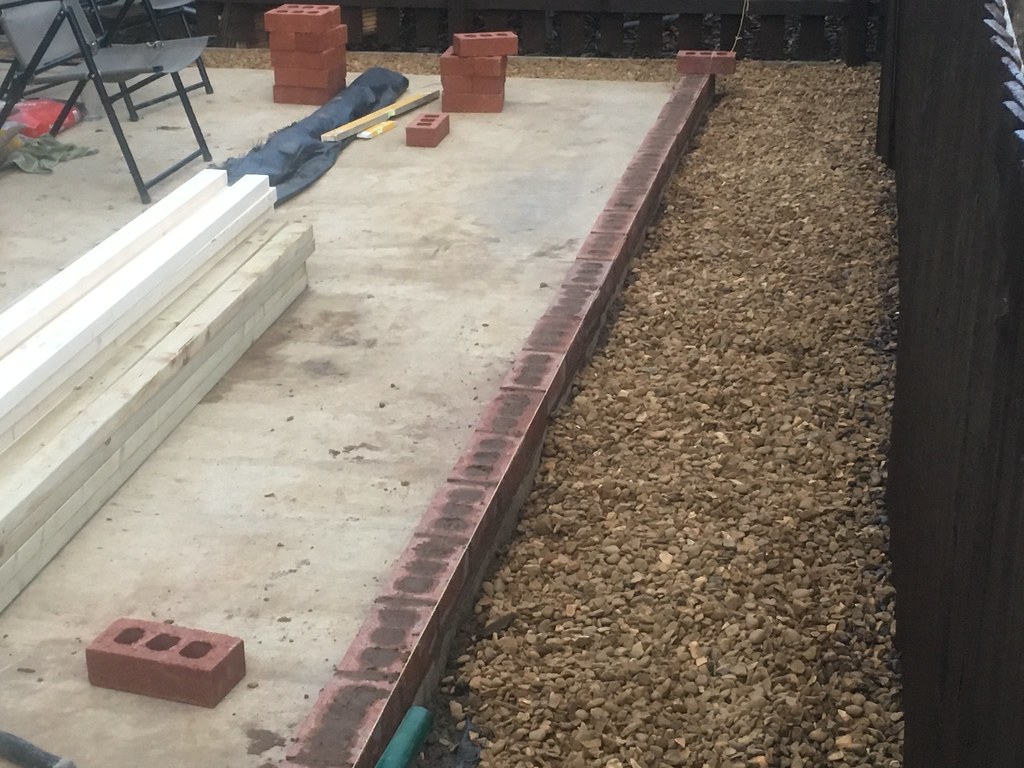
I decided that I wanted to put in a course of engineering bricks to keep the timber construction well off the ground, so in went a course of bricks:
 IMG_2750 by Tomoose85, on Flickr
 IMG_2766 by Tomoose85, on Flickr
I filled the frogs with mortar to give me half a chance of being able to screw the sole plate down
IMG_2727 by Tomoose85, on FlickrI don't think this is going anywhere!!
IMG_2710 by Tomoose85, on FlickrThen it was a case of striking the shuttering:
IMG_2713 by Tomoose85, on FlickrLevelling the ground as much as possible
IMG_2719 by Tomoose85, on FlickrDown with Terram (cut by my 5 year old daughter and a spoon, I think):
IMG_2720 by Tomoose85, on FlickrAnd then gravel:
IMG_2722 by Tomoose85, on FlickrIMG_2726 by Tomoose85, on FlickrI decided that I wanted to put in a course of engineering bricks to keep the timber construction well off the ground, so in went a course of bricks:
IMG_2750 by Tomoose85, on FlickrIMG_2766 by Tomoose85, on FlickrI filled the frogs with mortar to give me half a chance of being able to screw the sole plate down
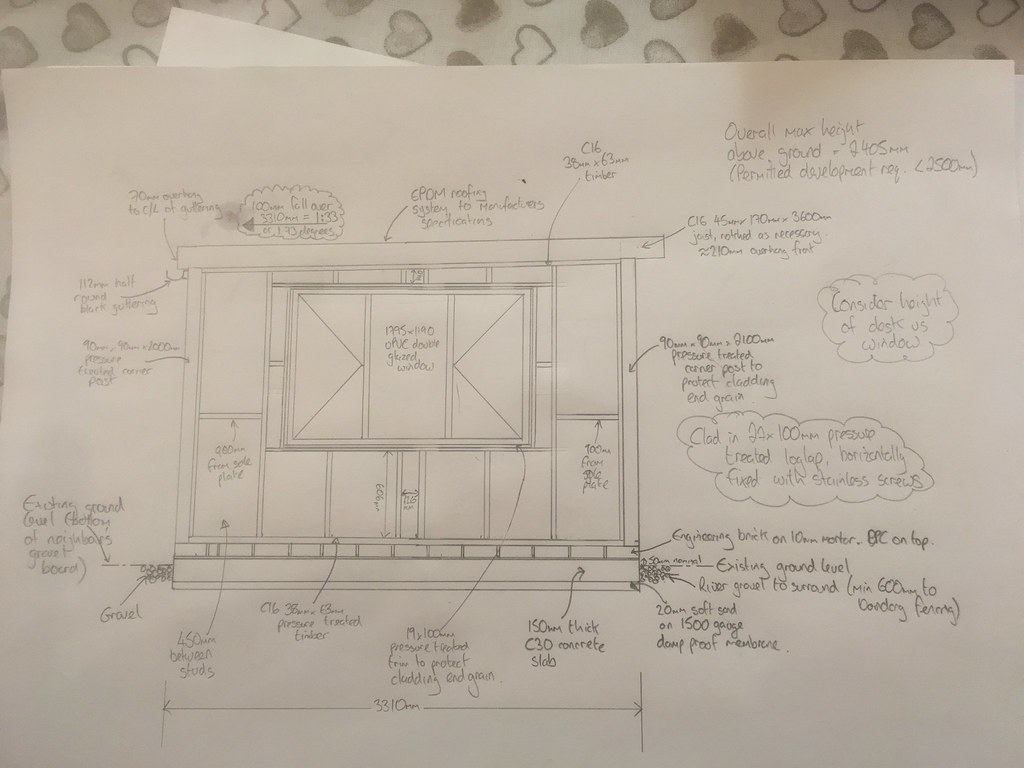
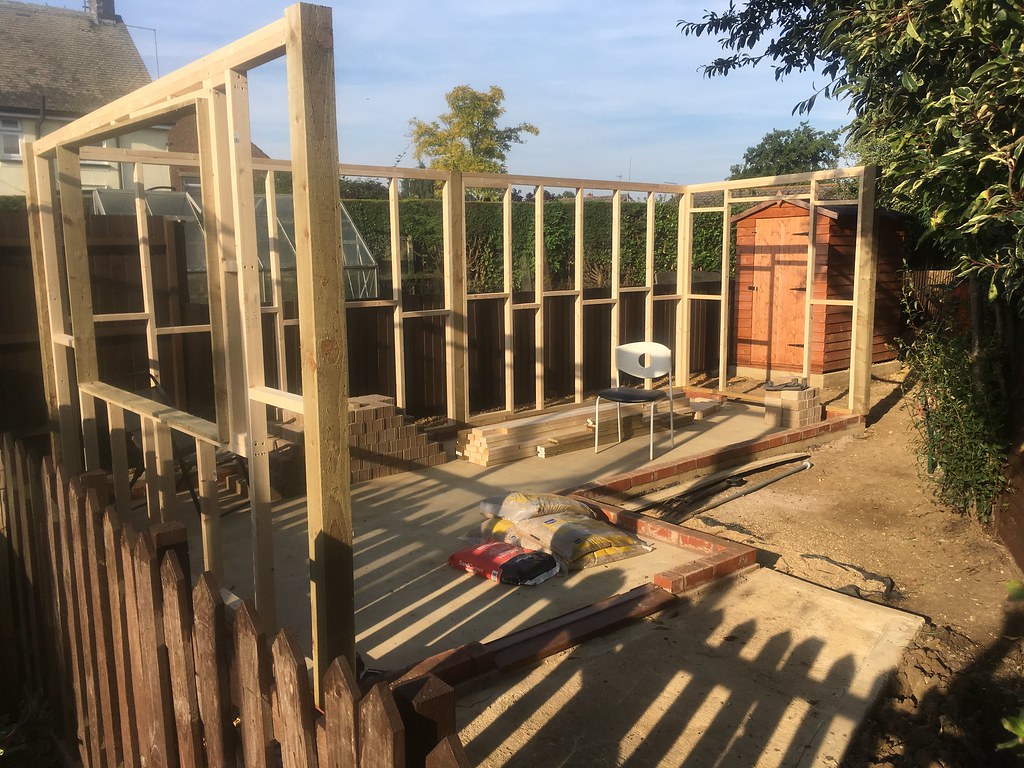
Well after months of graft, I couldn't wait to start getting the timber frame up.
I decided on 63 x 38mm CLS as it is so cheap (£2.19 a 2.4m length from Wickes), although I did splurge on pressure treated for the sole plate.
To get a nice finish to the log lap cladding, I set a 4x4 fence post in each corner which will protect the end grain of the cladding
I set the studs at 450mm between studs as this fits nicely with the job-lot of insulation board I picked up locally on Gumtree.
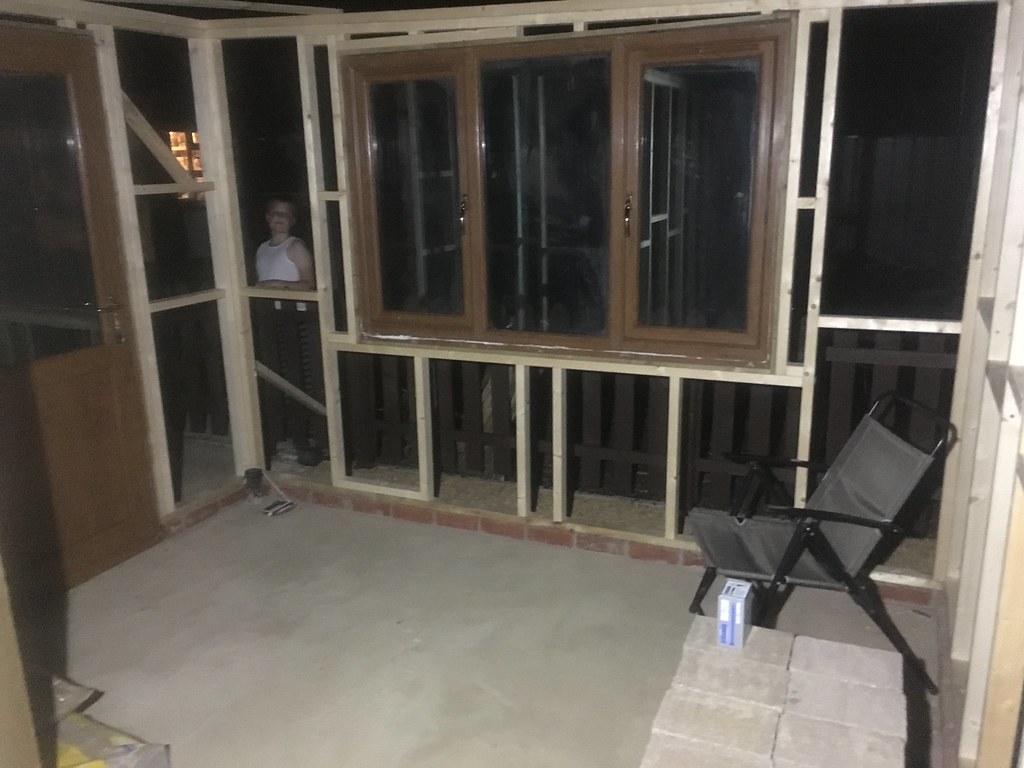
I found an oak effect uPVC door and 2 windows for £44 (!!!) on eBay, and couldn't get there quick enough to collect them. They are in frankly fantastic condition. I framed the door and windows in treated 6x1 to again give a nice finish and protect the end grain of the cladding.
So on with the panels!
Quick sketch (although I made a few changes, such as doubling up on the wall plate etc.)
 fullsizeoutput_44f2 by Tomoose85, on Flickr
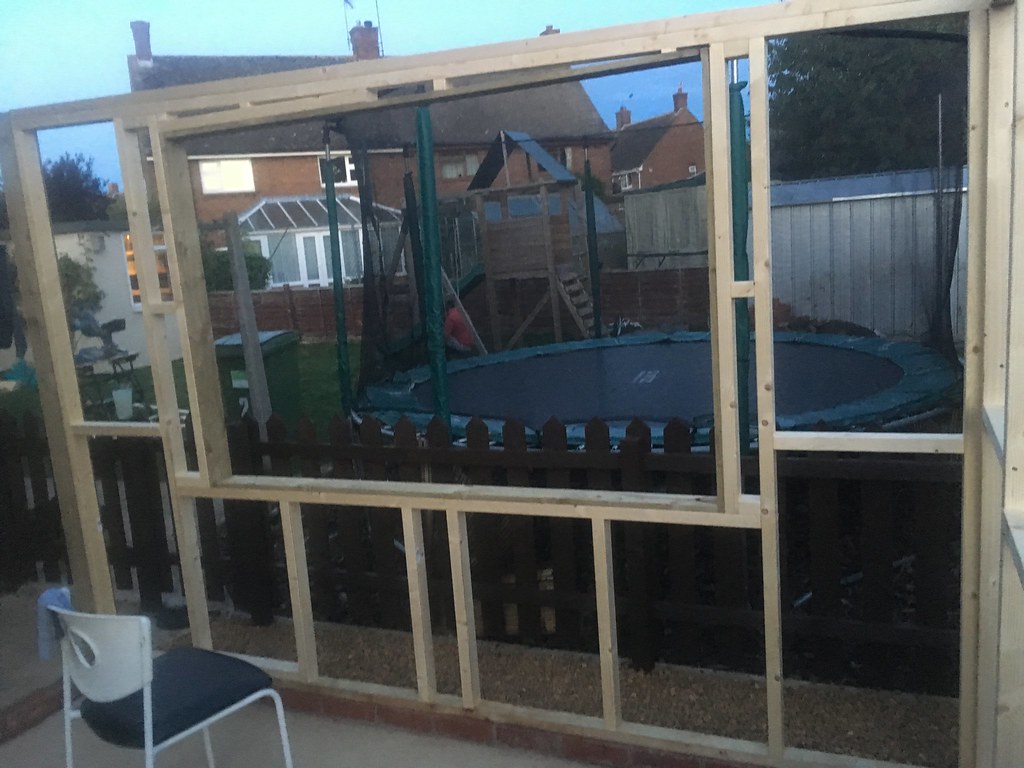
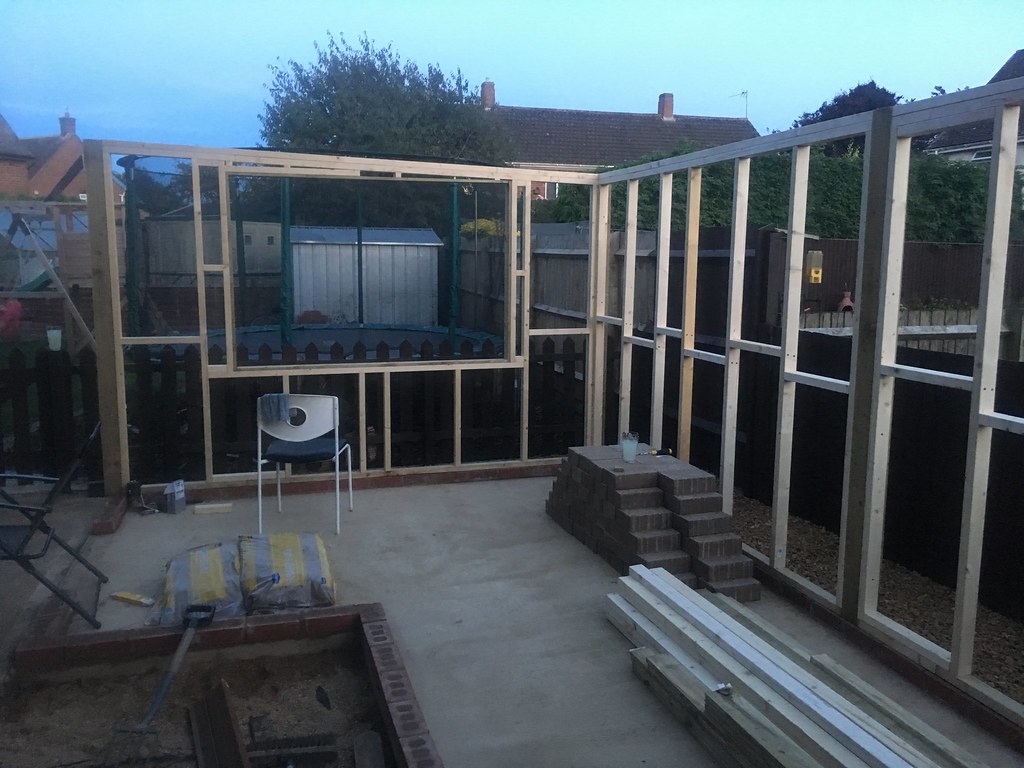
First panel knocked up, this will be my office window.
 IMG_2792 by Tomoose85, on Flickr
It was a great excuse to buy a nice impact gun too, Makita jobby with 5Ah batteries, its the dogs danglies, driving in 100mm screws all day long with no effort whatsoever
 IMG_2797 by Tomoose85, on Flickr
Long panel split into two with a fence post to prevent having cuts in the cladding
 IMG_2796 by Tomoose85, on Flickr
 IMG_2795 by Tomoose85, on Flickr
 IMG_2799 by Tomoose85, on Flickr
Window fitted!
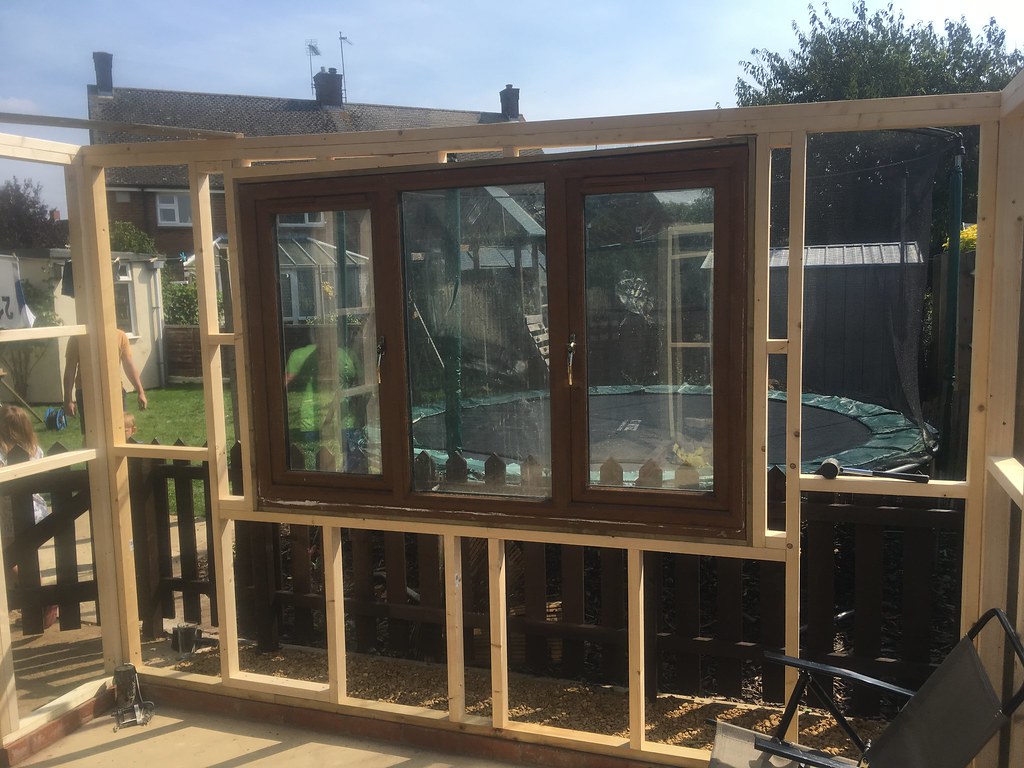 IMG_2804 by Tomoose85, on Flickr
 IMG_2803 by Tomoose85, on Flickr
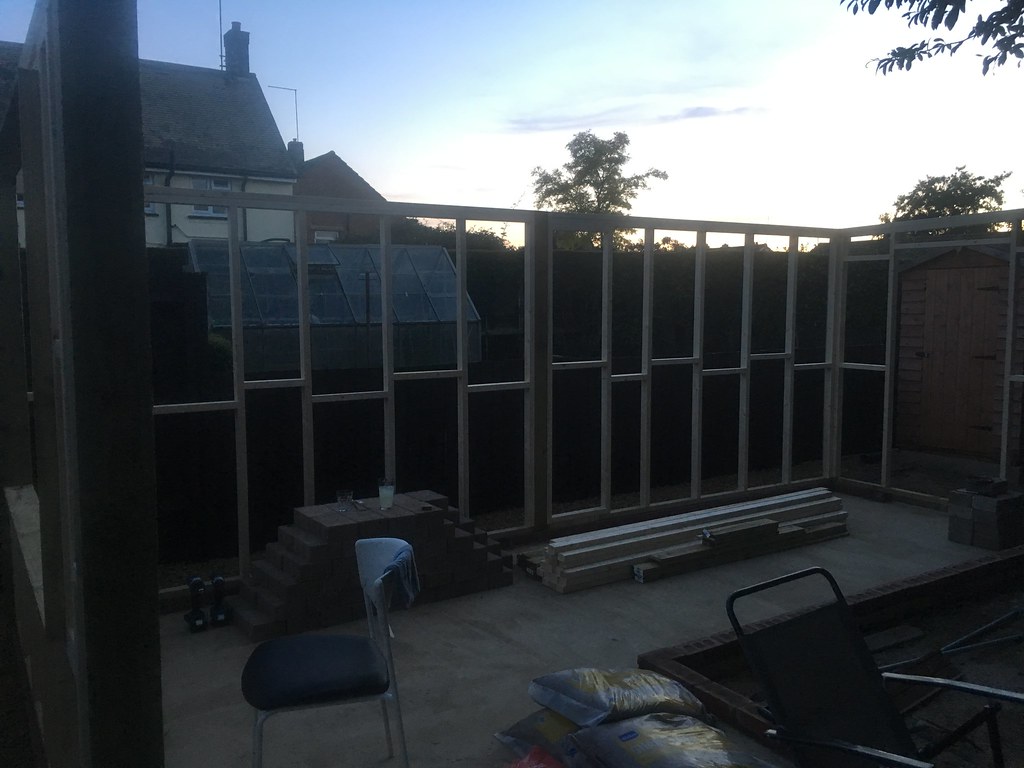
And on with the rest of the walls and the door.
 IMG_2807 by Tomoose85, on Flickr
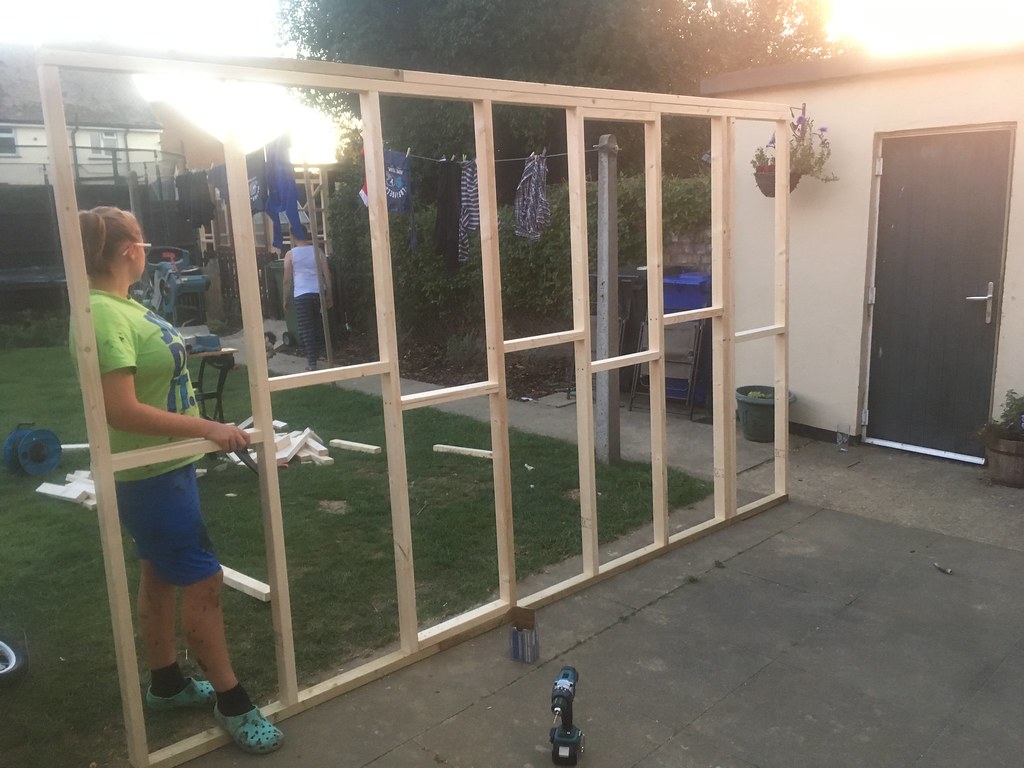 IMG_2808 by Tomoose85, on Flickr
 IMG_2810 by Tomoose85, on Flickr
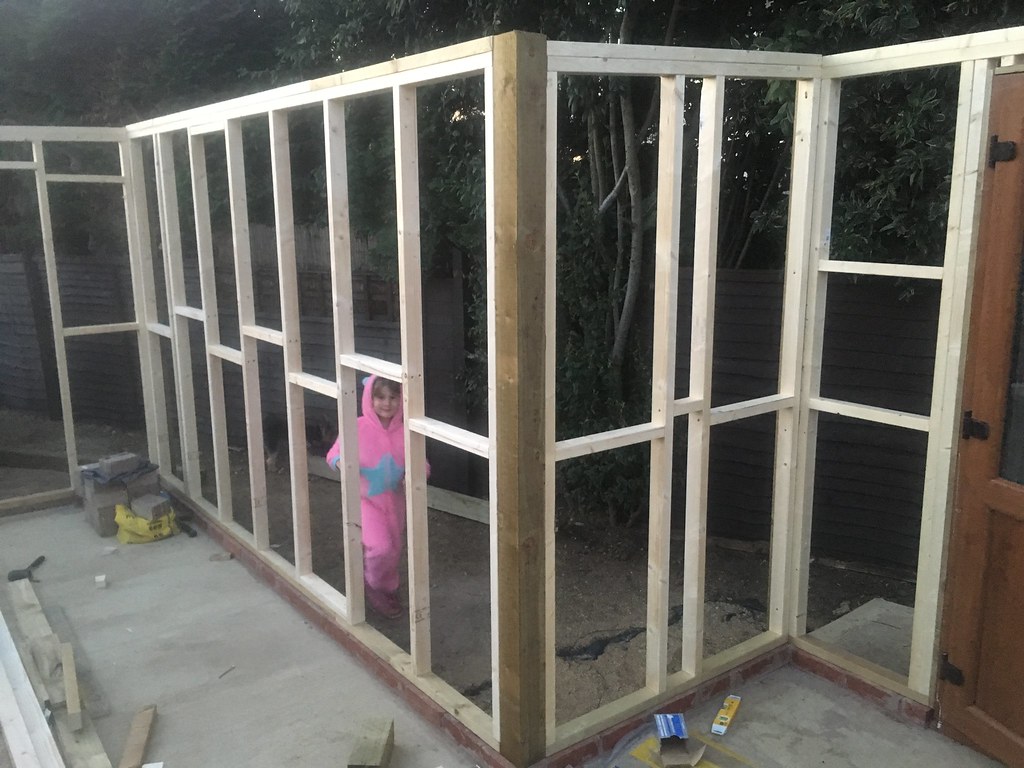
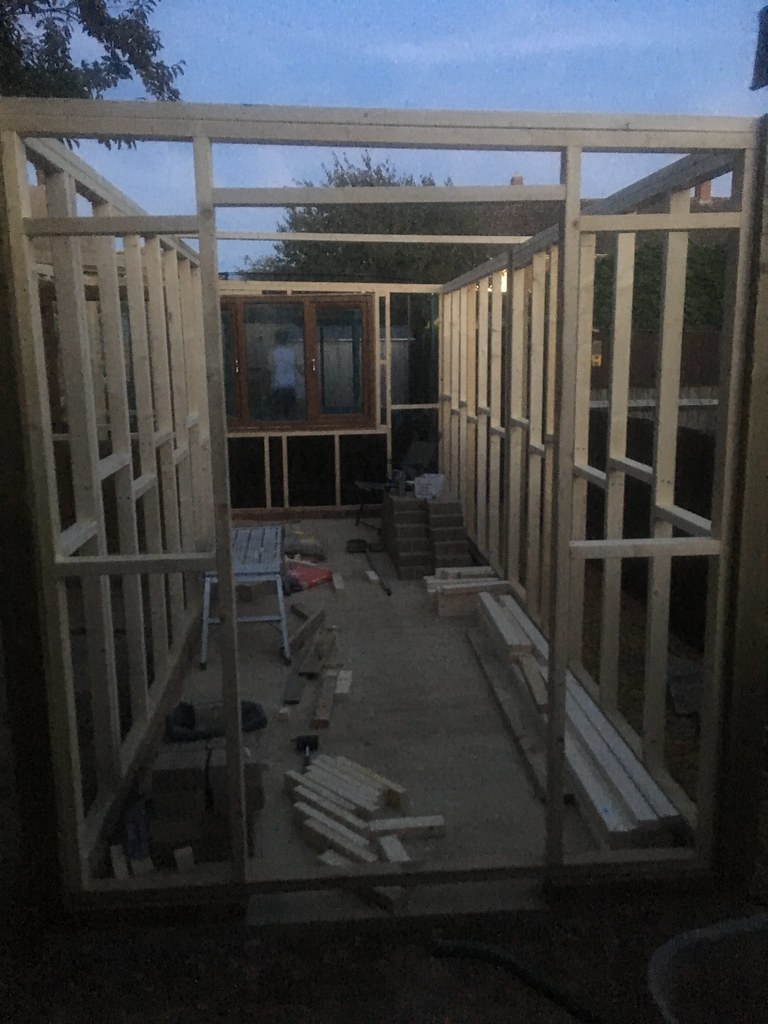 IMG_2816 by Tomoose85, on Flickr
The man patio area!
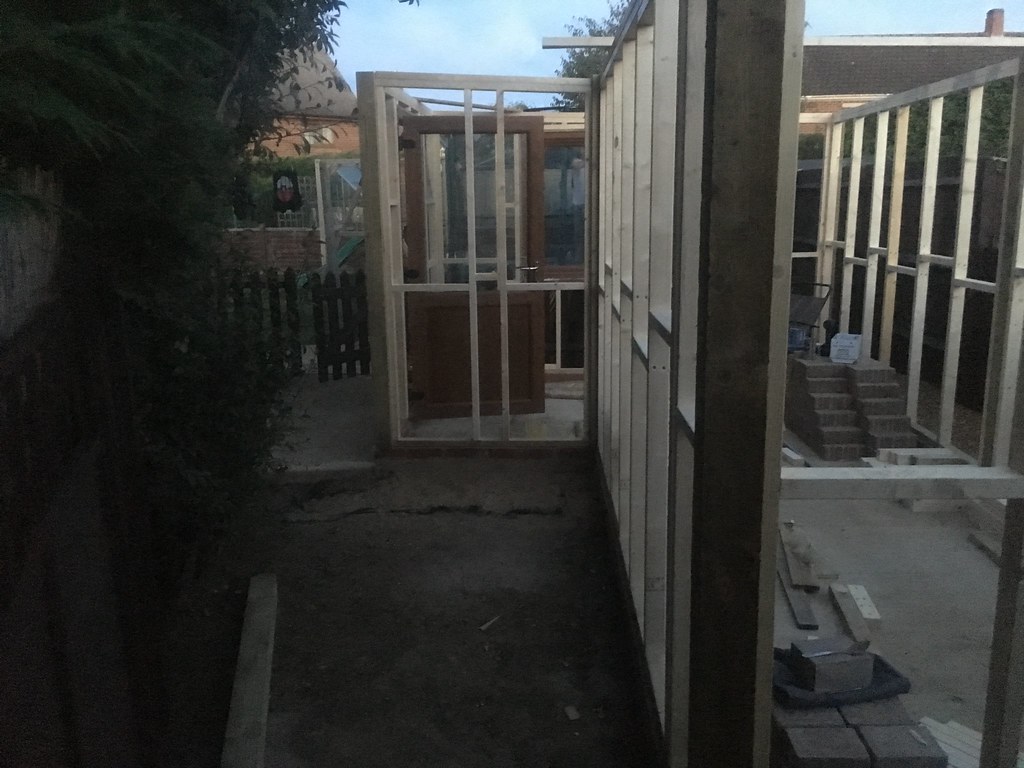 IMG_2815 by Tomoose85, on Flickr
 IMG_2828 by Tomoose85, on Flickr
And that pretty much takes me up to now.
Lots of roof joists and OSB sheeting is on order for the weekend, so update soon
I decided on 63 x 38mm CLS as it is so cheap (£2.19 a 2.4m length from Wickes), although I did splurge on pressure treated for the sole plate.
To get a nice finish to the log lap cladding, I set a 4x4 fence post in each corner which will protect the end grain of the cladding
I set the studs at 450mm between studs as this fits nicely with the job-lot of insulation board I picked up locally on Gumtree.
I found an oak effect uPVC door and 2 windows for £44 (!!!) on eBay, and couldn't get there quick enough to collect them. They are in frankly fantastic condition. I framed the door and windows in treated 6x1 to again give a nice finish and protect the end grain of the cladding.
So on with the panels!
Quick sketch (although I made a few changes, such as doubling up on the wall plate etc.)
fullsizeoutput_44f2 by Tomoose85, on FlickrFirst panel knocked up, this will be my office window.
IMG_2792 by Tomoose85, on FlickrIt was a great excuse to buy a nice impact gun too, Makita jobby with 5Ah batteries, its the dogs danglies, driving in 100mm screws all day long with no effort whatsoever
IMG_2797 by Tomoose85, on FlickrLong panel split into two with a fence post to prevent having cuts in the cladding
IMG_2796 by Tomoose85, on FlickrIMG_2795 by Tomoose85, on FlickrIMG_2799 by Tomoose85, on FlickrWindow fitted!
IMG_2804 by Tomoose85, on FlickrIMG_2803 by Tomoose85, on FlickrAnd on with the rest of the walls and the door.
IMG_2807 by Tomoose85, on FlickrIMG_2808 by Tomoose85, on FlickrIMG_2810 by Tomoose85, on FlickrIMG_2816 by Tomoose85, on FlickrThe man patio area!
IMG_2815 by Tomoose85, on FlickrIMG_2828 by Tomoose85, on FlickrAnd that pretty much takes me up to now.
Lots of roof joists and OSB sheeting is on order for the weekend, so update soon
Laurel Green said:
Simes205 said:
Excellent progress!
Indeed and, looking forward to the future build. 
camshafted said:
What a fantastic thread. Well done - brilliant progress.
What is your background for this sort of job? I'm assuming you must be some sort of tradesman to be this good?!
I'm no tradesman for sure, I'm a highway engineer, but I'm good at using google and getting stuck in What is your background for this sort of job? I'm assuming you must be some sort of tradesman to be this good?!
 I wish I could afford to pay someone but I'm doing this on the cheap as it were, I hope to bring it all in with insulation, plastered finish, full electrics and flooring etc for around £3500
 There are a few things I've struggled with, but I've worked them out along the way, e.g. I realised last minute that the window sill would be lower than the desk height, so I tweaked things last minute which made the framing above the window a bit bodgier than I'd like.
Edited by PartOfTheProblem on Wednesday 6th September 08:31
Great thread and great job - enjoying it.
I've just done a base for our free (used but good order) summerhouse that I've stuck in a remodelled and never before used corner of our garden. I saw differing viewpoints on this, so I didn't put a damp proof membrane underneath. Having said that it's got fencepost bearers on top and then the actual summerhouse floor, so I don't think damp is going to be an issue.
I've just done a base for our free (used but good order) summerhouse that I've stuck in a remodelled and never before used corner of our garden. I saw differing viewpoints on this, so I didn't put a damp proof membrane underneath. Having said that it's got fencepost bearers on top and then the actual summerhouse floor, so I don't think damp is going to be an issue.
PartOfTheProblem said:
I'm no tradesman for sure, I'm a highway engineer, but I'm good at using google and getting stuck in I wish I could afford to pay someone but I'm doing this on the cheap as it were, I hope to bring it all in with insulation, plastered finish, full electrics and flooring etc for around £3500
There are a few things I've struggled with, but I've worked them out along the way, e.g. I realised last minute that the window sill would be lower than the desk height, so I tweaked things last minute which made the framing above the window a bit bodgier than I'd like.
Even greater applause in that case! I wish I could afford to pay someone but I'm doing this on the cheap as it were, I hope to bring it all in with insulation, plastered finish, full electrics and flooring etc for around £3500 There are a few things I've struggled with, but I've worked them out along the way, e.g. I realised last minute that the window sill would be lower than the desk height, so I tweaked things last minute which made the framing above the window a bit bodgier than I'd like.
Edited by PartOfTheProblem on Wednesday 6th September 08:31
Novice question: when you were installing the shuttering, was was it fixed into the ground or is it freestanding? Is that the normal process for laying the concrete base?
Dog Star said:
Great thread and great job - enjoying it.
I've just done a base for our free (used but good order) summerhouse that I've stuck in a remodelled and never before used corner of our garden. I saw differing viewpoints on this, so I didn't put a damp proof membrane underneath. Having said that it's got fencepost bearers on top and then the actual summerhouse floor, so I don't think damp is going to be an issue.
DPC was more for keeping the moisture in the concrete for as long as possible for strength, but it could probably be omitted for a shed to be honest.I've just done a base for our free (used but good order) summerhouse that I've stuck in a remodelled and never before used corner of our garden. I saw differing viewpoints on this, so I didn't put a damp proof membrane underneath. Having said that it's got fencepost bearers on top and then the actual summerhouse floor, so I don't think damp is going to be an issue.
camshafted said:
Even greater applause in that case!
Novice question: when you were installing the shuttering, was was it fixed into the ground or is it freestanding? Is that the normal process for laying the concrete base?
A bit of both. I made it all freestanding first, but then it was braced and pegged in on most of the sides, and buried into the ground at one end to ensure it was all level.Novice question: when you were installing the shuttering, was was it fixed into the ground or is it freestanding? Is that the normal process for laying the concrete base?
This photo shows the bracing for the shuttering. All corners were doubled up with overlapping pieces, as were butt joints. I made some triangles from studwork timber, and these were then pegged in at the back to stop them moving. It worked a treat!
 IMG_2514 by Tomoose85, on Flickr
NDA said:
I love watching these projects developing... looks like you're doing a really good job.
No issues with neighbours and/or planning?
No problems, neighbour said he is pleased as it will provide him some privacy. No light issues etc as my garden in south facing and his is north facing.No issues with neighbours and/or planning?
No issues with planning either, this is permitted development as its under 15m2 and 2.5m high
Gassing Station | Homes, Gardens and DIY | Top of Page | What's New | My Stuff