Rubber Garage Floor Tiles - Recommendations please
Discussion


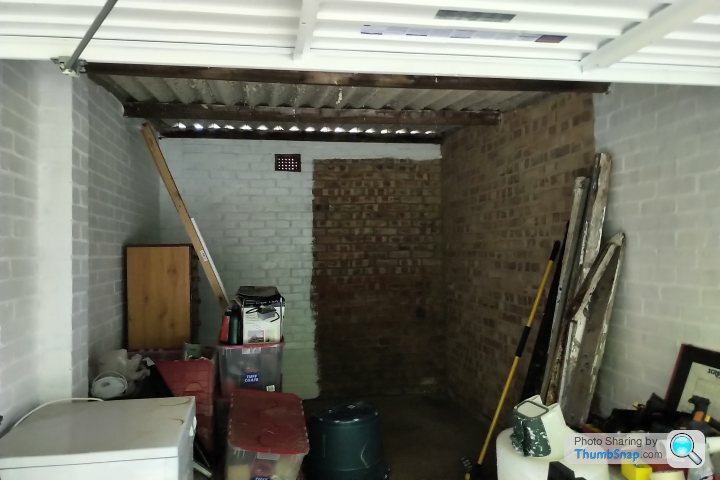
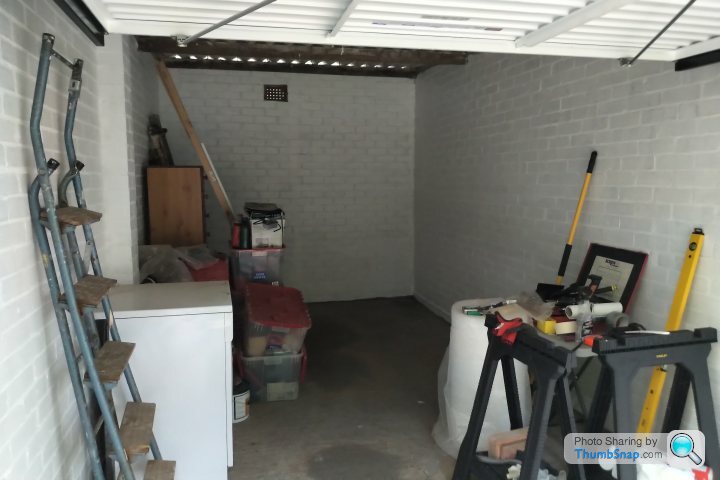
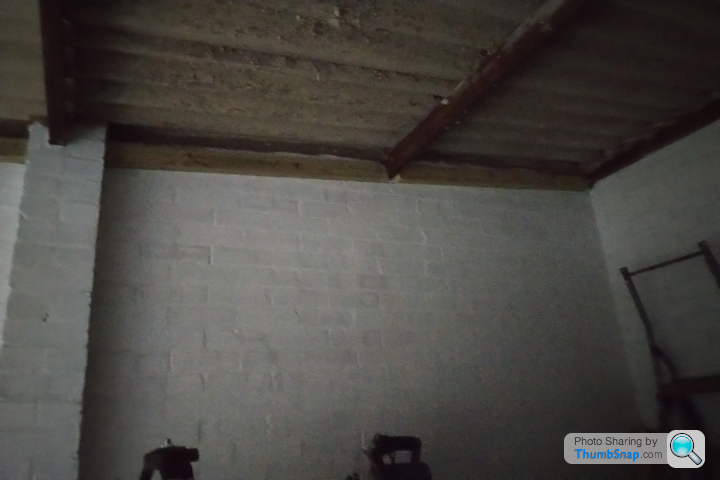
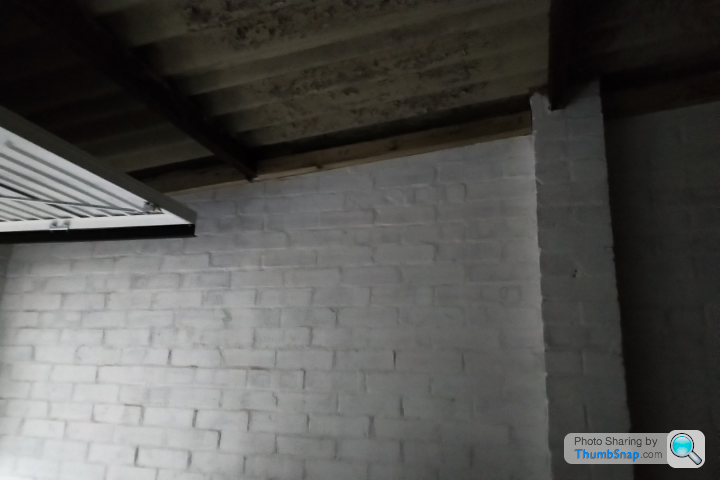
Morning all, I'm part way through renovating our garage in a block (painting brick walls white, adding a stud false ceiling below the old concrete/asbestos corrugated roof which will be covered in reflective white pvc tongue and groove slats) and am now thinking about the floor (concrete base, pretty level and nice and solid, just a bit dusty).
It is mostly going to be used to keep my motorbikes in and I was going to use 'garage floor paint' but after some web browsing I'm tempted to go for some of those interlocking rubber floor tiles (typically c47cm x c47cm) to stay looking nice for longer and give a softer surface to sit on when needed.
Has anyone got any recommendations for a particular brand/supplier that they have used? Also for finish type/construction?
They seem to come as either checkerplate, buttons, or smooth finish and one review I read said the checkerplate is uncomfortable to kneel on if fettling a bike so I'm leaning towards buttons or smooth. Another review said that the ones with a grid construction as viewed from the underside aren't ideal for motorbikes due to the single weight point of kick stands/centre stands creating a dip unless you use a stand puck underneath so a fully solid one may be better for bikes.
I also note that colours other than black are more expensive, sometimes a lot more, so for my basic single garage which I don't want to spend much on I'm wondering whether I should stick with black although I thought a light grey might be better for light purposes.
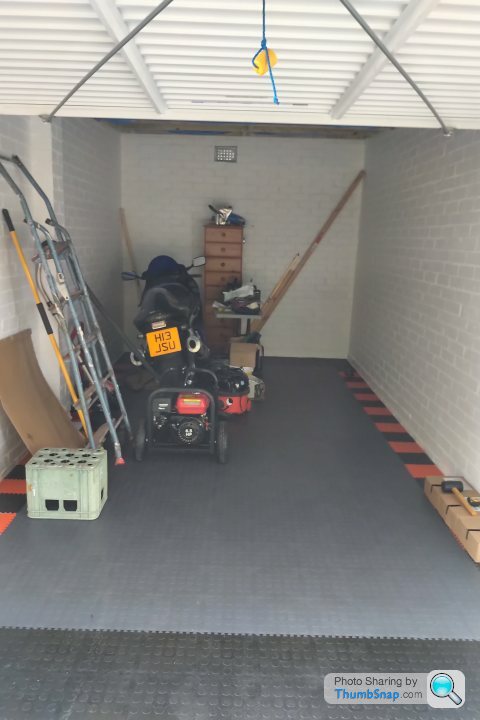
With the garage in a block 2 roads from the house I have no power but have bought a small generator off the bay of E-ness for if needed and intend to fit some 12v lights run from a battery I can recharge.
Incidentally I have ordered one of these for security (I did have a previous post asking for options and thanks to those that replied which gave good food for thought) and am just awaiting an install date https://www.youtube.com/watch?v=6gGczzLRri0
You can't drag a bike under it and you would need a lot of big lads to get one over it even if there was space. I like the fact it is inside the door and nothing visible from the outside and by also chaining the bikes to the optional metal loops I'm having added (like a ground anchor) I'm happy that any opportunist who gets through the garage door may just give up at that point.
Anyway, sorry for the rambling, any company/type suggestions or web links for garage floor tiles (for DIY fit) you have any experience of would be much appreciated.
Cheers,
Jules
It is mostly going to be used to keep my motorbikes in and I was going to use 'garage floor paint' but after some web browsing I'm tempted to go for some of those interlocking rubber floor tiles (typically c47cm x c47cm) to stay looking nice for longer and give a softer surface to sit on when needed.
Has anyone got any recommendations for a particular brand/supplier that they have used? Also for finish type/construction?
They seem to come as either checkerplate, buttons, or smooth finish and one review I read said the checkerplate is uncomfortable to kneel on if fettling a bike so I'm leaning towards buttons or smooth. Another review said that the ones with a grid construction as viewed from the underside aren't ideal for motorbikes due to the single weight point of kick stands/centre stands creating a dip unless you use a stand puck underneath so a fully solid one may be better for bikes.
I also note that colours other than black are more expensive, sometimes a lot more, so for my basic single garage which I don't want to spend much on I'm wondering whether I should stick with black although I thought a light grey might be better for light purposes.
With the garage in a block 2 roads from the house I have no power but have bought a small generator off the bay of E-ness for if needed and intend to fit some 12v lights run from a battery I can recharge.
Incidentally I have ordered one of these for security (I did have a previous post asking for options and thanks to those that replied which gave good food for thought) and am just awaiting an install date https://www.youtube.com/watch?v=6gGczzLRri0
You can't drag a bike under it and you would need a lot of big lads to get one over it even if there was space. I like the fact it is inside the door and nothing visible from the outside and by also chaining the bikes to the optional metal loops I'm having added (like a ground anchor) I'm happy that any opportunist who gets through the garage door may just give up at that point.
Anyway, sorry for the rambling, any company/type suggestions or web links for garage floor tiles (for DIY fit) you have any experience of would be much appreciated.
Cheers,
Jules
Thanks for the suggestions so far, much appreciated and I'll check those out.
The Costco roll I actually have on part of the floor in my workshop/shed in the back garden where the bikes currently live (I have to use ramps to get them through the house side extension which is my office as no rear access hence now wanting to use the garage instead rather than leave one chained out the front when using regularly). It's good stuff but I want something I can fit fully in the floor without having to stick it down/find a way to cover a long join, which is the only reason I've ruled out the mat. I also like the thickness of the tile systems for some cushioning. Good plan otherwise though.
The Costco roll I actually have on part of the floor in my workshop/shed in the back garden where the bikes currently live (I have to use ramps to get them through the house side extension which is my office as no rear access hence now wanting to use the garage instead rather than leave one chained out the front when using regularly). It's good stuff but I want something I can fit fully in the floor without having to stick it down/find a way to cover a long join, which is the only reason I've ruled out the mat. I also like the thickness of the tile systems for some cushioning. Good plan otherwise though.
I've had a look at all the suggested now and Plasfloor is the winner for me. I like the smaller size tiles and the designer on their website so I can do a different coloured border around the outside like 5s Alive has done with it calculating my tile needs.
Sadly some of the colours are out of stock (the way of the world at present I know with lots of things) but I'll monitor their site and get ordered up as soon as I can.
Thanks all,
Jules
Sadly some of the colours are out of stock (the way of the world at present I know with lots of things) but I'll monitor their site and get ordered up as soon as I can.
Thanks all,
Jules
[quote=5s Alive]As the tiles come in packs of 25 you will end up with spares. Handy as a sharp bit of 20mm golden gravel from our drive got wedged in the tread of a winter tyre and cut a shallow groove in a tile. Wheelspin while easing backwards! Easy to replace by working in from an outer edge.
I cut the perimeter tiles with tin snips but it was hard work so probably better using a jigsaw unless you have forearms like Popeye. Much easier to cut when warm. Dust and debris sweep up a treat too. A mop and soapy water cleans them up like new after a mucky winter.
[/quotside]
Thank you. I rang them today as some colours are out of stock - spoke to a very helpful guy who is getting the relevant person to call me back tomorrow to confirm what the lead time is. I was thinking spares are a good idea and working my design on that basis. Been painting more of the walls again this evening, getting there! Cheers for the jigsaw tip too, I have one. Also dimensions wise it looks like I should be almost spot on with the width to use full tiles with a few mm spare each side so possibly avoid any full tile cutting other than some edge tabs. Once I get to the stage of fitting I'll pop some pics up.
Thanks Biggy.
I've gone with the Plas ones and order is now in. First coat on all walls now finished and tomorrow I'm hoovering the floor so I can paint the very bottom row of the wall and around the edges of the floor prior to then clearing half the floor to seal it and then switching to seal the other half.
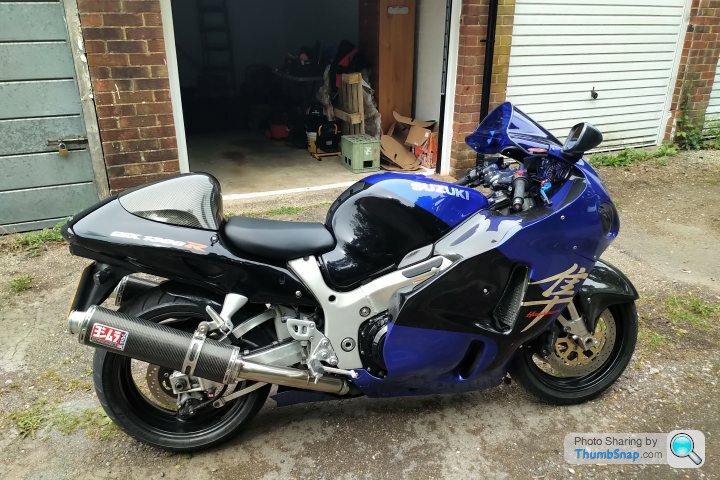
Also ended up buying another bike as a great one came up locally (Hayabusa) and the seller is storing for me for 10 days so I can get the space ready for it and my security barrier installed.
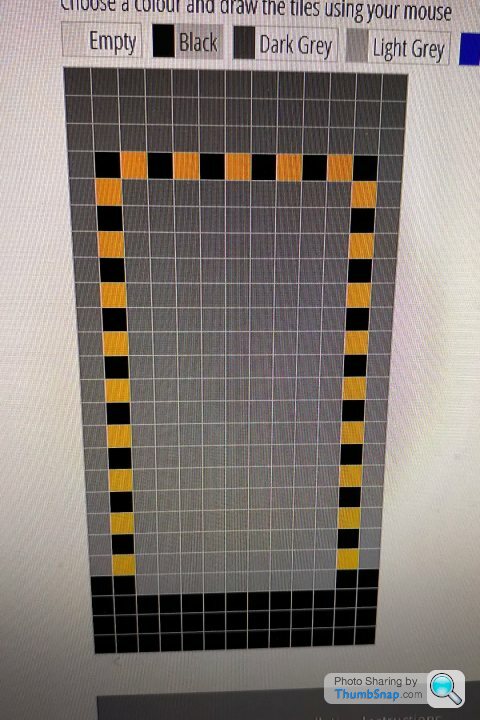
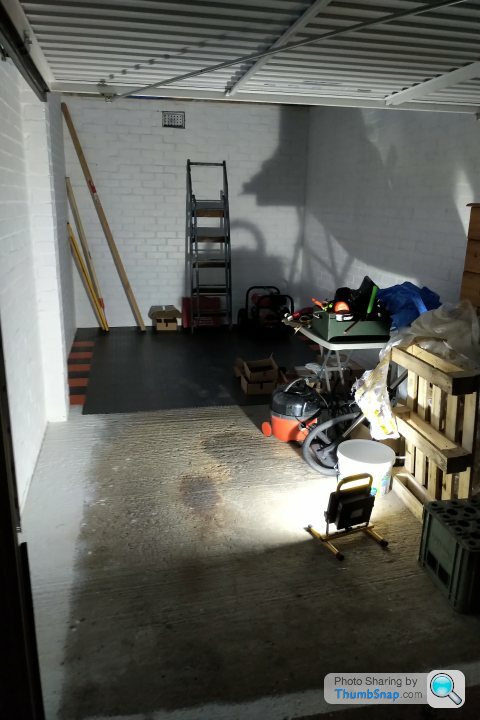
Pic of current position as well as design for floor tiles I have ordered. The back 2 rows will have storage units on casters over them and I went for black at the front so easier to clean for any muck that gets under the door.
I've gone with the Plas ones and order is now in. First coat on all walls now finished and tomorrow I'm hoovering the floor so I can paint the very bottom row of the wall and around the edges of the floor prior to then clearing half the floor to seal it and then switching to seal the other half.
Also ended up buying another bike as a great one came up locally (Hayabusa) and the seller is storing for me for 10 days so I can get the space ready for it and my security barrier installed.
Pic of current position as well as design for floor tiles I have ordered. The back 2 rows will have storage units on casters over them and I went for black at the front so easier to clean for any muck that gets under the door.
andy43 said:
Don’t want to come across as an H&S nutter but if there’s any chance the roof is asbestos I’d hose the garage out rather than sweeping it or stirring it all up with a badly filtered hoover. Just sayin’...
Not nutty at all. It's why I'm putting a false ceiling in and yes I will be wetting it down before a sweep so the Hoover will only be for any tiny bits of dust left. Garage is in a block 2 roads from the house so no water supply there but I'll be taking some bottles with me. I've bought a second hand generator for power for our old Hoover and it will be staying in there and not coming back to the house. Good point well made, asbestos is nasty stuff indeed although all seems sound and I haven't touched it at all and won't be.5s Alive said:
Liking the colour scheme and design, I did the same at the shelving end.
Attempted to service the car yesterday and discovered that the creeper moves rather too well, pivoting underneath the car in a graceful arc as I applied torque to the ratchet bar.
Didn't actually manage to change the oil as I discovered that I had used the last of my batch of oil filters, fortunately before I drained the oil. Doh!
Well they do say they are easy to move stuff across.....whether you want it or not lol.Attempted to service the car yesterday and discovered that the creeper moves rather too well, pivoting underneath the car in a graceful arc as I applied torque to the ratchet bar.
Didn't actually manage to change the oil as I discovered that I had used the last of my batch of oil filters, fortunately before I drained the oil. Doh!
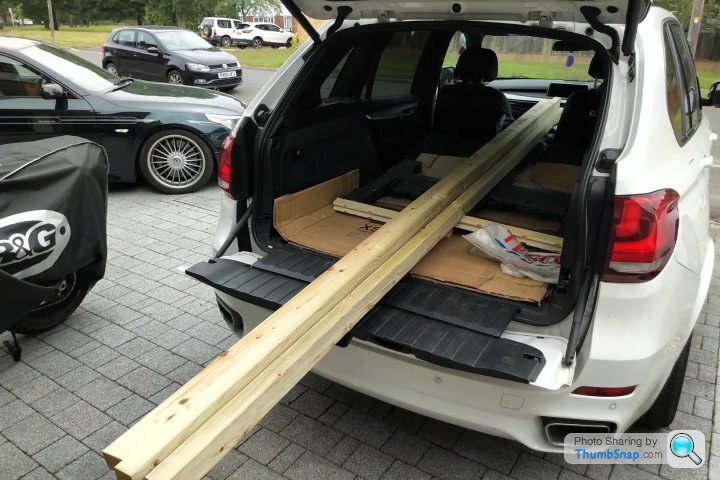
Was working on the false ceiling studs this weekend, turns out the bricks seem to be made of granite as getting the 8mm holes in for the Fischer fixings wasn't very fun but a combination of a smaller masonry bit followed by the bigger SDS worked out fine and I know at least that the wood once up isn't going anywhere Big faff was marking out even with a laser level as I wanted to keep the slope getting higher to the rear so multiple tripod adjustments were needed to get in the right place so I could draw this out on both sides of the garage and a brick pier half way back also made this awkward. Once the rest of the perimeter is up it should be nice and easy just fixing beams across as my second-hand ebay generator works my smaller chop saw just fine. Was interesting driving car from house to garage with the wood hanging out - thankfully just around the corner.... Progress!
Edited by Jules Sunley on Monday 28th June 13:37
5s Alive said:
Had the same issue when fixing battens to the garage wall and had to work up through the masonry bit sizes. No fun working above head height either. Once finished a nice matt white roof does reflect plenty of light where you need it. The current crop of 20W led light battens are remarkably bright too.
You're probably aware but when laying flooring in warmer weather you don't need to leave much of an expansion gap for PlasFloor tiles. 3mm would be more than enough. I only ever notice expansion when the garage door is open and the sun hits the floor directly.
Last (sucking eggs) tip, some people have reported warping of flooring/tiles if they have parked hot DPF's or turbo's without a cooling off period.
Thanks, appreciate all the advice. Based on my measurements I shouldn't need to cut any tiles as there should be a few mm gap each side as they are - will have to see how it works out with the tabs and worst case scenario just need to cut some lugs off.You're probably aware but when laying flooring in warmer weather you don't need to leave much of an expansion gap for PlasFloor tiles. 3mm would be more than enough. I only ever notice expansion when the garage door is open and the sun hits the floor directly.
Last (sucking eggs) tip, some people have reported warping of flooring/tiles if they have parked hot DPF's or turbo's without a cooling off period.
The garage is for for my motorbikes rather than a car so heat think shouldn't be a problem but will monitor it.
Finished the perimeter battens this evening, tomorrow evening I start on the cross spans. Ceiling will be plastic tongue and groove stuff (shiny white, designed for bathrooms) as comes in 5M lengths (right length for garage) and 25cm wide planks so should be quick to fix up (lightweight and flexible).
Cheers
Update - second coat of paint on walls done and stud ceiling completed with tarps for keeping any dust out. Ceiling strips ordered and due this week to finish that off.
Also sealed half the floor and fitted half the plas floor tiles - really pleased with them and they go down very easily. Just got to move stuff to the back now and seal and tile the front half. Pleased to find as hoped I don't need to cut tiles as perfect width as-is with an expansion gap each side, with just the one side middle brick pier to cut 2 tiles around. Collecting new (to me) bike later today so it can go on the completed rear half.
Almost there!
Indecision said:
Looking great - another big fan of Plasflor here - I have an insulated slab so no need for thicker tiles. They’re also very cost-effective!
Thanks, and yes I thought they were very reasonable. I like the smaller tiles so I have been able to add some colour detail around the edges. Looking forward to getting all completed and some shelving at the back to move stuff in that is currently cluttering the house!Ground anchor going in later once my large drill bit from Amazon arrives having realised I don't have one big enough for the supplied bolts. Could be interesting drilling into the concrete floor if it's as hard as the LBC bricks of the walls were.
EyeHeartSpellin said:
Do you need to seal a concrete slab before laying them? I've just got a new to me house and the garage floor is concrete with a few big oil stains.
You don't need to no, I just liked the idea as very quick to do and should save any dust building up underneath over time with movement. I bought a 5 litre container of sealer on Amazon and it is very watery so quick to roller on and touch dry in 2 hours and fully dry (and recoatable if wanted) in 4 hours. After sweeping the floor I vacuumed it before applying to get as much dust out as possible and now I can run my hand over it and it feels like it has a slight sheen. Also made easier to adjust the floor after the first few rows to make sure I had it straight with a small expansion gap each side as a load of tiles fixed together can be slid slightly with a bit of effort.You can just lay as-is, I just thought one extra step wouldn't hurt while I was at it.
Edit - mine also had an oil stain in the middle from previous owner so that was another reason I thought why not.
Chainsaw Rebuild said:
That looks good op! as a bonus - sealing the floor will trap any asbestos dust that's on the floor. Plus you have painted the walls so any dust on that is trapped too.
Thank you, and yes I've been a bit obsessive about 'dodgy dust', and of course have worn a quality face mask when working in there prior to now having a tarp over the top of the false ceiling studs. The actual ceiling going in will properly seal this off but in the interim it means no more dust from anywhere with the walls and floor sealed as you mention.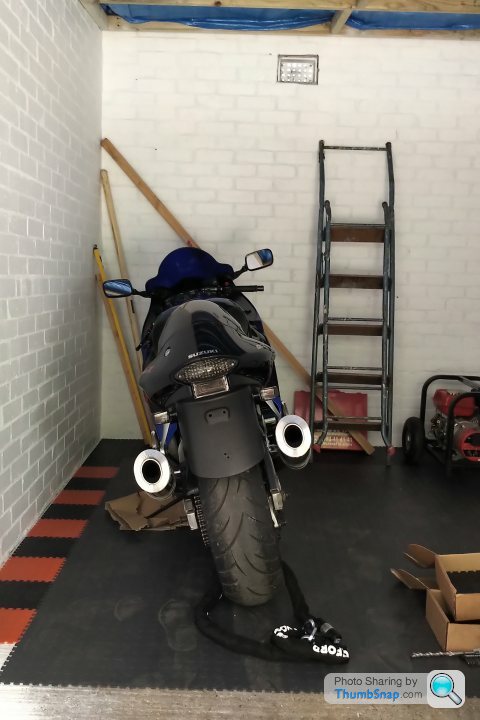
wilbo83 said:
What a transformation, good work. I have a similar sized garage that I am hoping to do similar, can I ask a couple of questions:
- Approximately how many litres of white paint did you use? and how many hours would you say it took to paint?
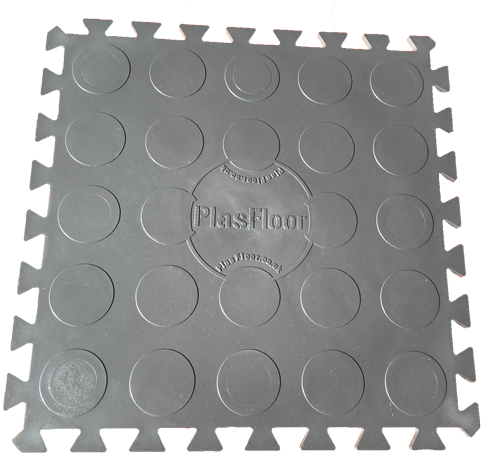
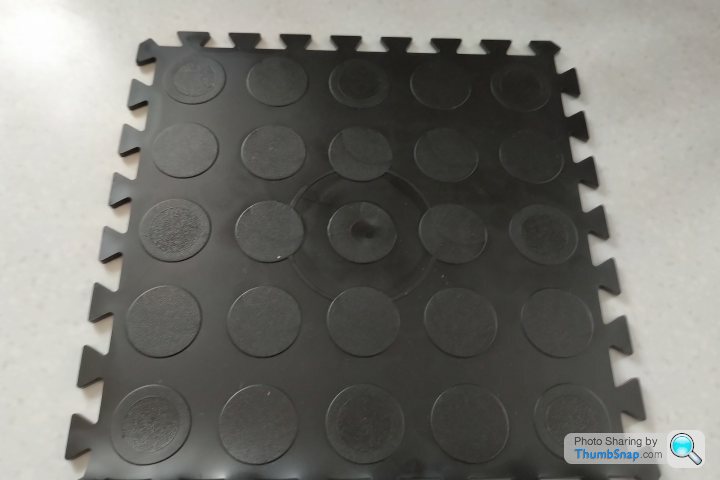
- Do you have any close up pics of your Plasfloor tiles? Or can you confirm what is in middle of them? The website states they don't come with the Plasfloor logo, as shown below, but I'd like to know if they still have the circle bit (feel like I saw this mentioned somewhere on PH recently but can't find it).
Thank you and yes of course.- Approximately how many litres of white paint did you use? and how many hours would you say it took to paint?
- Do you have any close up pics of your Plasfloor tiles? Or can you confirm what is in middle of them? The website states they don't come with the Plasfloor logo, as shown below, but I'd like to know if they still have the circle bit (feel like I saw this mentioned somewhere on PH recently but can't find it).
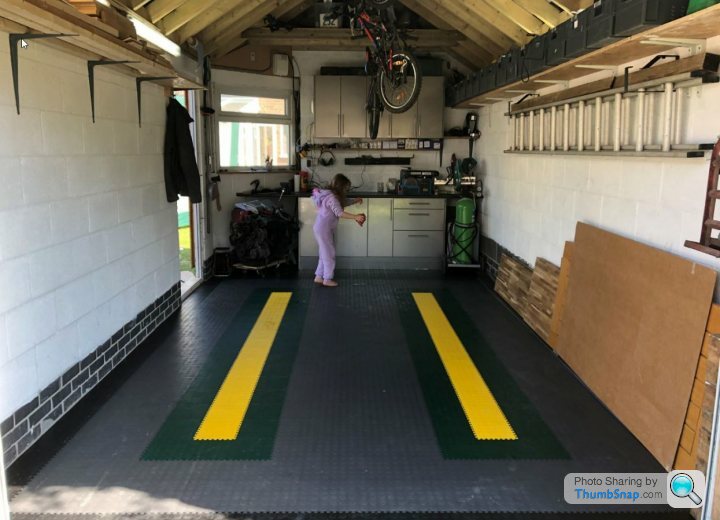
The tiles don't have a logo, I'm at home now but will take a pic when round the garage tomorrow. They are just a uniform pattern of the spots.
I bought two 10 litre tubs of smooth white masonry paint from Screwfix, and used a whole one on the first coat which was a very thick coat applied by brush (i slapped it on) as it needed to be stippled into the mortar and soaked in well. I did in stages and it did take a lot of hours. I did evenings and weekends over the course of a couple of weeks I suppose (this thread in real time). Maybe 6 stages of a couple of hours each at a guess so 12 hours?
The second coat I sprayed with a cheap second hand sprayer with the paint highly watered down. Only used about a quarter of a tub for that so maybe 12 litres all in. Could have rollered the second coat but wanted to do it quickly and get into the rough surface and not make too much mess. The first coat covered really well so the second was just a small improvement and second coat done in one hit.
Plas Floor tiles are great, and just need a rubber mallet to put together. The floor doesn't need to be fully smooth but I did crawl around on my hands and knees with a hammer and cold chisel to remove any sticking up stones in the concrete that were sharp - hour or so to do that.
Good luck and make sure to post some pics!
wilbo83 said:
What a transformation, good work. I have a similar sized garage that I am hoping to do similar, can I ask a couple of questions:
- Approximately how many litres of white paint did you use? and how many hours would you say it took to paint?
- Do you have any close up pics of your Plasfloor tiles? Or can you confirm what is in middle of them? The website states they don't come with the Plasfloor logo, as shown below, but I'd like to know if they still have the circle bit (feel like I saw this mentioned somewhere on PH recently but can't find it).
Hi Wilbo, picture of one of the black tiles, no logo as you'll see. Cheers- Approximately how many litres of white paint did you use? and how many hours would you say it took to paint?
- Do you have any close up pics of your Plasfloor tiles? Or can you confirm what is in middle of them? The website states they don't come with the Plasfloor logo, as shown below, but I'd like to know if they still have the circle bit (feel like I saw this mentioned somewhere on PH recently but can't find it).
Gassing Station | Homes, Gardens and DIY | Top of Page | What's New | My Stuff