My wife is letting me have a Wankle with twins
Discussion


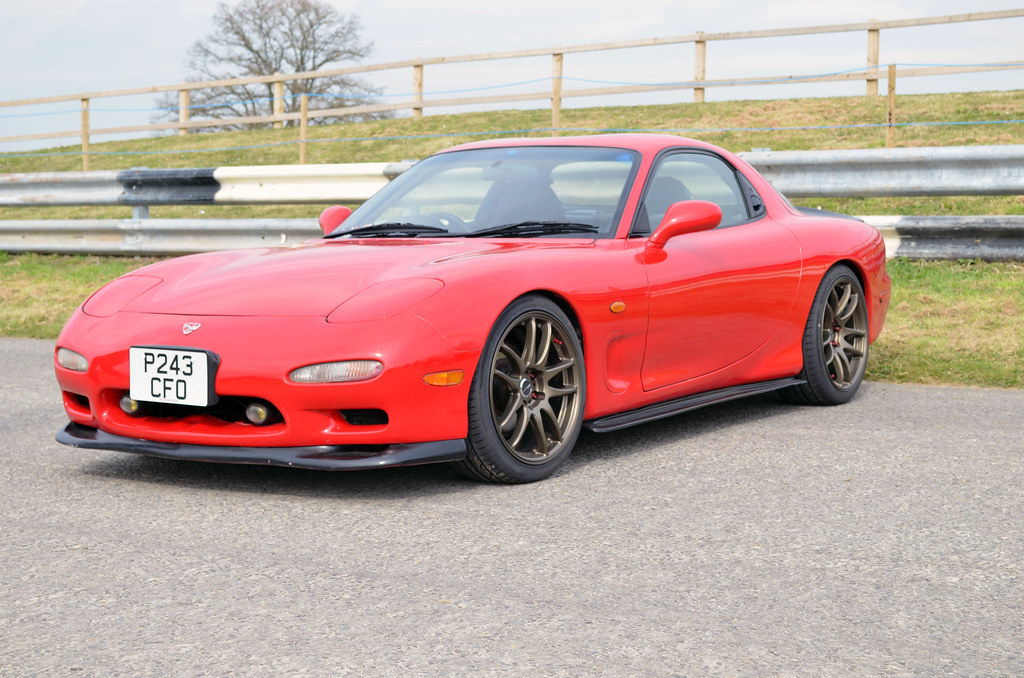
She is finally out of the garage!
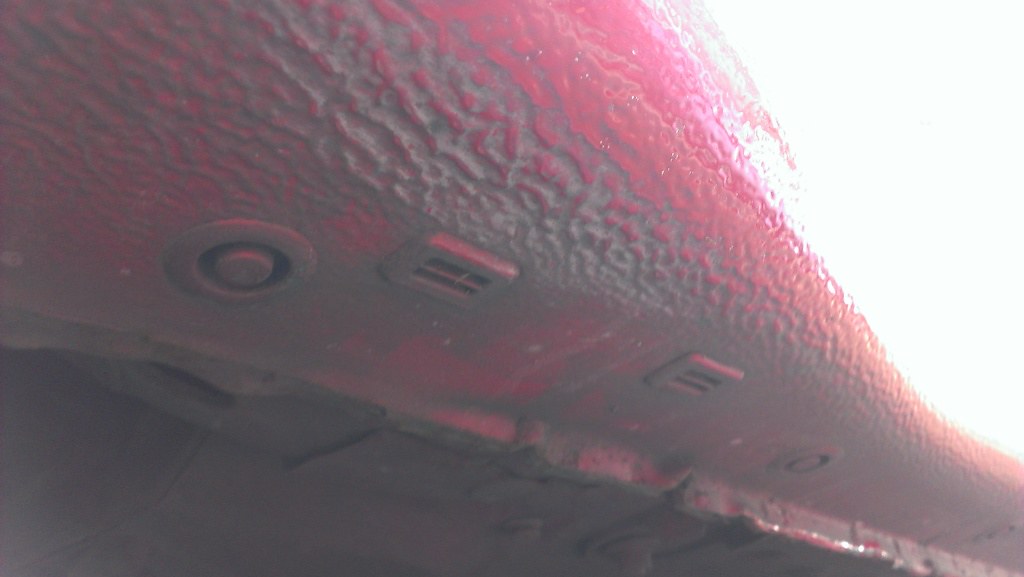
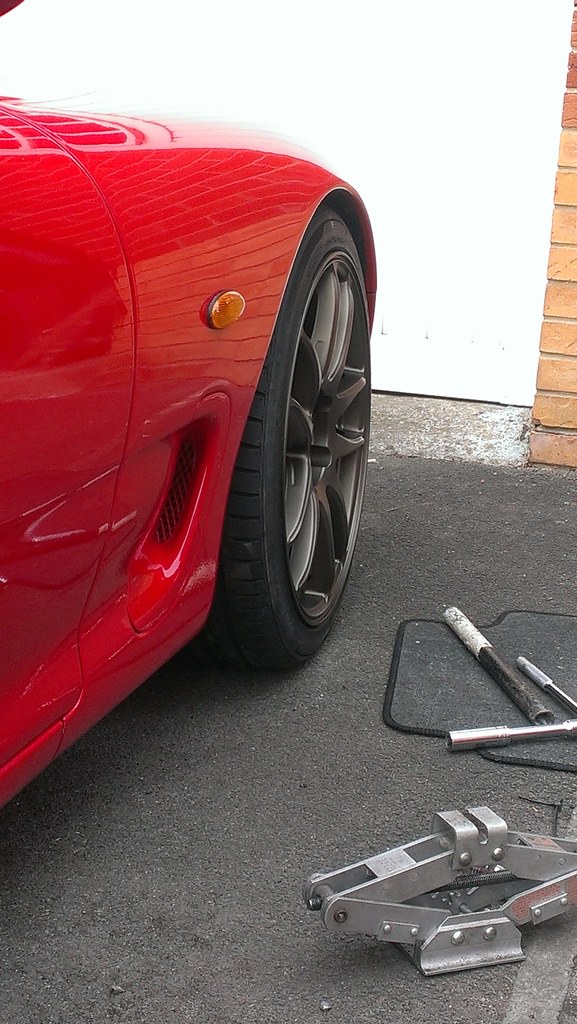
I instantly regretted setting the front coilovers to the lowest setting it was quite a clenching experience edging out of my garage as there a rather large lip leading down to the drive. Thankfully nothing worse than a scuffed under tray.
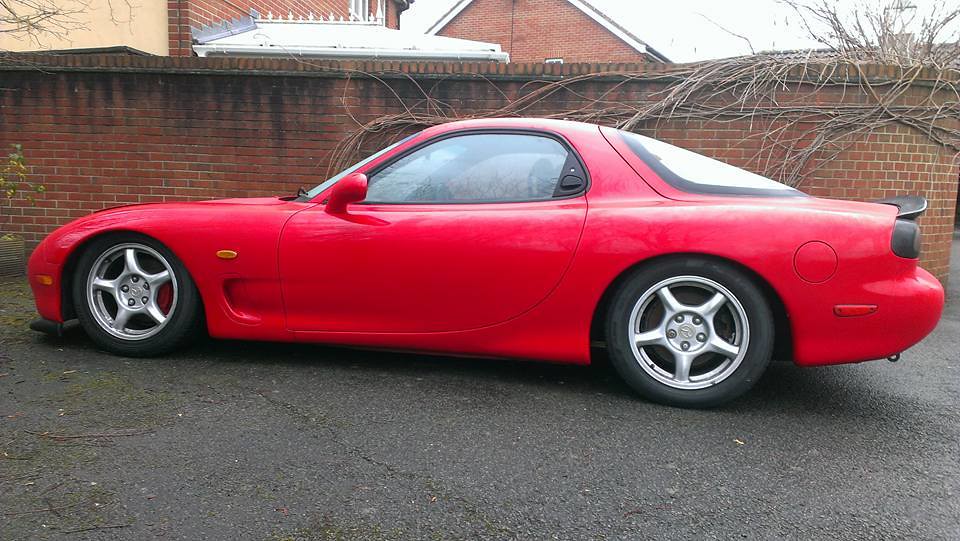
Spent today taking wheels off and putting them back on again to try and sort the ride height out. Finally got it looking like this.
I think the front could do with dropping ever so slightly maybe half a cm as it doesn't look even.
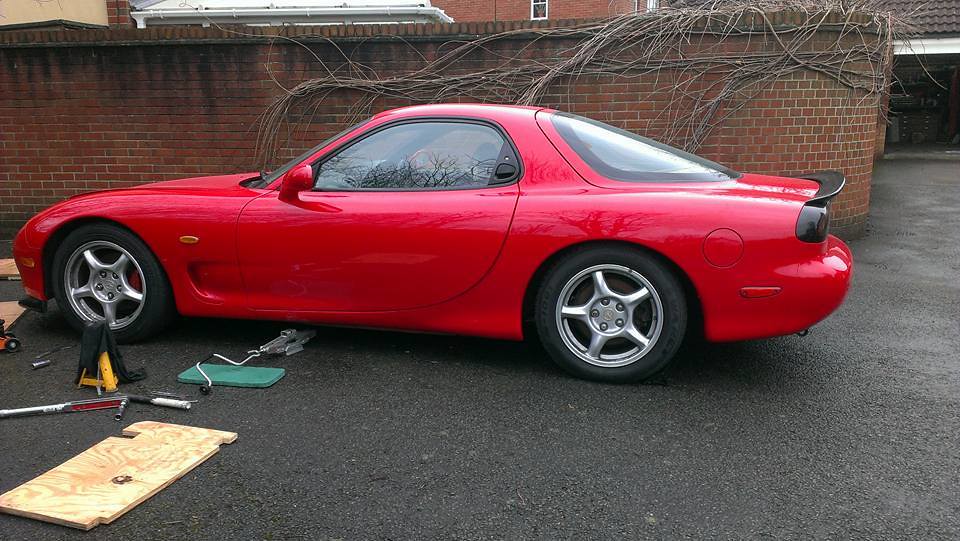
Quick spin around the block as it hasn't moved off the drive in 3 months and other than a lot of smoke she ran perfectly Just need to get an alignment done as the rear feels funny (camber/toe probably out).
Next up - fixing this charging fault and getting my windscreen wipers working as they decided they did't want to play ball today.
I instantly regretted setting the front coilovers to the lowest setting it was quite a clenching experience edging out of my garage as there a rather large lip leading down to the drive. Thankfully nothing worse than a scuffed under tray.
Spent today taking wheels off and putting them back on again to try and sort the ride height out. Finally got it looking like this.
I think the front could do with dropping ever so slightly maybe half a cm as it doesn't look even.
Quick spin around the block as it hasn't moved off the drive in 3 months and other than a lot of smoke she ran perfectly
Just need to get an alignment done as the rear feels funny (camber/toe probably out). Next up - fixing this charging fault and getting my windscreen wipers working as they decided they did't want to play ball today.
Edited by Daston on Wednesday 9th August 22:50
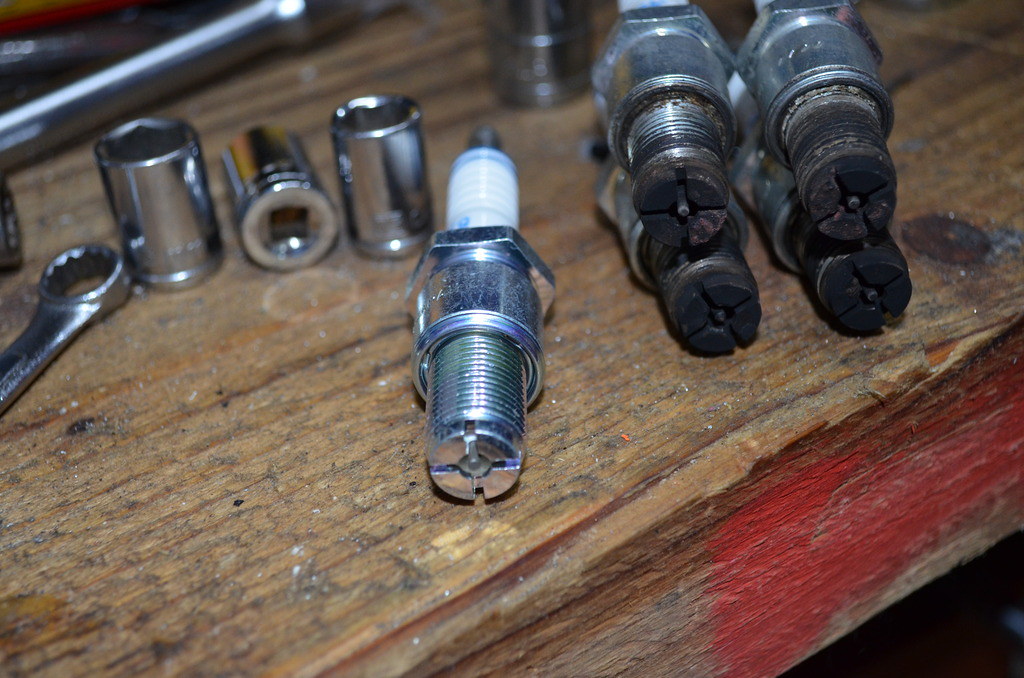
Had a few hours to kill yesterday so decided to swap out the spark plugs on the car. How hard could it be anyway? There are only 4 of them.
Of course it being a rotary the plugs are located on the side of the engine block and happen to be buried under pipes for the power steering and a fair amount of engine loom.
First task was removing the intake from the intercooler to the throttle body, nothing to hard just 4 small bolts and a jubilly clip, so far so good.
This then reveled this
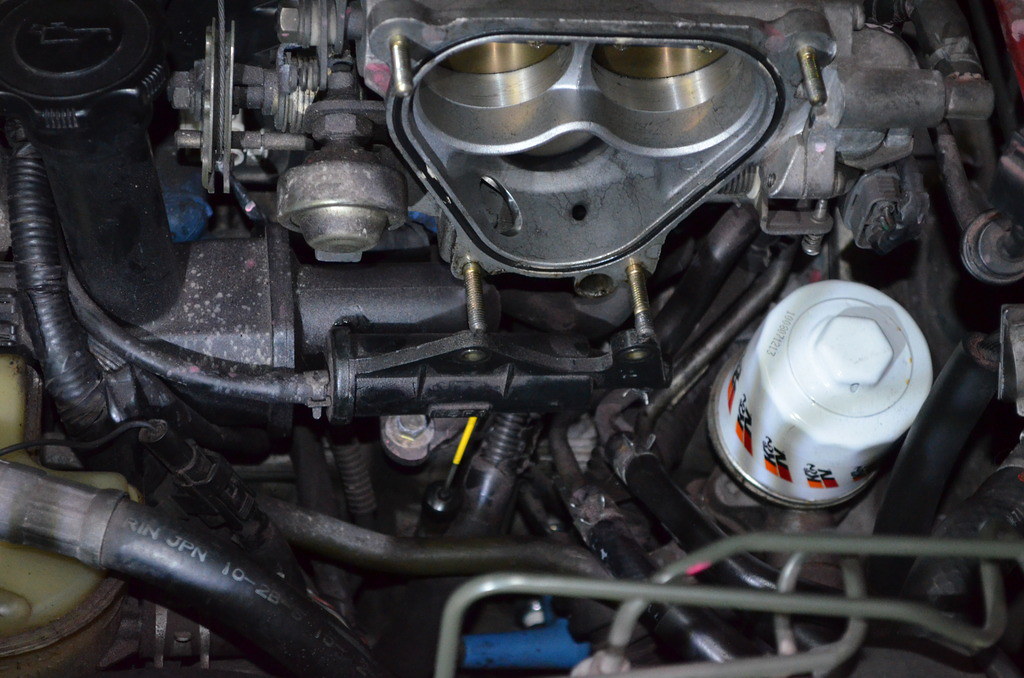
You can just make out the blue HT leads under the mound of cables/pipes.
The actual spark plugs were not too bad to undo just over finger tight (thankfully as getting a larger socket set in there would have been impossible).
After must feeling around by touch and feel I got all 4 sparkplugs out.
The car had been running rich for a number of miles and the plugs confirmed this with a nice strong smell of petrol and the amount of soot on them.
Here are the plugs in all their uh glory, the left plugs are from rotor 1 and the right plugs from rotor 2.....at least both are looking the same.
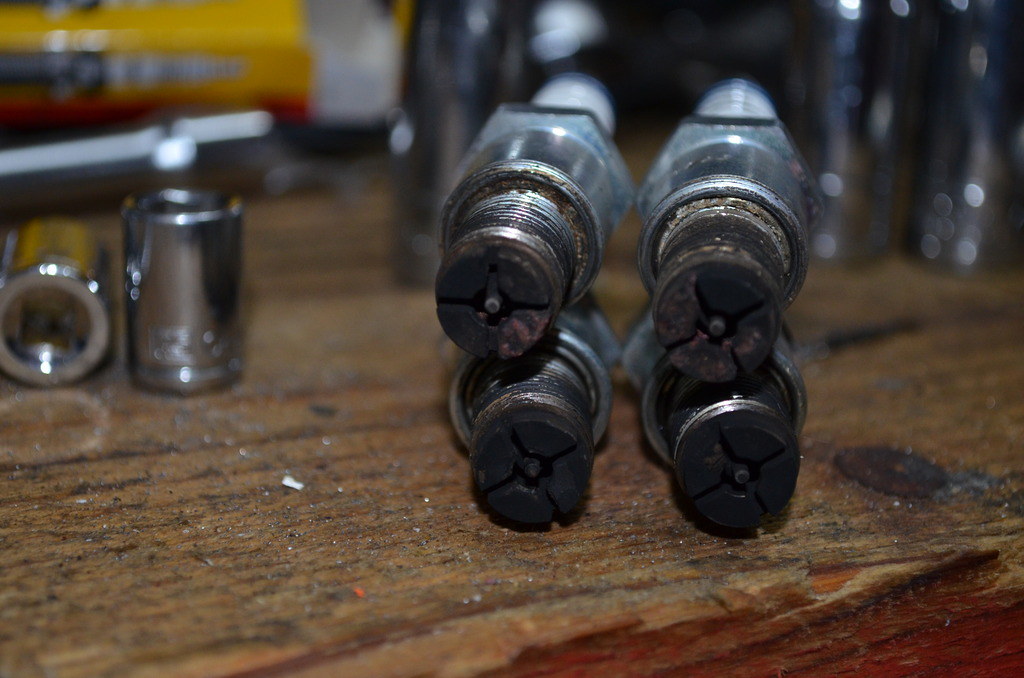
A little different to the new shiny ones!
On a plus the wipers now work....as I reconnected the motor that I had disconnected and forgot about lol
Of course it being a rotary the plugs are located on the side of the engine block and happen to be buried under pipes for the power steering and a fair amount of engine loom.
First task was removing the intake from the intercooler to the throttle body, nothing to hard just 4 small bolts and a jubilly clip, so far so good.
This then reveled this
You can just make out the blue HT leads under the mound of cables/pipes.
The actual spark plugs were not too bad to undo just over finger tight (thankfully as getting a larger socket set in there would have been impossible).
After must feeling around by touch and feel I got all 4 sparkplugs out.
The car had been running rich for a number of miles and the plugs confirmed this with a nice strong smell of petrol and the amount of soot on them.
Here are the plugs in all their uh glory, the left plugs are from rotor 1 and the right plugs from rotor 2.....at least both are looking the same.
A little different to the new shiny ones!
On a plus the wipers now work....as I reconnected the motor that I had disconnected and forgot about lol
Edited by Daston on Monday 15th February 12:39
Edited by Daston on Wednesday 9th August 22:52
Nik da Greek said:
Definitely too rich there, dude 
If you thought that was annoying when you've all the time in the world, imagine trying to do it in a hurry to de-flood the damned thing
I was thinking that as I was changing them over. If you thought that was annoying when you've all the time in the world, imagine trying to do it in a hurry to de-flood the damned thing
The engine has done roughly 2k miles since rebuild now and just before the charging fault I swapped the o2 sensor over so I hope it will now run less rich. What I don't get is that it runs perfectly fine and on the standard ECU so can't be a mapping fault. The only thing I can think of is possibly a sticking injector.
I will be getting the injectors checked before I decat and fit the new Apexi ECU.
Does it still have the cat? Might be blocking up... no scratch that... if it's on the original cat it will be blocking up. Leads to all kinds of mutant fuelling anomalies
EDIT: re-read the sentence above my post, lol, where it says "before I decat". Note to self; pay more attention If you've got the next round of mods all ready to swap in then I wouldn't worry about it. An engine never went from being too rich and spark plugs are cheaper than apex seals. Just get JayDee or someone sensible to map it when you swap the Apexi in there and swallow the extra cost of V-Power in the meanwhile
EDIT: re-read the sentence above my post, lol, where it says "before I decat". Note to self; pay more attention
If you've got the next round of mods all ready to swap in then I wouldn't worry about it. An engine never went from being too rich and spark plugs are cheaper than apex seals. Just get JayDee or someone sensible to map it when you swap the Apexi in there and swallow the extra cost of V-Power in the meanwhileEdited by Nik da Greek on Monday 15th February 13:06
Edited by Nik da Greek on Monday 15th February 13:06
Good news!
Battery is now charging itself! Bite the bullet and ordered a 110A reconditioned alternator from the states, took 3 weeks to clear customs but after fitting it battery sees 14.4v at idle.
I did however learn a couple of things after taking it back out onto the road. 1) Our next door neighbours 308's alarm will go off as soon as I back out of the garage and 2) I really need to get the suspension alignment done!
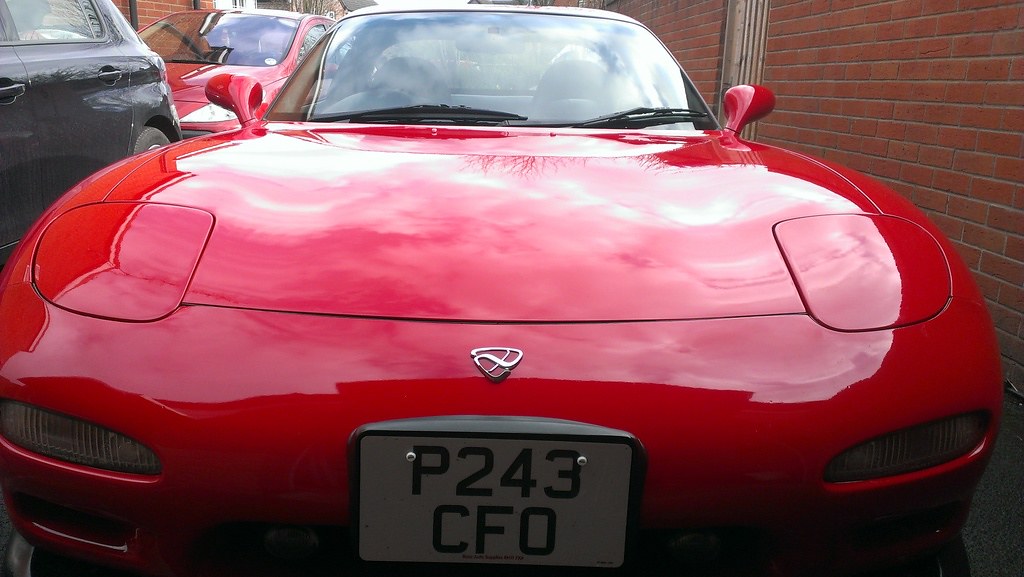
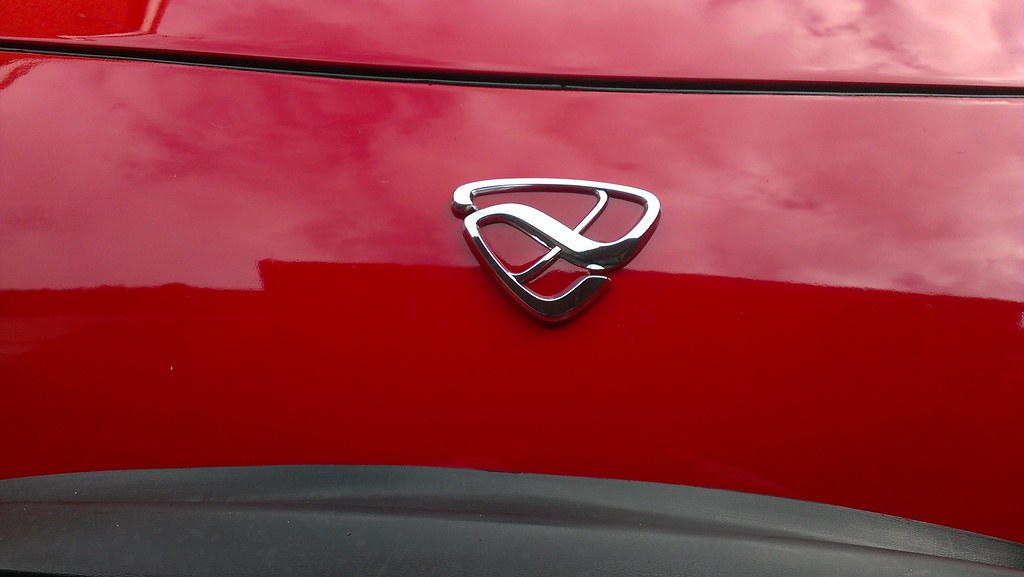
Decided to do a few small jobs today whilst it was out of the garage, the first was to get shot of the horrid badge that has been on the car since I have had it and replace it with a new one I got from Japan.
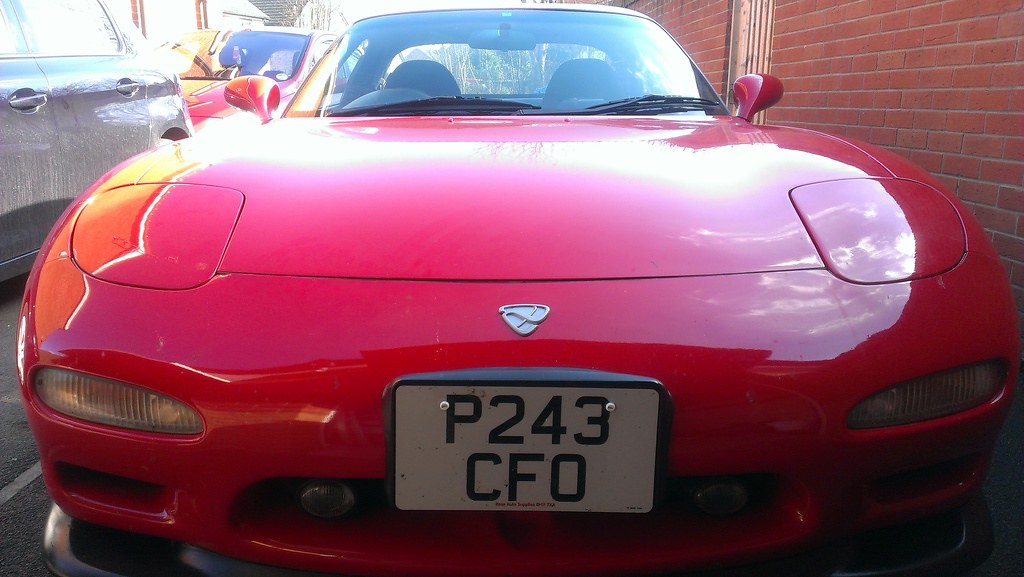
Nice and shiny
The other thing I wanted to do was test fit the side steps that I have. It all lines up OK and I am trying to think of away to attach them which does not involve drilling into the Sill like so many others do.
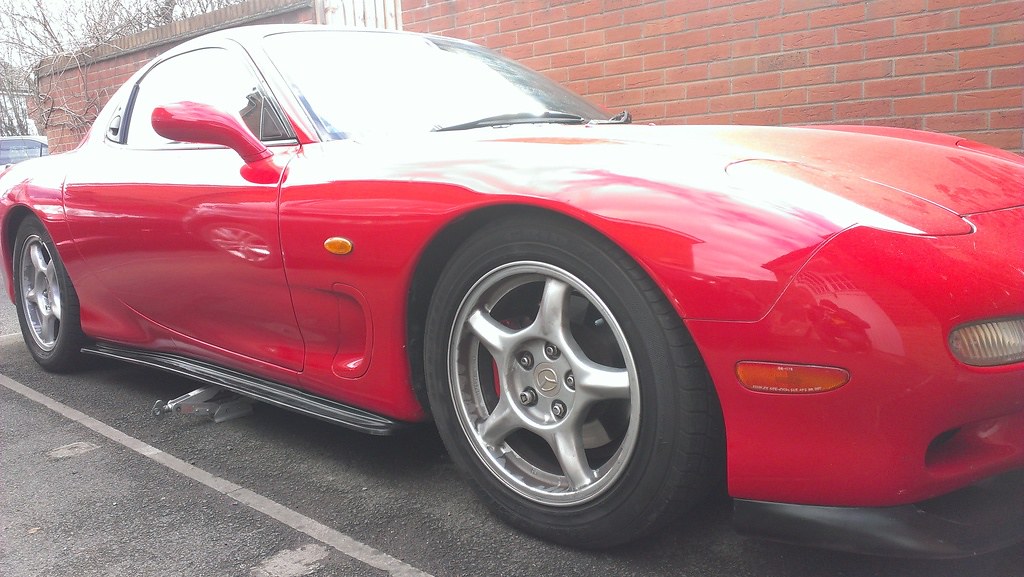
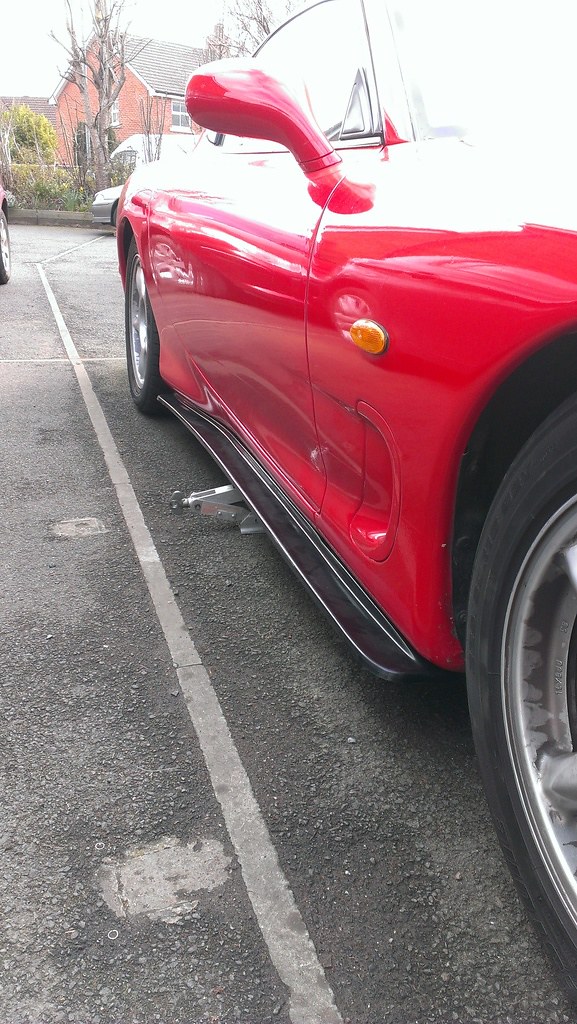
The front of the Sill has 2 bolts for the wing so that shouldn't be a problem and the back of the sill has these 2 square grommets which the side step have an indent for (making it an easy place to line up).
I am thinking of a way to drill a hole into these grommets and use some expanding clip like you get in wheel arches. The center of the side step can then be held in place with some automotive double sided tape (the stuff that sticks like brown stuff to blankets)
Battery is now charging itself! Bite the bullet and ordered a 110A reconditioned alternator from the states, took 3 weeks to clear customs but after fitting it battery sees 14.4v at idle
. I did however learn a couple of things after taking it back out onto the road. 1) Our next door neighbours 308's alarm will go off as soon as I back out of the garage and 2) I really need to get the suspension alignment done!
Decided to do a few small jobs today whilst it was out of the garage, the first was to get shot of the horrid badge that has been on the car since I have had it and replace it with a new one I got from Japan.
Nice and shiny
The other thing I wanted to do was test fit the side steps that I have. It all lines up OK and I am trying to think of away to attach them which does not involve drilling into the Sill like so many others do.
The front of the Sill has 2 bolts for the wing so that shouldn't be a problem and the back of the sill has these 2 square grommets which the side step have an indent for (making it an easy place to line up).
I am thinking of a way to drill a hole into these grommets and use some expanding clip like you get in wheel arches. The center of the side step can then be held in place with some automotive double sided tape (the stuff that sticks like brown stuff to blankets)
Edited by Daston on Wednesday 9th August 23:00
Nik da Greek said:
TBH I would be tempted just to drill and use rivnuts. You don't want your expensive FEED-alike sidesteps bouncing off under a truck on the M1 because you secured them to plastic vents using trimclips and hopes.
Just use plenty of sealant after you drill the holes.
Just having a look on the old youtube.....looks like that may indeed be a plan Just use plenty of sealant after you drill the holes.
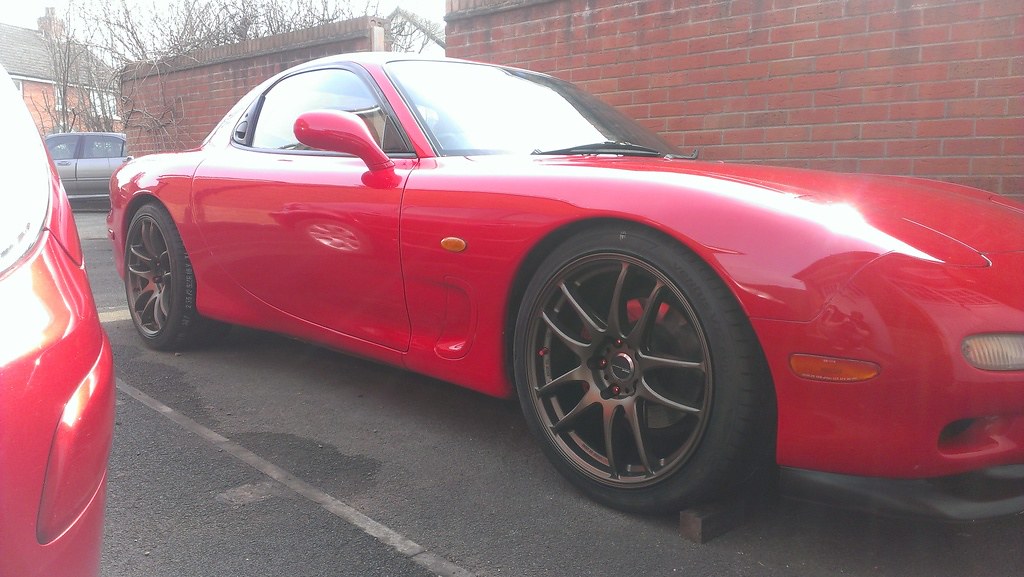
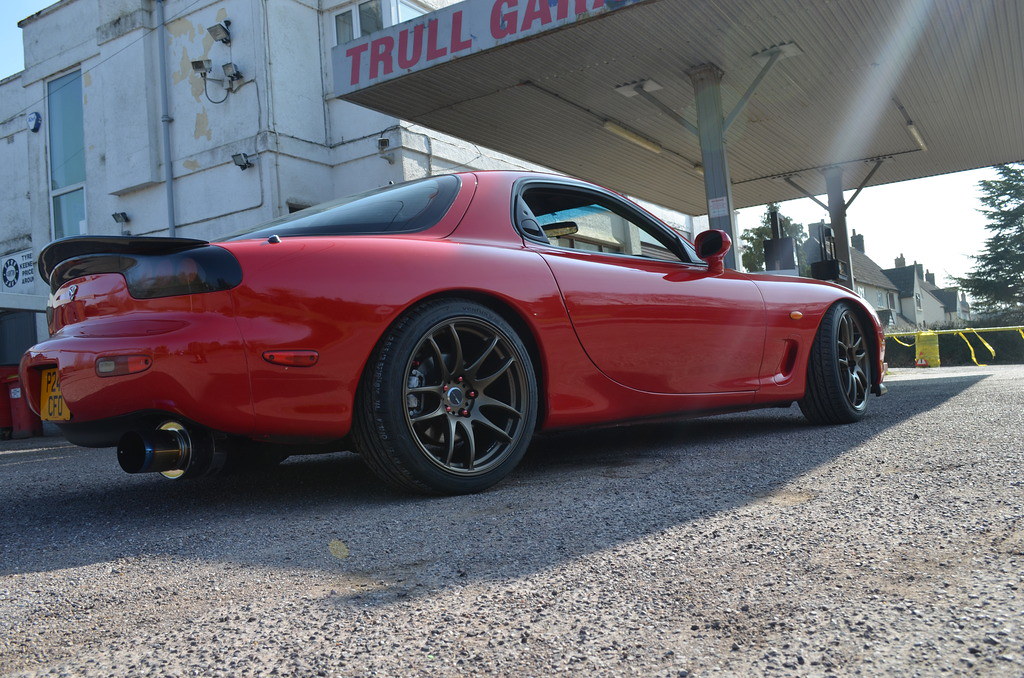
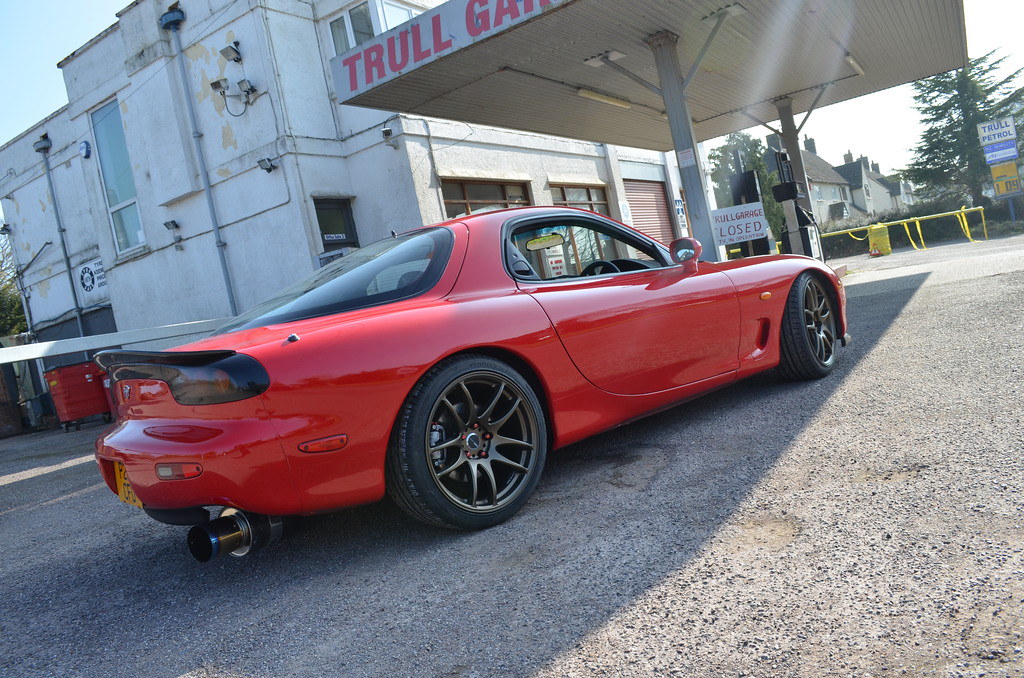
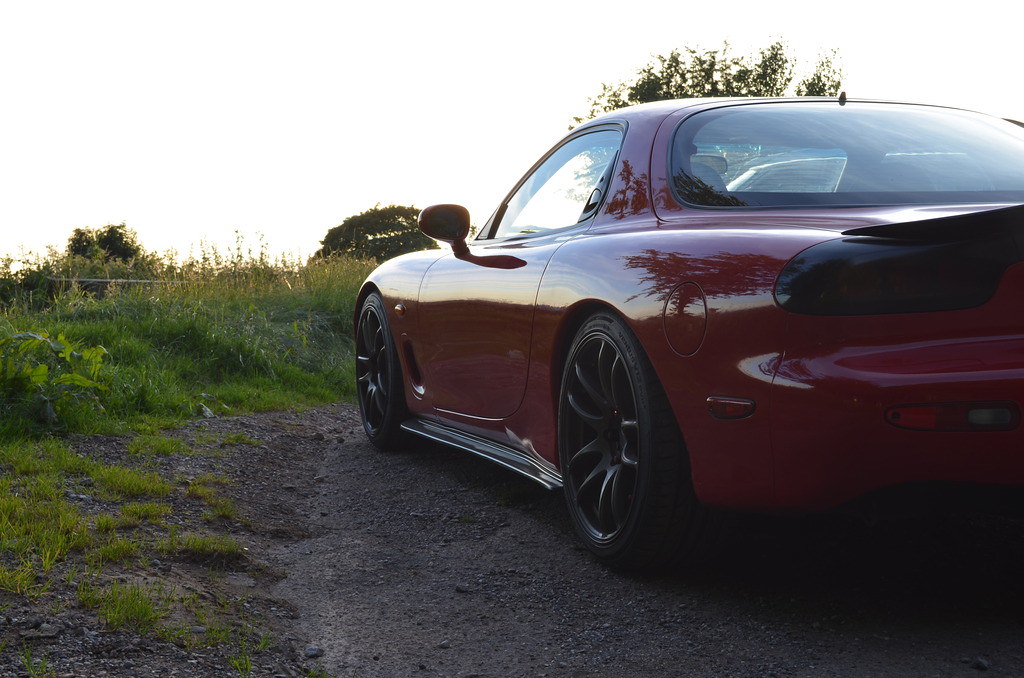
Not had a chance to update this as I have been rather busy of late. However I managed to get the new wheels fitted with some rubber a couple of weeks back and took load of photos very very happy with the fitment of the wheels, they seem to fill the arches a lot better than the originals.
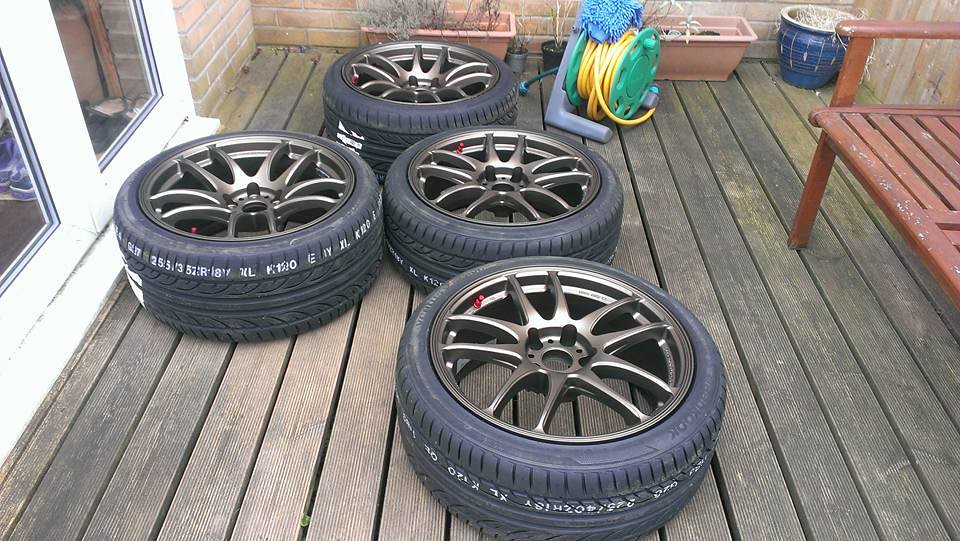
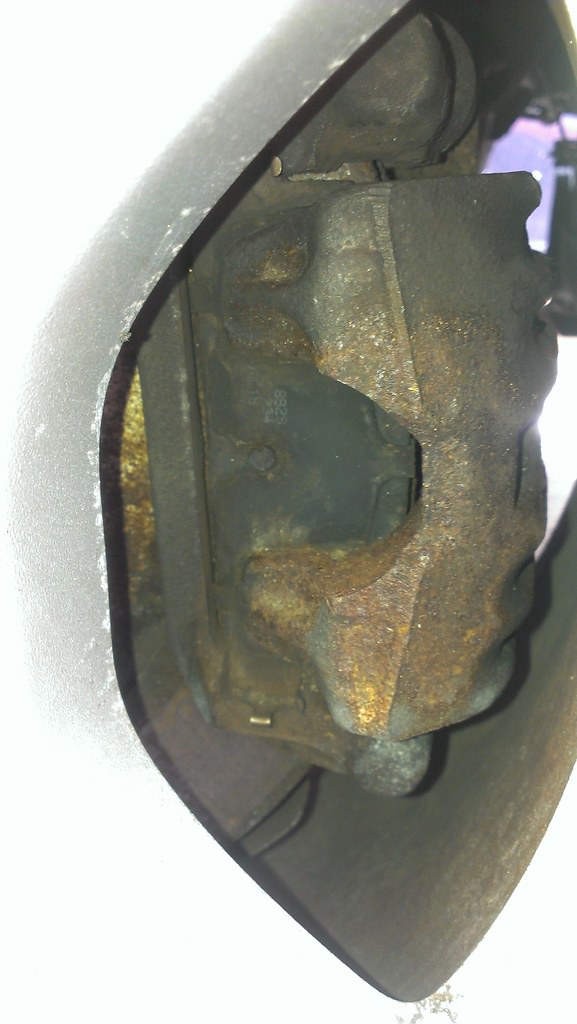
Whilst I was fitting the wheels I noticed that the rear calipers were looking rather s te to be honest, I think a mixture of anti rust stuff and all the crap from the wheel arches had turned them grim. As the new wheels would show them up I thought a quick lick of paint was needed. This was just very quick rub down with a wire brush and then gloss silver caliper paint. I plan on giving them a proper paint at a later date.
looks great from a distance, a bit rough up close tho.
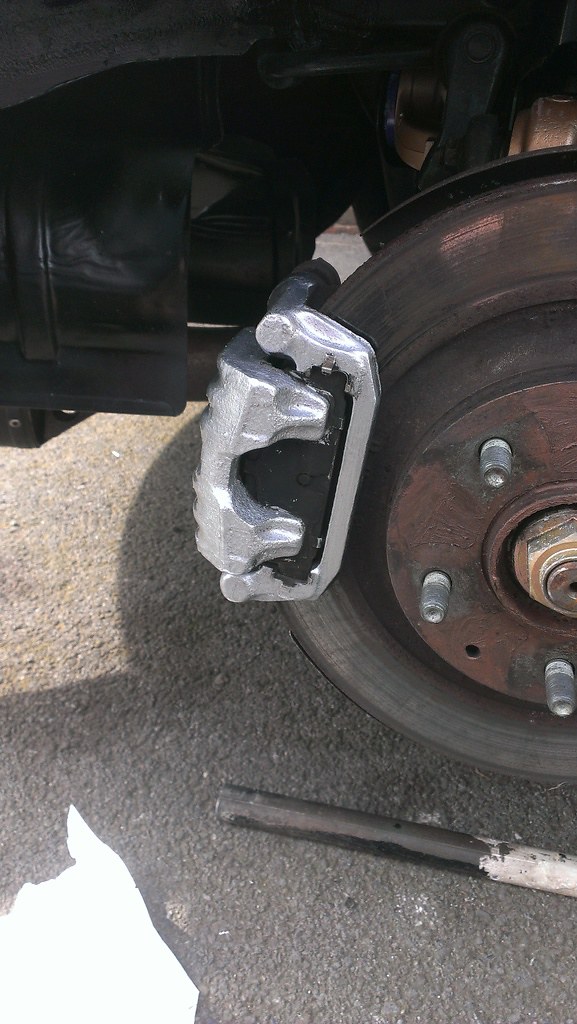
I left the caliper to dry for a couple of hours (longest 2 hours of my life!!) before I put the wheel on as I could seem me getting silver paint everywhere.
First wheel on and I almost regretted my decision to go for 18's as the car looked a bit like a monster truck when compared to the front.

I then decided that it would be better to fit both fronts before painting the other caliper at least I then only have the one rear to wait for.
Starting to look a bit better if not a little over wheeled
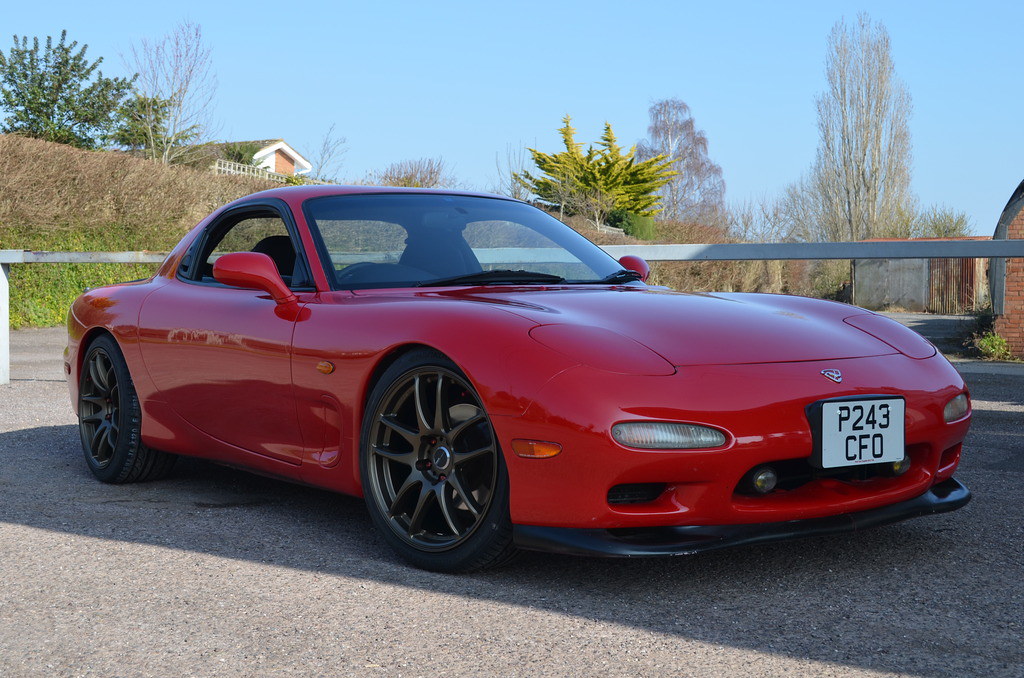
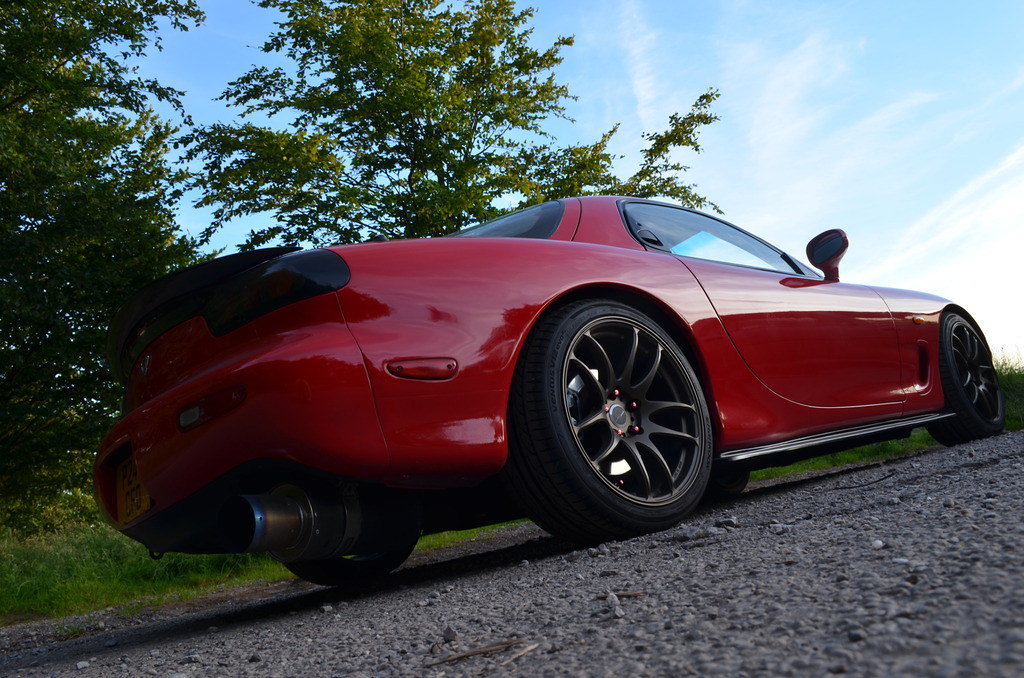
With the sun still out I thought I would head out for some photos and being able to stand more than 4 feet away from the car makes it look a hell of a lot better!


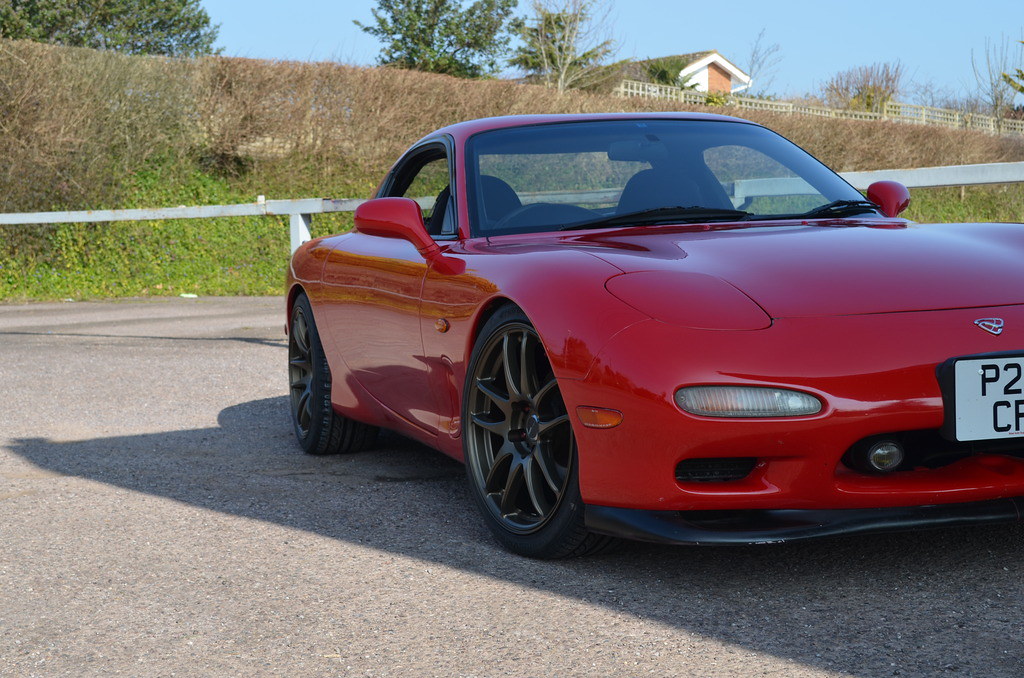
The first thing I noticed was the ride, the new suspension plus 18's is a hard hard thing! I have slowly been adjusting the spring stiffness until I have got it to a setting that is comfortable the front wheels just touch the arches if I hit any pot holes whilst on full lock so could probably do with being raised 5mm.
I also got to try out a rivnut tool, I have to say I do not find drilling into perfectly good bodywork a fun task! I was a little nervous to say the least but they do say the first cut is the hardest! Over the course of the day I managed to fit the side steps and there is no way they are going to be falling off!
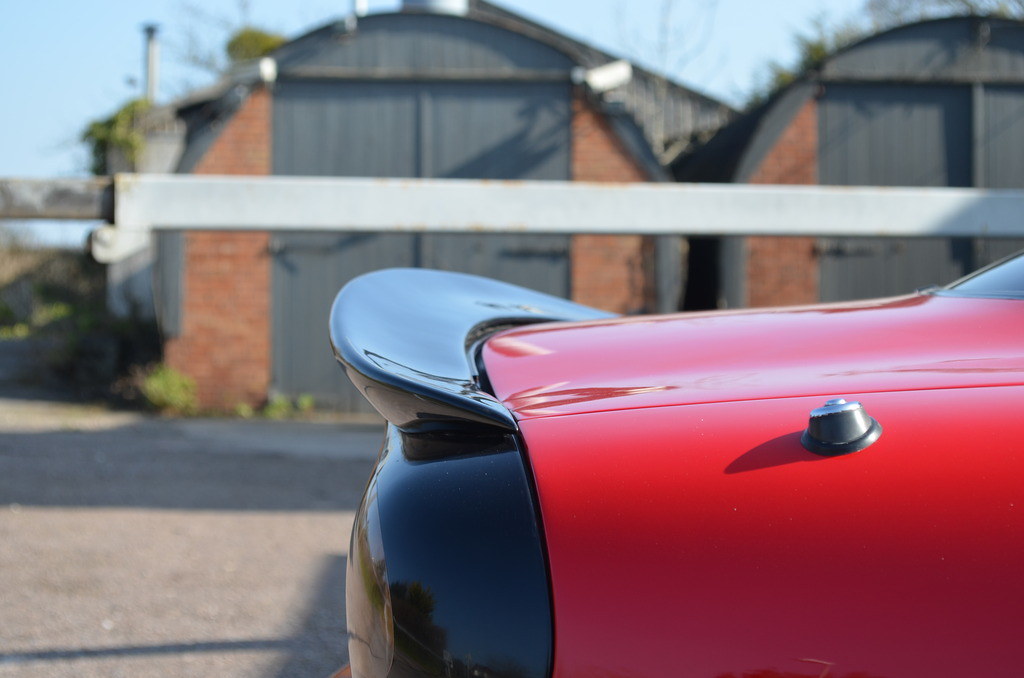
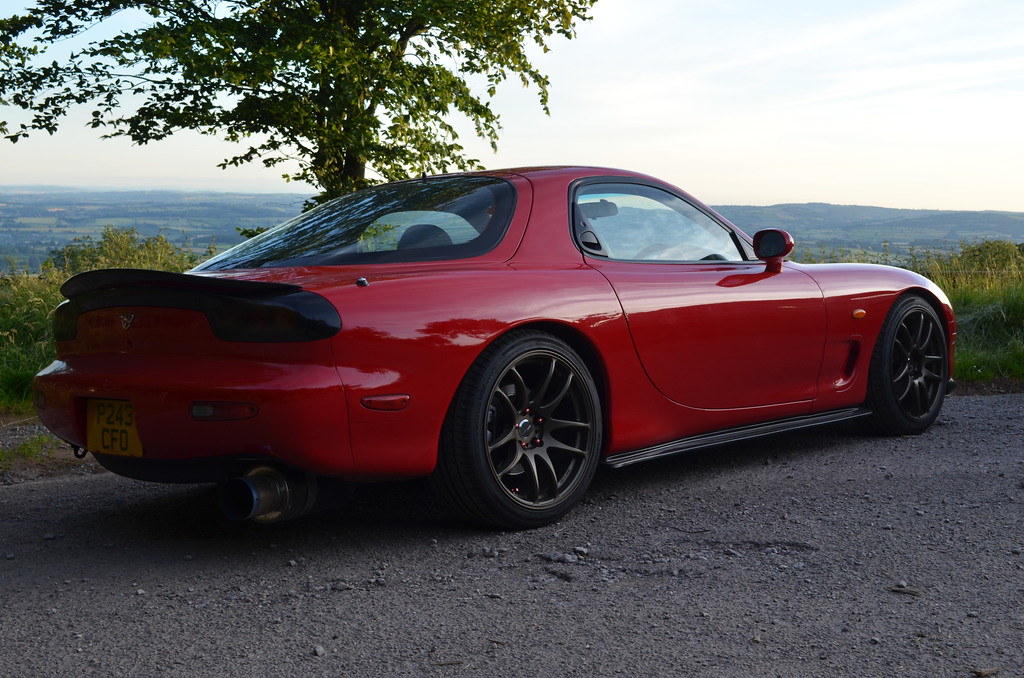
With the wheels, duck tail and side steps I think that is all I am going to change externally as Mazda did a wonderful job and I don't want to ruin that.
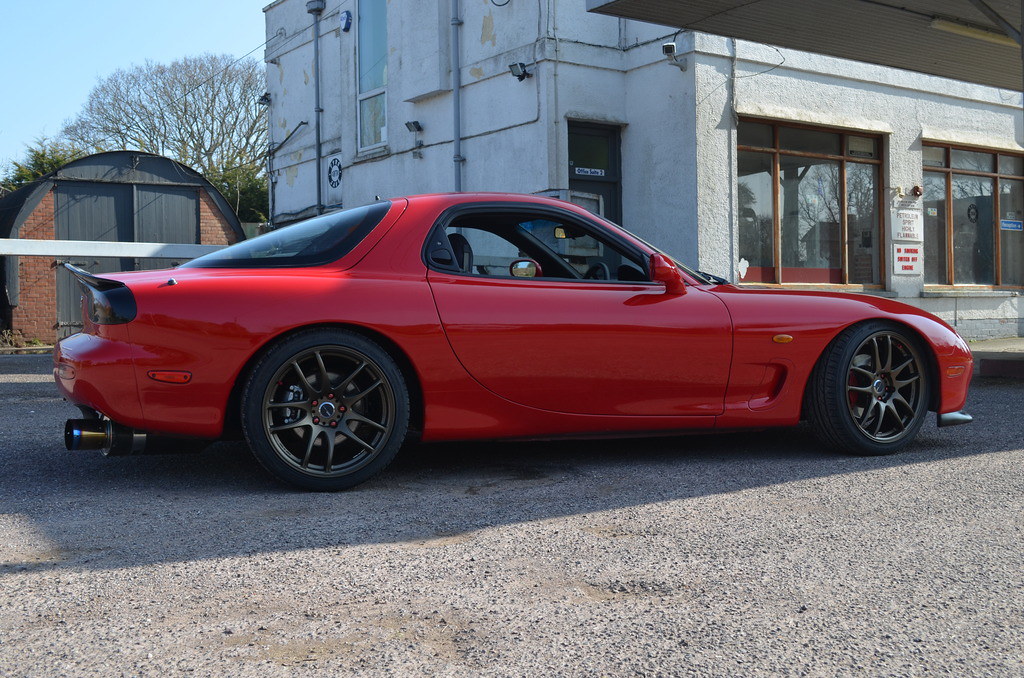
Here is how she stood at the Haynes Motor Museum Breakfast club today

My plan is to now tackle some of the niggles that have risen their heads since I have got the car back on the road. The first is the loss of my 2nd Turbo, coming back from Haynes it is intermittent in coming on boost resulting in low power above 4.5k rpm. It is doing it every now and then and the vacuum hoses have all been renewed so its likely to be a control valve. I have heard that the sequential can cause quite a headache so I am looking forward to it....not!
My other problem (not as large) is something is sodding loose in the dash, harder suspension brings greater vibration and by god my dash has found it! That can be found another day.
very very happy with the fitment of the wheels, they seem to fill the arches a lot better than the originals. Whilst I was fitting the wheels I noticed that the rear calipers were looking rather s
te to be honest, I think a mixture of anti rust stuff and all the crap from the wheel arches had turned them grim. As the new wheels would show them up I thought a quick lick of paint was needed. This was just very quick rub down with a wire brush and then gloss silver caliper paint. I plan on giving them a proper paint at a later date.looks great from a distance, a bit rough up close tho.
I left the caliper to dry for a couple of hours (longest 2 hours of my life!!) before I put the wheel on as I could seem me getting silver paint everywhere.
First wheel on and I almost regretted my decision to go for 18's as the car looked a bit like a monster truck when compared to the front.
I then decided that it would be better to fit both fronts before painting the other caliper at least I then only have the one rear to wait for.
Starting to look a bit better if not a little over wheeled
With the sun still out I thought I would head out for some photos and being able to stand more than 4 feet away from the car makes it look a hell of a lot better!
The first thing I noticed was the ride, the new suspension plus 18's is a hard hard thing! I have slowly been adjusting the spring stiffness until I have got it to a setting that is comfortable the front wheels just touch the arches if I hit any pot holes whilst on full lock so could probably do with being raised 5mm.
I also got to try out a rivnut tool, I have to say I do not find drilling into perfectly good bodywork a fun task! I was a little nervous to say the least but they do say the first cut is the hardest! Over the course of the day I managed to fit the side steps and there is no way they are going to be falling off!
With the wheels, duck tail and side steps I think that is all I am going to change externally as Mazda did a wonderful job and I don't want to ruin that.
Here is how she stood at the Haynes Motor Museum Breakfast club today
My plan is to now tackle some of the niggles that have risen their heads since I have got the car back on the road. The first is the loss of my 2nd Turbo, coming back from Haynes it is intermittent in coming on boost resulting in low power above 4.5k rpm. It is doing it every now and then and the vacuum hoses have all been renewed so its likely to be a control valve. I have heard that the sequential can cause quite a headache so I am looking forward to it....not!
My other problem (not as large) is something is sodding loose in the dash, harder suspension brings greater vibration and by god my dash has found it! That can be found another day.
Edited by Daston on Wednesday 9th August 23:07

Samjeev said:
The Bronze wheels on reg look awesome.
Are they a matt bronze finish or gloss bronze? and might i ask where you got your red wheel nuts and valves from?
The wheels are a matt finish, the nuts came from ebay of all places. They are stainless steel ones annodized red as I hear bad things about alloy nuts getting stuck on the threads. The valves were an option extra with Works they do black, blue or red. Are they a matt bronze finish or gloss bronze? and might i ask where you got your red wheel nuts and valves from?
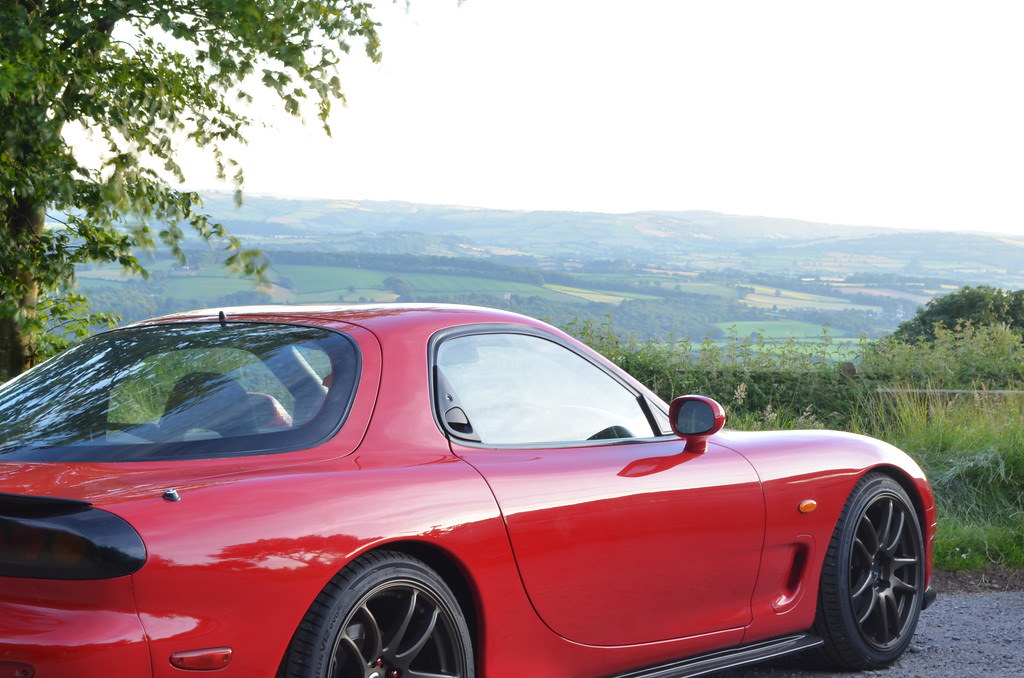
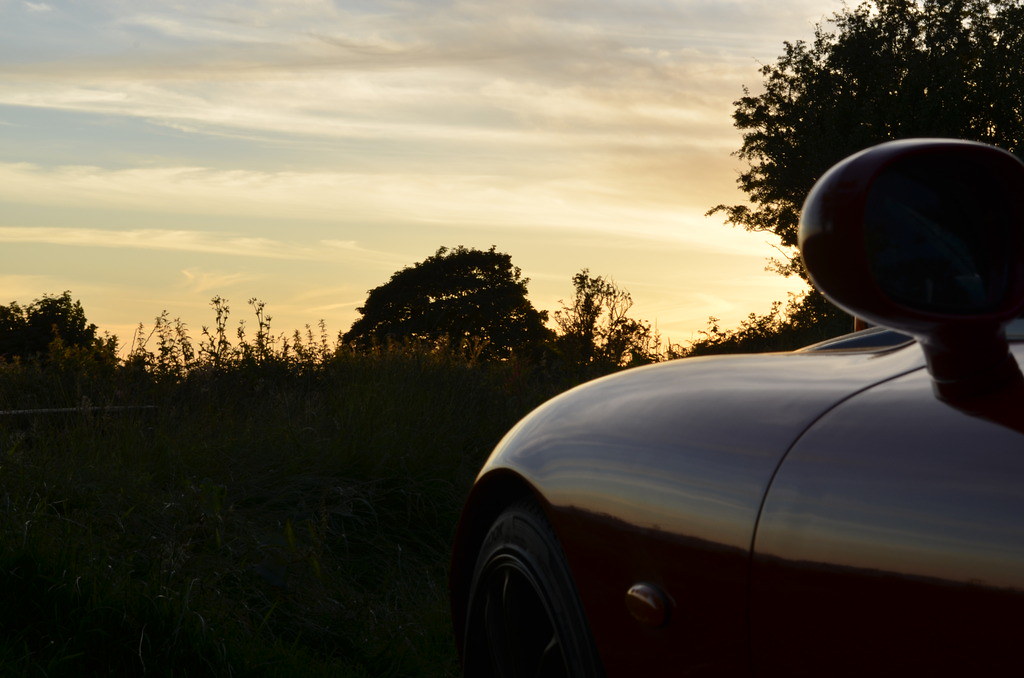
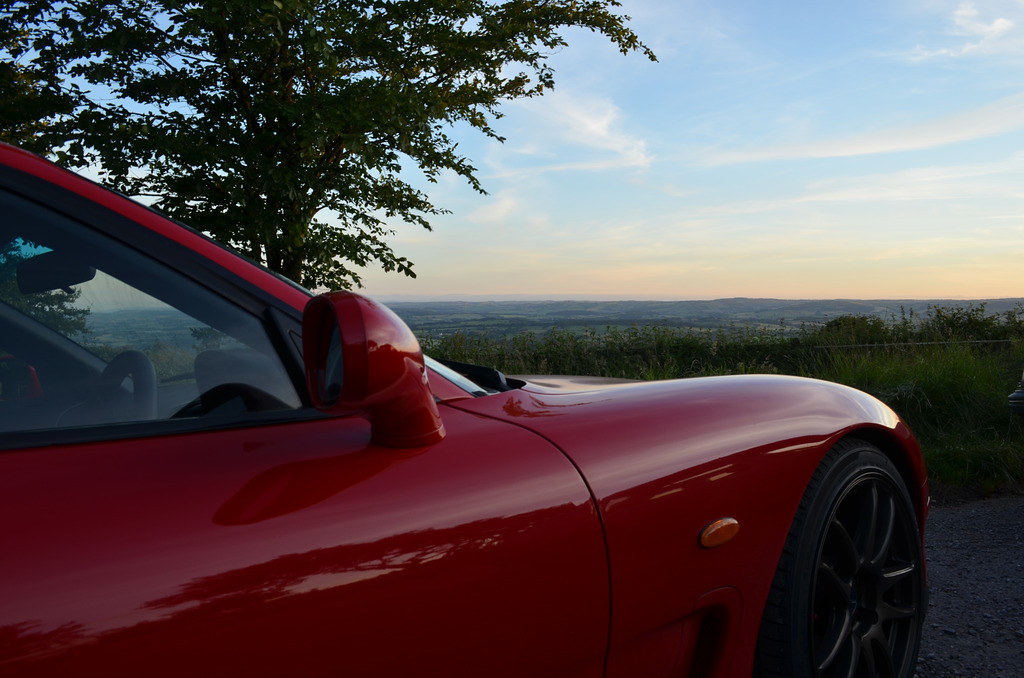
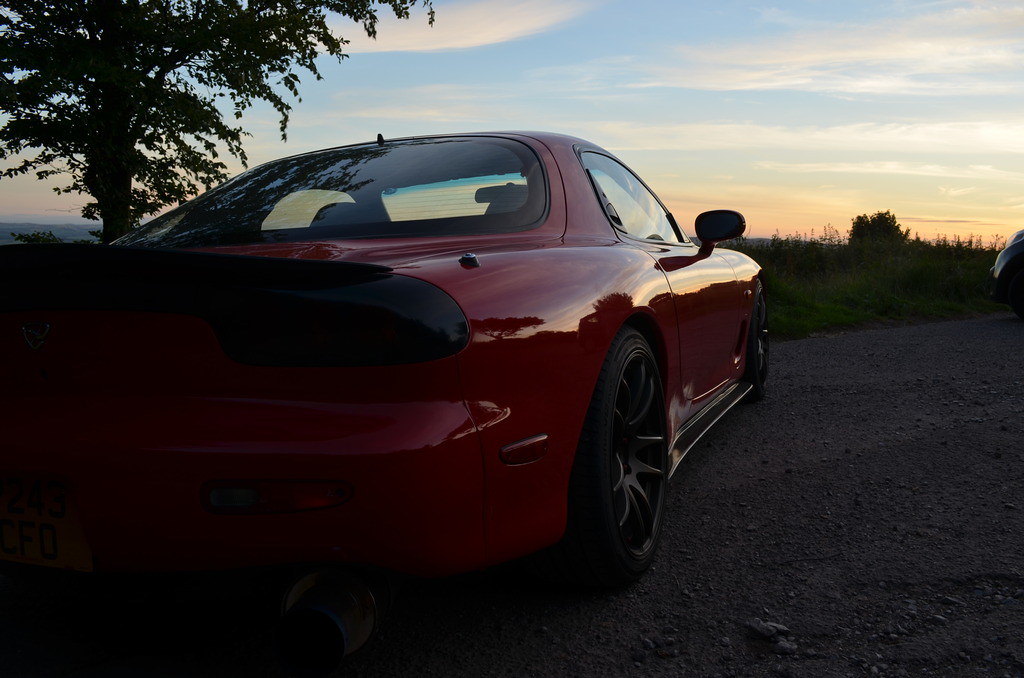
Not had much to share, the car has been garaged for a while as I haven't had the time to get her out. However the insurance company needed some photos for the agreed valuation and as the night was clear I thought I would head off into the Quantocks for some photos.
Edited by Daston on Wednesday 9th August 23:10
Gassing Station | Readers' Cars | Top of Page | What's New | My Stuff