1985 Rover 3500 Vitesse
Discussion


So how's Lockdown treating everyone?
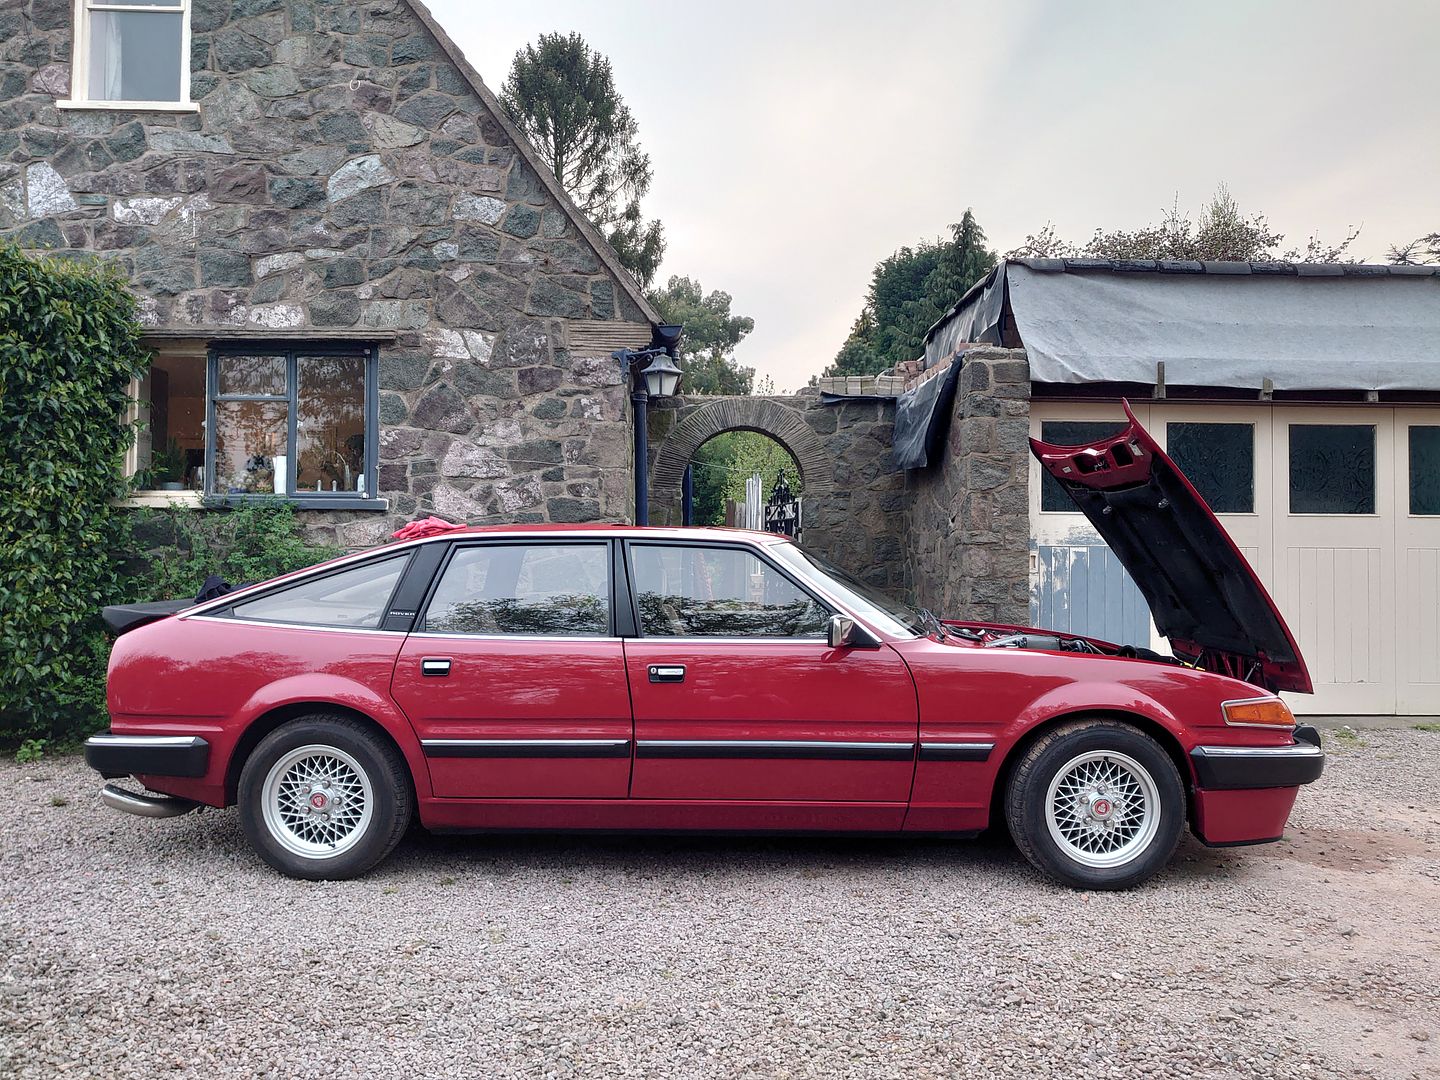
I've been keeping busy with various projects, and of course the Vitesse has been getting some love.
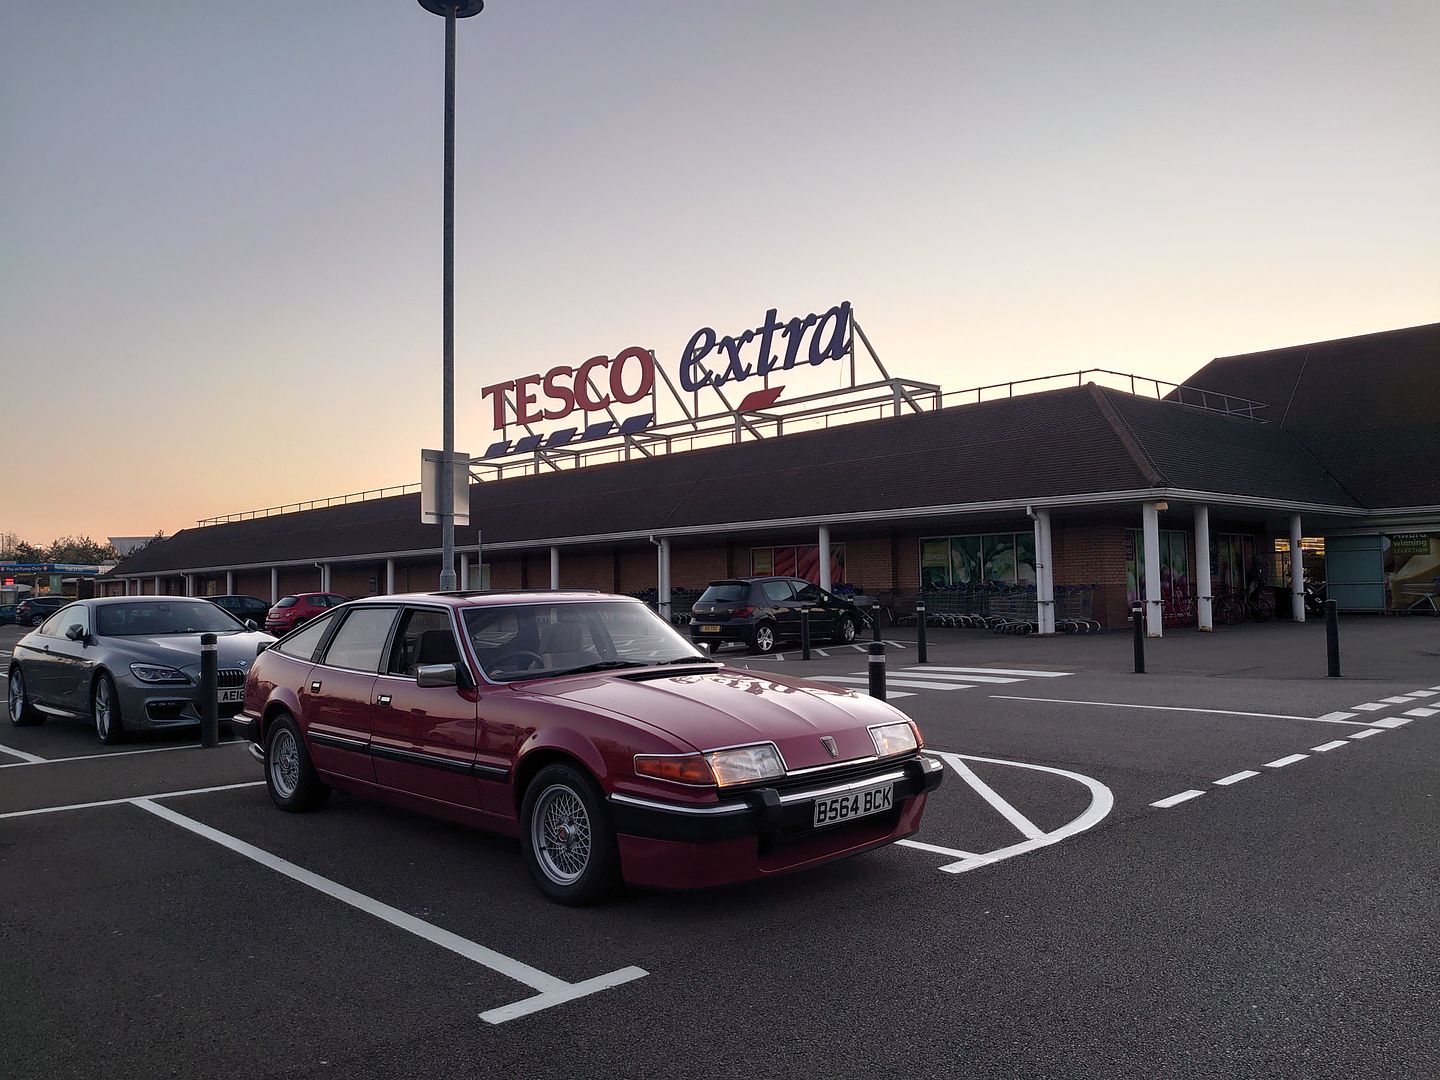
Some essential trips to pick up supplies had to be done. Leaving cars sitting is never good, and it does have one massive boot. One silver lining is that with petrol being the cheapest it's been for a while it's now the perfect shopping car!
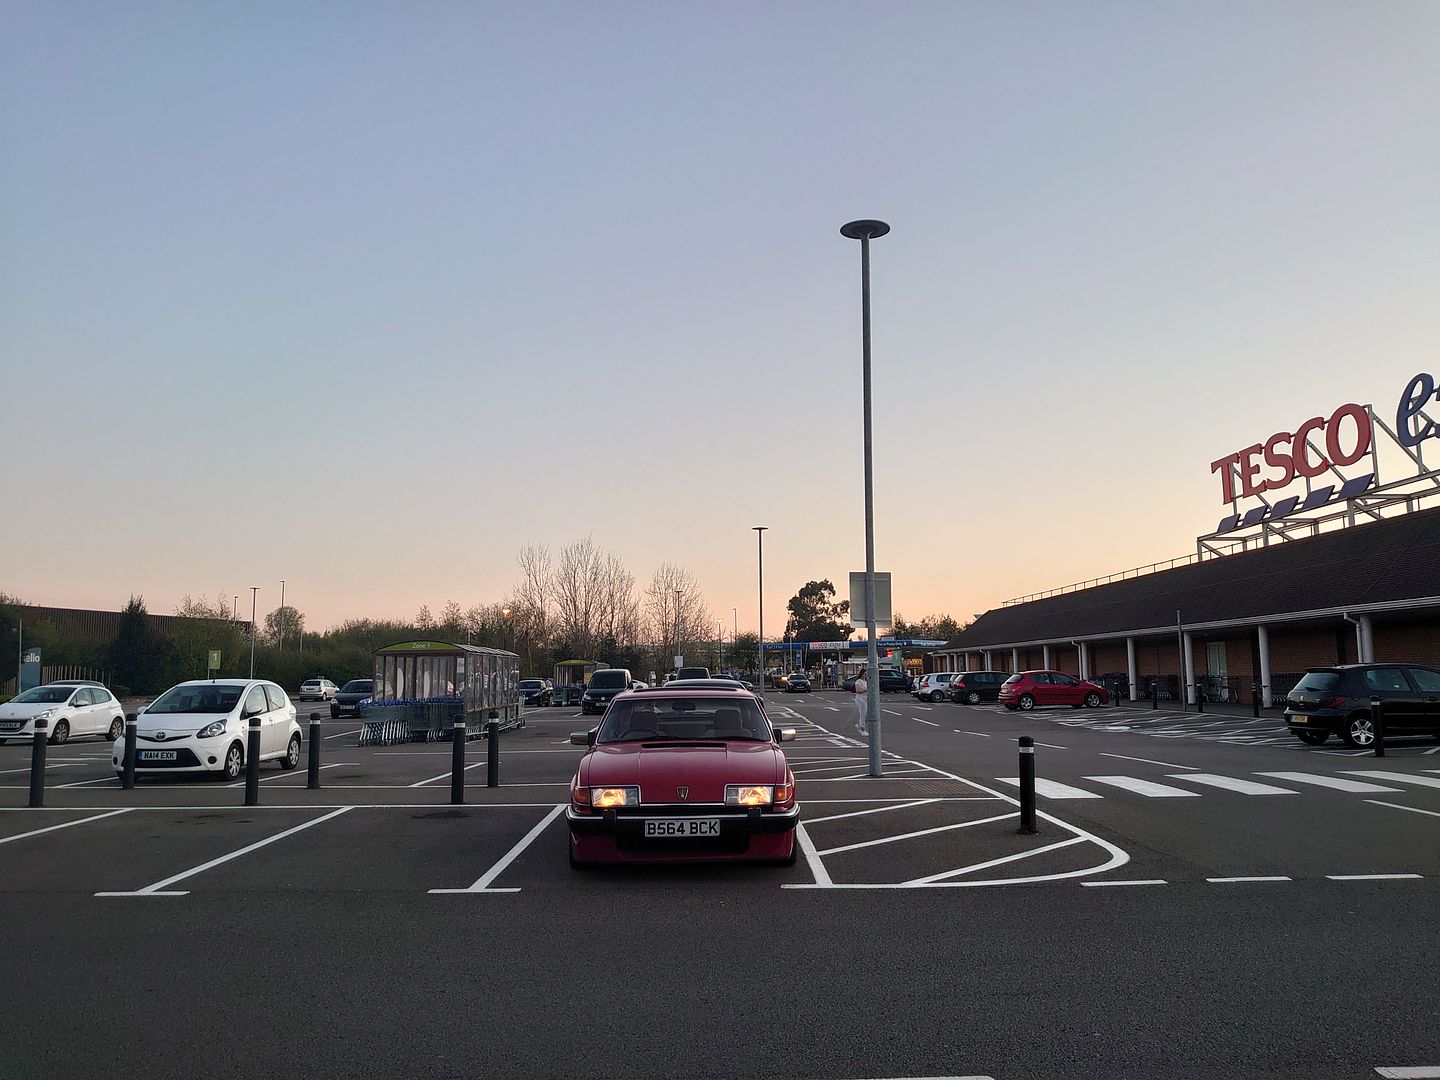
Always nice to bring some joy, while loading it up I had two people come and say what a cool sight it was! They liked it even more when I fired it up!
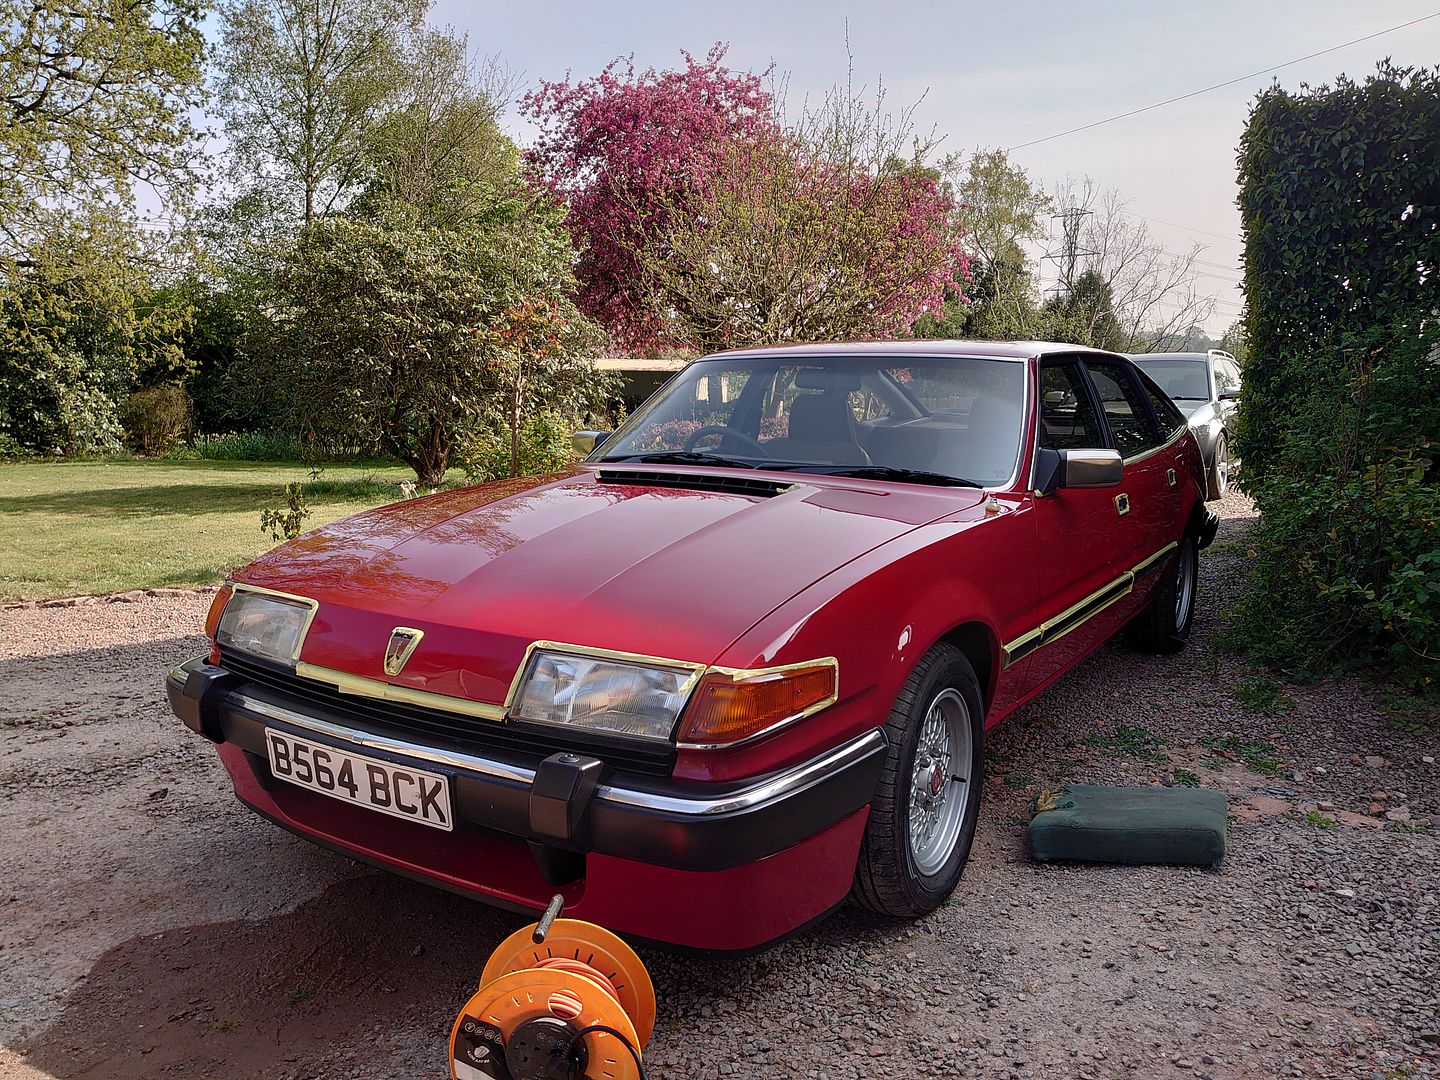
First project is something I've been wanting to do for a long while, so after a lot of research I finally invested in a Meguiars MT320 DA polisher.
I've had a good go at hand polishing the Vitesse before, but in bright sunlight you can see my swirled attempts!
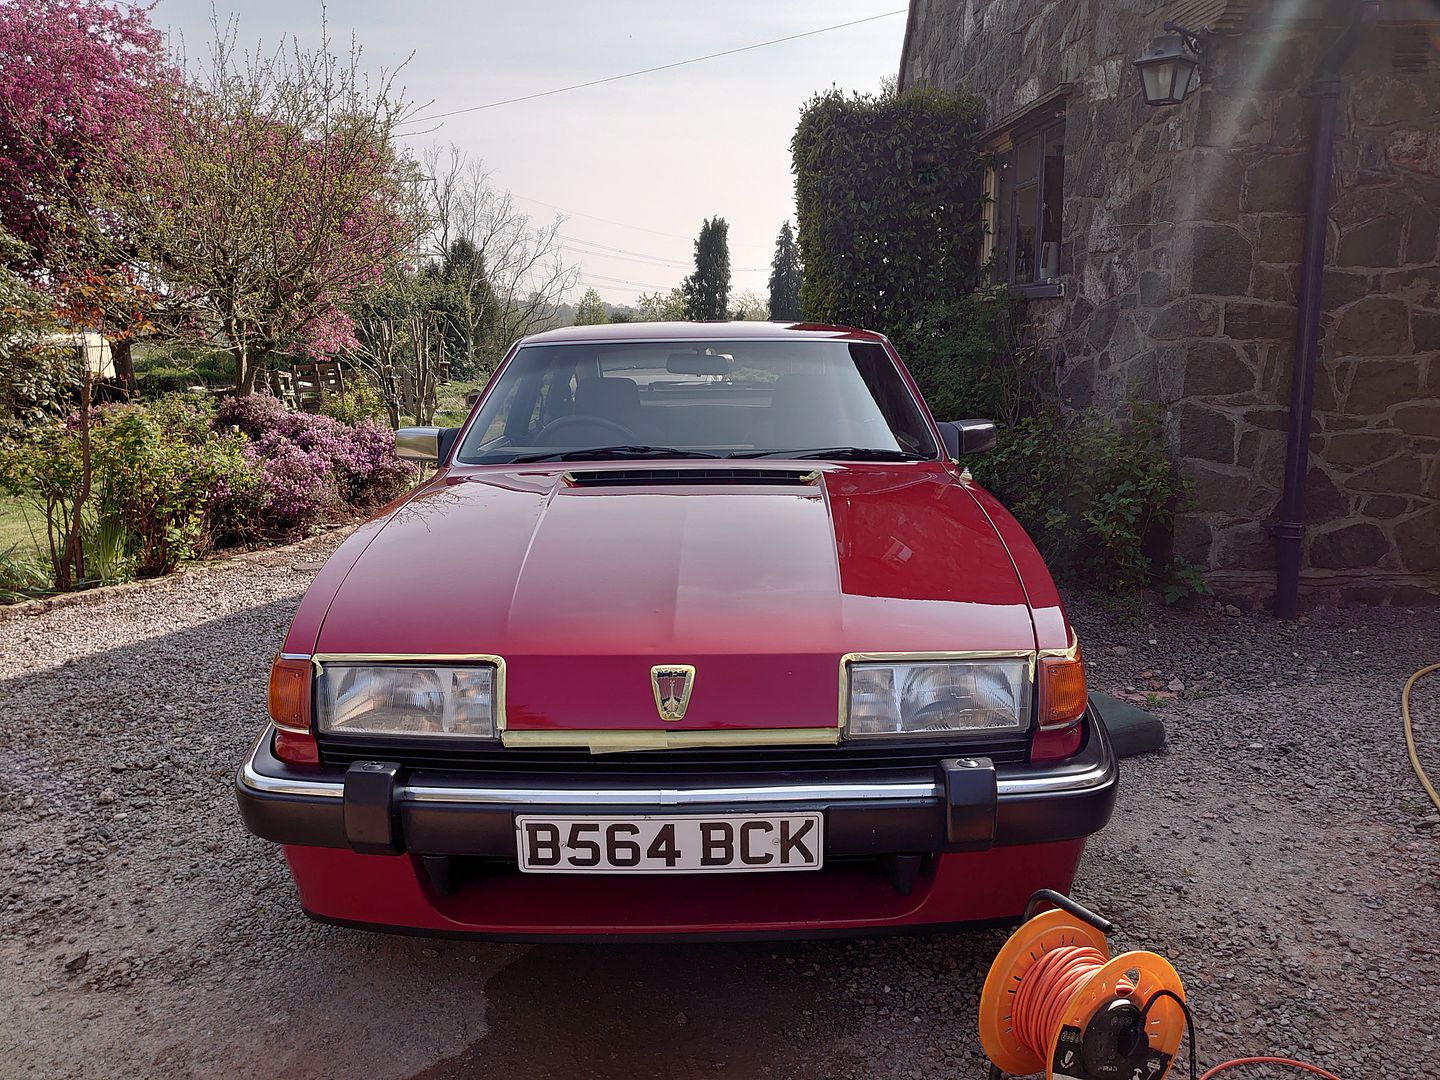
So after a long awaited clean it was time to tape her up!
I've learnt a lot from my painting experience, and detailing is no different. you have to do the prep right! If you don't want polish behind every bit of trim, and all your plastics covered in white, detailing tape is a must.
The drivers side is definitely an area that I wanted to look at. It's definitely had the drivers side doors and rear wing painted during its life, and it hasn't held up too well. I'm not sure what would cause this, maybe contamination in the top coat causing the lines?
So definitely an opportunity to improve!
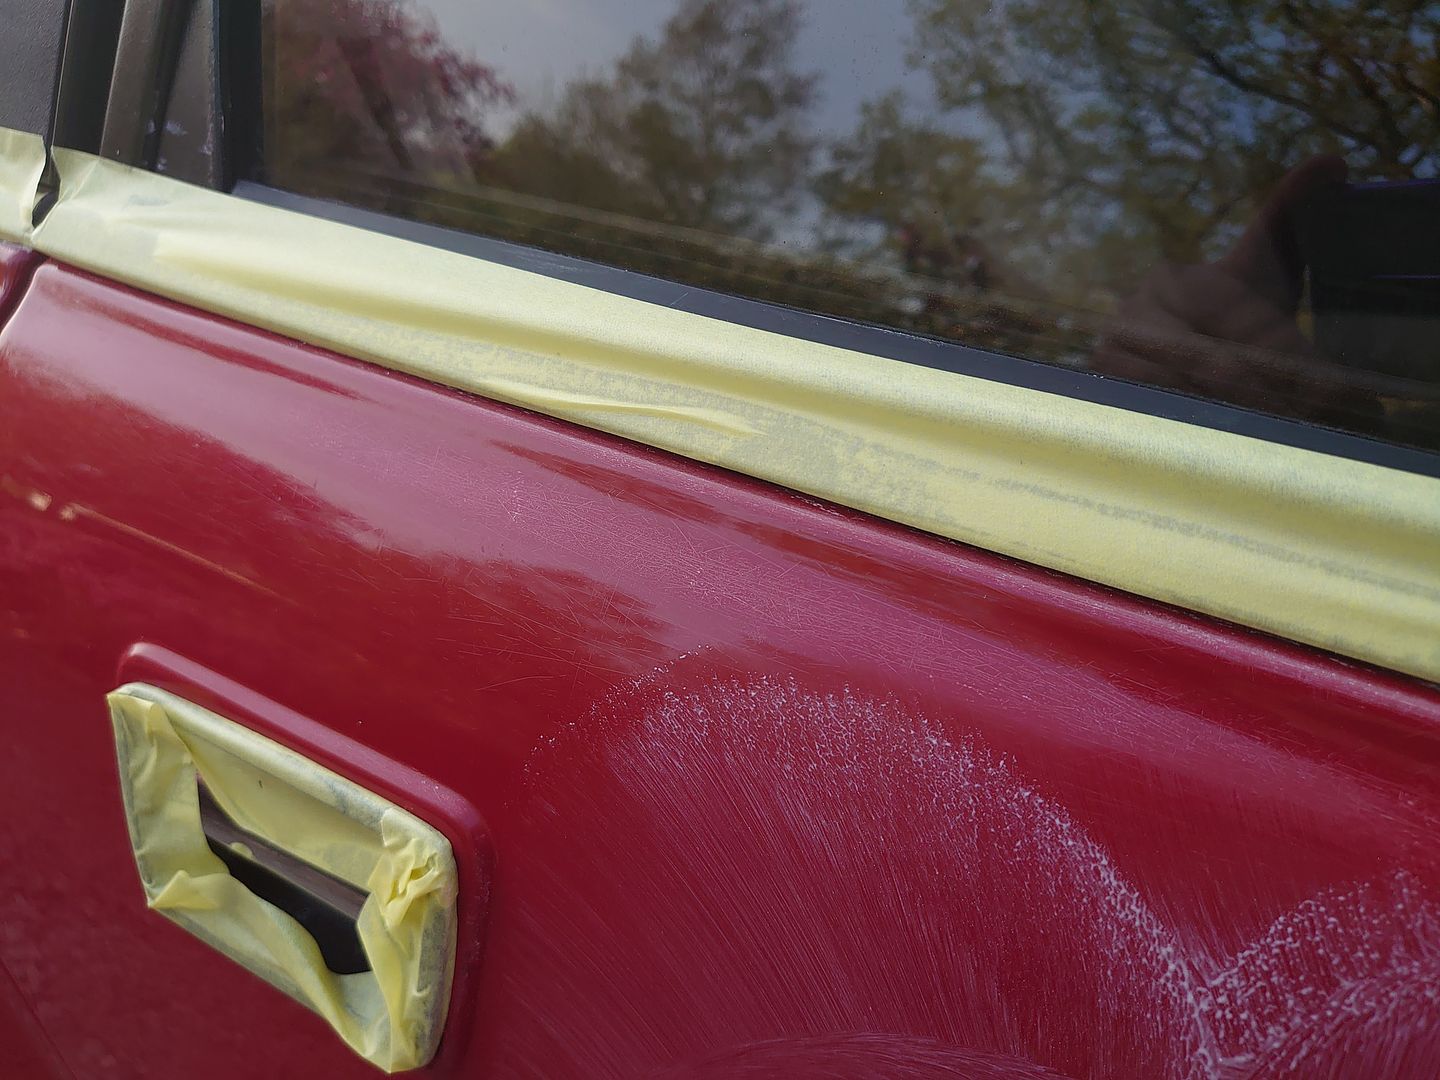
After the first few passes it definitely decreased the visibility of the lines, and after a few more you can barely see them. Really brought back some of the depth and colour of the paint, and I managed to not damage anything, so definitely positive.
I also got rid of a lot of light scratches, there's still some of the deeper ones, and the defects are still visable when you really look, but much better than they were.
After a few passes you can definitely see an improvement.
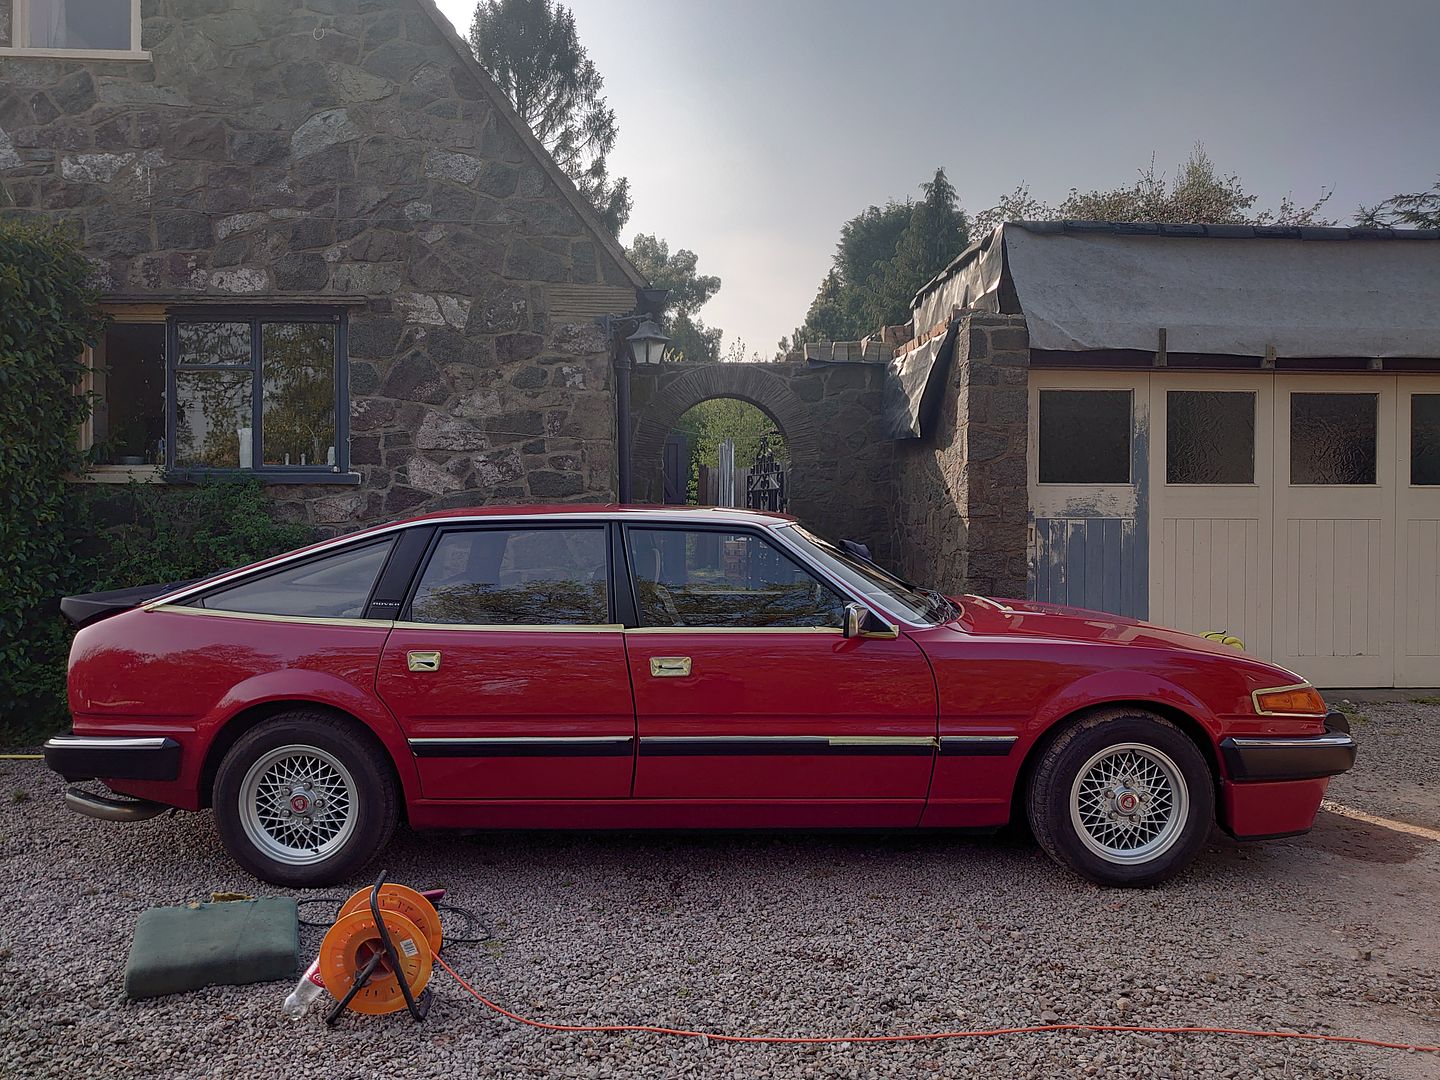
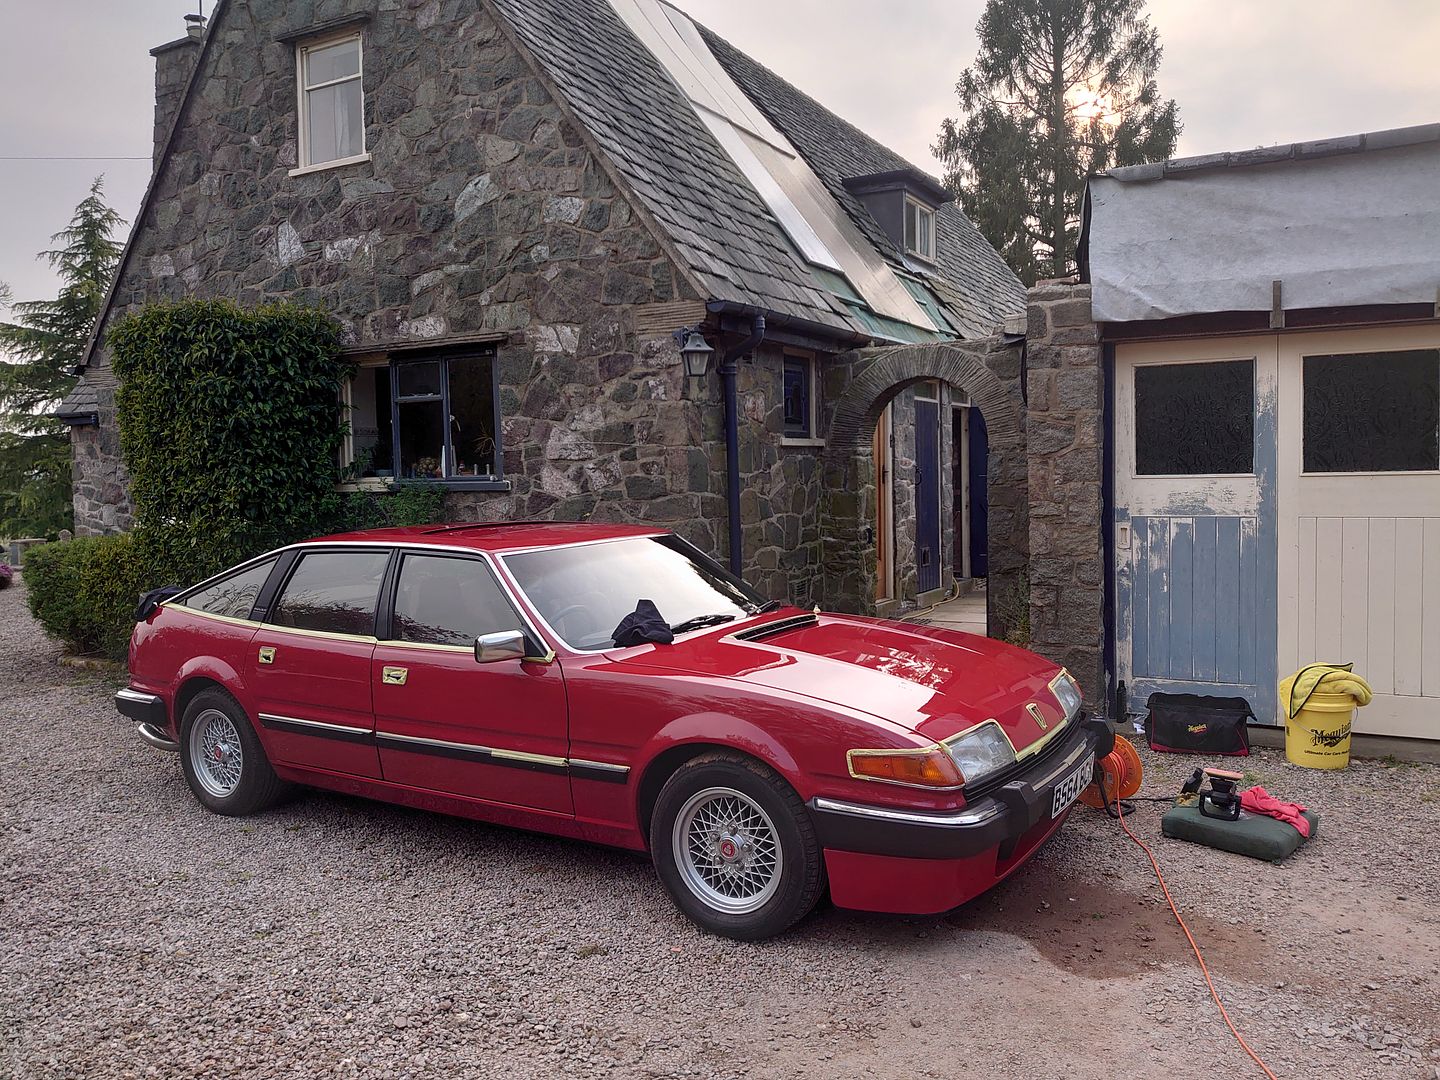
So that's after stage one and two, cutting and polishing.
Then after the final stage of waxig we're left with the final product.
Definitely a significant improvement, and i really liked the polisher. Only complaint is the foam cutting pads only really last for about a car and a half. I've now done 3 cars and already had 2 pads come apart on me. I'm not sure this is normal and just accepted as a consumable, or I'm doing something wrong!
Either way it's worth it.
I just have nowhere to take it now!
Joe
I've been keeping busy with various projects, and of course the Vitesse has been getting some love.

Some essential trips to pick up supplies had to be done. Leaving cars sitting is never good, and it does have one massive boot. One silver lining is that with petrol being the cheapest it's been for a while it's now the perfect shopping car!

Always nice to bring some joy, while loading it up I had two people come and say what a cool sight it was! They liked it even more when I fired it up!
First project is something I've been wanting to do for a long while, so after a lot of research I finally invested in a Meguiars MT320 DA polisher.
I've had a good go at hand polishing the Vitesse before, but in bright sunlight you can see my swirled attempts!
So after a long awaited clean it was time to tape her up!
I've learnt a lot from my painting experience, and detailing is no different. you have to do the prep right! If you don't want polish behind every bit of trim, and all your plastics covered in white, detailing tape is a must.


The drivers side is definitely an area that I wanted to look at. It's definitely had the drivers side doors and rear wing painted during its life, and it hasn't held up too well. I'm not sure what would cause this, maybe contamination in the top coat causing the lines?
So definitely an opportunity to improve!


After the first few passes it definitely decreased the visibility of the lines, and after a few more you can barely see them. Really brought back some of the depth and colour of the paint, and I managed to not damage anything, so definitely positive.
I also got rid of a lot of light scratches, there's still some of the deeper ones, and the defects are still visable when you really look, but much better than they were.

After a few passes you can definitely see an improvement.
So that's after stage one and two, cutting and polishing.
Then after the final stage of waxig we're left with the final product.


Definitely a significant improvement, and i really liked the polisher. Only complaint is the foam cutting pads only really last for about a car and a half. I've now done 3 cars and already had 2 pads come apart on me. I'm not sure this is normal and just accepted as a consumable, or I'm doing something wrong!
Either way it's worth it.
I just have nowhere to take it now!
Joe
wormus said:
That looks stunning. Top work!
Cheers 
Watchman said:
Absolutely one of my fav PH cars ever.
I do love how well the Vitesses are received on PH, definitely my kind of people! gforceg said:
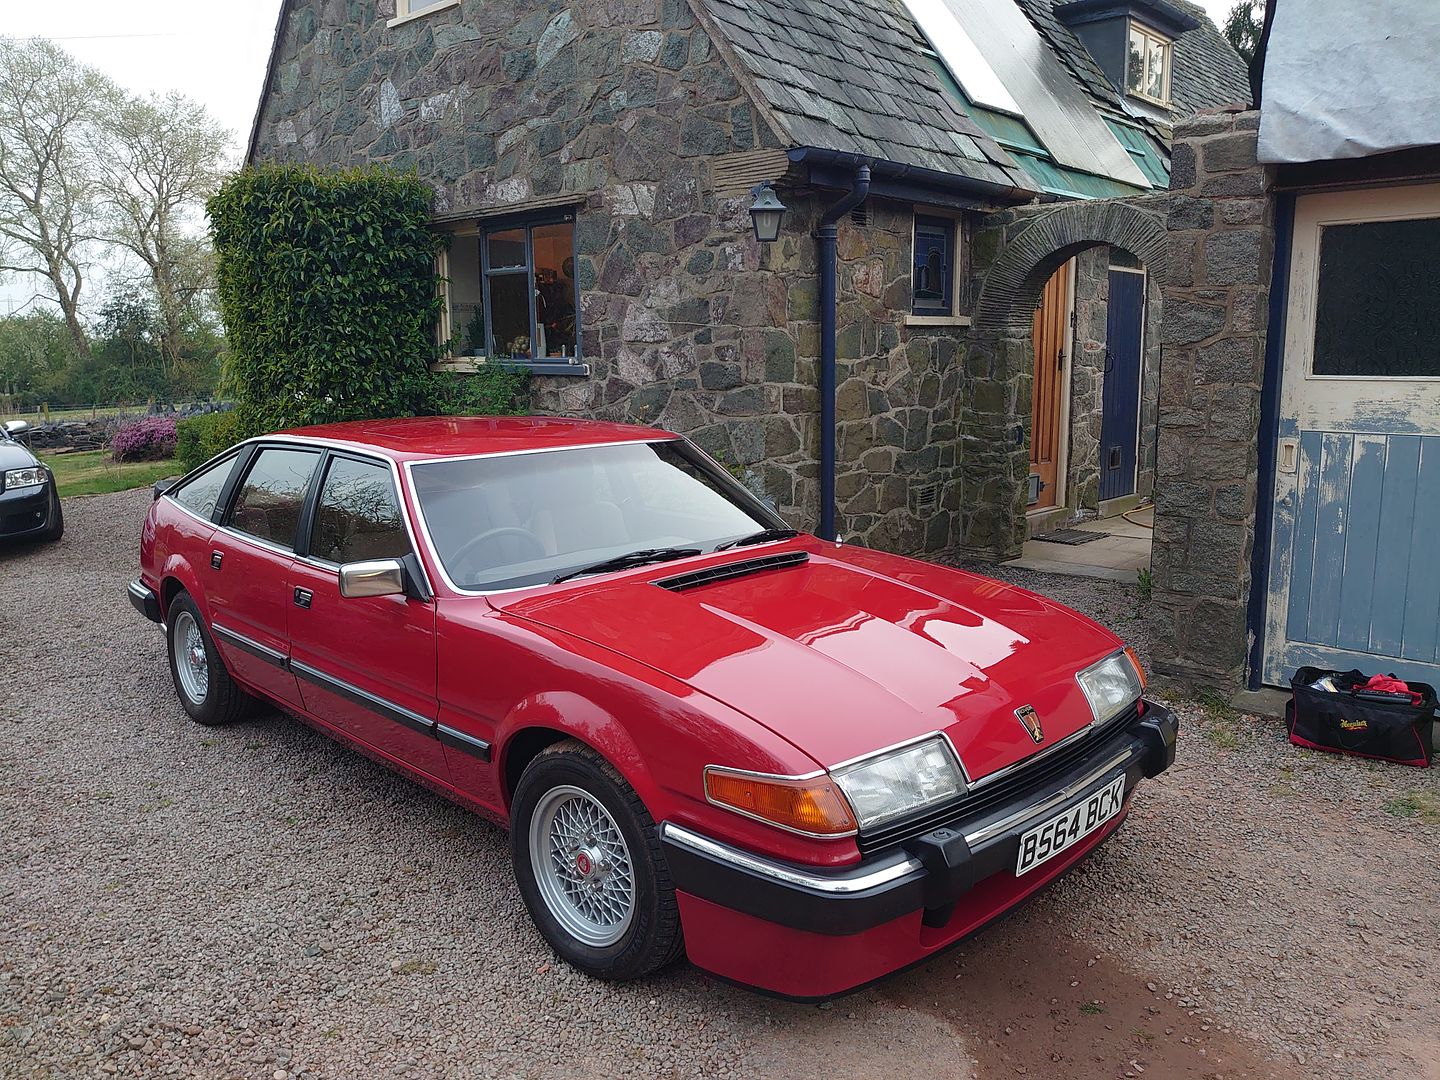
That looks fantastic in the evening light. I like driving on country roads at that time of day.
I did get to take it for a good run in similar conditions the day before, I agree one of my favourite times to drive! RhysH said:
Such a cool car! a credit to you.
Cheers 
SlimJim16v said:
Looks great. I just had to go back to page one and read it again.
I do also enjoy looking at how it started, didn't look that different, but it's a completely different car now.Usget said:
I'm sure that paint is better than when it left the factory!
The original paint is definitely still the best on the car, shame it's not entirely like that! Tin Hat said:
What a fine car
PS are you in the Outer Hebrides, Spring hasn’t sprung there yet!?
I think that's just my phone taking moody photos, the final photos where taken at around 8pm! PS are you in the Outer Hebrides, Spring hasn’t sprung there yet!?
miniman said:
It is a thing of the utmost loveliness. If you run out of things to do with it, you're very welcome to sell it to me
I seem to be gathering quite a list of first refusals at the moment, unfortunately I'm far from done KelvinatorNZ said:
That's gorgeous.
I do hate this thread though, I come in here for a nosy and leave wanting another SD1.
It's a dangerous game searching through these threads! I saw a previous owner of your black vitesse found your thread, very cool! Hows the TVR? playing ball yet? I do hate this thread though, I come in here for a nosy and leave wanting another SD1.
Joe
So like most projects sometimes inpatients gets the better of you.
In my case when I rebuilt my engine I left my inlet manifold alone, mainly because it was working well before, and I didn't want to add any variables when firing the new engine.
So now with some time on my hands I began to plan what I could do with it.
It's far from bad, and doesn't really detract from the rest of the engine bay but I can do better.
Another motivation is to refresh the fuel lines and injectors.
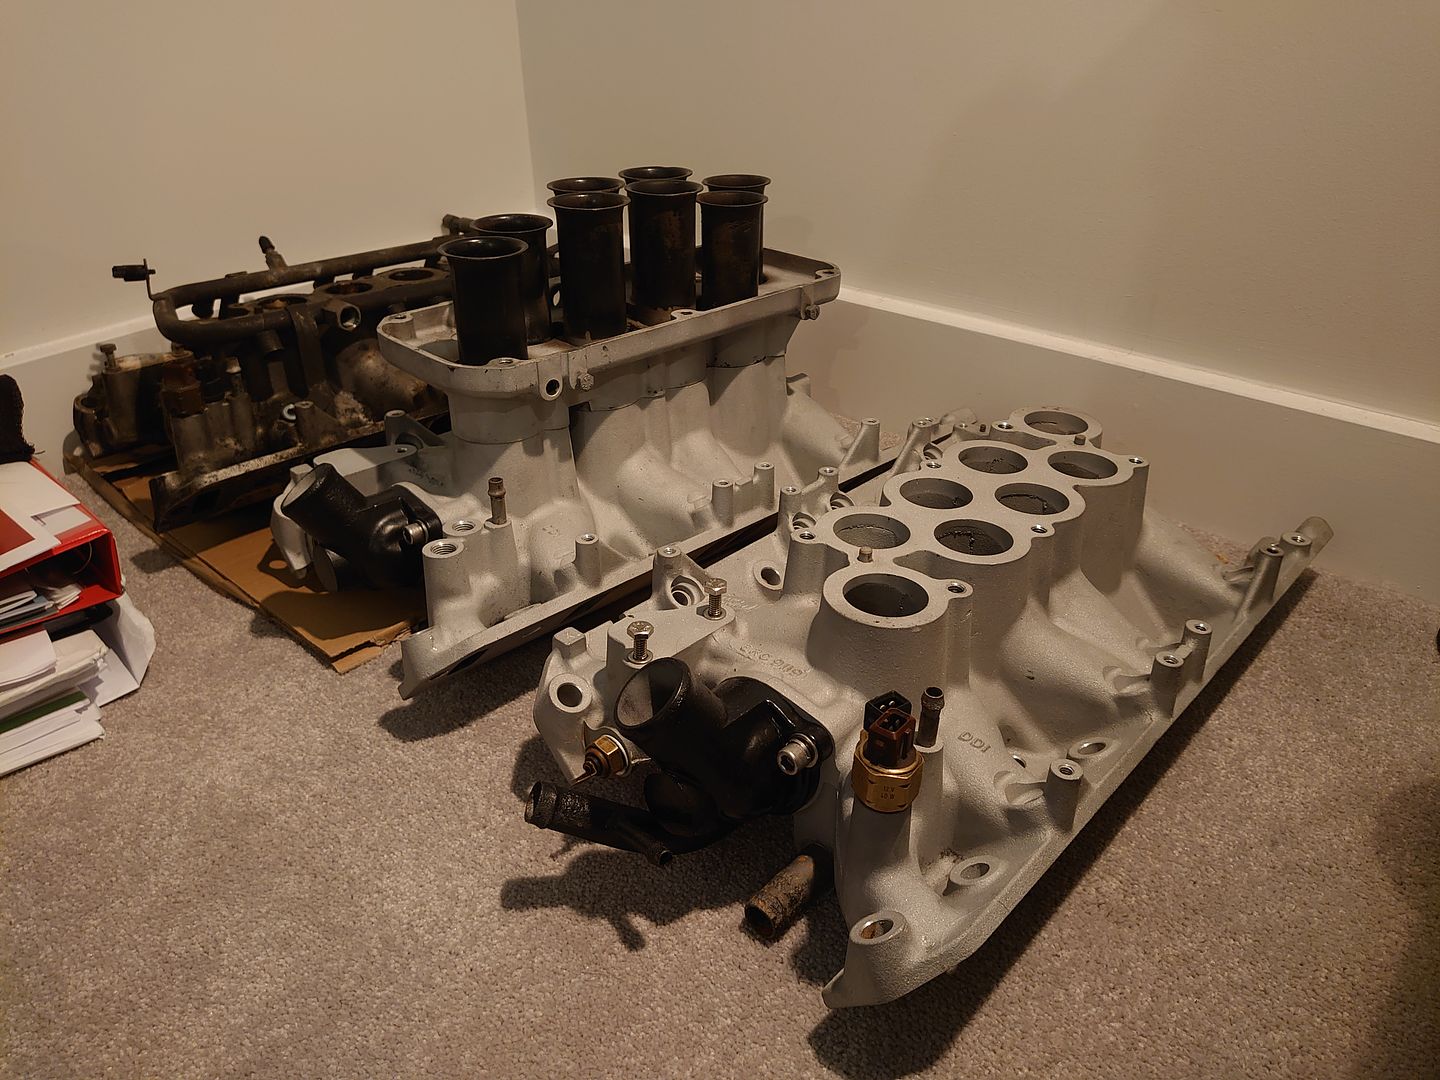
Currently on the car is a 1986 intake manifold with the base and everything else from my Vitesse.
So I pulled out the original Vitesse manifold and began to strip it down. It's a little grotty but everything is intact, working and original. So worth saving.
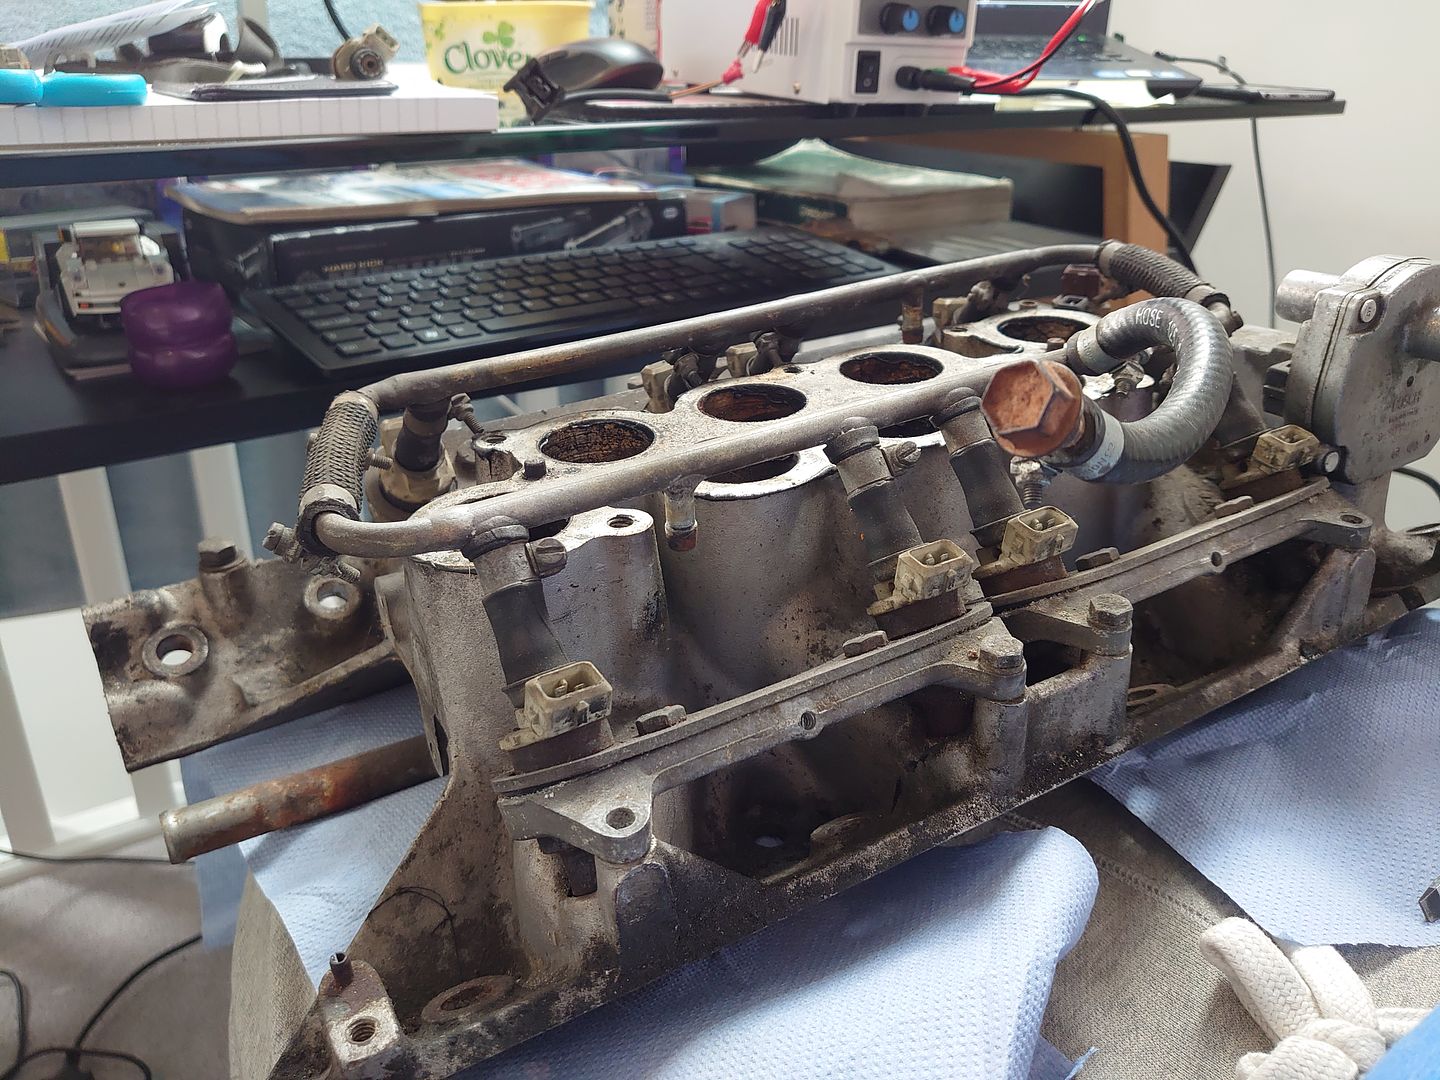
Late night Ebay browsing then also landed me with 2 further vapour blasted inlet manifolds and a shed load of spares!
I just can't help myself.
This then left me in a little dilemma as to how to proceed! But before I get to that I carried on stripping my original manifold of it's injectors and fuel rails.
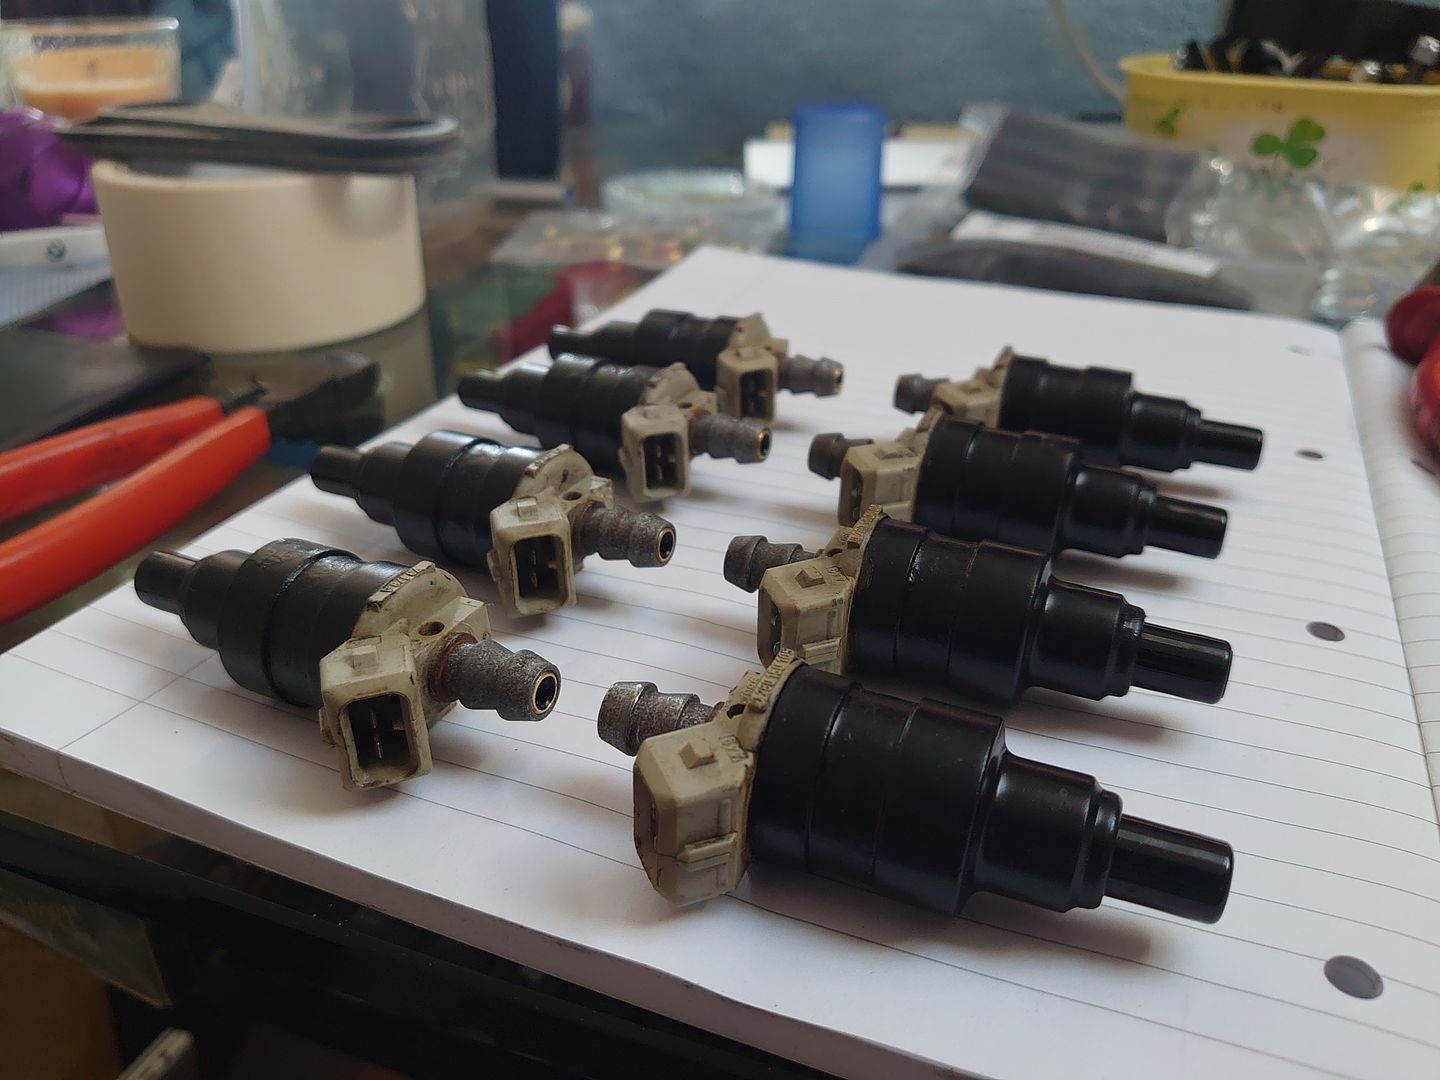
The original fuel rails are actually in really good nick, and definitely the nicer ones to refurbish.
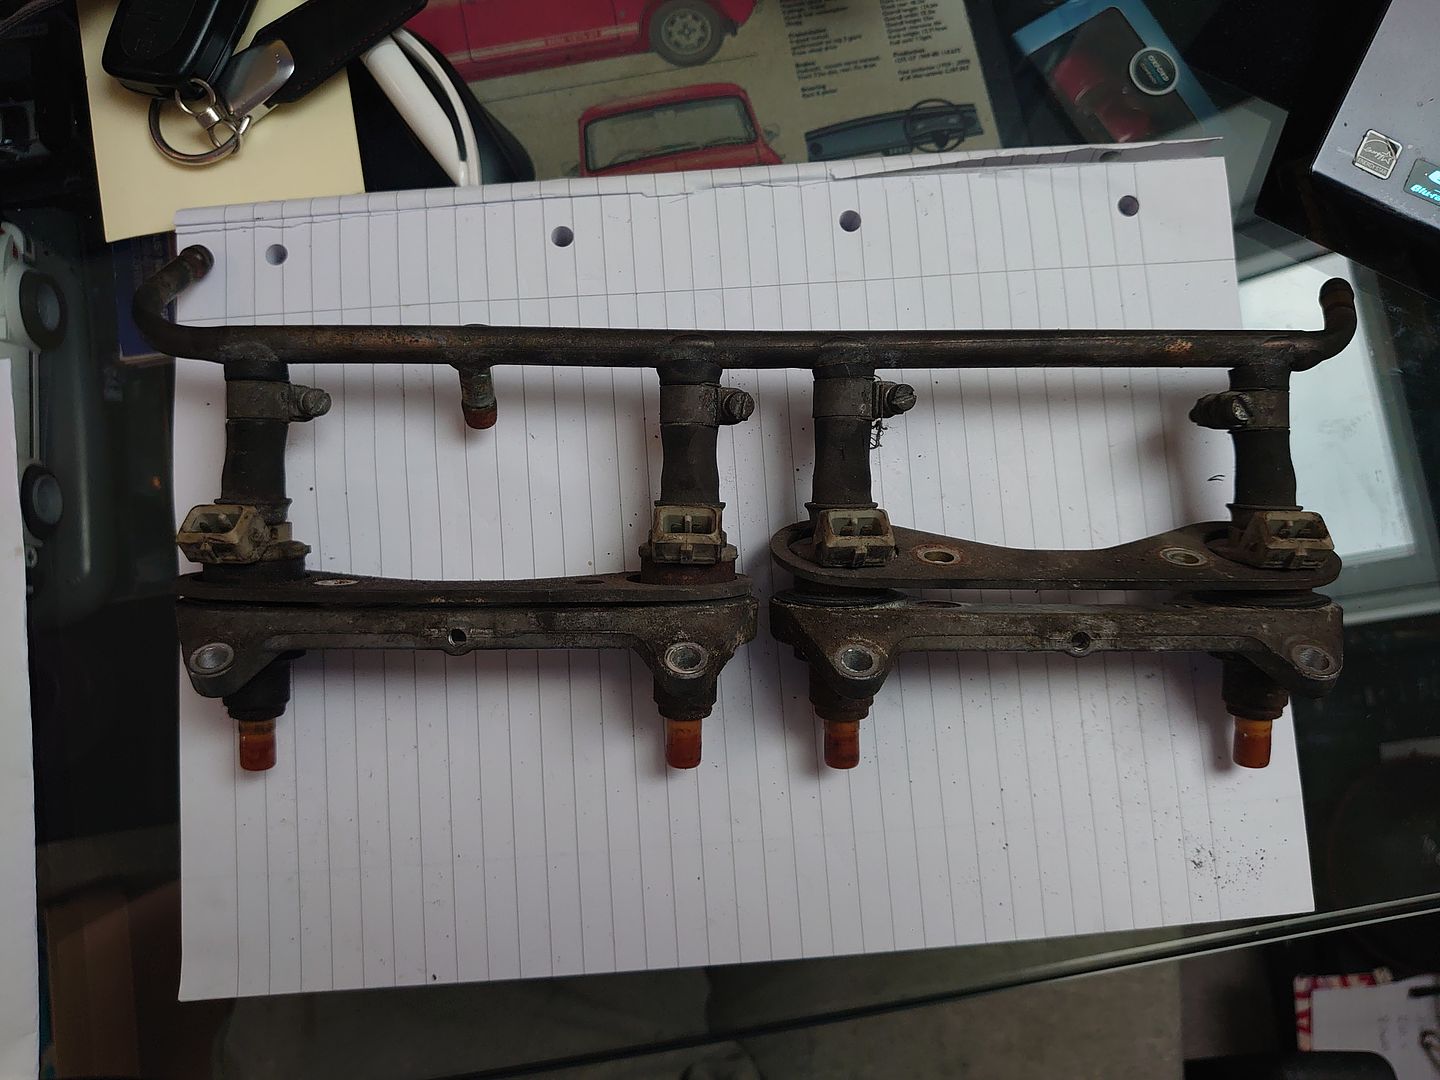
Everything came apart relatively easily and I began to prepare what I had.
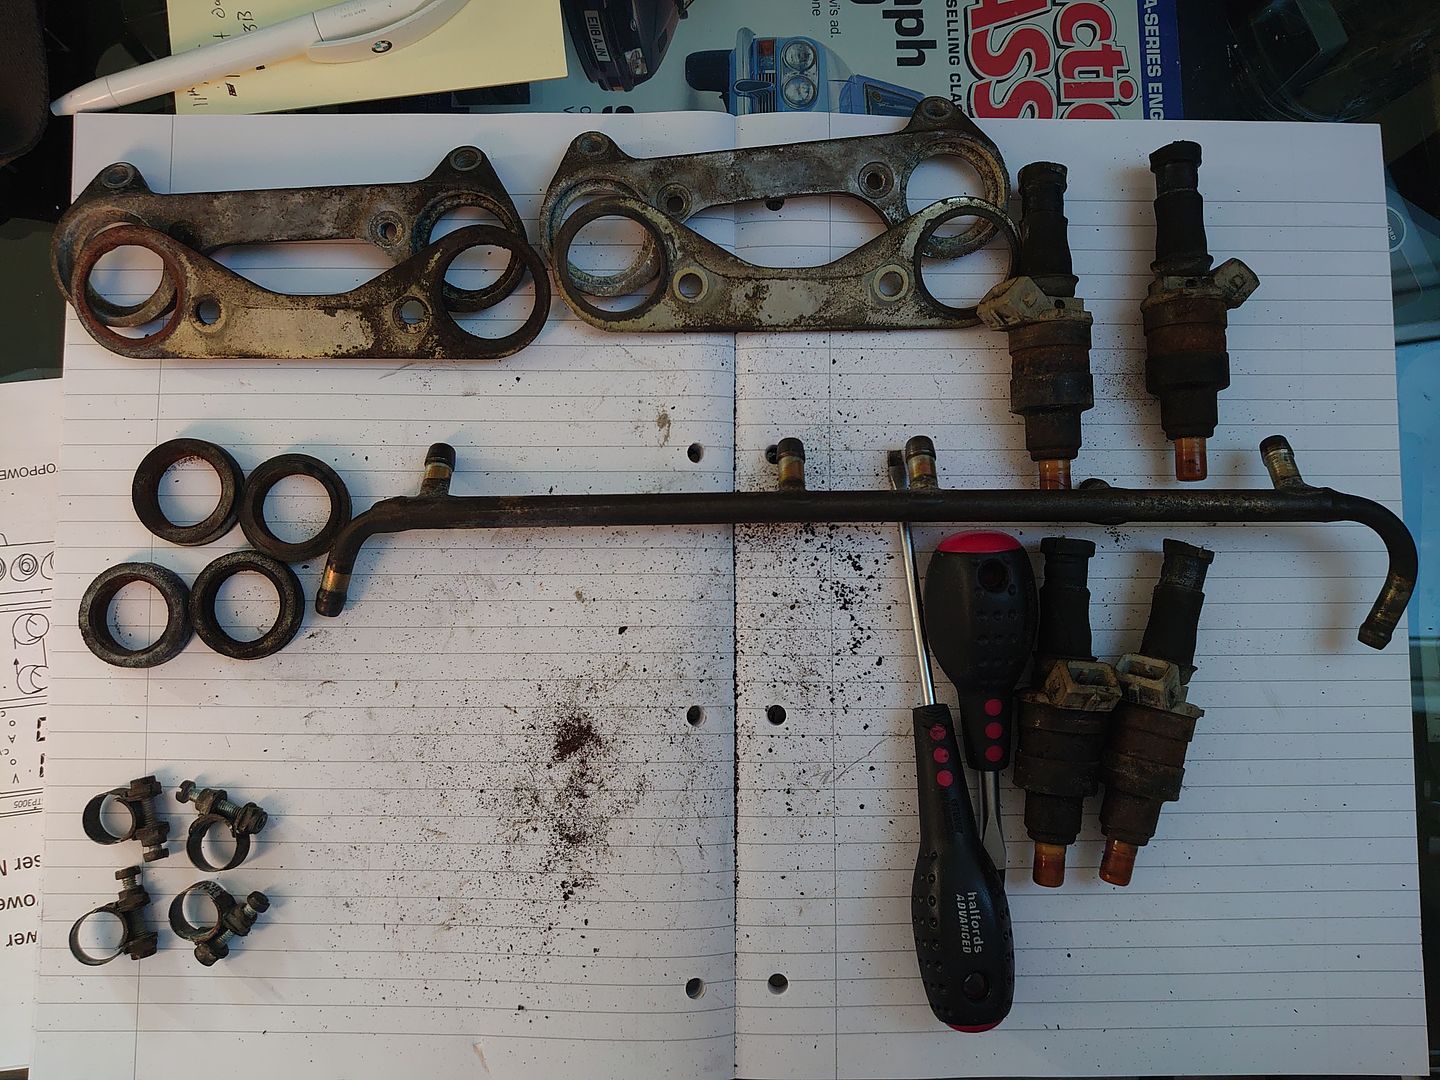
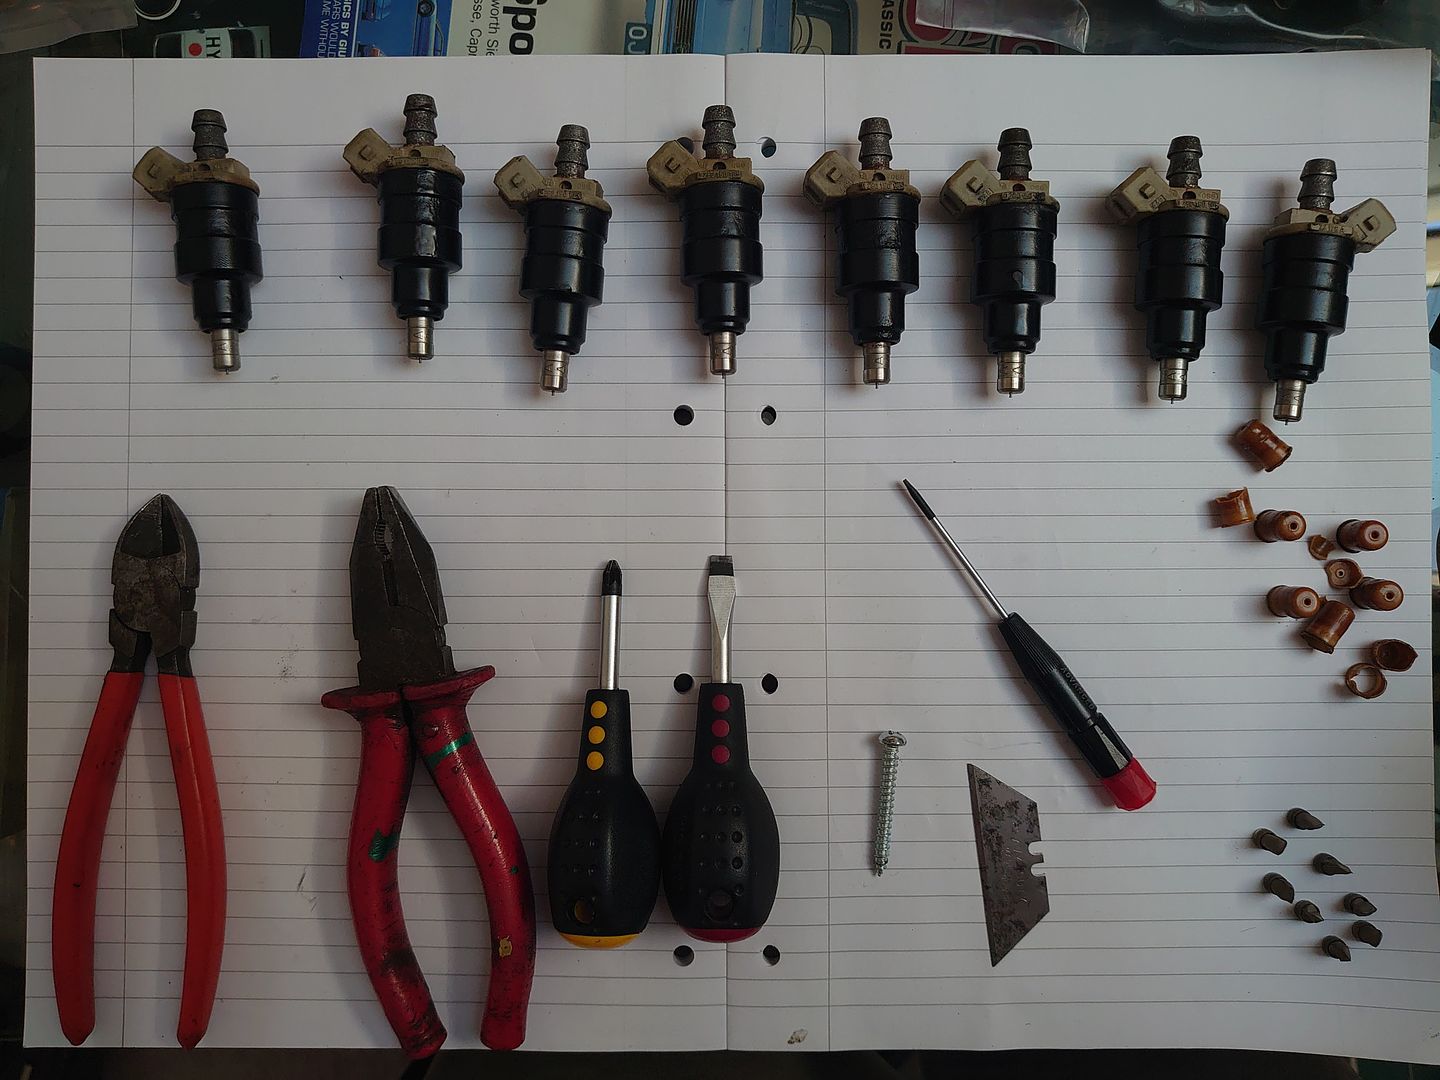
Removing the ferrules and hoses from the injectors was definitely the most challenging. I began doing it by hand, and after giving myself a blister I moved onto my Dremel. Making a small incision down the side of the ferrule before using wire cutters to snip the rest of it off.
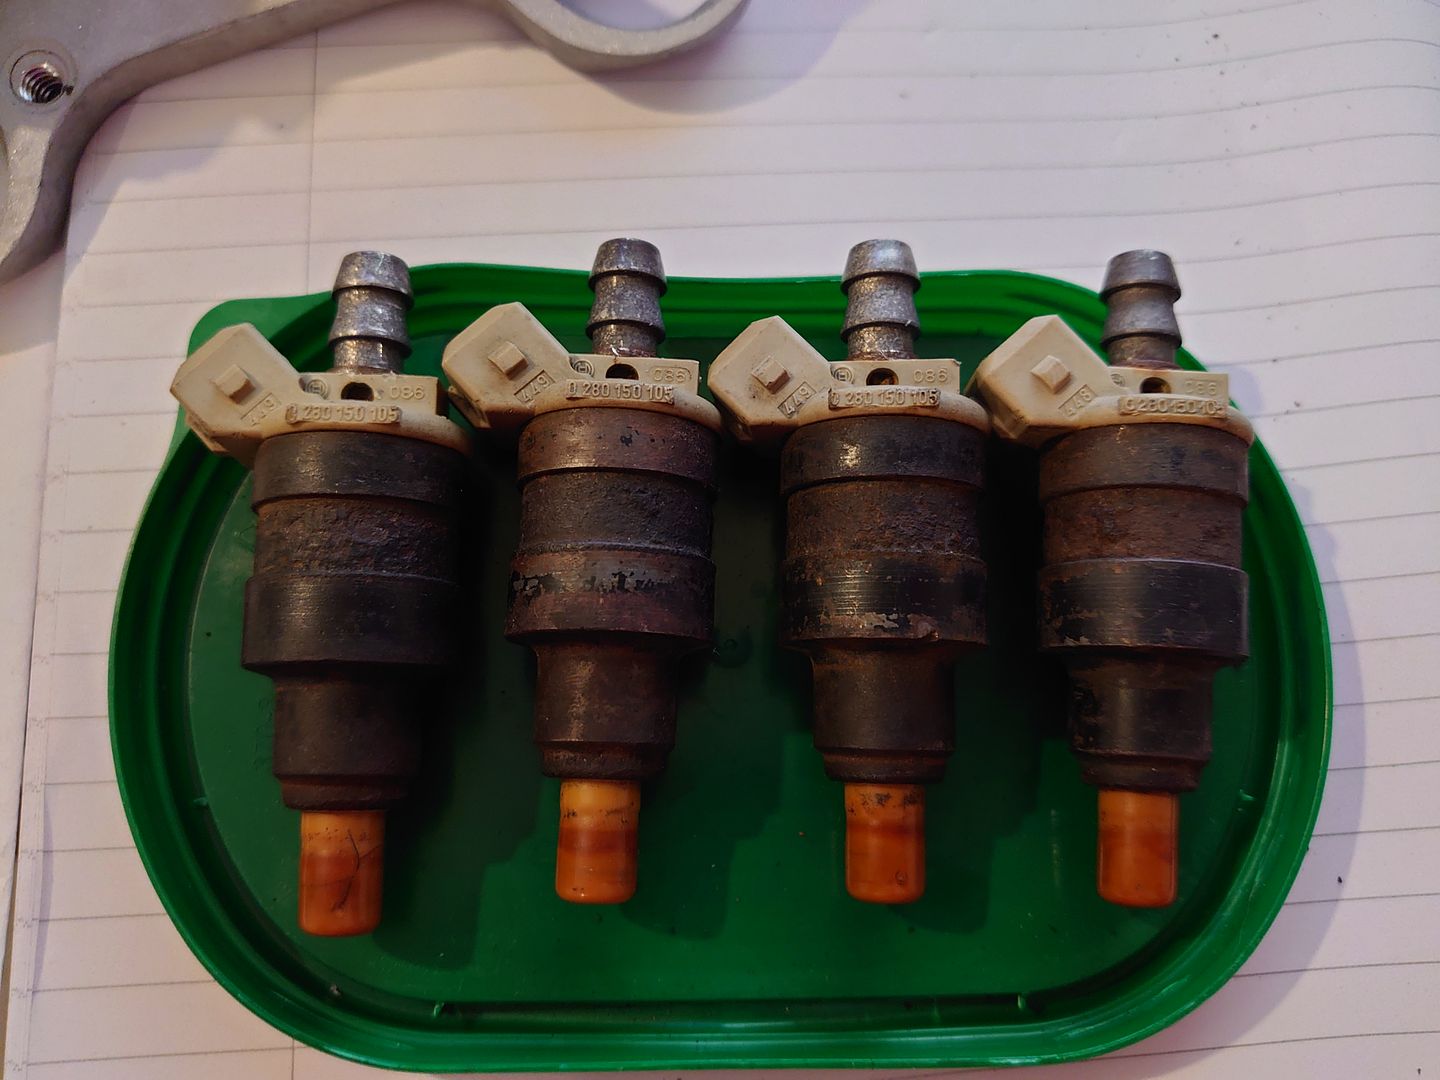
After this stage its back to the usual derust, treat, and paint!
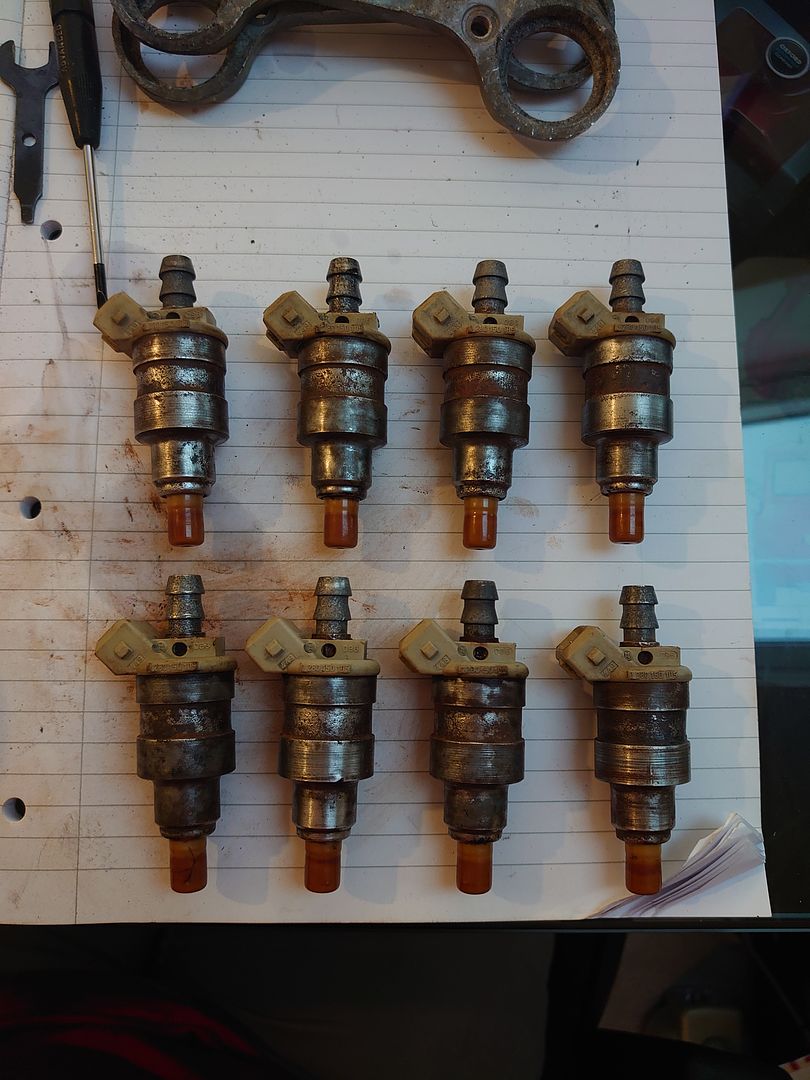
It is recommended to do this with the old pintle caps still installed, and the old injector filters still in place.
After a nice top coat...
I'd already done quite a bit of research into what fuel lines to use and where to source it. Everything always pointed to Mr Injector. After talking to both him and his distributor Master Injector, I was able to have a full injector rebuild kit, proper 7.3mm hose, and clamps sent out to me.

Filters and Pintle caps removed.
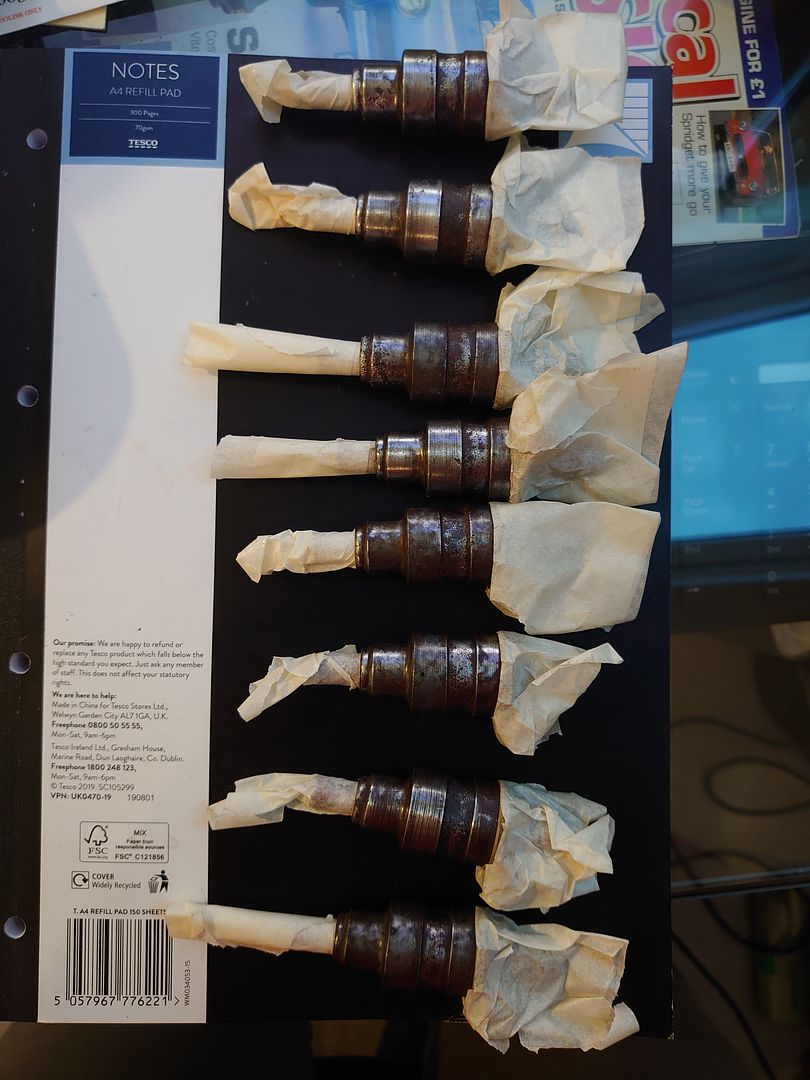
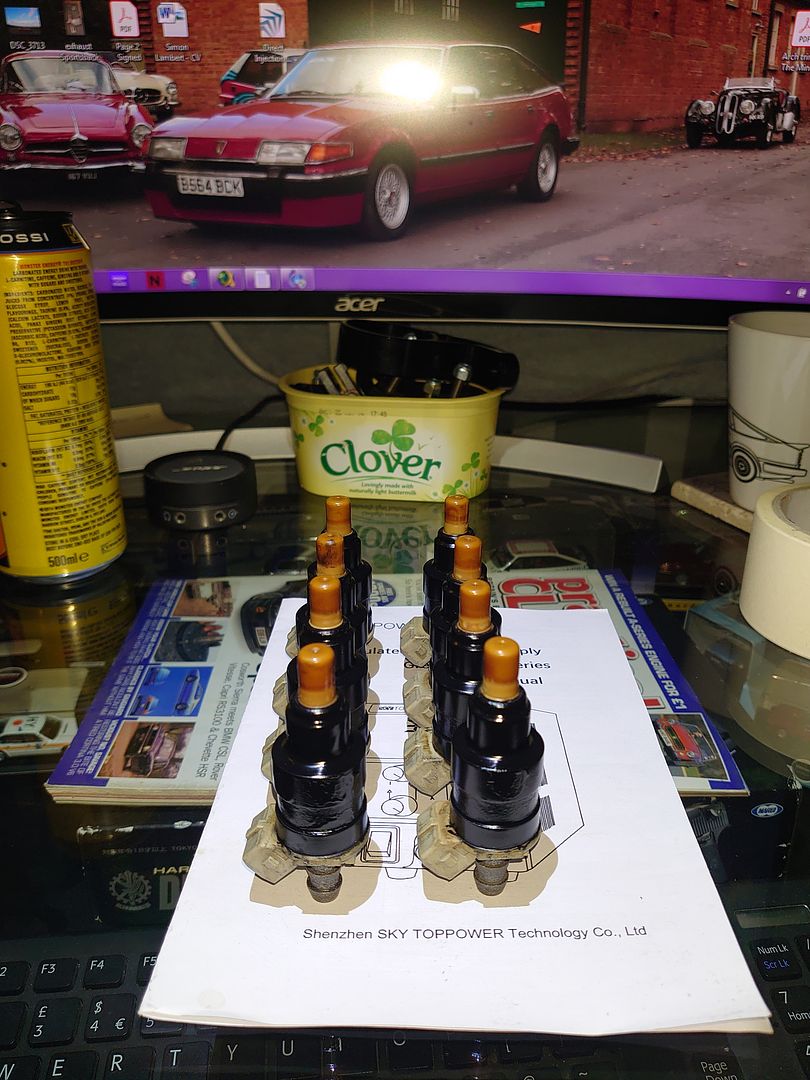
and with fresh filters and Pintle caps installed
And the money shot with new hoses and ferrules.
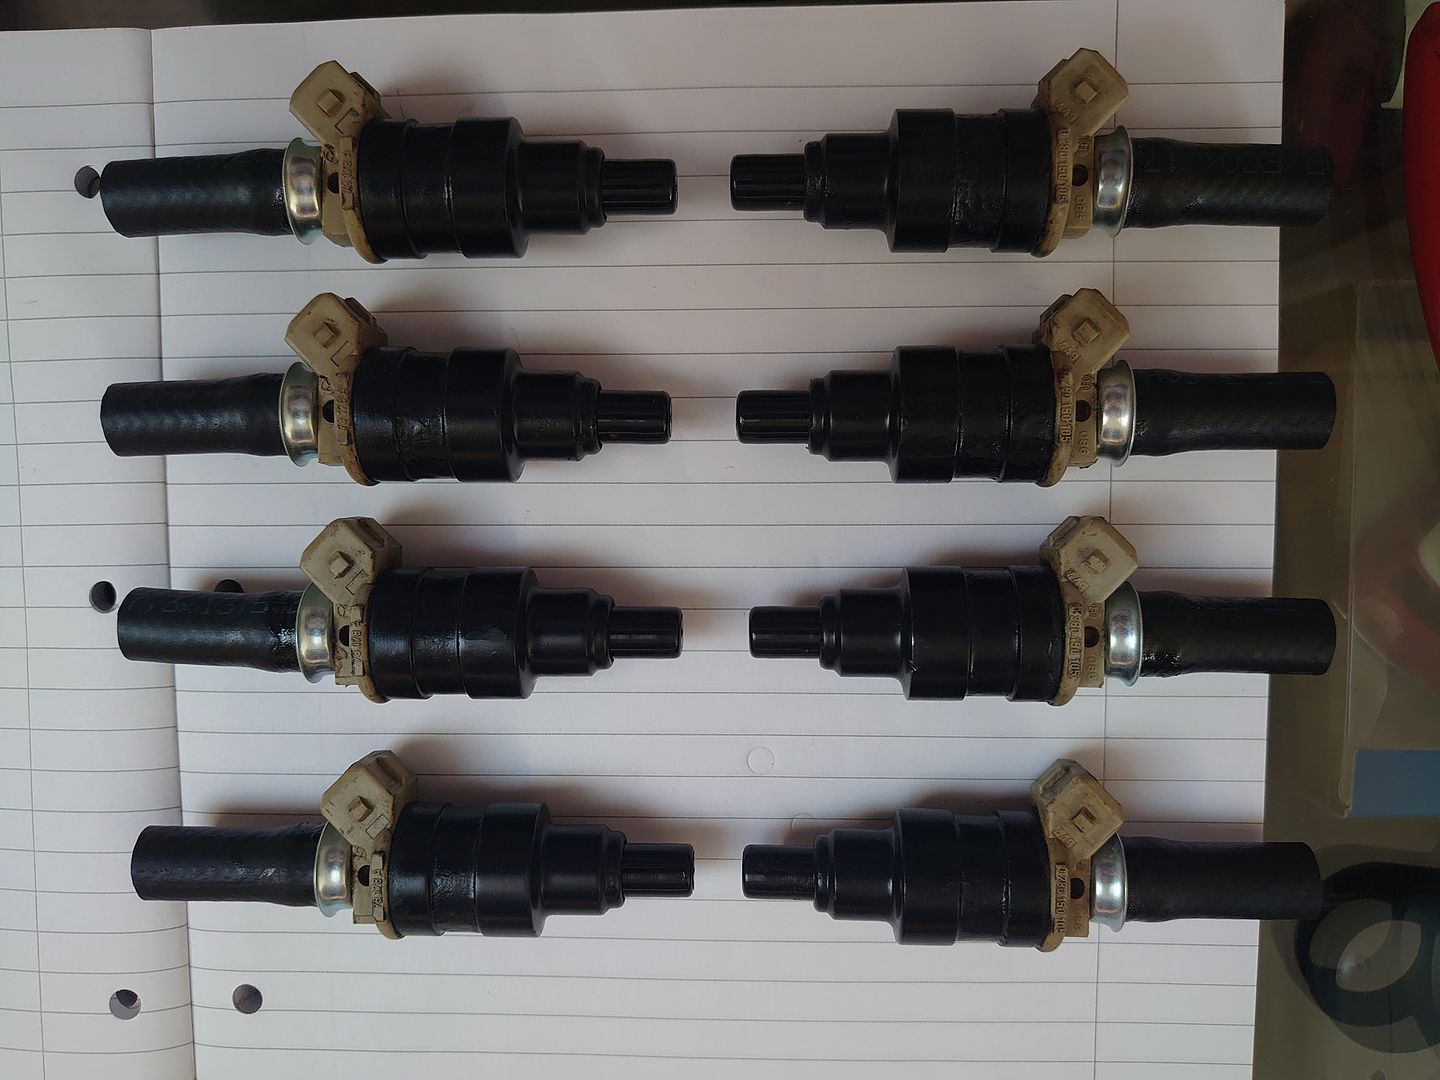
All ready to meet the car I think!
Joe
In my case when I rebuilt my engine I left my inlet manifold alone, mainly because it was working well before, and I didn't want to add any variables when firing the new engine.
So now with some time on my hands I began to plan what I could do with it.

It's far from bad, and doesn't really detract from the rest of the engine bay but I can do better.
Another motivation is to refresh the fuel lines and injectors.
Currently on the car is a 1986 intake manifold with the base and everything else from my Vitesse.
So I pulled out the original Vitesse manifold and began to strip it down. It's a little grotty but everything is intact, working and original. So worth saving.

Late night Ebay browsing then also landed me with 2 further vapour blasted inlet manifolds and a shed load of spares!
I just can't help myself.

This then left me in a little dilemma as to how to proceed! But before I get to that I carried on stripping my original manifold of it's injectors and fuel rails.
The original fuel rails are actually in really good nick, and definitely the nicer ones to refurbish.


Everything came apart relatively easily and I began to prepare what I had.
Removing the ferrules and hoses from the injectors was definitely the most challenging. I began doing it by hand, and after giving myself a blister I moved onto my Dremel. Making a small incision down the side of the ferrule before using wire cutters to snip the rest of it off.

After this stage its back to the usual derust, treat, and paint!


It is recommended to do this with the old pintle caps still installed, and the old injector filters still in place.
After a nice top coat...

I'd already done quite a bit of research into what fuel lines to use and where to source it. Everything always pointed to Mr Injector. After talking to both him and his distributor Master Injector, I was able to have a full injector rebuild kit, proper 7.3mm hose, and clamps sent out to me.

Filters and Pintle caps removed.


and with fresh filters and Pintle caps installed
And the money shot with new hoses and ferrules.

All ready to meet the car I think!
Joe
KelvinatorNZ said:
Yeah, running and driving well. All road worthy now. Just spent the last couple of weeks stripping out the old rotting carpet and replacing it, as well as a bunch of other jobs "while I'm here". Working on this thing is hard work compared to the SD1s, just no space for anything and its all kinda thrown together with minimal thought to servicing it down the line.
Ahh the while you're there jobs are always killer. I saw the pictures of all the carpet, a lot to replace all glued in! I'm always apprehensive when doing those jobs in case there's something I need to get to after I've glued it!I had suspected that might be the case. It always surprises me how easy the SD1 is to work on, definitely a well thought through design.
miniman said:
He does very nice work! 

So while watching some Finnegan's Garage on YouTube I began to prep the trumpet base.

It has also been vapour blasted, and needed very little work before it was ready for a quick clear coat.
The only minor modification was removing a blanking plug on the left side to replace with an outlet for the air-con idle compensation valve.
I'm still going to try and get my air-con working!
The alert among you will notice it's without trumpets...
Well one of the draws of the ebay manifolds was they came with a set of ACT Carbon Superflare trumpets.

I've read good things but if nothing else it's definitely some eye candy, that only i will ever see...
Taped off the trumpet base and gave it a coat or two of VHT clear.

I also finished prepping the injector bases that had also been vapour blasted.

After the base had dried I then sanded the mounting areas and began to mix up the epoxy resin.

I'd done a number of trial fitments before this so knew how they'd fit.
Outers in first, I taped them together so they lined up properly.
You have to work quickly with the middle 4 so I didn't get any during pictures.


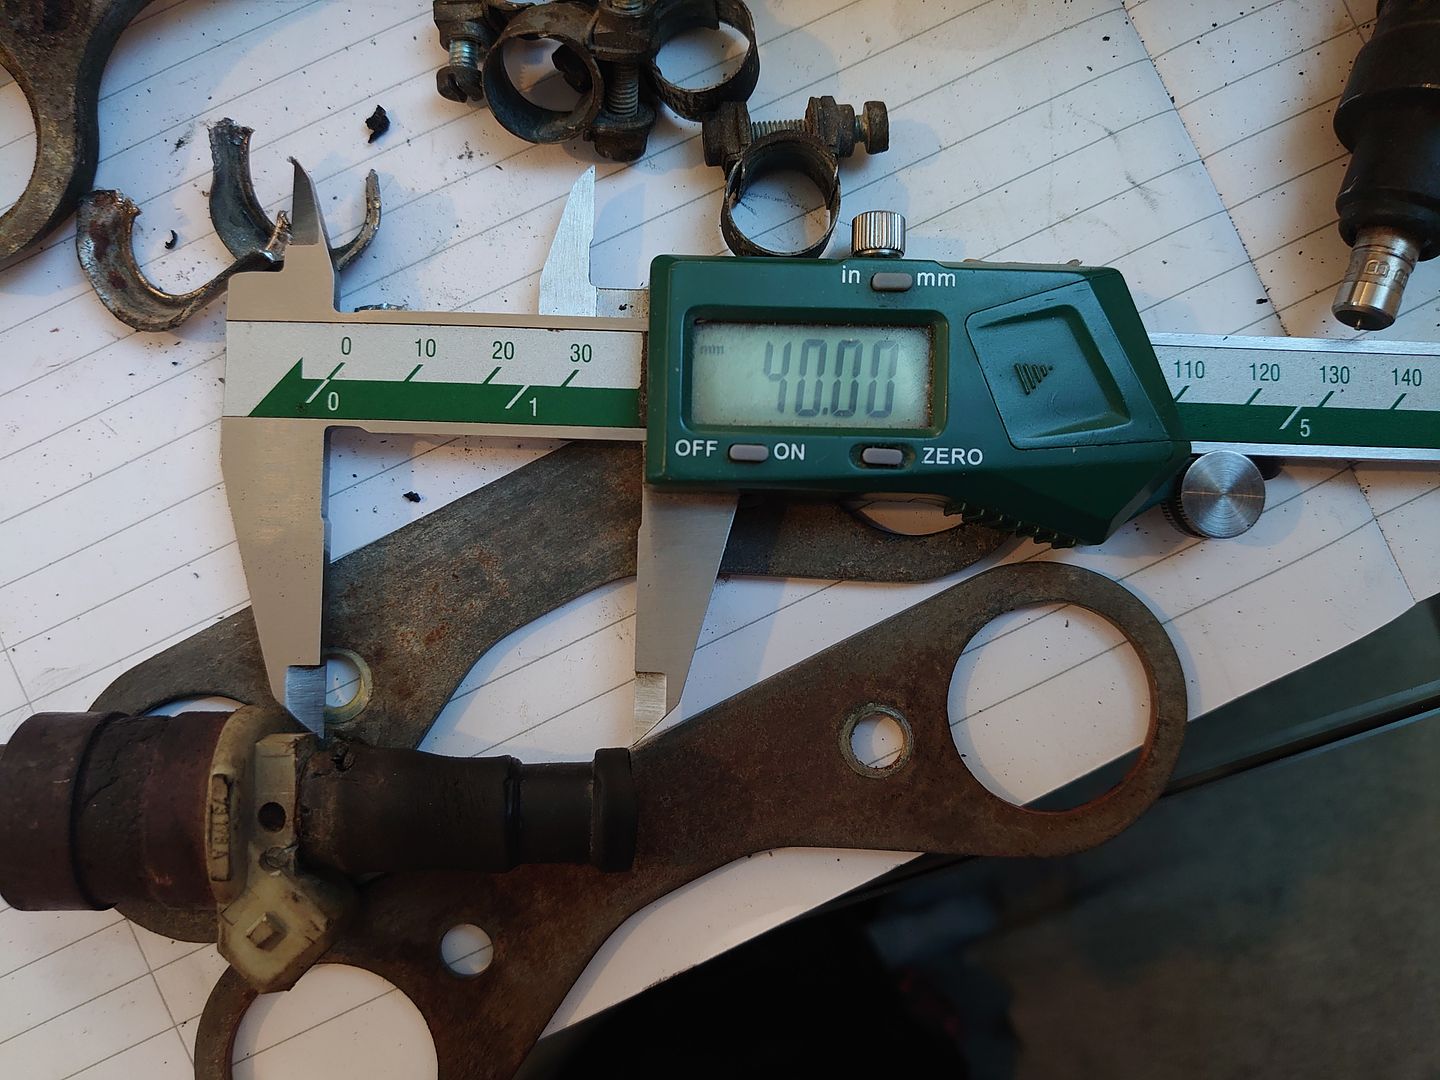
The finished article next to the stock 38mm trumpets.
The extra 10mm of diameter at the top with the taper definitely gives them a much beefier appearance along with sitting 10mm lower.
Unfortunately as I'm also completely revamping the fuel system I won't get a direct comparison, but hopefully with the whole package it should feel a little pokier. If not a much safer set up.
Joe
Edited by 1275 GT on Thursday 21st May 23:10
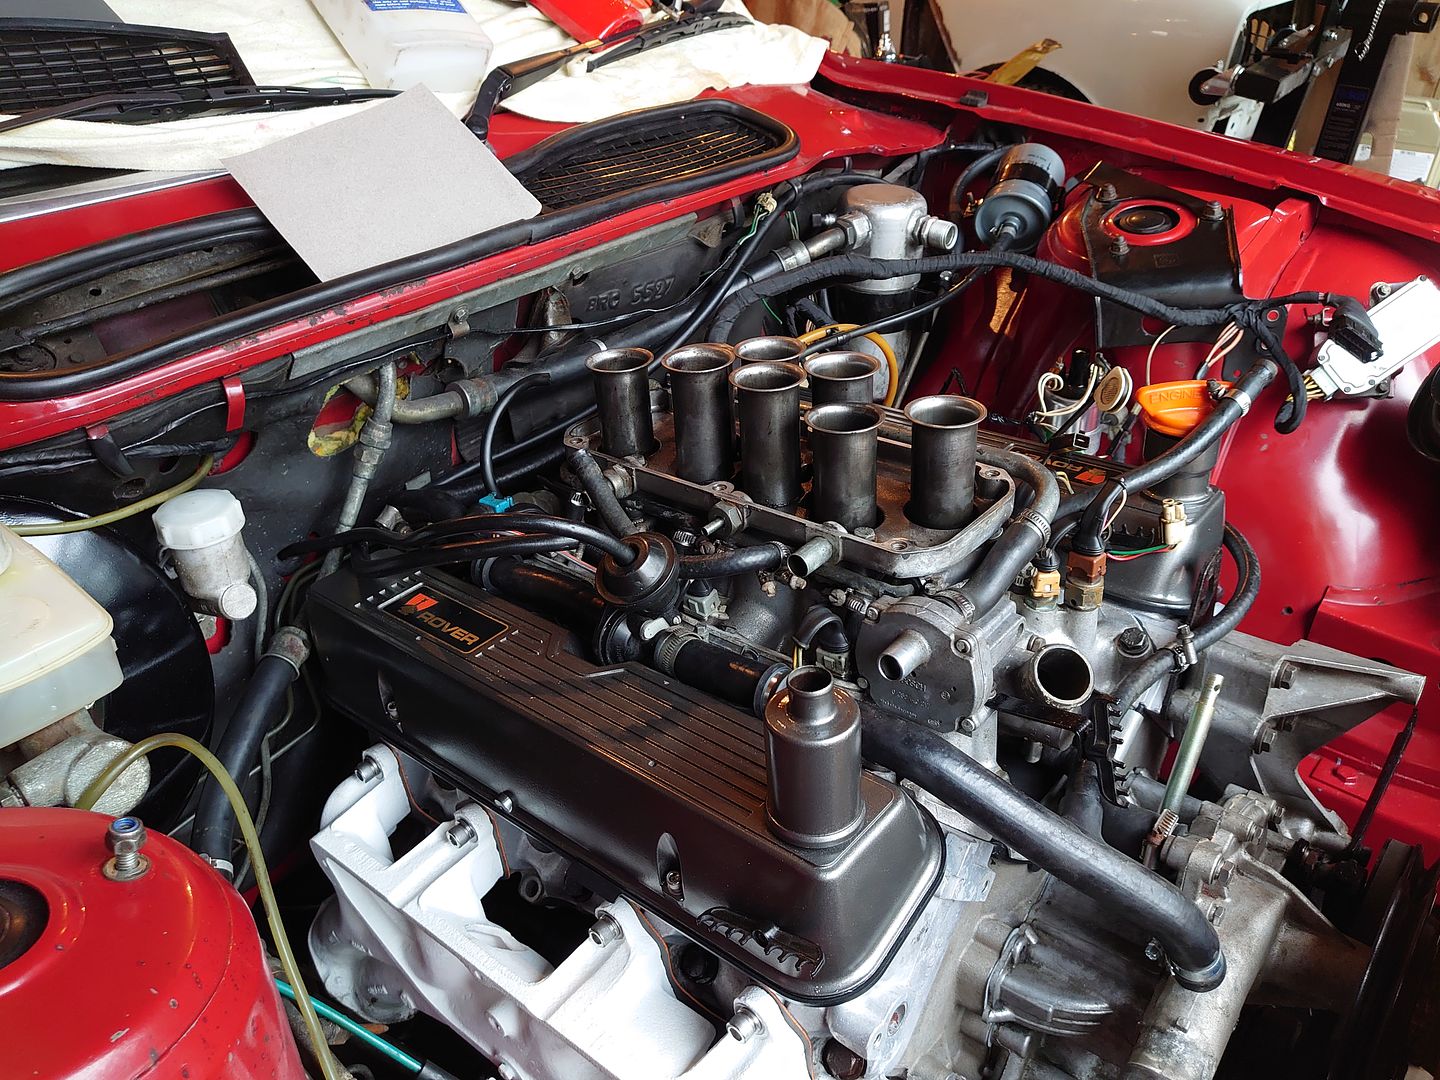
So the manifold set up in the car was far from bad, but without the plenum you can see it doesn't really match up to the rest of the engine.
I think I've said before it was a semi strategic move to not change anything with the fresh engine going in as I knew everything was functioning well.
But now I'm very happy with the engine, it's time for the fuel injection to see some love.

With the trumpet base removed you get a proper picture of what we're dealing with.
Very happy with how my re-wrapped loom is holding up, definitely the best option for a wiring loom!

This fuel rail and injector set up is a hang over from the RR set up, you can see a previous owner of that had changed the original junior jubilee clips for hose clamps, aswell as the two rubber hoses joining the halves of the fuel rails.
Probably thought this was a good idea at the time, but these are not suitable for clamping fuel hose.
Also didn't touch the rail to fuel injector hoses, or any of the feed or return lines.
With that lot out of the way we can see what the bare manifold looks like.

A few grubby areas but not bad at all. One thing I'd never noticed was the Landrover casting mark, this is on all of my injection manifolds including my original Vitesse item, shows Landrover must have been involved very early on in the EFI development.
I then rigged up my fuel pressure gauge to see what kind of pressure I'm seeing.

Stock fuel pressure seems to hold a steady 34PSI (2.3Bar) So what it should be.

With the increase in capacity, hot cam profile, and general engine fanciness I've been recommended to increase this to put more flow through the injectors. This is achieved by either an aftermarket adjustable FPR. Probably the right way to do it, but it looks unsightly. Or you can squeeze the original FPR, effectively increasing theload on the internal spring and bringing the pressure up.

42PSI should do very nicely.
After testing a few times to get to this figure I noticed I was losing pressure.
I found a weep from the fuel feed line, as it turns 90 degrees into the fuel rail.


You can see the bulge of where it's failed!
This is, apart from the rail to injector lines the only original piece of fuel hose in the engine bay. Unfortunately after 35 years it was it's time to go. This line is almost completely obscured under the throttle, so definitely one to look out for.
This time I was luckily, as it failed at probably the safest time.
This also highlights the main reason I did not want to increase my pressure without first replacing all the fuel lines!
Joe
I think I've said before it was a semi strategic move to not change anything with the fresh engine going in as I knew everything was functioning well.
But now I'm very happy with the engine, it's time for the fuel injection to see some love.
With the trumpet base removed you get a proper picture of what we're dealing with.
Very happy with how my re-wrapped loom is holding up, definitely the best option for a wiring loom!
This fuel rail and injector set up is a hang over from the RR set up, you can see a previous owner of that had changed the original junior jubilee clips for hose clamps, aswell as the two rubber hoses joining the halves of the fuel rails.
Probably thought this was a good idea at the time, but these are not suitable for clamping fuel hose.
Also didn't touch the rail to fuel injector hoses, or any of the feed or return lines.
With that lot out of the way we can see what the bare manifold looks like.
A few grubby areas but not bad at all. One thing I'd never noticed was the Landrover casting mark, this is on all of my injection manifolds including my original Vitesse item, shows Landrover must have been involved very early on in the EFI development.
I then rigged up my fuel pressure gauge to see what kind of pressure I'm seeing.
Stock fuel pressure seems to hold a steady 34PSI (2.3Bar) So what it should be.
With the increase in capacity, hot cam profile, and general engine fanciness I've been recommended to increase this to put more flow through the injectors. This is achieved by either an aftermarket adjustable FPR. Probably the right way to do it, but it looks unsightly. Or you can squeeze the original FPR, effectively increasing theload on the internal spring and bringing the pressure up.
42PSI should do very nicely.
After testing a few times to get to this figure I noticed I was losing pressure.
I found a weep from the fuel feed line, as it turns 90 degrees into the fuel rail.
You can see the bulge of where it's failed!
This is, apart from the rail to injector lines the only original piece of fuel hose in the engine bay. Unfortunately after 35 years it was it's time to go. This line is almost completely obscured under the throttle, so definitely one to look out for.
This time I was luckily, as it failed at probably the safest time.
This also highlights the main reason I did not want to increase my pressure without first replacing all the fuel lines!
Joe
Edited by 1275 GT on Monday 20th July 20:49
With disassembled things you need shiny things to put back don't you.
With that logic I bought myself a zinc plating kit
The Rovers engine bay is absolutely littered in what would have been gold passivated zinc plated parts.
Unfortunately after 35 years they don't look quite so good.


We have the throttle mechanism, extra air piping, fuel lines, a load of stuff!
I took a lot of pictures of the two throttle assemblies to make sure it all went back together properly, they're surprisingly complicated.
The plating turned out to be a lot more complicated than first anticipated, really testing my memory of A level Chemistry!
I did a few test pieces as recommended in the manual, but the first proper piece I tried had mixed results...


Initial results of the fuel rails did not turn out well, in hindsight looking at the picture I had the voltage too high...
They actually looked really good until they went into the passivate, and went all blotchy!
Second results came out better though.


Not perfect but a definite improvement on rusty old parts.

I didn't get a picture disassembled but I also did the throttle support bracket on the side of the plenum.

Final results in the sunlight came out much better, and yes I stripped and replated the fuel lines. I couldn't live with the blotchy.
So I'm now left with a shiny pile of parts curing reading for reassembly!
While that happens I decide that I really don't want to remove the inlet manifold and drain all the coolant again, so I went about cleaning up the manifold on the car. It already has a new heater pipe on the underside so doesn't really want for anything.

It really isn't in bad nick, but definitely room for improvement.

Much better

Of course with everything starting to look nice I had to trial fit my new trumpets!
I'm glad I did as although I had test fitted them multiple times with another spare plenum it didn't have the internal bosses that my nice one has for the overrun valve. So further modification was needed to the rear-most trumpet, but easy enough to do.
Joe
With that logic I bought myself a zinc plating kit
The Rovers engine bay is absolutely littered in what would have been gold passivated zinc plated parts.
Unfortunately after 35 years they don't look quite so good.
We have the throttle mechanism, extra air piping, fuel lines, a load of stuff!
I took a lot of pictures of the two throttle assemblies to make sure it all went back together properly, they're surprisingly complicated.
The plating turned out to be a lot more complicated than first anticipated, really testing my memory of A level Chemistry!
I did a few test pieces as recommended in the manual, but the first proper piece I tried had mixed results...
Initial results of the fuel rails did not turn out well, in hindsight looking at the picture I had the voltage too high...
They actually looked really good until they went into the passivate, and went all blotchy!
Second results came out better though.
Not perfect but a definite improvement on rusty old parts.
I didn't get a picture disassembled but I also did the throttle support bracket on the side of the plenum.
Final results in the sunlight came out much better, and yes I stripped and replated the fuel lines. I couldn't live with the blotchy.
So I'm now left with a shiny pile of parts curing reading for reassembly!
While that happens I decide that I really don't want to remove the inlet manifold and drain all the coolant again, so I went about cleaning up the manifold on the car. It already has a new heater pipe on the underside so doesn't really want for anything.
It really isn't in bad nick, but definitely room for improvement.
Much better
Of course with everything starting to look nice I had to trial fit my new trumpets!
I'm glad I did as although I had test fitted them multiple times with another spare plenum it didn't have the internal bosses that my nice one has for the overrun valve. So further modification was needed to the rear-most trumpet, but easy enough to do.
Joe
Edited by 1275 GT on Monday 20th July 21:08
idealstandard said:
Just incredible attention to detail and the fruits of your labour are something to behold. Congratulations Sir. Can't wait for more updates
Thankyou hopefully you'll like the next one, I think it's a good update! shalmaneser said:
Can't wait to see this fire up!
Well you won't have to wait much longer! Bobberoo99 said:
Fantastic updates, looking forward to seeing the end result, great attention to detail as always!!
Thankyou bolidemichael said:
Hi Joe,
I'm just checking in to let you know that your thread has made for compelling reading over the last few days - whenever I'd grab some downtime at work, it was a pleasure to read through your methodical workmanship on this beautiful old girl and I'm impressed too at the contribution of both your parents. I do have a request, perhaps on behalf of all of us less-mechanically-literate PHers... could you edit the images when posting about specific components so as to highlight it? It would really enhance the appreciation of the problem/solution; an examples is when you 'packed' the fuel pump, though I didn't reaslise until a response that this meant petroleum jelly! Up until then, I had been searching for newspaper etc stuffed into an opening somewhere! I know...
Nevertheless, I defo hope to see this at a Bicester Scramble (though not a January one by your track record!) and have a realy appreciation of what went into this. There are a handful of RC thread that are awesome (Kelvinator amongst them) and the writing style and images make for very accessible reading.
Oh... the V8 sounds effing marvellous.
Michael
ps. You obscured the VRN of the M3 in one of the images, but not in a following image where it is visible through the glass of the car DOH!
Hi Michael, thankyou for your kind words, yes I tend to drag everyone around me into my car obsession! Although my dad is more than a little responsible! I'm just checking in to let you know that your thread has made for compelling reading over the last few days - whenever I'd grab some downtime at work, it was a pleasure to read through your methodical workmanship on this beautiful old girl and I'm impressed too at the contribution of both your parents. I do have a request, perhaps on behalf of all of us less-mechanically-literate PHers... could you edit the images when posting about specific components so as to highlight it? It would really enhance the appreciation of the problem/solution; an examples is when you 'packed' the fuel pump, though I didn't reaslise until a response that this meant petroleum jelly! Up until then, I had been searching for newspaper etc stuffed into an opening somewhere! I know...
Nevertheless, I defo hope to see this at a Bicester Scramble (though not a January one by your track record!) and have a realy appreciation of what went into this. There are a handful of RC thread that are awesome (Kelvinator amongst them) and the writing style and images make for very accessible reading.
Oh... the V8 sounds effing marvellous.
Michael
ps. You obscured the VRN of the M3 in one of the images, but not in a following image where it is visible through the glass of the car DOH!
I'll have a look and try to make some of the more technical bits a bit more friendly. Everyone has to learn, so don't feel too embarrassed!
It'll definitely be at the next Scramble! hopefully my run of bad luck is over!
Oh so I did, it was more as it's not my car it didn't seem fair to plaster it over the internet.
Well with lots of shiny bits cured it was reassembly time.

First up is the fuel injectors.
The clamping bar has to be fitted before the mid body rubbers.
I initially had the tip seals also installed, but getting them to seat into the manifold was tricky, so these were removed and put into the manifold, and the injectors pushed through. Much easier.
I lubricated the seals with vasoline, as all the seals are fuel safe, petroleum jelly shouldn't cause any issues. I did take care to keep anything away from the tips of the injectors though.
This part is unfortunately lacking in pictures as I got a little carried away.
So we jump to both the injectors installed, and the fuel rails pushed into the new rubber hoses.


All the clamps in place but left un-tightened. at this point it was just the injectors, next up was the fuel feed and return to the regulator, they're fiddly to get too, but worth doing right after finding mine bulged!

with the rail and hoses in place it was time to tighten up the clamps. These clamps are only suppose to be tightened to 1.5Nm, so they don't need to be super tight!
With everything tight, it was time to pressure test the fuel rail.

This is performing a leak down test, and shows how the fuel rail, first holds pressure, and leaving it pressurised, how long it can hold pressure. The factory manaul states that the rail should not have a loss greater than 10.6psi/min. Mine holds 42psi for quite a while, and after about 30 minutes was still around 34psi, so I'm very happy with that. This shows that my injectors also hold pressure nicely. So I shouldn't have any problems with leaking injectors.
With the injectors and rail verified it was time to begin finally seating the injectors. Again everything was lubricated during assembly to prevent any pinched seals so the mid body seals can be clamped into place.
 DSC_2456
I re-plated all the screws and bolts, but the bolts that hold down the injector clamps were black, so being a stickler for originality, black they will stay.
Here was can also see the fuel return out of the rail, going to the regulator.

After seating the injectors everything else can be gradually tightened,
You can also see the fuel feed coming under the fuel rail and joining the rail.
I'm also very pleased with how my re-covered wiring loom is holding up, still looks as good as when I did it!


Next up was to remove the gauge from the system and tighten up the cold start injector.
With that all completed it was time to place the trumpet base in-place. This was sealed with a slight smear of instant gasket to prevent any air leaks.


I then installed the extra air piping, and idle compensation valve. This is on my car as it is optioned with air conditioning. This valve increases airflow when the compressor is activated to hold the idle steady, I gave this a quick vacuum test, and when applying voltage it releases air as it should!
Now it's time to cover those lovely trumpets for the last time.
The coolant hoses are connected to under the throttle body, and on goes the plenum lid, again sealed with a light smear of instant gasket.


And finally we have a complete engine!
Now I had to wait to let everything cure before the first start!
https://youtu.be/r_9D8svw02U
I'm just missing two cable ties to attach the harness to the bracket over the throttle.
I'm very pleased with how it looks now, and runs absolutely beautifully!
Joe
Edited by 1275 GT on Thursday 21st May 22:49
Edited by 1275 GT on Thursday 21st May 23:02
miniman said:
Awesome
Cheers, it was a very satisfying job. Especially driving it after! 


It's really helped with drivability, it'll now pull smoothly from idle all the way through the rev range. You can drive at 30mph in 4th at 1000rpm no problem at all. Top end does feel more punchy too.
I let the engine heat soak shutting it off with the engine up the temperature and the bonnet closed. After 30 minutes in the sun it'll still take 10seconds of cranking, but now it'll fire and pick up, where previously it would struggle for a good 20 seconds before coming good again.
My cable ties also arrived so I can finally secure my harness back.
I need to get some drive by videos of it now!
Joe
NelsonM3 said:
What a lovely thing.
Thankyou Just need some places to take it now!
bolidemichael said:
In case you have yet to come across it, this is a fantastically cool homage to the SD1.
I hadn't come across that, very cool. I really want to do some videos of mine. I need to find either a willing camera operator, or a willing driver! Joe
miniman said:
I am literally both of those things 
haha I've backed myself into a corner now haven't I! bolidemichael said:
Yes, miniman films, 1275GT films and I drive. Fantastic idea.
The idea of watching someone else drive my car off does terrify me...I think the only person who's driven this car in the last 4 years is my Dad.
njw1 said:
Top works as always! Can I add my name to the list of willing drivers too please...?
Cheers That terrifying list is getting at long as the first refusals one! CarlosV8 said:
Amazing work as always. The zinc plating kit looks intriguing, I may have to give that a go.
And if you need an experienced SD1 driver for filming...
I would be intrigued to know how it stacks up against other SD1's. Now the motor is how I want it, I think the suspension is a little wallowy, but I have no frame of reference! And if you need an experienced SD1 driver for filming...
The Zinc plating is something I've been wanting to try for a long time, it was frustrating at first, but when you finally get it, it gives a lovely finish. It's the intricate bits like the throttle linkages, that just wouldn't look right painted.
rm36house said:
This thread is pure gold! Awesome! I have some quastions to you mate!
Where you got that zinc plating kit? Is it from ebay? How do you clean your engine? It looks so clean.
Thankyou very much Where you got that zinc plating kit? Is it from ebay? How do you clean your engine? It looks so clean.
No worries at all, hopefully I'll answer everything!
Zinc plating kit was from Gateros. I went for their ultimate kit, which I would definitely recommend.
It comes with 4 10l tubs and I used all of them!
Unfortunately they were out of their power supplies, so I bought a 10A one off amazon.
Engine is very clean mainly due to being only in the engine bay since July last year!
But as far as what I use to clean everything. I've got through about 10l of this stuff in total doing this car.
https://www.amazon.co.uk/Body-Automotive-evaporati...
Makes cleaning parts an absolute dream, and then perfect for wiping down again for paint.
https://www.amazon.co.uk/Equip-Stainless-Bristles-...
This type of small wire brush is also very useful. The brass ones combined with the panel wipe clean up aluminium beautifully.
The actual engine bay was degreased using that panel wipe, then touched in using some matched cellulose I had, then given a quick polish. I should really have just painted the whole lot while the engine was out though!
All the bolted on painted parts (Plenum, Rocker Covers Etc.) in the engine bay are done in VHT engine enamel. It's very sensitive as to how it goes on, but gives a lovely finish once you've become its friend. Does chip relatively easily though.
And Finally the zinc plating has really helped tidy up those last few remaining bits.
After I'd done the video of it running nicely I had to take it out for one last blast before putting it away again...
Everyone likes gratuitous photos though don't you???


Not a bad way to mark the 35th anniversary of its first registration!
Quite by accident, but a nice coincidence I thought.
Joe
Edited by 1275 GT on Wednesday 27th May 20:48
rm36house said:
Awesome!
Thank you very much mate for this wide information.
Stay safe! Good luck and I can't wait next updates with your car and ideas for my self and my BMW who is sitting quite a while in my garage and waiting his time.
No problem at all Thank you very much mate for this wide information.
Stay safe! Good luck and I can't wait next updates with your car and ideas for my self and my BMW who is sitting quite a while in my garage and waiting his time.
updates might not be so regular now as there's not too much to do! james_TW said:
Looking fabulous - One question in this current weather... Did you get the air conditioning working?
Unfortunately it's still non-functional, I haven't even tried to pressurise it yet.I'm expecting it to require a full refresh with new seals. now the car is in a nice place I think it's time to sort it out.
I've tested everything from the electrical and vacuum side, and that functions well. so next step is to get some gas in it!
Watchman said:
I spent the weekend watching the SpaceX launch but inbetween anything interesting I found a load of Goodwood Revival videos on YouTube. Some of the old touring car stuff is epic - SD1s against Capris, minis and American muscle. So much fun to watch them drifting around the circuit. None of them (except the minis - on occasion) appear to have much of a friction-relationship with the circuit.
In fact, it was everything F1 isn't. Loads of overtaking, side-by-side drifting through corners, outbraking going into corners, out-dragging out of corners... really fabulous stuff. Chris Harris was sharing the driving of an SD1 in one race, and they did really well in it, even against a Camaro with nearly twice the displacement.
The Members Meet with the Group 1 racing at Goodwood really is something special. As you say proper racing! and such an amazing variety of shapes and noises! In fact, it was everything F1 isn't. Loads of overtaking, side-by-side drifting through corners, outbraking going into corners, out-dragging out of corners... really fabulous stuff. Chris Harris was sharing the driving of an SD1 in one race, and they did really well in it, even against a Camaro with nearly twice the displacement.
I've always been a big fan of Chris Harris, and that video really was something special.
At the time I had my 1275GT, and loved watching it dicing with the Rovers. I had it decal-ed like a Mini Challenge car too to give me that racey feeling.
I didn't immediately jump on the Rovers though, I think that's because I've always had a greater affinity to the series 2 cars, rather than the simpler series 1 design. I think it's the sunken headlights that don't do it for me.
It did re-ignite my interest in SD1's though, my Dad's last one went around 2000, and it really started off my search!
eskidavies said:
Just watching the CH SD1. Proper edge off your seat stuff ,”RACING “
I still think his Chris Harris on Cars was better than the Top Gear stuff he does now.Not really much to report on the Rover front, I've just been exercising it now I'm confident in the fuel injection. I did about 100 miles this weekend enjoying my hard work
It's definitely ready for some longer trips now.

Joe
Edited by 1275 GT on Thursday 4th June 20:48
Mr Tidy said:
Your car looks stunning Joe. 
And the upside of the temperature dropping is you can enjoy it without A/C!
How thoughtful of the environment! It's still a sunroof open windows down kinda car, I will get the AC working soon though. And the upside of the temperature dropping is you can enjoy it without A/C!
oobster said:
Hi Joe,
Spotted this earlier and thought you might be interested:
https://www.modelissimo.de/Modellautos/Cult-Scale/...
How's the car doing anyway? Much use during lockdown?
I'm very interested! I've been eagerly awaiting the release since the first shots were released a few months back. I actually have the red one and the blue one pre-ordered, and they should be arriving next week! Spotted this earlier and thought you might be interested:
https://www.modelissimo.de/Modellautos/Cult-Scale/...
How's the car doing anyway? Much use during lockdown?
I've actually been getting to use the Vitesse more occasionally than before, I've got lots of pictures taken in carparks from my essential shopping trips!


I did have to do some final tinkering though to really bring it up to a jump in and drive state!
After I'd spent so much time and effort improving the underbonnet fueling system I figured it was foolish not to address it everywhere else.
The underbody fuel pump supporting stuff had definitely seen better days. I knew this was the case when I replaced the fuel pump but didn't have time to address it at that point, so it was definitely needed!

We have the cross member, the fuel pump guard and bracket, and the fuel line guard, all of which have seen some action. how people run these cars any lower I don't know!
I won't bore you with the usual process of degrease, derust, prep, and paint!


I also replaced all of the rubber fuel lines to and from the hard lines. The only one I couldn't change was the main feed from the tank to the pump, it's absolutely massive diameter, and I don't have any fuel safe hose that size! It actually looked in quite good nick so will stay until suitable replacement is sourced.
It was all going smoothly until after running for 10mins I could smell fuel. I initally thought it was just on my clothes but it persisted. Eventually appearing as a puddle under the passenger side.
A quick investigation found the source.

It was actually coming from the hardline where it is mounted to the body.
Looking in retrospect you can see where the underseal has been washed away, and has probably had a weep for some time!
I think me moving the hardlines around to install new rubber at each end finally caused the leak to be large enough to see.
So off came the fuel feed hardline. Long since unavailable.


Apart from the single area the pipe was actually in quite good nick, just suffering from where the clamp held it to the body, the rubber was intact so I suspect water had sat between the rubber and the pipe causing the corrosion.
Derusted you can see the small area.
 DSC_2609
I didn't want to replace this line with copper, and I couldn't find anyone who would consider making me a replacement!
So I figured I would fix what I had.

I slid lengths of fuel hose over the pipe to the areas that contacted the body, and clamped them at either end, this compression fitting should be more than sufficient to hold pressure.

I will keep an eye out for a replacement pipe though.
I then replaced the original mild steel brackets for stainless rubber insulated P clips, and rubber wrapped everything to prevent further leaks.

Now holds fuel pressure beautifully. This was definitely exaggerated by increasing the fuel pressure, but it would have still needed fixing eventually, so at least I found it while in the garage and not at the side of the road!
It definitely deserved a clean after all that, and seems to be behaving very nicely at the moment!

As I said I've actually been using it most weekends when the weather allows, including an extended jaunt to the peak district with a friend.
Even managed a show this weekend!
I've also booked to go to C&M next Wednesday for their evening Japanese meet. Very inappropriate car but I'm sure people won't mind.
Got some brilliant pictures that I'll upload.

Little sneak peak
Joe
bolidemichael said:
And I think that we've just found Wally! 
Nice update Joe and good work as always. Why didn't you want to replace with a copper pipe?
I definitely am a Wally for having to lie under the bloody thing for so long! Nice update Joe and good work as always. Why didn't you want to replace with a copper pipe?
Few reasons really. As it's the high pressure line I wasn't confident that a copper line in the same size would hold up to having a rubber line clamped into it without distorting. That would mean using thicker copper, and different sized rubber lines to join. Something I didn't want.
I would also want to flare the ends to hold the rubber on, and I don't have a flare tool!
I know copper brake lines are a common replacement but are flared and crushed to seal, so a little different.
Maybe I'm just a little over cautious!
Joe
So it's been a little while since I updated this, luckily for you still reading it just means you get a lot of pictures all at once!
Firstly was a brilliant trip into the Peak District with my friend Tim in his Bentley Turbo R called Pearl.
(you can see a lot more of it in this review https://youtu.be/sdwnnxF_K00 )

Whats better than some good old fashioned british brutes making V8 noises in beautiful countryside!

A rare shot of me in front of the camera, but enough of that mug, back to the car that really does make me smile!
We found some brilliant spots especially in Buxton.


I loved taking pictures here, really good fun and drew quite a crowd!
Tim also recorded on his GoPro the journey from Buxton to the Goyt Valley.
https://www.youtube.com/watch?v=wtvs2dd8uxA&t=...
Managed to open it up properly a few times.
The engine has bedded in really nicely, and pulls so strongly. Really is lovely to drive.


We also did some runs up and down the Cat and Fiddle Pass. The 50mph average speed limit kills the fun a little, but still a brilliant road.

Finally found a car that makes a Vitesse look small!

After that we departed and I headed home, car sat very happily back on the A50, and only used half a tank of fuel!
Car didn't overheat, use any oil, or really give any issues at all!
Joe
Firstly was a brilliant trip into the Peak District with my friend Tim in his Bentley Turbo R called Pearl.
(you can see a lot more of it in this review https://youtu.be/sdwnnxF_K00 )
Whats better than some good old fashioned british brutes making V8 noises in beautiful countryside!
A rare shot of me in front of the camera, but enough of that mug, back to the car that really does make me smile!
We found some brilliant spots especially in Buxton.
I loved taking pictures here, really good fun and drew quite a crowd!
Tim also recorded on his GoPro the journey from Buxton to the Goyt Valley.
https://www.youtube.com/watch?v=wtvs2dd8uxA&t=...
Managed to open it up properly a few times.
The engine has bedded in really nicely, and pulls so strongly. Really is lovely to drive.
We also did some runs up and down the Cat and Fiddle Pass. The 50mph average speed limit kills the fun a little, but still a brilliant road.
Finally found a car that makes a Vitesse look small!
After that we departed and I headed home, car sat very happily back on the A50, and only used half a tank of fuel!
Car didn't overheat, use any oil, or really give any issues at all!
Joe
Edited by 1275 GT on Friday 2nd October 21:01
21st Century Man said:
Nice
I'm trying to find the photo of my old Turbo R in the same layby with a mates silver Vitesse.
definitely post it up when you find it, what are the chances of the same pair!? It must be a good combination. I'm trying to find the photo of my old Turbo R in the same layby with a mates silver Vitesse.
Huskyman said:
Fantastic car you have there. I fancied one of these for a long time after one of these blasted passed me on a dual carriage way, I love the sound of a V8.
I’m a fan of Tyrrels classic cars on YouTube and he does a lovely vid on these, I thought it might be of interest to you https://youtu.be/JXJJoP4pFM0
Cheers Huskyman, yeah the noise of the V8 is one of my favourite things about these. I’m a fan of Tyrrels classic cars on YouTube and he does a lovely vid on these, I thought it might be of interest to you https://youtu.be/JXJJoP4pFM0
I also started watching his videos after Harry Metcalfe took his Espada there for some work.
I was hoping a video was coming after seeing it in the background. I think the number of comments asking about it prompted it.
That specific Vitesse sold quite recently, so its nice to see it being properly taken care of.
https://themarket.co.uk/listings/rover/sd1-vitesse...
It does have a much more raspy tone to it compared to mine though, must be a different design of exhaust.
So I did manage the Rovers first show of the year, heading to a local railway museum for Cars in Strawberry Park at Statfold Barn Railway.
Decent turn out, and nice just to be out!


I also booked in with a friend with a MK4 Supra for Daikoku nights at C&M


Parked in the naughty corner for non event appropriate cars!
I also had some good evenings out taking photos. It's been really nice just being able to enjoy the car, especially with the nicer weather in September. Perfect evening pub show weather!


Even put on a spare Motolita steering wheel I had knocking around. After buying the SD1 boss. Didn't get on with it though, it doesn't seat correctly on the spines so gives a horrible wobble. Not sure if its catching on the cowling or just wrong. The Boss will be going back to Motolita.


My Shot also made it on the Cover of the SD1 Club Magazine
from my adventures in the Peak District. 
But most importantly Cult released a 1:18 model of the Vitesse. So of course I had to buy it and get my number plates on ASAP.


It's actually a brilliant model, and despite being from a different manufacturer goes very well with my Minichamps SD1s.
Just need to paint the sills so it matches properly...
Joe
mercedeslimos said:
I wonder are they trying to imitate period undersealing?
You're probably right! Mine also has a similar treatment which has bugged me for a while. But we'll get to that 
finlo said:
More likely rust repairs!;)
Oooh cheap shot! But probably also likely 
So next up was the Bank Holiday, started off with a brilliant trip to C&M definitely a good way to spend a Saturday afternoon. Managed to nab a good spot which always helps
 Sat and ate lunch watching people having a look around. Always fun listening to people say to friends, "didn't they have a V8?"


Followed with a local pub type meet on the Monday, definitely my kind of weekend!


Definitely made the most of the good weather!
Joe
surveyor said:
These appear to be addictive.. Nathan now has two!
They do get under your skin, he was very excited to show me I need to go and have a look! I do love that he's ended up with them both in the same colour as well.
I think 2 is a good number of SD1's any more and it's hard to find the space!
I always like to have a reference car for a project. That way the nice one is a perfect pattern for the restoration.

That's how I did my Minis, and how I intend on doing my next Vitesse...
Joe
surveyor said:
I’ve seen some very disturbing pictures today of 3 in a row. It’s left me feeling a bit damaged..
I would say you where seeing things, but you are in fact correct...


we have hiding in the garage a September 1984 (85MY) Rover 3500 Vitesse Single Plenum in Targa Red. Belonging to my friend Nathan.
In the middle is a May 1986 Rover 3500 Vitesse Twin Plenum in Targa Red also Nathan's, his latest purchase.
Finally is my tub picking up the rear.
It was fun going through all the differences in 3 nearly identically specced cars.
Joe
JPvanRossem said:
That is an exceptionally stylish driveway line-up. My father had a blue 2600 in the early '80s, followed by a white Vanden Plas with brown leather. I remember sort of wishing he'd had a Vitesse instead, but that VP probably initiated my now long-held belief that no car can possibly have enough brown - and that is no bad thing. He bought it from some dodgy geezer who specialised in SD1s, so I saw a few Vitesses in the yard (on its frequent trips back for repair), but mostly darker colours with loopy decals on the side. Yours looks the business in that red, like it was made for the car. Awesome stuff. Love it.
The multi SD1 drive is definitely a goal! My Dad also had a VDP, at the time I didn't even know it wasn't the best one. The sound did it for me. I did look at a VDP EFI with the chocolate leather interior. there really was a lot of brown!
Cheers
I do think they suit the red, although I think I've said before I really wanted a black one, or a Moonraker Blue one, like my dads VDP. But I'm glad I ended up with Red. Much more of a shouty colour.Mr Tidy said:
That is a great SD1 line-up.
Many years ago I had a P6B 3500S which felt like a rocket-ship to me when I was 20 (in 1979)!
But only because I couldn't insure a 3 litre Capri. So in 1984 I bought a 2.8 Capri Injection as I didn't need the extra space offered by an SD1, and Capris were cheaper. Coincidentally the guy I bought my Capri from had bought a 3500 Van Den Plas.
Then in the 90s a mate bought an SD1 to race in the Toyo Tyres Winter Series and I drove it down to Goodwood for a track day - and found out how good they were.
Despite the british car obsession that's two cars I've never been in! Would love to see the difference between the SD1 and P6. And although not a Ford guy, I would like to try a Capri. I think a 3.0 S, or a 2.8 injection would be a lot of fun. Many years ago I had a P6B 3500S which felt like a rocket-ship to me when I was 20 (in 1979)!
But only because I couldn't insure a 3 litre Capri. So in 1984 I bought a 2.8 Capri Injection as I didn't need the extra space offered by an SD1, and Capris were cheaper. Coincidentally the guy I bought my Capri from had bought a 3500 Van Den Plas.
Then in the 90s a mate bought an SD1 to race in the Toyo Tyres Winter Series and I drove it down to Goodwood for a track day - and found out how good they were.
It really did surprise me too how well the SD1 handles. I wasn't expecting too much from such a long car. But it really holds on well.
Oi_Oi_Savaloy said:
It's a pity you can't make the cover that goes over the intake trumpets transparent so that those trumpets can be seen in all their glory
What an absolutely wonderful car. Brings back memories - dad had one back in the 70's.
I have considered trying to remake the plenum lid in a clear Perspex. I think those carbon trumpets need more exposure! What an absolutely wonderful car. Brings back memories - dad had one back in the 70's.
grumpy52 said:
A rare example. A late VDP efi converted to manual by an approved main dealer when nearly new . Known for over 20 years as we did work on the car , sold for one of the owners to another regular customer then bought back by my mate and repaired and used intermittently.
I think i've seen one Opaline Vitesse living in Switzerland.
Nyloc20 said:
Just collected my Elan after MoT in York and noticed a really tidy B reg red SDI parked nearby. I always thought they were a stylish motor but have never owned one.
The MD at a past employer in the 80’s where I worked for four years used to buy a new top of the range SDI every year. Sadly I remember they weren’t very reliable, he moved onto Jags eventually.
A friends Dad had a very similar opinion when I first bought mine. He had a very bad experience with 2 SD1 company cars. Gave me a whole list of everything that went wrong. I think you really get good ones and bad ones. The MD at a past employer in the 80’s where I worked for four years used to buy a new top of the range SDI every year. Sadly I remember they weren’t very reliable, he moved onto Jags eventually.
wormus said:
My favourite feature on mine (my dad’s old one) was if you tried to wind down all 4 electric windows at the same time, it would blow the fuse!
They are a special car. Mine might do that if my rear windows start working again Joe
I may as well summarize the last of the good weather before we ended up the rain and the wind we're in now!
Annoying the MOT expiry fell outside of the 6 month extension. So back to Lutterworth MOT Centre for the Vitesse.
Brilliant service as always didn't throw up any issues, and another year with a clean ticket
I also had another little play with the tuning after it passed the emissions. Added a little more fuel to pep it up a little more.


I also thought it deserved the geometry looking at.


This didn't exactly go to plan. I had previously taken my Audi here and the guys were brilliant. So I thought an 80's Rover wouldn't be too hard.
After initially going very smoothly I left, but after setting off it really didn't feel right. So after a quick call, I was invited back for them to take another look at it.
I also checked the paperwork and they'd used the geo settings for a 820 Vitesse. I should have known when they asked if it was a turbo...
After being told they couldn't align it I eventually got to speak to the guy doing it. After seeing multiple 70's cars listed, I knew I could find it. After a quick glace I found the correct settings (under Rover 200-3500, then sub menu Vitesse if anyone is ever using a hunter alignment system) Always catches people out as they're not actually called SD1s by Rover.
It definitely feels better, but still pulls to the left slightly... But I haven't worked out what that is yet.
Seeing it up on the lift also highlighted that the lower doors really aren't that good. But I'll get to that
The main motivation for the fresh ticket was the BMC and Leyland Show! This was the first show I took the Vitesse too, hence the MOT expiry so close...
Had a lovely drive down, car behaved perfectly, although I did arrive late! As I pulled into the show cars were already being directed to the overflow car park. Not that I'm dramatic, but as I pulled up to the Events Coordinator I did my puppy dog eyes and after a little groveling I was directed down to the other SD1s. (This of course is partially true, I'm very good friends with him, and used that card to get a spot at the front despite my timing!)

After my prime parking I spent the entire day looking at brilliant cars! Some really amazing SD1s on display including Vitesses, V8S's, 2300s, VDPs.


A highlight was seeing PUK, the last SD1 to come off the production line, and also a Twin Plenum Vitesse.
Took far to many pictures, but invaluable as a reference.


Absolutely brilliant day almost felt normal. Really good to catch up with some friends, and see some brilliant cars!
Joe
Annoying the MOT expiry fell outside of the 6 month extension. So back to Lutterworth MOT Centre for the Vitesse.
Brilliant service as always didn't throw up any issues, and another year with a clean ticket
I also had another little play with the tuning after it passed the emissions. Added a little more fuel to pep it up a little more.
I also thought it deserved the geometry looking at.
This didn't exactly go to plan. I had previously taken my Audi here and the guys were brilliant. So I thought an 80's Rover wouldn't be too hard.
After initially going very smoothly I left, but after setting off it really didn't feel right. So after a quick call, I was invited back for them to take another look at it.
I also checked the paperwork and they'd used the geo settings for a 820 Vitesse. I should have known when they asked if it was a turbo...
After being told they couldn't align it I eventually got to speak to the guy doing it. After seeing multiple 70's cars listed, I knew I could find it. After a quick glace I found the correct settings (under Rover 200-3500, then sub menu Vitesse if anyone is ever using a hunter alignment system) Always catches people out as they're not actually called SD1s by Rover.
It definitely feels better, but still pulls to the left slightly... But I haven't worked out what that is yet.
Seeing it up on the lift also highlighted that the lower doors really aren't that good. But I'll get to that
The main motivation for the fresh ticket was the BMC and Leyland Show! This was the first show I took the Vitesse too, hence the MOT expiry so close...
Had a lovely drive down, car behaved perfectly, although I did arrive late! As I pulled into the show cars were already being directed to the overflow car park. Not that I'm dramatic, but as I pulled up to the Events Coordinator I did my puppy dog eyes and after a little groveling I was directed down to the other SD1s. (This of course is partially true, I'm very good friends with him, and used that card to get a spot at the front despite my timing!)
After my prime parking I spent the entire day looking at brilliant cars! Some really amazing SD1s on display including Vitesses, V8S's, 2300s, VDPs.
A highlight was seeing PUK, the last SD1 to come off the production line, and also a Twin Plenum Vitesse.
Took far to many pictures, but invaluable as a reference.
Absolutely brilliant day almost felt normal. Really good to catch up with some friends, and see some brilliant cars!
Joe
Gassing Station | Readers' Cars | Top of Page | What's New | My Stuff