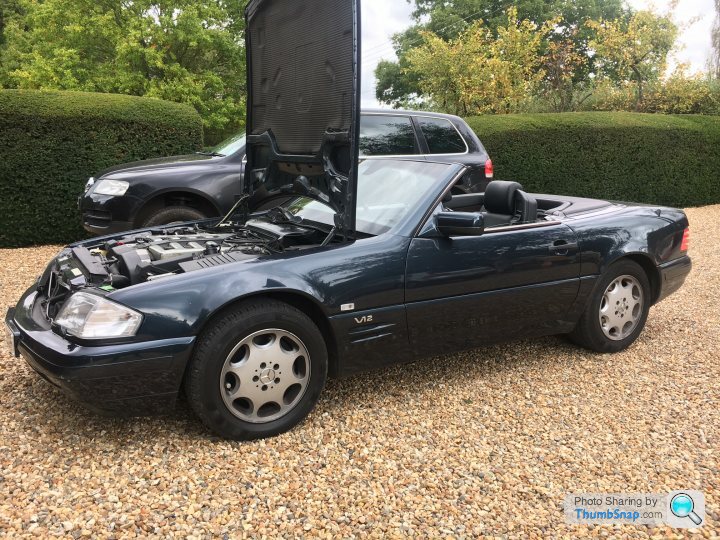
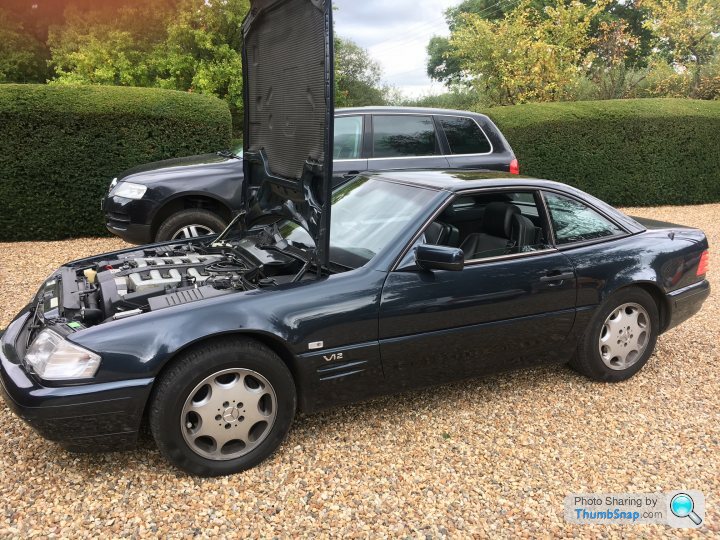
1996 Mercedes SL 600
Discussion


Time flies. Nothing dramatic to report. The MOT was issued with no advisories and the car continues to be a pleasure to own and drive.
I have noticed the oil pressure drops to just under 2 bar when the engine is hot at idle. Instantly rises back to 3 bar when throttle applied (and when idling cold) so I hope this isn't anything to worry about.
The roof mechanism will very occasionally stop moving mid-operation when closing. A quick release and re-application of the button finishes the operation.
The engine continues to weep a little oil from the front cover. I think this Winter I will stump up the cash for some new gaskets.
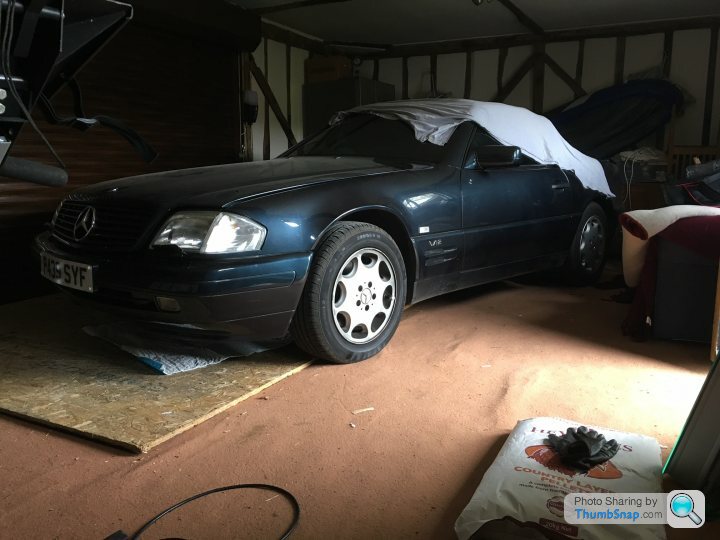
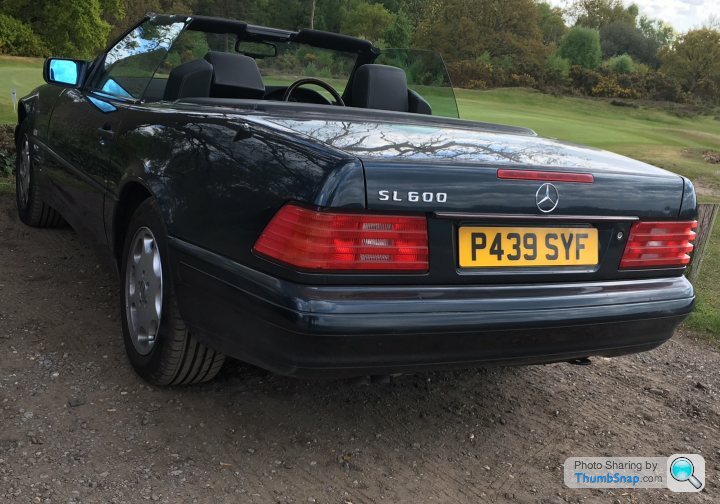
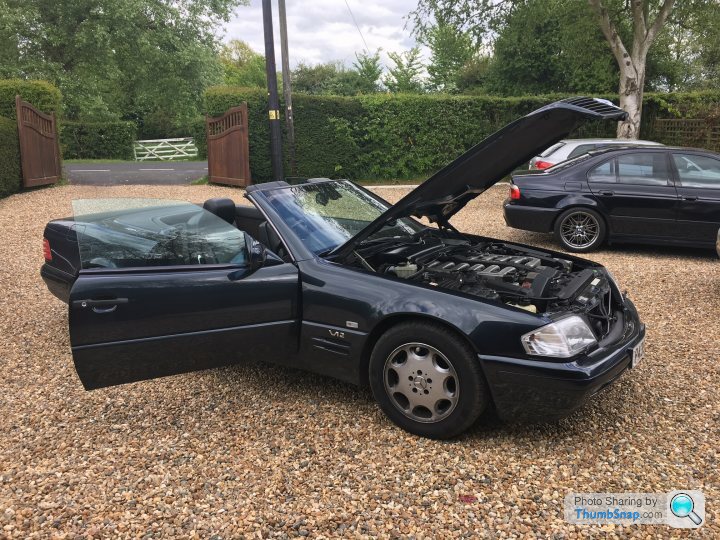
A variety of pics from the last few months:
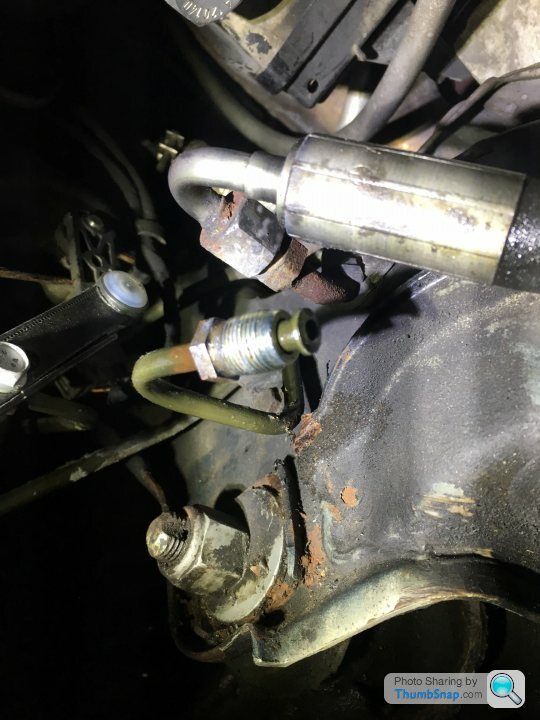
Preventative maintenance - I fitted a new hose that supplies pressurised hydraulic fluid from the pump to the ADS valve block:
Fitted a new ADS switch. The red lock switch on the original one was occasionally reluctant to engage:
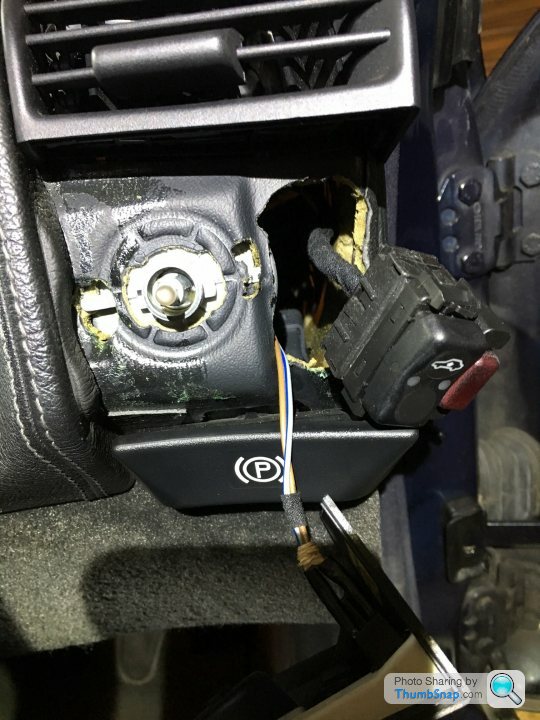
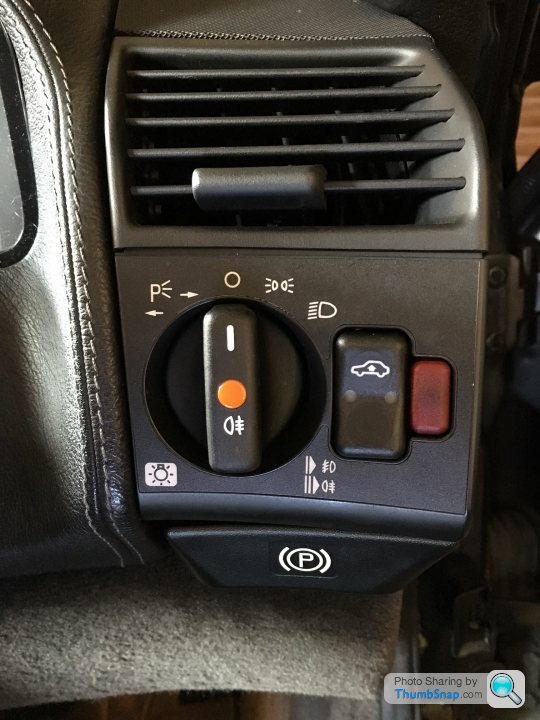
Voila:
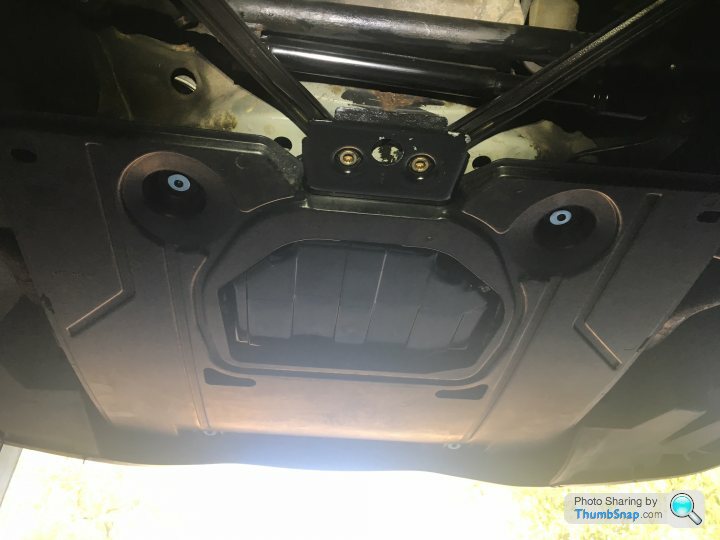
I ordered a new engine undertray. Helps hide the oil leaks! The snooty woman at Mercedes Gatwick told me these were NLA so I ordered direct from Germany and it arrived in about 2 weeks:
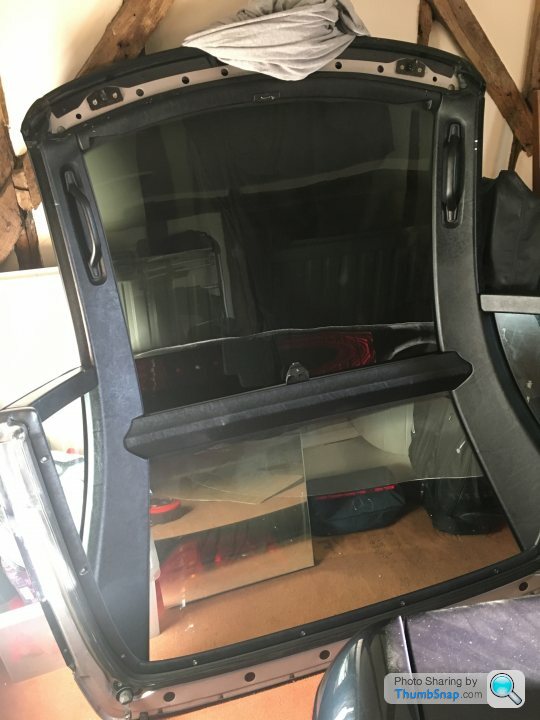
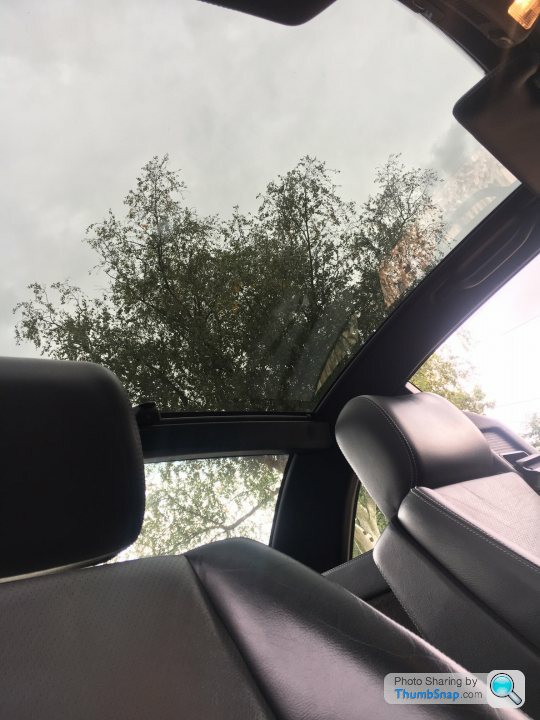
I had been looking for a panoramic roof for a while and this one popped up on Ebay. It was black and the vendor lived 15 minutes away. He even drove to mine to deliver it. Lovely:
I have noticed the oil pressure drops to just under 2 bar when the engine is hot at idle. Instantly rises back to 3 bar when throttle applied (and when idling cold) so I hope this isn't anything to worry about.
The roof mechanism will very occasionally stop moving mid-operation when closing. A quick release and re-application of the button finishes the operation.
The engine continues to weep a little oil from the front cover. I think this Winter I will stump up the cash for some new gaskets.
A variety of pics from the last few months:
Preventative maintenance - I fitted a new hose that supplies pressurised hydraulic fluid from the pump to the ADS valve block:
Fitted a new ADS switch. The red lock switch on the original one was occasionally reluctant to engage:
Voila:
I ordered a new engine undertray. Helps hide the oil leaks! The snooty woman at Mercedes Gatwick told me these were NLA so I ordered direct from Germany and it arrived in about 2 weeks:
I had been looking for a panoramic roof for a while and this one popped up on Ebay. It was black and the vendor lived 15 minutes away. He even drove to mine to deliver it. Lovely:
Smashing car. The YouTube video of Harry's garage review of the 600SL has whetted my appetite for these leviathans.
I probably won't (having spent so long with my 300-24 SL), but they're certainly far better than the (slightly) dismissive reports in the motoring press at the time of the launch in '92.
I probably won't (having spent so long with my 300-24 SL), but they're certainly far better than the (slightly) dismissive reports in the motoring press at the time of the launch in '92.

I saw a very clean solid hardtop roof appear for sale on eBay... 
Hope it sells for something decent - that extended leather interior trim is fairly rare and the headliner seems alright.
Hardtop trim - both interior and exterior - comes to pieces fairly easily and it may be worth more in bits than as one unit. Bit easier to post that way too.
Hope it sells for something decent - that extended leather interior trim is fairly rare and the headliner seems alright.
Hardtop trim - both interior and exterior - comes to pieces fairly easily and it may be worth more in bits than as one unit. Bit easier to post that way too.
r129sl said:
Looks nice that hardtop. Is it a lot lighter than the pano top? I often think an aluminium hardtop would be useful for touring: the pano top is a bit too heavy for my wife to remove when we get to the destination but the soft top can be very noisy at high speed.
Pah - I removed my pano roof single-handedly last time I took it off. Doubt I would get it back on myself without some paint damage mind you. The panoramic roof is noticeably heavier than the standard roof. It's a wild guesstimate but from what I can remember from handling them both yesterday I would say perhaps 15kg difference?
There's a YouTube video of someone single-handedly fitting/removing a hard top. I'm not brave enough to give that a go. I would resemble a tortoise in its death throws before staggering the wrong way and trashing something.
There's a YouTube video of someone single-handedly fitting/removing a hard top. I'm not brave enough to give that a go. I would resemble a tortoise in its death throws before staggering the wrong way and trashing something.
Hereward said:
The panoramic roof is noticeably heavier than the standard roof. It's a wild guesstimate but from what I can remember from handling them both yesterday I would say perhaps 15kg difference?
There's a YouTube video of someone single-handedly fitting/removing a hard top. I'm not brave enough to give that a go. I would resemble a tortoise in its death throws before staggering the wrong way and trashing something.
Love your car and the hard work you've put into it OP. There's a YouTube video of someone single-handedly fitting/removing a hard top. I'm not brave enough to give that a go. I would resemble a tortoise in its death throws before staggering the wrong way and trashing something.
I've seen that video too so the evening of my MOT in May it was hot n sunny so decided to do it. Normally my neighbour gives me a hand. Anyway I did it myself and put a tiny scratch in the paint!
Hardtop will go back on before Hallowe'en then garaged.
Anyone know who would do a decent titivation of my SL? I live in NI. Cheers

MercedesClassic said:
Hereward said:
The panoramic roof is noticeably heavier than the standard roof. It's a wild guesstimate but from what I can remember from handling them both yesterday I would say perhaps 15kg difference?
There's a YouTube video of someone single-handedly fitting/removing a hard top. I'm not brave enough to give that a go. I would resemble a tortoise in its death throws before staggering the wrong way and trashing something.
Love your car and the hard work you've put into it OP. There's a YouTube video of someone single-handedly fitting/removing a hard top. I'm not brave enough to give that a go. I would resemble a tortoise in its death throws before staggering the wrong way and trashing something.
I've seen that video too so the evening of my MOT in May it was hot n sunny so decided to do it. Normally my neighbour gives me a hand. Anyway I did it myself and put a tiny scratch in the paint!
Hardtop will go back on before Hallowe'en then garaged.
Anyone know who would do a decent titivation of my SL? I live in NI. Cheers
Know two good independents... One just recommissioned my r107
Zonergem said:
I saw a very clean solid hardtop roof appear for sale on eBay...
Hope it sells for something decent - that extended leather interior trim is fairly rare and the headliner seems alright.
Hardtop trim - both interior and exterior - comes to pieces fairly easily and it may be worth more in bits than as one unit. Bit easier to post that way too.
My first Ebay Nutter experience (I am Alex and my Ebay feedback is perfect):Hope it sells for something decent - that extended leather interior trim is fairly rare and the headliner seems alright.
Hardtop trim - both interior and exterior - comes to pieces fairly easily and it may be worth more in bits than as one unit. Bit easier to post that way too.
New message from: i-love-mercs (2)
Alex
Thank you but no thanks I have just read some of your reviews and I dont believe you!!!
Please stop these games you playing. You wasting time.
Jozef
YOU:
Hello, Jozef.
Sorry but this won't be able to fit on a passenger train. It is too big and I estimate it weighs about 30kg. For collection you would need to turn up in an SL, so it can be fitted on, or a van/pickup truck.
Regards,
Alex
i-love-mercs:
Morning, Looking to take this off your hands. Will I be able to carry the roof on the train or is it to heavy?
Regards
Jozef
Edited by Hereward on Friday 13th October 11:42
Not much to report. This Winter has dragged and the weekends have been generally damp, meaning not much driving. When possible I take the car out for a 45 minute local lap to get everything hot and dry and work the hood hydraulics.
I have recently replaced the front suspension top mounts. The original items have surface cracking and a 400bhp, 2.2 tonne, 21 year old car car needs tip-top suspension components. The process was straightforward but the ADS hydraulic suspension components added a bit of excitement compared to a dry set up.
The top mount's job is to locate and secure the top of the suspension strut on to the body of the car and also absorb energy and reduce NVH.
The below is just a general guide, not gospel. It's an easy DIY job, though. Some of my jargon will probably be wrong.
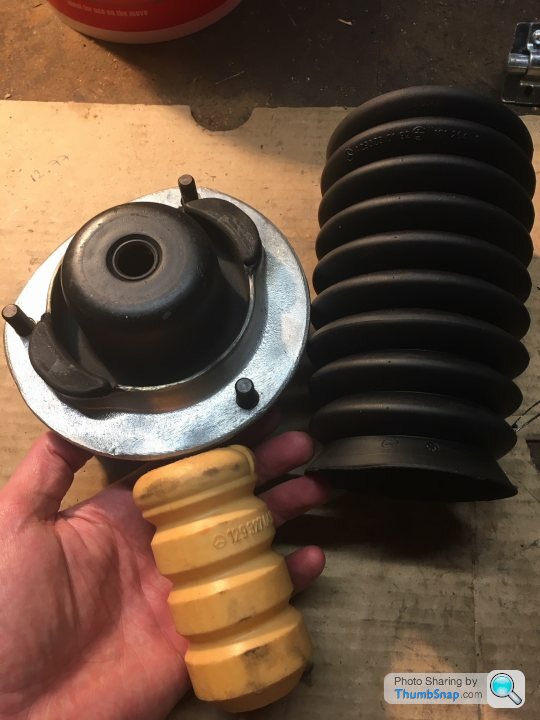
New top mount, bump stop and dust boot for each side, with my dainty hand providing scale. The top mounts for ADS-equipped cars are ~3 times the price of the non-ADS ones, not sure why.
1. Raise the car and remove the wheel. Jack up the suspension so it is partially compressed.
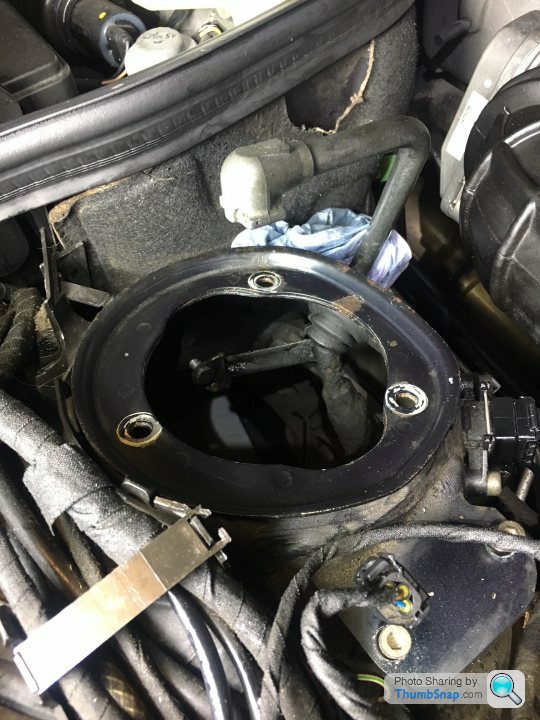
2. Remove engine bay plastic cover adjacent to top mount. This is the Offside (UK RHD car). The hydraulic line is push-fit to the top of the suspension strut and held in place with the retaining pin. I have circled in Red the ADS accelerometer. My car (with ADS2) has three of these; one on each front suspension turret and one mounted on the rear right suspension turret, which is accessible from inside the boot. These three accelerometers measure vertical movement and report this live data to the ADS computer which adjusts the hydraulic damping effect accordingly. These sensors are hardier than the original ADS1 units and second hand ones are available for £30 on Ebay. I have stocked up on a few just in case, since my Nearside one is original (the Offside one in the pic is not, as its 2008 date stamp shows)

As an aside this Youtube video shows the diagnosis of a bad accelerometer from this era:
https://www.youtube.com/watch?v=oqatLelB0u4&t=...
3. Prise the hydraulic line from the top of the strut. I had a collection bottle and lots of towel ready since hydraulic fluid goes everywhere and it's nasty stuff to clean up. I lost about 1 litre, I reckon. I think the protocol is to drain the system properly from the drain point near the front left wheel but I was feeling wild and reckless. Probably best to wear goggles/glasses.
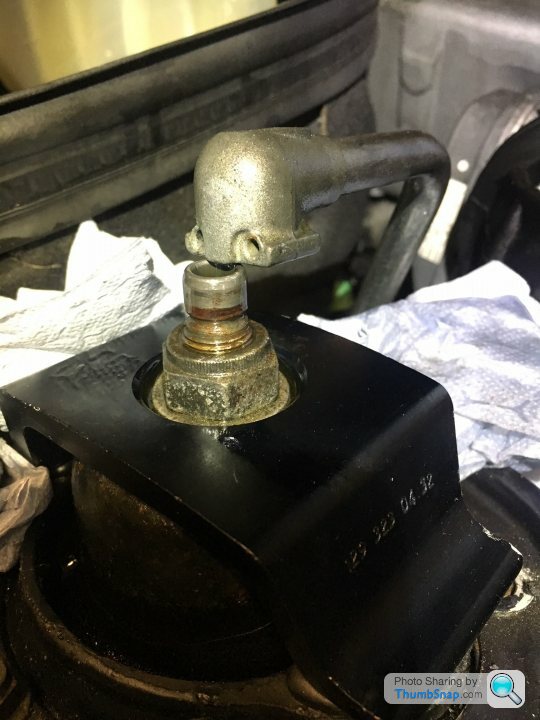
4. Undo the big top nut that attaches the suspension to the top mount. You can then compress and lower the strut's piston down in to the wheel arch. More hydraulic fluid fountains ensue, so have towels ready. It's nice that the spring is located separately from the strut so you don't need to worry about compressing/removing the spring. The top mount itself can then be simply removed from the car by undoing its 3 mounting nuts and lowering it down in to the wheel arch.
5. The old red bumpstop slides off the strut's piston and it's easy to replace the dust boot, too.
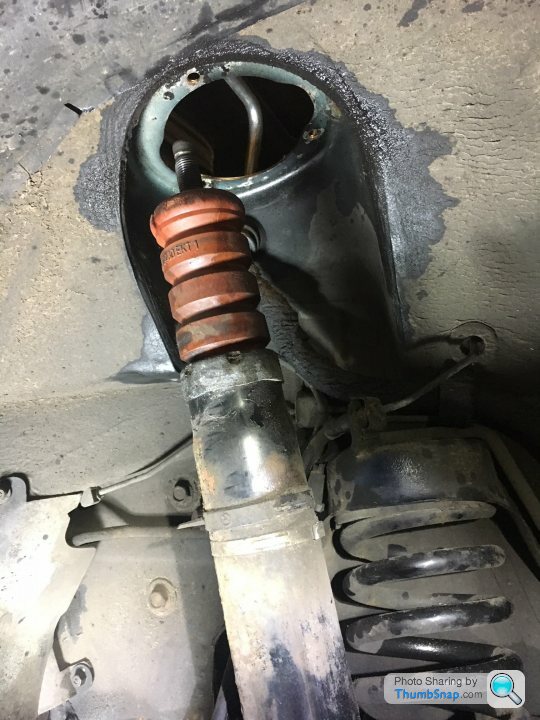
Installation is "simply" the reverse process. Ensure the ADS hydraulic fluid tank is topped up with the same volume of oil lost BEFORE starting the engine (with wheels back on terra firma). The system is self-bleeding and there were a tense ~4mins after starting the car before she suddenly rose like a majestic salmon. The ADS pump (same pump that pressurises the power steering) must not be allowed to run dry. It's not very apparent in this pic but this is the front suspension in a collapsed state before engine start:
What else? The engine still leaks a small amount of oil. I can't quite face the bill to get that sorted yet (probably an engine out job).
This video shows the scale of the undertaking for an M120 engine re-build (turn the appalling background music right down):
https://www.youtube.com/watch?v=yPzKs1I68mc&in...
I have recently replaced the front suspension top mounts. The original items have surface cracking and a 400bhp, 2.2 tonne, 21 year old car car needs tip-top suspension components. The process was straightforward but the ADS hydraulic suspension components added a bit of excitement compared to a dry set up.
The top mount's job is to locate and secure the top of the suspension strut on to the body of the car and also absorb energy and reduce NVH.
The below is just a general guide, not gospel. It's an easy DIY job, though. Some of my jargon will probably be wrong.
New top mount, bump stop and dust boot for each side, with my dainty hand providing scale. The top mounts for ADS-equipped cars are ~3 times the price of the non-ADS ones, not sure why.
1. Raise the car and remove the wheel. Jack up the suspension so it is partially compressed.
2. Remove engine bay plastic cover adjacent to top mount. This is the Offside (UK RHD car). The hydraulic line is push-fit to the top of the suspension strut and held in place with the retaining pin. I have circled in Red the ADS accelerometer. My car (with ADS2) has three of these; one on each front suspension turret and one mounted on the rear right suspension turret, which is accessible from inside the boot. These three accelerometers measure vertical movement and report this live data to the ADS computer which adjusts the hydraulic damping effect accordingly. These sensors are hardier than the original ADS1 units and second hand ones are available for £30 on Ebay. I have stocked up on a few just in case, since my Nearside one is original (the Offside one in the pic is not, as its 2008 date stamp shows)
As an aside this Youtube video shows the diagnosis of a bad accelerometer from this era:
https://www.youtube.com/watch?v=oqatLelB0u4&t=...
3. Prise the hydraulic line from the top of the strut. I had a collection bottle and lots of towel ready since hydraulic fluid goes everywhere and it's nasty stuff to clean up. I lost about 1 litre, I reckon. I think the protocol is to drain the system properly from the drain point near the front left wheel but I was feeling wild and reckless. Probably best to wear goggles/glasses.
4. Undo the big top nut that attaches the suspension to the top mount. You can then compress and lower the strut's piston down in to the wheel arch. More hydraulic fluid fountains ensue, so have towels ready. It's nice that the spring is located separately from the strut so you don't need to worry about compressing/removing the spring. The top mount itself can then be simply removed from the car by undoing its 3 mounting nuts and lowering it down in to the wheel arch.
5. The old red bumpstop slides off the strut's piston and it's easy to replace the dust boot, too.
Installation is "simply" the reverse process. Ensure the ADS hydraulic fluid tank is topped up with the same volume of oil lost BEFORE starting the engine (with wheels back on terra firma). The system is self-bleeding and there were a tense ~4mins after starting the car before she suddenly rose like a majestic salmon. The ADS pump (same pump that pressurises the power steering) must not be allowed to run dry. It's not very apparent in this pic but this is the front suspension in a collapsed state before engine start:
What else? The engine still leaks a small amount of oil. I can't quite face the bill to get that sorted yet (probably an engine out job).
This video shows the scale of the undertaking for an M120 engine re-build (turn the appalling background music right down):
https://www.youtube.com/watch?v=yPzKs1I68mc&in...
Edited by Hereward on Friday 16th February 20:36
Great stuff. Did you know how many flavours of bump stop there are?
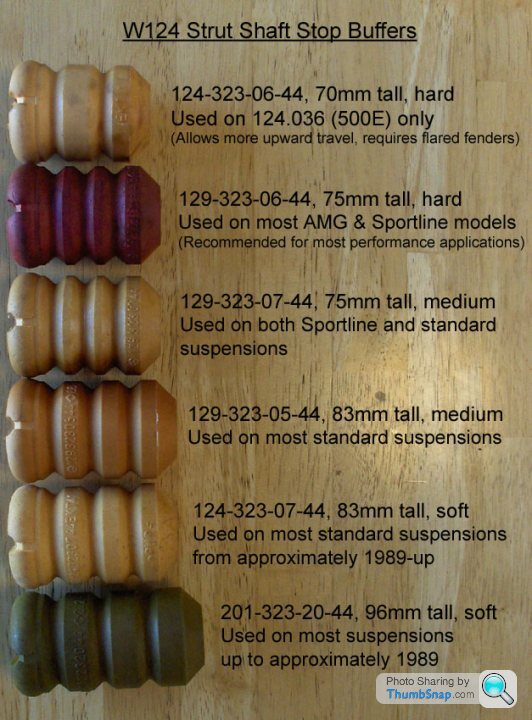
Courtesy of W124Performance.com
http://www.w124performance.com/images/W124_suspens...
Courtesy of W124Performance.com
http://www.w124performance.com/images/W124_suspens...
Really interesting thread.
I was wondering how you ordered directly from MB Germany, did you do it online?
I’ve been told both the loom and parts to make my own one are NLA from Mercedes so being able to confirm that would be a benefit. Both my closest parts places have lost the very good parts guys they had sadly.
Dave!
I was wondering how you ordered directly from MB Germany, did you do it online?
I’ve been told both the loom and parts to make my own one are NLA from Mercedes so being able to confirm that would be a benefit. Both my closest parts places have lost the very good parts guys they had sadly.
Dave!
Zonergem said:
Great stuff. Did you know how many flavours of bump stop there are?
Courtesy of W124Performance.com
http://www.w124performance.com/images/W124_suspens...
Wow, that is mad! My original reddish ones and the yellow replacements are 96mm variants. Definitely a car set up more for wafting rather than storming the Nurburgring.Courtesy of W124Performance.com
http://www.w124performance.com/images/W124_suspens...
Howitzer said:
Really interesting thread.
I was wondering how you ordered directly from MB Germany, did you do it online?
I’ve been told both the loom and parts to make my own one are NLA from Mercedes so being able to confirm that would be a benefit. Both my closest parts places have lost the very good parts guys they had sadly.
Dave!
I used these people. Been very good so far:I was wondering how you ordered directly from MB Germany, did you do it online?
I’ve been told both the loom and parts to make my own one are NLA from Mercedes so being able to confirm that would be a benefit. Both my closest parts places have lost the very good parts guys they had sadly.
Dave!
https://www.online-teile.com/mercedes-ersatzteile/...
You'll need to input the part numbers, though. This site is good for the parts diagrammes:
https://www.genuinemercedesparts.com/auto-parts/19...
However, there is a guy in Kent who specialises in fabricating R129 wiring looms. I can't recall his details but Zonergem will know.
There is also this guy in New York. People post him all sorts of stuff to repair:
https://www.youtube.com/user/vsandvs/videos
Edit - you have a 500E?!


Edited by Hereward on Saturday 17th February 08:29
Gassing Station | Readers' Cars | Top of Page | What's New | My Stuff