WRX RA powered VW 1303 beetle cabrio with a bit of Porsche
Discussion


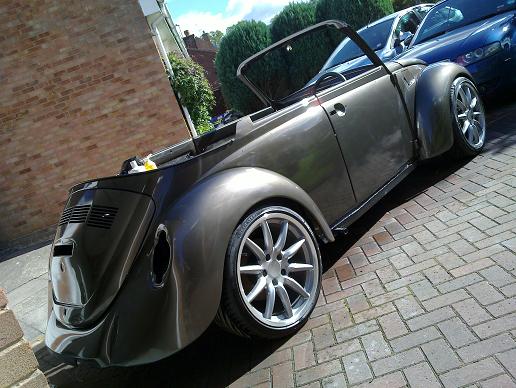
If anybody else had a feeling that the doors didn't look quite right in the previous pictures I was having the same thoughts! In the end after repainting and then re-clearing they have come out right. I also wet-sanded and machine polished the whole car so I can start refitting brightwork and other fittings...
Much better!
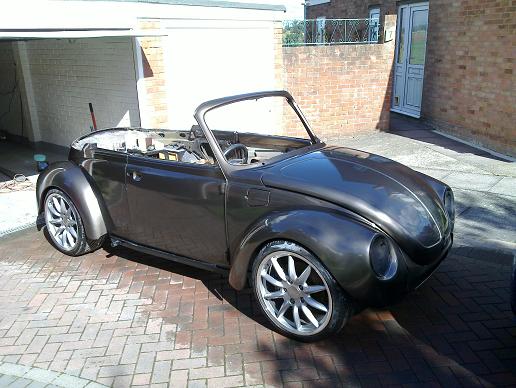
Door windows in, it was like doing a 3D jigsaw puzzle that would only go together in a particular sequence!
I've put in all the door hinge screw not too and am really please with how the doors line up with the rear quarter panels, the swage line is perfect. I just need to pack up the rear body spacer a small amount to get the door gap parallel.
Much better!
Door windows in, it was like doing a 3D jigsaw puzzle that would only go together in a particular sequence!
I've put in all the door hinge screw not too and am really please with how the doors line up with the rear quarter panels, the swage line is perfect. I just need to pack up the rear body spacer a small amount to get the door gap parallel.
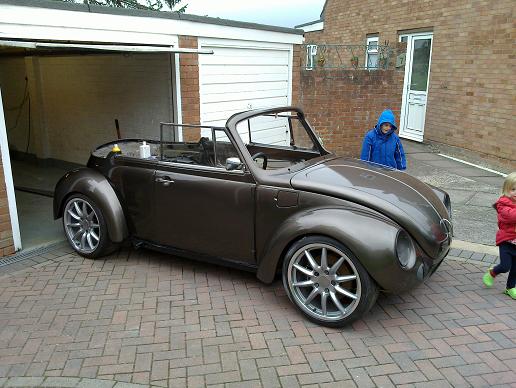
I've been doing loads of little jobs, mainly refurbishing parts before refitting them.
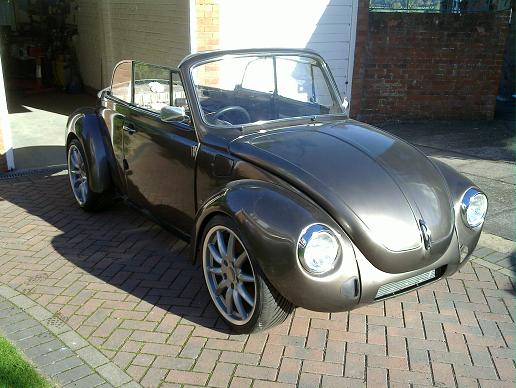
Definitely getting there! All glass now in after spending a small fortune on various rubber seals which were too far gone to re-use.
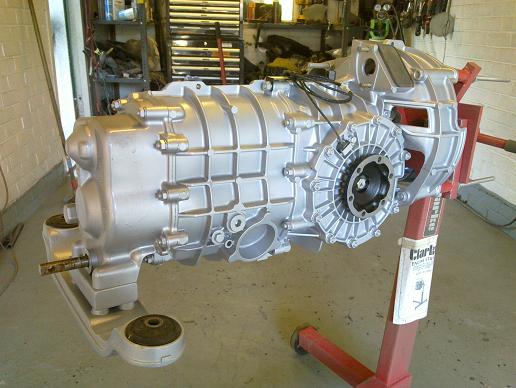
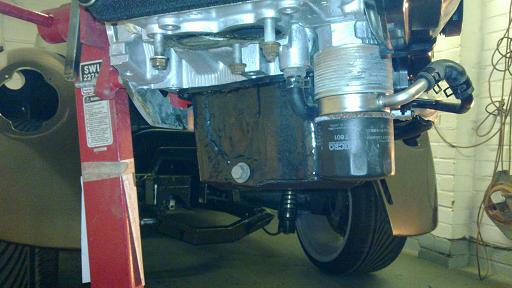
The G50 was a real pain to detail! Porsche use a really thick type of wax and liberally spray it on all over the underside. A 10mm wire brush was the best thing to get it out in the end. Lots of degreasers and finally etched and painted in alloy wheel silver should keep it looking much better and cleaner in the long run... You can also see the steel spacer under the front mount.
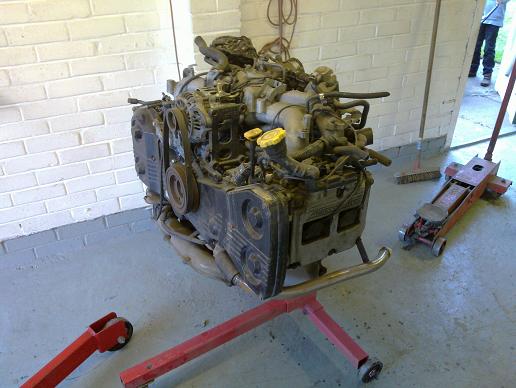
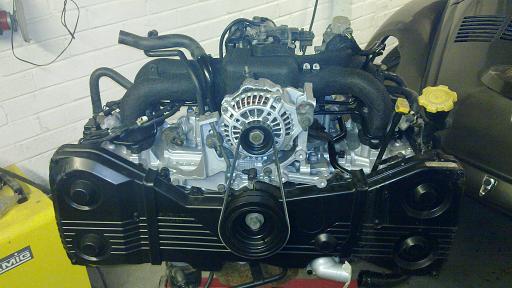
The engine's turn on the stand for some detailing... I'm probably going to go with black wrinckle paint for the alloy bits (cam covers and intake manifold).
Definitely getting there! All glass now in after spending a small fortune on various rubber seals which were too far gone to re-use.
The G50 was a real pain to detail! Porsche use a really thick type of wax and liberally spray it on all over the underside. A 10mm wire brush was the best thing to get it out in the end. Lots of degreasers and finally etched and painted in alloy wheel silver should keep it looking much better and cleaner in the long run... You can also see the steel spacer under the front mount.
The engine's turn on the stand for some detailing... I'm probably going to go with black wrinckle paint for the alloy bits (cam covers and intake manifold).

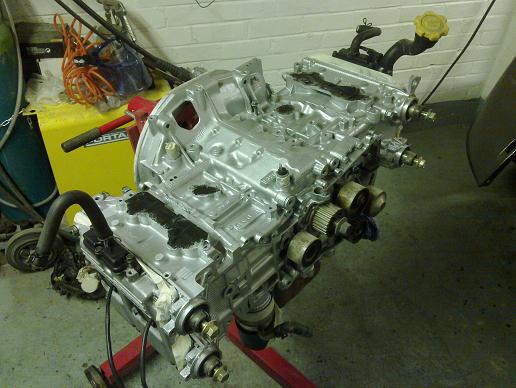
Engine stripped back to a bare longblock and painted in POR engine enamel..
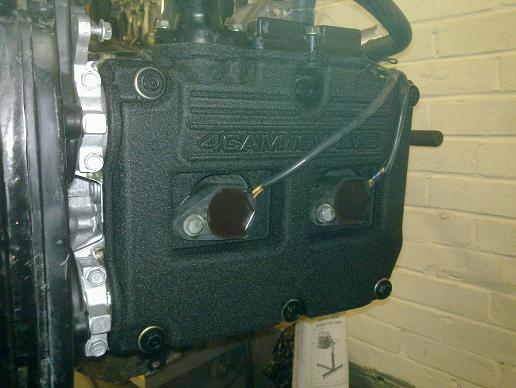
Cam covers were stripped back and treated to some VHT black wrinkle paint.
Coming back together, new cambelt hiding under there too...

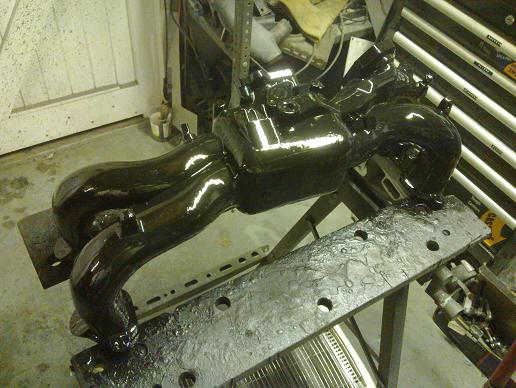
Lots of now redundant bosses were cut off and smoothed to give a cleaner look and the manifold also painted in wrinkle. This is how it looks straight away...
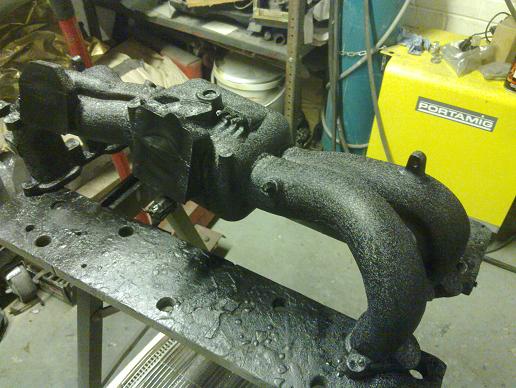
....and after a couple of hours!
Cam covers were stripped back and treated to some VHT black wrinkle paint.
Coming back together, new cambelt hiding under there too...
Lots of now redundant bosses were cut off and smoothed to give a cleaner look and the manifold also painted in wrinkle. This is how it looks straight away...
....and after a couple of hours!


 . Top work from a genius.
Engine just about ready to go back in the car...
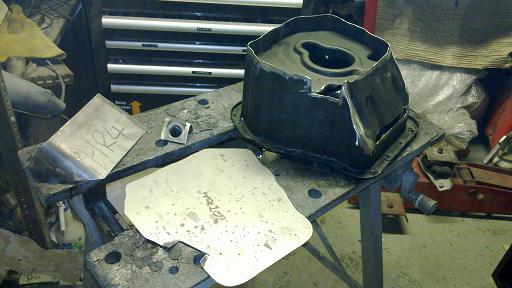
I decided to shorten the sump but only by an inch or so as that will just about bring it level with the exhaust manifold and oil filter and maximise ground clearance.
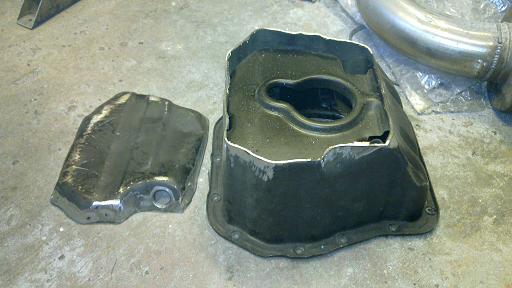
Cut up and new component parts. I filled in the slope at the front part to regain lost capacity and it turned out near enough identical to the original volume. I cut slots at the top and bottom of the additional triangular section so the old sloped wall acts like a baffle.
All welded up, just needs a clean and like of paint, then to shorten the pick-up tube. Note the drain plug is at the low point...
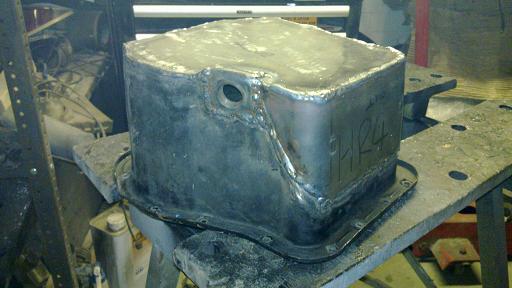
Looking and thinking about it now I might weld on some strengthening ribs on the bottom level with the drain plug to add some strength...
I decided to shorten the sump but only by an inch or so as that will just about bring it level with the exhaust manifold and oil filter and maximise ground clearance.
Cut up and new component parts. I filled in the slope at the front part to regain lost capacity and it turned out near enough identical to the original volume. I cut slots at the top and bottom of the additional triangular section so the old sloped wall acts like a baffle.
All welded up, just needs a clean and like of paint, then to shorten the pick-up tube. Note the drain plug is at the low point...
Looking and thinking about it now I might weld on some strengthening ribs on the bottom level with the drain plug to add some strength...
In the end I welded on some strengthening ribs which also serve as a flat bottom and stop the drain point getting damaged. Note that the old sump drain 'bulge' has already been flattened on the old sump so the gain is better than it looks here...
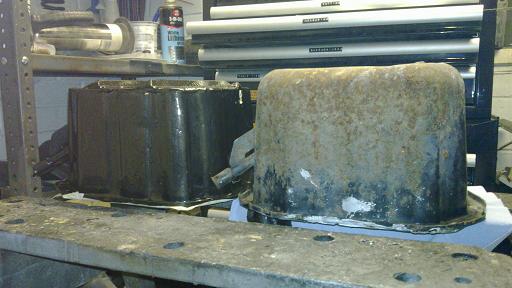
Stock pick-up pipe
shortened to suit the new sump. I also had to shorten the support piece. Normal clearance to the bottom is 16mm but I reduced this to both gain useful capacity and it was easier to just shorten the vertical section and braze it back together, I ended up with 9mm to the bottom. Apparently subaru rally cars are modified to only 6mm...
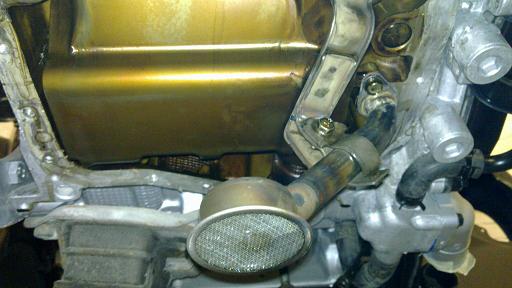
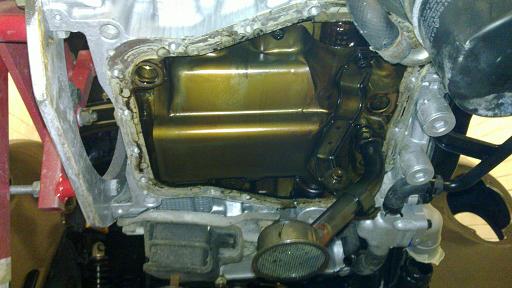
Finally fitted, the actual oil part of the sump is level with the bottom of the oil filter and I didn't want that to be the lowest point. All in I have gained about an inch ground clearance.
Stock pick-up pipe
shortened to suit the new sump. I also had to shorten the support piece. Normal clearance to the bottom is 16mm but I reduced this to both gain useful capacity and it was easier to just shorten the vertical section and braze it back together, I ended up with 9mm to the bottom. Apparently subaru rally cars are modified to only 6mm...
Finally fitted, the actual oil part of the sump is level with the bottom of the oil filter and I didn't want that to be the lowest point. All in I have gained about an inch ground clearance.
Gassing Station | Readers' Cars | Top of Page | What's New | My Stuff