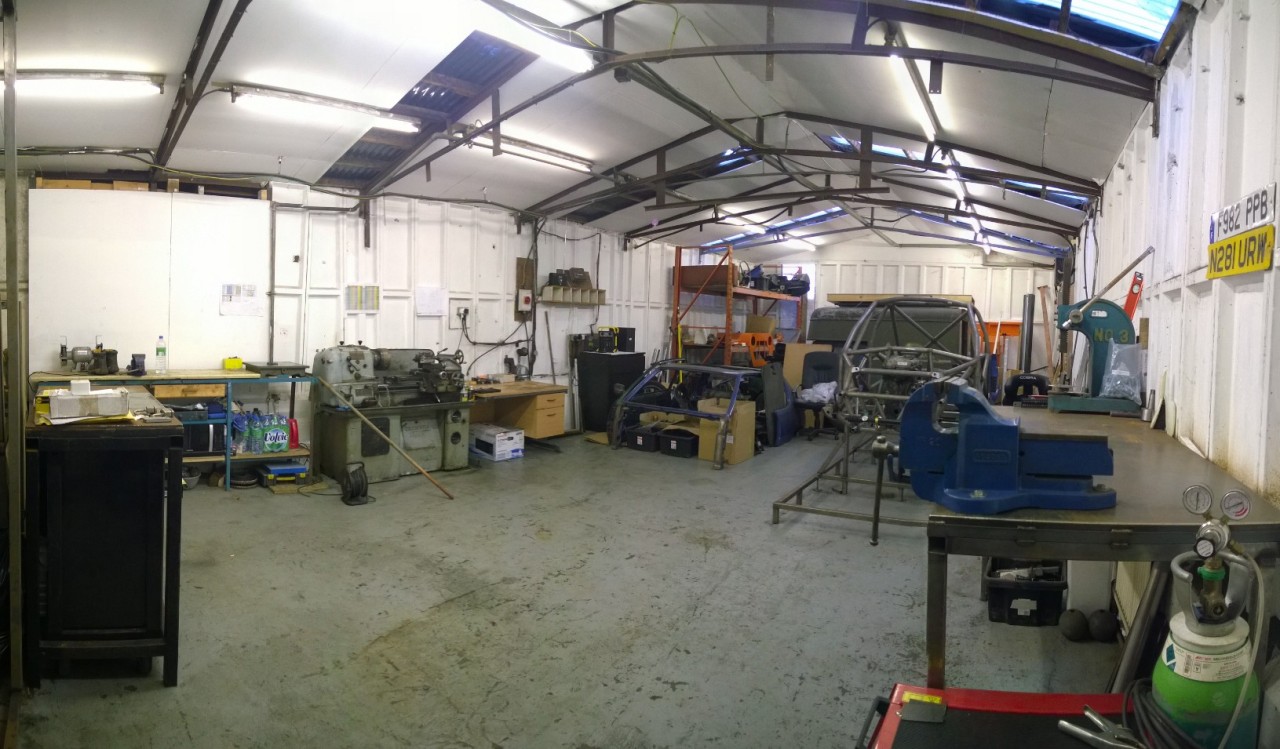
Peugeot 205 Saloon Libre - RWD Space-Frame Silhouette Racer
Discussion


How much of the Pug's gonna actually be Peugeot at the end of this? 
Always good though seeing this progress Cam
Of note, the input shaft flange on the Sierra diff has M10 x 1mm pitch threads and they're probably going to need a clean out given how mucky that diff is.
Always good though seeing this progress Cam
Of note, the input shaft flange on the Sierra diff has M10 x 1mm pitch threads and they're probably going to need a clean out given how mucky that diff is.
Edited by Sf_Manta on Monday 10th March 14:17
Approximately zero percent - the way it should be! 
You wouldn't believe the amount of stick I used to get on an un-named 205 GTI enthusiast forum for claiming it was still a 205.
Thanks Ian.. I'm still struggling to find out what type of thread my steering rack (Caterham / Mk1 Fiesta) has for the inner balljoints. It's 7/8" x 20tpi from what I can measure.. but no idea what standard!

Thanks for the kind words.
Ok, so a small update this weekend.. Titanfall was released on Friday so frankly it's a wonder that I even made it out the house!
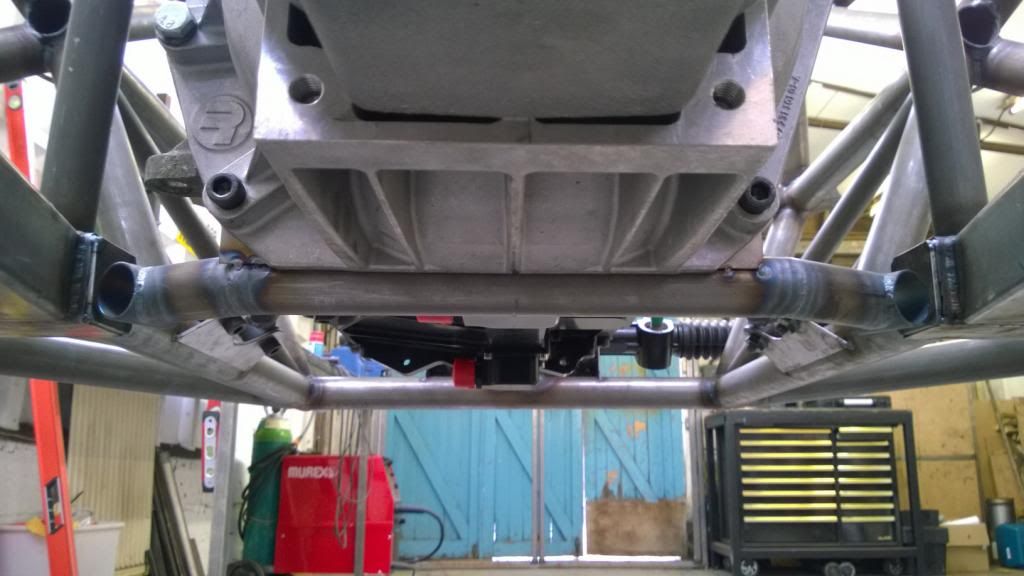
I made the front "strut brace" which also doubles up as a front engine mount.. it's pretty simple but was a little fiddly nonetheless.

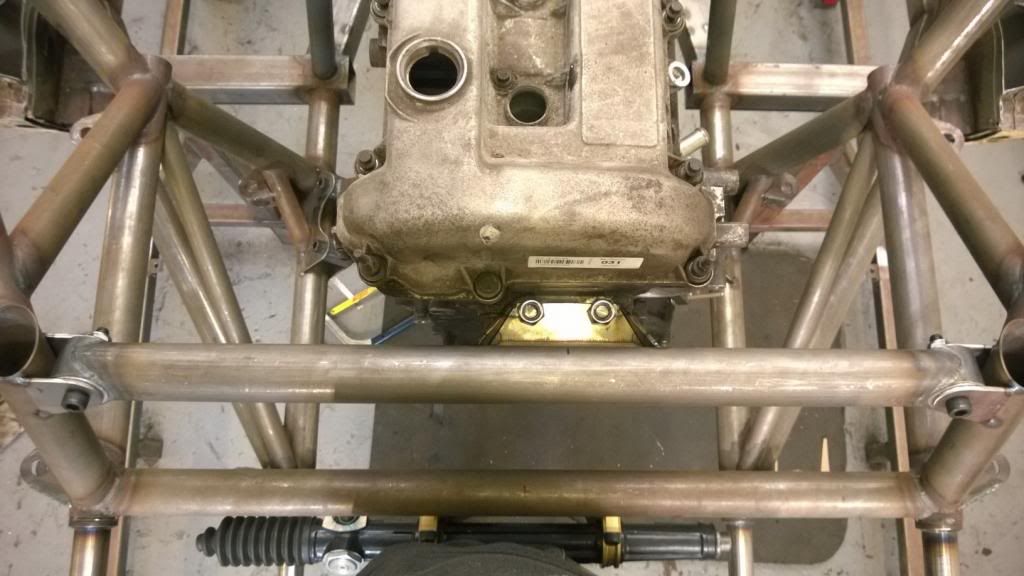
Then chopped out the central part of this box section, which will be replaced with a removable brace that bolts to the front of the bellhousing. Space for this is very very tight! I bolted the sump on, and will start making the brace (which is the last engine mount) next weekend.
That's all for now.. I have the week after next off so am hoping to get a lot done!
Ok, so a small update this weekend.. Titanfall was released on Friday so frankly it's a wonder that I even made it out the house!
I made the front "strut brace" which also doubles up as a front engine mount.. it's pretty simple but was a little fiddly nonetheless.
Then chopped out the central part of this box section, which will be replaced with a removable brace that bolts to the front of the bellhousing. Space for this is very very tight! I bolted the sump on, and will start making the brace (which is the last engine mount) next weekend.
That's all for now.. I have the week after next off so am hoping to get a lot done!
Thanks Kev, I'm hoping to get a lot done!
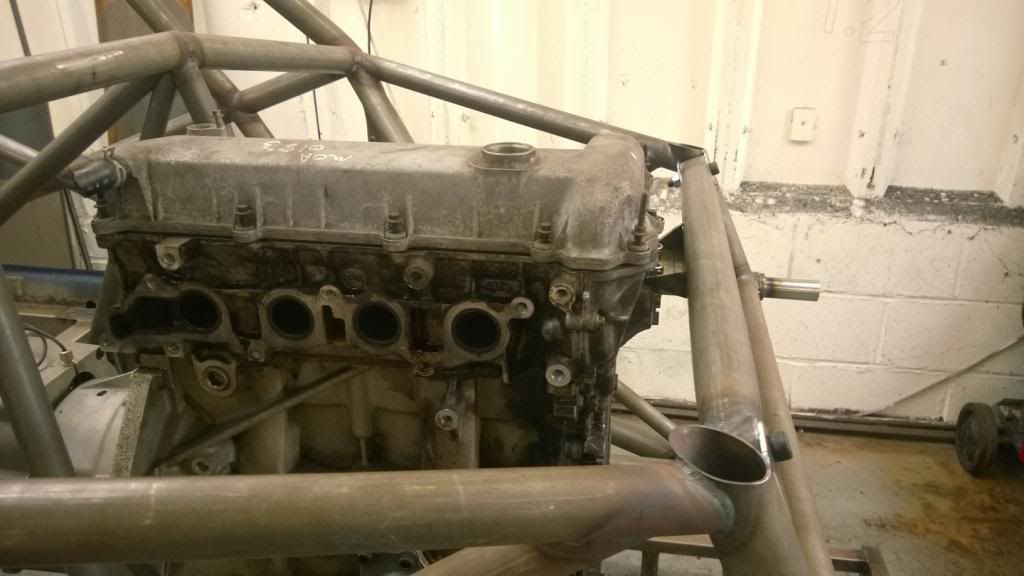
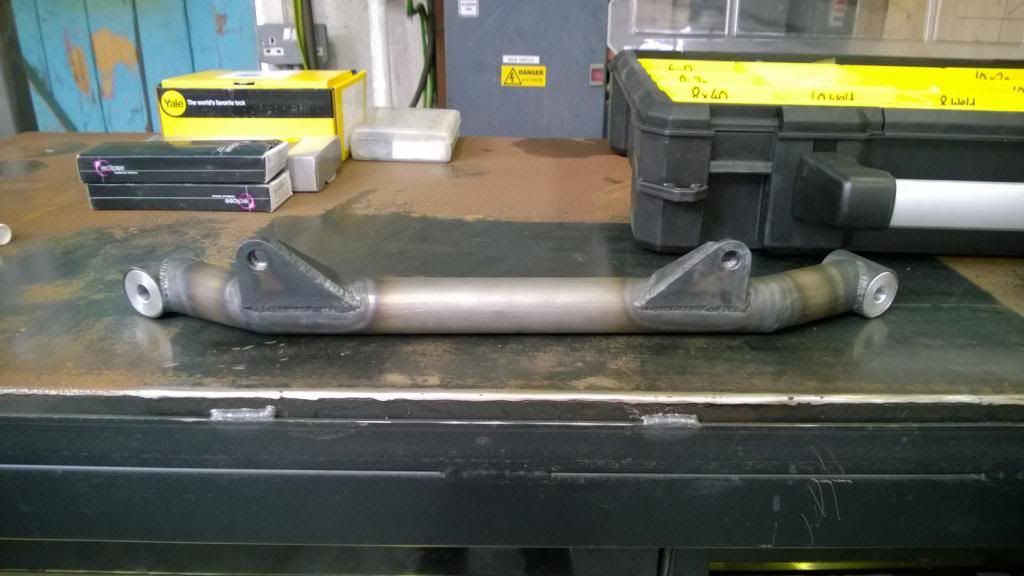
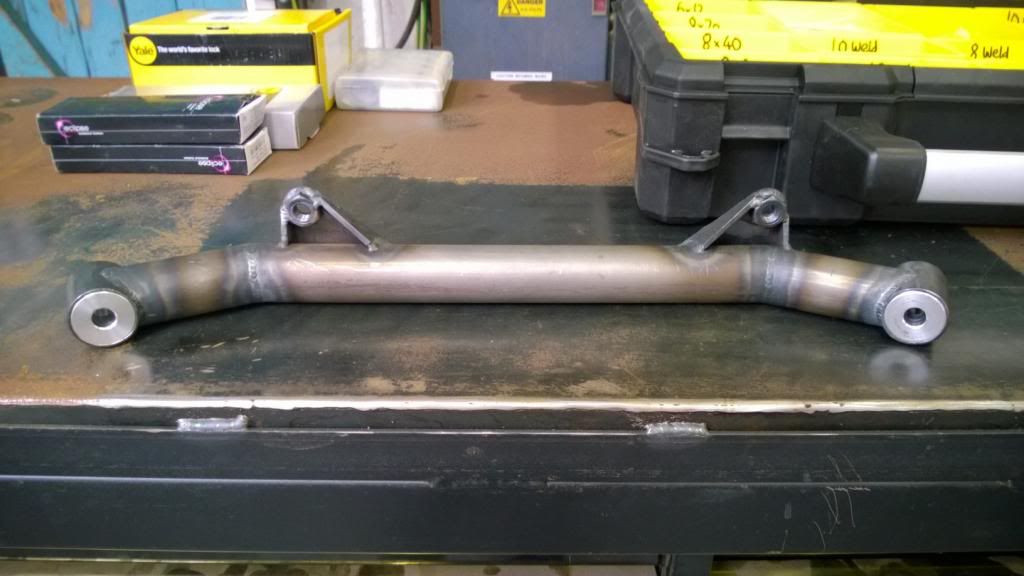
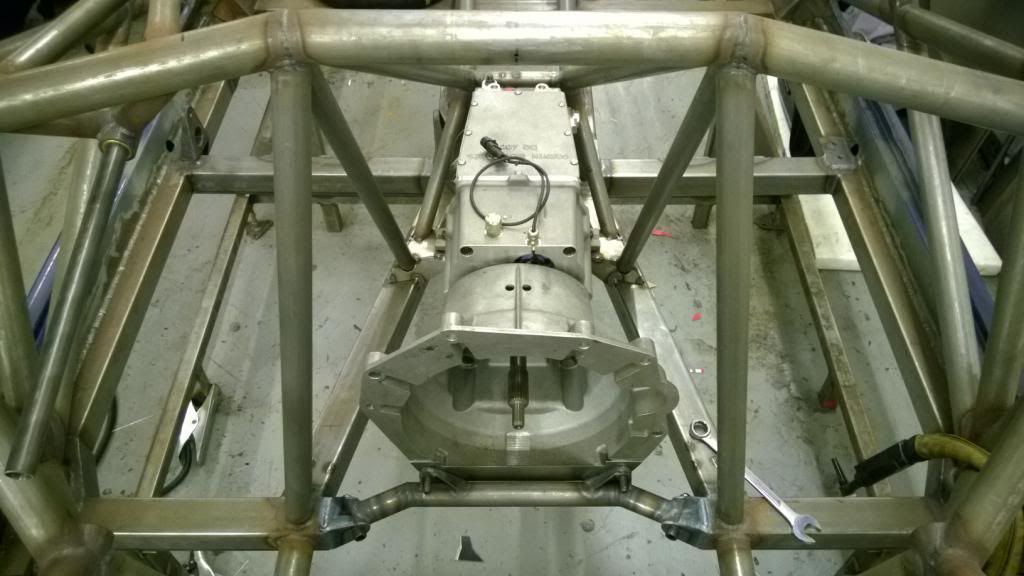
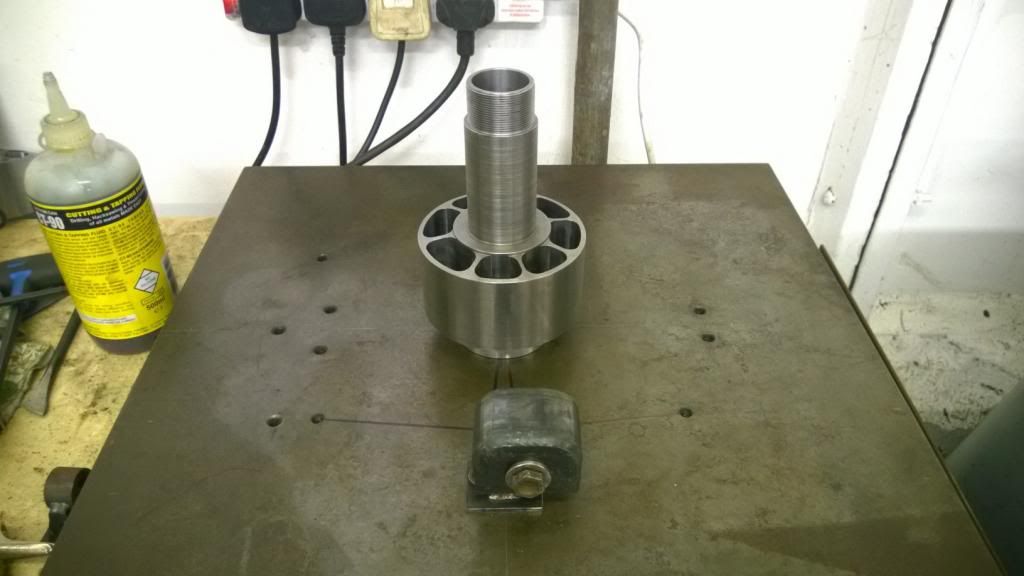
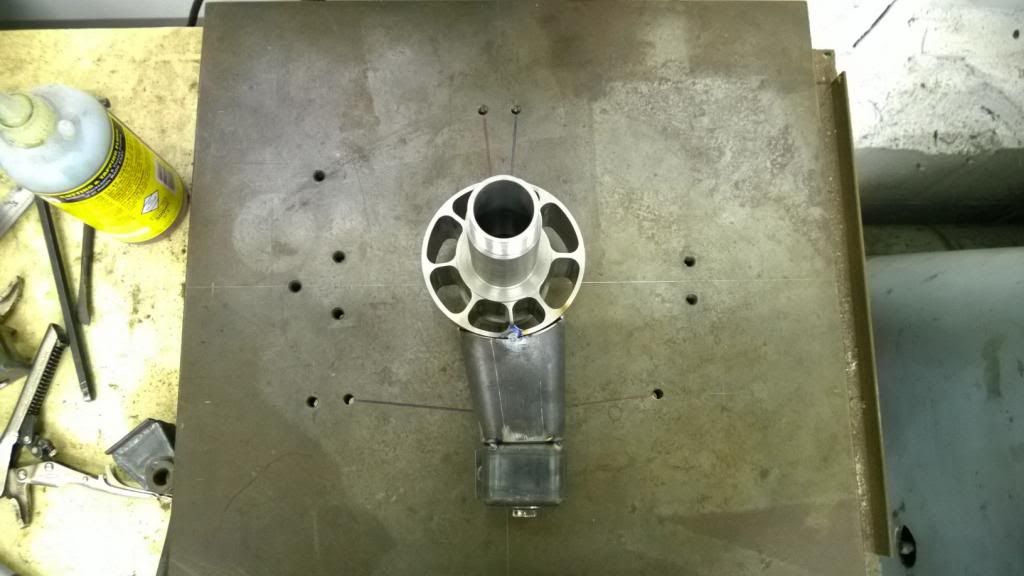
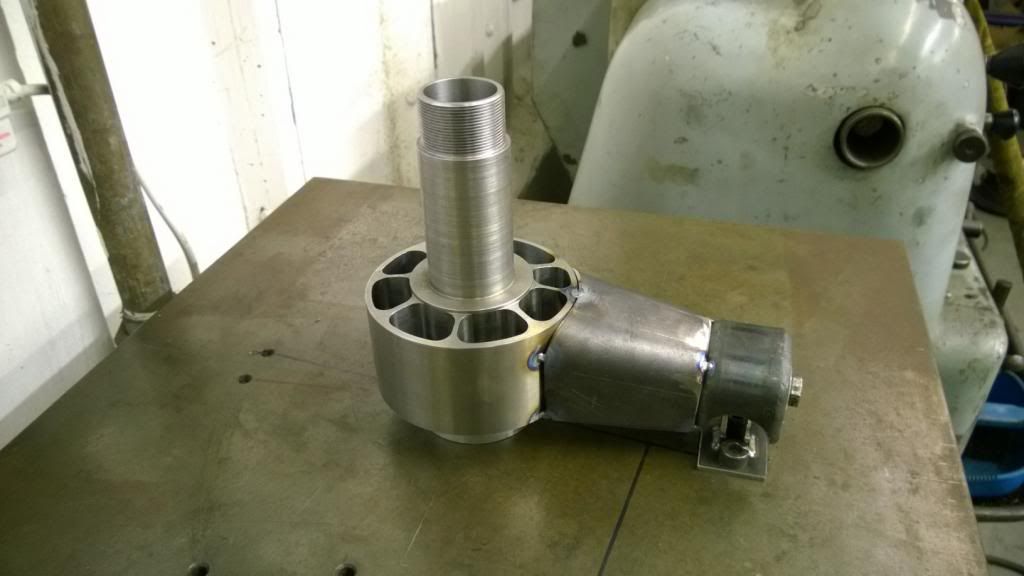
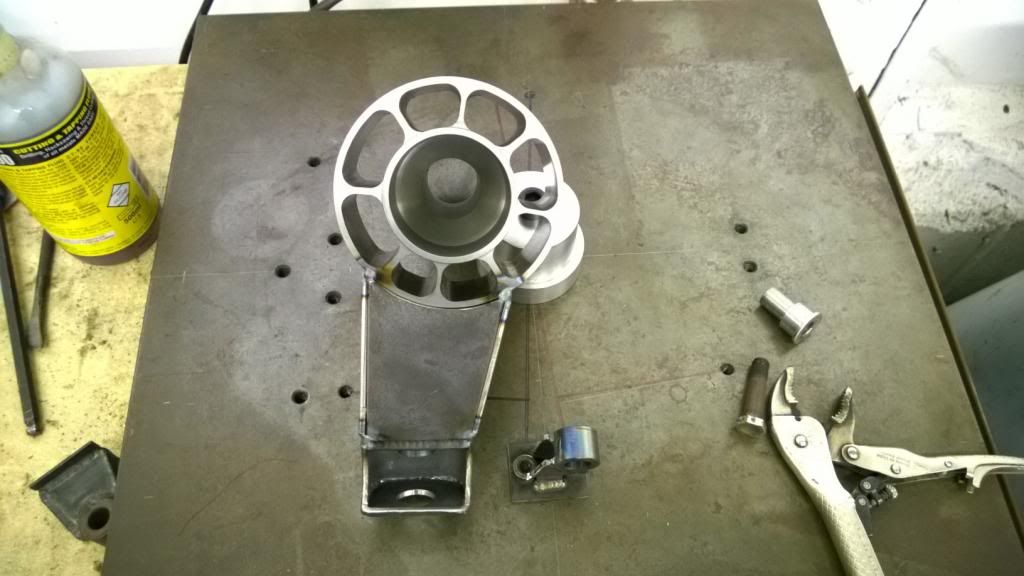
Update 1 of many: I made the last of the engine mounts today - a crossmember to tie the bottom of the chassis together and secure the front of the gearbox. I started off by making a close-out panel for the opening that is no longer covered by the wet sump pan, then got the bulk of the crossmember done by eye before tacking brackets to it in situ.
Clearance is very tight to the rear scavenge block! There's 3mm or so room, but neither are going anywhere so I'm not concerned.
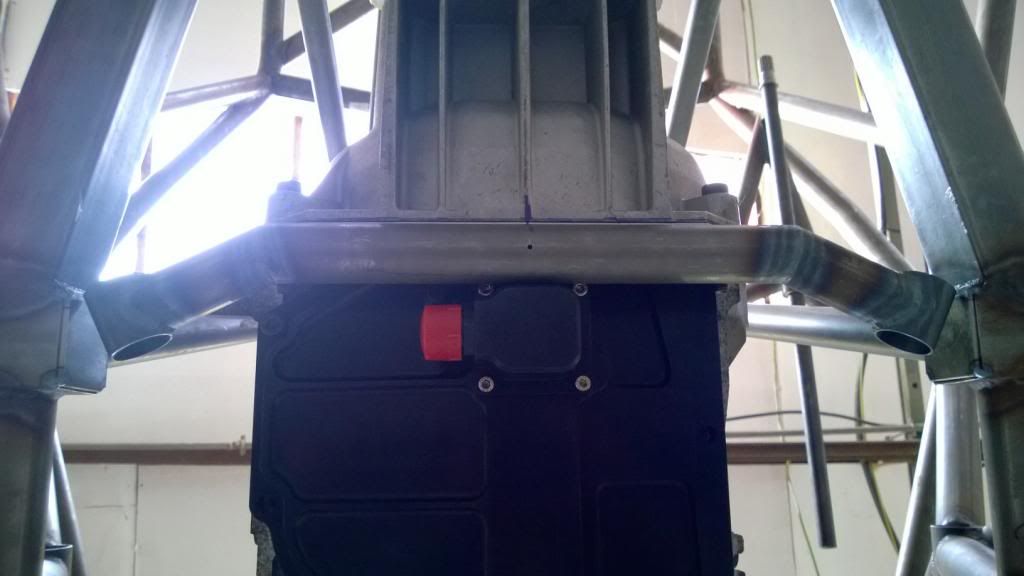
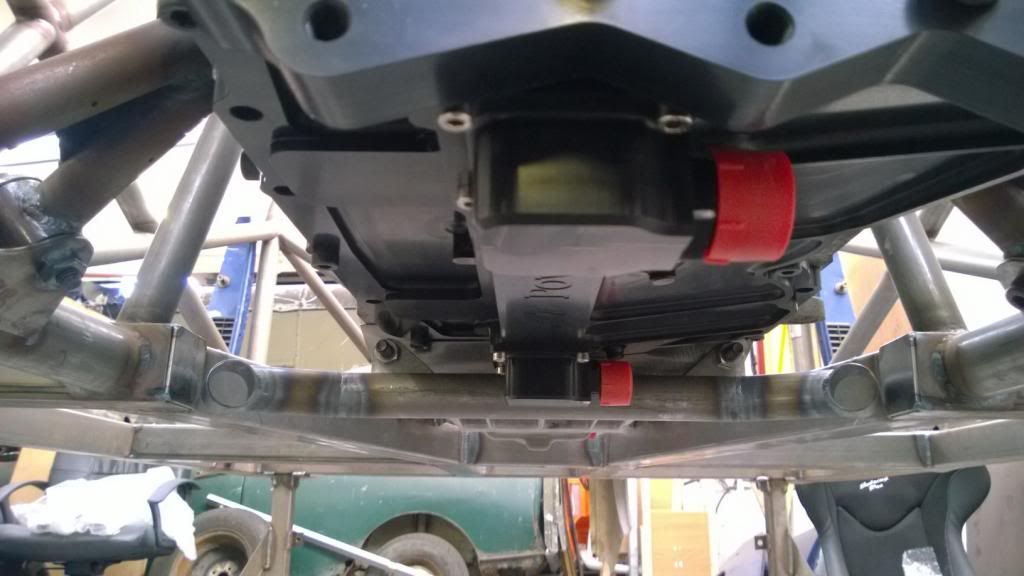
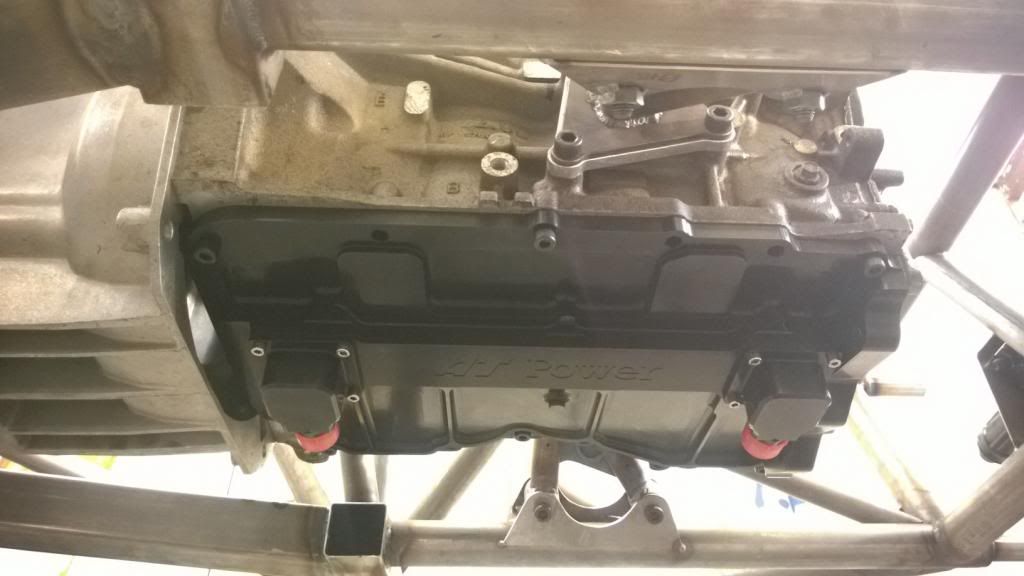
Then welded up the gearbox brackets with some captive nuts, and machined some aluminium bushes for the ends.
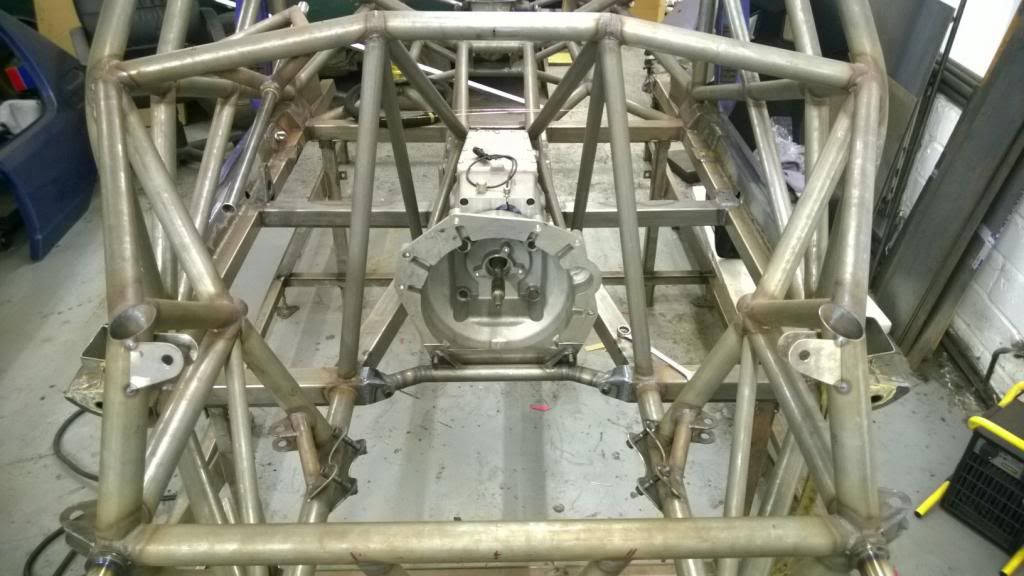
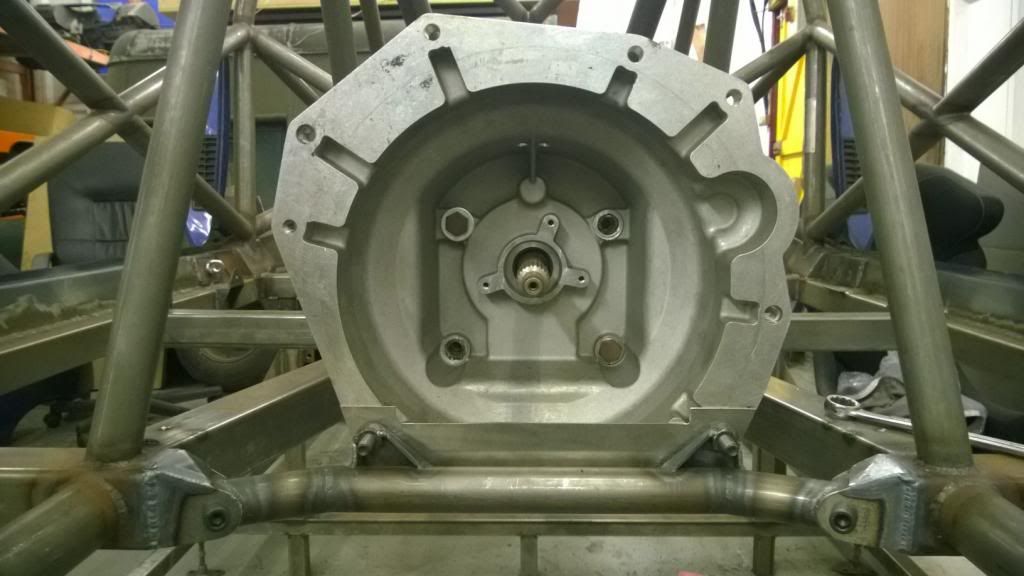
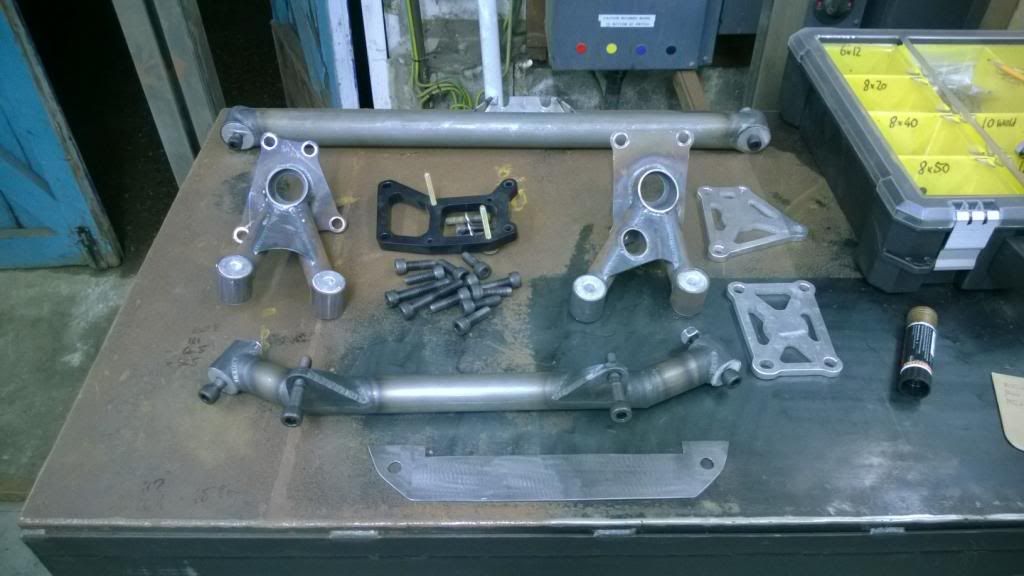
So with that I did a full engine-out test to make sure it was all possible. It's actually a really nice job, broken down in to a few manageable steps. The front strut brace & mount comes off, then the side engine mounts - leaving the engine attached to the box, then the engine comes straight out, then box comes off the crossmember & rear mounts to be lowered out the front to the ground. Nice.
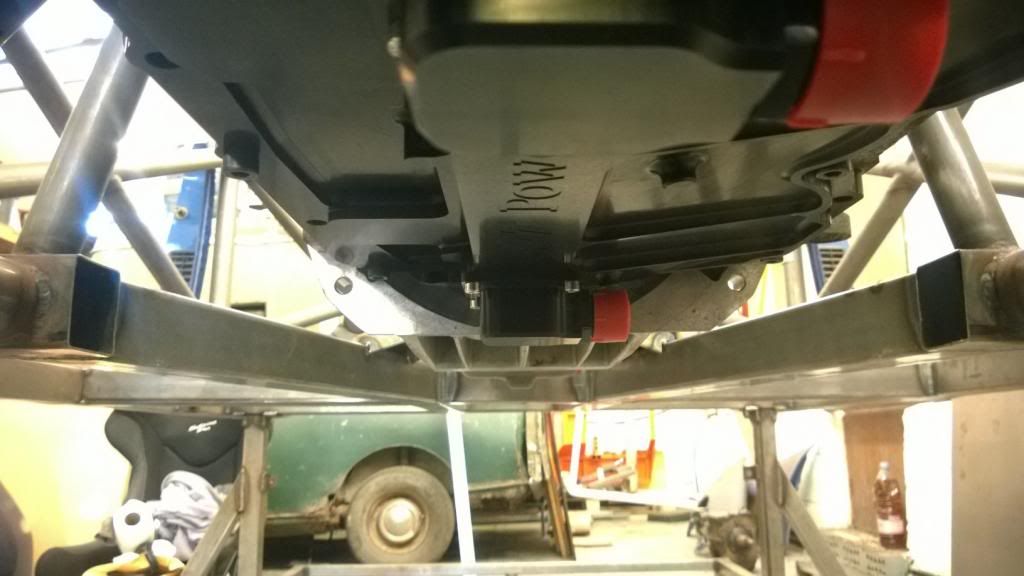
Everything out!

And a shot of all the mounts.
Update 1 of many: I made the last of the engine mounts today - a crossmember to tie the bottom of the chassis together and secure the front of the gearbox. I started off by making a close-out panel for the opening that is no longer covered by the wet sump pan, then got the bulk of the crossmember done by eye before tacking brackets to it in situ.
Clearance is very tight to the rear scavenge block! There's 3mm or so room, but neither are going anywhere so I'm not concerned.
Then welded up the gearbox brackets with some captive nuts, and machined some aluminium bushes for the ends.
So with that I did a full engine-out test to make sure it was all possible. It's actually a really nice job, broken down in to a few manageable steps. The front strut brace & mount comes off, then the side engine mounts - leaving the engine attached to the box, then the engine comes straight out, then box comes off the crossmember & rear mounts to be lowered out the front to the ground. Nice.
Everything out!
And a shot of all the mounts.

I've been working on the front uprights for the past couple of days, so here's a small update. It's 8pm and I still haven't eaten, so this'll be just pictures and a few words.
Drawings!
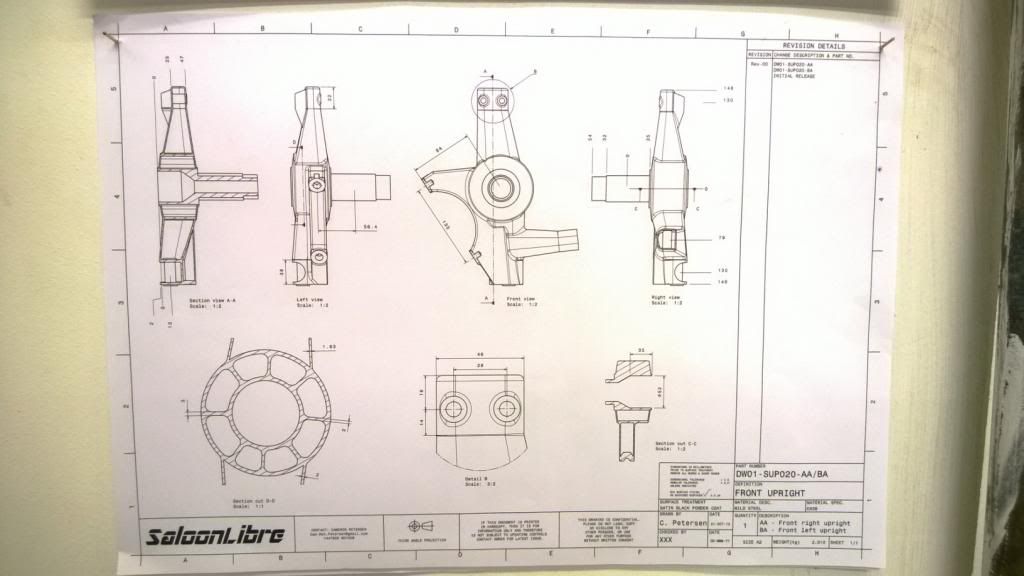
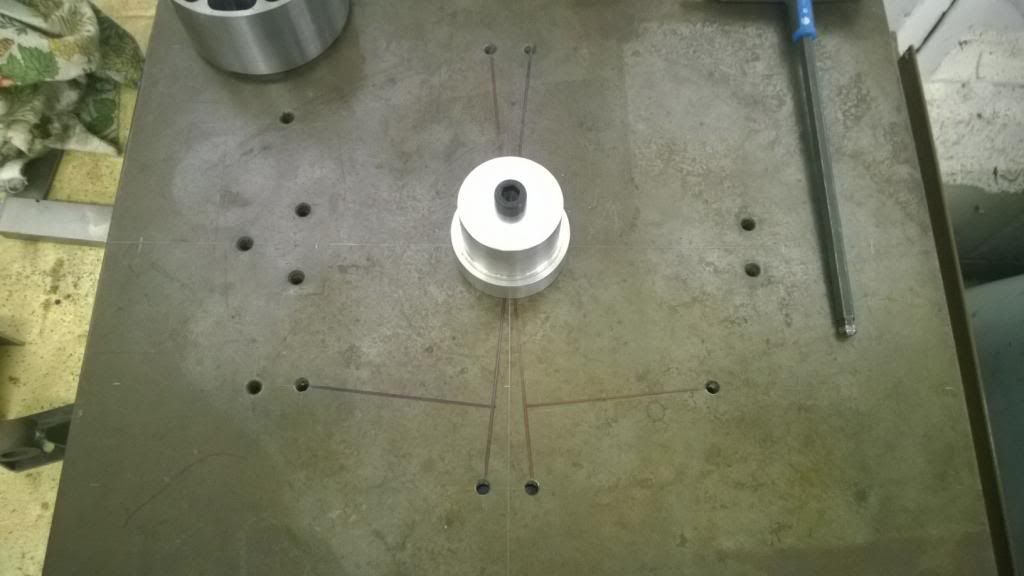
Which I used to mark out my "jig table"..
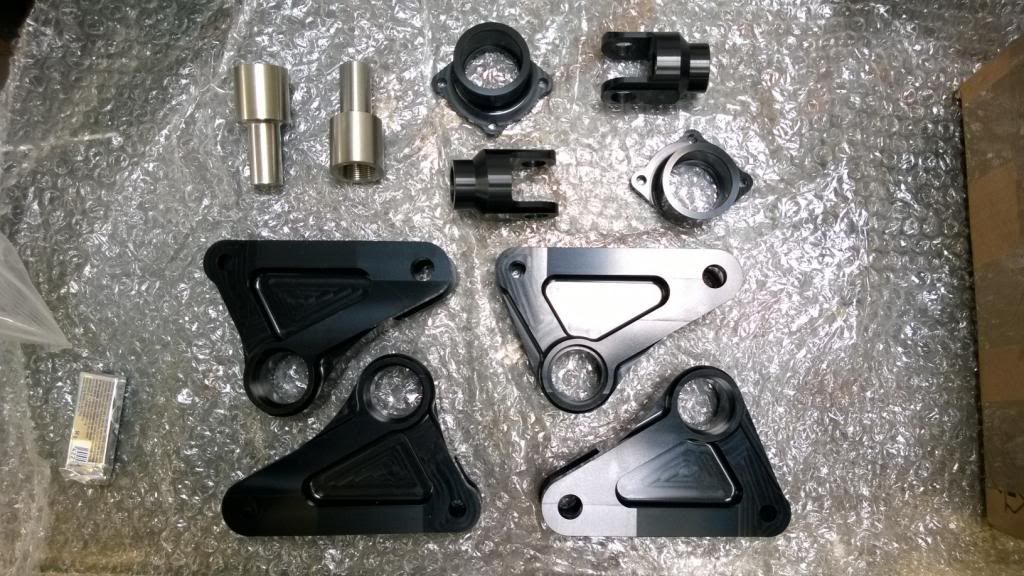
Machined a boss for the stub axle and made a little jig for the LBJ.
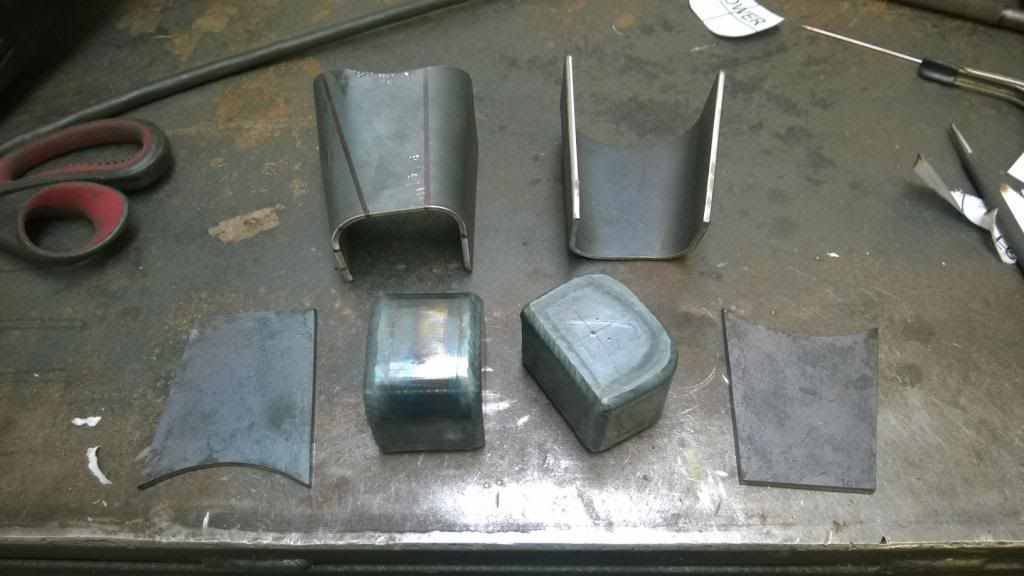
Then cut some bits out..
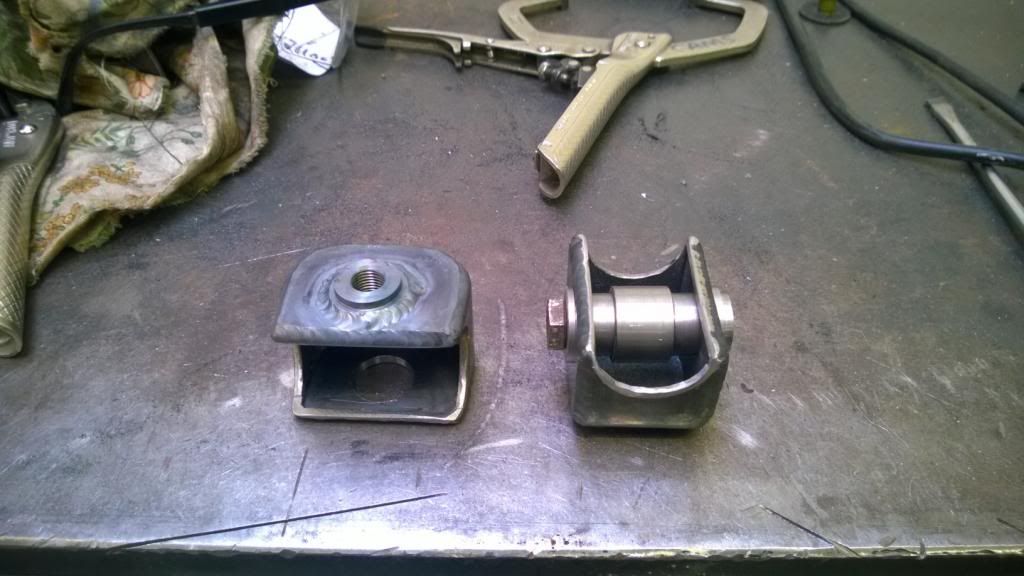
And got them in place..
That's all for now.. my pizza is done.
Drawings!
Which I used to mark out my "jig table"..
Machined a boss for the stub axle and made a little jig for the LBJ.
Then cut some bits out..
And got them in place..
That's all for now.. my pizza is done.
Edited by CamMoreRon on Tuesday 25th March 20:55
While I cannot exactly comprehend a lot of what is actually going on here, this is the most compelling thread I've ever read.
To echo others comments the attention to detail is fascinating, and the physical engineering is a sight to behold.
Suffice to say you are one talented young man. Can't wait for more!
To echo others comments the attention to detail is fascinating, and the physical engineering is a sight to behold.
Suffice to say you are one talented young man. Can't wait for more!
Gassing Station | Readers' Cars | Top of Page | What's New | My Stuff