Attempting to build the fastest road legal Elan in the world
Discussion


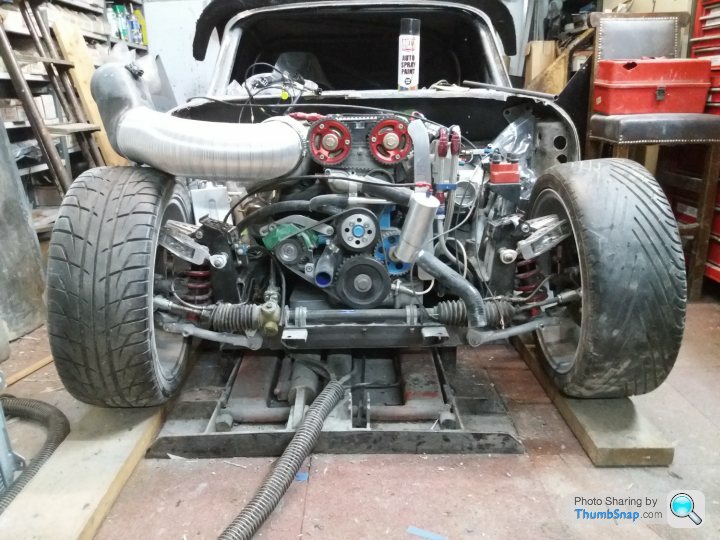
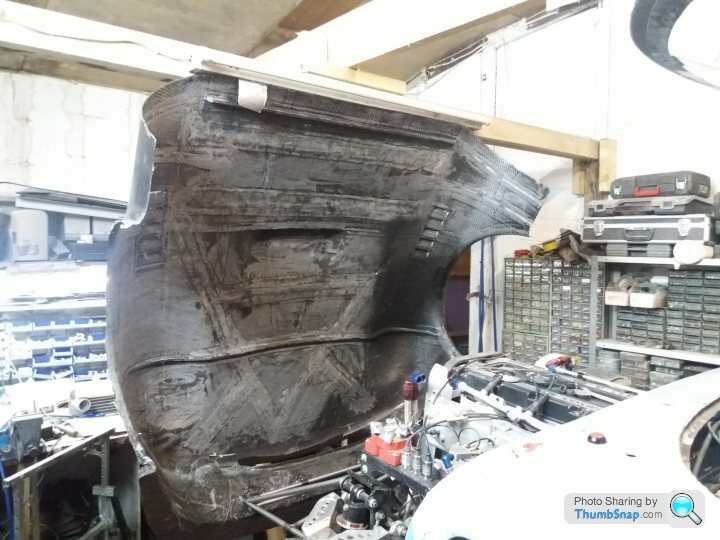
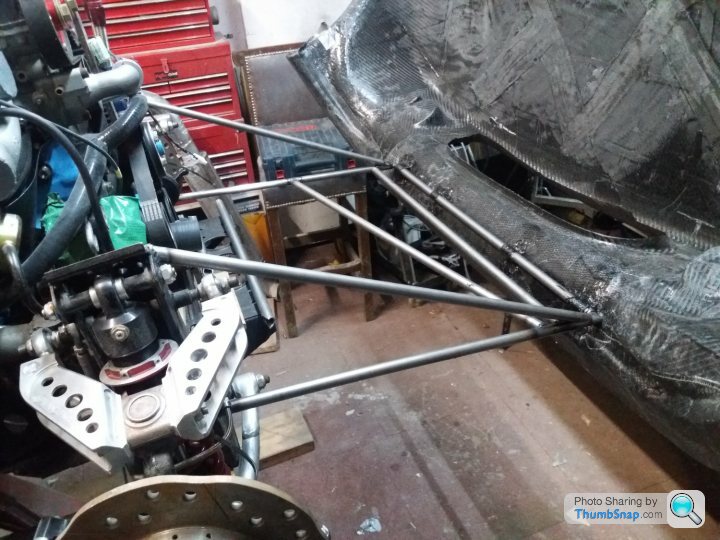
Although the frame isn't finished (a couple of additional tubes to increase the triangulation still to be added) I decided to see if I had got my calculations correct. The answer is yes......just.
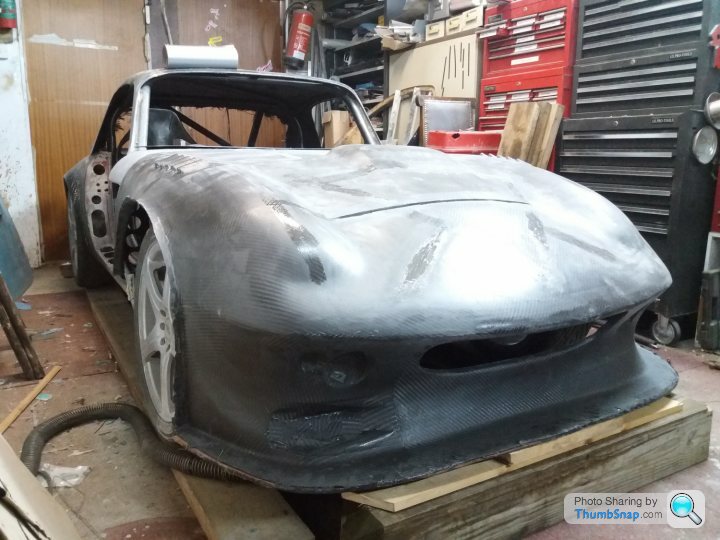
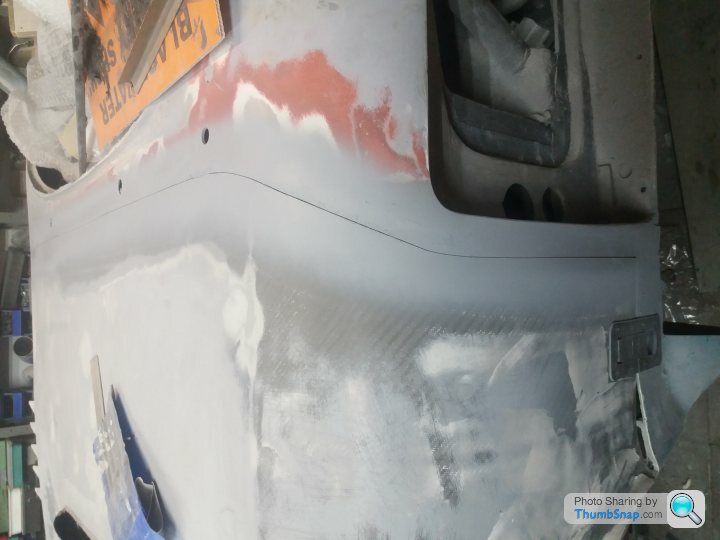
The tube fitted to the clip will be fully bonded on when I next remove the clip. The surface finish, both top and underside, looks c-rap at the moment due to ongoing repair work to fix the issues caused by deformation of the mould under heat and pressure.
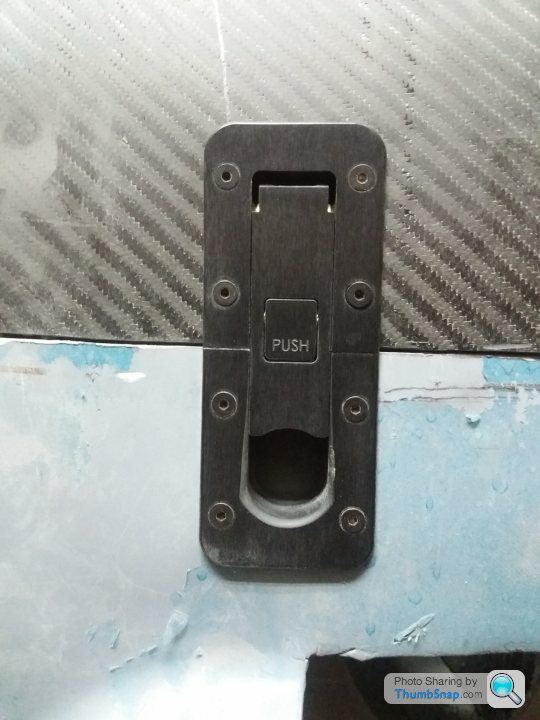
Fitted first AeroCatch, seems to work well:
The tube fitted to the clip will be fully bonded on when I next remove the clip. The surface finish, both top and underside, looks c-rap at the moment due to ongoing repair work to fix the issues caused by deformation of the mould under heat and pressure.
Fitted first AeroCatch, seems to work well:
Basically, yes :-)
150w bulbs on four separate circuits, one of which is thermostatically controlled. Large fan to distribute heat evenly. 8 temp sensors to monitor temp. Glass from mircowave door so I can see what is going on :-) I normally use it at 120 deg C. However it takes quite a while to get there so I have bought a spider bulb holder that takes 6 bulbs which should allow me to ramp up the temp at around 3 deg C a minute which is what is recommended for my prepreg.
I have both vacuum and pressure lines installed.

A bit Heath Robinson, but it works :-)
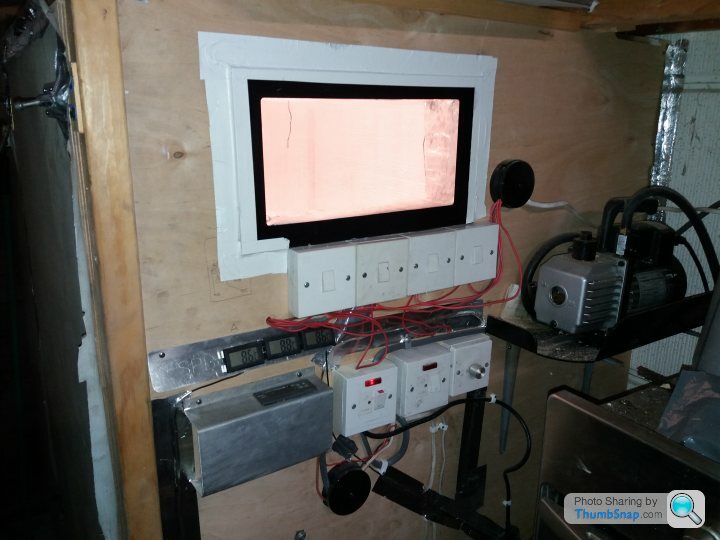
150w bulbs on four separate circuits, one of which is thermostatically controlled. Large fan to distribute heat evenly. 8 temp sensors to monitor temp. Glass from mircowave door so I can see what is going on :-) I normally use it at 120 deg C. However it takes quite a while to get there so I have bought a spider bulb holder that takes 6 bulbs which should allow me to ramp up the temp at around 3 deg C a minute which is what is recommended for my prepreg.
I have both vacuum and pressure lines installed.
A bit Heath Robinson, but it works :-)
Edited by stevebroad on Tuesday 12th June 11:34
Edited by stevebroad on Tuesday 12th June 11:35
Edited by stevebroad on Tuesday 12th June 11:37
Slow said:
Looks good, do the bulbs max the temp inside at 120 or does the circuit cut power if it raises above say 125 and turns back on at like 115?
Never worked on anything related to a oven before so fairly newbie.
If left to its own devices it maxes out at around 130. I can control the temp to within 2 deg using the thermostatically controlled bulbs.Never worked on anything related to a oven before so fairly newbie.
rampageturke said:
are you planning to run side walls for your v-mount? IIRC the RX7 guys get better performance out of them this way

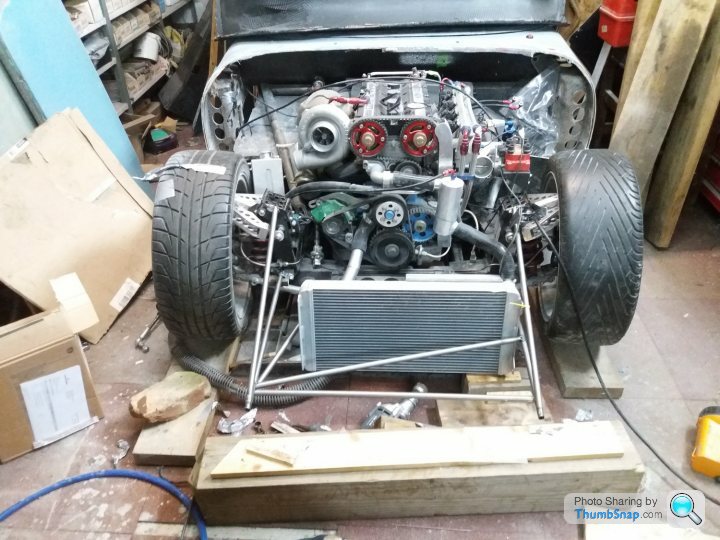
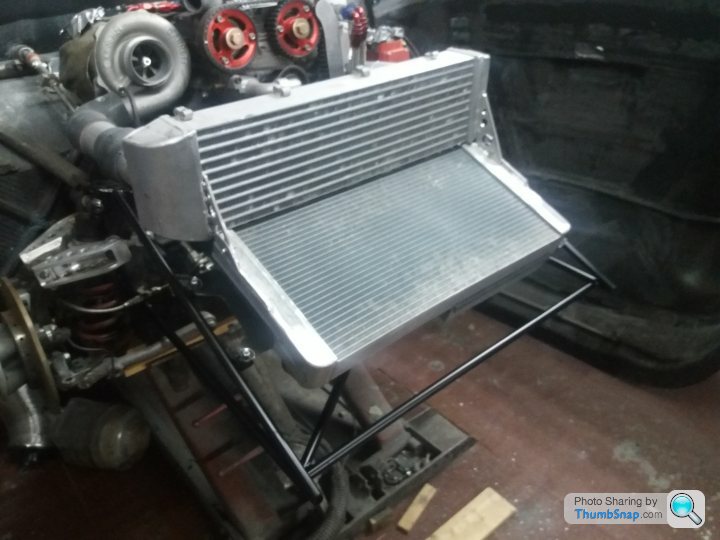
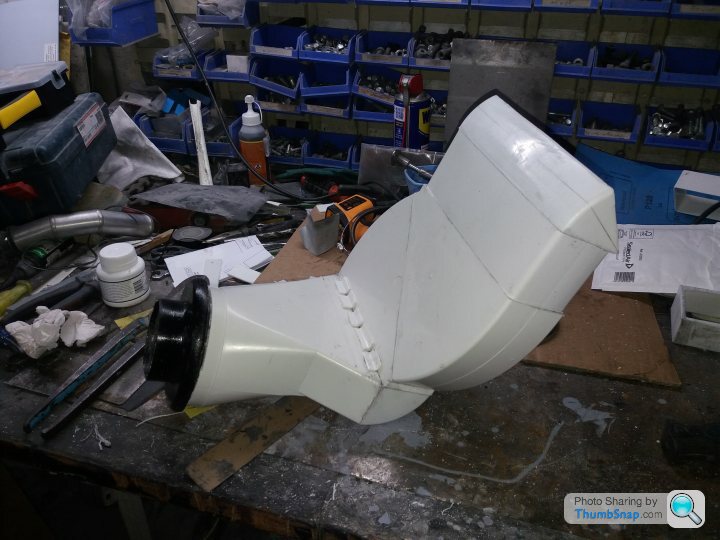
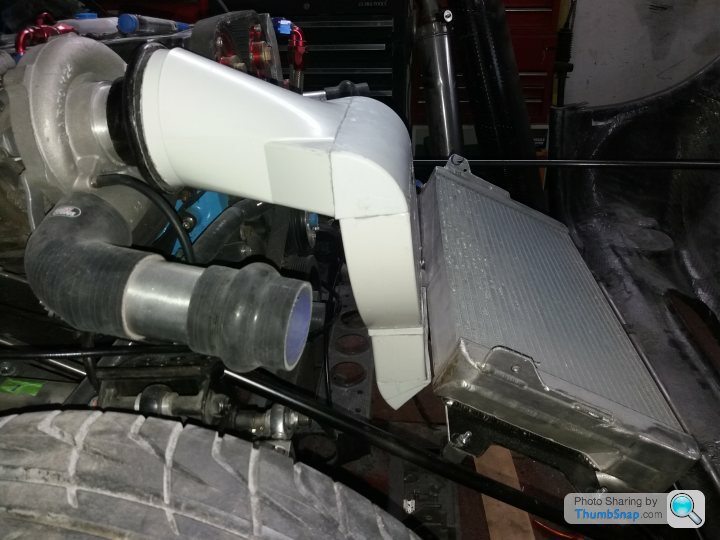
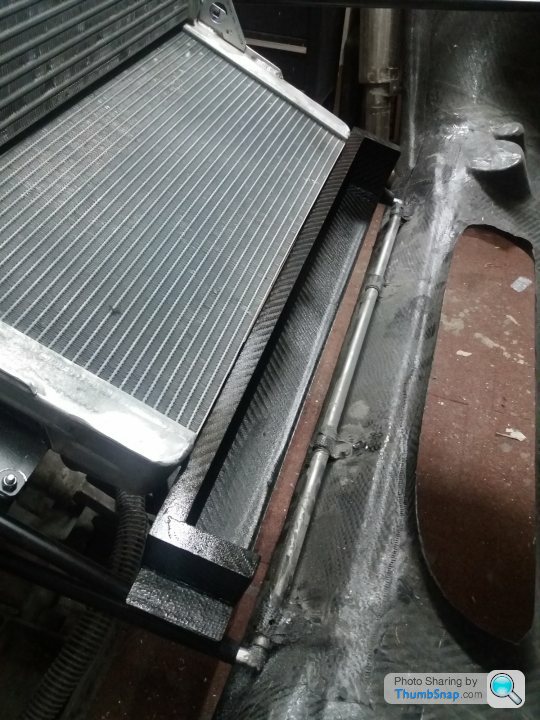
The plan was to enclose rads in a sealed duct when I had the original body fitted. However, as the ducting will be more complicated (due to the flip front) and heavy :-), I will leave them open for now and monitor temps. Parts arrived today so I can get on with making the induction pattern. From this a two part fibreglass mould will be made so a carbon fibre induction system can be fabricated.
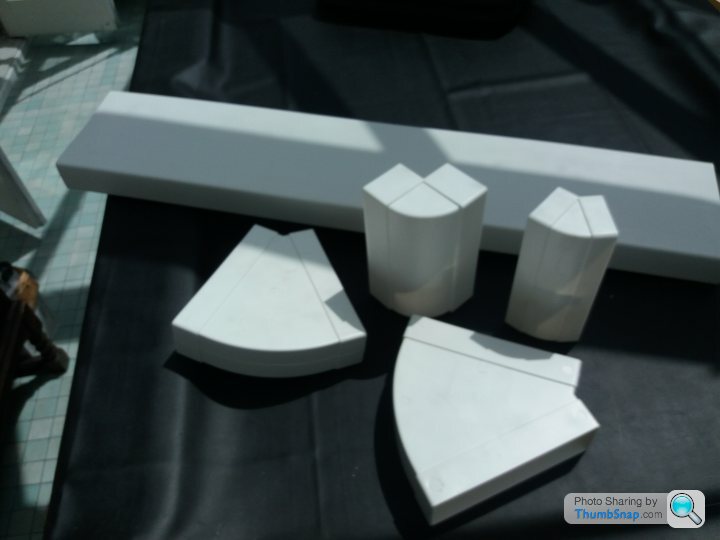
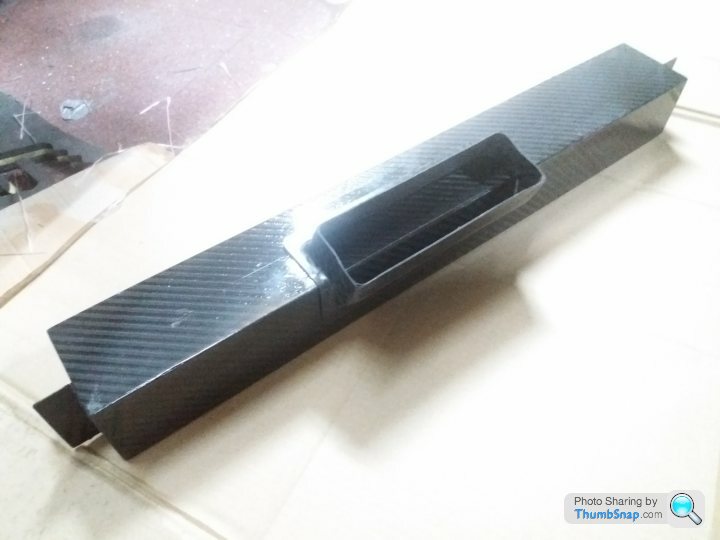
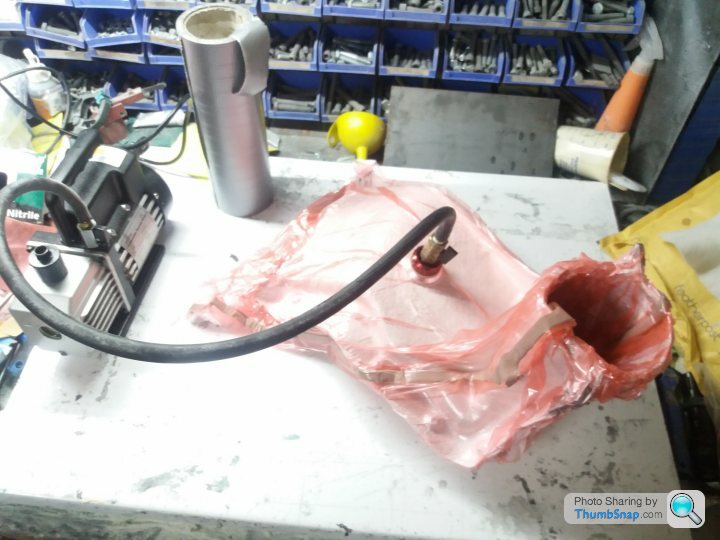
The round to rectangular adaptor fits the turbo inlet perfectly.

Filter box designed, just waiting for a price from ITG for the bespoke filter element.
The round to rectangular adaptor fits the turbo inlet perfectly.
Filter box designed, just waiting for a price from ITG for the bespoke filter element.
Edited by stevebroad on Saturday 16th June 08:23
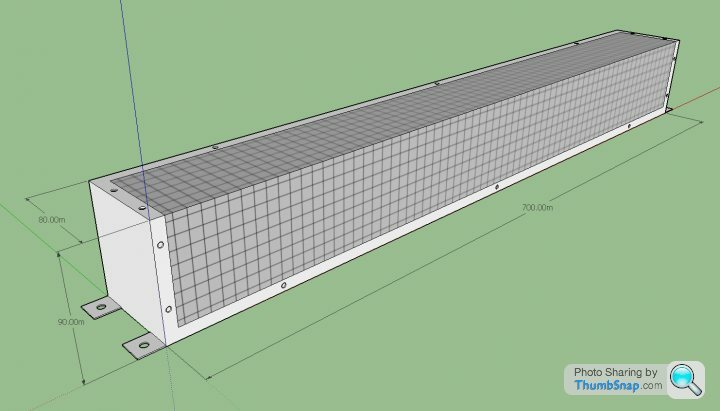
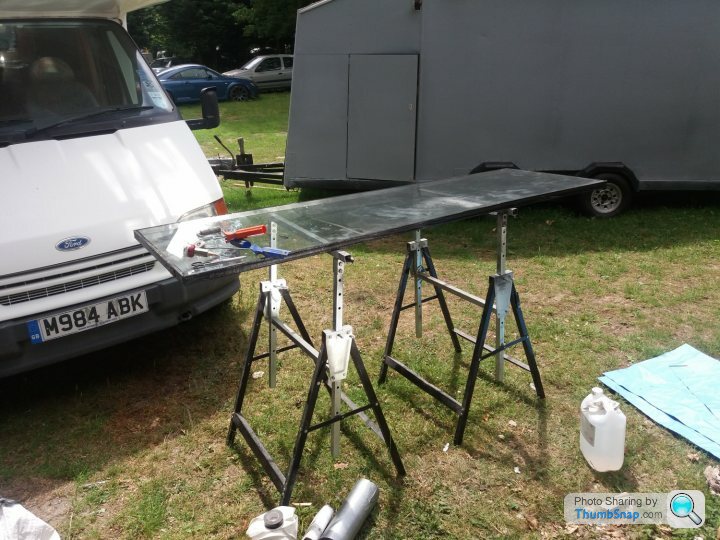
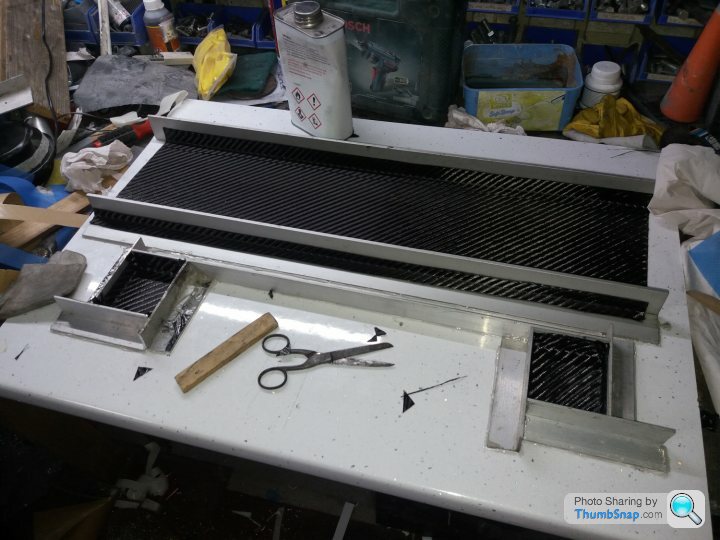
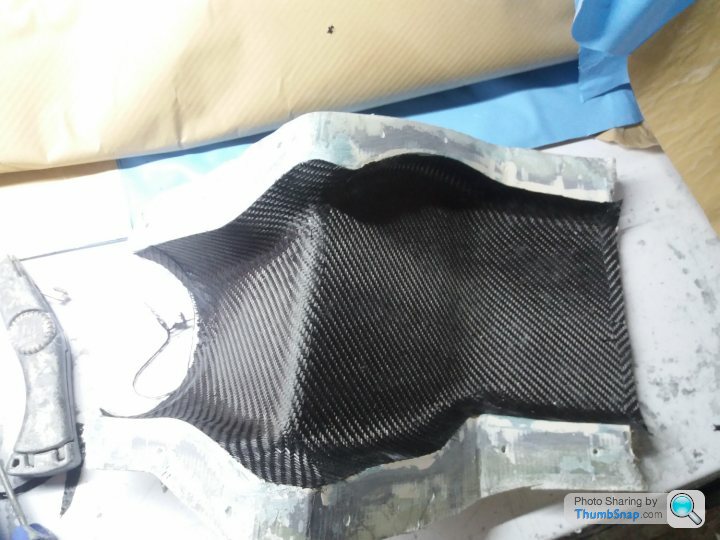
Started on the floor panels that will sit under the rads and engine.
Decided to lay the floor up on a large double glazing panel so it would be flat. First time I have done this with prepreg so I needed to deal with the issue of the gas in the panel expanding due to the heat. To this end I simply drilled a couple of holes through the separator.
All went well until it came to extracting the air. Stated off OK but then I started to hear creaking noises. This isn't right, I thought to myself, so I had a closer look and noticed that the glass was starting to take on a concave shape! The vacuum bag was trying to pull the two panes of glass together so I quickly turned the pump off and released the vacuum.
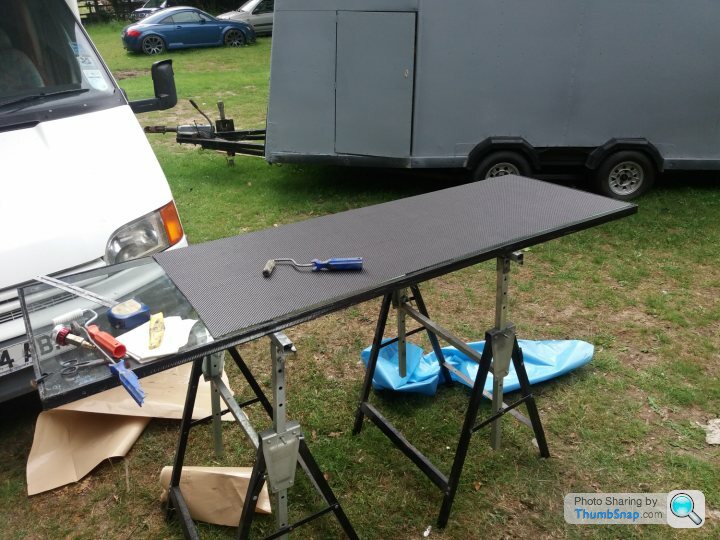
Now what to do? Luckily, I found an old flat pack desk top in the barn that was a suitable size. Managed to remove the floor from the glass and transfer it to the top. Phew! Panic over.
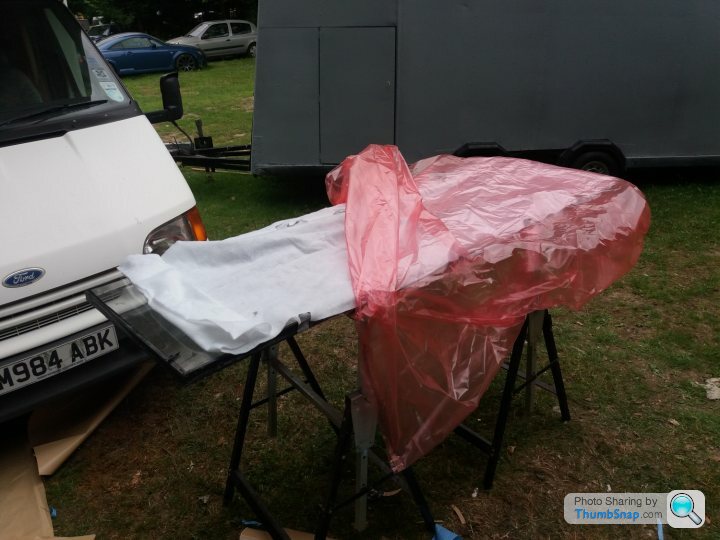
As the foam filler isn't designed for prepreg it doesn't like high temperatures. I have, therefore, had to cure the carbon at 100 deg C rather than the usual 120. Same result, just takes longer so I have left it to run over night.
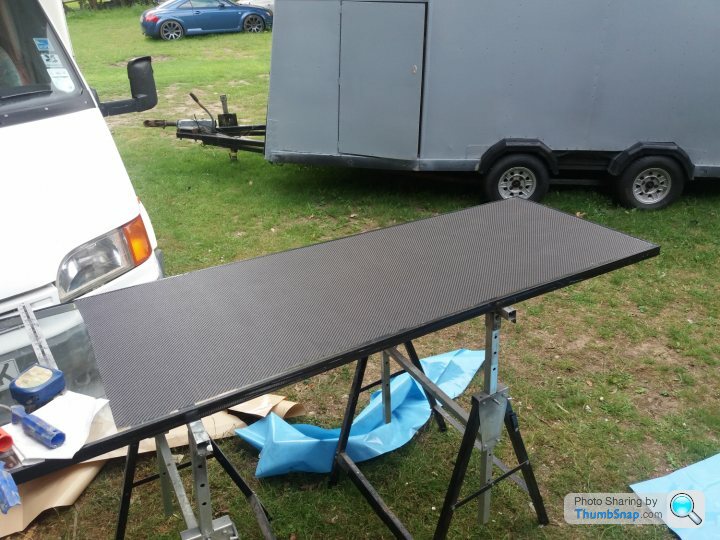
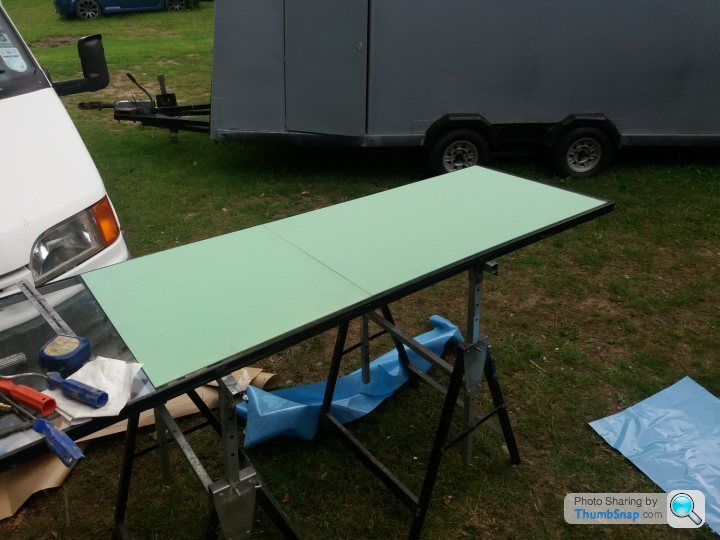


Decided to lay the floor up on a large double glazing panel so it would be flat. First time I have done this with prepreg so I needed to deal with the issue of the gas in the panel expanding due to the heat. To this end I simply drilled a couple of holes through the separator.
All went well until it came to extracting the air. Stated off OK but then I started to hear creaking noises. This isn't right, I thought to myself, so I had a closer look and noticed that the glass was starting to take on a concave shape! The vacuum bag was trying to pull the two panes of glass together so I quickly turned the pump off and released the vacuum.
Now what to do? Luckily, I found an old flat pack desk top in the barn that was a suitable size. Managed to remove the floor from the glass and transfer it to the top. Phew! Panic over.
As the foam filler isn't designed for prepreg it doesn't like high temperatures. I have, therefore, had to cure the carbon at 100 deg C rather than the usual 120. Same result, just takes longer so I have left it to run over night.

 |https://thumbsnap.com/Lg3KBYW7[/url]
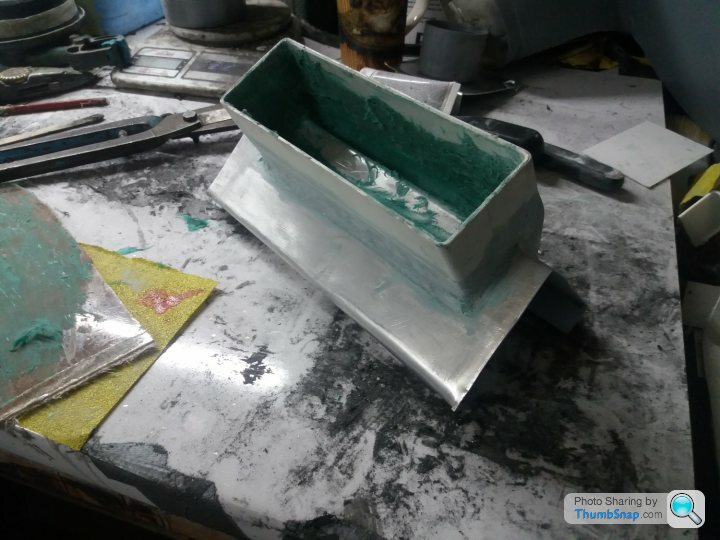
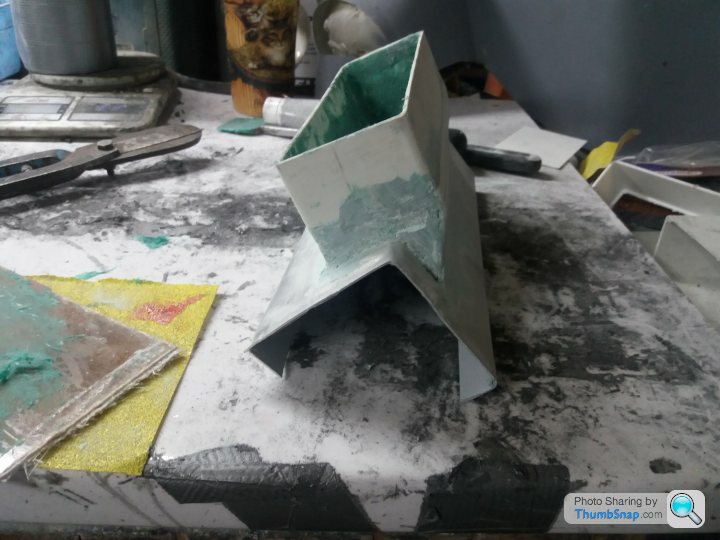
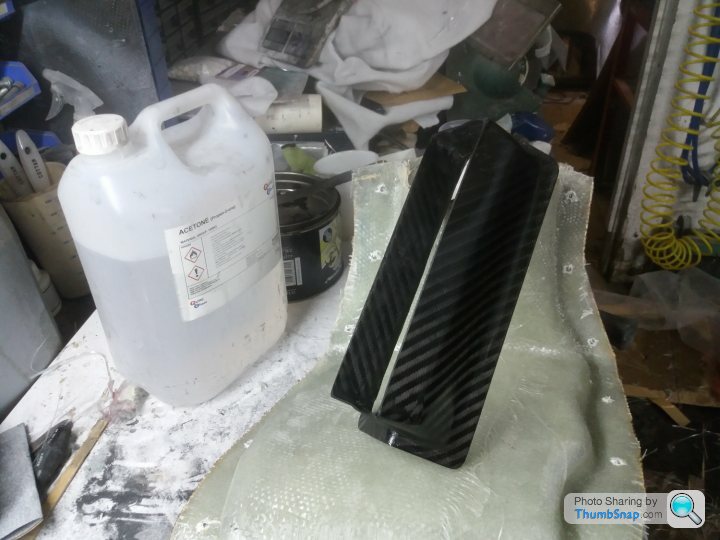

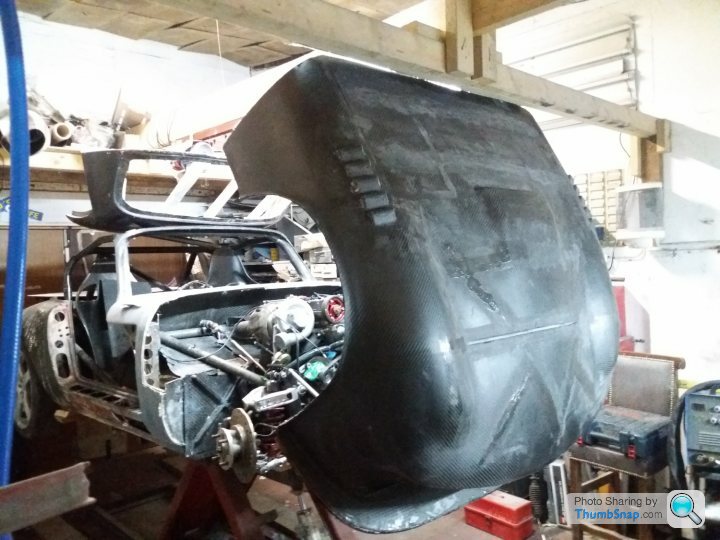
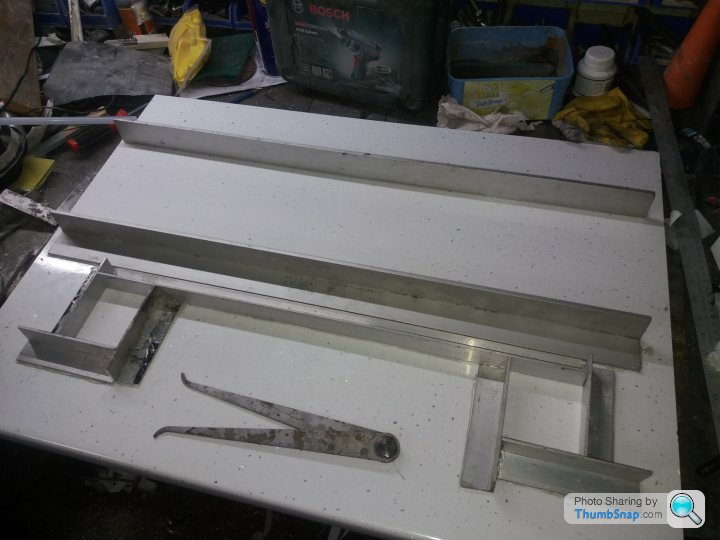
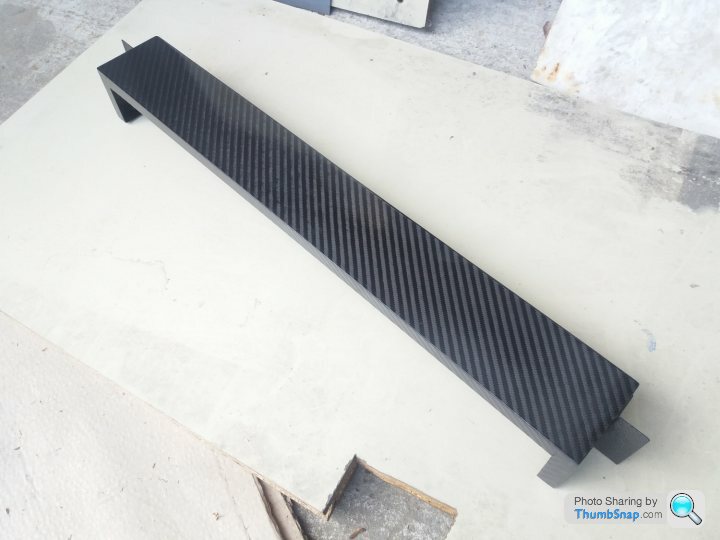
A couple of days making the mould and smoothing out the internal angles and i was ready to lay up some carbon. This was quickly done, then I spent an hour working out how to lay in the peal ply, breather cloth and vacuum bag. After curing I spent another hour separating the carbon from the mould.
Subject to my customary post cure fettling, it should look OK


Subject to my customary post cure fettling, it should look OK
Gassing Station | Readers' Cars | Top of Page | What's New | My Stuff