Escort Mk2 Rally Car Build Modern Spec
Discussion


Part three of the body shell:
Full Safety devices weld in cage:
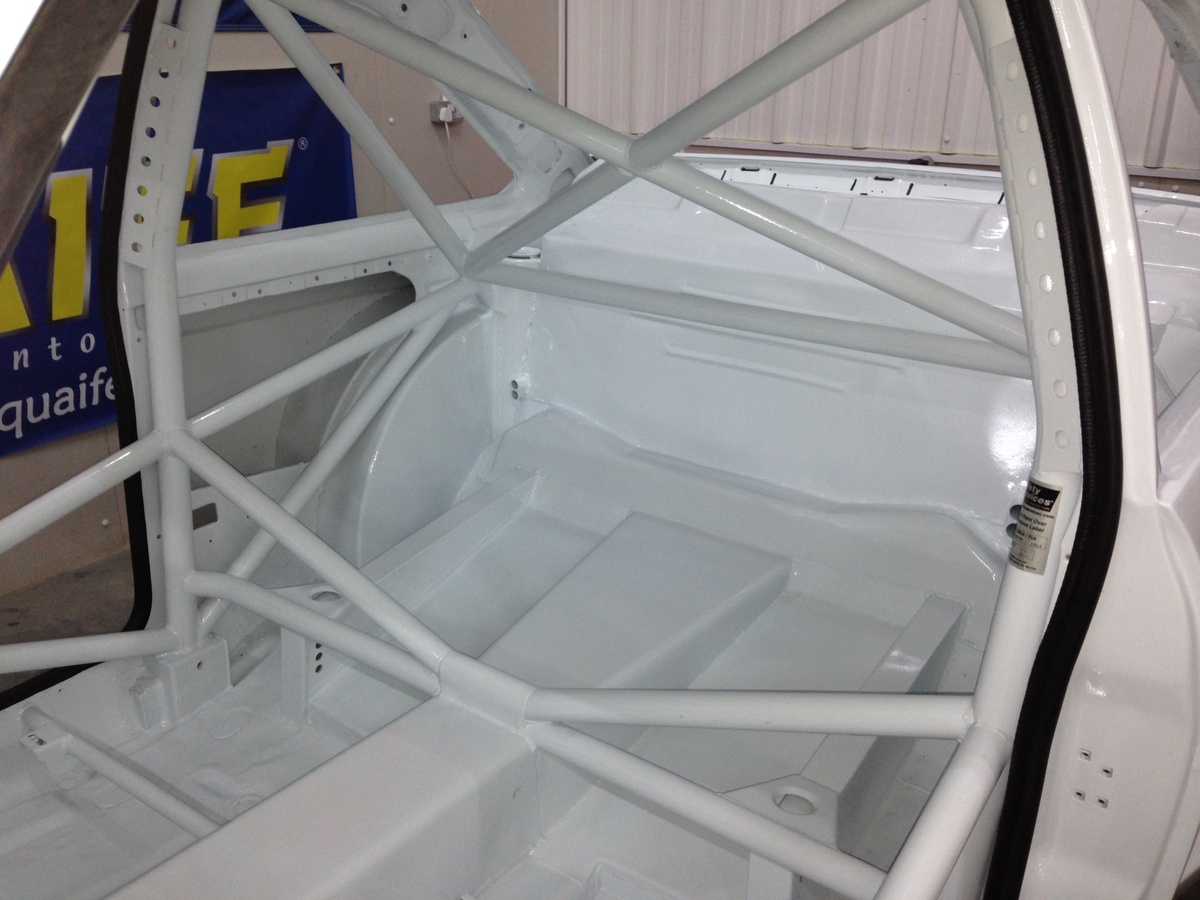
Extra gussets added on the door bars:

Turret conversion on the rear:
Bigger wheel arch inner's for....that's right bigger wheels! ;-)

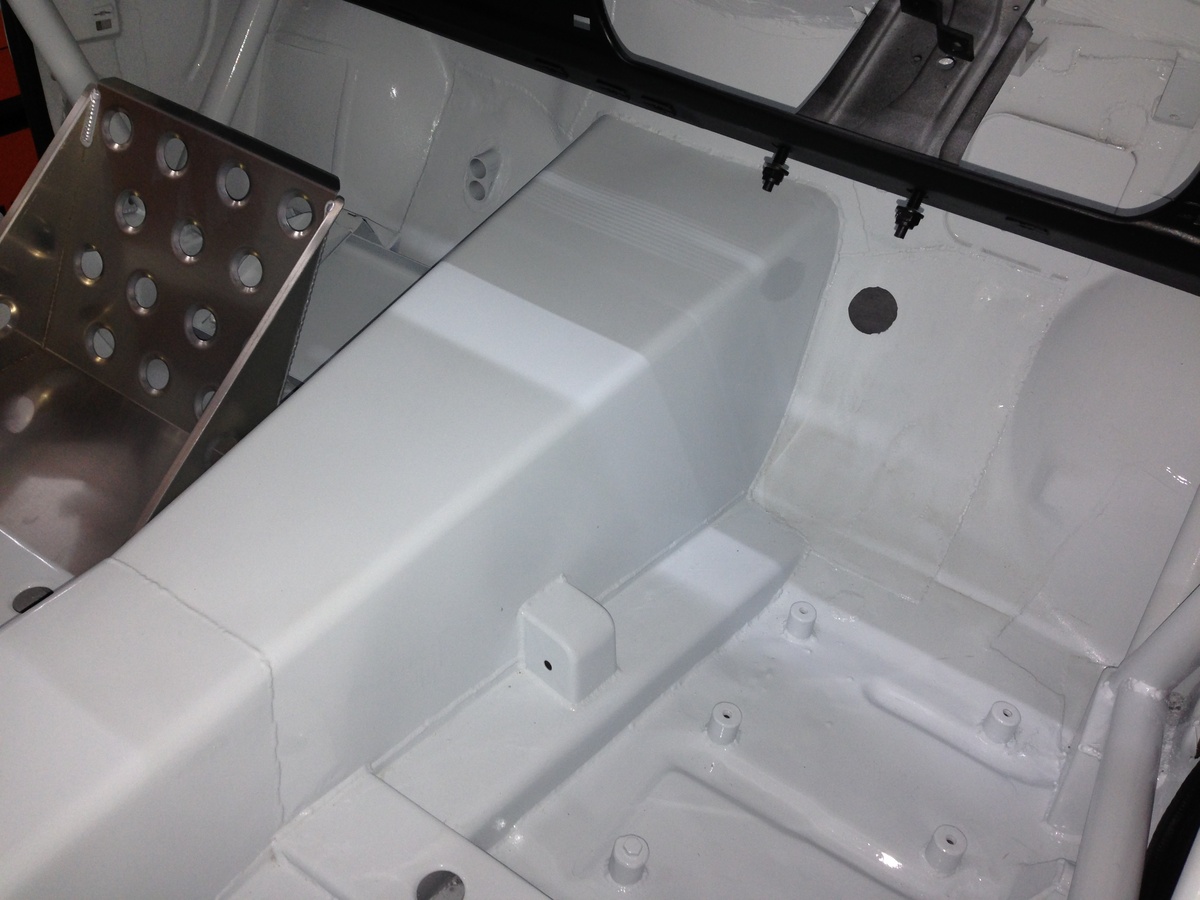
Massive transmission tunnel ready for Quaife 60G Sequential:
A few more details on here: http://www.motorsport-tools.com/blog/a-closer-look...
By the way if your into MotoGp, I went to visit a team at Silverstone and got some brilliant pictures from in the garage here:
http://www.motorsport-tools.com/blog/motorsport-to...
Next to come:
3 way monotube suspension has arrived, looks very complicated :-)
Engine in on the dyno so should be here very soon.
Gearbox is in build at Qauife.
Our own type9 bell housing and hydraulic clutch kit is ready...will be fitted up to an AP Racing twin plate.
Cross member is being powder coated.
Cant really get stuck in without all the main parts here!
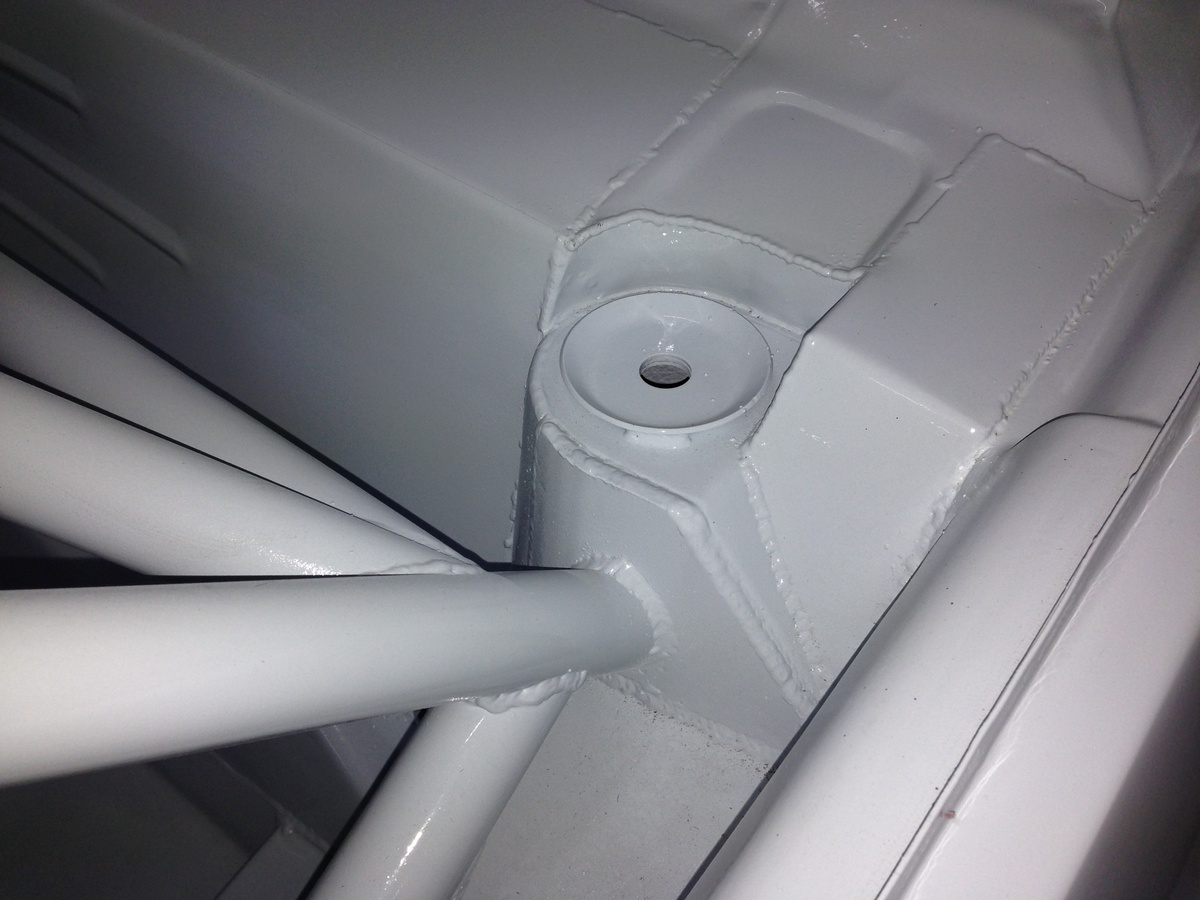
On the top pic why does the plate between the cage and the shell not have one long weld instead of lots of little ones?
I've see it on lots of pics but with yours painted I'd though nows the time to ask.
Is that to allow for any slight flexing? Lighter if a full one not required? In case of a crash to absorb energy?
I've see it on lots of pics but with yours painted I'd though nows the time to ask.
Is that to allow for any slight flexing? Lighter if a full one not required? In case of a crash to absorb energy?
firemunki said:
On the top pic why does the plate between the cage and the shell not have one long weld instead of lots of little ones?
I've see it on lots of pics but with yours painted I'd though nows the time to ask.
Is that to allow for any slight flexing? Lighter if a full one not required? In case of a crash to absorb energy?
I think you've hit the nail on the head there.I've see it on lots of pics but with yours painted I'd though nows the time to ask.
Is that to allow for any slight flexing? Lighter if a full one not required? In case of a crash to absorb energy?
A lot of the car has been seam welded, but the roof inner isnt at all! I told thats how its done with Escort's......Some movement is left in it in places.
Im not 100% sure why though tbh, I think its for handling. I'll ask the boss who knows a lot more about them.
Update:
The first few bits for our Escort Mk2 project are now coming together, this week we have been putting together the front suspension. We are using AVO 3 way adjustable monotubes all round with the RIX Engineering front assembly which will be fully adjustable.
The AVO front leg with remote canister, adjustable ride height:
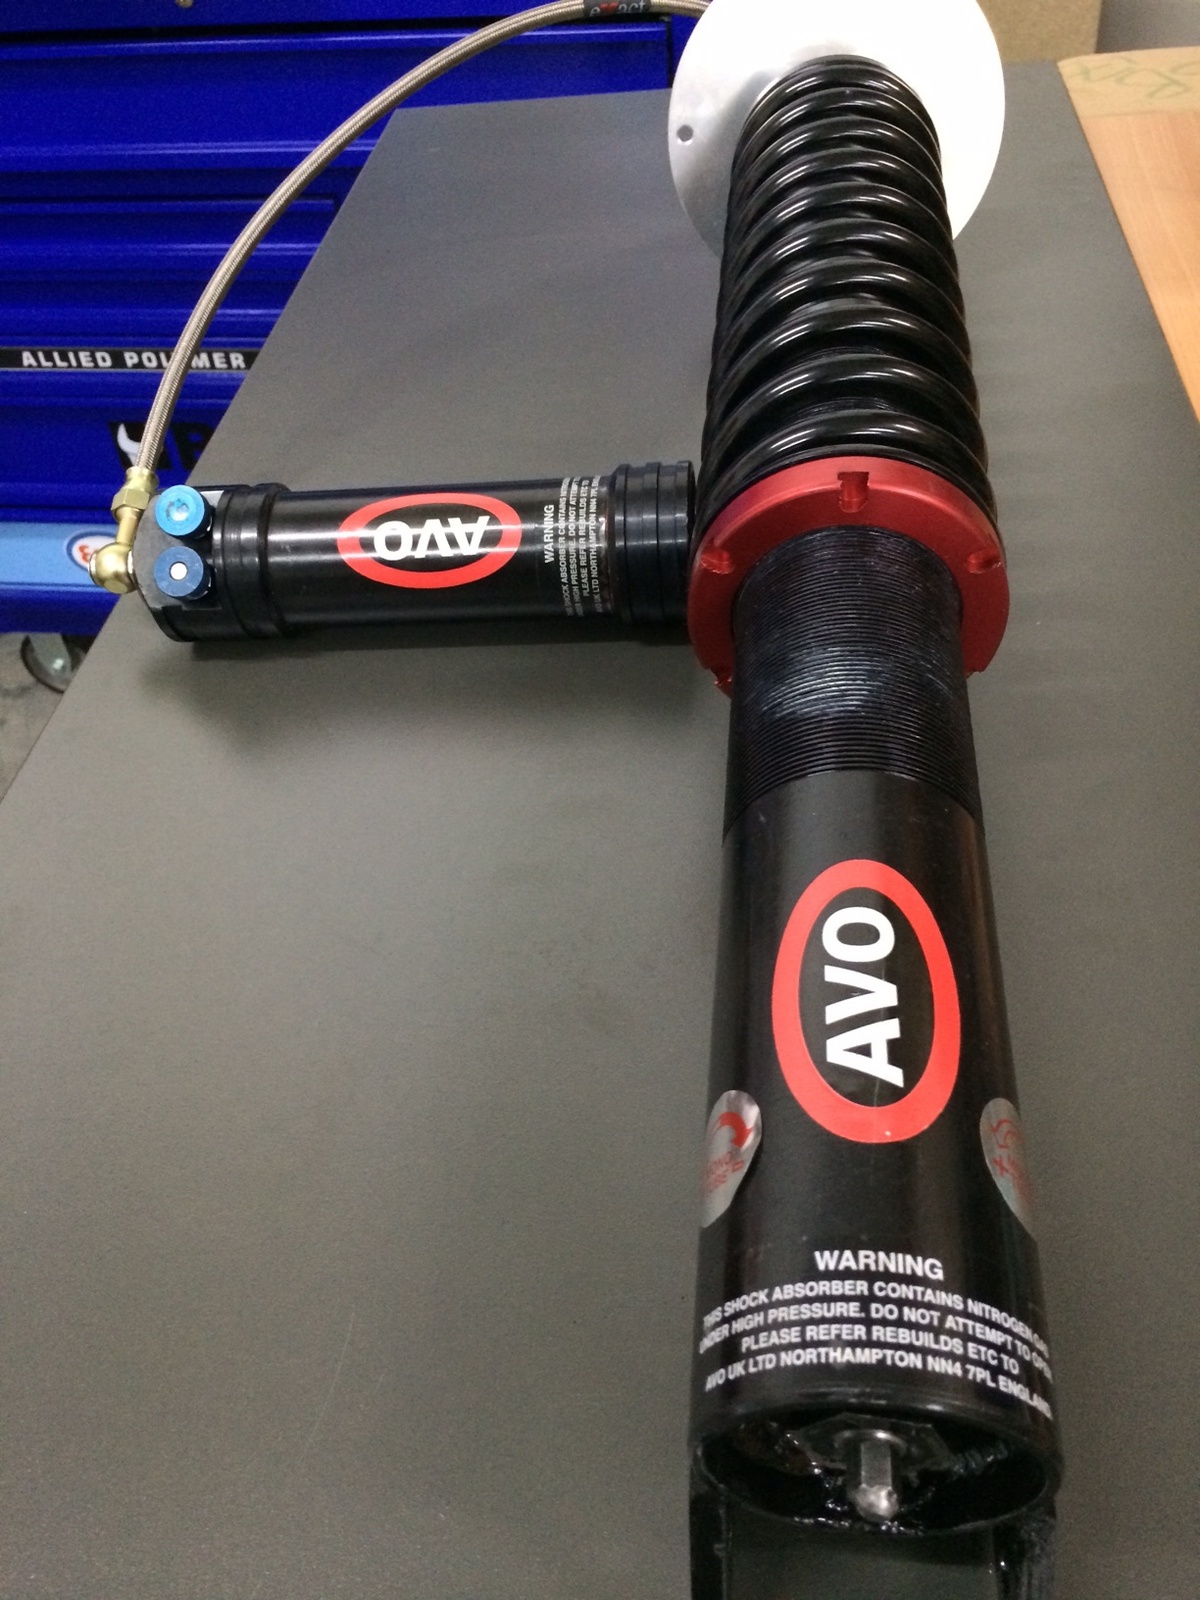
Mono tube, 50mm OD inserts, supplied with 250lb coilover springs and alloy top mounts:

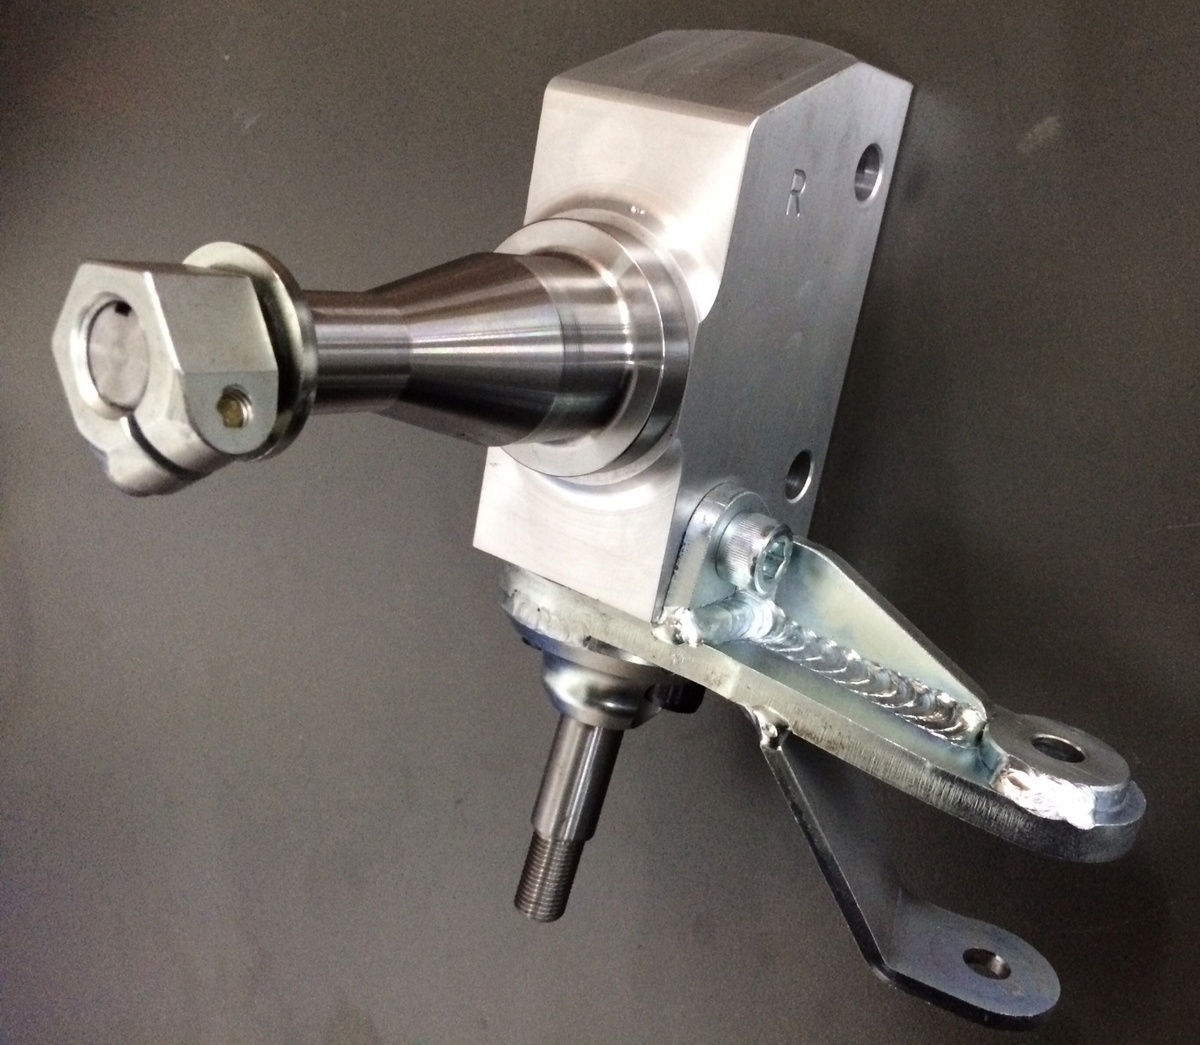
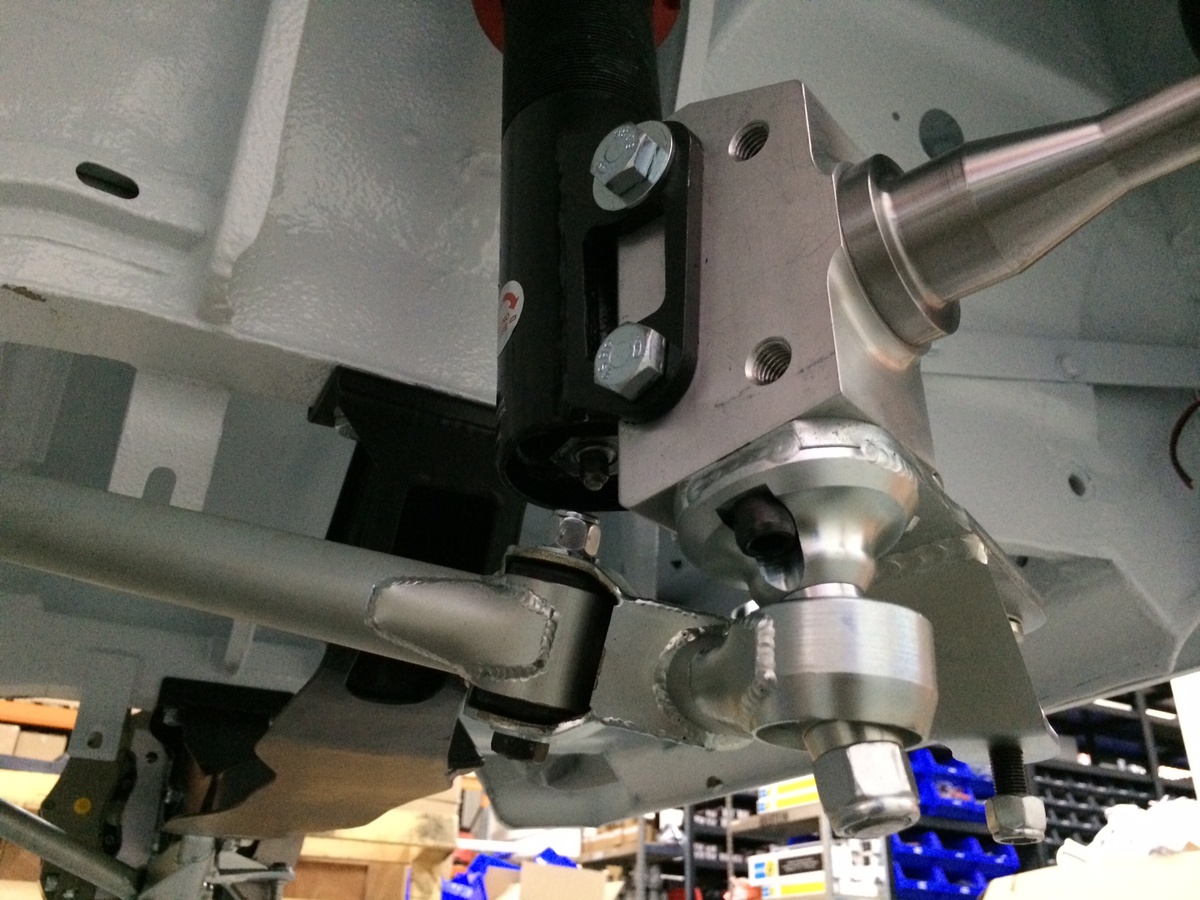
Rix Engineering alloy stub axles with special fabricated steering arms. These are precision fabricated and CNC machined for maximum strength and durability whilst keeping weight to the minimum. :-)


The steering arm attaches under the alloy upright block and over the lower TCA pin. The alloy block then bolts on the the AVO leg, these are specially designed for the RIX setup. The kit is supplied with 4 types of special camper adjustment shims, giving 7 camper adjustments by simply undoing the bolt and replacing the shims.
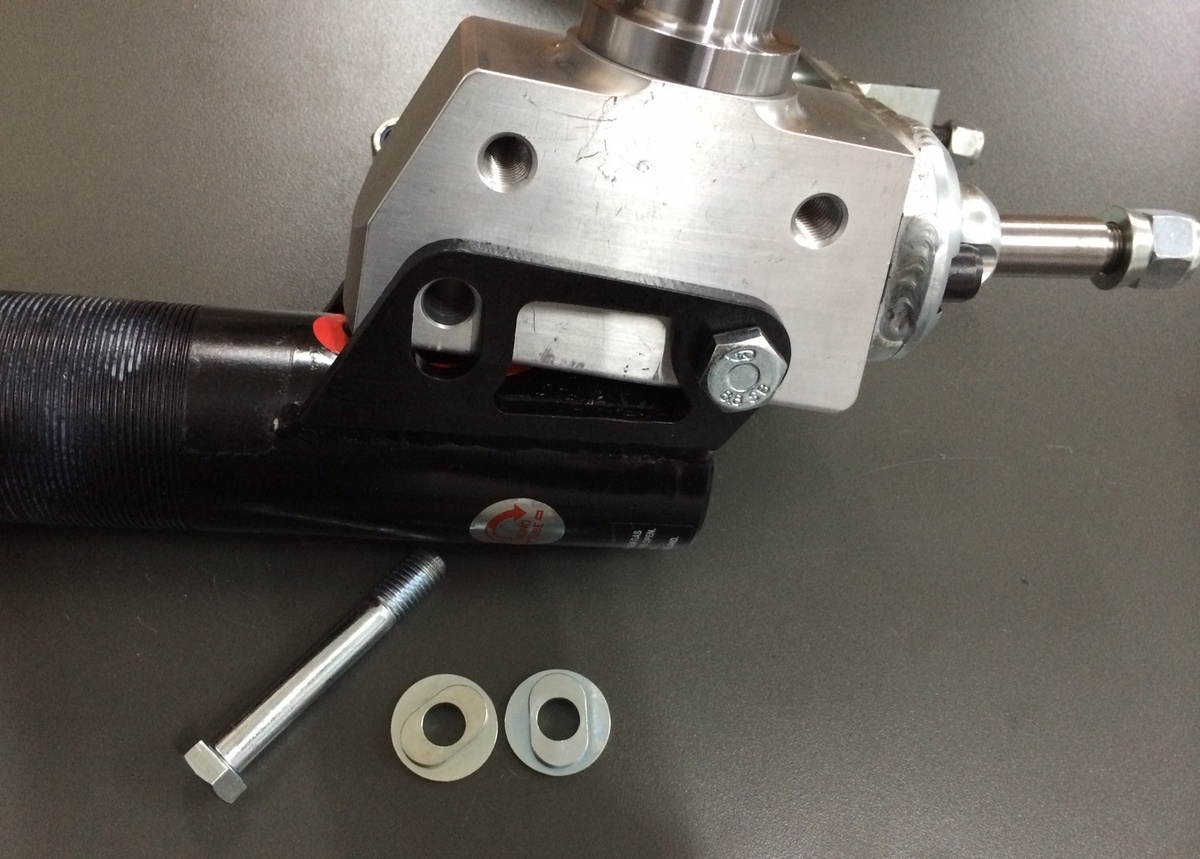
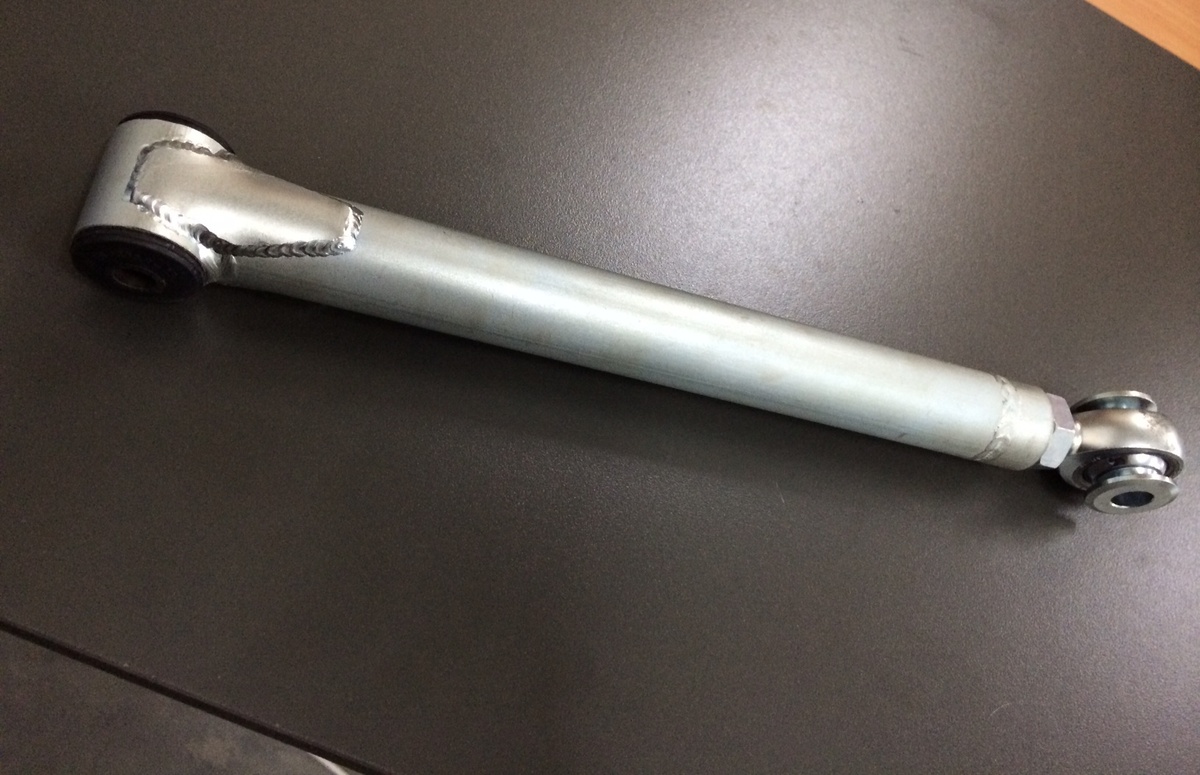
Tig welded TCAs and compressioin struts complete with heavy duty Aurora rod ends, all part of the Rix Engineering kit.
Also notice the billet caliper mounitng bracket, we will be using the AP Racing CP5219 4 pot calipers. (very very light weight).
Assembly pictures:


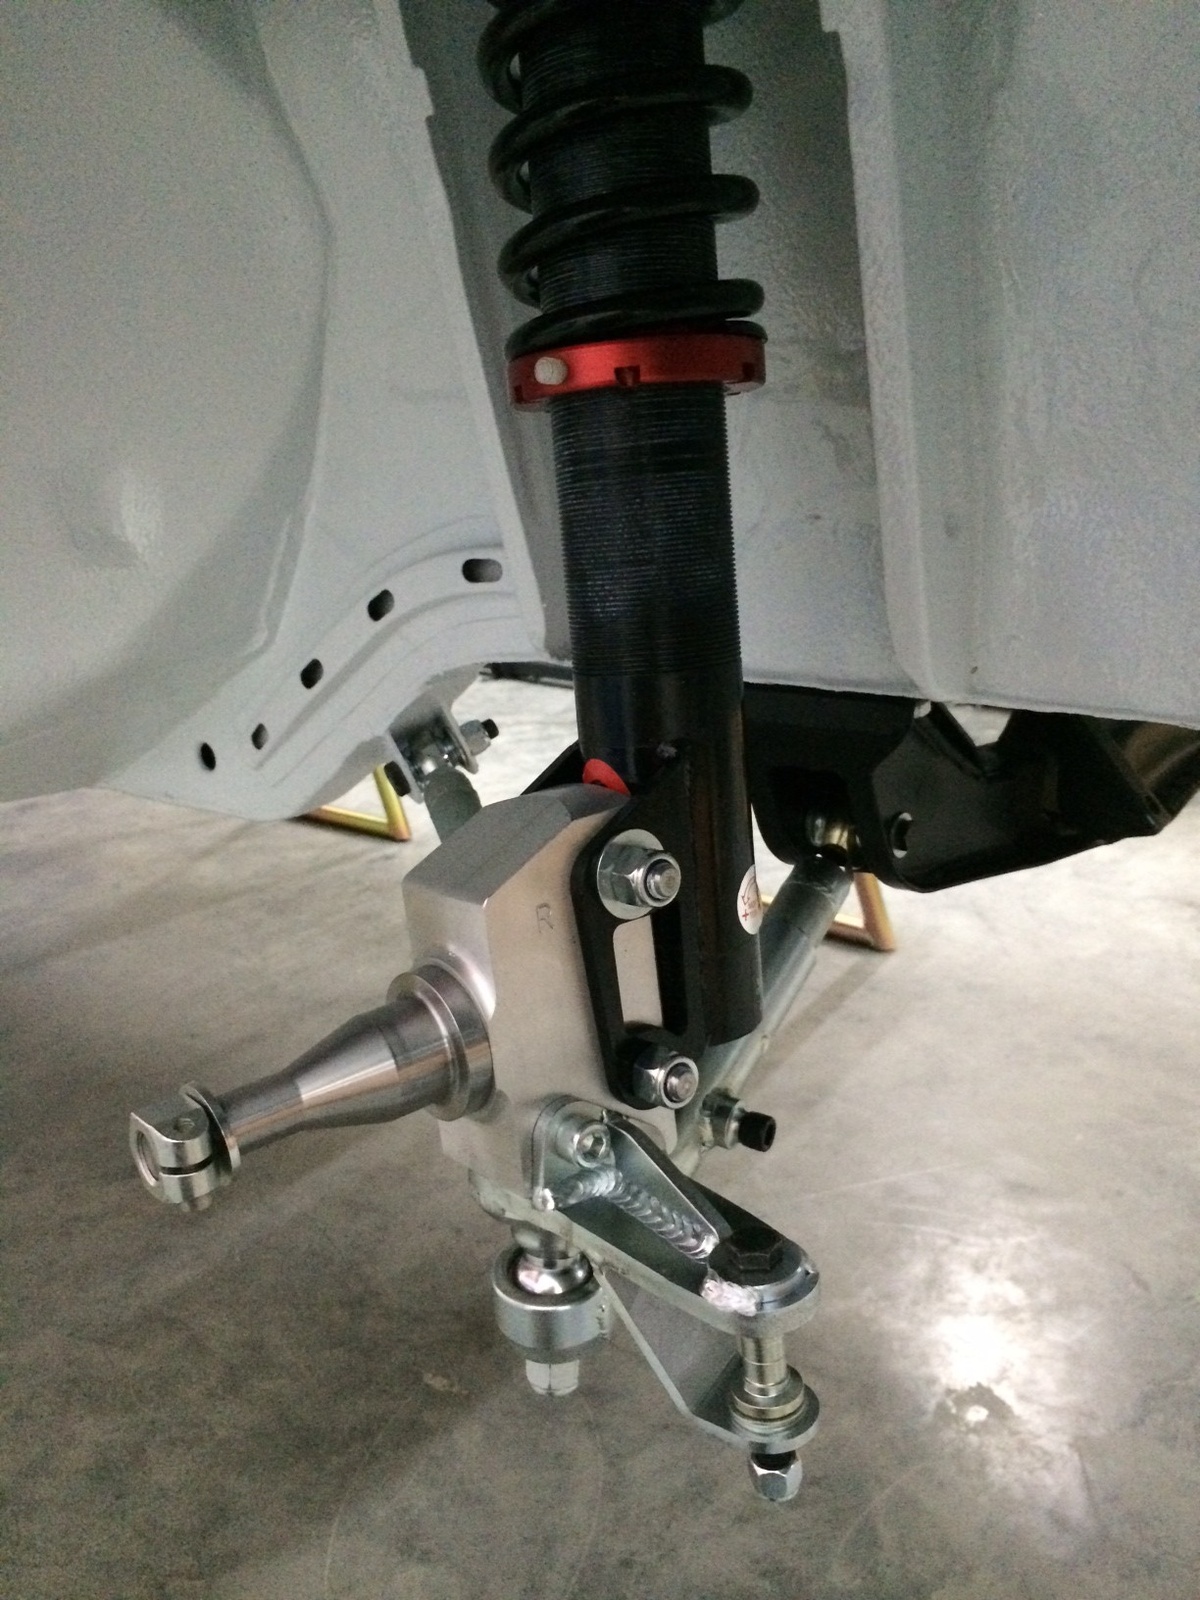
Finally bolted up to the shell, ready to fit the wheel hubs and brakes. The main advantage of this set up is the scrub radius position over the standard setup, giving less tyre resistance and more grip. The tyre wear rate will be lower so softer tyres can be used. :-)
Still waiting on an engine.....
Taken from:
http://www.motorsport-tools.com/blog/avo-3-way-adj...
The first few bits for our Escort Mk2 project are now coming together, this week we have been putting together the front suspension. We are using AVO 3 way adjustable monotubes all round with the RIX Engineering front assembly which will be fully adjustable.
The AVO front leg with remote canister, adjustable ride height:
Mono tube, 50mm OD inserts, supplied with 250lb coilover springs and alloy top mounts:
Rix Engineering alloy stub axles with special fabricated steering arms. These are precision fabricated and CNC machined for maximum strength and durability whilst keeping weight to the minimum. :-)
The steering arm attaches under the alloy upright block and over the lower TCA pin. The alloy block then bolts on the the AVO leg, these are specially designed for the RIX setup. The kit is supplied with 4 types of special camper adjustment shims, giving 7 camper adjustments by simply undoing the bolt and replacing the shims.
Tig welded TCAs and compressioin struts complete with heavy duty Aurora rod ends, all part of the Rix Engineering kit.
Also notice the billet caliper mounitng bracket, we will be using the AP Racing CP5219 4 pot calipers. (very very light weight).
Assembly pictures:
Finally bolted up to the shell, ready to fit the wheel hubs and brakes. The main advantage of this set up is the scrub radius position over the standard setup, giving less tyre resistance and more grip. The tyre wear rate will be lower so softer tyres can be used. :-)
Still waiting on an engine.....
Taken from:
http://www.motorsport-tools.com/blog/avo-3-way-adj...

firemunki said:
On the top pic why does the plate between the cage and the shell not have one long weld instead of lots of little ones?
I've see it on lots of pics but with yours painted I'd though nows the time to ask.
Is that to allow for any slight flexing? Lighter if a full one not required? In case of a crash to absorb energy?
I can't actually work out which picture you're referring to but I would imagine it's a point where the car's shell is thin, or perhaps the middle of a lesser supported section. Electric welding is usually done in long seams, it's quicker and looks better, however this can introduce a lot of heat into a particular area - which leads to distortion. I've see it on lots of pics but with yours painted I'd though nows the time to ask.
Is that to allow for any slight flexing? Lighter if a full one not required? In case of a crash to absorb energy?
One way round this is to do lots of little welds, letting the metal cool between each. Sometimes called stitch welding, for obvious reasons. I've never welded an Escort but would guess that region is prone to distortion so the fabricator has used a different technique to minimise it.
Futuramic said:
firemunki said:
On the top pic why does the plate between the cage and the shell not have one long weld instead of lots of little ones?
I've see it on lots of pics but with yours painted I'd though nows the time to ask.
Is that to allow for any slight flexing? Lighter if a full one not required? In case of a crash to absorb energy?
I can't actually work out which picture you're referring to but I would imagine it's a point where the car's shell is thin, or perhaps the middle of a lesser supported section. Electric welding is usually done in long seams, it's quicker and looks better, however this can introduce a lot of heat into a particular area - which leads to distortion. I've see it on lots of pics but with yours painted I'd though nows the time to ask.
Is that to allow for any slight flexing? Lighter if a full one not required? In case of a crash to absorb energy?
One way round this is to do lots of little welds, letting the metal cool between each. Sometimes called stitch welding, for obvious reasons. I've never welded an Escort but would guess that region is prone to distortion so the fabricator has used a different technique to minimise it.

Vauxhall agila column is much more compact than the corsa and is clutch drive so no drag if you don't use any assistance , I've done a few conversions but they work best if you ditch the eBay box of tricks and feed a proper speed signal in to get proper speed sensitive assistance . The agila has the same Mitsubishi ecu so will work with the eBay signal generator .
mighty kitten said:
Vauxhall agila column is much more compact than the corsa and is clutch drive so no drag if you don't use any assistance , I've done a few conversions but they work best if you ditch the eBay box of tricks and feed a proper speed signal in to get proper speed sensitive assistance . The agila has the same Mitsubishi ecu so will work with the eBay signal generator .
Thanks for the info! :-)

Gassing Station | Readers' Cars | Top of Page | What's New | My Stuff