Caterham Seven 360R
Discussion


Thanks everyone!
I'm a bit pedantic so maybe flakey is a strong word.
Sometimes the instructions will say "use bolt (3) from fixings pack 30DAZ6" for example. When actually it means 30DAZ5. A minor detail but one that makes me convince myself I'm doing something wrong.
It can also sometimes tell you to fit a part that doesn't come with your car which can be misleading.
Don't forget, I'm a complete novice when it comes to spannering. I'd imagine the instructions would be fine for someone with a bit more DIY nous.
There's some talk of Caterham releasing a new instruction manual which is inspired by Lego-Technics. This sounds perfect for me!
I'm away this weekend so no updates until next week :-(
Bookmarked! Good luck!
Something I would love to do for my 40th in a few years, so watching this thread with a lot of interest and inspiration. My spannering skills sounds in the same "amateur" category to yours. Although I have had two used kit cars before and enjoyed the tinkering.
Really surprised Caterham haven't a 100% accurate manual yet, they must have sold 1000's of S3 kits. I can only assume they don't seek or listen to builders feedback.
When do you hope to have the kit finished?
I'm virtually swaying between 360R and 420R, so look forward to your thoughts once up and running. I love the idea of upgrading a 360R over many years of ownership. But I'm also a fairly impatient guy and would probably end up upgrading to 420 spec after 6 months, wasting thousands in the process.
Edited by scz4 on Thursday 12th January 22:30
I've probably spent enough hours reading kit car build threads to cover the build time for several of my own builds!
Common to every single one are missing parts and incorrect deliveries. Really is poor, especially from the headline brand.
Hope it doesn't hamper your progress too much!
Common to every single one are missing parts and incorrect deliveries. Really is poor, especially from the headline brand.
Hope it doesn't hamper your progress too much!
ECG1000 said:
Thanks everyone!
I'm a bit pedantic so maybe flakey is a strong word.
Sometimes the instructions will say "use bolt (3) from fixings pack 30DAZ6" for example. When actually it means 30DAZ5. A minor detail but one that makes me convince myself I'm doing something wrong.
It can also sometimes tell you to fit a part that doesn't come with your car which can be misleading.
Don't forget, I'm a complete novice when it comes to spannering. I'd imagine the instructions would be fine for someone with a bit more DIY nous.
There's some talk of Caterham releasing a new instruction manual which is inspired by Lego-Technics. This sounds perfect for me!
I'm away this weekend so no updates until next week :-(
They sound like great instructions. My Westfield ones made no mention of fitting the suspension I'm a bit pedantic so maybe flakey is a strong word.
Sometimes the instructions will say "use bolt (3) from fixings pack 30DAZ6" for example. When actually it means 30DAZ5. A minor detail but one that makes me convince myself I'm doing something wrong.
It can also sometimes tell you to fit a part that doesn't come with your car which can be misleading.
Don't forget, I'm a complete novice when it comes to spannering. I'd imagine the instructions would be fine for someone with a bit more DIY nous.
There's some talk of Caterham releasing a new instruction manual which is inspired by Lego-Technics. This sounds perfect for me!
I'm away this weekend so no updates until next week :-(

Ideally seperate all the bolts and fittings into each corner, so you have a kit of parts to work with for each job.rather than trying to find the bolts as you are doing the job.
Also make sure you try the bolts in the chassis or fitting first if its a captive thread to make sure you clean out any powder coating.
Nothing worse than struggling to put the bolt in and finding it binds up.
Enjoy fitting the top wishbone rear bolt, they can be quite challanging
Also make sure you try the bolts in the chassis or fitting first if its a captive thread to make sure you clean out any powder coating.
Nothing worse than struggling to put the bolt in and finding it binds up.
Enjoy fitting the top wishbone rear bolt, they can be quite challanging
lewisco said:
They sound like great instructions. My Westfield ones made no mention of fitting the suspension
Haha, I built a Westy back in 2000, was a bit of a challenge.....I think they have got their act together now and the kits are more modular than before.OP - Car looks stunning, bookmarked....hope you get it on the road for the spring
scz4 said:
When do you hope to have the kit finished?
I'm virtually swaying between 360R and 420R, so look forward to your thoughts once up and running. I love the idea of upgrading a 360R over many years of ownership. But I'm also a fairly impatient guy and would probably end up upgrading to 420 spec after 6 months, wasting thousands in the process.
Thank you! I'm virtually swaying between 360R and 420R, so look forward to your thoughts once up and running. I love the idea of upgrading a 360R over many years of ownership. But I'm also a fairly impatient guy and would probably end up upgrading to 420 spec after 6 months, wasting thousands in the process.
Edited by scz4 on Thursday 12th January 22:30
Hoping to be on the road by Easter. Fingers crossed that's not an ambitious dream!
I was swaying between this or a 310. Went for the 360 because it excited/frightened me the most on the test drive round a very damp and greasy Donnington. Plus the 310 is (realistically) at the top of its tuning potential, whereas there's room for more power in the 360 if I ever need it.
Between the 360 and 420 - I read the latter can be a bit more tricky on the limit. Something a tinker with the geometry could sort out no doubt.
Tazio77 said:
Get some lengths of foam pipe insulation to put on the diagonals in the engine bay to protect them too.
And enjoy the process...read the installation manual, then read it again, don't try and get ahead of yourself.
Join the L7Club, loads of advice to be had over there.
Thank you for the advice. I'll be sure to join the club soon!And enjoy the process...read the installation manual, then read it again, don't try and get ahead of yourself.
Join the L7Club, loads of advice to be had over there.
Feirny said:
I'm local if you require some decent snaps of it some time, in build or completed.
I'll follow the progress regardless, as it looks great.
That would be awesome! Cheers. I'll follow the progress regardless, as it looks great.
DaveK-S1 said:
Enjoy fitting the top wishbone rear bolt, they can be quite challanging
Hmm, I've done this without much of a fight.... Perhaps a stroke of luck or I've done something wrong?!jdwoodbury said:
OP - Car looks stunning, bookmarked....hope you get it on the road for the spring
Thank you very much. Me too! jdwoodbury said:
Haha, I built a Westy back in 2000, was a bit of a challenge.....I think they have got their act together now and the kits are more modular than before.
I remember reading many years ago on the Westfield forum someone along the lines of:You assemble a Caterham
You build a Westfield
You engineer a Dax, Tiger etc
I know Westfield and Caterham don't let you source/refurb components like they used to, they are trying to ensure all cars end up with a date specific plate rather than a Q registration. Back when I built mine they only needed to look like they were new to qualify(officially they had to be new but no-one checked), my entire drivetrain was used but I got a new plate!
These days you can only have one used/reconditioned part with hthe rest being new to qualify for a new style plate.
I got an age related L reg as it used multiple parts of the donor car which was a L reg with the rest being new.
Look forward to seeing the differences in your build OP compared to my Westfield build.
I got an age related L reg as it used multiple parts of the donor car which was a L reg with the rest being new.
Look forward to seeing the differences in your build OP compared to my Westfield build.
jdwoodbury said:
I know Westfield and Caterham don't let you source/refurb components like they used to, they are trying to ensure all cars end up with a date specific plate rather than a Q registration. Back when I built mine they only needed to look like they were new to qualify(officially they had to be new but no-one checked), my entire drivetrain was used but I got a new plate!
Not always the case with the Mazda Westfield SDV route being a very popular back to grass roots approach to car construction, dirty parts refurbing way with an age related platejdwoodbury said:
lewisco said:
They sound like great instructions. My Westfield ones made no mention of fitting the suspension
Haha, I built a Westy back in 2000, was a bit of a challenge.....I think they have got their act together now and the kits are more modular than before.OP - Car looks stunning, bookmarked....hope you get it on the road for the spring
Little bit of progress last night...
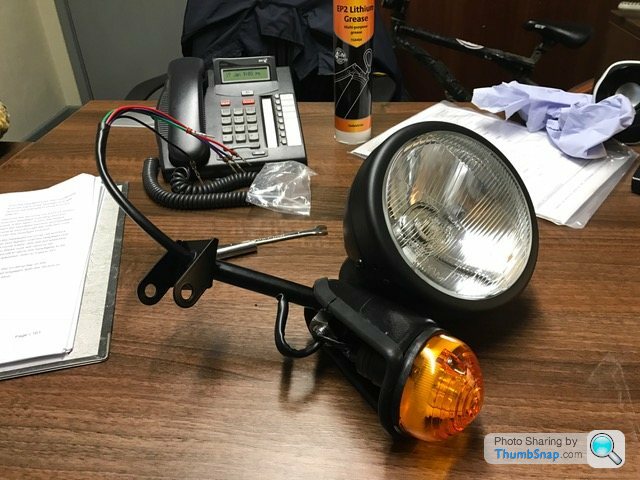
The missing headlight bracket arrived through the post on Monday allowing me to crack on where I left off.
Headlight assembly was pretty easy if a bit fiddly. It requires you to pass the indicator earth wire up into the headlight bowl and secure it to an earth bolt. The live wire (is that what they're called?) then needs to be fed down the sleeve containing the wires for the headlight. This all then gets pushed through the headlight bracket ready to bolt onto the upper wishbone front mount.
With it being so fiddly, it took me over an hour. I thought it was going to be a ten minute job! Have a feeling I'll be saying that a lot during the build...
Anyway, I now have two of these:
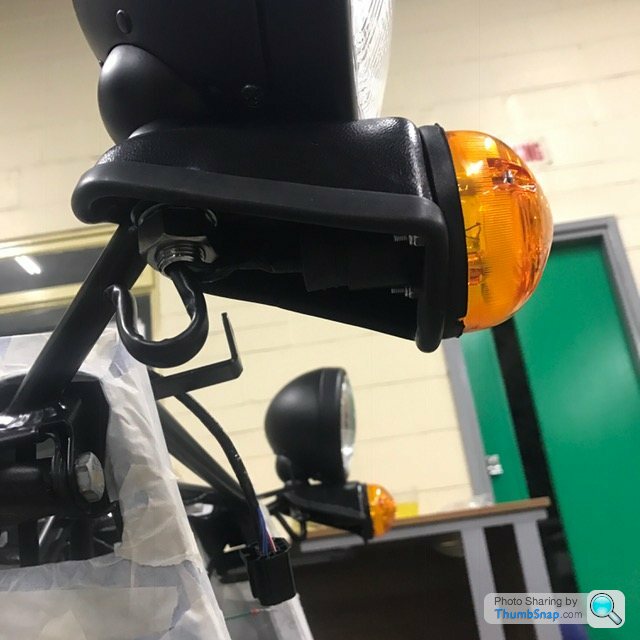
Next up was bolting them to the chassis using the same bolt that secure the upper wishbone front leg. The headlight bracket put up a little bit of a fight but nothing major:

Notice the rubber strip (lovingly applied by me) running round the indicator cone. This is for IVA purposes.... Just in case you cut someone with the sharp plastic edge whilst you run them over.
Now time to fit the spring/damper units.
More inserting metal bushes within bushes. As some of you will know, I've encountered these metal sleeves before so now know what I'm looking for!
The cap head bolt screws into a captive nut in the chassis so all you have to do is unscrew it, line the damper up, and screw back in. Only problem is, the bodywork is in the way.. This requires a gentle push giving you enough room to gradually quarter turn an allen key. It also needs torqueing to 11nm... no way a torque wrench will fit in there so I've used my best judgement. Maybe I'll come across an action man sized torque wrench one day!
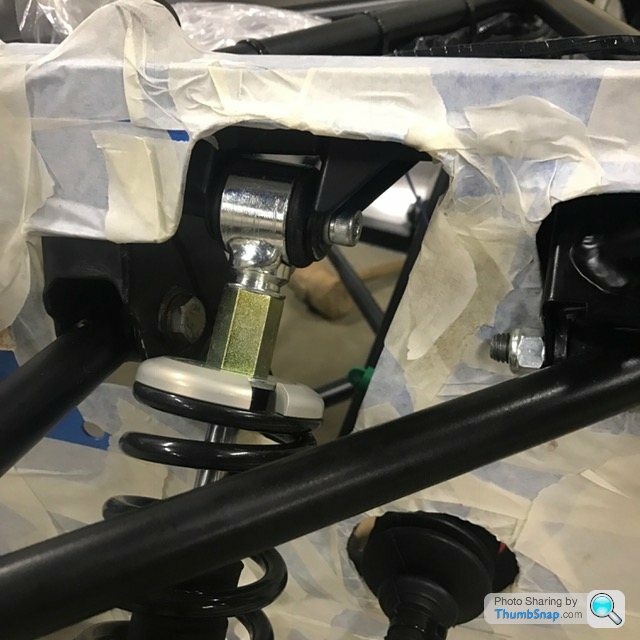
Next was fitting the lower damper bush (within a bush) onto the lower wishbone. Another cap head bolt with plenty of room round it this time. The bracket the damper sits in is very tight so a fair bit of 'persuading' was need for it to slot into place.

Both sides on and it's starting to look a bit more like a car now. Albeit one without an engine, gearbox or rear end...oh, and wheels. Hopefully this will be rectified soon!
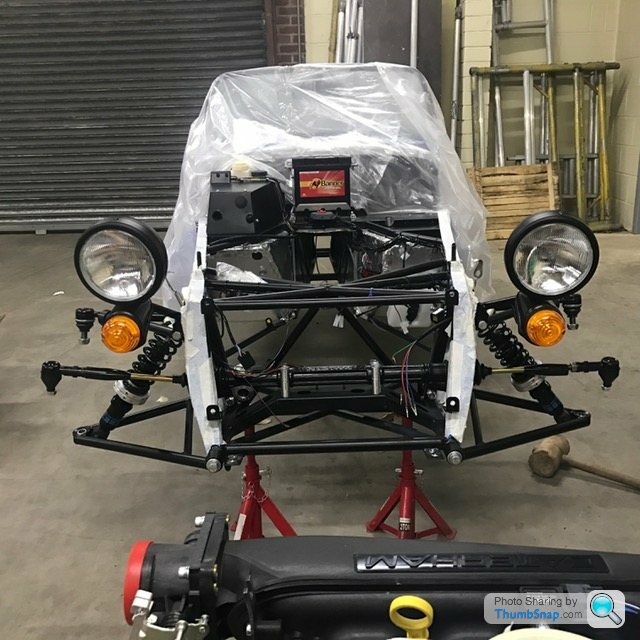
More green ticks on a very long 'to do' list:

More tonight.
The missing headlight bracket arrived through the post on Monday allowing me to crack on where I left off.
Headlight assembly was pretty easy if a bit fiddly. It requires you to pass the indicator earth wire up into the headlight bowl and secure it to an earth bolt. The live wire (is that what they're called?) then needs to be fed down the sleeve containing the wires for the headlight. This all then gets pushed through the headlight bracket ready to bolt onto the upper wishbone front mount.
With it being so fiddly, it took me over an hour. I thought it was going to be a ten minute job! Have a feeling I'll be saying that a lot during the build...
Anyway, I now have two of these:
Next up was bolting them to the chassis using the same bolt that secure the upper wishbone front leg. The headlight bracket put up a little bit of a fight but nothing major:
Notice the rubber strip (lovingly applied by me) running round the indicator cone. This is for IVA purposes.... Just in case you cut someone with the sharp plastic edge whilst you run them over.
Now time to fit the spring/damper units.
More inserting metal bushes within bushes. As some of you will know, I've encountered these metal sleeves before so now know what I'm looking for!
The cap head bolt screws into a captive nut in the chassis so all you have to do is unscrew it, line the damper up, and screw back in. Only problem is, the bodywork is in the way.. This requires a gentle push giving you enough room to gradually quarter turn an allen key. It also needs torqueing to 11nm... no way a torque wrench will fit in there so I've used my best judgement. Maybe I'll come across an action man sized torque wrench one day!
Next was fitting the lower damper bush (within a bush) onto the lower wishbone. Another cap head bolt with plenty of room round it this time. The bracket the damper sits in is very tight so a fair bit of 'persuading' was need for it to slot into place.
Both sides on and it's starting to look a bit more like a car now. Albeit one without an engine, gearbox or rear end...oh, and wheels. Hopefully this will be rectified soon!
More green ticks on a very long 'to do' list:
More tonight.
Edited by ECG1000 on Wednesday 18th January 13:38
Gassing Station | Readers' Cars | Top of Page | What's New | My Stuff