My MR2 GT-S Turbo
Discussion


10speeduk said:
My mate raced one of these on a dual carriage way in his new 997 Carrera S. He couldn't shake the MR2 from his rear bumper and had to pull over to let it past! I wish I was there, as the C2S seemed pretty fast when I have been in it! Bang for buck eh?! Best of luck with it mate.
Doesnt surprise me.I comfortably beat a regular C2 with my boost at 0.9bar. The porsche did make a better sound though


Been a while so heres an update!
I've spent the last two days with Ed at Fusion Motorsport fitting my chargecooler
I didnt get as many photos as I'd have liked along the way but here is what I have.
First step, bumper off and radiator on.

Had to drill out the foglight bolts as the screw heads had rusted to mush and just gave out as soon as a screwdriver touched them.
Anyway, many bolts and some drilling later


Ed trimmed some superfluous material from the radiator, and tapped three points on iit so he could bolt a pair of brackets to it.

The tops of these brackets pretty much lined up with the holes left from removing the horns, which was rather handy. The right hand bracket didn't perfectly line up so Ed tig'd a tab onto it to sort that. A recess was also ground out of the right hand bracket to accomodate the bleed point.


Ed then made up the lower parts of the brackets so they could bolt directly to the same points as the aircon rad.


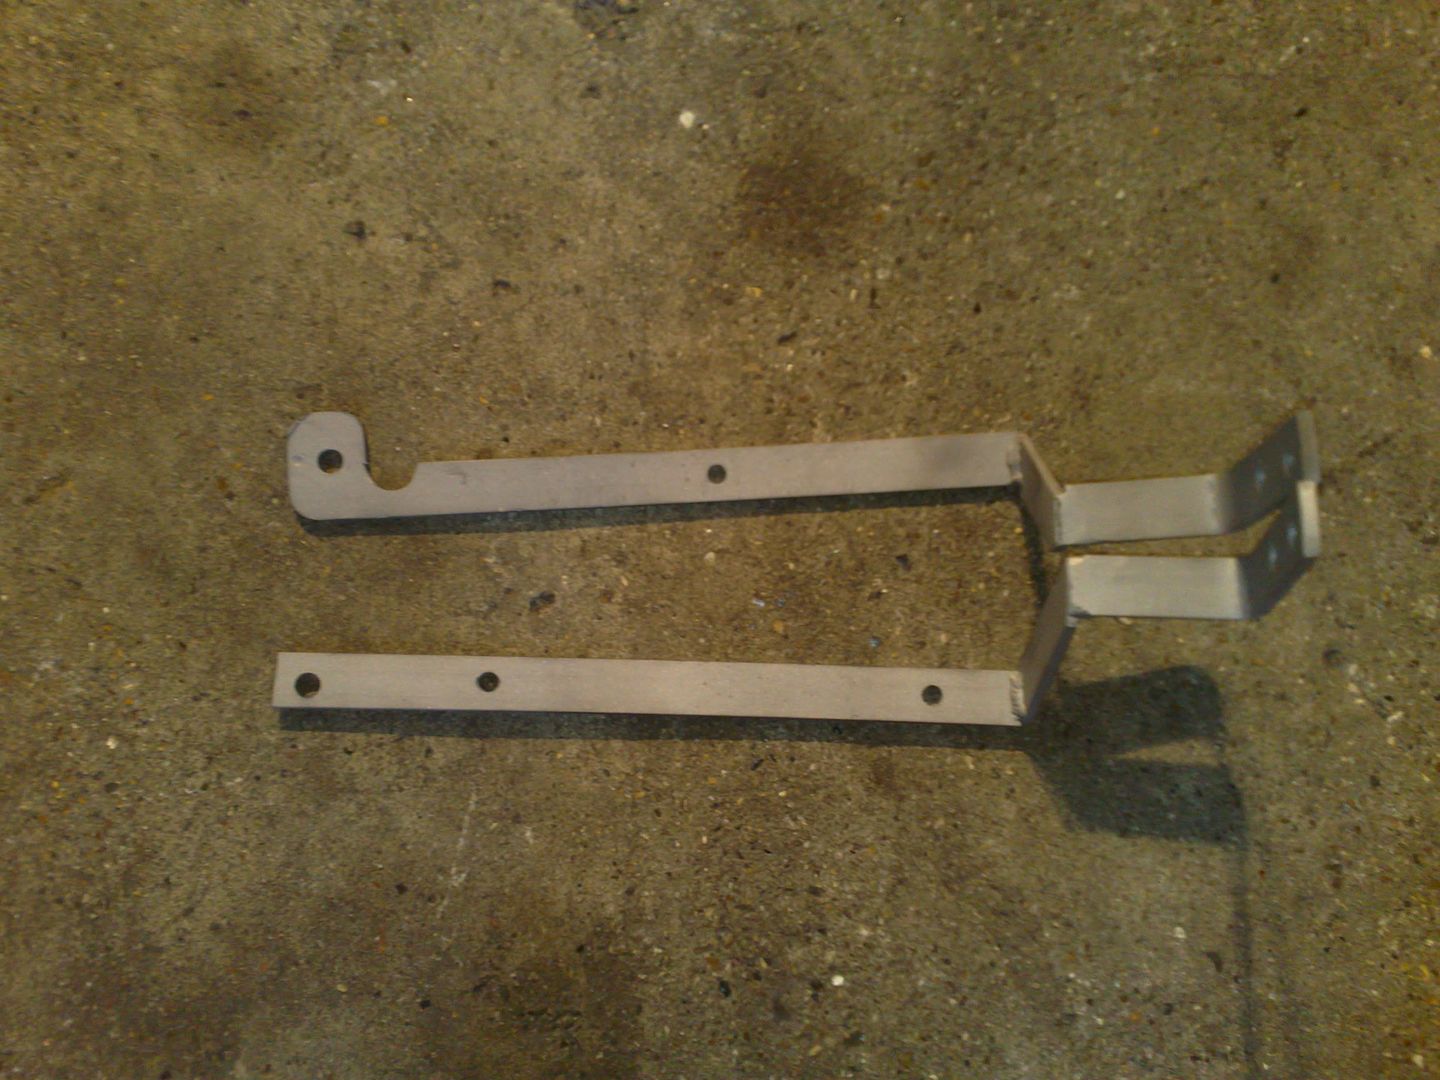
The finished brackets, sandblasted and ready for paint.
Painted and bolted to the rad.

Radiator mounted.


We then ran the coolant pipes under the car and had to trim one of the sections of undertray due to hose I bought, which whilst very sturdy, wasnt that flexible. Didn't get any pics of this, was about 10:30pm by the time we knocked off on the first day so I had kind of lost the drive to do my photographer bit
Onto the pump!
The stock bracket was trimmed down and cut so it could be rewelded to give it a good placement on the gearbox, whilst retaining the stock rubber damping bushes. Doing this allowed it to be mounted on the box and not be the lowest point on the car, so hopefully no danger of catching it on anything.


The undertray was also trimmed here to make way for the hoses.
We then tested the pump to make sure it worked and to check the coolant hoses for leaks. Pump fired up fine and no leaks turned up so we cracked on.
Again not many photos from here on in but anyway. We had to change my cam cover gasket before we tackled the chargecooler install, so we got to taking the top of the engine to bits and ditching the stock intercooler(which took an age to remove and caused much frustration )
The engine hanger was trimmed from the bracket on the dizzy end, and Ed cut, rotated and rewelded the shorter of the two chargecooler water pipes so it didnt foul the coolant filler neck.
We also had to bend the bracket which holds the feed for the stock BPV so it cleared the coolant in/out on the core.
On the wiring side Ed tapped a 12v feed off the ignition on relay in the fuse box.
With regards to the BPV we hit luck here too, by chopping a small section off the stock recirc pipe, we could mount the BPV on the chargecooler and use the remainder of the hose to mate up to my ARC airbox, albeit with some jigging around of the airbox-turbo pipe and the thicker of the two breathers on that pipe.
So here are some pics of the finished setup


nb we had to use some of these 90 degree copper bends on the coolant pipes as I didnt factor in the stiffness of the coolant hose. These aren't ideal as they are quite short so I have 4 ally bends on order to replace these with.

So there it is! Finally
It feels really good to drive, it may be placebo but it feels like theres less lag. It definitely pulls harder on my two boost(10 and 14psi) settings than before. I've not yet turned the boost up, and probably won't until I've replaced the copper bends.
Big thanks to Ed at Fusion Motorsport for all his work and fabrication skills, and to Toxo over on IMOC for all the advice he gave me along the way
I've spent the last two days with Ed at Fusion Motorsport fitting my chargecooler
I didnt get as many photos as I'd have liked along the way but here is what I have.
First step, bumper off and radiator on.
Had to drill out the foglight bolts as the screw heads had rusted to mush and just gave out as soon as a screwdriver touched them.
Anyway, many bolts and some drilling later
Ed trimmed some superfluous material from the radiator, and tapped three points on iit so he could bolt a pair of brackets to it.
The tops of these brackets pretty much lined up with the holes left from removing the horns, which was rather handy. The right hand bracket didn't perfectly line up so Ed tig'd a tab onto it to sort that. A recess was also ground out of the right hand bracket to accomodate the bleed point.
Ed then made up the lower parts of the brackets so they could bolt directly to the same points as the aircon rad.
The finished brackets, sandblasted and ready for paint.
Painted and bolted to the rad.
Radiator mounted.
We then ran the coolant pipes under the car and had to trim one of the sections of undertray due to hose I bought, which whilst very sturdy, wasnt that flexible. Didn't get any pics of this, was about 10:30pm by the time we knocked off on the first day so I had kind of lost the drive to do my photographer bit
Onto the pump!
The stock bracket was trimmed down and cut so it could be rewelded to give it a good placement on the gearbox, whilst retaining the stock rubber damping bushes. Doing this allowed it to be mounted on the box and not be the lowest point on the car, so hopefully no danger of catching it on anything.
The undertray was also trimmed here to make way for the hoses.
We then tested the pump to make sure it worked and to check the coolant hoses for leaks. Pump fired up fine and no leaks turned up so we cracked on.
Again not many photos from here on in but anyway. We had to change my cam cover gasket before we tackled the chargecooler install, so we got to taking the top of the engine to bits and ditching the stock intercooler(which took an age to remove and caused much frustration
)The engine hanger was trimmed from the bracket on the dizzy end, and Ed cut, rotated and rewelded the shorter of the two chargecooler water pipes so it didnt foul the coolant filler neck.
We also had to bend the bracket which holds the feed for the stock BPV so it cleared the coolant in/out on the core.
On the wiring side Ed tapped a 12v feed off the ignition on relay in the fuse box.
With regards to the BPV we hit luck here too, by chopping a small section off the stock recirc pipe, we could mount the BPV on the chargecooler and use the remainder of the hose to mate up to my ARC airbox, albeit with some jigging around of the airbox-turbo pipe and the thicker of the two breathers on that pipe.
So here are some pics of the finished setup
nb we had to use some of these 90 degree copper bends on the coolant pipes as I didnt factor in the stiffness of the coolant hose. These aren't ideal as they are quite short so I have 4 ally bends on order to replace these with.
So there it is! Finally
It feels really good to drive, it may be placebo but it feels like theres less lag. It definitely pulls harder on my two boost(10 and 14psi) settings than before. I've not yet turned the boost up, and probably won't until I've replaced the copper bends.
Big thanks to Ed at Fusion Motorsport for all his work and fabrication skills, and to Toxo over on IMOC for all the advice he gave me along the way
Edited by Marf on Thursday 1st April 19:48
Quality looking install there.
I did the 205CC install myself and it is a real pain routing the hoses but all in all it does make make the car more responsive. I had a little temp guage for the intake temps and a long pull never went over 40deg compared to over 70deg with the glorified oil cooler that the standard intercooler is.
You can get an n/a engine bay cooling fan in the gap left by the old setup, every little helps
Cheers Lee, yeah the stock "intercooler" is pap! I had a string of Charade Turbos before the MR2, they had exactly the same intercooler, only the MR2 one is about an inch taller. Not great really considering the MR2 produces over twice the HP!
Interesting on the NA cooling fan, does it connect to the same loom plug that the stock IC fan would have connected to?
I have also considered mounting a thermostatted oil cooler in there
Interesting on the NA cooling fan, does it connect to the same loom plug that the stock IC fan would have connected to?
I have also considered mounting a thermostatted oil cooler in there
Edited by Marf on Friday 2nd April 12:53
Gassing Station | Readers' Cars | Top of Page | What's New | My Stuff