Attempting to build the fastest road legal Elan in the world
Discussion


Not everything goes to plan. Most people tend to hide or gloss over their failures, but not me :-)
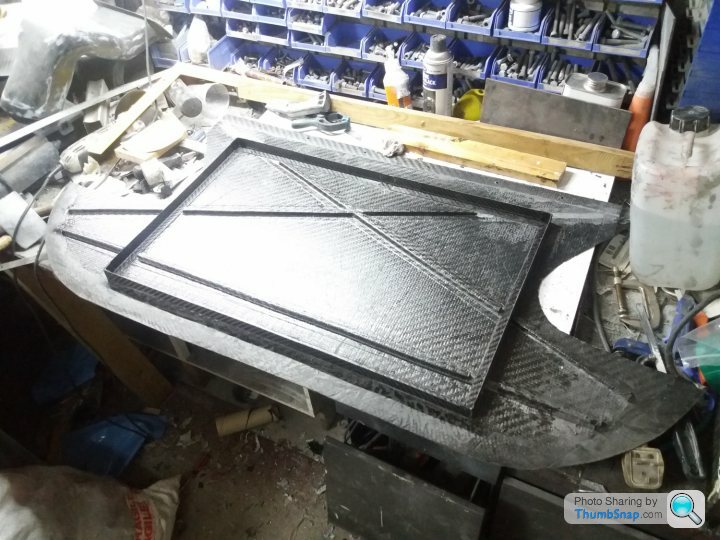
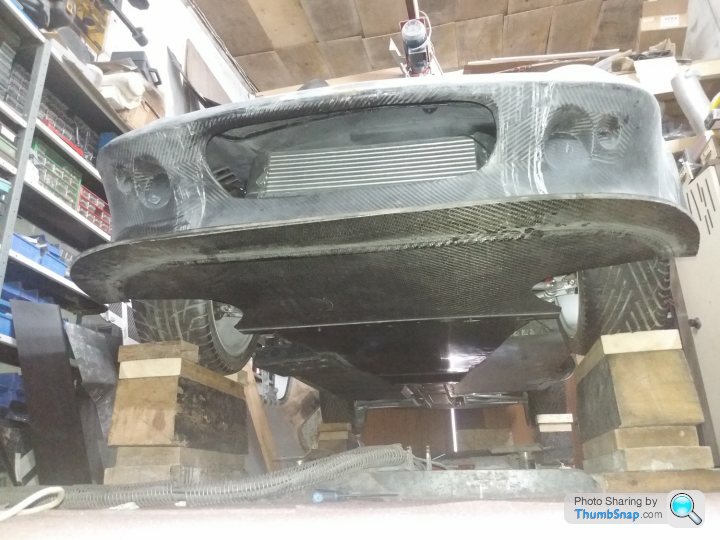
Back on page 72 I chronicled the saga of making the first section of undercar panelling, where I had to change from glass to a timber support for the carbon. This turned out to be an issue.
Everything started out OK, for the first hour. Then the vacuum pump started to make strange noises and the oil went very cloudy. I turned the pump off, removed the drain plug and clear water poured out before the oil! To say I was confused is an understatement. Where the hell did this water come from. My conclusion was that I hadn't allowed the carbon the thaw properly so was contaminated with moisture.
As the vacuum seemed to be holding up I carried on with the cure cycle. However, when I took it out of the oven, the vacuum had dissipated and the carbon wasn't properly compacted and hadn't adhered to the core material - basically a complete disaster.
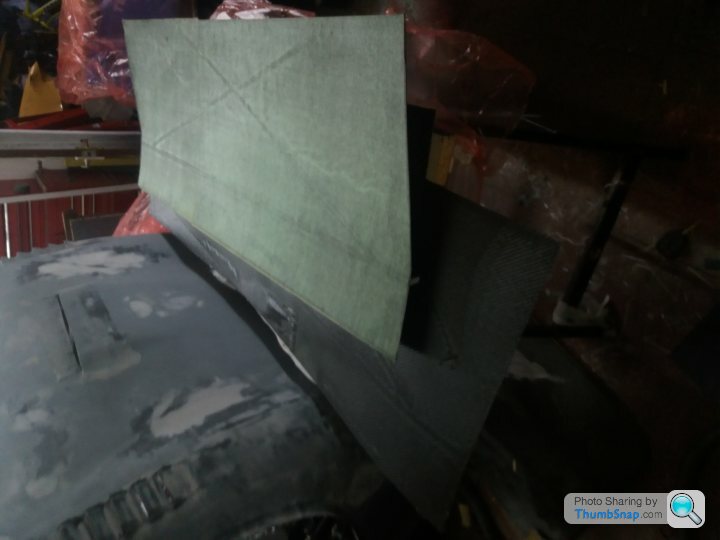
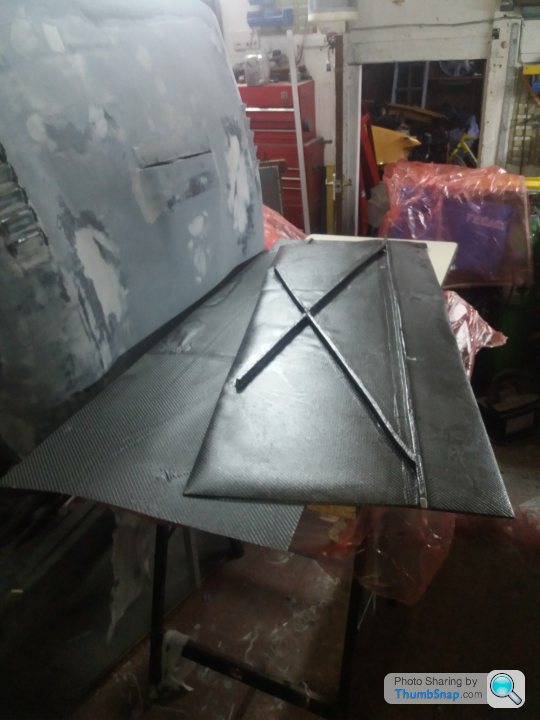
I was out of carbon so a second attempt had to wait until new stock arrived. As this turned out to be heavier, 375gm/m2 rather than the original 210gm/m2, I decided to go with two layers without the foam core.
Also, as this carbon is primarily designed for use in an autoclave (beggars can't be choosers when it is free - apart from the carriage) I had to go through a more complicated process in order to be able to use it in my non-pressurised oven. Each layer had to be debulked before adding the next layer. This entails vacuum compacting each layer of carbon in order to remove any trapped air and to make sure it is fully compressed.
Once this was completed and the carbon was ready for the oven the next task was to cure it. I had to slowly raise the temp to 80 deg C and keep it there for 30 minutes. I then had to raise the temp up to 120 deg C and keep it there for 2.5 hours.
I had the same problem with moisture getting into the vacuum pump's oil. Fortunately, the vacuum bag was air tight this time so I was able to drain and refill the pump with no loss of vacuum. I had to do this four times! After the third oil change is dawned on me what the problem was. I was drying out the timber support and pulling the moisture into the pump!
I will be geting a moisture trap before I use a timber suppoort again. Live and learn. live and learn :-)
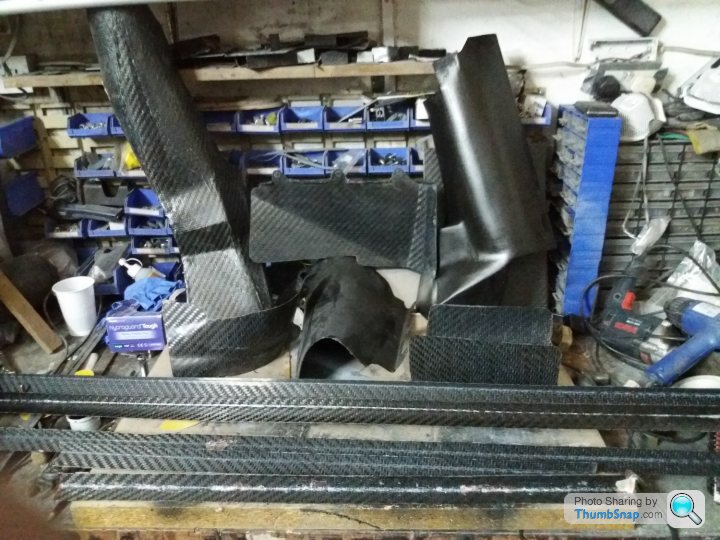
Anyway, unwrapped the carbon and it has come out perfect and weighs little more than the original effort so all is good. 1.2Kg, so once it is trimmed to allow the wheels to turn and various supports and air strakes are added it should end up at around this figure.
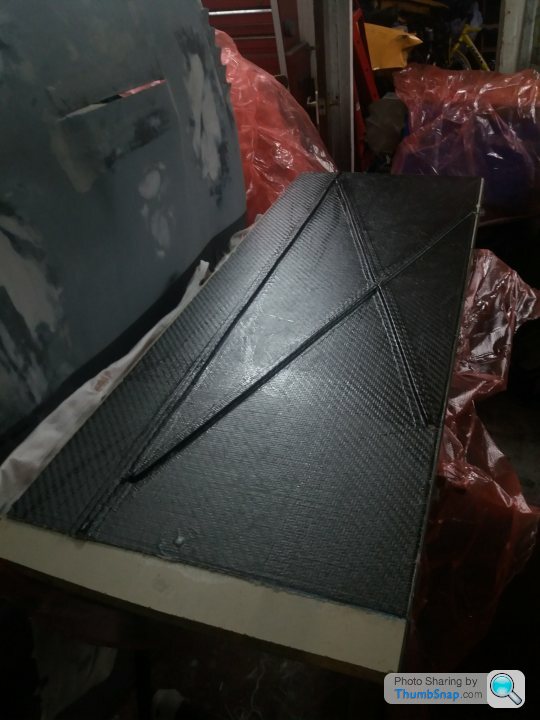

Extra weight, I know, but this will be more than outweighed by the improved aerodynamics. The underside presently looks like this :-)

I now have to work out how to attach it so it allows the front to open, I love these challenges :-)
Back on page 72 I chronicled the saga of making the first section of undercar panelling, where I had to change from glass to a timber support for the carbon. This turned out to be an issue.
Everything started out OK, for the first hour. Then the vacuum pump started to make strange noises and the oil went very cloudy. I turned the pump off, removed the drain plug and clear water poured out before the oil! To say I was confused is an understatement. Where the hell did this water come from. My conclusion was that I hadn't allowed the carbon the thaw properly so was contaminated with moisture.
As the vacuum seemed to be holding up I carried on with the cure cycle. However, when I took it out of the oven, the vacuum had dissipated and the carbon wasn't properly compacted and hadn't adhered to the core material - basically a complete disaster.
I was out of carbon so a second attempt had to wait until new stock arrived. As this turned out to be heavier, 375gm/m2 rather than the original 210gm/m2, I decided to go with two layers without the foam core.
Also, as this carbon is primarily designed for use in an autoclave (beggars can't be choosers when it is free - apart from the carriage) I had to go through a more complicated process in order to be able to use it in my non-pressurised oven. Each layer had to be debulked before adding the next layer. This entails vacuum compacting each layer of carbon in order to remove any trapped air and to make sure it is fully compressed.
Once this was completed and the carbon was ready for the oven the next task was to cure it. I had to slowly raise the temp to 80 deg C and keep it there for 30 minutes. I then had to raise the temp up to 120 deg C and keep it there for 2.5 hours.
I had the same problem with moisture getting into the vacuum pump's oil. Fortunately, the vacuum bag was air tight this time so I was able to drain and refill the pump with no loss of vacuum. I had to do this four times! After the third oil change is dawned on me what the problem was. I was drying out the timber support and pulling the moisture into the pump!
I will be geting a moisture trap before I use a timber suppoort again. Live and learn. live and learn :-)
Anyway, unwrapped the carbon and it has come out perfect and weighs little more than the original effort so all is good. 1.2Kg, so once it is trimmed to allow the wheels to turn and various supports and air strakes are added it should end up at around this figure.
Extra weight, I know, but this will be more than outweighed by the improved aerodynamics. The underside presently looks like this :-)
I now have to work out how to attach it so it allows the front to open, I love these challenges :-)
Edited by stevebroad on Monday 2nd July 22:45

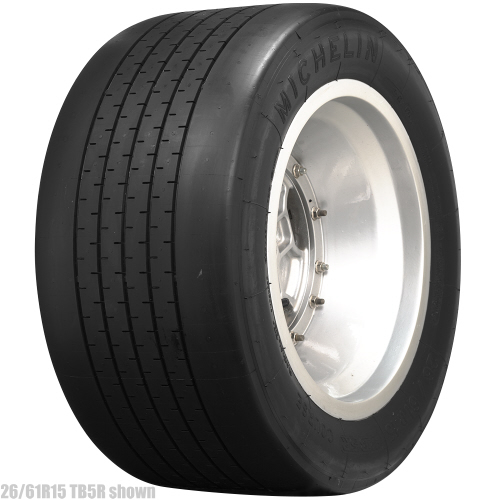
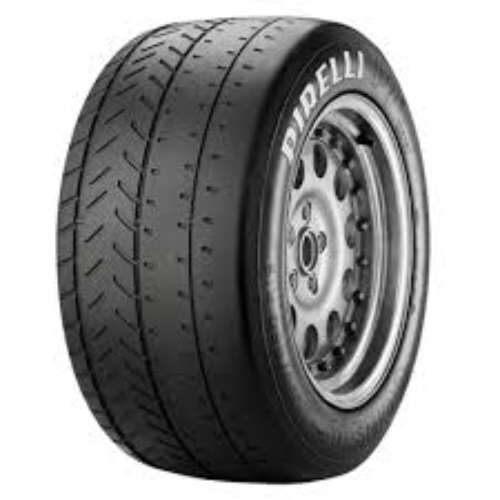
Still ruminating about tyres. I think that I have narrowed it down to two. The Pirelli P7 Corsa Classic 305/35 (592mm dia) on 15 x 11 rims and the Michelin TB5 285/40 (610mm dia) on 15 x 10.5. However, I have no idea of their respective Mu values so don't know which has the stickiest rubber.
Tyres have to be UK road legal.
Tyres have to be UK road legal.
Edited by stevebroad on Sunday 5th August 14:56

 |https://thumbsnap.com/iNaxY47O[/url]
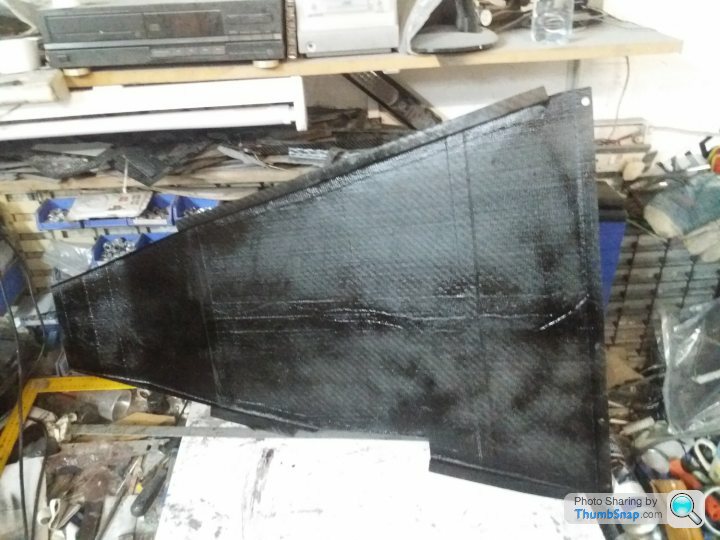
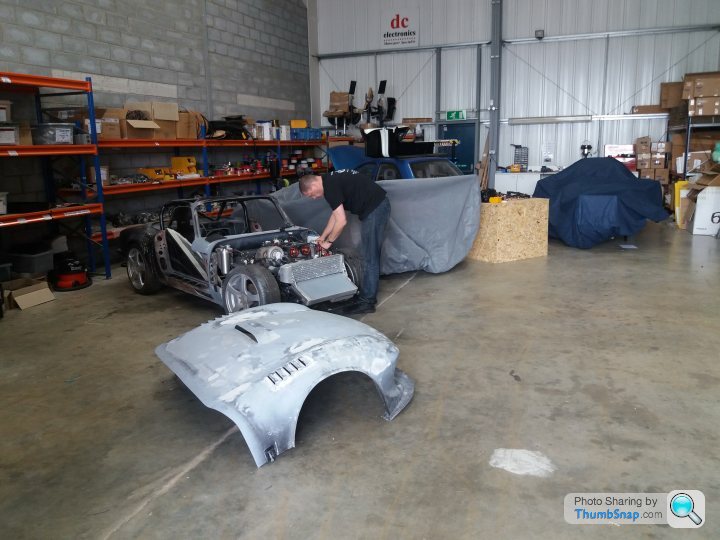
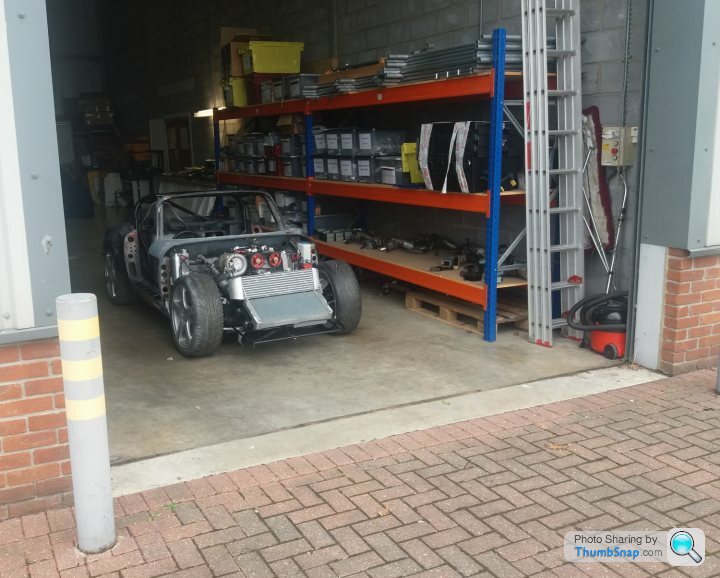
Elan leaving DC Electronics after completion of wiring. Once I have connected everything up, bolted everything down and tightened everything up, programmed the PDM and loaded a basic MAP on to the ECU, we can look at starting the engine. And before anyone asks, no onlookers will be welcome :-)
Had my first walk around the car since getting it back from DCe, making a list of jobs still to do. Probably missed a lot but this is something to work on :-) Steve
Secure intercooler
Modify radiator brackets to allow repositioning.
Fit air filter box
Finish air intake pipework
Fit header tank pipes
Get header tank filler cap
New pipe from overflow bottle to header tank.
Make new exhaust heat shields in CF
Fit wiper motor (either fix original or replace)
Finish front bulkhead and add heat shield material
Finish engine bay bodywork
Secure and adjust steering rack/rod ends for bump steer
Finish front clip
Fit injector rail and injectors
Connect up loom. Adjust position and wire lengths where necessary
Repostion ECU support bracket
Fit dash cover and cut hole for access
Fit screen wash jets and piping
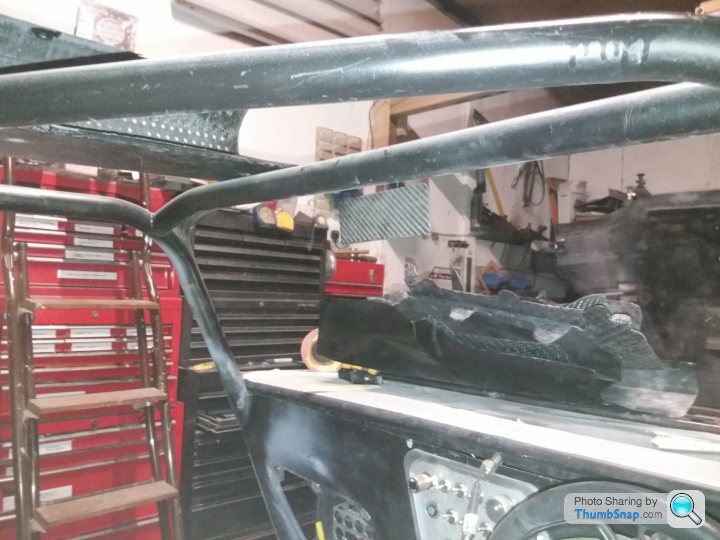
Weld in additional roll cage tubing behind seats
Fit roll cage cushioning
Fit interior panels
Make doors and glass
Secure glove box door
Secure switch panel
Secure centre console and tidy up edges
Make front screen
Make and fit new roof and rear screen
Sort out fire supression system
Fit EGT and Lamda sensors
Fit oil filler cap
Get and fit plug leads
Fit plugs
Secure fuel tank and nitrous bottle
Get new electric bottle opener (or fix old one)
Fit fuel filler cap
Fit rear lamps
Finish droop limiters
Tighten ALL nuts and bolts, marking as I go.
Door locks and hinges
Get seat belts and fit
Parachute bracket
Under floor trays, side splitters and strakes
Rear view mirror
Fit and wire up remote tyre temp sensors
Change front springs
Make new radiator bottom hose
Fit hose clips to header tank hoses and secure
Fit exhaust box and cover
Fit heat shield material behind exhaust box
Fit boot
Bond in floors
Bolt on exhaust manifold and turbo
Fit turbo support strut
Reposition alternator/battery cable
Repostion loom through bulkhead and fit grommets/covers
Final fit of loom, adjusting wire lengths where necessary
Connect battery
Sort out wheels and tyres
Had my first walk around the car since getting it back from DCe, making a list of jobs still to do. Probably missed a lot but this is something to work on :-) Steve
Secure intercooler
Modify radiator brackets to allow repositioning.
Fit air filter box
Finish air intake pipework
Fit header tank pipes
Get header tank filler cap
New pipe from overflow bottle to header tank.
Make new exhaust heat shields in CF
Fit wiper motor (either fix original or replace)
Finish front bulkhead and add heat shield material
Finish engine bay bodywork
Secure and adjust steering rack/rod ends for bump steer
Finish front clip
Fit injector rail and injectors
Connect up loom. Adjust position and wire lengths where necessary
Repostion ECU support bracket
Fit dash cover and cut hole for access
Fit screen wash jets and piping
Weld in additional roll cage tubing behind seats
Fit roll cage cushioning
Fit interior panels
Make doors and glass
Secure glove box door
Secure switch panel
Secure centre console and tidy up edges
Make front screen
Make and fit new roof and rear screen
Sort out fire supression system
Fit EGT and Lamda sensors
Fit oil filler cap
Get and fit plug leads
Fit plugs
Secure fuel tank and nitrous bottle
Get new electric bottle opener (or fix old one)
Fit fuel filler cap
Fit rear lamps
Finish droop limiters
Tighten ALL nuts and bolts, marking as I go.
Door locks and hinges
Get seat belts and fit
Parachute bracket
Under floor trays, side splitters and strakes
Rear view mirror
Fit and wire up remote tyre temp sensors
Change front springs
Make new radiator bottom hose
Fit hose clips to header tank hoses and secure
Fit exhaust box and cover
Fit heat shield material behind exhaust box
Fit boot
Bond in floors
Bolt on exhaust manifold and turbo
Fit turbo support strut
Reposition alternator/battery cable
Repostion loom through bulkhead and fit grommets/covers
Final fit of loom, adjusting wire lengths where necessary
Connect battery
Sort out wheels and tyres
br d said:
Just read from start to finish, what a fantastic thread Steve, massive kudos for your skills and patience!
I won't pretend to understand any of it (if I have car problems it goes off to someone with a clue!) but it's been a brilliant read. There is a very eclectic monthly car meet held just down the road from you and it would be a real treat to see it once completed. Best of luck with the countdown!
Thanks.I won't pretend to understand any of it (if I have car problems it goes off to someone with a clue!) but it's been a brilliant read. There is a very eclectic monthly car meet held just down the road from you and it would be a real treat to see it once completed. Best of luck with the countdown!
Do you mean the one at the White Elm Nursery, held every second Saturday of the month?
br d said:
Indeed. My apologies if you already go and we have met, I get progressively stupider as I age!
I'm normally there in a McLaren of some description, your Elan would be a definite highlight when it's ready to rock!
No apology required as I have yet to visit, which is rather remiss of me as it is less than a mile away :-) Did you go today? I'm normally there in a McLaren of some description, your Elan would be a definite highlight when it's ready to rock!
Please let me know when you next go so we can meet up.
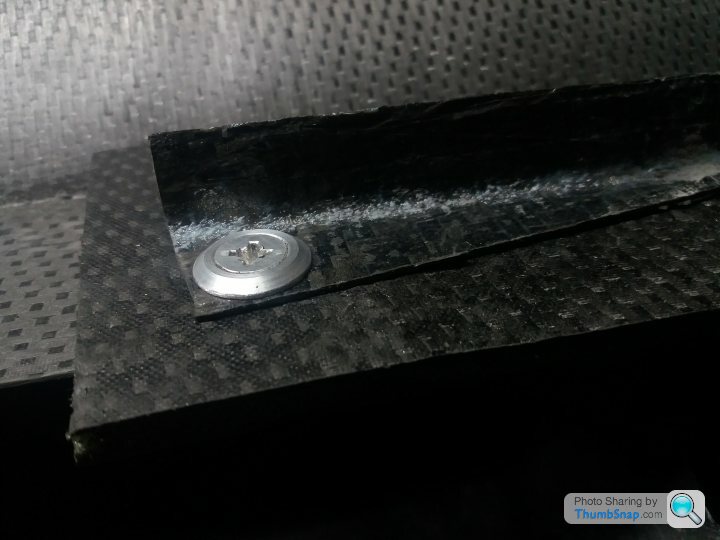
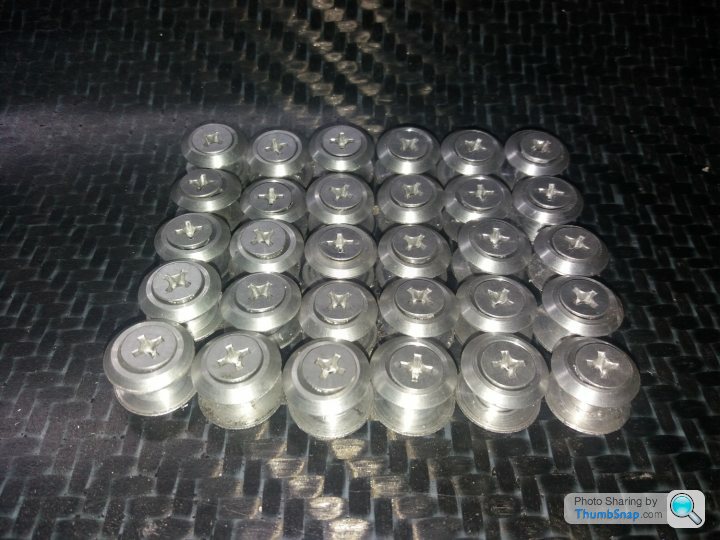
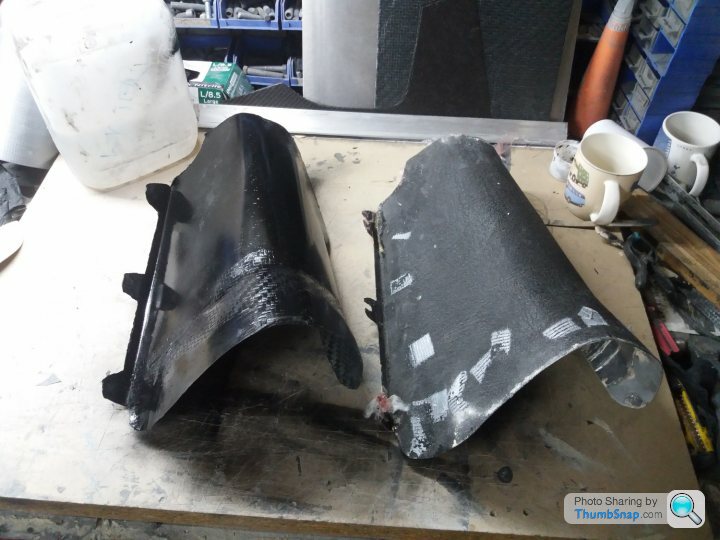
Made all of the underfloor panels, just need to cut rear section to size. Next task is how to secure them. Decided to bolt them on so had to make threaded inserts to glue into the existing carbon floor plus washers to stop the screws pulling through the thin panels. I hate making more than one of anything but I need around 30! Oh, well, spoon and Elephant to the rescue again :-) Photos shows how they will work. They will be cleaned up prior to fitting :-)
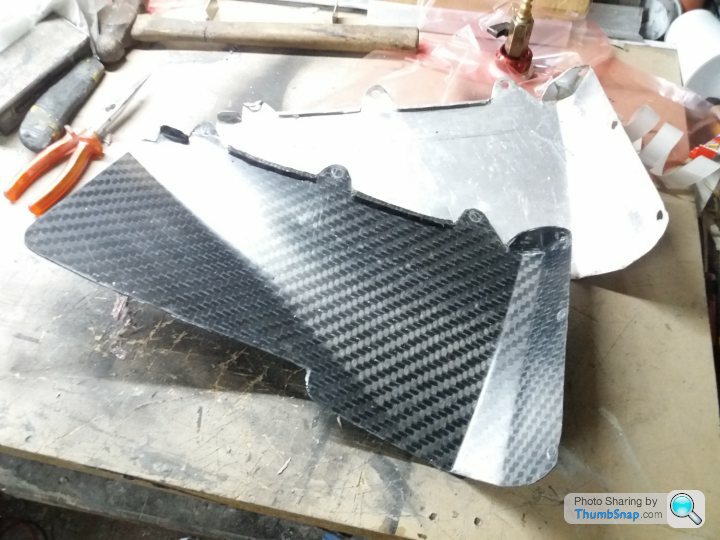
Yet more weight saving. One section of the aluminium exhaust heat shield (which would be lined with Zircoflex) replaced with a carbon version (also to be lined with Zircoflex). Weight saved just over 250gms (or, to make it sound more, over 1/4kg :-) ). As usual with my slapdash carbon work a little fettling is required to make it presentable. There are 5 more sections (of which some are bigger) so should remove over a Kg by the time I have finished.
Another part of the exhaust shield converted to carbon. 45% of the weight of the aluminium original.
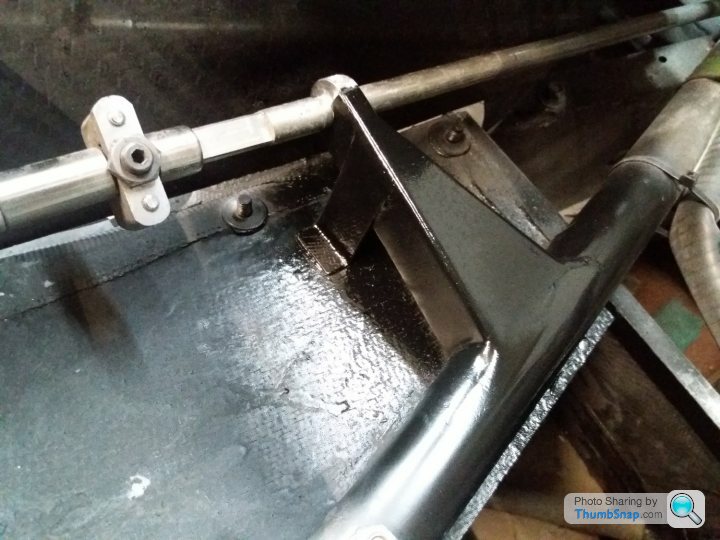
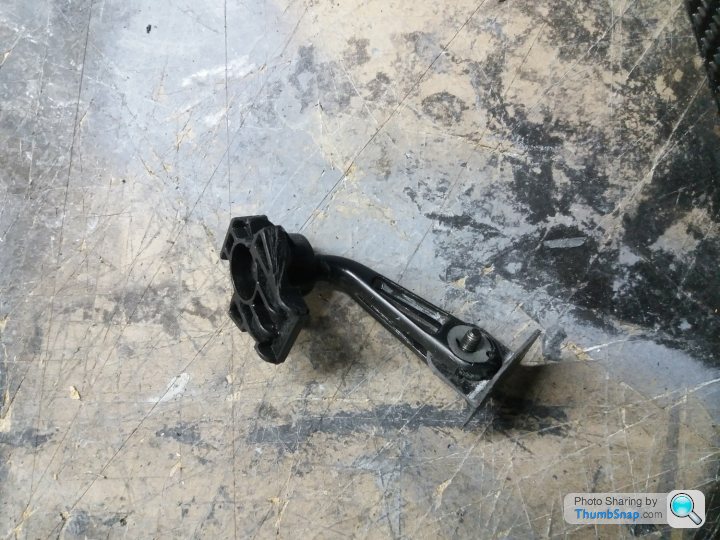
I have replaced the original mild steel steering column with a titanium version. As I have also repositioned the steering wheel I had to add a helicopter joint which has resulted in a little side to side play in the column.
So, I decided to install a support bearing. However, I am unable to install a bearing on the shaft due to the connecting collars at each end that connect the titanium shaft to the mild steel spines.
Surfing the interweb I found a 14mm diam split bearing that is perfect! Just had to make a support bracket.
Another part of the exhaust shield converted to carbon. 45% of the weight of the aluminium original.
I have replaced the original mild steel steering column with a titanium version. As I have also repositioned the steering wheel I had to add a helicopter joint which has resulted in a little side to side play in the column.
So, I decided to install a support bearing. However, I am unable to install a bearing on the shaft due to the connecting collars at each end that connect the titanium shaft to the mild steel spines.
Surfing the interweb I found a 14mm diam split bearing that is perfect! Just had to make a support bracket.
Carbon exhaust heat shields finally complete, apart from some beautification and drilling fastening holes. Final weight is 936gms compared to the aluminium originals at 2202gms, a 1266gm saving. May not sound much for all the work, but it is a 57% reduction :-)
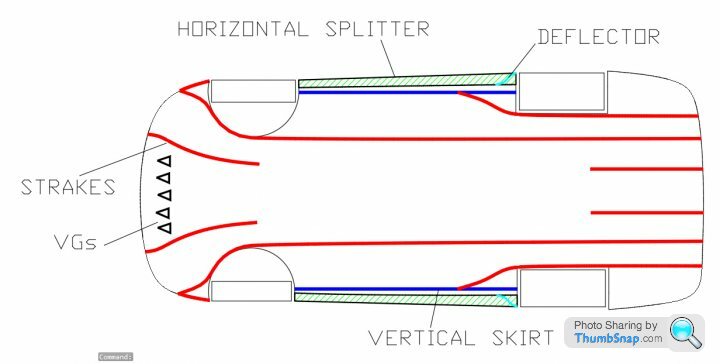
Also shown are the underfloor aero strakes. These weigh in at a total 377gms, which is 63gms/m. When trimmed that will come down to around 50gms/m. Not exactly heavy :-) They will serve two jobs, directing underfloor air flow and stiffening the undertrays, allowing them to be thinner and lighter.
Also shown are the underfloor aero strakes. These weigh in at a total 377gms, which is 63gms/m. When trimmed that will come down to around 50gms/m. Not exactly heavy :-) They will serve two jobs, directing underfloor air flow and stiffening the undertrays, allowing them to be thinner and lighter.
Edited by stevebroad on Friday 26th October 18:11
ReaperCushions said:
I wonder if Horatio Pagani uses house bricks in his carbon fibre production process? 
Love this thread, so talented and you can really see your skills (especially in the CF making) come on leaps and bounds. Amazing.
House brick/CF combination is a patented process and I would require royalty payments if he does :-)Love this thread, so talented and you can really see your skills (especially in the CF making) come on leaps and bounds. Amazing.
Thanks, although a skilled CF practitioner would weep if he saw my work conditions, methods and finished results close up. Luckily I am hiding my carbon so the imperfections are disguised :-)
If there is anyone out there that isn't convinced that I am obsessed with weight loss, then this should convince them once and for all :-)
I need an interior mirror to comply with the MOT, so I decided to make one.
Took the mirror out of my wife's old Astra that is still in the paddock (she can't bear to get rid of it!) and removed the arm and ball joint. However, it weighed a mighty 101gms so it had to be lightened and it ended up at 51gms.

Next task was to make the mirror holder.
Made the mould out of aluminium and put a slight curve into it so it would stabilise the thin carbon and give a wider field of view allowing the mirror to be smaller.

Experimented with 2 and 3 layers of CF and settled on 2.
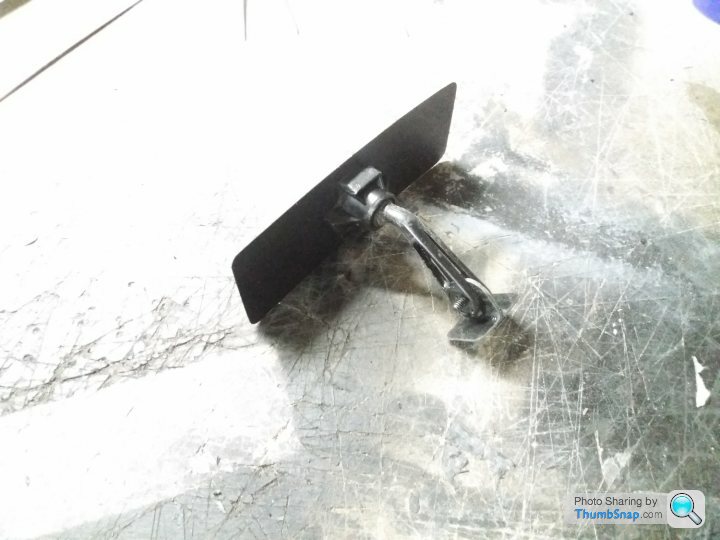
Although I am waiting for the stick on 0.2mm thick plastic mirror tiles, it shouldn't end up weighing much more than the just under 58gms it is at the moment :-)
I need an interior mirror to comply with the MOT, so I decided to make one.
Took the mirror out of my wife's old Astra that is still in the paddock (she can't bear to get rid of it!) and removed the arm and ball joint. However, it weighed a mighty 101gms so it had to be lightened and it ended up at 51gms.
Next task was to make the mirror holder.
Made the mould out of aluminium and put a slight curve into it so it would stabilise the thin carbon and give a wider field of view allowing the mirror to be smaller.
Experimented with 2 and 3 layers of CF and settled on 2.
Although I am waiting for the stick on 0.2mm thick plastic mirror tiles, it shouldn't end up weighing much more than the just under 58gms it is at the moment :-)
Gassing Station | Readers' Cars | Top of Page | What's New | My Stuff