E46 M3 Project
Discussion


The splitters on my CSl bumper had suffered the usual fate i.e. crazing from small impacts and fading & yellowing of the Epoxy clear coat.


The was the worst of the splitters. It's hard to see from this photo but the Epozy had crazed and was flaking off following an impact.

Before ordering a new set from BMW I thought I'd see what could be done with my set. My Dad kindly helped here and sanded them with coarse 80 grit, paper, followed by 120, then 1500 etc. The 80 grit was used to remove most of the existing Epoxy and expose the Carbon in damage areas.
I then lacquered the splitters using standard car paint.


I will use a compond to achieve the final finish, but they are already transformed.
The was the worst of the splitters. It's hard to see from this photo but the Epozy had crazed and was flaking off following an impact.
Before ordering a new set from BMW I thought I'd see what could be done with my set. My Dad kindly helped here and sanded them with coarse 80 grit, paper, followed by 120, then 1500 etc. The 80 grit was used to remove most of the existing Epoxy and expose the Carbon in damage areas.
I then lacquered the splitters using standard car paint.
I will use a compond to achieve the final finish, but they are already transformed.
darreni said:
I've refurbed a couple of sets of splitters & I will say don't go too fine on the sanding grades as the lacquer will look fine & then peel in sheets within months.
800 would be the finest I'd use now, but have had great results using 400 grit.
Thanks Darren, seems like I may be doing them again in a few months then 800 would be the finest I'd use now, but have had great results using 400 grit.

The first time I did them I went through 2000, 3000 & 4000 grit finishing grades before the lacquer & they did look amazing, but the first stone chip caused the lacquer to peel in sheets as a 4k grit mirror surface did not offer anything for the lacquer to adhere to.
400 grit as the last stage before lacquer sounds mental, but the lacquer (3-4 coats) fills the scratches & leaves a great finish. Leave for 2 days before final wet sanding & machine polish.
I used UPOL clear 1 lacquer as it is UV resistant.
400 grit as the last stage before lacquer sounds mental, but the lacquer (3-4 coats) fills the scratches & leaves a great finish. Leave for 2 days before final wet sanding & machine polish.
I used UPOL clear 1 lacquer as it is UV resistant.


The bonnet catches and release latch were showing some signs of rust, so they were sanded and repainted.

Refitted.

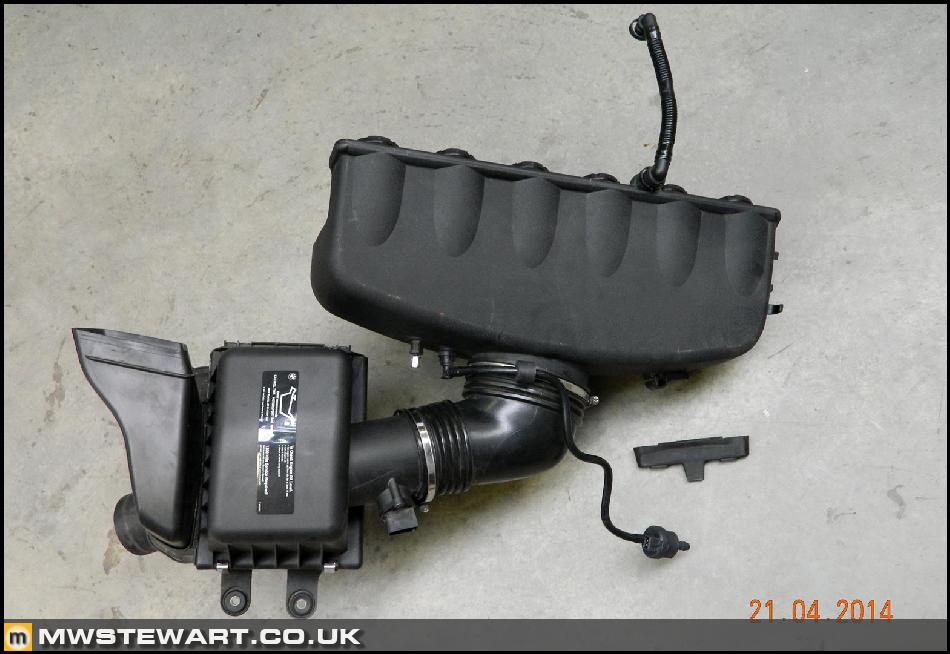
I also removed the standard induction system ready for the CSL airbox. Here's the standard engine bay.
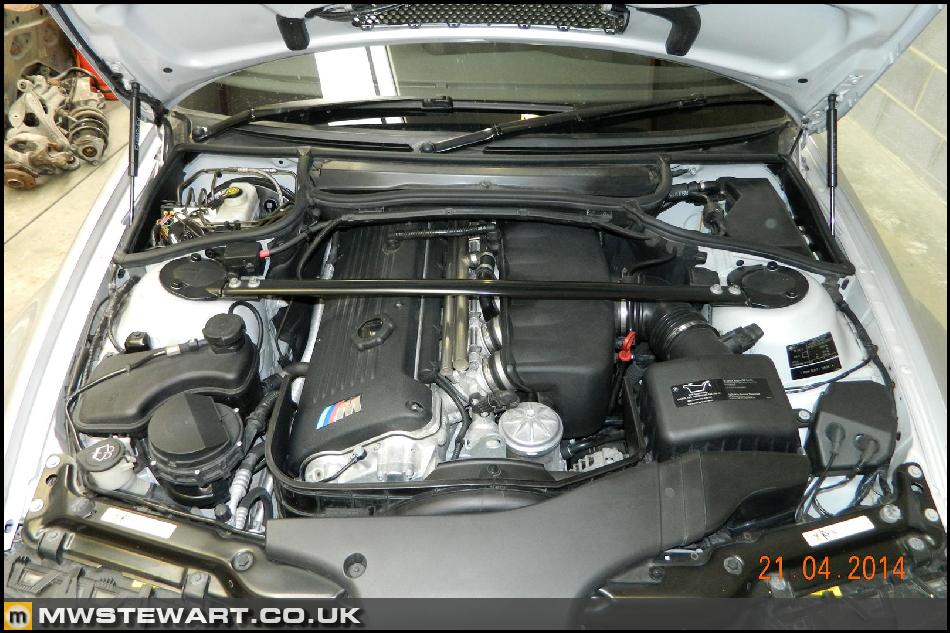
Intake system removed.
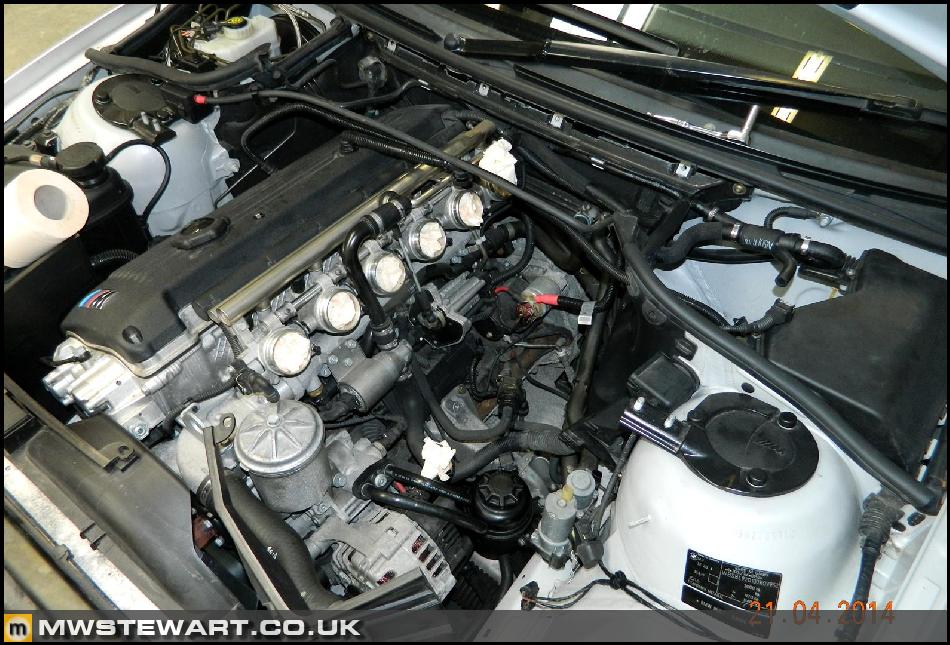
The standard parts are actually very heavy. The CSL airbox feels like it weighs at most one third of these standard M3 parts.
Refitted.
I also removed the standard induction system ready for the CSL airbox. Here's the standard engine bay.
Intake system removed.
The standard parts are actually very heavy. The CSL airbox feels like it weighs at most one third of these standard M3 parts.

CSL dispstick and guide tube (top). The standard tube can apparently be bent to clear the airbox, but I had a go and couldn't achieve a satisfactory result that left the guide tube mounted securely.

CSL specific vaccum line & check valve and oil breather.

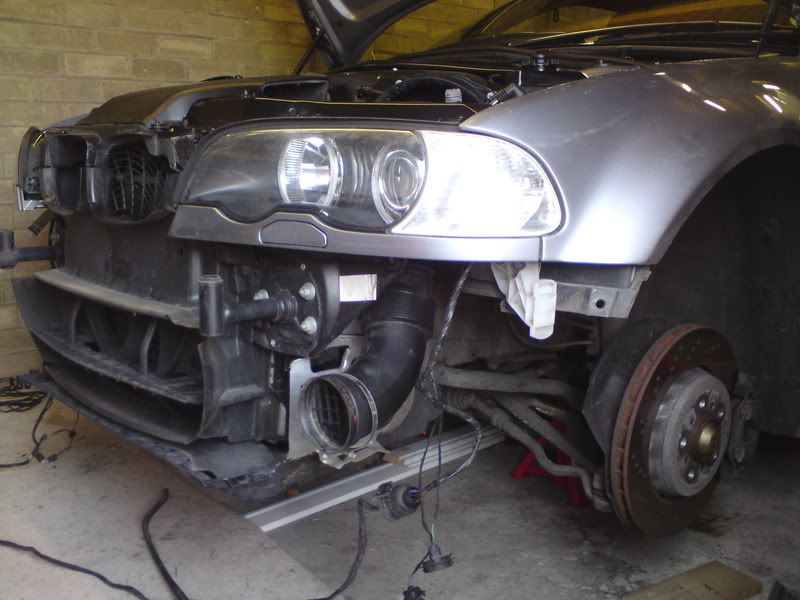
Silenced inlet duct (left) and unsilenced front bumper duct (right).

Temperature sensor.

The M3 slam panel inlet duct has an additional section on the end that pushes onto the standard airbox. This is no longer required so I cut it off.

The silenced inlet route on the CSL is operative when the inake flap is closed. The route services no purpose other than to minimise intake noise at low RPM condition when out of sport mode. I want to hear the intake sing all the time so in my case the silenced intake is just a source of undesirable hot air from the engine bay. Although I did buy the ducting to plumb in the silenced route I decided against using it, so I cut off the silenced duct flange, and sealed with plastic and a foil-backed Butul covering.

I'm still waiting for the air filter at the moment, but the airbox is in place nonetheless.


I have removed the ECU and sent it away to have the following work done:
- Conversion to CSL spec, but minus the flap actuation hardware, and with deletion of codes for non-operational flap
- Manual gearbox conversion on CSL software
- Retention of my current VIN and build date etc.
- SMG Shift Lights adapted for manual gearbox
- Top Speed Governor Removal
- Disable post-cat o2 sensors
- Sport Button Memory
- Permanent Dyno mode

The remaining sections of high gloss Shadowline arrived and are now fitted.

CSL specific vaccum line & check valve and oil breather.
Silenced inlet duct (left) and unsilenced front bumper duct (right).
Temperature sensor.
The M3 slam panel inlet duct has an additional section on the end that pushes onto the standard airbox. This is no longer required so I cut it off.
The silenced inlet route on the CSL is operative when the inake flap is closed. The route services no purpose other than to minimise intake noise at low RPM condition when out of sport mode. I want to hear the intake sing all the time so in my case the silenced intake is just a source of undesirable hot air from the engine bay. Although I did buy the ducting to plumb in the silenced route I decided against using it, so I cut off the silenced duct flange, and sealed with plastic and a foil-backed Butul covering.
I'm still waiting for the air filter at the moment, but the airbox is in place nonetheless.
I have removed the ECU and sent it away to have the following work done:
- Conversion to CSL spec, but minus the flap actuation hardware, and with deletion of codes for non-operational flap
- Manual gearbox conversion on CSL software
- Retention of my current VIN and build date etc.
- SMG Shift Lights adapted for manual gearbox
- Top Speed Governor Removal
- Disable post-cat o2 sensors
- Sport Button Memory
- Permanent Dyno mode
The remaining sections of high gloss Shadowline arrived and are now fitted.
Max M4X WW said:
All looks great, love all the details.
Have you physically removed the flap then? Always wondered what this was for, is it just for noise? Would it be closed with the ignition off on a standard CSL?
What are the benefits of having the car in Dyno mode permanently?
Thanks Max. Yes, I have removed the flap. It's there purely to control intake noise by closing off the main aperture fed from the front bumper hole, and forcing the inlet air via a much smaller route that starts with a 700mm length of silenced duct. Have you physically removed the flap then? Always wondered what this was for, is it just for noise? Would it be closed with the ignition off on a standard CSL?
What are the benefits of having the car in Dyno mode permanently?
The following photos are probably clearer than my explanation.
Main inlet tract

Silenced tract.


Dyno mode is a convenience thing to make mapping work a little easier. I don't think I'll be on the dyno any more than the first time for a setup and map, but I thought I may as well get the modification coded in whilst the ECU work was being done.
I looked at using the CSL dipstick (and housing tube) when I fitted my carbon airbox, but as I understand it the standard M3 ECU can't be reprogrammed to replicate the CSL electronic oil reading on the dash. That means removing the airbox to dip the oil or have you found away around this?
benny.c said:
I looked at using the CSL dipstick (and housing tube) when I fitted my carbon airbox, but as I understand it the standard M3 ECU can't be reprogrammed to replicate the CSL electronic oil reading on the dash. That means removing the airbox to dip the oil or have you found away around this?
Yes, as above my ECU is being converted to CSL spec with additional features and at the same time altered to suit the manual gearbox. I will have the oil level reading in the instrument cluster.benny.c said:
I thought I read somewhere that you need a CSL instrument cluster too? There is lots of threads on the US forums where folk have got the gauge to appear but not actually read anything. As you say, bending the dipstick pipe isn't the ideal solution.
The CSL cluster is identical to all facelift M3 clusters down to the 'M Track' mode LED/warning light - which I have yet to code in. People have hit issues trying to port the oil level display to a regular S54 file on the MSS54HP ECU, but I'm going for the CSL version in its entirety as I don't like the pseudo Alpha-N implementation on the standard ECU.It's only a matter of time though before the oil level is available on the standard MSS54HP.
I see. So a full CSL conversion of the ECU will work, but trying to tweak only certain elements of the normal M3 code won't. Reading the US forums it seems like folk have been trying to get it work (without full CSL conversion) for ages. I'll have to stay with my bent dipstick for a while longer 
benny.c said:
I see. So a full CSL conversion of the ECU will work, but trying to tweak only certain elements of the normal M3 code won't. Reading the US forums it seems like folk have been trying to get it work (without full CSL conversion) for ages. I'll have to stay with my bent dipstick for a while longer
Yes, you got it. Out of interest how do you find your map? Do you have a flat spot or any hesitance lower down?Gassing Station | Readers' Cars | Top of Page | What's New | My Stuff