Knackered old Porsche with loads of miles - 996 content
Discussion


Mikeeb said:
I delighted to see you can procrastinate almost as well as me in avoiding those horrible jobs.
The trick is to always have something else that can be considered productive to do instead. That way you're not procrastinating you're just working through the required jobs list in a none linear order..... as they all need doing! 
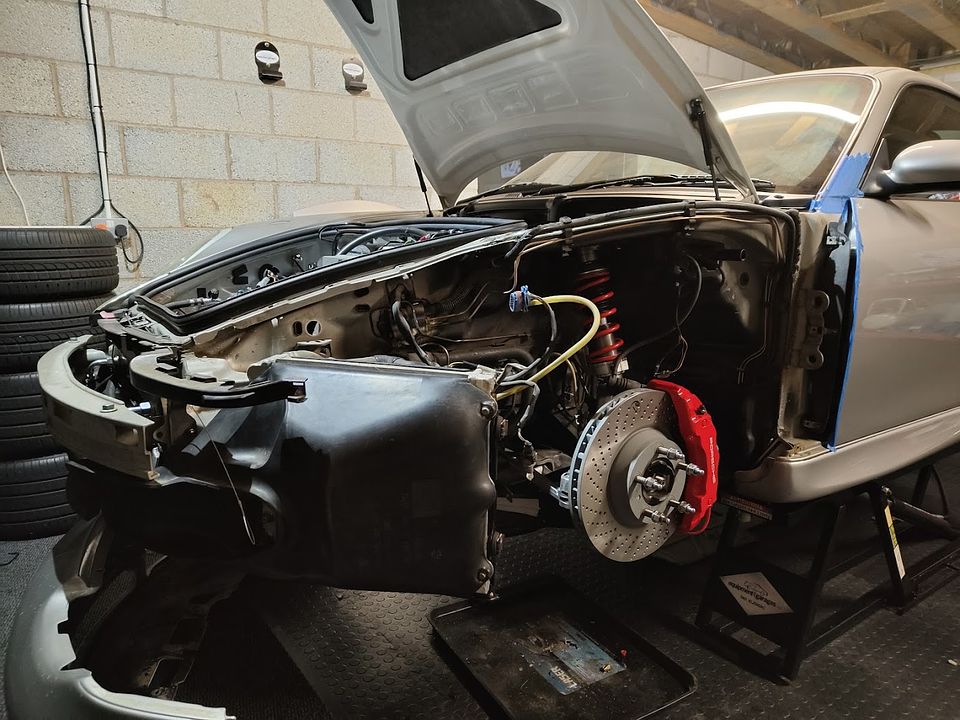
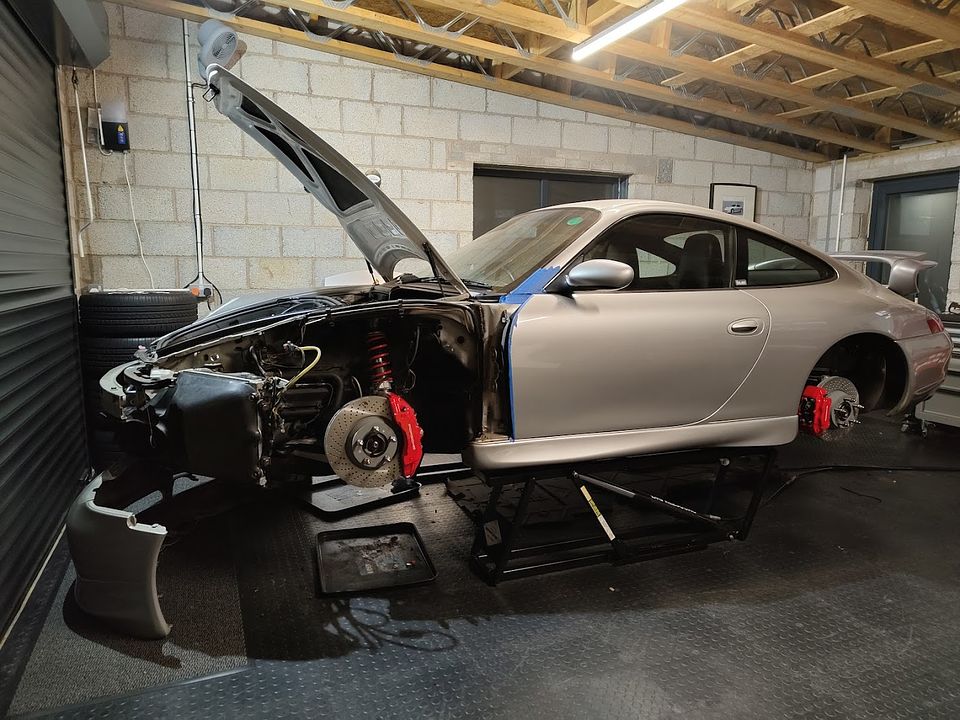
Well maybe not blow by blow but I took a couple of pictures.... It wasn't as bad as it could have been although having said that I still have one side to go and that's the side which is even more of a pain in the arse!
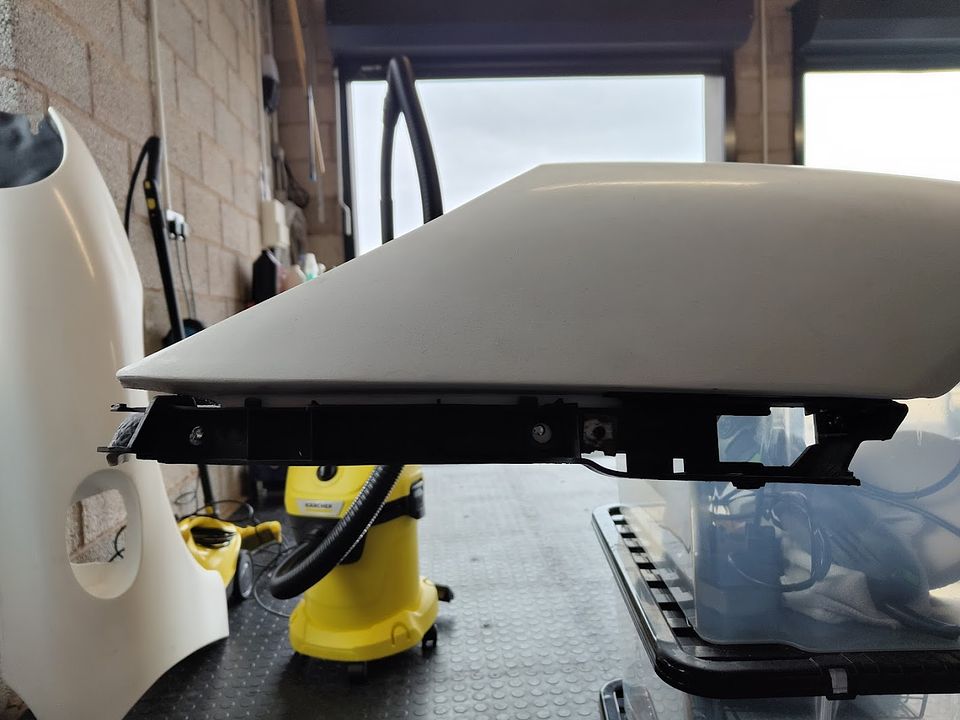
As these are untrimmed for the most part the first job was to put in all the holes required to attached them to the car. First off everything was piloted, which usually you wouldn't do but there's little chance of accuracy otherwise due to the surface finish:

 [/URL]
Before being opened up to 10mm:

They look a bit unround in that pic but that's only the surface fibres, a quick touch with the flap wheel makes them look perfectly round.
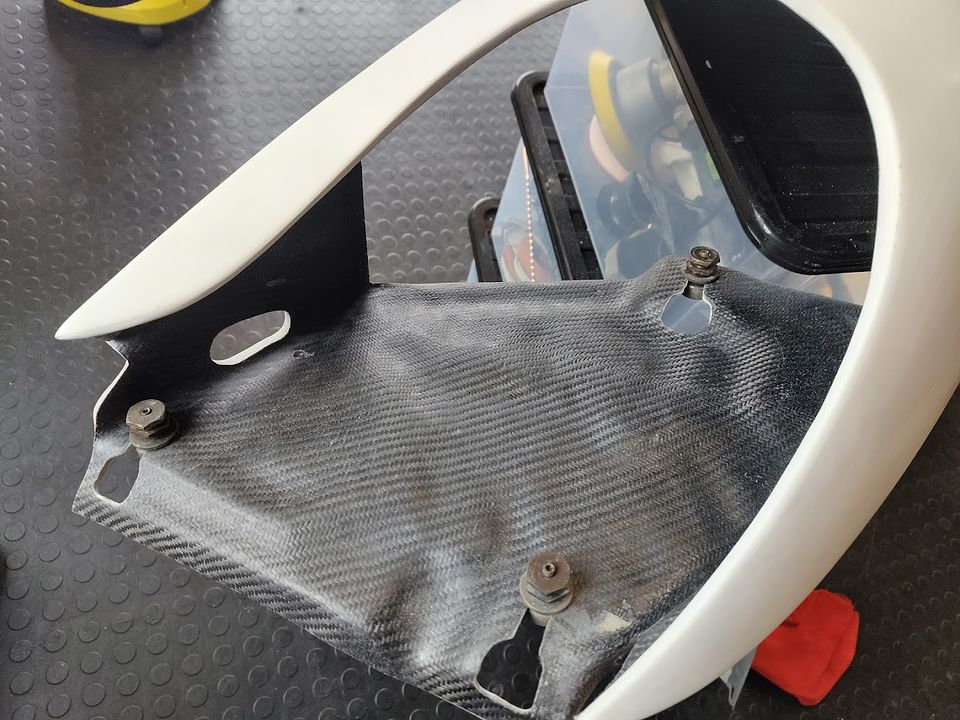
With that done it's time to break out the death wheel and start chopping bits to clearance for all the bolt on bits, like the side repeater carrier / bumper mount:
And then finally the head light carrier mounts and a few holes to carry the wing support bar.
Then onto throwing it at the car and seeing how much it doesn't fit:
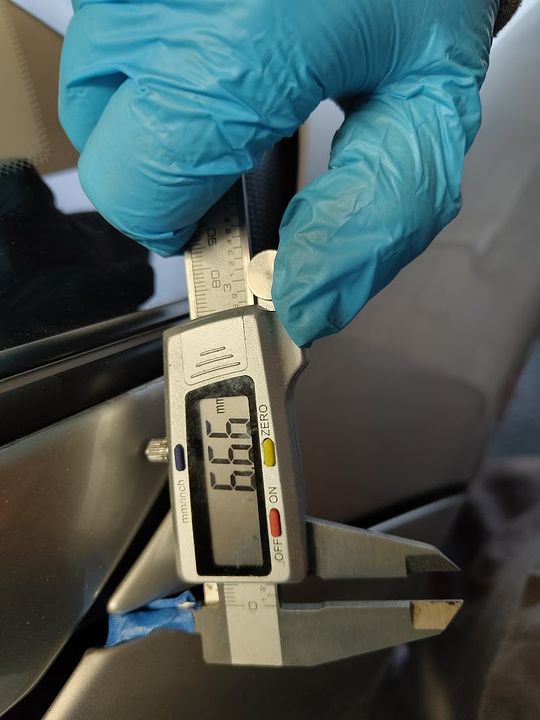
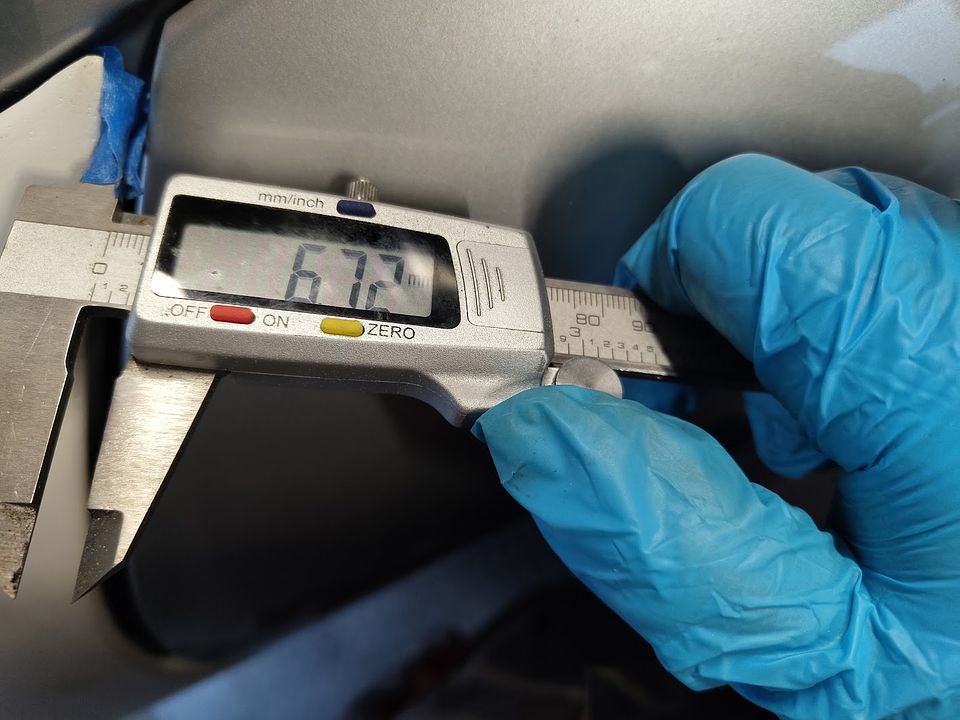
An hour or so of dicking around later and we were getting somewhere, carbon panels are always a massive pain as they don't bend like steel does and generally speaking have different thickness properties which means it's never one on and one off. Still these are the panel gaps between the standard, never been off the car, steel wing on one side and the carbon wing on the other:
Standard:
Carbon:
 [/URL]
Less than a tenth of a mm difference, I'll take that
Another hour of dicking around to get the headlight correct, all the adjustment here is in the tray so there is a lot of on and off required to set the mounts.
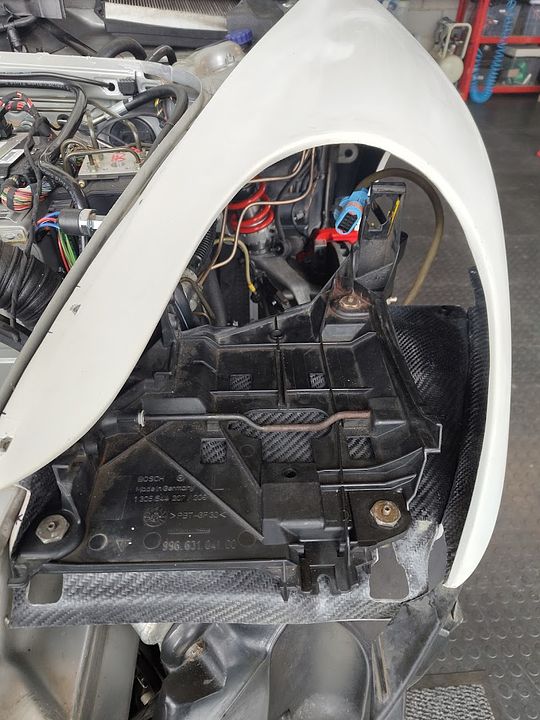
All fits up well in the end though, top tip is to keep one side as per so you have something to compare against - we're not going to insane concourse here - just no worse than standard
And with that side done I stripped the other wing off ready to make a start on that:
Of course this all needs to come back off again for final trim and both wings need some big heads bonding on for the lower wing mounts and side repeater carriers but for the most part this is 90% of the arse ache as it all lines up and fits. Here's hoping the other side does too!
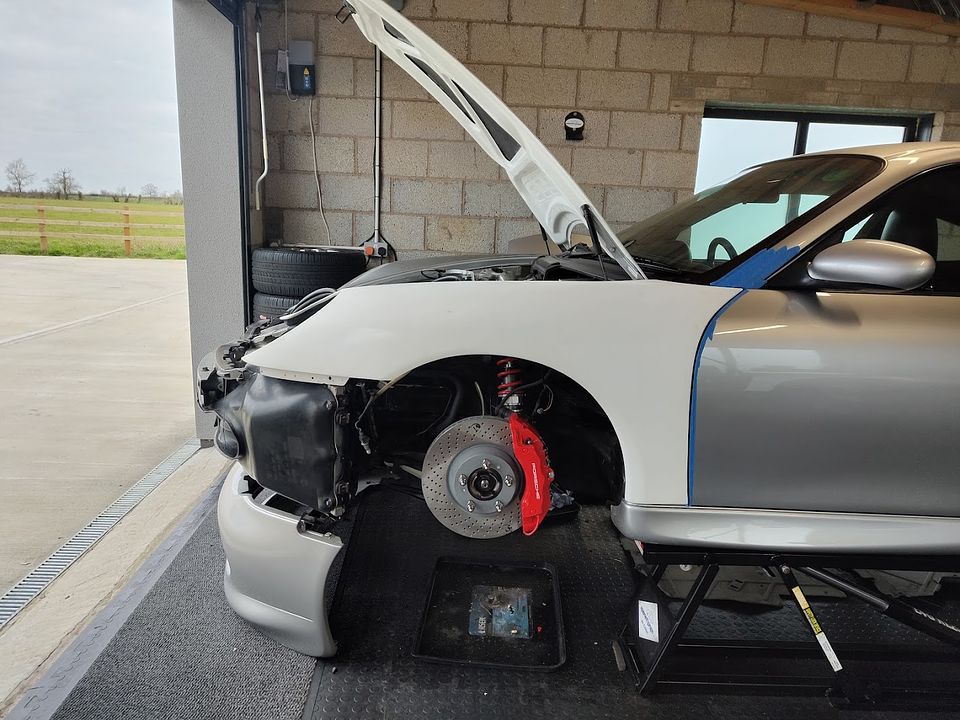
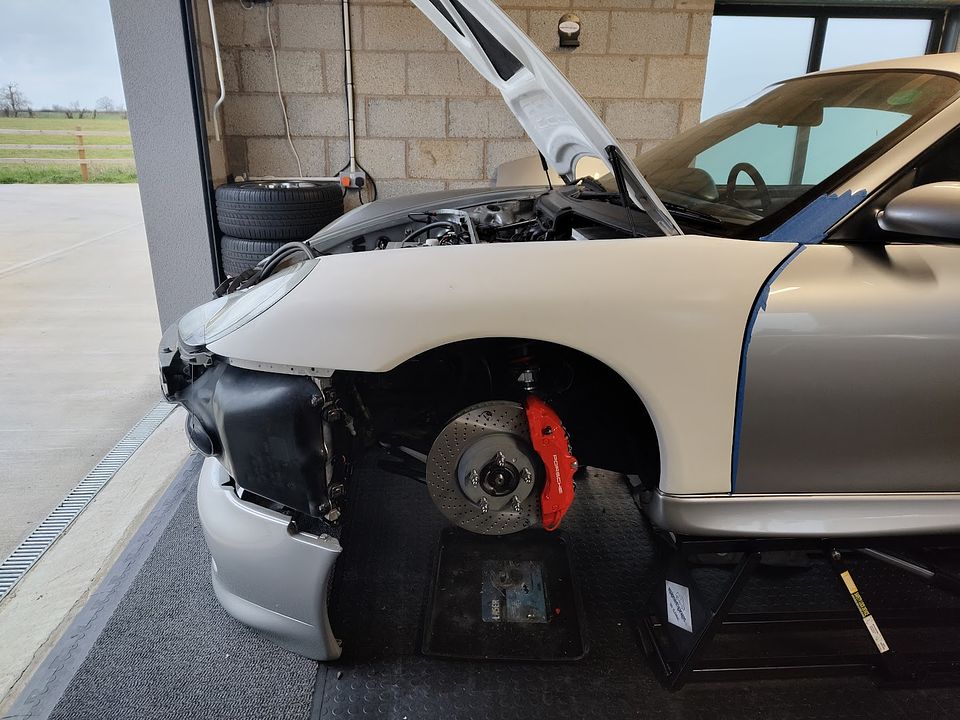
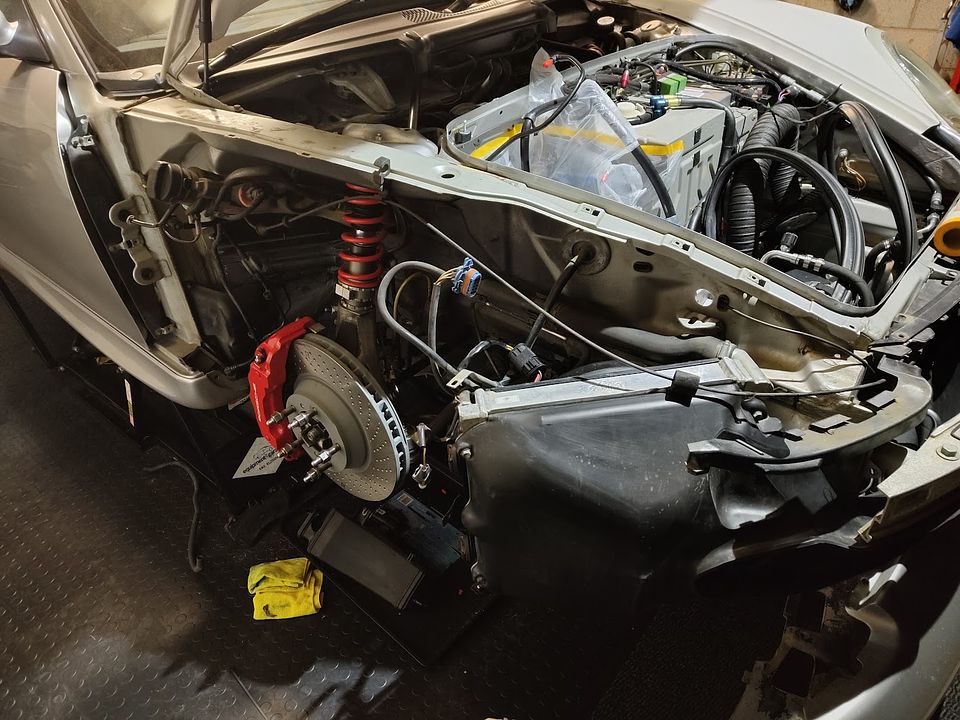
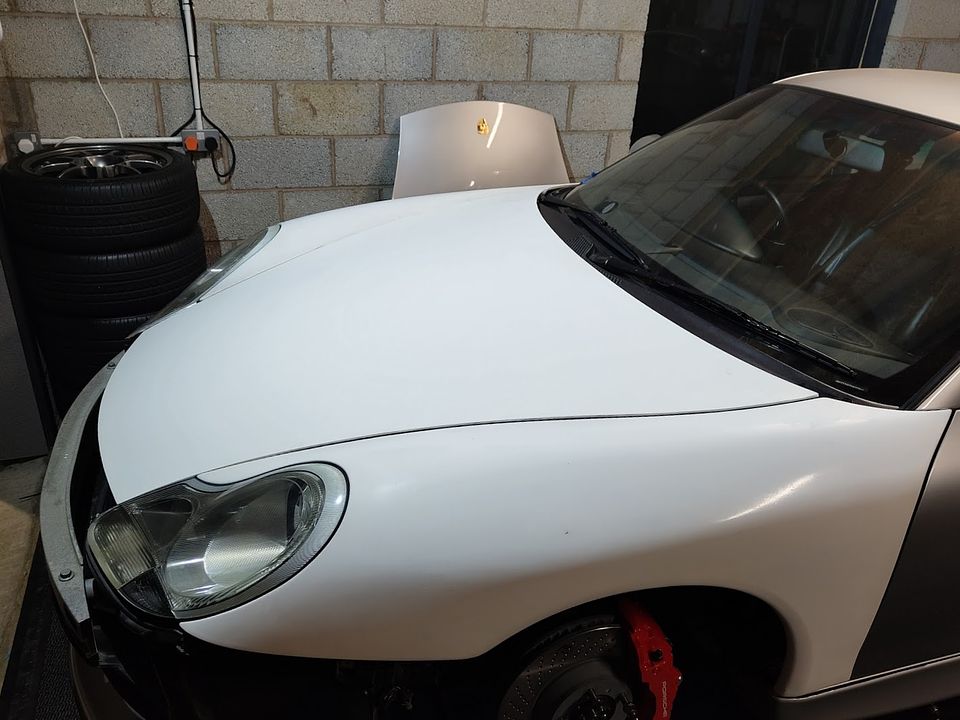
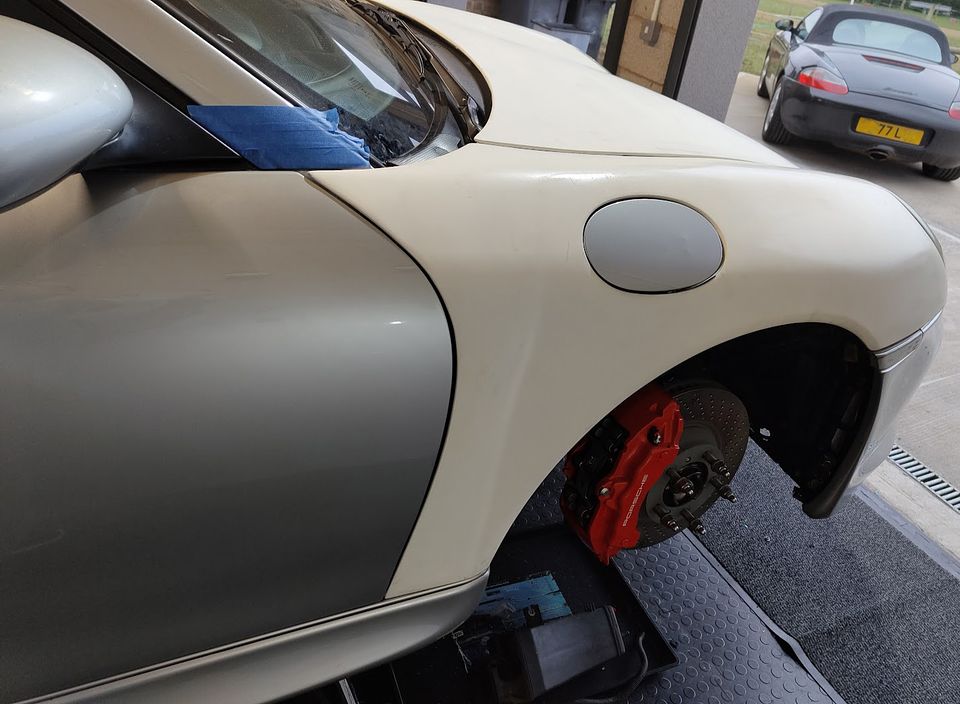
Finally here's why the old wings had to go:
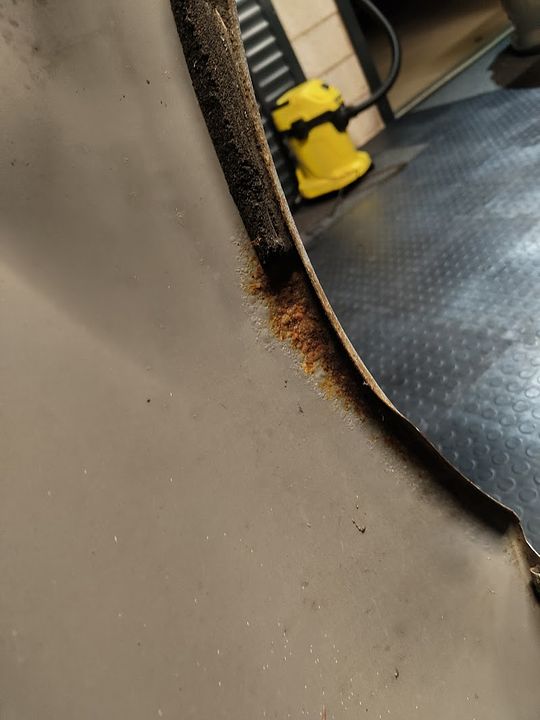
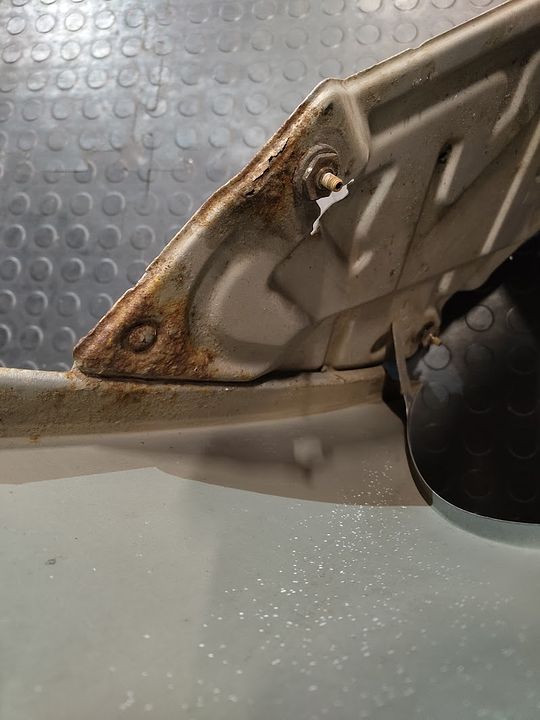
All of this could be fixed and isn't untypical for a very well used 996 but hey, good excuse to make a load of work and take some weight off right!
I'm expecting Ohlins to deliver the middle of the month so it can go back on its wheels then, I better get a wiggle on as I've got a bit in the rear arches to do before then too!
although having said that I still have one side to go and that's the side which is even more of a pain in the arse! As these are untrimmed for the most part the first job was to put in all the holes required to attached them to the car. First off everything was piloted, which usually you wouldn't do but there's little chance of accuracy otherwise due to the surface finish:
[/URL]Before being opened up to 10mm:
They look a bit unround in that pic but that's only the surface fibres, a quick touch with the flap wheel makes them look perfectly round.
With that done it's time to break out the death wheel and start chopping bits to clearance for all the bolt on bits, like the side repeater carrier / bumper mount:
And then finally the head light carrier mounts and a few holes to carry the wing support bar.
Then onto throwing it at the car and seeing how much it doesn't fit:
An hour or so of dicking around later and we were getting somewhere, carbon panels are always a massive pain as they don't bend like steel does and generally speaking have different thickness properties which means it's never one on and one off. Still these are the panel gaps between the standard, never been off the car, steel wing on one side and the carbon wing on the other:
Standard:
Carbon:
[/URL]Less than a tenth of a mm difference, I'll take that
Another hour of dicking around to get the headlight correct, all the adjustment here is in the tray so there is a lot of on and off required to set the mounts.
All fits up well in the end though, top tip is to keep one side as per so you have something to compare against - we're not going to insane concourse here - just no worse than standard
And with that side done I stripped the other wing off ready to make a start on that:
Of course this all needs to come back off again for final trim and both wings need some big heads bonding on for the lower wing mounts and side repeater carriers but for the most part this is 90% of the arse ache as it all lines up and fits. Here's hoping the other side does too!
Finally here's why the old wings had to go:
All of this could be fixed and isn't untypical for a very well used 996 but hey, good excuse to make a load of work and take some weight off right!
I'm expecting Ohlins to deliver the middle of the month so it can go back on its wheels then, I better get a wiggle on as I've got a bit in the rear arches to do before then too!
Other side is on:

 [/URL]
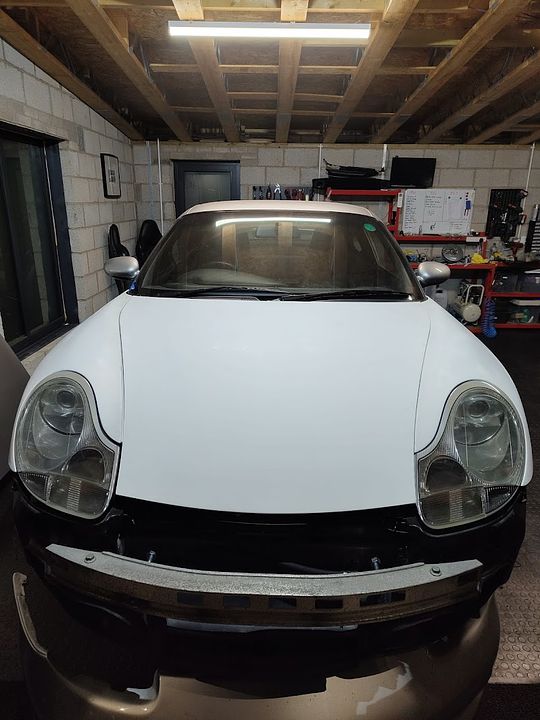
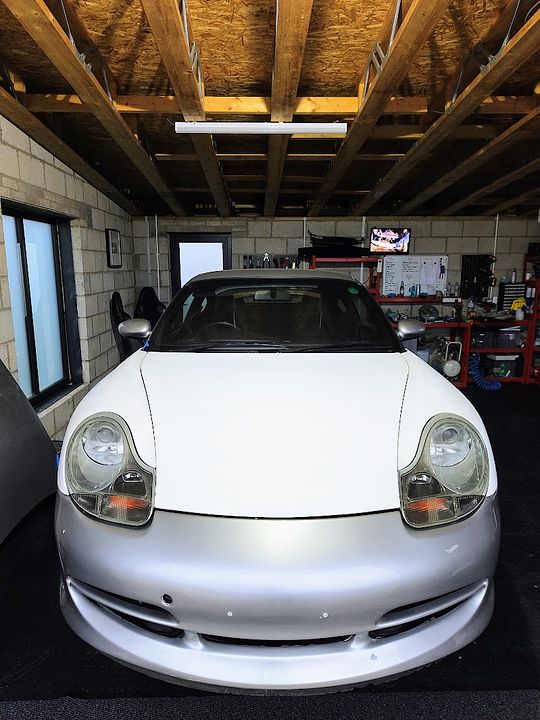
Now it's all got to come back off again to cut in the rest of the bonnet bits (like the rubber stop block holes), bond on the big heads that secure the lower wing sections, oval a few holes where a bit more adjustment is required and then put it all back together again with acceptable panel gaps....... but it's on, it'll all fit and the critical gaps are all spot on so the rest will bend to fit from there
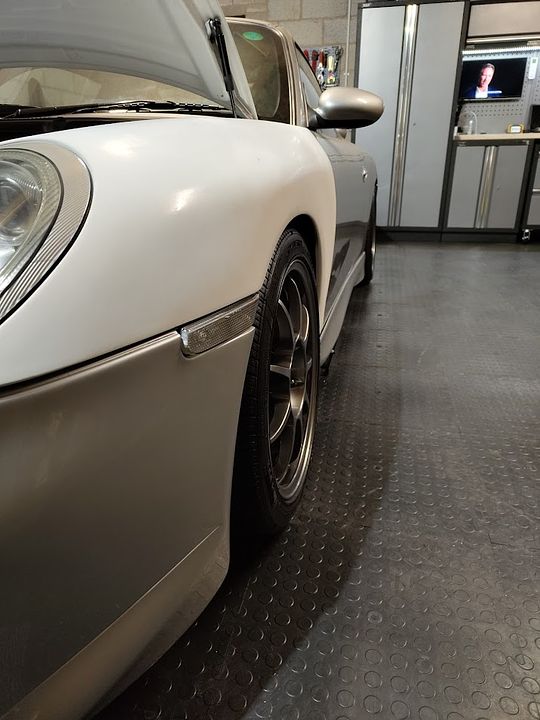
Oh and this is a total result:

Fuel filler and surround fit a treat - just got to sort out fitting the flap now!
The ends not quite in sight yet as I've still got to sort and fit new side skirts and a load of associated bits as well as fit all the bits that are currently on order..... like the rear dampers.
[/URL]Now it's all got to come back off again to cut in the rest of the bonnet bits (like the rubber stop block holes), bond on the big heads that secure the lower wing sections, oval a few holes where a bit more adjustment is required and then put it all back together again with acceptable panel gaps....... but it's on, it'll all fit and the critical gaps are all spot on so the rest will bend to fit from there
Oh and this is a total result:
Fuel filler and surround fit a treat - just got to sort out fitting the flap now!
The ends not quite in sight yet as I've still got to sort and fit new side skirts and a load of associated bits as well as fit all the bits that are currently on order..... like the rear dampers.
Nearly there!
And the utter, utter PITA fuel filler flap:
I ended up drilling out the spot welds on the original wing which held the fuel flap mount and salvaging this part to transplant to the new carbon wing via some stainless M6 button heads (as it's all the exposed to the elements in there). Worked a treat in the end!
Everything is gapped up sufficiently to know it'll go together well after paint so I'm just waiting on Ohlins now and a few brake bits, once they arrive it's a day for it to be on the deck and ready to go to the body shop for paint
ATM said:
I didn't realise you also have a 986. Is that standard or have you started tinkering?
Absolutely completely standard bar a set of spacers and a short shift kit. It's a late 99 car so one of the very last 2.5 Boxsters and has a few choice options such as Litronics and extended leather. Lovely little thing!I have a 957 too which is lifted 2.5" and fitted with KO2's on some Braid bead lockers and a few other off roady bits.
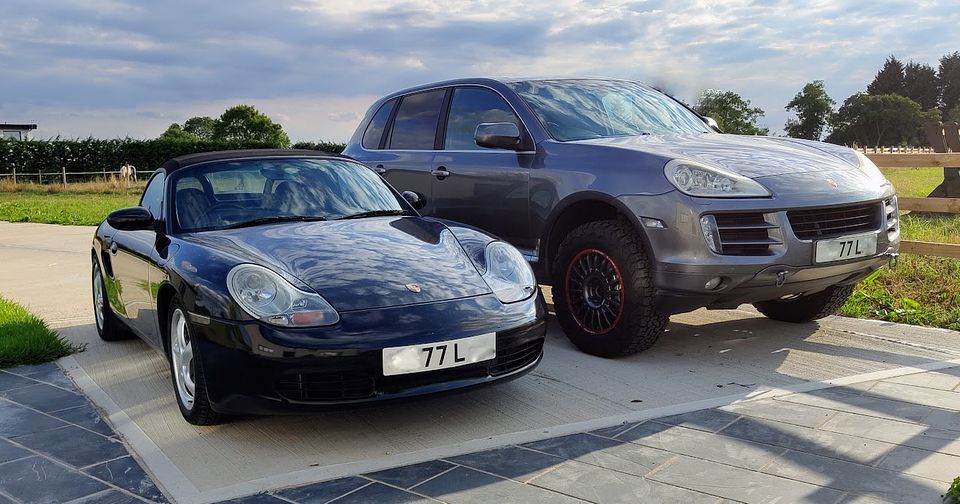
Between the three I've got most bases covered!
-Ad- said:
@PPBB, loving the garage setup, which version of the the quickjack is that as I was contemplating one for the Mrs 996
They are Garage Equipment 2.5T Kwik Lifts from here: https://www.garageequipment.co.uk/Vehicle-Lifts/Kw... I really wanted the 240V version which was out of stock for ages but found some second hand ones from a Gent who posted above  The 12V ones are fine, a friend of mine has them, but 240V is a lot more convenient for me!
 I originally thought they were the same as the Quickjacks version Costco etc. sell but someone has since informed me the Garage Equipment ones have much better rams in them which don't require pressuring up off an air compressor occasionally to create the return force.
I can't recommend them enough to be honest, the 2.5T ones are spot on length of a 996 with lifting blocks at the furthest points and they're the perfect solution for a low garage or home tinkering and allow all the corners etc. to be accessed at will, they also store on the wall which is a massive plus vs a two poster chopping your garage in half. I think the only thing better for the kind of work I do at home would be an in ground scissor lift but that's a pain to install!
ATM said:
I didn't realise you also have a 986. Is that standard or have you started tinkering?
When he opens the rear boot, the Eurojet engine from a Euro fighters neatly and methodically folds out. Lancia888 said:
Yes, please keep cock'in about , I do look forward to your updates.
If I could get bits I would do! I'm still waiting on rear dampers but the good news is the rest of the brake bits shipped today so early next week I can crack on and put the top end of the brake hydraulics back together again. Dampers etc. end of next week I believe so it should be back on its wheels this time next week and I can prep it to go to the body shop accordingly. The Boxster is in at CG next week too so already lining up the next project for when this one can be considered "phase complete"
not_mint said:
Next project and a new thread?
Already one running: https://www.pistonheads.com/gassing/topic.asp?h=0&... but this isn't a big project and no plans for adding any more performance etc. to it. It's just a great little Boxster Good evening in the garage, brake system is back together.
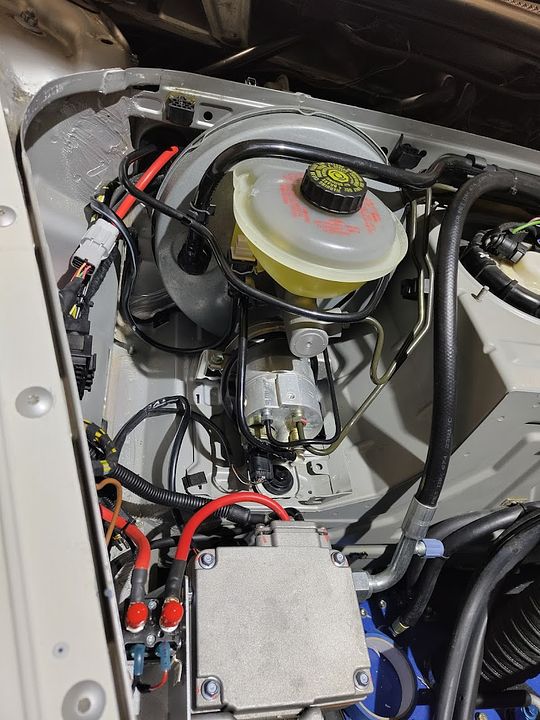
With a shiny new master cylinder and the odd fresh line:
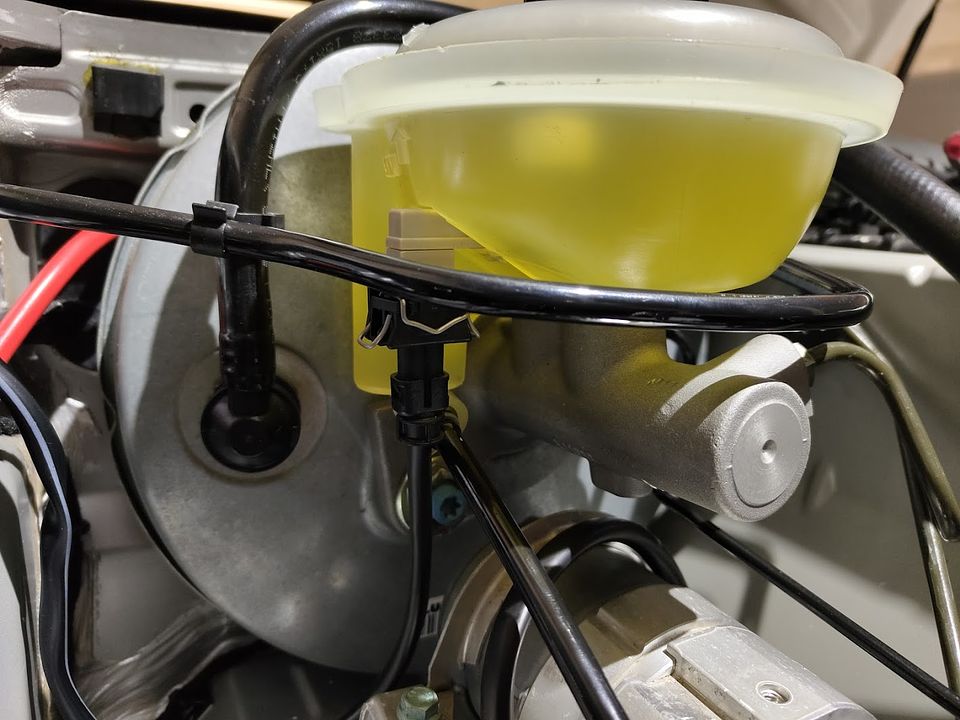
I changed the bulkhead gasket on the servo at the same time as it would be rude not to. Bled it up with some Motul 5.1:
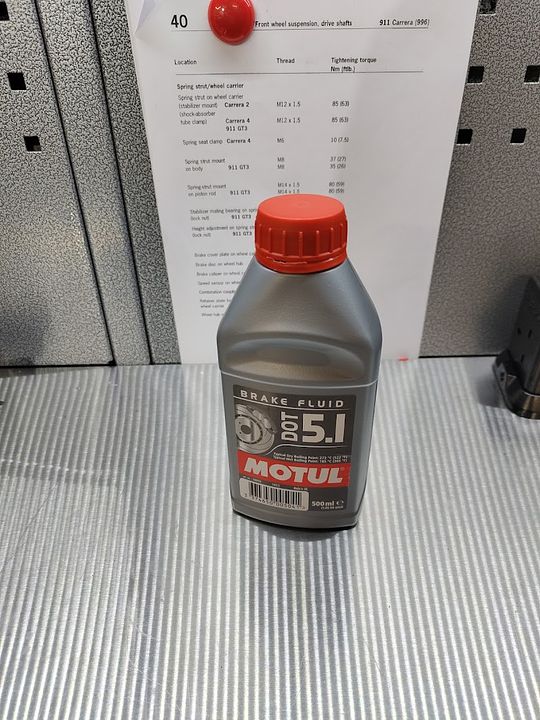
Which is my go to brake fluid for 99% of things, RBF700 is great and everything but I'm not trying to skinny up the brake ducts for aero and my front pads are essentially standard Cayenne Turbo so not exactly the material you'd be getting high 200's of fluid temp with
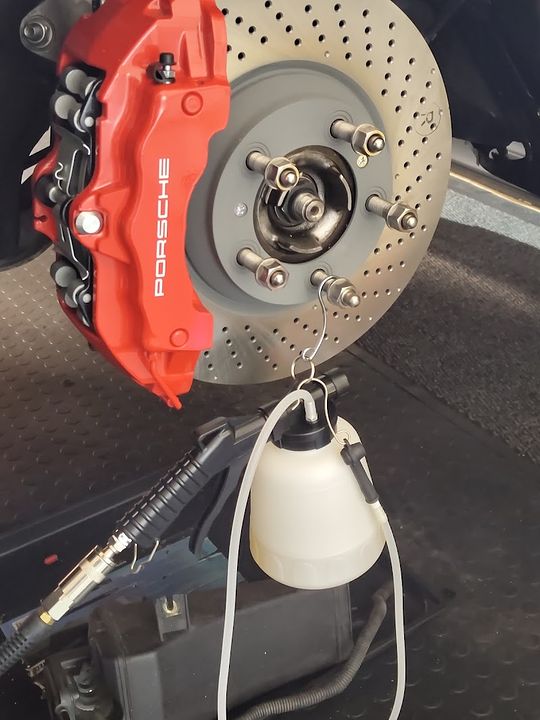
Also got change to use the best sub £30 tool I've ever purchased, a Sealey vacuum brake bleeder - several of my project car friends have suggested one and as they're half price on Amazon at the moment it seemed rude not to, absolute game changer for bleeding stuff single handed and so much more civilise than pressuring up the reservoir!
Finally made new main power cables for the e-aircon compressor, so that's installed in a less temporary way now :
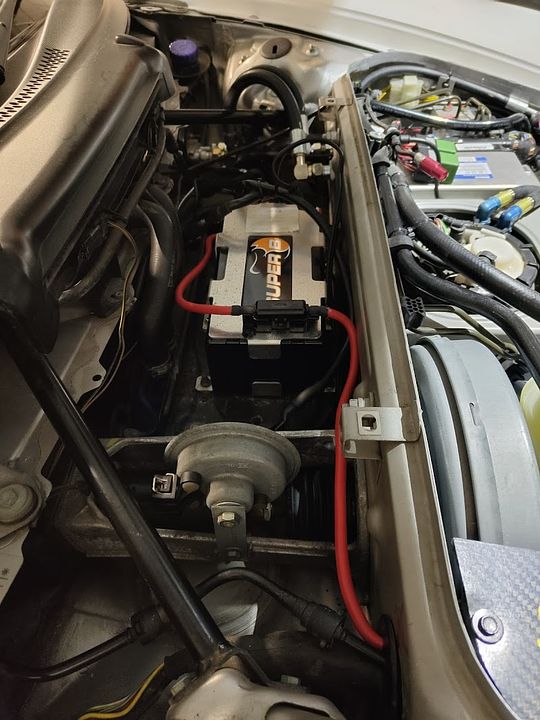
Although I've ran out of TC105s so it'll have to wait until later this week to get some cable ties on it.
Another step closer to it being back on the deck Dampers are ETA later this week too so it should be back on its wheels by the weekend!
With a shiny new master cylinder and the odd fresh line:
I changed the bulkhead gasket on the servo at the same time as it would be rude not to. Bled it up with some Motul 5.1:
Which is my go to brake fluid for 99% of things, RBF700 is great and everything but I'm not trying to skinny up the brake ducts for aero and my front pads are essentially standard Cayenne Turbo so not exactly the material you'd be getting high 200's of fluid temp with
Also got change to use the best sub £30 tool I've ever purchased, a Sealey vacuum brake bleeder - several of my project car friends have suggested one and as they're half price on Amazon at the moment it seemed rude not to, absolute game changer for bleeding stuff single handed and so much more civilise than pressuring up the reservoir!
Finally made new main power cables for the e-aircon compressor, so that's installed in a less temporary way now
:Although I've ran out of TC105s so it'll have to wait until later this week to get some cable ties on it.
Another step closer to it being back on the deck
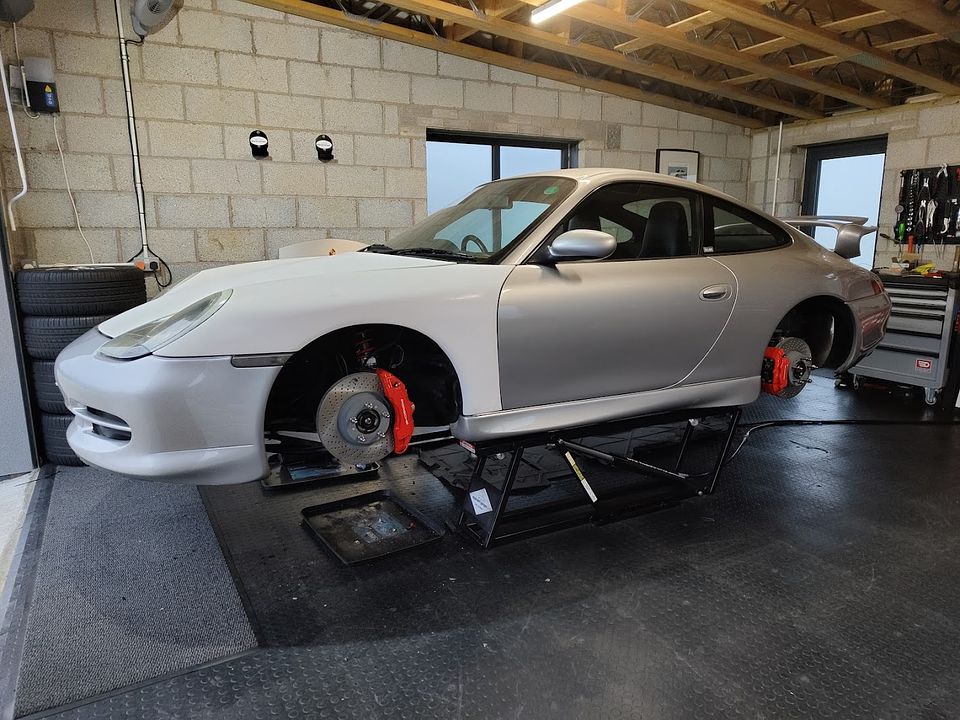
Dampers are ETA later this week too so it should be back on its wheels by the weekend!From this:
To this:

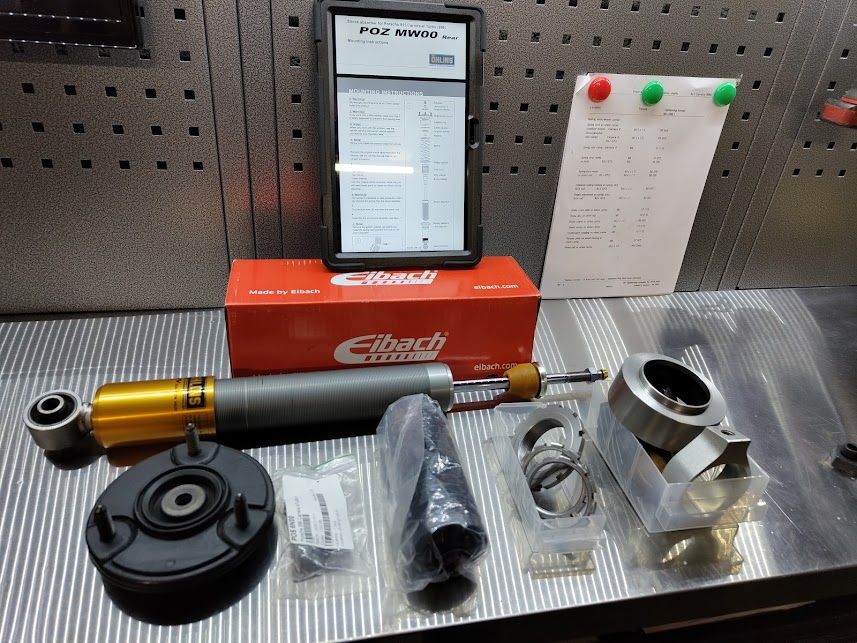
One more to do and they can go back on the car which means it can go back on the deck for the first time in nearly three months! Only a month over time but I suppose that's not bad with supply chain how it is at the moment... Some good revisions on the later spec rear Ohlins too, I provided some feedback back in the day that the lower mounting cups could do with being a bit deeper to provide a greater range of ride height adjustment and these have been revised to provide another 30mm or so of heigh adjustment in the rear vs the original parts so always good to see customer feedback actioned
Next job is to drop the side skirts off and get a job list for the body shop together as it's going there next!
To this:
One more to do and they can go back on the car which means it can go back on the deck for the first time in nearly three months! Only a month over time but I suppose that's not bad with supply chain how it is at the moment... Some good revisions on the later spec rear Ohlins too, I provided some feedback back in the day that the lower mounting cups could do with being a bit deeper to provide a greater range of ride height adjustment and these have been revised to provide another 30mm or so of heigh adjustment in the rear vs the original parts so always good to see customer feedback actioned
Next job is to drop the side skirts off and get a job list for the body shop together as it's going there next!
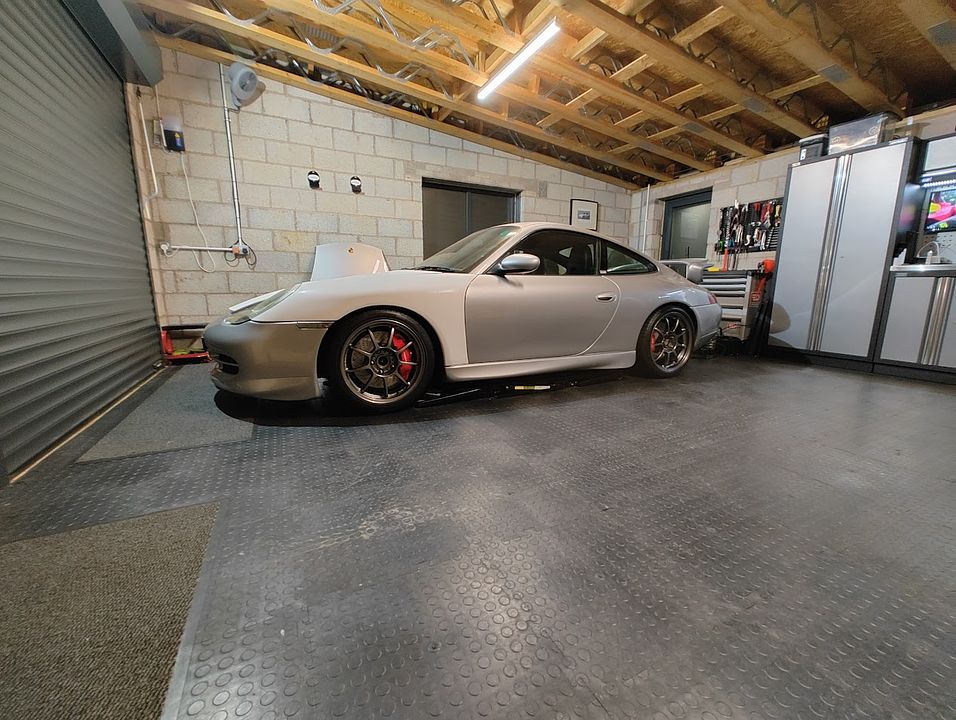
Well those fit a treat!
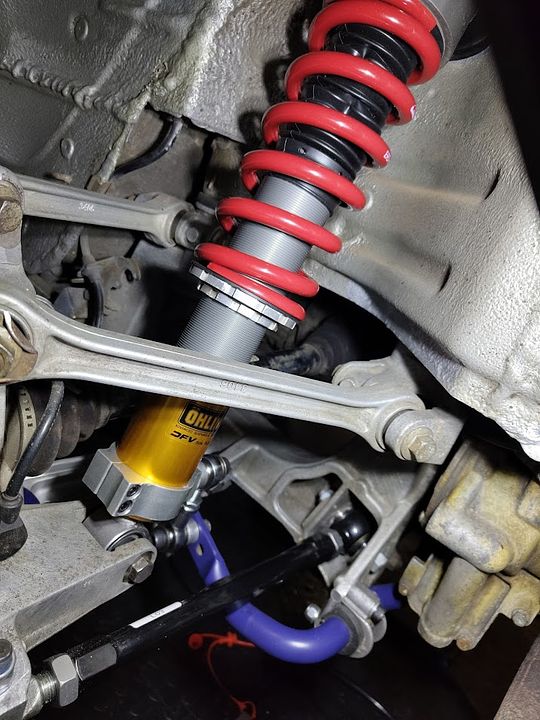
Which meant it was time to stick the wheels on:
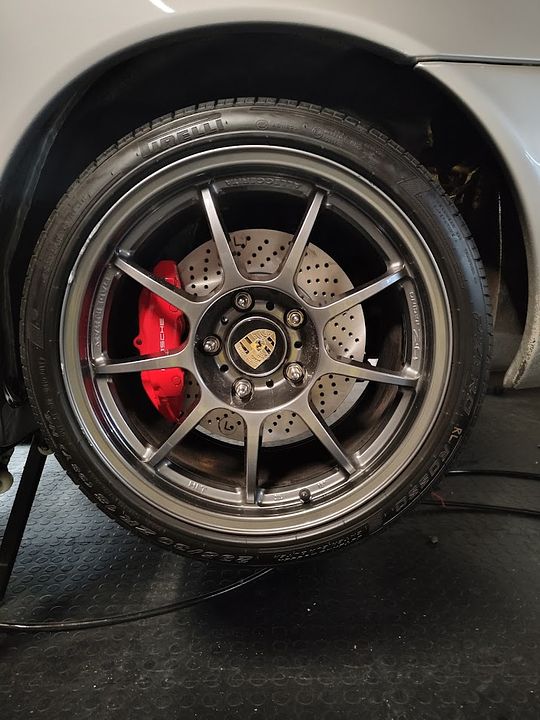
Really pleased with how the red calipers have come out, I was a bit unsure about this but a splash of colour on a very monochromatic car has worked very well in my humble opinion.
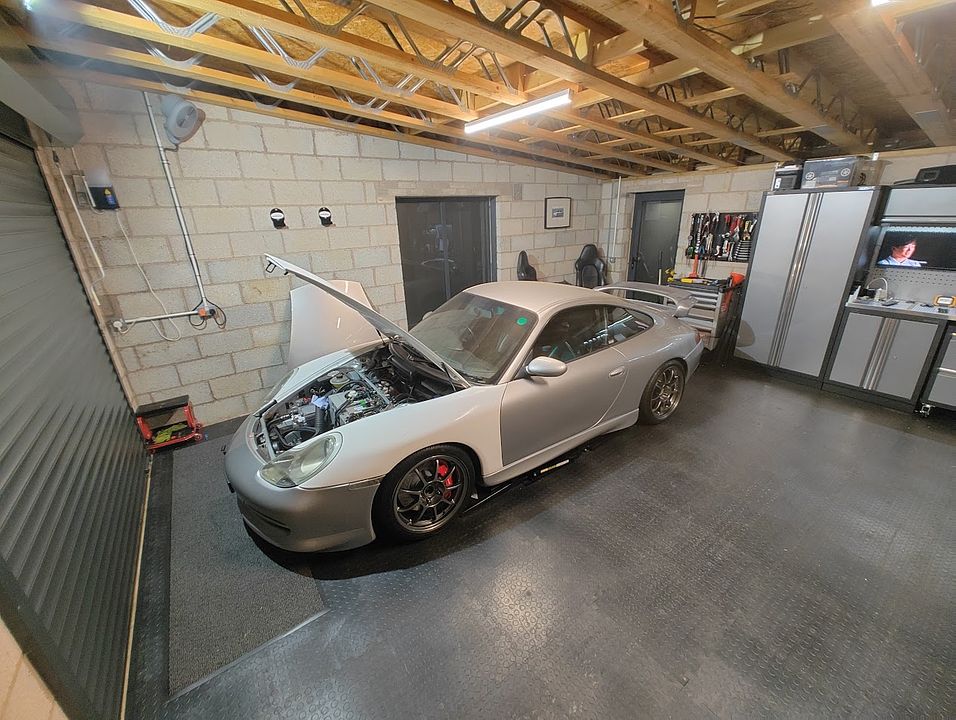
It was great to see the old knacker back on its wheels:
A touch on the low side perhaps:
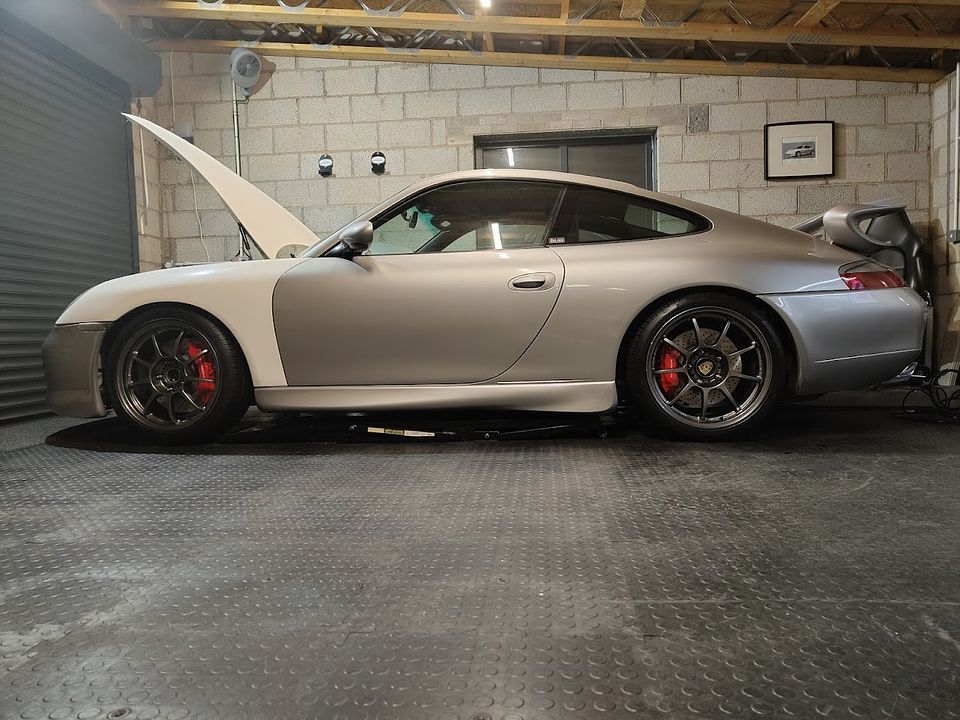
But tomorrow morning is a setup morning and it's equal height all the way around so the damper lengths are good, it just wants a bit more spring preload as these are way softer than the previous options!
Also I will never get bored with how perfect the wheel offsets worked out, thanks OZ

So a few last jobs to do before it heads off to the body shop (and a fair post body shop list too once it's back) but great to see it on the deck, it's not been the smallest of refurbs this one!
Which meant it was time to stick the wheels on:
Really pleased with how the red calipers have come out, I was a bit unsure about this but a splash of colour on a very monochromatic car has worked very well in my humble opinion.
It was great to see the old knacker back on its wheels:
A touch on the low side perhaps:
But tomorrow morning is a setup morning and it's equal height all the way around so the damper lengths are good, it just wants a bit more spring preload as these are way softer than the previous options!
Also I will never get bored with how perfect the wheel offsets worked out, thanks OZ
So a few last jobs to do before it heads off to the body shop (and a fair post body shop list too once it's back) but great to see it on the deck, it's not been the smallest of refurbs this one!
Edited by poppopbangbang on Saturday 25th February 00:05
Slippydiff said:
Excellent progress 
Must be getting older ...
May I ask what rates you're running now ? I'm currently in the process of having some dampers built and I'm trying to use the softest rates possible.
I ran these with 65 N/mm rears and 30 N/mm fronts. They were hugely impressive, but I'd like to go softer still ...
I'm definitely getting older Must be getting older ...
May I ask what rates you're running now ? I'm currently in the process of having some dampers built and I'm trying to use the softest rates possible.
I ran these with 65 N/mm rears and 30 N/mm fronts. They were hugely impressive, but I'd like to go softer still ...
Lovely dampers by the way! I'm now at 80N/mm rear and 40N/mm front. Down from 100N/mm rear and 50N/mm front. I would also like to try softer and have some 35/70's as option but I think I'm approaching the limit for the R&T damper at that point as they have a lot less oil capacity in them vs a remote res option. Slippydiff said:
Did you go for the wider option 11" and 8.5" Alleggeritas ?
I did yes, are you on the same? If so what tyre size are you running? 285 rears are getting hard to find now!Mallone said:
Useful info. Could either of you make any recommendations for spring suppliers? Currently weighing up options for a set of 996 GT3 Bilstein dampers that are going to get a rebuild and would be nice to have alternatives to the Porsche OEM springs that are looking quite pricey...
Order straight out the Eibach motorsport catalogue (which can be downloaded here https://eibach.com/us/file/710-Complete+Motorsport... whilst Eibach UK in Leicester don't sell direct to public, eibachshop.co.uk (part of POTN) will happily take the order and it will be shipped from Leicester. Their stock is good so there isn't much you can't get next day. Note you'll need to know the diameter, free length and rate that you want. Free length and diameter you can work out from what you currently have with a steel rule and a pair of calipers (or very likely Google!), I'm afraid I've never seen standard GT3 suspension to help with that one
Great info and pics!
Slippydiff said:
IIRC the rears are some weird diameter items made by H&R. Added to which they’re progressive items too.
Will post images of them when I can find them on my PC
Guessing it's the same upper dia as the standard spring to retain the standard dimensions top mount but with a 2.5" lower? I think Elephant Racing do a top mount that converts it to a standard 2.5 top and bottom. You could probably even use the Ohlins upper spring perch to do the same job on the standard top mounts...Will post images of them when I can find them on my PC
Slippydiff said:
Mk1 and Mk 2 upper rear spring seats differ too. Blue item is Mk1, gold is Mk2 (and yes, I was fitting Mk2 springs onto a Mk1,and no they didn't fit ...)
They look pretty simple to draw up and have a few made should anyone be properly stuck....it looks like the MK2 spring and platform is a good 40mm shorter than the Mk1 as a combination between the perch height and the spring itself!HughG said:
PPBB you are obviously on the 285 side of the 285/265 fence. Was that always the case even when economy was a priority? I don’t find rear grip a problem with 265s.
It was built to run a 285 AD08R rear on an 11" rim so 265 was never an option due to the rim width for me. Unfortunately Yoko then stopped selling AD08R in the UK/EU above 255 due to the drive by noise regs and it being a pretty rare size. Gassing Station | Readers' Cars | Top of Page | What's New | My Stuff