Building "Thor"
Discussion


Today found me buying a tractor radiator for the test rig cooling. Not as big as I would have liked but the engine will not be under load and I may fit a buffer tank with 3 or 4 gallons of coolant that will probably give me 8 to 10 gallons of coolant to absorb the heat from a test run.
Need to get a 24 volt fan - should get that sorted later tonight.
2 Scania truck batteries should sort the staring out.
Dry sump tank well under way.
Should make my Christmas deadline with ease at this rate (what could go wrong!!!!!!!!). Famous last words....
Pictures to follow in the next day or two.
Paul
Bit more progress today with the dry sump tank almost finished. Tomorrow I will sand blast the inside, flush and then weld the bottom on. Just needs a ventilated filler cap now.
Cut the brackets for the radiator this evening.
I am planning to use an old gas bottle as the fuel tank, so took the top off and filled it with water to flush the gas out. I need to put a filler cap on the top and an outlet on the bottom. I will do this with water in the tank. Then I can pressure wash any gas sludge out.
Risky I know, but life needs a few risks.......famous last words.....possibly.
Hopefully I will be in a position to paint it after next weekend, then it's electrics time.
I will try to get some pics tomorrow.
Paul
 .
. A little progress today
Cut the hole in the bottom of the gas cylinder. Used the plasma cutter with the cylinder full of water. Quite surreal watching the arc with water pouring everywhere!!!!
Also cut some plates that will need bending as brackets for the batteries and fuel tank. I will get them bent tomorrow.
Sand blasted the dry sump and then washed in the parts washer. Need a breather/filler cap and then it is ready.
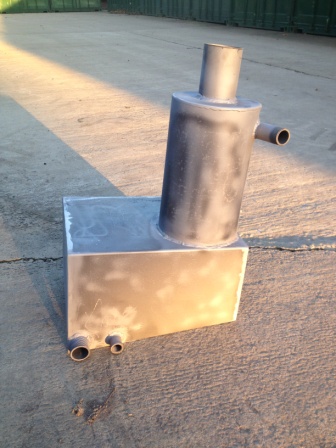
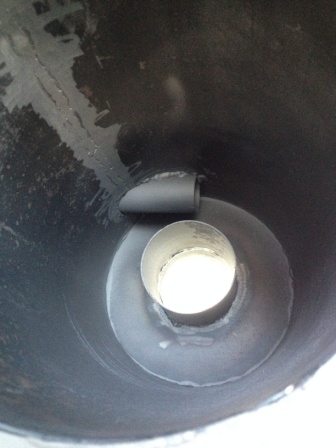
You can see the inlet tube to create the swirl to allow the air in the oil to escape. The breather tube starts slightly below the inlet tube.
The reason for the strange shaped box below the tube is that the height difference between the inlet of the pump and the top is not very great and if the oil level is much higher it will drain back into the engine creating starting issues.
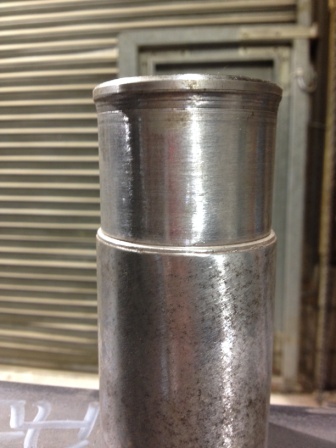
Also made a pipe for the coolant outlet to the bottom of the radiator.
Hopefully I can progress a good bit further this week.
Paul
Cut the hole in the bottom of the gas cylinder. Used the plasma cutter with the cylinder full of water. Quite surreal watching the arc with water pouring everywhere!!!!
Also cut some plates that will need bending as brackets for the batteries and fuel tank. I will get them bent tomorrow.
Sand blasted the dry sump and then washed in the parts washer. Need a breather/filler cap and then it is ready.
You can see the inlet tube to create the swirl to allow the air in the oil to escape. The breather tube starts slightly below the inlet tube.
The reason for the strange shaped box below the tube is that the height difference between the inlet of the pump and the top is not very great and if the oil level is much higher it will drain back into the engine creating starting issues.
Also made a pipe for the coolant outlet to the bottom of the radiator.
Hopefully I can progress a good bit further this week.
Paul
 |http://thumbsnap.com/PTWHfizL[/url]
I saw this advertised in the local rag on Saturday.
http://www.marriottco.auctionevo.com/AuctionDetail...
http://www.marriottco.auctionevo.com/AuctionDetail...
For the styling of Thor, I have a suggestion. Get in touch with Coventry Uni or the RCA in London. They have lots and lots of 1st, 2nd and 3rd year car design students that are always looking for projects.
Approach them to see if they would like to style Thor as a project for their students and you'll at least have some crazy and awesome designs to work from...
Approach them to see if they would like to style Thor as a project for their students and you'll at least have some crazy and awesome designs to work from...
[quote=Storer]A little progress today
Cut the hole in the bottom of the gas cylinder. Used the plasma cutter with the cylinder full of water. Quite surreal watching the arc with water pouring everywhere!!!!
Also cut some plates that will need bending as brackets for the batteries and fuel tank. I will get them bent tomorrow.
Sand blasted the dry sump and then washed in the parts washer. Need a breather/filler cap and then it is ready.
Nice work Paul, Andy
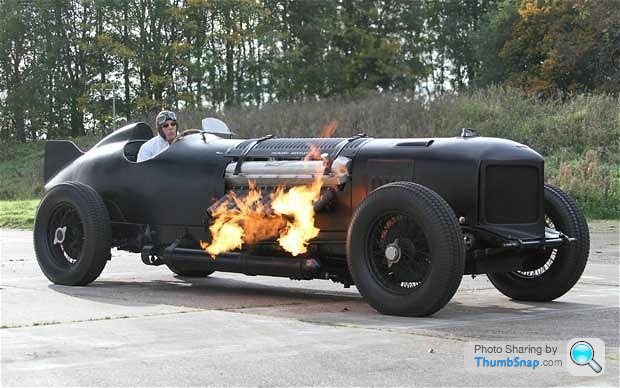
Ok, it's a bit late, but this thread looks to be a good place to post pics of cars with unecessarily large engines, so i give you the Mercedes / Porsche Type 80:


Mad as a box of frogs and aimed at the 300mph LSR, which unfortunately, due to WW2 getting in the way, had climbed up above 400mph by the time the car was ready. Never turned a wheel under it's own power!
I suspect spuds the size of mellons would have been required to drive that ;-)
Mad as a box of frogs and aimed at the 300mph LSR, which unfortunately, due to WW2 getting in the way, had climbed up above 400mph by the time the car was ready. Never turned a wheel under it's own power!
I suspect spuds the size of mellons would have been required to drive that ;-)

Gassing Station | Readers' Cars | Top of Page | What's New | My Stuff