500+bhp Mk3 Fiesta Project
Discussion


slybunda said:
hey stewart, the pollen filter housing mod you done from a mk5 fiesta, is it a direct simple fit onto the mk3 without much faffing around? i got huge issues with my fan vents everytime i turn the heater on i get slapped in the face with dust or even a leaf or two. lol
No. It's a different bulkhead, different air box with heater matrix, which requires a different dashboard.It would be much easier to fabricate a box and filter to sit on top of the Mk3 fan assembly. Something out of sheet plastic would work.
I have restarted work on the Fiesta after an unplanned eight month hiatus due to COVID stuff. I spent a couple of hours one evening pottering about to figure out the approach, and I've started with engine plumbing and wiring.
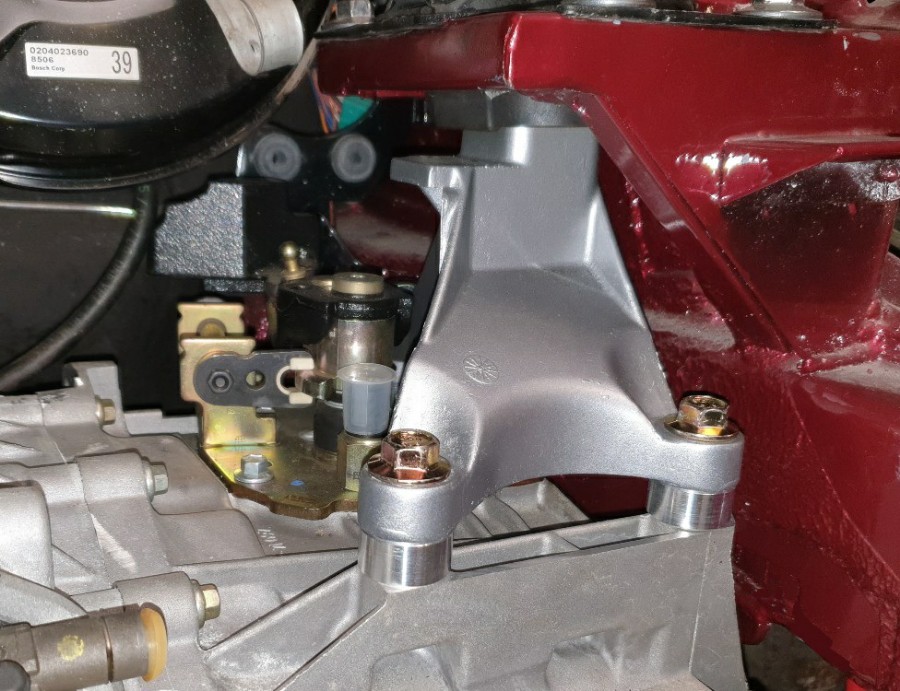
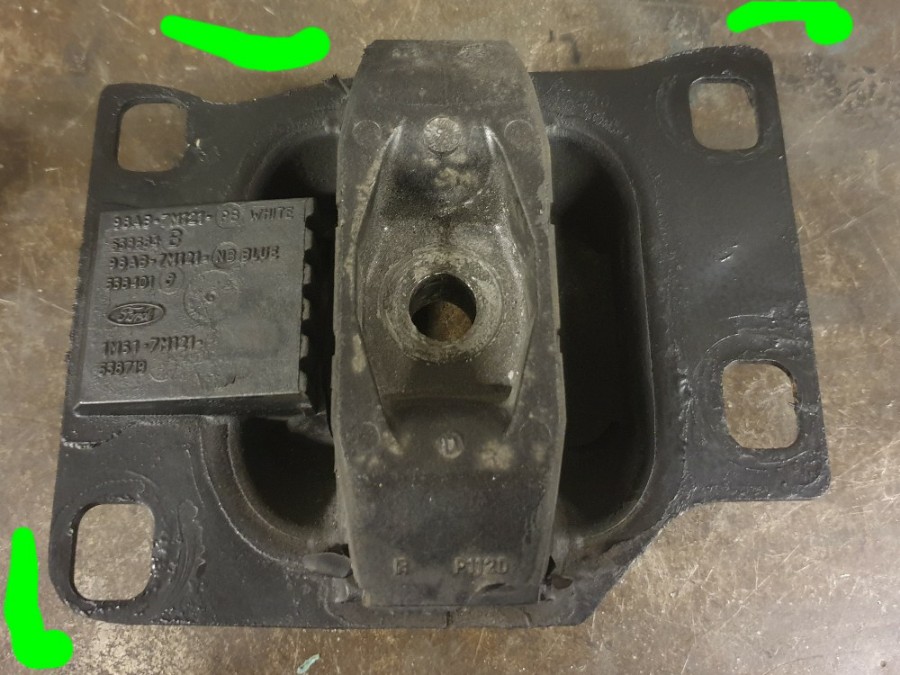
When I originally fabricated the engine mounts my measurements were based on the standard Mk3 positions, but because I'm no longer using the under-slung gearbox mounting cradle I realised that I can lower the engine a little bit.
The Focus mounts are easy to space so I've gone for 15mm. The gearbox mount spacers are 25mm diameter but I will swap for 30mm.
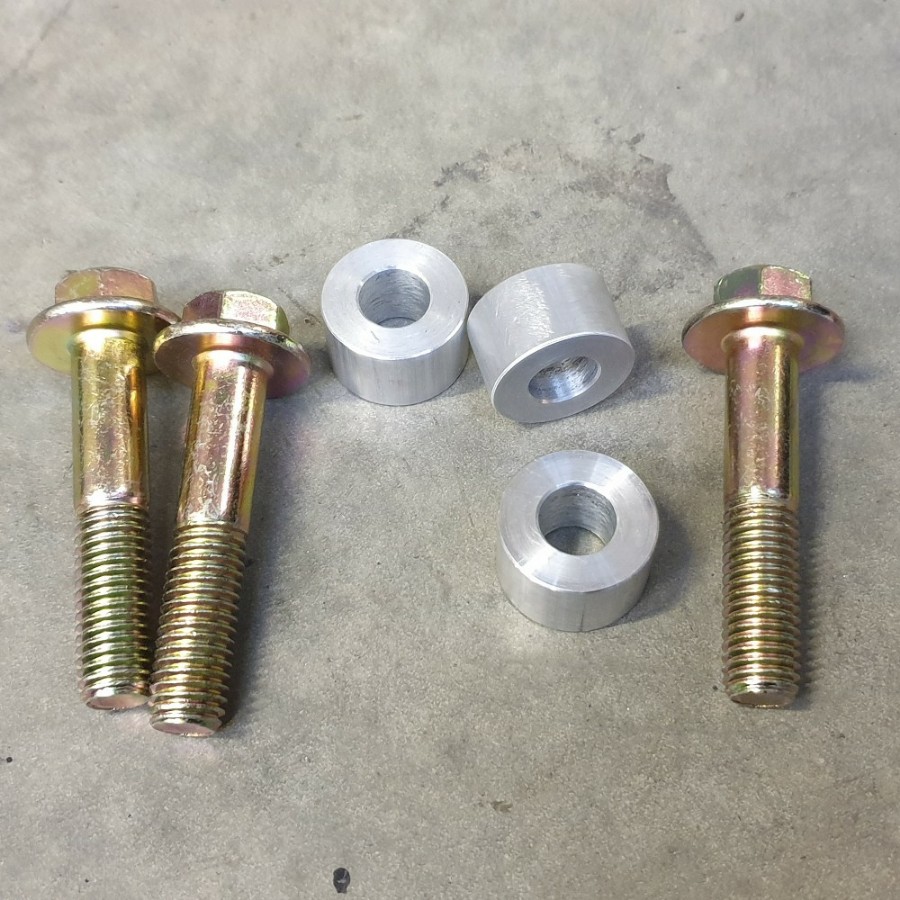
The sump is the lowest point but it is still above the chassis brace.
I now have the engine mount to space.
When I originally fabricated the engine mounts my measurements were based on the standard Mk3 positions, but because I'm no longer using the under-slung gearbox mounting cradle I realised that I can lower the engine a little bit.
The Focus mounts are easy to space so I've gone for 15mm. The gearbox mount spacers are 25mm diameter but I will swap for 30mm.
The sump is the lowest point but it is still above the chassis brace.
I now have the engine mount to space.
Ha ha 
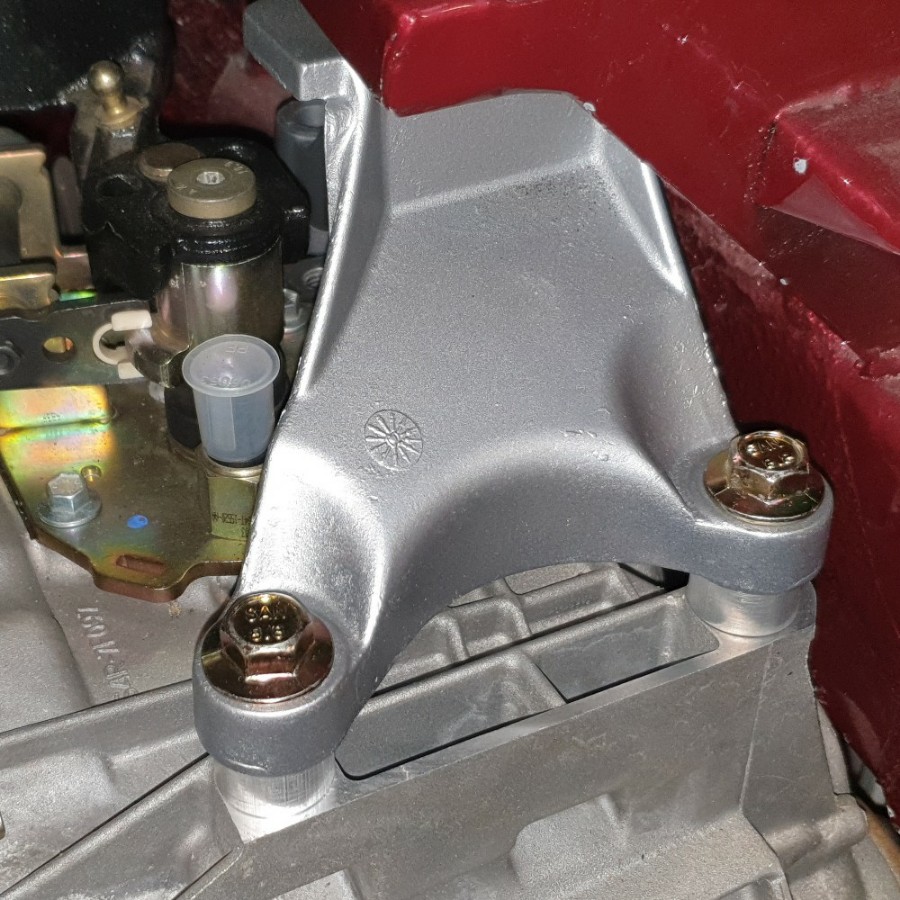
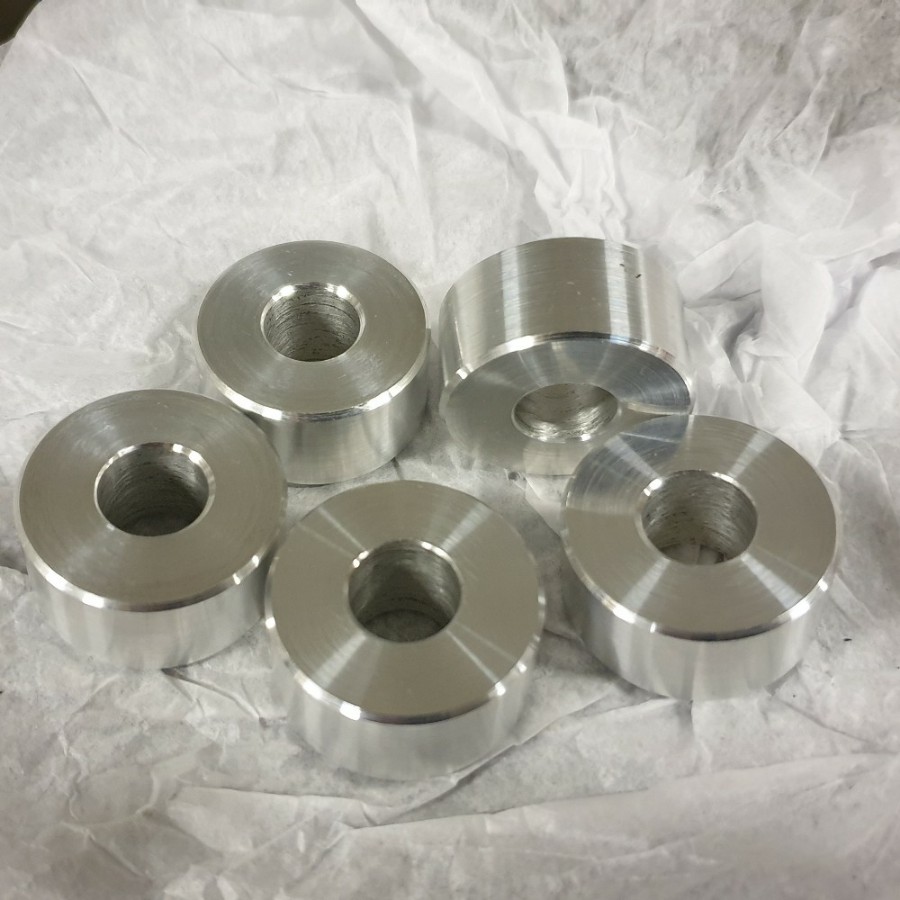
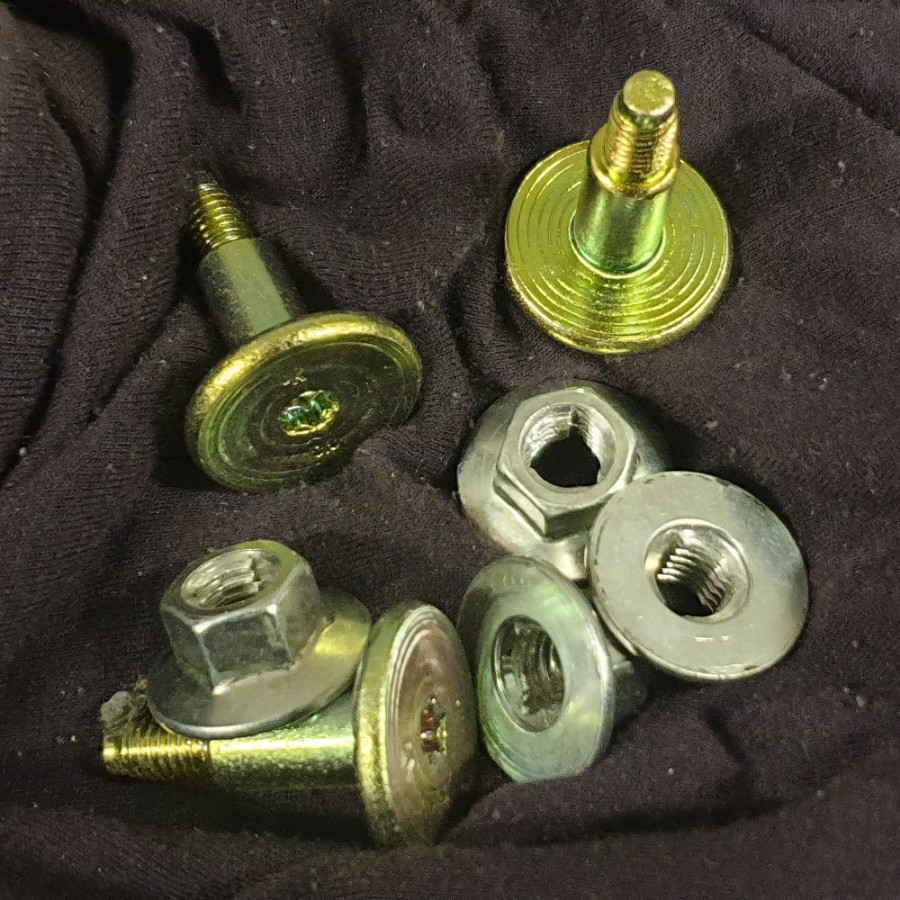
30mm diameter spacers finished and installed. These are a better fit with the alloy bracket.
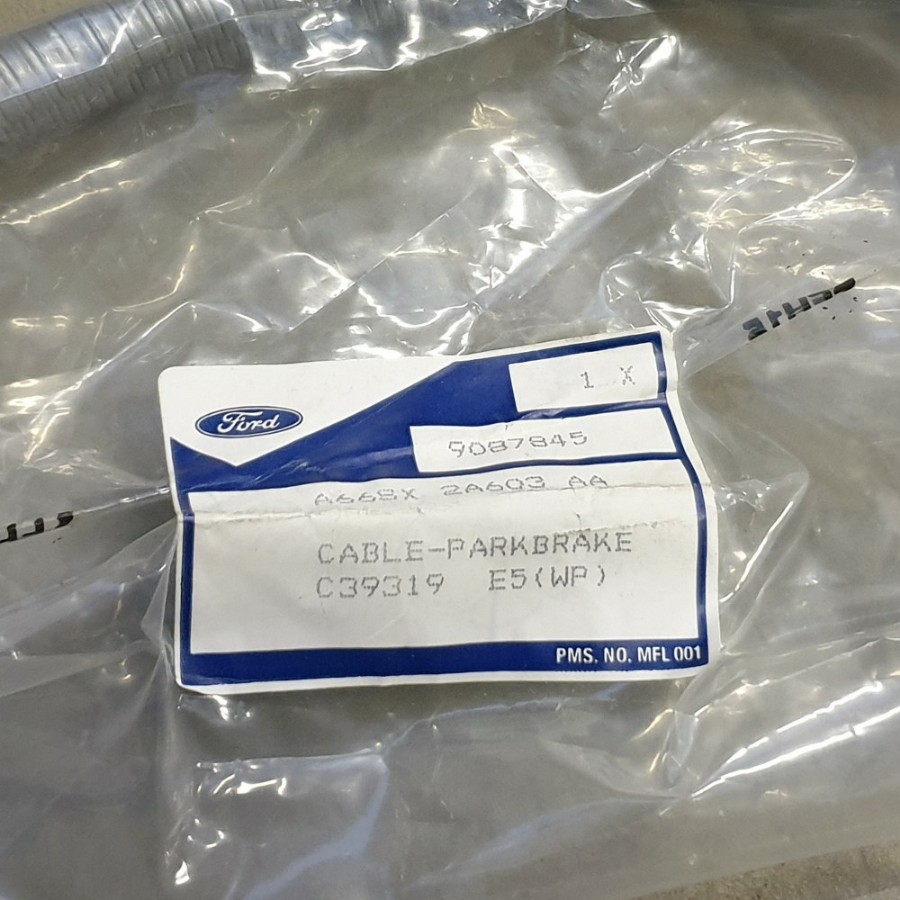
Next on to the handbrake cable, and I was pleased to find that I had a new Racing Puma cable in stock. These fit the Fiesta floor pan and suit the Lucas handbrake calipers for rear discs. I believe that this cable was discontinued a while ago.
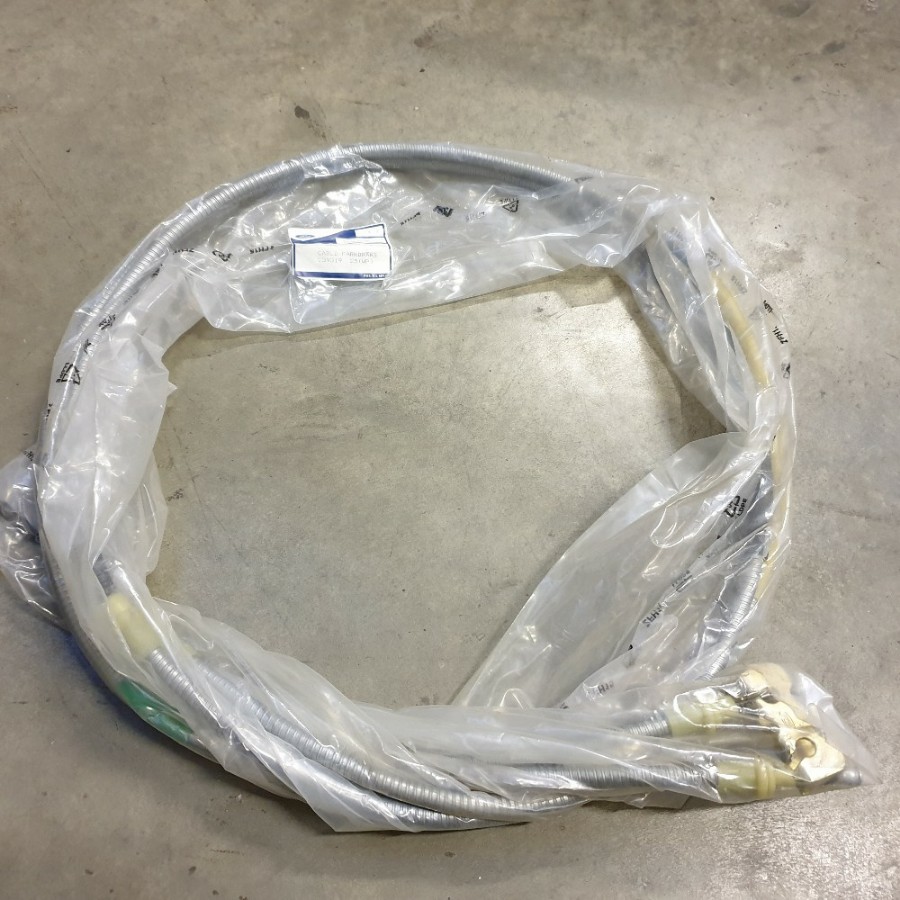
Ford buffs will be familiar with 909 prefixed part numbers which originated in Boreham and were assigned to motorsport or special build parts. For some reason around the time of the Racing Puma production a 908 prefix was introduced.
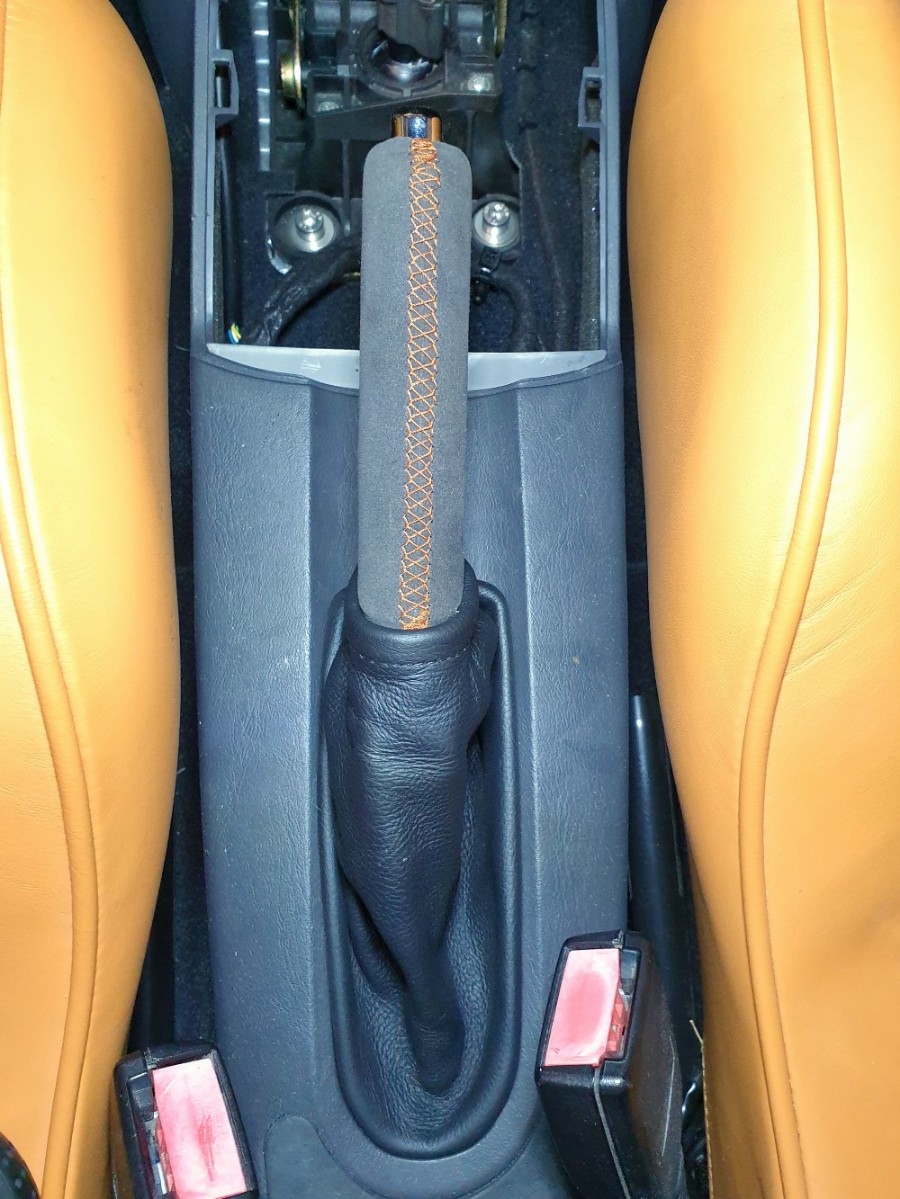
Cable fitted and gaiter in place. I missed a trick here by not having the handbrake and gear gaiter trimmed in the seat leather. I may send them away during lockdown.
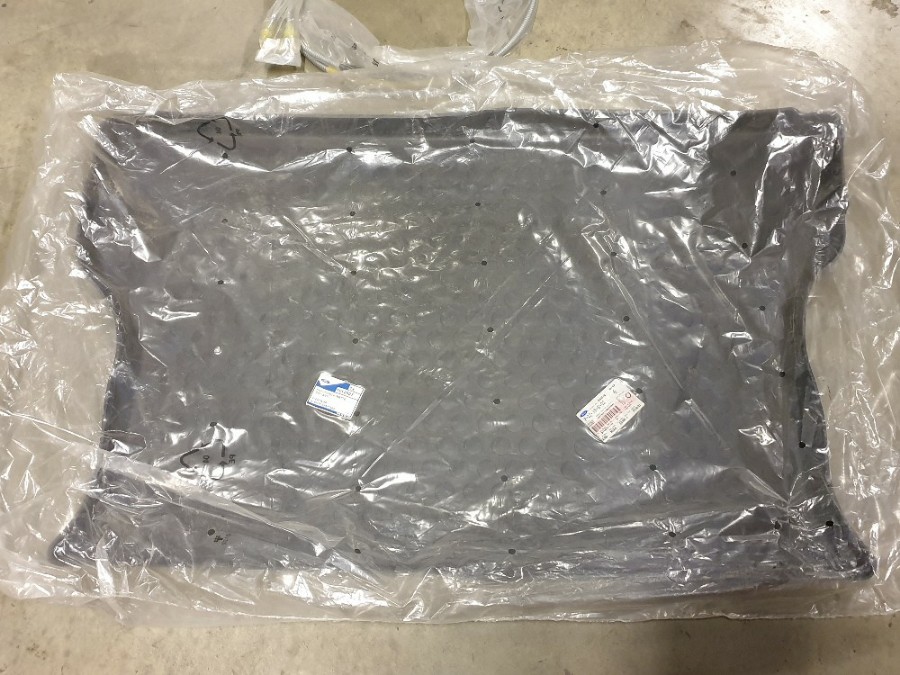
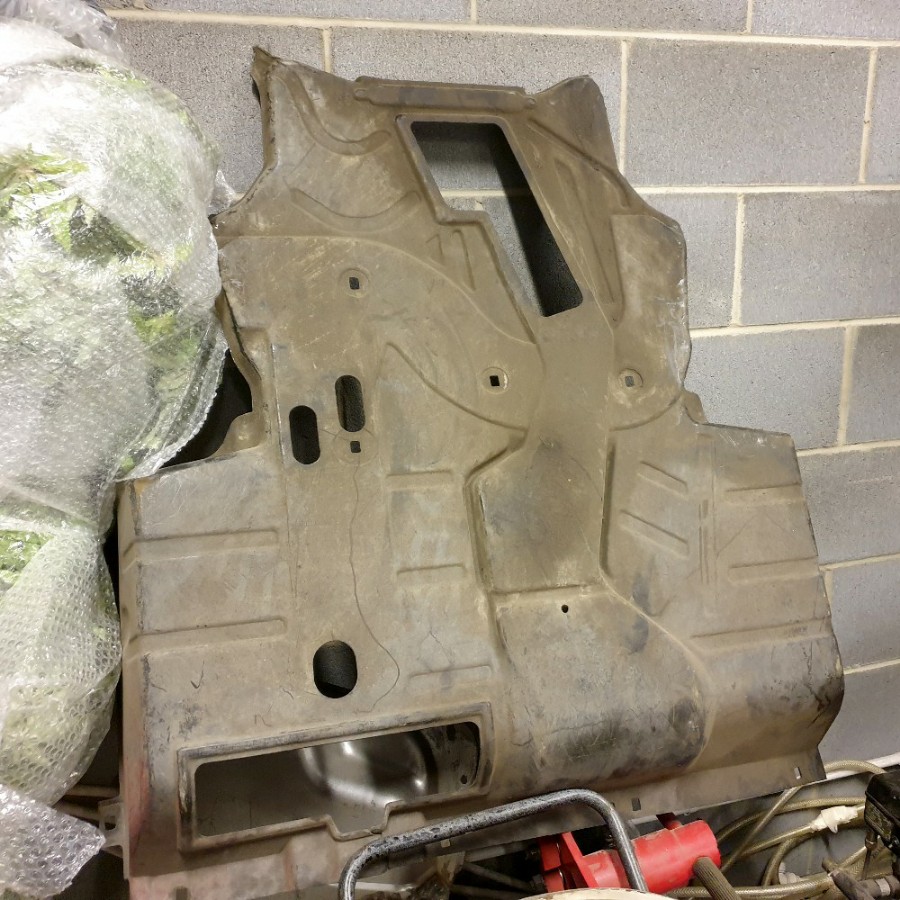
I found a couple of rare parts for the Mk3: a Ford boot liner, and an engine undertray which was fitted to the very first XR2i's to leave the factory after which it was discontinued in short order.
30mm diameter spacers finished and installed. These are a better fit with the alloy bracket.
Next on to the handbrake cable, and I was pleased to find that I had a new Racing Puma cable in stock. These fit the Fiesta floor pan and suit the Lucas handbrake calipers for rear discs. I believe that this cable was discontinued a while ago.
Ford buffs will be familiar with 909 prefixed part numbers which originated in Boreham and were assigned to motorsport or special build parts. For some reason around the time of the Racing Puma production a 908 prefix was introduced.
Cable fitted and gaiter in place. I missed a trick here by not having the handbrake and gear gaiter trimmed in the seat leather. I may send them away during lockdown.
I found a couple of rare parts for the Mk3: a Ford boot liner, and an engine undertray which was fitted to the very first XR2i's to leave the factory after which it was discontinued in short order.
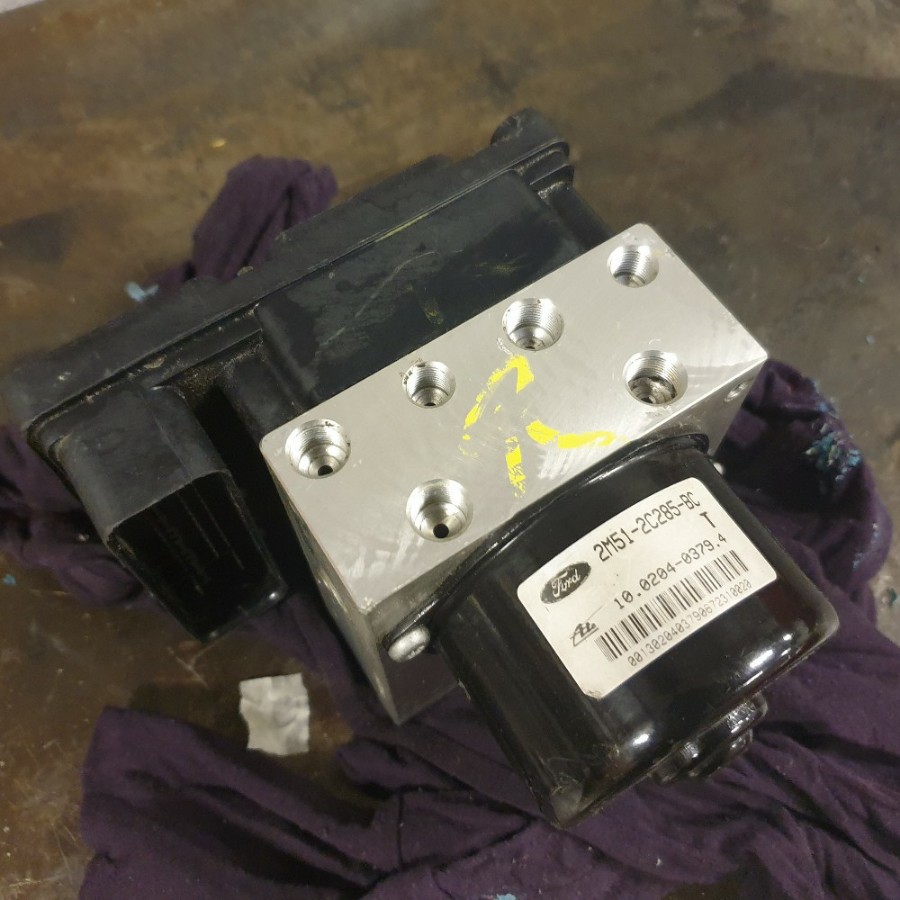
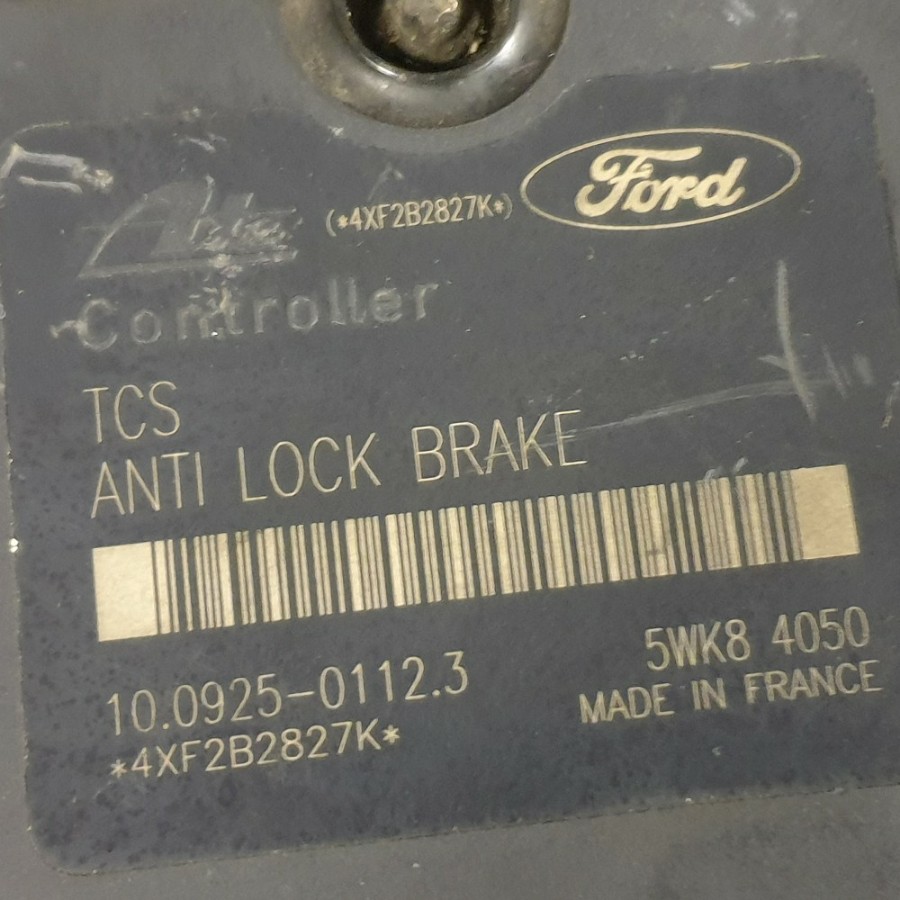
ABS Module
It was decision time:
1) Fit a small frame ABS system from a later Fiesta. The benefits of this system are a compact module which is easier to package and the wiring is plug and play with the Mk5 engine bay loom that I'm using. The drawbacks are that the traction control version is not switchable and the rear Focus hubs that I've used would require machining for a different ABS sensor.
2) Fit the large frame ATE MK25 ABS system from the Mk1 Focus. The benefits are the availability of a switchable TC module (I've pre-wired for this) and the ABS sensors are more reliable, and more accurate. The drawbacks are that my wiring loom would require modification, as would the front hubs to suit a later ABS sensor, and also the gearbox mount and master cylinder to clear the larger module.
I decided to go for option 2. I had prepared a bracket for this option and I had in stock a very nice TC equipped module from a Mk1 Focus ST170.
The gearbox mount now has a couple of rounded corners and a scalloped section in order to allow more clearance.
The fastenings are from the donor ST170 but have been re-plated.
In order to fit the module the servo & master cylinder are loosed off and moved out of the way. It's interesting when working on bespoke installations not only because it's satisfying when a plan comes together, but also the learning of how to maintain it.
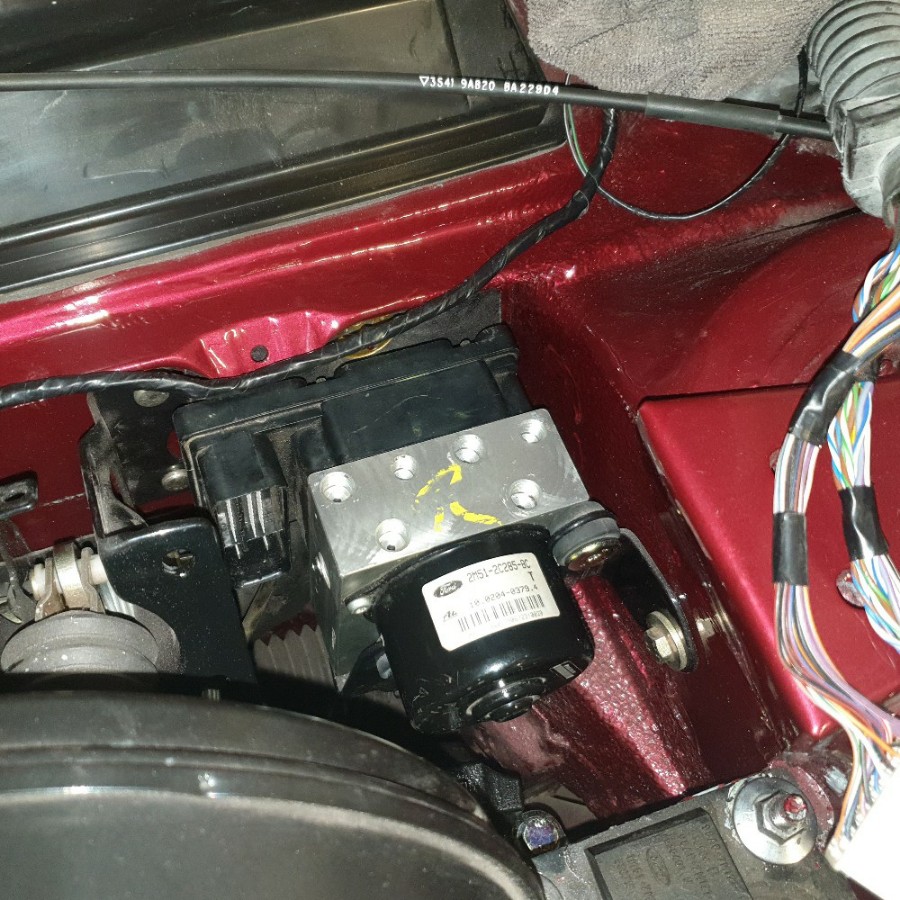
The servo & master cylinder refitted with the spacers to clear the larger ABS/TC module.
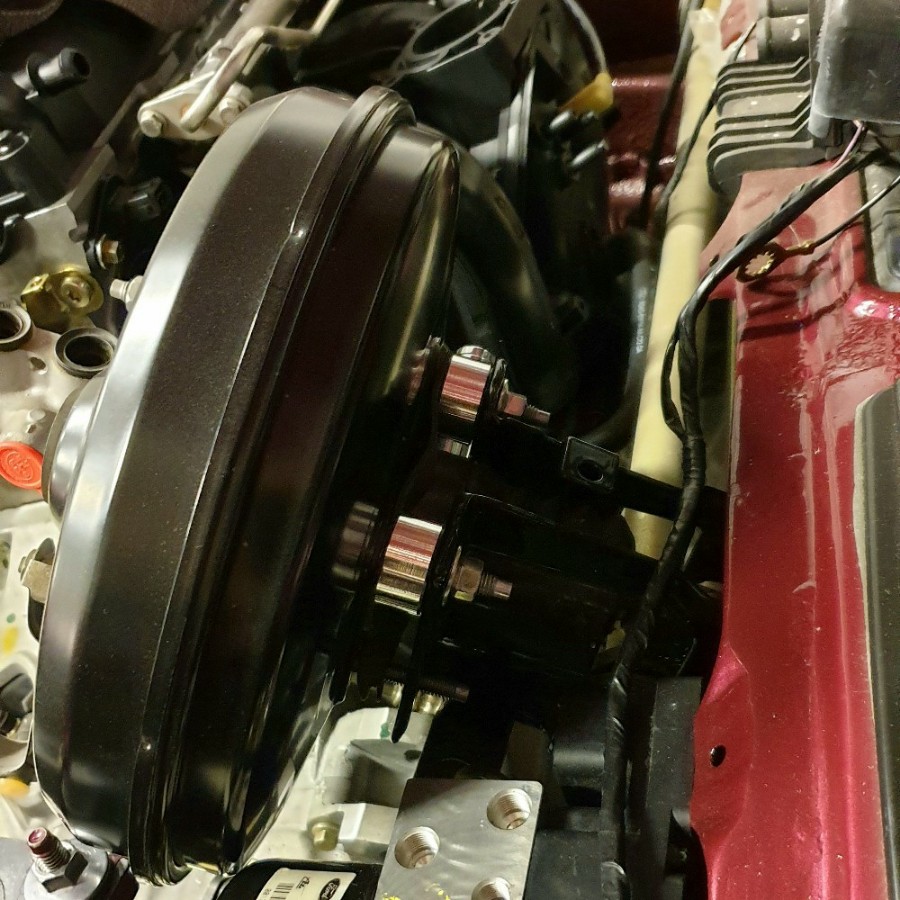
My measurements and mock-up during the chassis build appear to have worked; there is 5mm clearance between chassis mount, module, and servo.
Now I can move on to plumbing.

It was decision time:
1) Fit a small frame ABS system from a later Fiesta. The benefits of this system are a compact module which is easier to package and the wiring is plug and play with the Mk5 engine bay loom that I'm using. The drawbacks are that the traction control version is not switchable and the rear Focus hubs that I've used would require machining for a different ABS sensor.
2) Fit the large frame ATE MK25 ABS system from the Mk1 Focus. The benefits are the availability of a switchable TC module (I've pre-wired for this) and the ABS sensors are more reliable, and more accurate. The drawbacks are that my wiring loom would require modification, as would the front hubs to suit a later ABS sensor, and also the gearbox mount and master cylinder to clear the larger module.
I decided to go for option 2. I had prepared a bracket for this option and I had in stock a very nice TC equipped module from a Mk1 Focus ST170.
The gearbox mount now has a couple of rounded corners and a scalloped section in order to allow more clearance.
The fastenings are from the donor ST170 but have been re-plated.
In order to fit the module the servo & master cylinder are loosed off and moved out of the way. It's interesting when working on bespoke installations not only because it's satisfying when a plan comes together, but also the learning of how to maintain it.
The servo & master cylinder refitted with the spacers to clear the larger ABS/TC module.
My measurements and mock-up during the chassis build appear to have worked; there is 5mm clearance between chassis mount, module, and servo.
Now I can move on to plumbing.
Edited by mwstewart on Monday 9th November 10:22
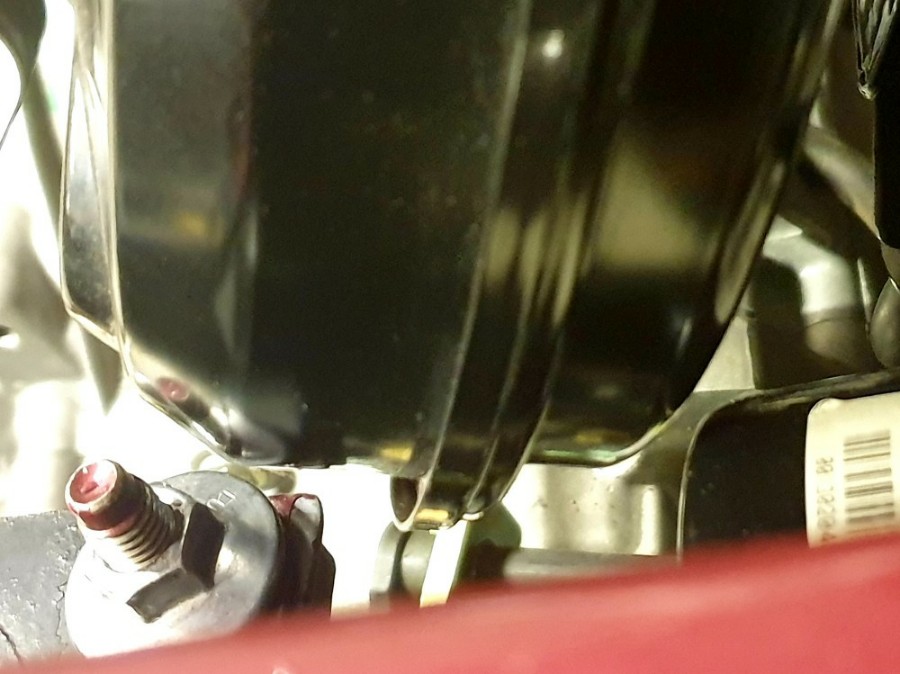
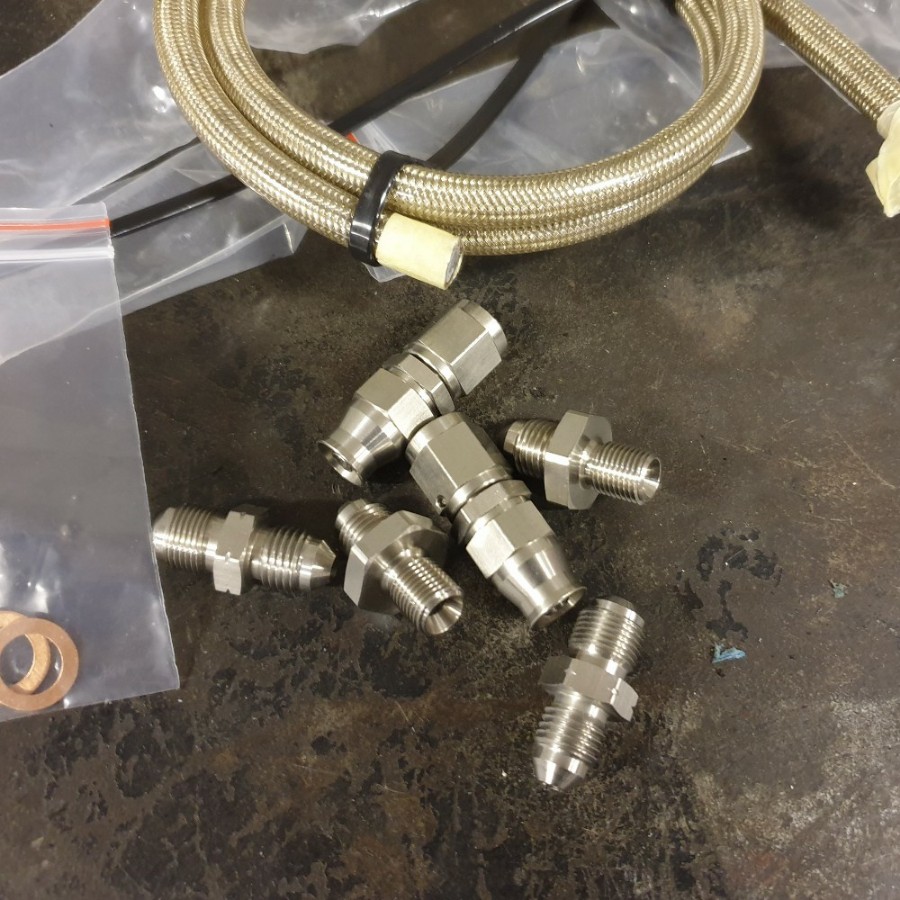
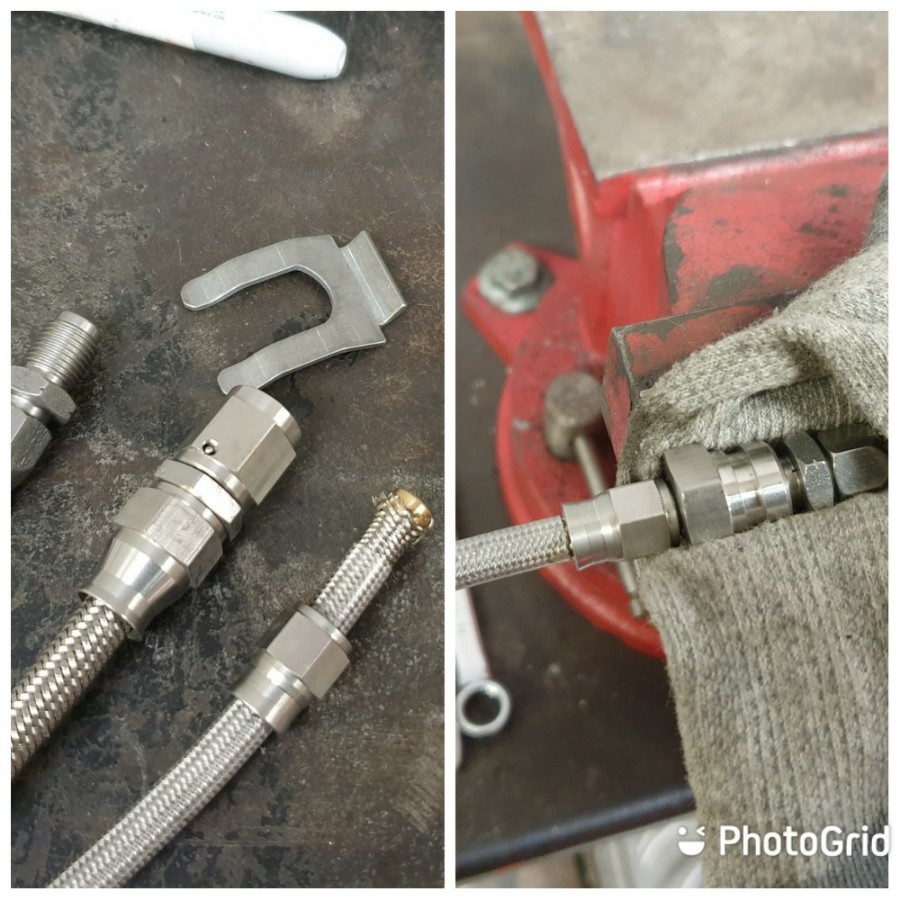
I have started plumbing the brake lines. For the master cylinder I'm using AN4 hose with AN4 hose fittings then AN4 to M12x1 adapters to suit the M/C and module. The hose sent was supposed to be silver with a clear PVC sheath but it looks yellow, so I've ordered another length.
The AN3 hose was fine. I'm adding stainless rivnuts in the holes originally for the OEM plastic fittings. I always find pipe routing takes a bit of thought and time; for example a triple hose clamp drilled out to take a longer bolt in order to secure it to a hole drilled on the master cylinder bracket, over which a spire clip is mounted.
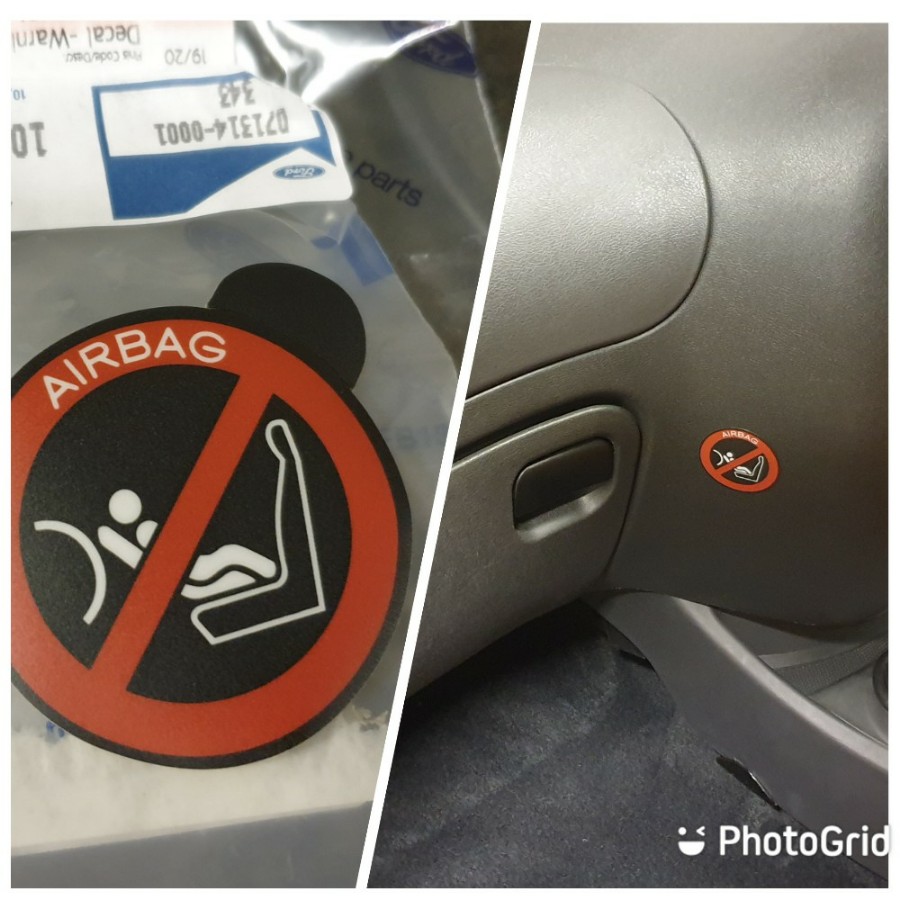
Passenger airbag warning sticker just to make things correct given that I have retrofitted one.
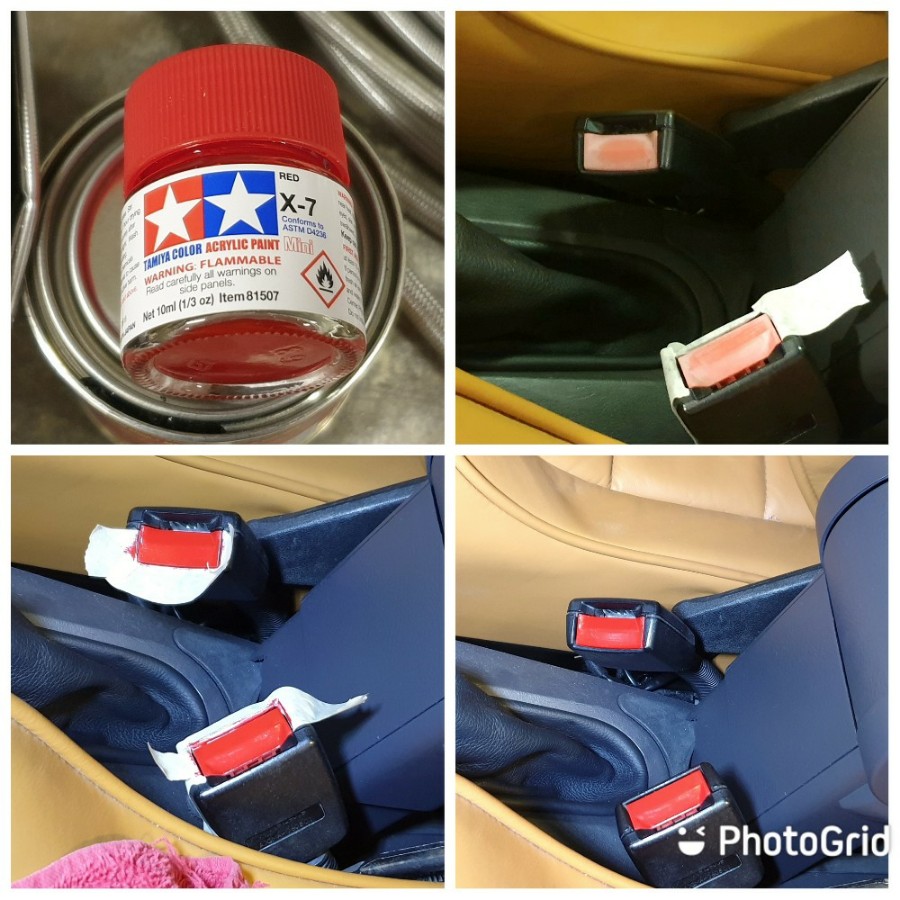
I addressed the faded seat belt clasps by painting with some Tamiya X-7 red paint.
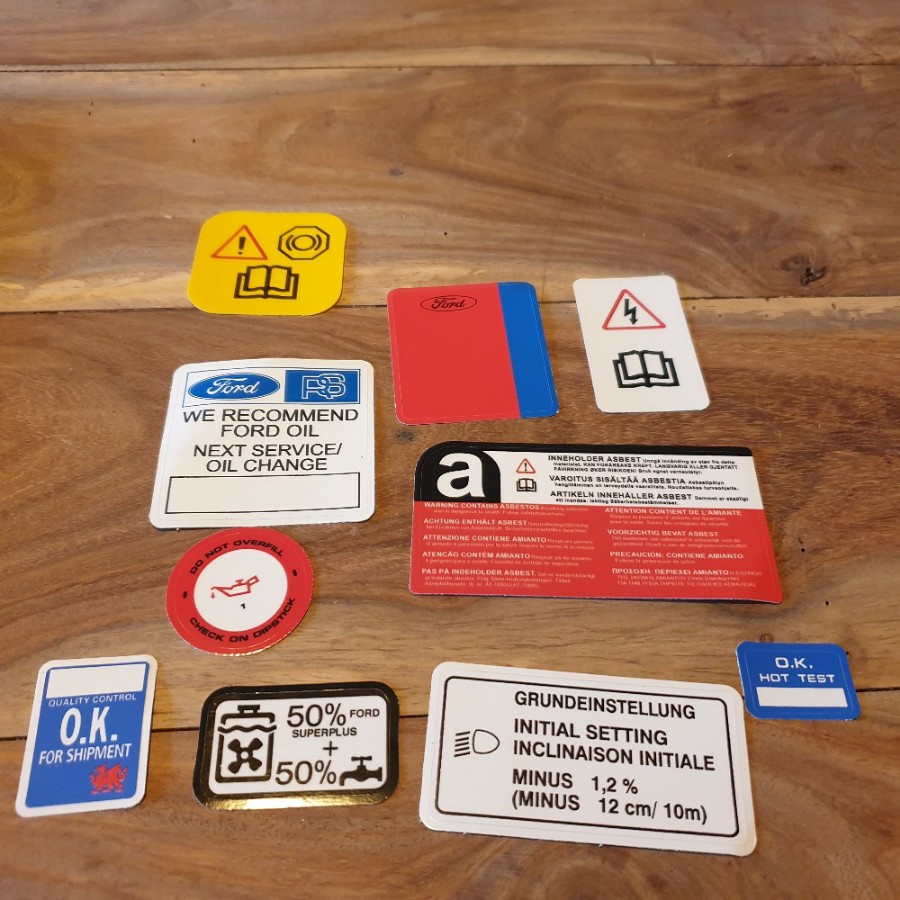
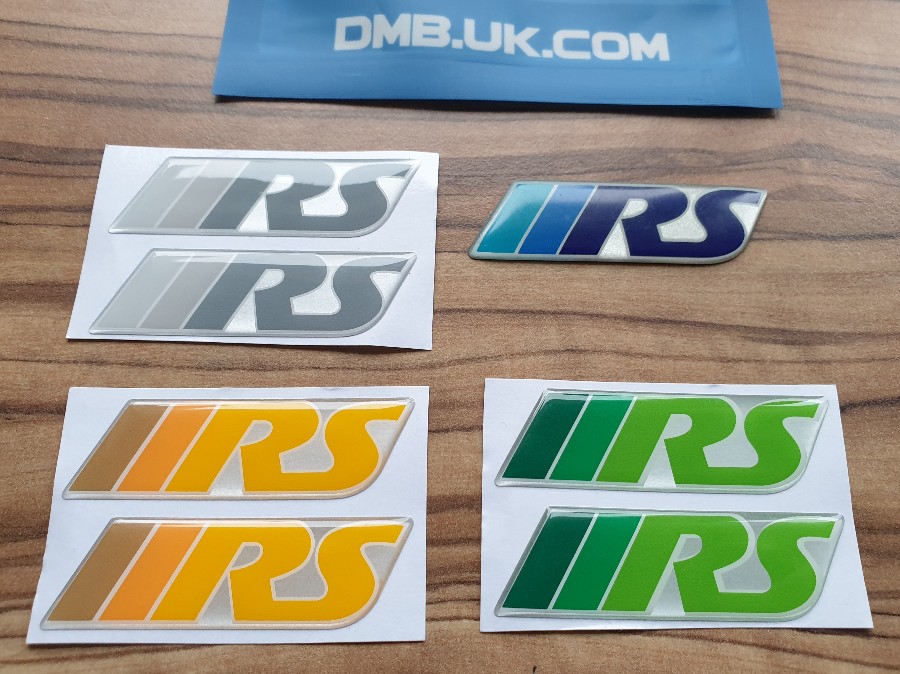
Decal kit for the engine bay.
The AN3 hose was fine. I'm adding stainless rivnuts in the holes originally for the OEM plastic fittings. I always find pipe routing takes a bit of thought and time; for example a triple hose clamp drilled out to take a longer bolt in order to secure it to a hole drilled on the master cylinder bracket, over which a spire clip is mounted.
Passenger airbag warning sticker just to make things correct given that I have retrofitted one.
I addressed the faded seat belt clasps by painting with some Tamiya X-7 red paint.
Decal kit for the engine bay.
keith2.2 said:
This thread reminds me that I've been following this car for 20 years 
It makes me want to revisit my H22 Civic build - but do it properly this time! Would love to catch up with you and this next time I'm back!
It has been a while mate It makes me want to revisit my H22 Civic build - but do it properly this time! Would love to catch up with you and this next time I'm back!
 Do you still have the Civic?
Good luck with training and the next race!
rainmasterb said:
Hi Mark, hope you’re well. Have you been to the 5 Bells lately?
Do you have a photo of the exterior of the car, or is it still in bits?
I can vividly remember a Max Power magazine with a bright red Fiesta RST on the cover that was really nicely done. I think it was by Power Engineering and had Escort Cosworth wheels and a Mondeo Estate spoiler grated to the rear hatch.
Oh and to caveat, that was way before Maxy P went Pornographic and my Mum banned it!
I'm good, thanks, the same to you. I haven't been there for over a year but that isn't out of choice - its a funny old year! I was a Fast Ford/Performance Ford reader but I see others have posted the pics; it looks good.Do you have a photo of the exterior of the car, or is it still in bits?
I can vividly remember a Max Power magazine with a bright red Fiesta RST on the cover that was really nicely done. I think it was by Power Engineering and had Escort Cosworth wheels and a Mondeo Estate spoiler grated to the rear hatch.
Oh and to caveat, that was way before Maxy P went Pornographic and my Mum banned it!
Here is a pic with the 15" version of the wheels that I now have:
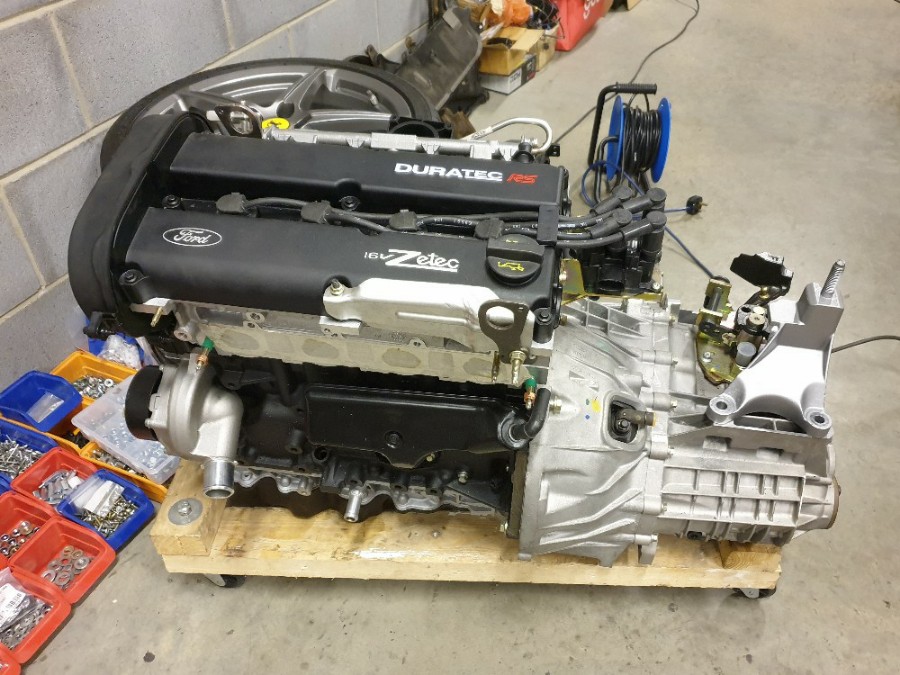
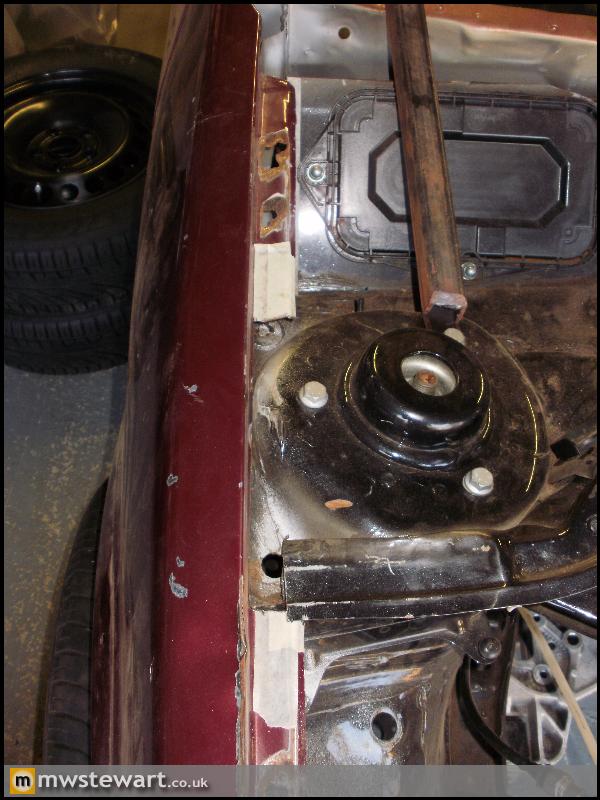
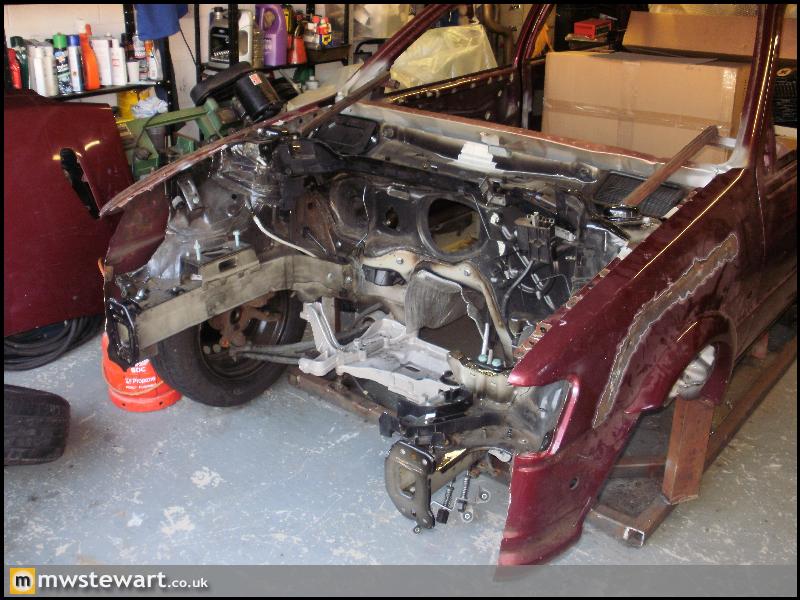
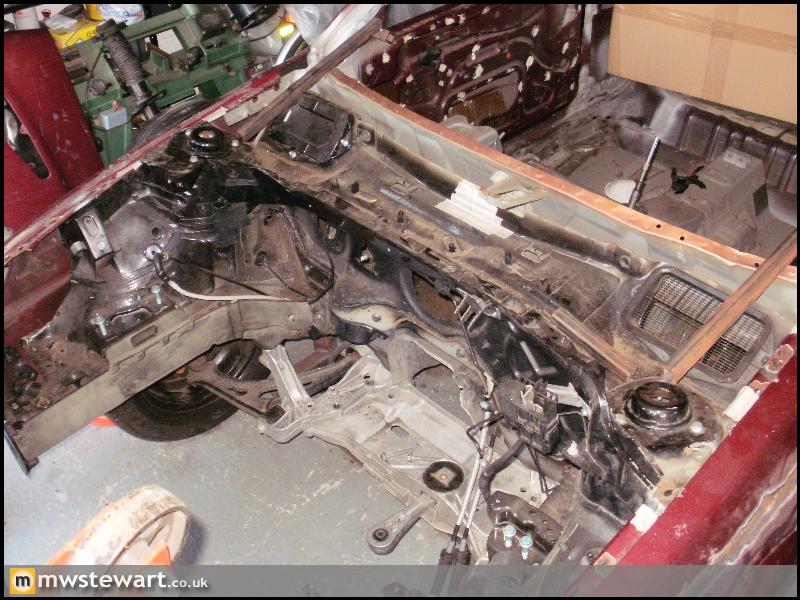
Now that I've figured out most of the engine bay plumbing I dropped the powertrain in order to ease access.
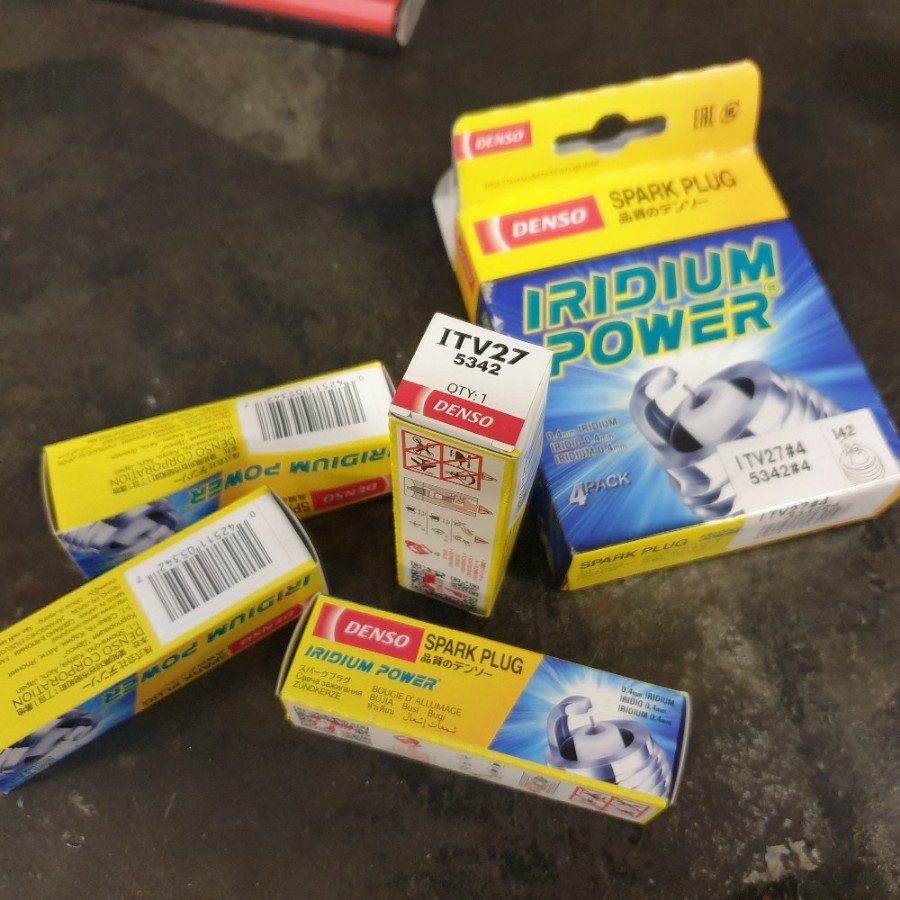
Plugs installed with a 0.7mm gap.
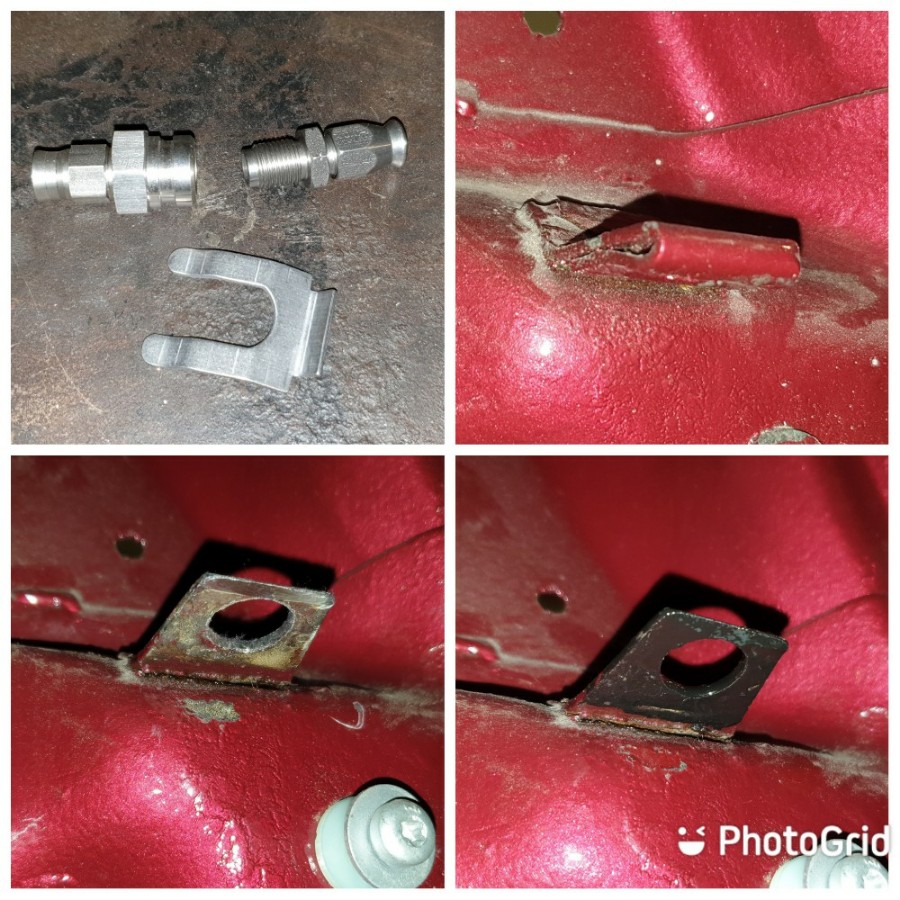
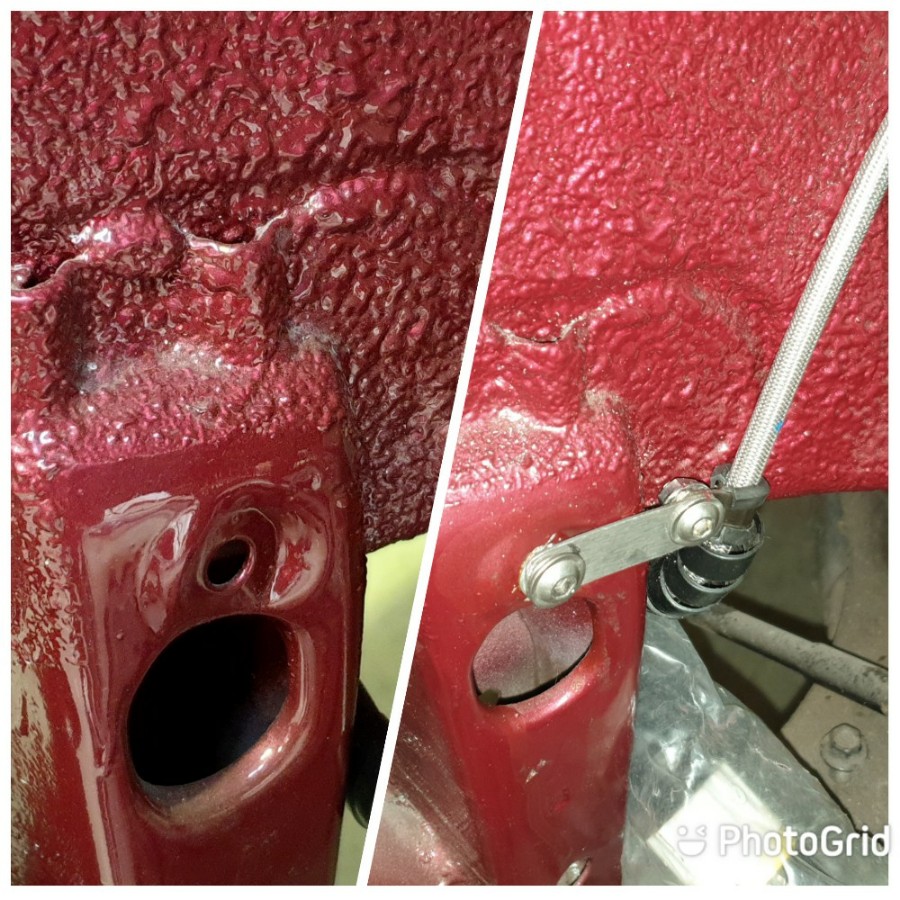
Finishing off the front brake lines: I have converted to spring clip type bulkhead fittings which I have in stainless. To convert the Ford chassis mounts I used a Dremel to cut off the lower leaf, drilled out the hole to 15mm, filed smooth, and then finished with POR15.
NSF wheelarch complete with new arch liner fittings and a liberal application of protective wax.
Plugs installed with a 0.7mm gap.
Finishing off the front brake lines: I have converted to spring clip type bulkhead fittings which I have in stainless. To convert the Ford chassis mounts I used a Dremel to cut off the lower leaf, drilled out the hole to 15mm, filed smooth, and then finished with POR15.
NSF wheelarch complete with new arch liner fittings and a liberal application of protective wax.
Thanks all.
The VR6 engine makes a nice sound but it and everything attached to it was just too heavy.
On this project I've chosen the standard Focus RS engine and gearbox mounts but with an uprated torque link - which is the mount which takes most of the load. This is for comfort as the car is more of a mini-GT, hence I don't want anti-lag. Boost per gear is on the cards as well as switchable maps.
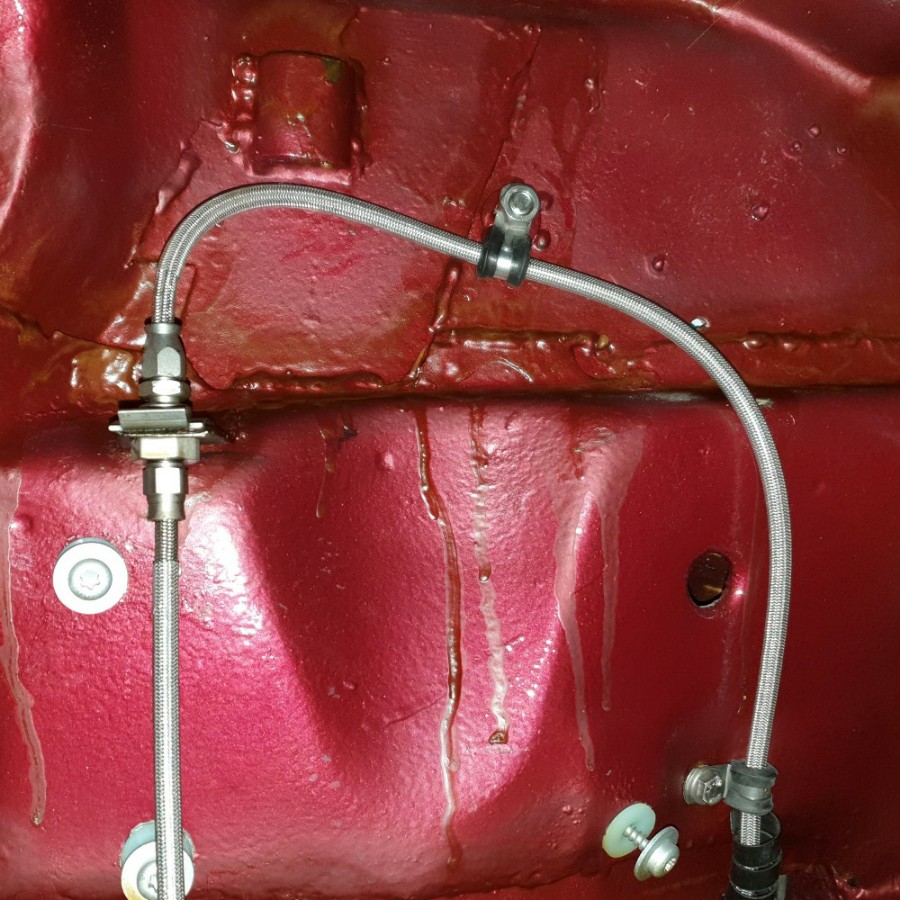
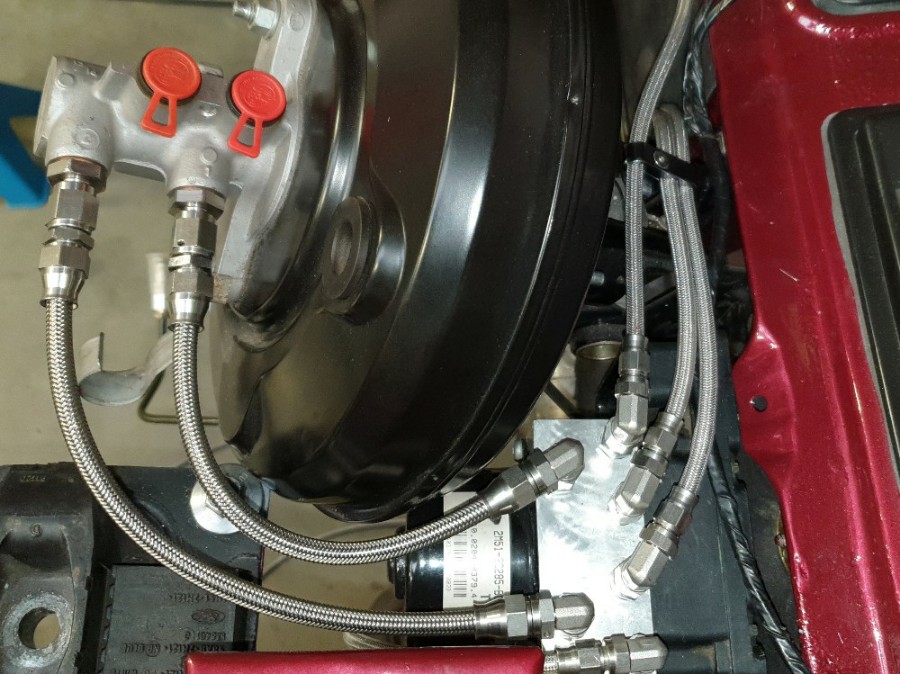
Back on to brake plumbing: AN3 for the brakes and AN4 for the MC to ABS module.
Master cylinder and module plumbed in.
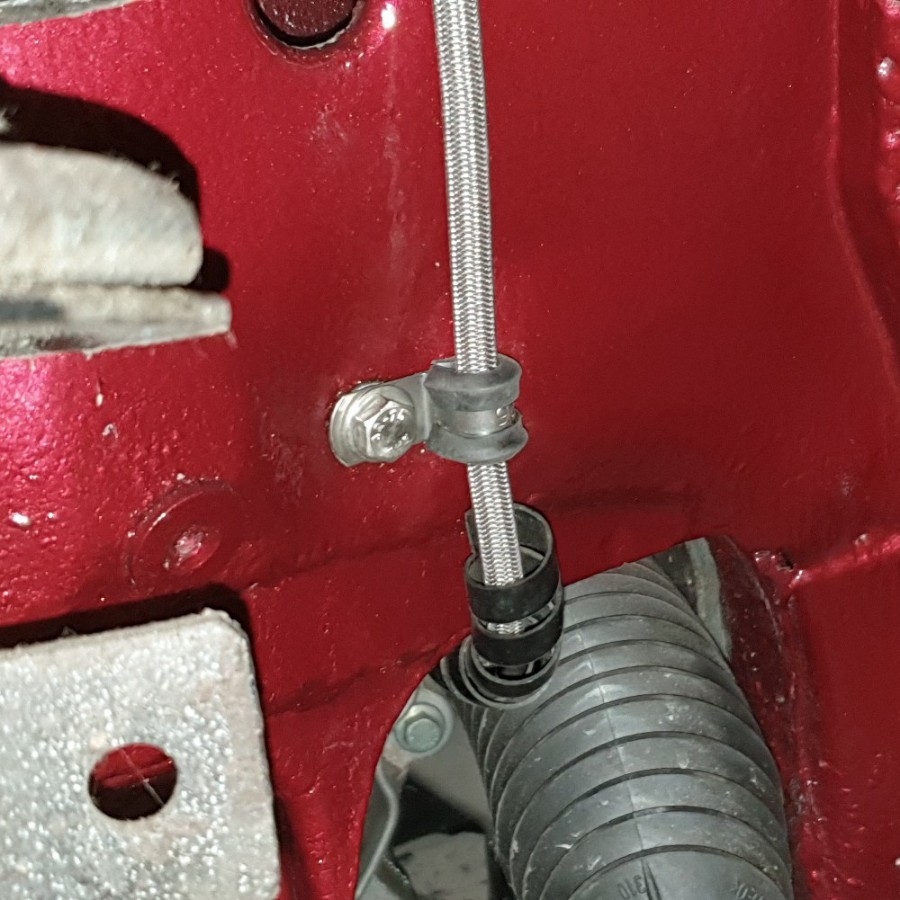
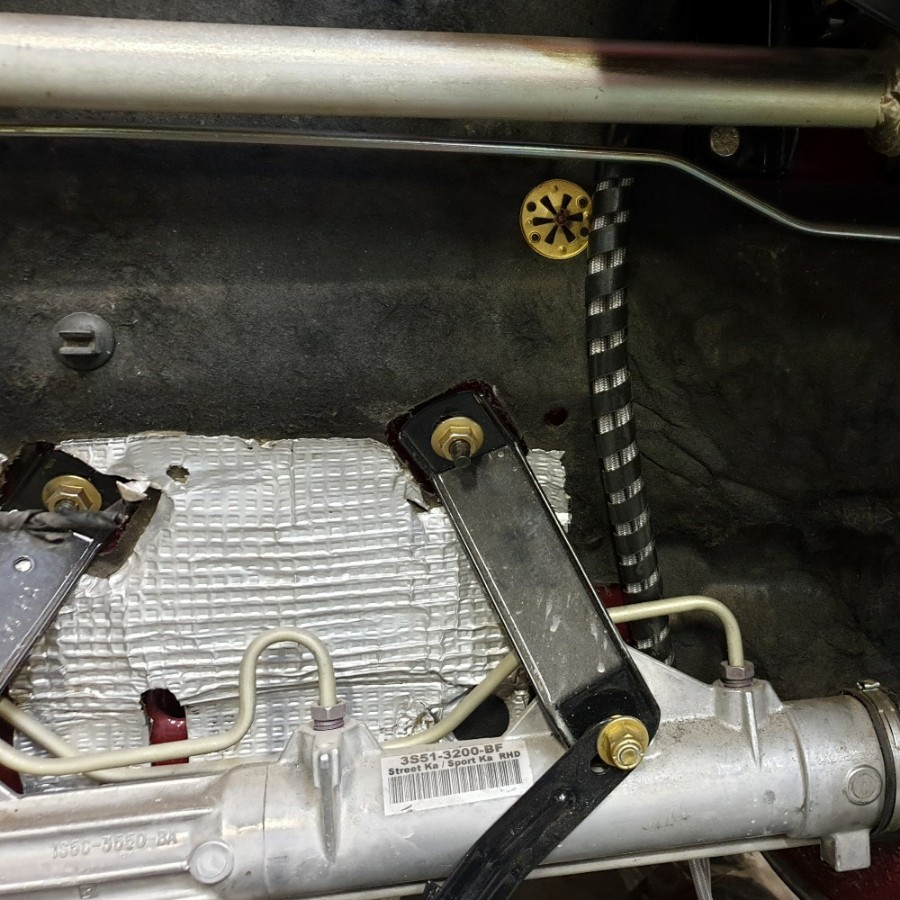
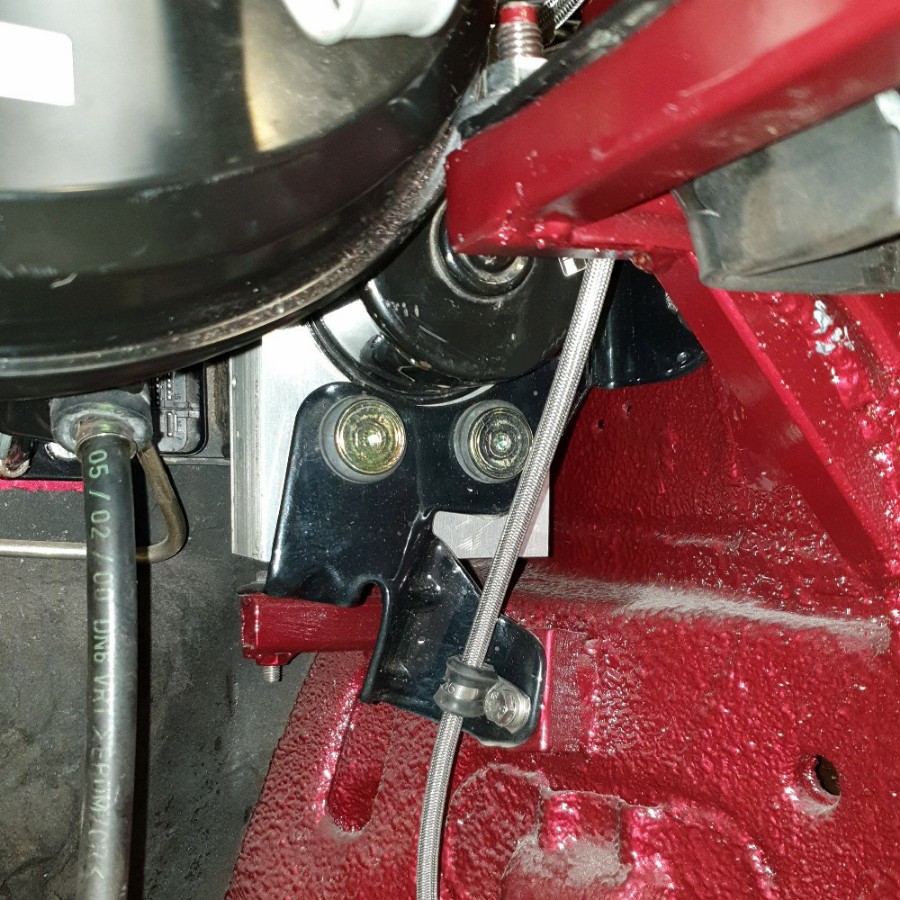
The rear lines follow the OEM route and I've wrapped them in nylon spiral wrap to keep them together.
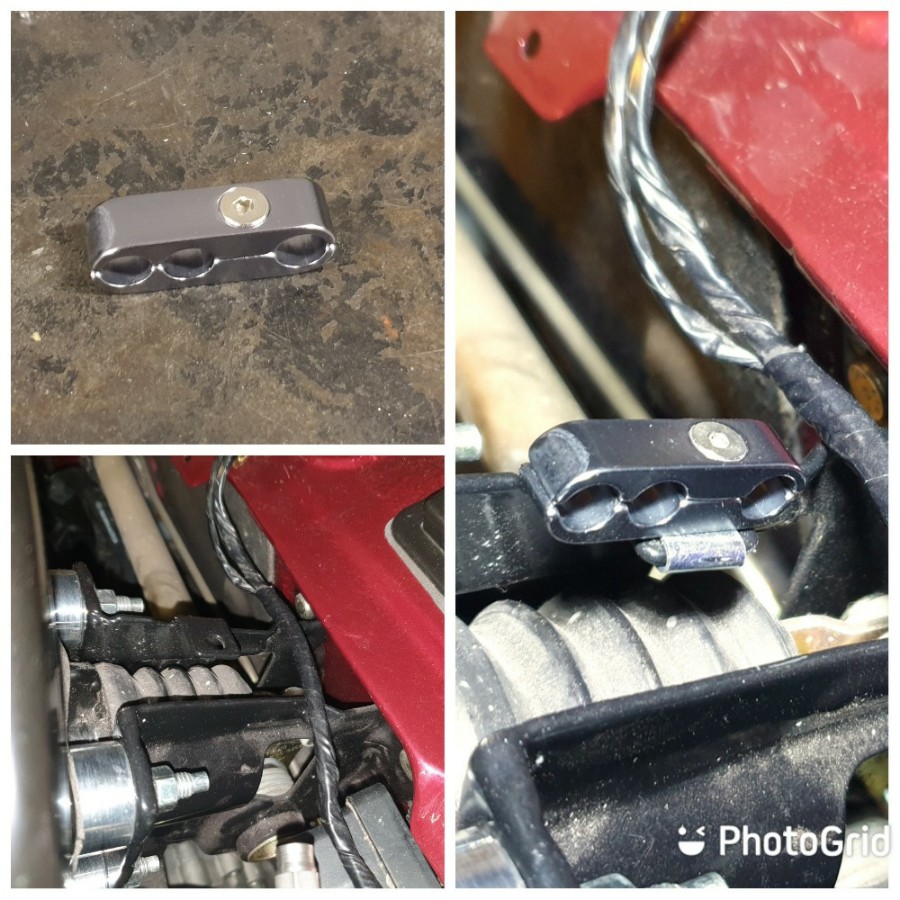
In accordance to Colin Chapman's philosophy where possible fixings and fastening points serve more than one purpose.
Strap bracket fabricated to keep the OSF line as close to the chassis as possible in the area of the alternator.
Liberal application of wax to all of the common rust spots.
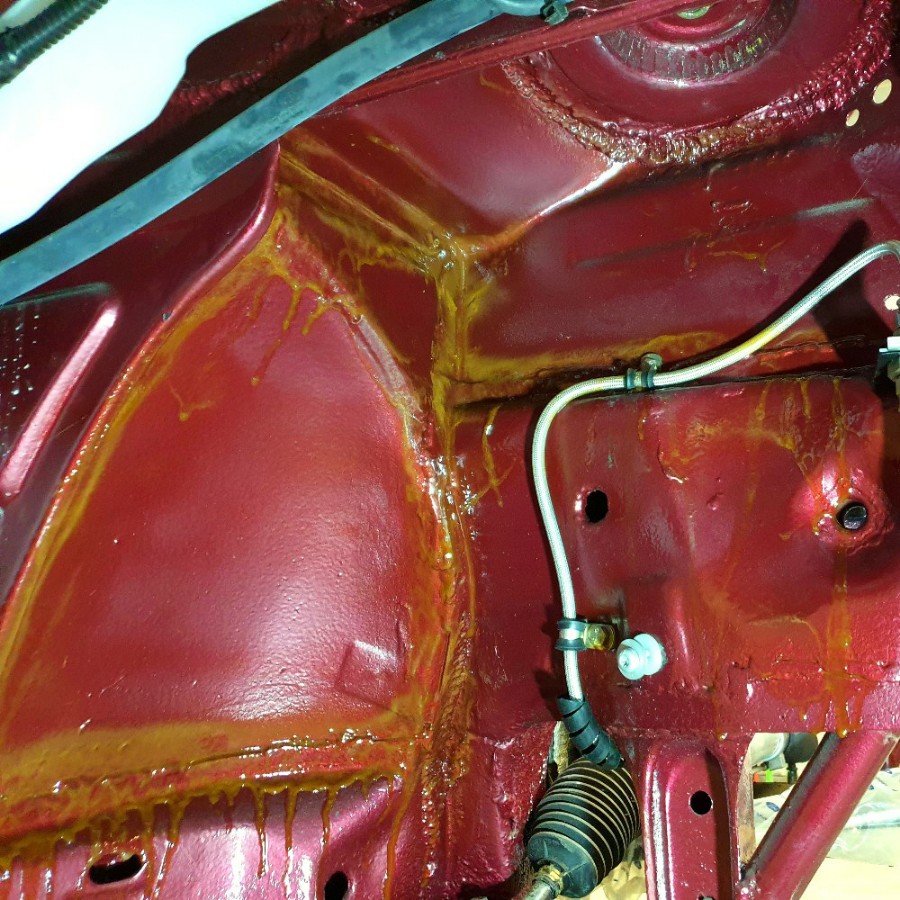
Master cylinder and module plumbed in.
The rear lines follow the OEM route and I've wrapped them in nylon spiral wrap to keep them together.
In accordance to Colin Chapman's philosophy where possible fixings and fastening points serve more than one purpose.
Strap bracket fabricated to keep the OSF line as close to the chassis as possible in the area of the alternator.
Liberal application of wax to all of the common rust spots.
Lord-Haggis said:
Where did you get your lines from? I'm about to do the same on one mine.
Both http://www.torques.co.uk and https://www.thinkauto.comI have the RS accessory version of the Cosworth style wheels which have a unique centre cap and badge. I did not like the look of the original blue badge against my paintwork, the FRST green strip, and the interior & brake bell colour. I scanned an original badge and made three alternative colour schemes: one to suit the FRST green strips, one to match the interior, and a third, more subtle option.
I chose DMB Graphics to produce the reproductions - initially two of each as a test - and Dave was excellent to work with sharing his colour palette to help make my electronic design production ready. There is a small tweak required to the green version should I decide to go that way.
OEM Fastenings
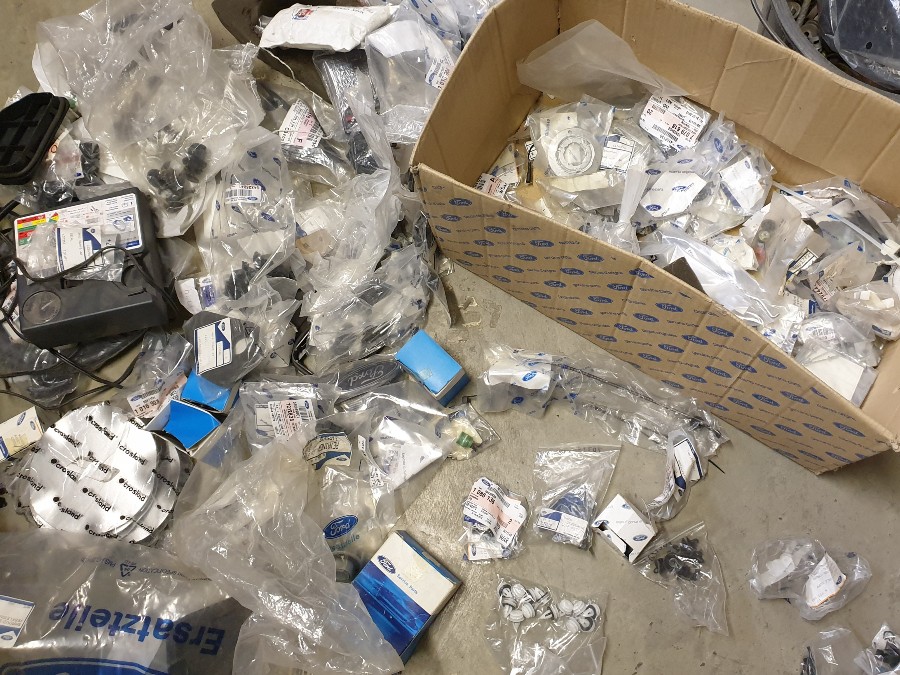
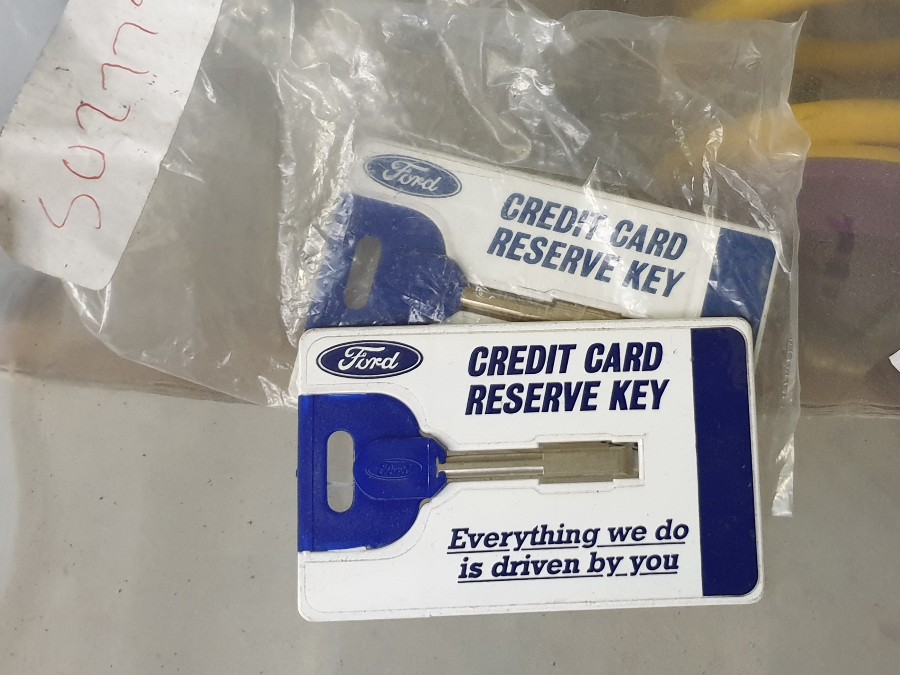
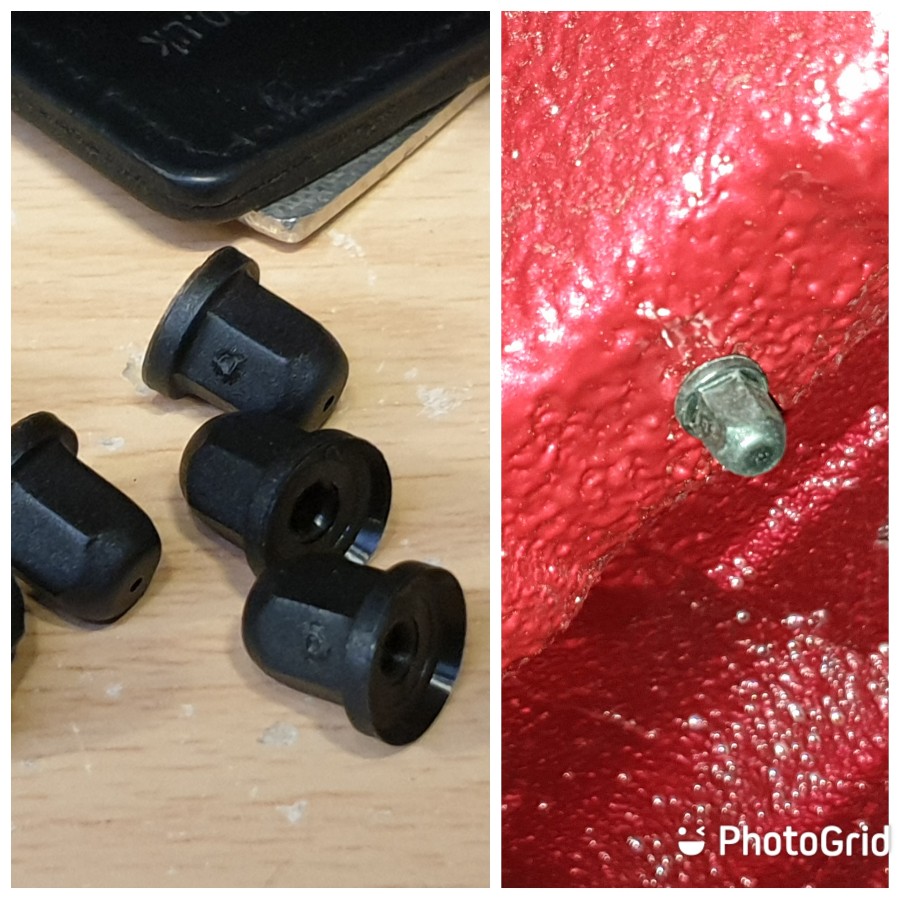
I've started to go through my box of Ford clips and fastenings to refresh my mind on what I have, which thankfully is enough to finish the car. The price these parts sell for now is significantly higher than the original retail. There were some interesting little nic-nacs available.
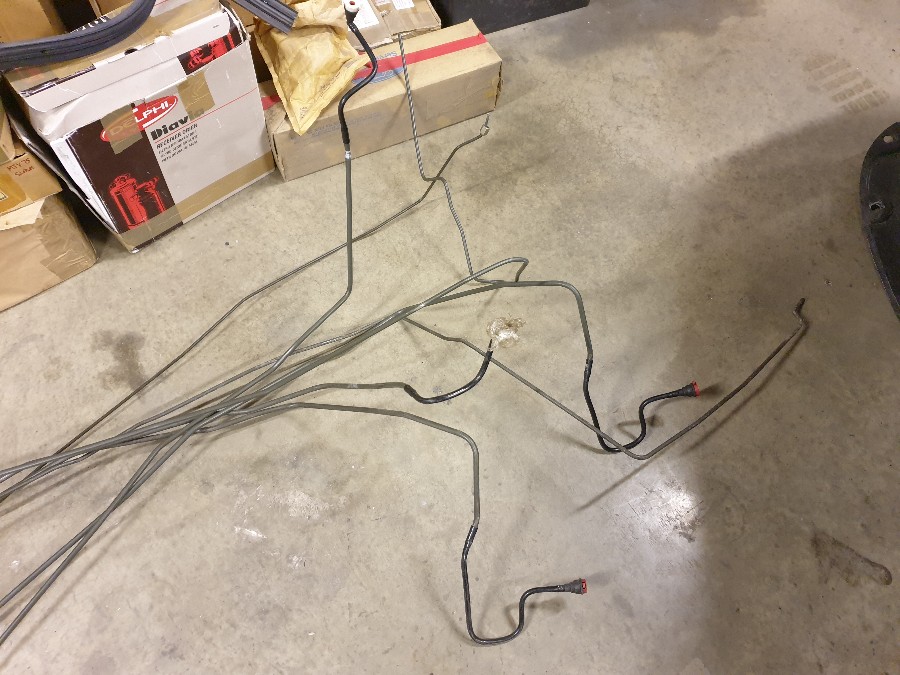
Fuel and Rear Brake Lines
The original fuel lines are AN6 sized which is perfectly adequate for my needs so I've been through my parts store and chosen some perfect original lines: fuel feed (AN6), fuel return (AN6), and evap (AN3) hard lines. The rear brakes lines are AN3 PVC coated braided hose rather than the OEM steel lines.
I found the original Ford fuel and brake pipe clips which I'm modifying to suit the two AN3 braided hoses in place of the original AN3 hard lines.
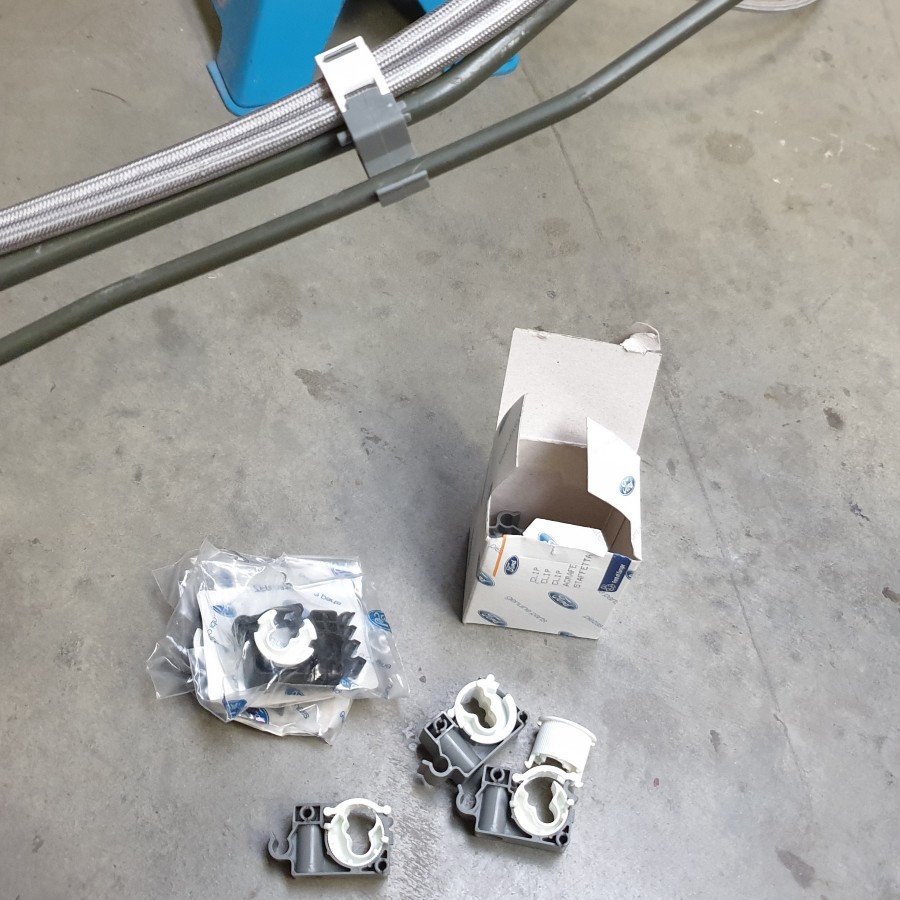
I have replaced the original metal fastenings with nylon types from a later model.
Misc
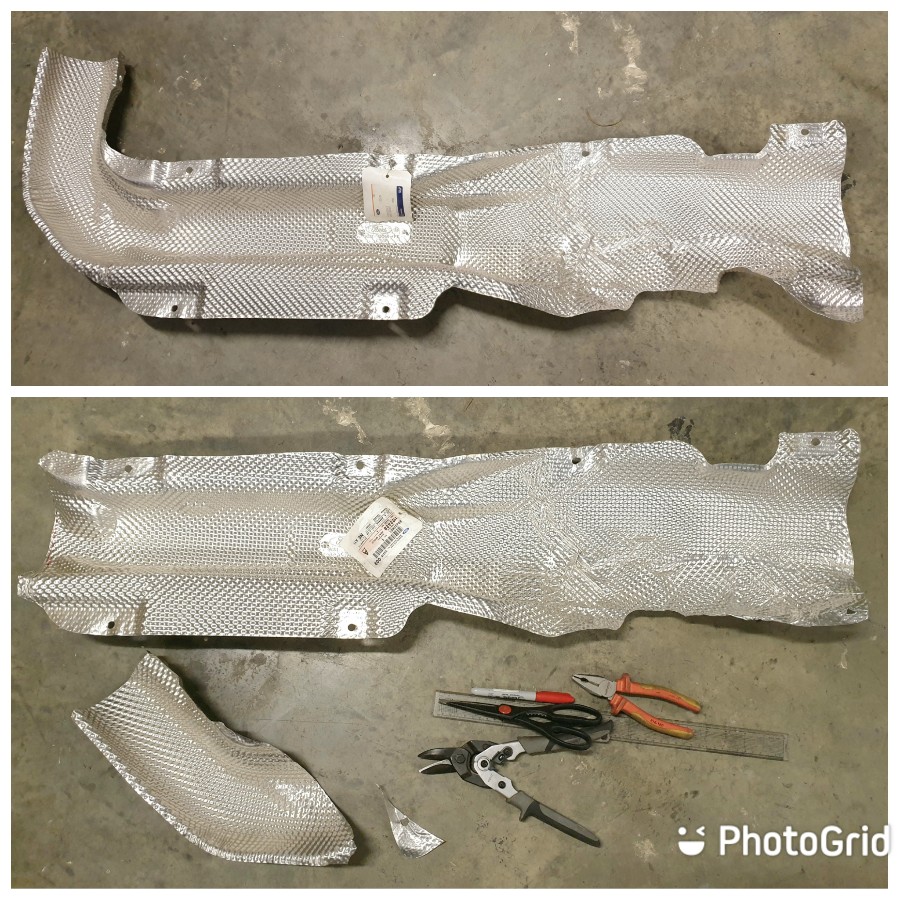
New OEM heat shield modified to suit my unique exhaust route.
The handbrake cable is galvanised but they normally end up rusty, so I have etched primed & painted it silver.
Engine Installation
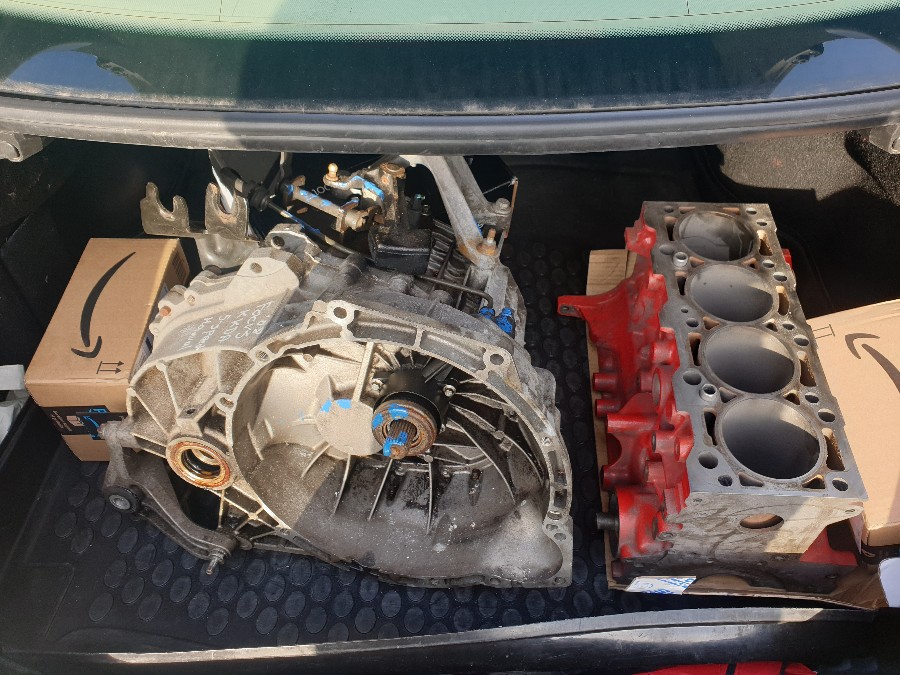
I now have a third MTX75 gearbox this time a Focus Mk2 TDCi version, and thanks to Ian/Area Six a block to go along with it.
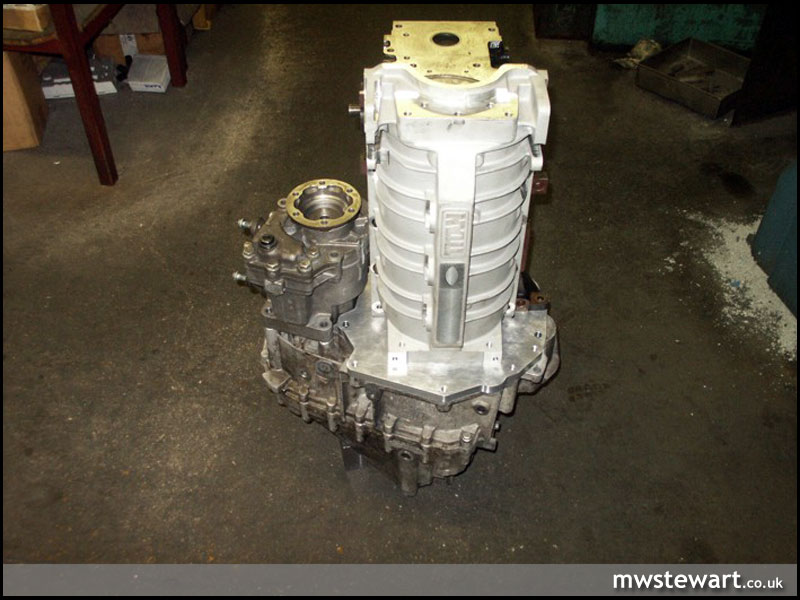
For some reason - packaging, possibly - the 'Black Top' Zetec is mounted tilted forwards by several degrees which is not ideal for weight distribution and, hence handling. It is something that always bugged me so I've been in touch with my friend Mark who has agreed to produce a bespoke bell-housing that tilts the engine back to my specification. It will be a bolt in part meaning that there won't be further changes to my shell.
Mark built the adapter plate for my previous project: a dry sumped ST170 engine mated to a VAG 4x4 02M gearbox.
I chose DMB Graphics to produce the reproductions - initially two of each as a test - and Dave was excellent to work with sharing his colour palette to help make my electronic design production ready. There is a small tweak required to the green version should I decide to go that way.
OEM Fastenings
I've started to go through my box of Ford clips and fastenings to refresh my mind on what I have, which thankfully is enough to finish the car. The price these parts sell for now is significantly higher than the original retail. There were some interesting little nic-nacs available.
Fuel and Rear Brake Lines
The original fuel lines are AN6 sized which is perfectly adequate for my needs so I've been through my parts store and chosen some perfect original lines: fuel feed (AN6), fuel return (AN6), and evap (AN3) hard lines. The rear brakes lines are AN3 PVC coated braided hose rather than the OEM steel lines.
I found the original Ford fuel and brake pipe clips which I'm modifying to suit the two AN3 braided hoses in place of the original AN3 hard lines.
I have replaced the original metal fastenings with nylon types from a later model.
Misc
New OEM heat shield modified to suit my unique exhaust route.
The handbrake cable is galvanised but they normally end up rusty, so I have etched primed & painted it silver.
Engine Installation
I now have a third MTX75 gearbox this time a Focus Mk2 TDCi version, and thanks to Ian/Area Six a block to go along with it.
For some reason - packaging, possibly - the 'Black Top' Zetec is mounted tilted forwards by several degrees which is not ideal for weight distribution and, hence handling. It is something that always bugged me so I've been in touch with my friend Mark who has agreed to produce a bespoke bell-housing that tilts the engine back to my specification. It will be a bolt in part meaning that there won't be further changes to my shell.
Mark built the adapter plate for my previous project: a dry sumped ST170 engine mated to a VAG 4x4 02M gearbox.
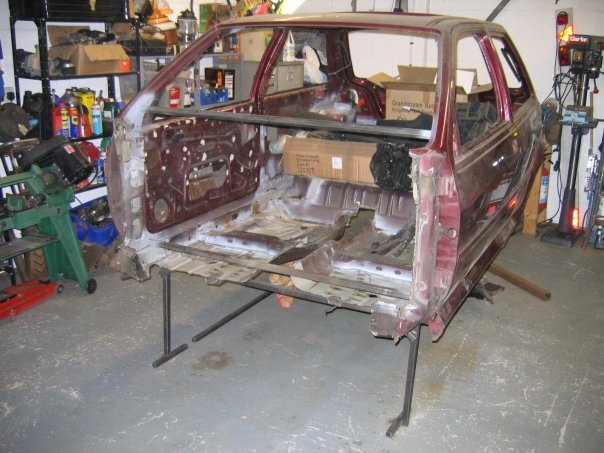
The project mentioned was also Mk3 Fiesta based: a turbocharged ST170 engine with a VAG 02M gearbox and S3/TT Haldex based 4WD system. I completed all of the complex work but as time went on I became increasingly unhappy with the excess weight of the VAG components, and later, having owned a BAM engined S3 8L, I realised just how dire the platform was in terms of driving performance and pleasure.
The VR6 engine would fit so I bought a very low mileage R32 engine and gearbox but, again, the weight vs performance vs durability was astronomically skewed to the worse. The project started with the first generation Haldex platform, but later I bought the Haldex 2 drivetrain to study - but the same applied.
I bought a scrap Mk2 TT to use as the donor for sections of its shell, and also some parts from a later Fiesta.
Phase 1 was largely based on a later Fiesta.

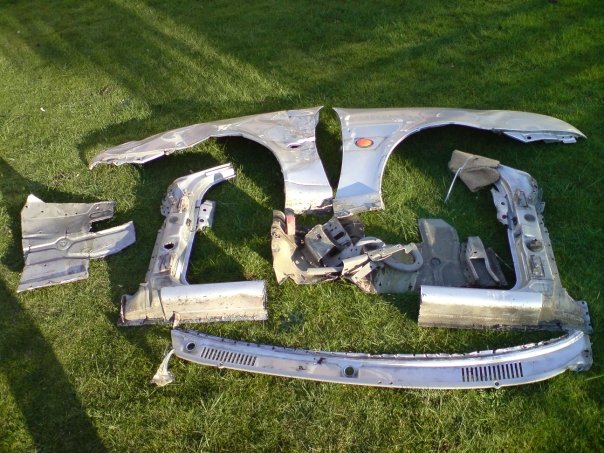
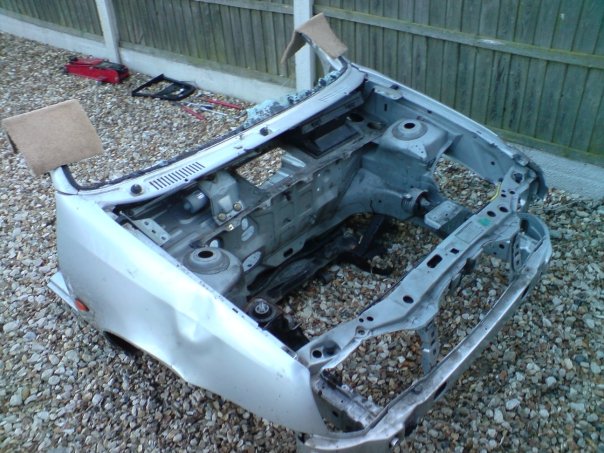
Phase 2 was a small section of later Fiesta and sectioned parts of the TT floorpan and chassis legs & rails.
I'd figured out all of the load paths and integrated everything safely - though mainly my focus was on handling but safety tends to be a byproduct of a stiff shell.
I was early 20's at the time so it was a good learning exercise for fabrication etc. - I learnt to weld on this project.
The VR6 engine would fit so I bought a very low mileage R32 engine and gearbox but, again, the weight vs performance vs durability was astronomically skewed to the worse. The project started with the first generation Haldex platform, but later I bought the Haldex 2 drivetrain to study - but the same applied.
I bought a scrap Mk2 TT to use as the donor for sections of its shell, and also some parts from a later Fiesta.
Phase 1 was largely based on a later Fiesta.
Phase 2 was a small section of later Fiesta and sectioned parts of the TT floorpan and chassis legs & rails.
I'd figured out all of the load paths and integrated everything safely - though mainly my focus was on handling but safety tends to be a byproduct of a stiff shell.
I was early 20's at the time so it was a good learning exercise for fabrication etc. - I learnt to weld on this project.
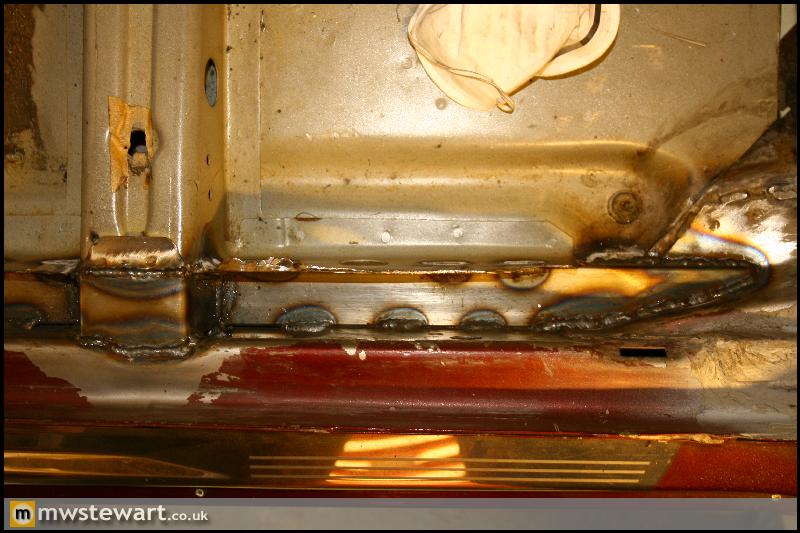
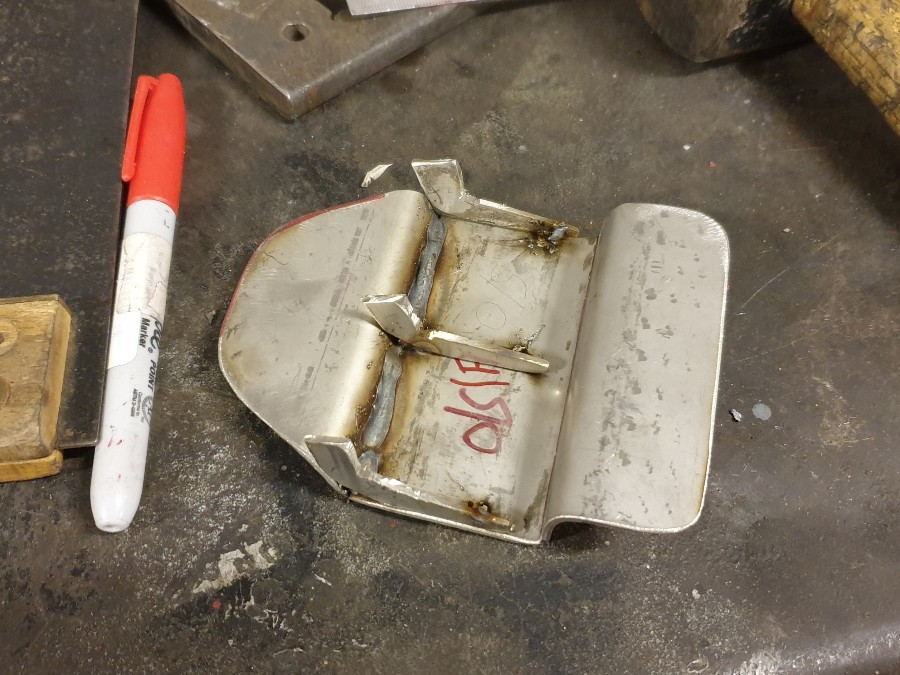
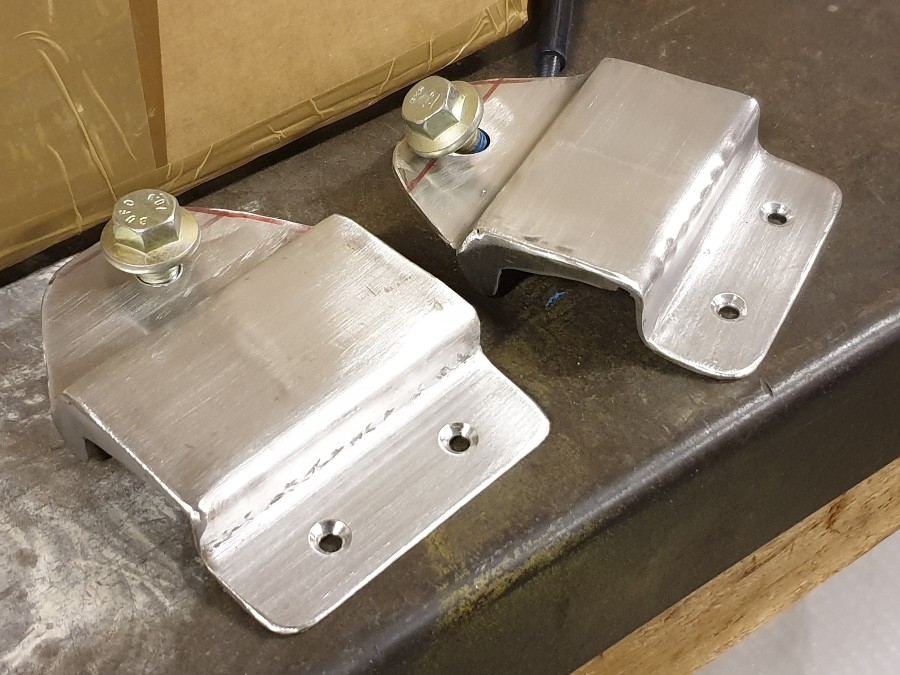
Jacking Points
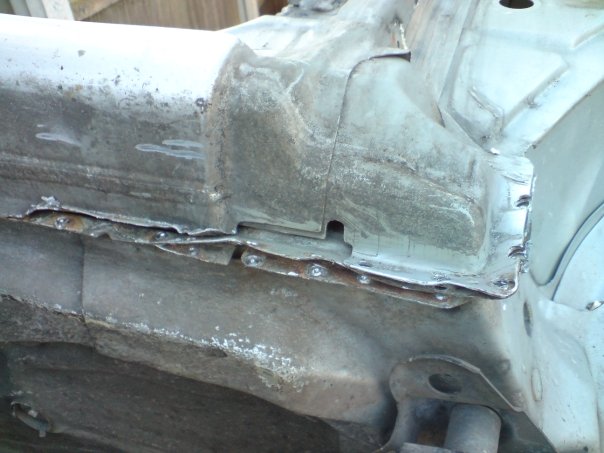
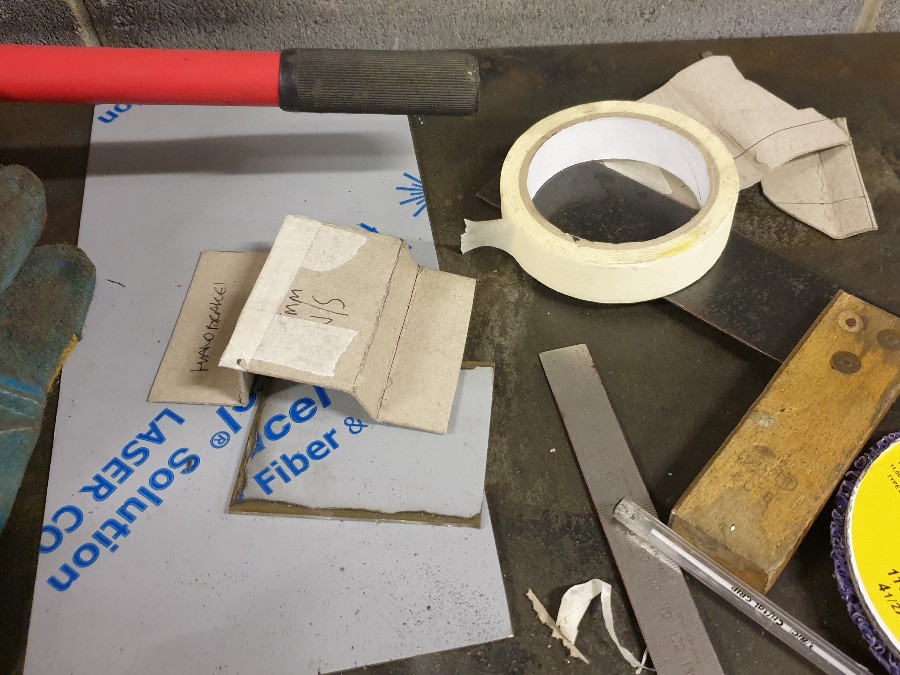
The Mk3 Fiesta standard jacking points are less than ideal being on the narrow lip of a very thin sill section. I already reinforced both sills with 25mm x 15mm box section and the finishing touch is four stainless steel jacking pads, which are a bit of a tricky shape due to the angle of the floor pan in that area.
The front jacking pads are dual function serving as an attachment point for part of the to-be-constructed underfloor chassis brace. The pads are riveted to the sills and bonded with methacrylate structural adhesive.
The jacking points are now complete and I'm very pleased with them. In my head I envisaged that these would take a couple of hours with an angle grinder and sheet metal folder but, as is usually the case, they required a little bit more time - this was mainly due to each surface being on a slight incline.
The front pads have a hole and accompanying captive nut/spreader plate for a chassis brace and the rears have a stud for the OEM handbrake cable clip.
Once fabrication was complete I used a poly wheel to smooth and then 40 grit to create a brushed finish.
Looking to the interior and I'm piecing together a period correct (for the dashboard) Ford 'universal hands free phone system'. I've chosen the Nokia 6210 version and once the handset arrives I will send its cover to paint along another couple of interior trim pieces for refinishing in the same metallic grey as the instrument cluster bezel.
trails said:
Could you convert that phone holder to support your iPhone...that would be pretty cool.
Possibly, but I quite fancy a period phone Drive it fix it repeat said:
I’m 23, do we reckon there’s an outside chance this gets finished before I die of old age?
I love a good build and they don’t come better than this but i also like things actually getting used. It does feel a bit like complication for the sake of it at times. Sorry to be negative as your talents and knowledge far surpass my own but come on already
I have other cars to use of course, but getting things right takes time and the beauty of doing this for myself and not a customer means that I'm completely free of constraints like time or a fixed plan.I love a good build and they don’t come better than this but i also like things actually getting used. It does feel a bit like complication for the sake of it at times. Sorry to be negative as your talents and knowledge far surpass my own but come on already
Gtom said:
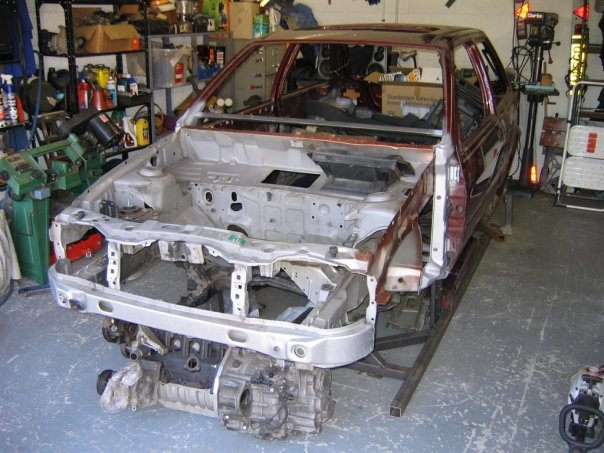
The car with the front end missing is a different car I think.
Yes, that's right. Other posters asked about a previous project.Gassing Station | Readers' Cars | Top of Page | What's New | My Stuff