500+bhp Mk3 Fiesta Project
Discussion


E36Ross said:
Have you a finis number for the accessory caps?
Have those wheels on my Mk6 but with standard caps.
Here you go https://www.ebay.de/itm/Ford-RS-Logo-13-14-15-16-Z...Have those wheels on my Mk6 but with standard caps.


Jacking Points - Complete
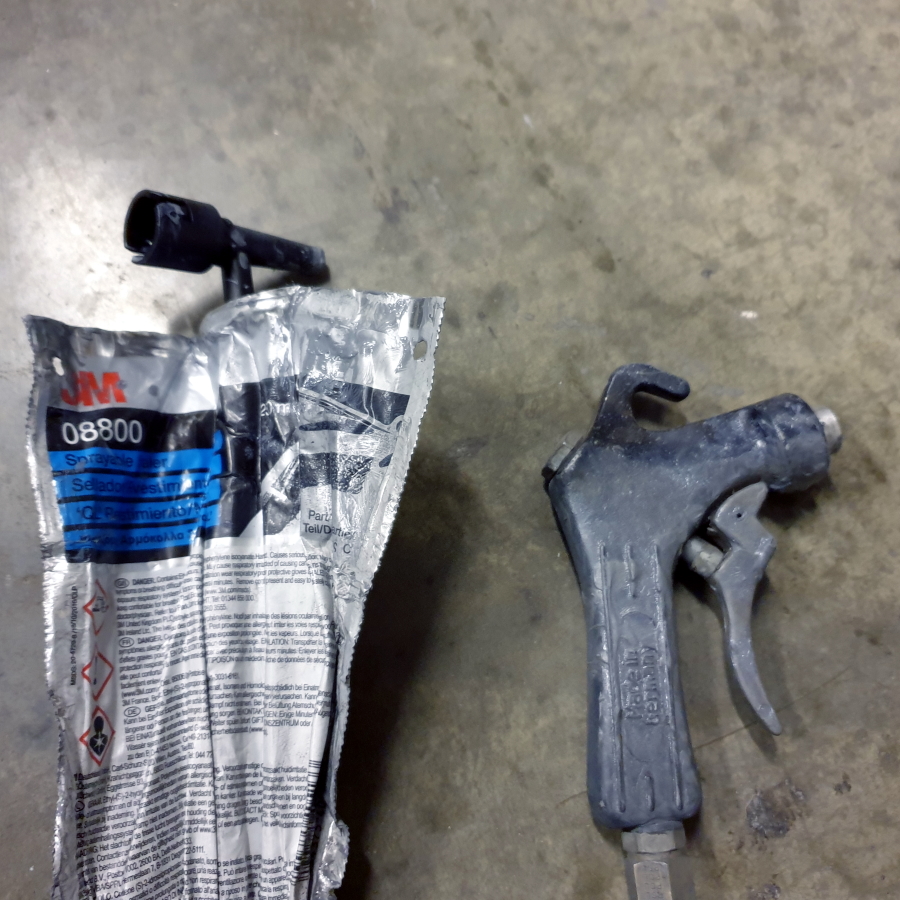
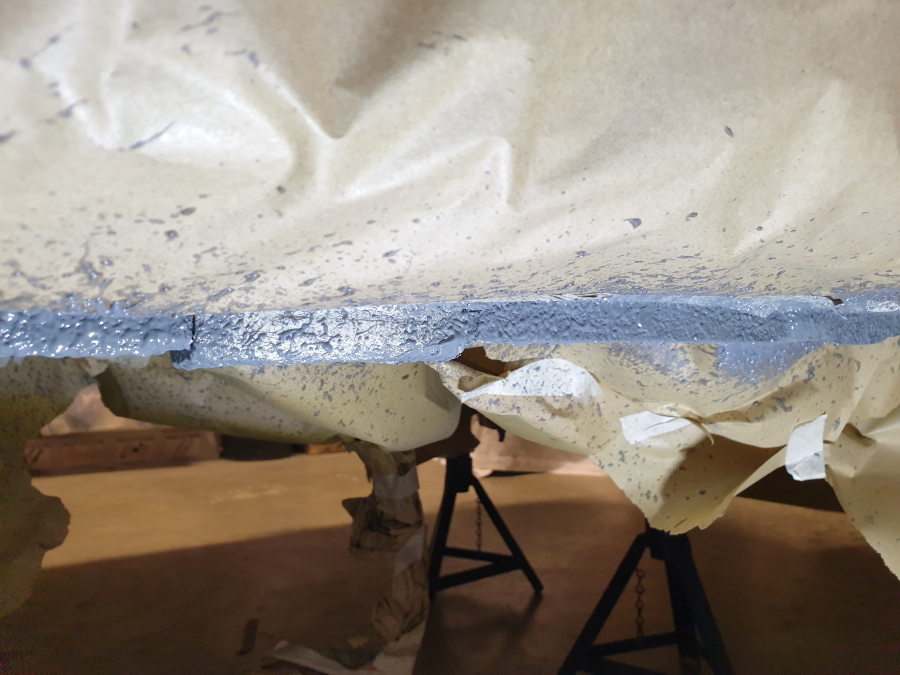
The jacking points are complete and fitted. I let them in to the existing underseal and neated up by blending with some additional 3M 08800 sealer.
Finishing involved paint and lacquer but was worth it for the finished result .The rear pads double up as a handbrake cable mount using the OEM clips.
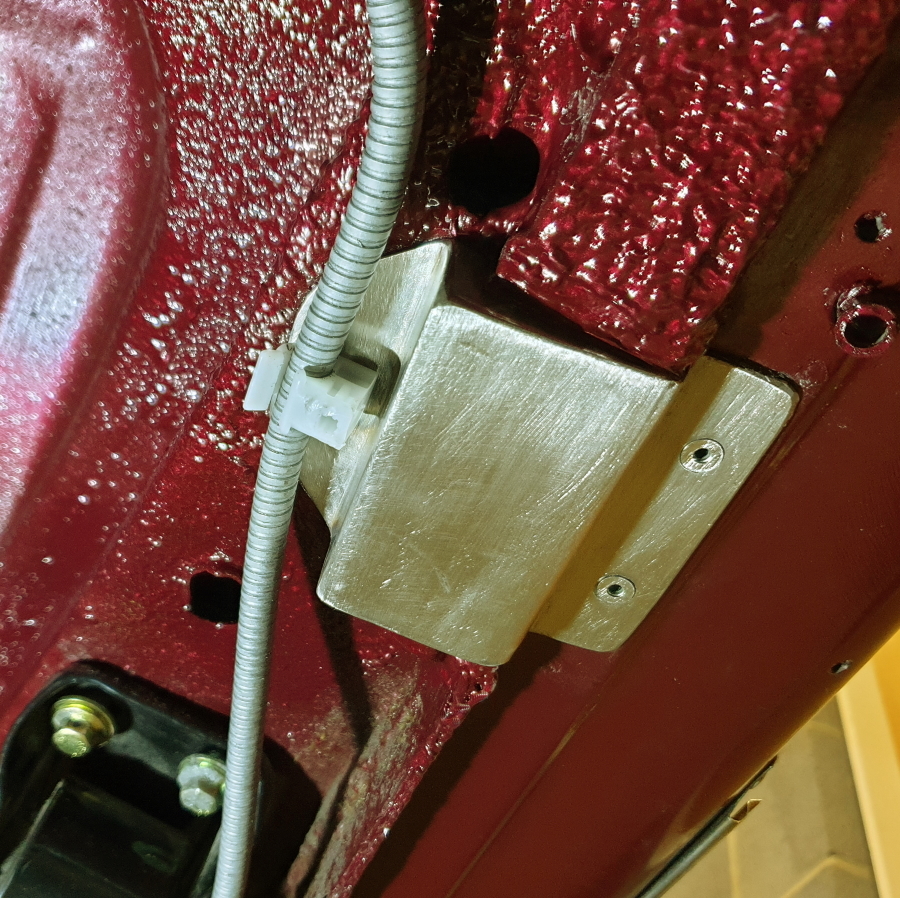
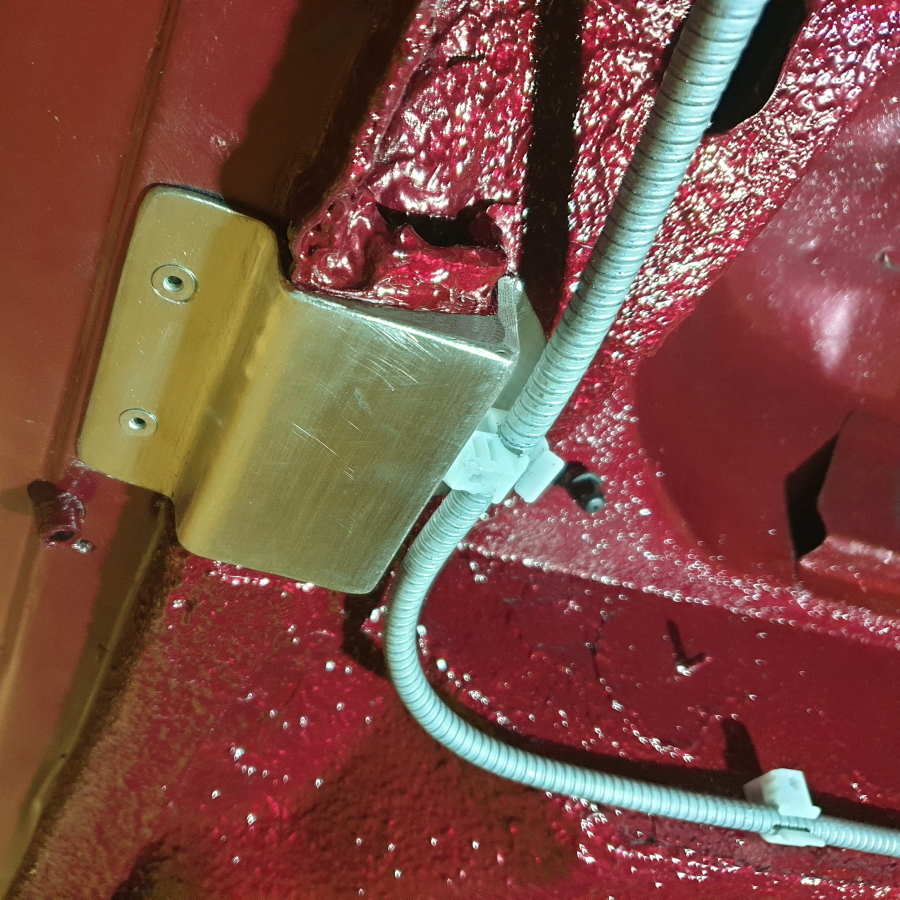
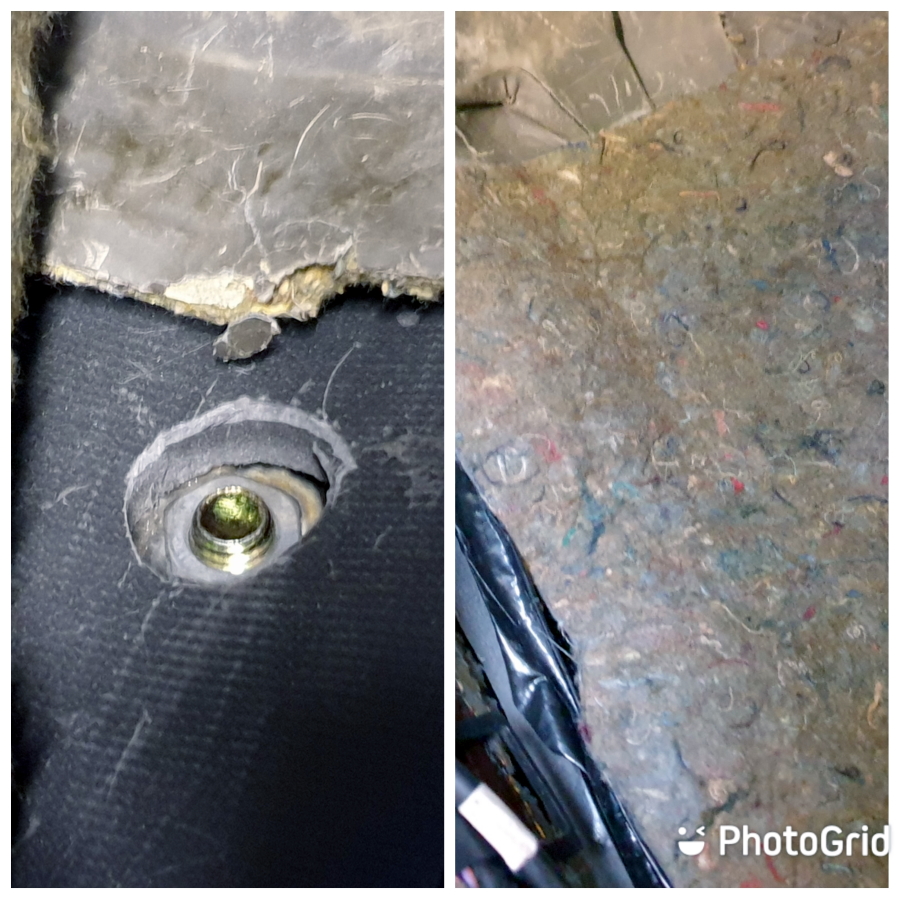
The front pads installed showing the captive fitting for a chassis brace. I bonded the spreader plate/captive fitting to the inside of the floor with a relief in the first (new) layer of sound deadening foam for the nut, and the original felt underlay covers all of that. The fittings are undetectable underneath the carpet.


Car Phone
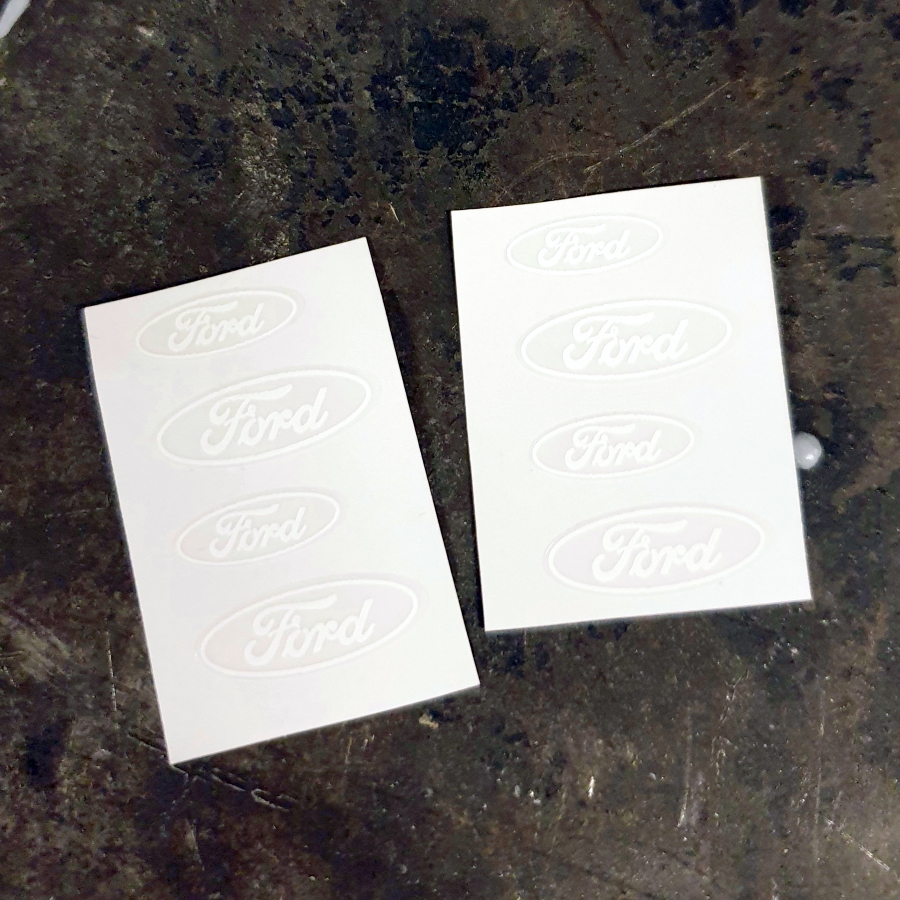
I had DMB make small Ford decals. I wasn't sure what size would look best so ordered different sizes. 15mm was perfect.
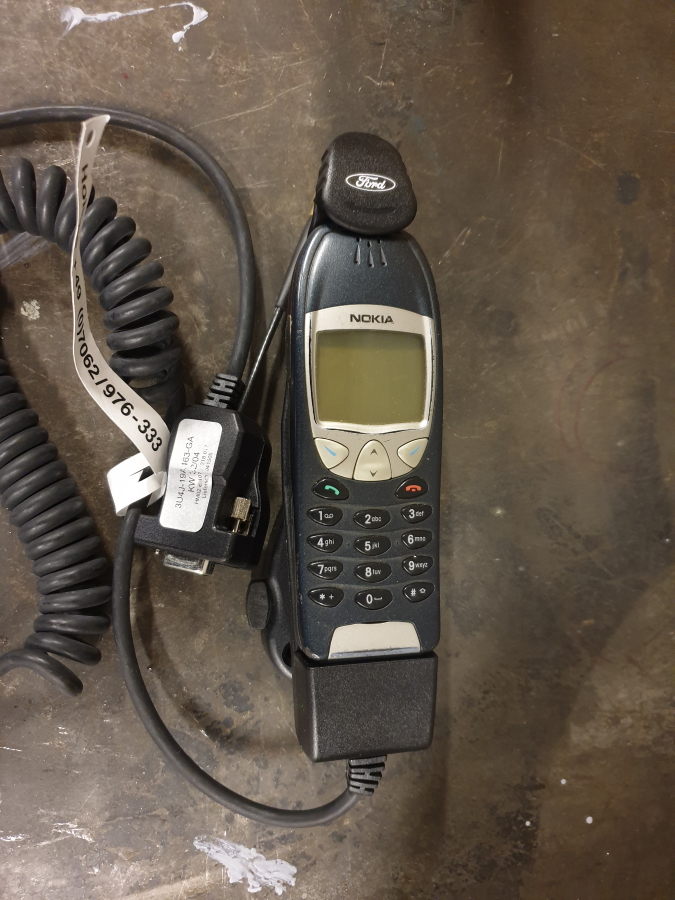
Ford oval stuck to phone mount. The Nokia 6210 arrived but is a bit tatty so I'll order a new case for it before sending to paint to be matched to the dashboard trim.
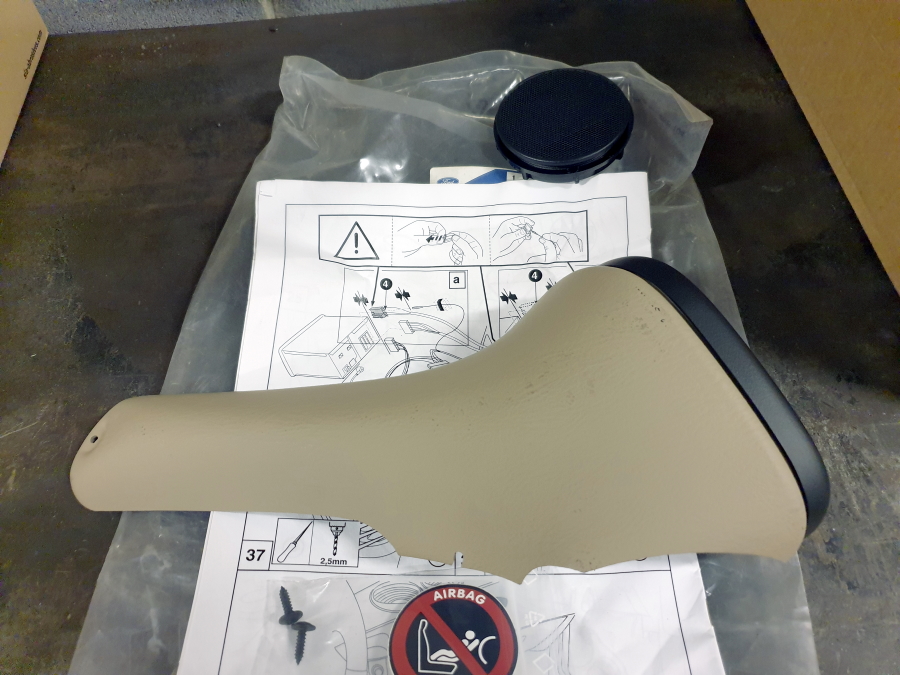
I found a dashboard bezel for the phone kit. These parts are long discontinued so I couldn't be picky when it came to the trim colour. I've ordered a can of SEM Classic Coat 17073 Medium Dark Graphite to match the dashboard; I used that product on the Golf arm rest and the match was absolutely perfect.
Misc
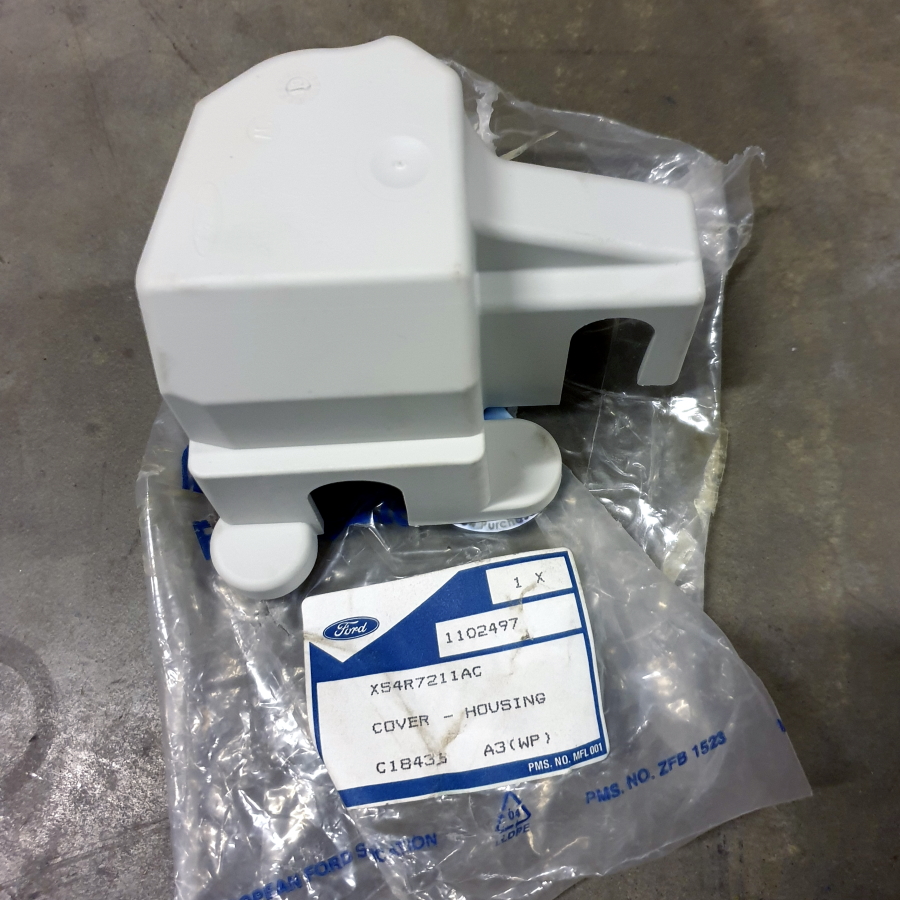
My Focus RS gearbox did not have a shift mechanism tower cover - I don't know if they are supposed to or not but I found a new Focus part that I will modify to fit.
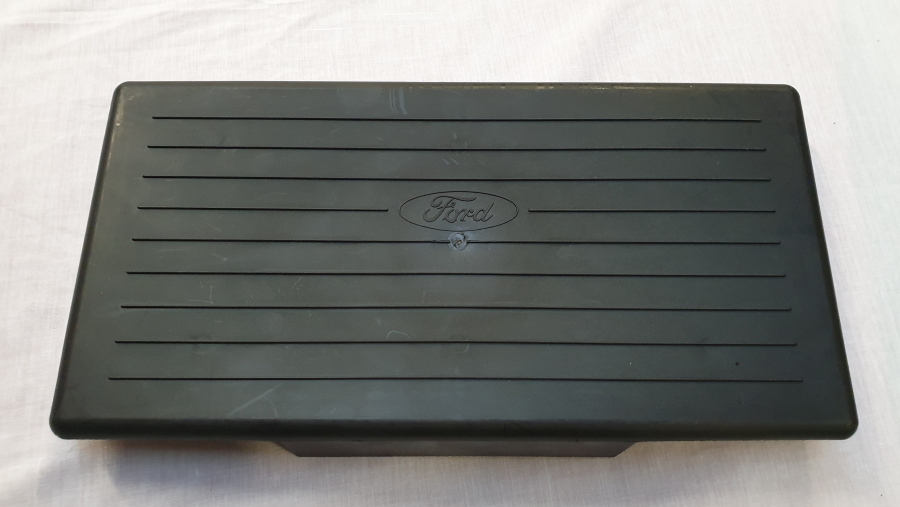
I also found a genuine Ford period battery cover to suit a larger capacity battery, which I will use in place of the original ~50Ah version.
Handbrake Cable
The handbrake is from a Mk1.5 Focus, the handbrake cable from a Racing Puma, and of course the car is an earlier Fiesta so the two cables don't quite marry up. My next task is to fabricate something to join the Puma front cable to Puma rear.
In places the underside is dusty so I'll give that a clean, too.
The jacking points are complete and fitted. I let them in to the existing underseal and neated up by blending with some additional 3M 08800 sealer.
Finishing involved paint and lacquer but was worth it for the finished result .The rear pads double up as a handbrake cable mount using the OEM clips.
The front pads installed showing the captive fitting for a chassis brace. I bonded the spreader plate/captive fitting to the inside of the floor with a relief in the first (new) layer of sound deadening foam for the nut, and the original felt underlay covers all of that. The fittings are undetectable underneath the carpet.
Car Phone
I had DMB make small Ford decals. I wasn't sure what size would look best so ordered different sizes. 15mm was perfect.
Ford oval stuck to phone mount. The Nokia 6210 arrived but is a bit tatty so I'll order a new case for it before sending to paint to be matched to the dashboard trim.
I found a dashboard bezel for the phone kit. These parts are long discontinued so I couldn't be picky when it came to the trim colour. I've ordered a can of SEM Classic Coat 17073 Medium Dark Graphite to match the dashboard; I used that product on the Golf arm rest and the match was absolutely perfect.
Misc
My Focus RS gearbox did not have a shift mechanism tower cover - I don't know if they are supposed to or not but I found a new Focus part that I will modify to fit.
I also found a genuine Ford period battery cover to suit a larger capacity battery, which I will use in place of the original ~50Ah version.
Handbrake Cable
The handbrake is from a Mk1.5 Focus, the handbrake cable from a Racing Puma, and of course the car is an earlier Fiesta so the two cables don't quite marry up. My next task is to fabricate something to join the Puma front cable to Puma rear.
In places the underside is dusty so I'll give that a clean, too.
Edited by mwstewart on Wednesday 23 December 14:37
I spent a couple of hours this evening fabricating a new handbrake cable yoke. I had in stock a spare Puma yoke which made the job a lot quicker, so the plan was to fabricate something to join the two together. I settled on the shank of a stainless M8 bolt which I welded on to the centre of one original yoke.
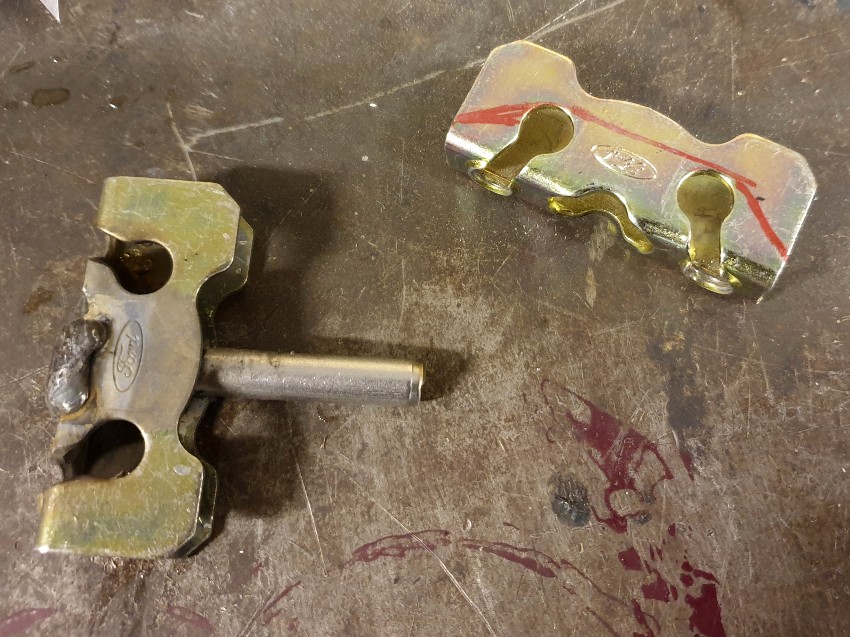
The handbrake side of the yoke needed clearance to allow the nipple to be pushed through the yoke and turned 90 degrees. To provide this clearance I heated and bent another stainless bolt to form a curve.
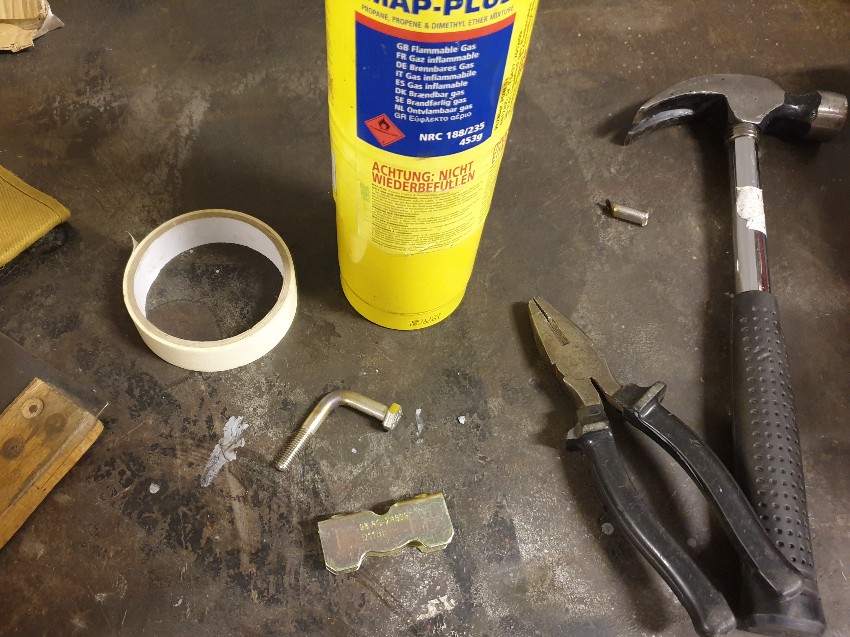
I welded the two bolt sections together which gave the required 40mm clearance between each yoke. I etch primed and finished in Plasti-kote gold. Note: not Plasti-dip which is a temporary finish.
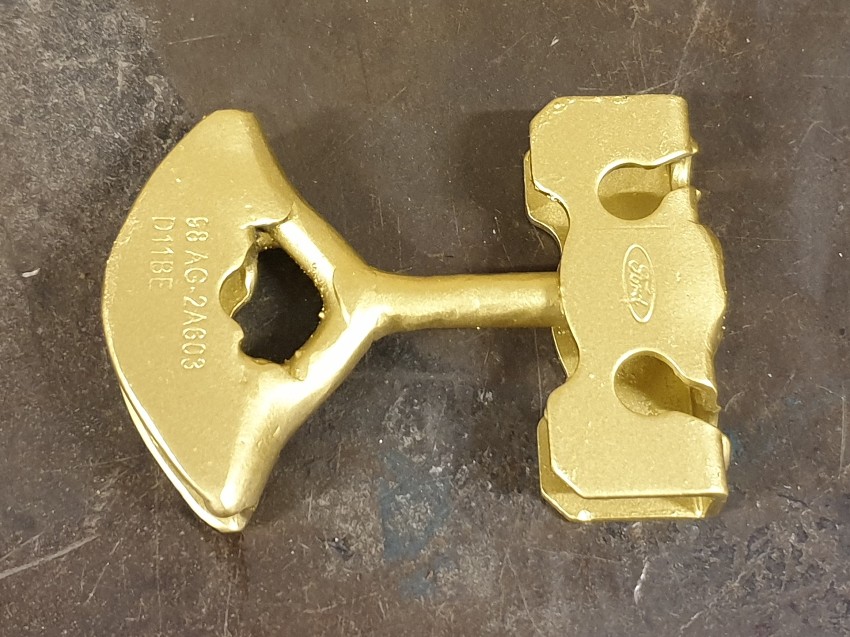
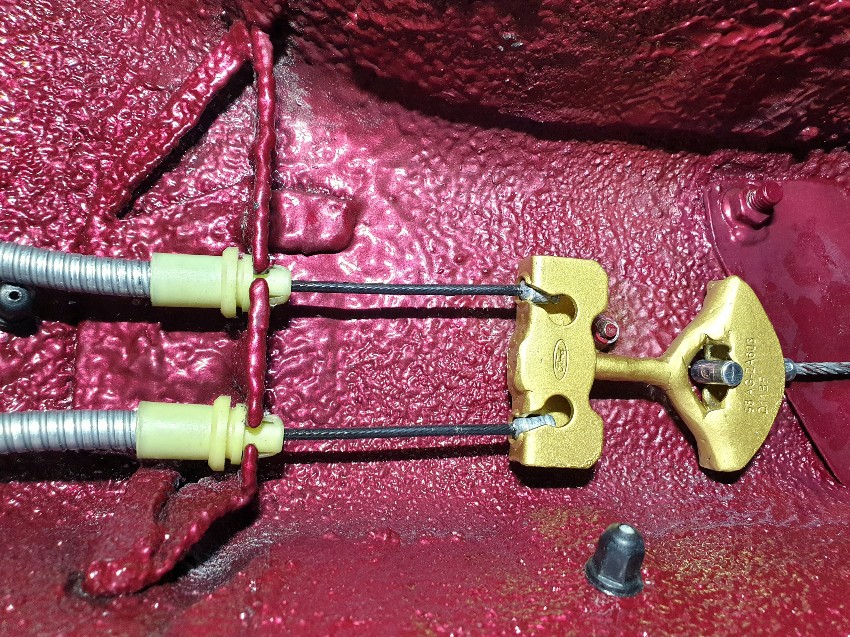
New yoke mounted and handbrake adjusted - the adjustment nut still has 90% of its travel available which will maximise the service life of the cable.
The handbrake side of the yoke needed clearance to allow the nipple to be pushed through the yoke and turned 90 degrees. To provide this clearance I heated and bent another stainless bolt to form a curve.
I welded the two bolt sections together which gave the required 40mm clearance between each yoke. I etch primed and finished in Plasti-kote gold. Note: not Plasti-dip which is a temporary finish.
New yoke mounted and handbrake adjusted - the adjustment nut still has 90% of its travel available which will maximise the service life of the cable.
Fuel, Brake, and Evap Lines
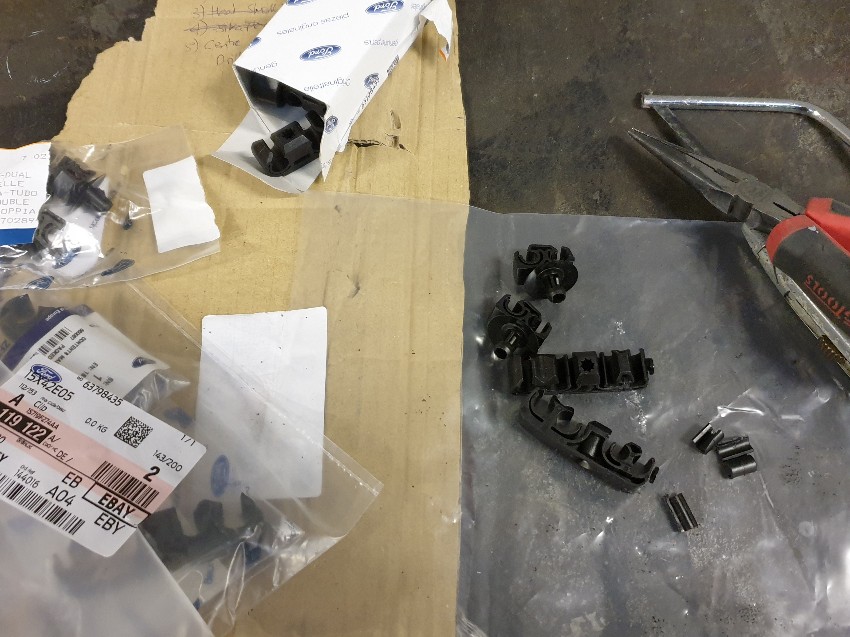
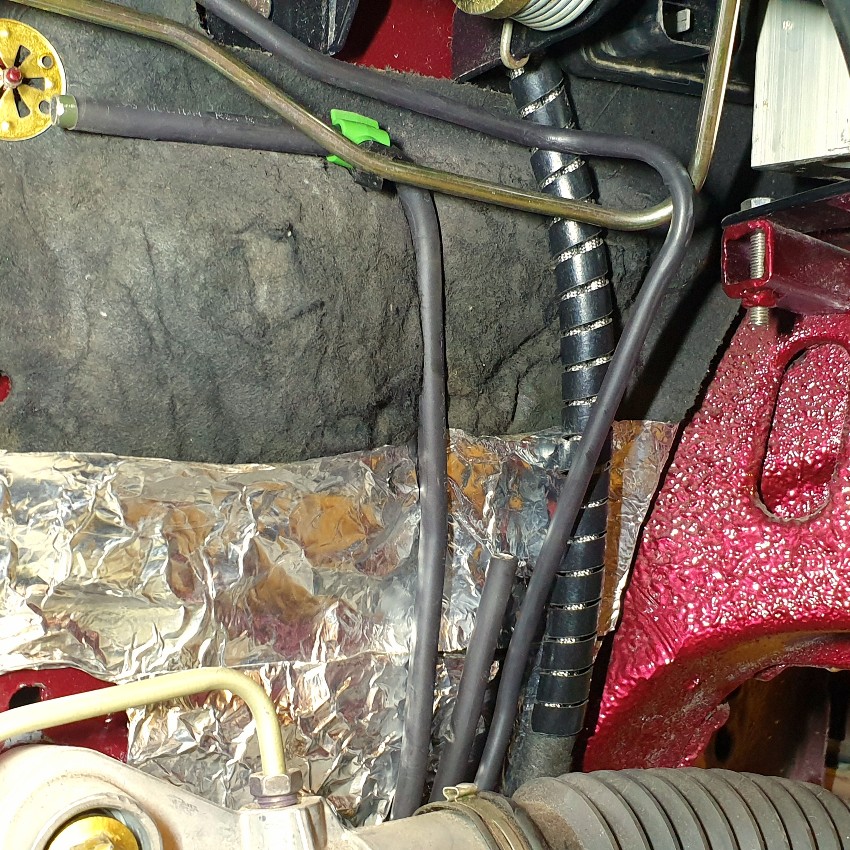
I have modified the various hard line and hose clips to suit PVC coated AN3 stainless hose which I've used in place of the original AN3 steel hard line.
I'm using the original Ford AN6 fuel lines and AN4 evap line - AN6 will flow a sufficient amount of fuel for my needs.
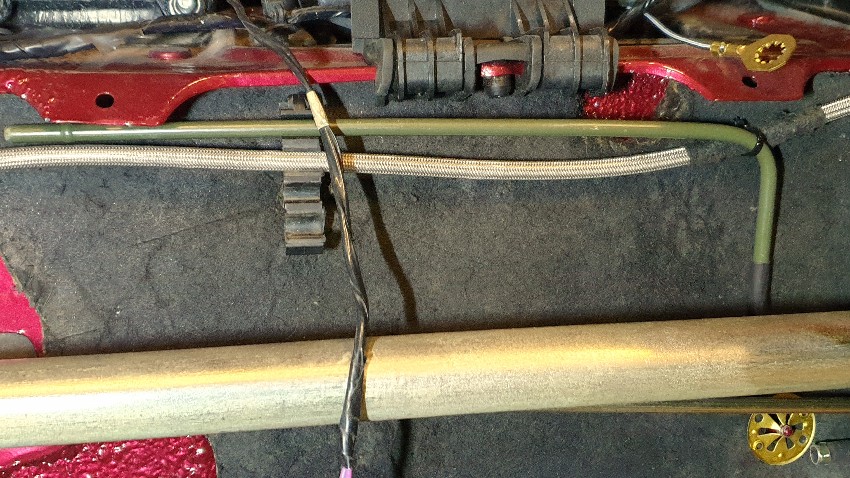
All original lines are steel and finished in typical olive green paint, so in order to add some protection and chaffe resistance I have covered the fuel lines in heat shrink and sprayed the evap line silver.
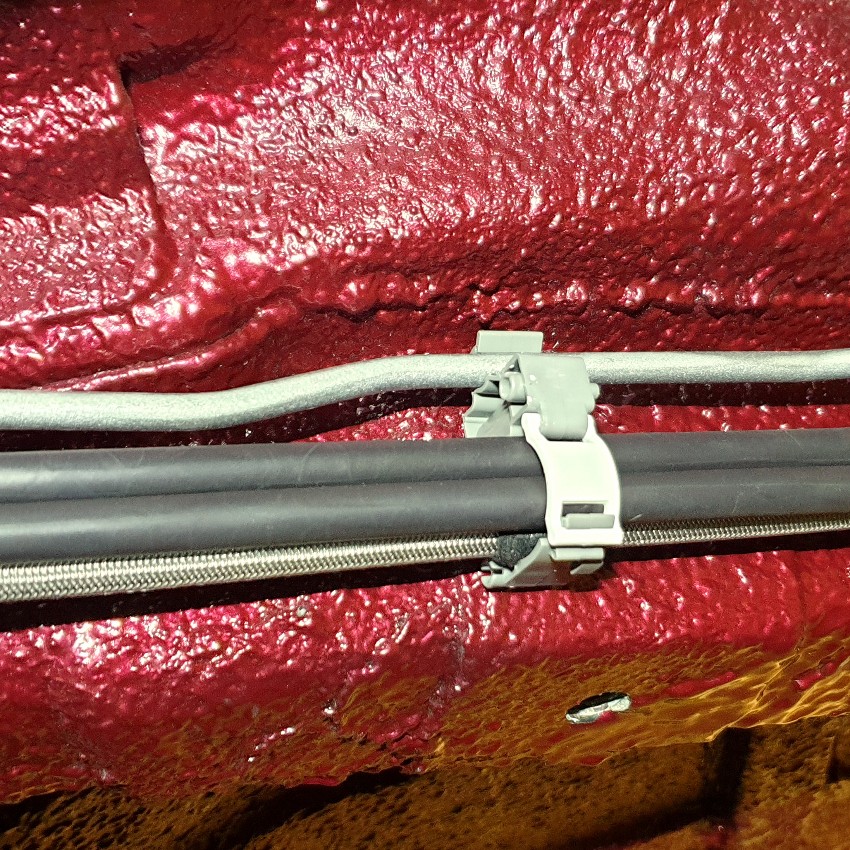
Fuel, evap, and new AN3 braided hoses in the OEM underbody pipe clips.
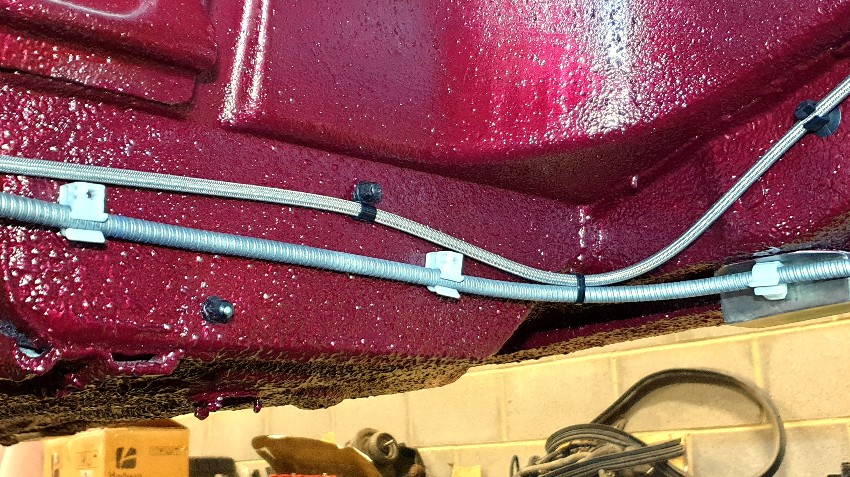
Lines fitted at the rear of the car.
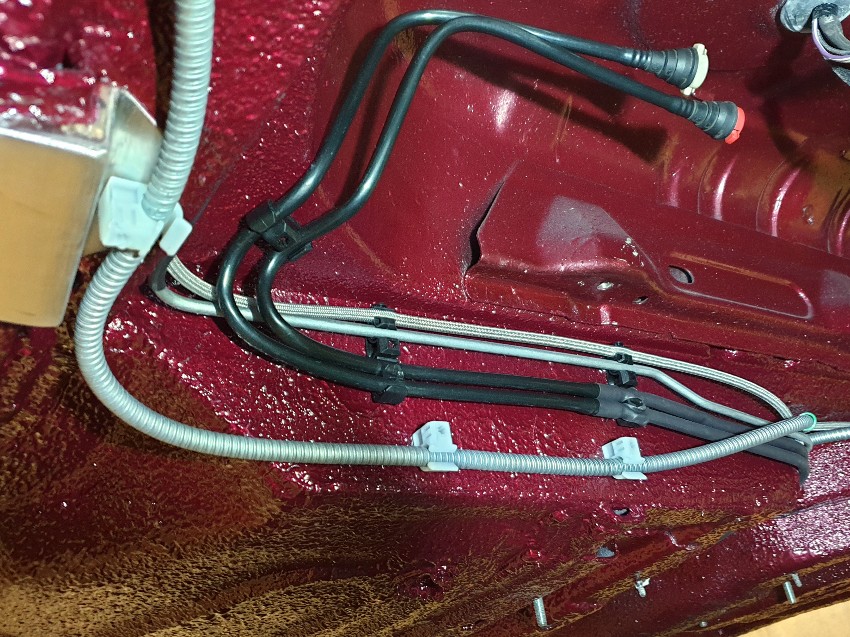

Evap and fuel lines in the engine bay. New Ford pipe clips used.
I have modified the various hard line and hose clips to suit PVC coated AN3 stainless hose which I've used in place of the original AN3 steel hard line.
I'm using the original Ford AN6 fuel lines and AN4 evap line - AN6 will flow a sufficient amount of fuel for my needs.
All original lines are steel and finished in typical olive green paint, so in order to add some protection and chaffe resistance I have covered the fuel lines in heat shrink and sprayed the evap line silver.
Fuel, evap, and new AN3 braided hoses in the OEM underbody pipe clips.
Lines fitted at the rear of the car.
Evap and fuel lines in the engine bay. New Ford pipe clips used.
Thank you.
Fuel Rail Hose
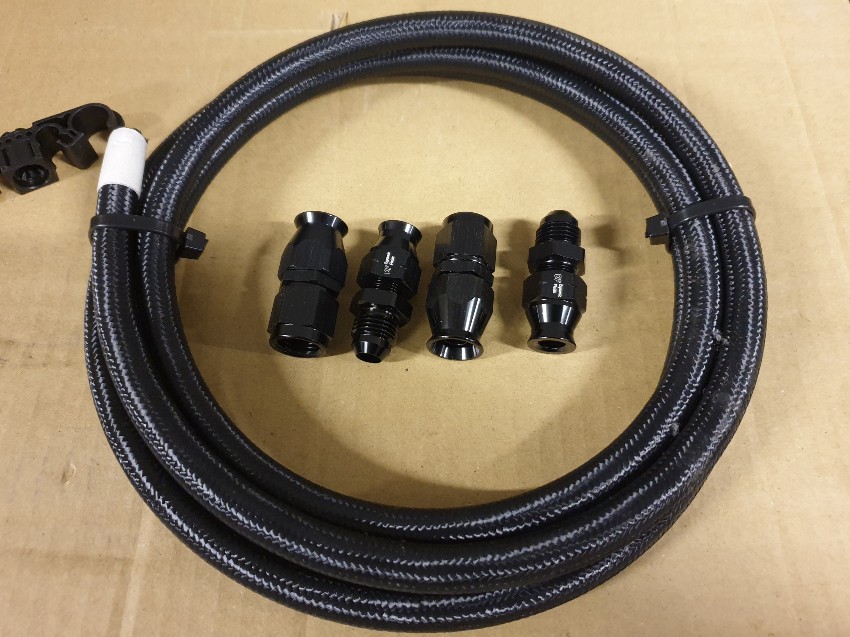
I've made up the hose to link fuel hard lines to the fuel rail. AN6 Teflon lined stainless braided hose with a black nylon outer braid which is a bit kinder to anything it comes into contact with.
AN6 hardline fittings used to connect to the normal AN6 hose fittings.
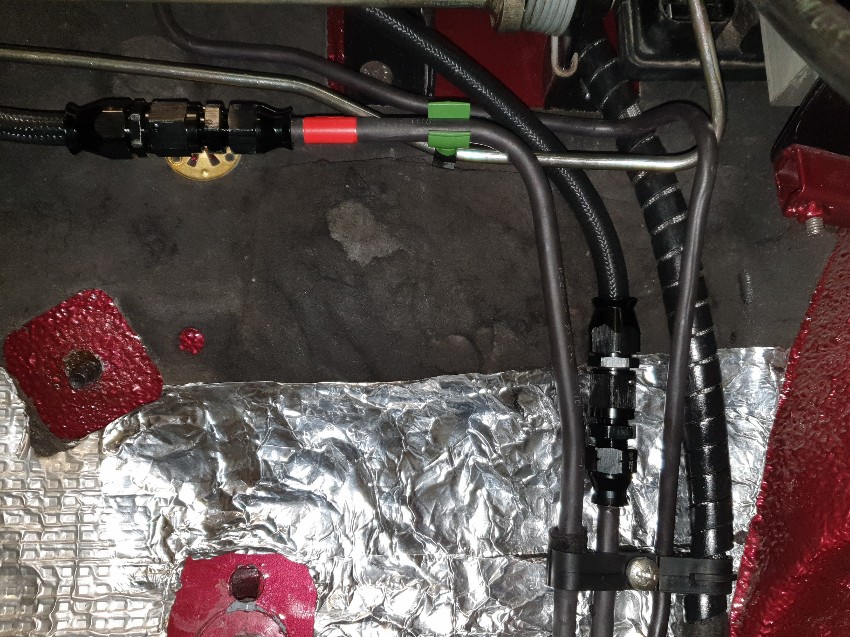
Everything in place. Red tape to signify the return as per Ford spec: white for feed and red for return. I also modified a Focus underbody fuel line clamp and used it to keep all lines tight to the bulkhead and away from the steering rack gaiter.
Fuel Rail Hose
I've made up the hose to link fuel hard lines to the fuel rail. AN6 Teflon lined stainless braided hose with a black nylon outer braid which is a bit kinder to anything it comes into contact with.
AN6 hardline fittings used to connect to the normal AN6 hose fittings.
Everything in place. Red tape to signify the return as per Ford spec: white for feed and red for return. I also modified a Focus underbody fuel line clamp and used it to keep all lines tight to the bulkhead and away from the steering rack gaiter.
_dobbo_ said:
today I realised the reason I wasn't seeing photos in this thread is that Virgin Media has a child safe setting - and it thinks photos of a Ford Fiesta are not suitable for viewing by children.
I can't even be bothered to start to think why Virgin have decided this is unsuitable for kids. I've tuned off child safe instead.
Good find but how odd!I can't even be bothered to start to think why Virgin have decided this is unsuitable for kids. I've tuned off child safe instead.
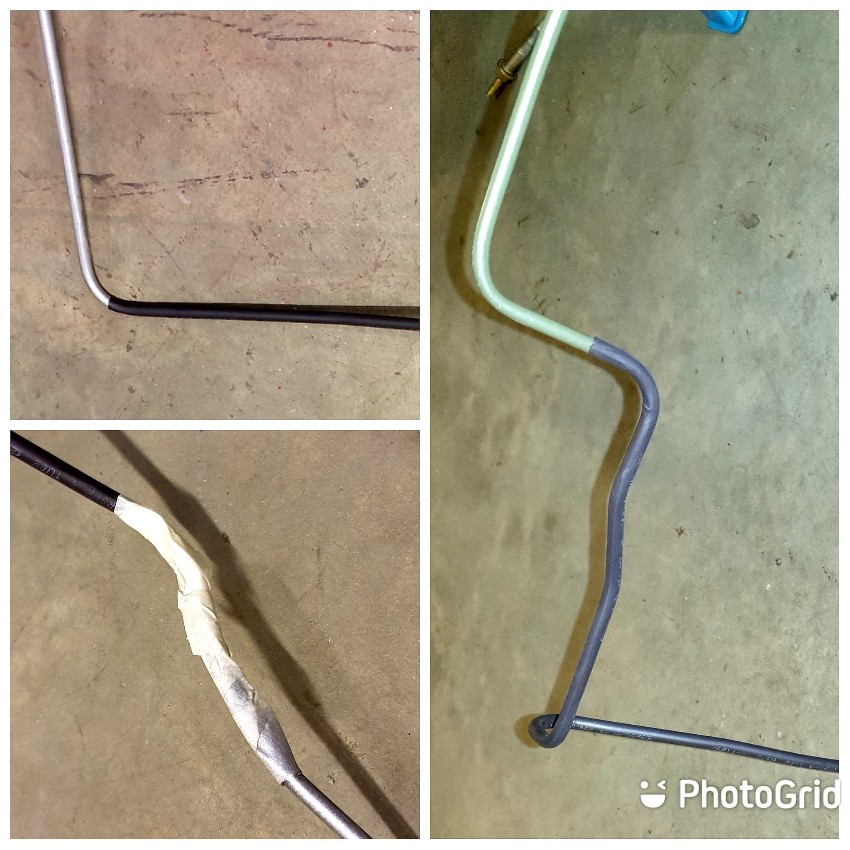
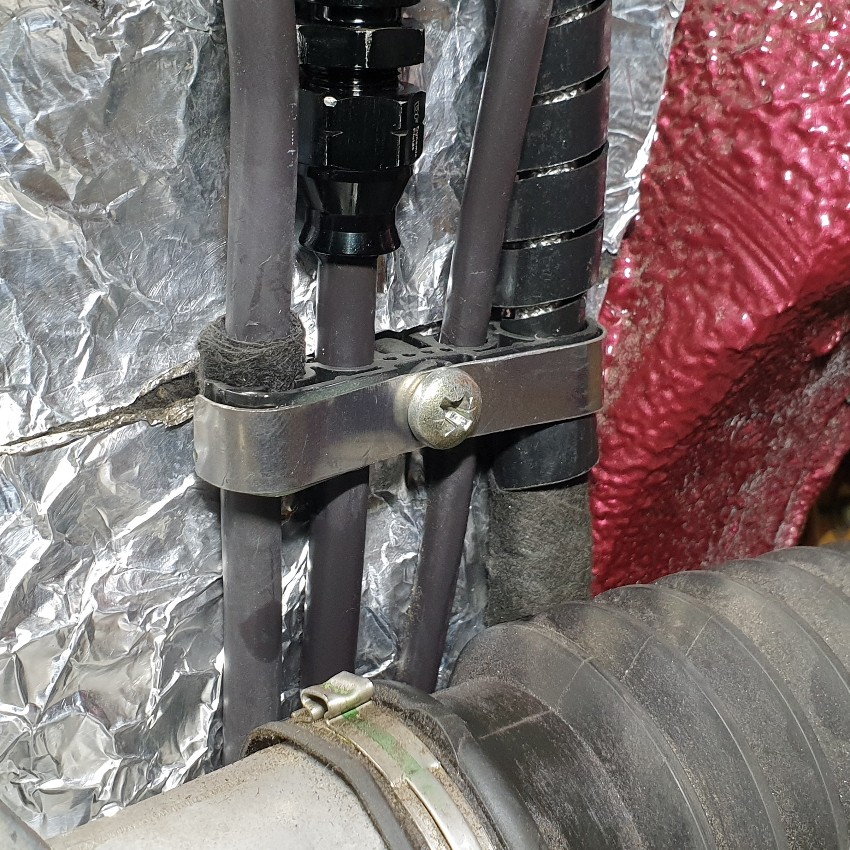
I noticed that the engine bay fuel line/brake line clip that I fitted yesterday had bowed slightly under compression of the securing screw. To address that I fabricated a reinforcing strap out of 0.5mm stainless sheet.
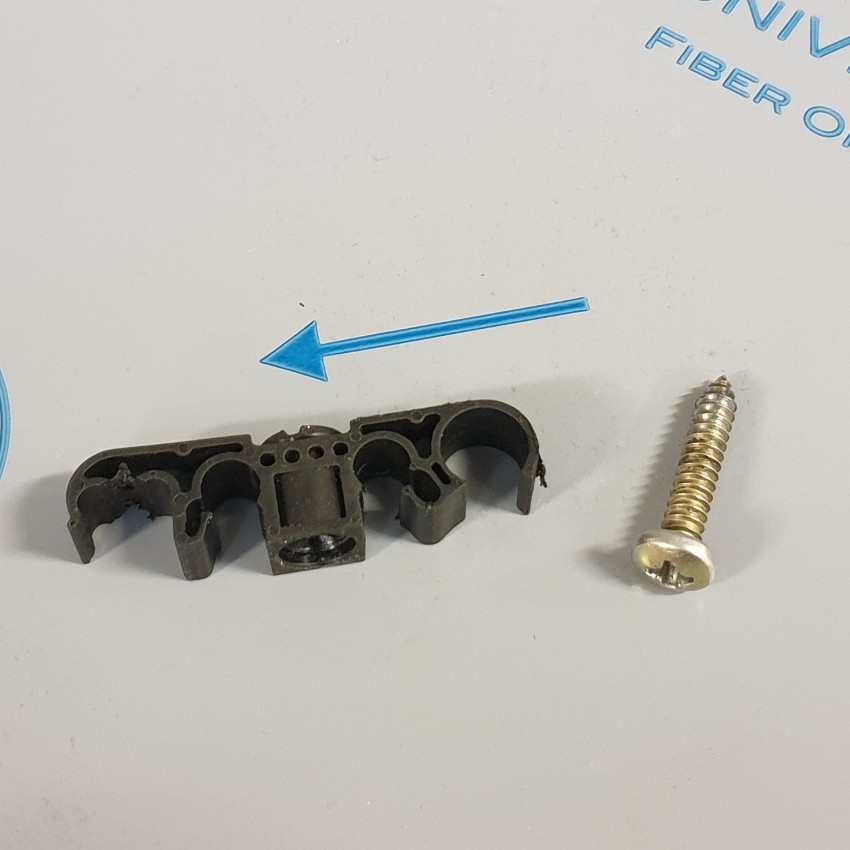
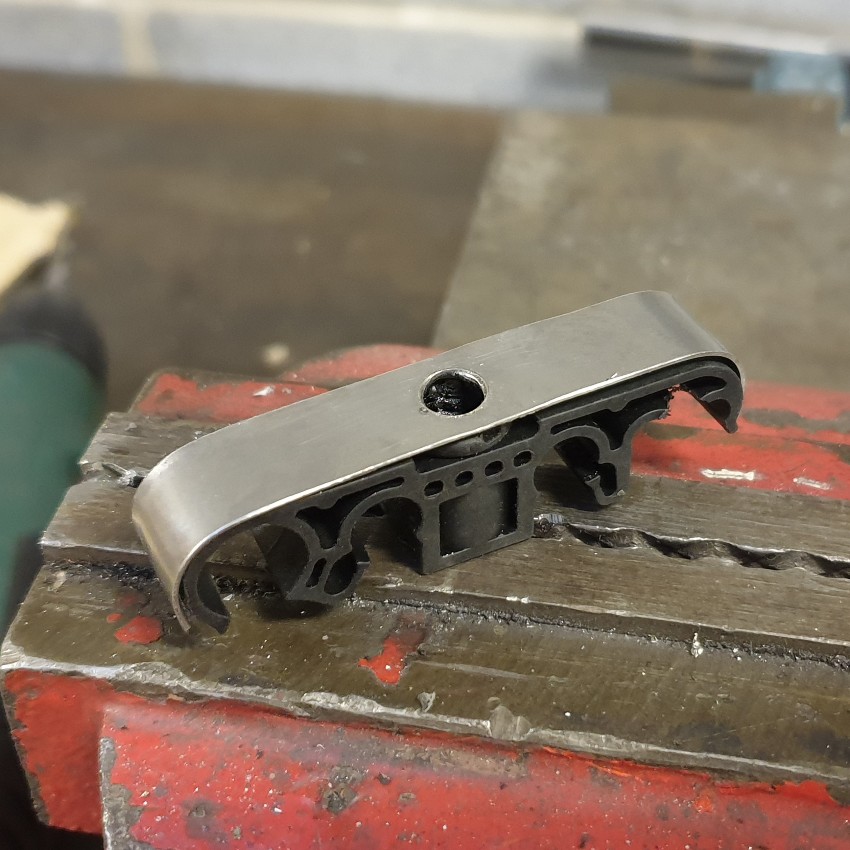
I used epoxy to bond the strap to the pipe clip. Problem solved.
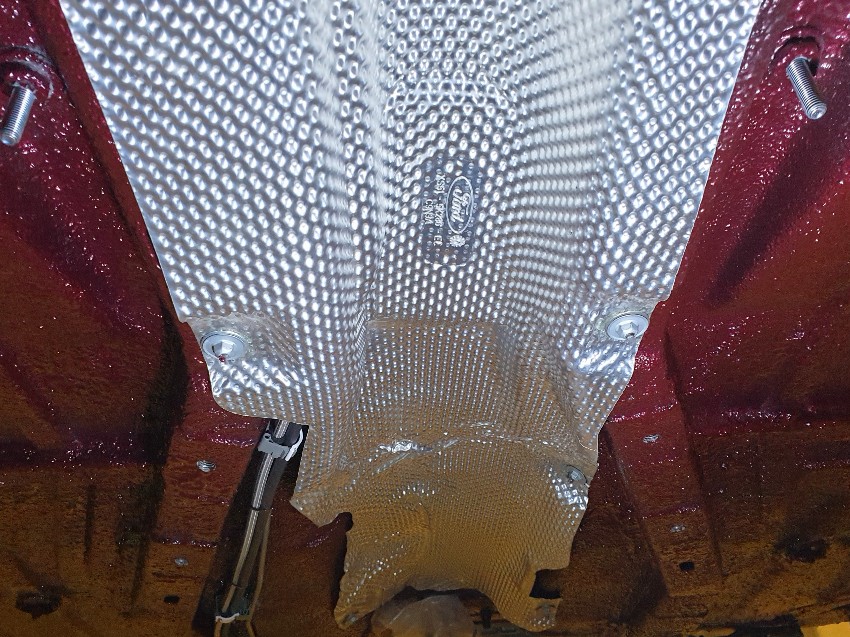
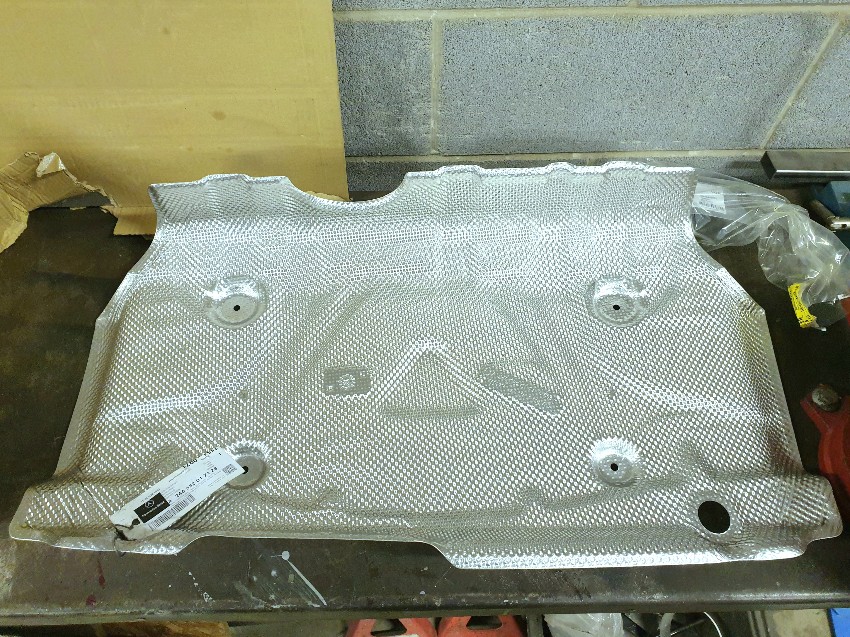
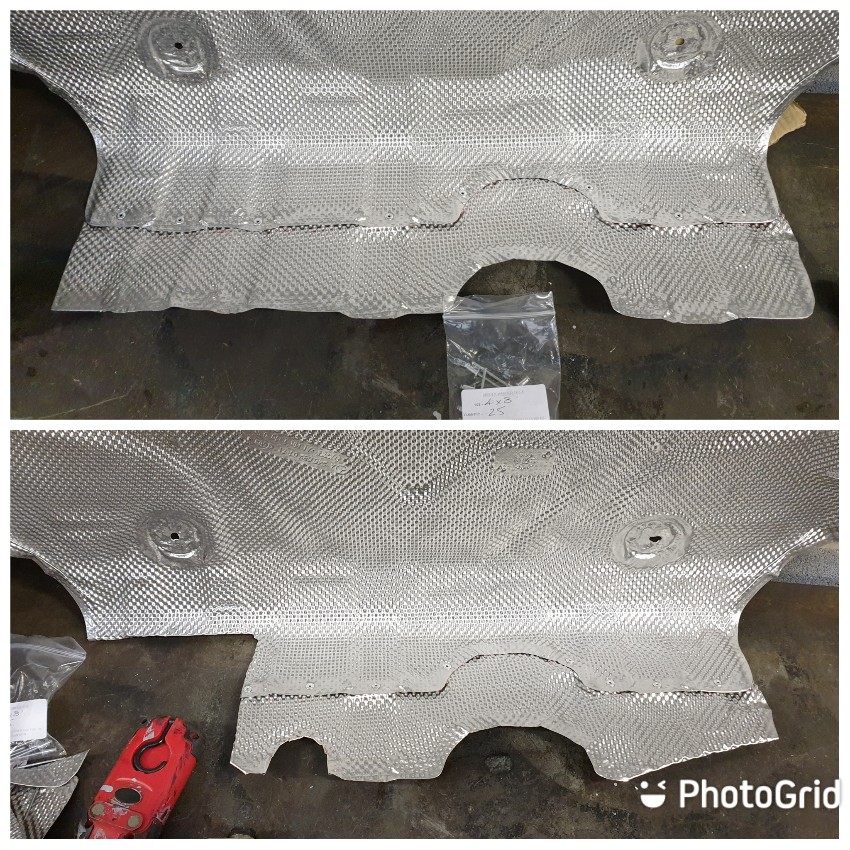
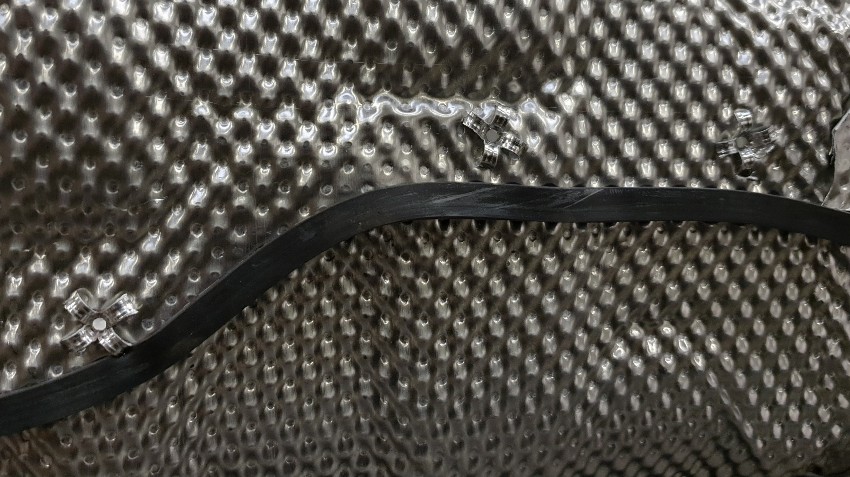
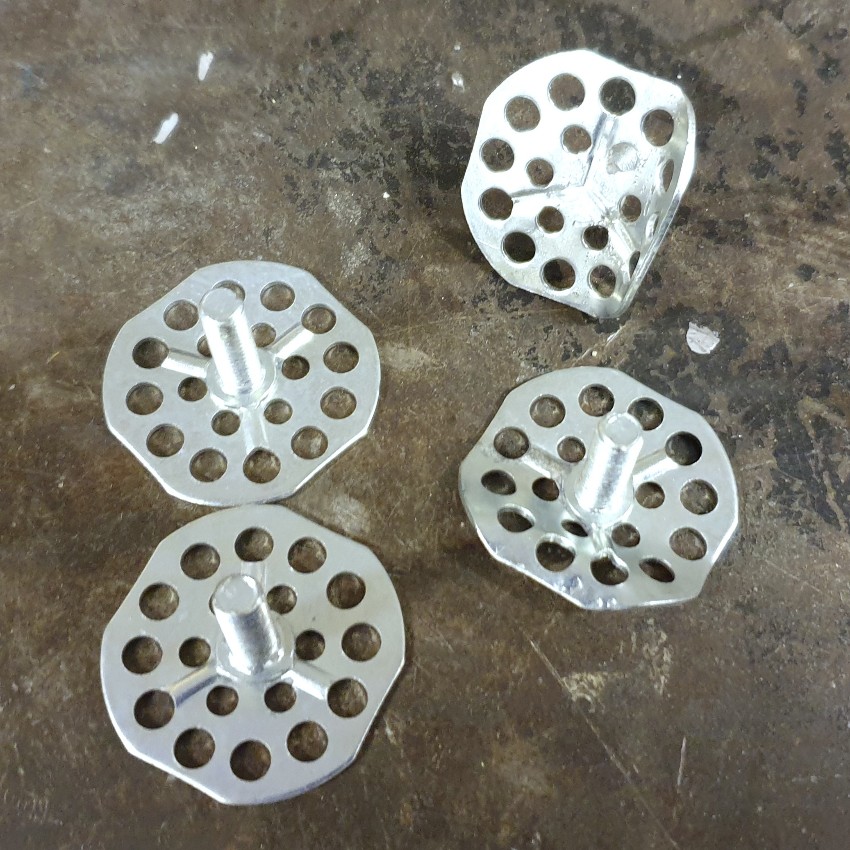
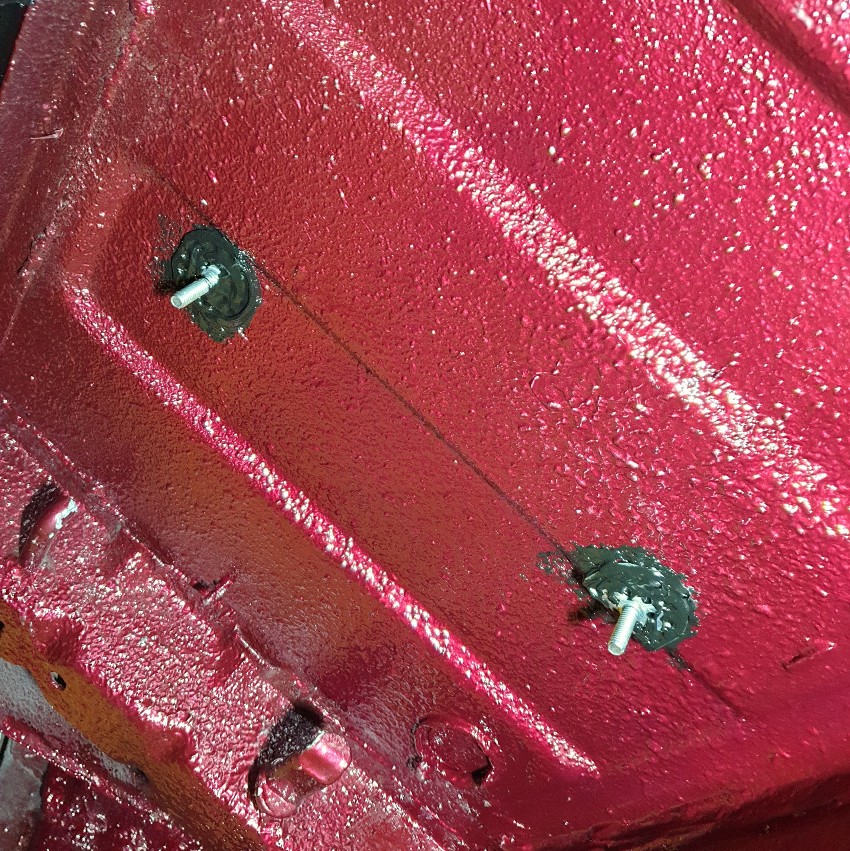
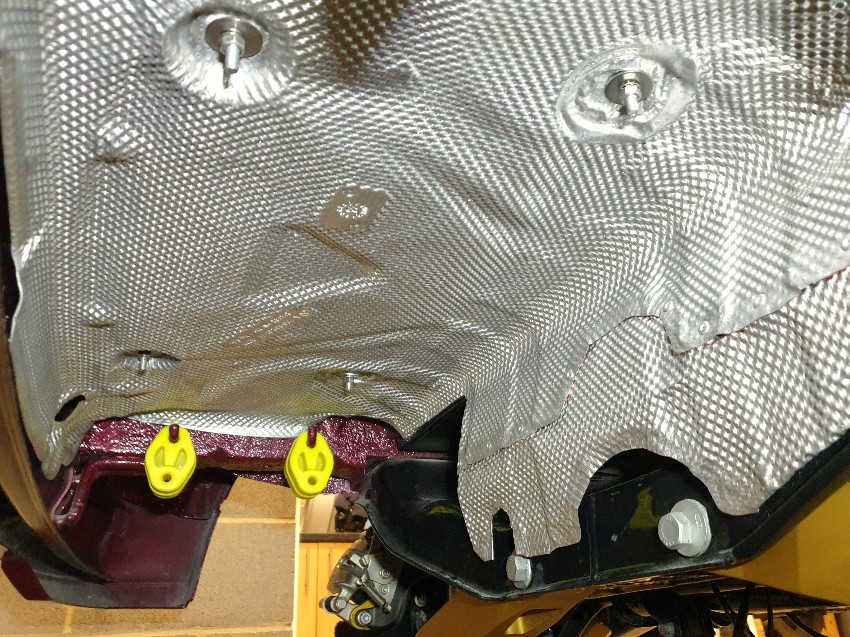
Exhaust Heat Shield - Front
The fixing area of aluminium heat shields have a bit of a hard life: trapped water and electrolytic corrosion usually result in the aluminium shield disintegrating underneath its fastenings. Fiesta heat shields have long been NLA, so in order to preserve them I have smeared grease around both sides of the mounting points and isolated the steel fasteners from the aluminium with stainless washers.
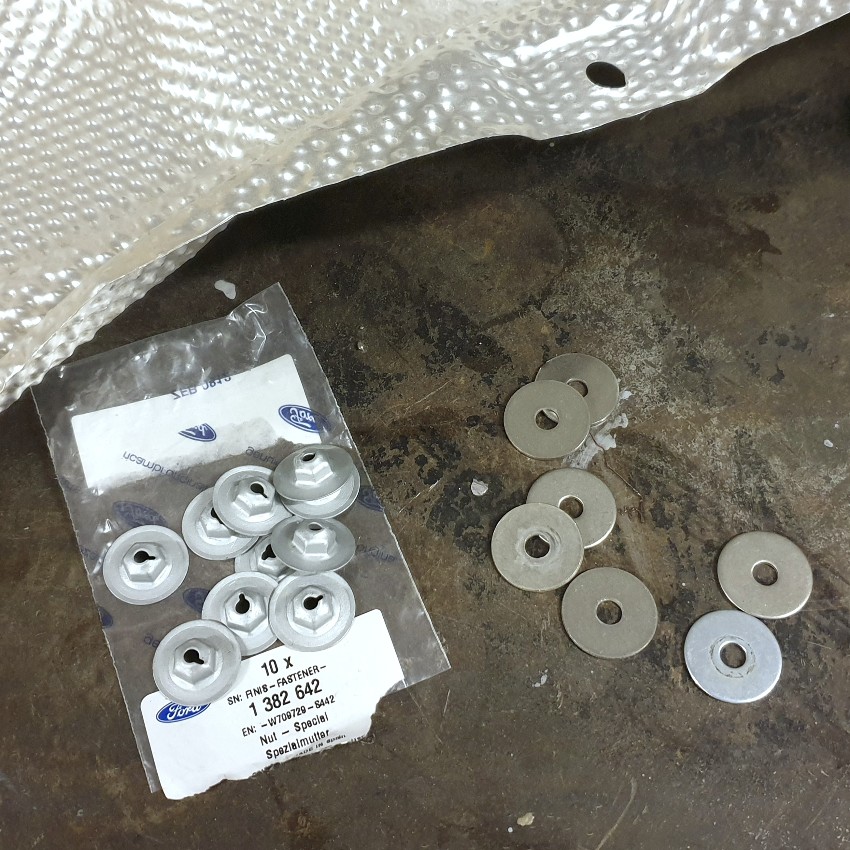
Shield fitted.
I used epoxy to bond the strap to the pipe clip. Problem solved.
Exhaust Heat Shield - Front
The fixing area of aluminium heat shields have a bit of a hard life: trapped water and electrolytic corrosion usually result in the aluminium shield disintegrating underneath its fastenings. Fiesta heat shields have long been NLA, so in order to preserve them I have smeared grease around both sides of the mounting points and isolated the steel fasteners from the aluminium with stainless washers.
Shield fitted.
Max M4X WW said:
Are those stainless washers available online Mark? Assuming mine are not already disintegrated it would be good to salvage them!
Good idea. Here you go https://www.ebay.co.uk/itm/PENNY-REPAIR-WASHERS-A2...M6 x 25mm
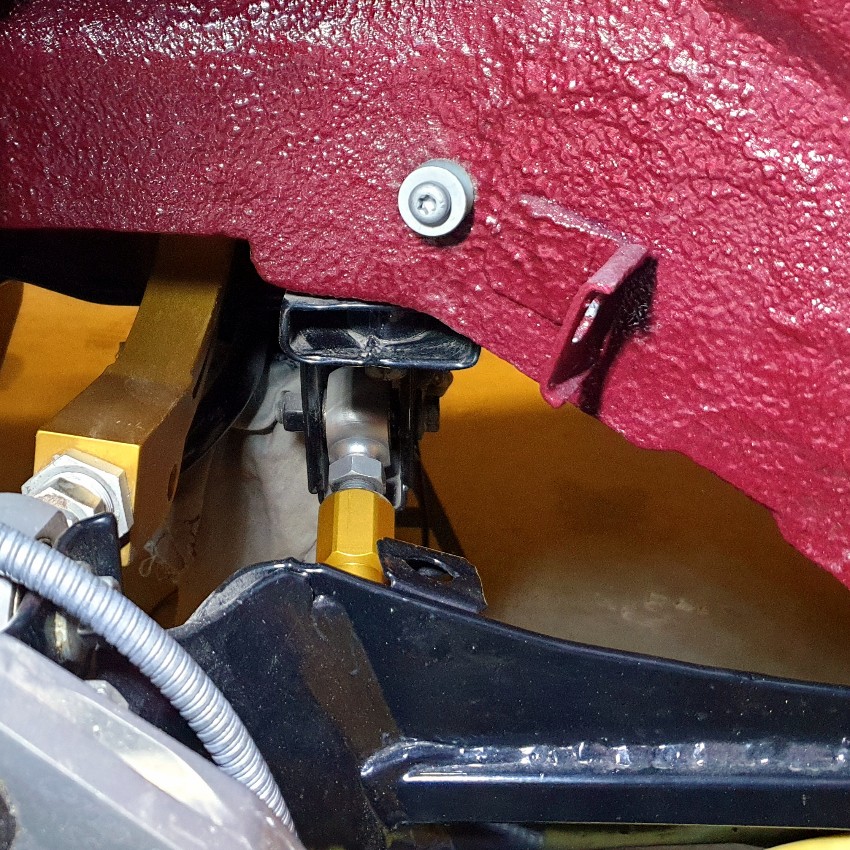
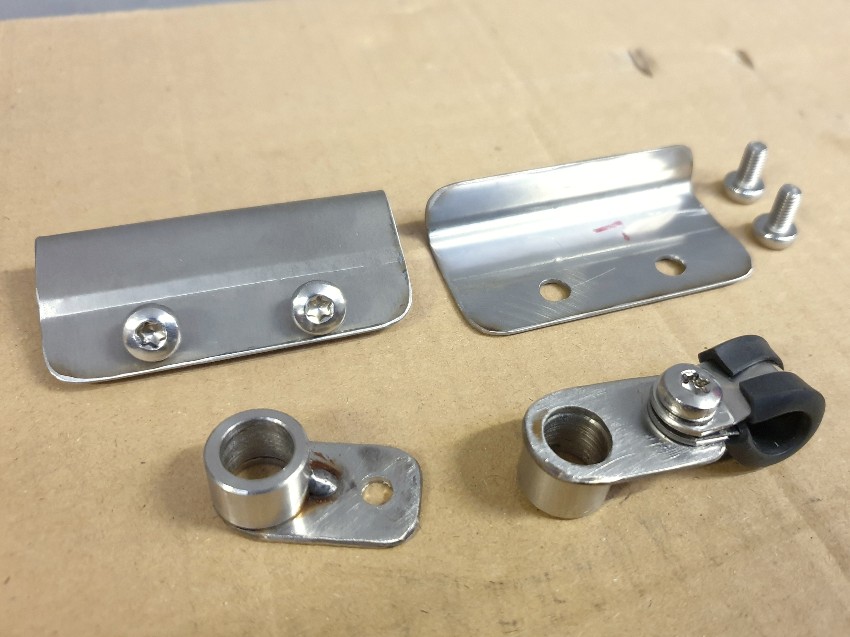
Rear Brake Hoses
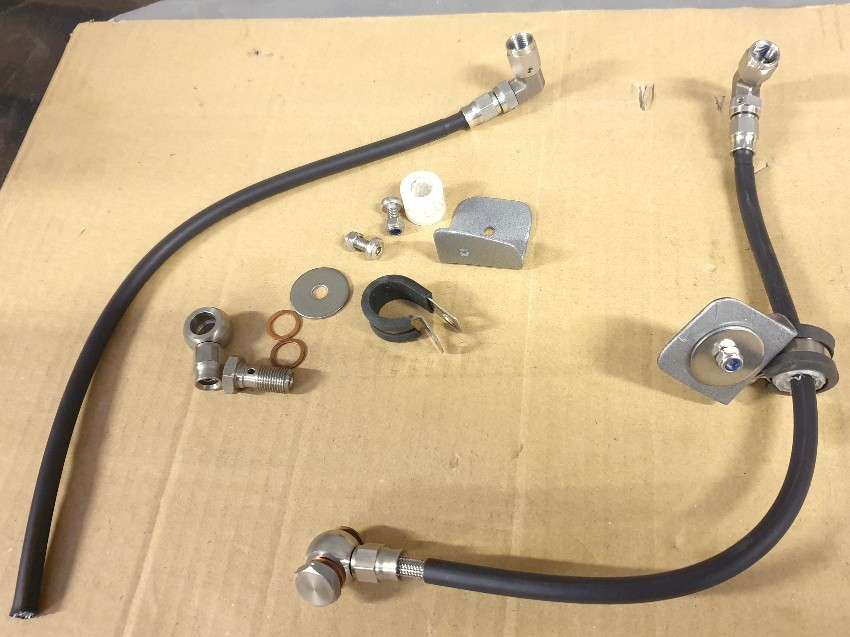
The rear lines are completely bespoke: Fiesta wheelarch mount, Focus trailing arms, and AP Racing calipers mounted in a unique location. The photo below shows what I had to work with.
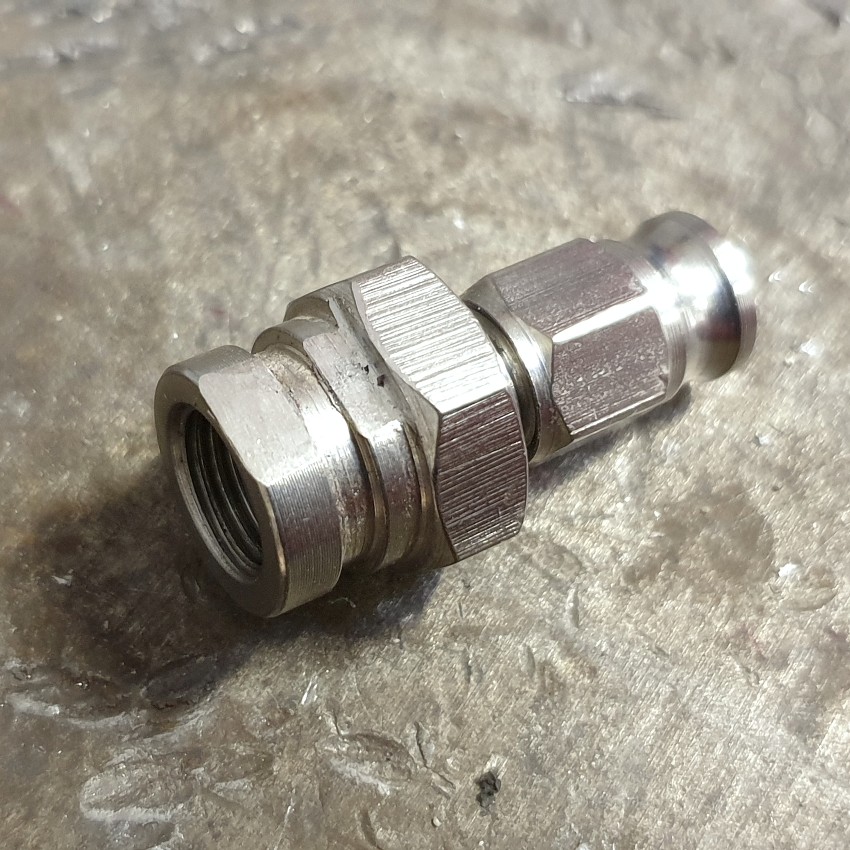
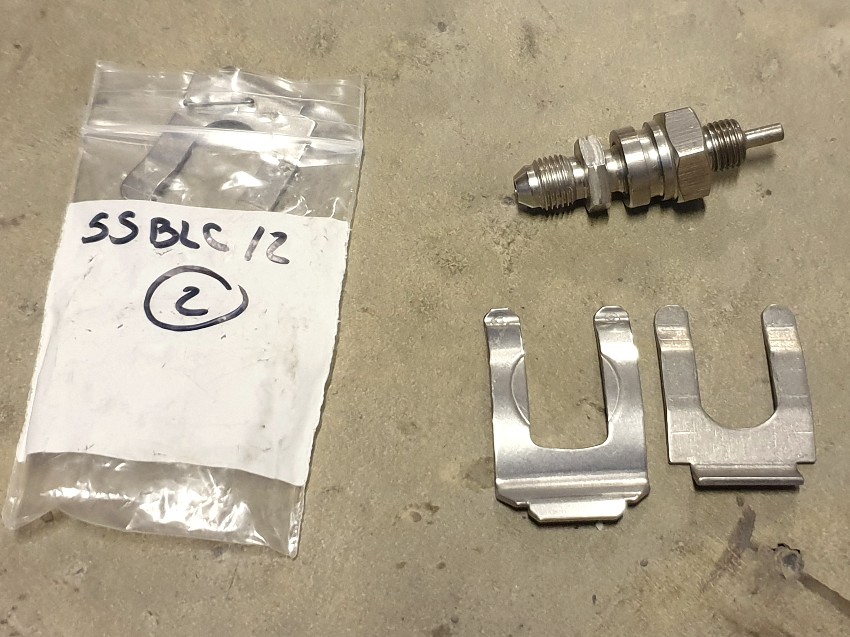
The design uses a particular set of fittings that are a mix of convex and concave seats, and required a male/male adapter to suit. All fittings are stainless steel.
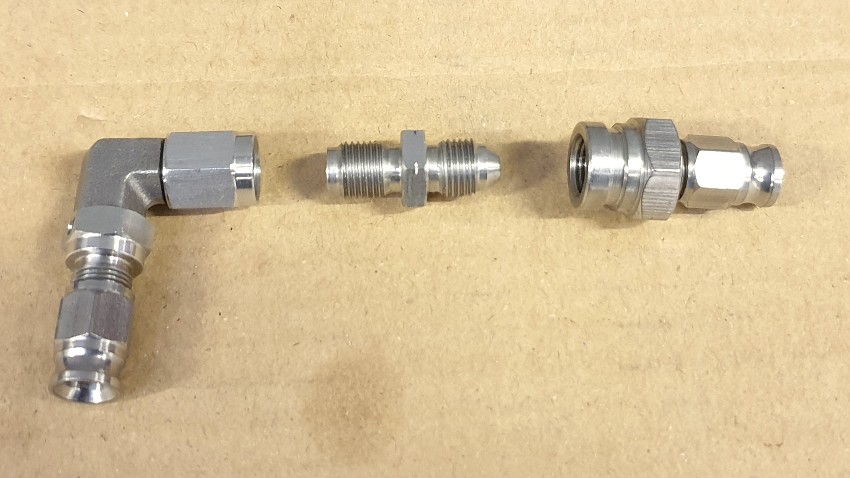
The Fiesta wheelarch bulkhead mount is keyed to prevent the fitting from twisting, so I've filed flats on the bulkhead fittings to match.
In order to make the plumbing work the bulkhead fittings will be installed in reverse orientation, but doing so leaves less room for the securing clips due to the design of the mounting bracket. I'm using stainless clips rather than OEM steel and I managed to find a second, shorter design which are a perfect fit.
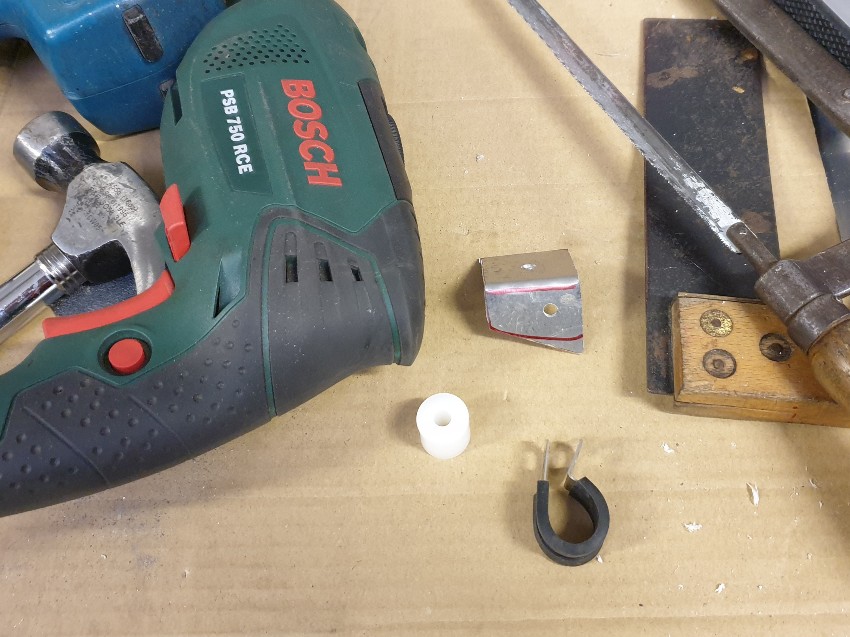
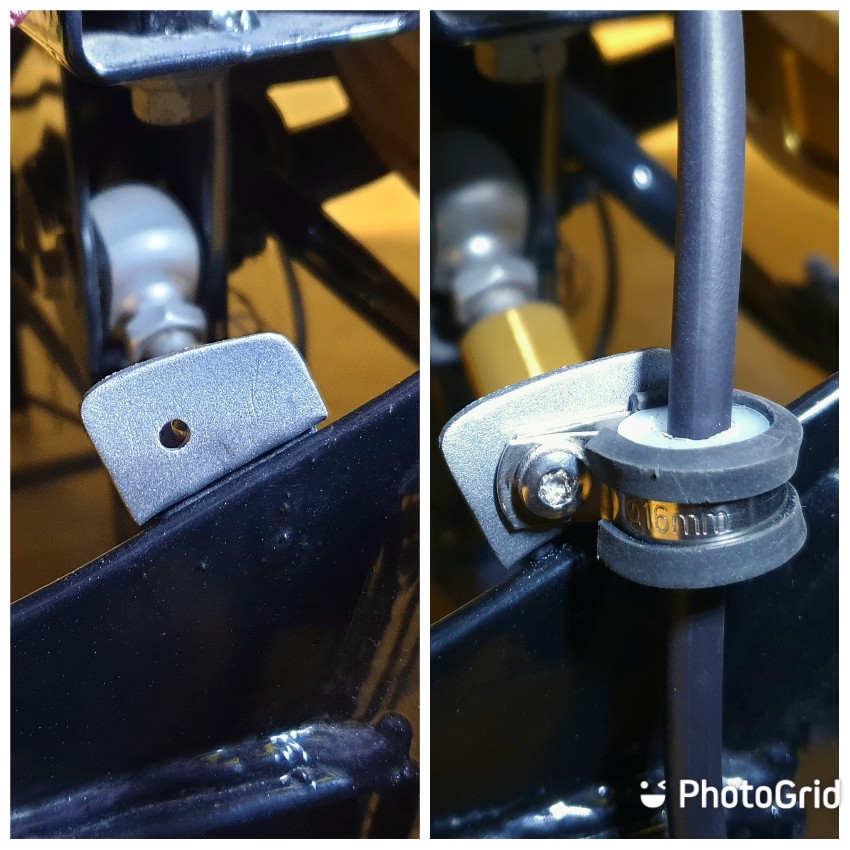
I've designed a mounting bracket that allows the hose to slide through it as the suspension compresses. I made it from a Delrin bush which is held in a P clip attached to an aluminium bracket.
The hose brackets bolt through the original bulkhead fitting mounts on the Focus trailing arm. The brackets were etch primed and painted silver.
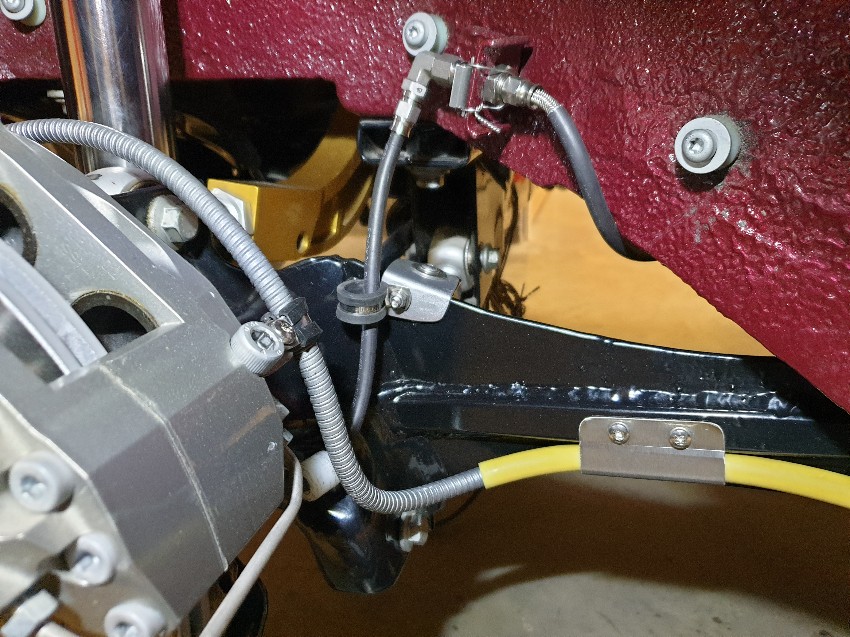
Hose assemblies partially complete. The stainless hose has a PVC sheath but I've added some black heatshrink in places to make it look more OEM.
Completed.

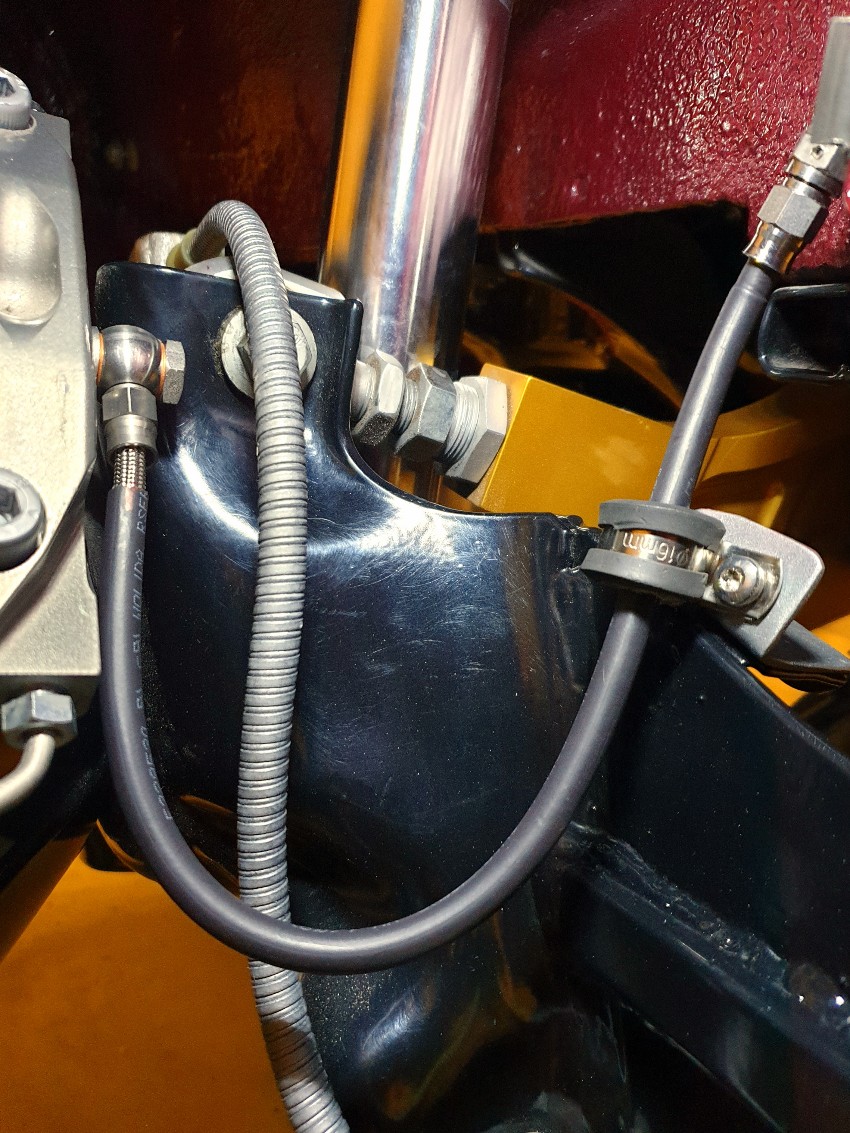
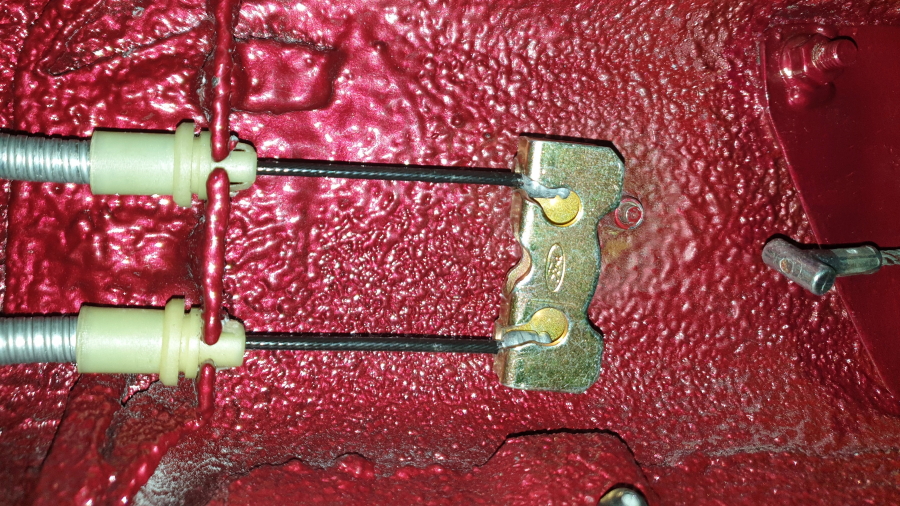
I have lockwired the brake cable mounts. I'm thinking ahead to a top speed run should I change the gear ratios.

The rear lines are completely bespoke: Fiesta wheelarch mount, Focus trailing arms, and AP Racing calipers mounted in a unique location. The photo below shows what I had to work with.
The design uses a particular set of fittings that are a mix of convex and concave seats, and required a male/male adapter to suit. All fittings are stainless steel.
The Fiesta wheelarch bulkhead mount is keyed to prevent the fitting from twisting, so I've filed flats on the bulkhead fittings to match.
In order to make the plumbing work the bulkhead fittings will be installed in reverse orientation, but doing so leaves less room for the securing clips due to the design of the mounting bracket. I'm using stainless clips rather than OEM steel and I managed to find a second, shorter design which are a perfect fit.
I've designed a mounting bracket that allows the hose to slide through it as the suspension compresses. I made it from a Delrin bush which is held in a P clip attached to an aluminium bracket.
The hose brackets bolt through the original bulkhead fitting mounts on the Focus trailing arm. The brackets were etch primed and painted silver.
Hose assemblies partially complete. The stainless hose has a PVC sheath but I've added some black heatshrink in places to make it look more OEM.
Completed.
I have lockwired the brake cable mounts. I'm thinking ahead to a top speed run should I change the gear ratios.
Max M4X WW said:
Looking good Mark, I assume the 'sliding' brake hose mounts will be acceptable to a picky MOT tester?
Cheers Max. The standard Fiesta doesn't have brackets, so I've added them to keep the lines in check at speed. The MOT check on flexible hoses is for condition and not mounting arrangement.HughG said:
Looks great Mark. Do the brake line and handbrake cable maintain separation through the range of suspension travel?
Thank you. Good spot - in those photos the handbrake cable mounts were WIP.Exhaust Heat Shield - Rear
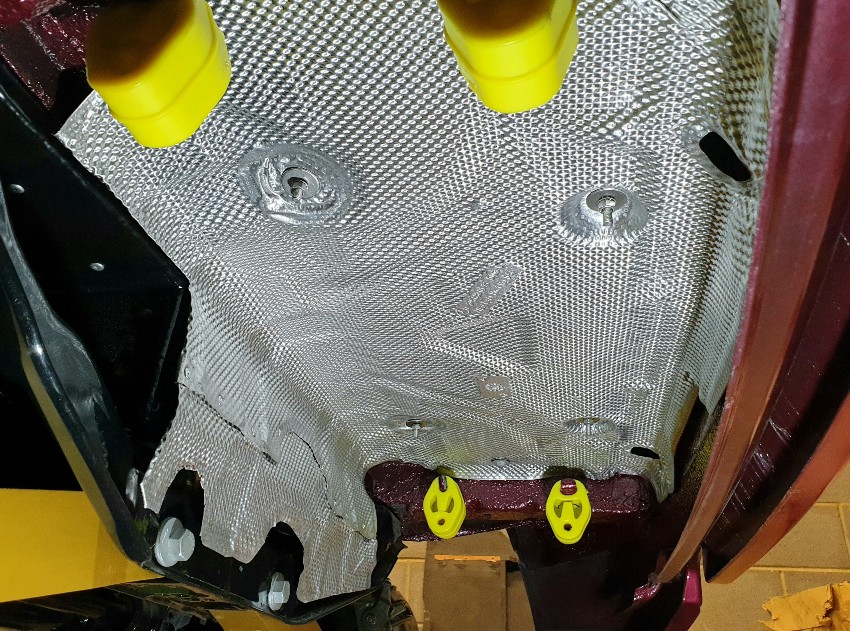
The rear silencer on my car will be mounted transversely behind the rear axle, unlike longitudinally on the O/S of the boot floor, as standard. I researched various cars with this exhaust configuration including the TT, Quattro Audis and others. In the end I decided that I could make a Mercedes-Benz CLA part work. Part number A2466820171.
With my Mercedes discount the part came in around £20 which is considerably less than those offered on eBay - with the usual mark-up. I bought two so that I could use one as a prototype.
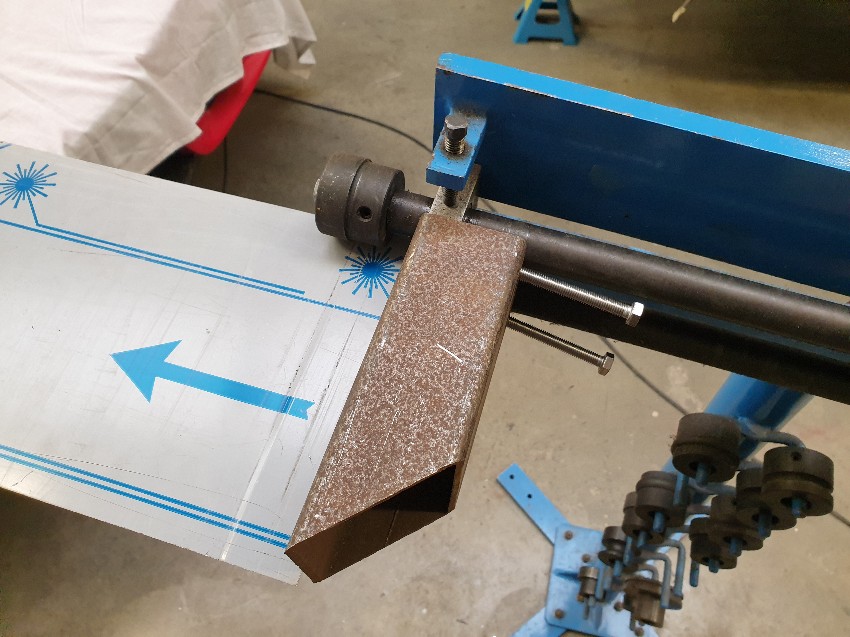
After some time spent hammering and reshaping I was happy with the fit. I cut up the prototype shield and used it to extend the good one. The following pic shows the initial extension (top) and then the reshaping to fit my installation (bottom), including a relief to access the camber adjustment bolts on the rear subframe. All edges were folded over and hammered flat to create a smooth seam.
I used stainless peel rivets to join the extension. This was the first time that I've used them, and they were perfect for the job.
I didn't want to drill the floor, so I used 'big head' bonding studs and secured them to the boot floor with RTV. These were bent into shape to suit the contours of the boot floor.
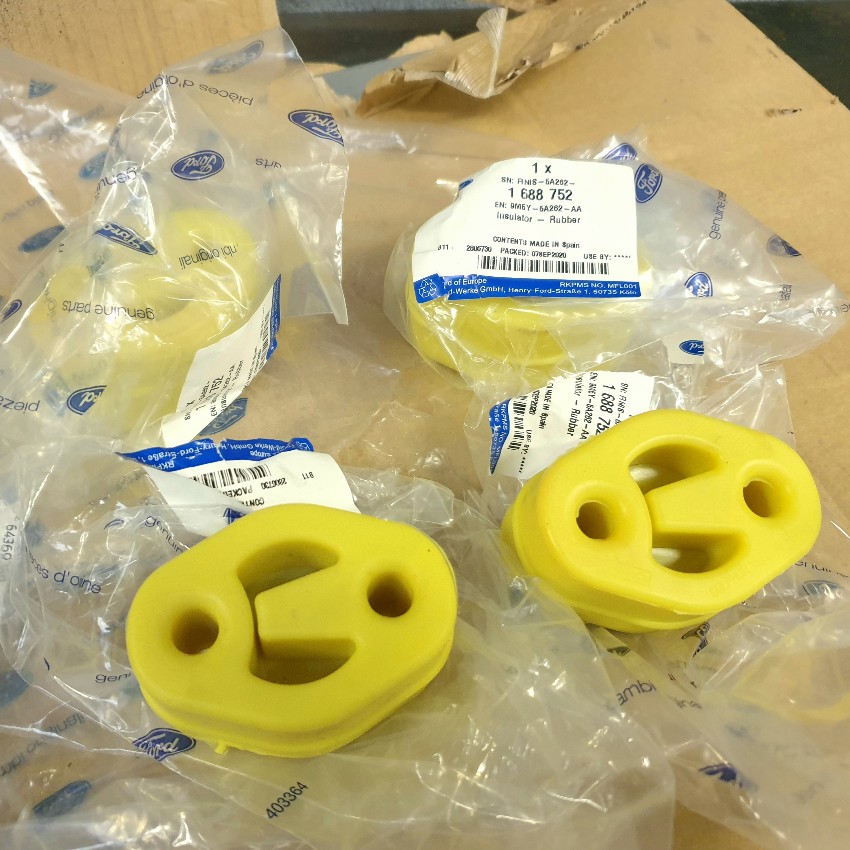
I've chosen Focus ST/RS exhaust mounts. Ford part number 1688752. These have a most unusual smell! Like liquorice mixed with surfboard wax.
Complete. When preparing the shell I had made provision for three additional exhaust mounts. I'm very pleased with how this job turned out.
Handbrake Cable - Rear Brackets
The handbrake cable position and routing is completely unique to my car and required custom brackets. For the first time in years I made use of the bead roller - I fashioned a sightly Heath Robinson looking guard to make the job simpler.
Brackets fabricated from stainless steel.
Brackets mounted. The lower bracket is drilled and tapped into the 3mm reinforcement section that I welded to the Focus trailing arm, which is a sealed section, so I took the opportunity to inject some wax. The upper mount is attached to the AP caliper mounting bolt.
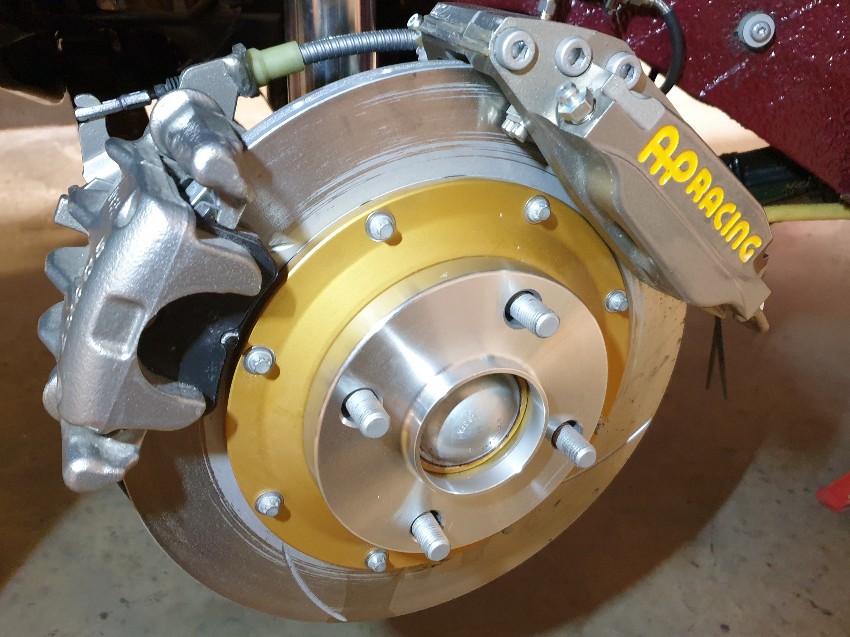
Wheel Spacers & Extended Studs
Changing to the Ford wheels has reduced caliper clearance by 10mm; 3mm due to ET35 rather than ET38, and 7mm due to the wheel design. The Team Dynamics wheels required a 3mm spacer therefore the Ford wheels require 13mm.
I couldn't find spacers in the required thickness, so I ordered 16mm and I'll have them milled to spec. I've ordered longer studs to suit - for reference these are M12 x 1.5, 13mm spline, 42mm thread. I really dislike the spaced wheel look but thankfully due to the rolled and flared arches I can still retain a decent inset within the wheel arch.
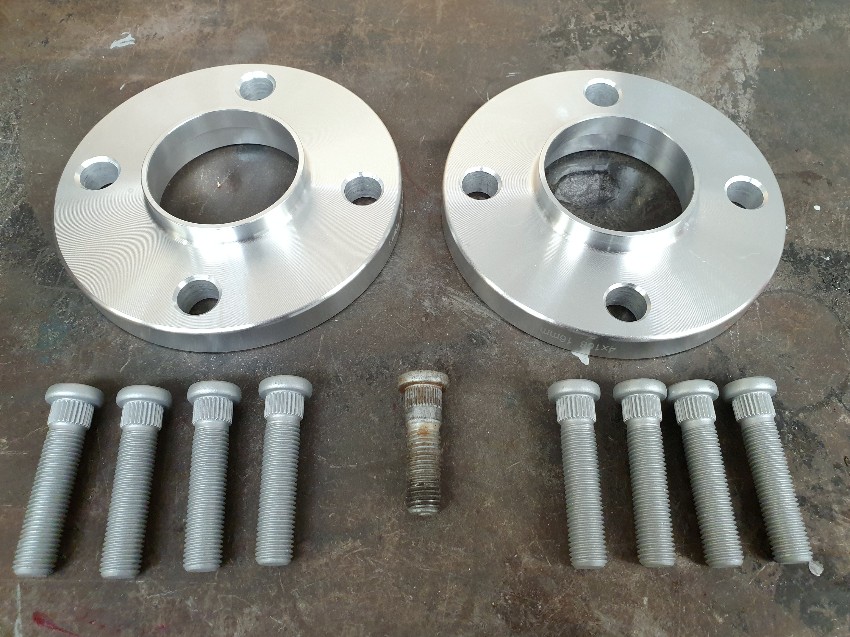
I hammered out the existing studs and managed to fit the replacements through a clearance hole in the disc back plate, and wind them home by locking the hub with a long screwdriver.
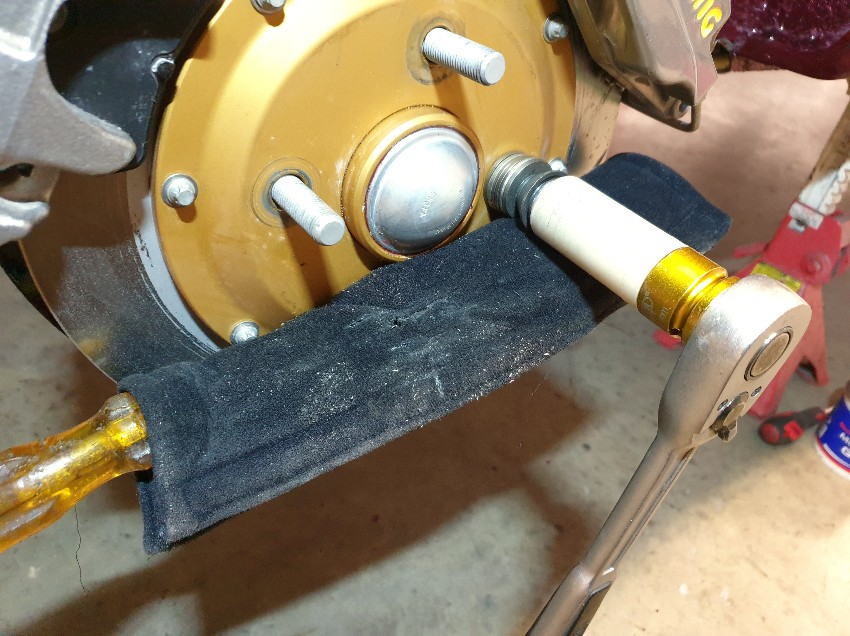
Studs and spacers fitted. Spacers yet to be milled.
The rear silencer on my car will be mounted transversely behind the rear axle, unlike longitudinally on the O/S of the boot floor, as standard. I researched various cars with this exhaust configuration including the TT, Quattro Audis and others. In the end I decided that I could make a Mercedes-Benz CLA part work. Part number A2466820171.
With my Mercedes discount the part came in around £20 which is considerably less than those offered on eBay - with the usual mark-up. I bought two so that I could use one as a prototype.
After some time spent hammering and reshaping I was happy with the fit. I cut up the prototype shield and used it to extend the good one. The following pic shows the initial extension (top) and then the reshaping to fit my installation (bottom), including a relief to access the camber adjustment bolts on the rear subframe. All edges were folded over and hammered flat to create a smooth seam.
I used stainless peel rivets to join the extension. This was the first time that I've used them, and they were perfect for the job.
I didn't want to drill the floor, so I used 'big head' bonding studs and secured them to the boot floor with RTV. These were bent into shape to suit the contours of the boot floor.
I've chosen Focus ST/RS exhaust mounts. Ford part number 1688752. These have a most unusual smell! Like liquorice mixed with surfboard wax.
Complete. When preparing the shell I had made provision for three additional exhaust mounts. I'm very pleased with how this job turned out.
Handbrake Cable - Rear Brackets
The handbrake cable position and routing is completely unique to my car and required custom brackets. For the first time in years I made use of the bead roller - I fashioned a sightly Heath Robinson looking guard to make the job simpler.
Brackets fabricated from stainless steel.
Brackets mounted. The lower bracket is drilled and tapped into the 3mm reinforcement section that I welded to the Focus trailing arm, which is a sealed section, so I took the opportunity to inject some wax. The upper mount is attached to the AP caliper mounting bolt.
Wheel Spacers & Extended Studs
Changing to the Ford wheels has reduced caliper clearance by 10mm; 3mm due to ET35 rather than ET38, and 7mm due to the wheel design. The Team Dynamics wheels required a 3mm spacer therefore the Ford wheels require 13mm.
I couldn't find spacers in the required thickness, so I ordered 16mm and I'll have them milled to spec. I've ordered longer studs to suit - for reference these are M12 x 1.5, 13mm spline, 42mm thread. I really dislike the spaced wheel look but thankfully due to the rolled and flared arches I can still retain a decent inset within the wheel arch.
I hammered out the existing studs and managed to fit the replacements through a clearance hole in the disc back plate, and wind them home by locking the hub with a long screwdriver.
Studs and spacers fitted. Spacers yet to be milled.
Engine Oil Cooler
A short segway into engine preparation. I wanted to fit an OEM sandwich oil cooler - technically more of an oil temperature management device because they both aid warm up and prevent high temperatures. The Ford part is steel, rusts at the water unions, and is heavy. I wanted an aluminium part and an upgrade to double capacity.
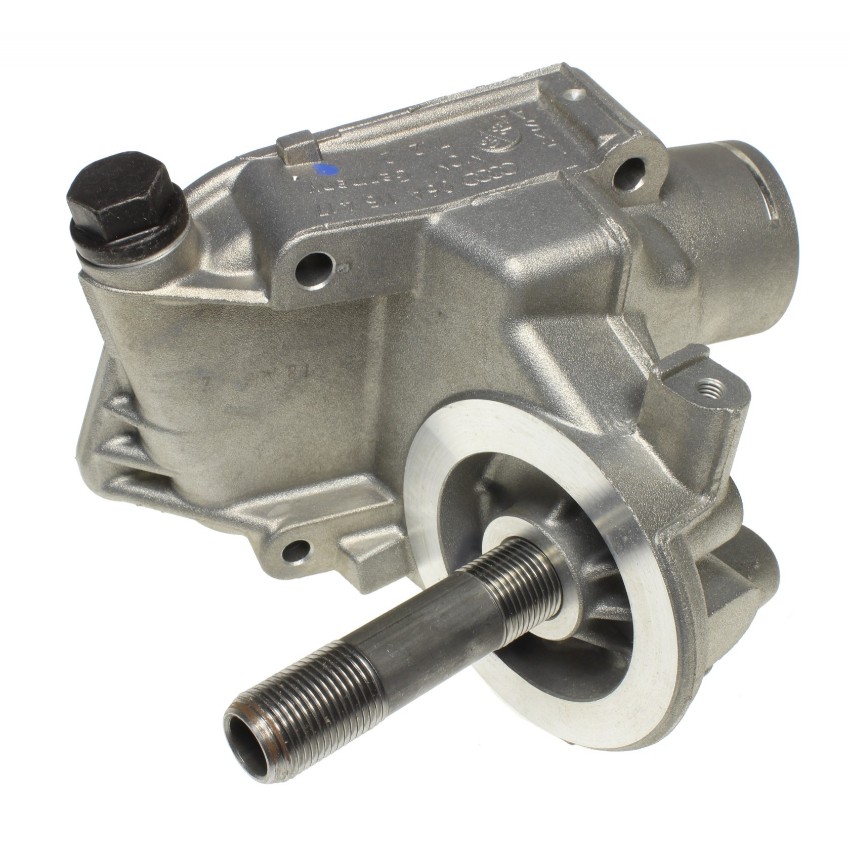
I found a Ford part used in the US market which at some point switched to aluminium, but I couldn't pin down exactly when, so I looked elsewhere. Many VAG cars use a double capacity sandwich cooler, so I tried part 038 117 021A. A trial fit showed this to be unsuitable because the seal arrangement is designed for installation in reverse orientation to the Zetec.
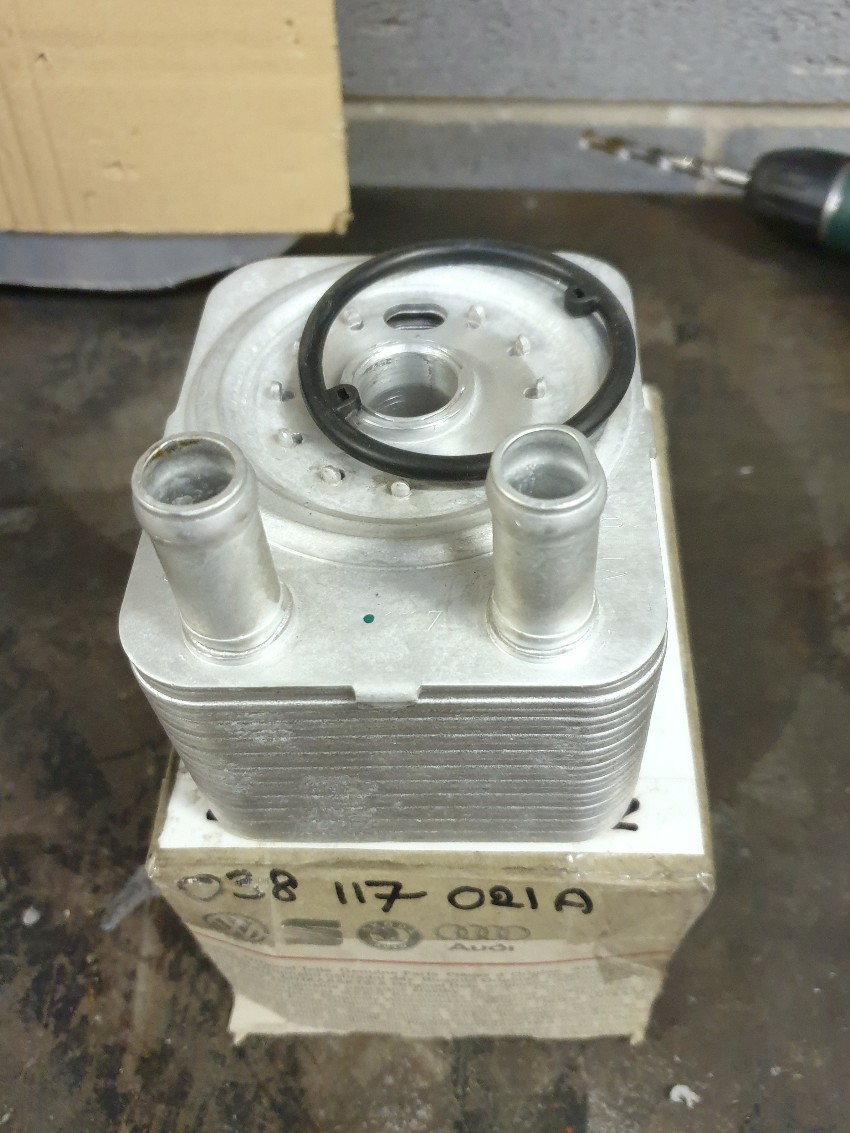
Whilst I was searching for a suitable part I turned my attention to the mounting stanchion/oil supply tube. It must be extended or replaced in order to accommodate a double capacity cooler in addition to the screw-on filter. Ford use a 3/4 UNF thread for the filter, which is fairly common, so I bought a used VAG oil filter housing 06A115405BP for the stanchion and half nut to lock the cooler in place. Aftermarket oil coolers have a screw on extension tube but this won't work with the VAG coolers.
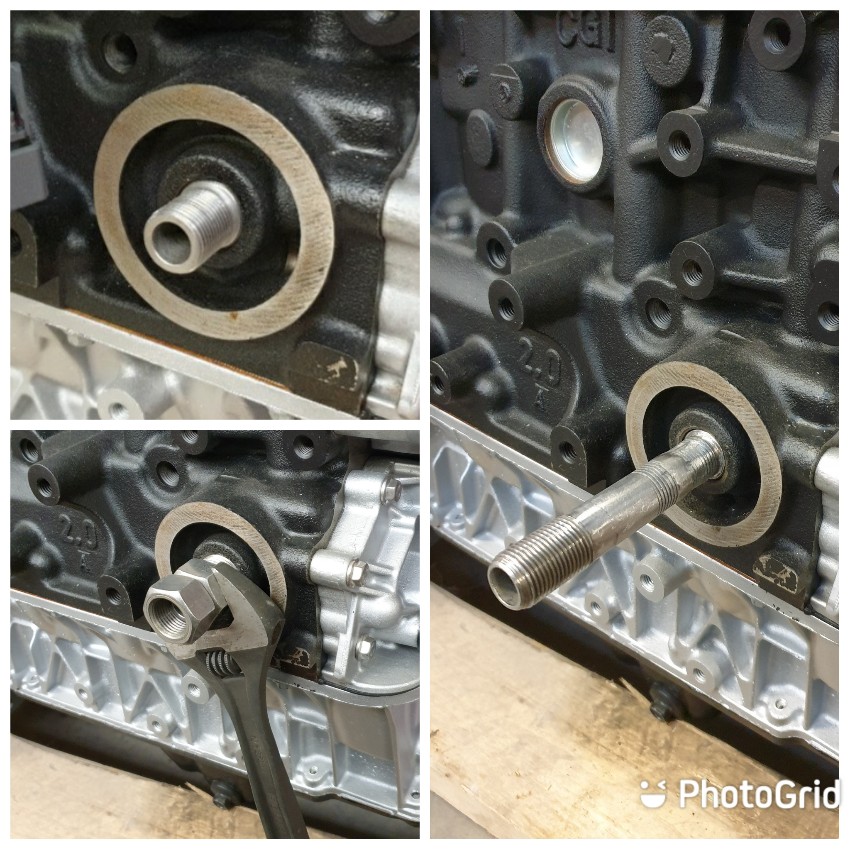
The Zetec stanchion has a different thread at one end to suit that used in the block. I determined the exact length required, and cut down the VAG part to suit ready to weld to the Ford part. I made a jig to align the two parts for welding by cutting an access window in a 3/4 UNF nut.
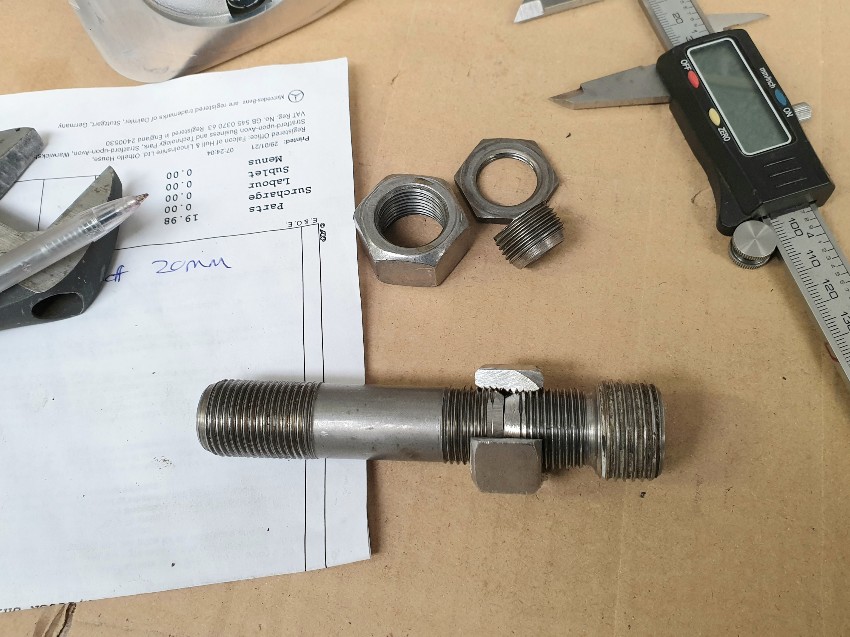
The following collage shows the original stanchion, double nut method used to remove, and the extended version that I made.
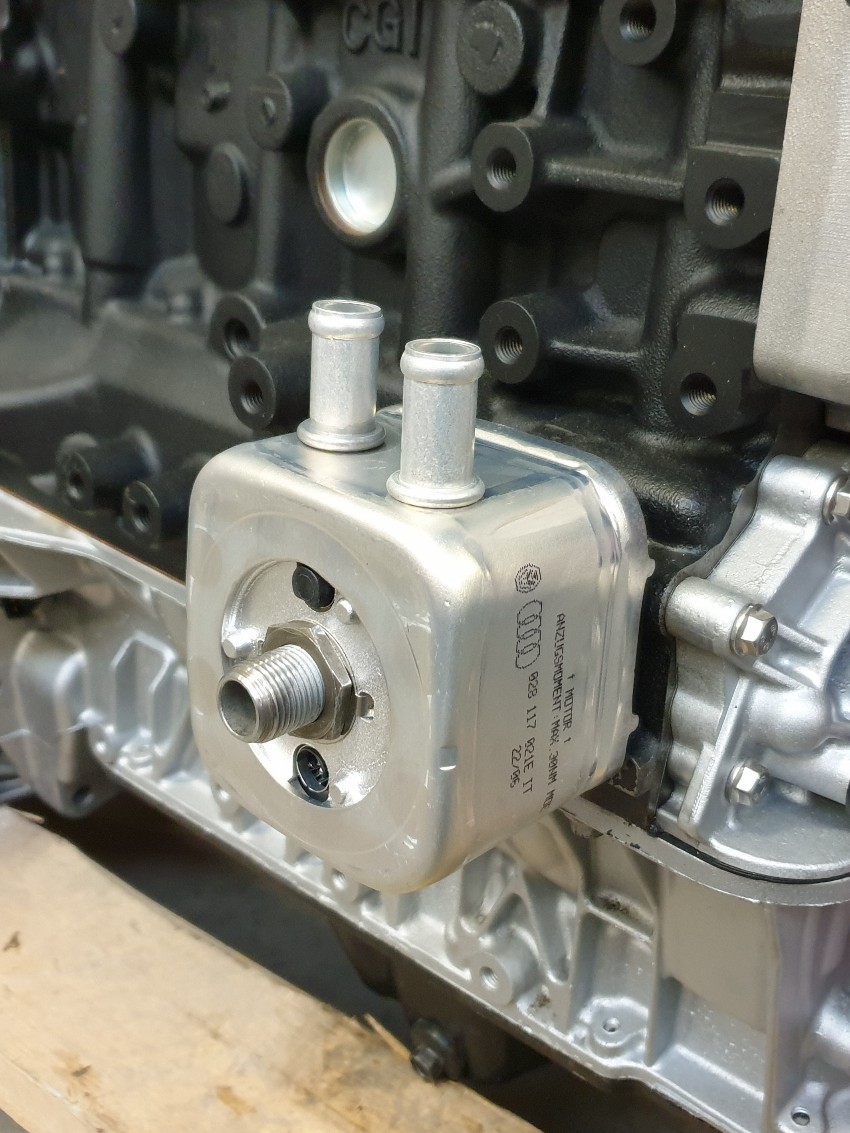
Here is the completed solution. VAG part 028117021E proved to be perfect and is a higher quality part than the friction welded plate type that I originally tried.
A short segway into engine preparation. I wanted to fit an OEM sandwich oil cooler - technically more of an oil temperature management device because they both aid warm up and prevent high temperatures. The Ford part is steel, rusts at the water unions, and is heavy. I wanted an aluminium part and an upgrade to double capacity.
I found a Ford part used in the US market which at some point switched to aluminium, but I couldn't pin down exactly when, so I looked elsewhere. Many VAG cars use a double capacity sandwich cooler, so I tried part 038 117 021A. A trial fit showed this to be unsuitable because the seal arrangement is designed for installation in reverse orientation to the Zetec.
Whilst I was searching for a suitable part I turned my attention to the mounting stanchion/oil supply tube. It must be extended or replaced in order to accommodate a double capacity cooler in addition to the screw-on filter. Ford use a 3/4 UNF thread for the filter, which is fairly common, so I bought a used VAG oil filter housing 06A115405BP for the stanchion and half nut to lock the cooler in place. Aftermarket oil coolers have a screw on extension tube but this won't work with the VAG coolers.
The Zetec stanchion has a different thread at one end to suit that used in the block. I determined the exact length required, and cut down the VAG part to suit ready to weld to the Ford part. I made a jig to align the two parts for welding by cutting an access window in a 3/4 UNF nut.
The following collage shows the original stanchion, double nut method used to remove, and the extended version that I made.
Here is the completed solution. VAG part 028117021E proved to be perfect and is a higher quality part than the friction welded plate type that I originally tried.
Gassing Station | Readers' Cars | Top of Page | What's New | My Stuff