Jade green Mk2 Golf GTI 16v - project
Discussion


More stripping down

Started thinking about the arches, sill and rear quarter.


I’m not going to do any welding until I’ve got the car up on the rollover jig and get a lot more of the paint and under seal ground back to show the full extent of the corrosion.
The plan is to use as little of those repair panels as possible. I’ll find the edge of the rust and cut it back just beyond that. Hopefully get my weld on the arch behind where the trim will sit.
Started thinking about the arches, sill and rear quarter.
I’m not going to do any welding until I’ve got the car up on the rollover jig and get a lot more of the paint and under seal ground back to show the full extent of the corrosion.
The plan is to use as little of those repair panels as possible. I’ll find the edge of the rust and cut it back just beyond that. Hopefully get my weld on the arch behind where the trim will sit.
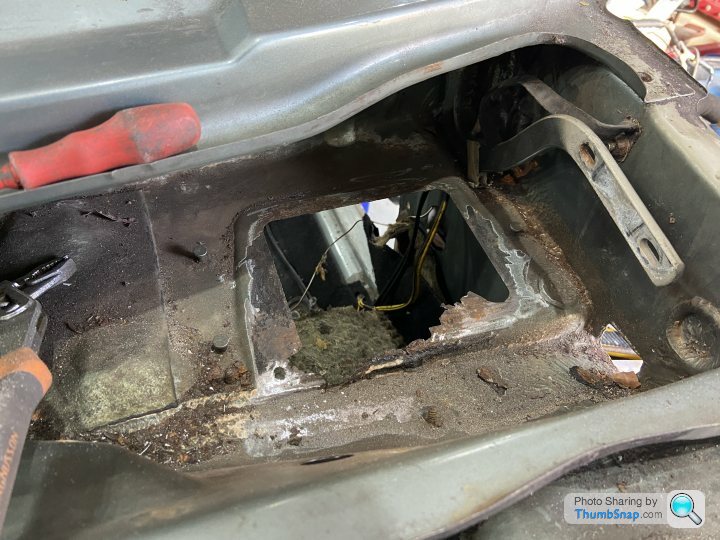
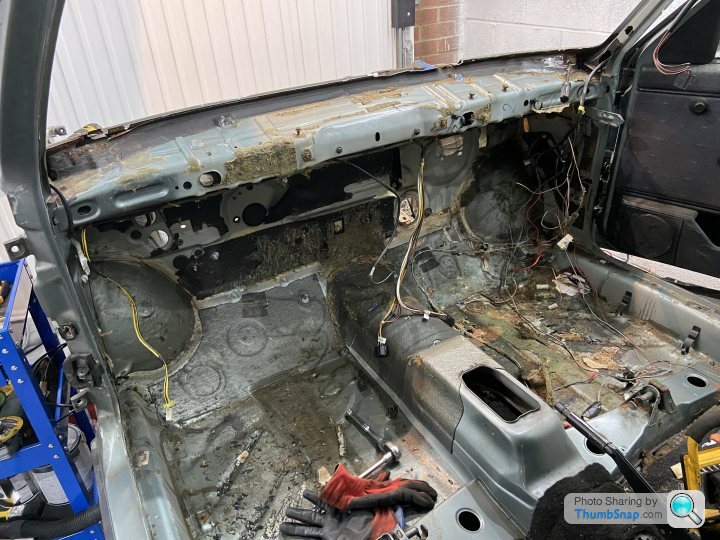
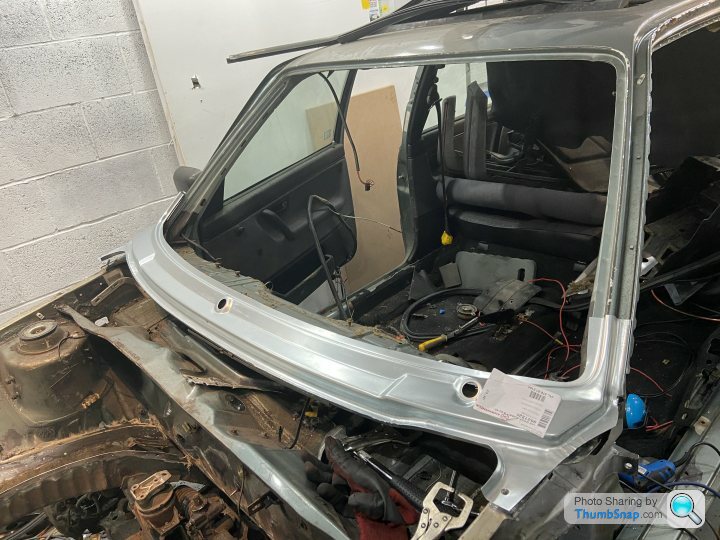
Looks like I’m taking it back to a bare shell to fix some tricky areas of corrosion. The windscreen lower surround/scuttle will need to be deseamed and removed so I can fix a hole where the accelerator cable comes through from the top of the pedal.
I also need to remove the engine bay wiring harness and brake accumulator so that I can fully weld in the new chassis leg closing plate.
With that all in mind, I’m busy getting busy. I need to start taking some notes and not just relying on a picture diary.


I also need to remove the engine bay wiring harness and brake accumulator so that I can fully weld in the new chassis leg closing plate.
With that all in mind, I’m busy getting busy. I need to start taking some notes and not just relying on a picture diary.
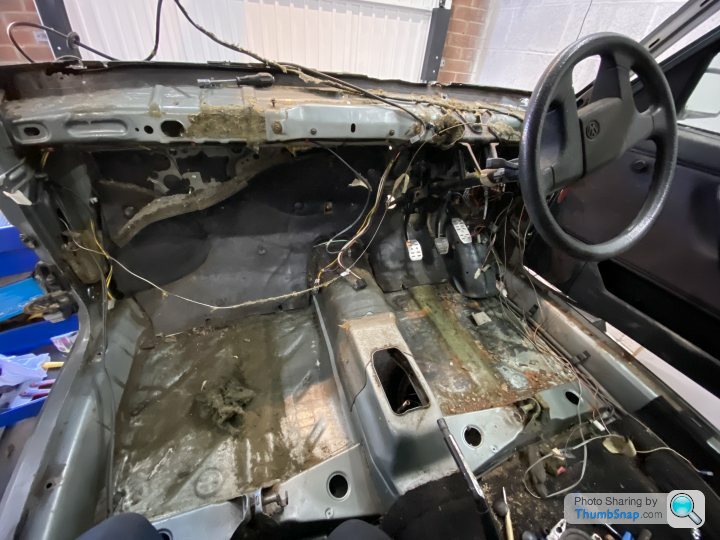
Those two pictures are in the wrong order. The heater hoses that poke through the bulkhead are gone as I've taken the complete airbox/heater assembly out from the interior.
The brake accumulator is now out also. Getting the little clip off the end of the pivot pin on the top of the pedal was quite awkward due to access, but, it's out.
I now need to pull the wiring harness out of the engine bay and remove the hard plastic fuel lines as they sit right near where I need to weld up the chassis leg.
_Mja_ said:
Strong progress. 2 years is a good estimate and it will all come together quickly once you get all the welding bits done - I like your idea of getting it on a jig and then focusing the welding.
I'm slightly nervous about managing to get all the wiring out in a state that I'll remember how to put it back in 2 years, but I've got no upper time limit and the car is safe and warm in the garage so I can take my time to get it right I guess.When I first picked up the project I was thinking that I'd be able to keep at least some of the original paint, there's not a chance of that now!

_Mja_ said:
Yes lots of pics and labelling. Also take the time to re-wrap it and you can repair and faulty wiring for abother 30 years trouble free motoring!
Funnily enough I'm unpicking and planning to repair the bodged in alarm. Not sure it'll ever live outside long enough to need an alarm in the future so I'm good to leave it without one.Mr Tidy said:
Some good progress but you are definitely in it for the long haul, so good luck. 
I doubt it is relevant now, but back in 1996 or so I got a recall on my 1986 MK2 GTi 16V for the heater matrix - apparently they were prone to giving people a hot foot bath!
I dropped the fuel tank last night which felt like another big step to getting it back to a bare shell. Yeah, I’m into this for the foreseeable! Might take a few days off work and line up a good run of work to get a solid push.I doubt it is relevant now, but back in 1996 or so I got a recall on my 1986 MK2 GTi 16V for the heater matrix - apparently they were prone to giving people a hot foot bath!
I’ve got the heater assembly out already, a new matrix is on my shopping list.
Another hour in the time machine.
Drilled the spot welds out then took a cold chisel to the reluctant bits. Need to get in and somehow drill the two spot welds out of the bulkhead so that I can tease the rusty flap of metal out. Once that’s done it needs a really decent grind back, clean out, rust treat, epoxy primer and a coat of weld through primer.
Then ……. the new panels will get plug welded in.

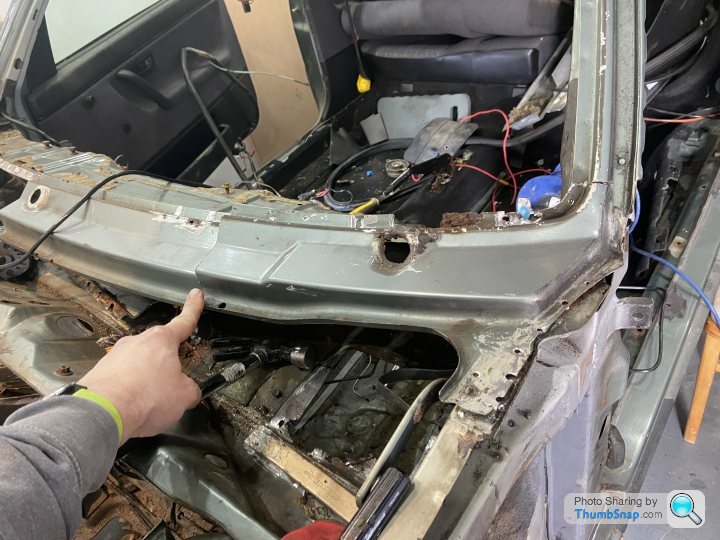
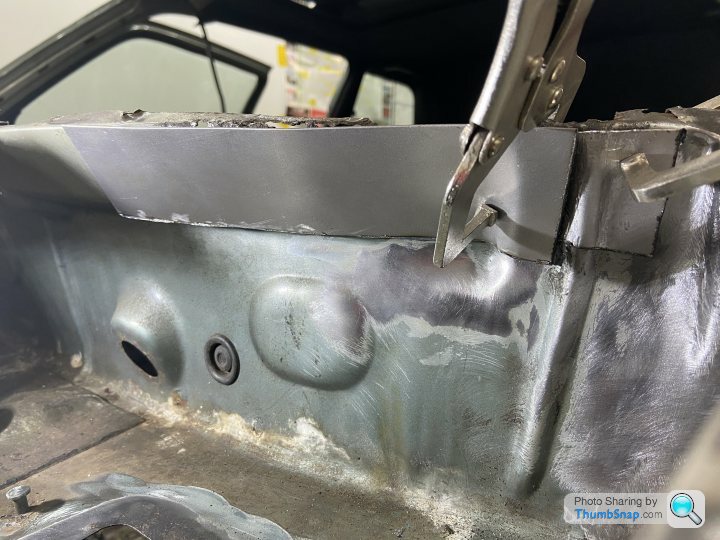
Spent this lunchtime cutting the windscreen surround out. I’ve ordered a new windscreen frame panel from VW Heritage so that’ll all go in the bin eventually.
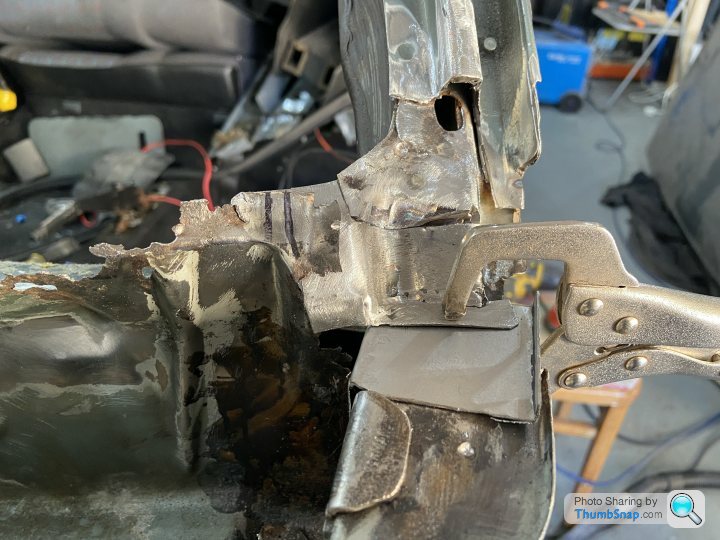
But, it gave me a chance to see an area that I was pretty sure was going to be rotten. Sure enough, it is! 20 minutes with some power tools and I got it back far enough to see some good shiny bits.
A bit of fiddling with some 1mm steel plate and I’ve got the start of a piece to weld in there, once I’ve cut the bad metal out of course!
gary71 said:
In deep now! 
Having done similar I’d say don’t weld any of that in until you’ve got the upper panel and dry built it
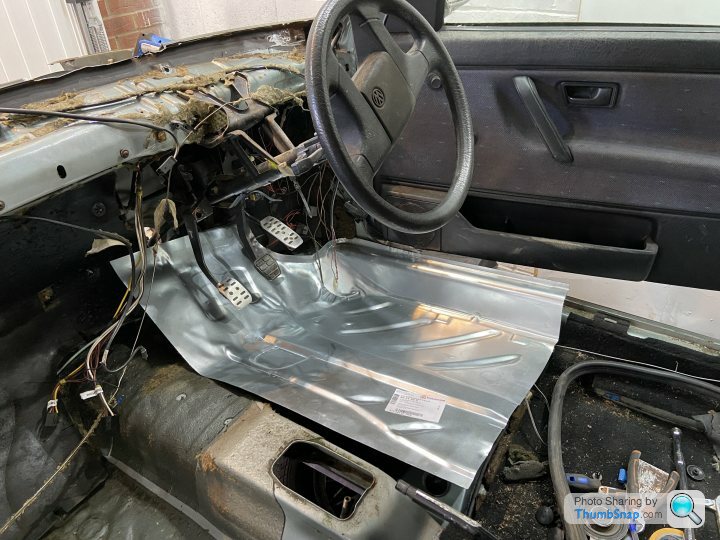
Panel arrived today. The replacement panels always need a bit of fettling, this is no exception. But it’s way easier than trying to make that repair myself.Having done similar I’d say don’t weld any of that in until you’ve got the upper panel and dry built it
Hopefully I’ll get an hour or two in the garage tomorrow to get some measurements and comparisons to the old panel.
Shazz said:
Hi buddy, I may have missed it, but where do you purchase the pre cut out parts from? They look new. thanks
I get them from a few places, here are some links:VW Heritage.
https://www.heritagepartscentre.com/uk/volkswagen/...
Type19
https://type19.co.uk/product-category/vw-nos-fabri...
Classic-VW
https://www.classic-vw.co.uk/panels-685-c.asp
Plus of course eBay, which those 3 stores all list parts on too.
I've bought panels from all three of those and would recommend them as suppliers. However, there's a wild variance in the quality of the pressings. VW NOS panels are great, Klokkerholm repro panels are an approximation but if you're in that deep you probably know how to use a hammer and a grinder etc. to get the parts somewhere close.
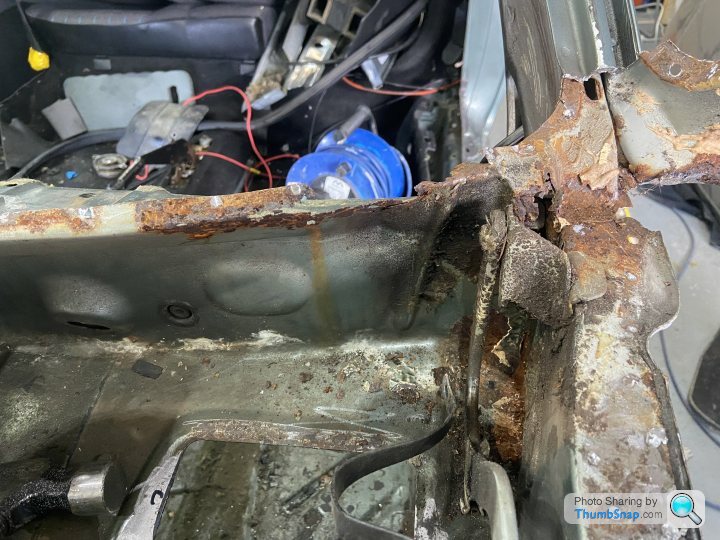
Passenger side lower windscreen frame repair.
Started to peel the layers of metal apart and cut the rot out. This will all be hidden by seam sealer then enclosed by the scuttle panel but it rotted once so it’ll rot again. It looks a mess at the moment but I’ve started to make little patches to weld in to each panel that then get welded together to form the inside/underneath of the screen frame.
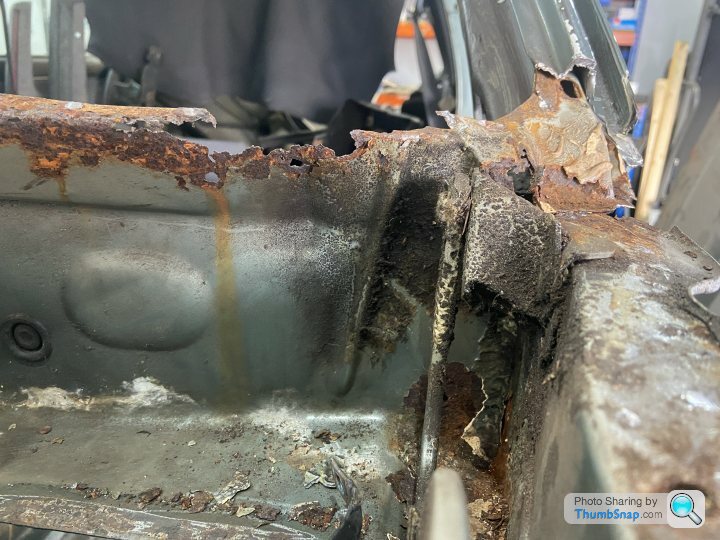
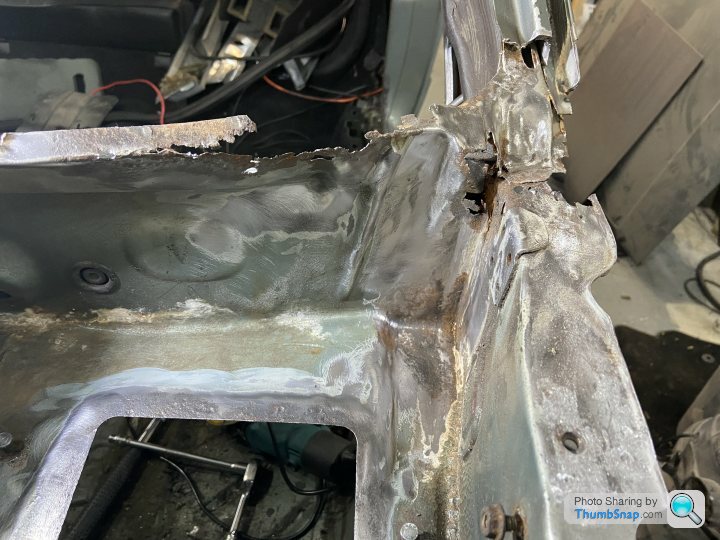
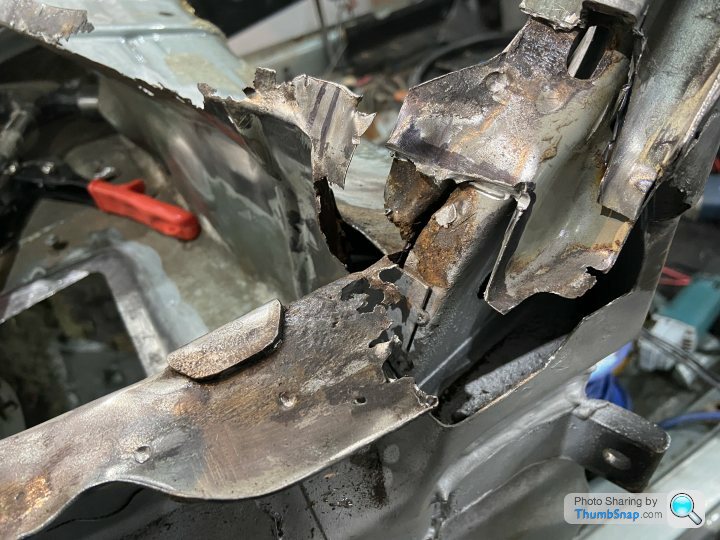

Still a way to go, these are just work in progress.
Started to peel the layers of metal apart and cut the rot out. This will all be hidden by seam sealer then enclosed by the scuttle panel but it rotted once so it’ll rot again. It looks a mess at the moment but I’ve started to make little patches to weld in to each panel that then get welded together to form the inside/underneath of the screen frame.
Still a way to go, these are just work in progress.
aka_kerrly said:
I do enjoy these kinds of builds... There are a LOT of MK2 owners and potential MK2 owners who really do not appreciate just how much work can be required.
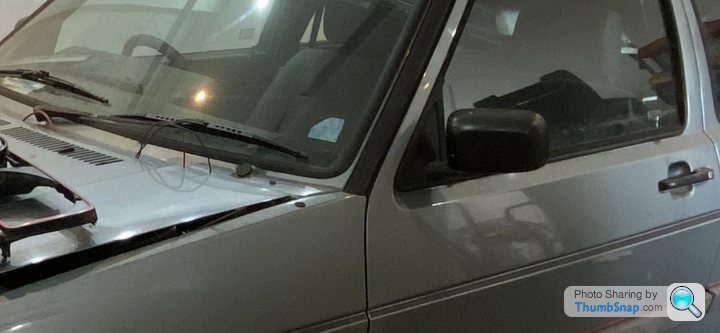
There are so so many Golfs out there right now that look like it's a few rust bubbles around the wiper arm holes/blank an next thing it's whole windscreen surround needs work, the A pullers, the scuttle tray and so on.
Fantastic work, keep it documented and build up a great photo album to go with the cars service history!!
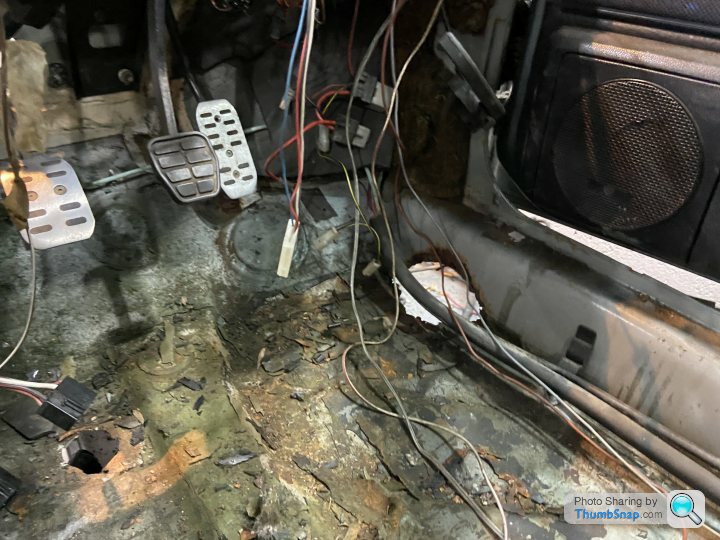
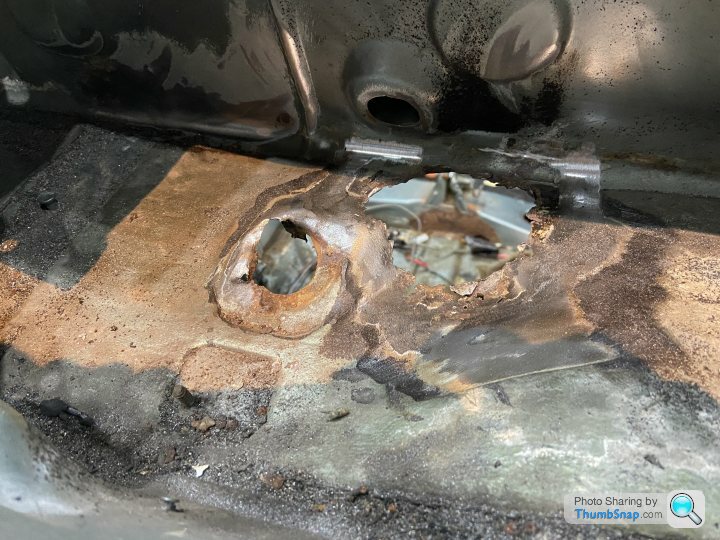
This car looked rotten when I bought it, but as you say, there are some areas on it that didn't even have any surface rust. I poked a bit, pulled a few trim panels, lifted carpets and discovered 50p piece sized holes in the floor! Every panel I de-seam and remove shows rust underneath it.There are so so many Golfs out there right now that look like it's a few rust bubbles around the wiper arm holes/blank an next thing it's whole windscreen surround needs work, the A pullers, the scuttle tray and so on.
Fantastic work, keep it documented and build up a great photo album to go with the cars service history!!
I bet there are "concourse" original Mk2 Golfs out there that have all of these issues but covered in Autoglym.
Gassing Station | Readers' Cars | Top of Page | What's New | My Stuff