Aston martin V8 Vantage club sport type thing
Discussion


V8V Pete said:
Great project. Thanks for sharing.
Do you still have the standard pedal setup? I found heel & toe was virtually impossible with the Grand Canyon sized gap between the brake and throttle so got an extended throttle peddle which helps, although it's still not as good as my son's Clio 197's standard setup. Perhaps that says something about the driving intentions of the target market which is a bit sad.
Hi Pete,Do you still have the standard pedal setup? I found heel & toe was virtually impossible with the Grand Canyon sized gap between the brake and throttle so got an extended throttle peddle which helps, although it's still not as good as my son's Clio 197's standard setup. Perhaps that says something about the driving intentions of the target market which is a bit sad.
No, I just have the factory pedals, though your comment resonates as When ollie drove the car he commented on the exact same thing, for me the issue was less that I couldn't get my heel to the pedal (why that's the case i dont know, i have fairly large feet perhaps?) but that the pedal required a significant push to generate the required pickup in RPM. This was improved by the "light" fly and clutch assembly but not enough for it to feel truly natural. Post the re-map with AHM (which puts a particular emphasis on throttle response) this was much improved. ultimately this will just have changed the relationship between the pedal potentiometer and the throttle actuator, but it does work, though there is a level of "price to pay" in that the cruise control becomes a but brutish, but given how rarely i use it its not an issue for me. I dare say it may be possible to change that but would require changes to the mapping of the cruse control graduations, not worth the faff for me but could be a concern for some.
I had originally considered making adjustments to the pivot of the potentiometer on the pedal to achieve the same effect but the remap was far simpler and with the raised rpm limit makes the shift light functional, improved the economy and potentially improved the power output (i say potentially as although I have no reason to believe otherwise, and the car feels faster i have not run the car up on a dyno to be able to prove to myself that this is the case).
V8V Pete said:
Yes I did but if anything the gap is a bit tight now. When I get around to it I think I will get someone (perhaps Ultimate Pedals because I think they do custom stuff) to make me a pair of custom pedals or definitely a custom brake pedal to go with their throttle pedal. My car's a keeper and life's too short not to have the optimal pedal setup (especially when you've got small feet and slightly dodgy knees).
Obviously no one wants cheesy ripspeed pedals but i would have thought that some generic OMP pedals could potentially work?https://www.ebay.co.uk/itm/323484340243?_trkparms=...
SturdyHSV said:
Cool updates, the carbon fibre console slab looks nice, I assume because Aston the factory one is hewn from glass and iron then coated in flimsy plastics to make it fit or something?
With regards to pedals, I imagine it depends on how one actually does the heel & toe. If it's a literal heel and toe (toes on brake pedals, leg / knee twisted, heel pressing accelerator) then that gap doesn't look too awful, but can understand if you're one of those side to side chaps that do big toe on the brake and little toe on the throttle that'd be impossible.
I never warmed to the side to side method, I can imagine it's more relaxed and easier on the road at mild brake pressure, but it always feels a bit sketchy having so little foot on the brake pedal.
To be fair to aston, it is all fairly well built, overbuilt in many respects (all the suspension fasteners are huge for example, m14/m16) and that follows through to the cabin, the gear surround for example, is a piece of solid billet alloy as is the console, more importantly again there is a giant pile of toss behind the dash like not very good 6 cd changers etc etc and the sat nav out of an early 200's volvo that i will remove without regret!With regards to pedals, I imagine it depends on how one actually does the heel & toe. If it's a literal heel and toe (toes on brake pedals, leg / knee twisted, heel pressing accelerator) then that gap doesn't look too awful, but can understand if you're one of those side to side chaps that do big toe on the brake and little toe on the throttle that'd be impossible.
I never warmed to the side to side method, I can imagine it's more relaxed and easier on the road at mild brake pressure, but it always feels a bit sketchy having so little foot on the brake pedal.
I think you may be correct on the technique point, i am a leg twist toe and heel man not an ankle twister, this is why the throttle response was such an issue in that you found yourself with your heel at 45 degrees to your toe (unless you were standing on the brake) just to get enough of an rpm increase that would do the actual job.
Brief Update:
As agreed its been back to the wrapper (Isle of Wraps) as he was not happy with the amount of stretch required, to be frank it was fine, but I wanted to make some changes anyway
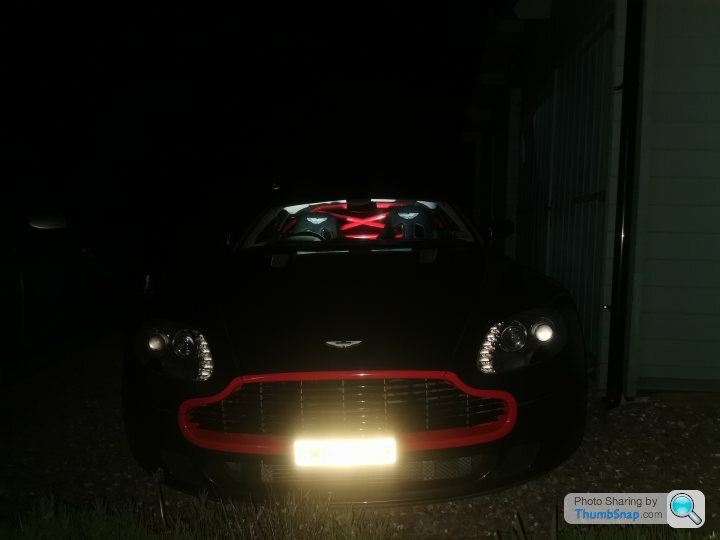
The bonnet stripes have gone leaving the later style n430 / gt4 (even i don't care) livery in red, profile has changed on the A pillar, but yea, meh. Also all the chrome has been wrapped black. Its an incredibly neat job and just knocks a bit more of the golf club off the car.
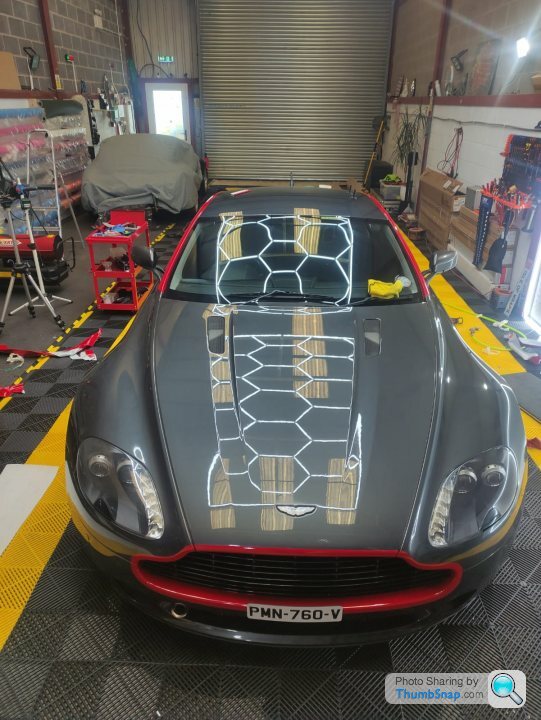
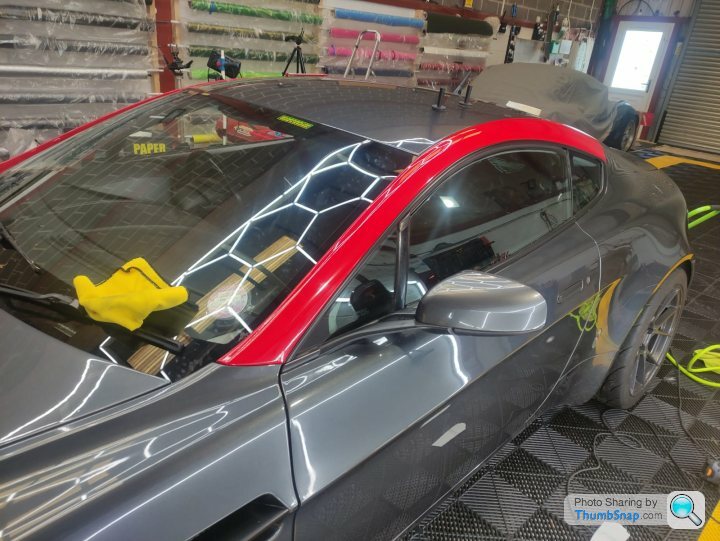
Do i prefer it? Probably. i will do something with this car paint / wrap wise at some point, but i just don't know what, or when. But the grey is enormously dull, i think it was popular due to the (incredibly tedious and frankly rather tragic) "James Bond" association that makes me cringe, so the more i can distance myself from that demographic the better.
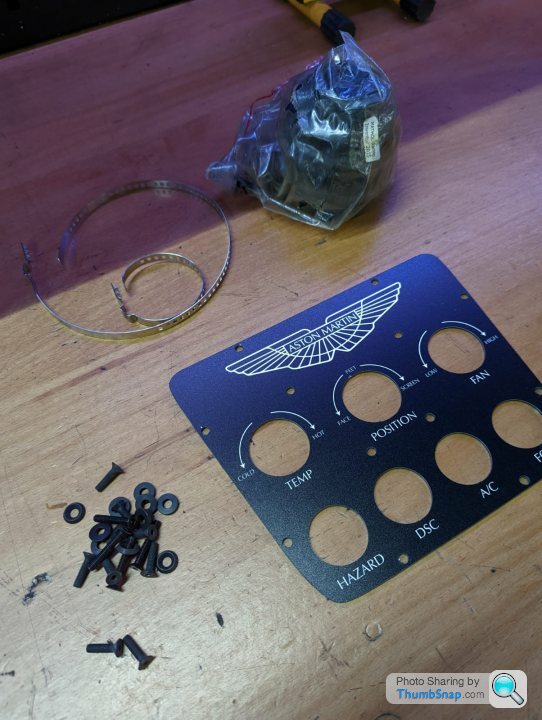
My switch panel is on its way so i can start to think more seriously about fitting the centre section of the dash, ideally what i want to do is to scrap all the electronics , but retain the t1/t1 and Read buttons so i can clear warnings and put the wipers in rest. I would also like to integrate some sort of MOST amp gateway so i can put a receiver to it and retain the factory amp and speakers, while they are not great it minimises the disruption. Aston installations think i am in for trouble but time will tell
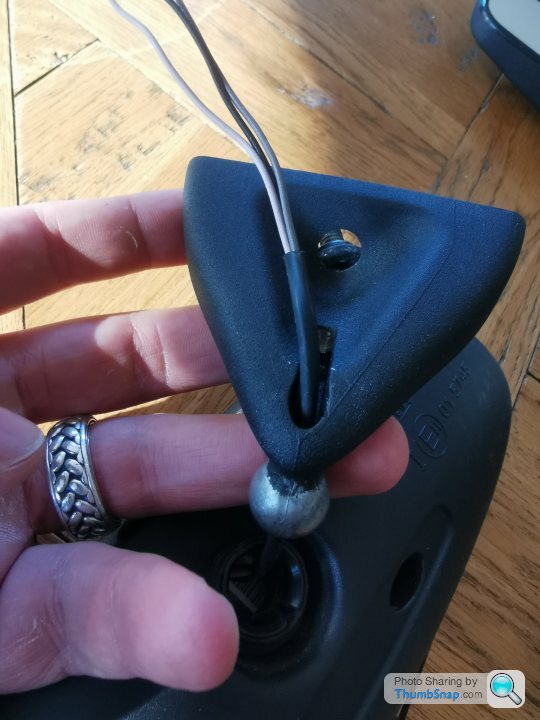
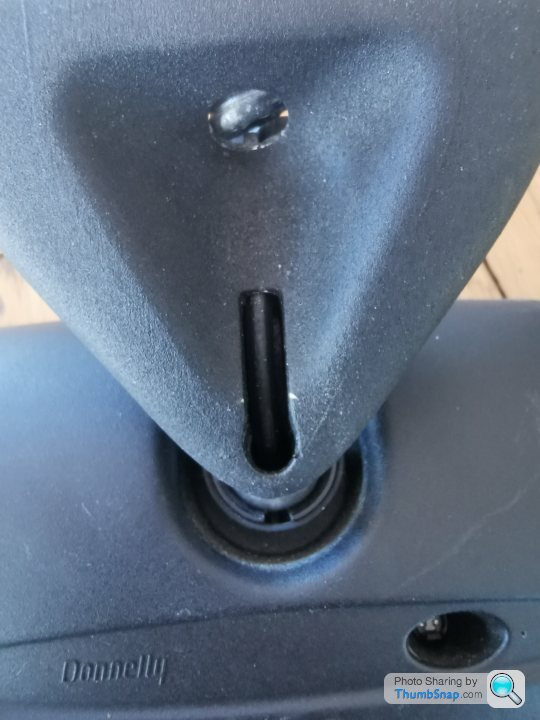
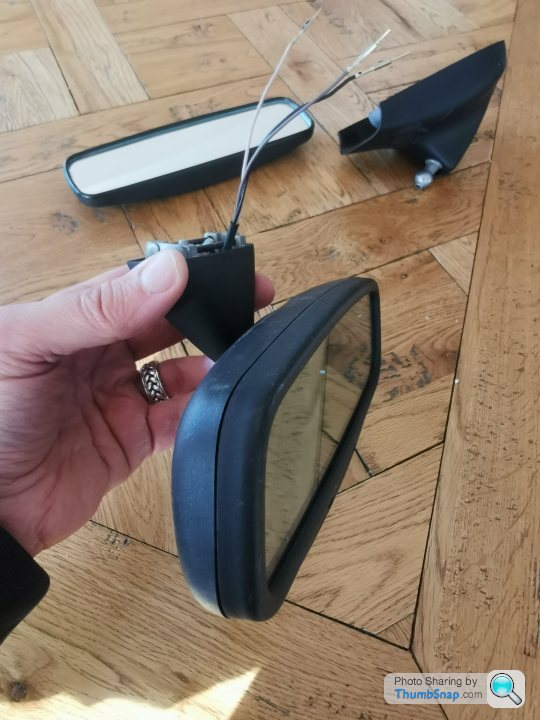
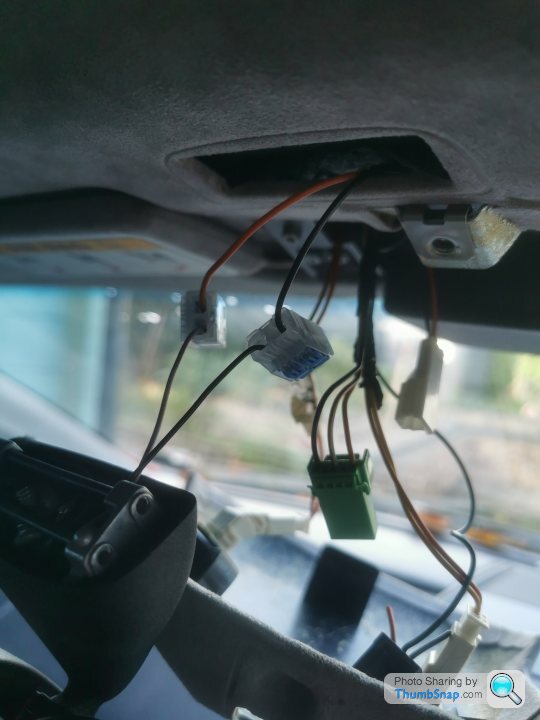
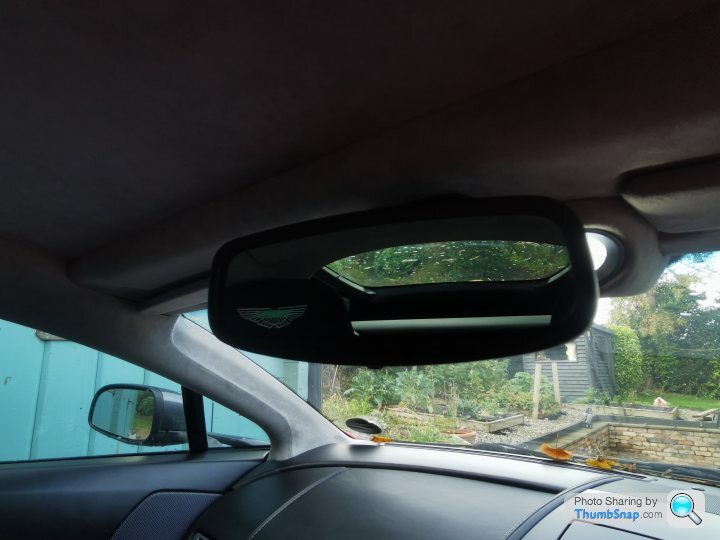
Now in 2006 when other manufacturers were offering you the world in options, aston were still shafting you for a dipping mirror. An excellent Gentleman in the aston section of pistonheads had figured out that you could use the mirror from a 2001-2008 s troen c5 as it had a 16mm ball socket. So i snapped one up from ebay (£28) saving myself about £230. My fitting was a little different but ultimately comprised of drilling holes through the old aston mount to feed the wire, then wiring it into one of the roof console plugs (i do need to find some nice compact plugs and re do this bit as its making my brain itch)
To complete the absolute tedium of this update I have also bought some more oil, annoyingly I couldn't get the 20l drums i usually get so had to order it in 4ltr jugs, being that it came from Germany this triggered the VAT man to take a view on my imports and bend be over for a further £50
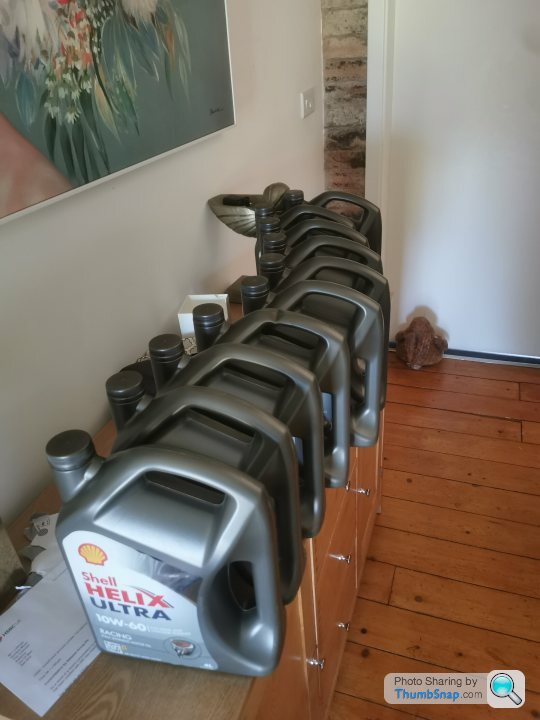
My wife loves this st, some women come home to flowers and a cooked meal, mine gets 48 litres of 10-60 helix racing, what more could she ever dream of, lucky girl.
As agreed its been back to the wrapper (Isle of Wraps) as he was not happy with the amount of stretch required, to be frank it was fine, but I wanted to make some changes anyway
The bonnet stripes have gone leaving the later style n430 / gt4 (even i don't care) livery in red, profile has changed on the A pillar, but yea, meh. Also all the chrome has been wrapped black. Its an incredibly neat job and just knocks a bit more of the golf club off the car.
Do i prefer it? Probably. i will do something with this car paint / wrap wise at some point, but i just don't know what, or when. But the grey is enormously dull, i think it was popular due to the (incredibly tedious and frankly rather tragic) "James Bond" association that makes me cringe, so the more i can distance myself from that demographic the better.
My switch panel is on its way so i can start to think more seriously about fitting the centre section of the dash, ideally what i want to do is to scrap all the electronics , but retain the t1/t1 and Read buttons so i can clear warnings and put the wipers in rest. I would also like to integrate some sort of MOST amp gateway so i can put a receiver to it and retain the factory amp and speakers, while they are not great it minimises the disruption. Aston installations think i am in for trouble but time will tell
Now in 2006 when other manufacturers were offering you the world in options, aston were still shafting you for a dipping mirror. An excellent Gentleman in the aston section of pistonheads had figured out that you could use the mirror from a 2001-2008 s
troen c5 as it had a 16mm ball socket. So i snapped one up from ebay (£28) saving myself about £230. My fitting was a little different but ultimately comprised of drilling holes through the old aston mount to feed the wire, then wiring it into one of the roof console plugs (i do need to find some nice compact plugs and re do this bit as its making my brain itch) To complete the absolute tedium of this update I have also bought some more oil, annoyingly I couldn't get the 20l drums i usually get so had to order it in 4ltr jugs, being that it came from Germany this triggered the VAT man to take a view on my imports and bend be over for a further £50
My wife loves this s
t, some women come home to flowers and a cooked meal, mine gets 48 litres of 10-60 helix racing, what more could she ever dream of, lucky girl. Appreciate its been quite some time sine I updated this, but as always that does not mean nothing has been done. Many things have been given a fairly tick coat of looking at, in some cases I have even managed to turn this into an actual outcome.
Hard to really put all this into a cogent set of events as i have been too slack in keeping my updates never the less i will give it a shot.
S as per my last update I have an Aston martin N24 center section, you know its an n24 one as its a manual. Fitting it, is actually a lot of work and needed a lot of parts to be accumulated for this to happen, even just on the basis of the things you think you will need, let alone the bits you actually do.
While these bits have been accumulated i have been chatting with a specialist tube bender that Jim from M3 cutters put me onto, The reason for this is that they are the supplier to prodive and made up the cages for both the Gt4 Cars and more importantly for me the AMR pro which has the cage below:

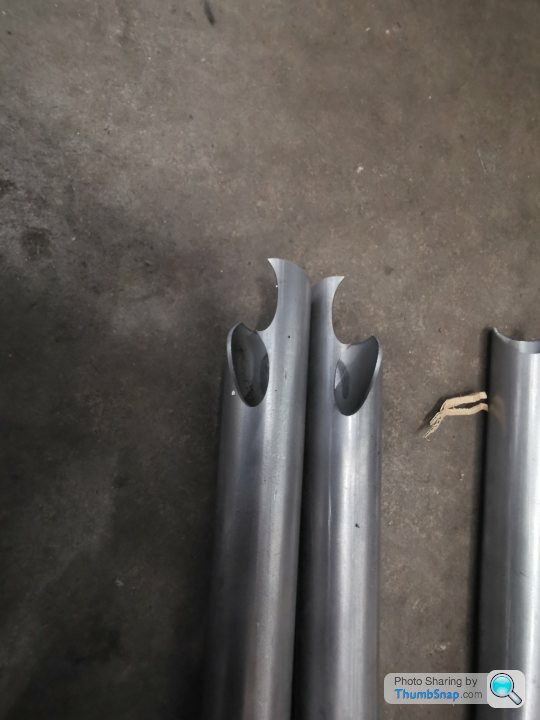
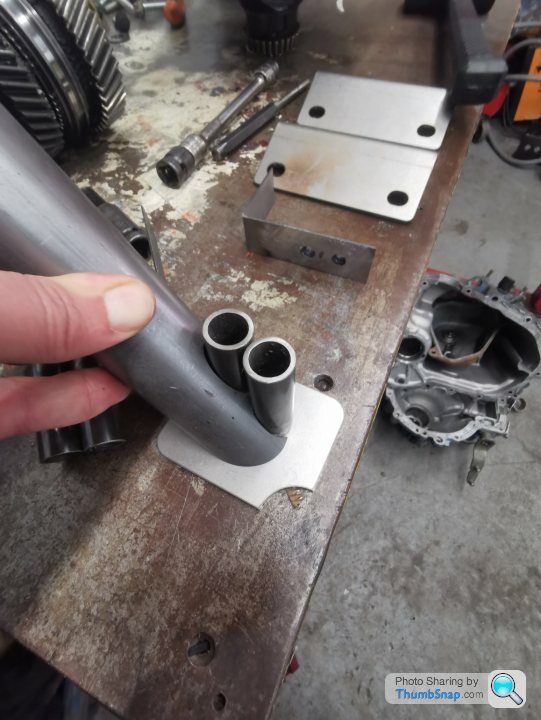
Have had a good chat with the guys there it emerged that while they still had all the programming to make the cage, the actual Jig to make it had gone missing. With that established, i opted to just get a set of tubes and get on and DIY
As is so often the case ollie did a sloid and picked it up once all the components were cut out and brought it over during a visit. some very funky cuts in its production.
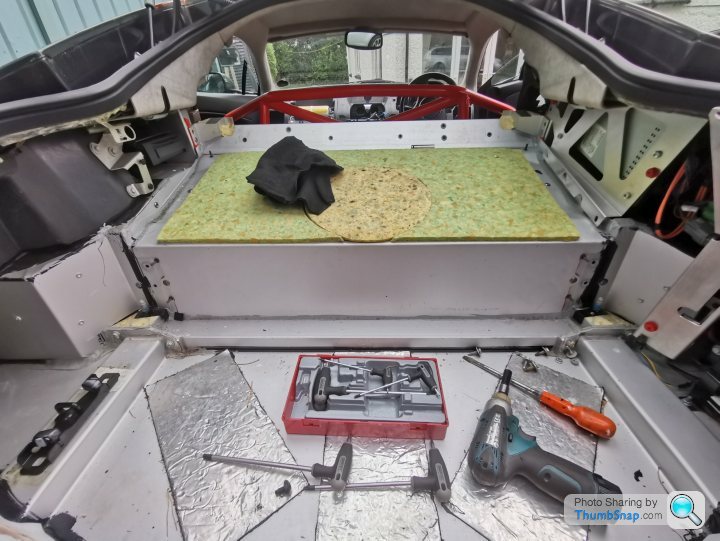
Some time passed while I was looking at other things, but as the weather got slightly better I summoned up some enthusiasm to rip the interior out get down to my mates unit and start drilling holes.
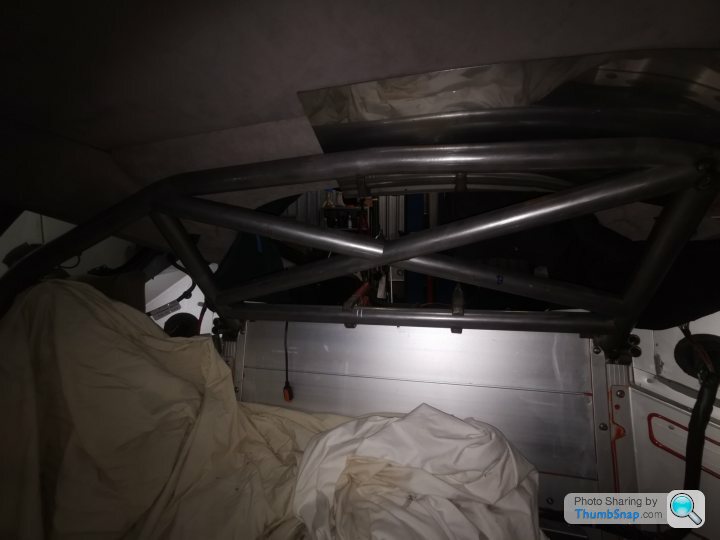
Access is not good in these cars so it was everything out to get the main hoop in, initial test fit suggested that it would be best to weld up the rear stays as a unit then get on with the rest.
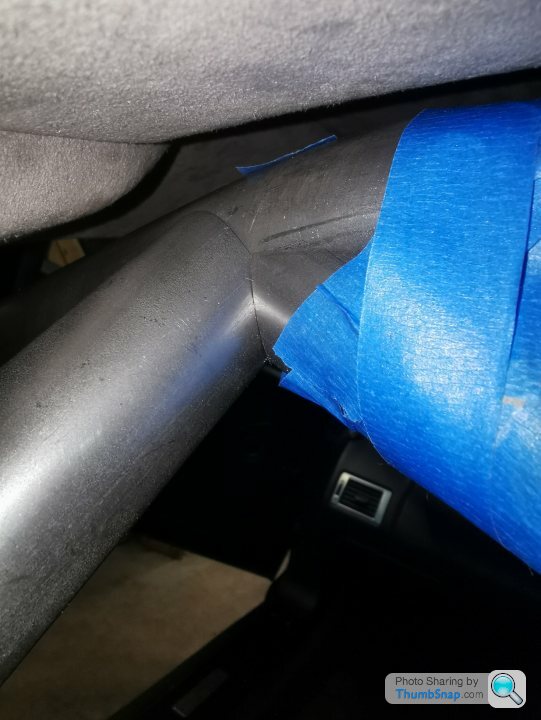
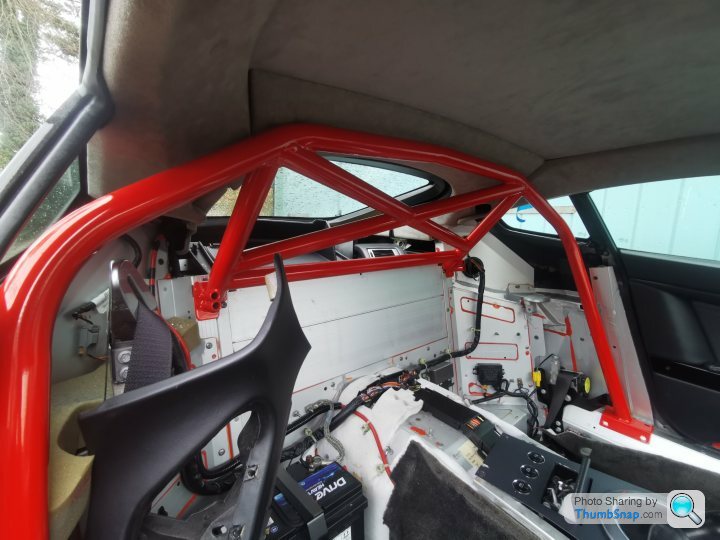
Much faffing and swearing later it was all in place and taped into position
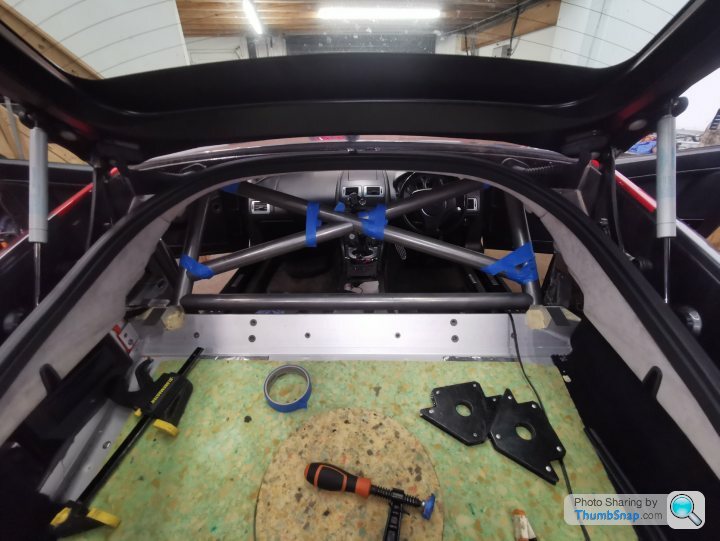
To say that the cage fit and accuracy was exceptional really would be under selling it.
 |https://thumbsnap.com/zzSrLqeJ[/url]
As this point the entire cage was tacked up so that there was no movement once it was removed. Protecting the interior was a concern hence the stainless steel "blast shield" on the headlining
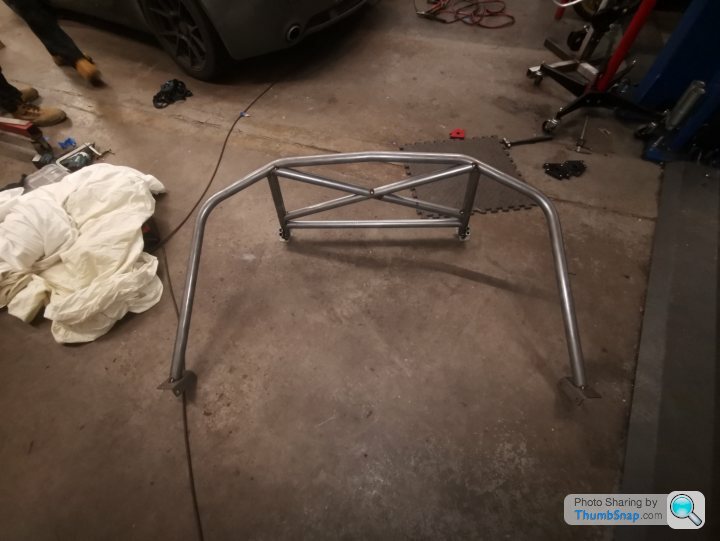
With this done the entire cage was removed as one and welded up outside of the car
 [url].
At this point I vacillated over painting it or powder coating, ultimately I went for powder coating on the basis that this would form part of the luggage area and the additional durability would be good. Having being absolutely set on getting it done in boring (but safe) silver, I folded to peer pressure
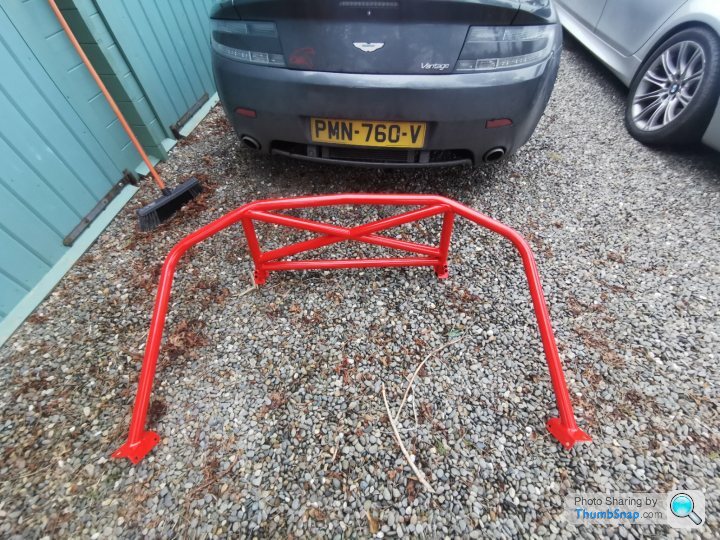
And a few days later did the initial fit
Lots more on the go so will continue to update this in the near future
Hard to really put all this into a cogent set of events as i have been too slack in keeping my updates never the less i will give it a shot.
S as per my last update I have an Aston martin N24 center section, you know its an n24 one as its a manual. Fitting it, is actually a lot of work and needed a lot of parts to be accumulated for this to happen, even just on the basis of the things you think you will need, let alone the bits you actually do.
While these bits have been accumulated i have been chatting with a specialist tube bender that Jim from M3 cutters put me onto, The reason for this is that they are the supplier to prodive and made up the cages for both the Gt4 Cars and more importantly for me the AMR pro which has the cage below:
Have had a good chat with the guys there it emerged that while they still had all the programming to make the cage, the actual Jig to make it had gone missing. With that established, i opted to just get a set of tubes and get on and DIY
As is so often the case ollie did a sloid and picked it up once all the components were cut out and brought it over during a visit. some very funky cuts in its production.
Some time passed while I was looking at other things, but as the weather got slightly better I summoned up some enthusiasm to rip the interior out get down to my mates unit and start drilling holes.
Access is not good in these cars so it was everything out to get the main hoop in, initial test fit suggested that it would be best to weld up the rear stays as a unit then get on with the rest.
Much faffing and swearing later it was all in place and taped into position
To say that the cage fit and accuracy was exceptional really would be under selling it.
|https://thumbsnap.com/zzSrLqeJ[/url] As this point the entire cage was tacked up so that there was no movement once it was removed. Protecting the interior was a concern hence the stainless steel "blast shield" on the headlining
With this done the entire cage was removed as one and welded up outside of the car
[url]. At this point I vacillated over painting it or powder coating, ultimately I went for powder coating on the basis that this would form part of the luggage area and the additional durability would be good. Having being absolutely set on getting it done in boring (but safe) silver, I folded to peer pressure
And a few days later did the initial fit
Lots more on the go so will continue to update this in the near future
olv said:
The cage looks nicely done. Will you get the interior trim back in without hacking it up too much? Or are you leaving it in its more rural state?
Very interested to see how the centre console comes together.
Ah, all the interior will be going back in , or at least as much is possible, i have enough cars with nothing sinside but a seat, so its certainly not something i would be looking to replicate. its horribly noisy with it removed i think due to the aluminium construction and absence of underseal. Very interested to see how the centre console comes together.
Centre console is a pain in the balls tbh, lot of work
olv said:
Haha wow. Rapidly scrubbing that off my wish list.
To be honest that's the easy bit.in a nutshell:
Remove all the dash and interior panels
Remove all dash instruments
Complete CAN Gateway circuit
Establish replacement hifi (all of this is lost with the removal of the centre stack )
Wiring for t1 and read switches
Wiring for interior lights
Amplification replacement as you lose the MOST gateway
Sort out power seat controls
make switch bosses for all retained components
Make switch boss for starter button
Make gaiter and surround
Strip out all defunct hardware
Its not a small job if you want a nice result and to retain the correct level of road comfort.
NickXX said:
Crazy amount of work!
Thanks for keeping this thread updated - always very interested to see how you're progressing this.
I think i would probably still chose to do it knowing what it entails, but its certainly not straight forward if you want something nice at the end. Obviously you could just tex-felx the switches in, bridge the canbus and slap it all in, but i think it would look and if I am honest, feel shÏte.Thanks for keeping this thread updated - always very interested to see how you're progressing this.
As the the thread, no worries. its hard to know if there is much interest as its a rather niche thing but it at least it covers some topics that could help others if anyone else chooses to be so odd in the future.
Well, this has all taken a very very long time. This has been due to a few factors. Primarily that the amount of work that is required to fit all this stuff in nicely (or as nicely as i could manage) takes a very very long time. Lots of stuff needed to be deigned and made to make all of this work. these are in the main boring parts, plastic parts to hold the switches in the starter button, the gear surround. Also as a lot of trim needs to be cut to pass the roll cage i ended up stripping off all the leather and re trimming it myself in Alcantara. On top of this you need to ditch the complete infotainment system and i drew a number of short straws here with some very annoying component failures that I then had to wait for replacements. Basically its been a right ball ache.
Anyway, on with it.
I figured that being that i was ripping the car to bits to fit the cage there was no point doing the job twice i should get on and fit the console at the same time.
Firstly: fitting the cage.
Fitting the cage was a complete d1ck, the rear stays are simple, cut out foam drop in bracket bolt in, the sill mounts are not. to fit it to the sills you need to access in the internal boxed to fix the spreader plates. the boxes are all separate. To access each you need to remove all the arch liners, to are most easily accessed from the rear as this is a short run of tube, the others are only accessible from the front and require the removal of the washer bottle and bump and on the other side the abs pump need to be moved out of the way. you then need to tape your spreader plates to a long long pole and while assistant A (my wife) trys to poke a screw though the hole you wiggle the pole about though t the sill to her "instructions" i am sure some couples can manage this without an argument, we are not that couple.
The best tool for this (that i found) was a long length of plumbing tube with the ends flattened (spreader plates are just steel plate with serrated nuts tacked on) it is a annoying and thankless task.
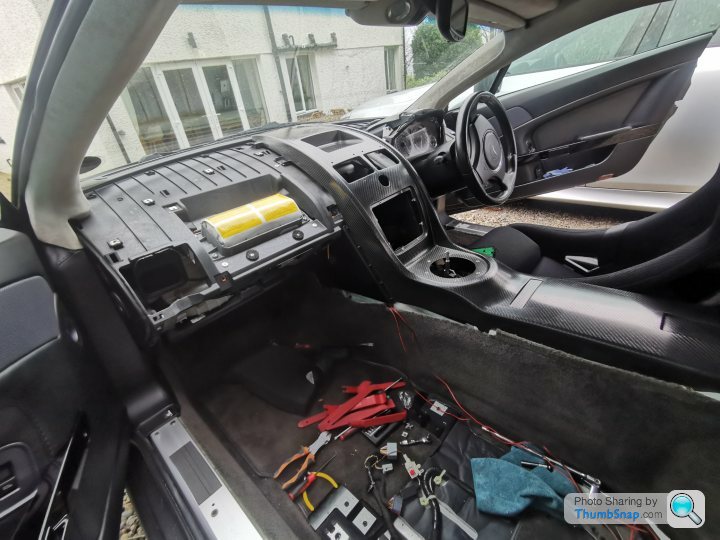
With all that bolted up i spent some considerable time cutting and shaping the interior panels to profile round the cage and replacing the grey leather with black Alcantara (i preserved all the leather panels in case they are of use to someone)
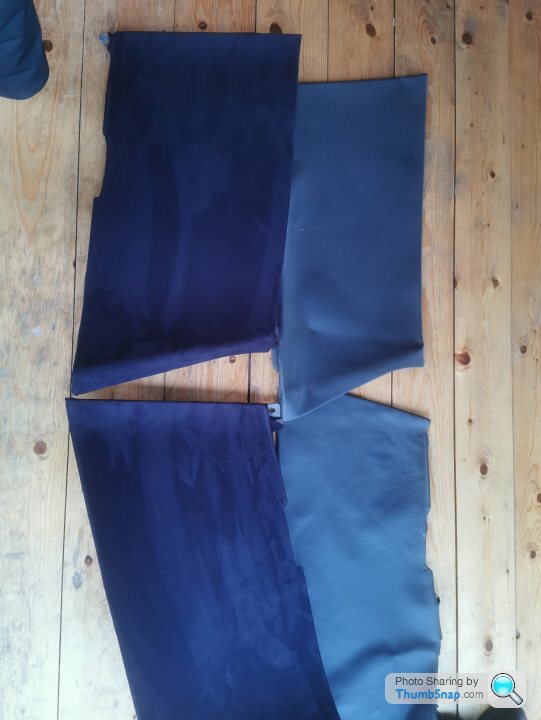
As i had over ordered glue and fabric, i also trimmed the upper dash sections ass the reflection at Spa was horrible

With that (largely) out of the way (please note there is some license taken here in terms of the order the trim needs to go back in to make the pictures make sense).
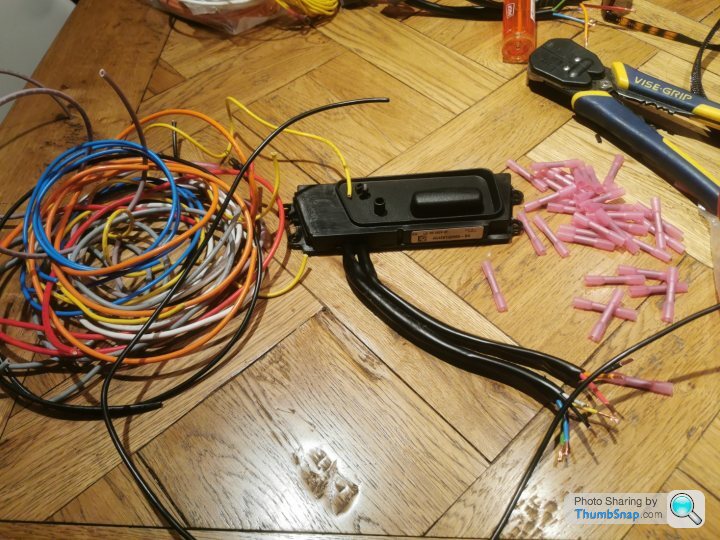
I needed to nail the infotainment replacement. This was a problem as it all had to go to fir the carbon center, given its ancient volvo origins i wasnt too sorry but had hoped to retain the amp. I discussed this problem with Aston Installations who were exceptionally help full and talked through a few idea's, i had originally planned to use a MOST RCA gateway to hijack the MOST fiber optics and just inject the audio from another source, Aston Installations were not at all convinced it would work and also suggested the original amplifier was not much to get excited about. Instead it was suggested to get Bury Handsfree kit which supports streaming and replace the amp completely.
With this in mind i went off and bought a cheap Pioneer amp and a used Bury kit, (the used bury kit was later to bite me in the @rse) I then removed the entire system.
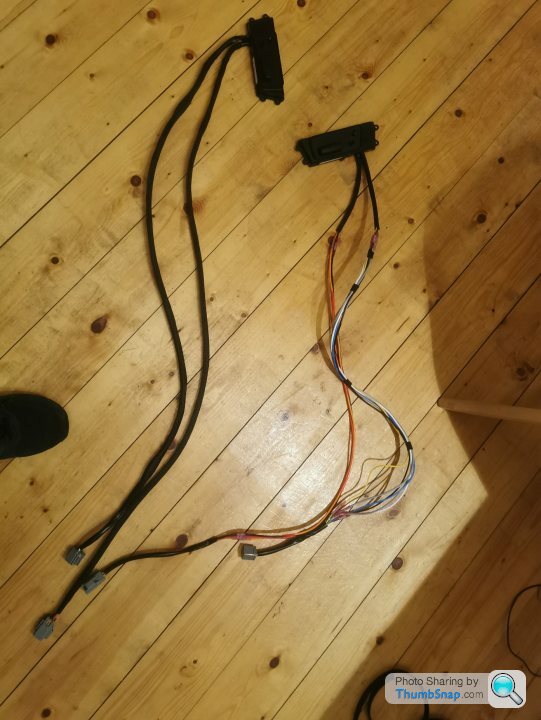
As various audio systems were optioned for the car there was middle loom that connected the low rent amp to the rest of the body loom (for those with basic systems the rear speaker wiring is already present and i suspect the stock amp would use it if connected) so i used this to create a plug in loom for the bury kit and amp, meaning that if needed the entire thing can just be unscrewed and unplugged (i did not regret this)
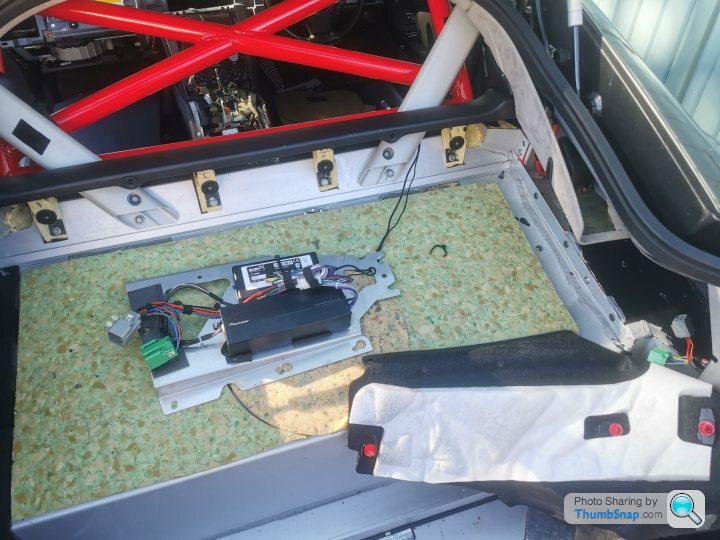
At this point i re-ran the wiring from the rear of the car and re fitted all of the rear boot trim.
no sooner had i done this than the Bury kit stopped turning the screen on, this was hugely annoying, so i bought another used one which was also goosed, then bought a used parrot asteroid that turned up without the main data lead before having a strop and buying one at hugely over rrp locally in an effort to avoid more delay. An annoying illustration of buy cheap buy 3 times over. this cost me about 2 weeks as i couldn't refit without a working solution.
With that bull$hit out of the way it was down to thinking about the console (in the real world much of this was in parallel).
The console has no provision for parking sensors, heated front or rear screens, power seat adjustment or for that matter any additional switches, in addition the small screen present in the original setup houses a CAN Gateway and finally there is no way of integrating the T1/Read buttons in the supplied panel
Que the faff.
First up, small momentary switches to pin into the loom and provide read and T1/2
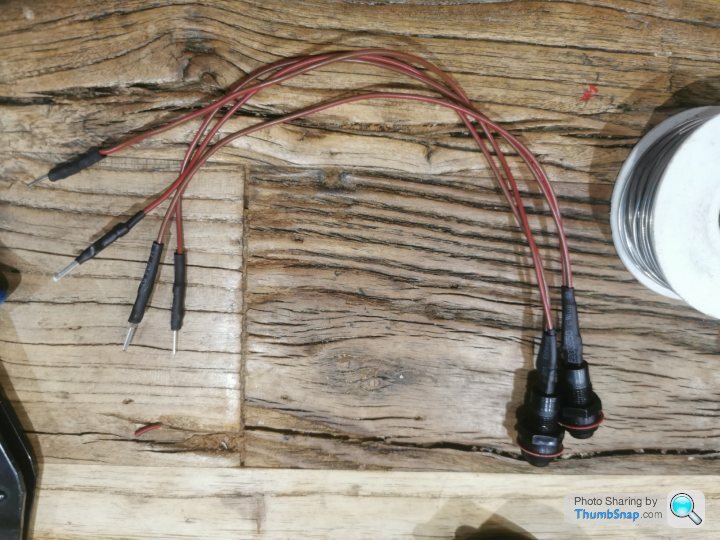
these are just contacts to ground, in retrospect i should have done them with a shared earth tbh.
Then onto the seat adjustment, i decided to mount these under the seats, i dont need backrest adjustment so this was desoldered from the controller, then all the controller cables made longer to enable the relocation and give enough slack to move the seat, these were then over braided in nylon to make sure nothing nasty happened to them.
Finally some small alloy panels were just and to make them feel less hostile to the hand covered in alcantara
More as soon as i get a chance to write it all out!
Anyway, on with it.
I figured that being that i was ripping the car to bits to fit the cage there was no point doing the job twice i should get on and fit the console at the same time.
Firstly: fitting the cage.
Fitting the cage was a complete d1ck, the rear stays are simple, cut out foam drop in bracket bolt in, the sill mounts are not. to fit it to the sills you need to access in the internal boxed to fix the spreader plates. the boxes are all separate. To access each you need to remove all the arch liners, to are most easily accessed from the rear as this is a short run of tube, the others are only accessible from the front and require the removal of the washer bottle and bump and on the other side the abs pump need to be moved out of the way. you then need to tape your spreader plates to a long long pole and while assistant A (my wife) trys to poke a screw though the hole you wiggle the pole about though t the sill to her "instructions" i am sure some couples can manage this without an argument, we are not that couple.
The best tool for this (that i found) was a long length of plumbing tube with the ends flattened (spreader plates are just steel plate with serrated nuts tacked on) it is a annoying and thankless task.
With all that bolted up i spent some considerable time cutting and shaping the interior panels to profile round the cage and replacing the grey leather with black Alcantara (i preserved all the leather panels in case they are of use to someone)
As i had over ordered glue and fabric, i also trimmed the upper dash sections ass the reflection at Spa was horrible
With that (largely) out of the way (please note there is some license taken here in terms of the order the trim needs to go back in to make the pictures make sense).
I needed to nail the infotainment replacement. This was a problem as it all had to go to fir the carbon center, given its ancient volvo origins i wasnt too sorry but had hoped to retain the amp. I discussed this problem with Aston Installations who were exceptionally help full and talked through a few idea's, i had originally planned to use a MOST RCA gateway to hijack the MOST fiber optics and just inject the audio from another source, Aston Installations were not at all convinced it would work and also suggested the original amplifier was not much to get excited about. Instead it was suggested to get Bury Handsfree kit which supports streaming and replace the amp completely.
With this in mind i went off and bought a cheap Pioneer amp and a used Bury kit, (the used bury kit was later to bite me in the @rse) I then removed the entire system.
As various audio systems were optioned for the car there was middle loom that connected the low rent amp to the rest of the body loom (for those with basic systems the rear speaker wiring is already present and i suspect the stock amp would use it if connected) so i used this to create a plug in loom for the bury kit and amp, meaning that if needed the entire thing can just be unscrewed and unplugged (i did not regret this)
At this point i re-ran the wiring from the rear of the car and re fitted all of the rear boot trim.
no sooner had i done this than the Bury kit stopped turning the screen on, this was hugely annoying, so i bought another used one which was also goosed, then bought a used parrot asteroid that turned up without the main data lead before having a strop and buying one at hugely over rrp locally in an effort to avoid more delay. An annoying illustration of buy cheap buy 3 times over. this cost me about 2 weeks as i couldn't refit without a working solution.
With that bull$hit out of the way it was down to thinking about the console (in the real world much of this was in parallel).
The console has no provision for parking sensors, heated front or rear screens, power seat adjustment or for that matter any additional switches, in addition the small screen present in the original setup houses a CAN Gateway and finally there is no way of integrating the T1/Read buttons in the supplied panel
Que the faff.
First up, small momentary switches to pin into the loom and provide read and T1/2
these are just contacts to ground, in retrospect i should have done them with a shared earth tbh.
Then onto the seat adjustment, i decided to mount these under the seats, i dont need backrest adjustment so this was desoldered from the controller, then all the controller cables made longer to enable the relocation and give enough slack to move the seat, these were then over braided in nylon to make sure nothing nasty happened to them.
Finally some small alloy panels were just and to make them feel less hostile to the hand covered in alcantara
More as soon as i get a chance to write it all out!
Thanks all, its frankly been a "bit" annoying at times
SO:
With the seat adjustment sorted i needed to make up a way tolhold all the switches into the dash, and the starter switch, and the gear surround etc. To be fair the Guy i got the console off supplies a few 3d printed bosses, but if i am honest, these were a bit $hit as they didnt fit the switch properly and were all bent where they had printed on a slant, also there were not enough to retain all the functions i wanted, oh and the starter switch is a different diameter. Apparently prodrive sell them but they are about 50 per boss so 360 quid in bosses, no, thank, you.
After some less brilliant prototypes (read many)
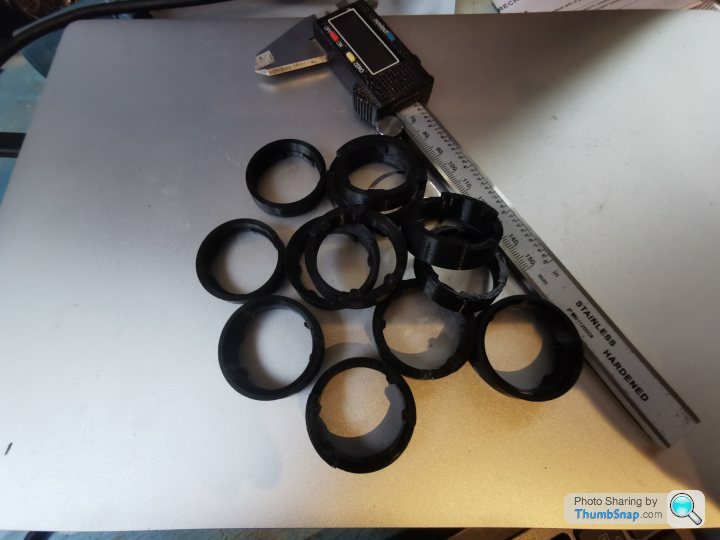
I ended up with a load of designs that worked for all the switches and connections I needed


Etc etc etc
At this point i need to get the drill out and bore some holes though 1600 quids worth of carbon fiber so i wanted to get it right, the reason for this was to retain the heated screens and the PDC. as always its easy to just lash this race car stuff in, but to make it work in a clubsport type thing is much more messing
I decided to mount these into the cutout that would normally house the GT4/N24 plaque.

This turned out to be a bit of an error as i then needed to relocate all the modules that were in the way, fortunately noting that a few small brackets couldnt resolve, more faffing.
it was about this time that i decided to call in professional help

Finally with some competant help i could really make progress and get it in for a bit of a better test fit.

The underlying dash structure needed a few small trims here and there to get a good fit but it was nothing significant, this was simply easier than trimming the carbon, and less upsetting.
With the test fit complete i finalised the wiring, the CAN data bypass was supplied by aston installations who had been hugely helpful and did suggest that i should just make it myself, but at the time i just didnt want to deal with yet another thing. Now i have a bit of a better grip of how it all works i am less phased by it all but the aston wiring diagrams are a joke in comparison to a major maker as are the stupid acronyms. The turning point in understanding really came from realising that what i had assumed was simply an HVAC module was a CAN gateway and actually body control module also. The absence of any working slack in the loom is also a source of unending annoyance, honestly its like they were trying to save on wire.
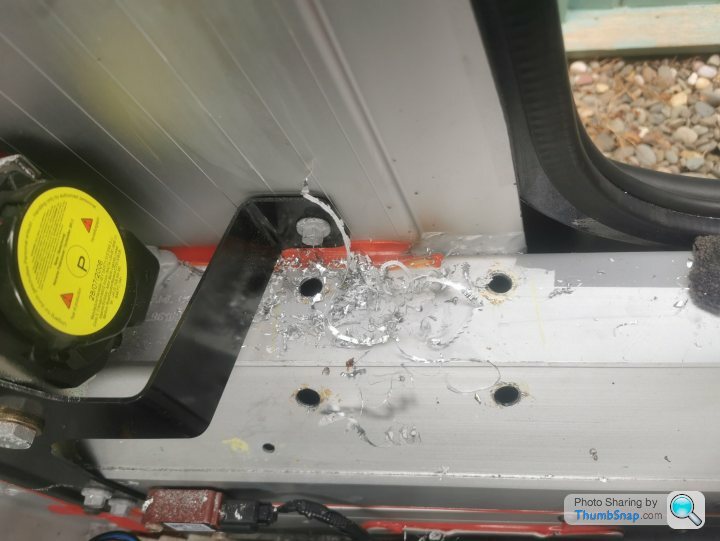
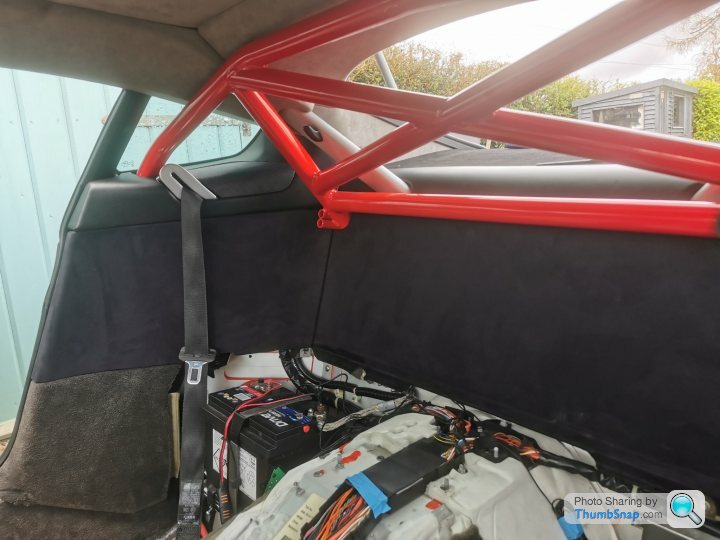
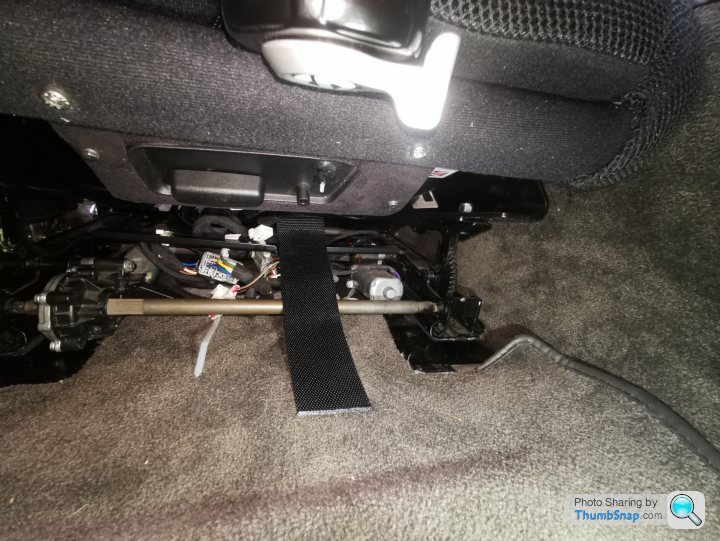
Cutting a long story short i them moved onto the final fit and bolted it all down and refitted all the decorative panels to the dash structure, with this done i drilled the holes for the Crutch straps and bonded the spreader plates to the underside of the car (prevent any water trapped between the plate and the allow causing galvanic corrosion) and fitted the passenger seat and harness. (again this was actually a complete ball ach due the power seat mech being in the way)

From that point on it was just a case of doing the same for the drivers side, and adding in printed gear surround that i had bonded the gaiter to.

Few pictures to give a better idea of the fit


 [url]
[url]
 |https://thumbsnap.com/zL2pptaB[/url][url]
 |https://thumbsnap.com/kpvCaXzs[/url]
With that out of the way, i reapplied the expanding foam to all the sills the seal them, and re fitted the arch liners, while doing this i also fitted some new rear pads (very squeaky)

And removed the last of the infotainment (accessed though rear wheel arch, yes, really) which was bolted to some horrible bit of rusty steel and weighed a ton

This was too crusty and heavy to go back so i made up a replacement from some turnes stainless i had in the bin of many things

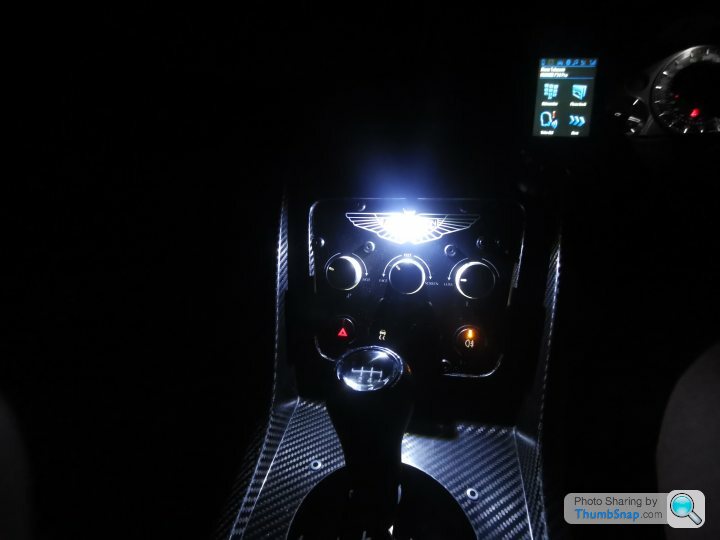
All that was left to do was mount the replacement infotainment, this now covers full Bluetooth handsfree and streaming as well as a host of other functions i will never use. crucially it means your not touching your phone while driving.

Sound quality is to be honest considerably better than the stock Aston system. with the amp being set to high pass filter the doors and low pass to the sub, works great.
Quite a bit more on the go at the moment, but pleased to have it all back up running and driving well, the weight removed was about 20kg of old volvo crap, but then of course some of that is back in with the harnesses and cage. overall i suspect i am slightly lighter net net.
SO:
With the seat adjustment sorted i needed to make up a way tolhold all the switches into the dash, and the starter switch, and the gear surround etc. To be fair the Guy i got the console off supplies a few 3d printed bosses, but if i am honest, these were a bit $hit as they didnt fit the switch properly and were all bent where they had printed on a slant, also there were not enough to retain all the functions i wanted, oh and the starter switch is a different diameter. Apparently prodrive sell them but they are about 50 per boss so 360 quid in bosses, no, thank, you.
After some less brilliant prototypes (read many)
I ended up with a load of designs that worked for all the switches and connections I needed
Etc etc etc
At this point i need to get the drill out and bore some holes though 1600 quids worth of carbon fiber so i wanted to get it right, the reason for this was to retain the heated screens and the PDC. as always its easy to just lash this race car stuff in, but to make it work in a clubsport type thing is much more messing
I decided to mount these into the cutout that would normally house the GT4/N24 plaque.
This turned out to be a bit of an error as i then needed to relocate all the modules that were in the way, fortunately noting that a few small brackets couldnt resolve, more faffing.
it was about this time that i decided to call in professional help
Finally with some competant help i could really make progress and get it in for a bit of a better test fit.
The underlying dash structure needed a few small trims here and there to get a good fit but it was nothing significant, this was simply easier than trimming the carbon, and less upsetting.
With the test fit complete i finalised the wiring, the CAN data bypass was supplied by aston installations who had been hugely helpful and did suggest that i should just make it myself, but at the time i just didnt want to deal with yet another thing. Now i have a bit of a better grip of how it all works i am less phased by it all but the aston wiring diagrams are a joke in comparison to a major maker as are the stupid acronyms. The turning point in understanding really came from realising that what i had assumed was simply an HVAC module was a CAN gateway and actually body control module also. The absence of any working slack in the loom is also a source of unending annoyance, honestly its like they were trying to save on wire.
Cutting a long story short i them moved onto the final fit and bolted it all down and refitted all the decorative panels to the dash structure, with this done i drilled the holes for the Crutch straps and bonded the spreader plates to the underside of the car (prevent any water trapped between the plate and the allow causing galvanic corrosion) and fitted the passenger seat and harness. (again this was actually a complete ball ach due the power seat mech being in the way)
From that point on it was just a case of doing the same for the drivers side, and adding in printed gear surround that i had bonded the gaiter to.
Few pictures to give a better idea of the fit
[url] |https://thumbsnap.com/zL2pptaB[/url][url] |https://thumbsnap.com/kpvCaXzs[/url] With that out of the way, i reapplied the expanding foam to all the sills the seal them, and re fitted the arch liners, while doing this i also fitted some new rear pads (very squeaky)
And removed the last of the infotainment (accessed though rear wheel arch, yes, really) which was bolted to some horrible bit of rusty steel and weighed a ton
This was too crusty and heavy to go back so i made up a replacement from some turnes stainless i had in the bin of many things
All that was left to do was mount the replacement infotainment, this now covers full Bluetooth handsfree and streaming as well as a host of other functions i will never use. crucially it means your not touching your phone while driving.
Sound quality is to be honest considerably better than the stock Aston system. with the amp being set to high pass filter the doors and low pass to the sub, works great.
Quite a bit more on the go at the moment, but pleased to have it all back up running and driving well, the weight removed was about 20kg of old volvo crap, but then of course some of that is back in with the harnesses and cage. overall i suspect i am slightly lighter net net.
magycks said:
This looks really good under the light control knob - black on black plastic as if OEM.
How does this bit of trim come off and is the plastic easy enough to drill a 20mm hole through without risk of damage?
Looking to do the same on my car but the wiring loom appears to be different on mine (MY14 DB9 with valve linked to Fuse 15). https://www.pistonheads.com/gassing/topic.asp?h=0&...
Hi, thanks i think its a sensible location, you cant actually see the switch at all under normal circumstances. How does this bit of trim come off and is the plastic easy enough to drill a 20mm hole through without risk of damage?
Looking to do the same on my car but the wiring loom appears to be different on mine (MY14 DB9 with valve linked to Fuse 15). https://www.pistonheads.com/gassing/topic.asp?h=0&...
You need to remove the kick plate, this is 8 fixings on a vantage as the you need to remove the decorative plate to them remove the final two allens, whith that done there is a fit tree fitting, these just need to be pulled out, they can be re used but get a bit bent, they are a standard trim fitting for many makes and you can just buy boxes of them from ebay / motorfactors i replace most of them as as it just keeps things nice and tight, with the fitting out you can pull the door rubber down and move the trim over. I didnt actually completely remove it as i recall there was another section overlapping but you could generate plenty of space.
difficult to advise on a db9 as i have not tried it but there will be a diagram in the factory manual though the factory diagrams are to be honest $hite in my opinion., but better than nothing. There is nothgin to say you have to tap the circuit at this point, it just is near where you want the switch, you could tap it right at the compresser if you chose which i would assume is in the same place on a db9 (rear drivers wheel well behind the liner)
As to the hole just remove the whole drivers knee roll panel, it will probably make a hirrible snapping sound as the air temp probe pops off but it just snaps back on. unplug the light switch, disasemble the switch from the panel and drill away. you need to take it apart thpough or there is a high chance of doing into the headlight switch, you need to be fairly accurate.
olv said:
Amazing. Love it.
Have you reverted to the stop gearstick or will the long one you had go back in?
Thansk man, its been a pain having the car in quite so many bits for so long, but i am pretty pleased with the result.Have you reverted to the stop gearstick or will the long one you had go back in?
Gear lever is a work in progress, i was never happy with it and i then welded a 10mm pivot to it but a bit too far up (trying to make the throw too short) and ran out of adjustment on the main cable. I have made a new solution that i think will be much much better but just need a spot more time with a lathe on the weekend. i will write it up as it should be repeatable and will not rely on adjusting to pivot on the bell crank end.
seefarr said:
This thread is simply marvellous. It's got Astons, pisstaking, wiring, dogs: everything you could want.

Outragous, the dog is the one that does! 
 |https://thumbsnap.com/Ss3ywdEo[/url]
Snooglefinder said:
Superb work - excellent thread! Congrats on the work done so far.
Thanks dude 
Jhonno said:
Great work on the centre console! Nice 3D printed solutions too.. I approve! 3D printers are bloody handy and cool aren't they! Have you got a lightweight battery? Can't remember if you have..
3d printer wise, yea 100%, without one doing this would be very difficut, possibly even not viable given you would otherwise have to pay others. Its also been hugely helpful in terms of getting confidence in a design beofre making it properly. The mill has also been very useful in terms of making up the suspension components where 3Dp just doesnt hace the required strength. Battery wise i have a smaller one, its just one from a cooper S (same as an e46 csl) so its lighter than stock but not litium light. its on the cards, just not yet gotten round to deciding which one i want. EdmondDantes said:
Interior looks incredible now, cool dog!
Thanks mate!In terms of updates, nothing huge but some notable bits i suppose.
Firstly the 3Dp gear surround was only likely to be temporary, and so it turned out to be. I used a site called machining4u so solicit for some jobs, its a good site from my (limited) experience. in essence, you submit your job, get quotes, accept one and pay the money into their escrow. Once you get your part, you release the funds.
What this means is i had the gear surround made in t6061 (yes i know overkill to the Nth degree) bead blasted and chemically blacked. turned out well i think. Just need to bond the gaiter to it and fit it.

I also worked on the gear lever issue.
For me the stock lever is too short, too heavy and has too long a throw, not to mention i dont think much of the feel tbh.
Now the simple way to shorten the throw is to move the ball pin on the bell crank on the gearbox end. Getting the box out of these cars is simple given where its mounted, but not exactly convienient, and definately not convienient currently. so the other option is to increase the distance between the pivot and the cable attachment on the lever end.
This is what i have gone for and it could be done on any vantage at essentially no cost other than some time and effort.
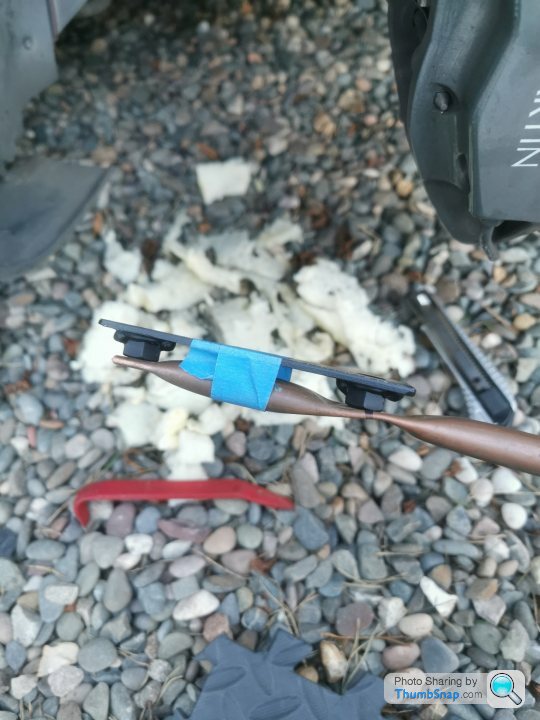
This is the final combo fitted with an Audi sport knob (solid alloy and correct shift pattern), the audi knob is longer so brings the lever closer to your hand and is a fraction of the weight giving it a lighter less inertia laden feeling.

In this picture the pivot has moved downward by 13mm which is a 22% reduction in throw length,
This is done by pressing the rod from the pivot

Drilling and tapping the rod and counterboring the pivot ball

The drilling and tapping etc essentially allows the rod to remain fully secured without being fully in the pivot ball, though this took quite a few tons of pressure in a hydraulic press to move so if likely overkill really, but proper is proper.
With that done a printed stepped spaved can be pressed over the top of the shaft and the audi knob drilled and tapped and fitted with a small grub screw.

The end result is a considerable improvement. in terms of feed and throw... But could be shorter still and more direct, so it will remain on the project list, but its now much more acceptable (to me)

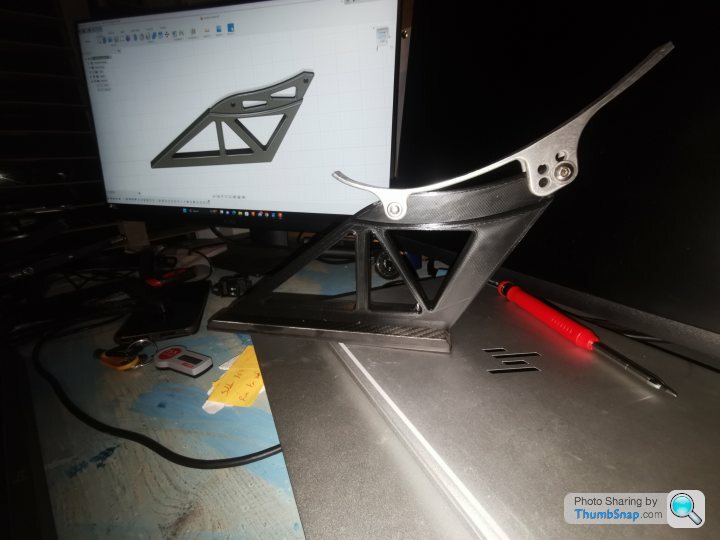
Finally i have also been working on a spoiler to fit the car, but this is still in very much prototype phase

Firstly the 3Dp gear surround was only likely to be temporary, and so it turned out to be. I used a site called machining4u so solicit for some jobs, its a good site from my (limited) experience. in essence, you submit your job, get quotes, accept one and pay the money into their escrow. Once you get your part, you release the funds.
What this means is i had the gear surround made in t6061 (yes i know overkill to the Nth degree) bead blasted and chemically blacked. turned out well i think. Just need to bond the gaiter to it and fit it.
I also worked on the gear lever issue.
For me the stock lever is too short, too heavy and has too long a throw, not to mention i dont think much of the feel tbh.
Now the simple way to shorten the throw is to move the ball pin on the bell crank on the gearbox end. Getting the box out of these cars is simple given where its mounted, but not exactly convienient, and definately not convienient currently. so the other option is to increase the distance between the pivot and the cable attachment on the lever end.
This is what i have gone for and it could be done on any vantage at essentially no cost other than some time and effort.
This is the final combo fitted with an Audi sport knob (solid alloy and correct shift pattern), the audi knob is longer so brings the lever closer to your hand and is a fraction of the weight giving it a lighter less inertia laden feeling.
In this picture the pivot has moved downward by 13mm which is a 22% reduction in throw length,
This is done by pressing the rod from the pivot
Drilling and tapping the rod and counterboring the pivot ball
The drilling and tapping etc essentially allows the rod to remain fully secured without being fully in the pivot ball, though this took quite a few tons of pressure in a hydraulic press to move so if likely overkill really, but proper is proper.
With that done a printed stepped spaved can be pressed over the top of the shaft and the audi knob drilled and tapped and fitted with a small grub screw.
The end result is a considerable improvement. in terms of feed and throw... But could be shorter still and more direct, so it will remain on the project list, but its now much more acceptable (to me)
Finally i have also been working on a spoiler to fit the car, but this is still in very much prototype phase
Also i did a bit of gentrification on the power steering venting, while the original solution was essentially factory and worked perfectly, it just lacked a bit of neatness.
so from here:

To Here:

I would say there is zero functional benefit, but it looks a bit nicer.
Its just a motorbik resevoir with some nylon tubing heated up and formed, but its reasonably tidy i think
so from here:
To Here:
I would say there is zero functional benefit, but it looks a bit nicer.
Its just a motorbik resevoir with some nylon tubing heated up and formed, but its reasonably tidy i think
SturdyHSV said:
This thread is brilliant, thanks for keeping it up 
Thanks dude, always keep an eye on your too Jhonno said:
I can recommend Deadweight! I and some mates run them.. Great chaps too, proper car guys, behind them.
INteresting call on deadweight, looks like the same battery that valient whitelabel. My instinct was to just use something cheap off ebay but potentially i should spend a bit more so i dont find myself in too many no start scenario's Cars being a dick now though as the rear indicator has died, i wouldnt mind but i have literally just dried it out and sealed it, f
king thing!Jhonno said:
Just did a search (Valiant Ecosse) and yes, it is a Deadweight battery with their branding on.
The issue with cheap ones, is if they go flat it kills them. The Deadweight has a BMS which shuts the battery down to prevent cell damage.
I am going to come over as a smart are here so I apologies in advance, but pretty much all lithium packs will have some form of BMS to balance the cells and a lower limit voltage floor, I dont know what would be different from the "norm" in the deadweight ones. That said i looks like a decent product and it does look competitive VS the likes of antigravity, superbee etc etc they are definitely on my shortlist! The issue with cheap ones, is if they go flat it kills them. The Deadweight has a BMS which shuts the battery down to prevent cell damage.
olv said:
The wing looks pretty serious (but probably shouldn’t be surprised by this point…)
Funnily enough just ordered a Deadweight battery for mine. Feels a bit frivolous but mine still has the original battery at 16 years old the extra cost to change to save 20kg seemed vaguely justifiable
The wing is actually a really nice item, full carbon chord, very strong very light. It originally had some horrid mounts on it but i cut them off, for £150 I am really pleased with it Vs the GT4 or Reverie optionsFunnily enough just ordered a Deadweight battery for mine. Feels a bit frivolous but mine still has the original battery at 16 years old the extra cost to change to save 20kg seemed vaguely justifiable
Jhonno said:
Not at all. I am pretty sure the cheaper ones don't have a BMS that prevents damage when the cell voltage drops too far.. I could be wrong, but I have heard of cheaper ones being killed by being allowed to go flat.
We melted a skyrich one a few years ago using a regular charger on it (logic being, it would be fine as it charges off a conventional alternator) it definately wasn't fine.I chipped open the melted plastic and there was quite a comprehensive BMS, but maybe the Deadweight ones are a bit more comprehensive, the ebay ones are certainly built to a price for sure
OK, so will try and update this a bit, lots of things have been done but documented poorly. If anyone (unlikely) has any specific questions or wants any specific bits making happy to help but will try not to go into too much detail or i will never get anywhere.
So, prepping for another trip to Spa and Zolder (Meppen was also planned but more on that later)
First up was to stop messing about with the spoiler and just get it done, it will be painted in the fullness of time but its currently just in raw carbon complete with a few scuffs etc in it.
I didnt like the end pates that had come on the spoiler, tbh other than the actual foil i didn't use any of it, but the foil its self is a really quality item
Tried a few different designs amd CNC'd them out of cheap card, settled on this one and milled it out of 3mm carbon plate


With that done i had the brackets i had designed and printed made from 6061 and anodised grey, they are a fully integrated bracket that incorporates the foot of the mount for a gasket and the profild section at the top so that the entire upright is the same width, i.e. the mounting bracket on the spoiler side is flush. I should have had them shotblasted before anodising but, you live and learn!


I then just cut some simple gaskets from Viton to help the mount profile to the boot and seal any waster ingress

The brackets were bonded on using 3m 2 part structural adhesive (DP6310NS serious stuff) but because i am paranoid about things coming off i also added some rivnuts with wafer head screws to keep it high and tight

Next up was the bushings, powerflex make (at great cost) a full set of very nicely engineered black series race bushes for the Vantage, they are lots of money but genuinely fancy things. Fortunately a mate of mine was able to get me a deal, but it was still a notable cost just for the complete front bushings. At present i have only dont the front of the car, the reason being that at some point the back axle needs to come out and i dont really want to do a load of elements of that job twice. none of the OEM bushings are in bad condition so i have made that a problem for future Iain, fk that guy right?
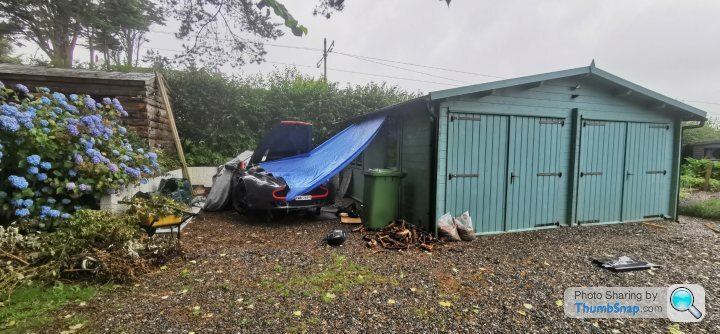
Probably because of this way of thinking i am still that guy with the half built immobile car taking upm his work space so had to recreate a Aleppo camp scene in my drive
I pulled the entire front uprights off as single units as it was just a much simpler way of doing the job and allowed me to use a mates press to remove them. Something i was very glad of as it was a complete nob to do. The rear caster adjusted on the passenger side snapped off leaving the shank and had seized in the bolt and ultimately had to be sawn out on both sides. if your going to DIY this i suggest you ensure you have the following tools detailed in the below image (hope this helps!)

Ultimately you end up with two of these

Which you then struggle with for a bit to remove these
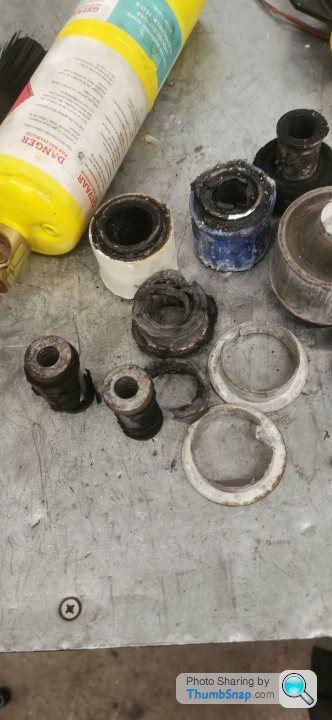
Ending up with a pile of this

I also took the opportunity to remove the bearings from the uprights with the press, these were absolutely jammed in, hopefully this will make it easier should i find myself having to replace one in a hurry, optimism and all that..
The only other drama was that on the passenger side (again) the arb mounts pulled the thread inserts out with the bolts slightly on both the upper and lower mounts, rather than trying to fight to get them back to true i decided to just pull them out

And fit new ones
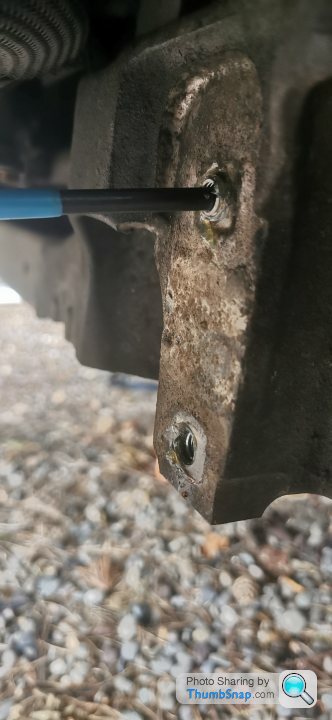

Just standard M8 helicoils (m8x1.25) in case its of use to anyone.
As my standard droplinks were looking a bit tired (though felt fine to be fair) I made up some adjustable ones using a tunbuckle universal kit and just cut them to size, this allowed me to set the rollbar without any preload at the adjusted ride height, simple and cheap

Putting it back together was delayed by the broken bolt but good service from Astonmartinbits.com who supplied the caster bolt for less than half the price of scudaria who want £40 plus vat for an m12 cam bolt ffs!
With it all together i eyeballed some geometry onto the front of the car and took it to be aligned and aircon gassed
No one really talks about track Geo on these from what i can see, or rather what i could see looked very weaksauce.
I was fairly conservative with the starting point but will add a bit more camber in and possibly look at moving to a fully neutral toe later (the rear left toe was corrected to 0.07 but i dot have the latter sheet to hand, the rear right camber was not corrected as they recon they couldn't get the angle, but looking at the adjusters they look set to minimum so i have no idea why, i will put the inclinometer on it at some point and just add a bit more now i know the starting numbers)

The result of all of the above was a really marked improvement in how connected the car felt and responded, immediately even just on my eyeballed alignment the responsiveness of the front end was an order of magnitude better. bearing in mind the stock bushes were actually not in terrible condition this was a good result. As with all things there is no fee lunch and using the hard black series bushes definitely increases the noise level a bit. the softer purples are likely a better bet if you would rather not make that compromise.
Lots more to write, but its late.....
So, prepping for another trip to Spa and Zolder (Meppen was also planned but more on that later)
First up was to stop messing about with the spoiler and just get it done, it will be painted in the fullness of time but its currently just in raw carbon complete with a few scuffs etc in it.
I didnt like the end pates that had come on the spoiler, tbh other than the actual foil i didn't use any of it, but the foil its self is a really quality item
Tried a few different designs amd CNC'd them out of cheap card, settled on this one and milled it out of 3mm carbon plate
With that done i had the brackets i had designed and printed made from 6061 and anodised grey, they are a fully integrated bracket that incorporates the foot of the mount for a gasket and the profild section at the top so that the entire upright is the same width, i.e. the mounting bracket on the spoiler side is flush. I should have had them shotblasted before anodising but, you live and learn!
I then just cut some simple gaskets from Viton to help the mount profile to the boot and seal any waster ingress
The brackets were bonded on using 3m 2 part structural adhesive (DP6310NS serious stuff) but because i am paranoid about things coming off i also added some rivnuts with wafer head screws to keep it high and tight
Next up was the bushings, powerflex make (at great cost) a full set of very nicely engineered black series race bushes for the Vantage, they are lots of money but genuinely fancy things. Fortunately a mate of mine was able to get me a deal, but it was still a notable cost just for the complete front bushings. At present i have only dont the front of the car, the reason being that at some point the back axle needs to come out and i dont really want to do a load of elements of that job twice. none of the OEM bushings are in bad condition so i have made that a problem for future Iain, fk that guy right?
Probably because of this way of thinking i am still that guy with the half built immobile car taking upm his work space so had to recreate a Aleppo camp scene in my drive
I pulled the entire front uprights off as single units as it was just a much simpler way of doing the job and allowed me to use a mates press to remove them. Something i was very glad of as it was a complete nob to do. The rear caster adjusted on the passenger side snapped off leaving the shank and had seized in the bolt and ultimately had to be sawn out on both sides. if your going to DIY this i suggest you ensure you have the following tools detailed in the below image (hope this helps!)
Ultimately you end up with two of these
Which you then struggle with for a bit to remove these
Ending up with a pile of this
I also took the opportunity to remove the bearings from the uprights with the press, these were absolutely jammed in, hopefully this will make it easier should i find myself having to replace one in a hurry, optimism and all that..
The only other drama was that on the passenger side (again) the arb mounts pulled the thread inserts out with the bolts slightly on both the upper and lower mounts, rather than trying to fight to get them back to true i decided to just pull them out
And fit new ones
Just standard M8 helicoils (m8x1.25) in case its of use to anyone.
As my standard droplinks were looking a bit tired (though felt fine to be fair) I made up some adjustable ones using a tunbuckle universal kit and just cut them to size, this allowed me to set the rollbar without any preload at the adjusted ride height, simple and cheap
Putting it back together was delayed by the broken bolt but good service from Astonmartinbits.com who supplied the caster bolt for less than half the price of scudaria who want £40 plus vat for an m12 cam bolt ffs!
With it all together i eyeballed some geometry onto the front of the car and took it to be aligned and aircon gassed
No one really talks about track Geo on these from what i can see, or rather what i could see looked very weaksauce.
I was fairly conservative with the starting point but will add a bit more camber in and possibly look at moving to a fully neutral toe later (the rear left toe was corrected to 0.07 but i dot have the latter sheet to hand, the rear right camber was not corrected as they recon they couldn't get the angle, but looking at the adjusters they look set to minimum so i have no idea why, i will put the inclinometer on it at some point and just add a bit more now i know the starting numbers)
The result of all of the above was a really marked improvement in how connected the car felt and responded, immediately even just on my eyeballed alignment the responsiveness of the front end was an order of magnitude better. bearing in mind the stock bushes were actually not in terrible condition this was a good result. As with all things there is no fee lunch and using the hard black series bushes definitely increases the noise level a bit. the softer purples are likely a better bet if you would rather not make that compromise.
Lots more to write, but its late.....
Edited by IainWhy on Wednesday 16th August 01:12
trails said:
I'm glad I'm not the only one that ends up with a pile of tools on the floor at the end of every job.
Saw this on ebay...bit late though.
https://www.ebay.co.uk/itm/134609283636?mkcid=16&a...
Thanks dude, i have considered fitting pole positions as we have them in the Z4 race car and they are comfortable, but i think these are actually more supportive. I may re trip them in something a bit more in keeping with the rest of the interior though Saw this on ebay...bit late though.
https://www.ebay.co.uk/itm/134609283636?mkcid=16&a...
So, onward
Car with spoiler attached


Needs some painting and a few adjustments like changing the TI bolts to Tube nuts for a cleaner look but its well screwed on and i am personally happy with how it turned out. I simply didnt have time before the trip to mess about with the finer details.
Next up for addressing was the halfshaft CV joint boot that had failed and started venting oil, I did this the easy way by removing the rear hub and shaft in one go, pressing out the driveshaft and then removing the inner race cap and replacing the boot.


This was a quick and simple job but revealed annoyingly that the output shaft flange on the transaxle was leaking.
Fortunately, Scuderia actually quote the seal sizes on the parts page so i just ordered nice SKF viton ones for about 30% of the cost from aston

Now fitting this was supposed to be simple, there are no diagrams for the Graziano transaxle that i have yet found, they are fairly common in Audi R8's etc and used in a lot of prototype cars where they want the gearbox behind the engine but i am not well acquainted with them so it took a good bit of head scratching. Once you know its easy, until that point its a complete tt.
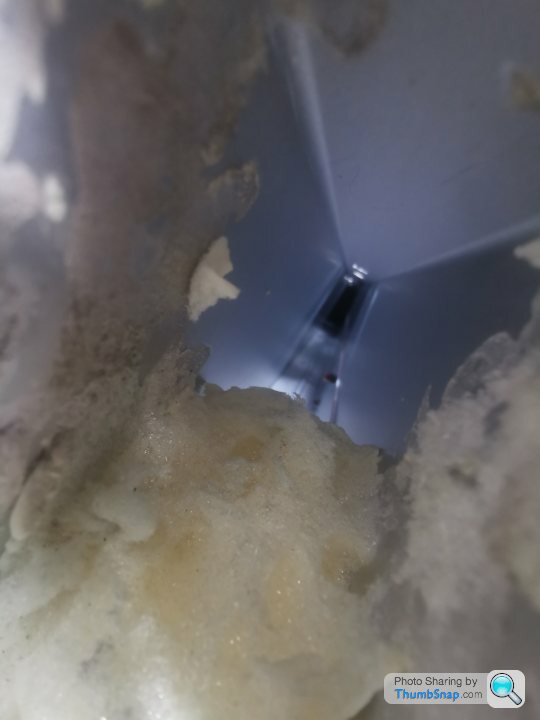
You cant remove the output shaft flange as it runs on a double bearing and the circlip to secure it sits behind the first bearing. as such you need to remove the entire cover plate with the output shaft in one go, then you can remove the circlip and remove the flange from the cover plate (not sure i have ever written "flange" so frequently).

The below image is during reassembly as you can clearly see the new seal but you can see the cover plate on the side.
Because you have to remove this its a complete drain down of the axle and removal of the mounts and exhaust mid section to get to it. Crucially it also exposes the crown sheel and differential.
THe stof setup on these cars gives very little LSD effect on acceleration, them really don't feel like they have a diff in at all. I had read a long time ago that prodrive had in some cases reversed the differential but had filed it under "interesting shiz for another day" but given we were very much "in there" it seemed like as good a time as any to split the diff down and see what was what.
Its a decent diff, by eye i would say its probably a ZF unit in 4 plate configuration, i have taken the dimensions off the clutches and steels so will see what they correspond to when i get some time. what is interesting it that its structured as a 1.5 way, but set backwards to any conventional logic (i believe that this was changed in the later 4.7 cars) as such on power the diff meets a approx 80 degree ramp angle leading to very very little clutch engagement, however on deceleration meest a very shallow approx 30 degree angle producing a lot of lock. its weirdly arse about face.
diff out


Interestingly (if your as boring as i am) the crown is retained by the cover plate bolts, which is smart as you only need half the fixings
with the diff opened up you can see in the crappy picture below that the angles are hugely asymmetric, this is compounded further as unlike older ZF units the gear vales are also profiled to give better engagement on the ramp (another good idea as the round ones tended to dent the ramps)

The diff was rotated by simply switching the upper and lower drive plates to reverse the angles giving max lock on acceleration and and minimum on overrun.
Jumping ahead a bit this has completely changed the car, you really know you have a spicy diff in it, in corners you are able to control the car much more on the throttle to neutralise understeer and open up on the throttle does actually generate some turn in in the slower ones, i am personally very happy with the change, particularly as its essentially free.
Finally on the gearbox side the breather was completely rooted and of very poor quality to start with so was replaced with a better john guest type push fit that i have used on the nylon line in other applications.
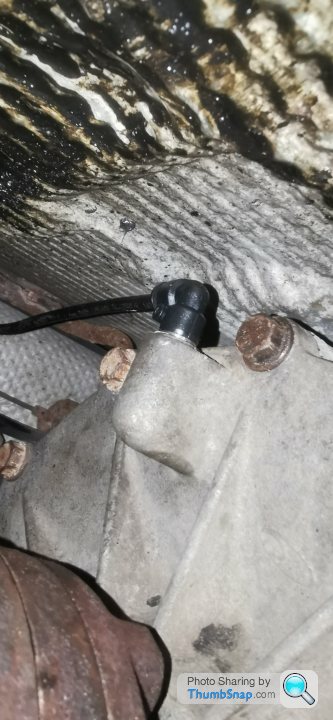
With that done i noticed that the valves were rotting off the v12 backbox, they are absolutely crap quality mild steel, and were so badly gone i could simply pull them off by hand

they really are absolute st. fortunately the cheaper V8 uses much better stainless valves so i cut these off the old exhaust and Matt welded them onto the v12 box. Before fitting i fully threaded the actuator rods in the hope that it will allow me in the future to adjust how loud loud actually is.

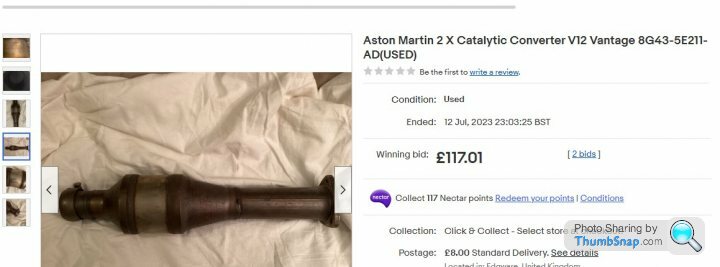
Finally running no cats on the current map was causing a lot of heat and a fair bit of fire out of the exhaust, this had started to distort the rear diffuser and was a source of constant emissions lights. I dodnt have time to mess about with another map to resolve this, but fortunately had spotted a set of v12 secondary cats on ebay.
I bought these for the huge sum of £117 and they met an angle grinder, drill and a welder to make some low cell count "race catz" nothign is quite plain sailing and they did mean that i needed to extend to looms on the post cat sensors, but that was just half an hours faff.

Still a fair bit more to cover i am afraid, but i will aim to get there in the next few days..... oh the excitement......
Car with spoiler attached
Needs some painting and a few adjustments like changing the TI bolts to Tube nuts for a cleaner look but its well screwed on and i am personally happy with how it turned out. I simply didnt have time before the trip to mess about with the finer details.
Next up for addressing was the halfshaft CV joint boot that had failed and started venting oil, I did this the easy way by removing the rear hub and shaft in one go, pressing out the driveshaft and then removing the inner race cap and replacing the boot.
This was a quick and simple job but revealed annoyingly that the output shaft flange on the transaxle was leaking.
Fortunately, Scuderia actually quote the seal sizes on the parts page so i just ordered nice SKF viton ones for about 30% of the cost from aston
Now fitting this was supposed to be simple, there are no diagrams for the Graziano transaxle that i have yet found, they are fairly common in Audi R8's etc and used in a lot of prototype cars where they want the gearbox behind the engine but i am not well acquainted with them so it took a good bit of head scratching. Once you know its easy, until that point its a complete t
t. You cant remove the output shaft flange as it runs on a double bearing and the circlip to secure it sits behind the first bearing. as such you need to remove the entire cover plate with the output shaft in one go, then you can remove the circlip and remove the flange from the cover plate (not sure i have ever written "flange" so frequently).
The below image is during reassembly as you can clearly see the new seal but you can see the cover plate on the side.
Because you have to remove this its a complete drain down of the axle and removal of the mounts and exhaust mid section to get to it. Crucially it also exposes the crown sheel and differential.
THe stof setup on these cars gives very little LSD effect on acceleration, them really don't feel like they have a diff in at all. I had read a long time ago that prodrive had in some cases reversed the differential but had filed it under "interesting shiz for another day" but given we were very much "in there" it seemed like as good a time as any to split the diff down and see what was what.
Its a decent diff, by eye i would say its probably a ZF unit in 4 plate configuration, i have taken the dimensions off the clutches and steels so will see what they correspond to when i get some time. what is interesting it that its structured as a 1.5 way, but set backwards to any conventional logic (i believe that this was changed in the later 4.7 cars) as such on power the diff meets a approx 80 degree ramp angle leading to very very little clutch engagement, however on deceleration meest a very shallow approx 30 degree angle producing a lot of lock. its weirdly arse about face.
diff out
Interestingly (if your as boring as i am) the crown is retained by the cover plate bolts, which is smart as you only need half the fixings
with the diff opened up you can see in the crappy picture below that the angles are hugely asymmetric, this is compounded further as unlike older ZF units the gear vales are also profiled to give better engagement on the ramp (another good idea as the round ones tended to dent the ramps)
The diff was rotated by simply switching the upper and lower drive plates to reverse the angles giving max lock on acceleration and and minimum on overrun.
Jumping ahead a bit this has completely changed the car, you really know you have a spicy diff in it, in corners you are able to control the car much more on the throttle to neutralise understeer and open up on the throttle does actually generate some turn in in the slower ones, i am personally very happy with the change, particularly as its essentially free.
Finally on the gearbox side the breather was completely rooted and of very poor quality to start with so was replaced with a better john guest type push fit that i have used on the nylon line in other applications.
With that done i noticed that the valves were rotting off the v12 backbox, they are absolutely crap quality mild steel, and were so badly gone i could simply pull them off by hand
they really are absolute s
t. fortunately the cheaper V8 uses much better stainless valves so i cut these off the old exhaust and Matt welded them onto the v12 box. Before fitting i fully threaded the actuator rods in the hope that it will allow me in the future to adjust how loud loud actually is.Finally running no cats on the current map was causing a lot of heat and a fair bit of fire out of the exhaust, this had started to distort the rear diffuser and was a source of constant emissions lights. I dodnt have time to mess about with another map to resolve this, but fortunately had spotted a set of v12 secondary cats on ebay.
I bought these for the huge sum of £117 and they met an angle grinder, drill and a welder to make some low cell count "race catz" nothign is quite plain sailing and they did mean that i needed to extend to looms on the post cat sensors, but that was just half an hours faff.
Still a fair bit more to cover i am afraid, but i will aim to get there in the next few days..... oh the excitement......
Gassing Station | Readers' Cars | Top of Page | What's New | My Stuff