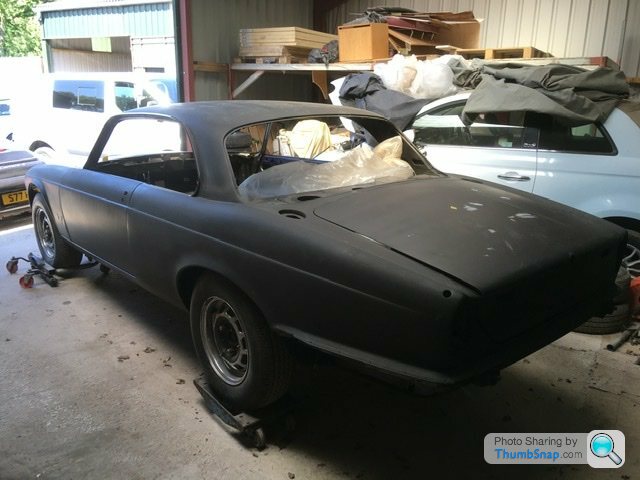
Jaguar xjc 4.2
Discussion


Retro_Jim said:
Love the colour Rob, I'd keep with the Jaguar grille etc and keep looking for one in better condition or a spare that can be refurbished.
I’m trying to negotiate a price for a spray chrome finish to the Jag bonnet grille. Probably won’t get done till the new year though. With all the Christmas parcels knocking around I don’t want this large part getting damaged or go missing. 
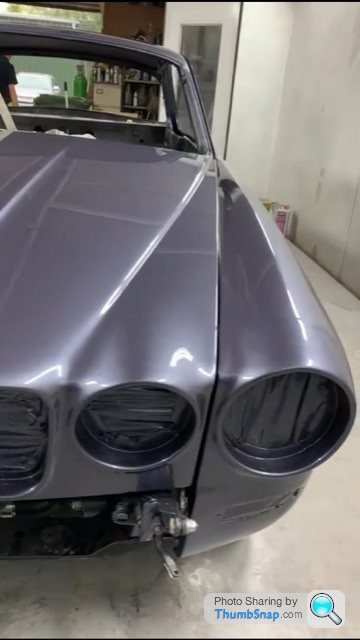
So this morning I was told the bonnet won’t shut as it fouls on the front carburettor. So the new paint is marked. I had this all fitted prior to the restoration. The one thing is I repaired the bonnet hinges. One had actually sheared when the bonnet was removed at strip down.
A while back I repaired the steel pivots with bronze bushes and stainless pins which work very well I was told but due to holding all in place I have zero bonnet clearance over the carburettor.
The engine can’t be engineered lower as the sump has minimal clearance over the front axle as it currently is unless I start cutting the sump. The sump is cast aluminium so that will be difficult due to oil seepage in the casting unlike a pressed steel item which would be simple to cut and shut.
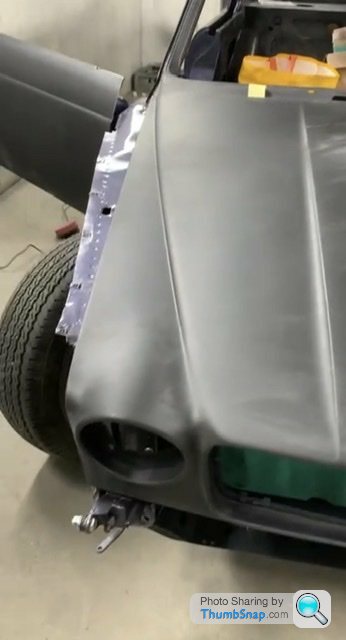
So now a teardrop type blister will now be incorporated into the bonnet. Not ideal but necessary. Getting it to look good will be interesting.
A while back I repaired the steel pivots with bronze bushes and stainless pins which work very well I was told but due to holding all in place I have zero bonnet clearance over the carburettor.
The engine can’t be engineered lower as the sump has minimal clearance over the front axle as it currently is unless I start cutting the sump. The sump is cast aluminium so that will be difficult due to oil seepage in the casting unlike a pressed steel item which would be simple to cut and shut.
So now a teardrop type blister will now be incorporated into the bonnet. Not ideal but necessary. Getting it to look good will be interesting.
B'stard Child said:
Is there not an option to have the inlet manifold to bring carbs closer to engine and as a result lower ot change the angle of the carbs (manifold shave again) to provide more clearance
Or triple webbers
Triple Webber’s will require a new inlet manifold. A rather expensive option. Or triple webbers
Machining the existing manifold is possible but I think putting an angle on it to kick the carb over won’t help the damper inside it.
To remove the inlet manifold the engine needs to be out again so I can measure the part properly rather than taking a bit off and checking each time.
Just a pain really as I’ve seen a few XJ’s with triple su carbs but no mention of bonnet clearance issues.
jeremyc said:
Custom cut-down dashpot on the carb(s)? 
It's right up your (fabrication) street.
That’s the first thing I thought. Easy to do but I don’t think there is enough spare material to remove from the top and bottom of those dash pots. It's right up your (fabrication) street.
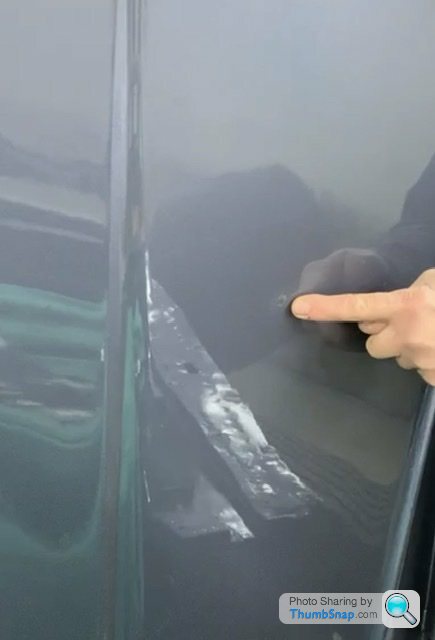
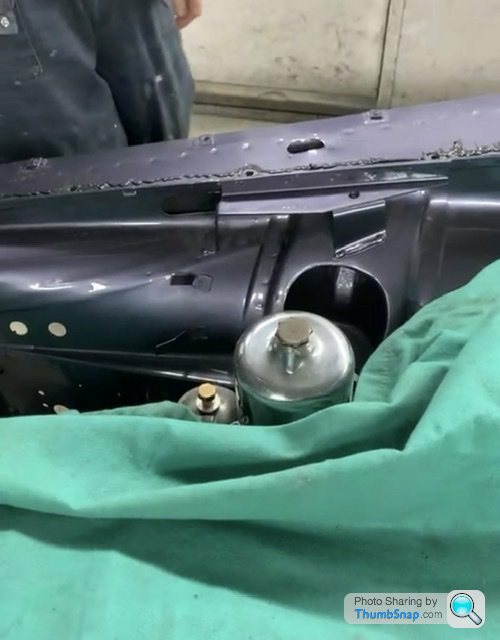
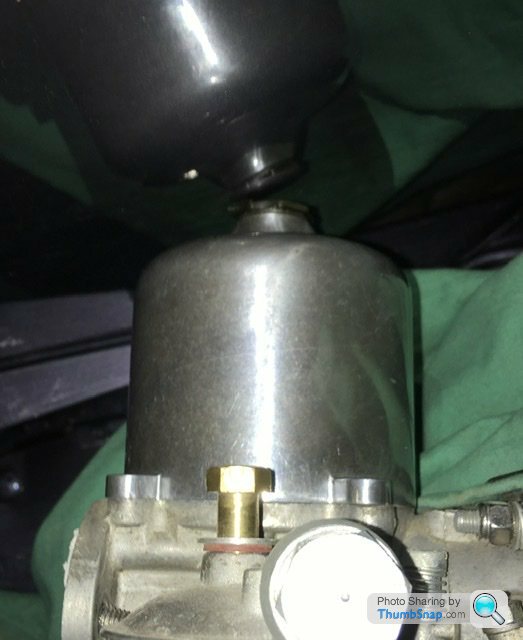
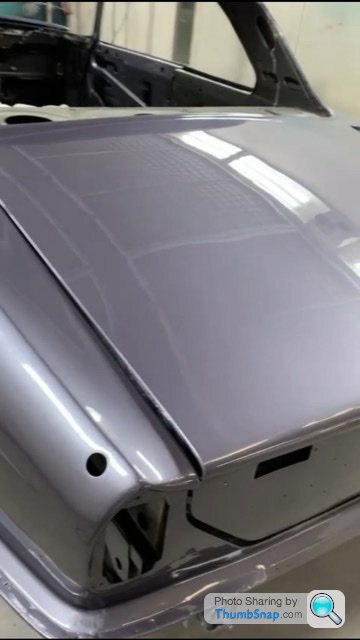
Engine sump needs more clearance off front subframe. So say 4mm minimum. Currently approx 2mm if that. Bonnet needs 5mm off carb to shut properly plus engine raise of at least 2mm. That’s 7mm off the carb to shut the bonnet and it will just kiss the inside of the bonnet still.
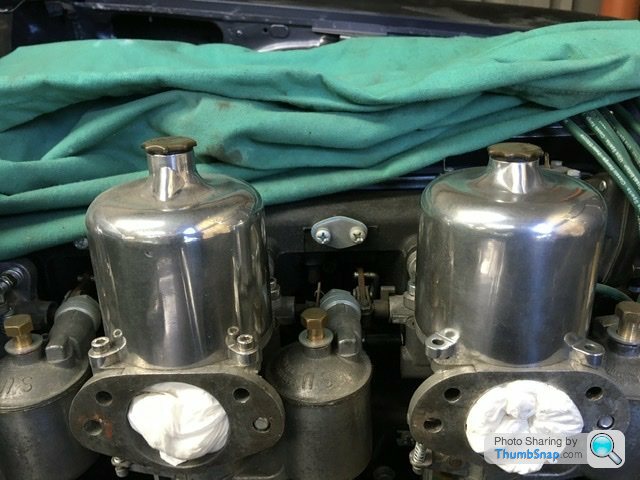
Still chipping away at this. Picture shows the machined slightly shorter carburettor dash pot on the right compared to original on the left.
I shortened it by 6mm. This removed the original thread to screw the damper in place. So that was re-cut also.
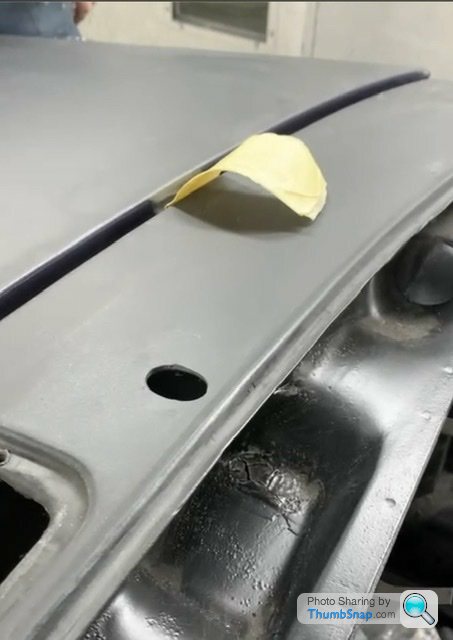
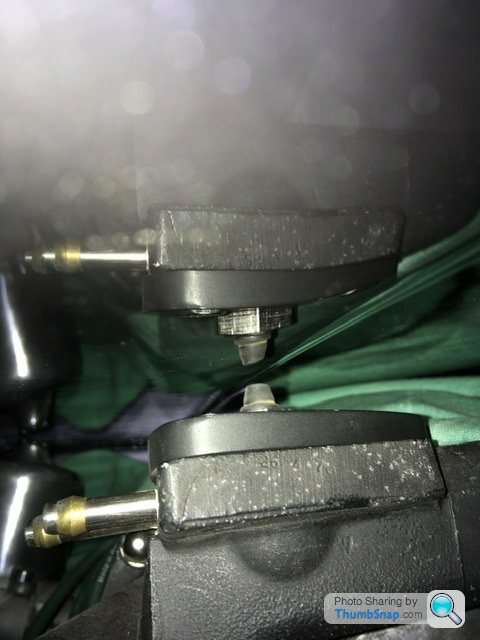
Picture below shows minimal clearance with the bonnet shut. With the reflection above there is a small gap between that and the actual carburettor. Another 2mm off should be perfect.
I also reduced the height of the coolant bleed screw which fits on the end of the carb manifold. Originally a regular radiator pressurised screw cap but that failed the bonnet. My version uses a stainless steel brake caliper bleed screw. Just push a pipe on and crack the bleed nipple until any air is purged. Then tighten when complete.
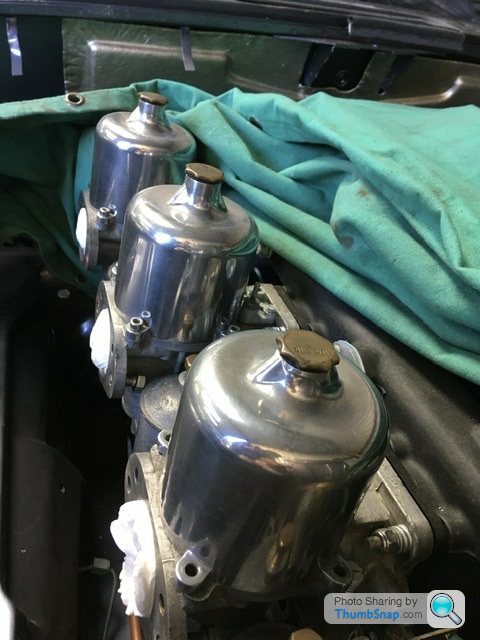
Picture above shows under bonnet reflection again with a good gap between reflection and actual part.
No need to spoil the bonnet with a cut-out/Louvre or bulge now. So very happy with that outcome.
Been a while for an update, but this will start moving again soon.
I’m always looking for better chrome parts or interesting parts to fit the xjc.
Recently I managed to buy a pair of smoked front indicator lenses. Being sold as single items on separate flea bay listings. I’ve never seen another set before. They wasn’t expensive either as they were sold as singles.
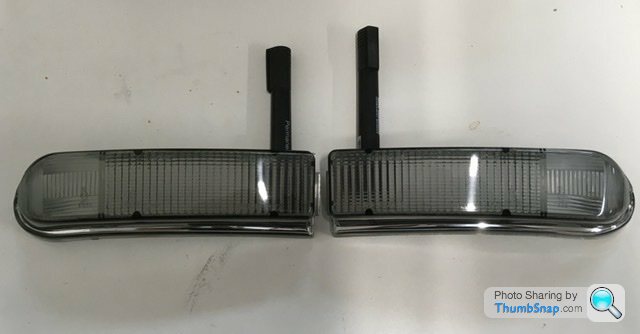
Will be an orange bulb behind them but that isn’t an issue. I think these will clean up the front perfectly so no huge orange lense to stare at.
Also ordered a new headliner biscuit today. That was expensive! But it’s new and will give a better finish once the new covering goes on (with no foam backing that eventually separates).
I’m always looking for better chrome parts or interesting parts to fit the xjc.
Recently I managed to buy a pair of smoked front indicator lenses. Being sold as single items on separate flea bay listings. I’ve never seen another set before. They wasn’t expensive either as they were sold as singles.
Will be an orange bulb behind them but that isn’t an issue. I think these will clean up the front perfectly so no huge orange lense to stare at.
Also ordered a new headliner biscuit today. That was expensive! But it’s new and will give a better finish once the new covering goes on (with no foam backing that eventually separates).
B'stard Child said:
RobXjcoupe said:
Been a while for an update, but this will start moving again soon.
I’m always looking for better chrome parts or interesting parts to fit the xjc.
Recently I managed to buy a pair of smoked front indicator lenses. Being sold as single items on separate flea bay listings. I’ve never seen another set before. They wasn’t expensive either as they were sold as singles.
Will be an orange bulb behind them but that isn’t an issue. I think these will clean up the front perfectly so no huge orange lense to stare at.
Silvered bulbs that flash orange would also work well to avoid the "burnt fried egg" lookI’m always looking for better chrome parts or interesting parts to fit the xjc.
Recently I managed to buy a pair of smoked front indicator lenses. Being sold as single items on separate flea bay listings. I’ve never seen another set before. They wasn’t expensive either as they were sold as singles.
Will be an orange bulb behind them but that isn’t an issue. I think these will clean up the front perfectly so no huge orange lense to stare at.
that’s the plan 
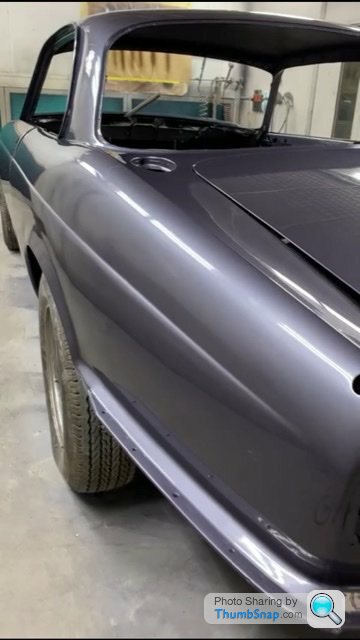
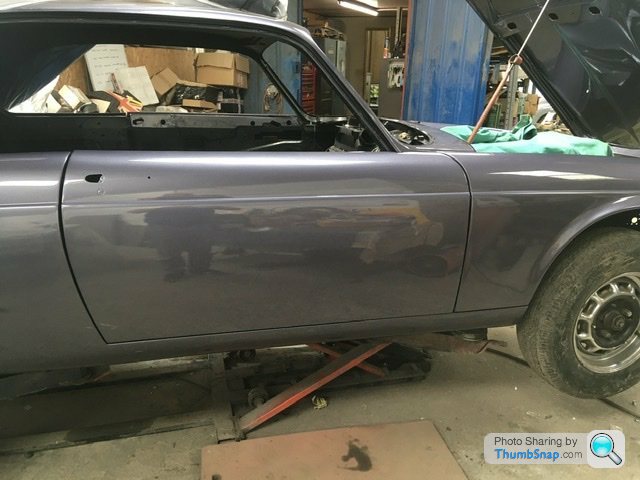
Visited the xjc earlier today dropping off a customer seat as an excuse to see the ole girl.
She has been patient. The lads were making space to get her back into the workshop for paint prep.
I did notice how small she looks compared to the s-type I’ve been using recently. Especially sitting on 15” wheels. Still looking forward to driving her again though
B'stard Child said:
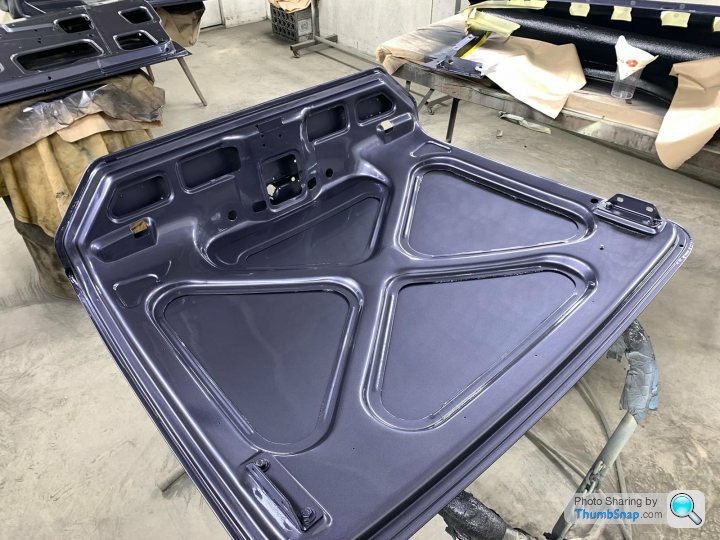
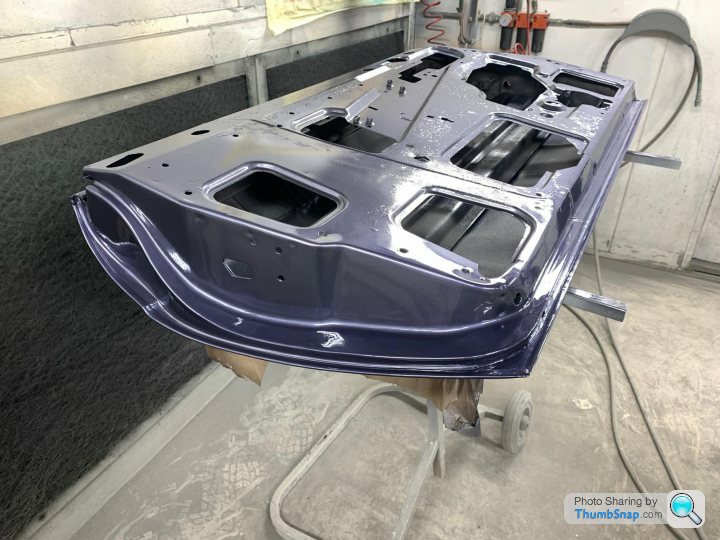
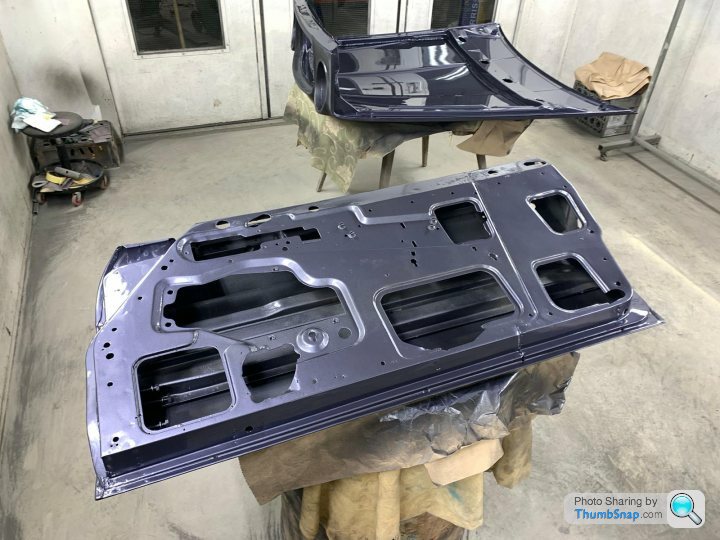
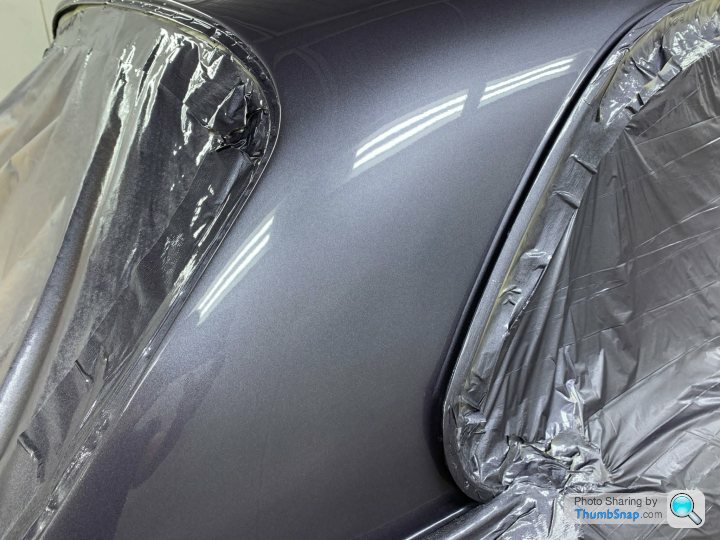
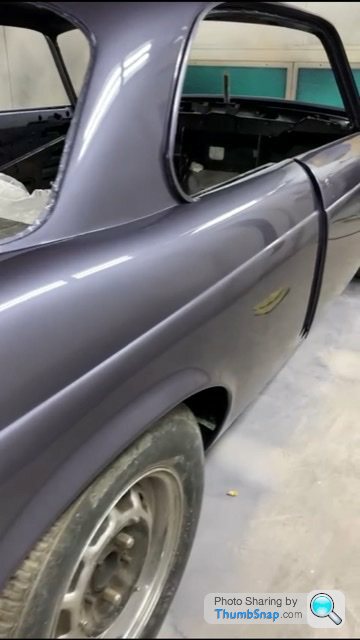
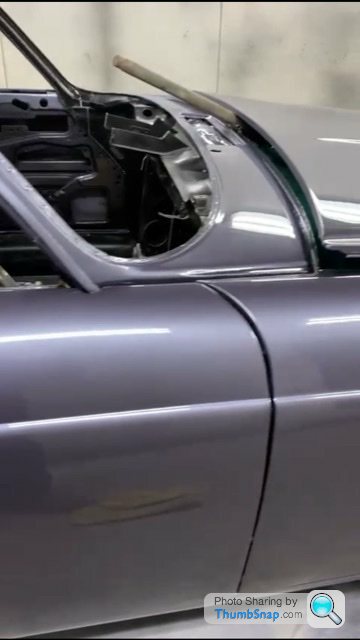
Takes a while to paint and assemble for a full picture. The colour won’t truly pop until the chrome is fitted. Looks grey in the photos but it isn’t. The wiring goes in next, then the next biggie is getting the ole girl firing and running.

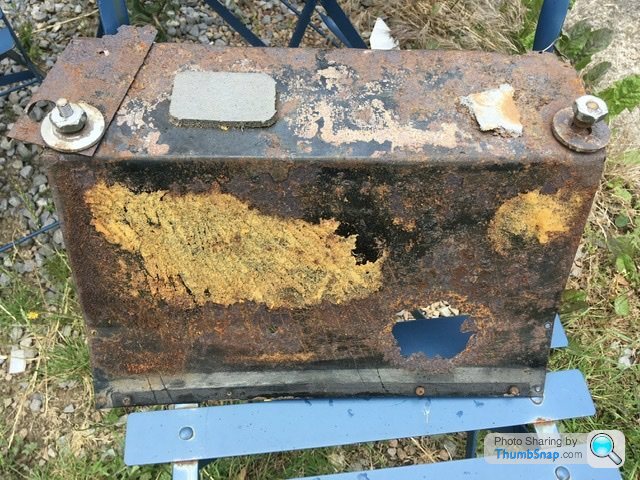
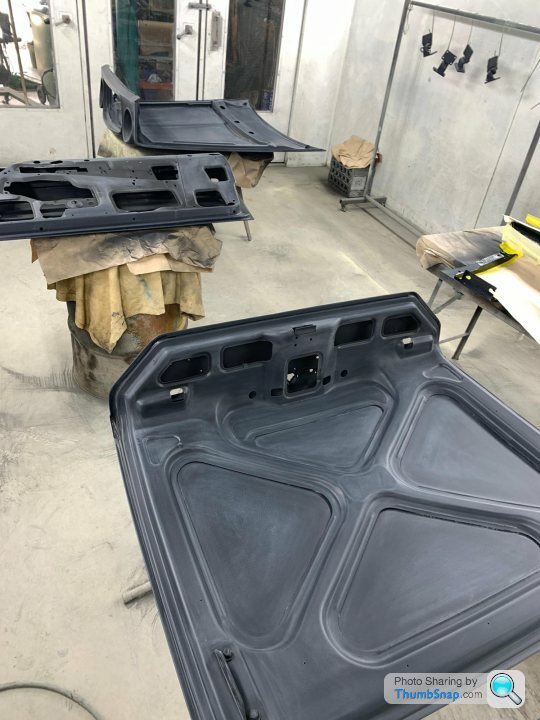
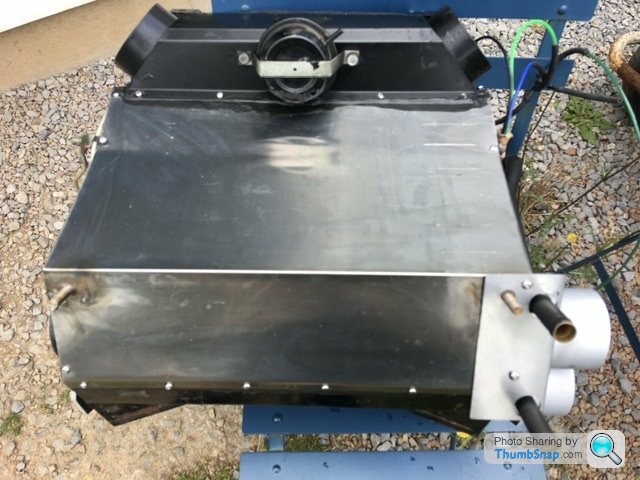
Picture above shows the cover of the heater box. Totally rotten!
I’ve spent too many hours repairing this part, but like most things once started it’s gonna get repaired!
The heater box has many parts and many seals. I removed that grotty panel when I was still working as a Ford toolmaker and have made a stainless steel replacement. The past month I’ve had the innards out replacing the foam seals between moving panels. I’ve made a new lever for one vain as the original plastic version had split. Lots of naff bits to rectify and once together you can’t see any of it. Lastly I fitted a new heater matrix core as a bit of belt and braces repair as I won’t be dismantling this unit again when fitted back into the car. Picture below shows the unit assembled again with the new stainless steel panel fitted.
The original used foam seals between the panels. I used a rubber silicone sealant. There were lots of badly sealed parts so just took my time making sure all was correctly sealed and fingers crossed when it’s powered up the vents should blow with more air volume from the openings rather than out the sides of the panels.
This will be fitted into the car tomorrow. So the rebuild finally begins
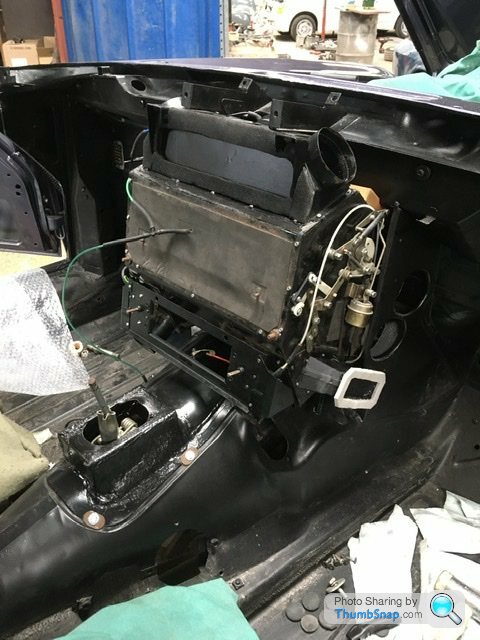
Eventually got the heater box fitted. Gearbox was sitting too high on its mount under the car so the transmission cover wouldn’t fit.
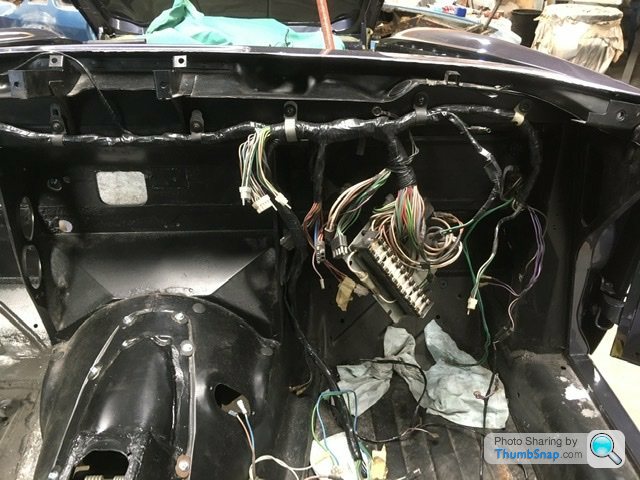
Then first bit wiring went over the heater box but with all the wired connections I could thread the wiring within the gap. So heater box removed to run the cables. Even then it took a couple of goes to get the earth points to line up properly.
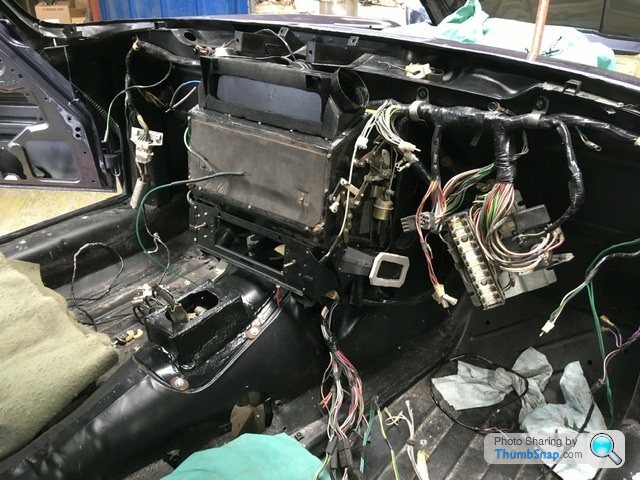
One other thing to mention is the sealing of the various punched holes within the car to stop exhaust/engine fumes from getting inside the cabin. That transmission cover, access plates on the side of the tunnel, 3 holes under the heater box I found suitable sized rubber bung/grommets. I think these time consuming but necessary things helps the Old Jag become a better place to sit in once the interior goes in. Just knowing everything is correctly sealed underneath. I won’t use any dynamat as I found the ride was quiet anyway when the car last ran. I’ll use new standard insulation were appropriate though.
Gassing Station | Readers' Cars | Top of Page | What's New | My Stuff