Jaguar xjc 4.2
Discussion


Seat and interior restoration has begun

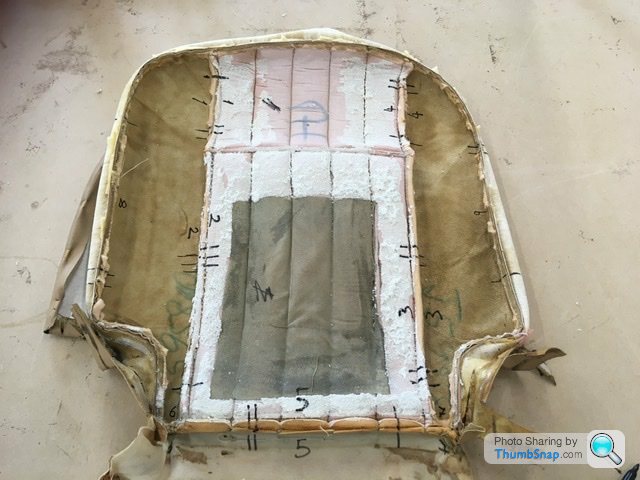
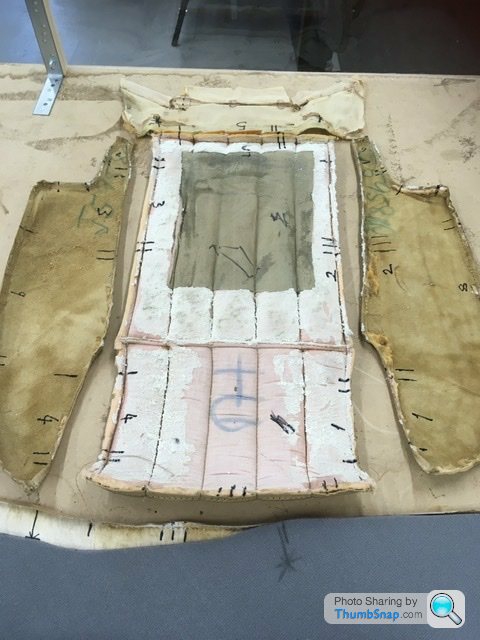
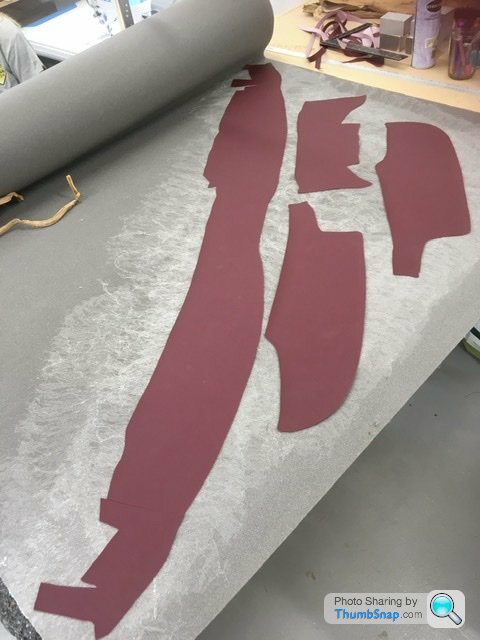
All seats will be completely stripped down. Original covers will be used to make my own templates. Although the replacement seat foam forms I’ve just bought are not looking close to the originals so Im gonna be making custom patterns for those no doubt
All seats will be completely stripped down. Original covers will be used to make my own templates. Although the replacement seat foam forms I’ve just bought are not looking close to the originals so Im gonna be making custom patterns for those no doubt
CharlesdeGaulle said:
Looking good. I think I've said it before, but I'm impressed with your versatility and skills.
Thank you  . Classic interiors is now my trade since being made redundant from toolmaking. I just need a bit of time to produce some lovely samples so I can advertise my work
 RobXjcoupe said:
CharlesdeGaulle said:
Looking good. I think I've said it before, but I'm impressed with your versatility and skills.
Thank you . Classic interiors is now my trade since being made redundant from toolmaking. I just need a bit of time to produce some lovely samples so I can advertise my work Brother D said:
RobXjcoupe said:
CharlesdeGaulle said:
Looking good. I think I've said it before, but I'm impressed with your versatility and skills.
Thank you . Classic interiors is now my trade since being made redundant from toolmaking. I just need a bit of time to produce some lovely samples so I can advertise my work . I don’t have any YouTube channel. Never really thought of that. Perhaps in the future maybe. 

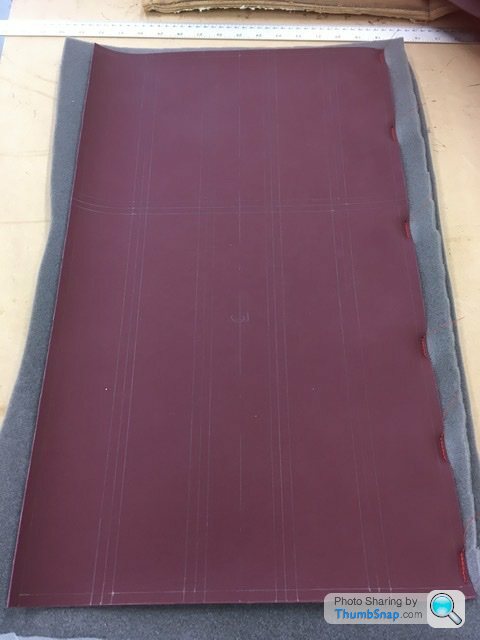
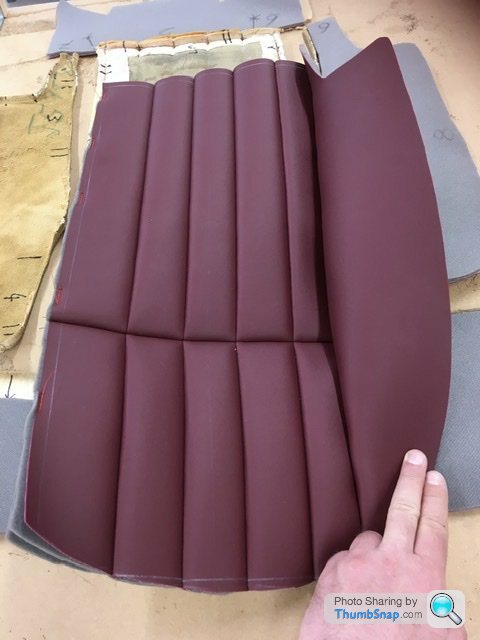
So below shows the seat cover with both sides attached and the piping. Making the piping trim is very relaxing tbh.
[url]
 |https://thumbsnap.com/4NyLDMGq[/url]
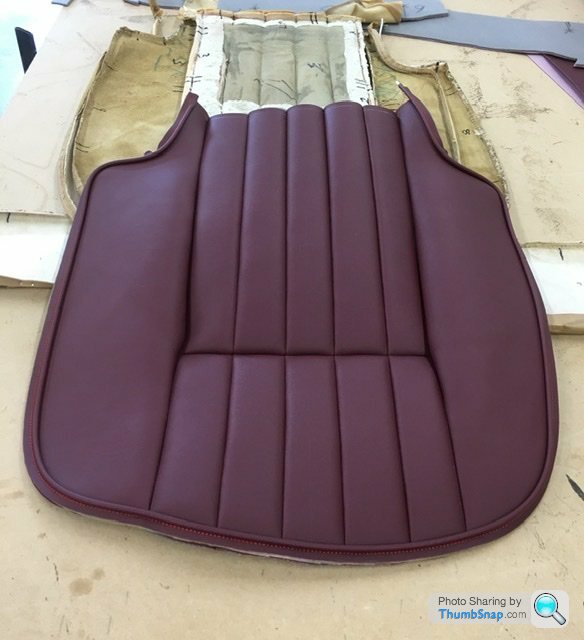
Then the skirt is attached. Starts to get interesting when stitching through 3 material thicknesses.
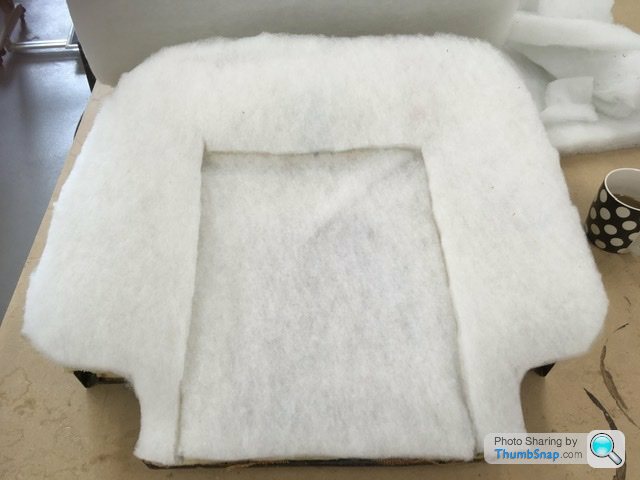
The original seat foam has been used with a new top layer to stop any possible lumps and bumps showing once the cover is fitted
[url]
 |https://thumbsnap.com/QYkiQYjH[/url]
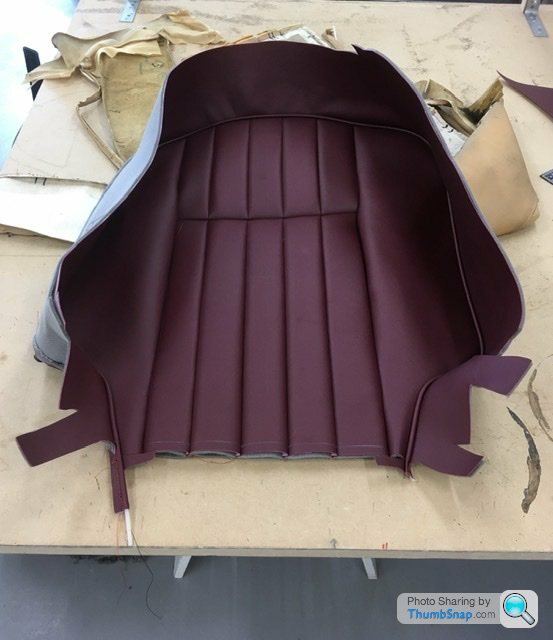
The first fit shows how flat the original foam is with no real definition on the cover

The original cover was actually glued to the foam which was how it achieved a more contoured fit. I won’t be glueing as that is deemed a short cut for a good upholsterer.
So a little modification and a bit of time later, a better fit has been achieved
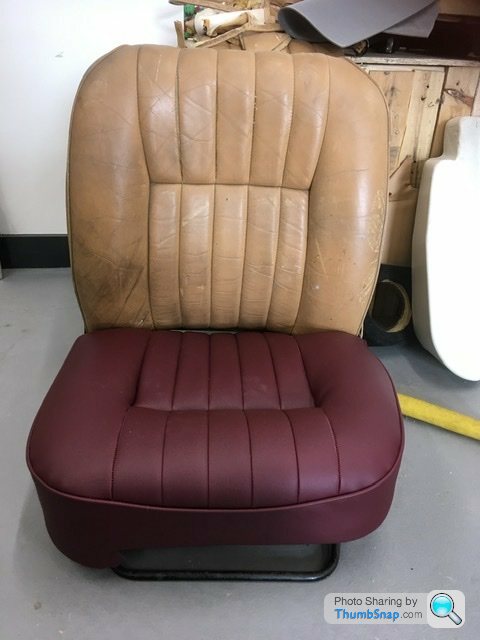
The cushion has only been roughly placed on the seat frame to show the pattern lining up nicely with the original still on the seat back.
[url]
|https://thumbsnap.com/4NyLDMGq[/url]Then the skirt is attached. Starts to get interesting when stitching through 3 material thicknesses.
The original seat foam has been used with a new top layer to stop any possible lumps and bumps showing once the cover is fitted
[url]
|https://thumbsnap.com/QYkiQYjH[/url]The first fit shows how flat the original foam is with no real definition on the cover
The original cover was actually glued to the foam which was how it achieved a more contoured fit. I won’t be glueing as that is deemed a short cut for a good upholsterer.
So a little modification and a bit of time later, a better fit has been achieved
The cushion has only been roughly placed on the seat frame to show the pattern lining up nicely with the original still on the seat back.

RobXjcoupe said:
Brother D said:
RobXjcoupe said:
CharlesdeGaulle said:
Looking good. I think I've said it before, but I'm impressed with your versatility and skills.
Thank you . Classic interiors is now my trade since being made redundant from toolmaking. I just need a bit of time to produce some lovely samples so I can advertise my work . I don’t have any YouTube channel. Never really thought of that. Perhaps in the future maybe. RobXjcoupe said:
So below shows the seat cover with both sides attached and the piping. Making the piping trim is very relaxing tbh.
<snip>
So a little modification and a bit of time later, a better fit has been achieved
The cushion has only been roughly placed on the seat frame to show the pattern lining up nicely with the original still on the seat back.
Lovely work - It might seem an odd question but how does a toolmaker learn upholstery?<snip>
So a little modification and a bit of time later, a better fit has been achieved
The cushion has only been roughly placed on the seat frame to show the pattern lining up nicely with the original still on the seat back.
B'stard Child said:
RobXjcoupe said:
So below shows the seat cover with both sides attached and the piping. Making the piping trim is very relaxing tbh.
<snip>
So a little modification and a bit of time later, a better fit has been achieved
The cushion has only been roughly placed on the seat frame to show the pattern lining up nicely with the original still on the seat back.
Lovely work - It might seem an odd question but how does a toolmaker learn upholstery?<snip>
So a little modification and a bit of time later, a better fit has been achieved
The cushion has only been roughly placed on the seat frame to show the pattern lining up nicely with the original still on the seat back.
RobXjcoupe said:
B'stard Child said:
RobXjcoupe said:
So below shows the seat cover with both sides attached and the piping. Making the piping trim is very relaxing tbh.
<snip>
So a little modification and a bit of time later, a better fit has been achieved
The cushion has only been roughly placed on the seat frame to show the pattern lining up nicely with the original still on the seat back.
Lovely work - It might seem an odd question but how does a toolmaker learn upholstery?<snip>
So a little modification and a bit of time later, a better fit has been achieved
The cushion has only been roughly placed on the seat frame to show the pattern lining up nicely with the original still on the seat back.

Gassing Station | Readers' Cars | Top of Page | What's New | My Stuff