Jaguar xjc 4.2
Discussion


carinaman said:
The plating looks good to me. I am liking the shiny new servo with a correct looking sticker on it. The diamond quilt effect looks OK on the pedal rubbers. 
Not sure how long the plating will stay corrosion free but it’s not difficult to re-finish in the future. The servo sticker I found on the flea-bay. The original had been painted over with hammerite way back and only found it when I stripped the paint off to re-finish the original servo. The brake master cylinder is also the original but re-finished. I used a gold colour paint to mimic the plated original which doesn’t last very long on cast iron, hence the painted finish.I did fit a new brake fluid reservoir. I think I showed pictures of the pedal box about 3 years ago lol. Time flies when rebuilding a classic
Those pedals to stitch in rubber was hard work!
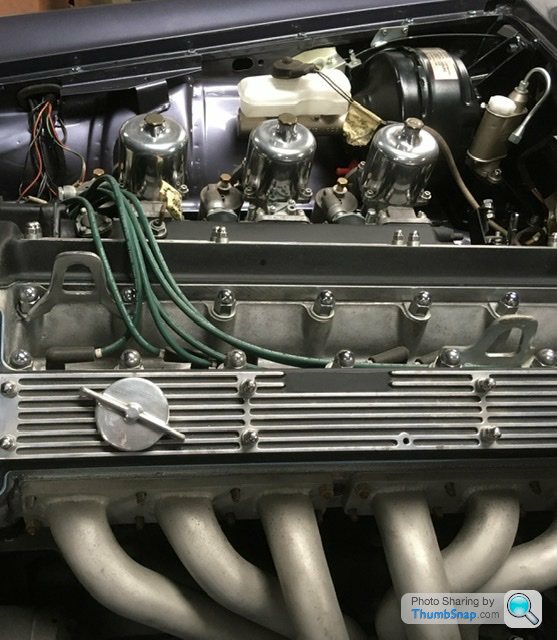
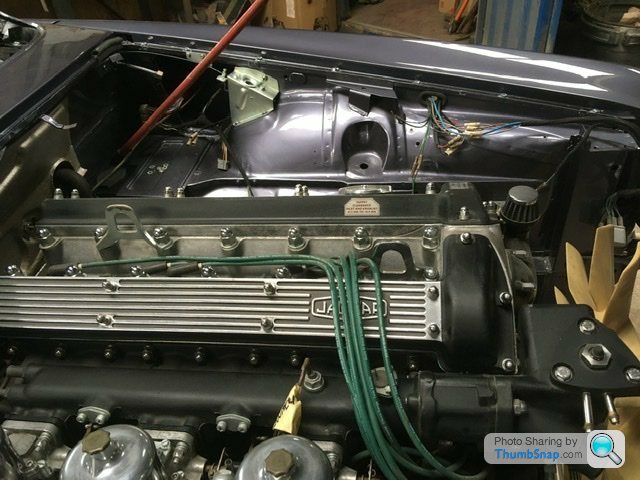
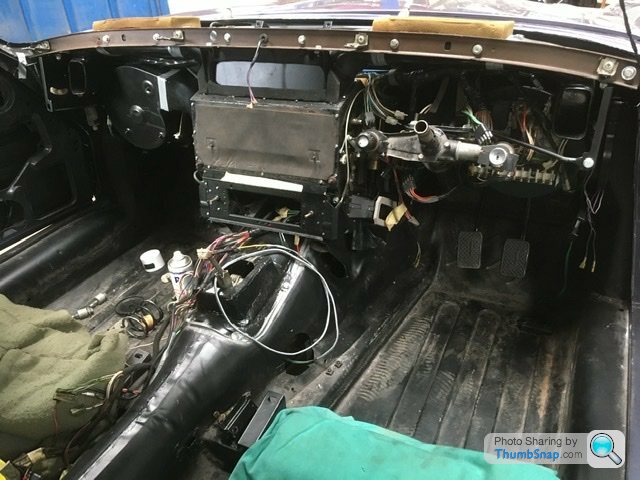
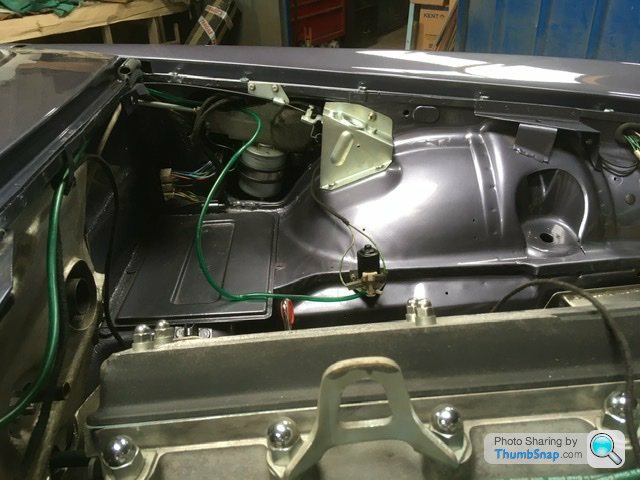
The past few days I have concentrated on the engine bay wiring and the mechanical parts it connects too. Most of Friday was threading cables in behind the wiper motor position. Picture wise it doesn’t look much but took a fair few hours cleaning earth connections and generally getting things look right and neat. The interior hasn’t moved on as much as I had hoped mainly reassembling what I had previously s as l ready built but missed bits. Still, steering column is there, pedal box also, the natty fresh air vents are also sealed and fitted. Currently it’s taken me 44hrs to get this far. Interior wise I think it will come together a little quicker as it’s one main loom from the centre console to the rear lights with all the spurs branching off accordingly. Probably be eating my words next week lol
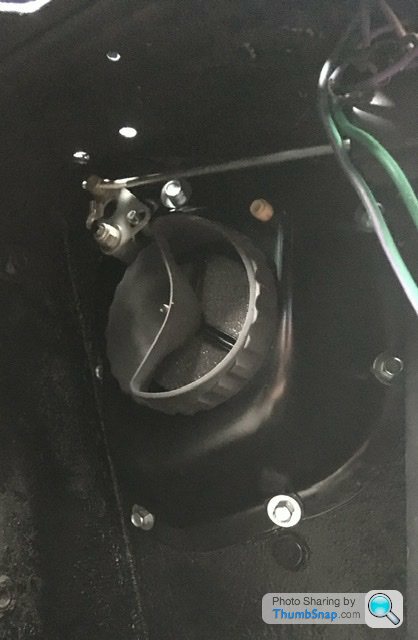
Couple more pictures below. First the fresh air vent. One each side tucked into the left and right footwell.
You can just see the wiper motor installed here along with a lonely looking washer pump. There are 3 main loom cable connections in this position hence it took a while getting it all in position.
Lastly I’ve offered up the replacement radiator expansion tank I made a very long time ago. It’s a very snug fit with the plastic washer bottle container. I’m not happy with the stainless finish of the washer bottle so I think will prep it and spray it gloss black as per the original. The original rotted away with rust hence I made a new one in stainless steel.
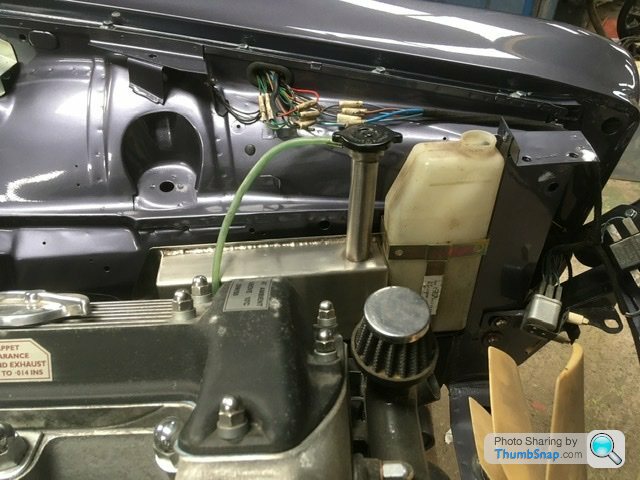
Just waiting for the top radiator panel to be finished in body colour. I had it galvanised a while back and wasn’t sure to have it black again or body colour. I Plumped for body colour.
Once that’s fitted the radiator and oil cooler can go it and then finish off the engine build along with all the rubber hose and pipes.
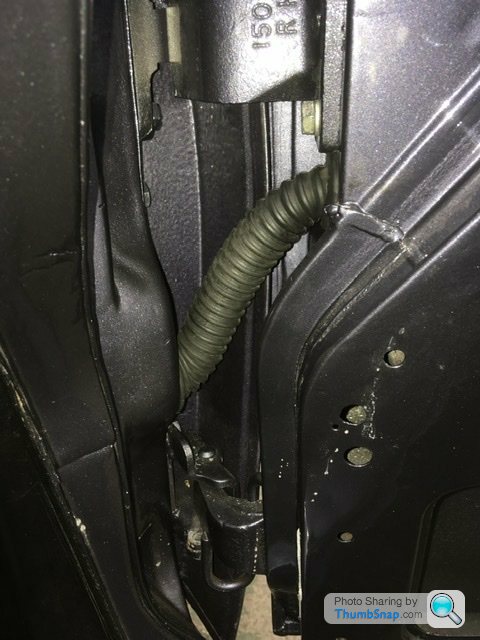
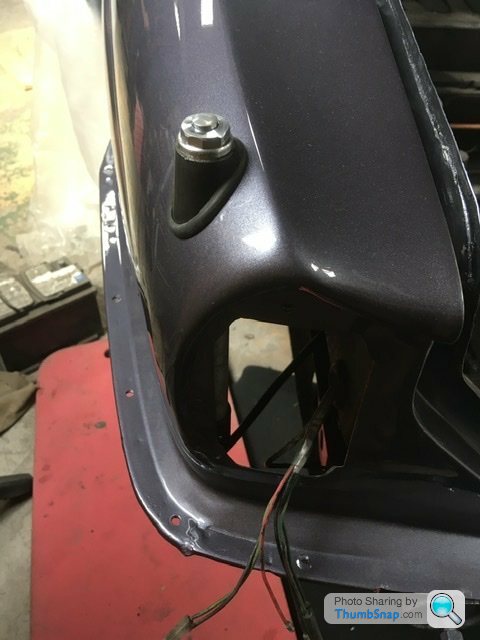
Above a boring picture but oh my the effort needed to thread the wiring from the a pillar into the door. The rubber conduit is from a classic Range Rover. It’s a bigger diameter to help thread the wiring through although didn’t seem like it earlier. The original Jaguar conduits had simply perished and fell to bits.
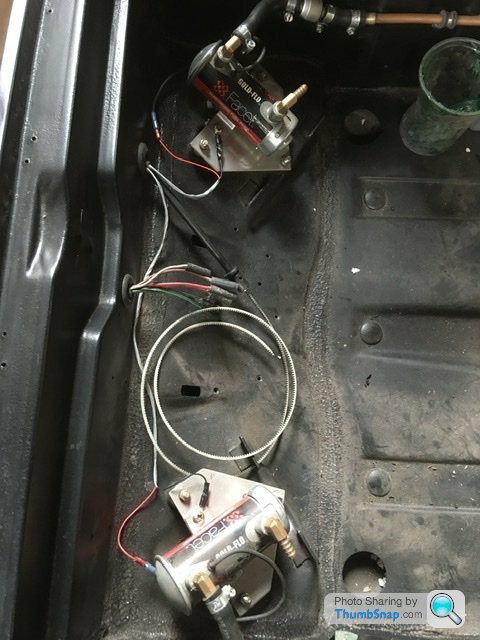
Below showing the tail light wiring all run. Lovely original retractable radio aerial fitted. The motor to push and retract the aerial is a separate unit mounted in the boot between the fuel pumps. The wiring for the new fuel pumps also altered slightly, basically lengthened to run into the boot rather than the original in tank fuel pumps.
Once the fuel tanks are fitted the modified fuel pipes to the pumps can be completed. Things are getting closer to a running engine.
Been a bit of a delay the last few weeks as I needed some repair work completed on the winter car. Had a poke at a bit of rust that turned into a hole. Usual stuff. Sometimes I wish my hobby was model cars instead of full size.
So money went to fix that rather than the xjc.
I’ve ordered a few gaskets to fit the exterior light units. They are packed away waiting. Still nil stock on the leather hide I’m after for the interior. I’m actually considering a mulberry red now.
So money went to fix that rather than the xjc.
I’ve ordered a few gaskets to fit the exterior light units. They are packed away waiting. Still nil stock on the leather hide I’m after for the interior. I’m actually considering a mulberry red now.
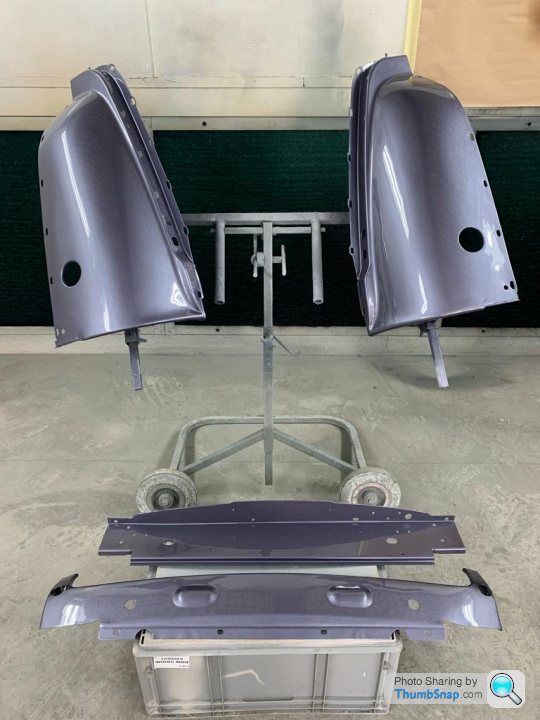
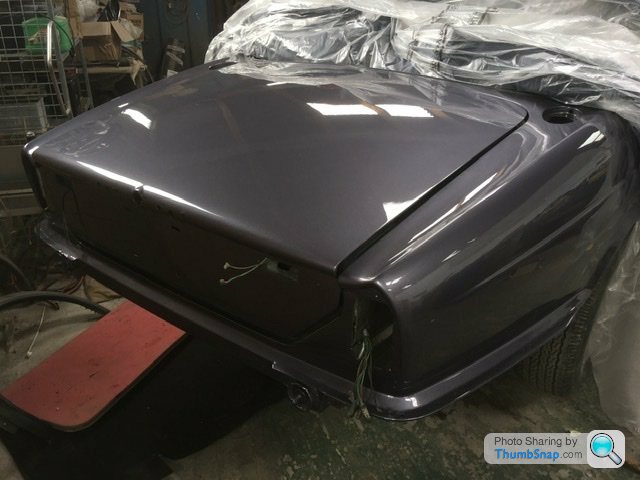
Last few panels painted.
The tank covers were prepped ready to paint a while back but needed fettling to fit correctly due to bolts cross threading into the panel holes and a couple of other issues. The under bonnet radiator panel is now body colour and lastly the valance panel which is a pattern part obviously didn’t fit so more fettling and has had the flanged joins seam welded to create a one piece panel. Subtle mods again but creates a better finish I think.
Pictures below are snapshots from a video so please excuse any lack of clarity
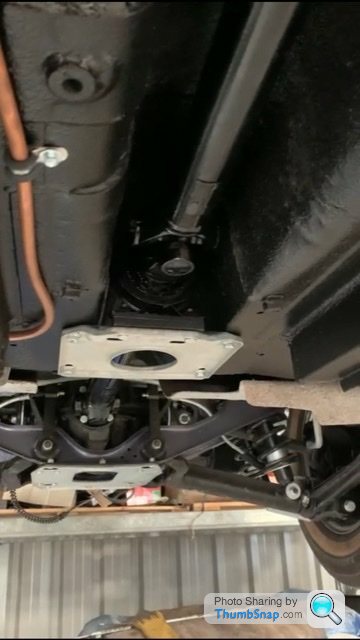
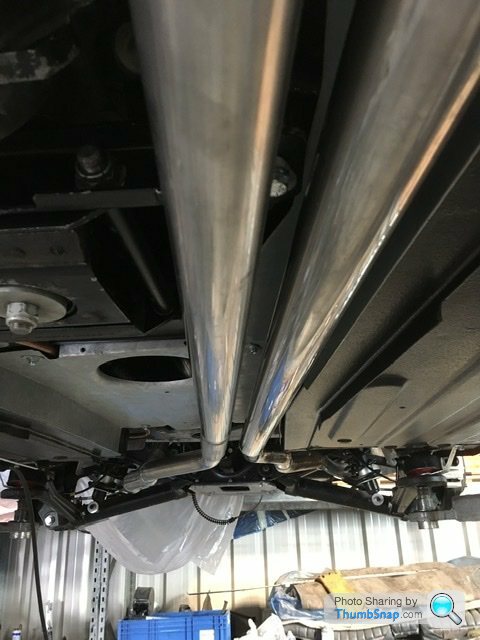
Above showing the prop shaft fitted. I wasn’t going to clean and paint it so the restorer did as he couldn’t fit a dirty part to a clean underside.
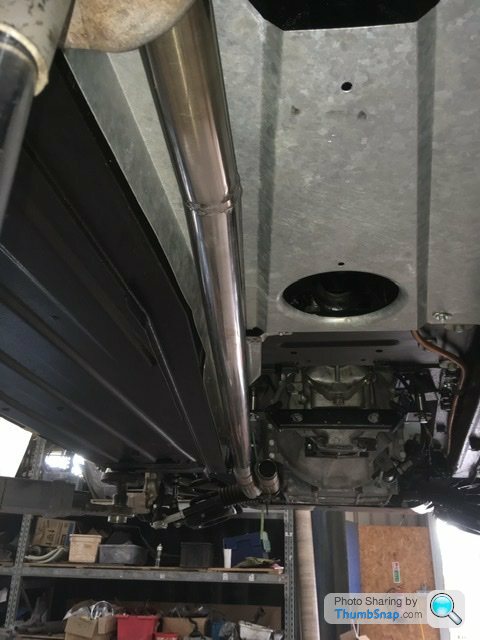
Below is the beginning of the new exhaust system. The two pipes from the bottom of the exhaust manifold need to be extended to allow the twin pipes to curve behind the gearbox and allow another 2 extensions to connect to the over axle pipes and rear silencers.
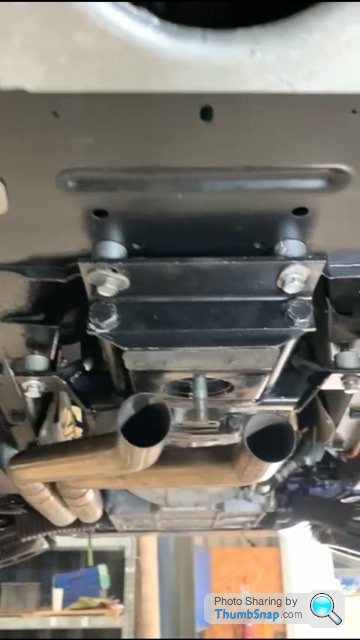
Hopefully the pictures give an idea of what’s needed.
Above showing the prop shaft fitted. I wasn’t going to clean and paint it so the restorer did as he couldn’t fit a dirty part to a clean underside.
Below is the beginning of the new exhaust system. The two pipes from the bottom of the exhaust manifold need to be extended to allow the twin pipes to curve behind the gearbox and allow another 2 extensions to connect to the over axle pipes and rear silencers.
Hopefully the pictures give an idea of what’s needed.
Yep getting close but still irritating issues to solve
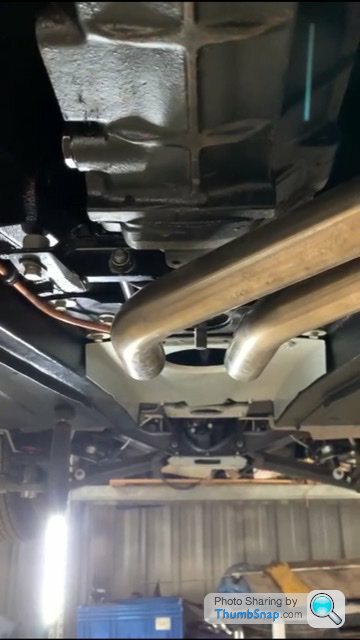
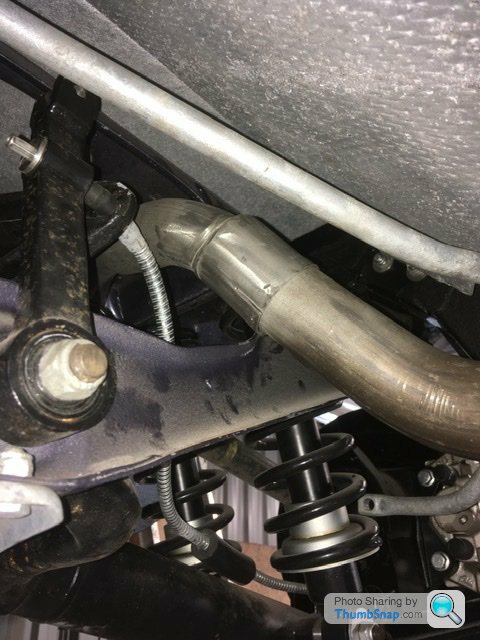
Picture showing the through axle exhaust pipe mounting flange fouling on the rear anti-roll bar.
Only way I can see to fix this is cut and shut the exhaust pipes to move the joining flange out of the axle to give clearance. Looks like the exhaust is going to be a bit more custom.
Also looking at brake lines, I’m running rear outboard discs with metric fittings into the calipers with imperial fittings up front. So a regular kit won’t do. So more custom pipes are required or I should say mix and match fittings.
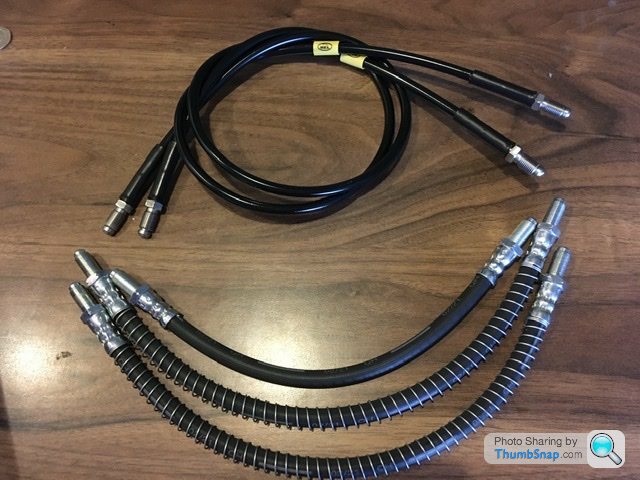
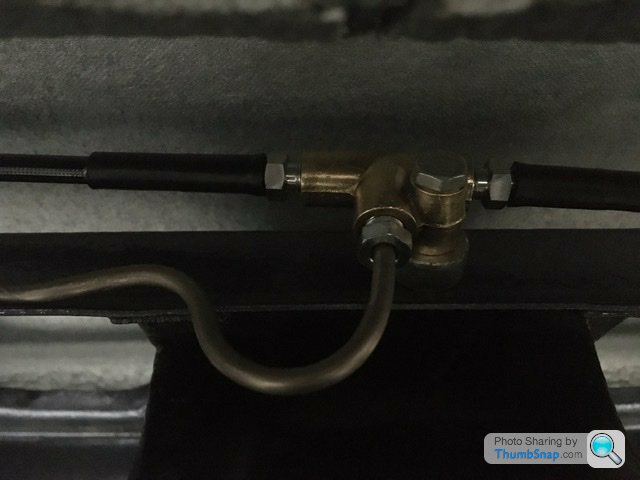
New brake flexi hoses arrived over the weekend. New standard on the front and body to rear axle. Custom length rears to suit the inboard caliper tee piece but to fit outboard metric fittings.
For future reference the custom rears are 840mm long including fittings, both ends the swivel type to ease fitting and removal. Usually one end is fixed (the caliper) and the body/axle mount is the swivel type.
On the series 2 xj6 there is a mix of metric and imperial fittings as standard. Original front calipers are metric with metric flexi hose, body to rear axle is metric flexi hose, original inboard calipers have imperial hard line fittings.
Other hard line fittings to master cylinder are imperial.
Series 1 xj6 are all imperial and series 3 xj6 are all metric.
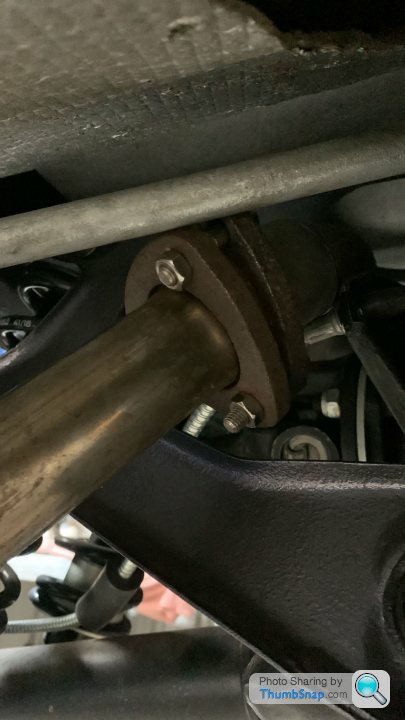
Below picture shows hose fittings with little grooves on the hex denotes metric.
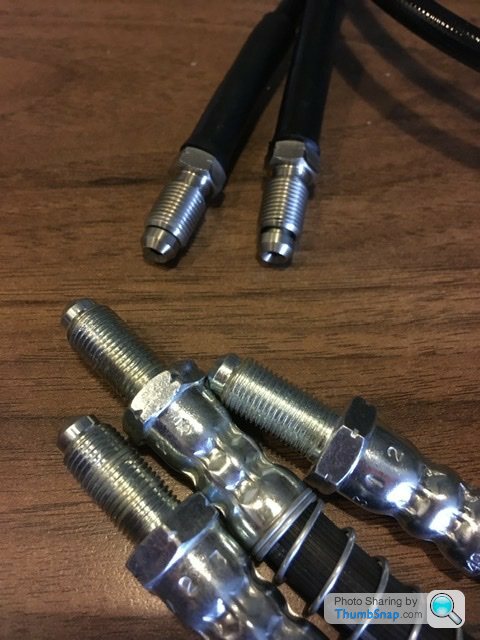
Next picture shows no groove on the hex which denotes an imperial fitting

That info took a while to figure when you look beyond manufactured year of car parts.
The other strange issue is the gearbox mount.
In short it’s a spring and rubber bush but mine doesn’t seem to sit in the correct position either too high and touching the gearstick cover in the interior but when sitting correctly the sliding bolt that limits the upwards movement is too long and would allow the gearbox to crash into the interior gearstick cover.
I’ve dropped the positive of the whole of the gearbox mount frame by an additional 10mm which seems to work by allowing a small amount of sprung movement and just clears the interior gearstick cover. The sliding bolt still requires modification as there isn’t enough thread on it to clamp a nut and the sliding distance tube between the hex and that thick washer to limit the upward bounce. Hard to explain in words.
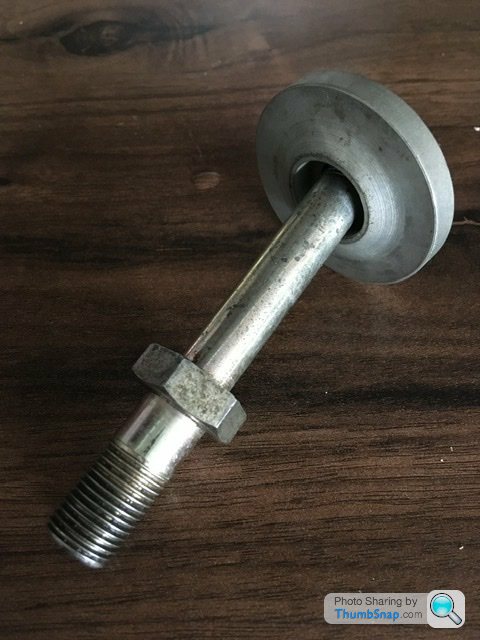

Above pictures show the bolt that bobs up and down slightly attached to the gearbox with a spring and rubber bush in between. It just feels too soft. Currently I need to shorten the bolt by 15mm, increase the threaded position which will limit its upward bounce with a shortened distance tube and stop it touching the interior gearstick cover. Well that’s the plan.
In short it’s a spring and rubber bush but mine doesn’t seem to sit in the correct position either too high and touching the gearstick cover in the interior but when sitting correctly the sliding bolt that limits the upwards movement is too long and would allow the gearbox to crash into the interior gearstick cover.
I’ve dropped the positive of the whole of the gearbox mount frame by an additional 10mm which seems to work by allowing a small amount of sprung movement and just clears the interior gearstick cover. The sliding bolt still requires modification as there isn’t enough thread on it to clamp a nut and the sliding distance tube between the hex and that thick washer to limit the upward bounce. Hard to explain in words.
Above pictures show the bolt that bobs up and down slightly attached to the gearbox with a spring and rubber bush in between. It just feels too soft. Currently I need to shorten the bolt by 15mm, increase the threaded position which will limit its upward bounce with a shortened distance tube and stop it touching the interior gearstick cover. Well that’s the plan.
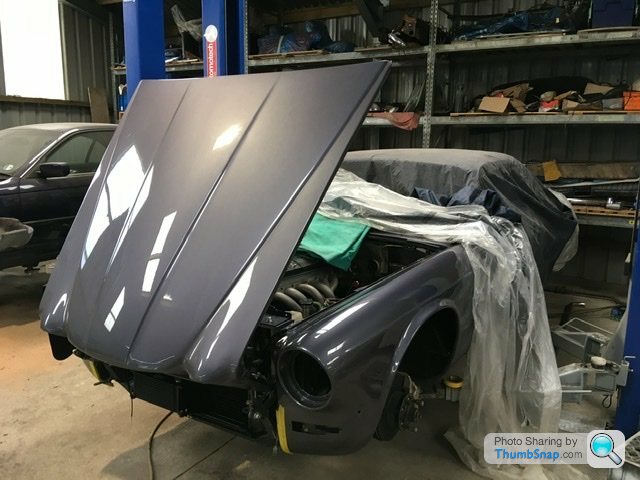
Currently sitting on the lift. Radiator and oil cooler fitted. Radiator top panel bolts are tight in the panel, so rather than damage the paint I’ll reduce the bolt diameter under the bolt head and washer to give the extra clearance. These detail jobs are popping up quite frequently at the moment
Fitted oil cooler picture below that I didn’t post earlier.
[url]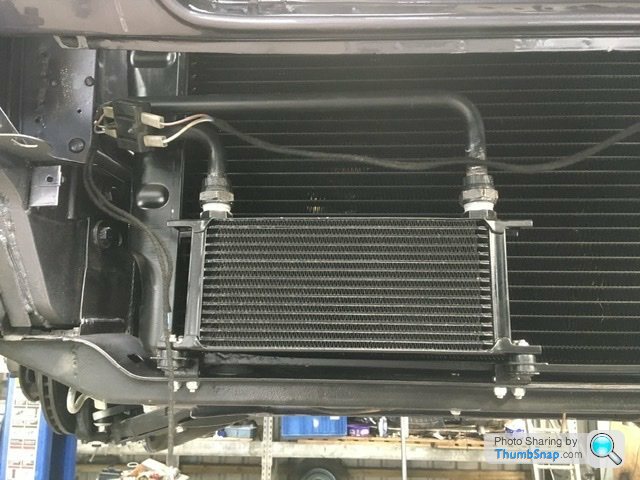 |https://thumbsnap.com/zyMESMoW[/url
]
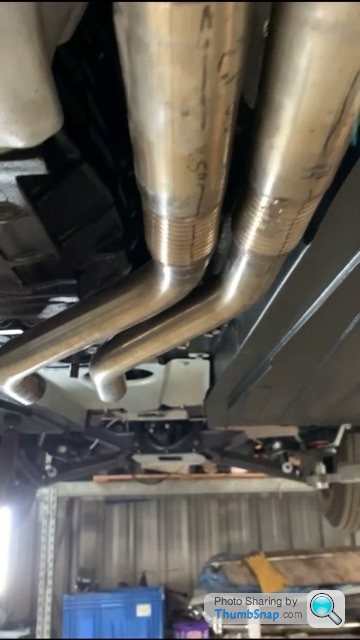
Exhaust being worked on. Original hanging brackets have been removed and repositioned to gain more clearance with the rear anti-roll bar and outboard disc handbrake cable. The 3 bolt clamping flanges were cut off and replaced with a sliding tube fit connection. Quite a bit of work for a standard fit exhaust piece.


So one pipe is complete. The other not far behind. These will be then removed to be ceramic coated along with the manifold in black to give a more factory/modified look under the bonnet. The tail pipes will remain in stainless.
[url]
|https://thumbsnap.com/zyMESMoW[/url]
Exhaust being worked on. Original hanging brackets have been removed and repositioned to gain more clearance with the rear anti-roll bar and outboard disc handbrake cable. The 3 bolt clamping flanges were cut off and replaced with a sliding tube fit connection. Quite a bit of work for a standard fit exhaust piece.
So one pipe is complete. The other not far behind. These will be then removed to be ceramic coated along with the manifold in black to give a more factory/modified look under the bonnet. The tail pipes will remain in stainless.
Stick Legs said:
RobXjcoupe said:
Pipes will remain straight. Big bore swan necks would look odd.
Fair play. 

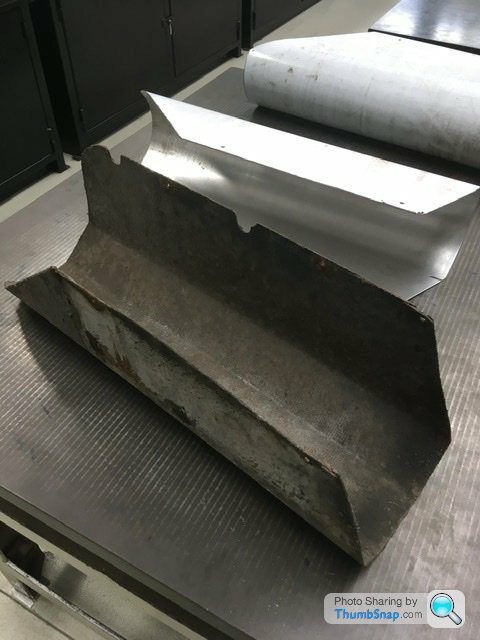
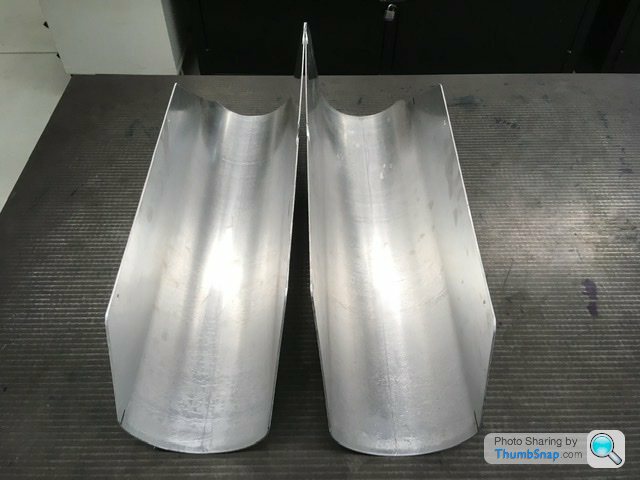
Yet more making of parts. This time exhaust heat shields for the rear silencers. Quite important as one side is the boot interior and the other the fuel tanks. I only had one fitted. Originally an asbestos part shown above.
Ideally I would have used a sheet of stainless steel but as the aluminium sheet was free of charge it was a good alternative


Dropped off the exhaust heat shields this afternoon, had another nosey under the coupe whilst there. The mod to the gearbox mount has worked. That was shortened by 15mm and the thread extended to compensate. Looks good. Won’t know for sure until the car is driven but visually it looks good and pulls the gearbox down nicely. Didn’t get a picture of that because my phone battery went dead.
The exhaust is more or less finished other than clamping together. The heat shields around the rear silencers will need fettling to fit so exhaust stays with the car until that’s completed, then all off to zircotec for coating.
Custom rear brake lines are fitted and a perfect fit. They connect to the original brass tee piece attached to the rear axle.
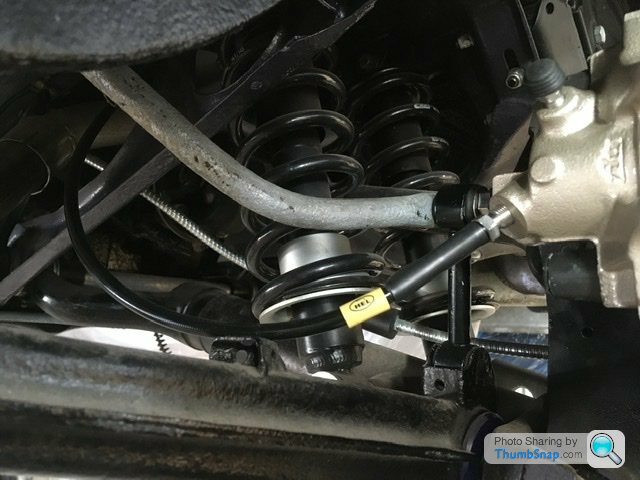
Flexi hose from body to rear axle done together with a new hard line across the rear axle to the brass tee.

Lastly the handbrake cable. All original series 2 xj6 fittings and position to the late outboard disc rear axle. I need to make a small brass bush to a fitting. My mistake rather than Jaguars, I made two parts the same when one should have a smaller hole. I’ll make that Wednesday.
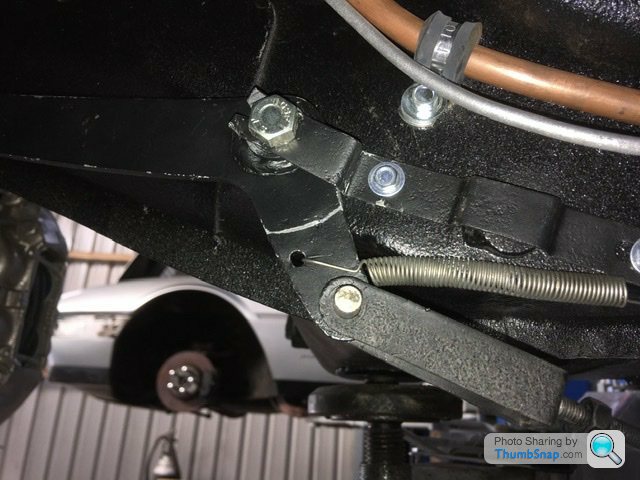
Above shows the handbrake lever under the car which has the adjustment screw to tighten up the handbrake within the outboard brake discs. That has its own bush fitting to rotate around. Keeping all these parts lubricated is essential for correct operation.
The exhaust is more or less finished other than clamping together. The heat shields around the rear silencers will need fettling to fit so exhaust stays with the car until that’s completed, then all off to zircotec for coating.
Custom rear brake lines are fitted and a perfect fit. They connect to the original brass tee piece attached to the rear axle.
Flexi hose from body to rear axle done together with a new hard line across the rear axle to the brass tee.
Lastly the handbrake cable. All original series 2 xj6 fittings and position to the late outboard disc rear axle. I need to make a small brass bush to a fitting. My mistake rather than Jaguars, I made two parts the same when one should have a smaller hole. I’ll make that Wednesday.
Above shows the handbrake lever under the car which has the adjustment screw to tighten up the handbrake within the outboard brake discs. That has its own bush fitting to rotate around. Keeping all these parts lubricated is essential for correct operation.


Gassing Station | Readers' Cars | Top of Page | What's New | My Stuff