Jaguar xjc 4.2
Discussion


CharlesdeGaulle said:
RobXjcoupe said:
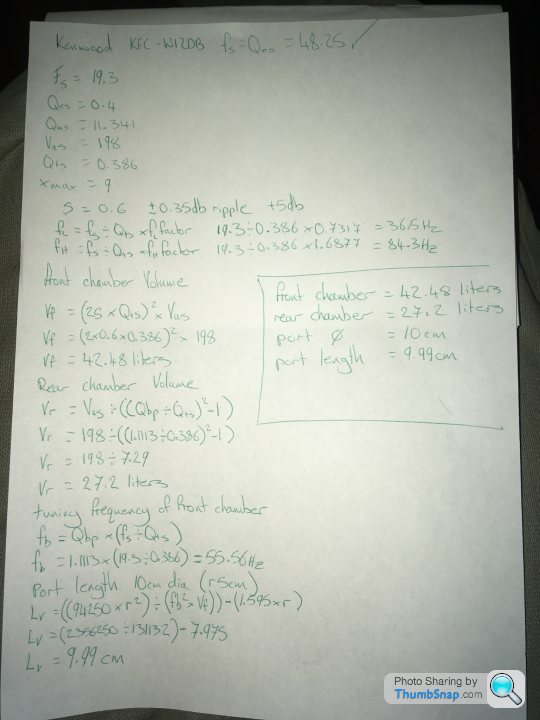
Doing some calcs to build a 4th order bandpass subwoofer enclosure. The equations are readily available on the internet and it’s finding the relevant spec for the subwoofer.
Initial thoughts are that the box volume will be to big for the space I want to use at 69.68 litres. That’s using the 12” kenwood dB+ subwoofer I currently have. A 10” dB+ subwoofer only uses a volume of 34.8 litres with a similar frequency response of between 38hz-93hz with a 4db boost compared to a 36hz-84hz 5db boost of the 12” subwoofer.
Now I’m thinking of using a pair of high excursion 8” subwoofers fitted in a triple chamber enclosure.
While the car is in bits the modifications to the rear shelf will be a lot easier hence doing these calcs now.
Hope that explains things a little?
CharlesdeGaulle said:
RobXjcoupe said:
Hope that explains things a little?
It does, thanks. I suppose it makes sense to completely re-do the soundz whilst you're doing what you are, but I confess I rarely listen to anything in any of my cars, so I don't really get the obsession with decent audio. Notwithstanding, I really love what you're doing with the car and I hope it works out perfectly.
Sometimes the details make the difference and I think building a properly dimensionsed bandpass subwoofer enclosure rather than my previous oversized sealed enclosure will give the sound I’m after.
The stereo components I’m using are mostly second hand or stuff I’ve bought new from 20 years ago lol but were/and are good quality items still.
Stereo systems in classic cars always seem to be frowned apon for some reason? So I’m trying to build a version that is possibly acceptable

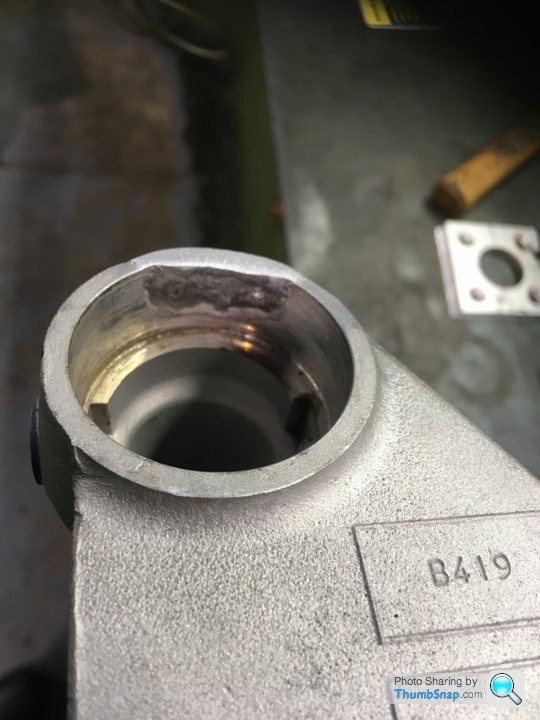
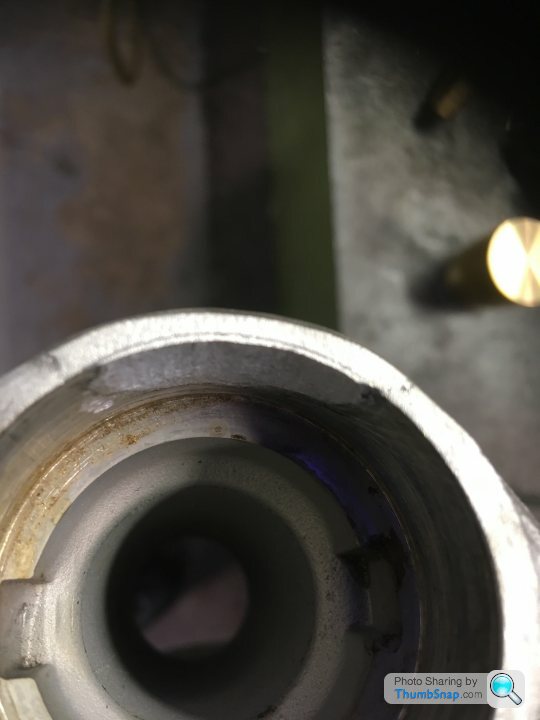
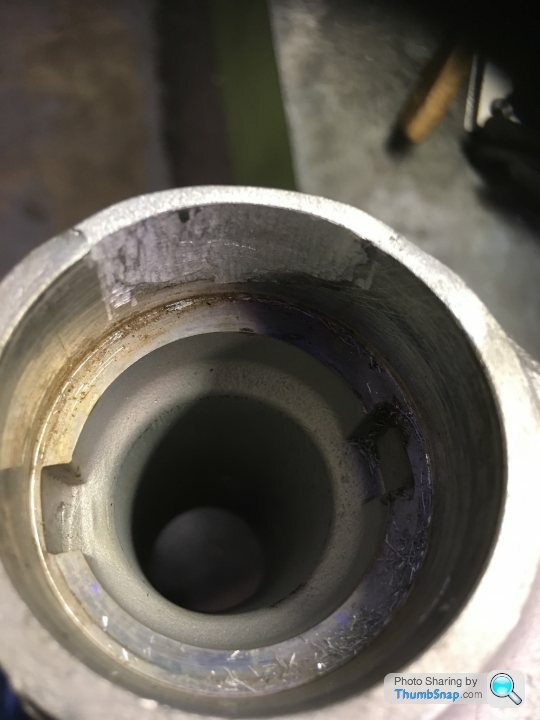
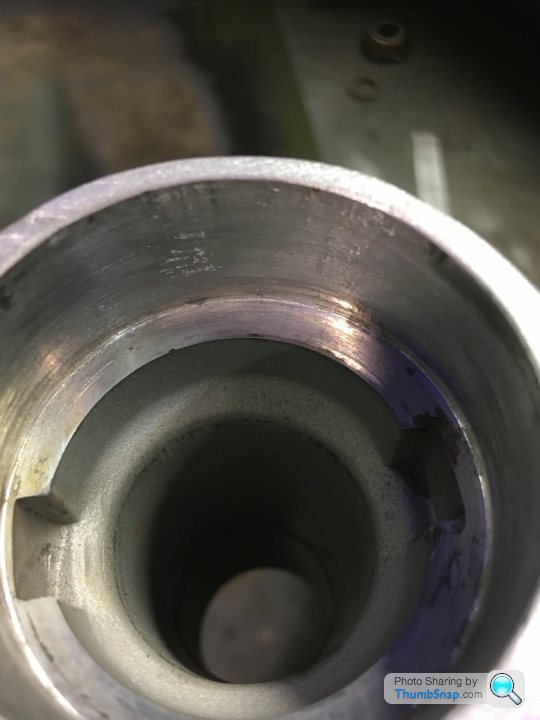
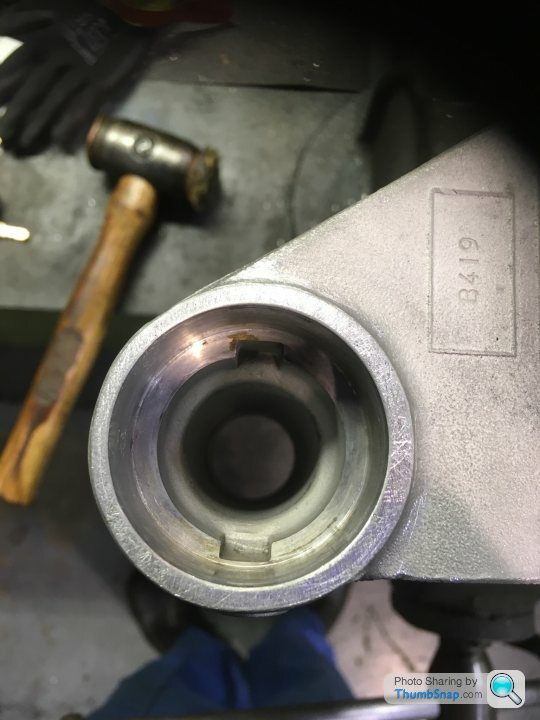
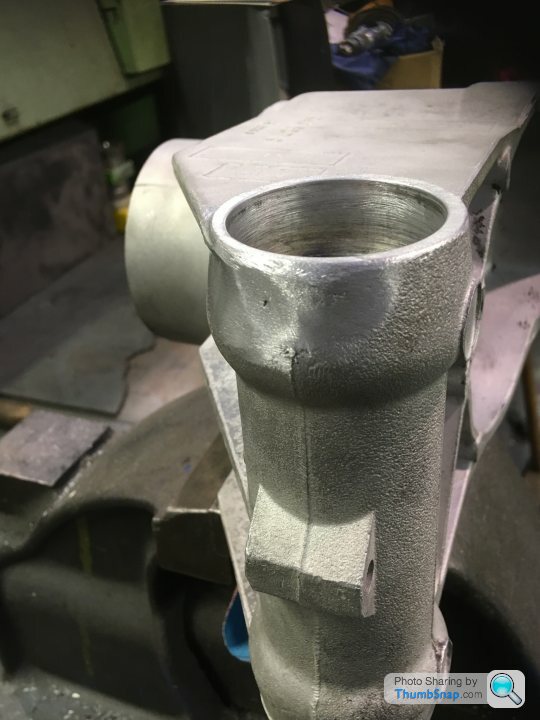
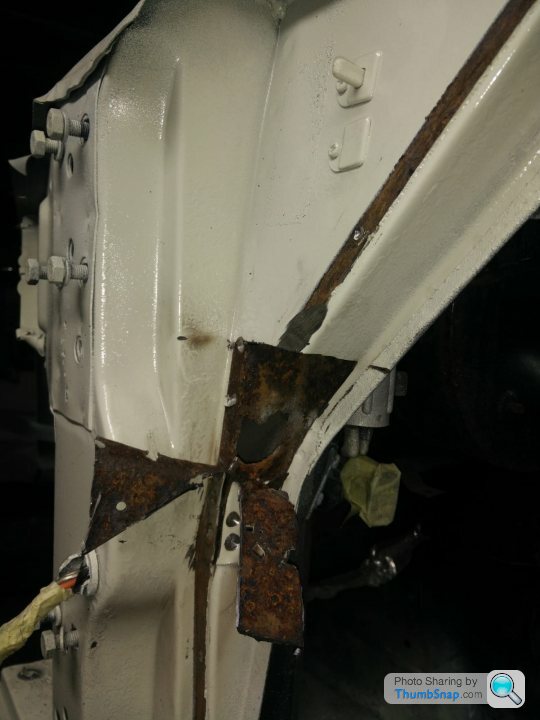
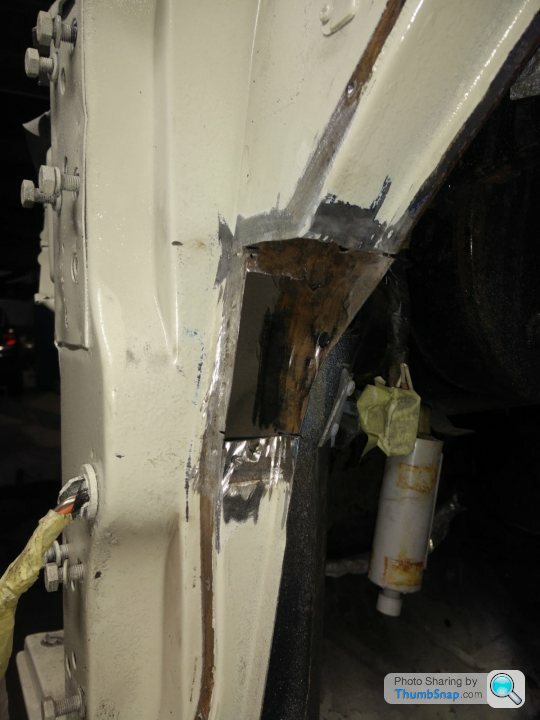
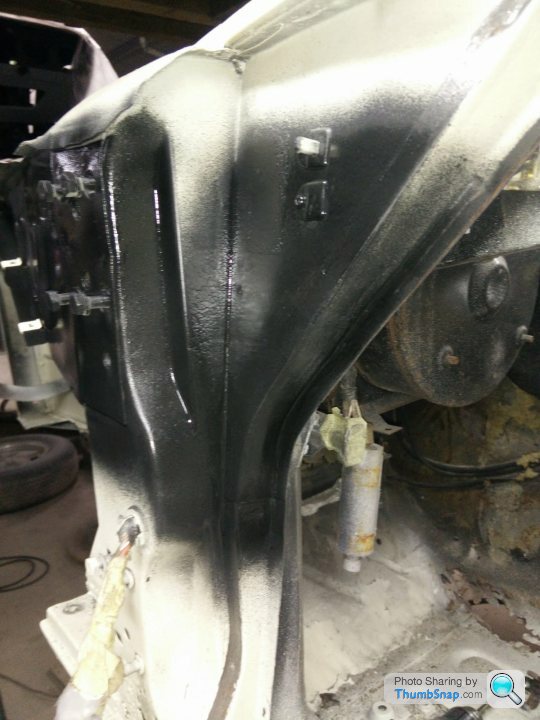
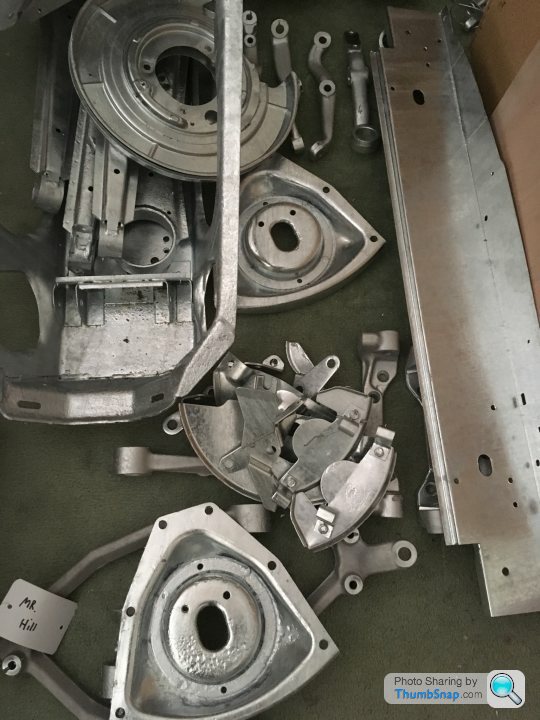
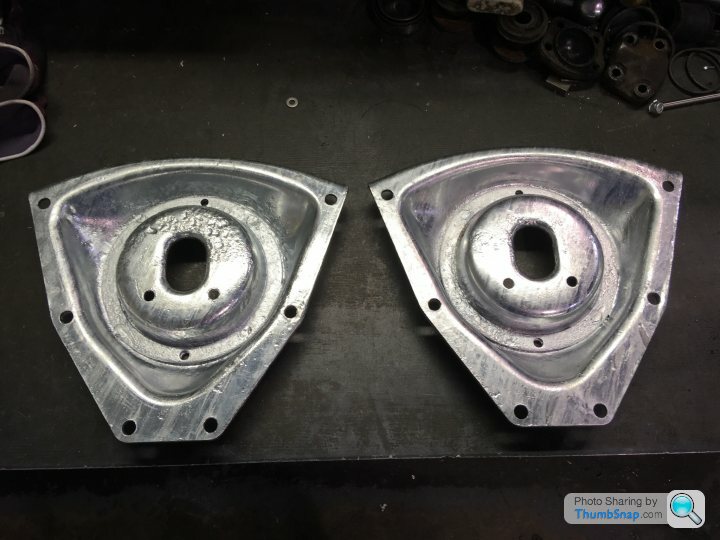
Back to the engineering now. Below are pictures of a small repair to the rear axle aluminium hub carrier. It’s the lower wishbone fulcrum and houses a needle bearing. Part of the casting had broke off leaving a gap for the rubber bearing seal. Tonight it was welded up and finished by hand.


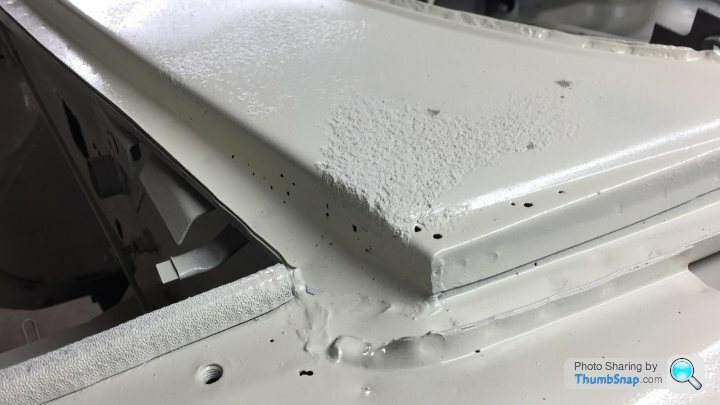
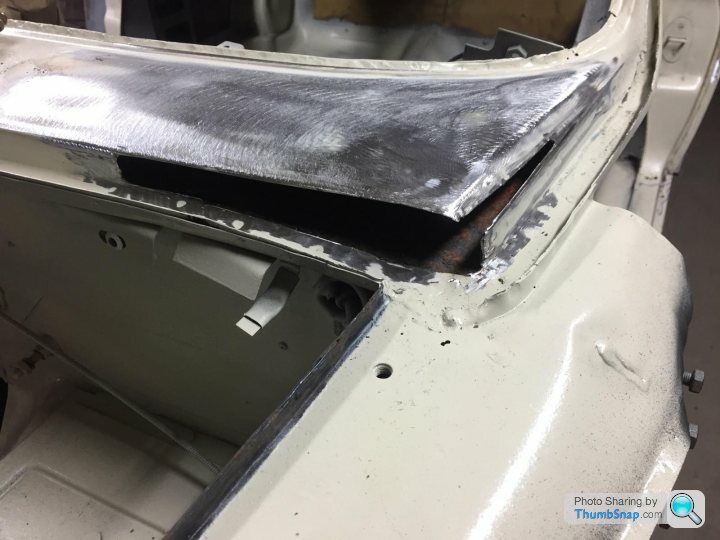
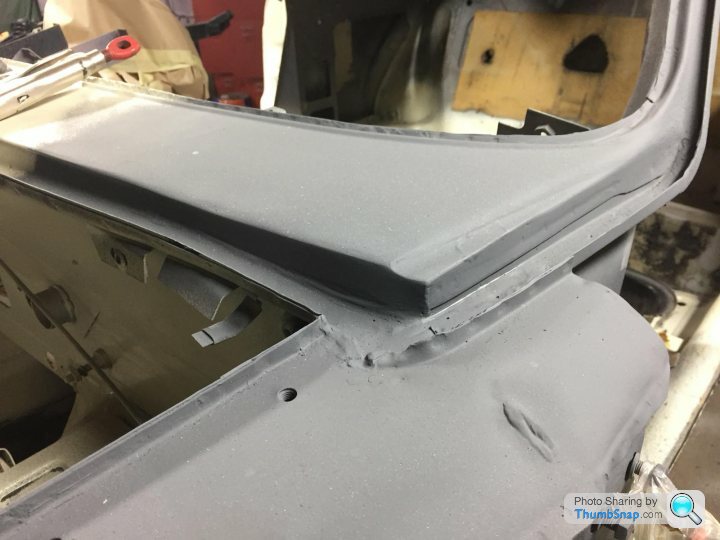
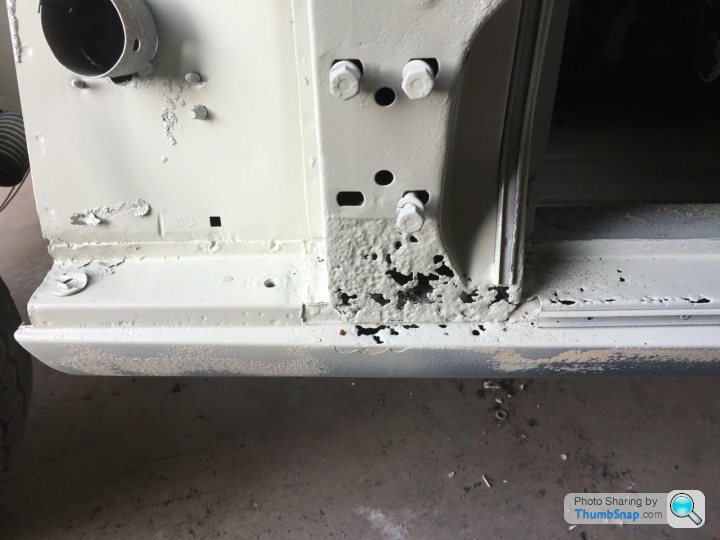
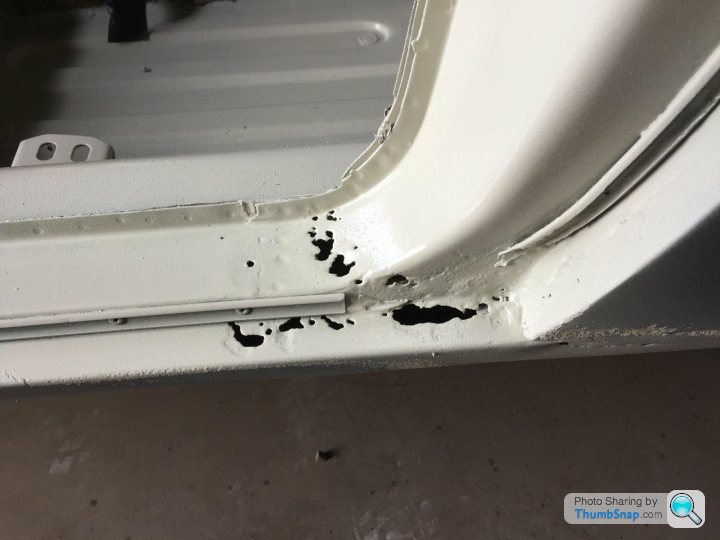
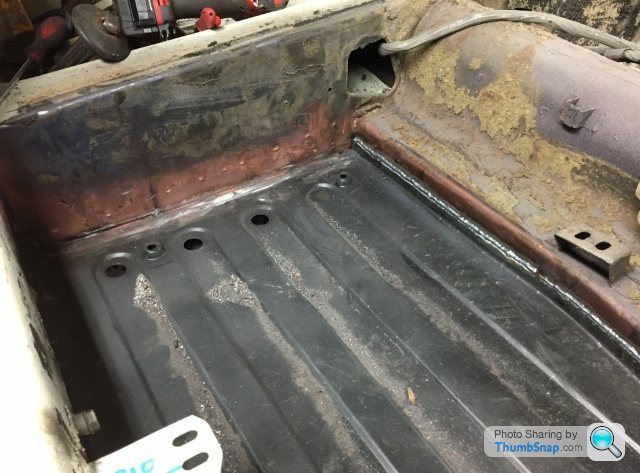
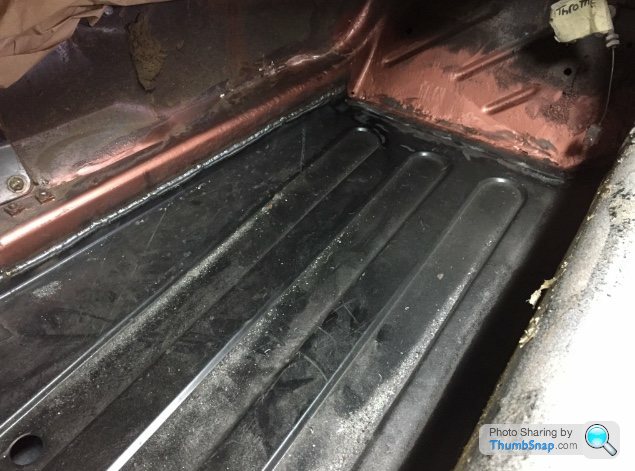
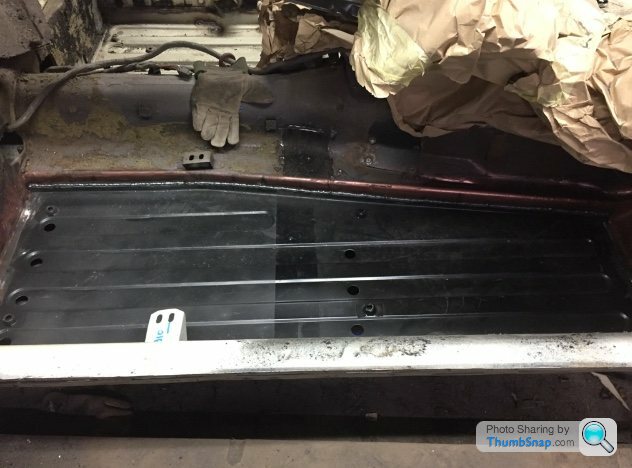
A few pictures of repairs to the body that have taken place
Also repaired but without pictures is the passenger footwell near the inside sill. It had been repaired in 89/90 but wasn’t very pleasing to the eye so has been cut out and done again. The outer sills have been removed to check the quality of the inners. Inners were remarkable good so have been cleaned up and galvanised spray applied. New passenger sill has started to be fitted using the door to check panel shut lines. Well the door had a new skin fitted by xj restorations about 10 years ago. My restorer showed me the quality of fit expecting a straight line for the bottom of the door. Instead was a wavy line with a 5mm deviation at some points. Needless to say that door skin is being removed and replaced rather than try to make good. The deviation was well hidden with the door rubber seals fitted which deceived the eye in thinking it was straight.
Anyway a slight modification is to remove the flange on the bottom of the quarter panel which produces the style line. This is a rust trap so will be ground back and seam welded front and back to stop any possible corrosion. I’ll lose the style line from the sill to the bottom of the quarter panel to give a nice perfectly fitted quarter flush down to the sill with no worries of that edge blowing again. Hopefully will last my lifetime once inner panel protection applied.
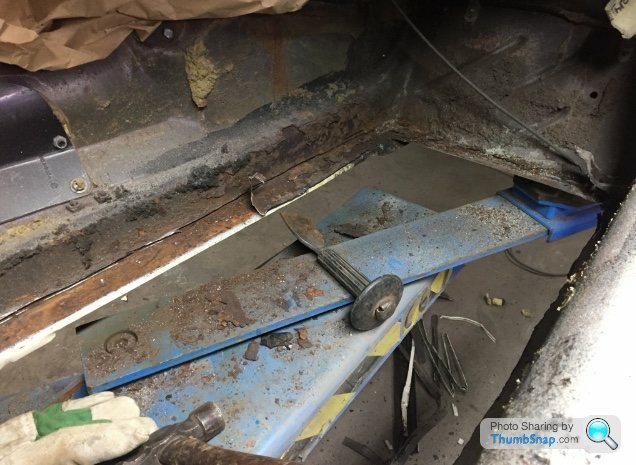
Other areas being cut out is the bottom of the a pillar onto the sill and same bottom area of b pillar/quarter meeting the sill. Pictures show the areas described before the sill was removed.
[url]
 |https://thumbsnap.com/S5WlooXN[/url
That’s about it till the new year picture wise. The body is now being repaired bit by bit. I’ve seen a few of the cars in the restorers garage from knackered shells worse than mine to repaired and painted and the finish is stunning. Looking forward to seeing mine in new paint
The new year has started and I’m back at work with bits of grotty Jag to make good again.
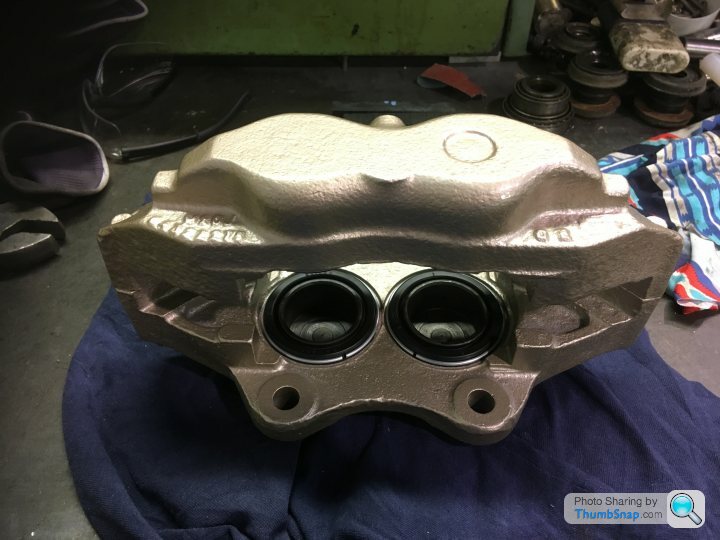
I have a partially stripped down front axle in my garage and below are the front brake calipers. They are not the originals but are the same spec, cast iron 4 pots.
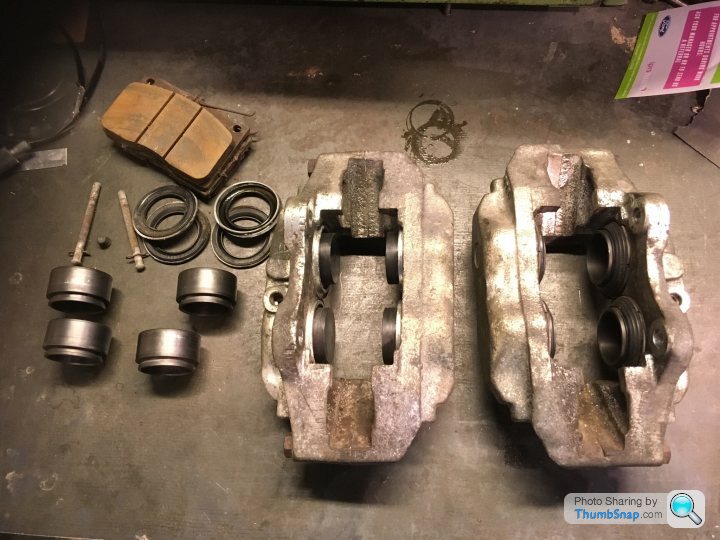
The one on the left of the picture has had the 4 pistons and outer seals removed and 4 dummy nylon pistons fitted ready to shot blast.
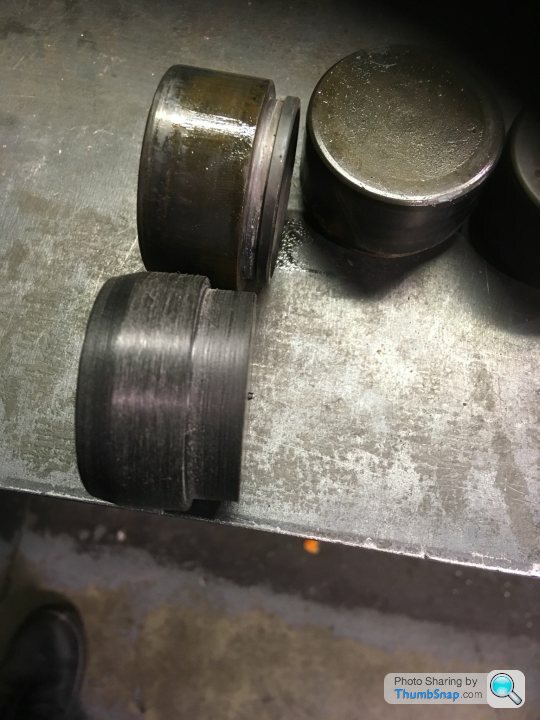
The nylon plugs still have to be a good fit pushing into the inside rubber seal. Bit of a pain getting to diameter of 48.06mm. The actual pistons are all in good condition.

So once the caliper castings have been refurbed to match the rears I just need to replace the rubber inner and outer seals and fit the pistons I removed.
Hopefully end of next week the front calipers will be as good as new again
I have a partially stripped down front axle in my garage and below are the front brake calipers. They are not the originals but are the same spec, cast iron 4 pots.
The one on the left of the picture has had the 4 pistons and outer seals removed and 4 dummy nylon pistons fitted ready to shot blast.
The nylon plugs still have to be a good fit pushing into the inside rubber seal. Bit of a pain getting to diameter of 48.06mm. The actual pistons are all in good condition.
So once the caliper castings have been refurbed to match the rears I just need to replace the rubber inner and outer seals and fit the pistons I removed.
Hopefully end of next week the front calipers will be as good as new again
Working day shifts are usually busier than nights so haven’t had a chance to get the calipers painted so whilst doing some lathe work I fitted in my own work to make a front suspension spring compression tool similar to the original Jaguar version
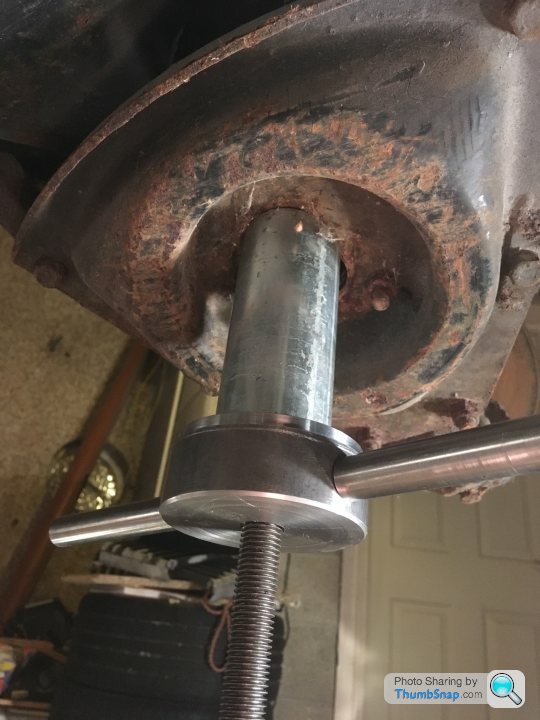
Tried it out this evening and it worked perfectly
Tried it out this evening and it worked perfectly
So front clip or front axle what ever it’s referred to has been totally stripped to its component parts. No horrendous rust or rot was found. Drivers side spring had snapped and both stub axles have too much wear to reuse with new bearings. Ball joints will be replaced as with the wishbone arm rubber bushes. I didn’t take any before and after pictures. Oops! I can do after pictures if interested?
Hoping to arrange the parts to be galvanised soon and then they can be painted and finally put back together better than new.
Hoping to arrange the parts to be galvanised soon and then they can be painted and finally put back together better than new.
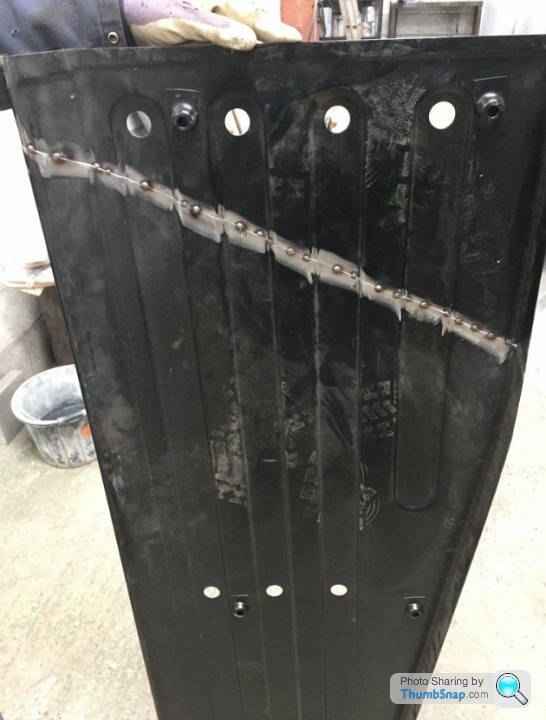
Drivers side floor removed and replaced. Original panel didn’t actually have any holes in it but was a bit thin in places so it was replaced. Panel used was a long wheel base floor which needed to be shortened. A diagonal cut was done to spread the load once butt welded and finished. The panel hasn’t been overlapped. As you can see the join has disappeared with just a thin coat of weld through primer applied. The welder did a fabulous job in my eye


All but one part was galvanised. The front suspension subframe apparently couldn’t be done due to gas expansion within the welded compartment even though holes were put in by the galvanising firm, it was then acid dipped before they decided not to hot dip. Really pissed off as that part is now orange with rust which needs blasting again and I now need to repair the holes put into it.
Parts completed have come out fine including the radius arms which are a fabbed part with no extra gas expansion holes put in?! Go figure


Above is the glovebox lid of the freshly re-finished dash. Really pleased with that. Took the front and rear bumpers to stoneleigh today as a firm there will be restoring those. Any pitting, scraps, bends will be corrected and a finish better than new. Not cheap but I’m not wanting to be doing these again in my ownership. Still I’ve got 6 months to save and pay for them when I collect from stoneleigh spares day in October
xjc said:
Hi Rob, excellent thread, please keep the updates coming.
What mods had you done on your car when you were running it previously & what new ones are you planning on incorporating in the rebuild ? Any info would be much appreciated.
Thank you, erm mods when running was a series 3 xj6 5 speed manual gearbox to replace the original 3 speed auto. The 5th gear is in effect the same ratio as the old 4 speed manual with overdrive. The 5th gear reduces engine speed quite nicely when travelling at 70mph so no need to alter the original diff ratio. Top speed improved dramatically also. Series 3 speedo dial needs to be fitted as it’s an electric feed from the gearbox.What mods had you done on your car when you were running it previously & what new ones are you planning on incorporating in the rebuild ? Any info would be much appreciated.
The original engine seized up so a new series 3 injection engine was built but uses 3 su carbs to supply fuel. Never got these set up properly before the divorce kicked in. Now 11 years later it’s being repaired top to bottom.
Mechanically I’m fitting a late xjs outboard disc brake rear axle with power lock diff. All polybushed mounts and galvanised parts underneath. The car will sit low on conventional shorter springs with suitably uprated dampers. The front anti-roll bar is a larger diameter item from a db7 and will be fitting a rear anti-roll bar also. The brake calipers will be standard but as shown previously all fully rebuilt and working on grooved discs. Wheels will be 18s as before the stripdown. They will be changed to a different design but essentially the same size 18”x8j fronts and 18”x9j rears.
Body wise it’s being repaired as a series 2 xj. Some inner panels are using stainless steel, original powder coat items will be galvanised and then painted. Usual stuff really. I’m not putting a vinyl roof back. The colour won’t be original but will be a Jaguar code. Interior will be classic with subtle changes. Still about a year away to complete the body and axles. I’m only just about to start fitting the new bearings into the rear axle hubs lol. No rush though
I assume you are starting or about to start something similar?


Gassing Station | Readers' Cars | Top of Page | What's New | My Stuff