1983 Land Rover Series 3
Discussion


It looks superb, nice to see a Land Rover on its original wheels and tyre fitments instead of huuge off road tyres that knacker the way it drives. Also nice to see a complete lack of checker plate.
Defender mirrors look very similar to the original Series III door mirrors so must count as a sympathetic modification.
Defender mirrors look very similar to the original Series III door mirrors so must count as a sympathetic modification.

warch said:
It looks superb, nice to see a Land Rover on its original wheels and tyre fitments instead of huuge off road tyres that knacker the way it drives. Also nice to see a complete lack of checker plate.
Defender mirrors look very similar to the original Series III door mirrors so must count as a sympathetic modification.
Thanks for the compliment Defender mirrors look very similar to the original Series III door mirrors so must count as a sympathetic modification.

I really don't like checker plate and I think alot of it is applied to cover up body work damage. I did my best to fill the dents on mine but there are still several that I missed.
I will be fitting 235 85 R16 tyres to mine eventually. They replicate the old 750s, so think they will look fine and fill the arches nicely.
Tree sliders are also on the agenda but that is for safety and a step to get in and out. They are quite high!
Edited by bakerstreet on Wednesday 26th December 22:50
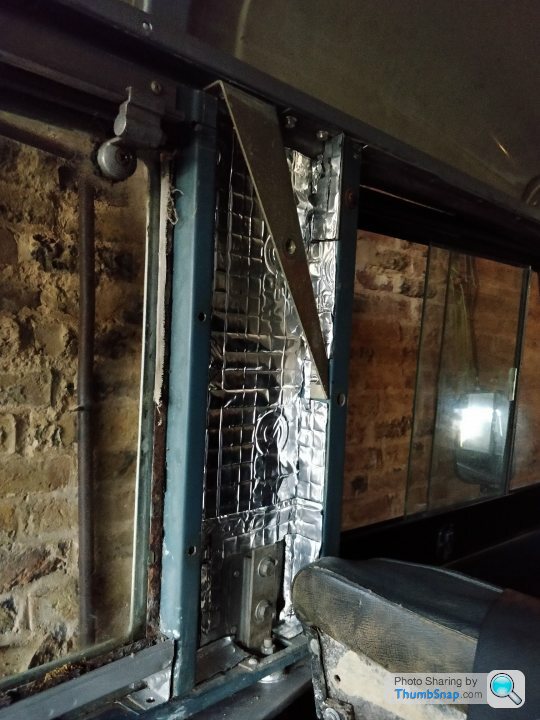
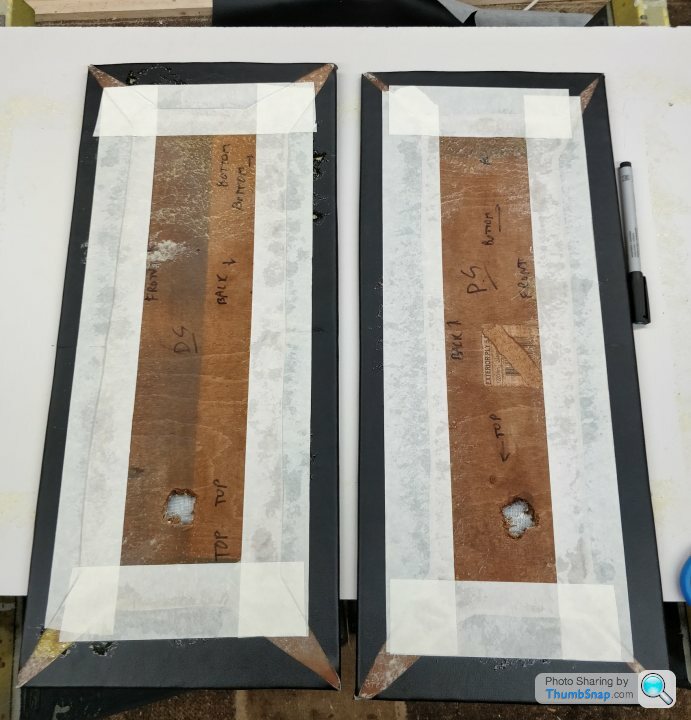
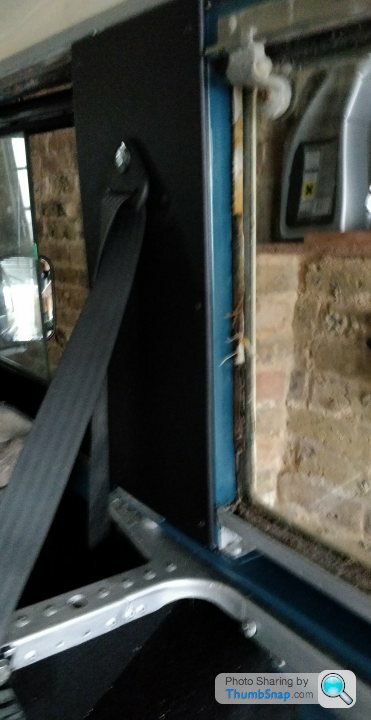
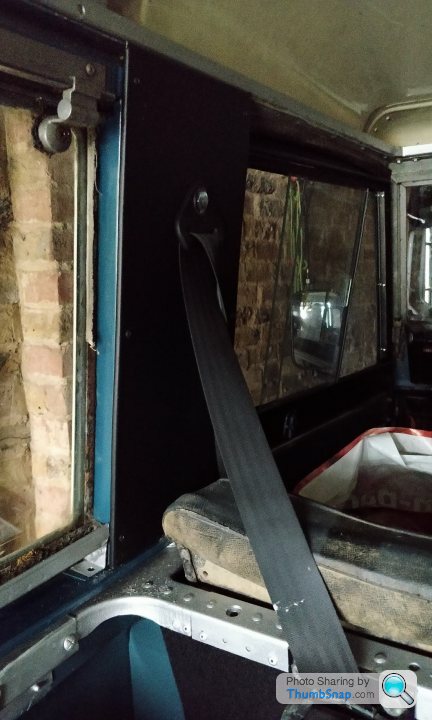
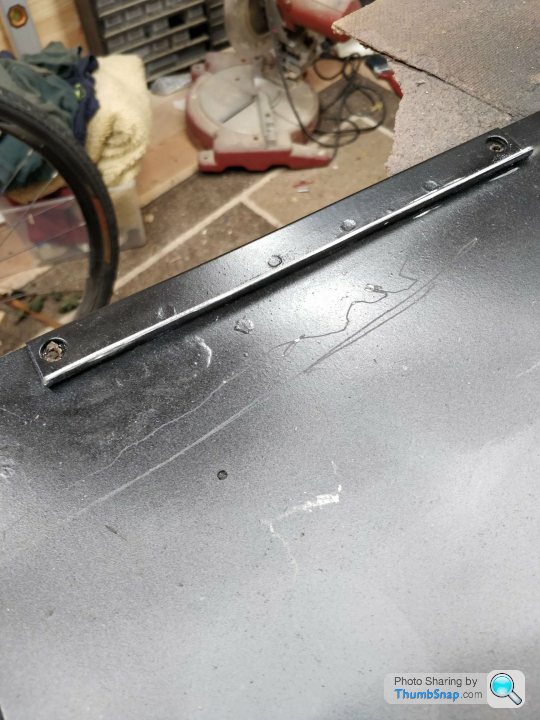
The seat belt top mounts have always looked untidy. The factory optional delux trim pack included vinyl covered hard board panels that were held in using spring clips.
Exmor trim do offer a full delux trim pack but it’s quite expensive and looks a little over the top in a series Land Rover. I just wanted to cover the seat belt top mounts. Its also at eye level and immediately visible when you open the back door.
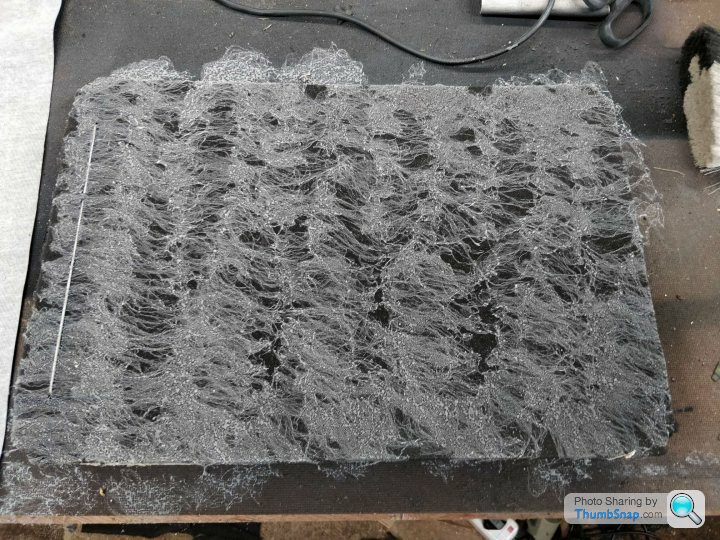
Applied some 2.5mm silent coat to the exposed bodywork. Used this in several places on the series including on the rear aches and the bulkhead. Commercial body series came with no sound deadening as standard so anything you can add will be of benefit.
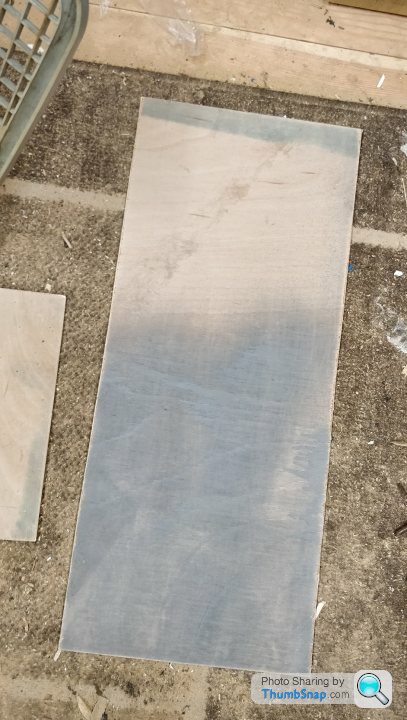
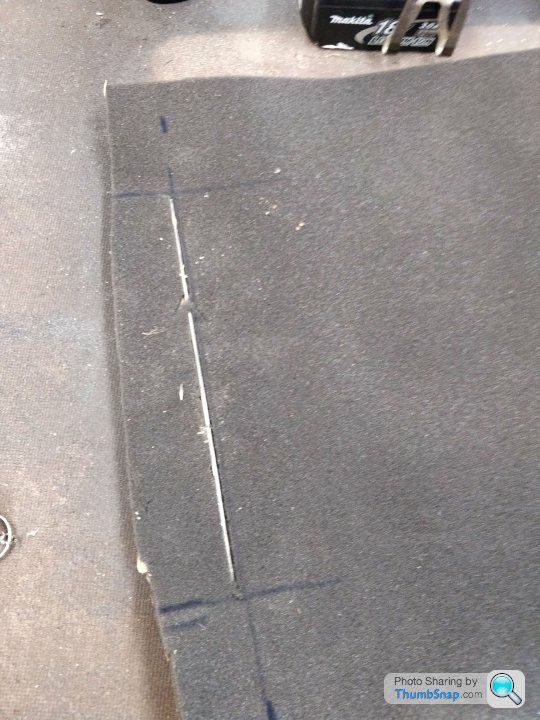
I made up the trim panels using 6mm ply which in a previous life served a load bay panel for my D3 and also a spray gun test panel when I was painting the series (Nice to have a bit of history in even the simplest of tasks)
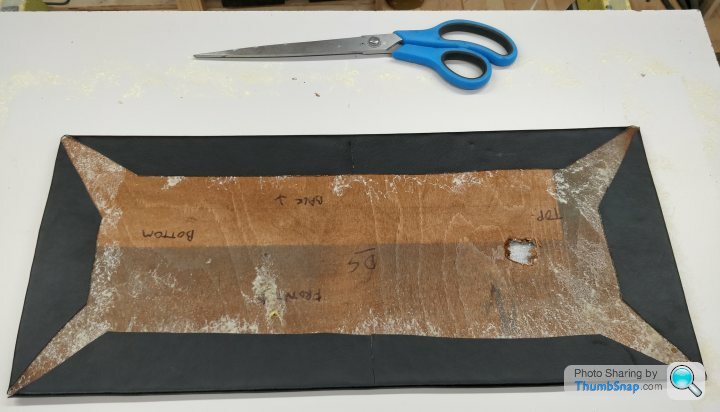
I learned from my trimming of the rear boot panel and used better adhesive (TrimBond) I cut small straight sections at the corner of the vinyl which allowed for a slightly neater corner.
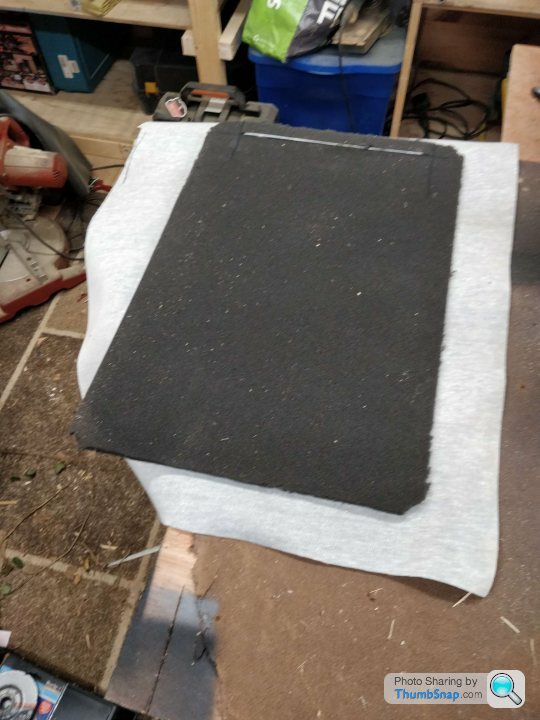
Once the vinyl was wrapped I used some cheaper builder contact adhesive and applied some masking tape to stop it ever peeling. Pretty pleased with finished panels and whilst they don’t look completely factory, I still think they look much better that before.
The panels are held on using 6 black self tapping screw. Not bothered by the exposed screwheads as I’ve used the same screws for the rear door trim panel. I’ll probably use the same screws for the side door trims.
At the same time, I have also been building some custom trim panels for the front doors, but this is part of a bigger project which includes new hinges, catches, latches and painting of the inside of the door tops. That is going to take a while. The door alignment on my Series is pretty bad and I have some anti burst kits which need fitting and I’m expecting that to take at least a day.
Not looking forward to the hinges job either. Highly likely that the bulkhead side of the bolts will be seized. Centre pin on my hinges have gone so the door wobbles about all over the place. The bulkhead end panel has a door shape dent in the top which was caused by the door and I’m worried that it has pulled the bulkhead out and could make lining the doors up very difficult, but we’ll have to see. May even offload that job to a garage…
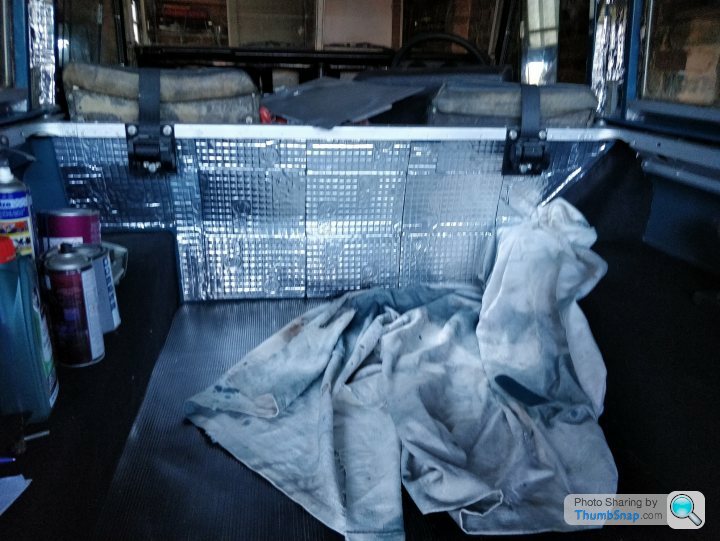
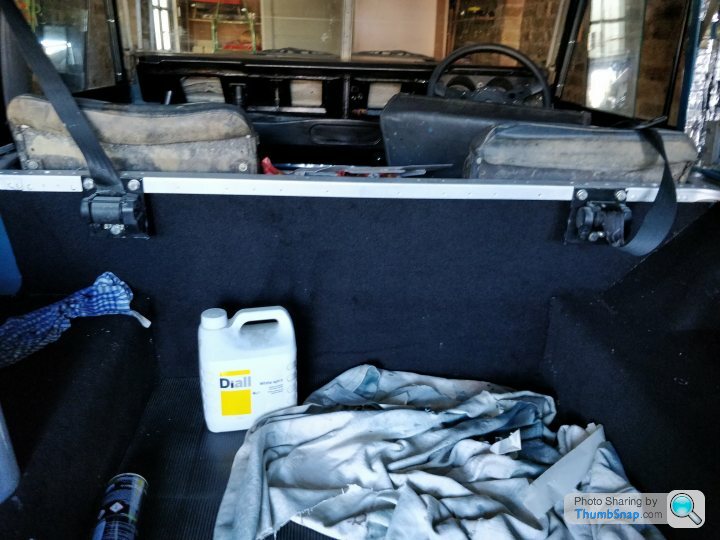
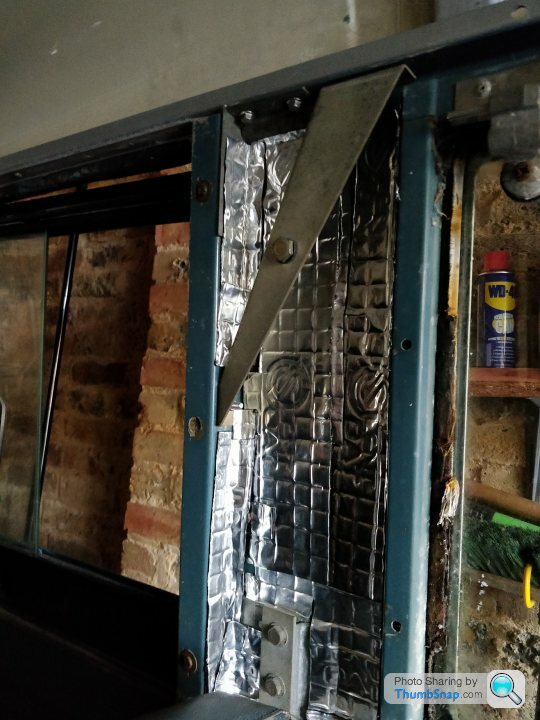
Bulkhead Carpet Application
In a bid to quieten the vehicle down, I applied sound deadening to the load bay side of the bulkhead. Used 2.5mm Silent Coat. All from Ebay. Applying it to large areas is easier than smaller areas such as the seat belt top mounts and the underseat storage.
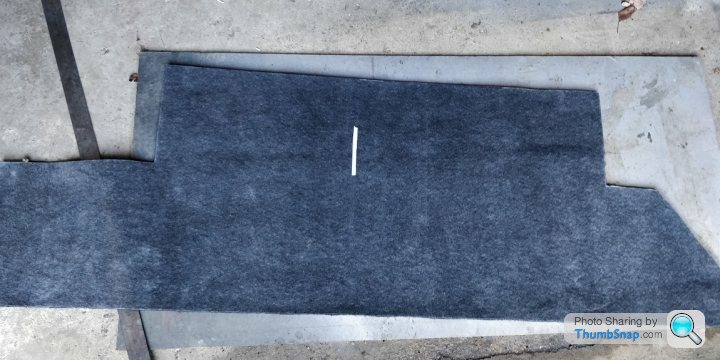
Used cardboard strips to create templates for both sides and it worked out quite well.
Carpet isn’t an exact match though and that’s annoying but sending it back will be time consuming and expensive and I think it still looks decent enough now that it’s fitted. It’s also an interior with numerous colours and finishes so I think it goes unnoticed.
When I get round to replacing the seats, I shall apply sound deadening to cab side of the bulkhead and add some carpet there too, but that will need an edge stitched onto the carpet because the top edge will be very visible.
Fitting the carpet was quite fiddly. I managed to get a good dry fit, but fitting it with contract adhesive applies is much harder as it’s difficult to position . I have tried polythene dust sheets as they don’t stick to the adhesive, but I didn’t have much success, so I just end up pulling it off and re-applying more adhesive. Got a few annoying gaps here and there. Just going to have fill the gaps with thin strips of carpet or paint it black. It’s only because the sound deadening is silver and shows up if there are any gaps.
Next task will be fitting right angle brackets to the seat belt brackets for the buckles. Should allow for a slightly neater installation of the buckles. Inside of the door tops need painting too along with a window catch fitting.I also have a new rear view mirror to fit. None of the later is essential for the MOT though. However, I would really like doors that lock and I’m expecting that task to take an entire weekend...
MOT plans have been delayed thanks to Parking Brake on my Disco3 failing, so I had to use the Series MOT booking for that repair instead.
Few pics of the carpeting and seat belt top mounts. I think it’s starting to look pretty good. Must bite the bullet and buy some new seats. Fed up of staring at the muddy backs of the originals every time I work on the car.
Silent coat applied to the bulkhead.
Cut cut to size. Used cardboard templates to get the ends right.
Carpet fitted. Few obvious errors, but overall, it looks ok and a million miles better than when I bought it.
Seat belt panel area with sound deadening applied. Very fiddly.
6mm ply cut to size. Even convinced myself I needed to buy a new cordless jigsaw to co them on site so to speak
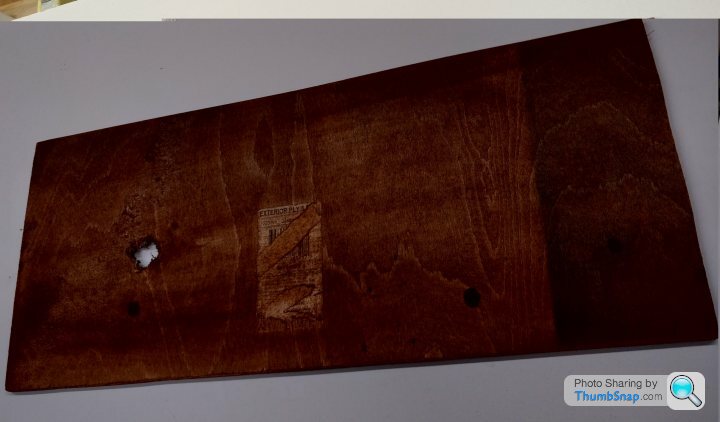
Treated the panels using fence treatment. It was what I had in the garage at the time.
Panels wrapped with vinyl and taped at the back so it shouldn't peel off.
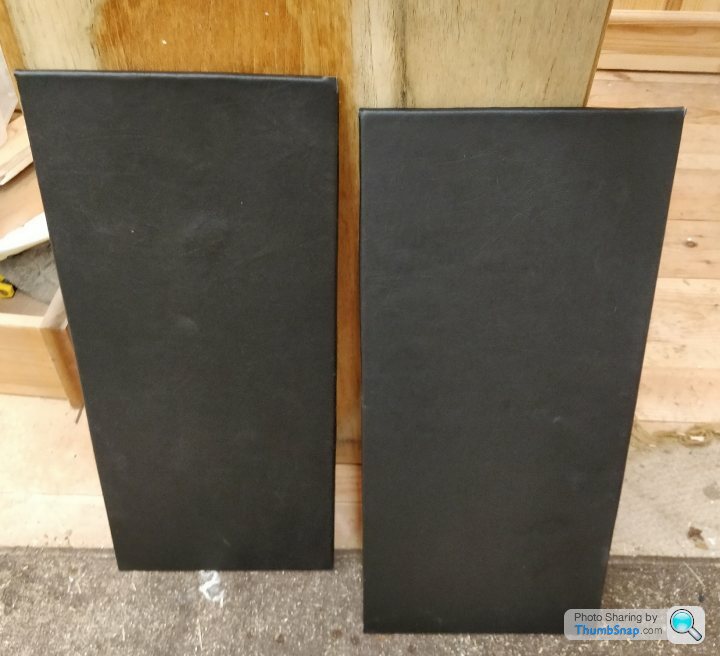
Panels fitted to the car. Much better than the bare panels before. I think they look pretty good.
Exmor trim do offer a full delux trim pack but it’s quite expensive and looks a little over the top in a series Land Rover. I just wanted to cover the seat belt top mounts. Its also at eye level and immediately visible when you open the back door.
Applied some 2.5mm silent coat to the exposed bodywork. Used this in several places on the series including on the rear aches and the bulkhead. Commercial body series came with no sound deadening as standard so anything you can add will be of benefit.
I made up the trim panels using 6mm ply which in a previous life served a load bay panel for my D3 and also a spray gun test panel when I was painting the series (Nice to have a bit of history in even the simplest of tasks)
I learned from my trimming of the rear boot panel and used better adhesive (TrimBond) I cut small straight sections at the corner of the vinyl which allowed for a slightly neater corner.
Once the vinyl was wrapped I used some cheaper builder contact adhesive and applied some masking tape to stop it ever peeling. Pretty pleased with finished panels and whilst they don’t look completely factory, I still think they look much better that before.
The panels are held on using 6 black self tapping screw. Not bothered by the exposed screwheads as I’ve used the same screws for the rear door trim panel. I’ll probably use the same screws for the side door trims.
At the same time, I have also been building some custom trim panels for the front doors, but this is part of a bigger project which includes new hinges, catches, latches and painting of the inside of the door tops. That is going to take a while. The door alignment on my Series is pretty bad and I have some anti burst kits which need fitting and I’m expecting that to take at least a day.
Not looking forward to the hinges job either. Highly likely that the bulkhead side of the bolts will be seized. Centre pin on my hinges have gone so the door wobbles about all over the place. The bulkhead end panel has a door shape dent in the top which was caused by the door and I’m worried that it has pulled the bulkhead out and could make lining the doors up very difficult, but we’ll have to see. May even offload that job to a garage…
Bulkhead Carpet Application
In a bid to quieten the vehicle down, I applied sound deadening to the load bay side of the bulkhead. Used 2.5mm Silent Coat. All from Ebay. Applying it to large areas is easier than smaller areas such as the seat belt top mounts and the underseat storage.
Used cardboard strips to create templates for both sides and it worked out quite well.
Carpet isn’t an exact match though and that’s annoying but sending it back will be time consuming and expensive and I think it still looks decent enough now that it’s fitted. It’s also an interior with numerous colours and finishes so I think it goes unnoticed.
When I get round to replacing the seats, I shall apply sound deadening to cab side of the bulkhead and add some carpet there too, but that will need an edge stitched onto the carpet because the top edge will be very visible.
Fitting the carpet was quite fiddly. I managed to get a good dry fit, but fitting it with contract adhesive applies is much harder as it’s difficult to position . I have tried polythene dust sheets as they don’t stick to the adhesive, but I didn’t have much success, so I just end up pulling it off and re-applying more adhesive. Got a few annoying gaps here and there. Just going to have fill the gaps with thin strips of carpet or paint it black. It’s only because the sound deadening is silver and shows up if there are any gaps.
Next task will be fitting right angle brackets to the seat belt brackets for the buckles. Should allow for a slightly neater installation of the buckles. Inside of the door tops need painting too along with a window catch fitting.I also have a new rear view mirror to fit. None of the later is essential for the MOT though. However, I would really like doors that lock and I’m expecting that task to take an entire weekend...
MOT plans have been delayed thanks to Parking Brake on my Disco3 failing, so I had to use the Series MOT booking for that repair instead.
Few pics of the carpeting and seat belt top mounts. I think it’s starting to look pretty good. Must bite the bullet and buy some new seats. Fed up of staring at the muddy backs of the originals every time I work on the car.
Silent coat applied to the bulkhead.
Cut cut to size. Used cardboard templates to get the ends right.
Carpet fitted. Few obvious errors, but overall, it looks ok and a million miles better than when I bought it.
Seat belt panel area with sound deadening applied. Very fiddly.
6mm ply cut to size. Even convinced myself I needed to buy a new cordless jigsaw to co them on site so to speak
Treated the panels using fence treatment. It was what I had in the garage at the time.
Panels wrapped with vinyl and taped at the back so it shouldn't peel off.
Panels fitted to the car. Much better than the bare panels before. I think they look pretty good.
Been over 6 months since the last update and progress has been slow for a variety of reasons.
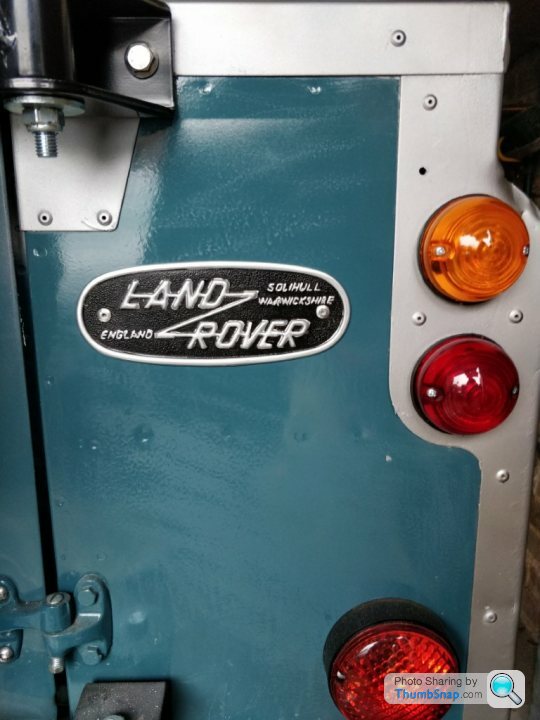
Refurbished Land Rover badge was fitted using rivets. Hand painted the badge using Humbrol model paints. Border was masked and sprayed. It looks ok from a distance and much better than when I bought the car. It was just bare pressed metal back then.

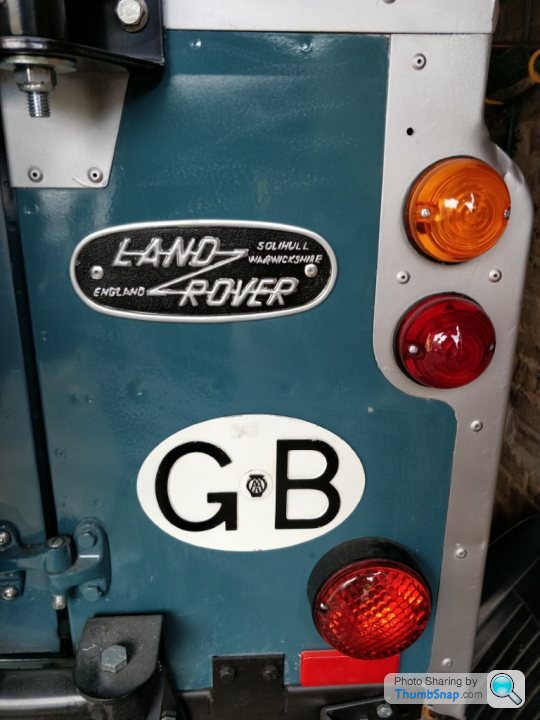
Reproduction vintage GB badge is something I have wanted for a while. They go for £50 in eBay and I picked this up at the Beaulieu Auto Jumble in May for a tenner. Attached using rubber pads. Didn't even re-paint it as I liked the less than perfect finish.
Also picked up an original sales leaflet for my model at Beaulieu. £25 on eBay and £6 at the show so I was quite pleased.
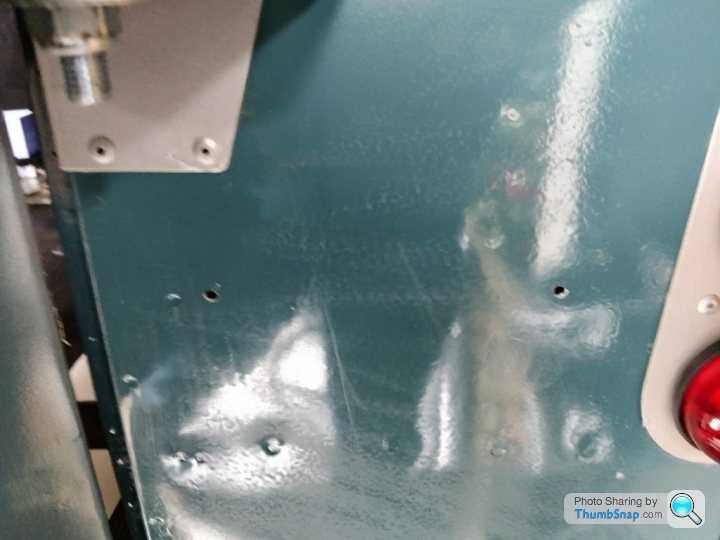
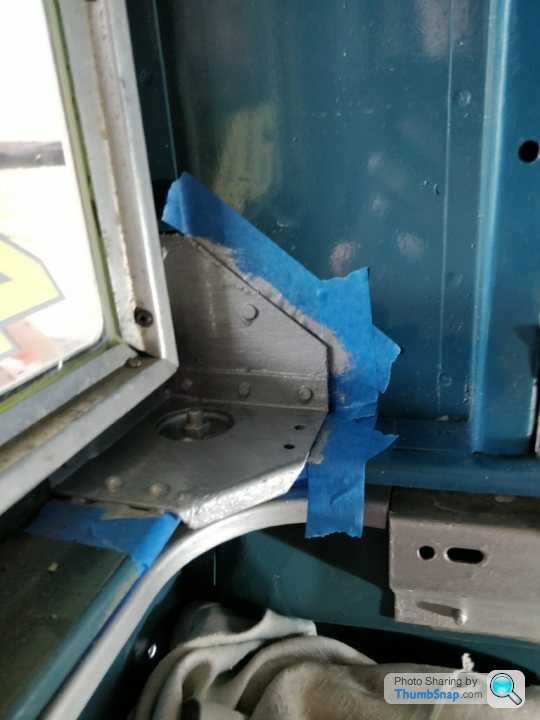
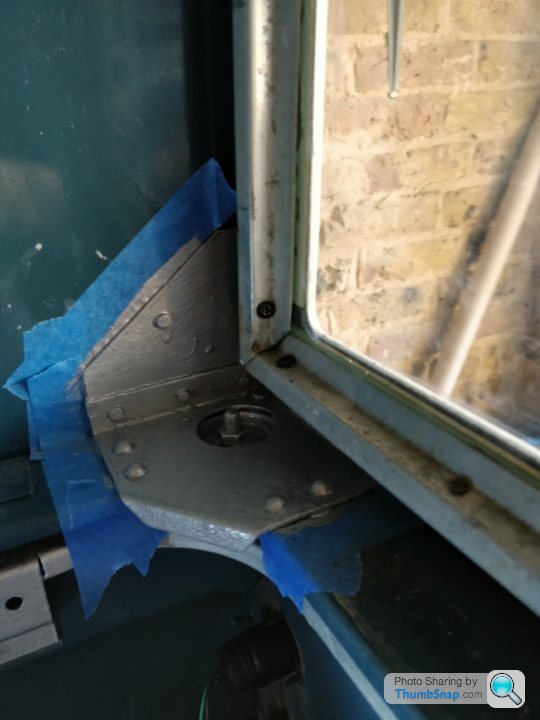
Corner mount areas for the tub to window panels looked scruffy compared to the other Ali parts, so painted those in Hammerite silver to match other bits.
 [url]
[url]
 |https://thumbsnap.com/PBh7sj6k[/url][url]
 |https://thumbsnap.com/fGchIXFB[/url][url]
 |https://thumbsnap.com/3UhuWjI1[/url]
Bulkhead cab side has had sound deadening applied along with the seat belt mount area. Carpet was cut to fit and a local carpet place fitted the edge trim for me. Carpet attached using Trimbond adhesive. I did a much better job of this side compared to the other side. Used masking tape to make sure that it lined up at the right point.
Seat brackets have always looked scruffy. it's one of the first things you look at when you open the door so will always stand out They have had a light sand and then treated with hammerite red oxide primer and then no less than three coats of smooth black. A lot of the time I am painting using a head torch, so I inevitably miss bits that only come to light in broad daylight. Quite annoying as painting takes 5 to 10 minutes to apply yet drying takes 24hrs!
Even with just bases lightly fitted, it looks much much better than the plain tired looking bases that came with the car.
Original plan was to try and sell the original bases, but I just can't be bothered and they have gone to the tip.
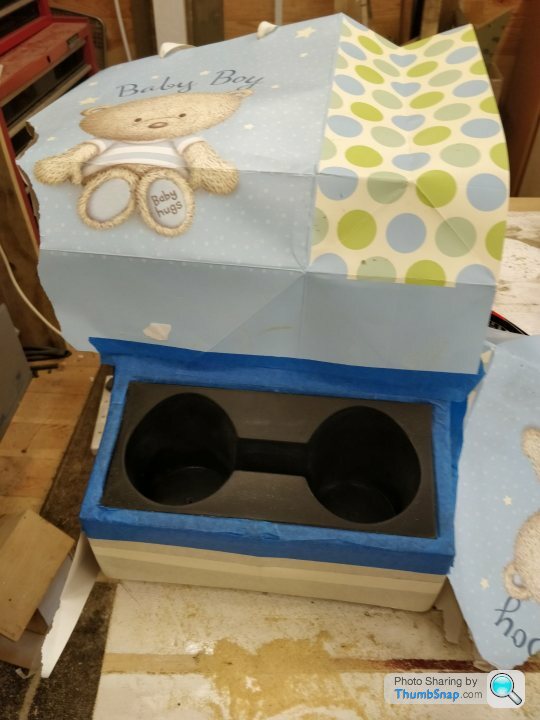
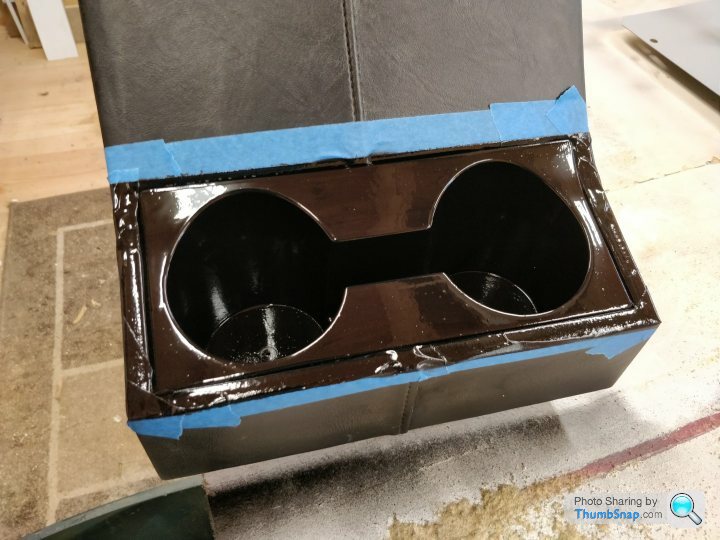
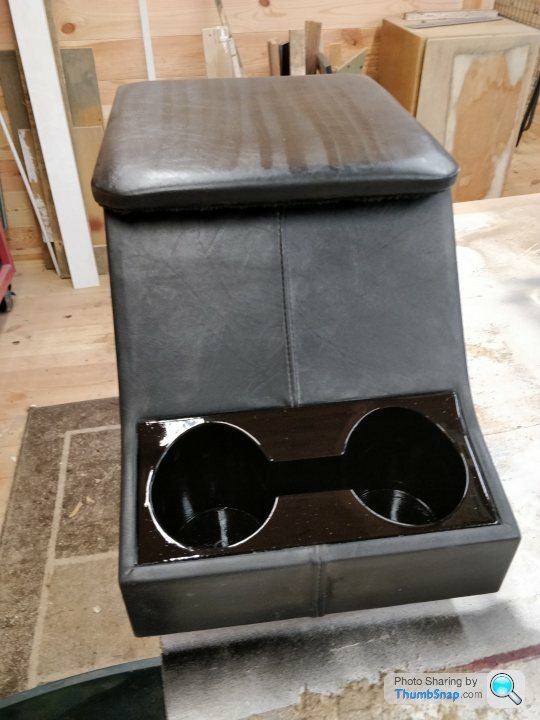
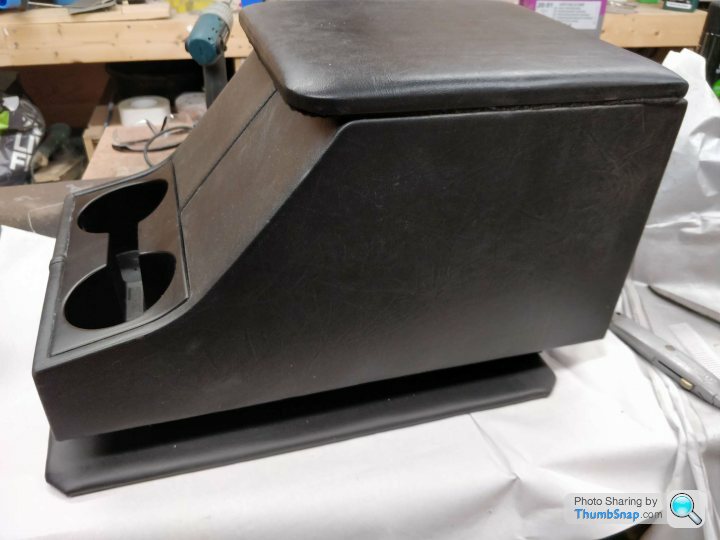
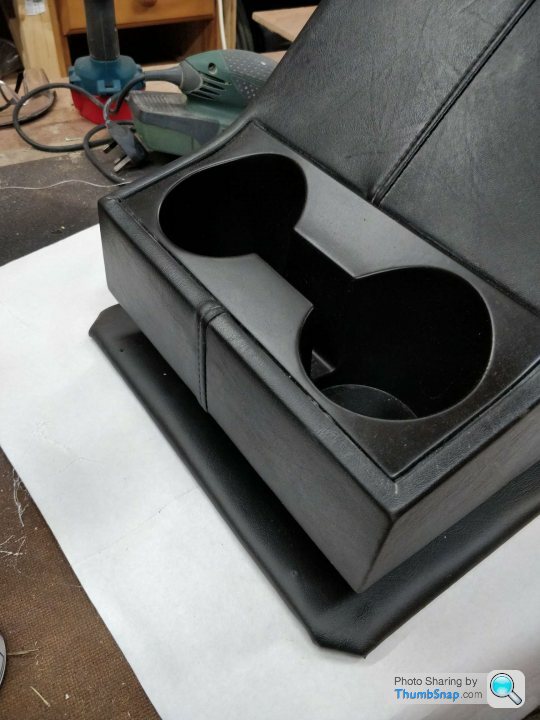
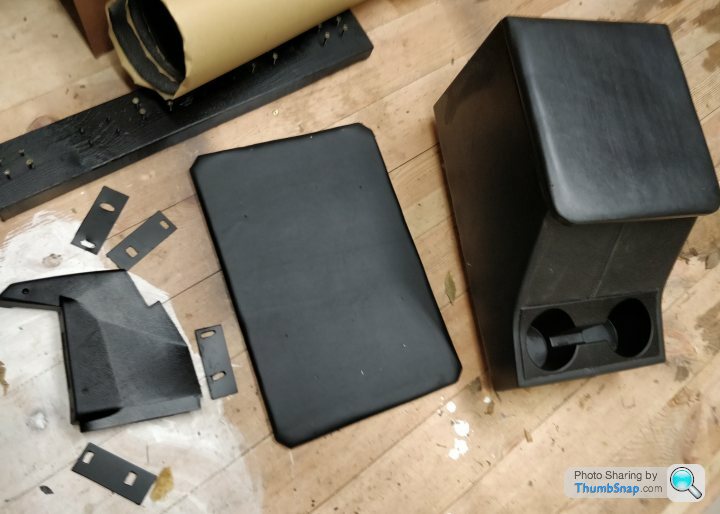
Cubby box has had a mini re-furb. Just a good clean and re-painting the cup holder section. I have also primed and glossed the exposed MDF of the base as I didn't want that to turn to mush at the first sign of damp. Cubby box wouldn't have needed a refurb if I had covered it properly during the re-spray. Overspray really does get everywhere.
 [url]
[url]
 |https://thumbsnap.com/i8XkI6ua[/url][url]
 |https://thumbsnap.com/3LKrp0bd[/url][url]
 |https://thumbsnap.com/rHWOi9s3[/url][url]
 |https://thumbsnap.com/7msovcGR[/url][url]
 |https://thumbsnap.com/2YjvaOhg[/url]
Seat base panels have also had a lick of paint as well as sound deadening applied on the underside. Anything to try and keep the noise down. I recon I have probably fitted about 20kg of sound deadening to the series which is 20kg more than it ever had at the factory
 [url]
[url]
 |https://thumbsnap.com/ANbh9v42[/url][url]
 |https://thumbsnap.com/gVgacVG8[/url][url]
 |https://thumbsnap.com/EydW1OjK[/url]
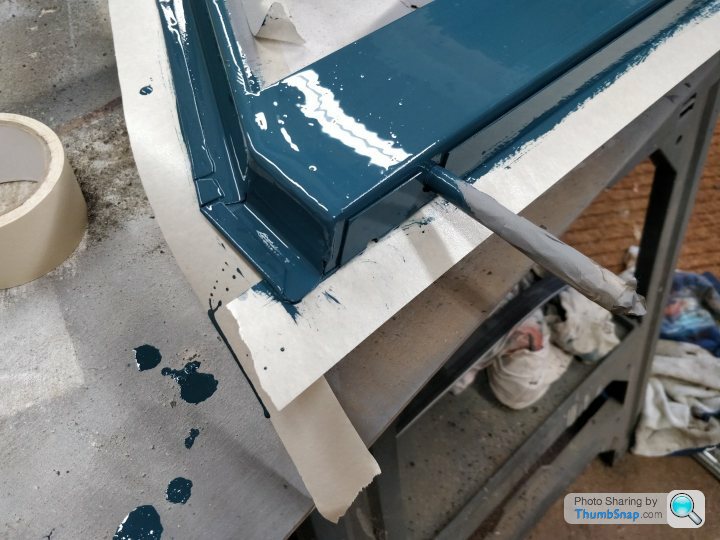
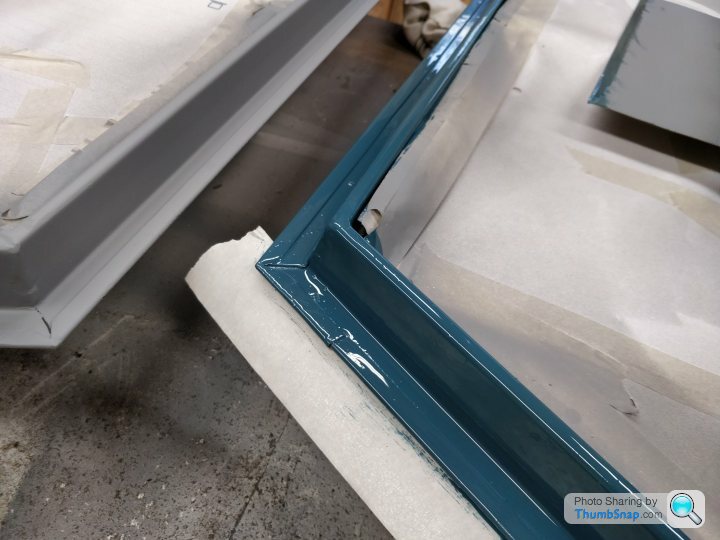
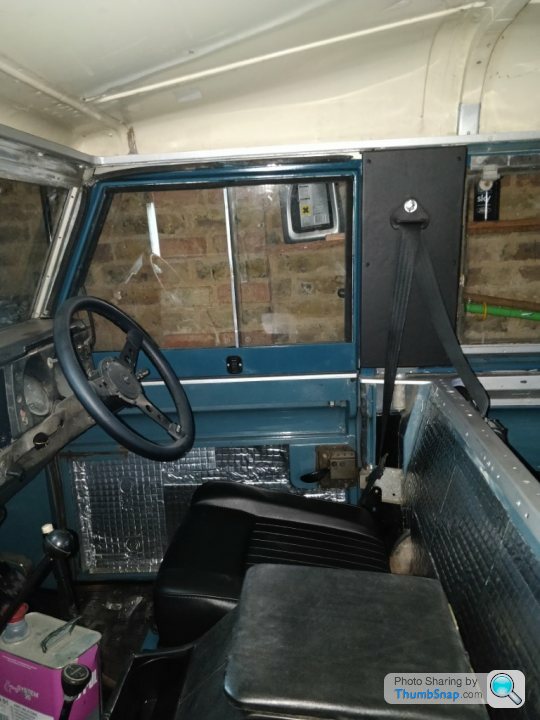
Door tops have had the welds ground down then the frames have been sanded and painted in the body colour blue. Also fitted the window lock switches. Unless you are very thin, your arms rub against the paintwork on the door tops, so I have stuck on some helicopter tape which doesn't look that pretty but better than blue paint on your clothes. They door tops look pretty good for a brush finish.
 [url]
[url]
 |https://thumbsnap.com/fVGOwO3M[/url][url]
 |https://thumbsnap.com/y8ZyqsvB[/url][url]
 |https://thumbsnap.com/oVgL4p8O[/url][url]
 |https://thumbsnap.com/mG0naDyo[/url][url]
 |https://thumbsnap.com/hwN3Fhx2[/url]
Also fitted some new seats complete with carpet and sound deadening. Even had my mum help with fitting the carpet. Interior is looking pretty smart now.
 [url]
[url]
 |https://thumbsnap.com/tmX6CrRz[/url][url]
 |https://thumbsnap.com/EcCltnif[/url][url]
 |https://thumbsnap.com/VQRZZPHk[/url]
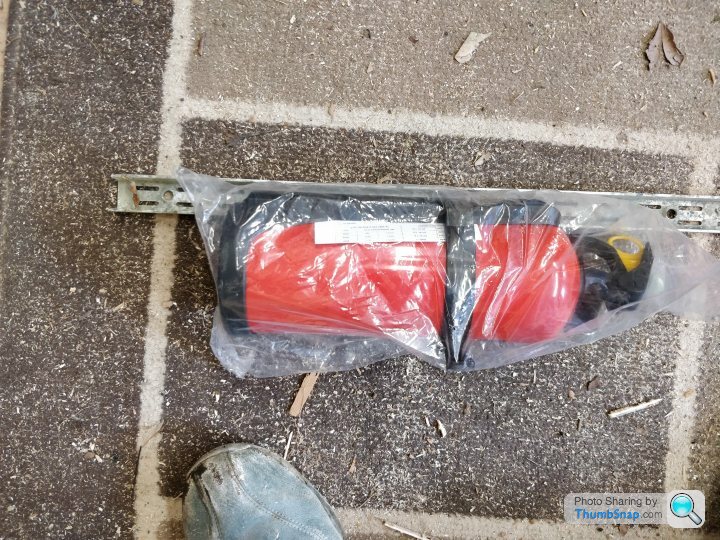
Always thought I needed a Fire extinguisher somewhere in the car. Bought the below from a caravan show of all places, Its mounted to the seat box using a cut down metal shelving bracket as a spreader plate for the mounting bolts. Looks quite neat and easy to reach from the driver's seat should the need arise. The bracket is also quite low profile so shouldn’t catch on anything that I store in that area.
 [url]
[url]
 |https://thumbsnap.com/JmdU6T0w[/url][url]
 |https://thumbsnap.com/f2o9kqV9[/url][url]
 |https://thumbsnap.com/KEwbAP8f[/url][url]
 |https://thumbsnap.com/NO8mEkKn[/url]
I'm still trying to find a gap in my calendar where I can take two days off to sort out the door locks but it's proving to be challenging.
There are shows coming up that I would like to take the series too, but I just don't think I'm going to make it. We have started quite a big garden project at home and this will also take up alot of my time.
As a little side project, I've taken the measurements of the roof and I've been thinking about making my own headlining using hardboard and headlining material. Will allow me to sound deaden the roof and not worry about it looking like it's made out of tinfoil from the inside. Alternative is keep an eye out for a safari roof, but they are quite rare on the used market and usually sold in quite a scruffy state. They do come with a headlining already installed and it would look much better than anything that I could probably make.
Also been thinking about a speaker board in the rear section of the roof to house a pair of 5.5in speakers. Stereo would be a welcome addition to the series. Maybe 12mm ply treated in woodstain and then wrapped in headlining material. Would also serve as somewhere to mount an interior light. Once again this is something that would be really useful in the series. Getting fed up of tripping over portable LED Work lights. These seem to be a constant feature in the back of my project.
One target over the next couple of weeks is to get it started and out in the open so I can take a few pictures. It’s not been out in the open since I painted the bumper, fitted the mirrors and painted the windscreen. Seeing it in the daylight would give me some encouragement
Its booked to be shown at a car show at the end of August. That is the target date. If I don't make that, then it will probably go into hibernation again until I put a new box and engine in it next year.
Hopefully the next update will have some half decent photos taken outside after its had a wash
Refurbished Land Rover badge was fitted using rivets. Hand painted the badge using Humbrol model paints. Border was masked and sprayed. It looks ok from a distance and much better than when I bought the car. It was just bare pressed metal back then.
Reproduction vintage GB badge is something I have wanted for a while. They go for £50 in eBay and I picked this up at the Beaulieu Auto Jumble in May for a tenner. Attached using rubber pads. Didn't even re-paint it as I liked the less than perfect finish.
Also picked up an original sales leaflet for my model at Beaulieu. £25 on eBay and £6 at the show so I was quite pleased.
Corner mount areas for the tub to window panels looked scruffy compared to the other Ali parts, so painted those in Hammerite silver to match other bits.
[url]|https://thumbsnap.com/PBh7sj6k[/url][url]|https://thumbsnap.com/fGchIXFB[/url][url]|https://thumbsnap.com/3UhuWjI1[/url]Bulkhead cab side has had sound deadening applied along with the seat belt mount area. Carpet was cut to fit and a local carpet place fitted the edge trim for me. Carpet attached using Trimbond adhesive. I did a much better job of this side compared to the other side. Used masking tape to make sure that it lined up at the right point.
Seat brackets have always looked scruffy. it's one of the first things you look at when you open the door so will always stand out They have had a light sand and then treated with hammerite red oxide primer and then no less than three coats of smooth black. A lot of the time I am painting using a head torch, so I inevitably miss bits that only come to light in broad daylight. Quite annoying as painting takes 5 to 10 minutes to apply yet drying takes 24hrs!
Even with just bases lightly fitted, it looks much much better than the plain tired looking bases that came with the car.
Original plan was to try and sell the original bases, but I just can't be bothered and they have gone to the tip.
Cubby box has had a mini re-furb. Just a good clean and re-painting the cup holder section. I have also primed and glossed the exposed MDF of the base as I didn't want that to turn to mush at the first sign of damp. Cubby box wouldn't have needed a refurb if I had covered it properly during the re-spray. Overspray really does get everywhere.
[url]|https://thumbsnap.com/i8XkI6ua[/url][url]|https://thumbsnap.com/3LKrp0bd[/url][url]|https://thumbsnap.com/rHWOi9s3[/url][url]|https://thumbsnap.com/7msovcGR[/url][url]|https://thumbsnap.com/2YjvaOhg[/url]Seat base panels have also had a lick of paint as well as sound deadening applied on the underside. Anything to try and keep the noise down. I recon I have probably fitted about 20kg of sound deadening to the series which is 20kg more than it ever had at the factory
[url]|https://thumbsnap.com/ANbh9v42[/url][url]|https://thumbsnap.com/gVgacVG8[/url][url]|https://thumbsnap.com/EydW1OjK[/url]Door tops have had the welds ground down then the frames have been sanded and painted in the body colour blue. Also fitted the window lock switches. Unless you are very thin, your arms rub against the paintwork on the door tops, so I have stuck on some helicopter tape which doesn't look that pretty but better than blue paint on your clothes. They door tops look pretty good for a brush finish.
[url]|https://thumbsnap.com/fVGOwO3M[/url][url]|https://thumbsnap.com/y8ZyqsvB[/url][url]|https://thumbsnap.com/oVgL4p8O[/url][url]|https://thumbsnap.com/mG0naDyo[/url][url]|https://thumbsnap.com/hwN3Fhx2[/url]Also fitted some new seats complete with carpet and sound deadening. Even had my mum help with fitting the carpet. Interior is looking pretty smart now.
[url]|https://thumbsnap.com/tmX6CrRz[/url][url]|https://thumbsnap.com/EcCltnif[/url][url]|https://thumbsnap.com/VQRZZPHk[/url]Always thought I needed a Fire extinguisher somewhere in the car. Bought the below from a caravan show of all places, Its mounted to the seat box using a cut down metal shelving bracket as a spreader plate for the mounting bolts. Looks quite neat and easy to reach from the driver's seat should the need arise. The bracket is also quite low profile so shouldn’t catch on anything that I store in that area.
[url]|https://thumbsnap.com/JmdU6T0w[/url][url]|https://thumbsnap.com/f2o9kqV9[/url][url]|https://thumbsnap.com/KEwbAP8f[/url][url]|https://thumbsnap.com/NO8mEkKn[/url]I'm still trying to find a gap in my calendar where I can take two days off to sort out the door locks but it's proving to be challenging.
There are shows coming up that I would like to take the series too, but I just don't think I'm going to make it. We have started quite a big garden project at home and this will also take up alot of my time.
As a little side project, I've taken the measurements of the roof and I've been thinking about making my own headlining using hardboard and headlining material. Will allow me to sound deaden the roof and not worry about it looking like it's made out of tinfoil from the inside. Alternative is keep an eye out for a safari roof, but they are quite rare on the used market and usually sold in quite a scruffy state. They do come with a headlining already installed and it would look much better than anything that I could probably make.
Also been thinking about a speaker board in the rear section of the roof to house a pair of 5.5in speakers. Stereo would be a welcome addition to the series. Maybe 12mm ply treated in woodstain and then wrapped in headlining material. Would also serve as somewhere to mount an interior light. Once again this is something that would be really useful in the series. Getting fed up of tripping over portable LED Work lights. These seem to be a constant feature in the back of my project.
One target over the next couple of weeks is to get it started and out in the open so I can take a few pictures. It’s not been out in the open since I painted the bumper, fitted the mirrors and painted the windscreen. Seeing it in the daylight would give me some encouragement
Its booked to be shown at a car show at the end of August. That is the target date. If I don't make that, then it will probably go into hibernation again until I put a new box and engine in it next year.
Hopefully the next update will have some half decent photos taken outside after its had a wash
I'm currently knee deep in a garden project and I am having to sink a lot of my available funds into this and sadly this includes the money that I had set aside for the brakes and any other work required to get it on the road for the Classic Car show on the 26th August.
I am also at a critical juncture with a Mobile App launch at work and taking time off to do the doors is a complete no no.
I have decided to carry on with a few Nice to have bits in my workshop at home. This will eventually be a speaker board mounted above the rear door and so crewed onto to the metal lip at the base of roof. Will probabaly make up some timber batons at the top of the rood, just so I can be sure it isn't going to flap about.
The 12mm plywood I got for free from the builder along with some hardboard. Long term plan is to make up a headlining board and covered with perforated foam backed vinyl. Think it looks much nicer than the suede look headlining.
Templating the curves of the roof will be quite tricky. Thinking I will template it from the outside using some cardboard or any old scrap timber that I have around.

I had originally said that if it didn't get on the road this time, I would moth ball it for another year and put a new engine and box in it. May still go with this option.
I am also at a critical juncture with a Mobile App launch at work and taking time off to do the doors is a complete no no.
I have decided to carry on with a few Nice to have bits in my workshop at home. This will eventually be a speaker board mounted above the rear door and so crewed onto to the metal lip at the base of roof. Will probabaly make up some timber batons at the top of the rood, just so I can be sure it isn't going to flap about.
The 12mm plywood I got for free from the builder along with some hardboard. Long term plan is to make up a headlining board and covered with perforated foam backed vinyl. Think it looks much nicer than the suede look headlining.
Templating the curves of the roof will be quite tricky. Thinking I will template it from the outside using some cardboard or any old scrap timber that I have around.
I had originally said that if it didn't get on the road this time, I would moth ball it for another year and put a new engine and box in it. May still go with this option.
Well its still not back on the road, but I have been slowly making progress on a few cosmetic jobs that I have been putting off for a while and the I have also been stockpiling all the parts I need to creat the new front to back electronics loom which will probably now have a new fuse board at its centre. Will save me having several inline fuses dotted around the car. The long term plan is to have a stereo and Mud Dash console in there to house 12v outlets and additional gauges.
My last post detailed the speaker board I was trying to make. This proved to much harder than I expected. I made up card templates of the roof contour from outside the car and it turned out they were miles off. Also making the template out of 12mm ply meant cutting it to shape was slow progress. Going to try and make another template using thinner hardboard which will be easier to cut and then make up the finished 12mm board from the new template. Its very slow process getting it in and out of the car and then cutting it again. You forget how uch of a pain it is to get in and out the back of a series. The rear door lip is quite high and even with my towbar mounted step, its still not comfortable. I'm actiall thinking of building a wooden box step to make like easier
A guy at work has been helping me with the wiring diagram for the new load bay light. Manged to find a way to make it like a modern car with a three way switch. IE on, on a door pressure switch, permanently on and all off. Pretty pleased with that.
Rear of the car will have two 12v outlets housed in a single box along with an on off switch for the outlets and the switch for load bay light.
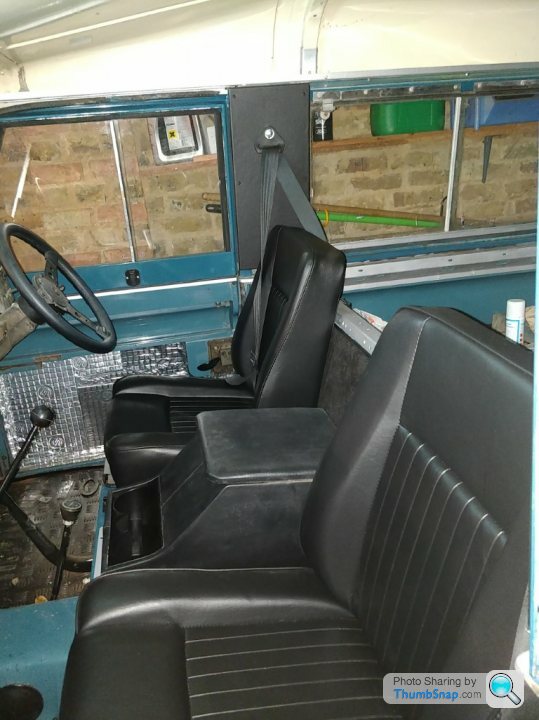
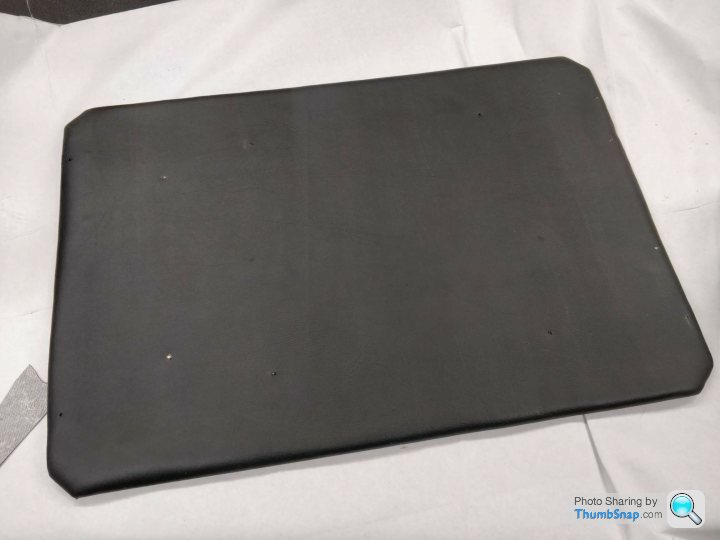
Cubby Box
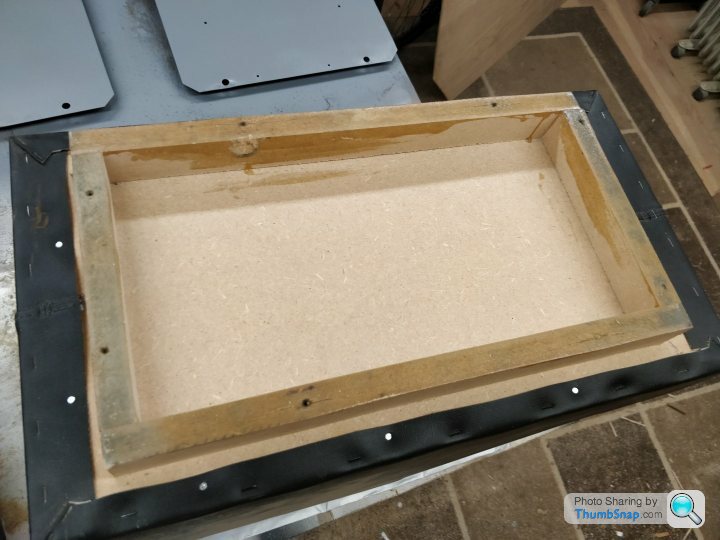
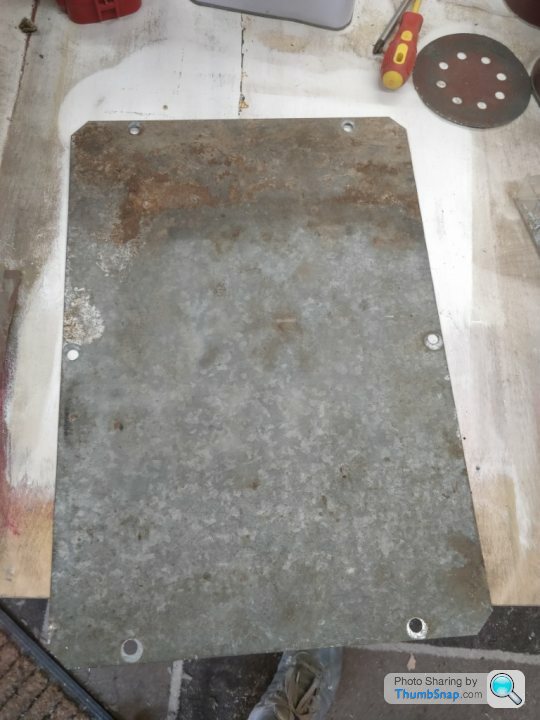
The centre cubby box cover panels are just galvanised steel or Ali (Not sure) plates. They offer nothing for sound deadening and look unsightly as they don't weather well. More restorers will re-galvaise or paint body color. I didn't see the point in painting body colour as you can't see them, so just painted them using alloy wheel paint (AutoTek). Used that a lot on other parts of the car.
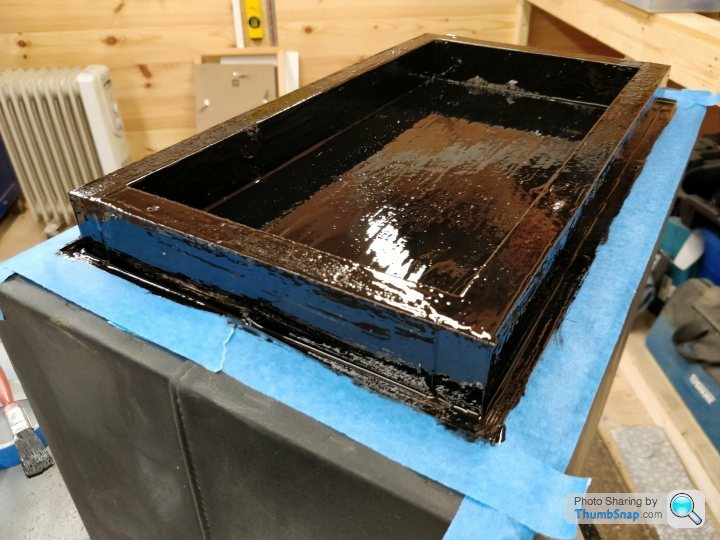
However this really stood out against the blue and black vinyl of the cubby box, so I ground down the lipped section and applied silent coat sound deadening sheets to one side and and then 6mm lightweight sound deadening foam to the other and then wrapped in black vinyl. Now looks quite smart I think.
Added a load of sound deadening to the underside of the box as well. Just used the 6mm stuff I had left over and some old tool box foam.
Anti burst door handles
The handles and catches weren't lining up. This is quite common as series doors are known to be all over the place. I made up 3mm and 1.5mm spacers. Etch primer and satin paint applied.
Dash End Panel
Mine is a mess. Weathered and covered in scratches (God knows why). Picked up a nice used one on ebay. Cleaned it with panel wipe, couple of coats of etch and then some more satin black. Looks much better than the original.
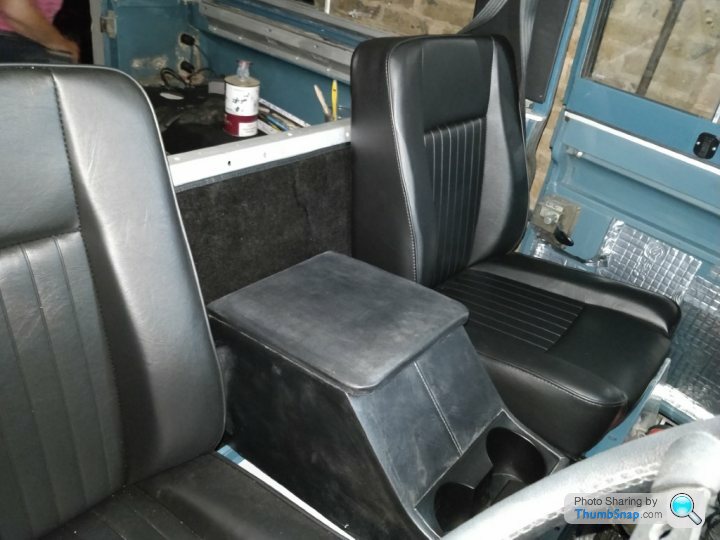
Seat belt brackets
Bit of meh job, but didn't like the bare galvanised look, so decided to spray them black and then just refitted them to the car.
New battery will probably be fitted next month along with the new front to back loom. LED Indicators with a new earth point are also on the cards
I have also been investigating V8 fitment options. Kinda figured I might as well build up my dream series. If it takes a bit longer then so be it. However, if it doesn't make the August Knebworth show this year, then the engine is coming out and I shall go with a V8 if I get all the parts I need for a reasonable price.
Few pics of the finished parts.
My last post detailed the speaker board I was trying to make. This proved to much harder than I expected. I made up card templates of the roof contour from outside the car and it turned out they were miles off. Also making the template out of 12mm ply meant cutting it to shape was slow progress. Going to try and make another template using thinner hardboard which will be easier to cut and then make up the finished 12mm board from the new template. Its very slow process getting it in and out of the car and then cutting it again. You forget how uch of a pain it is to get in and out the back of a series. The rear door lip is quite high and even with my towbar mounted step, its still not comfortable. I'm actiall thinking of building a wooden box step to make like easier
A guy at work has been helping me with the wiring diagram for the new load bay light. Manged to find a way to make it like a modern car with a three way switch. IE on, on a door pressure switch, permanently on and all off. Pretty pleased with that.
Rear of the car will have two 12v outlets housed in a single box along with an on off switch for the outlets and the switch for load bay light.
Cubby Box
The centre cubby box cover panels are just galvanised steel or Ali (Not sure) plates. They offer nothing for sound deadening and look unsightly as they don't weather well. More restorers will re-galvaise or paint body color. I didn't see the point in painting body colour as you can't see them, so just painted them using alloy wheel paint (AutoTek). Used that a lot on other parts of the car.
However this really stood out against the blue and black vinyl of the cubby box, so I ground down the lipped section and applied silent coat sound deadening sheets to one side and and then 6mm lightweight sound deadening foam to the other and then wrapped in black vinyl. Now looks quite smart I think.
Added a load of sound deadening to the underside of the box as well. Just used the 6mm stuff I had left over and some old tool box foam.
Anti burst door handles
The handles and catches weren't lining up. This is quite common as series doors are known to be all over the place. I made up 3mm and 1.5mm spacers. Etch primer and satin paint applied.
Dash End Panel
Mine is a mess. Weathered and covered in scratches (God knows why). Picked up a nice used one on ebay. Cleaned it with panel wipe, couple of coats of etch and then some more satin black. Looks much better than the original.
Seat belt brackets
Bit of meh job, but didn't like the bare galvanised look, so decided to spray them black and then just refitted them to the car.
New battery will probably be fitted next month along with the new front to back loom. LED Indicators with a new earth point are also on the cards
I have also been investigating V8 fitment options. Kinda figured I might as well build up my dream series. If it takes a bit longer then so be it. However, if it doesn't make the August Knebworth show this year, then the engine is coming out and I shall go with a V8 if I get all the parts I need for a reasonable price.
Few pics of the finished parts.
Well following last nights announcement, I won't be going to work on the actual car as its still at my parents place, but I have been carrying on building up the speaker board. Hopefully I will be able to work on it over Christmas.
Ordered the battery. Could have gone mad and spent £150, but went with an Enduroline from Tanya batteries. Very good service and WFH has helped me order because I never wanted to get 30Kg of battery delivered to next door.
The box had a rather direct and alarming instruction on the top
 |https://thumbsnap.com/iDyHfC3A[/url]
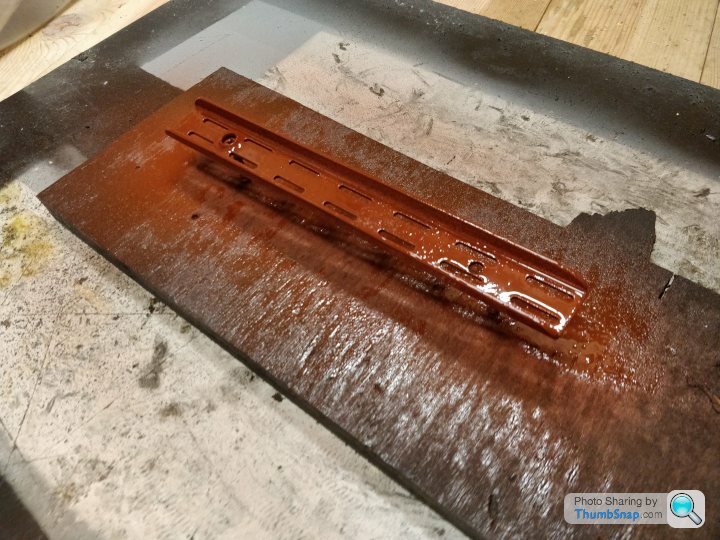
A decent battery is a must for a series. They are incredibly basic machines, but need a lot of grunt to crank especially when cold. Because of this I wanted to rig up a permanent solution for keeping the battery on trickle charge and I didn’t want the cable to be flapping about in the engine bay, so I built the below which will bolt to the underside of the front bumper
This won't be fitted to the car until December now
You can get chassis mount SAE connectors, but I didn't want something on the front of the bumper. Wanted it hidden. This is just a normal connector glued between plastic, aluminum and then wrapped in tape. Was going to paint it, but no one will ever see it so didn't see the point.
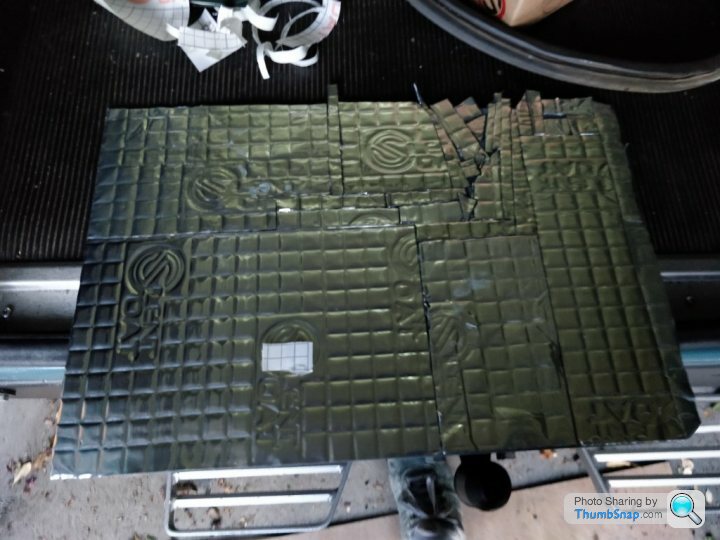
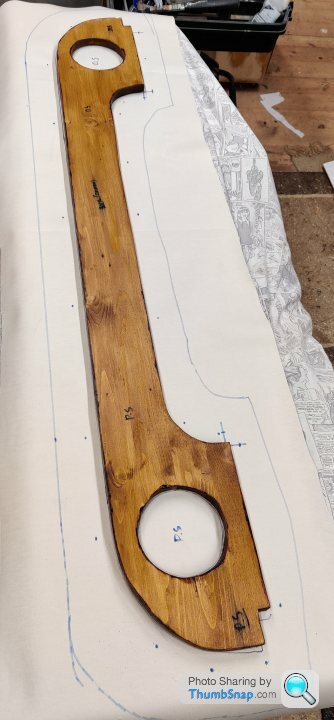
Speaker board involved a lot of prototyping using hardboard and cardboard templates. The board itself is made up of 22mm pine furniture board. Relatively light for its thickness compared to something like MDF or ply. With some protective coating it should last better compared to MDF. It's not a tough timber. Dents and splinters easily.
This is the speaker board dry fitted. I ended up cutting even more off it after that. Then stapled some leatherette to the top to mimic how it would fit when it was wrapped. Was a little tight, but that was kinda what I wanted.
 [url]
[url]
Board was treated using Johnsons Woodstain (What I had on the shelf). I'm of the view that anything timber in a series should have some sort of coating on it.
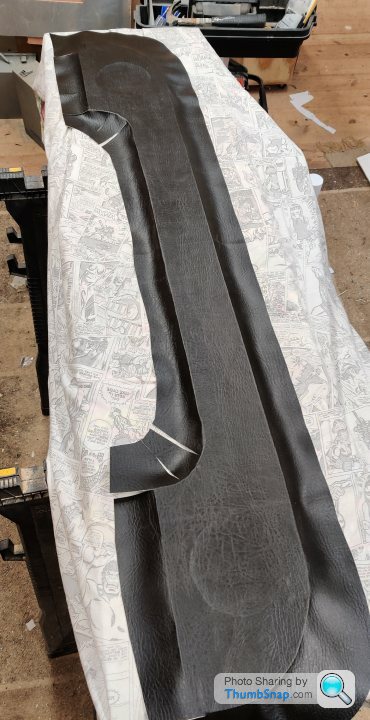
Decided on black leatherette to match other trim panels in the car. Took my time fixing the leatherette. Once again upholstering is not as as easy as I thought it would be. However I am pleased with the final result. Despite my best efforts I still made silly mistakes and annoying its on the visible parts as well.
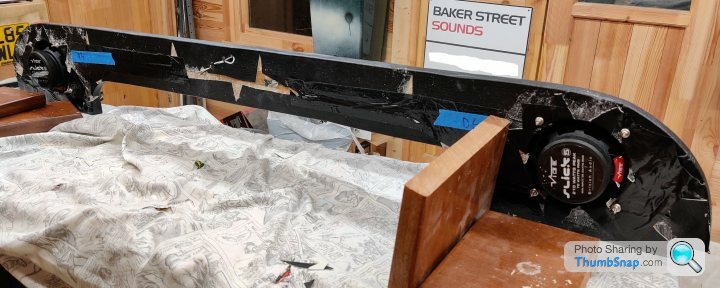
Next step was to add in the central light and two speakers. Speakers are Vibe 4.5in. Only £30 on ebay. Surrounds and grills were painted in limestone, but then I changed my mind and painted them black again and the grills silver which adds some contrast. The Central light was originally white and that that would have stood out somewhat.

Fixings had to be ordered specially. M4 40mm nuts and bolts with cup washers. Vinyl was attached using high temperature spray adhesive. A small foam roller also helps smooth it all out.
It has to be said, I am really quite happy with how this turned out. Fitting it to the car will come later, but I suspect I will need some aluminium angle to secure to the roof, so the board can be screwed to that as well as the lower section of the roof. Using fast fastners and self tappers for mounting the lower section of the board.
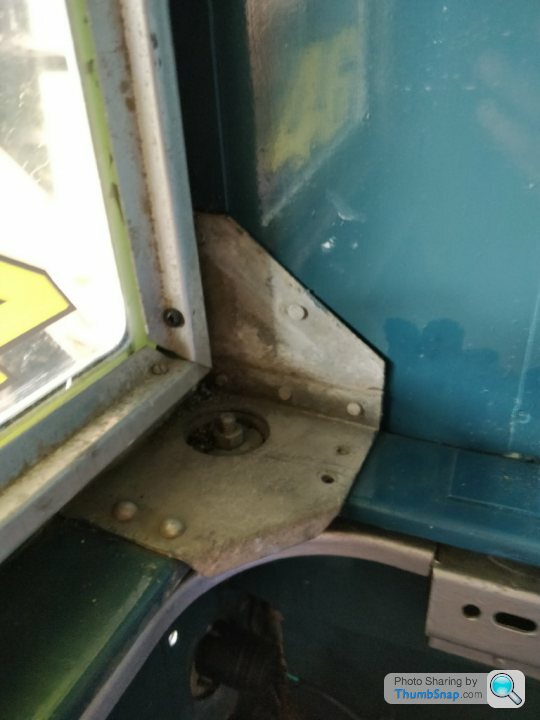
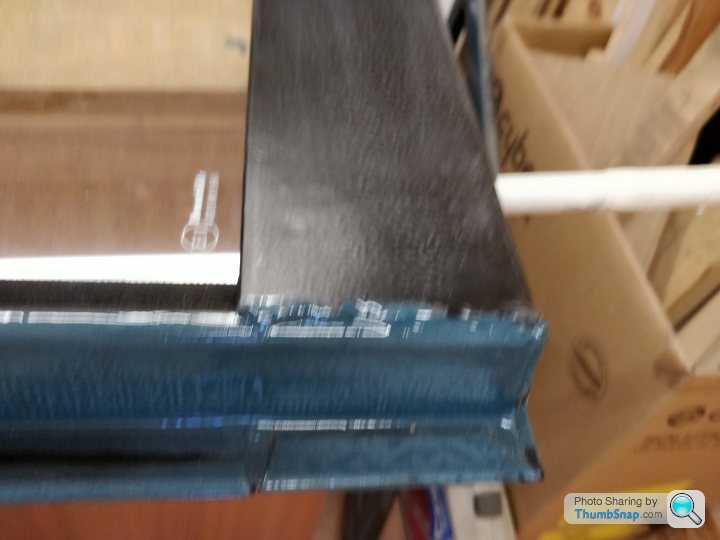
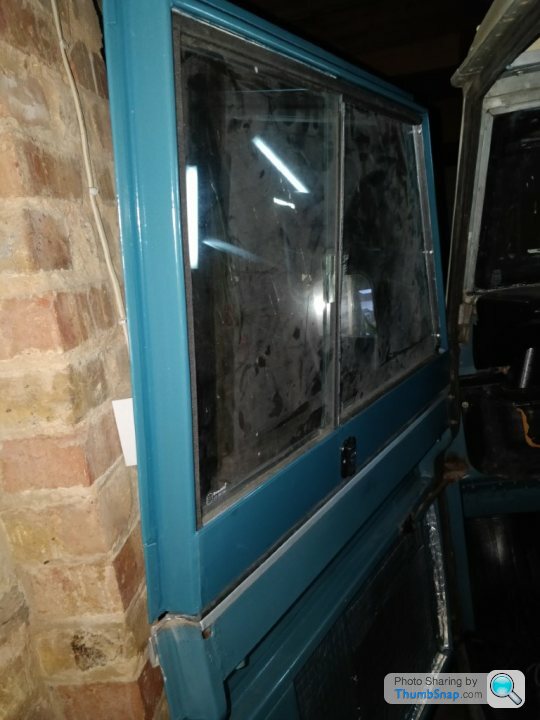
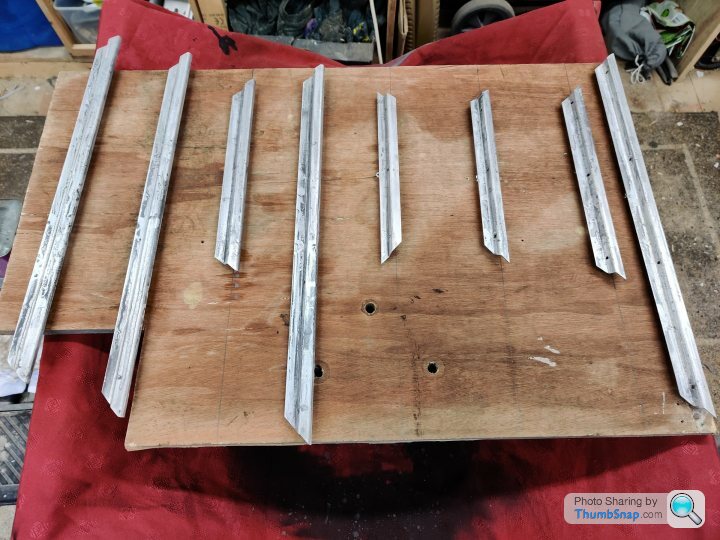
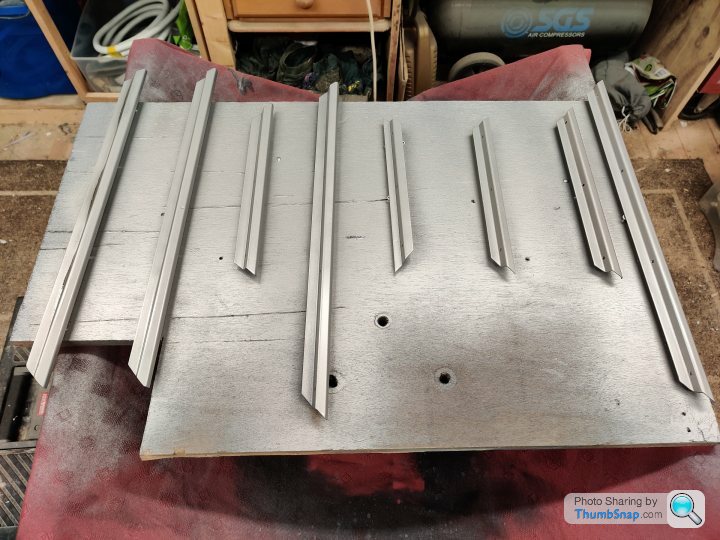
The station wagon rear windows are held in with rather crude pieces of angled aluminum and when I refitted the windows I had to cut them to fit as the bonding tape was clearly thicker than whatever they fitted in the late 1960s. My station wagon sides are from a Series 2, so older than the rest of the car by at least 5 years.
These were very weathered and stood out quite a lot when compared to the rest of the interior which has had quite a lot of work.
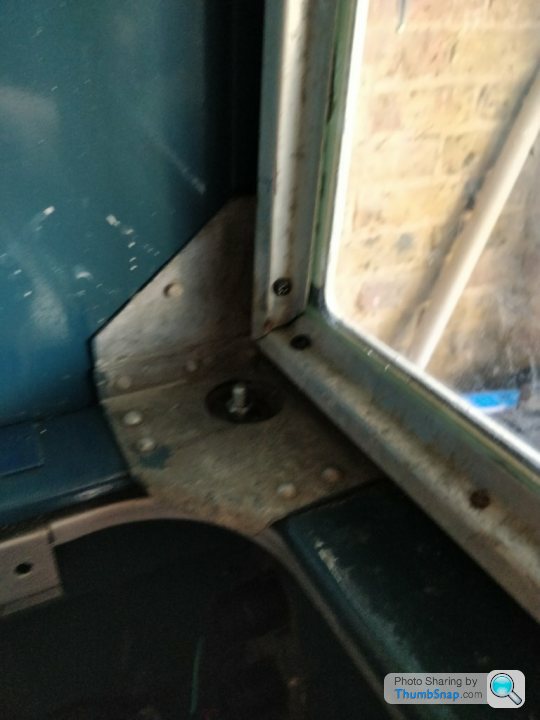
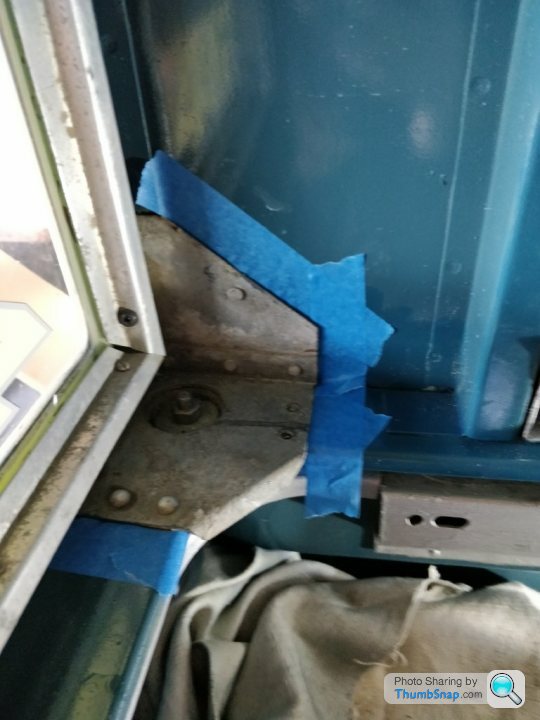
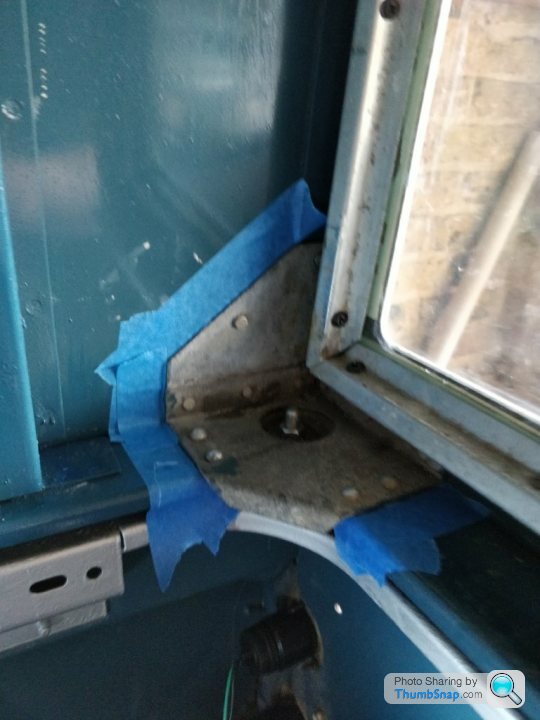
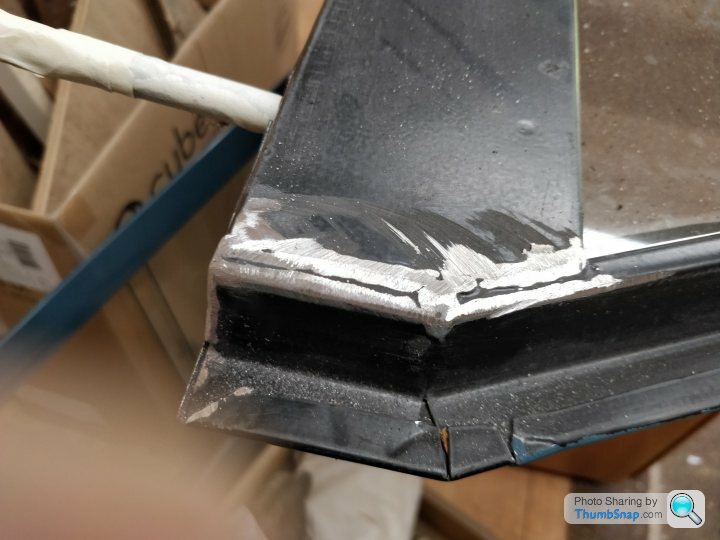
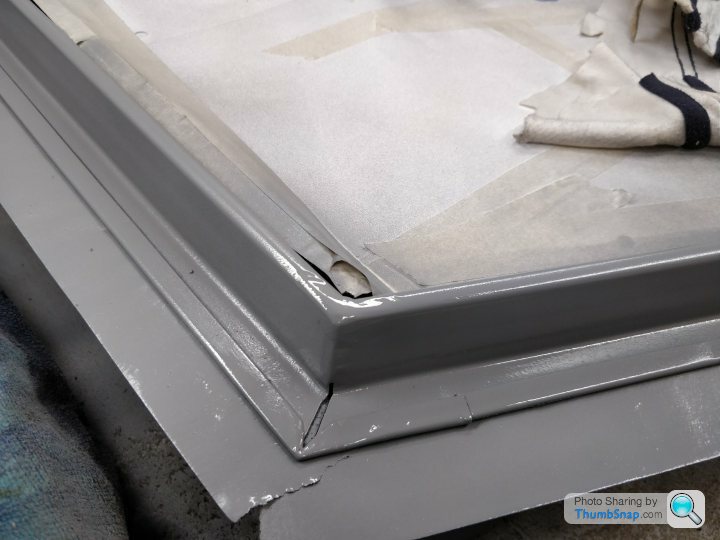
I removed the trim pieces and sanded them down with a detail sander using 240 grit. It was then sanded down using 400 grit wet and dry. Once again I reached for the AutoTek etch primer and Alloy wheel silver paint to finish which matches what I have used elsewhere in the car. Took the time to lay them out nicely and rest them on screws so the trim pieces wouldn’t stick to the board. I probably wouldn’t have done that five years ago.
Once again Covid means these won't be fitted to the car until December.
Pre primer and post sanding
Primed
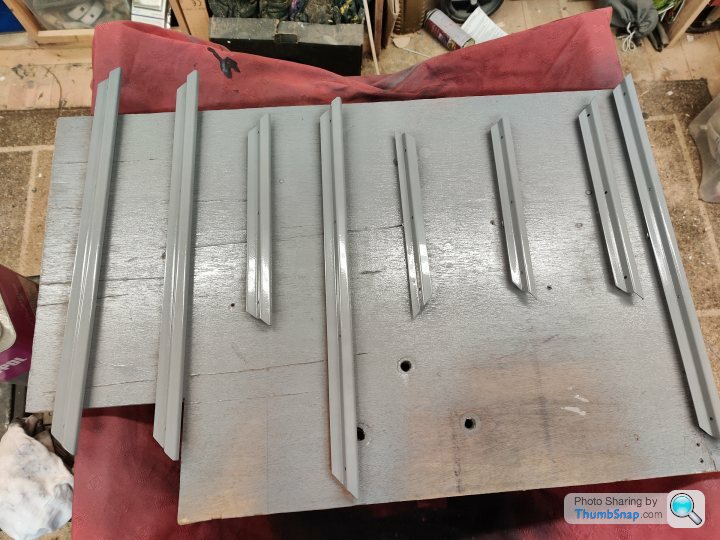
Top coat
Next steps will be making up the wiring loom for the speaker board. After that, I don't have much else to do for the Series without being able to physically see it.
I have found another engine for it, but who knows when I will be able to pick that up. Engines aren't easy things to buy due to weight and transport. I have bought myself an engine stand beforethe shop goes into lock down!
Will do another post when I am have finished the wiring loom at least.
Ordered the battery. Could have gone mad and spent £150, but went with an Enduroline from Tanya batteries. Very good service and WFH has helped me order because I never wanted to get 30Kg of battery delivered to next door.
The box had a rather direct and alarming instruction on the top
|https://thumbsnap.com/iDyHfC3A[/url]A decent battery is a must for a series. They are incredibly basic machines, but need a lot of grunt to crank especially when cold. Because of this I wanted to rig up a permanent solution for keeping the battery on trickle charge and I didn’t want the cable to be flapping about in the engine bay, so I built the below which will bolt to the underside of the front bumper
This won't be fitted to the car until December now
You can get chassis mount SAE connectors, but I didn't want something on the front of the bumper. Wanted it hidden. This is just a normal connector glued between plastic, aluminum and then wrapped in tape. Was going to paint it, but no one will ever see it so didn't see the point.
Speaker board involved a lot of prototyping using hardboard and cardboard templates. The board itself is made up of 22mm pine furniture board. Relatively light for its thickness compared to something like MDF or ply. With some protective coating it should last better compared to MDF. It's not a tough timber. Dents and splinters easily.
This is the speaker board dry fitted. I ended up cutting even more off it after that. Then stapled some leatherette to the top to mimic how it would fit when it was wrapped. Was a little tight, but that was kinda what I wanted.
[url]Board was treated using Johnsons Woodstain (What I had on the shelf). I'm of the view that anything timber in a series should have some sort of coating on it.
Decided on black leatherette to match other trim panels in the car. Took my time fixing the leatherette. Once again upholstering is not as as easy as I thought it would be. However I am pleased with the final result. Despite my best efforts I still made silly mistakes and annoying its on the visible parts as well.
Next step was to add in the central light and two speakers. Speakers are Vibe 4.5in. Only £30 on ebay. Surrounds and grills were painted in limestone, but then I changed my mind and painted them black again and the grills silver which adds some contrast. The Central light was originally white and that that would have stood out somewhat.
Fixings had to be ordered specially. M4 40mm nuts and bolts with cup washers. Vinyl was attached using high temperature spray adhesive. A small foam roller also helps smooth it all out.
It has to be said, I am really quite happy with how this turned out. Fitting it to the car will come later, but I suspect I will need some aluminium angle to secure to the roof, so the board can be screwed to that as well as the lower section of the roof. Using fast fastners and self tappers for mounting the lower section of the board.
The station wagon rear windows are held in with rather crude pieces of angled aluminum and when I refitted the windows I had to cut them to fit as the bonding tape was clearly thicker than whatever they fitted in the late 1960s. My station wagon sides are from a Series 2, so older than the rest of the car by at least 5 years.
These were very weathered and stood out quite a lot when compared to the rest of the interior which has had quite a lot of work.
I removed the trim pieces and sanded them down with a detail sander using 240 grit. It was then sanded down using 400 grit wet and dry. Once again I reached for the AutoTek etch primer and Alloy wheel silver paint to finish which matches what I have used elsewhere in the car. Took the time to lay them out nicely and rest them on screws so the trim pieces wouldn’t stick to the board. I probably wouldn’t have done that five years ago.
Once again Covid means these won't be fitted to the car until December.
Pre primer and post sanding
Primed
Top coat
Next steps will be making up the wiring loom for the speaker board. After that, I don't have much else to do for the Series without being able to physically see it.
I have found another engine for it, but who knows when I will be able to pick that up. Engines aren't easy things to buy due to weight and transport. I have bought myself an engine stand beforethe shop goes into lock down!
Will do another post when I am have finished the wiring loom at least.
Now that Lockdown 2 is finished, I managed to get round to my mum's to test fit the speaker board. Really pleased with the result. Its not 100% perfect, but its still quite tight to get in there, which was was the intention from the outset.
 |https://thumbsnap.com/RRzo3o3T[/url]
Also managed to fit the hidden 12v connector. Not happy with that. Due to how the connectors work, I have to use reverse polarity adapters and that could get a bit fiddly when its bolted under the bumper. I may still abandon my home made connector and just fit something in the crank handle hole. Will probably be neater overall. The bumper was pretty tough to drill through. Snapped two drill bits to do get through it.
[url]
Removed the old battery which was about 12 years old. New one doesn't quite fit in the tray, so will probably cut the tray. Have been thinking about shaving the plastic outer sections of the battery, but that is risky approach.
Will hopefully fit new battery to the car along with connecting of the charging lead on Friday morning. On the 19th, I'll be trying to start it and turning it round so its easier to work on the doors locks.
Ordered some new LED Indicators, side lights and brake lights this morning. Just don't want to mess about with the old ones anymore. New earth strip in the car will also help too.
Been doing some more work on the garage at home as well, as its becoming tiring having to drive for just under an hour to do the simplest of tasks.
|https://thumbsnap.com/RRzo3o3T[/url]Also managed to fit the hidden 12v connector. Not happy with that. Due to how the connectors work, I have to use reverse polarity adapters and that could get a bit fiddly when its bolted under the bumper. I may still abandon my home made connector and just fit something in the crank handle hole. Will probably be neater overall. The bumper was pretty tough to drill through. Snapped two drill bits to do get through it.
[url]
Removed the old battery which was about 12 years old. New one doesn't quite fit in the tray, so will probably cut the tray. Have been thinking about shaving the plastic outer sections of the battery, but that is risky approach.
Will hopefully fit new battery to the car along with connecting of the charging lead on Friday morning. On the 19th, I'll be trying to start it and turning it round so its easier to work on the doors locks.
Ordered some new LED Indicators, side lights and brake lights this morning. Just don't want to mess about with the old ones anymore. New earth strip in the car will also help too.
Been doing some more work on the garage at home as well, as its becoming tiring having to drive for just under an hour to do the simplest of tasks.
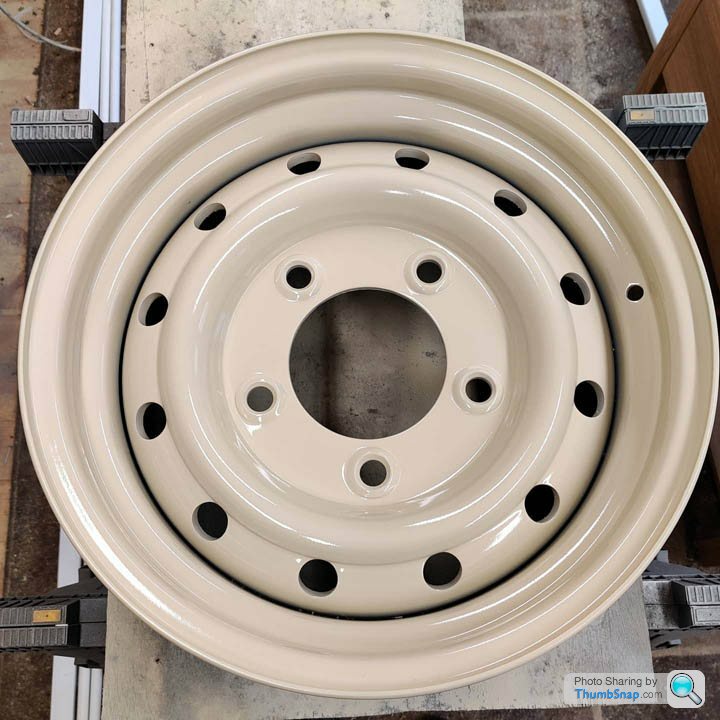
Was never really happy with the standard series steel rims from the moment I bolted them on. Bought some 7in wide Wellers and the plan was to paint those silver or white for the 1980s look, but then decided I didn’t like that as it was too much of a departure from stock. Bought those for £30 for five and sold again for £50 so didn’t do too badly
Sourcing 130 deep dish rims are rare on the used market. There are now reproductions available, but they are quite expensive. Banding was an option, but to be honest I wasn’t interested in driving all the way to Essex and paying £250 to band my old steels. I decided on some Wolf Military steel wheel replicas. Fairly cheap from Paddocks and they can run tubeless.
They had to be cream to match side panes and roof and its what the OEM wheels were painted in, so I simply sanded them down with 400 grit wet and dry then Autotek white etch primer and a couple of top coats of Paintman Limestone 007 coach enamel. The wheels came powder coate as standard so an easy finish to start from and certainly easier than when i refinished the original steels which were in quite a bad state.
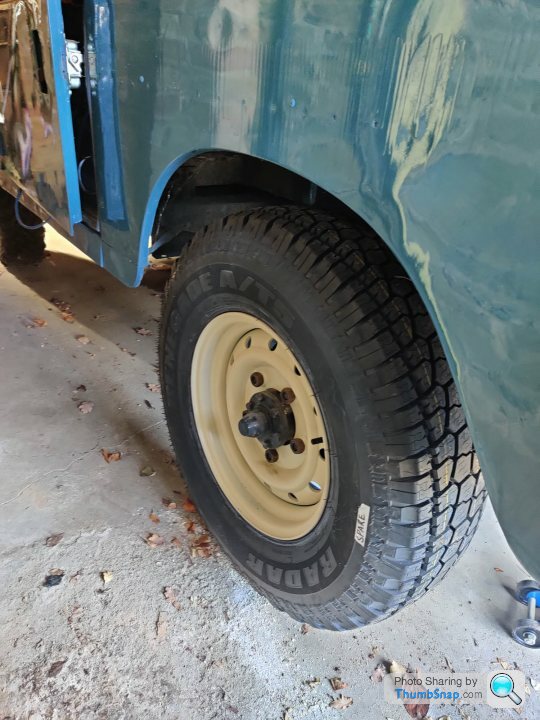
Tyres: Went with an AT pattern. The very well known Radar Renegade AT5. The BF Goodrich AT pattern might have looked better, but the Radars were cheaper an quite frankly I just don't need that kind of pattern.
Wheels were actually delayed by Brexit and they took over five weeks to arrive.
Fast forward to yesterday to last week when I took them to the tyre fitter. They marked up the wheels front and back and advised me to send one back to the supplier as it needed 225g of weights added! They said that is the sort of weight they have to add to abused Ford Transits used by Amazon! I was gutted as it’s taken a while to finish those wheels and I don’t fancy my chances of getting my money back from Padocks.
Two phone calls and an e-mail to Paddocks and they sent a free wheel and I keep the old one as a paper weight. Really impressed with Paddocks customer service and I am not sure I would have got that from an Ebay seller.
Now painted my 6th wheel. Without a doubt my finest painting effort with a rattle can. Really pleased with the finish and I painted that in my workshop which is far from a dust free environment.
Only fitted one just to test fit the length of studs and I’m satisfied that the nuts are ok on the original studs. There is a school of thought that you should use extended studs, but the military managed on standard length and I’m going down the same route!
Few pics of the wheels. Expect more updates soon. Really looking forward to getting it out the garage for some better photos. Battery has been fitted too and got some other bits to get it ready for the garage to to the final pieces of work.
Land Rover wheels and tyres are big! You don't realize this until you try and squeeze them all in a large estate car!
This is the new 235 ATs next to the standard series size 205s. Granted one is an All Terrain and the other is a Mud Terrain but you can clearly see the difference in size.
By far the best finish I have achieved with a rattle can. Think the secret is the fact that I kept a heater on and the paint lived in a jug of warm water for a few hours, so it went on thinner. Sadly this the spare!
Wolfs are not only wider than a standard series rim, but they have a larger offset which widens the stance and brings the outer edge of the tyres inline with the bodywork. Looks consierably better than standard series tyres and wheels IMO.
Sourcing 130 deep dish rims are rare on the used market. There are now reproductions available, but they are quite expensive. Banding was an option, but to be honest I wasn’t interested in driving all the way to Essex and paying £250 to band my old steels. I decided on some Wolf Military steel wheel replicas. Fairly cheap from Paddocks and they can run tubeless.
They had to be cream to match side panes and roof and its what the OEM wheels were painted in, so I simply sanded them down with 400 grit wet and dry then Autotek white etch primer and a couple of top coats of Paintman Limestone 007 coach enamel. The wheels came powder coate as standard so an easy finish to start from and certainly easier than when i refinished the original steels which were in quite a bad state.
Tyres: Went with an AT pattern. The very well known Radar Renegade AT5. The BF Goodrich AT pattern might have looked better, but the Radars were cheaper an quite frankly I just don't need that kind of pattern.
Wheels were actually delayed by Brexit and they took over five weeks to arrive.
Fast forward to yesterday to last week when I took them to the tyre fitter. They marked up the wheels front and back and advised me to send one back to the supplier as it needed 225g of weights added! They said that is the sort of weight they have to add to abused Ford Transits used by Amazon! I was gutted as it’s taken a while to finish those wheels and I don’t fancy my chances of getting my money back from Padocks.
Two phone calls and an e-mail to Paddocks and they sent a free wheel and I keep the old one as a paper weight. Really impressed with Paddocks customer service and I am not sure I would have got that from an Ebay seller.
Now painted my 6th wheel. Without a doubt my finest painting effort with a rattle can. Really pleased with the finish and I painted that in my workshop which is far from a dust free environment.
Only fitted one just to test fit the length of studs and I’m satisfied that the nuts are ok on the original studs. There is a school of thought that you should use extended studs, but the military managed on standard length and I’m going down the same route!
Few pics of the wheels. Expect more updates soon. Really looking forward to getting it out the garage for some better photos. Battery has been fitted too and got some other bits to get it ready for the garage to to the final pieces of work.
Land Rover wheels and tyres are big! You don't realize this until you try and squeeze them all in a large estate car!
This is the new 235 ATs next to the standard series size 205s. Granted one is an All Terrain and the other is a Mud Terrain but you can clearly see the difference in size.
By far the best finish I have achieved with a rattle can. Think the secret is the fact that I kept a heater on and the paint lived in a jug of warm water for a few hours, so it went on thinner. Sadly this the spare!
Wolfs are not only wider than a standard series rim, but they have a larger offset which widens the stance and brings the outer edge of the tyres inline with the bodywork. Looks consierably better than standard series tyres and wheels IMO.
smn159 said:
Good work! The added bonus with those wheels is that a front disk brake conversion will now fit...
I'm seriously considering that option. I have all bought all new parts for the brakes as mine were quite bad in both pedal feel and power. My Series is fitted with the 11in drums from the 109, so after the re-build so in theory, they are as good as standard series brakes can get. Will be interesting to see what they are like when its all fitted. There is a company called Heystee Automotive who specialize in a full conversion kit and its something I might look at in the future.
Will be connecting up battery at the weekend and trying to fin a way to connect a trickle charge connector to the charger without having to sort to just using crocodile clips straight onto the battery. I'm not too happy with SAE plug solution.
smn159 said:
Good work! The added bonus with those wheels is that a front disk brake conversion will now fit...
They were always going to be limestone. Some people have asked why I even bothered to refinish already finished wheels, but just didn't want black wheels as I think they are too much of a departure from the standard look. I kinda like how the wheels match the roof and side panels. Can't wait to get it out of the garage so I can see what it looks like in the open
bakerstreet said:
smn159 said:
Good work! The added bonus with those wheels is that a front disk brake conversion will now fit...
I'm seriously considering that option. I have all bought all new parts for the brakes as mine were quite bad in both pedal feel and power. My Series is fitted with the 11in drums from the 109, so after the re-build so in theory, they are as good as standard series brakes can get. Will be interesting to see what they are like when its all fitted. There is a company called Heystee Automotive who specialize in a full conversion kit and its something I might look at in the future.
Will be connecting up battery at the weekend and trying to fin a way to connect a trickle charge connector to the charger without having to sort to just using crocodile clips straight onto the battery. I'm not too happy with SAE plug solution.
EarlOfHazard said:
My Series 3 88" had a factory brake servo - it stopped on a sixpence. If I was to have used it as a daily though, I would have considered a front disc conversion...
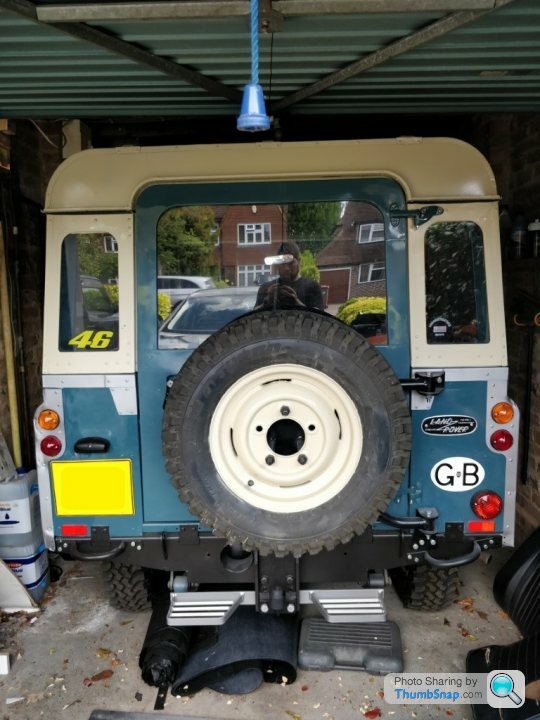
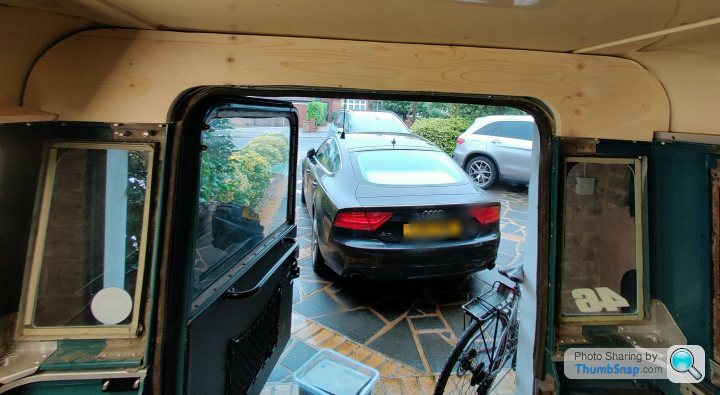
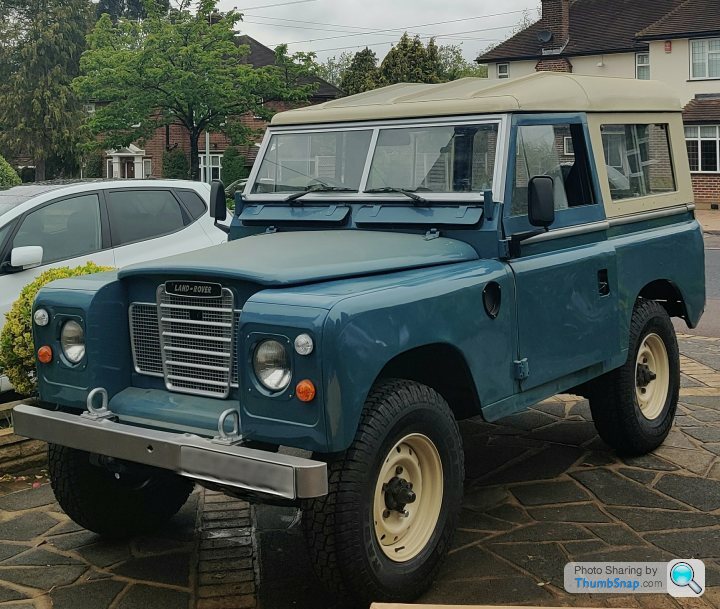
Mine has the Servo as well, but will just have to see what it's like when it's all been refurbished. There are a few more options for disc conversions these days, so you aren't just limited to €1000 from Heystee in Holland who don't have the best reputation for customer service. Did a bit at the weekend and I am pleased to report I managed to get it started and really didn't require too much effort at all. Reversed it out the garage so I could see what it looked like with the Wolf Wheels fitted. Really pleased with the overall look. Just what I was after.
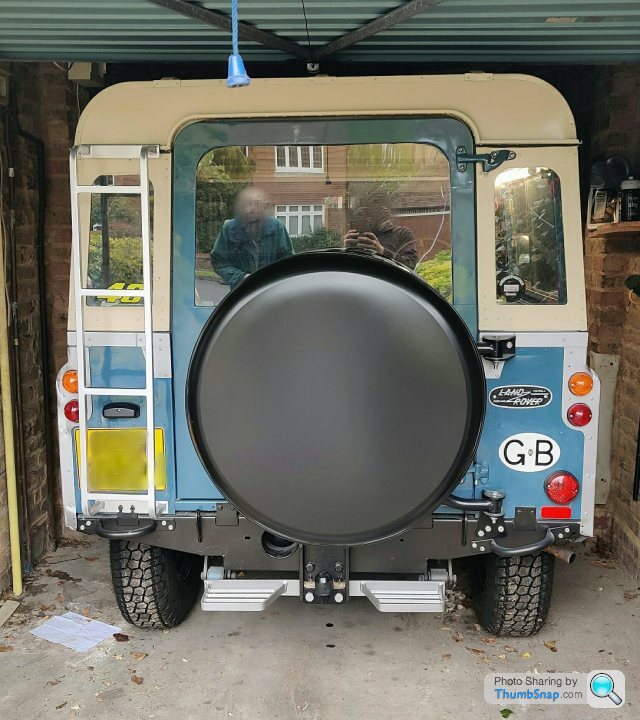
Fitted the rear ladder to make getting access to the roof bars easier (Yet to be fitted). Ladder looks smart but quite bright compared to the ali trim and I used the same paint too. Lot of work went into that ladder refurb. Grinded down all the welds and added grip tape too.
Basic spare wheel cover has been added as I don't want people to see there is a brand new Wheel/tyre fitted as a spare. Wanted a full canvas cover, but this was cheap from Paddocks. Will eventually add a yellow old school Land Rover decal so it isn't such an eye saw.
Unfortunately, starting the land rover also unearthed some other issues. Looks like one of the hoses has perished and water was spraying everywhere courtesy of the fan. This then caused the engine to start over heating once up to temperature. Ordered a complete rad hose kit and will drain and refill the rad at the same time. I'm not entirely convinced that the rad hose is the only reason it's overheating. COuld well be the waterpump as there is a good chance that the engine is fitted with the original pump. If its anything more than pump/rad hoses, then I'll consider a new engine, but that will probably take a year to do based on current pace of work!
New battery isn't charging either, which is a bit more of a worry. Easy fix will be the alternator which I have ordered anyway as they are only £65 brand new. Trying to get the Series into a reliable state so it can be started any time.
Wiring for the lights seems to be good. Went through the connections, so they are good. Just need to make up some new connections for the LED lights and get those fitted. I fitted a new LED tail light as original was falling apart.
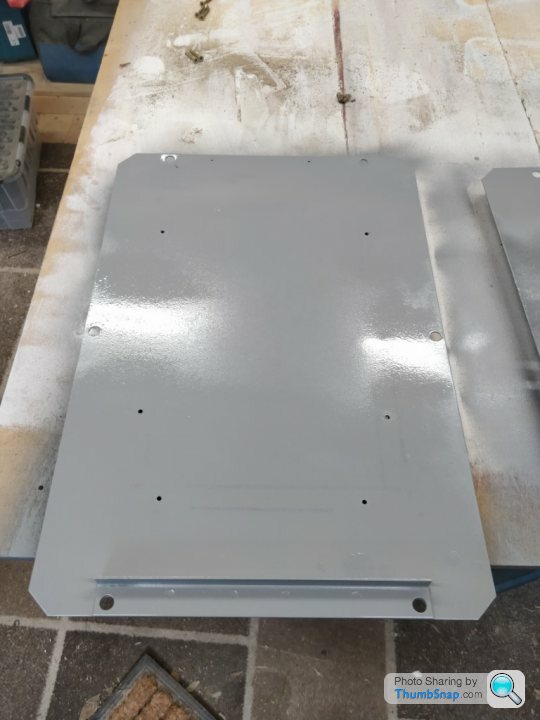
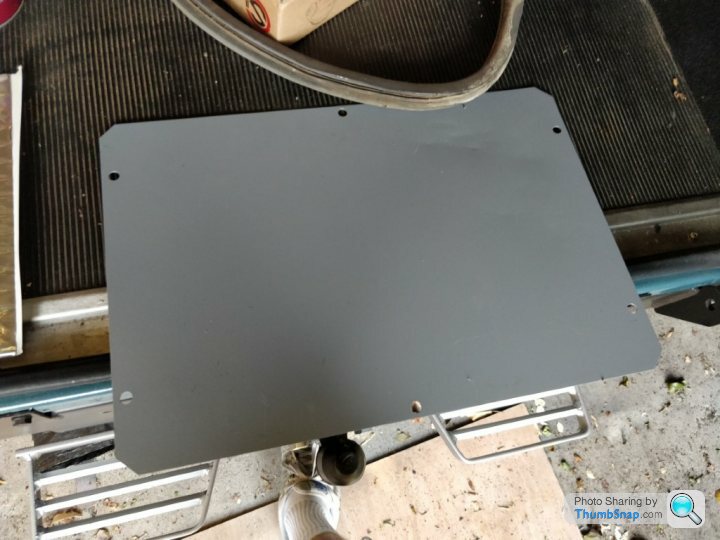
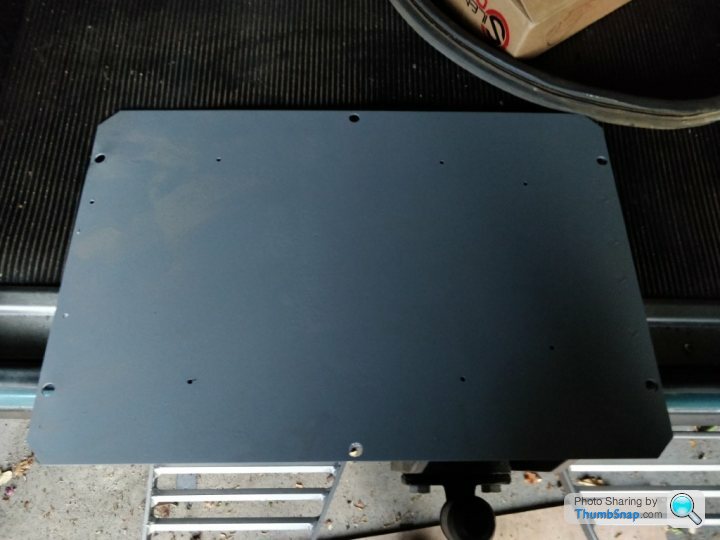
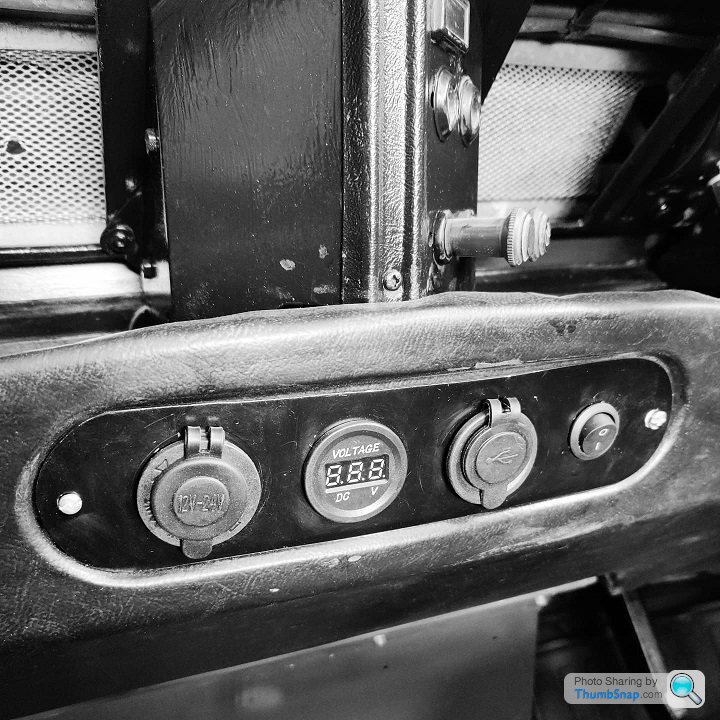
Made up a 12v faceplate for the dash. Bought a Mud Stuff plate and used that as a template. New face plate was made up using the metal side panel from an MFI cupboard that we ripped out one of the bedrooms. Nice bit of upcycling. Took quite a bit of cutting and filing to get right and even now the holes aren’t level.
Its not perfect, but I wanted a neat 12v installation without having a pod screwed on somewhere and this looks quite stock and you can blank it again if you wanted to cover up the holes. Still need to wire it all up, but that should be fairly straight forward. At least I will be able to charge phone now.
I have said this before, but the aim is to have it back on the road in the summer and now that I know it runs, I recon I can manage that.
Gassing Station | Readers' Cars | Top of Page | What's New | My Stuff