Ferrari F430 Spider
Discussion


Carbon front splitter fitted using stainless fastenings.

My F1 control panel was sprayed at the same time as the bumpers and now matches the wheels and front bumper air dam.

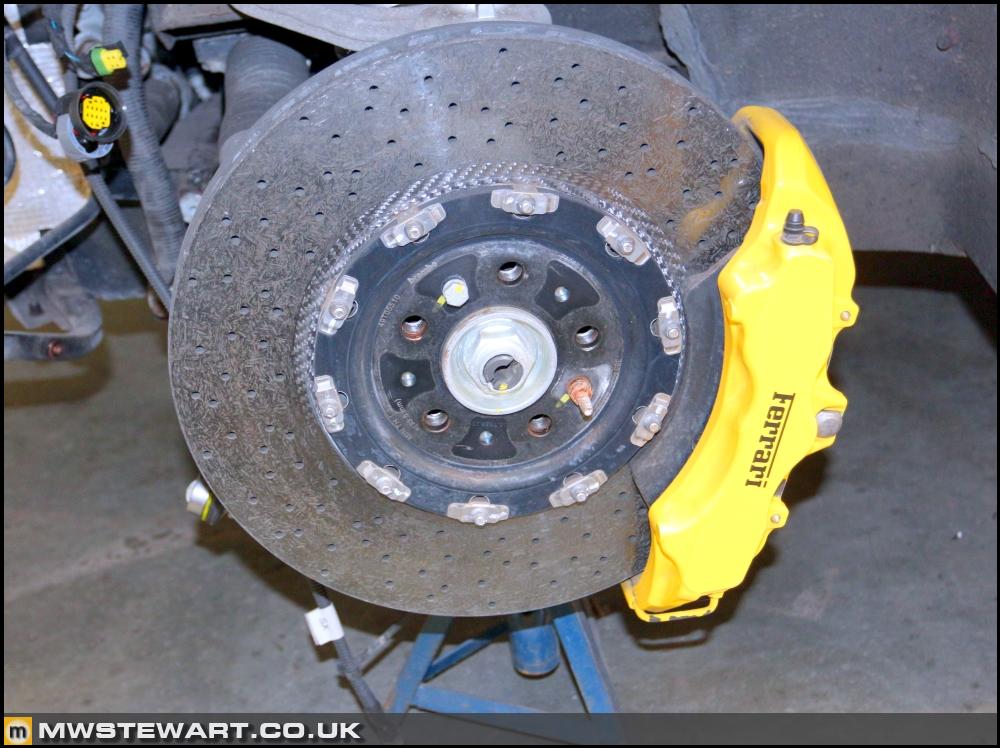
I've picked up some 458 Challenge CCMs to use as cores for refurbished Scuderia front discs. The 458 Challenge discs are 398mm x 37mm Brembo CCM-R.
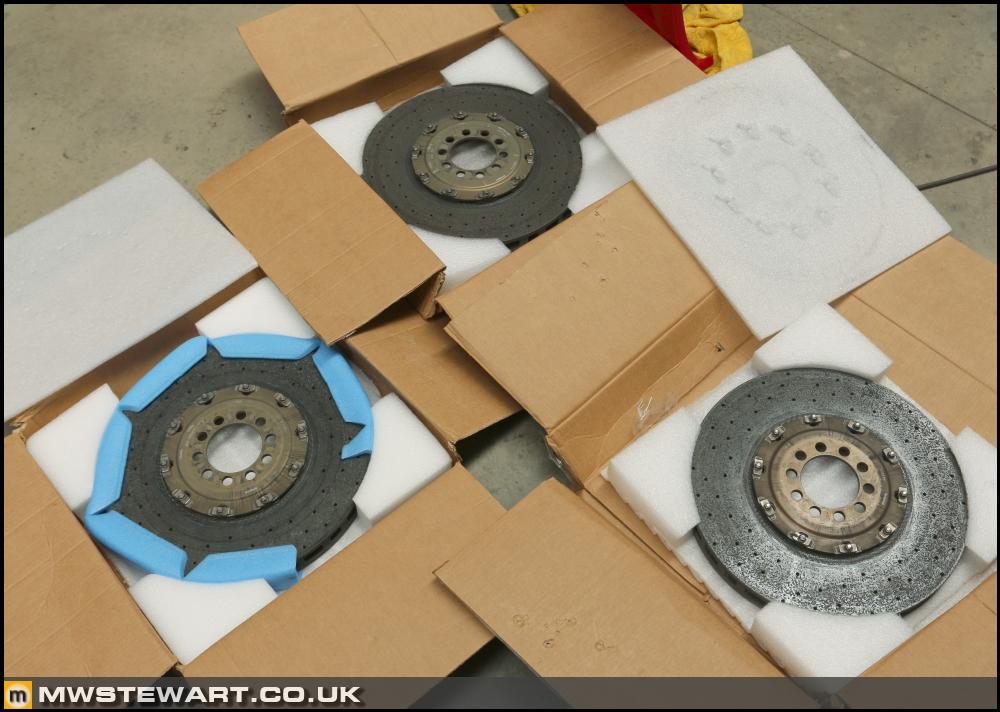
Scuderia front CCMs are 398mm x 36mm but the company refurbishing them are happy to take the CCM-Rs as cores.
For info, CCM-R discs can be identified by the fewer number of holes and even spacing between them. Here's my 380mnm and regular 458/Scuderia 398mm x 35mm CCMs for comparison:
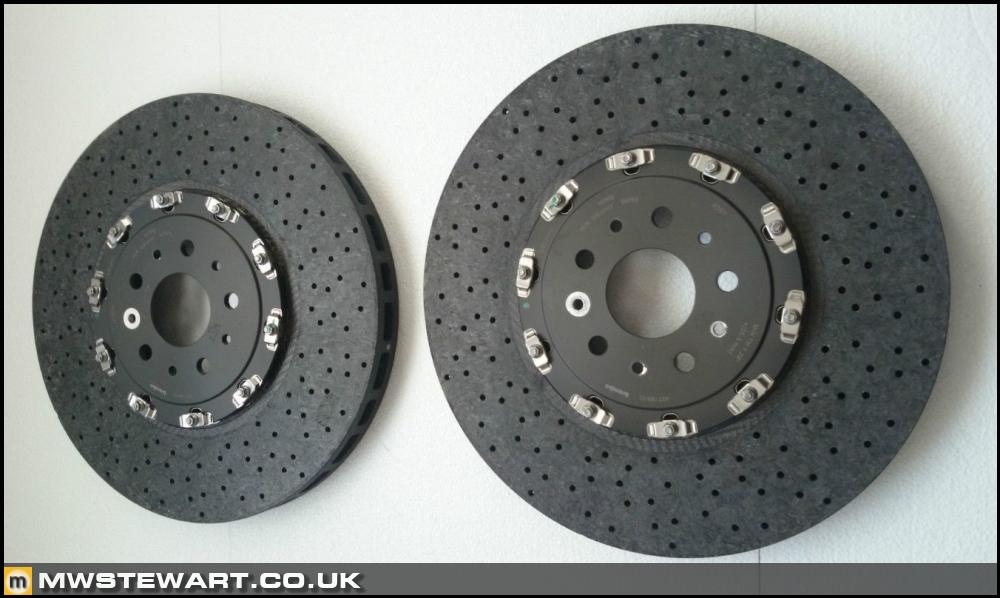
Note the greater number of holes and appearance of random spacing.
CCM-R discs must be pre-bedded by Brembo:
"Pre-bedding is the process of transferring pad material to the disc surface in a controlled environment. It is critical to have a transfer layer of pad material on the CCM-R disc to generate friction. Due to the material strength of CCM-R and the high level of surface hardness, it takes considerable pressure and temperature to transfer pad material onto the disc surface. This is done on a high inertia brake dynamometer using very specific computer controlled programs at the Brembo factory."
https://blog.racetechnologies.com/2015/05/01/bremb...
Rear upper cross member modification
Ferrari modified the F430 upper rear cross member to facilitate the high exhaust exit on the Scuderia but of course there is no documentation or guideline out there on how to modify an F430 to accomplish the same. The Scuderia rear structure can be bought from Ferrari but I draw the line at significant structural modifications to the car so I'm going to modify mine in-situ based on what I have determined from studying photos of Scuderia’s with the rear bumper removed.


Here is the standard rear cross member on my car.
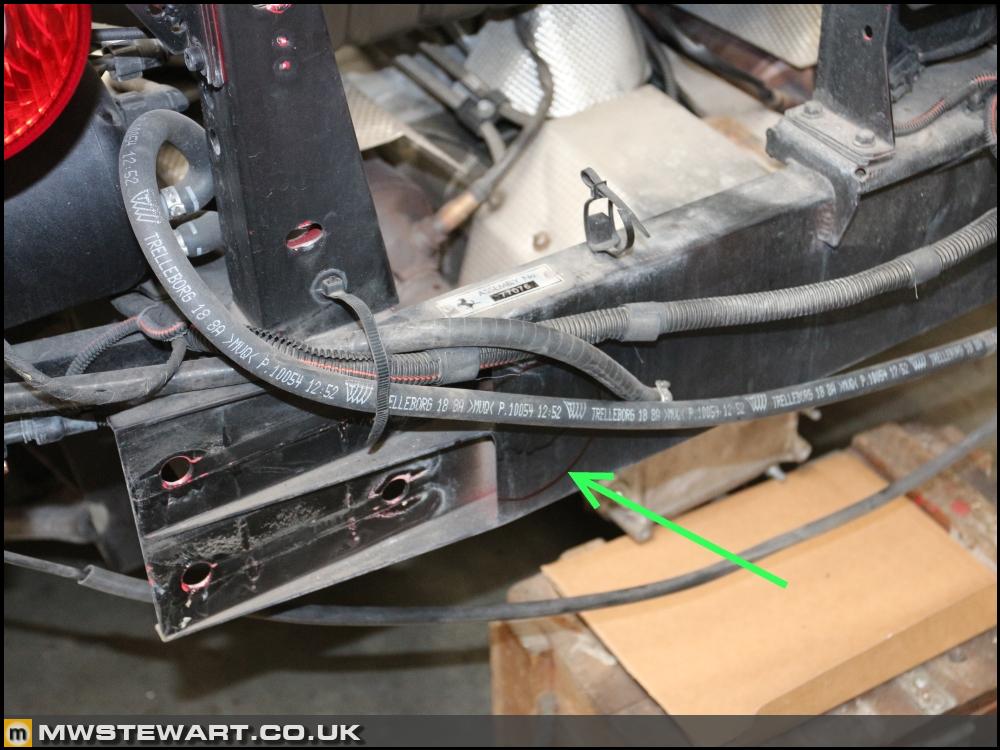
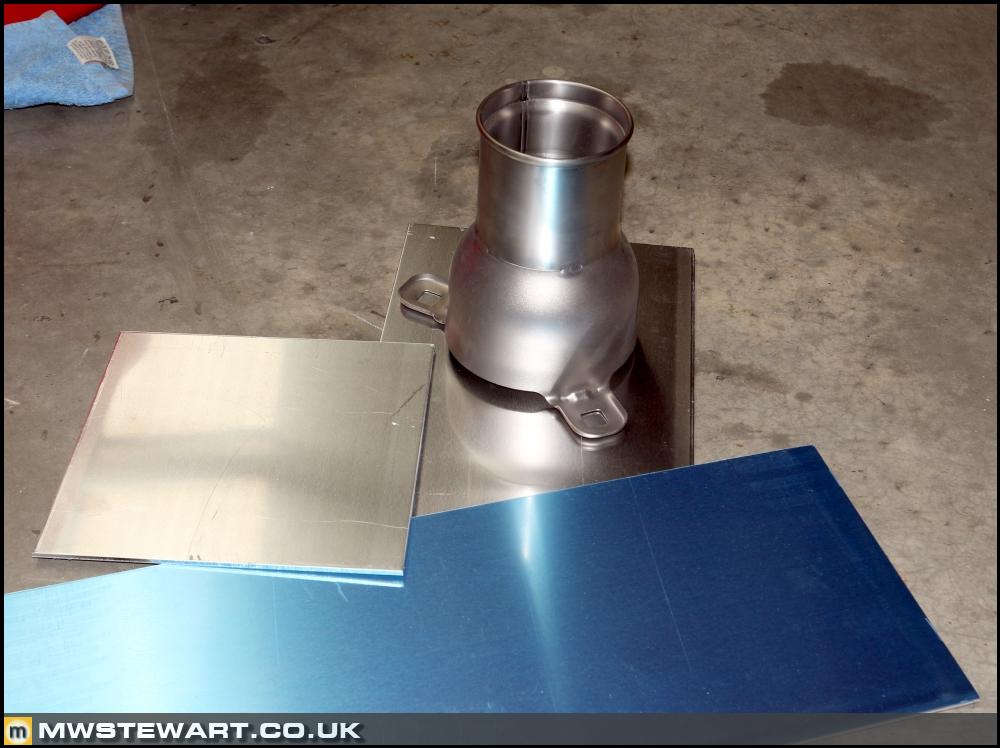
It became obvious to me that Ferrari simply cut some box section in half and welded the two pieces over the original cross member, bored it out to suit the tailpipes, and then reinforced with a section of tube in the hole, so that is the approach I will take. I want to be as non-invasive as possible therefore my TIG won't be going anywhere near the car - instead I'm going to make use of modern adhesives technology to make the modifications. It is a two part structural compound with high shear strength.
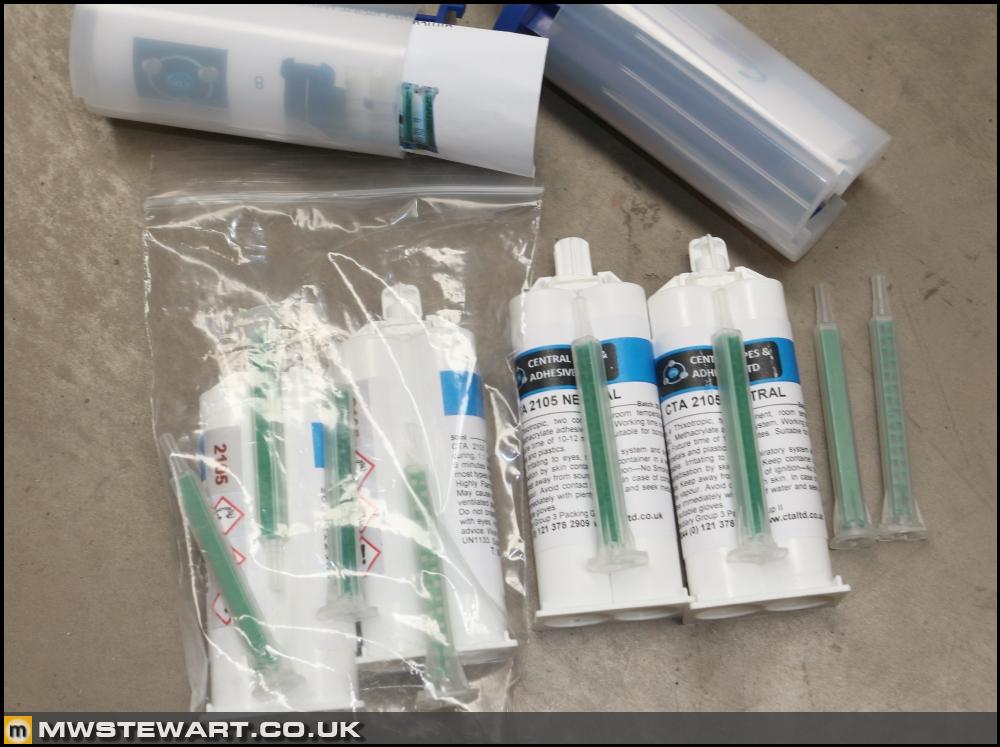
I've bought some 3mm aluminium to fold up and start fabricating the new parts.
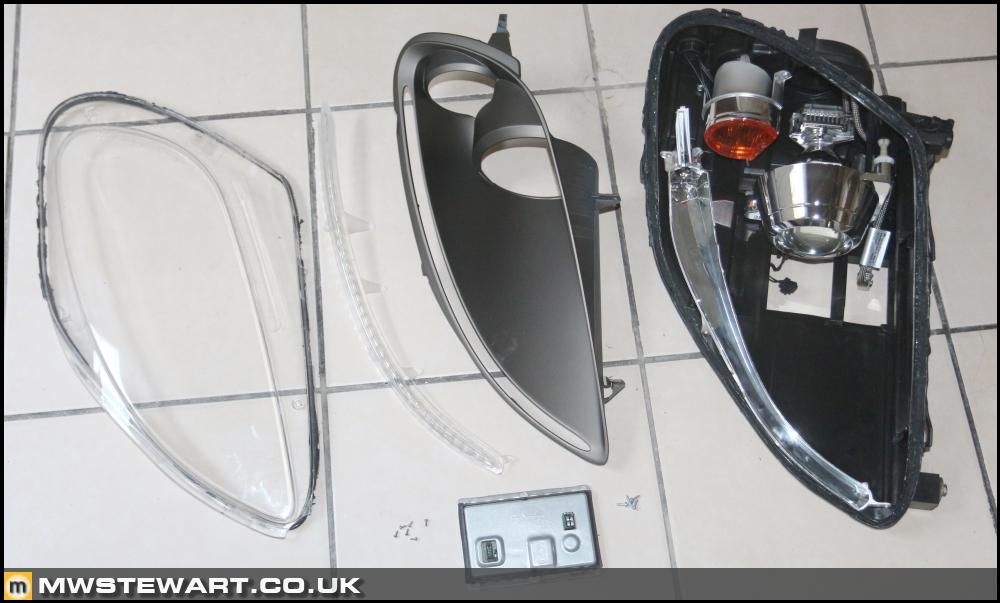
Headlight disassembly
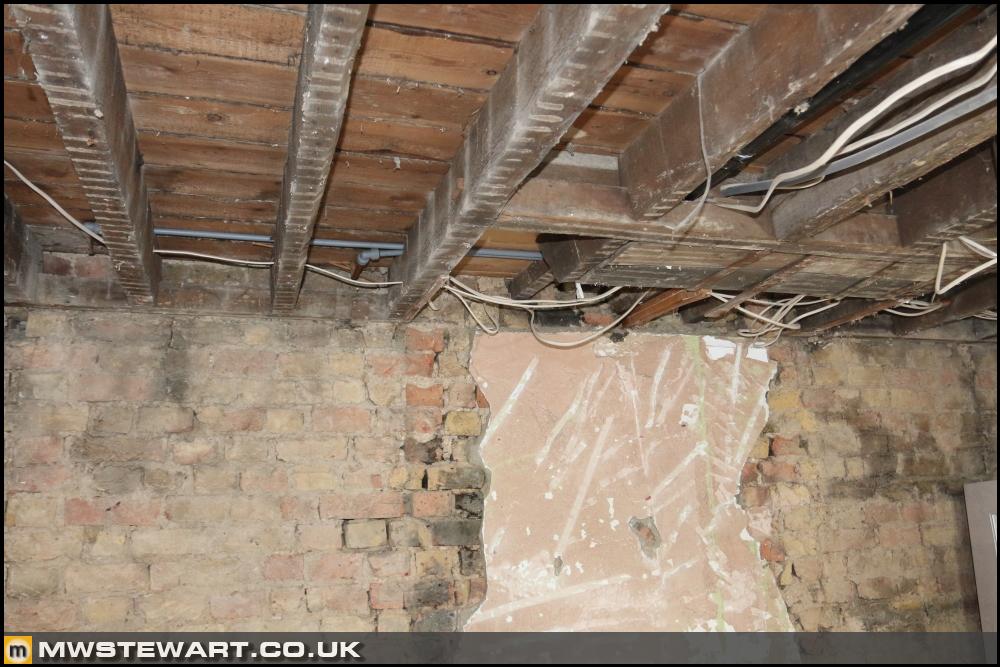
As per my last update I'm stripping the headlights to make a couple of modifications. Because our house is a renovation project, the kitchen currently looks like this:
Which means I can do undomesticated things like this:
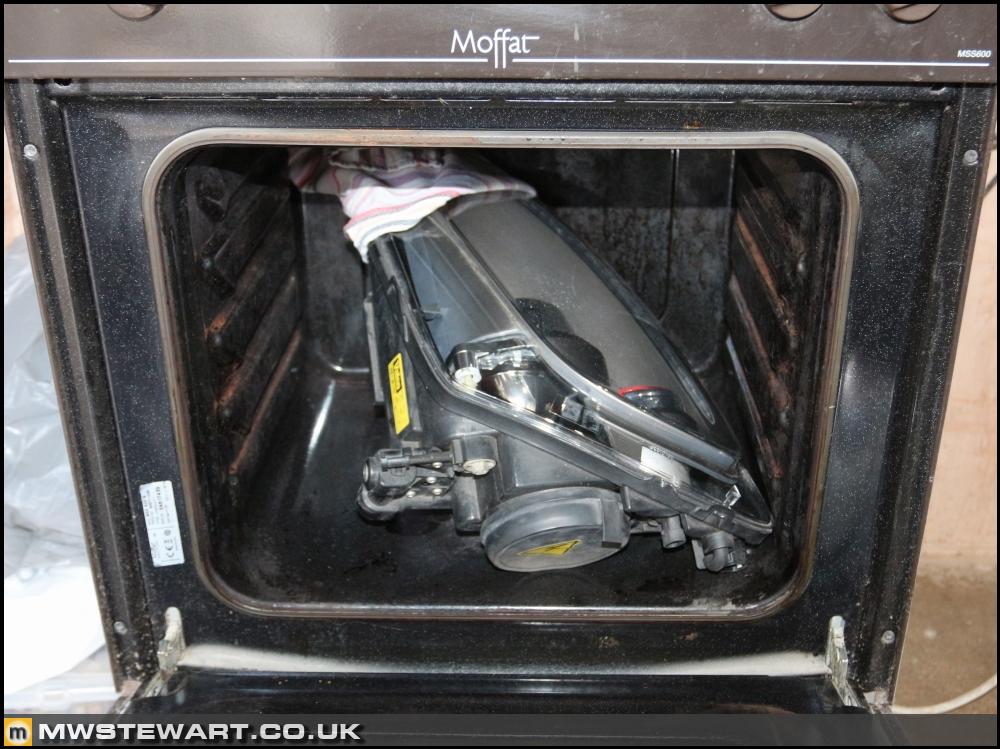
The headlights are sealed with what people describe as 'perma seal', which essentially means the oven technique doesn’t work, but I’ve found that four 15 minute ‘bakes’ at 90 degree C softens the adhesive enough to work it free.
My F1 control panel was sprayed at the same time as the bumpers and now matches the wheels and front bumper air dam.
I've picked up some 458 Challenge CCMs to use as cores for refurbished Scuderia front discs. The 458 Challenge discs are 398mm x 37mm Brembo CCM-R.
Scuderia front CCMs are 398mm x 36mm but the company refurbishing them are happy to take the CCM-Rs as cores.
For info, CCM-R discs can be identified by the fewer number of holes and even spacing between them. Here's my 380mnm and regular 458/Scuderia 398mm x 35mm CCMs for comparison:
Note the greater number of holes and appearance of random spacing.
CCM-R discs must be pre-bedded by Brembo:
"Pre-bedding is the process of transferring pad material to the disc surface in a controlled environment. It is critical to have a transfer layer of pad material on the CCM-R disc to generate friction. Due to the material strength of CCM-R and the high level of surface hardness, it takes considerable pressure and temperature to transfer pad material onto the disc surface. This is done on a high inertia brake dynamometer using very specific computer controlled programs at the Brembo factory."
https://blog.racetechnologies.com/2015/05/01/bremb...
Rear upper cross member modification
Ferrari modified the F430 upper rear cross member to facilitate the high exhaust exit on the Scuderia but of course there is no documentation or guideline out there on how to modify an F430 to accomplish the same. The Scuderia rear structure can be bought from Ferrari but I draw the line at significant structural modifications to the car so I'm going to modify mine in-situ based on what I have determined from studying photos of Scuderia’s with the rear bumper removed.
Here is the standard rear cross member on my car.
It became obvious to me that Ferrari simply cut some box section in half and welded the two pieces over the original cross member, bored it out to suit the tailpipes, and then reinforced with a section of tube in the hole, so that is the approach I will take. I want to be as non-invasive as possible therefore my TIG won't be going anywhere near the car - instead I'm going to make use of modern adhesives technology to make the modifications. It is a two part structural compound with high shear strength.
I've bought some 3mm aluminium to fold up and start fabricating the new parts.
Headlight disassembly
As per my last update I'm stripping the headlights to make a couple of modifications. Because our house is a renovation project, the kitchen currently looks like this:
Which means I can do undomesticated things like this:
The headlights are sealed with what people describe as 'perma seal', which essentially means the oven technique doesn’t work, but I’ve found that four 15 minute ‘bakes’ at 90 degree C softens the adhesive enough to work it free.

mwstewart said:
Which means I can do undomesticated things like this:
The headlights are sealed with what people describe as 'perma seal', which essentially means the oven technique doesn’t work, but I’ve found that four 15 minute ‘bakes’ at 90 degree C softens the adhesive enough to work it free.
We (actually shirt) did something similar when we sapped from OEM headlights to LED's on our endurance race car.The headlights are sealed with what people describe as 'perma seal', which essentially means the oven technique doesn’t work, but I’ve found that four 15 minute ‘bakes’ at 90 degree C softens the adhesive enough to work it free.
mwstewart said:
Rear upper cross member modification
Ferrari modified the F430 upper rear cross member to facilitate the high exhaust exit on the Scuderia but of course there is no documentation or guideline out there on how to modify an F430 to accomplish the same. The Scuderia rear structure can be bought from Ferrari but I draw the line at significant structural modifications to the car so I'm going to modify mine in-situ based on what I have determined from studying photos of Scuderia’s with the rear bumper removed.
Here is the standard rear cross member on my car.
It became obvious to me that Ferrari simply cut some box section in half and welded the two pieces over the original cross member, bored it out to suit the tailpipes, and then reinforced with a section of tube in the hole, so that is the approach I will take. I want to be as non-invasive as possible therefore my TIG won't be going anywhere near the car - instead I'm going to make use of modern adhesives technology to make the modifications. It is a two part structural compound with high shear strength.
I've bought some 3mm aluminium to fold up and start fabricating the new parts.
Amazing stuff as always - mind-blowing.Ferrari modified the F430 upper rear cross member to facilitate the high exhaust exit on the Scuderia but of course there is no documentation or guideline out there on how to modify an F430 to accomplish the same. The Scuderia rear structure can be bought from Ferrari but I draw the line at significant structural modifications to the car so I'm going to modify mine in-situ based on what I have determined from studying photos of Scuderia’s with the rear bumper removed.
Here is the standard rear cross member on my car.
It became obvious to me that Ferrari simply cut some box section in half and welded the two pieces over the original cross member, bored it out to suit the tailpipes, and then reinforced with a section of tube in the hole, so that is the approach I will take. I want to be as non-invasive as possible therefore my TIG won't be going anywhere near the car - instead I'm going to make use of modern adhesives technology to make the modifications. It is a two part structural compound with high shear strength.
I've bought some 3mm aluminium to fold up and start fabricating the new parts.
However I don't understand the logic/modification method of the Scud exhausts.
a) you're putting in so much work everywhere else, why not just buy the Scud crossmember?
b) surely simpler to buy said crossmember as it would be an easy bolt on/bolt off affair so you could easily reverse should you change your mind?
c) will the structural glue hold up to extreme exhaust temperatures?
d) define "significant structural modifications" - surely modifying what you already have is more significant than just replacing with another (pre-existing, official Ferrari OE) item?
As people have already said, I'm sure you have reasoning/answers to the above

Edited by Robbins on Monday 16th May 16:20
Edited by Robbins on Monday 16th May 16:24
I love the way you take an objective, clear-eyed, analytical approach to Ferrari's engineering & are not blind-sided by myth, marketing, heritage or brand obsession.
These vehicles can definitely be improved and tailored to the specific needs of the owner but sadly very few people have the confidence to tackle it.
Captivating! Keep going!
These vehicles can definitely be improved and tailored to the specific needs of the owner but sadly very few people have the confidence to tackle it.
Captivating! Keep going!
Gassing Station | Readers' Cars | Top of Page | What's New | My Stuff