Ferrari F430 Spider
Discussion


mwstewart said:
The car is back from Graypaul and now sports a replacement section of the magensium convertible roof frame. The underlying cause was identified as a broken pin. The roof had an adjustment and alignment check as part of the work and was given a clean bill of health, which I'm really pleased about as the roof mechanism can and will cause issues if out of spec. It's something useful for the history file.
I'm not impressed with the customer service from Graypaul however; I had to call them for updates and when I did it felt like I was causing them trouble. In comparison I have the Golf booked in on Friday for a £99 service and I've already had a courtesy call to confirm and remind me! I will look elsewhere next time even if it means a long trip.
I can only agree regards to servicing. I find Graypaul in Edinburgh pretty hard work on the Ferrari and Porsche side, deep down they are a helpful and professional lot but they do seem somewhat stuck up themselves at the best times...I'm not impressed with the customer service from Graypaul however; I had to call them for updates and when I did it felt like I was causing them trouble. In comparison I have the Golf booked in on Friday for a £99 service and I've already had a courtesy call to confirm and remind me! I will look elsewhere next time even if it means a long trip.
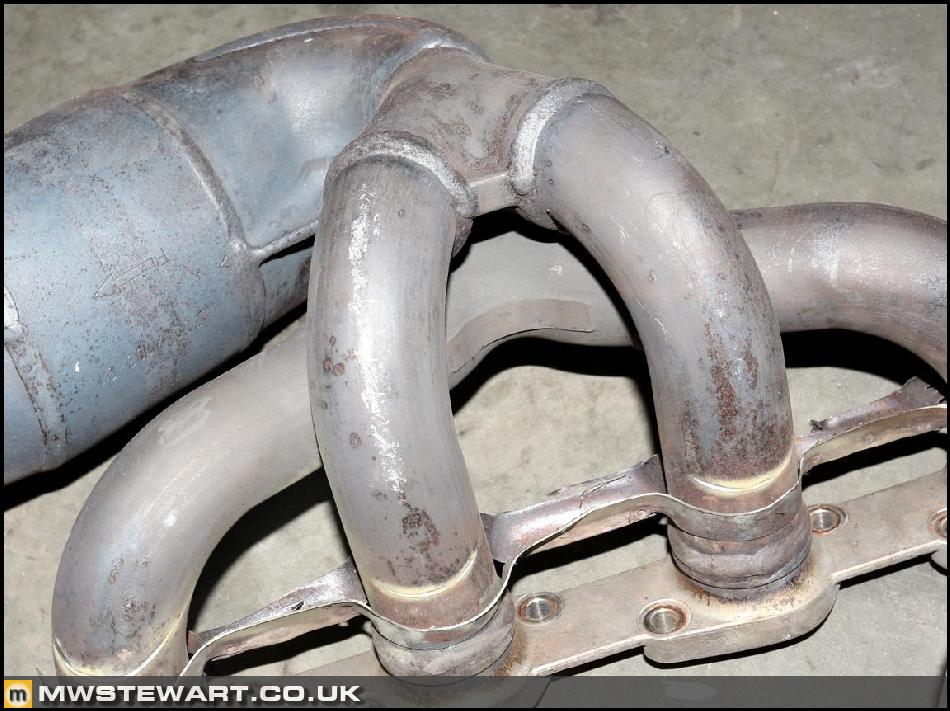
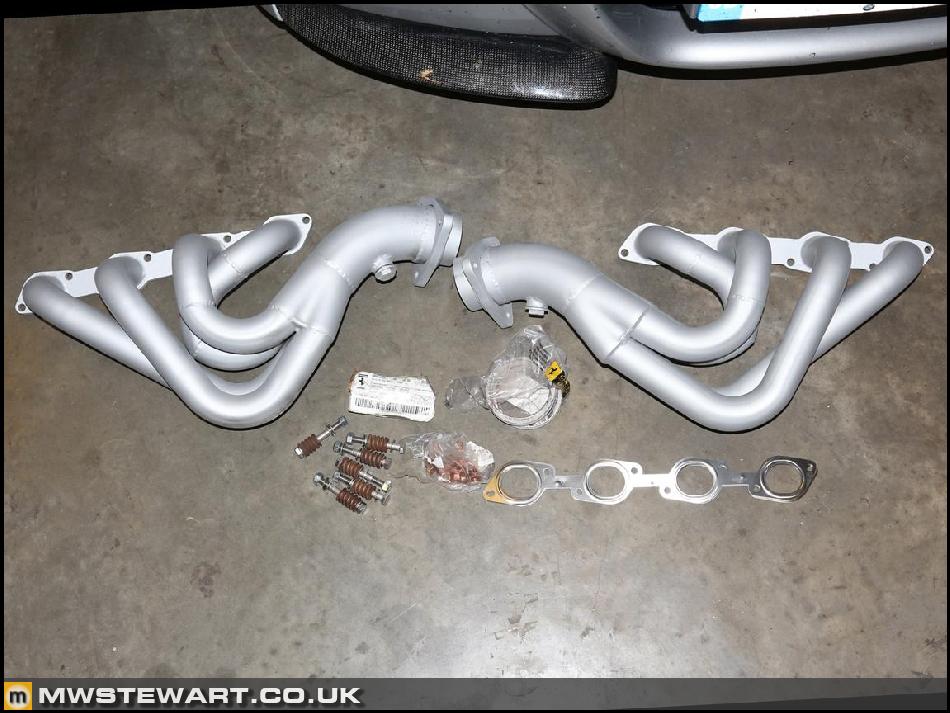
I'm in the process of replacing the OEM exhaust manifolds with the stainless tubular versions covered in my previous post, and whilst doing so I'm cleaning behind the various guards and trim pieces and replacing any corroded fasteners with stainless versions. It seemed like a good opportunity for a quick photo study of the parts that aren't usually seen.
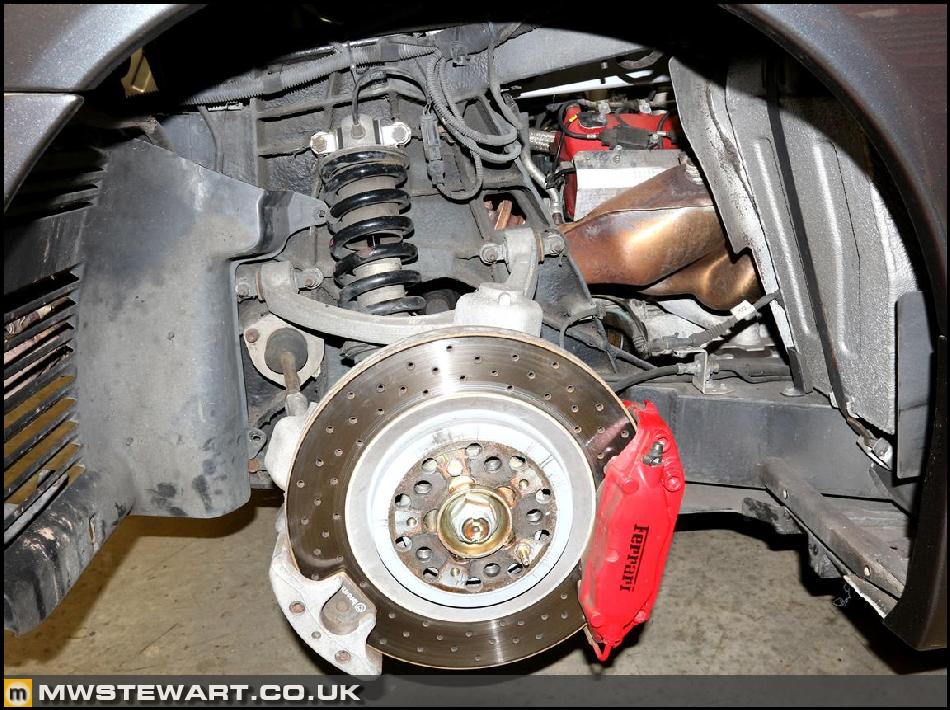
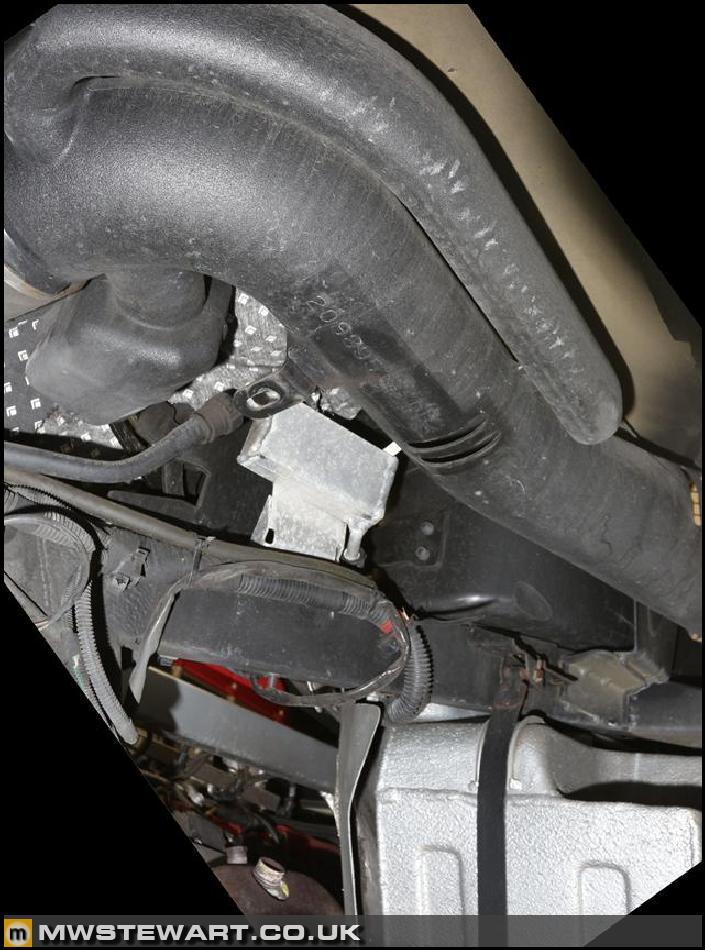
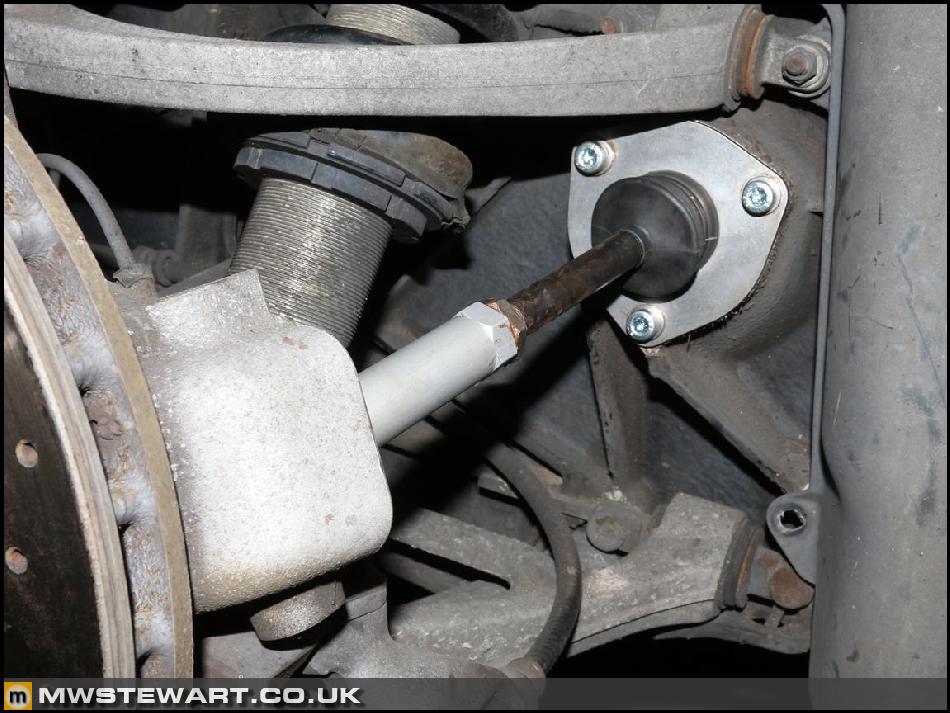
O/S/R wheel arch with liners removed and stock manifold visible through the aperture. Suspension is coil over with double wishbone and a tie rod, which is adjustable for toe. Camber adjustment is made by shimming the wishbone mounts.
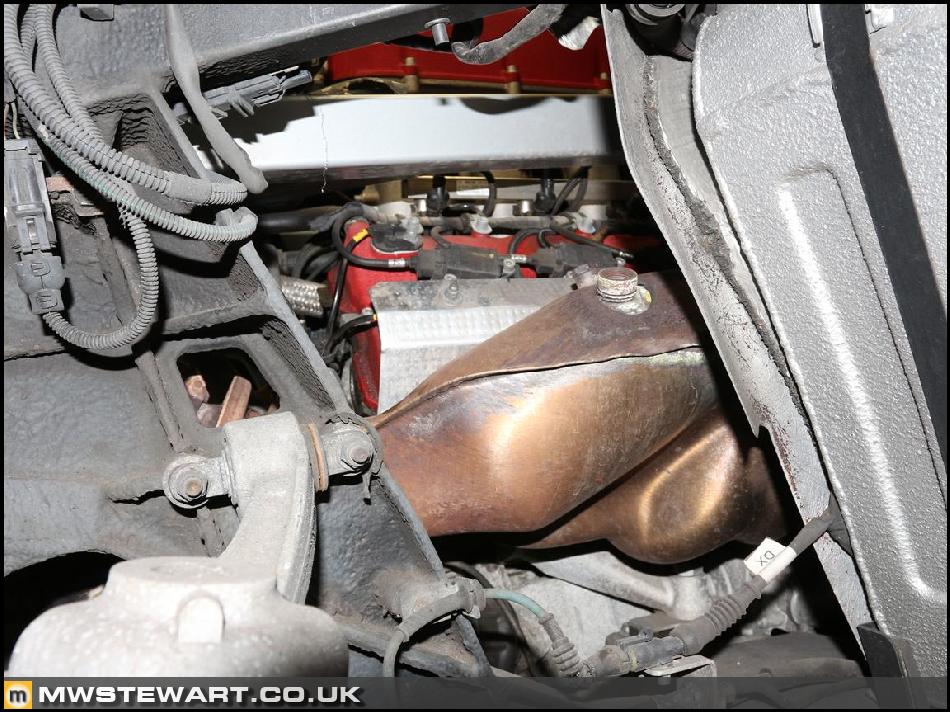
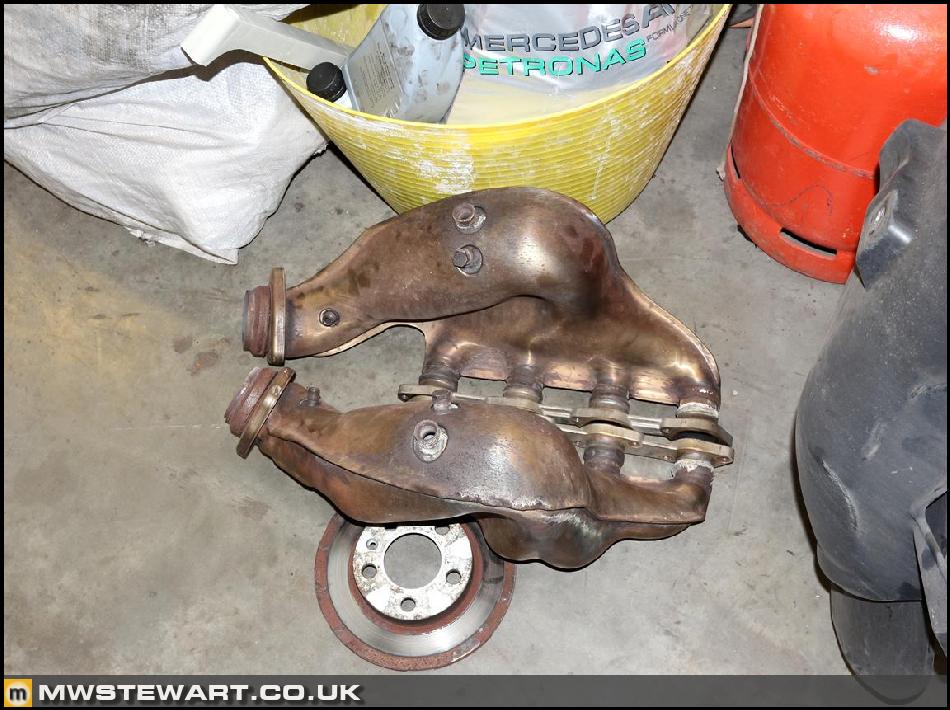
Close up of stock manifolds.
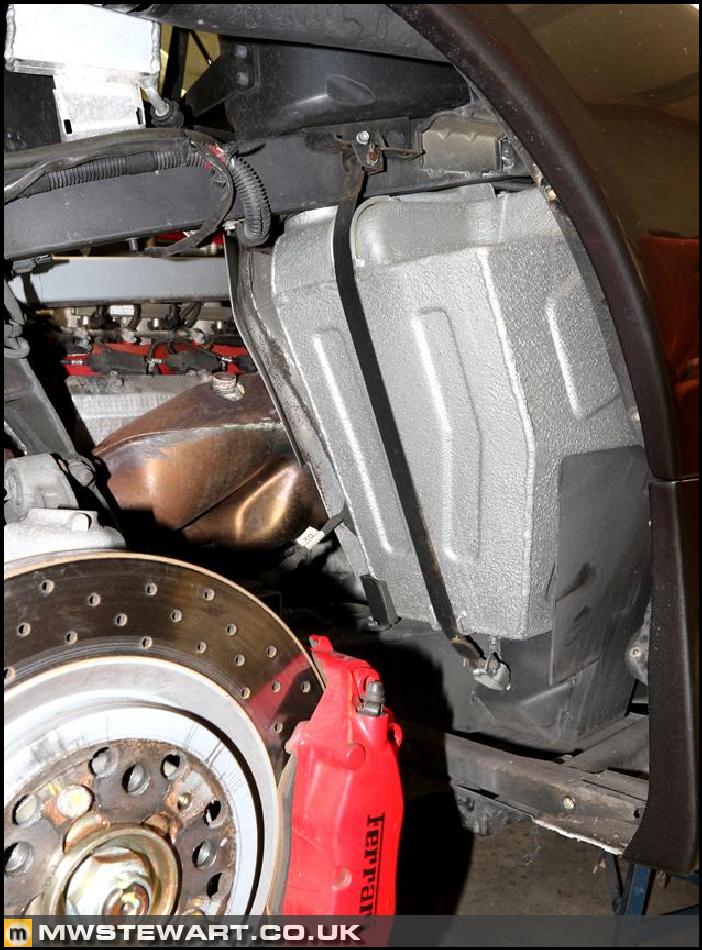
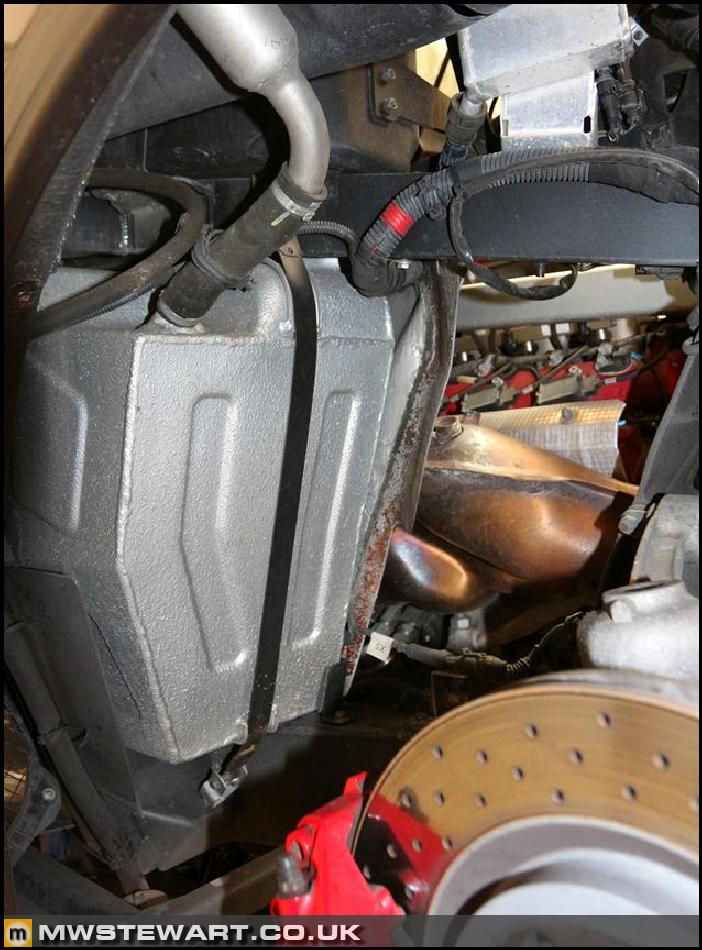
There are two aluminium fuel tanks; one in front of each rear wheel. I suspect they are baffled.
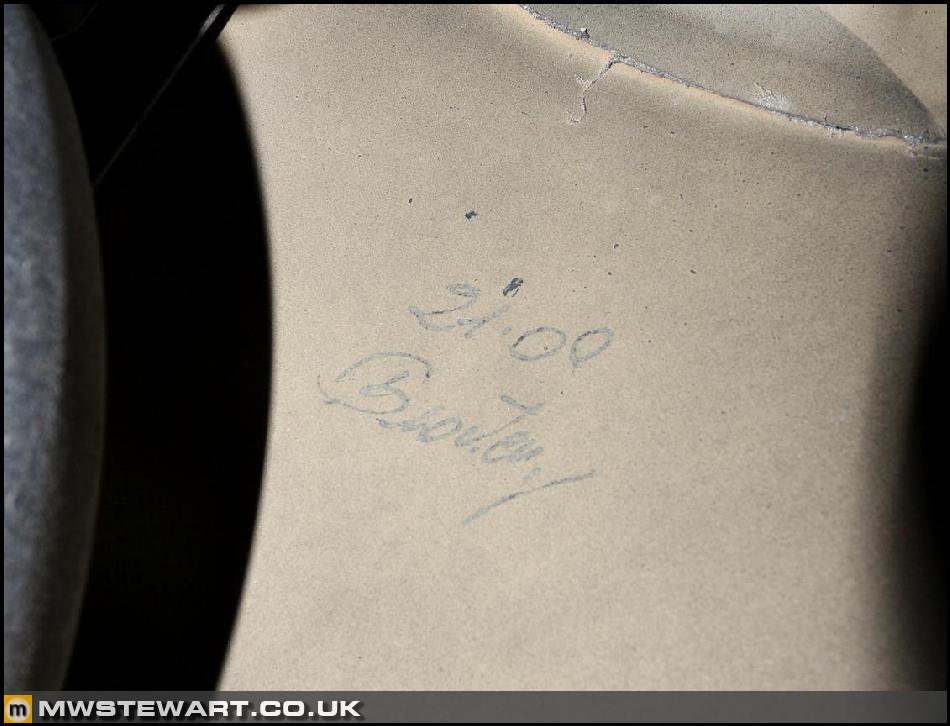
I found this signature at the top of the O/S/R arch - possibly a worker at Alcoa where the chassis is made.
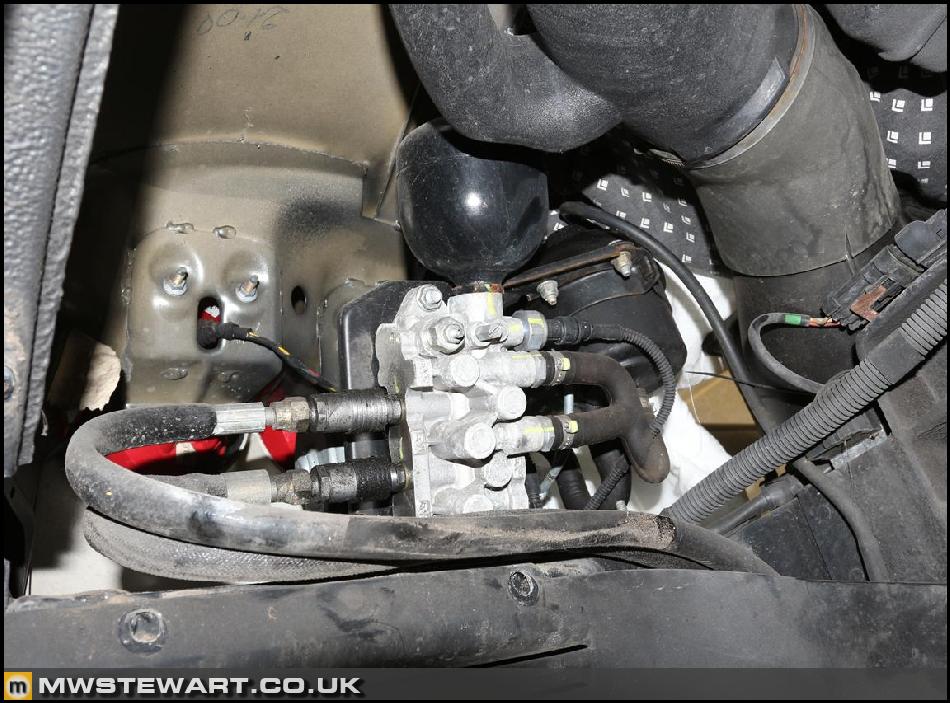
Hydraulic manifold for the Spider roof mechanism is visible at the rear of the O/S/R wheel arch.
The air inlets atop the rear quarters feed air along in to the airbox. This photo shows the ducting linking the two.
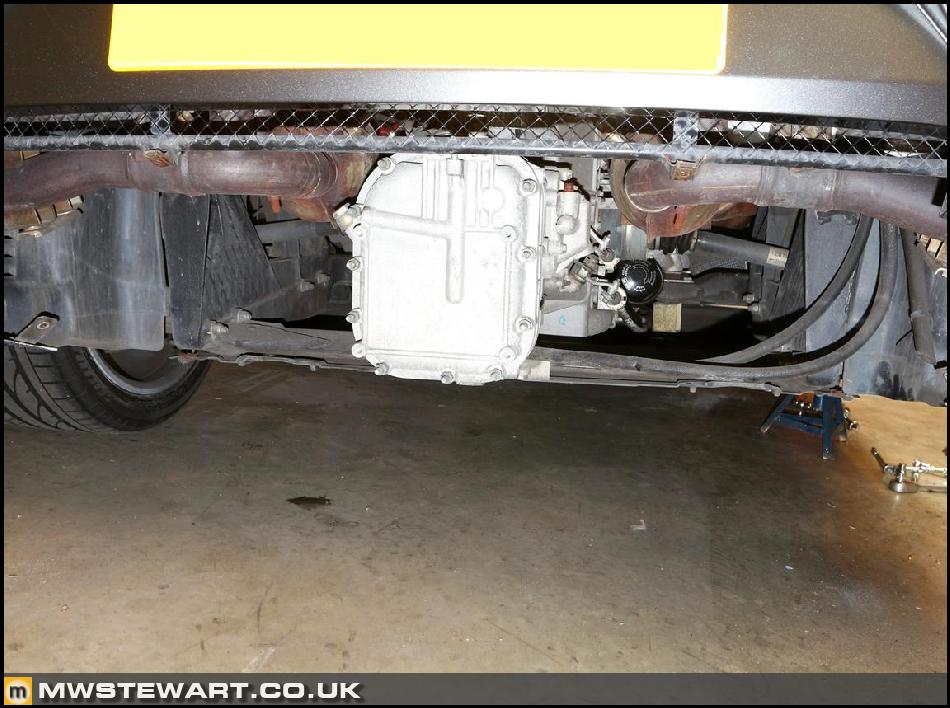
Rear diffuser removed revealing transaxle.
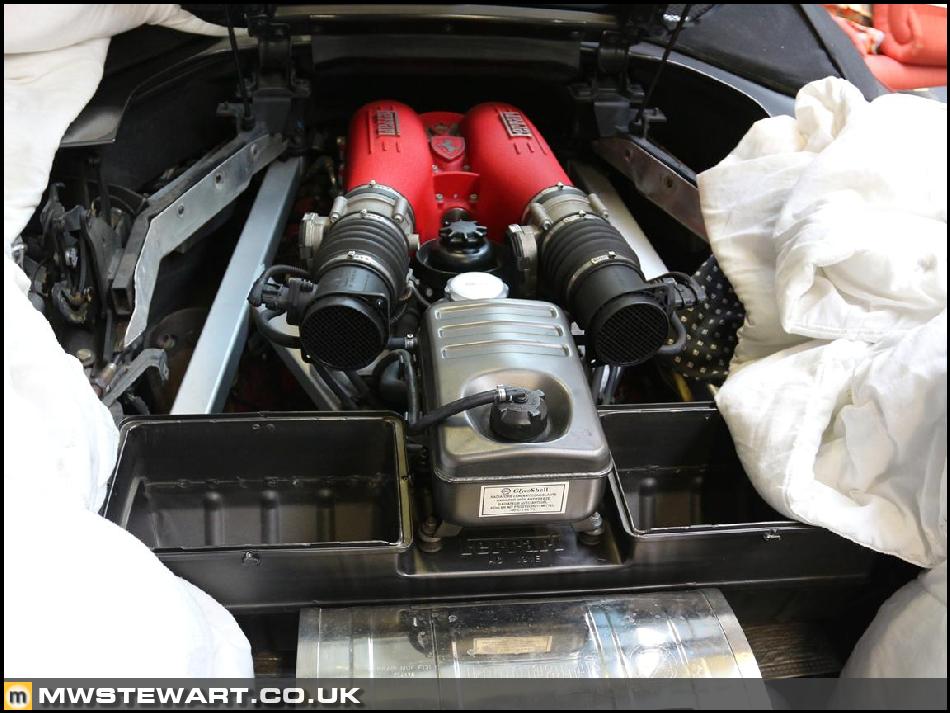
Airbox lids and engine bay access panels removed.
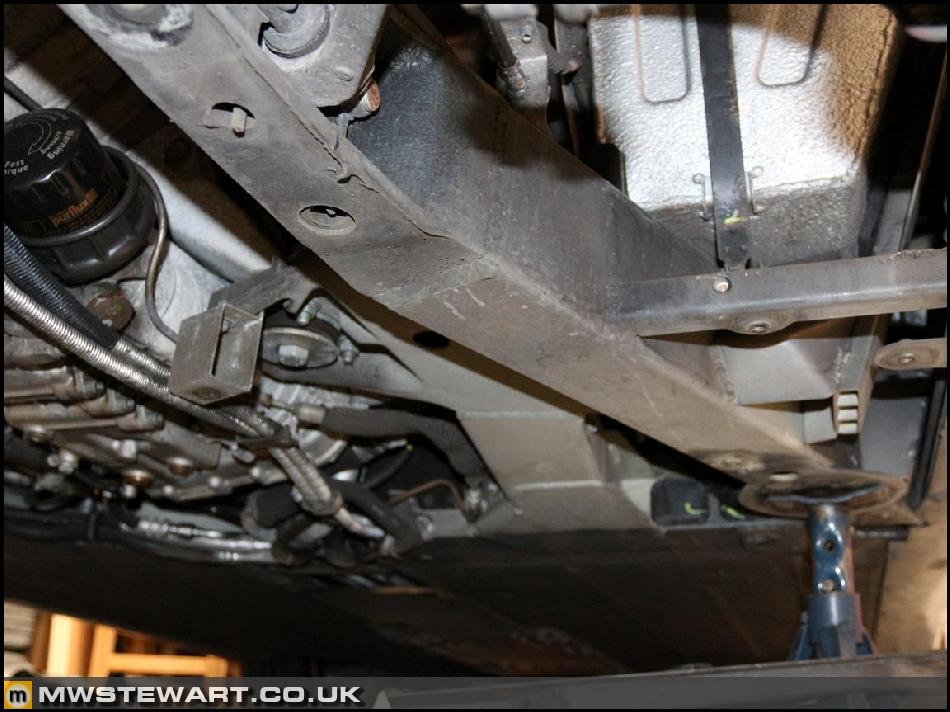
Flat under tray removed showing the rear of the Alcoa chassis. It's a mixture of box section, pressed, and extruded sections welded together.
Front of the engine showing how the services run around the periphery of the engine bay and converge in a neat run to the front of the car.

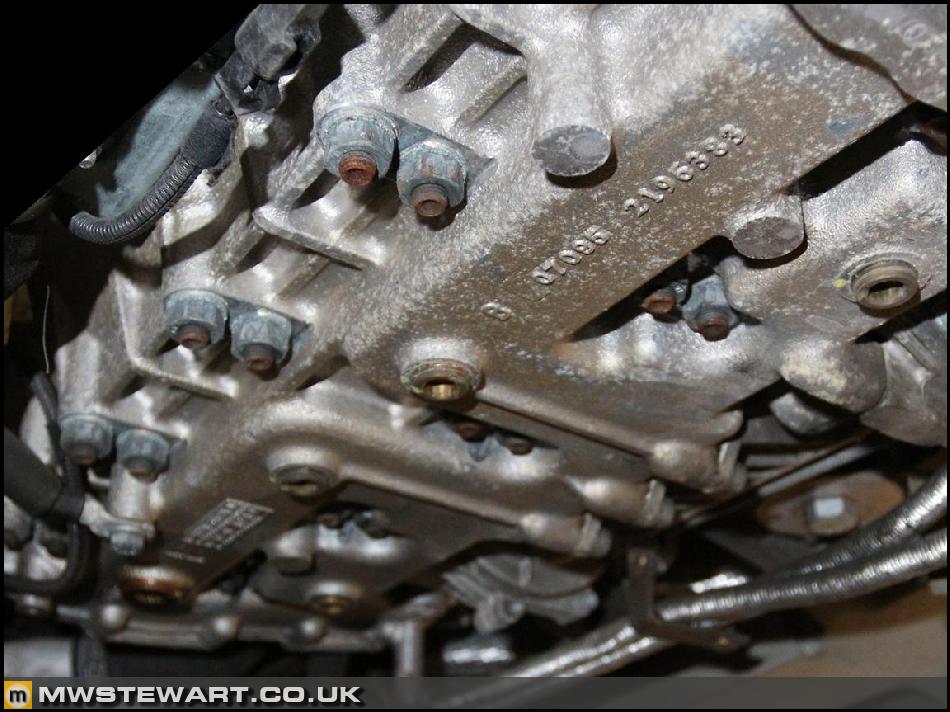
The engine is dry sumped, and the sump is structural. The main cap studs are through-bolted here to increase stiffness of the bottom end.
Here are the stock manifolds removed. The job took around five hours and can only be described as a pain! My car had replacement Mk2 manifolds fitted by Ferrari in 2009 and the nuts must have been tightened by a Gorilla; given there is access to turn some of the nuts 1/8th of a turn at best, one more than one occasion I seriously thought I may end up stuck.
O/S/R wheel arch with liners removed and stock manifold visible through the aperture. Suspension is coil over with double wishbone and a tie rod, which is adjustable for toe. Camber adjustment is made by shimming the wishbone mounts.
Close up of stock manifolds.
There are two aluminium fuel tanks; one in front of each rear wheel. I suspect they are baffled.
I found this signature at the top of the O/S/R arch - possibly a worker at Alcoa where the chassis is made.
Hydraulic manifold for the Spider roof mechanism is visible at the rear of the O/S/R wheel arch.
The air inlets atop the rear quarters feed air along in to the airbox. This photo shows the ducting linking the two.
Rear diffuser removed revealing transaxle.
Airbox lids and engine bay access panels removed.
Flat under tray removed showing the rear of the Alcoa chassis. It's a mixture of box section, pressed, and extruded sections welded together.
Front of the engine showing how the services run around the periphery of the engine bay and converge in a neat run to the front of the car.
The engine is dry sumped, and the sump is structural. The main cap studs are through-bolted here to increase stiffness of the bottom end.
Here are the stock manifolds removed. The job took around five hours and can only be described as a pain! My car had replacement Mk2 manifolds fitted by Ferrari in 2009 and the nuts must have been tightened by a Gorilla; given there is access to turn some of the nuts 1/8th of a turn at best, one more than one occasion I seriously thought I may end up stuck.
Rocksteadyeddie said:
Love this thread. Really interesting to get your qualified insight into how a Ferrari is put together.
H100S said:
Bookmarked another one of your threads! Great work, now you have stripped the car further has your opinion changed on the build quality? How do you feel it is wearing its 8 years and 27k
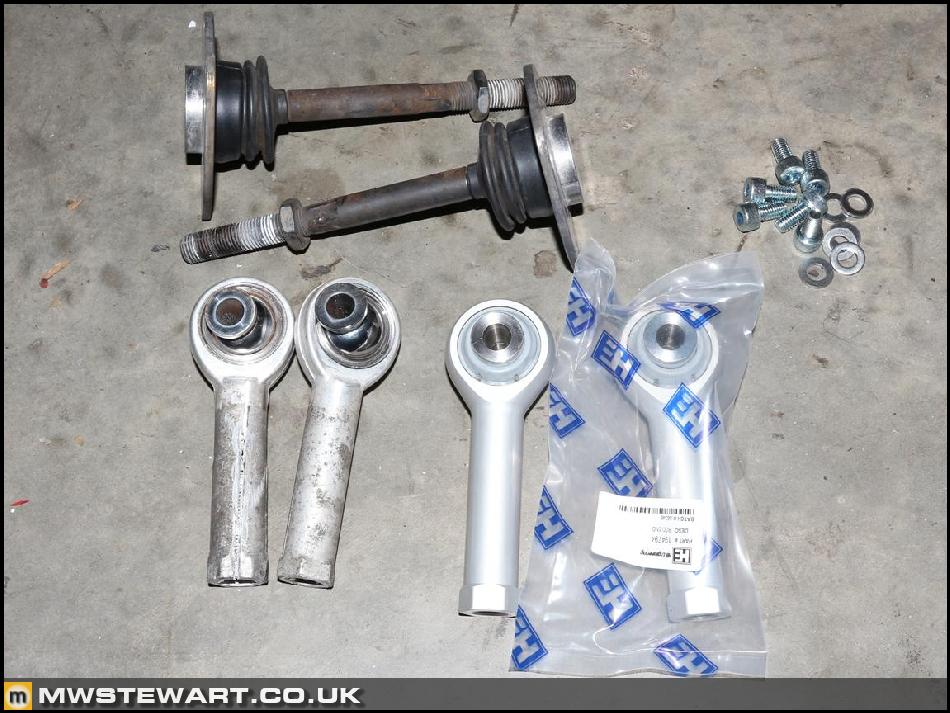
Thanks both. The mechanical parts are the best on the car and are generally arranged and manufactured to a good standard, but there are issues. Suspension components are heavily performance based and carry some compromises associated with that; all of the joints are plated steel spherical joints which are susceptible to water ingress and corrsion hence become a service item at quite short intervals. The ball joints on my car were replaced by Ferrari dueing a mileage based service in 2010 at a cost of £4.5k and the car has covered 8k since then but I estimate is only a year away from requiring the same again.The rear top mounts (called 'Silent Blocks') have been replaced already along with one of the rear tie rod ball joints. The other side tiw rod joint is showing play so I shall replace both sides with stainless versions manufactuerd by Hill Engineering. http://www.hillengineering.co.uk/catalog/194794-p-...
I've already covered the exhaust manifold issue and aside from that the engine is essentially service and forget. In general the underbody and engine bay finishing is not on par with a modern German car and hence it's not a car that would fair well if kept outdoors or in a damp garage.
In summary the mechanical parts and layout are significantly more impressive than the trim, which I suppose is the essence of the car.
mwstewart said:
Rocksteadyeddie said:
Love this thread. Really interesting to get your qualified insight into how a Ferrari is put together.
H100S said:
Bookmarked another one of your threads! Great work, now you have stripped the car further has your opinion changed on the build quality? How do you feel it is wearing its 8 years and 27k
Thanks both. The mechanical parts are the best on the car and are generally arranged and manufactured to a good standard, but there are issues. Suspension components are heavily performance based and carry some compromises associated with that; all of the joints are plated steel spherical joints which are susceptible to water ingress and corrsion hence become a service item at quite short intervals. The ball joints on my car were replaced by Ferrari dueing a mileage based service in 2010 at a cost of £4.5k and the car has covered 8k since then but I estimate is only a year away from requiring the same again.The rear top mounts (called 'Silent Blocks') have been replaced already along with one of the rear tie rod ball joints. The other side tiw rod joint is showing play so I shall replace both sides with stainless versions manufactuerd by Hill Engineering. http://www.hillengineering.co.uk/catalog/194794-p-...
I've already covered the exhaust manifold issue and aside from that the engine is essentially service and forget. In general the underbody and engine bay finishing is not on par with a modern German car and hence it's not a car that would fair well if kept outdoors or in a damp garage.
In summary the mechanical parts and layout are significantly more impressive than the trim, which I suppose is the essence of the car.
H100S said:
Great reply. I appreciate your feed back and honesty, car parts is my trade however i deal with volume not Prestige.
You're welcome. If you want to have a look at some of the parts then the workshop manual http://www.ferraridatabase.com/The_Downloads/The%2... is superb, and even contains technical drawings for various components. mwstewart said:
Hydraulic manifold for the Spider roof mechanism is visible at the rear of the O/S/R wheel arch.
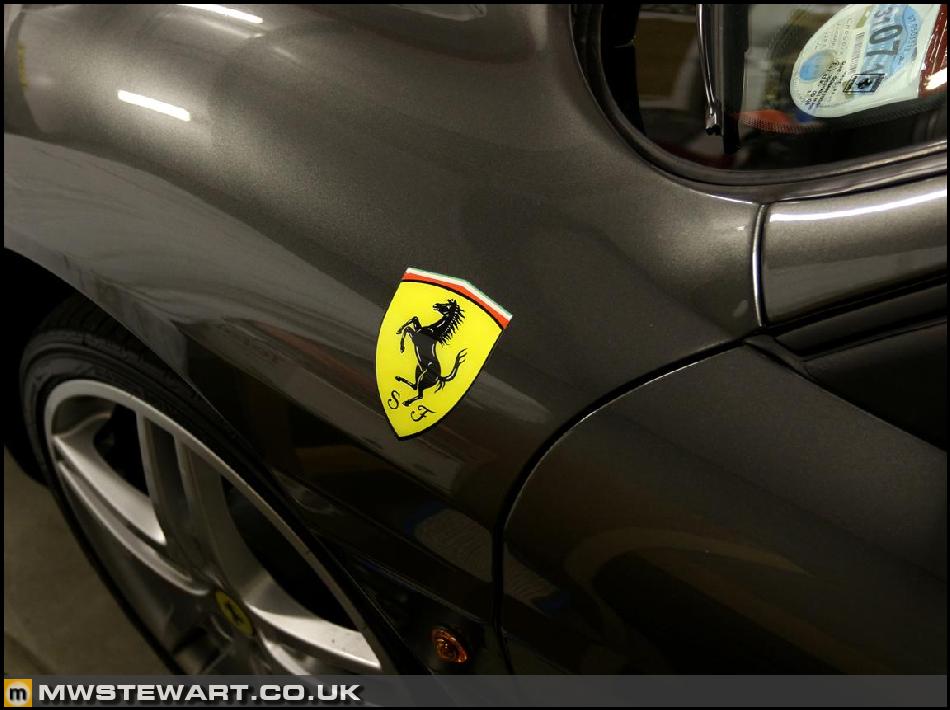
Minor correction to the above: the manifold is in actual fact for the E-Diff, not the roof.I now have the replica Scuderia Shields fitted to the front wings. I used the Ferrari measurements to position them.
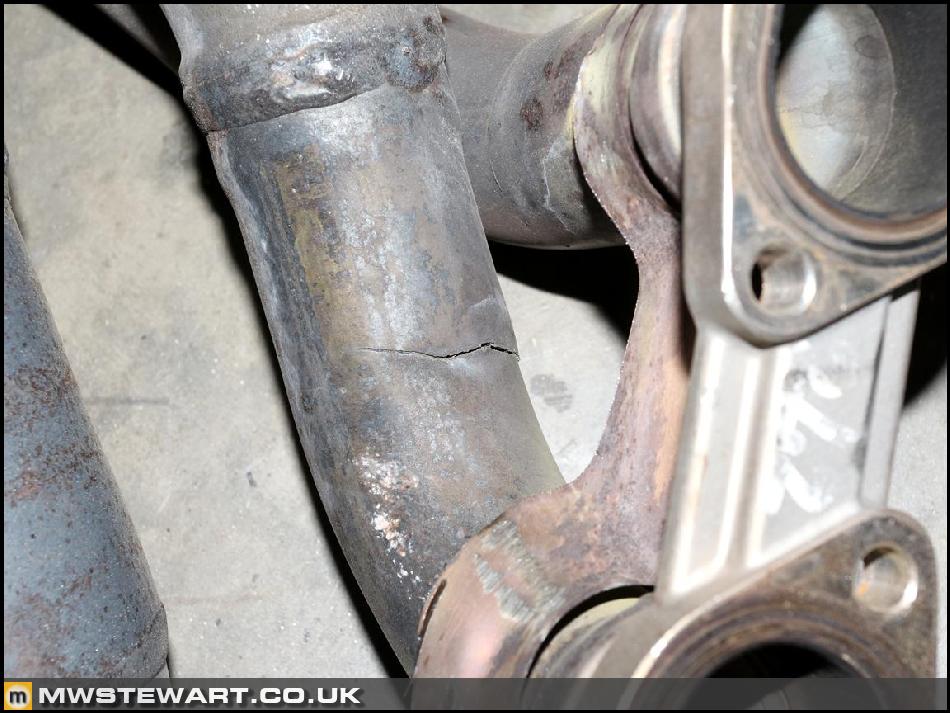
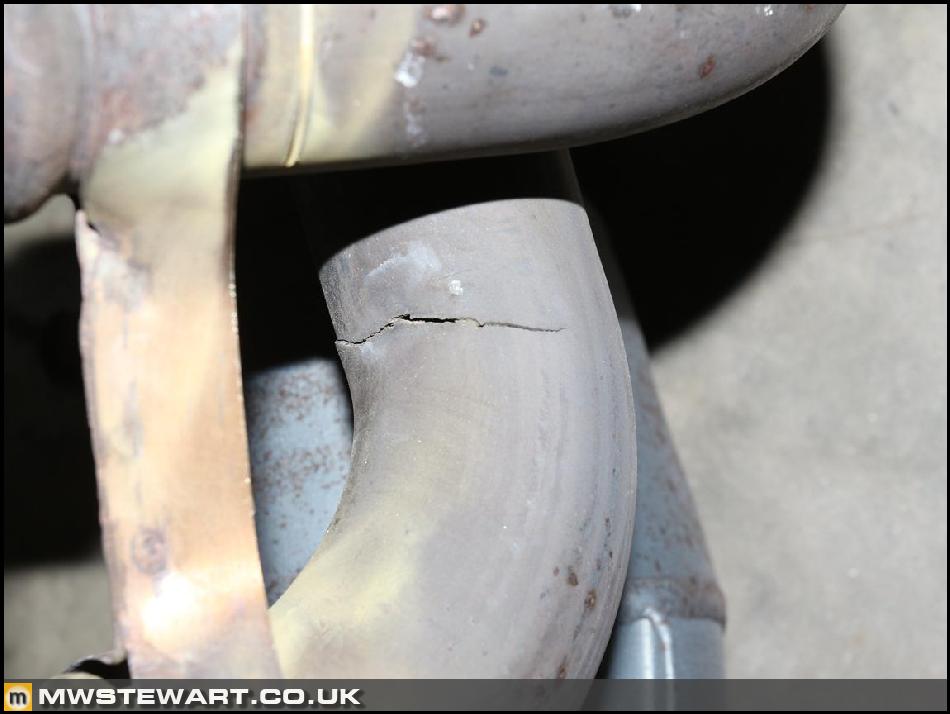
Mk2 exhaust manifold failiure
I mentioned previously that my exhaust manifolds were the Mk2 version fitted by Ferrari in 2009 after the original Mk1 versions failed. I had a blow from my exhaust which prompted me to buy the stainless versions as soon as possible, and given that the stock manifolds were scrap I took an angle grinder to them in order to remove the heat shields and confirm a definite failiure.
Here are both of the manifolds with the shields and heat insulating material removed.
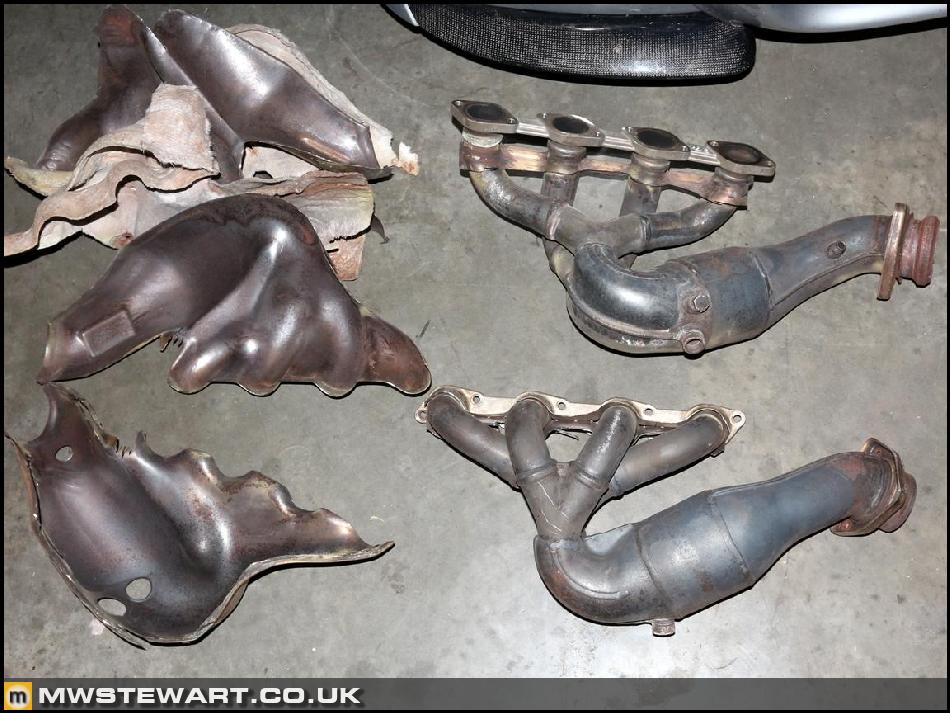
The right bank manifold was OK.
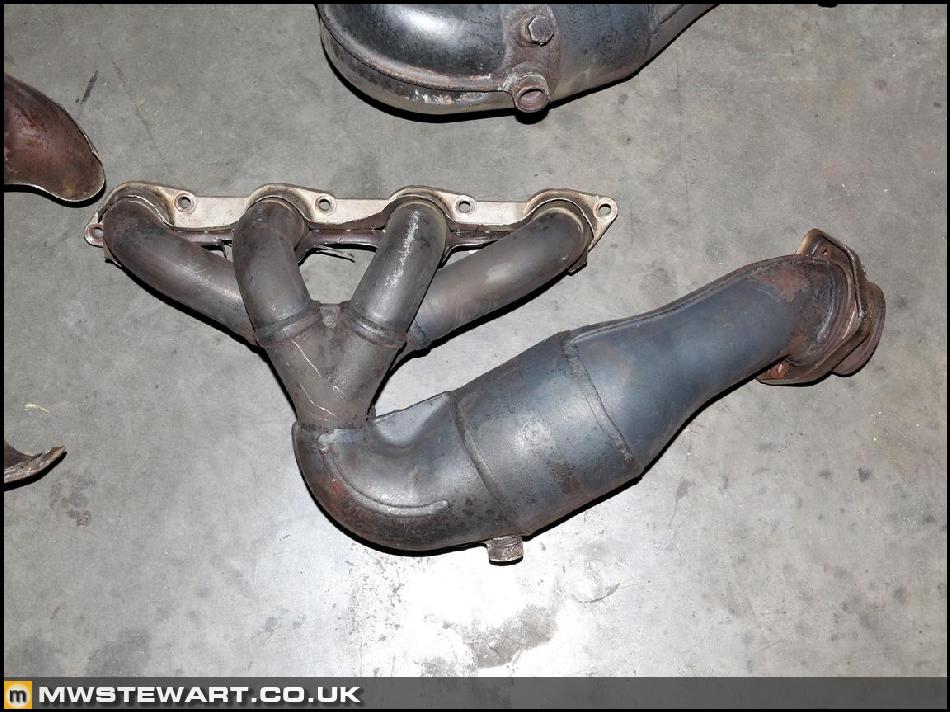
Strengthening gussets added by Ferrari.
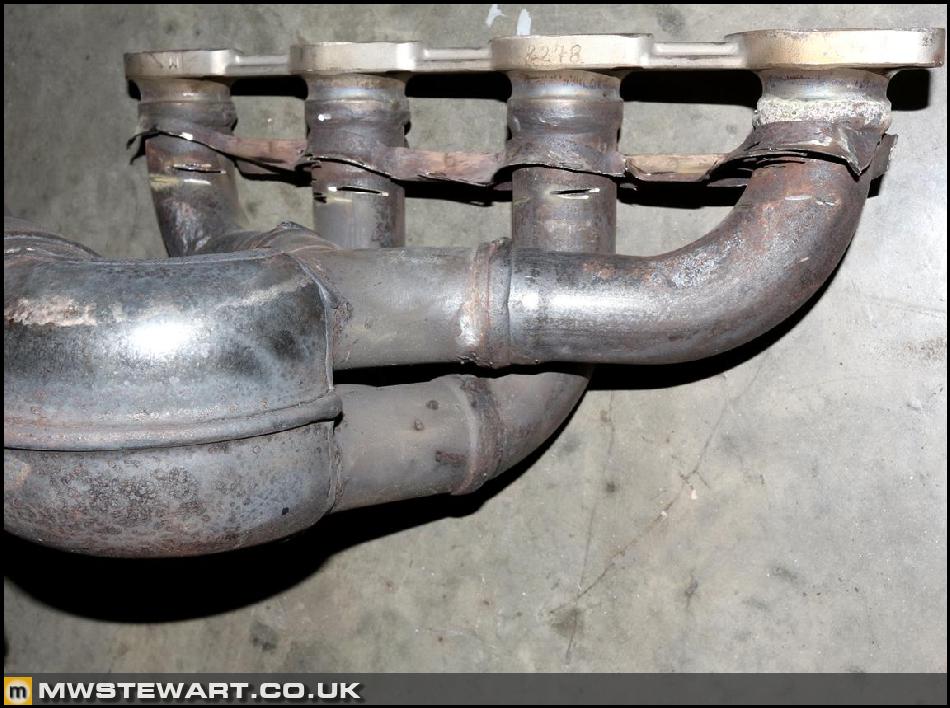
Here's the left bank manifold. There is a 50mm crack right around the primary of cylinder eight.

Rear Tie Rods
The Hill Engineering rear tie rod ends arrived. They are stainless steel ball joints encased within a billet aluminium end. The original Ferrari ends are plated ball joints in a forged alloy end. Ferrari fitted the arms in 2011 as a complete assembly and they hadn't used any anti-sieze compond which I always find vital when dealing with alloy threads. I had to cut off one of the original ends as it wouldn't budge even with heat applied. I've also bought new bolts to secure the end plates.
Assembly fitted.
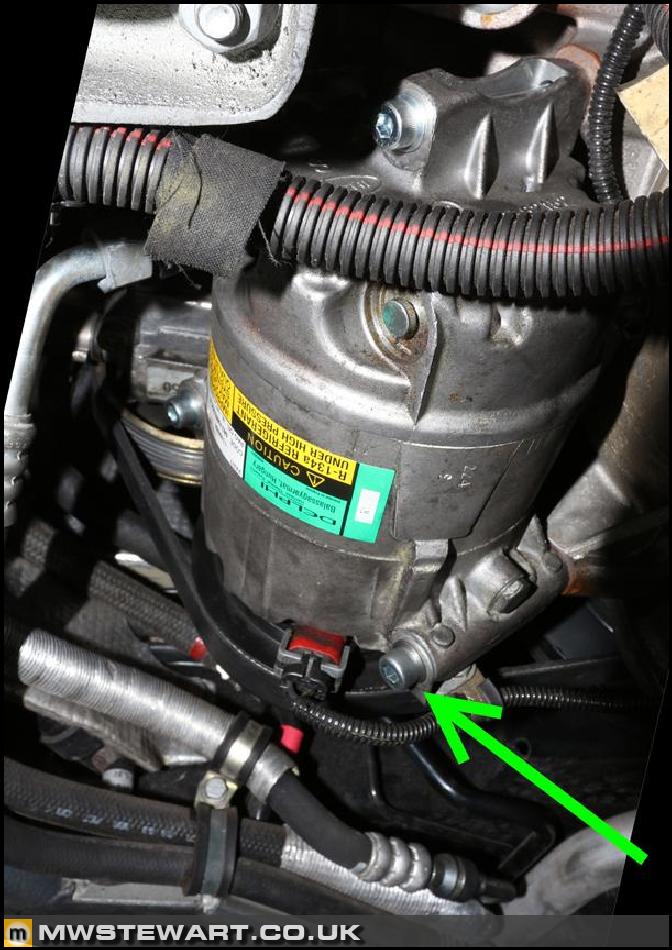
I removed the A/C compressor to gain better access to the N/S exhaust nuts, and one of the three securing bolts snapped off in the block. Thank God it was the lower bolt (see arrow) which is easy to access otherwise it could have been a huge amount of work to rectify! It turns out that Ferrari use a grade 12.9 bolt for one of the three, with the others being 8.8! Combine that grade of bolt with an alloy thread in a hot engine block without any anti-sieze and you have a potential recipie for disaster. I decided to Helicoil the mount to make it better than original. I also replaced the bolts with new ones this time all in grade 12.9.
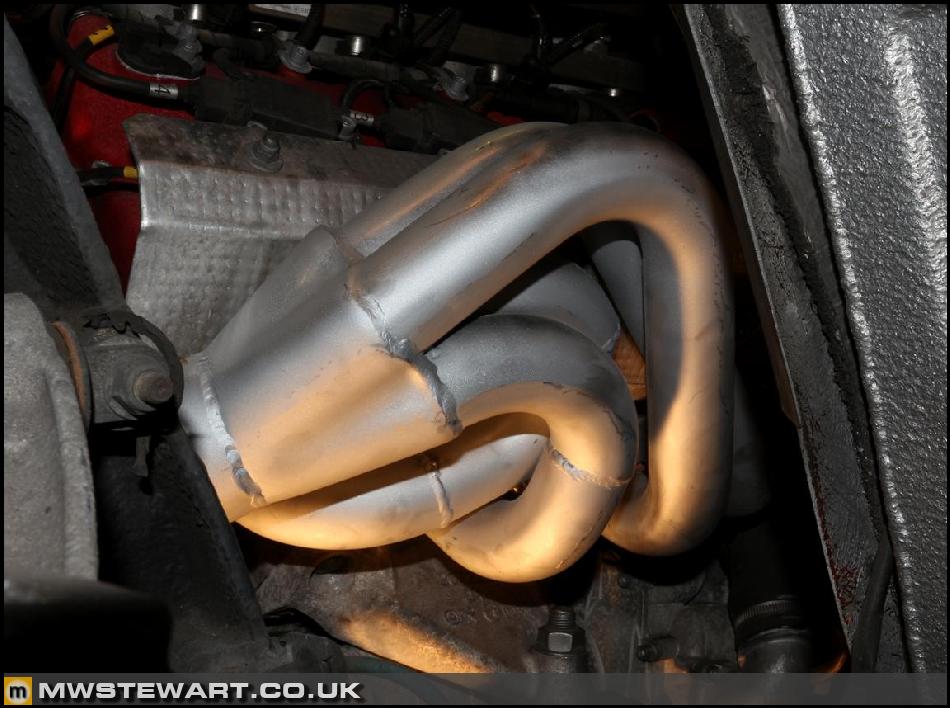
Manifolds fitted
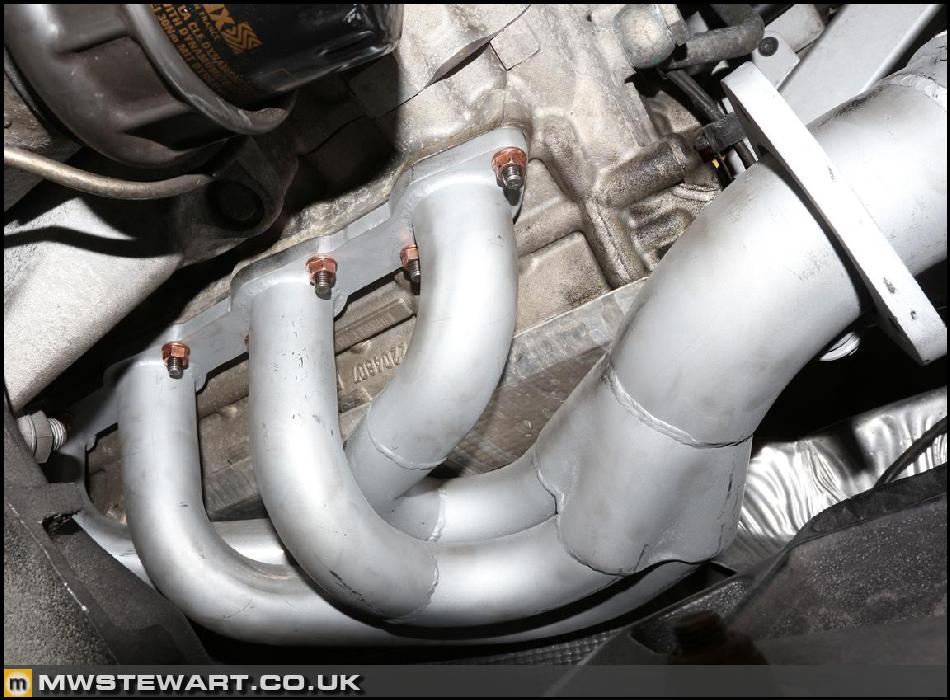
Manifolds coated, and new studs from Ferrari. They are only 71p each so it makes sense to replace them. The nuts were from VW as it happenend; most manufacturers now use M8 exhaust studs with the smaller 12mm hex head.
It took me twenty minutes to fit the new manifolds which is in stark contrast to the four hours it took to remove the stock manifolds! The replacements fit well - a little tight around the studs compared to OEM, but that's no bad thing - so at this point they are looking to be a complete bargain. Let's see how they hold up to regular use.
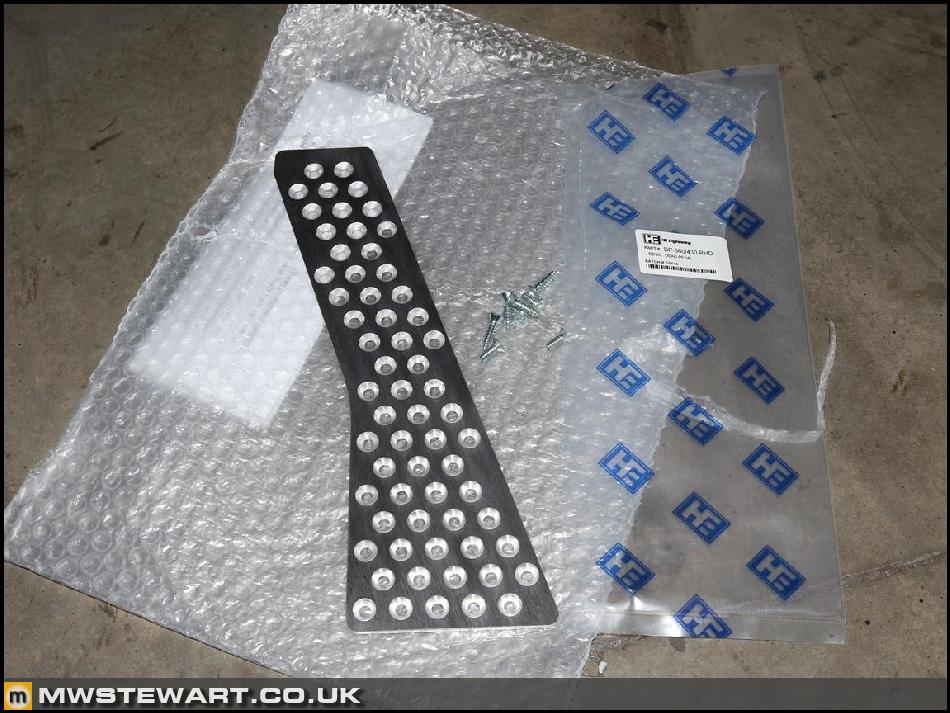
Hill Engineering Foot Rest
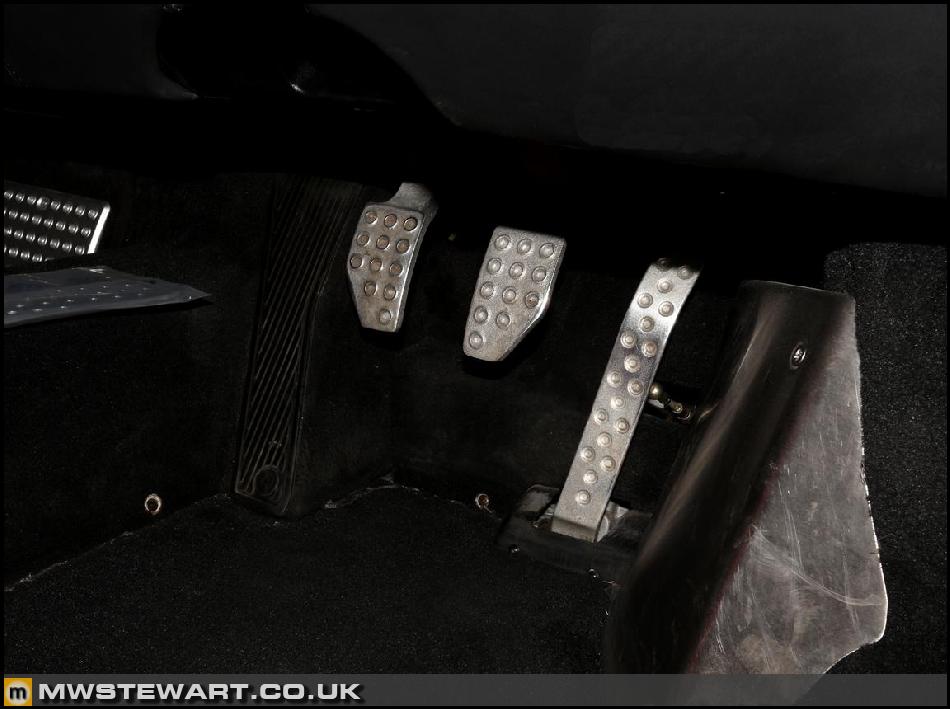
I ordered this at the same time as the ball joints. The standard Ferrari foot rest is just a black rubber peice stuck onto an aluminium back plate. The Hill piece matches the rest of the pedals.
Standard rest:
Hill Engineering were brilliant to deal with and the service was great, and fast. The products are excellent quality so I certainly recommend them.
The Hill Engineering rear tie rod ends arrived. They are stainless steel ball joints encased within a billet aluminium end. The original Ferrari ends are plated ball joints in a forged alloy end. Ferrari fitted the arms in 2011 as a complete assembly and they hadn't used any anti-sieze compond which I always find vital when dealing with alloy threads. I had to cut off one of the original ends as it wouldn't budge even with heat applied. I've also bought new bolts to secure the end plates.
Assembly fitted.
I removed the A/C compressor to gain better access to the N/S exhaust nuts, and one of the three securing bolts snapped off in the block. Thank God it was the lower bolt (see arrow) which is easy to access otherwise it could have been a huge amount of work to rectify! It turns out that Ferrari use a grade 12.9 bolt for one of the three, with the others being 8.8! Combine that grade of bolt with an alloy thread in a hot engine block without any anti-sieze and you have a potential recipie for disaster. I decided to Helicoil the mount to make it better than original. I also replaced the bolts with new ones this time all in grade 12.9.
Manifolds fitted
Manifolds coated, and new studs from Ferrari. They are only 71p each so it makes sense to replace them. The nuts were from VW as it happenend; most manufacturers now use M8 exhaust studs with the smaller 12mm hex head.
It took me twenty minutes to fit the new manifolds which is in stark contrast to the four hours it took to remove the stock manifolds! The replacements fit well - a little tight around the studs compared to OEM, but that's no bad thing - so at this point they are looking to be a complete bargain. Let's see how they hold up to regular use.
Hill Engineering Foot Rest
I ordered this at the same time as the ball joints. The standard Ferrari foot rest is just a black rubber peice stuck onto an aluminium back plate. The Hill piece matches the rest of the pedals.
Standard rest:
Hill Engineering were brilliant to deal with and the service was great, and fast. The products are excellent quality so I certainly recommend them.
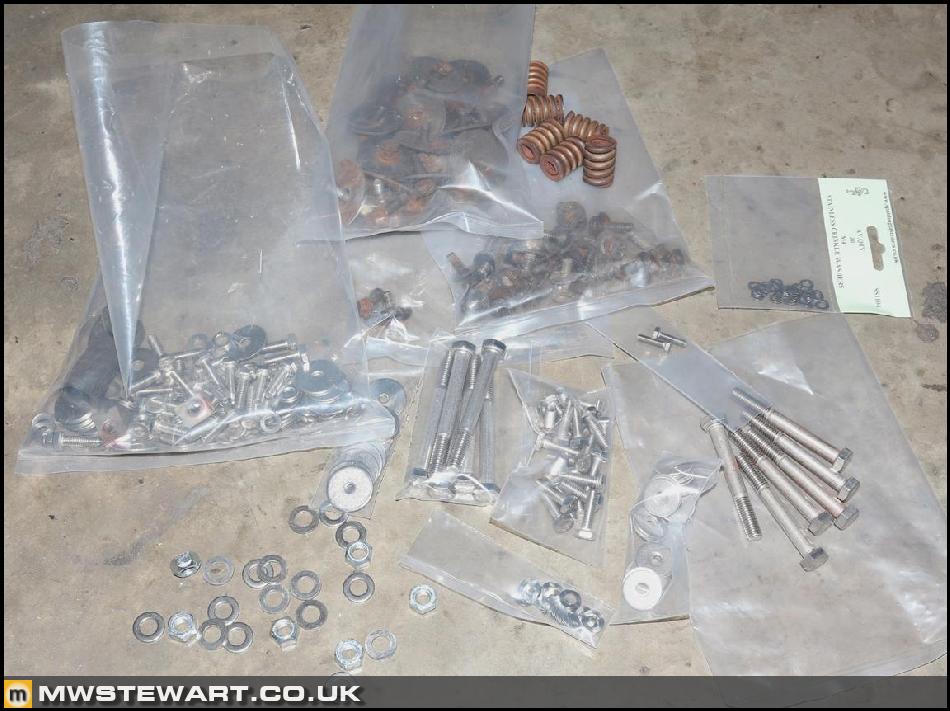
I finished off the manifolds this evening and gave them a quick test: no leaks. I replaced all of the undertray and wheelarch fastenings with stainless versions - there are a lot of them.
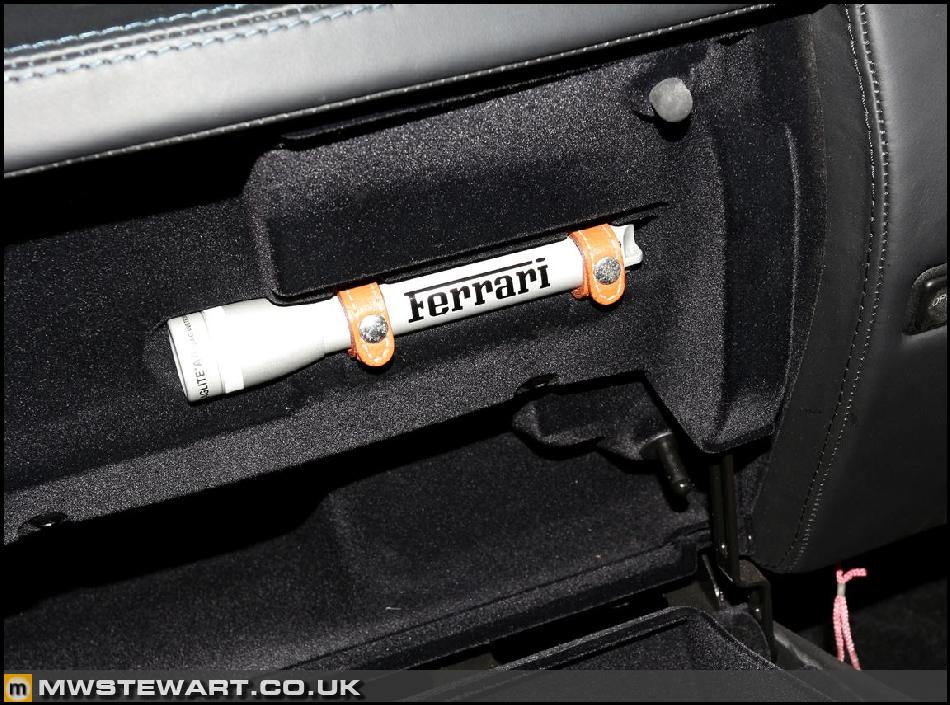
There is a recess and nice pair of tan leather straps in the glove box to mount a Ferrari Maglite. My car was missing this so whether it is an optional extra or previous owners just keep them for a memento, I don't know, but they are probably the most expensive Maglite mini there is
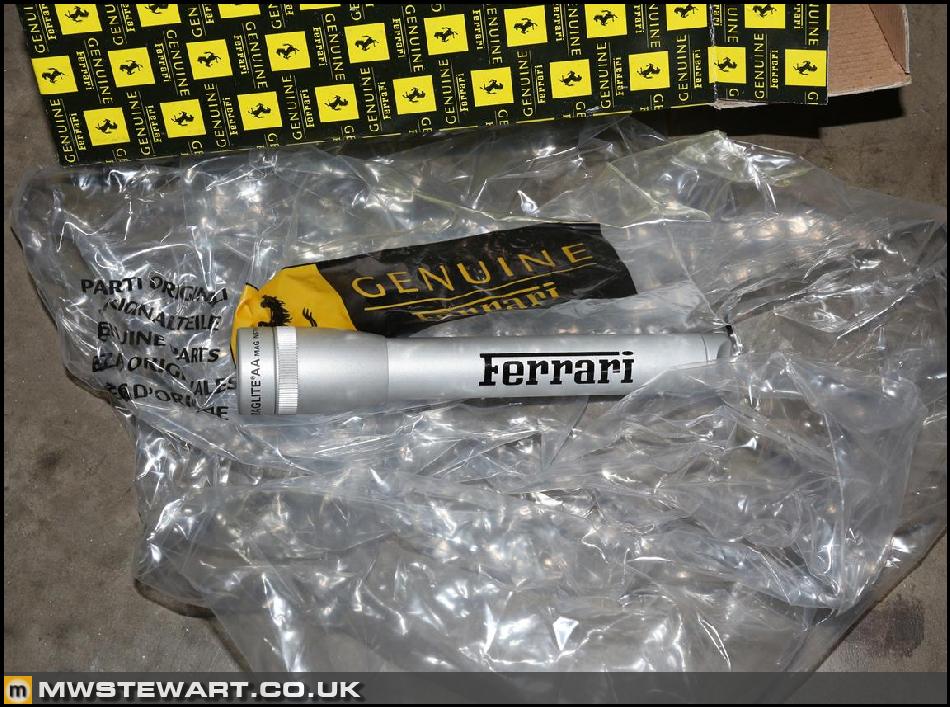
I think its a nice touch.
There is a recess and nice pair of tan leather straps in the glove box to mount a Ferrari Maglite. My car was missing this so whether it is an optional extra or previous owners just keep them for a memento, I don't know, but they are probably the most expensive Maglite mini there is
I think its a nice touch.
Bungleaio said:
As with all your threads thanks for sharing the insight us mere mortals will never have even if we can afford the machinery we won't have the skills to pull it apart.
Thank you, though it's just nuts and bolts like any other car - anyone can do it leglessAlex said:
$130* for a Maglite?! Woha.
Now you've seen the build quality of the car, have you any more thoughts on modifying it and generally bring it up to your standard? Or will it be a case of just fixing things as they become a problem/if they annoy you?
*according to Amazon at least
I just want to drive this one and not do too much other than maintain it to a high standard. In terms of maintenance the ball joints, manifolds, and to a lesser degree roof and clutch are the points to take care of. The roof and manifolds are ticked off of my list, leaving the clutch and ball joints, both of which are fine at the moment but will be changed next year for peace of mind. Now you've seen the build quality of the car, have you any more thoughts on modifying it and generally bring it up to your standard? Or will it be a case of just fixing things as they become a problem/if they annoy you?
*according to Amazon at least
In order to bring it up to a better standard I'd have to go through the whole thing like I've the Fiesta, and I think one of those projects is quite enough
 I will finish the front underside of the M3, the Fiesta as a whole, then start to think about a classic.
johnfm said:
Given you work in IT in the city (I assume), when do you find the time to do this? I assume you just get on with it after work, have no kids and your girlfriend doesn't live with you?
YOU LUCKY b d!
d!
Haha! My g/f has an even more demanding job than I do and hence works long hours, which if I'm not working late obviously prsents a great opportunity for me to work on the cars YOU LUCKY b
d! She's also been extremely patient and understanding when it comes to what I do for a hobby; I've probably pushed it a bit far truth be told - I tend to get quite absorbed in whatever I set my mind to. No kids yet - we're both just working to make way for a more relaxed life back in the country in the not too distant future. I dream of a nice barn to store the cars!
Good thread and refreshing honesty, it seems like people tend to get irrationally defensive about a car once bought but your posts have been rather balanced!
Enjoy, it seems you're being proactive about any of the weak points on this car which so I hope you're rewarded with a reliable ownership!
Enjoy, it seems you're being proactive about any of the weak points on this car which so I hope you're rewarded with a reliable ownership!
Gassing Station | Readers' Cars | Top of Page | What's New | My Stuff