500+bhp Mk3 Fiesta Project
Discussion


Max_Torque said:
Retard based on knock = Good
Retard based on EGT = Bad (very bad!) (retard = later burn = "mean" burn at large chamber volume = less expansion = less work done to piston = more heat flux in the exhaust gas = hotter EGT)
On my port throttled turbo i never managed to get the blend exactly correct between throttle plate angle and plenum pressure load determination, so i made myself a little high speed device that oversamples each intake stroke pressure wave (uses 4 high bandwidth map sensors (1 per runner) and the cam sensor signal to phase lock loop to engine position). This then outputs a psuedo MAP signal that has an superb signal to noise rato (because it only samples during each individual intake event, rather than sampling each runner over 720deg), yet combines this with near instant response due to the lack of plenum volume as a dampener (outputs MAP after every intake event in real time).
This gives the rapid response of a TPS based load determination system with the accuracy of a MAP based one ;-)

PS, the Fiesta is looking ace! ;-)
Ahh, so it does. As explained somewhere here: http://www.clubwrx.net/forums/engine-modifications...Retard based on EGT = Bad (very bad!) (retard = later burn = "mean" burn at large chamber volume = less expansion = less work done to piston = more heat flux in the exhaust gas = hotter EGT)
On my port throttled turbo i never managed to get the blend exactly correct between throttle plate angle and plenum pressure load determination, so i made myself a little high speed device that oversamples each intake stroke pressure wave (uses 4 high bandwidth map sensors (1 per runner) and the cam sensor signal to phase lock loop to engine position). This then outputs a psuedo MAP signal that has an superb signal to noise rato (because it only samples during each individual intake event, rather than sampling each runner over 720deg), yet combines this with near instant response due to the lack of plenum volume as a dampener (outputs MAP after every intake event in real time).
This gives the rapid response of a TPS based load determination system with the accuracy of a MAP based one ;-)
PS, the Fiesta is looking ace! ;-)
It's a good job I'm not mapping the thing

That's a very interesting device; so if I understood correctly it provides more accuracy to the management in an individual Throttle Body application? Are there any management systems that employ this?
Tom, of course: http://www.smsautospray.co.uk/index.htm
They're not perfectly local to our parents area but then not a million miles away either. I cannot recommend them highly enough.
They're not perfectly local to our parents area but then not a million miles away either. I cannot recommend them highly enough.
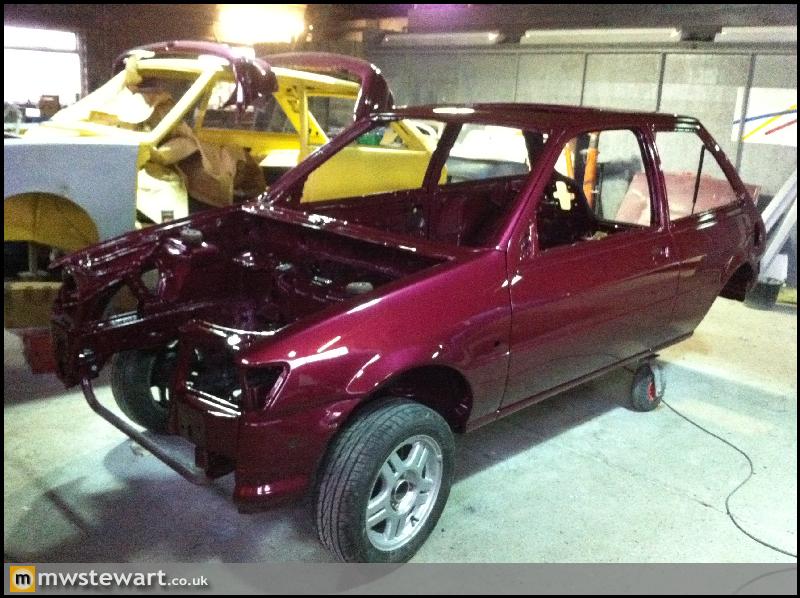
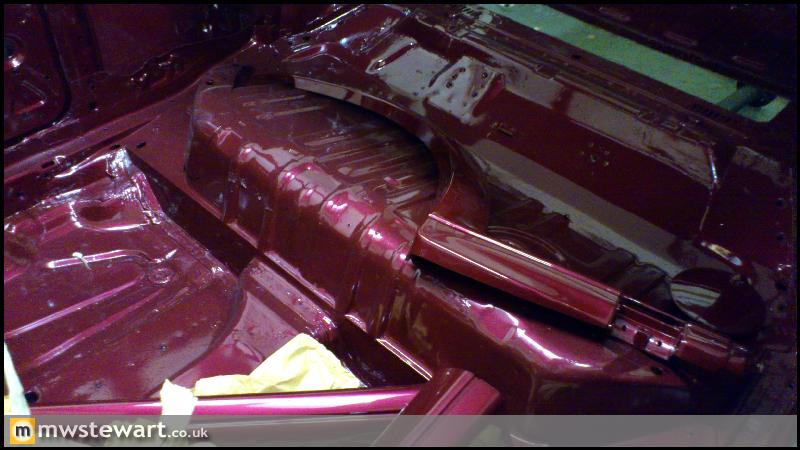
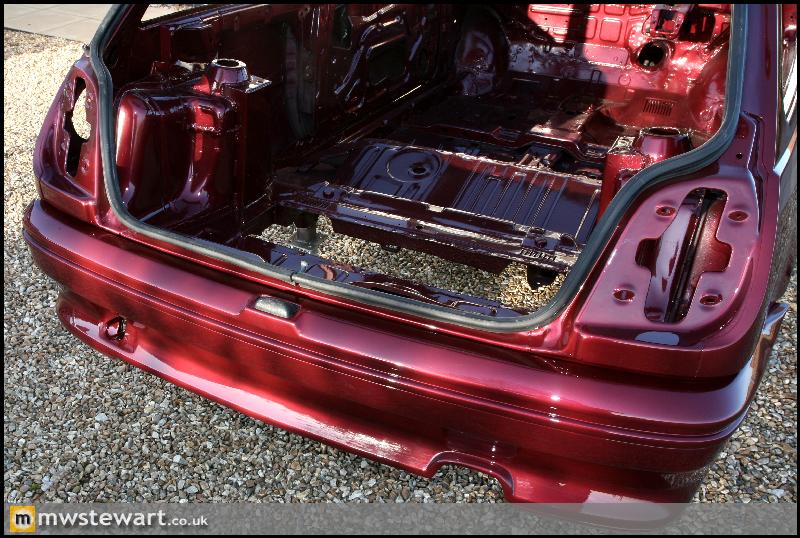
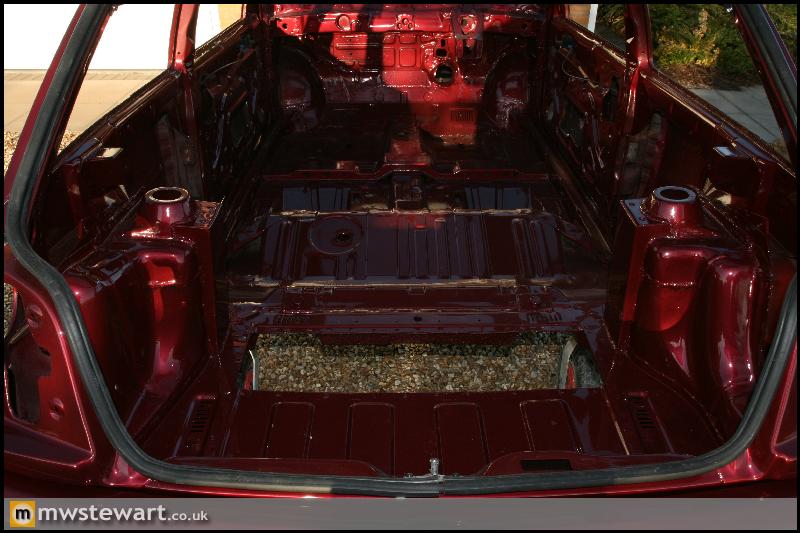
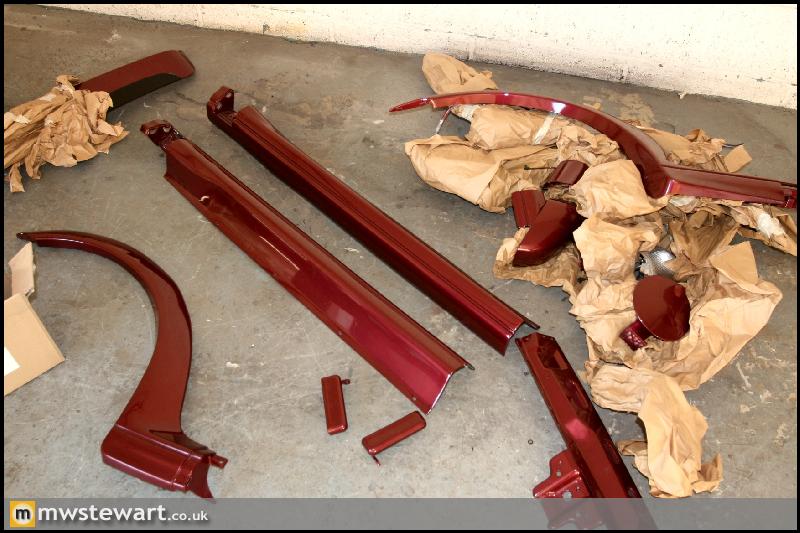
Steve from the Bodyshop has just sent some more photos.
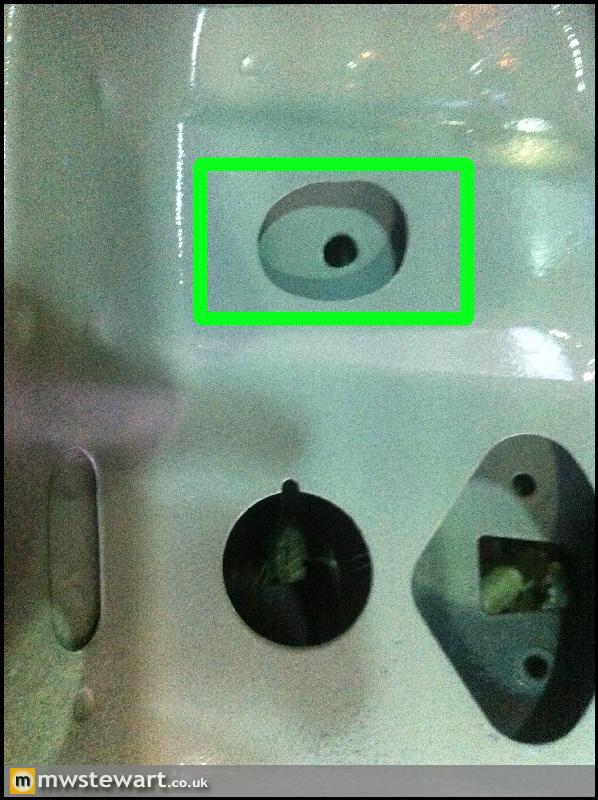
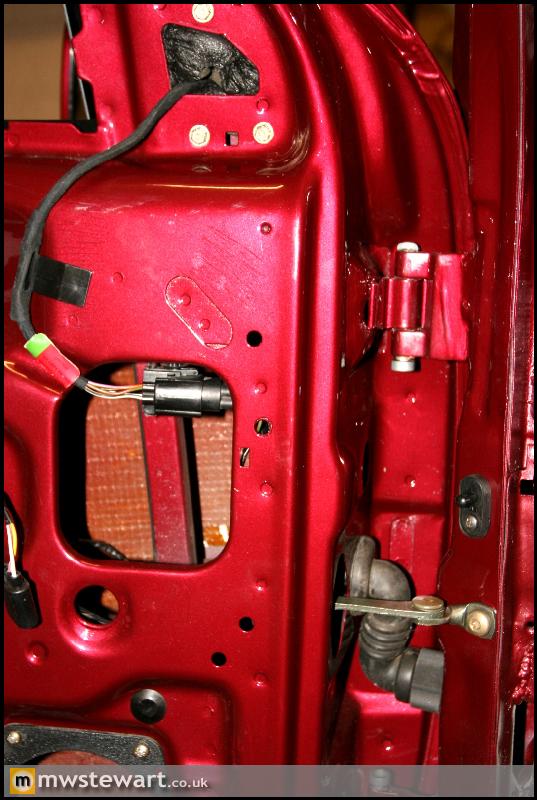
I've had an additional hole cut in each door so that I can use a Lexus IS200 door wiring loom boot in addition to the Ford boot/loom. This will allow me to run some audiophile grade speaker wire in isolation from the Ford power wires.
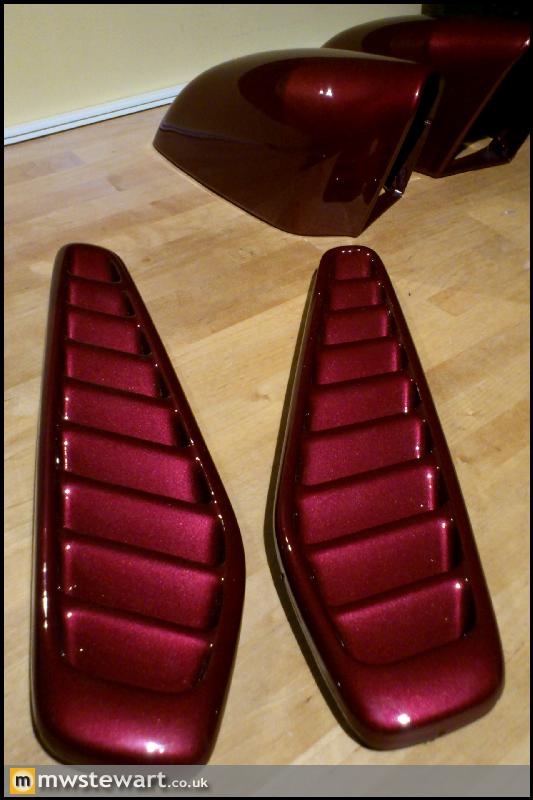
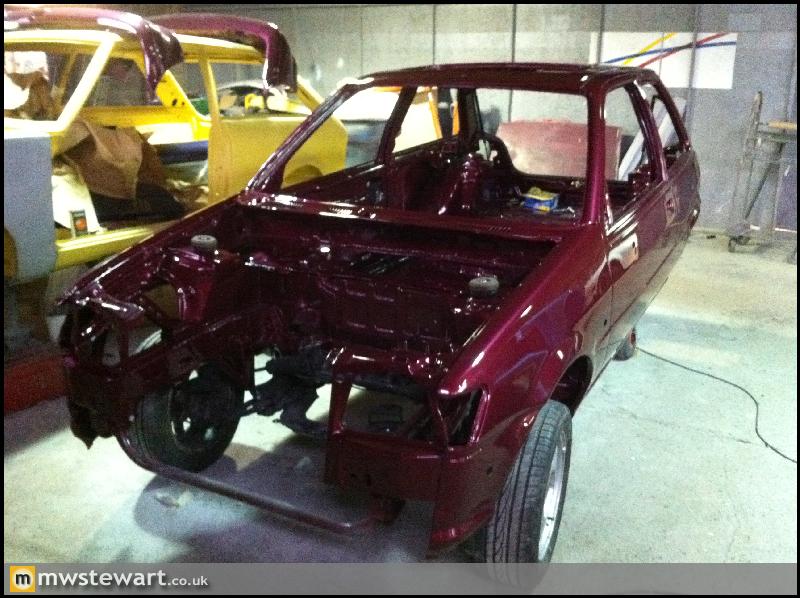
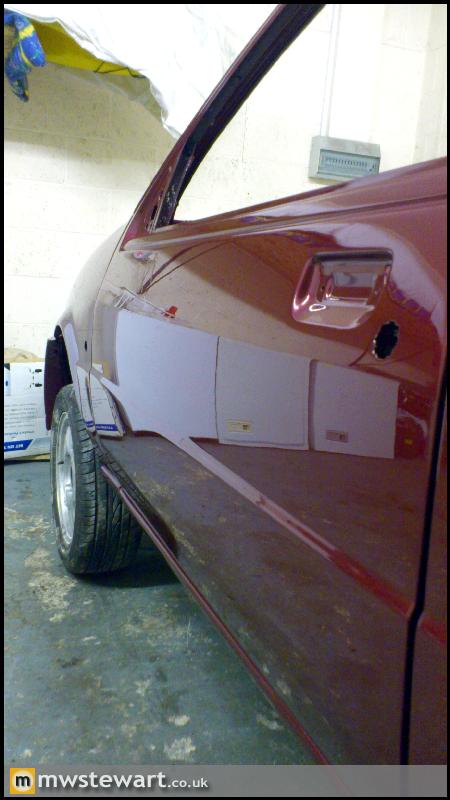
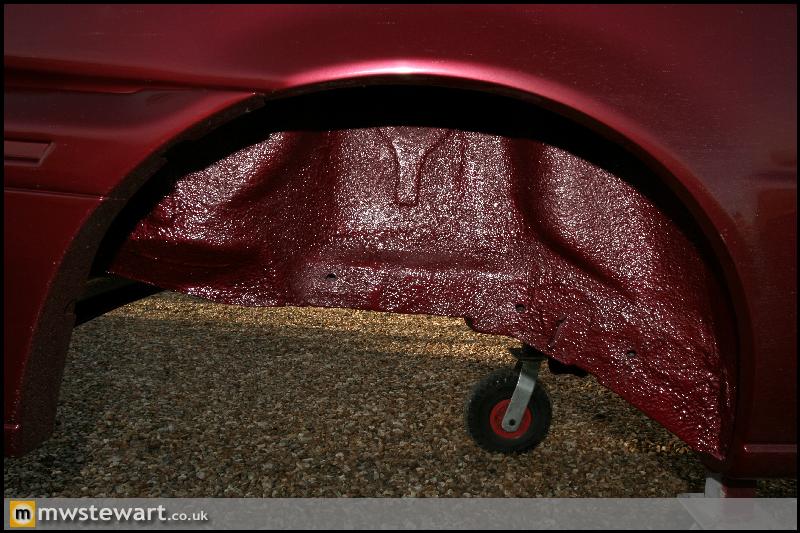
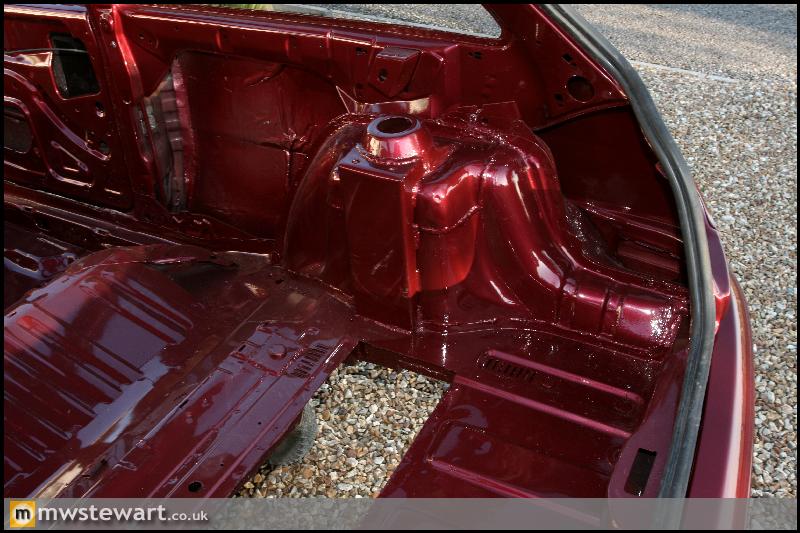
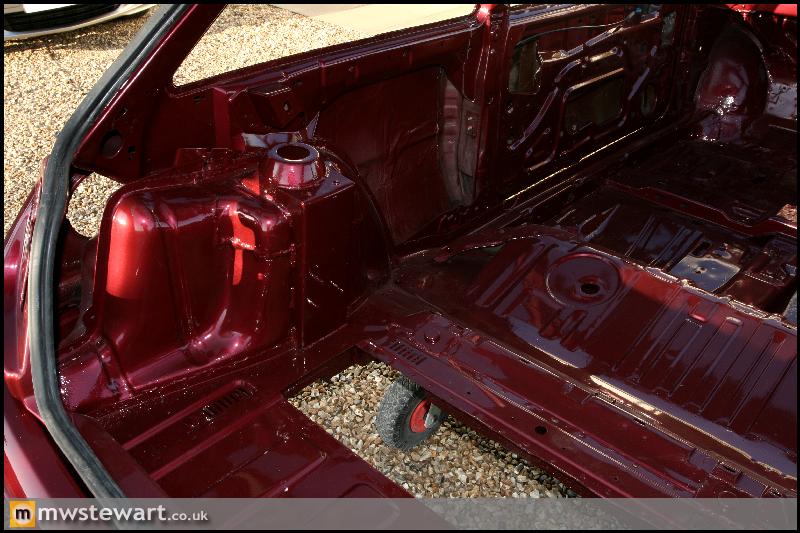
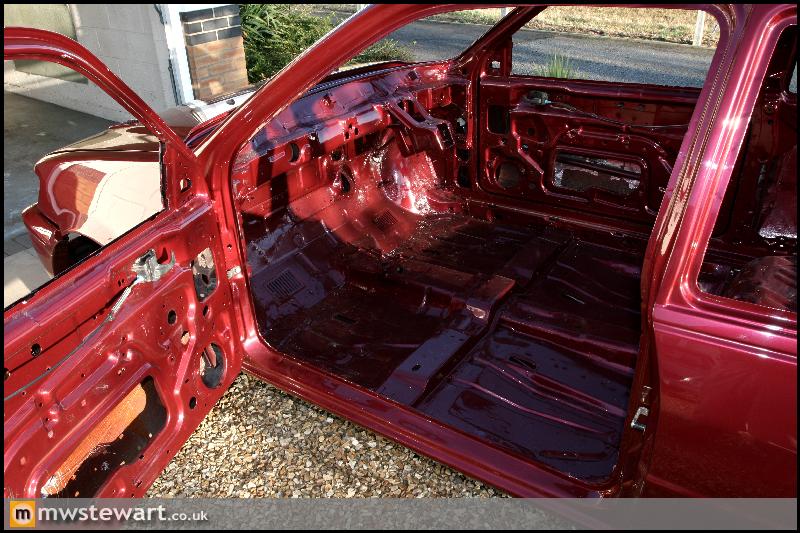
Here are some snaps now everything has another coat of Lacquer. The colour looks quite uninspiring here, but it looks anything but in the flesh:
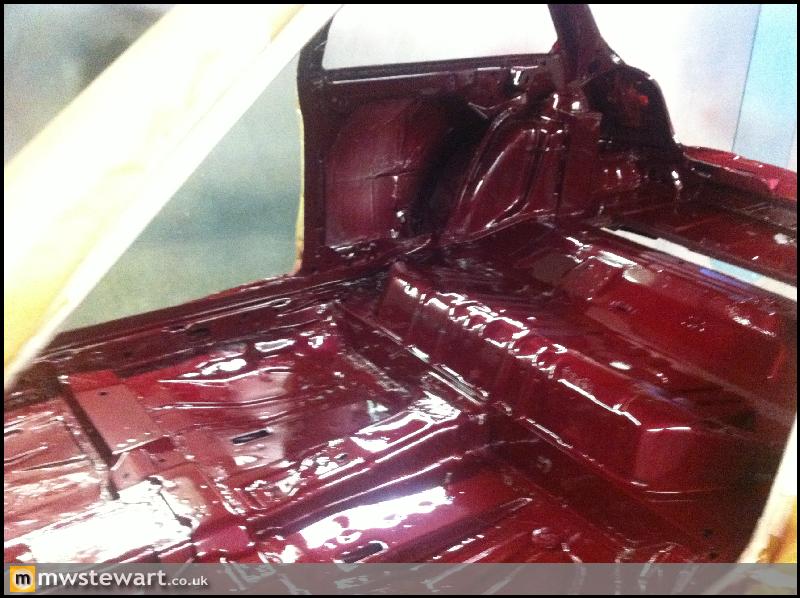
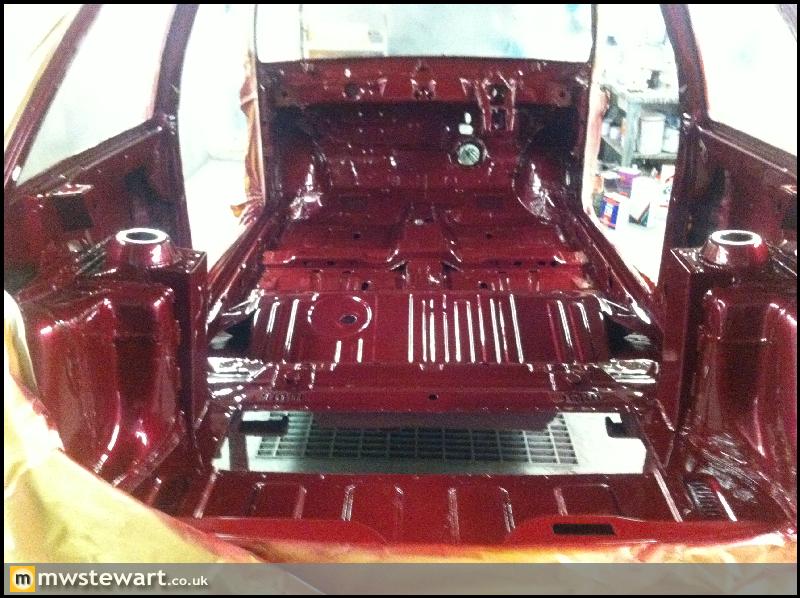
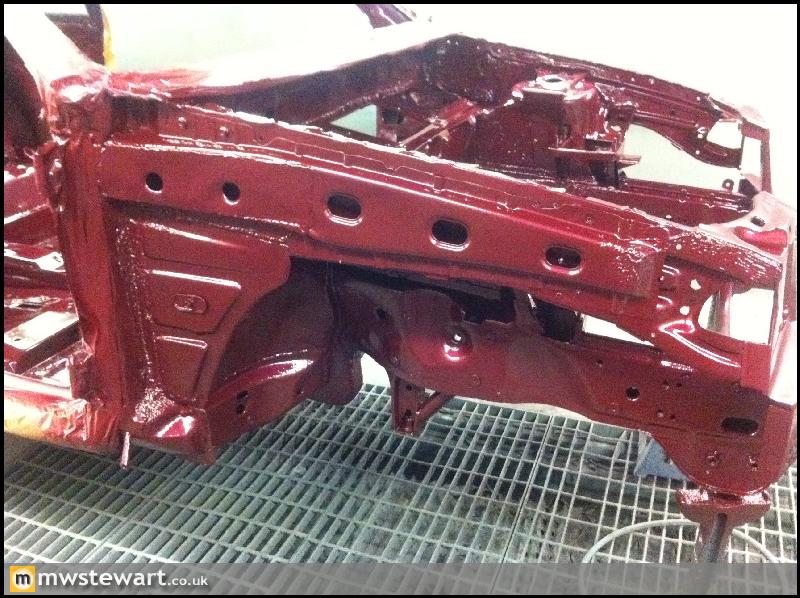

I'm over the moon with what they have done, and can't wait to pick it up next week. I will take some photos outside with my DSLR
I've had an additional hole cut in each door so that I can use a Lexus IS200 door wiring loom boot in addition to the Ford boot/loom. This will allow me to run some audiophile grade speaker wire in isolation from the Ford power wires.
Here are some snaps now everything has another coat of Lacquer. The colour looks quite uninspiring here, but it looks anything but in the flesh:
I'm over the moon with what they have done, and can't wait to pick it up next week. I will take some photos outside with my DSLR
Thank you.
My new Evo X Brake Servo and Master Cylinder arrived this morning. The MC is a Bosch 26mm bore unit and will comfortably manage the front and rear AP calipers that I've chosen.
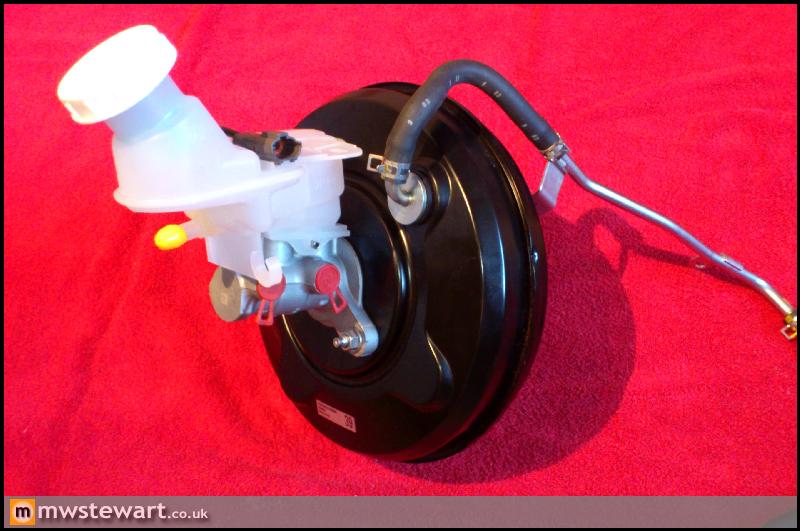
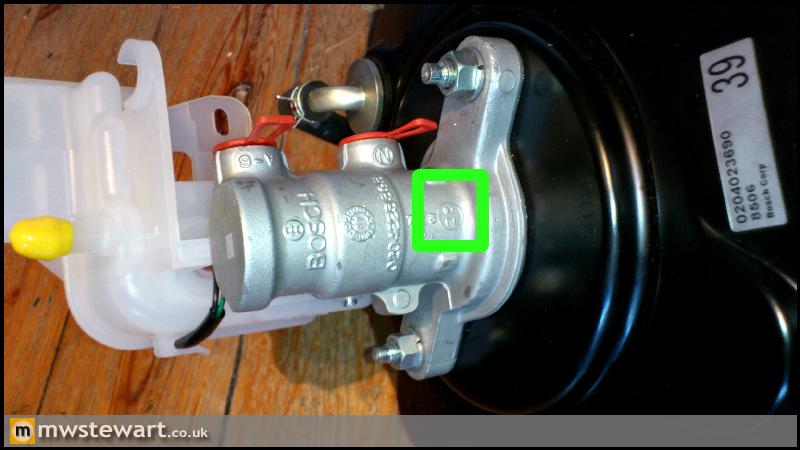
I may have to modify the Fiesta mounting brackets slightly to give more clearance to the Focus Gearbox, but aside from that it should be a straight-forward modification.
My new Evo X Brake Servo and Master Cylinder arrived this morning. The MC is a Bosch 26mm bore unit and will comfortably manage the front and rear AP calipers that I've chosen.
I may have to modify the Fiesta mounting brackets slightly to give more clearance to the Focus Gearbox, but aside from that it should be a straight-forward modification.


sc4589 said:
Really looking forward to seeing how this is going to turn out. Amazing job so far. You've definitely built it better than Ford ever intended!
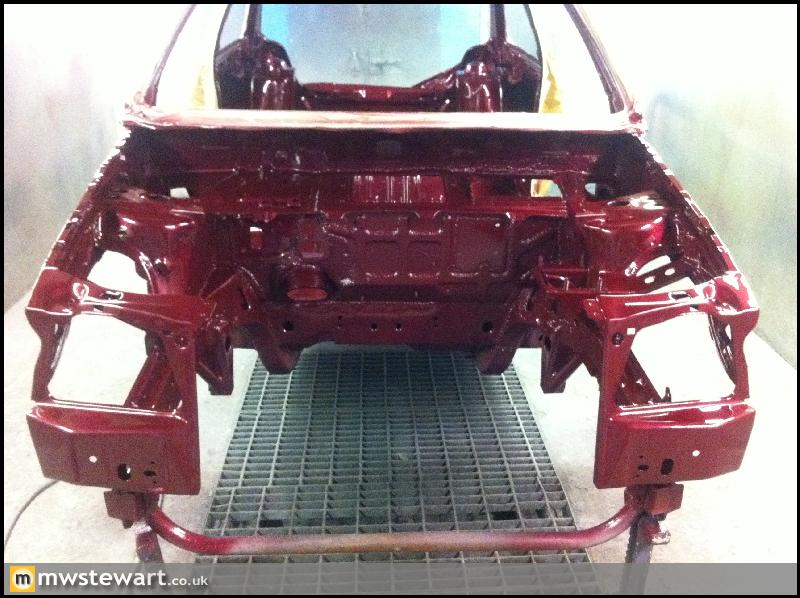
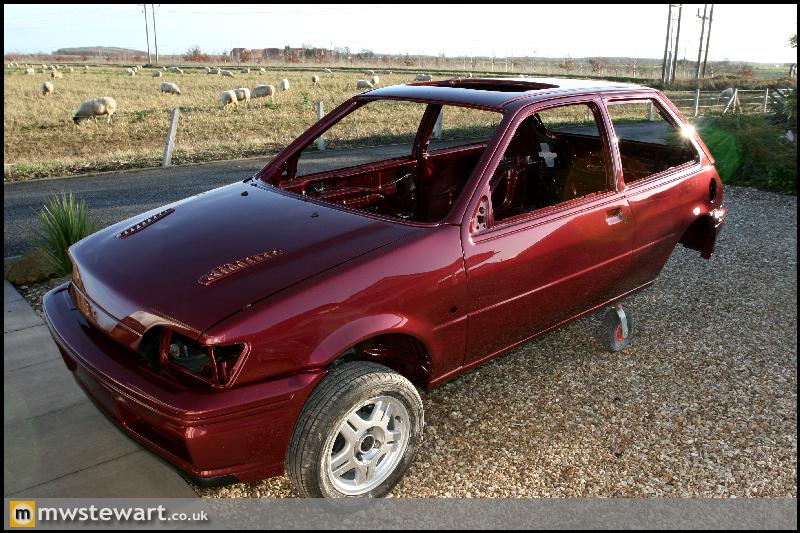
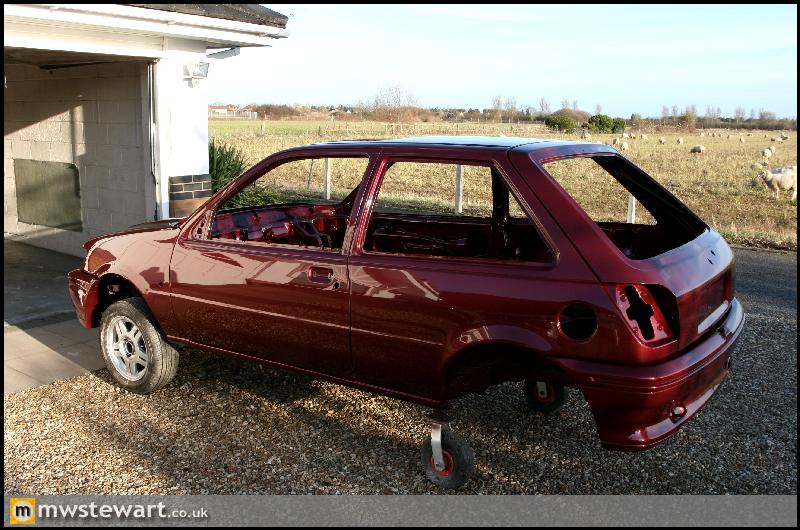
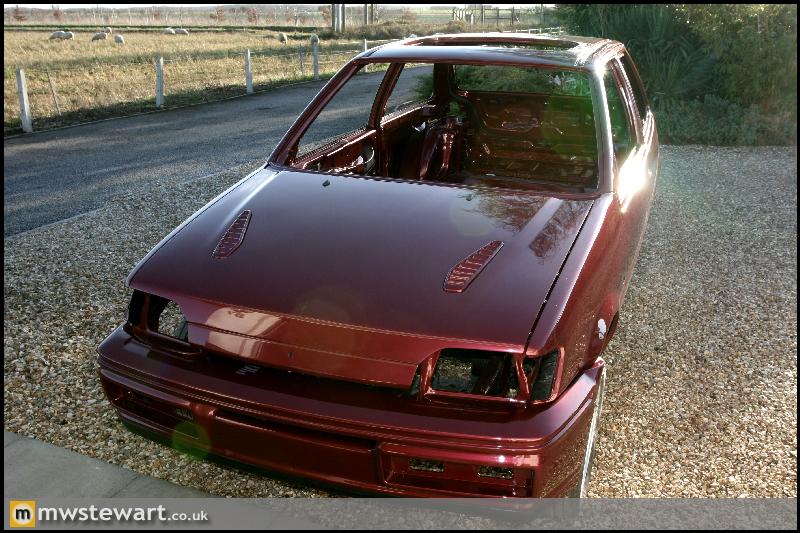
Cheers!It's getting there now:

I will arrange for it to be transported home this week and can look forward to fitting the mountain of new and uprated parts to fit over Christmas.
I had a day off work yesterday and did what any person undertaking a restoration would do: drive a 600 mile round trip to collect more parts 
The first stop was Wolverhampton to visit Aldridge Trimming. It took me a few weeks of investigation and research to find a company I trusted to re trim the interior, and during those weeks I emailed and spoke to trimmers who catered for various markets from the custom market (mainly VW), to more general trimmers who catered for boats and cars, through to those who catered specifically for the classic car market. There are obviously exceptions to the rule but I found that the trimmers with the greatest heritage and focus on quality of workmanship and materials were in the Classic car market. I think a lot of the modified car scene is about the first impression rather than an understanding of the materials and techniques, which is a shame as I wonder what will happen to some of the craftsmanship as time goes on. Aldridge are a great British firm who were established in the 1930's and continue to have very good reputation in classic circles, in fact it turned out that they trimmed one of the Jaguar's in the body shop I used. Here’s their site: http://www.aldridge.co.uk/about_us/index.cfm?id=2
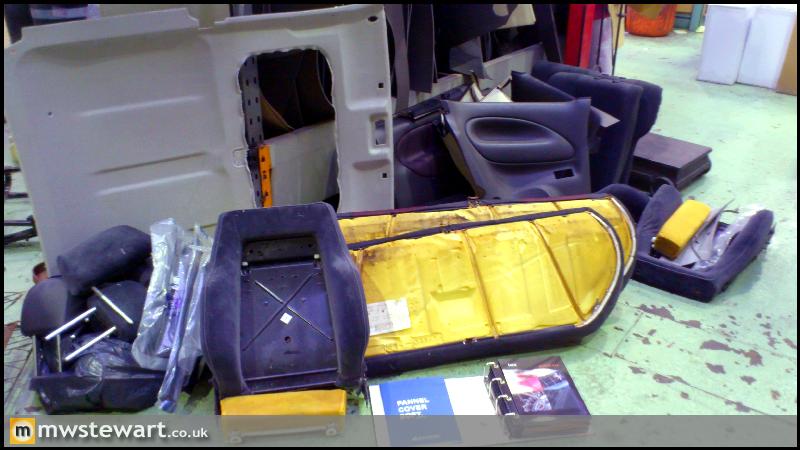
My Girlfriend also took a day off and came along to provide company and a second opinion on my colour choices, in fact it was actually her car that was the most suitable to carry the interior because its parcel shelf is removable. Unfortunately her car is small, so with two of us together with the complete interior of another car the seating position on the way there was, interesting, to say the least! Here's the complete interior:
The first decision was headlining colour. The existing headlining is a very light grey and the A,B & C pillars are dark grey, but for the re trim I’ve opted to have all coloured in a shade of Alcantara that matches the original dark grey plastic. To help here I used one of the new trim pieces I'd bought to find a good match and I settled on colour 9052:
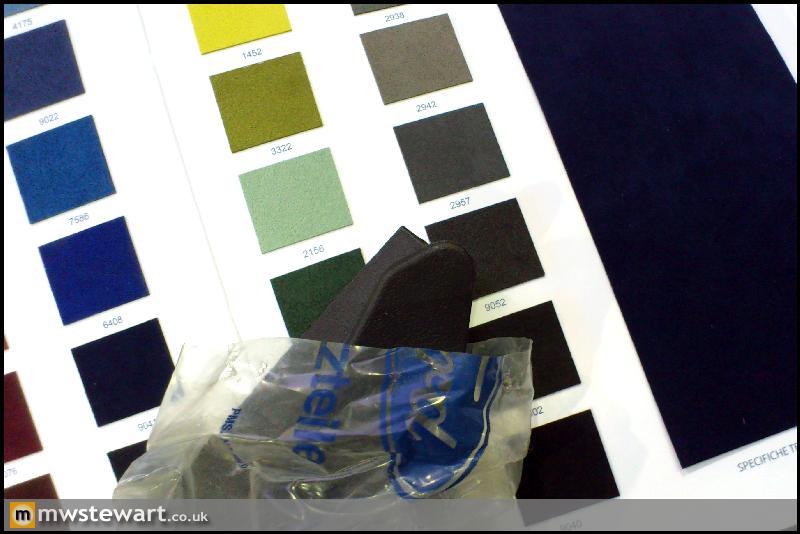
Next was the leather type and colour. Aldridge had a fantastic selection of hides including those which match the Bentley quality standard, and a range of colours which match OEM types in Ferrari, Bentley, Mercedes etc. I have decided on a Ferrari colour called 'Moderna' in the Premium Nappa leather. The hides alone are going to cost more than an average re trim but it will be worth it in the end.

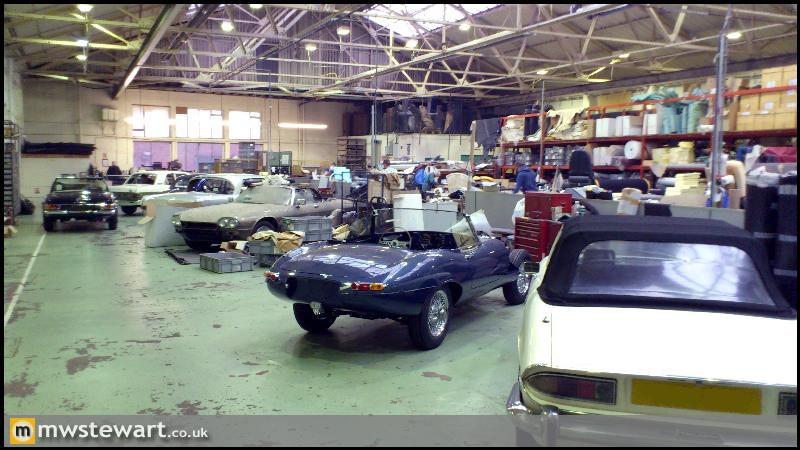
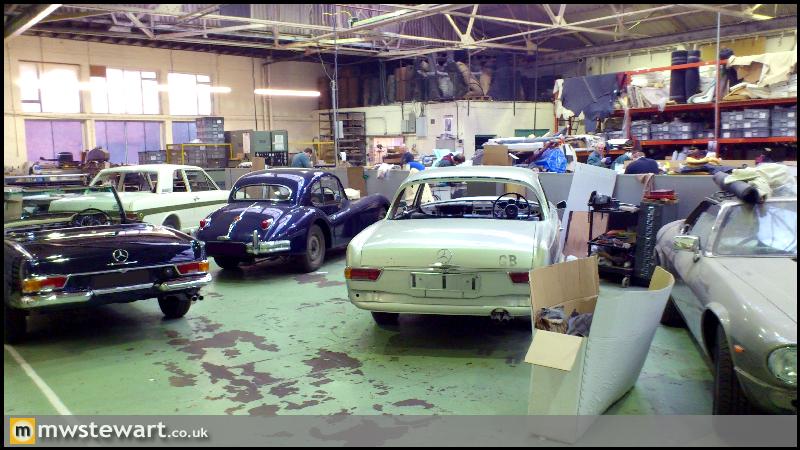
Here are some other customers' cars which are all a contrast to my Fiesta! When seeing these my Girlfriend laughed and said I really should focus on a classic of some sort, which is an opinion that both she and my Parents have had for a while now. I tend to agree and I'm looking in to restoring an E-Type V12 once the Fiesta is complete.
The other stops on the road trip were to various places to collect a complete set of brand new and genuine Ford glass for the car. I also called in at Ford to collect a box of new trim clips and fastenings for the entire car.
Speaking of glass, the car is now home and every panel looks like a pane of it. Incredible.
The first stop was Wolverhampton to visit Aldridge Trimming. It took me a few weeks of investigation and research to find a company I trusted to re trim the interior, and during those weeks I emailed and spoke to trimmers who catered for various markets from the custom market (mainly VW), to more general trimmers who catered for boats and cars, through to those who catered specifically for the classic car market. There are obviously exceptions to the rule but I found that the trimmers with the greatest heritage and focus on quality of workmanship and materials were in the Classic car market. I think a lot of the modified car scene is about the first impression rather than an understanding of the materials and techniques, which is a shame as I wonder what will happen to some of the craftsmanship as time goes on. Aldridge are a great British firm who were established in the 1930's and continue to have very good reputation in classic circles, in fact it turned out that they trimmed one of the Jaguar's in the body shop I used. Here’s their site: http://www.aldridge.co.uk/about_us/index.cfm?id=2
My Girlfriend also took a day off and came along to provide company and a second opinion on my colour choices, in fact it was actually her car that was the most suitable to carry the interior because its parcel shelf is removable. Unfortunately her car is small, so with two of us together with the complete interior of another car the seating position on the way there was, interesting, to say the least! Here's the complete interior:
The first decision was headlining colour. The existing headlining is a very light grey and the A,B & C pillars are dark grey, but for the re trim I’ve opted to have all coloured in a shade of Alcantara that matches the original dark grey plastic. To help here I used one of the new trim pieces I'd bought to find a good match and I settled on colour 9052:
Next was the leather type and colour. Aldridge had a fantastic selection of hides including those which match the Bentley quality standard, and a range of colours which match OEM types in Ferrari, Bentley, Mercedes etc. I have decided on a Ferrari colour called 'Moderna' in the Premium Nappa leather. The hides alone are going to cost more than an average re trim but it will be worth it in the end.
Here are some other customers' cars which are all a contrast to my Fiesta! When seeing these my Girlfriend laughed and said I really should focus on a classic of some sort, which is an opinion that both she and my Parents have had for a while now. I tend to agree and I'm looking in to restoring an E-Type V12 once the Fiesta is complete.
The other stops on the road trip were to various places to collect a complete set of brand new and genuine Ford glass for the car. I also called in at Ford to collect a box of new trim clips and fastenings for the entire car.
Speaking of glass, the car is now home and every panel looks like a pane of it. Incredible.
Some photos of the car before the build up starts tomorrow.

In preparation for the build I'd purchased two sets of new electric mirrors: one for my car, a Mk3.5 Fiesta, and the other for a later Mk4 Fiesta. The later Mk4 mirrors were identically sized for driver and passenger whereas, curiously, the drivers side of the earlier Mk3.5 mirrors was smaller which is of course very odd for a RHD market. Despite the size and base plate changes between years the internal architecture of the mirrors actually remained largely identical which meant that I could cannibalise both sets in order to make an equally sized pair to suit the earlier Mk3.5.
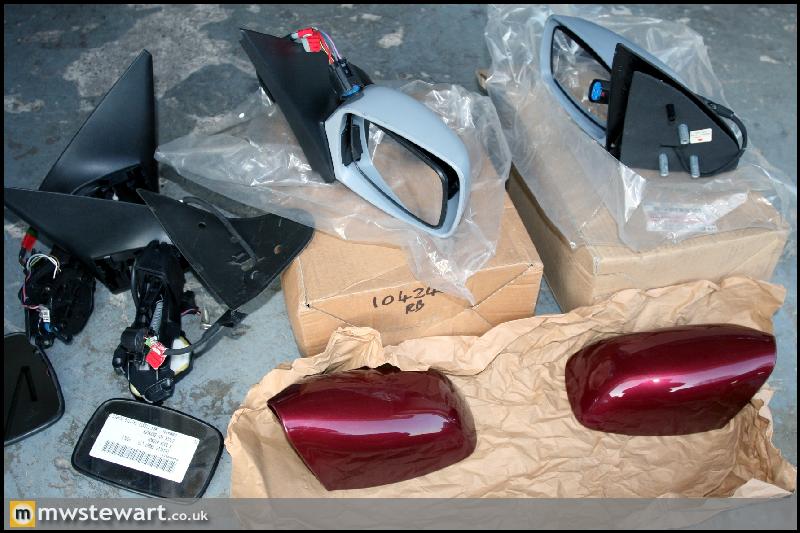
In preparation for the build I'd purchased two sets of new electric mirrors: one for my car, a Mk3.5 Fiesta, and the other for a later Mk4 Fiesta. The later Mk4 mirrors were identically sized for driver and passenger whereas, curiously, the drivers side of the earlier Mk3.5 mirrors was smaller which is of course very odd for a RHD market. Despite the size and base plate changes between years the internal architecture of the mirrors actually remained largely identical which meant that I could cannibalise both sets in order to make an equally sized pair to suit the earlier Mk3.5.
Thanks for all the kind words and they certainly keep up my enthusiasm. I appreciate the Fiesta isn't everyone's cup of tea but it's definitely been a great platform for me to learn from. I also think there is potential in this chassis to make something that is very good fun to drive. I have already said further up the thread that I'm looking in to an E-Type restoration for whenever the Fiesta is complete but I wouldn't ever sell the Fiesta
Well, today I started bolting parts back on the car which is definitely an enjoyable stage of the project. Bare with me for some of these updates as they may be fairly mundane but I want to make sure I document everything for future reference.
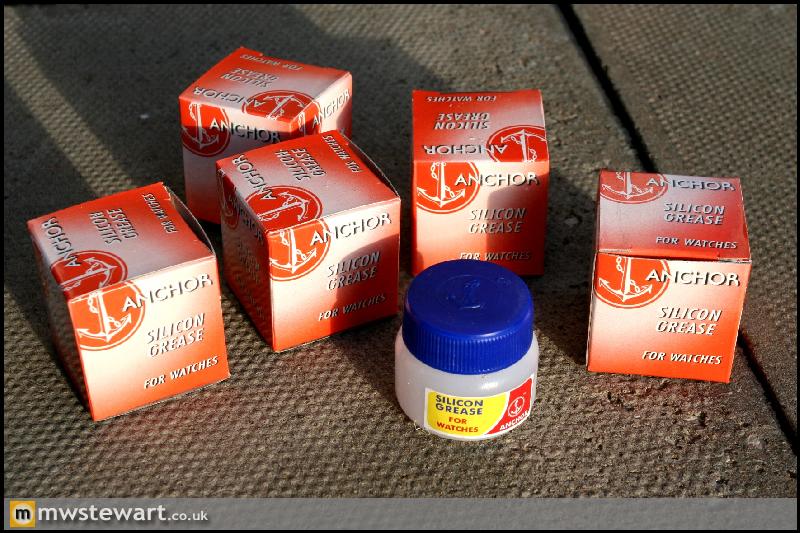
I've purchased a few pots of Silicone grease to carefully apply to any edges of the shell where an an interference fit clip is located, or any other area where trim or other items are likely to come into contact with painted metal.The Silicone grease is completely harmless for plastic and rubbe, in fact it's actually beneficial because it helps oil based products retain their oils. The reason I'm using it though is to prevent rust from either installing fastenings or the ongoing use of the car. I found a few markets to which the grease is sold: fishing, radio controlled cars or watch making. The latter has the cheapest prices by far.
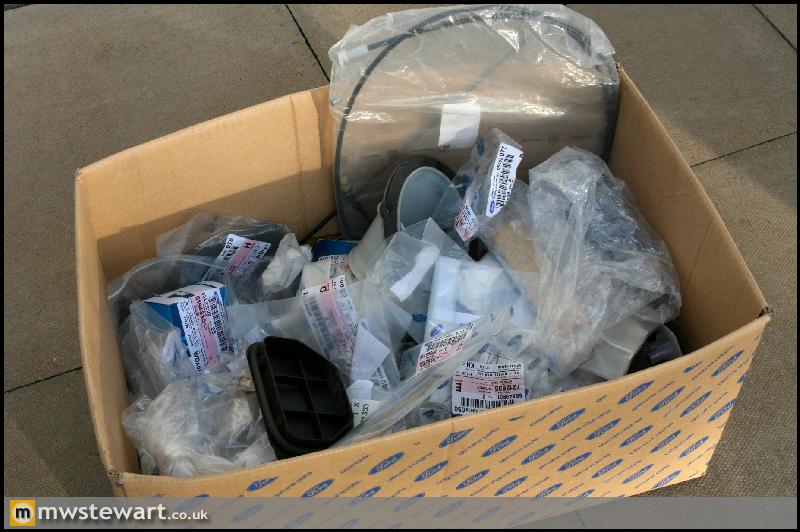
I have a big box of 'misc' which contains every single fastening, screw, clip etc. that is required for the entire car. I ordered two of most things in case I ever need to repair things in the future, as unlike other manufacturers Ford tend to discontinue parts on an ongoing basis.
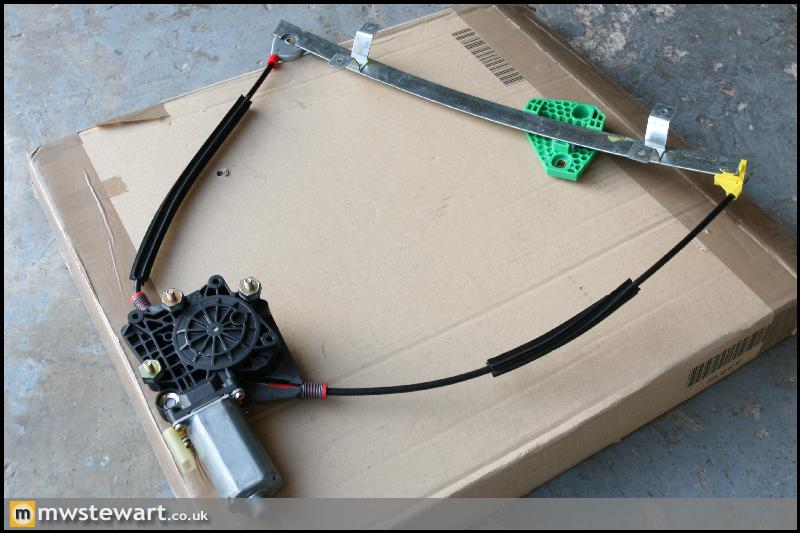
New electric window motors and regulators. These are a revised design which seem to make far more use of plastic than the original.
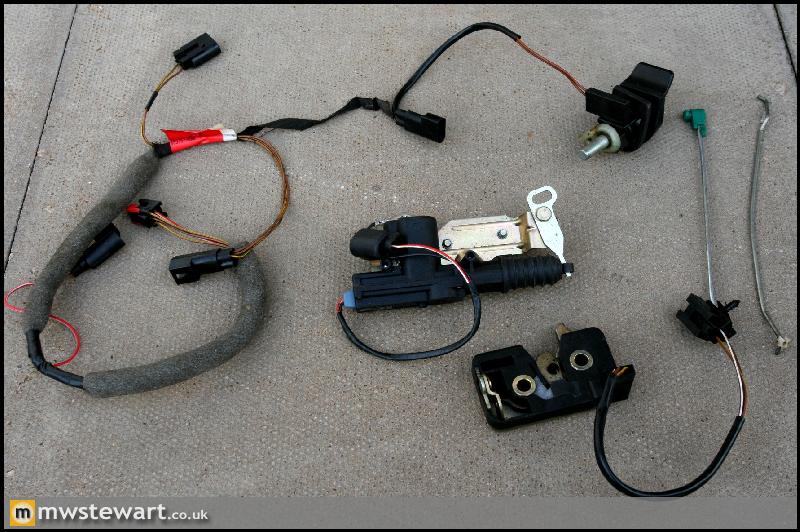
Ford alarm system wiring for the tailgate, including solenoid operated remote tailgate release.
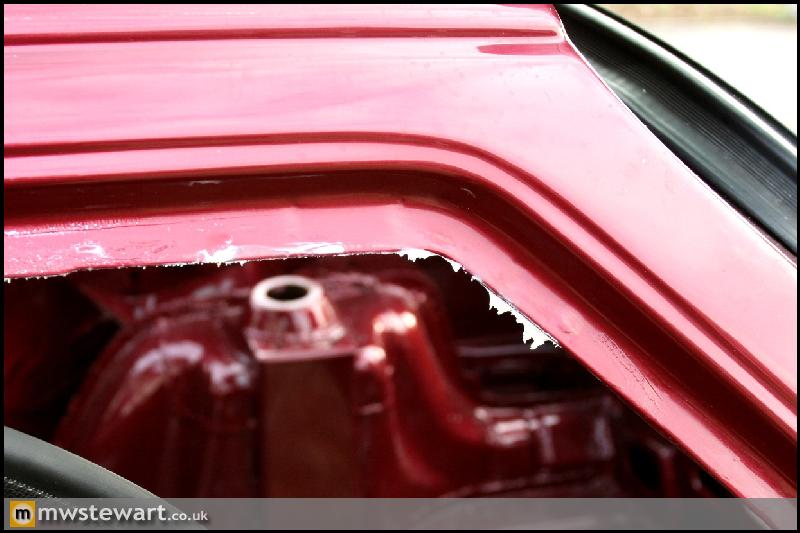
I think I already mentioned that I have a complete set of new Ford glass for the car together with new glass and aperture seals. I managed to get the rear window in today using the string technique. The new seals look perfectly black but as soon as you start to work with them they release a load of waxy mould release agent everywhere, so I need to clean the car before I take some photos.

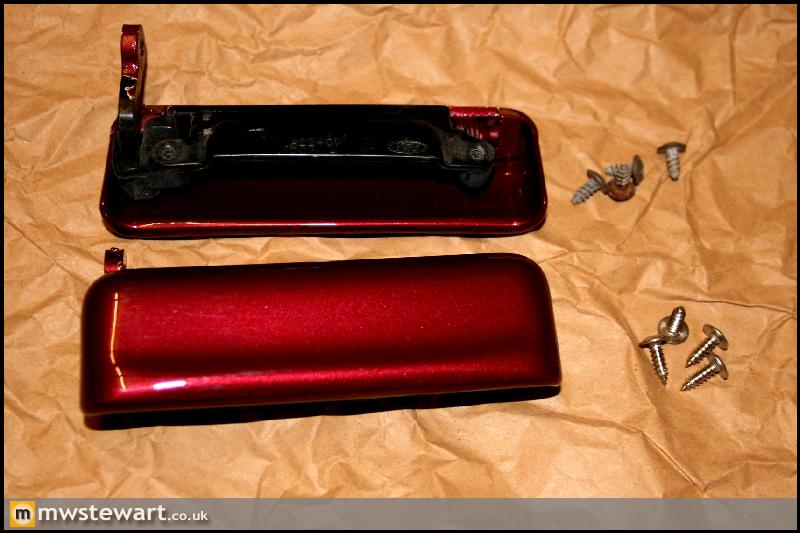
I fitted the door handles using stainless steel versions of the original screws. I'm replacing most bolts on the car with stainless versions; there is a fastening firm close by who happen to manufacture copies of most things in stainless, which is very handy.
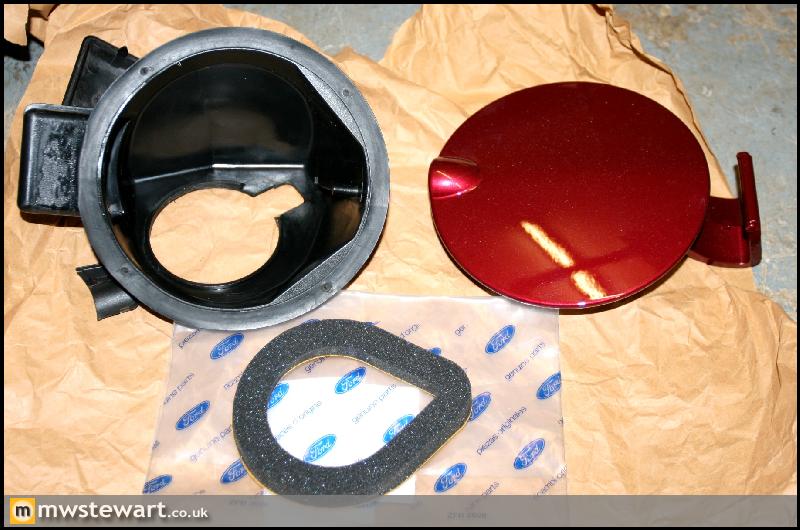
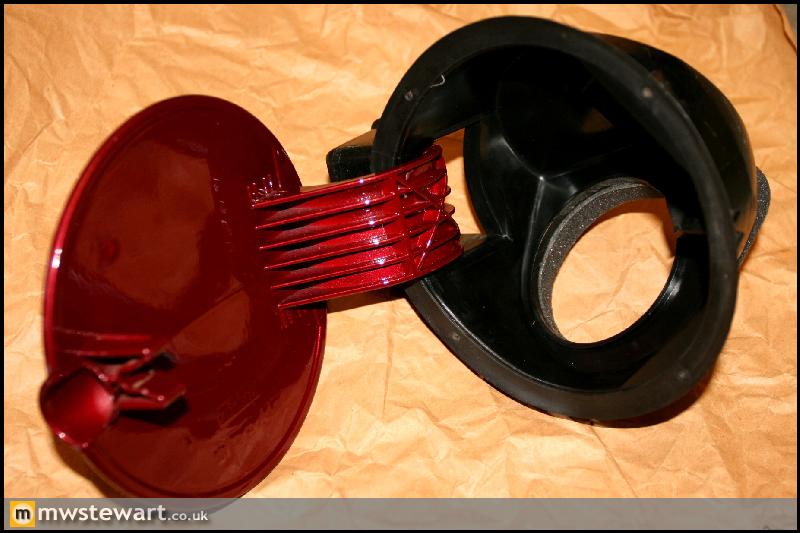
Fuel filler assembly rebuilt with new seals. The body shop painted the flap on both sides in fact they did everything including the front wings without prompting, which was a refreshing change!
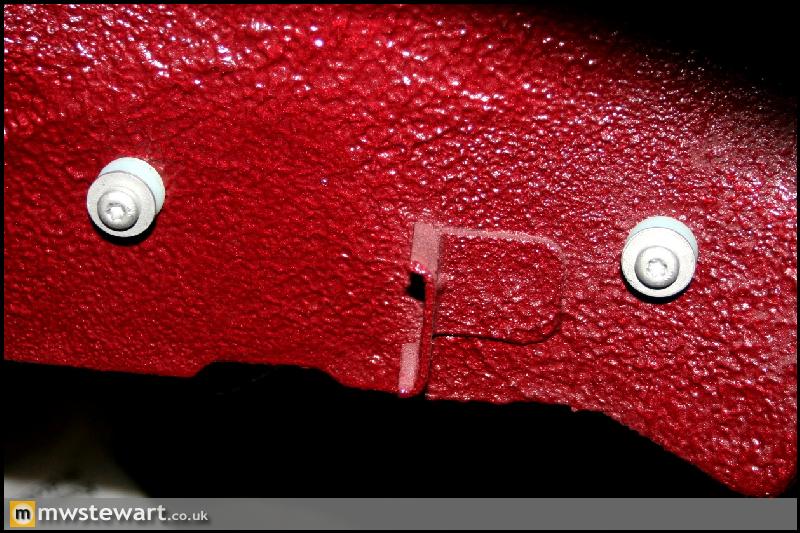
A couple of shots which show the bolt on front wing conversion. The first shot shows the slam panel without the removable section I made, I added black anti abrasion tape on the ledges.
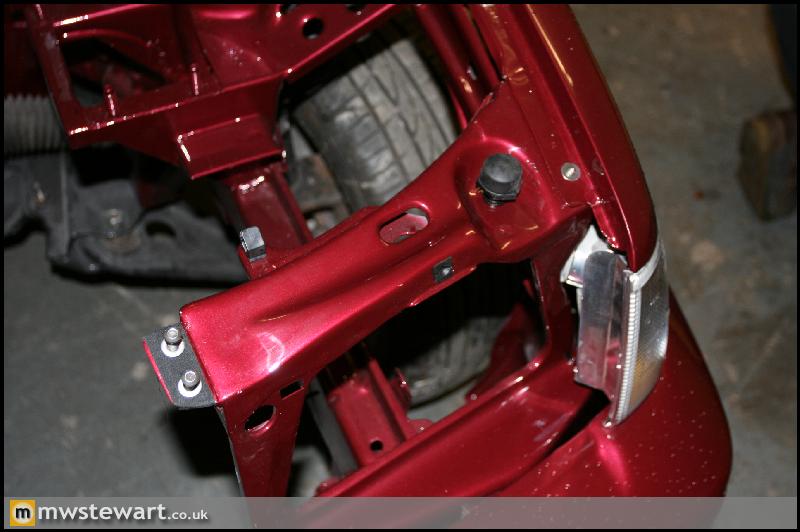
Here's the removable section fitted with stainless button head bolts.

Well, today I started bolting parts back on the car which is definitely an enjoyable stage of the project. Bare with me for some of these updates as they may be fairly mundane but I want to make sure I document everything for future reference.
I've purchased a few pots of Silicone grease to carefully apply to any edges of the shell where an an interference fit clip is located, or any other area where trim or other items are likely to come into contact with painted metal.The Silicone grease is completely harmless for plastic and rubbe, in fact it's actually beneficial because it helps oil based products retain their oils. The reason I'm using it though is to prevent rust from either installing fastenings or the ongoing use of the car. I found a few markets to which the grease is sold: fishing, radio controlled cars or watch making. The latter has the cheapest prices by far.
I have a big box of 'misc' which contains every single fastening, screw, clip etc. that is required for the entire car. I ordered two of most things in case I ever need to repair things in the future, as unlike other manufacturers Ford tend to discontinue parts on an ongoing basis.
New electric window motors and regulators. These are a revised design which seem to make far more use of plastic than the original.
Ford alarm system wiring for the tailgate, including solenoid operated remote tailgate release.
I think I already mentioned that I have a complete set of new Ford glass for the car together with new glass and aperture seals. I managed to get the rear window in today using the string technique. The new seals look perfectly black but as soon as you start to work with them they release a load of waxy mould release agent everywhere, so I need to clean the car before I take some photos.
I fitted the door handles using stainless steel versions of the original screws. I'm replacing most bolts on the car with stainless versions; there is a fastening firm close by who happen to manufacture copies of most things in stainless, which is very handy.
Fuel filler assembly rebuilt with new seals. The body shop painted the flap on both sides in fact they did everything including the front wings without prompting, which was a refreshing change!
A couple of shots which show the bolt on front wing conversion. The first shot shows the slam panel without the removable section I made, I added black anti abrasion tape on the ledges.
Here's the removable section fitted with stainless button head bolts.
New rear quarter window seals. I've had a few good second hand sets but thanks to sunlight they had all shrunk slightly and no longer fir the corners well, while in contrast the new seals are more supple and fit the aperture perfectly. I will keep the car garaged to prevent this kind of wear and tear in the future.
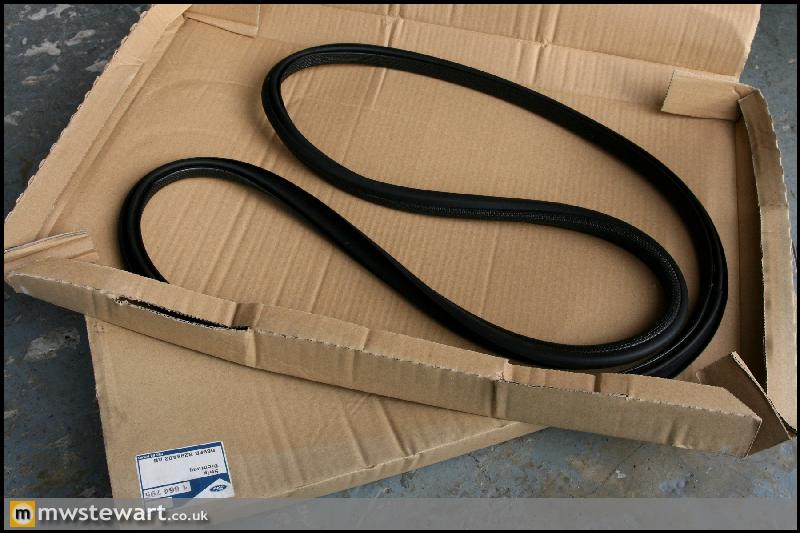
The new seals are lined with a non setting bedding sealant, which is a nice touch.
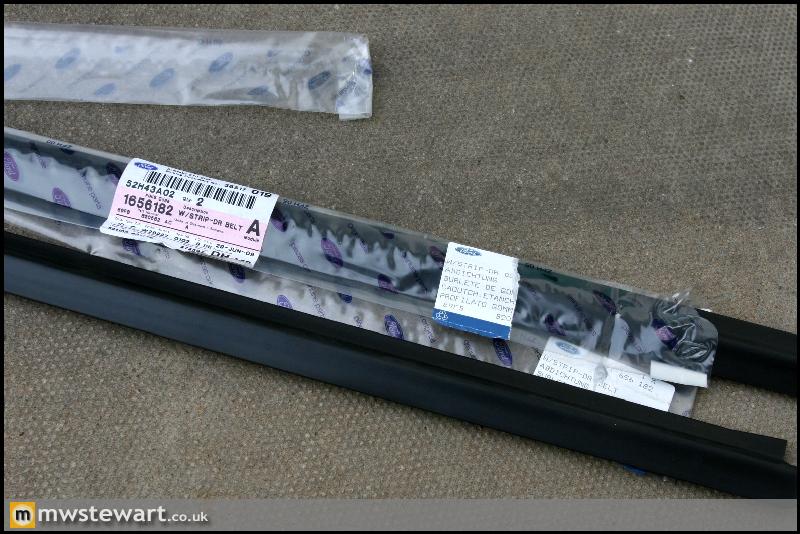
New weather strips for the doors. I believe these are sometimes referred to as 'glass scrapers'. They are basically pre-made mouldings that are manufactured in massive lengths then cut down to size with a guillotine. Ford don't put any surface protection on the cut edges so the internal aluminium strengthener eventually corrodes. I've painted the ends and greased them to prevent that.
New Mk4/5 Fiesta Aerial and base.

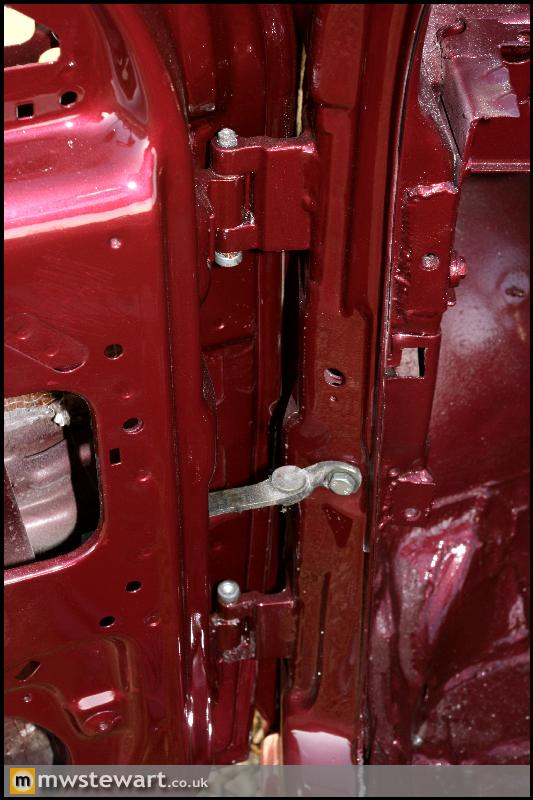
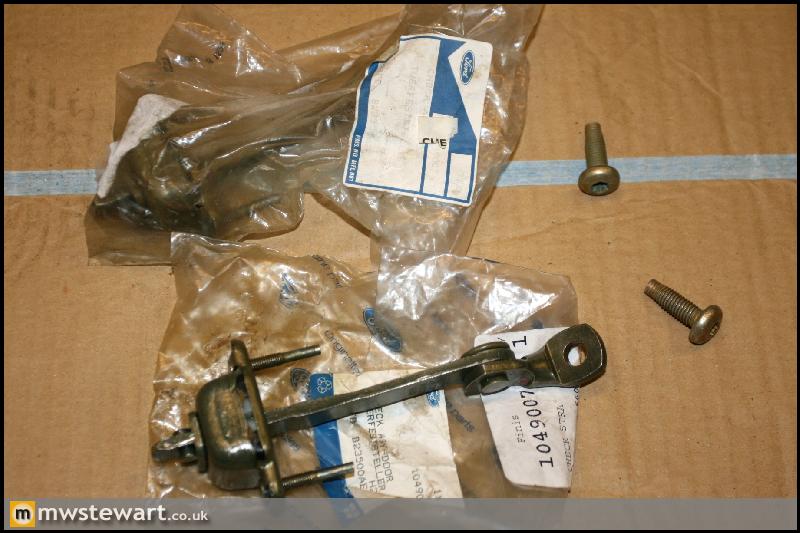
New door check straps and securing bolts.
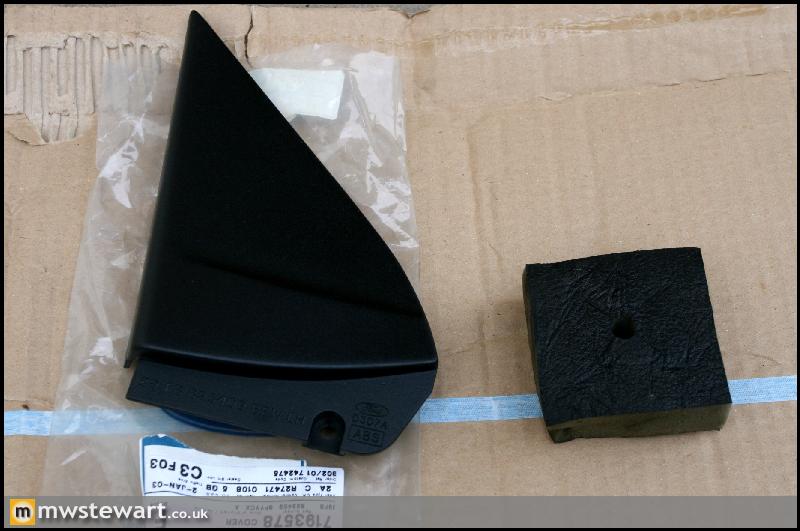
New noise insulators/dust seal for the hole in the door where the mirror wiring passes through, and new interior trim piece to suit electric mirrors i.e. without a manual adjustment knob
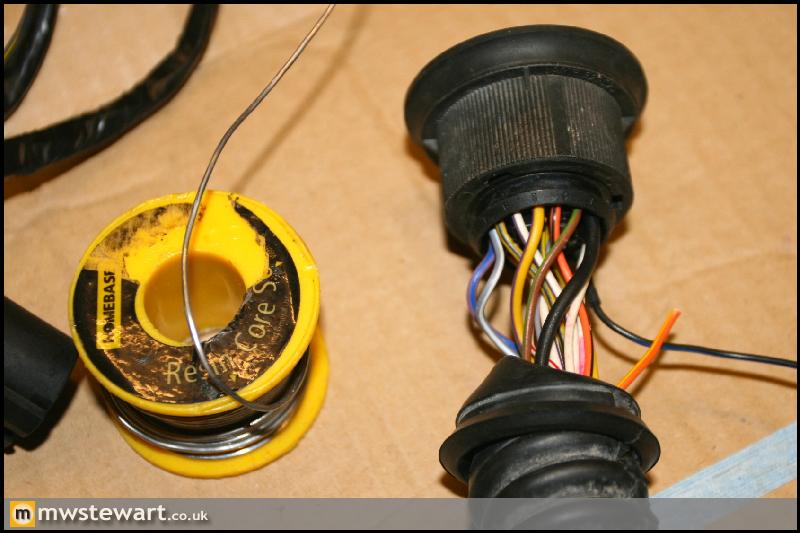
I made a last minute modification to the door looms by adding an additional pin to the multi plug in order to run some puddle lights on the lower edge of the door cards. These will be operated by a feed from the General Electric Module (GEM) and will operate when the car is unlocked, or a door is open etc.
Check straps, mirrors etc., and door looms fitted. I also fitted new door ajar sensors with stainless screws.
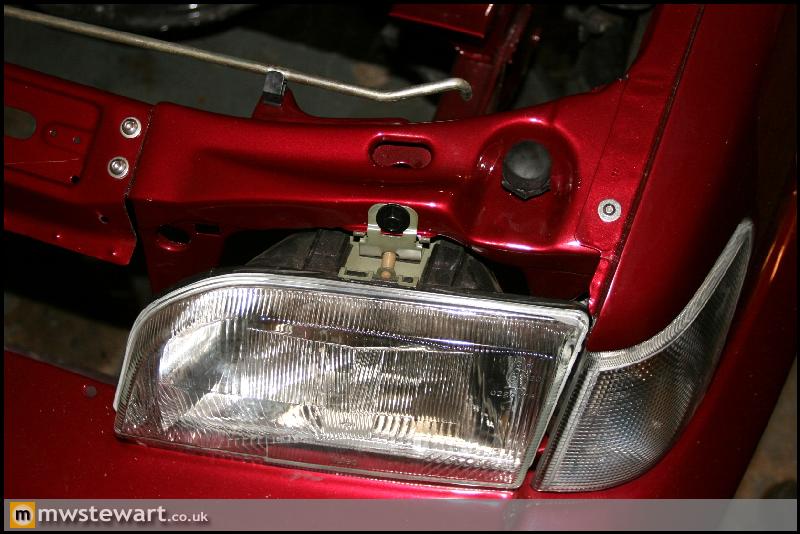
New bonnet stay, bonnet stay clip, bonnet bump stops/adjusters, indicators and headlamps. The headlamp in this photo is an original Ford unit made by Valeo and as expected it fits perfectly. The O/S headlamp is made by Lucas and just doesn't fit parallel to the indicator, which is a big bug bear of mine on the Mk3 Fiesta as it is so easy to make a straight car look like its been badly put together. I will order a Valeo unit to match the N/S.
New captive fittings and screws for the rear wheel arch splash guards.
The next task was to start on the sound deadening work so that I can build up the rest of the doors, the tailgate, and add components to the bulkhead area. I'm using a mixture of materials for sound deadening:
- 4mm Butyl based product for areas that are likely transmission points for NVH
- 2mm Butyl based product for general panel vibration dampening
- 1.5mm Butyl based product for reducing vibrations on trim
- 10mm noise suppressant material for panels
- 3mm noise suppressant material for lining trim pieces
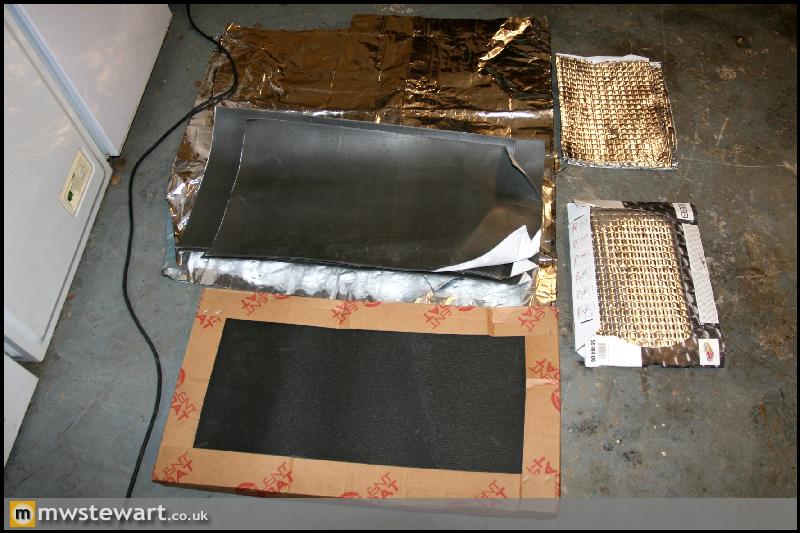
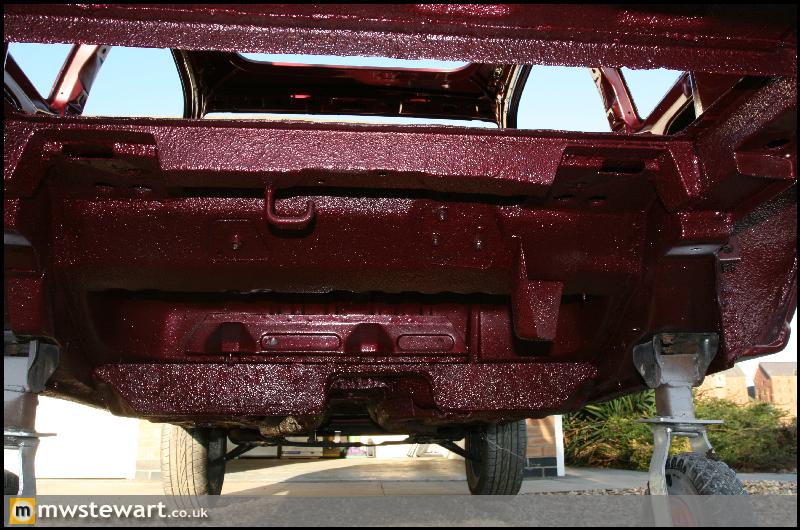
I keep this project in one of my parents garages and today my Dad very kindly helped me by starting on the vibration dampening work. First in the tailgate:
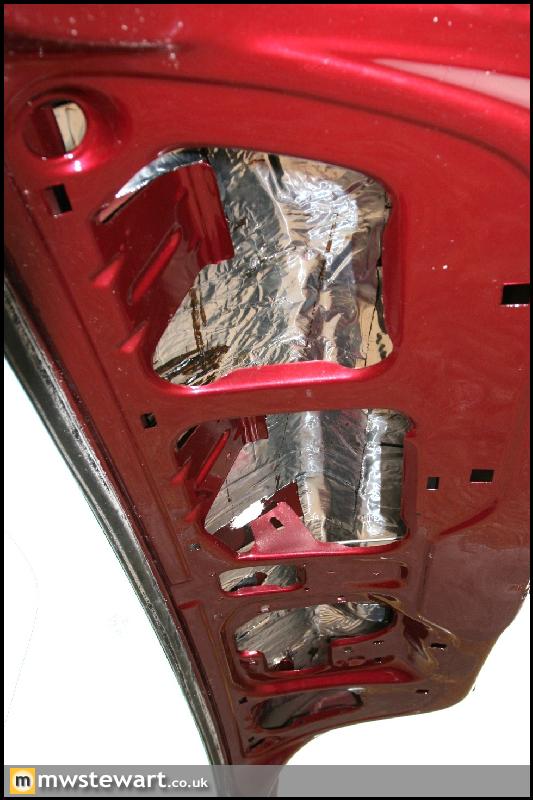
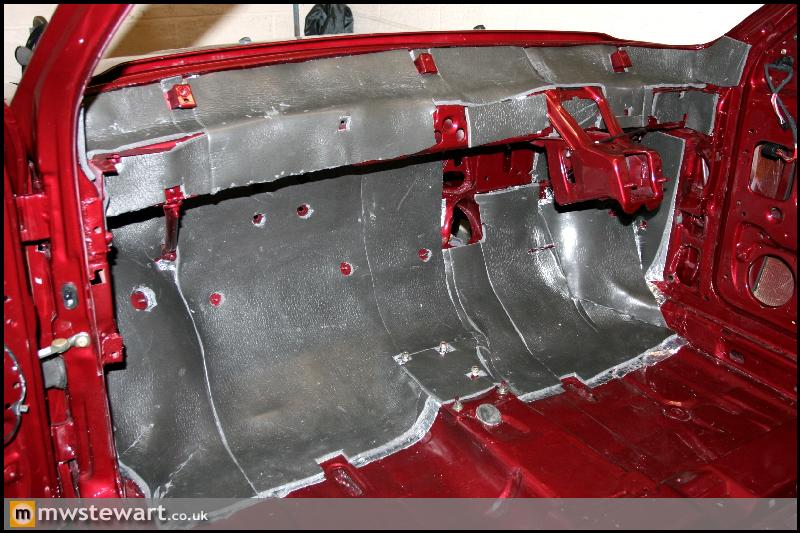
And then he did another fantastic job this time on the bulkhead using the 4mm Butyl material. Note holes cut out for fastenings etc. Thanks Dad!:
The new seals are lined with a non setting bedding sealant, which is a nice touch.
New weather strips for the doors. I believe these are sometimes referred to as 'glass scrapers'. They are basically pre-made mouldings that are manufactured in massive lengths then cut down to size with a guillotine. Ford don't put any surface protection on the cut edges so the internal aluminium strengthener eventually corrodes. I've painted the ends and greased them to prevent that.
New Mk4/5 Fiesta Aerial and base.
New door check straps and securing bolts.
New noise insulators/dust seal for the hole in the door where the mirror wiring passes through, and new interior trim piece to suit electric mirrors i.e. without a manual adjustment knob
I made a last minute modification to the door looms by adding an additional pin to the multi plug in order to run some puddle lights on the lower edge of the door cards. These will be operated by a feed from the General Electric Module (GEM) and will operate when the car is unlocked, or a door is open etc.
Check straps, mirrors etc., and door looms fitted. I also fitted new door ajar sensors with stainless screws.
New bonnet stay, bonnet stay clip, bonnet bump stops/adjusters, indicators and headlamps. The headlamp in this photo is an original Ford unit made by Valeo and as expected it fits perfectly. The O/S headlamp is made by Lucas and just doesn't fit parallel to the indicator, which is a big bug bear of mine on the Mk3 Fiesta as it is so easy to make a straight car look like its been badly put together. I will order a Valeo unit to match the N/S.
New captive fittings and screws for the rear wheel arch splash guards.
The next task was to start on the sound deadening work so that I can build up the rest of the doors, the tailgate, and add components to the bulkhead area. I'm using a mixture of materials for sound deadening:
- 4mm Butyl based product for areas that are likely transmission points for NVH
- 2mm Butyl based product for general panel vibration dampening
- 1.5mm Butyl based product for reducing vibrations on trim
- 10mm noise suppressant material for panels
- 3mm noise suppressant material for lining trim pieces
I keep this project in one of my parents garages and today my Dad very kindly helped me by starting on the vibration dampening work. First in the tailgate:
And then he did another fantastic job this time on the bulkhead using the 4mm Butyl material. Note holes cut out for fastenings etc. Thanks Dad!:
Thank you!
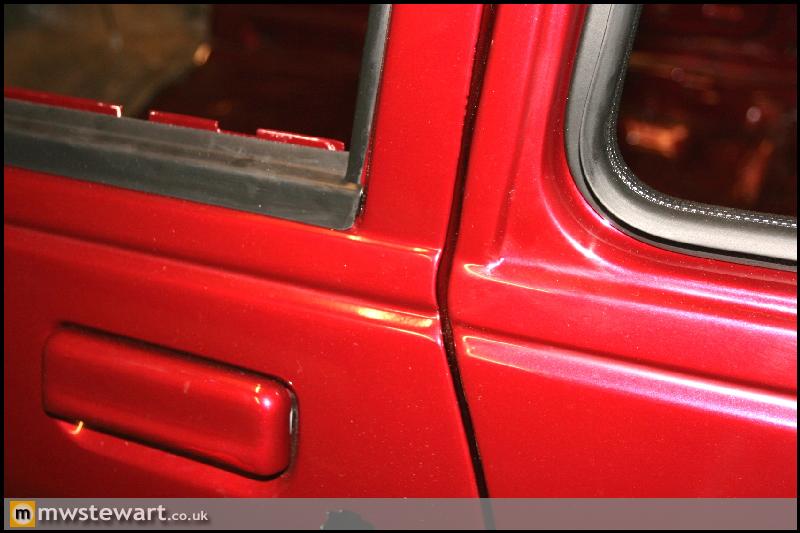
Door handles and seals etc. fitted.
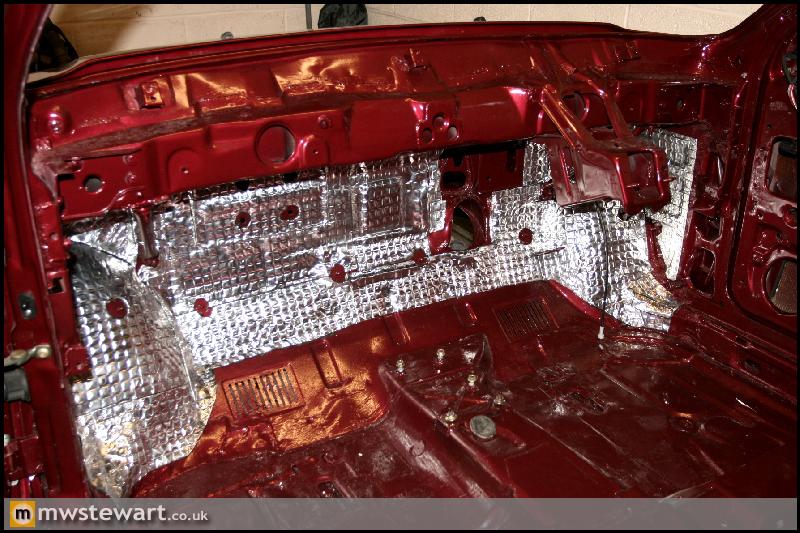
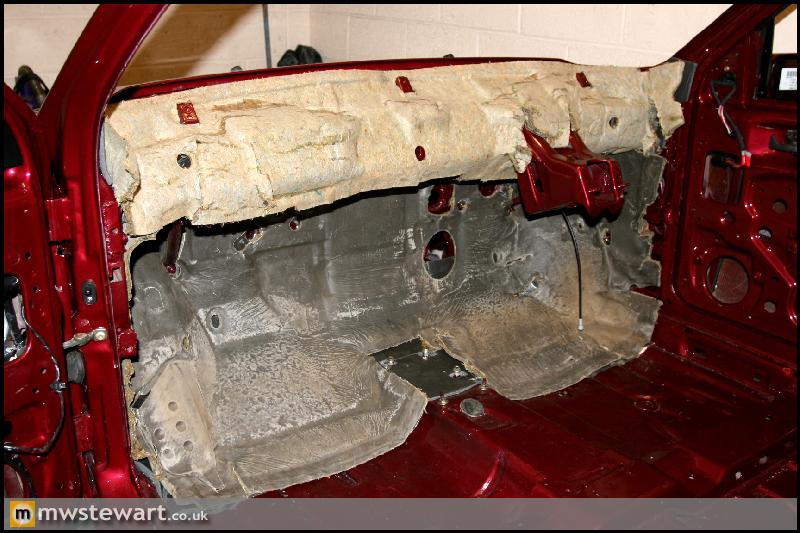
My Dad finished the rest of the Bulkhead with 2mm Butyl vibration damping material.
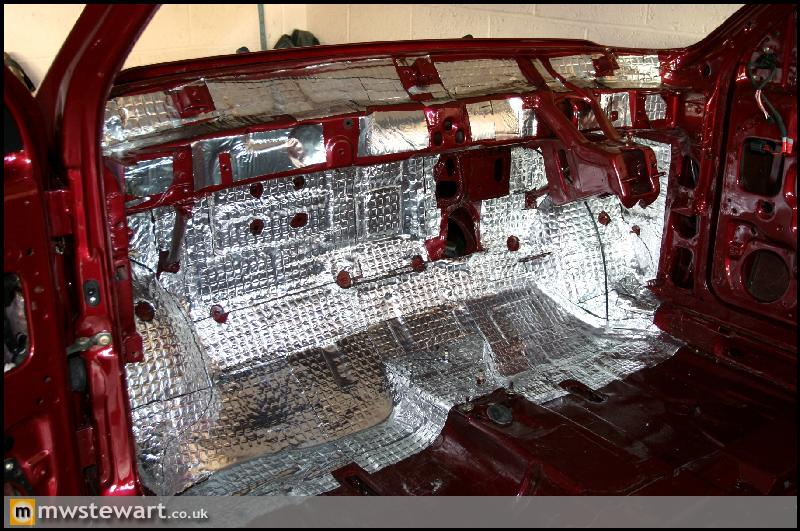
I applied 10mm noise absorption material over the top of that.
Finally the standard Ford sound deadening mat over the top.
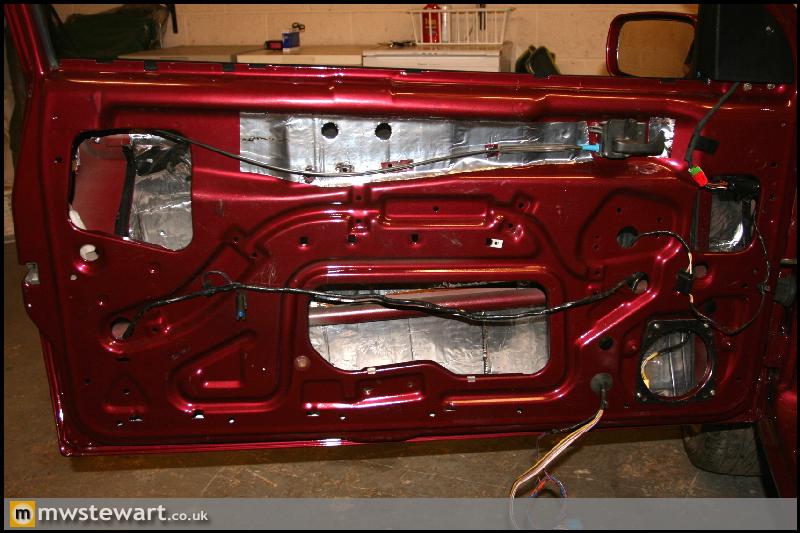
My Dad also put another layer of Butyl in the doors, which has made an incredible difference to resonance in the metal skin.
Door handles and seals etc. fitted.
My Dad finished the rest of the Bulkhead with 2mm Butyl vibration damping material.
I applied 10mm noise absorption material over the top of that.
Finally the standard Ford sound deadening mat over the top.
My Dad also put another layer of Butyl in the doors, which has made an incredible difference to resonance in the metal skin.
Thanks chaps!
Max, I don't consider significant weight loss to be the best approach for my project, in fact I view this weight gain as an advantage. Weight is relative and in car terms the Mk3 Fiesta is a light car to begin with, especially by modern standards, so when power starts to go beyond around 250-270bhp (flywheel) the benefits of weight loss on an already light car can easily turn to disadvantages.
Max, I don't consider significant weight loss to be the best approach for my project, in fact I view this weight gain as an advantage. Weight is relative and in car terms the Mk3 Fiesta is a light car to begin with, especially by modern standards, so when power starts to go beyond around 250-270bhp (flywheel) the benefits of weight loss on an already light car can easily turn to disadvantages.
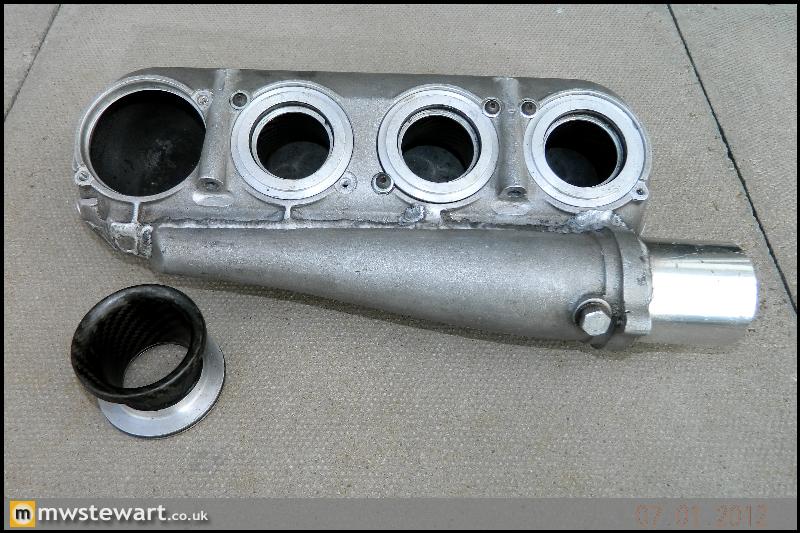
My WRC inlet manifold arrived. I'm very pleased with it overall but nevertheless there is room for a few improvements
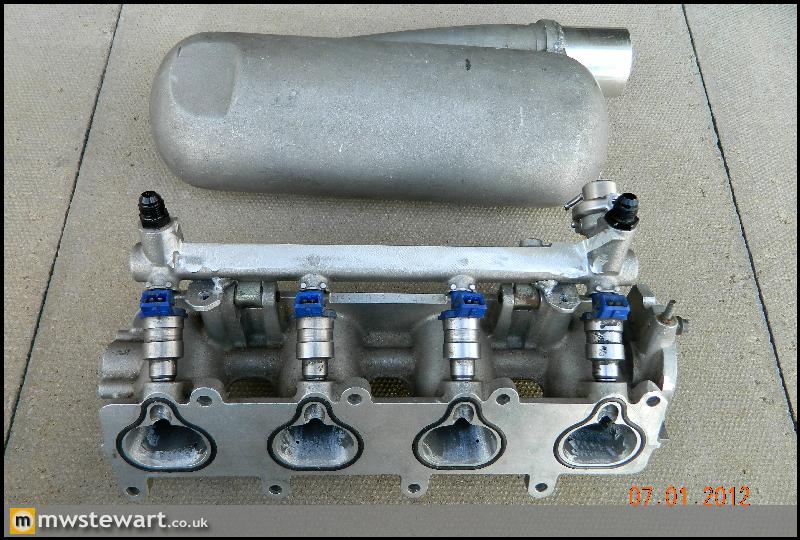
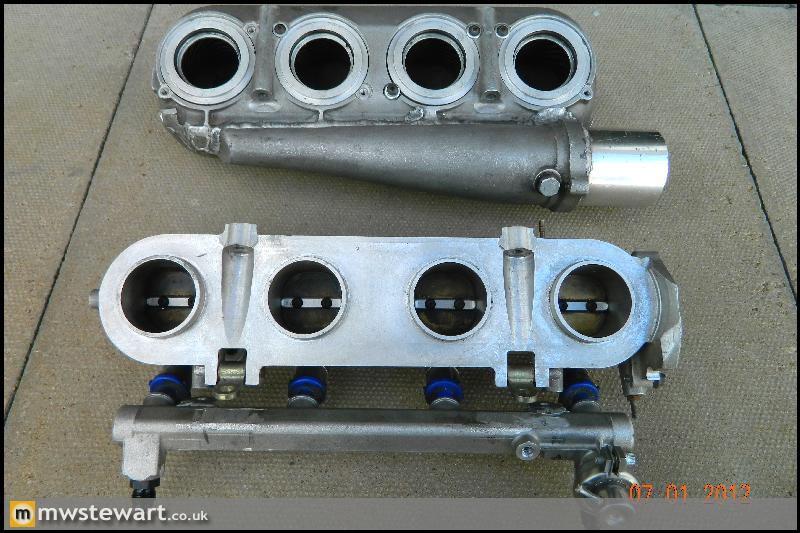
The feed plenum has been modified at some point in the manifolds life and is quite rough inside, so that's being chopped off and made good. At the same time the intersection area will be made larger. There also isn't a great deal of clearance between the plenum and the radius of the carbon trumpets so the plenum will be sectioned and 'banded' to slightly increase its volume.
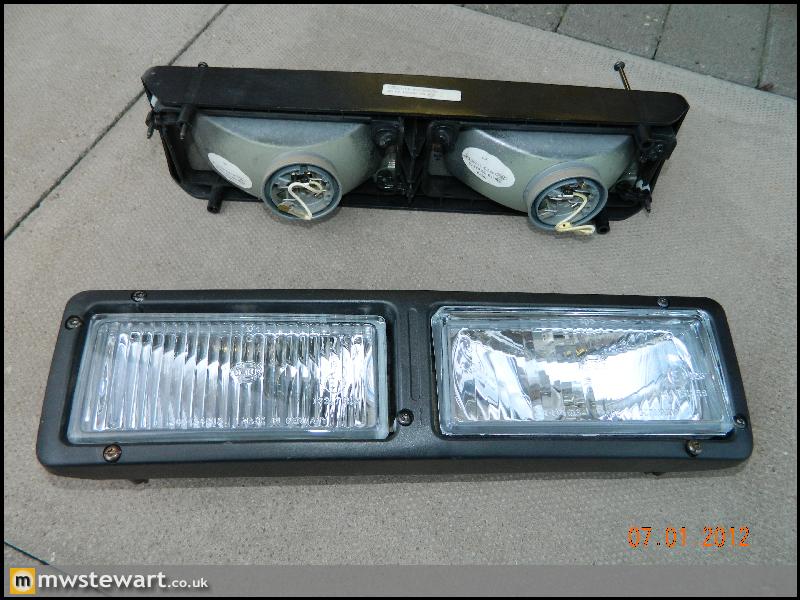
I fitted a new set of driving and fog lights. I really should know the answer to the next question but does anyone know if the driving lights are supposed to sit slightly proud of the mounting bezel? The Fog lamps sit flush, I could swear that on the last set I had the driving lights were too.
I built up the heater/evaporator/blower motor box ready for installation tomorrow.

The feed plenum has been modified at some point in the manifolds life and is quite rough inside, so that's being chopped off and made good. At the same time the intersection area will be made larger. There also isn't a great deal of clearance between the plenum and the radius of the carbon trumpets so the plenum will be sectioned and 'banded' to slightly increase its volume.
I fitted a new set of driving and fog lights. I really should know the answer to the next question but does anyone know if the driving lights are supposed to sit slightly proud of the mounting bezel? The Fog lamps sit flush, I could swear that on the last set I had the driving lights were too.
I built up the heater/evaporator/blower motor box ready for installation tomorrow.
Max M4X WW said:
My lights all sat flush when I had the XR/RS bumper on my old car Mark.
Glad you are happy(ish) with the plenum, I did worry slightly when I saw you'd bought it on the ft.com but obviously you know what you are looking at and have the knowledge/means to make any improvements.
Cheers Max. I'll have to see what's wrong with the lights.Glad you are happy(ish) with the plenum, I did worry slightly when I saw you'd bought it on the ft.com but obviously you know what you are looking at and have the knowledge/means to make any improvements.
Thanks!
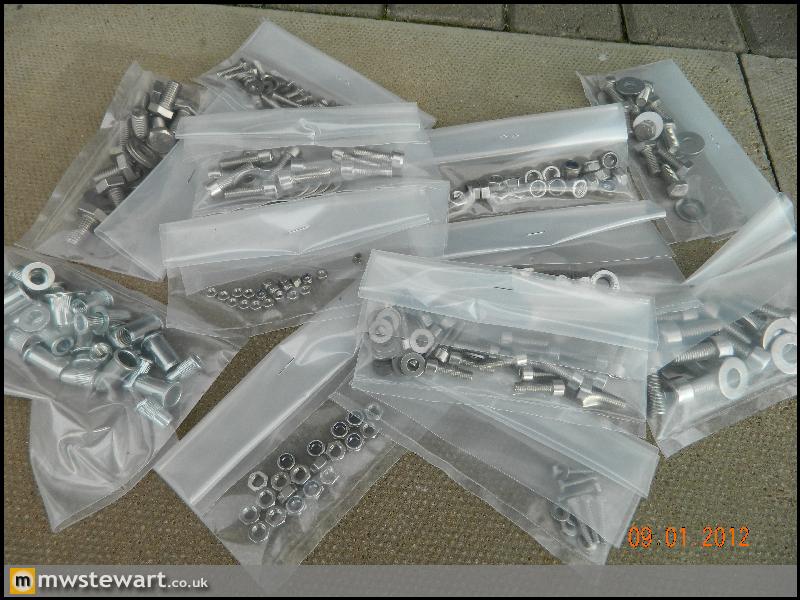
I now have the rest of the stainless steel fastenings that are required for the rebuild.
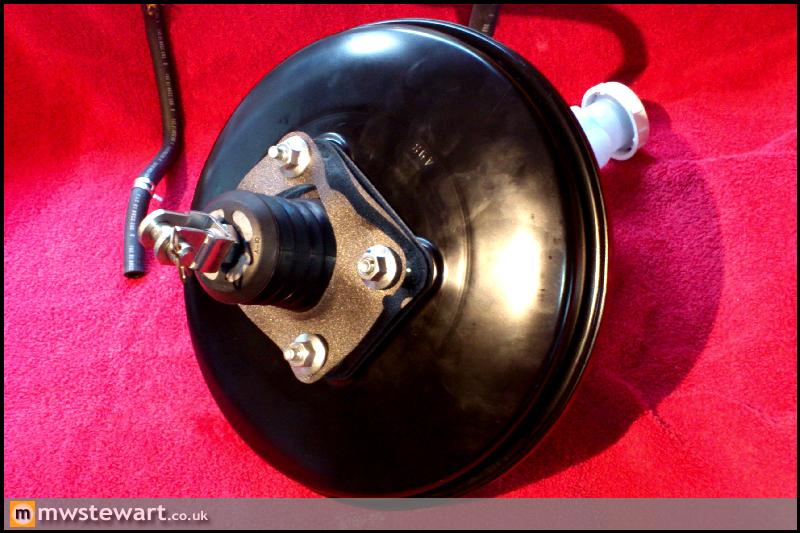
Here's the standard Clevis pin on the Evo servo.
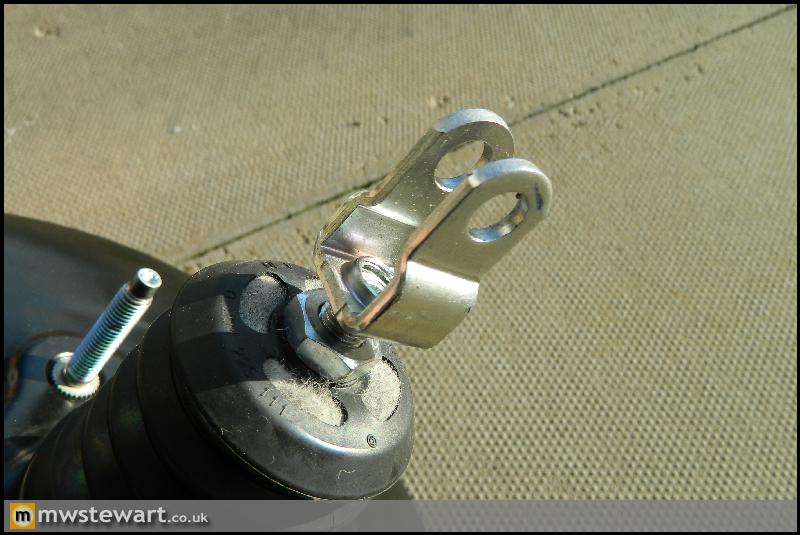
...which I had to shorten the as it made the Fiesta linkage sit too close to the bulkhead.

Ford don't paint the pedal box and some other parts behind the dashboard, so they were sanded, etch primed and painted.
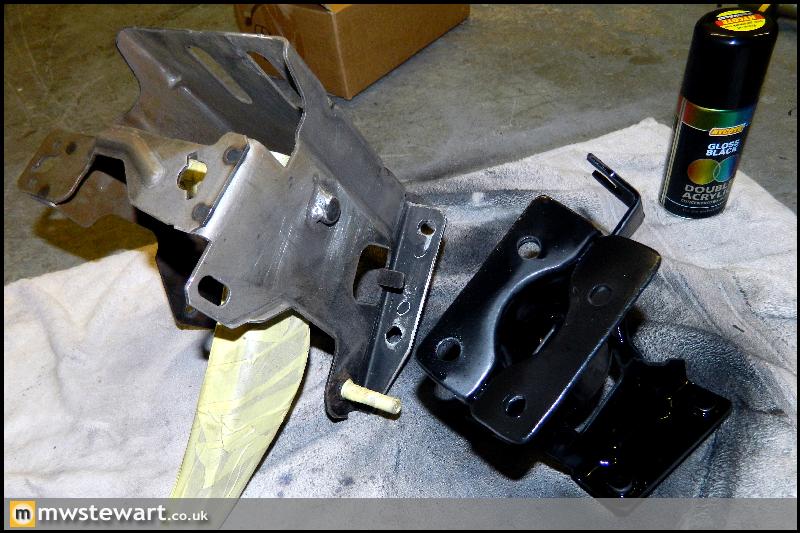
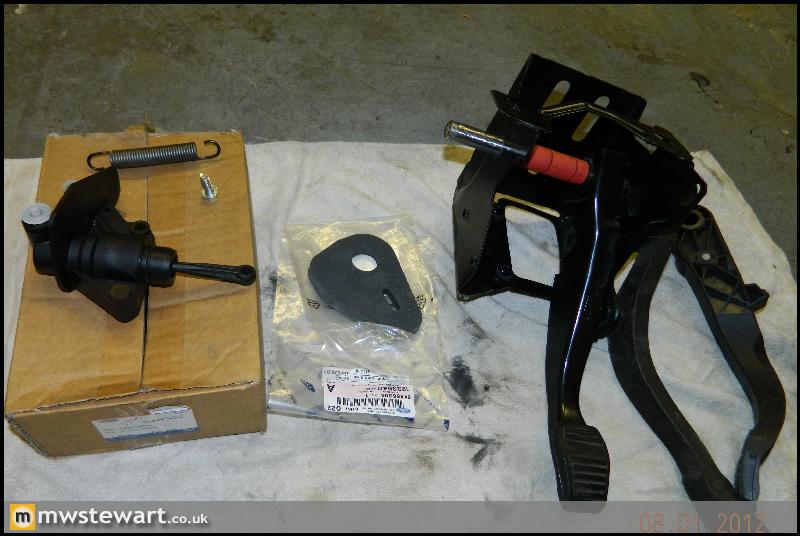
The pedal box was rebuilt with new bushes smeared with silicone grease, and a new clutch master cylinder for the hydraulic conversion.
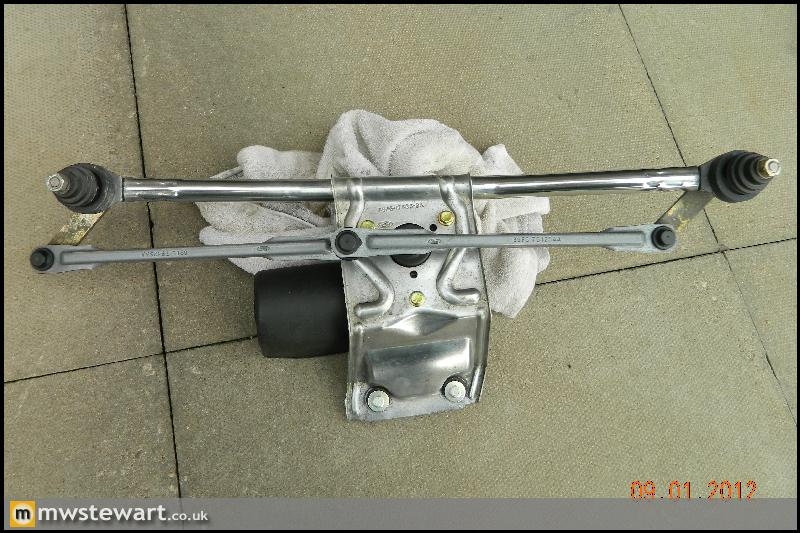
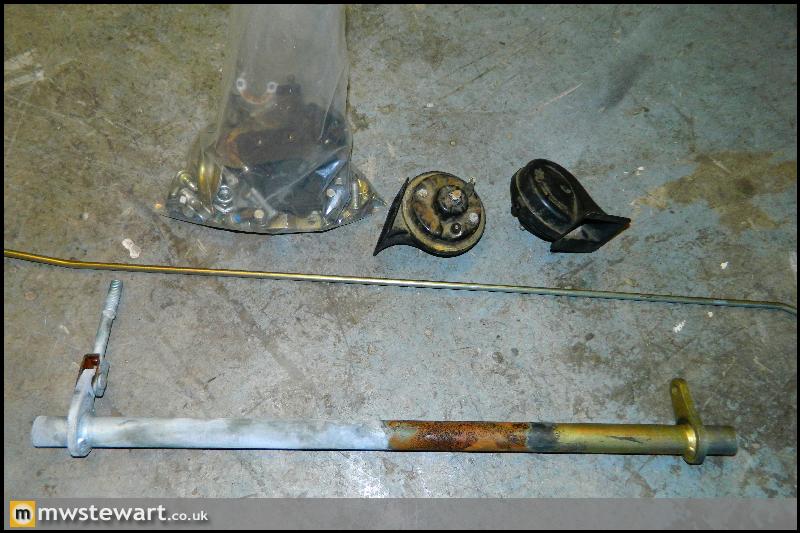
I got this far refurbishing the wiper linkage then decided to strip it all down to get the small parts re plated.
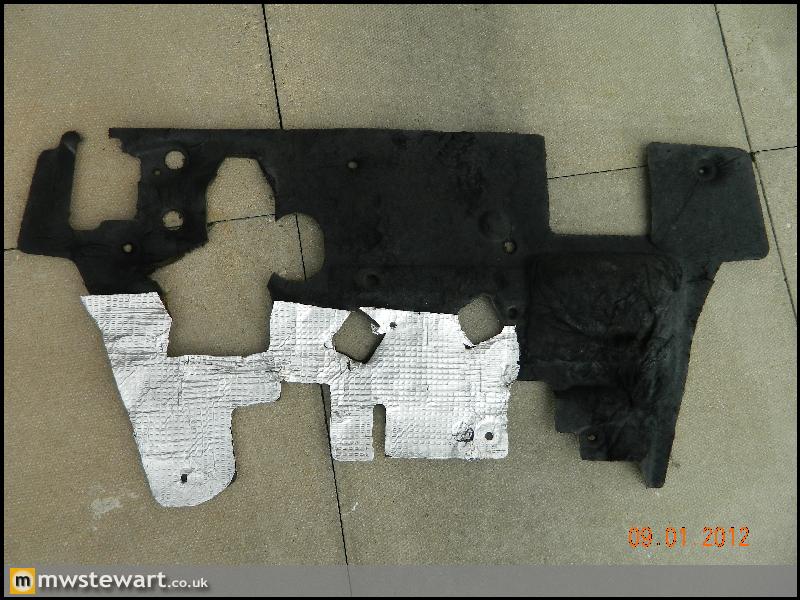
Engine bay sound deadening is NLA but came up with some elbow grease and black paint. It was cut to suit the new hydraulic clutch outlets.
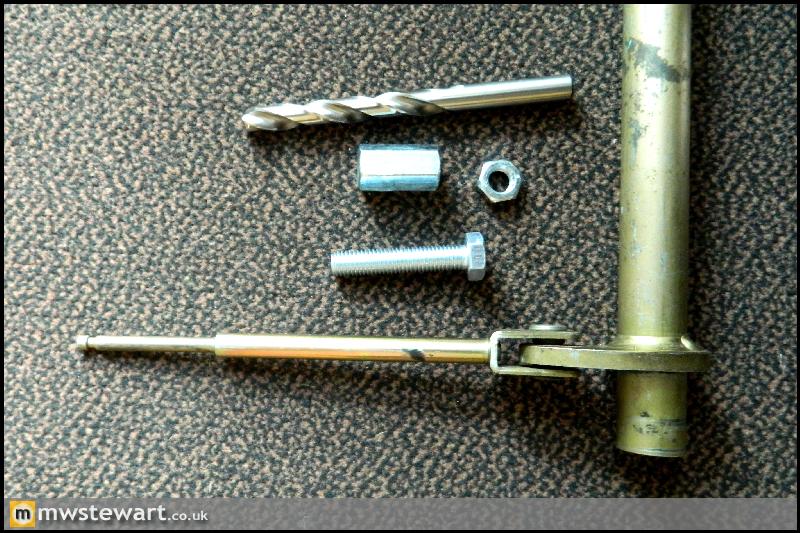
Next I moved on to the brake linkage. Like most production cars the brake pedal in the Fiesta sits slightly proud of the others, which is absolutely useless for heel and toe, so using a 'long nut' and a few other things I've made the brake pedal to brake bar link adjustable.
Et voilà. This will allow me to fine tune the level of the brake pedal.
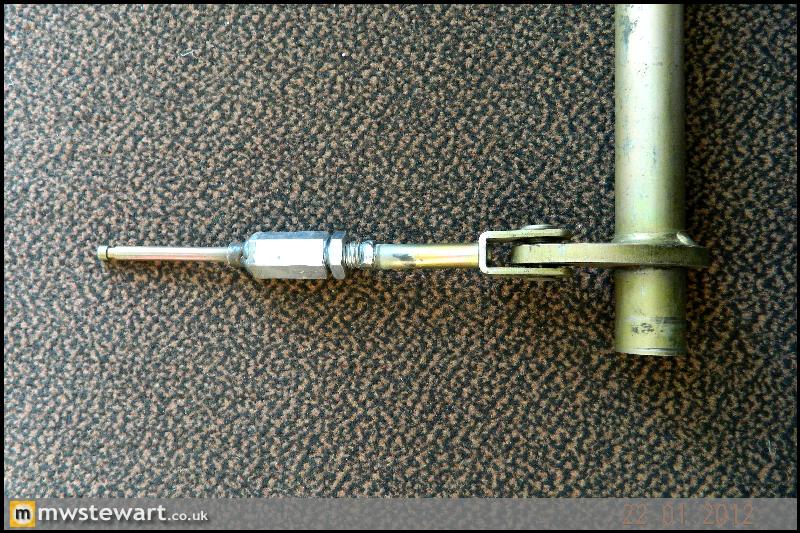
I reinforced the bracket which holds the drivers side of the brake link bar in an effort to further improve pedal response. This will compliment the other strengthening work I've done.

Here's the latest batch of parts ready to be Zinc plated:
I am going to add Bi-Xenon's to the car because I find it hard to go back to Halogen, however given the Mk3 Fiesta doesn't have headlamp washers let alone automatic range adjustment, and not wishing to be tarred with the same brush as those running 8000k Chinese kits in a reflector headlamp, things are immediately against me! To make any system legal I need to ensure it has both a headlamp wash function and automatic range control, and to this end my first purchase has been a pair of new genuine Ford German market (LHD) headlamps which have electronic range control, albeit manual. I'm going to convert these units to RHD by removing the glass and replacing it with that from my RHD headlamps. This will give me the basis for electronic range control.
To address the legal requirement for automatic levelling I have purchased the levelling system from a Mk1 Focus, which I selected for two reasons: 1) It doesn't use CAN, which is a necessity because I'm not employing it anywhere else, and 2) it will bolt up to my new rear suspension which is of course now Focus based. I was going to buy these parts from Ford but it all came to £750 + vat. One has to draw the line somewhere so I will recondition everything.
I will cover the headlamp wash in a future update, but that's really all there is for now as I'm waiting for parts to be plated and blasted/powder coated.
I now have the rest of the stainless steel fastenings that are required for the rebuild.
Here's the standard Clevis pin on the Evo servo.
...which I had to shorten the as it made the Fiesta linkage sit too close to the bulkhead.
Ford don't paint the pedal box and some other parts behind the dashboard, so they were sanded, etch primed and painted.
The pedal box was rebuilt with new bushes smeared with silicone grease, and a new clutch master cylinder for the hydraulic conversion.
I got this far refurbishing the wiper linkage then decided to strip it all down to get the small parts re plated.
Engine bay sound deadening is NLA but came up with some elbow grease and black paint. It was cut to suit the new hydraulic clutch outlets.
Next I moved on to the brake linkage. Like most production cars the brake pedal in the Fiesta sits slightly proud of the others, which is absolutely useless for heel and toe, so using a 'long nut' and a few other things I've made the brake pedal to brake bar link adjustable.
Et voilà. This will allow me to fine tune the level of the brake pedal.
I reinforced the bracket which holds the drivers side of the brake link bar in an effort to further improve pedal response. This will compliment the other strengthening work I've done.
Here's the latest batch of parts ready to be Zinc plated:
I am going to add Bi-Xenon's to the car because I find it hard to go back to Halogen, however given the Mk3 Fiesta doesn't have headlamp washers let alone automatic range adjustment, and not wishing to be tarred with the same brush as those running 8000k Chinese kits in a reflector headlamp, things are immediately against me! To make any system legal I need to ensure it has both a headlamp wash function and automatic range control, and to this end my first purchase has been a pair of new genuine Ford German market (LHD) headlamps which have electronic range control, albeit manual. I'm going to convert these units to RHD by removing the glass and replacing it with that from my RHD headlamps. This will give me the basis for electronic range control.
To address the legal requirement for automatic levelling I have purchased the levelling system from a Mk1 Focus, which I selected for two reasons: 1) It doesn't use CAN, which is a necessity because I'm not employing it anywhere else, and 2) it will bolt up to my new rear suspension which is of course now Focus based. I was going to buy these parts from Ford but it all came to £750 + vat. One has to draw the line somewhere so I will recondition everything.
I will cover the headlamp wash in a future update, but that's really all there is for now as I'm waiting for parts to be plated and blasted/powder coated.
Thanks chaps!
Since dropping off the interior back in December I've made a couple of changes: 1) I've replaced the wire element based heated seat kit with one that uses Carbon Fibre elements as they are far more flexible and withstand small cracks in the elements, and 2) I've changed to some dark grey sun visors with integrated illuminated vanity mirrors. Aldridge are trimming these in Alcantara to match the head lining and will have everything back with me for the beginning of March.
I'm making preparations on the car to ensure I can fit the interior when it arrives, and as I have an interest in HiFi I'm going to install an audiophile greade sound quality ('SQ') based system in the car. I've been very fortunate to find a set of what is arguably some of the best speakers produced for a car: the Seas Lotus Reference series:

The kit comes with cotton gloves to use when handling the drivers. The tweeters are beautifully machined:
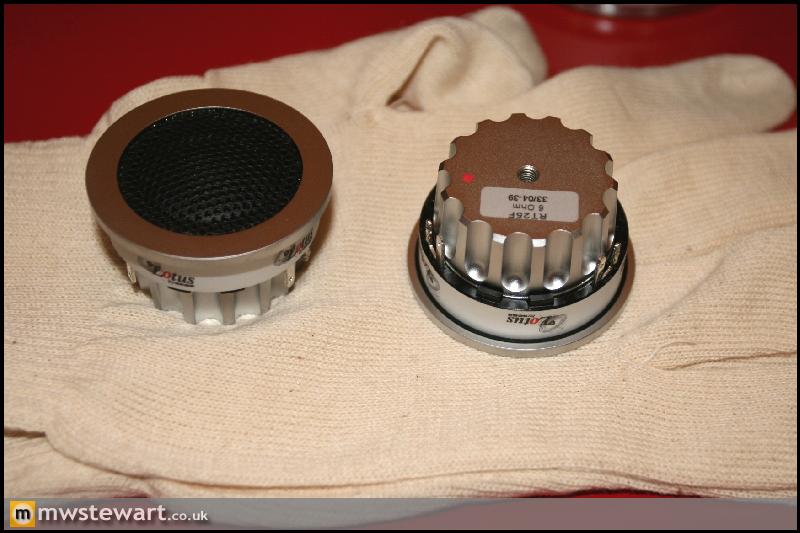
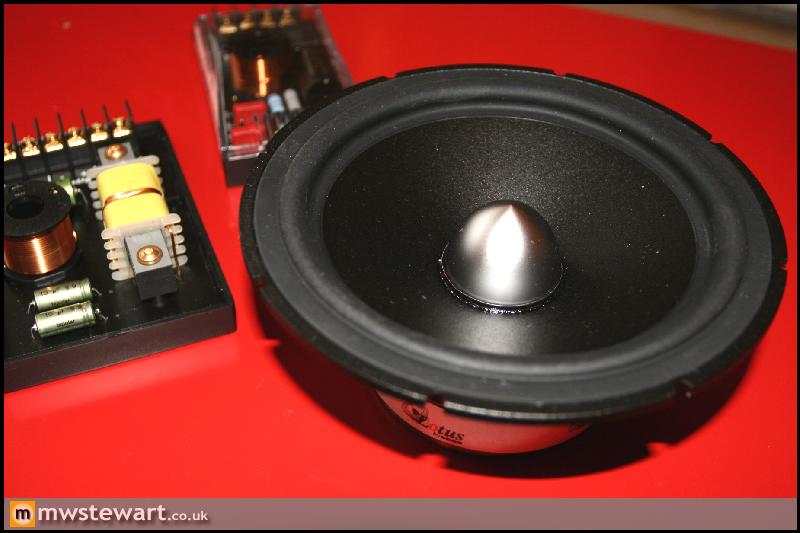
These are hard to get hold of second hand let alone brand new, and these are the Silk dome tweeter version which is much smoother than the earlier metal dome kit. I managed to save a bit off of the £800 RRP too so I'm very pleased!
Since dropping off the interior back in December I've made a couple of changes: 1) I've replaced the wire element based heated seat kit with one that uses Carbon Fibre elements as they are far more flexible and withstand small cracks in the elements, and 2) I've changed to some dark grey sun visors with integrated illuminated vanity mirrors. Aldridge are trimming these in Alcantara to match the head lining and will have everything back with me for the beginning of March.
I'm making preparations on the car to ensure I can fit the interior when it arrives, and as I have an interest in HiFi I'm going to install an audiophile greade sound quality ('SQ') based system in the car. I've been very fortunate to find a set of what is arguably some of the best speakers produced for a car: the Seas Lotus Reference series:
The kit comes with cotton gloves to use when handling the drivers. The tweeters are beautifully machined:
These are hard to get hold of second hand let alone brand new, and these are the Silk dome tweeter version which is much smoother than the earlier metal dome kit. I managed to save a bit off of the £800 RRP too so I'm very pleased!
I also like Silver and think it may look better on the new colour.
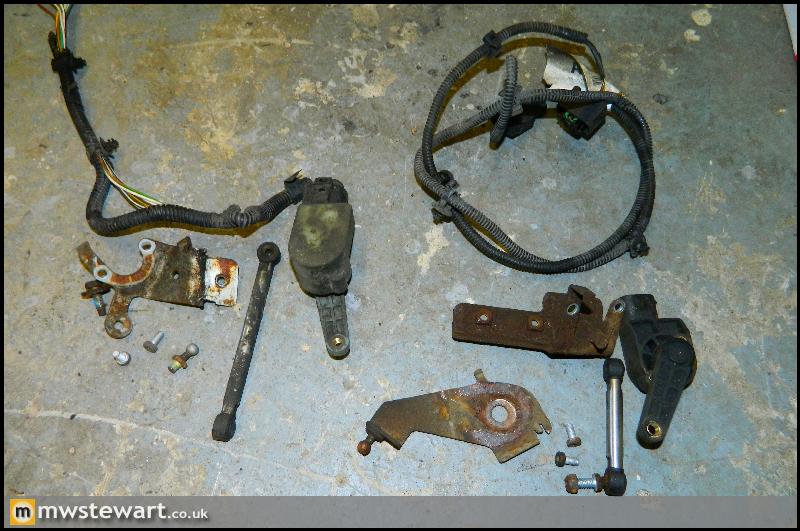
A wiring order I placed has arrived which contained everything required to integrate the Focus Xenon levelling system into the Fiesta, and all wire colours are OEM which will future diagnosis a lot easier! I have also cleaned any non metallic levelling components and all of them have cleaned up nicely. The metal parts are at the electro platers and should hopefully come back in a similar state.
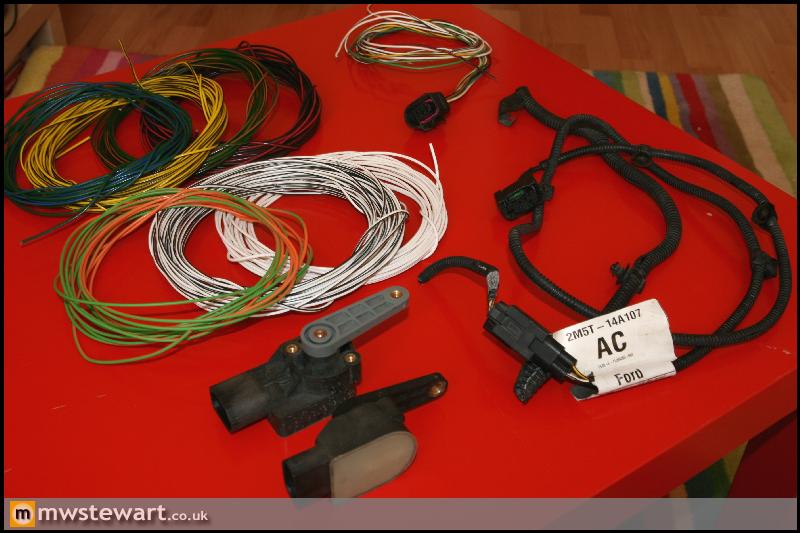
You may recall that the Mk3 Fiesta never had electronic ABS and so I incorporated the loom from a later (Mk5) Fiesta so that I can use it. The Mk5 Fiesta rear ABS wiring comes through a central grommet under the rear seat which I've now removed and replaced with separate grommets on both sides of car. The O/S ABS wiring and grommet is now shared by the new levelling wiring.
Once parts are back from the electro platers I can refit the dashboard etc. and start to make some real progress.
A wiring order I placed has arrived which contained everything required to integrate the Focus Xenon levelling system into the Fiesta, and all wire colours are OEM which will future diagnosis a lot easier! I have also cleaned any non metallic levelling components and all of them have cleaned up nicely. The metal parts are at the electro platers and should hopefully come back in a similar state.
You may recall that the Mk3 Fiesta never had electronic ABS and so I incorporated the loom from a later (Mk5) Fiesta so that I can use it. The Mk5 Fiesta rear ABS wiring comes through a central grommet under the rear seat which I've now removed and replaced with separate grommets on both sides of car. The O/S ABS wiring and grommet is now shared by the new levelling wiring.
Once parts are back from the electro platers I can refit the dashboard etc. and start to make some real progress.
Gassing Station | Readers' Cars | Top of Page | What's New | My Stuff