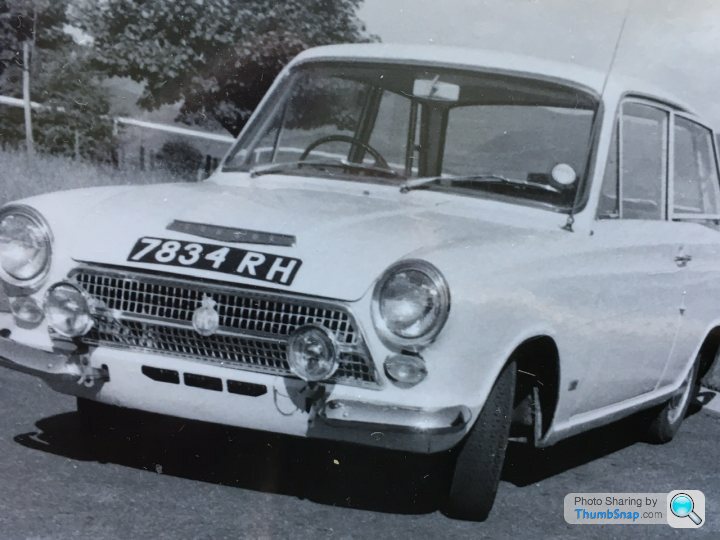
1966 Mk1 Cortina GT
Discussion


RobXjcoupe said:
The fuel filter looks factory fit. I was thinking to do something similar with my 70’s xj6. Usually boot mounted but looks more interesting in the engine bay  .
.
The learning of unc and unf thread sizes is painful having grown up with metric. Then getting to grips with those I found a near complete one off thread on the brake servo. Went through bsf, bsw sizes also and then randomly tried a metric size and it was metric! Arrrr! Lol still done now
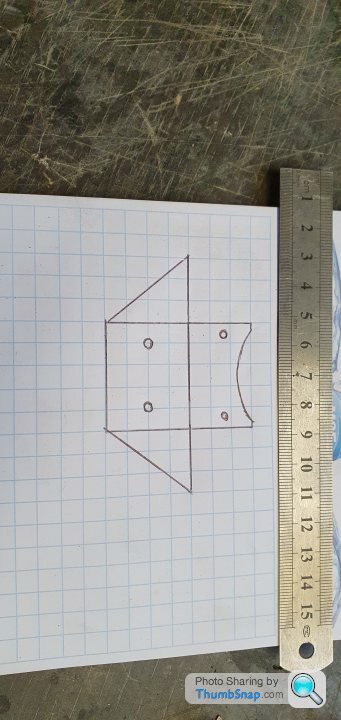
Thank you Rob, I'm going for subtlety in what I'm changing. I took a few extra photos of what I have done, firstly the bracket you get with the filter king is rubbish as it's just a flat plate and I have seen it used but they don't look great..The learning of unc and unf thread sizes is painful having grown up with metric. Then getting to grips with those I found a near complete one off thread on the brake servo. Went through bsf, bsw sizes also and then randomly tried a metric size and it was metric! Arrrr! Lol still done now
This is the design I used
 [url]
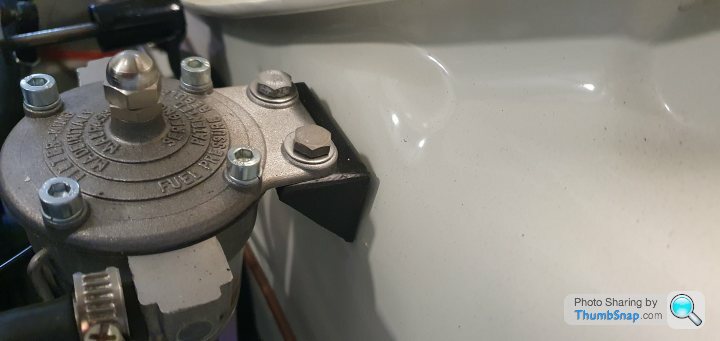
[url]this was made from 1.2mm steel, folded in my vice then I welded 2 M6 nuts underneath as I knew space would be tight to fit the regulator once it's mounted on the bulkhead.
The 2 side pieces had their seam welded up and flattened back before painting black. the bulkhead was then drilled and riv nutted.
 |https://thumbsnap.com/JToJFnfC[/url][url]
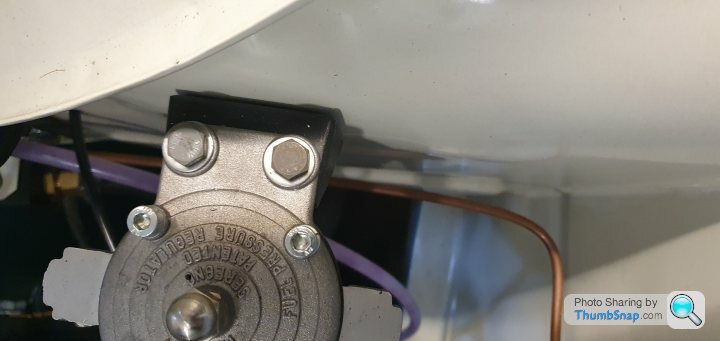 |https://thumbsnap.com/5vTceA93[/url]
ITP said:
That's lovely, I like the lucas spot lamps, I have a set of those to restore on a shelf one day.Mr Tidy said:
Wow!
I've just read the complete story and have to congratulate the OP on his perseverance and the quality of the build - that car will be stunning!
Thank you, I knew when the engine went I wanted to get it sorted and have it looking how I thought it would look (minus the rose tinted specs!) and if I sold it I wouldn't be able to afford another.I've just read the complete story and have to congratulate the OP on his perseverance and the quality of the build - that car will be stunning!
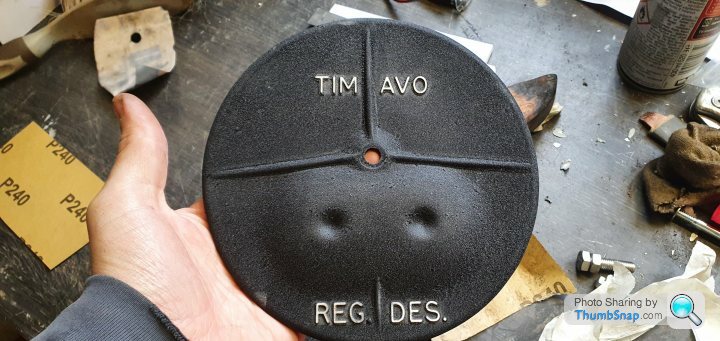
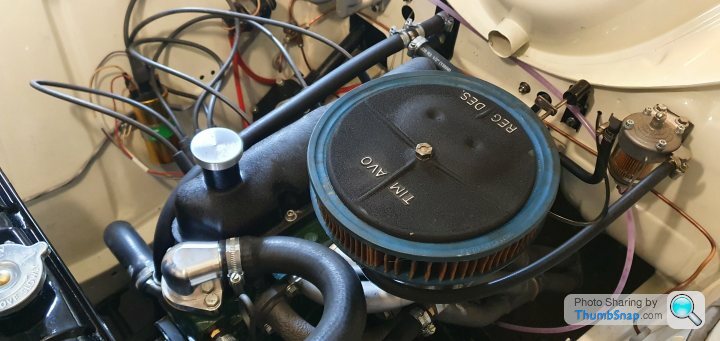
I stumbled across this period correct Timavo air filter on eBay, I had been looking at air filters for the 28/36 but most of them were a bit too modern or too shiny (yes, that is a thing) granted the filter itself is too big and had a life it was about the top and bottom pieces as I haven't seen these before.
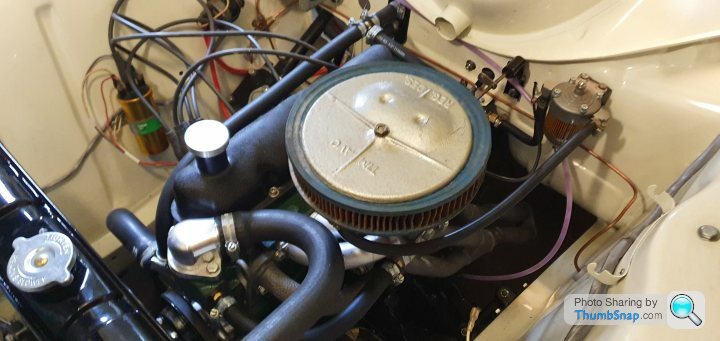
The paint was hammerite and felt soft on touch - the silver looked a bit drab so gave it a few coats of heat resistant wrinkle paint and after watching some videos on how to actually use the product wafted some heat over it, it's come out much better than I expected.
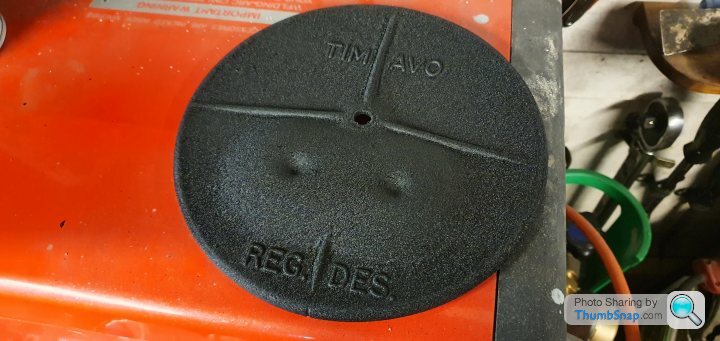
I obviously had to ensure people knew who made the filter so gave it a little careful sanding!
Just a quick update on the Cortina, since putting the engine in there have been 2 things I wanted to address;
Firstly is the choke cable, the original has notches on the handle that allow it to be pulled out and stay roughly where you want it without using pegs. unfortunately time has been not been kind to the original cable and outer and are looking a bit ropey to say the least.
When doing the dry build I purchased a replacement cable from the club for £15 I believe thinking this would be ideal - I was wrong...
The handle was too new, too plasticy and just looked off. The notches didn't work either so once pulled out it would recoil lightening fast so cold starting was problematic. Pegs, Pegs are for clothes lines. so that's not happening.
Knowing this I decided that I would try to replace the cable on the original so I get the notched action and authentic handle on something that works, what I did was keep onto this idea for 18 months so I could bugger about with bodywork.
The cable is mountain bike gear cable with and outer core from Halfords that cost me £7, replacing it was as simple as cut the cable at the handle then carefully use a hack saw on the clamped section to release the last of the cable and replace it with the new version, reclaims it using my vice then fit.
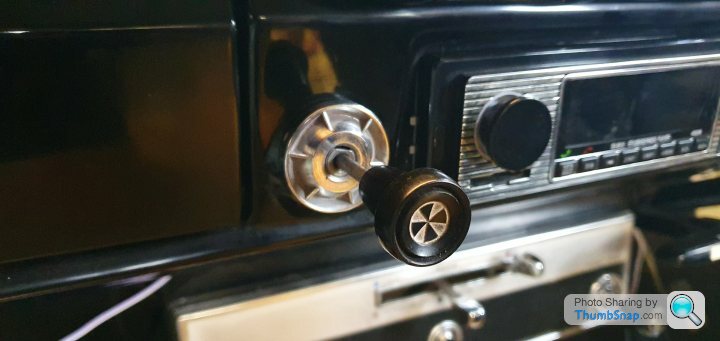
It's a simple but cheap repair that nobody will ever notice or care about but to me it's made me rather pleased with myself.
Secondly - those awful HT leads...
Having purchased a set of HT leads for a Mk1 Cortina from a supplier on eBay I wasn't overwhelmed by what I received, again this was a purchase made during the dry build so I was more concerned with a running engine than aesthetic but to say they were long is an understatement.
The dreary grey completes the look of I couldn't care less and is something that I didn't want to live with anymore.
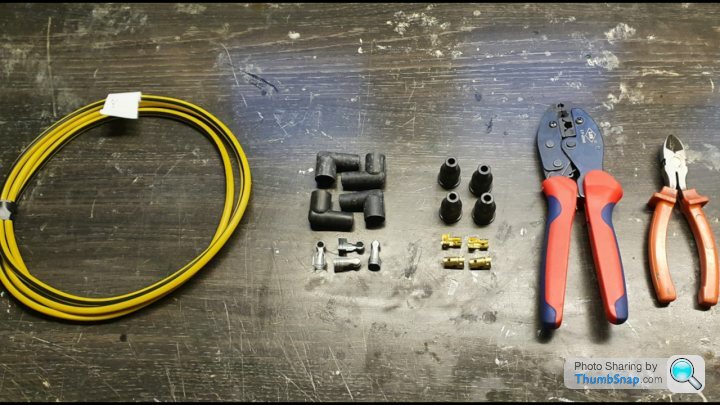
A friend of mine has been making his own HT leads for some time and recommended I give it a go, after all I wanted a set of leads that added a bit of colour and didn't serve a purpose as whips should I fancy a bit of roadside BDSM - not that I'm ruling that out, it certainly beats most car shows.
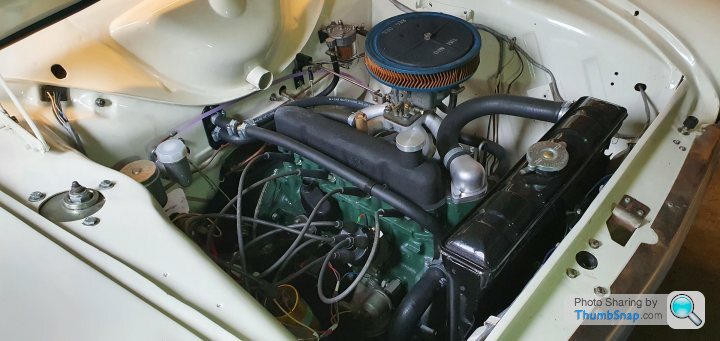
I had planned on using yellow cotton braided leads with black accents but remembered that this engine isn't exactly oil tight so they'd look a terrible in 6 months time after getting some use so I chose the black and yellow "period correct" PVC type.
The result of this was something again I'm rather proud of but also was an enjoyable job with a decent cup of tea.

To me it just looks neater and the yellow adds a bit of colour, plus it's the colours of the AA so that might inspire said roadside assistance when I'm in a spot of bother!
If you're interested in giving it a go I made short how to video on the subject.
https://www.youtube.com/watch?v=0Sh2XhmBKrw&t=...
Firstly is the choke cable, the original has notches on the handle that allow it to be pulled out and stay roughly where you want it without using pegs. unfortunately time has been not been kind to the original cable and outer and are looking a bit ropey to say the least.
When doing the dry build I purchased a replacement cable from the club for £15 I believe thinking this would be ideal - I was wrong...
The handle was too new, too plasticy and just looked off. The notches didn't work either so once pulled out it would recoil lightening fast so cold starting was problematic. Pegs, Pegs are for clothes lines. so that's not happening.
Knowing this I decided that I would try to replace the cable on the original so I get the notched action and authentic handle on something that works, what I did was keep onto this idea for 18 months so I could bugger about with bodywork.
The cable is mountain bike gear cable with and outer core from Halfords that cost me £7, replacing it was as simple as cut the cable at the handle then carefully use a hack saw on the clamped section to release the last of the cable and replace it with the new version, reclaims it using my vice then fit.
It's a simple but cheap repair that nobody will ever notice or care about but to me it's made me rather pleased with myself.
Secondly - those awful HT leads...
Having purchased a set of HT leads for a Mk1 Cortina from a supplier on eBay I wasn't overwhelmed by what I received, again this was a purchase made during the dry build so I was more concerned with a running engine than aesthetic but to say they were long is an understatement.
The dreary grey completes the look of I couldn't care less and is something that I didn't want to live with anymore.
A friend of mine has been making his own HT leads for some time and recommended I give it a go, after all I wanted a set of leads that added a bit of colour and didn't serve a purpose as whips should I fancy a bit of roadside BDSM - not that I'm ruling that out, it certainly beats most car shows.
I had planned on using yellow cotton braided leads with black accents but remembered that this engine isn't exactly oil tight so they'd look a terrible in 6 months time after getting some use so I chose the black and yellow "period correct" PVC type.
The result of this was something again I'm rather proud of but also was an enjoyable job with a decent cup of tea.
To me it just looks neater and the yellow adds a bit of colour, plus it's the colours of the AA so that might inspire said roadside assistance when I'm in a spot of bother!
If you're interested in giving it a go I made short how to video on the subject.
https://www.youtube.com/watch?v=0Sh2XhmBKrw&t=...
This thread has certainly evoked memories for me .
The instigator of my motorsport enthusiasm was a family friend who took me to my first race meeting on my 12th birthday in 1967 . Fast forward to 1971 and the same friend took me to join the Silverstone Marshall's club and many trips from where we lived near Bedford were done in his Cortina GT , dark blue with white stripe , wide lotus steels .
To this 15/16 year old the car was fabulous and always driven with enthusiasm.
I still get a flood of excitement whenever I watch a horde of 'Tina's doing their thing on circuit.
Breadvan72 said:
Continued fabulousness in all respects!
Thank you Breadvan, I feel as thought I'm turning a corner now that I don't need to push the Cortina around anymore.scottos said:
Awesome thread, what youve created is really impressive. I'm sharp realising after reading threads like this that i really need to learn to weld/ fabricate, especially having an early 70's car! I also need more patience it seems!
swisstoni said:
Really wish I had the skills and the facilities to do this.
Must be a great feeling to finally drive the results of all that work.
Must be a great feeling to finally drive the results of all that work.
Breadvan72 said:
I once tried to fix a 70s car. Once. Since then I pay others to fix 70s cars. I admire those who can fix cars, but that ain't me.
It's a fine blend of determination and sheer stubbornness! When I started work on the Cortina I didn't have a clue about welding and fabrication, I bought a 2nd hand Clarke 105EN mig welder for £40. I'd suggest using a rent free gas bottle from SDL Minofern instead of the Clarke small bottles as these tend to leak more gas than you'll use for shielding! I'm not master fabricator but generally I went in with the notion that most things can be fixed if I make bad of a job of it.grumpy52 said:
This thread has certainly evoked memories for me .
The instigator of my motorsport enthusiasm was a family friend who took me to my first race meeting on my 12th birthday in 1967 . Fast forward to 1971 and the same friend took me to join the Silverstone Marshall's club and many trips from where we lived near Bedford were done in his Cortina GT , dark blue with white stripe , wide lotus steels .
To this 15/16 year old the car was fabulous and always driven with enthusiasm.
I still get a flood of excitement whenever I watch a horde of 'Tina's doing their thing on circuit.
That must have been great to watch, I quite like the idea of running wider steels on the Cortina - I have a set of 4.5J which I'd like to keep the front as they are but take the rears out to 6 or 6.5" (albeit by someone who know's what they're doing). Hopefully I'll be able to take the Cortina to Silverstone classic when it's next as I too like seeing them be used, if you're there I'll take you out for a spin The instigator of my motorsport enthusiasm was a family friend who took me to my first race meeting on my 12th birthday in 1967 . Fast forward to 1971 and the same friend took me to join the Silverstone Marshall's club and many trips from where we lived near Bedford were done in his Cortina GT , dark blue with white stripe , wide lotus steels .
To this 15/16 year old the car was fabulous and always driven with enthusiasm.
I still get a flood of excitement whenever I watch a horde of 'Tina's doing their thing on circuit.
They need refurbishing anyway but I couldn't resist a quick photo seeing as though you had mentioned steel wheels!
With the Cortina moving under it's own power I felt a little lost, when I had a focussed goal I knew what to do to get there i.e. fixing the fuel tank or dumping coolant out of the core plug. With that milestone passed - what do I do next?
Lists are good, they're not as good as deadline that make lovely whooshing sounds as the whiz past! With that I wrote a list of what I could see that needed to be done, it's long and there's more to add no doubt but it's got plenty of minutia like painting brackets up to fitting headlining. I figured I'd do the mature thing and hit a load of easy stuff because the list is long and full of difficult stuff - future Jim can deal with that.
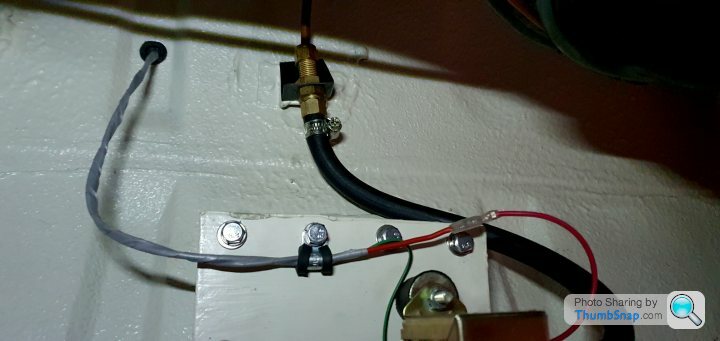
I started with the fuel tank wiring as everything was there but needed sorting, the fuel pump was crudely wired to just function and I had left a decent length of extra wiring for the fuel tank sender till I was sure how I wanted to wire it, this is something nobody will ever see or be that bothered about other than me and the MOT tester. I had some 5mm P clips spare which as it happens is the perfect size for what I needed to secure the fuel wiring and make it look that little bit nicer. The previous wire (fuel sender) has held in position with lashings of underseal - something that won't be happening on my watch!
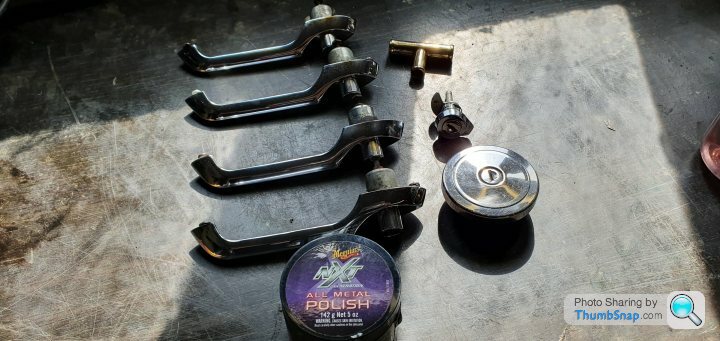
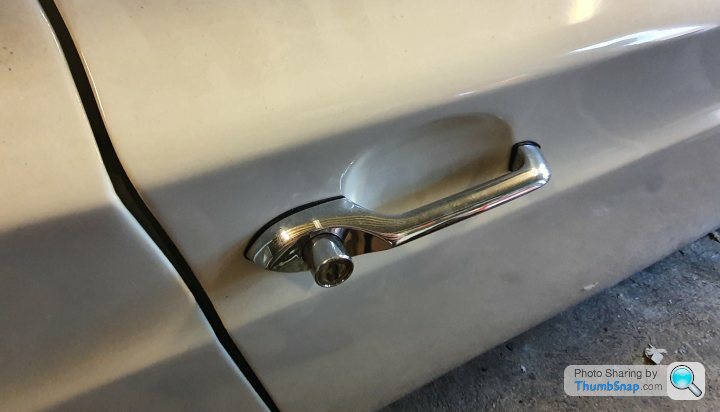
I had held off fitting the door handles because the paint still needs polishing back but that puts me in a catch 22 as I'll need to take the car to be have that done and I can't have the doors fly open whilst I'm doing it plus I'm tired of seeing the handles in a box. I gave them a clean and polish (I recommend the Meguairs wax as it doesn't damage chrome like autosol can plus it smells rather fruity). The Chrome is crazed but not pitted - it's passable for now and I'll look at chroming next year once I've got some miles under my belt and I'm looking at putting the Cortina away for winter.
The gaskets could do with a trim but the handles look functional and rather tidy.
The stickers have been cleaned, I was going to polish them too but I think that would look little odd if I'm honest.
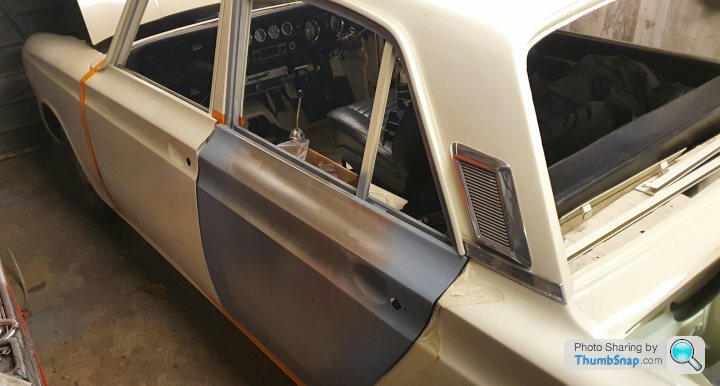
Whilst all this was going off I finally got my passengers side rear door skinned, the body shop I had used decided they couldn't do it after taking my money as part of the respray. I had talked to a few other classic friendly body shops some didn't respond and one in particular agreed to coming to look at the door along with the rest of the Cortina (there are a few assembly chips that need sorting). This quickly escalated to agreeing to the job in principle, viewing the Cortina and taking it on the spot and letting me know how much it'll cost after - this didn't sit right with me, I have no issue with spending money on work to be done but going in with no notion on cost beforehand seems reckless which I questioned the chap about on the phone.
He seemed put out that I dare ask for a quote and agreeing between us what work would be done (this all stems from my fingers being burned by so called professionals). Eventually he agreed and that was the last I heard from him so he's either lost on his way to my house or changed his mind - either way it's a bullet dodged! I found another place via my father who has been in the business 40 years and has skinned many Ford doors who had the door skinned in a week and will take the whole car to finish the fitment, paint the door and fit the door seals at the end of November (if he's still working).
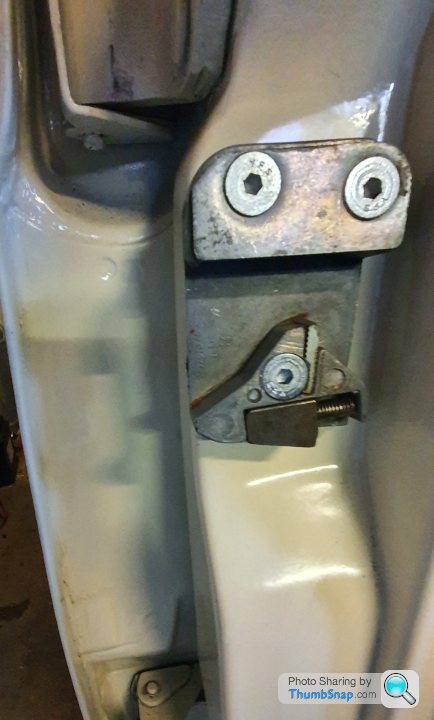
With both sides having full compliment of doors and handles aI turned my attention to the boot seal as I figured I'd attempt at least 1 seal - this was harder than I expected and again panel fitting isn't my forte, this may be a job for the bodywork guy! the seal is new and you currently have to give the boot some welly to shut it which apparently is the done thing in the club, I don't remember having to do this when the cortina was on the road but I'll get a 2nd opinion
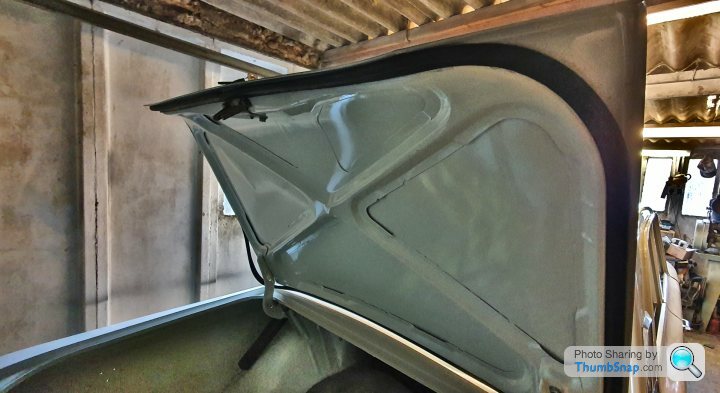
The boot lid is held up using heavy duty springs which do a great job but I was afraid of blowing a gasket when I went to fit them! Fortunately I survived with trousers in tact but it was close!

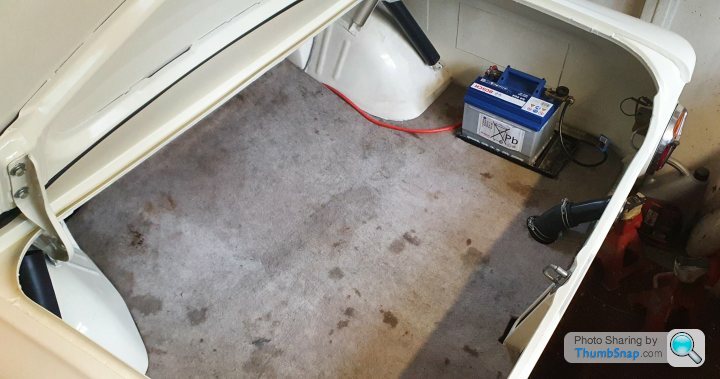
I used this opportunity to trim the old boot sound deadening pad to suit the relocated battery which I need to make a proper enclosure for (a job for future Jim). I have an Idea that I'll draft in CAD before I fabricate just because I can!
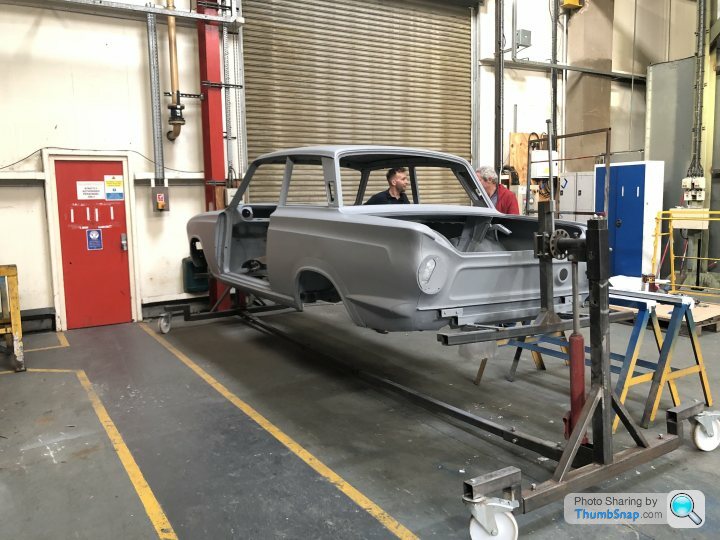
Lovely, so nice to see a GT being restored, sadly a rare sight among the seemingly endless supply of Lotus Cortinas (genuine and replicas).
My dad has a 1966 2 door that didn’t look too bad, back to bare metal now and needless to say, the amount of previous repairs mean you can see daylight through several places.. going to need a lot of work but she’ll be another back on the road at some point!
Please keep your thread updated as it’s an entertaining read - a photo of my dad’s from a couple of weeks ago to remind you it could be worse
It's good to see you are still making some progress, and with everything being done so meticulously.
Somehow I ended up with a couple of 6.5J banded rims on my MK2 Cortina and my mate had the other 2 on his Anglia. Whenever we followed each other you could see they hadn't been welded true, but that was back back in the 70s when we were students.
Personally I think your car would look great with a full set of 5.5J steelies but I'm sure whatever you fit it will look great!
Good to see that you are getting close to the finish line !
A couple of thoughts...
Those yellow plug leads look just right....they are even 'Lotus' colours ( ie yellow against the green block)
The battery placement: perhaps that was where they were OEM, but in my Elan I relocated the battery ( in fact fitted a larger one anyway as the standard one was tiny ) and fitted it it the centre of the boot tight up against the rear seat 'bulkhead'.
This was for a couple of reasons... the fibreglass body was showing signs of cracking where the battery was hard up against it, and the mounting was much stronger and kept the weight more central.
But all this was in a much lighter ( ie about 700kg !!) car...
In your car it would also give you more usable boot space, and you could also 'hide' it behind an access panel ( which I did ) : I was never in favour of the exposed battery in the boot area after a incident with the alternator regulator ( that did not regulate !!), and the boot was filled with acid fumes...
Anyway, excellent work and the car will be something special when you get there .
Bobberoo99 said:
Enjoying reading this, it's looking really good, please keep up the posting!!!
Thanks Bob, I've got plenty to update with but it all feels like minutia at the moment swisstoni said:
Any more of this and I might have to drag my 1600E out of the lockup it’s been in for the best part of 30 years.
A plan with no draw backs! Come on Toni - restoring a Cortina is like making love to a beautiful woman. It'll break you financially but it does make for an interesting story...Chunkychucky said:
Lovely, so nice to see a GT being restored, sadly a rare sight among the seemingly endless supply of Lotus Cortinas (genuine and replicas).
My dad has a 1966 2 door that didn’t look too bad, back to bare metal now and needless to say, the amount of previous repairs mean you can see daylight through several places.. going to need a lot of work but she’ll be another back on the road at some point!
Please keep your thread updated as it’s an entertaining read - a photo of my dad’s from a couple of weeks ago to remind you it could be worse
Thank you, I have had to defend my reasons for not painting a green stripe - it's not a Lotus! I don't think the stripe looks right on the 4 door either. I wouldn't say no to a Lotus twin cam however, given that the suspension is virtually the same on the Airflow GT and Lotus.My dad has a 1966 2 door that didn’t look too bad, back to bare metal now and needless to say, the amount of previous repairs mean you can see daylight through several places.. going to need a lot of work but she’ll be another back on the road at some point!
Please keep your thread updated as it’s an entertaining read - a photo of my dad’s from a couple of weeks ago to remind you it could be worse
Your Dad's Mk1 looks ok in the photo, did you have it dipped? I'd be interested in seeing more of it, but if you need any bits or advice etc with it just let me know
C70R said:
Indeed. Such a fabulous read, and real dedication.
Thank you. C70R I've tried to steer away from my standard adenoid classic car tone and remembered to not take myself too seriously Mr Tidy said:
It's good to see you are still making some progress, and with everything being done so meticulously.
Somehow I ended up with a couple of 6.5J banded rims on my MK2 Cortina and my mate had the other 2 on his Anglia. Whenever we followed each other you could see they hadn't been welded true, but that was back back in the 70s when we were students.
Personally I think your car would look great with a full set of 5.5J steelies but I'm sure whatever you fit it will look great!
That's interesting apart from the wonky wheel bit, I've spoken to a few firms and they're all around the same price. I'd love a set of 5.5's but the price is a bit daft and the Weller remakes look a little odd without caps.Somehow I ended up with a couple of 6.5J banded rims on my MK2 Cortina and my mate had the other 2 on his Anglia. Whenever we followed each other you could see they hadn't been welded true, but that was back back in the 70s when we were students.
Personally I think your car would look great with a full set of 5.5J steelies but I'm sure whatever you fit it will look great!
Paul S4 said:
Good to see that you are getting close to the finish line !
A couple of thoughts...
Those yellow plug leads look just right....they are even 'Lotus' colours ( ie yellow against the green block)
The battery placement: perhaps that was where they were OEM, but in my Elan I relocated the battery ( in fact fitted a larger one anyway as the standard one was tiny ) and fitted it it the centre of the boot tight up against the rear seat 'bulkhead'.
This was for a couple of reasons... the fibreglass body was showing signs of cracking where the battery was hard up against it, and the mounting was much stronger and kept the weight more central.
But all this was in a much lighter ( ie about 700kg !!) car...
In your car it would also give you more usable boot space, and you could also 'hide' it behind an access panel ( which I did ) : I was never in favour of the exposed battery in the boot area after a incident with the alternator regulator ( that did not regulate !!), and the boot was filled with acid fumes...
Anyway, excellent work and the car will be something special when you get there .
Thanks Paul, I think I made the right choice with the leads I had seen a set used on a twin cam that made the decision final.A couple of thoughts...
Those yellow plug leads look just right....they are even 'Lotus' colours ( ie yellow against the green block)
The battery placement: perhaps that was where they were OEM, but in my Elan I relocated the battery ( in fact fitted a larger one anyway as the standard one was tiny ) and fitted it it the centre of the boot tight up against the rear seat 'bulkhead'.
This was for a couple of reasons... the fibreglass body was showing signs of cracking where the battery was hard up against it, and the mounting was much stronger and kept the weight more central.
But all this was in a much lighter ( ie about 700kg !!) car...
In your car it would also give you more usable boot space, and you could also 'hide' it behind an access panel ( which I did ) : I was never in favour of the exposed battery in the boot area after a incident with the alternator regulator ( that did not regulate !!), and the boot was filled with acid fumes...
Anyway, excellent work and the car will be something special when you get there .
Mr. Tidy is right the battery tray was originally under the engine bay, they rust as had mine but when the engine died I was originally looking at putting a zetec in it's place. I had the engine and a type 9 box sat waiting to go in but as I was about to hack the crossmember up I just couldn't do it. The Kent engine has it's flaws but this is a road car that I may do the occasional B road blast which it loved in the past along with the seldom track day or lap of the ring but it's a 50 year old Cortina, not a super car or a land speed recorder breaker. I think there is potential with this engine that I will look into more (beyond my dissertation on developing that engine) but that's to start once I have an MOT - I have the spares already...
I digress.
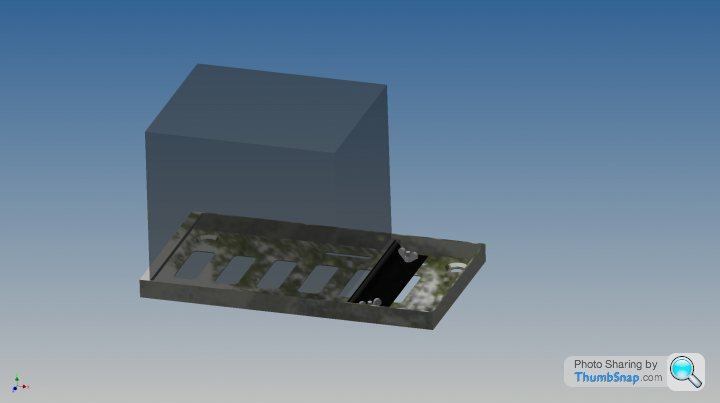
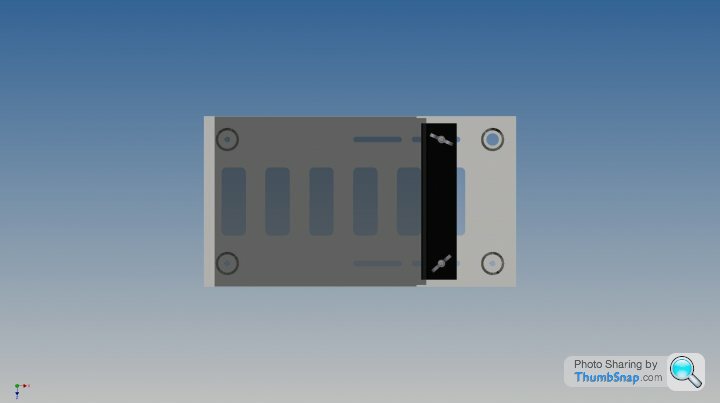
The battery tray I have is for the Lotus Cortina as they had it relocated to the boot roughly in the position it's in now. I have an idea for boxing it that I've drafted up of CAD.
The battery it's needs the posts adding along with the clamps I've used too.
I drilled the top right mount out and used that for earthing - it prevented me drilling extra holes into the shell, when I was prepping the underside for paint I welded captive nuts underneath too so all the mounting and disassembly is done from above by 1 person.
As for acid I'll put a pad under the battery that is designed for this application but venting is something I need to consider. I want to prevent the battery being hit or worse bridged by anything I put in the boot so I have designed the case below that I'll most likely rivet to the tray. I went for a flight case design using 2mm aluminium for the main structure (although this make change to stainless as I can TIG that at work) with GRP with a leatherette cover for the panels to again prevent bridging.
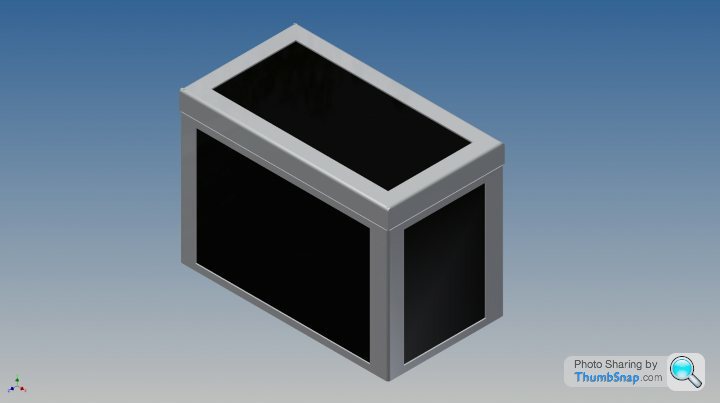
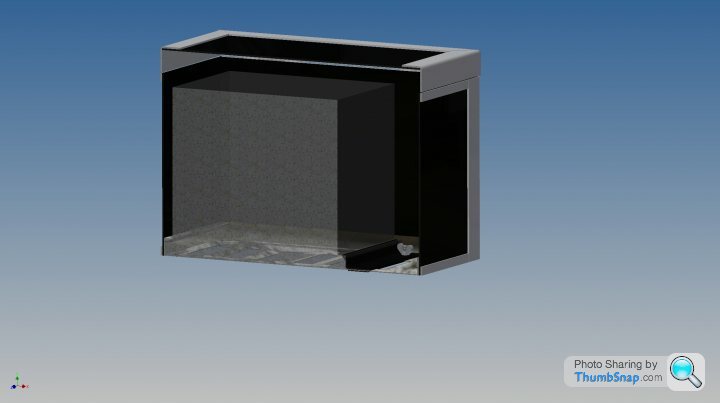
I'll mock something up in cardboard fibre first to test the theory and I'd like to put my EU kit in the right hand side (fuses and bulbs etc)
I do CAD stuff for a living so I have also looked at putting the GT shield badges into production but machining is out as the radii are too small (sub 1mm)
I have recently split a badge down and I believe there's potential in making a silicon mould and using 2 pack resin with a UV resistance then painting the red, black and chrome(?) as it was done at the factory.
 [url]
[url]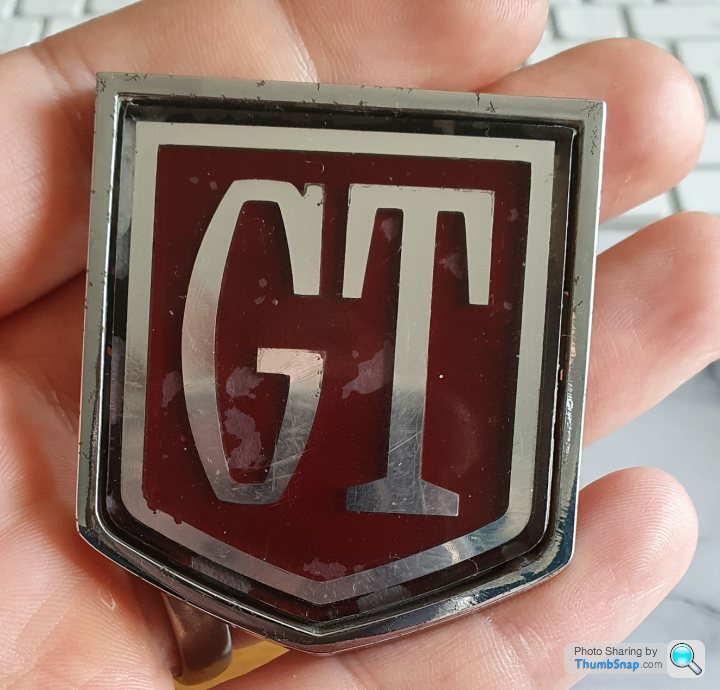 |https://thumbsnap.com/a1BRG93a[/url]
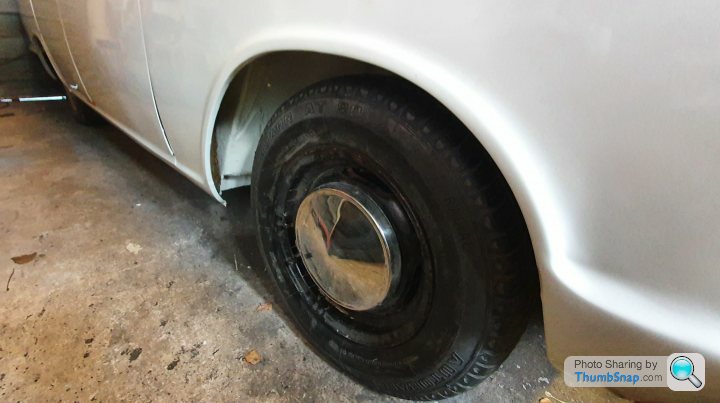
Going back to wheels, I bought the steels on a whim after a friend of mine has recently put a set of original steel wheels and chrome caps on his '73 VW Type 3 Fastback, I have a set of original dunlop D1's that will clean up nicely but the lips need welding and turning which I can't do and I believe 1 has a tiny flat spot.
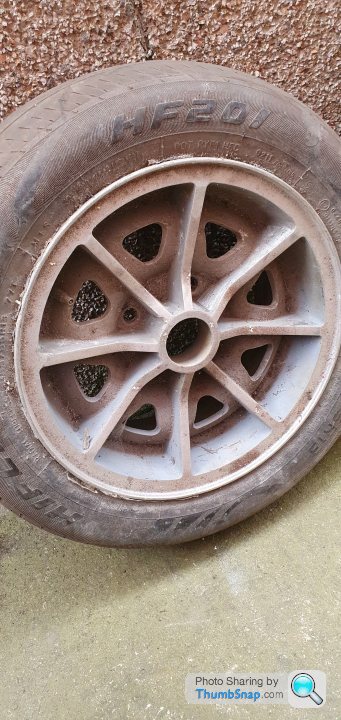
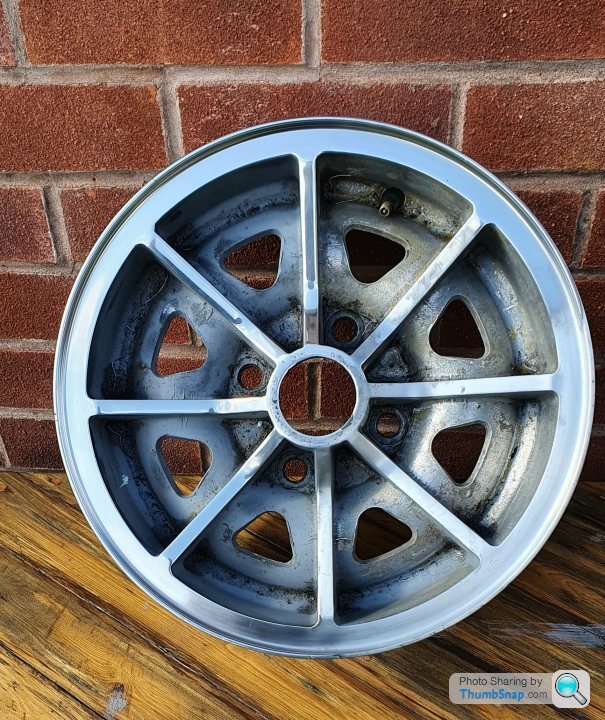
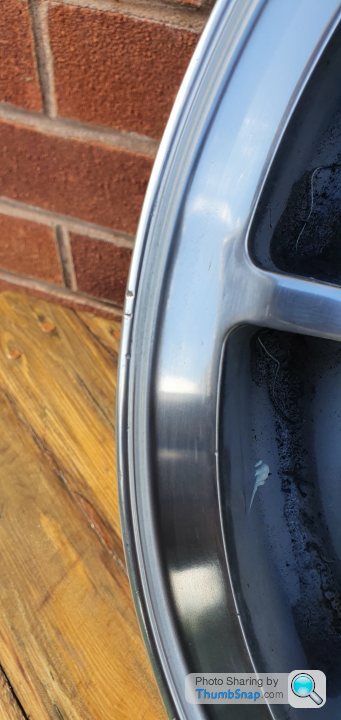
I completely forgot that there are 2 flavour of Ford steel wheels
The Anglia/ none GT spec Cortina's (this one was found on the Titanic)
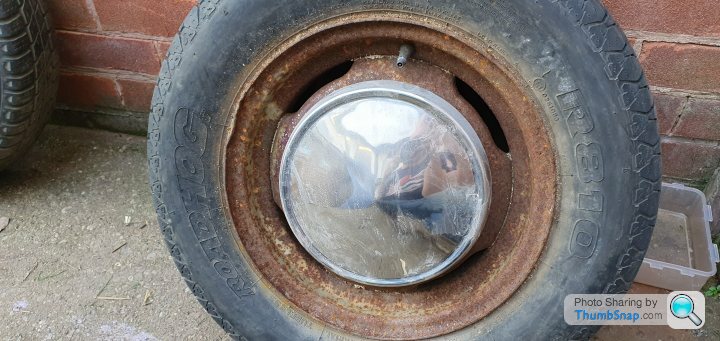
One's found on the GT
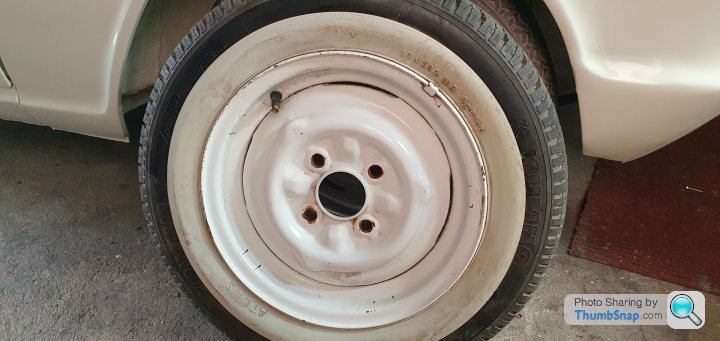
Frustratingly the 4 wheels I bought from Ebay had 3 anglia type and 1 GT, they fit with the disc brakes so that's good but I don't want to commit to wheel refurbs till I have a full set. I'm not losing sleep over all this as I paid £40 for 4 wheels with appalling tyres but I'll need to sort something soonish.
Edited by Retro_Jim on Tuesday 17th November 16:04
Just had another though re your battery....if you have ever seen Jay Leno's Garage on YouTube, he always puts 'gel' (?) modern batteries in all his classic cars ( of which he has..... a lot!!). For the very reason that they will not cause corrosion/leakage etc.
No idea where you get them but I think that they are used in racing/aerospace etc. Which may make them a bit pricey !
Also, re your wheels....not wishing to put a dampner on things....but I would be a bit wary about using very old alloy wheels on a modern restoration, unless they have been crack tested etc.
Steel I would assume is more resilient, but there are quite a few companies that produce 'classic' looking new wheels ( Spyder Engineering used to ( or maybe still do ) sell 'Minilite' type knock-off alloys ( ie with a single spinner).
Just IMO, but I think that your Cortina would look really good on some wider 'Lotus Cortina type" deeper steelies with the flat chrome hubcaps....
Gassing Station | Readers' Cars | Top of Page | What's New | My Stuff