Jaguar xjc 4.2
Discussion


Question for those that read this thread. I’m after the correct battery type for my 77 xj6 to fit within the steel battery holder.
I’ve been trying to find the correct type/code but with no luck so far.
If someone has an older book of battery types to include my car could you have a look and let me know what I’m looking for please
Thank you
I’ve been trying to find the correct type/code but with no luck so far.
If someone has an older book of battery types to include my car could you have a look and let me know what I’m looking for please
Thank you
RobXjcoupe said:
Question for those that read this thread. I’m after the correct battery type for my 77 xj6 to fit within the steel battery holder.
I’ve been trying to find the correct type/code but with no luck so far.
If someone has an older book of battery types to include my car could you have a look and let me know what I’m looking for please
Thank you
Tayna says it's a type 096.I’ve been trying to find the correct type/code but with no luck so far.
If someone has an older book of battery types to include my car could you have a look and let me know what I’m looking for please
Thank you
For example:
Do the dimensions/terminal layout look correct for your battery tray?
072 is the battery I have on my car.
However, I seem to remember having to put a thin piece of plywood under the battery to raise it up slightly.
I also had to make two longer hold down screws for some reason. I can't remember exactly why.
Easy enough to do though, and it will be obvious what's needed when you come to fit it.
However, I seem to remember having to put a thin piece of plywood under the battery to raise it up slightly.
I also had to make two longer hold down screws for some reason. I can't remember exactly why.
Easy enough to do though, and it will be obvious what's needed when you come to fit it.
Edited by Wheelbrace on Monday 27th May 15:45
Edited by Wheelbrace on Monday 27th May 15:45
Wheelbrace said:
072 is the battery I have on my car.
However, I seem to remember having to put a thin piece of plywood under the battery to raise it up slightly.
I also had to make two longer hold down screws for some reason. I can't remember exactly why.
Easy enough to do though, and it will be obvious what's needed when you come to fit it.
Thank you. Most things seem to need an engineering tweak. However, I seem to remember having to put a thin piece of plywood under the battery to raise it up slightly.
I also had to make two longer hold down screws for some reason. I can't remember exactly why.
Easy enough to do though, and it will be obvious what's needed when you come to fit it.
Edited by Wheelbrace on Monday 27th May 15:45
Edited by Wheelbrace on Monday 27th May 15:45
Dug out the rear light units and started fitting them. Lots of movement on the securing screws so currently not screwed on tight until I get the latch fitted to the boot. Looking good though with the American spec all red lense next to the early series 1 reverse light lense with the reflectors within. More luck than judgement but the lenses all have the same date stamp of 68
RobXjcoupe said:
Indeed, a modified m16 stainless steel bolt
Just made a new bolt!..... Awesome work once again fella, we're all in your awe.Just monkeying around with a selection of old imperial threads and the thought of cutting those on a lathe gives me a headache....
Very well done indeed.

catfood12 said:
RobXjcoupe said:
Indeed, a modified m16 stainless steel bolt
Just made a new bolt!..... Awesome work once again fella, we're all in your awe.Just monkeying around with a selection of old imperial threads and the thought of cutting those on a lathe gives me a headache....
Very well done indeed.
RobXjcoupe said:
Thank you. I’m quite happy to explain thread cutting on a lathe. It’s actually not that difficult.
Cheers Rob!My dad was a lathe turner and taught me screw cutting on UNF, UNC, BA, many others including some he made up, and finally under some duress metric!
Cutting imperial threads, getting the right tool and gears for the autofeed always seemed like a faf to me as a teenager in the early 80s.
I can see why the metric system proved more popular over most of the developed world.

I'm still very much in awe of your work and the finished product!
catfood12 said:
RobXjcoupe said:
Thank you. I’m quite happy to explain thread cutting on a lathe. It’s actually not that difficult.
Cheers Rob!My dad was a lathe turner and taught me screw cutting on UNF, UNC, BA, many others including some he made up, and finally under some duress metric!
Cutting imperial threads, getting the right tool and gears for the autofeed always seemed like a faf to me as a teenager in the early 80s.
I can see why the metric system proved more popular over most of the developed world.
I'm still very much in awe of your work and the finished product!
Bobberoo said:
catfood12 said:
RobXjcoupe said:
Thank you. I’m quite happy to explain thread cutting on a lathe. It’s actually not that difficult.
Cheers Rob!My dad was a lathe turner and taught me screw cutting on UNF, UNC, BA, many others including some he made up, and finally under some duress metric!
Cutting imperial threads, getting the right tool and gears for the autofeed always seemed like a faf to me as a teenager in the early 80s.
I can see why the metric system proved more popular over most of the developed world.
I'm still very much in awe of your work and the finished product!
Haven’t done anything interesting for a while as the students are all literal beginners but they do catch me and ask what bit of Jag is that for

Back to this ole chestnut and lack of clearance of the header tank at the end of the triple carb inlet manifold. I’m determined to crack this. So the orange putty is the clearance space between the bonnet and whatever I bolt on. It measures at its narrowest 9mm.

I machined the plate I made a while back and it measured 8.44mm so just out of curiosity gave it a go to shut the bonnet properly
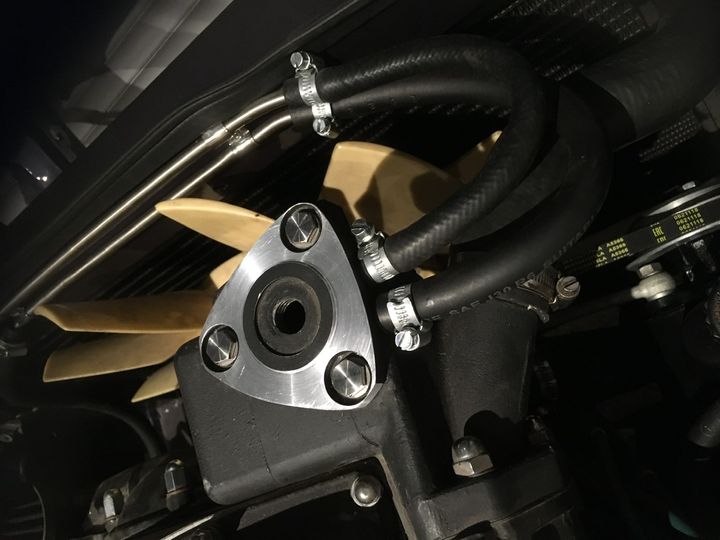
Plate on masked up inside of bonnet incase of panel flex
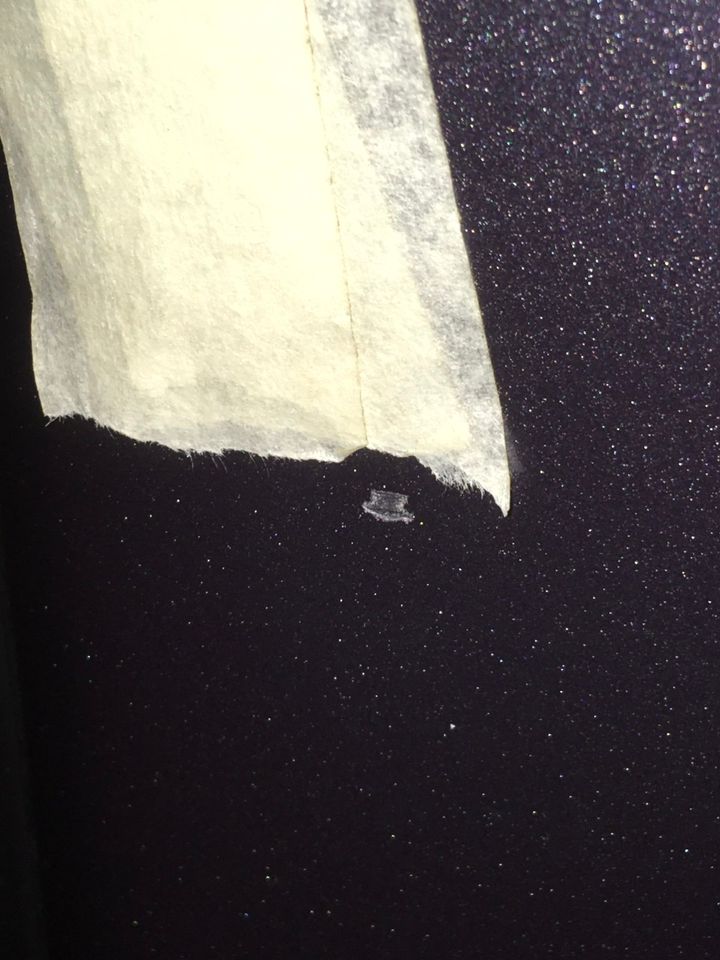
And it chipped the paint because it missed the masking tape
I machined the plate I made a while back and it measured 8.44mm so just out of curiosity gave it a go to shut the bonnet properly
Plate on masked up inside of bonnet incase of panel flex
And it chipped the paint because it missed the masking tape
So back on the machine to remove 1mm from the back and another 1mm off the top.
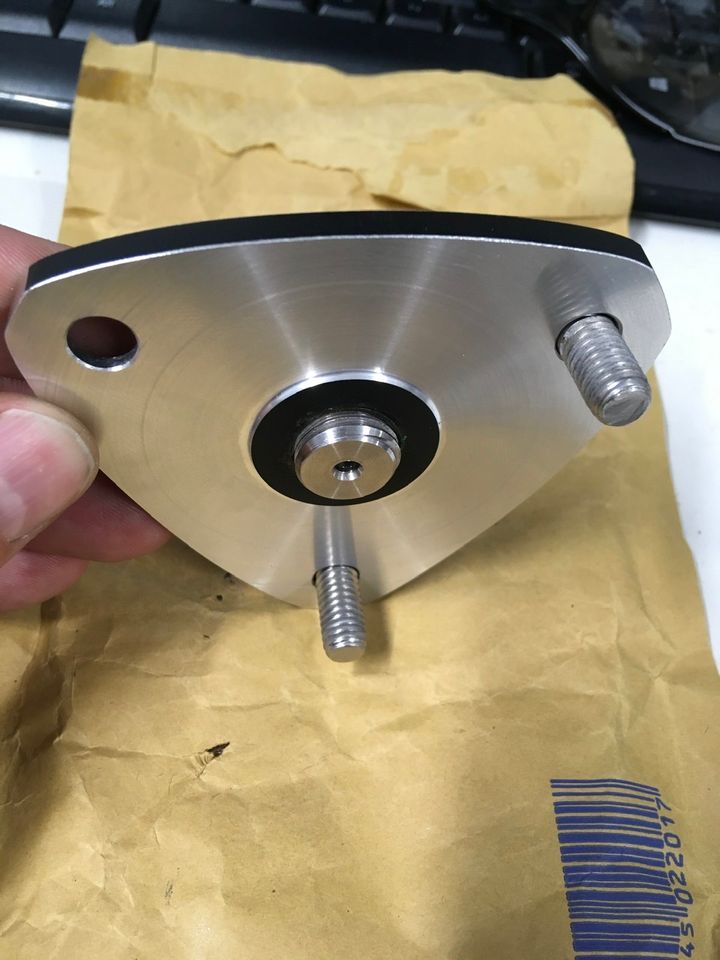
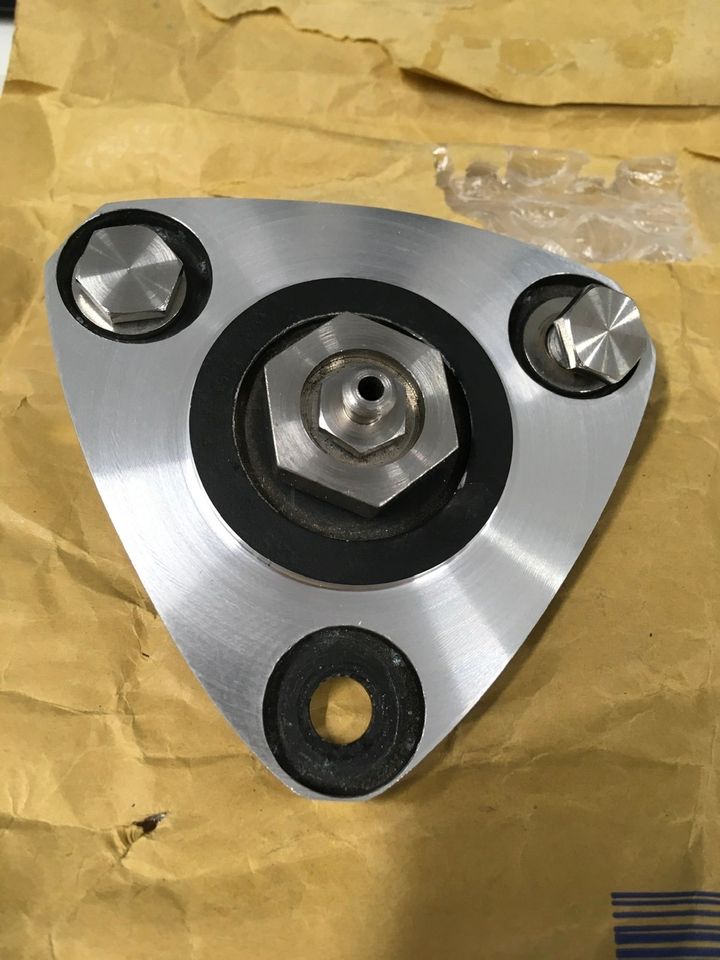
Screw heads were reduced before so can’t really take anymore off those. I’ll try fitting again later. If the screw fails at the front I’ll need a countersunk version so that would give a plate thickness of 5mm which should be ok with 4mm clearance of the bonnet when shut. Hopefully the panel doesn’t flex 4mm when shutting the bonnet.
Once the plate clears I can then measure clearance for the filler and bleed I fitted for the coolant.
Retro_Jim said:
It must be nice to have the Jag back home, your progress and fault chasing has been interesting to see
Definitely good to have the car home. I had been doing 80 mile round trips fettling and modify bits before. Now it’s home I can take my time carefully doing what’s needed.Gassing Station | Readers' Cars | Top of Page | What's New | My Stuff