962 recreation with a GT3 Heart...
Discussion


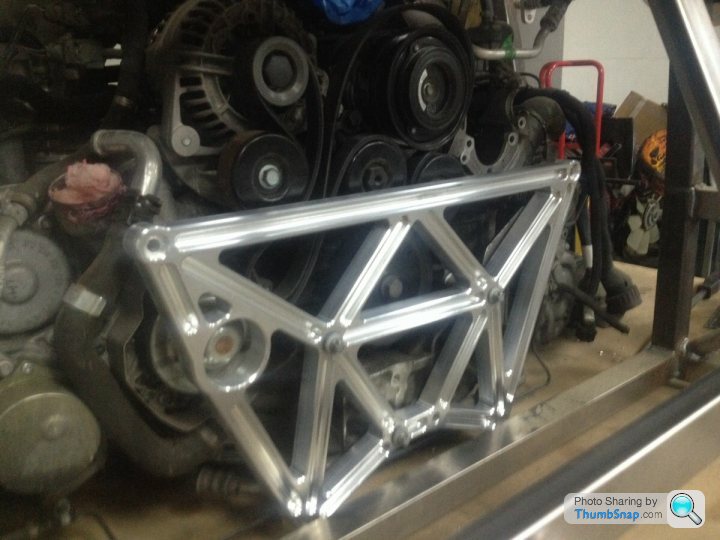
Billet is lovely but, doing any kind of weight comparison between the two 0.08" wall CDS is nearly always lighter for this kind of stuff. (also allot fast to make and therefore cheaper than a complex billet piece)
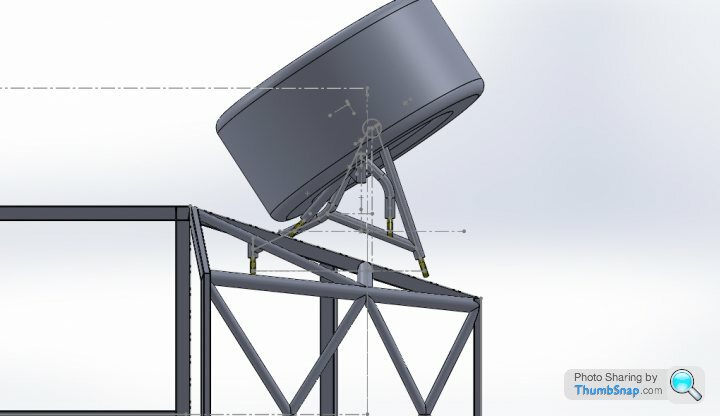
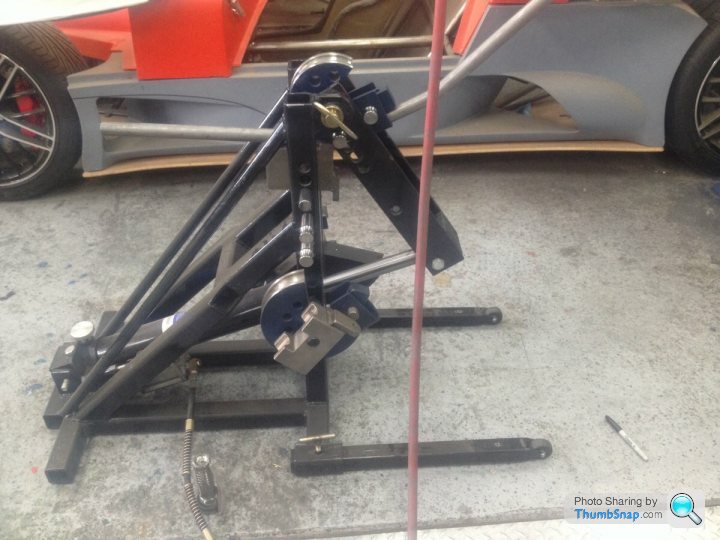
The original had the steer rack behind the wheel center line, and as you got in you had to put your feet under it to get to the pedals. Although this makes for an easier setup for the steering, and a shorter column so therefore lighter, I didn't like the idea of having the rack in the way of your feet. Plus putting the rack in-front of the pedals means I had more room and length to the steering column which in this design is a EPS column.
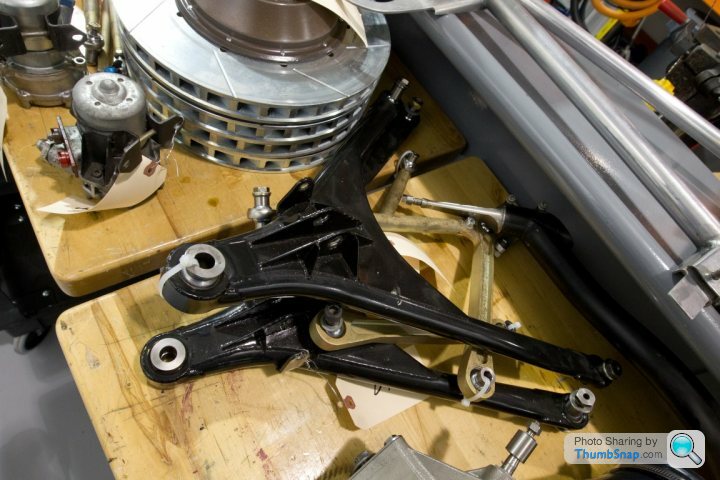
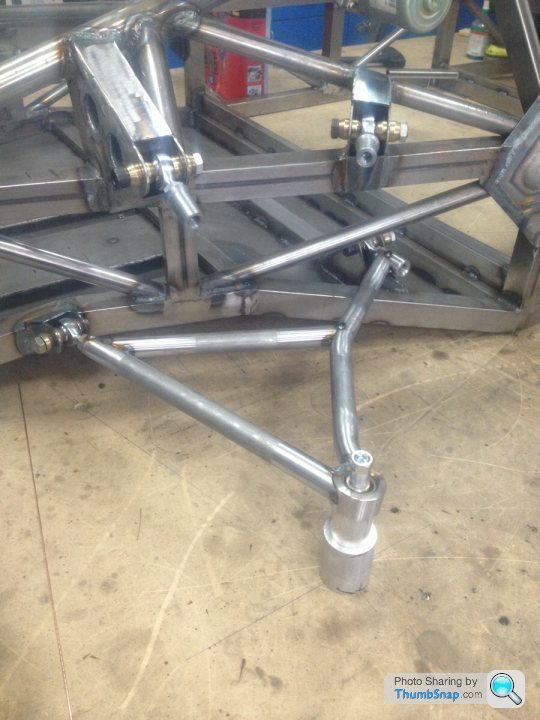
The spread of the lower Wishbone is similar to the original as the floor is roughly the same shape, although the design of the original is kind of Odd and Im not even sure what its made from, but I see why they did it, as getting a large width wheel to not hit anything on full lock make it thin on width at the ball joint end.. Looks as if it's welded but not certain on the exact metal used, hard to tell from the pics Ive got.
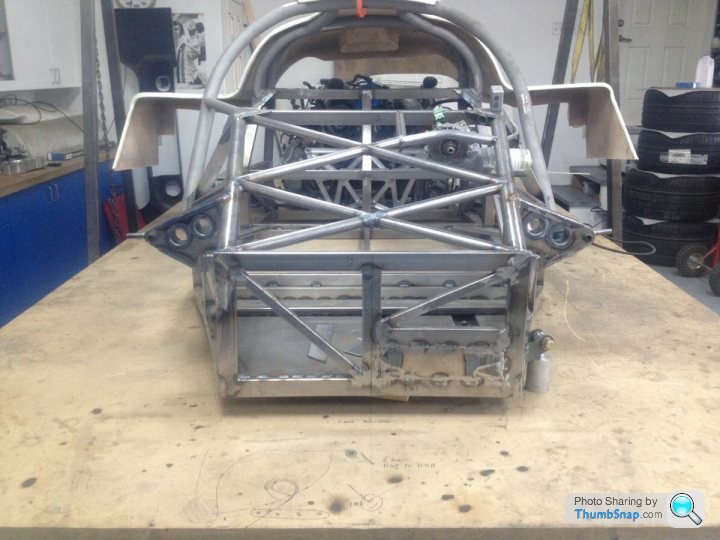
Here you can see the top ball joint is outside the wheel and therefore means even with a large KPI this is going to have allot of Scrub radius. Newer thinking is to lower the scrub radius that's why you just don't see much Dish in modern wheels anymore as the wheel offsets have pushed the upright etc further into the wheel. Scrub on the set I have is about 35mm, I'm guessing the scrub on a original 962 would have been above 100mm prob more.
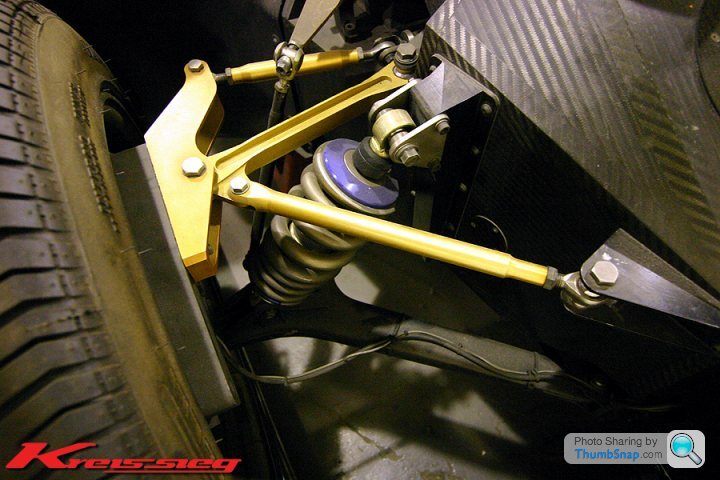
So yes design thinking has change a bit, and me moving the rack has really changed the way it will look. But then again the original had manual steering, don't see many manual steering Le Mans cars now.
The original had the steer rack behind the wheel center line, and as you got in you had to put your feet under it to get to the pedals. Although this makes for an easier setup for the steering, and a shorter column so therefore lighter, I didn't like the idea of having the rack in the way of your feet. Plus putting the rack in-front of the pedals means I had more room and length to the steering column which in this design is a EPS column.
The spread of the lower Wishbone is similar to the original as the floor is roughly the same shape, although the design of the original is kind of Odd and Im not even sure what its made from, but I see why they did it, as getting a large width wheel to not hit anything on full lock make it thin on width at the ball joint end.. Looks as if it's welded but not certain on the exact metal used, hard to tell from the pics Ive got.
Here you can see the top ball joint is outside the wheel and therefore means even with a large KPI this is going to have allot of Scrub radius. Newer thinking is to lower the scrub radius that's why you just don't see much Dish in modern wheels anymore as the wheel offsets have pushed the upright etc further into the wheel. Scrub on the set I have is about 35mm, I'm guessing the scrub on a original 962 would have been above 100mm prob more.
So yes design thinking has change a bit, and me moving the rack has really changed the way it will look. But then again the original had manual steering, don't see many manual steering Le Mans cars now.
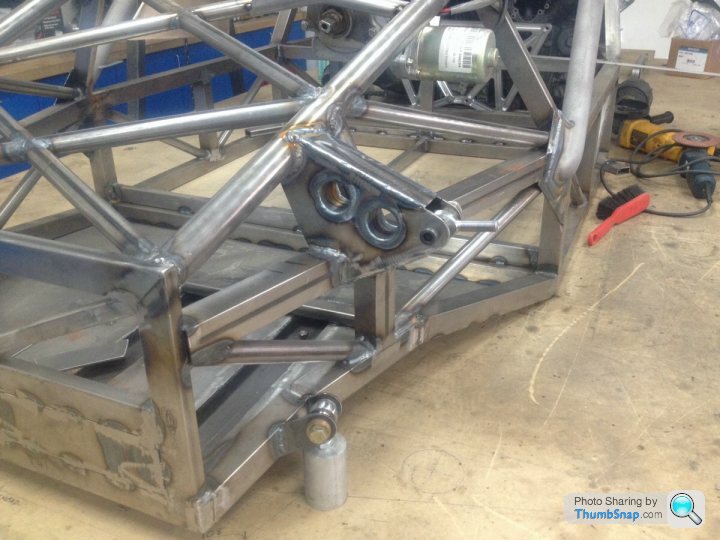
Well the miller has been making the rear mount for the lower wishbones at the back of the car....
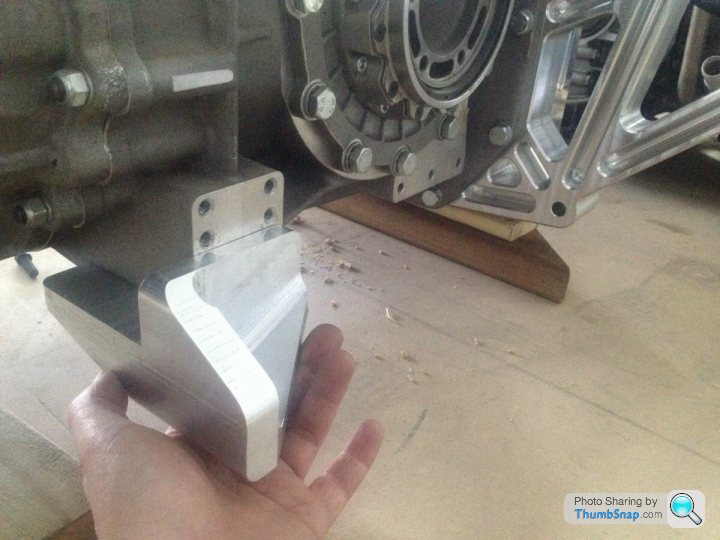
Some drilling and a cleanup and there will be done..
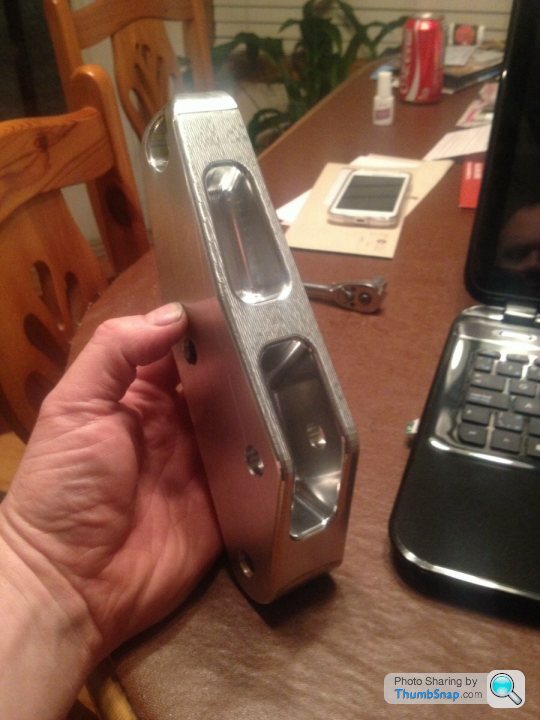
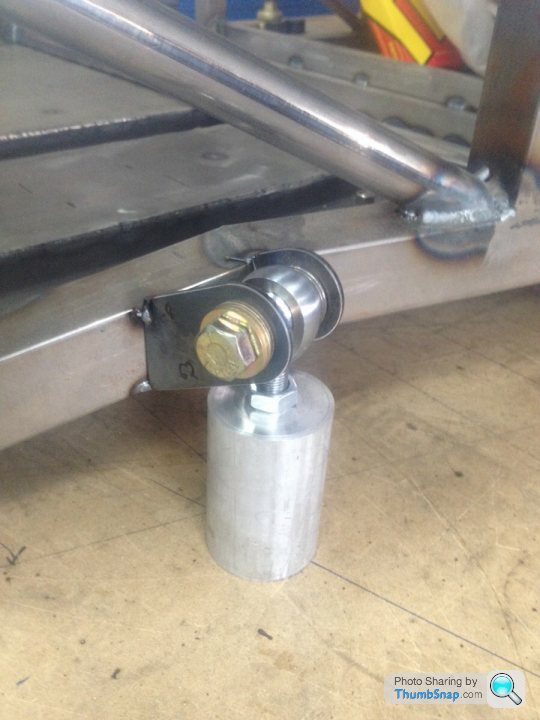
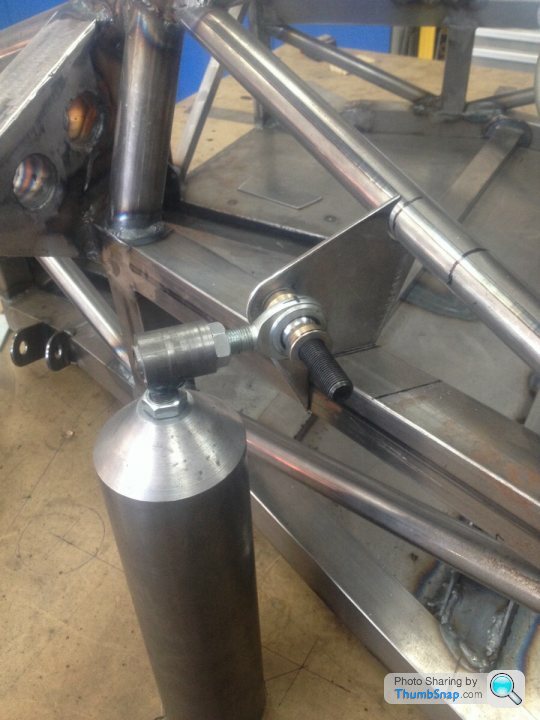
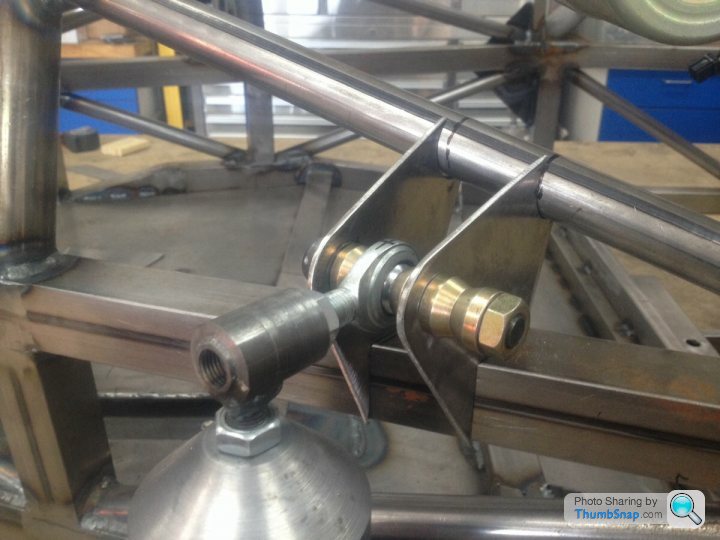
I've been trying to get the final Steering rack setup. To miss the wheel I've had to drop the pickup point on the upright, so a different solid billet steering arm has replaced the simple twin flat plates. This gave me the leverage I wanted as I didn't want to shorten the arm making the steering stiffer. Also found a rack position that misses the suspension and more importantly misses the pedal / drivers feet. Then finally dialed out the bump steer by finding the perfect rack pivot point and Tie rod length. Sounds simple but its took me a few days of head scratching to get it all right. The rack was going to be offset like a normal car but in the end to miss the pedals I've had to go back to a center steer unit and elevate the column link rod to make sure a size 13 boot misses everything... This is what prototyping is all about and I have to admit its great when you find a solution to problem that you thought was going to put you back to stage one...

Some drilling and a cleanup and there will be done..
I've been trying to get the final Steering rack setup. To miss the wheel I've had to drop the pickup point on the upright, so a different solid billet steering arm has replaced the simple twin flat plates. This gave me the leverage I wanted as I didn't want to shorten the arm making the steering stiffer. Also found a rack position that misses the suspension and more importantly misses the pedal / drivers feet. Then finally dialed out the bump steer by finding the perfect rack pivot point and Tie rod length. Sounds simple but its took me a few days of head scratching to get it all right. The rack was going to be offset like a normal car but in the end to miss the pedals I've had to go back to a center steer unit and elevate the column link rod to make sure a size 13 boot misses everything... This is what prototyping is all about and I have to admit its great when you find a solution to problem that you thought was going to put you back to stage one...


I did do a Double shear bracket in Cad, but it was so OTT I canned it. The distance between the pickup points has a bearing on the shear load. The further apart the less the leverage and therefore the less shear load. If this was going to be a 1000Lbs race engine then yes it would be worth it but seeing as its probably never going to be over 400lbs torque then the figures just where not high enough to worry about it. The bracket is threaded so the Nyloc nut on on the back is really a Locknut now....
ezakimak said:
thanks bloke.
ill be steeling that and using it on the 40.
No Problem glad I can help....ill be steeling that and using it on the 40.
And yes that sequence sounds about right...
Remember the chassis may move when you weld it don't be to worried as long as the structure is there,
if its a little off by a few mm here and there your still ok. Just when you build the pickup point for the suspension make sure there correct just means some brackets may not be identical left to right...
Todays fun...
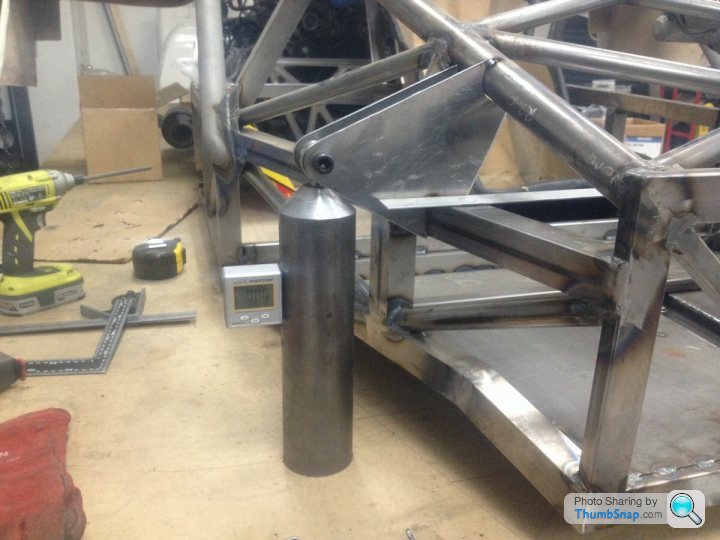
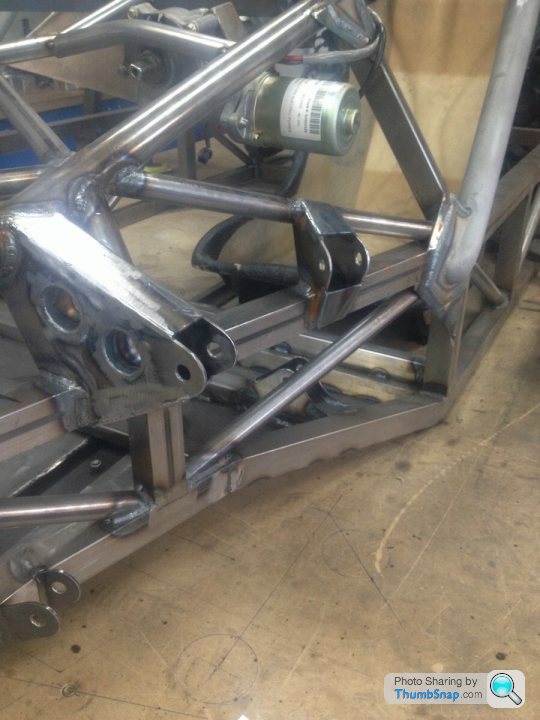
Nicely Tig'ed up box with some tubes welded in for strength

The back pickup point of the lower wishbone, had to do some Cad sims before I was happy which way to go,
but in the end I've Sliced a 38x38 box down the length as I wanted it vertical and the floors got 12 deg slant. The floors 2mm so Ive just stitched it to that to make a nice easy mount for the tabs....Pic to follow..
Nicely Tig'ed up box with some tubes welded in for strength
The back pickup point of the lower wishbone, had to do some Cad sims before I was happy which way to go,
but in the end I've Sliced a 38x38 box down the length as I wanted it vertical and the floors got 12 deg slant. The floors 2mm so Ive just stitched it to that to make a nice easy mount for the tabs....Pic to follow..
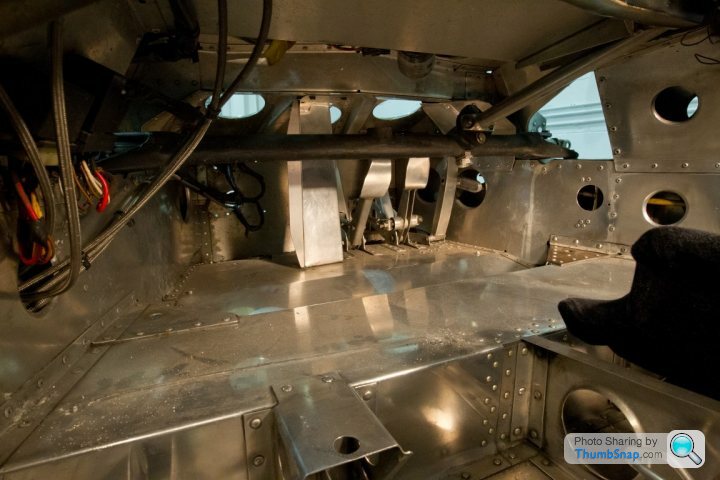
Of Course there are many benefits for building a Chassis on a Flat surface, you can use a old school marking out pointer to project the height of some thing over other tubes..

The beam between the 2 points is also at a height so I can use it for the Ally skin that will be the raised floor in=front of the seats..

The beam between the 2 points is also at a height so I can use it for the Ally skin that will be the raised floor in=front of the seats..


Gassing Station | Porsche General | Top of Page | What's New | My Stuff