962 recreation with a GT3 Heart...
Discussion


Well after some head scratching yet again out with the grinder.. If it ain't right then I'm not happy..
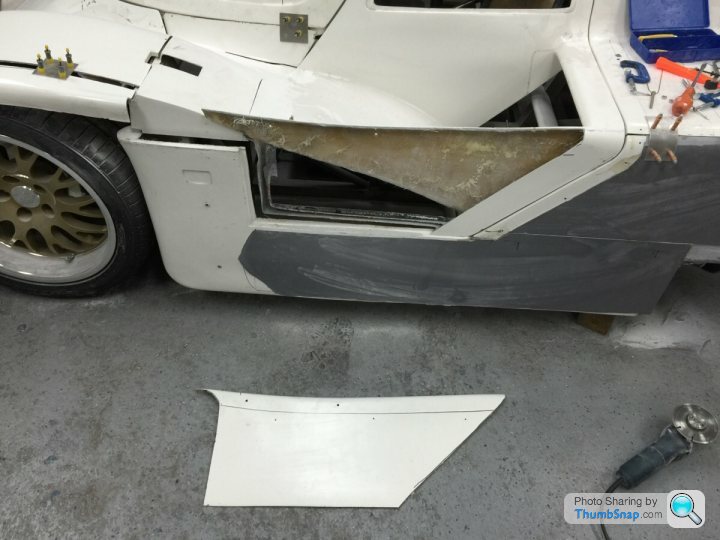
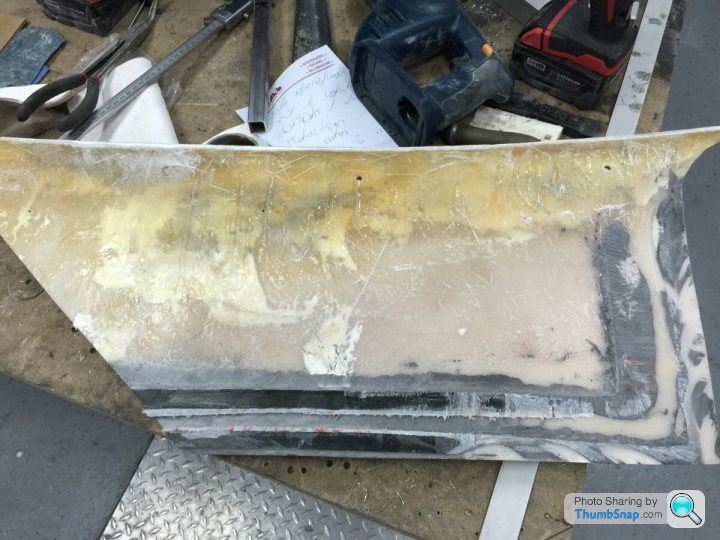
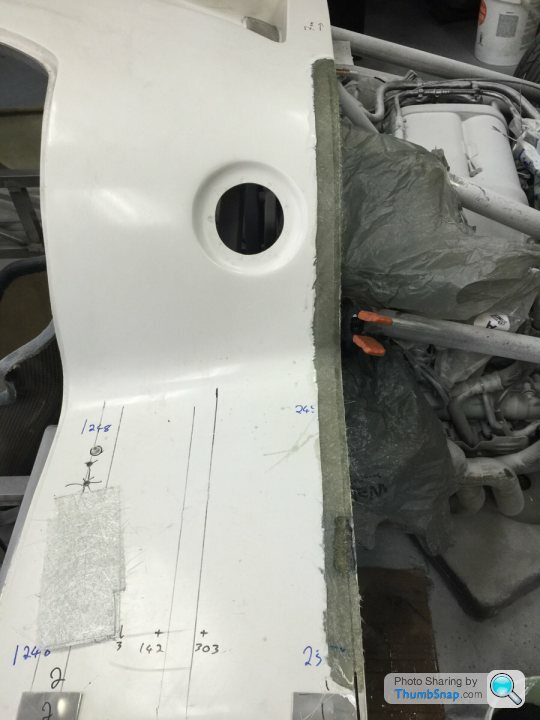
The inner and outer skins of the door just would not straighten out enough, so I cut of the outer completely
allowing me to rebuild the outer from scratch and straighten the inner and reinforce it from the inside.
As you can see from the state of the original glass work it was way to thick and the 2 parts of the door where not put together with much care and attention. Once the major lumps had been ground off so the inner panel was back to almost flat it actually corrected half the bend (Surprise surprise), but once we pushed it out 2mm past flat (allowing so it can spring back a little once the brace was removed) I added 3 layers of glass and some core matt to give it an even and strong thickness now.

Outer skin just as easy to build new again with the same process as the rectification we use on the side pods, cut off the curved top piece and grind to a knife edge then laminate up a new with added core mat of course...

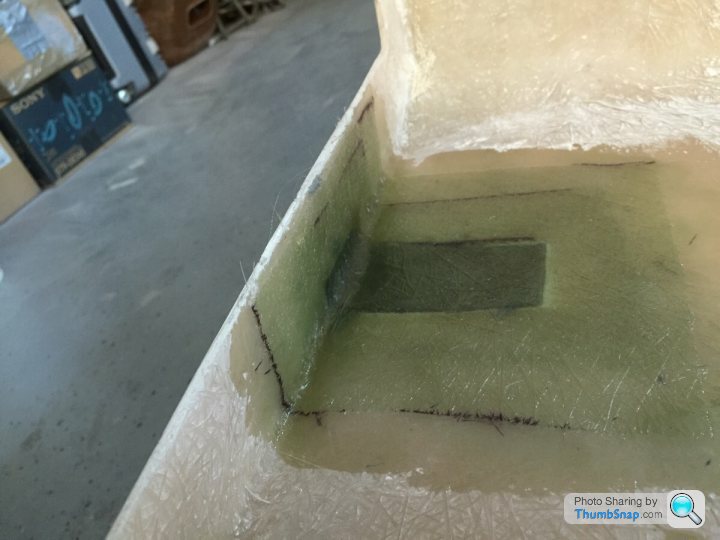
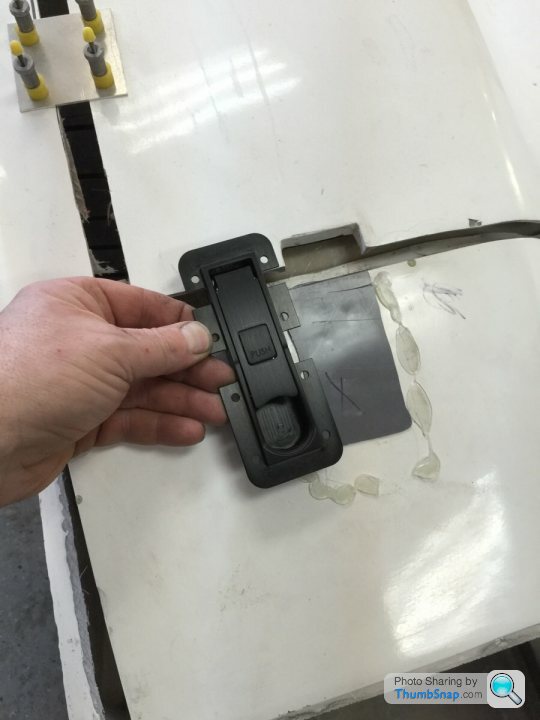
Also while doing these little bits I've been removing the original Catch holes for the front and rear clip, cutting out the large recesses and laminated them back to flat, so I can flush mount the newer and nicer billet "Aero 3" catches we have.
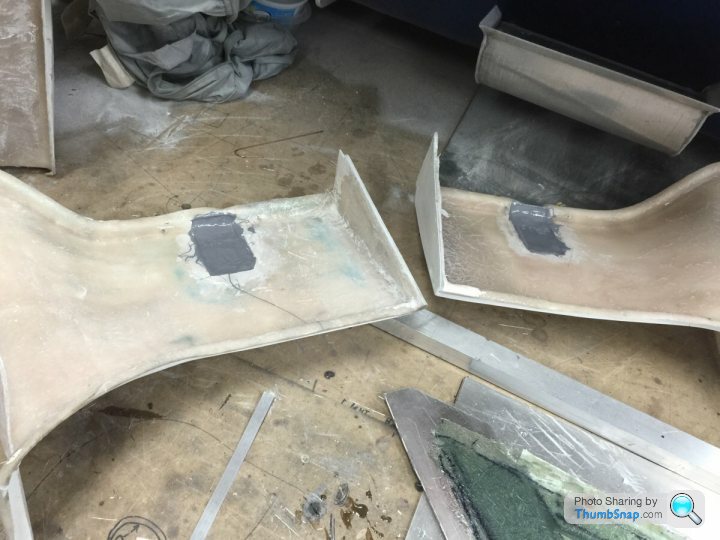
Gelcoat then layers of matt to fill the holes left...
The inner and outer skins of the door just would not straighten out enough, so I cut of the outer completely
allowing me to rebuild the outer from scratch and straighten the inner and reinforce it from the inside.
As you can see from the state of the original glass work it was way to thick and the 2 parts of the door where not put together with much care and attention. Once the major lumps had been ground off so the inner panel was back to almost flat it actually corrected half the bend (Surprise surprise), but once we pushed it out 2mm past flat (allowing so it can spring back a little once the brace was removed) I added 3 layers of glass and some core matt to give it an even and strong thickness now.
Outer skin just as easy to build new again with the same process as the rectification we use on the side pods, cut off the curved top piece and grind to a knife edge then laminate up a new with added core mat of course...
Also while doing these little bits I've been removing the original Catch holes for the front and rear clip, cutting out the large recesses and laminated them back to flat, so I can flush mount the newer and nicer billet "Aero 3" catches we have.
Gelcoat then layers of matt to fill the holes left...
Edited by GTRCLIVE on Tuesday 19th January 22:25
Only one draw back with the Manual Skin pins, is that if the panel is to thick then you can't get though with the stepped piece and they don't grip, where as the Cleco pins expand nicely even in deep holes. Only just starting to use Cleco pins and I must admit to preferring them, but I've used so many recently I had to break out my old stock of Skin pins.... horses for courses i suppose....
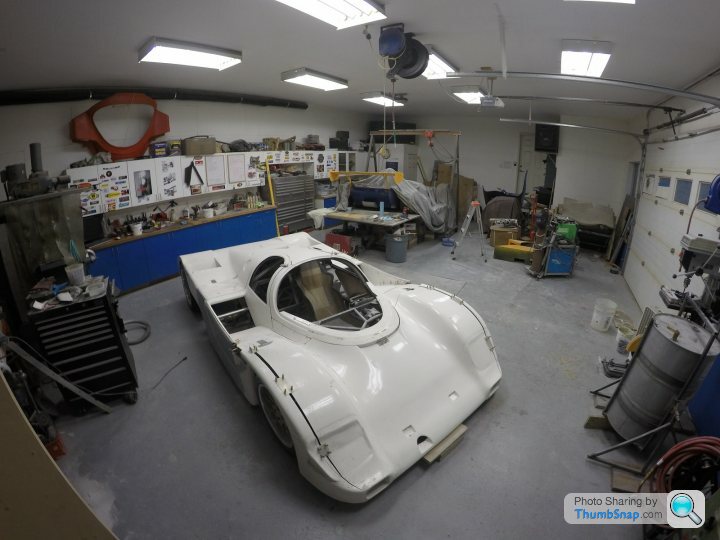
On a more positive note the driver door is now on its pivots and I feel I'm finally getting some traction on the body... Pic's tomorrow...
On a more positive note the driver door is now on its pivots and I feel I'm finally getting some traction on the body... Pic's tomorrow...
Storer said:
Holy s t now that's a build thread
Only ever seen one length, where do you get them from Bud ??
Positioned the panel the lower hinge attaches to, and bracketed it back to the ally frame to hold it. So finally laminated the panel back on. Made a new bottom hinge plate as the wall it attaches to has now moved, and allowed for a nice simple bracket instead of the one that came with the body.

Welded a threaded insert into the cage for the top hinge rod end, then mounted the billet upper.
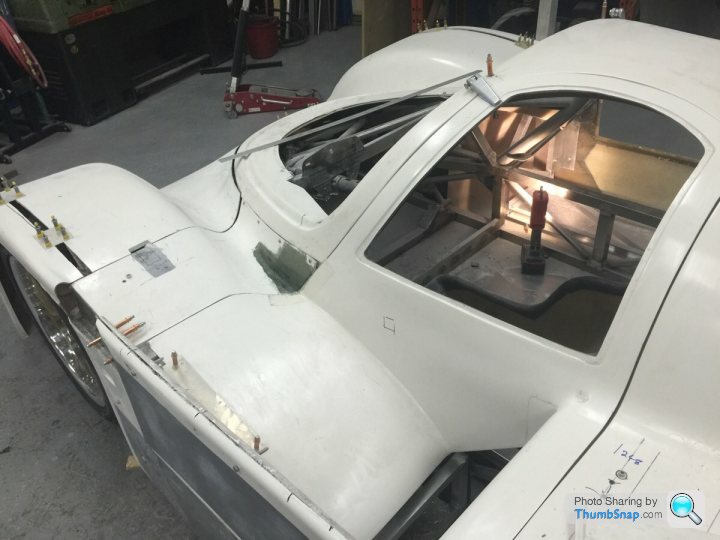
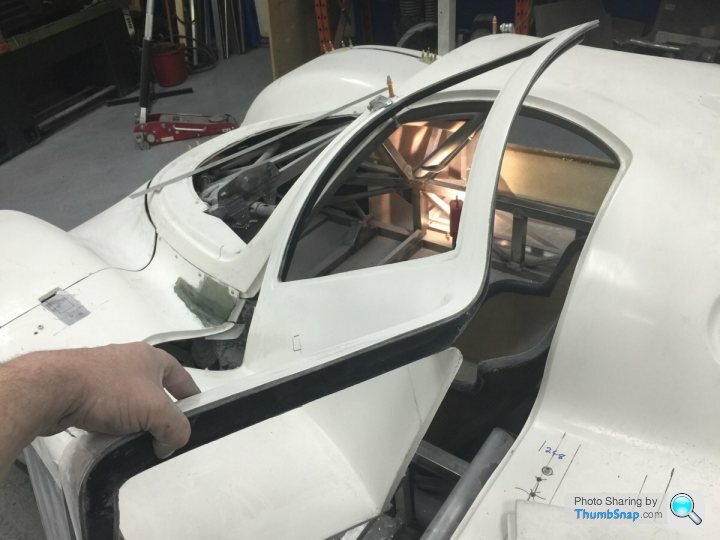
So finally have the drivers side alignment I'm happy with.
I've started the passenger door but it seems it's going to need a similar butchering to get it in spec... Oh well progress is good so I'm not so concerned now as I can see the light at the end of the tunnel...
Positioned the panel the lower hinge attaches to, and bracketed it back to the ally frame to hold it. So finally laminated the panel back on. Made a new bottom hinge plate as the wall it attaches to has now moved, and allowed for a nice simple bracket instead of the one that came with the body.
Welded a threaded insert into the cage for the top hinge rod end, then mounted the billet upper.
So finally have the drivers side alignment I'm happy with.
I've started the passenger door but it seems it's going to need a similar butchering to get it in spec... Oh well progress is good so I'm not so concerned now as I can see the light at the end of the tunnel...

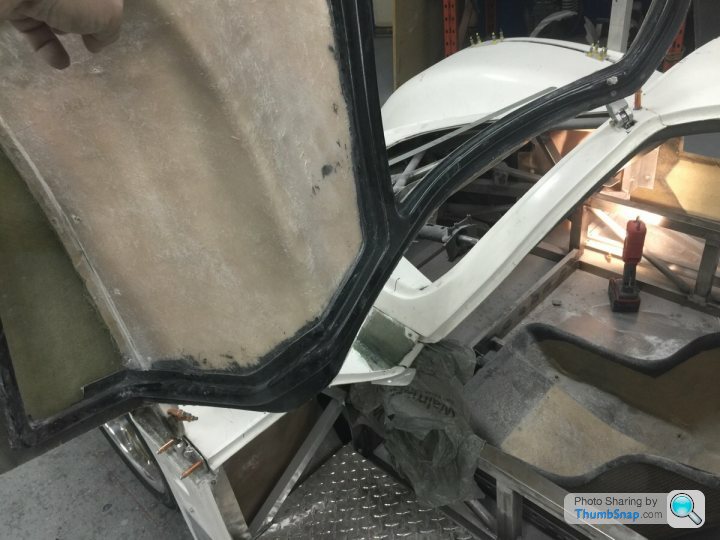
More F/G work, now both doors open and close. The first new catch is in and the alignment of the rear clip to bulkhead is sorted after another little adjustment. Thank god I have a diamond wheel for my angle grinder to cut this stuff... otherwise I would have gone though a box of normal wheels by now...
I put a vertical laser on the rear bulkhead and it was clear it was at fault, so a little cut a push back and 3 layers of glass and where all good now.
and a couple of shots from the GoPro...
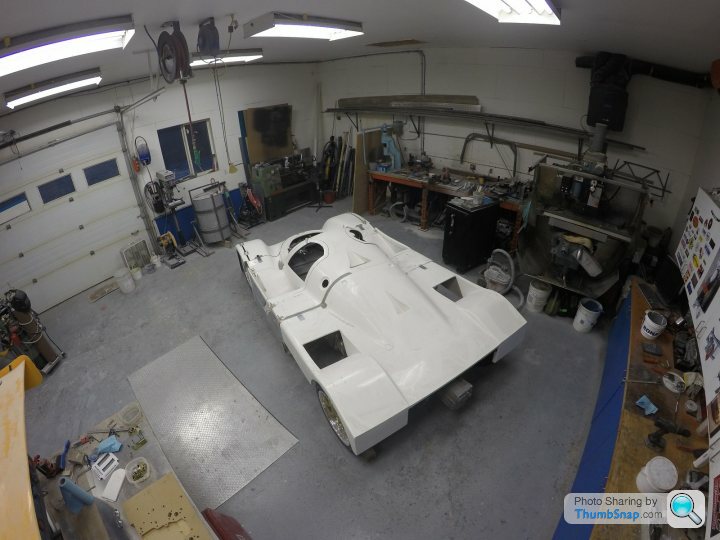
Just the front chassis crash structure to mount then the front clip will be the last panel to be self supporting .... Its getting closer every day now..
I put a vertical laser on the rear bulkhead and it was clear it was at fault, so a little cut a push back and 3 layers of glass and where all good now.
and a couple of shots from the GoPro...
Just the front chassis crash structure to mount then the front clip will be the last panel to be self supporting .... Its getting closer every day now..

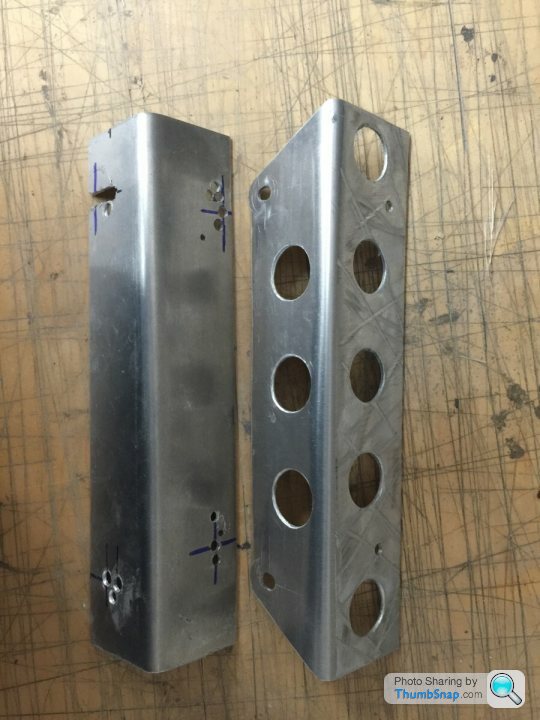
Door catches on the original cars are not very sturdy nor do they look very nice. So we've mounted the catch to the chassis and the striker to the door opposite to an original. This means no mechanical key lock to open the door, just a remote key fob... Bringing the car up to date with the rest of the drive train....
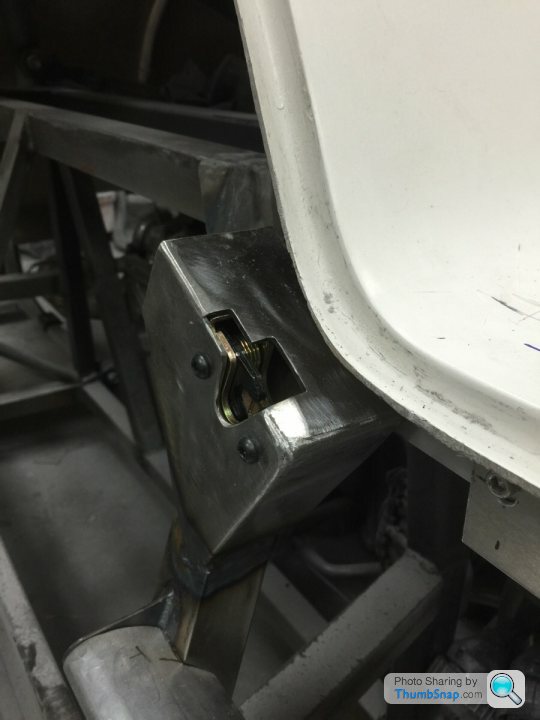
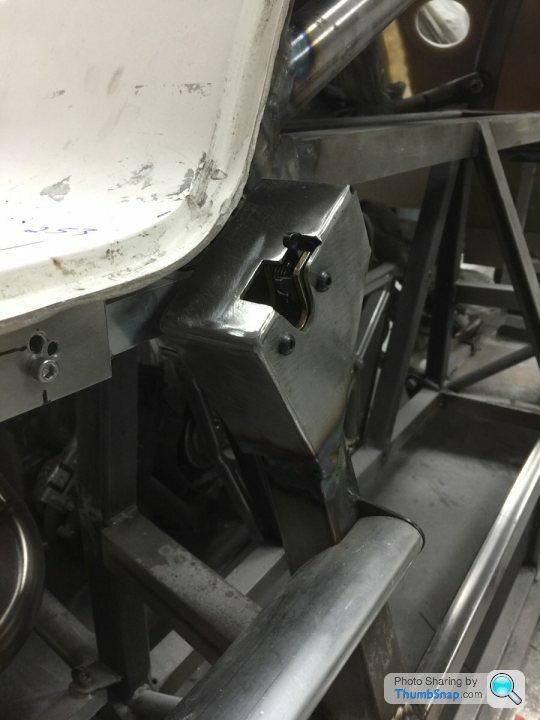
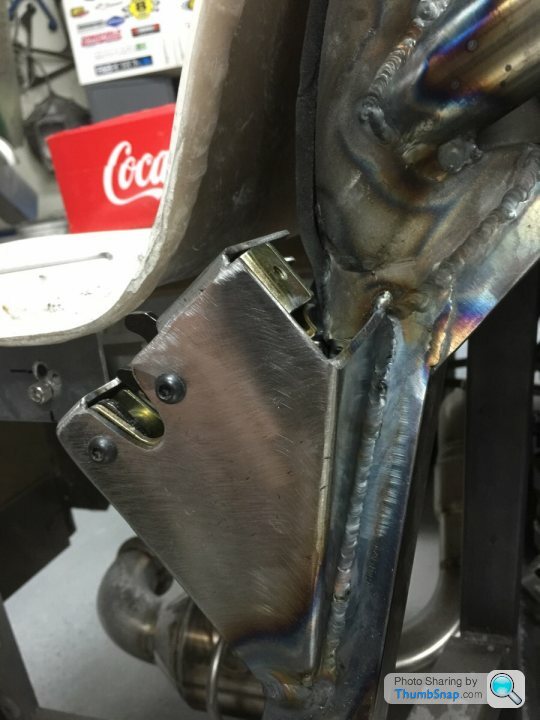
Due to the only way to install and remove the catch is though the top, I'll make a Beauty cover for that in ally later..
Due to the only way to install and remove the catch is though the top, I'll make a Beauty cover for that in ally later..
Due to the damage sustained by the original Tank ( when the GT3 had its off ) and the fact it got in the way of the chassis, a new tank had to be sorted. No point in buying another original (as its more expensive anyway) so this came today....
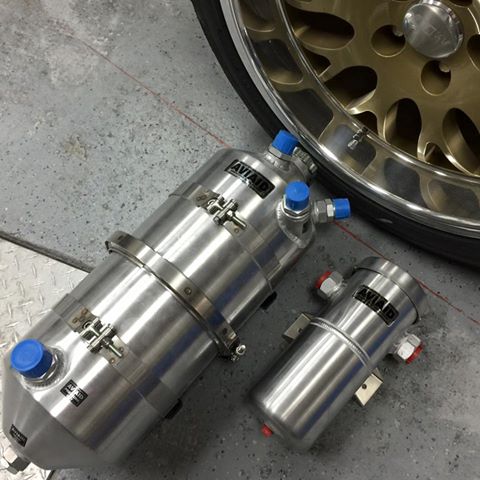
Apart from welding a few fittings onto the original GT3 pipes this should be a Easy install....
Apart from welding a few fittings onto the original GT3 pipes this should be a Easy install....
Well after some searching I have finally found a proper rear wing to do this car justice, its maybe "bigger than we actually need for a road car" ( Understatement of the year ) but it will be perfect for a Group C car. Due to the Size of it I will have to run it in low drag Configuration closer to the rear deck in height and almost certainly in Zero rake. Once it arrives of course pictures will be taken, and yes I have owned smaller Dining tables 
Edited by GTRCLIVE on Monday 22 February 23:23
Gassing Station | Porsche General | Top of Page | What's New | My Stuff