Body going back on LS1 Cerb tommorow
Discussion


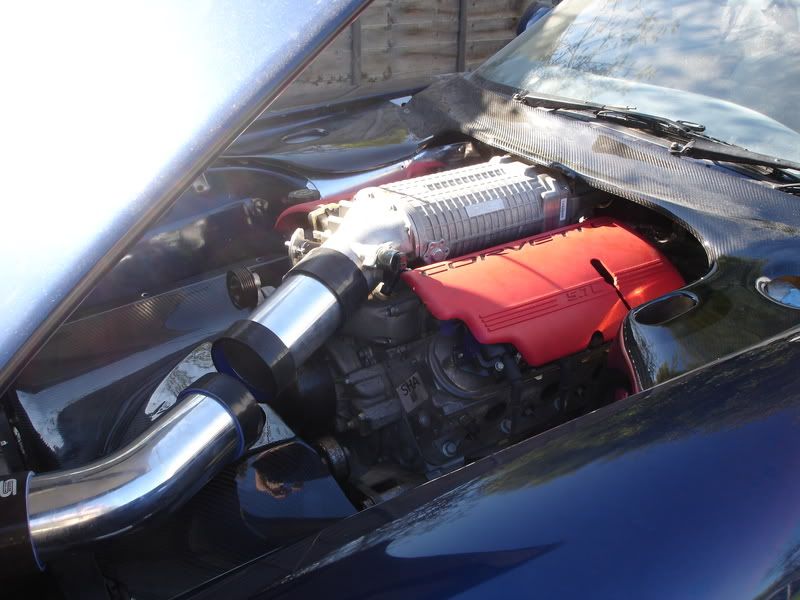
That supercharger sure looks the business tucked in there!
I'm doing the remote oil filter too, and a mini hi-torque starter motor on the other side. The McLeod scattershield bellhousing is a lot bigger than I thought and squeezing exhaust through is challenging, but doable. Engine mounts will be quite forward to make room for the headers and collectors.
Don
If you get a chance to take some more pics of your exhaust Rich I'd like to see how it's routed from the headers and past the bellhousing. I'm planning 4-2-1 with the 2-1 merge happening just behind the bellhousing - frm your pic here it looks like you're going 4-1?
ETA - never mind about the pics, found them the earlier build thread.
ETA - never mind about the pics, found them the earlier build thread.
Edited by Omerta on Wednesday 10th September 22:29
I'd like to say it's part of a master plan.... but it was done very early on when I thought a wide lump of lexus v8 would need more space. Then the plan changed. However, given I don't have any of the original fittings for those areas and it was substantially fire damaged I'm happy we've got plenty of room to play with.
Omerta said:
If you get a chance to take some more pics of your exhaust Rich I'd like to see how it's routed from the headers and past the bellhousing. I'm planning 4-2-1 with the 2-1 merge happening just behind the bellhousing - frm your pic here it looks like you're going 4-1?
ETA - never mind about the pics, found them the earlier build thread.
Here's a couple more, still need welding up. Its 3" tube but 2.5" is plenty, I went for 3" just in case I needed to make lots of indentations to clear the gearbox, as it turned out it only required a couple of small indents.ETA - never mind about the pics, found them the earlier build thread.
Edited by Omerta on Wednesday 10th September 22:29
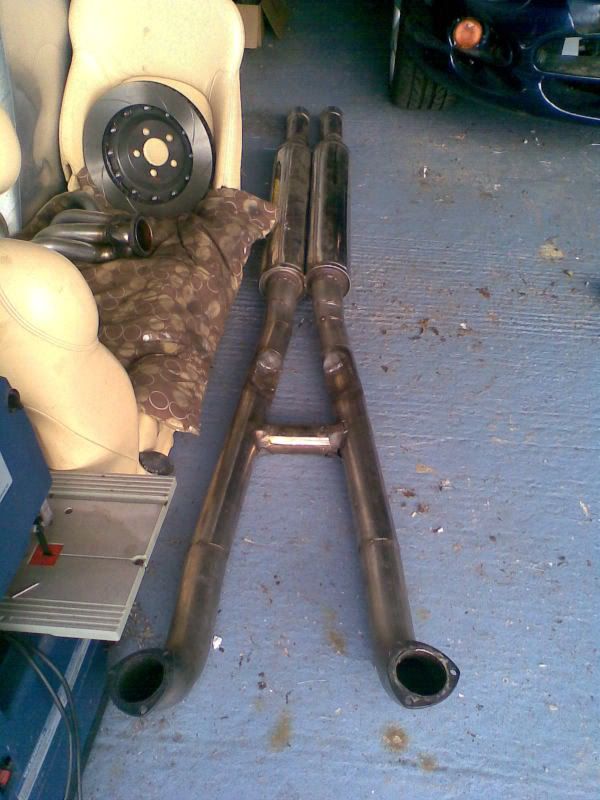
Manifolds,

Its not the best for scavenging effect but good enough as MK 1.

Rich.
Here we go then, I've had the week off and made a bit of progress, after battling with fixing some fibre glass around the dash board and messing with the gearbox mount again, I think I've got something to be proud of.
Firstly the brakes, now while some consider theirs to be adequate, my missus recons bigger is better. Still a bit of machining to do as theres only a knats knob between the wheel and caliper.
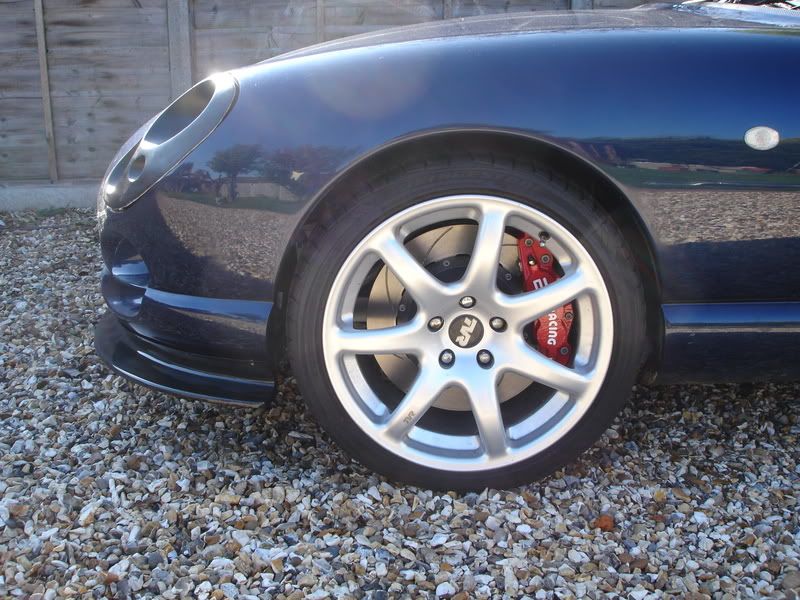
Big thankyou to CarbonAl and Kia for finishing my bits this week, I just couldn't wait to fit them.
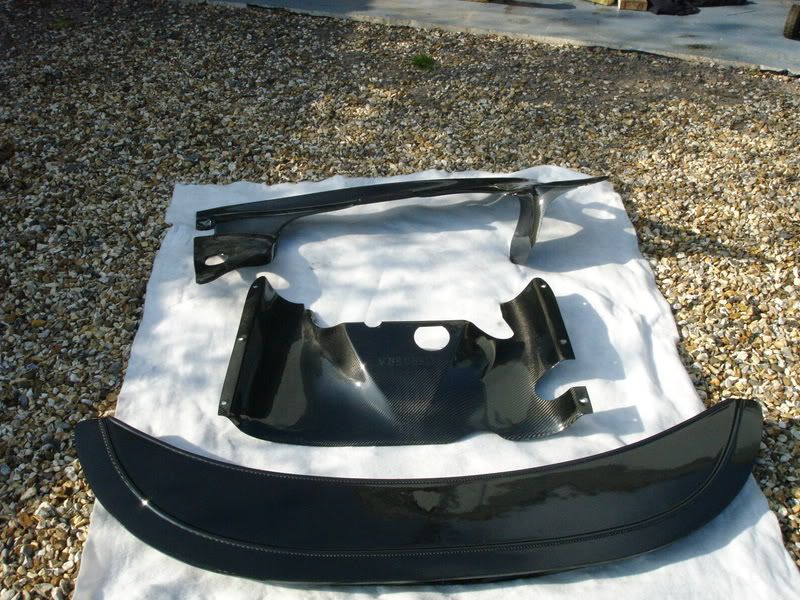
With a big gulp and one eye shut I took a saw to the headlights and cut them out for the conversion pods, this also helps with placing all the ancillaries for the engine.
Beneath the headlights on the near side I've fitted the chargecooler water pump and routed the hoses to the chargecooler rad which sits in front of the coolant rad.
Beneath the offside head lights I've mounted the oil thermostat. All the new hoses were made up by Pirtek, much cheaper than getting a motorsport outlet to do it.
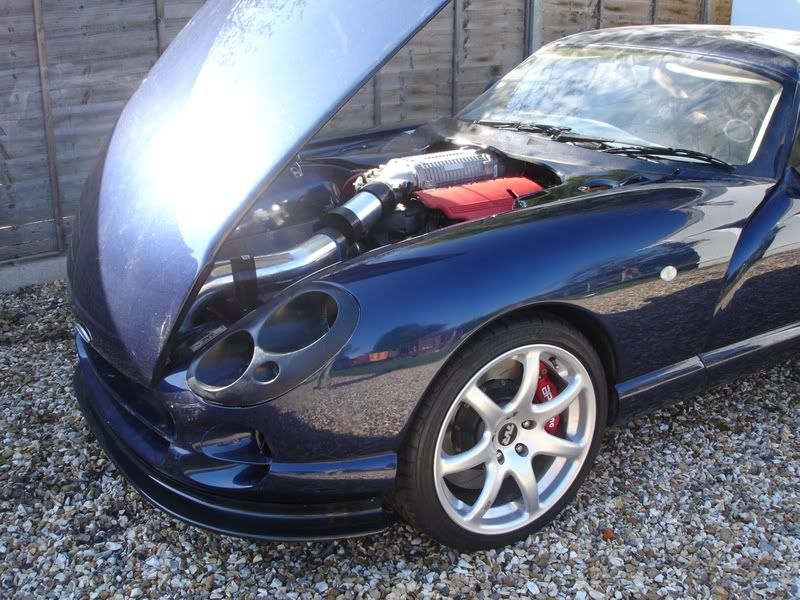
Heres how it looks from the front.
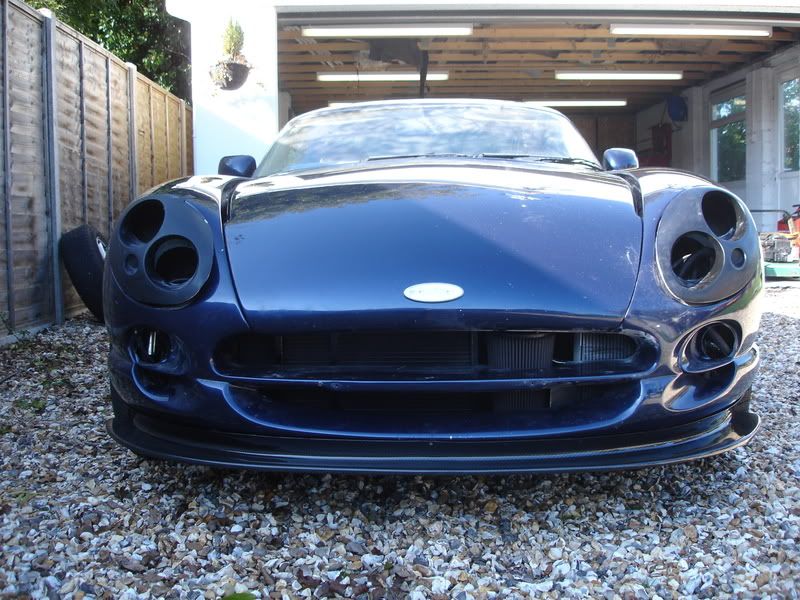
I'm going to lose the front indicators and fit smaller ones into the sidelight holes in the conversion pods, the sidelight will be inside the mainbeam unit. Maybe use the indicator holes for brake cooling in the future.
You can see the chargecooler rad to the left and the soon to be replaced oil cooler on the right, the cone filter fits nicely between the two and I've fitted a power steering cooler behind the oil cooler. Apparently the pumps are prone to seal failure through heat as its bolted directly to the cylinder head.
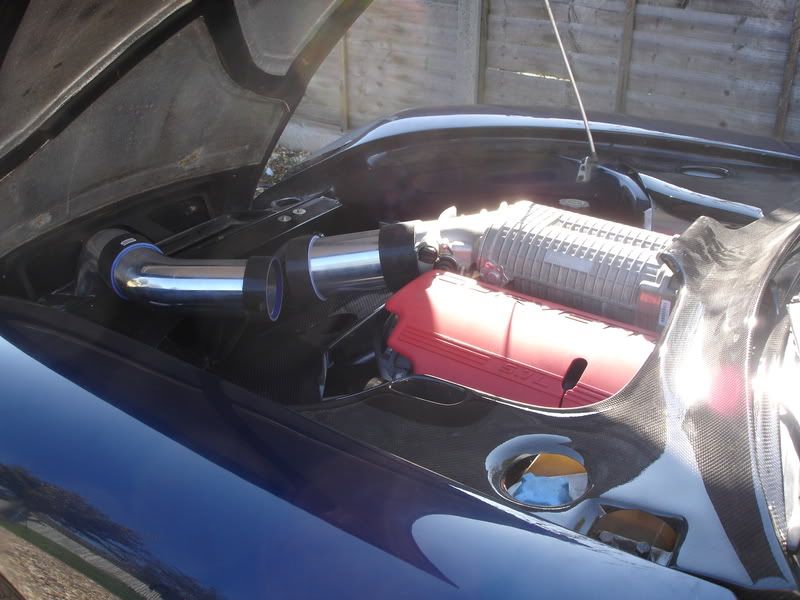
The induction tube and water pipes and hoses turned up this week from Siliconhoses.com The water pipes were very easy to make up, just 90 deg silicon bends and straight lengths of alley tube. I've fitted them so they all run underneath the F1 panel out of sight.
Induction tube is 4", the gap is for the 85mm MAF then straight into the 98mm throttle body.
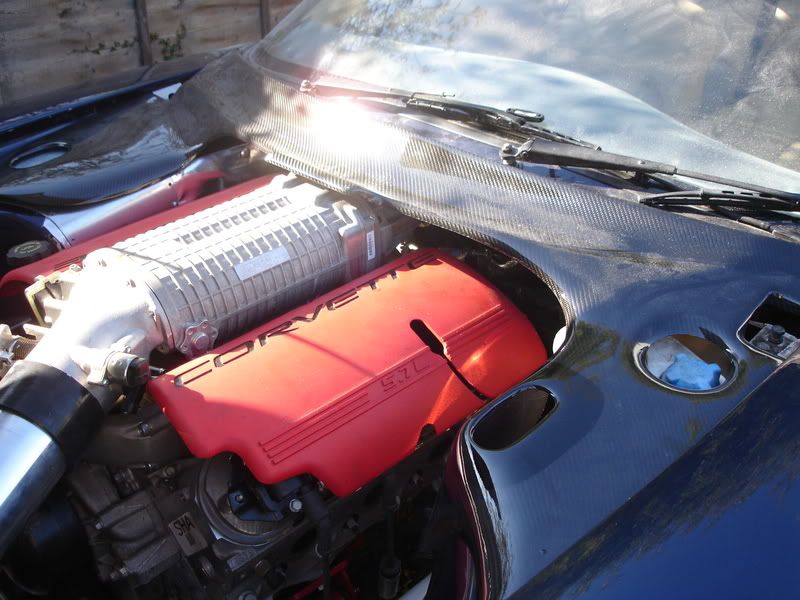
Check out that carbon Black around the battery terninal is glassfibre so the carbon doesn't short the battery out.
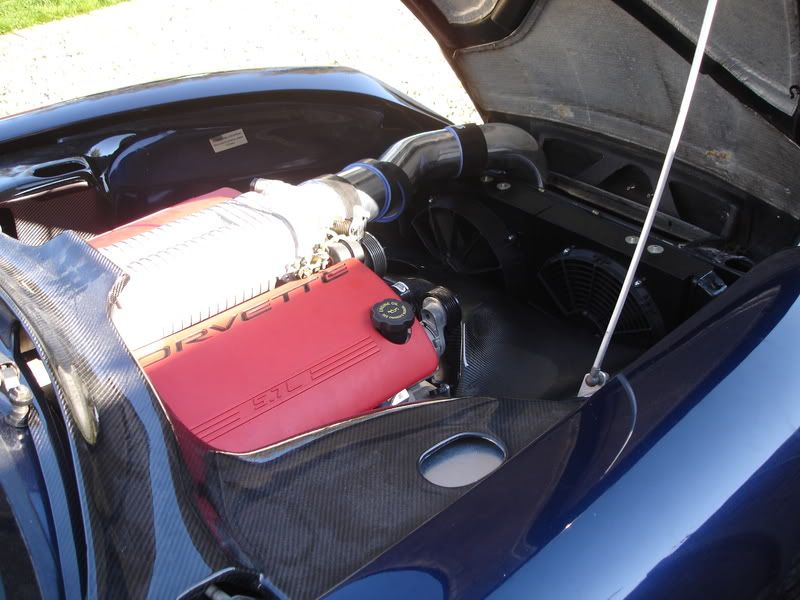
I put the rad back in just to mock everything up for a few pics. I just love that splitter, just hope the suspension settles a bit more, the shocks are as low as they'll go without the springs rattling, theres a bit more weight to add but not much. Do the GAZ settle much?
Next bit is to fit the chargecooler resevoir where the brake master cylinder use to sit and I must remember to finish bolting the body back to the chassis.
Rich.
Firstly the brakes, now while some consider theirs to be adequate, my missus recons bigger is better. Still a bit of machining to do as theres only a knats knob between the wheel and caliper.
Big thankyou to CarbonAl and Kia for finishing my bits this week, I just couldn't wait to fit them.
With a big gulp and one eye shut I took a saw to the headlights and cut them out for the conversion pods, this also helps with placing all the ancillaries for the engine.
Beneath the headlights on the near side I've fitted the chargecooler water pump and routed the hoses to the chargecooler rad which sits in front of the coolant rad.
Beneath the offside head lights I've mounted the oil thermostat. All the new hoses were made up by Pirtek, much cheaper than getting a motorsport outlet to do it.
Heres how it looks from the front.
I'm going to lose the front indicators and fit smaller ones into the sidelight holes in the conversion pods, the sidelight will be inside the mainbeam unit. Maybe use the indicator holes for brake cooling in the future.
You can see the chargecooler rad to the left and the soon to be replaced oil cooler on the right, the cone filter fits nicely between the two and I've fitted a power steering cooler behind the oil cooler. Apparently the pumps are prone to seal failure through heat as its bolted directly to the cylinder head.
The induction tube and water pipes and hoses turned up this week from Siliconhoses.com The water pipes were very easy to make up, just 90 deg silicon bends and straight lengths of alley tube. I've fitted them so they all run underneath the F1 panel out of sight.
Induction tube is 4", the gap is for the 85mm MAF then straight into the 98mm throttle body.
Check out that carbon
Black around the battery terninal is glassfibre so the carbon doesn't short the battery out.I put the rad back in just to mock everything up for a few pics. I just love that splitter, just hope the suspension settles a bit more, the shocks are as low as they'll go without the springs rattling, theres a bit more weight to add but not much. Do the GAZ settle much?
Next bit is to fit the chargecooler resevoir where the brake master cylinder use to sit and I must remember to finish bolting the body back to the chassis.
Rich.


Thanks for the comments guys, all appreciated.
Still a fair way to go, not looking forward to re-fitting all the interior and less so to cleaning it.
Doing it yourself is definetly satisfying but it can get a bit much, the exhaust nearly beat me. Might go for a MKII exhaust if it doesn't work out as I want.
Duke, headlight surrounds are held in with 4, 10mm nuts covered in silicon access is through the panels in the wheel arch. Basically cut everything away to leave yourself about an inch around the edge to mount the pods onto.
Rich.
diycerb said:
Thanks for the comments guys, all appreciated.
Still a fair way to go, not looking forward to re-fitting all the interior and less so to cleaning it.
Doing it yourself is definetly satisfying but it can get a bit much, the exhaust nearly beat me. Might go for a MKII exhaust if it doesn't work out as I want.
Duke, headlight surrounds are held in with 4, 10mm nuts covered in silicon access is through the panels in the wheel arch. Basically cut everything away to leave yourself about an inch around the edge to mount the pods onto.
Rich.
Ta Still a fair way to go, not looking forward to re-fitting all the interior and less so to cleaning it.
Doing it yourself is definetly satisfying but it can get a bit much, the exhaust nearly beat me. Might go for a MKII exhaust if it doesn't work out as I want.
Duke, headlight surrounds are held in with 4, 10mm nuts covered in silicon access is through the panels in the wheel arch. Basically cut everything away to leave yourself about an inch around the edge to mount the pods onto.
Rich.
diycerb said:
Duke, headlight surrounds are held in with 4, 10mm nuts covered in silicon access is through the panels in the wheel arch.
So are you saing that the original headlight pods are actually held in place by some bolts? Does that mean that the old pods could be removed relativly easily?Gassing Station | Cerbera | Top of Page | What's New | My Stuff