My new Project.. From Chop to...
Discussion


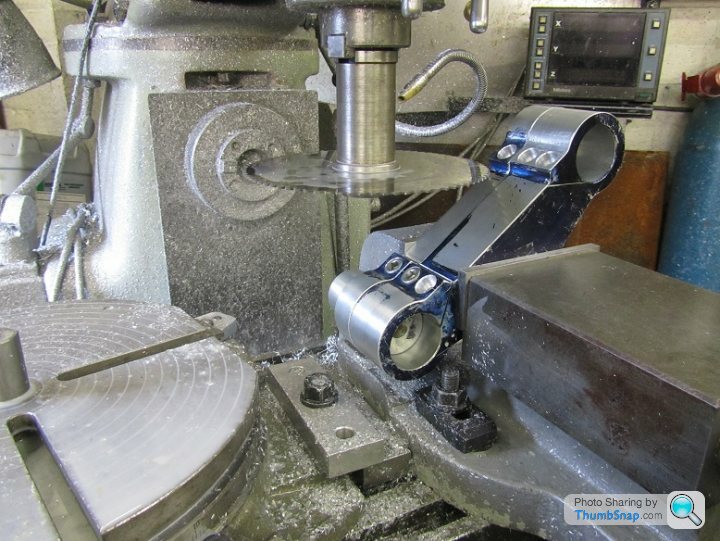
I don't have any forks yet, but the yokes are almost finished, here they are having their slots cut on the miller..
And here's a short video of the machining.. http://youtu.be/0fkvAG-WW70
And here's a short video of the machining.. http://youtu.be/0fkvAG-WW70
With the frame back, I need to get the bike done asap, as it needs to be running by December. The engine needs at least a thousand miles running in before it ready to use in anger, a bit tricky given its not road legal. The answer is to run it in on a rolling road dyno for twenty hours or so, which I can do for free, but only when the dyno is quiet around xmas.
Yesterday, we welded on the tabs to mount the rear mudguard and marked out where the lock stops had to go, and how long the bar risers will need to be and where the pegs will need to go etc. I also realised the rear wheel hub will need narrowing a little more to get the chain run aligned, and the rear caliper bracket will need to be remade. I thought we'd get all the welding on the frame done yesterday, but everything seems to take ten times longer than expected. The frame is over at Jeff's workshop now, so we'll be working on it again today.
+1 on having a go yourself, I'm beginner, but just making a simple wheel spacer on the lathe is very satisfying.
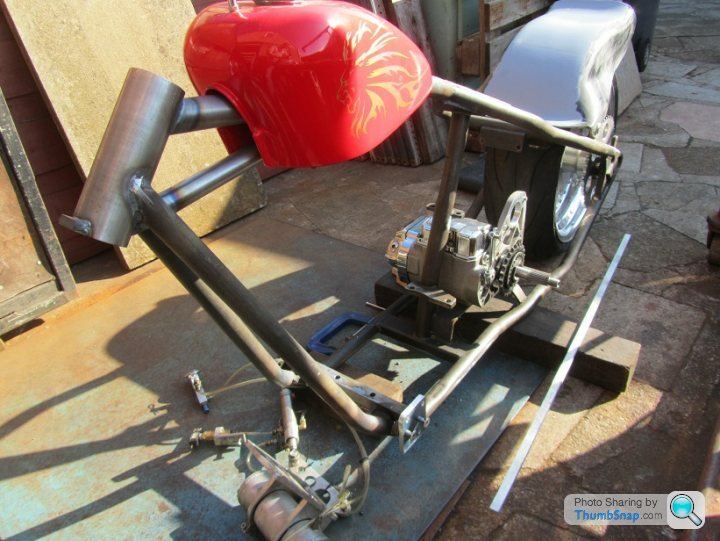
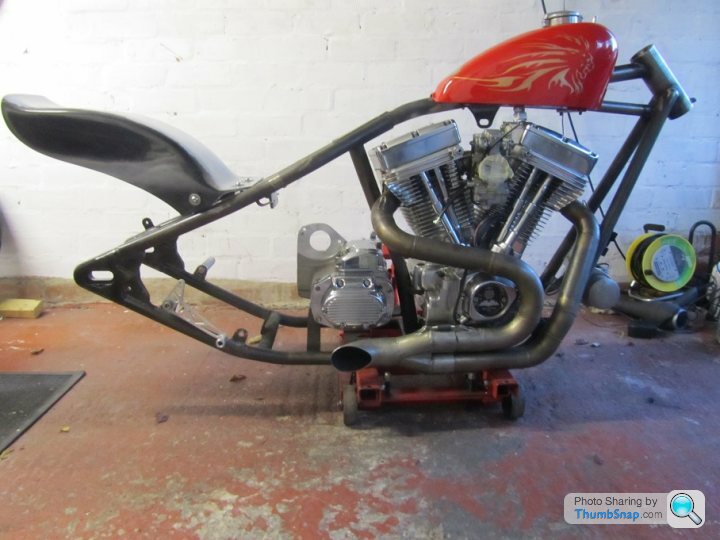
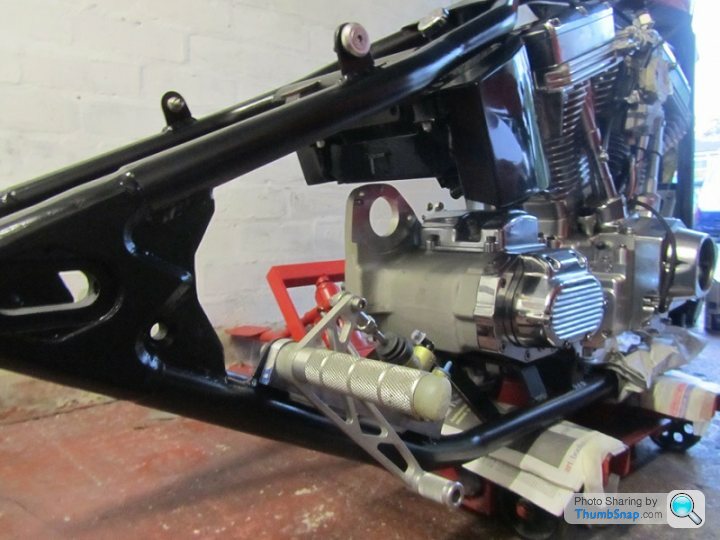
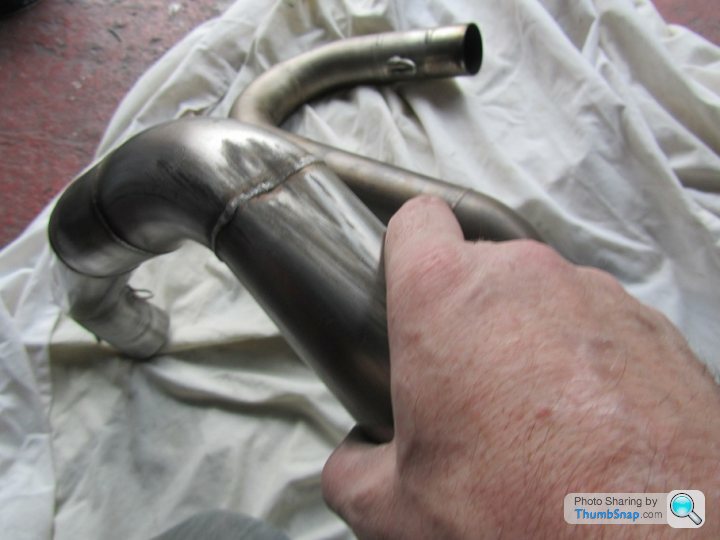
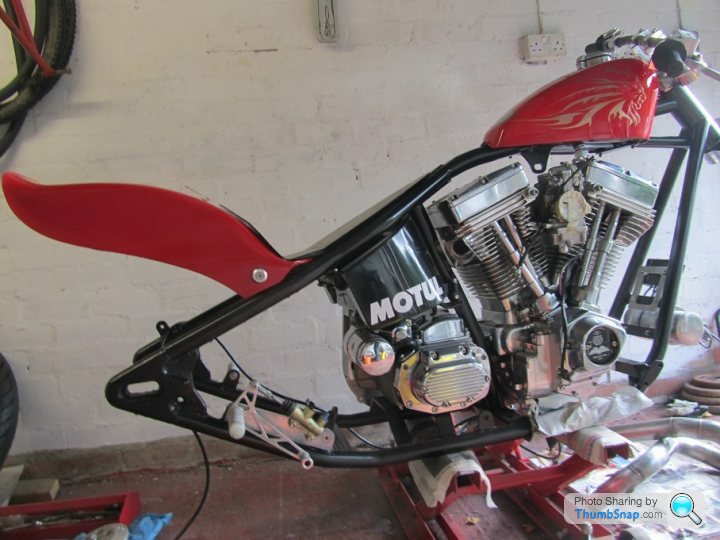
With the frame back home, the engine and box went back in, along with the home made 2 inch stainless exhaust from my old bike, while I made a mount for air tank and rectifier. The oil filter should fit below them, but as often happens the oil filter bracket doesn't fit now the down tubes have been modified, so it'll need a bit of machining to fit.
The drive side hub of the back wheel needs to be narrowed by a few more mm to get the chain lined up with the gearbox sprocket. While the rear caliper mount needs to be replaced as I didn't like the way its torque arm would have to be mounted.. one step forward, two steps back..
The drive side hub of the back wheel needs to be narrowed by a few more mm to get the chain lined up with the gearbox sprocket. While the rear caliper mount needs to be replaced as I didn't like the way its torque arm would have to be mounted.. one step forward, two steps back..
Yesterday was one of those days when nothing seems to go right, spent hours making a bracket only to drill a mounting hole in the wrong place, meant it was only good for the scrap bin. Oh well, got it done in the end.
I made a simple card template of the seat base, and had Geoff the welder make it for me in mild steel plate for £20. Wasn't worth me doing it myself, he can do in ten minutes what would take me an hour or more. I was looking online for some suitable seat foam, which all seemed expensive for a small sheet of foam. Luckily I mentioned it to a mate, who happened to have some I could have.
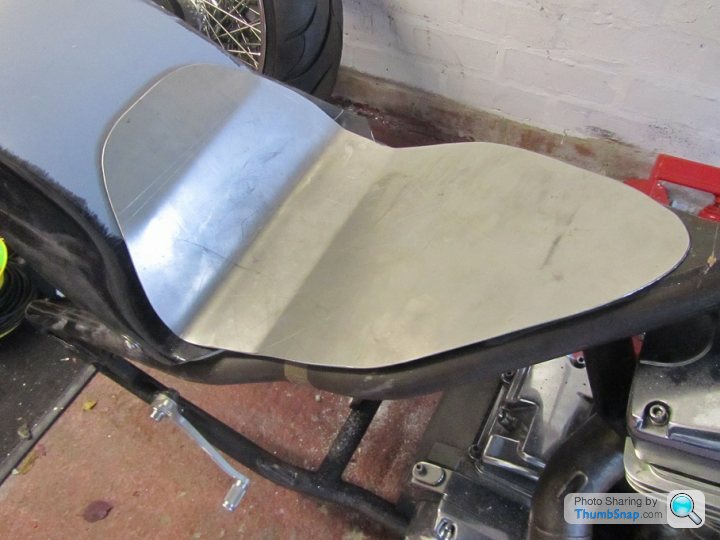
I made a simple card template of the seat base, and had Geoff the welder make it for me in mild steel plate for £20. Wasn't worth me doing it myself, he can do in ten minutes what would take me an hour or more. I was looking online for some suitable seat foam, which all seemed expensive for a small sheet of foam. Luckily I mentioned it to a mate, who happened to have some I could have.
Edited by Merch131 on Friday 10th October 18:45
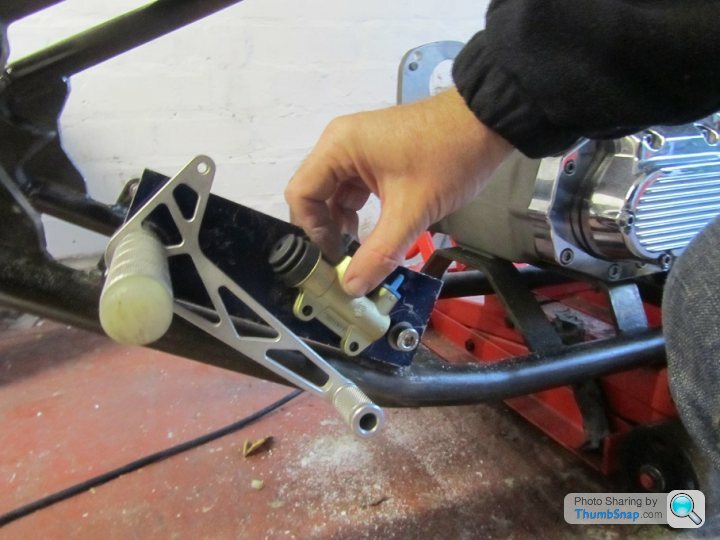
Next I started on the rear brake mount. Had a piece of 10mm alloy plate, which was a couple of mm too short, but didn't want to buy a bigger piece, so it would have to do. Having drilled the two mounting holes, it now needs to be shaped and drilled to take the master cylinder. Then the peg / lever need to be bushed so it will pivot when the peg is bolted to the alloy plate.
While today I spent the afternoon prepping the frame for paint, tedious but necessary. Normally I'd take the frame to Triple S for powder coating, but that would cost £150 plus another £50 in petrol. Instead its getting a cheap and cheerful brushed on undercoat and rattle can top coat. First coat done, which will be flattened when its dry, then a second undercoat if needed, or if it looks ok I'll just spray it with smooth Hammerite black. Another reason for going down this route is that the frame may need a few changes along the way, so a rattle can finish will be easier to touch up.


Some good progress this week, finally at the point where parts are being fitted for the last time. With the oil tank looking respectable it went back into the frame followed by the gearbox. The rear brake mount was drilled, tapped and shaped and a pushrod made from a stainless bolt and rose joint. The brake lever still needs a bush making so it can pivot.
Made a start on polishing various alloy brackets, including the MK2 rear caliper mount, and sprayed the seat unit with undercoat. Awaiting the delivery of some Ducati Red paint and lacquer so it'll match the tank.
Also picked up some Renthal drag bars, a cancelled order so got them at half price from the local bike shop. Hope to have the yokes back this week, which will also need polishing.
Not sure how much detail to include, but here's some of the alloy parts that need polishing. By polishing I don't mean a quick going over with a duster and Mr Sheen, but some bloody hard work. Start off with 60 grade wet and dry to remove the deep marks and scratches. Which in turn leaves its own marks, so then you move on to 120 grade wet and dry, then 240 and repeat till the alloy is clean and unmarked. Then its time for the buffing wheel. Its not difficult, but not many folks are prepared to put the time in to get a decent result.
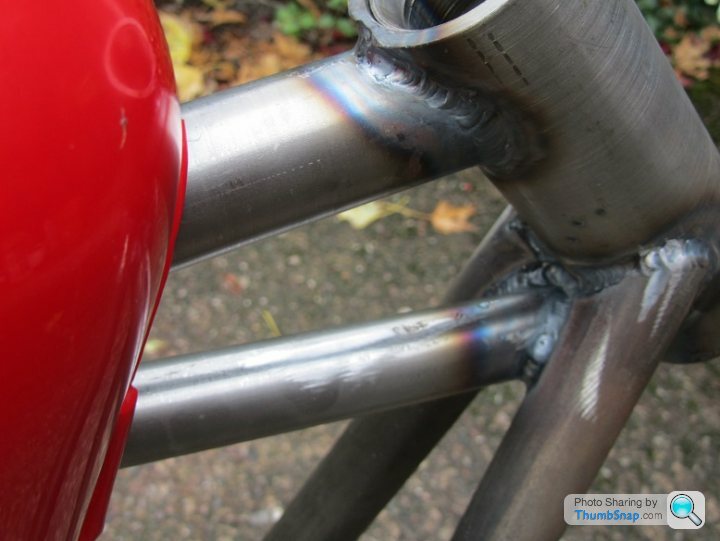
Edit to add that the two small holes in the exhaust collar I'm pointing to were drilled like that for the springs which hold the exhaust together..
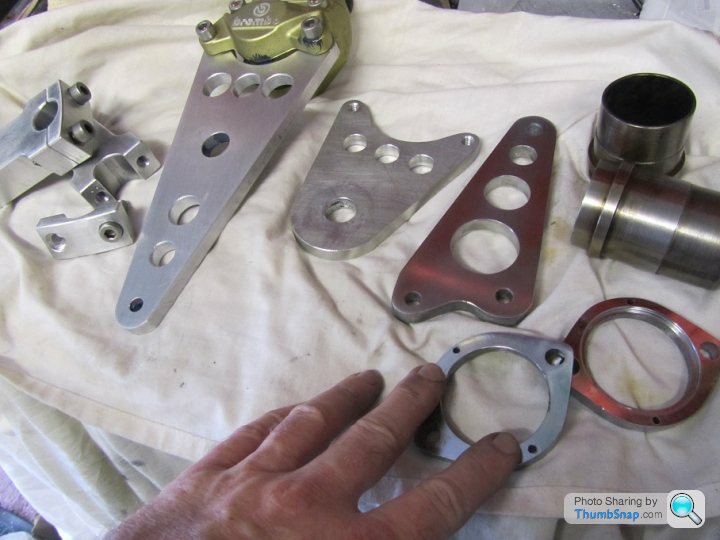
Edit to add that the two small holes in the exhaust collar I'm pointing to were drilled like that for the springs which hold the exhaust together..
Edited by Merch131 on Sunday 19th October 18:40

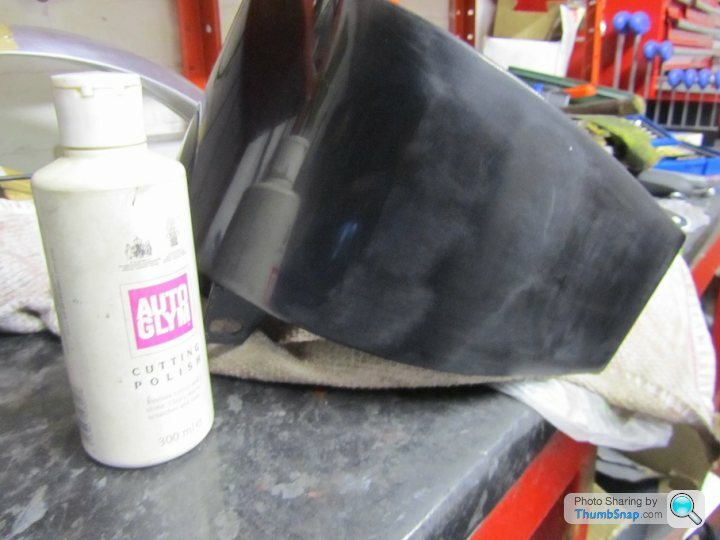
I was quite pleased with the paint and lacquer on the seat unit, turned out better than I'd hoped, using just rattle cans. It looked even better after it had been polished, though not for long 
I'd fitted a decal that I then decided didn't look right, being too clever by half I used a hair dryer to soften the decal, making it easier to remove. Which worked ok, but unbeknown to me the heat also softened the fresh paint and as I peeled away the decal, the paint came away too.
After I calmed down, nothing for it but to start again, beginning with many coats of filler primer, wont be doing that again.
Got the yokes back for a test fitting. The old HD steering stem we used must be the most modified in history. Its been hollowed out to lighten it, had a billet collar on its base so it fits the bottom yoke and has a completely different way of adjustment. All that and it still isn't quite right. That's the problem with having the bike in one garage and the lathe in another across town. Not a big problem, just needs a small spacer making and it'll fine.
The risers look too tall on the bike, and they probably are. That's because they were made before I could sit on the bike and check the riding position. Rather than wait, we made the risers an inch or two longer, knowing that it will be an easy job to mill them down to whatever length will be ideal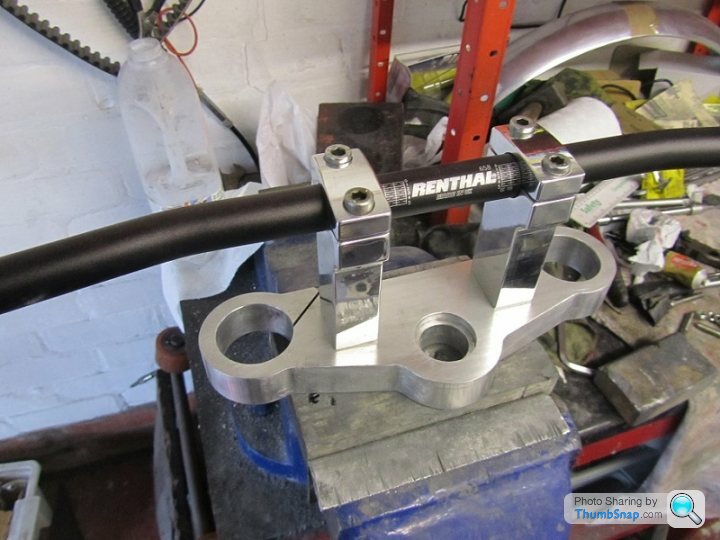
The risers look too tall on the bike, and they probably are. That's because they were made before I could sit on the bike and check the riding position. Rather than wait, we made the risers an inch or two longer, knowing that it will be an easy job to mill them down to whatever length will be ideal
With the yokes and bars fitted, the hand controls could go on to, but not so fast. The billet controls are made by the German company RST (Roland Stocker) and came off my old Harley road bike. They are made to fit 1 inch bars, not the 7/8 inch bars I'm using on this bike. You can buy spacers to make up the difference, but I made some instead. Its pretty easy, all you need is a few inches of 1 inch 16 gauge tubing (got it free from the scrap box of a local workshop), then slice it lengthways to make two half circles, and cut them to the width needed. The 16 gauge wall thickness of the tubing is just perfect to fit a 7/8 inch bar. The half circles are a bit awkward to hold, but apart from that its no problem. 
Gassing Station | Biker Banter | Top of Page | What's New | My Stuff