Suzuki 500 2 stroke Cafe Racer
Discussion


battered said:
I especially like the 2 radiators in the workshop. That must make it more pleasant. My garage is unheated with a metal door (cue world's smallest violin) and between November and March I spend more time putting clothes on to venture out there than I do actually mending things.
(Note to self - buy a radiant heater and dangle it over the bench)
yea, its nice and warm (Note to self - buy a radiant heater and dangle it over the bench)
 And it was 2 years before she spotted them
Thanks for the complements guys Have to say I am enjoying building this!
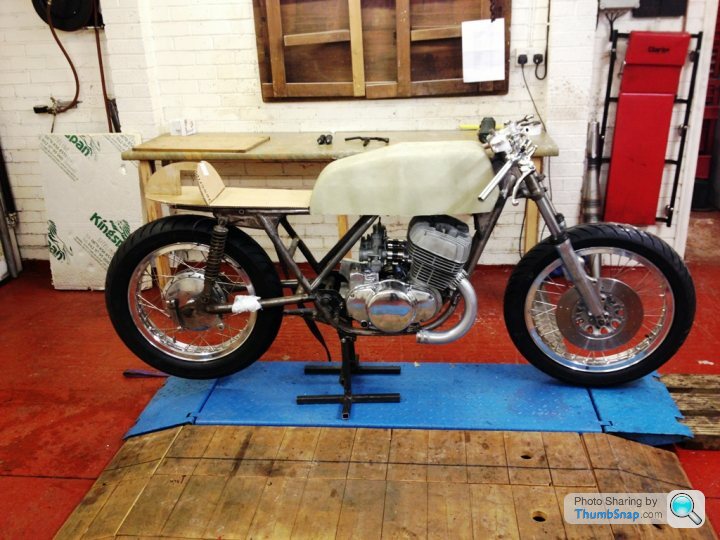
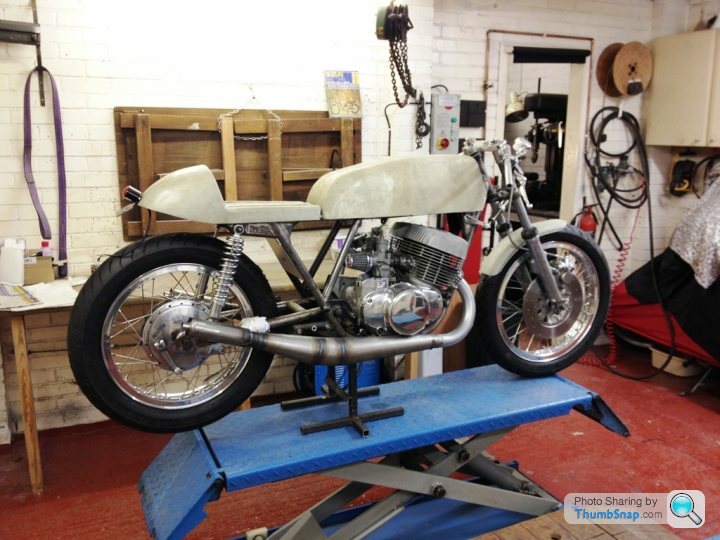
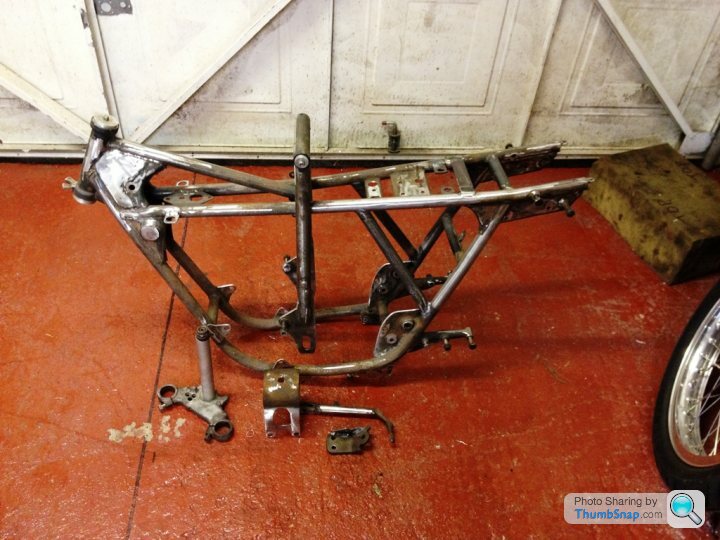
I picked up the wheels today, then took them to have the tyres fitted and balanced. Here it is on its wheels (well almost) for the first time in over 30 years! The intention is to do all the fabrication work before I paint the frame.
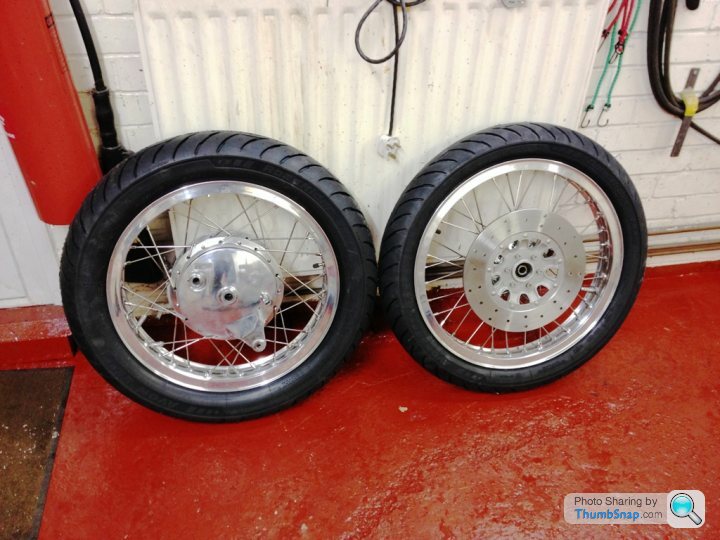

Have to say I am enjoying building this! I picked up the wheels today, then took them to have the tyres fitted and balanced. Here it is on its wheels (well almost) for the first time in over 30 years! The intention is to do all the fabrication work before I paint the frame.
D-Angle said:
Lovely! I'm building a Suzuki stroker of my own so I'll be watching this with interest. Good luck with it! 
keep an eye on my blog as well.... Www.jtccc.wordpress.comCorpulent Tosser said:
Wacky Racer said:
A 500 two stroke Suzuki would make a very poor basis for a café racer, (imo),...... the seals will probably be knackered after being in storage so long.
Do the job properly and make yourself a nice pre unit Triton.
Fortunately Eddie Crooks thought differently.Do the job properly and make yourself a nice pre unit Triton.
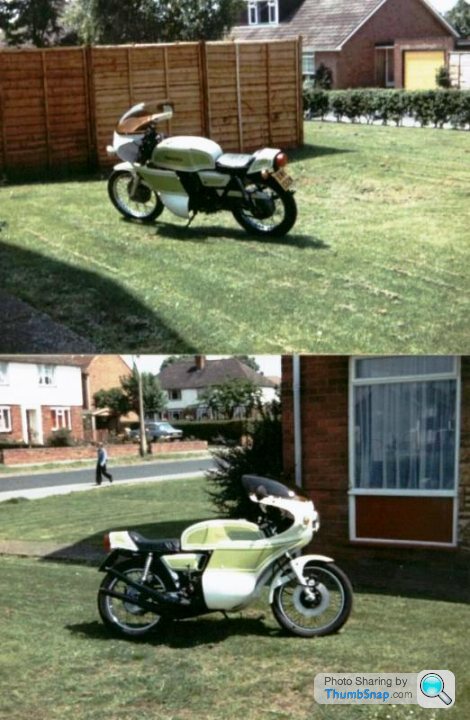
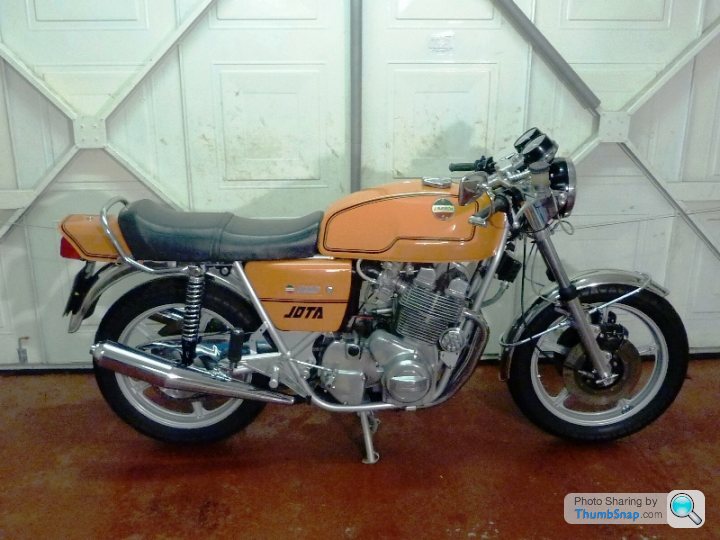
I also owned what I think is the ultimate factory classic Café Racer for 30 years… I sold it a while ago as I had stopped riding it.

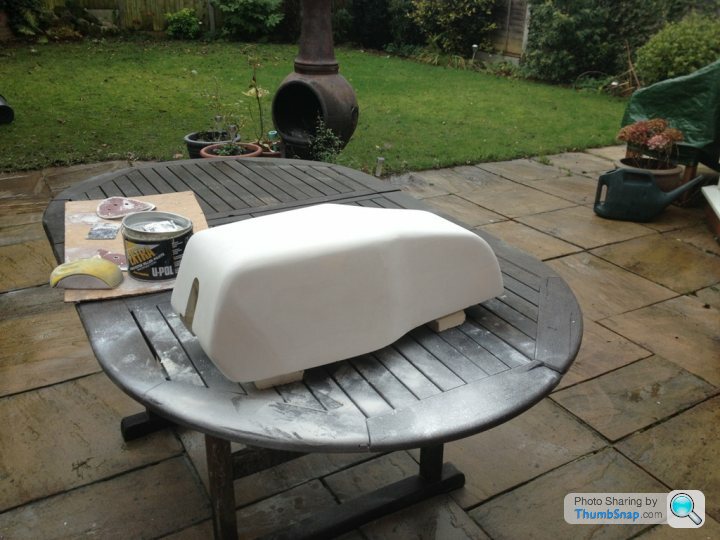
Another update. Who would have thought it would be warm enough to work in the garden in a sweatshirt in December! The tank is now to a shape I like... I guess it may not be to everyone's taste though... here it is ready as a mould.
here are the carbs after cleaning, one of the float bowls is cracked so will need replacing.
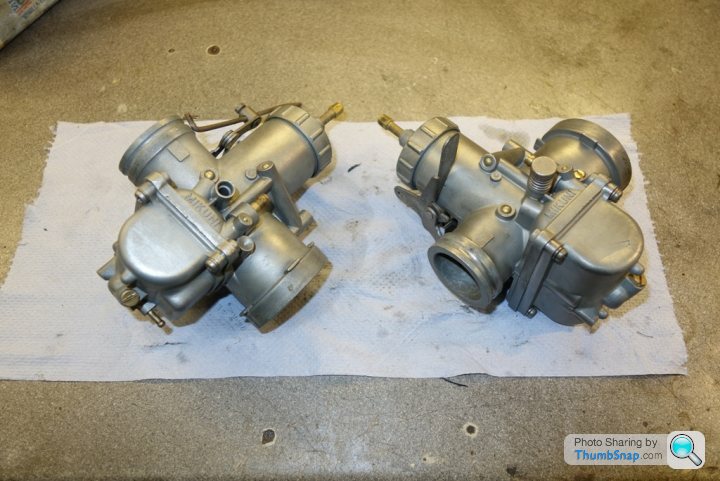
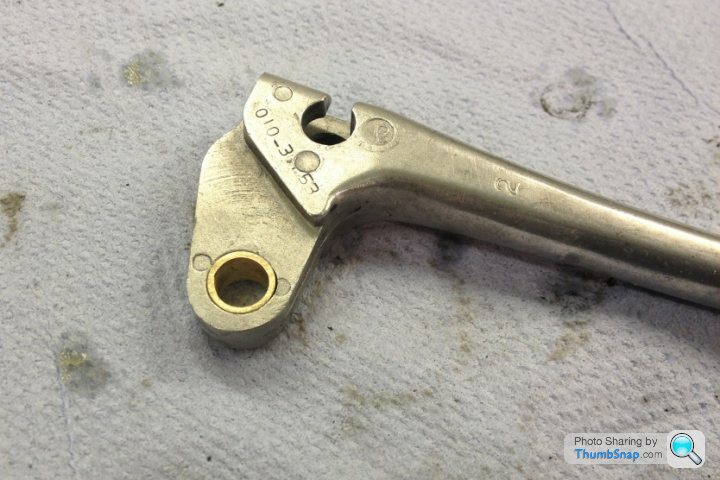
The clutch lever was worn on the pivot, so I made a bush and pressed it in.
here are the carbs after cleaning, one of the float bowls is cracked so will need replacing.
The clutch lever was worn on the pivot, so I made a bush and pressed it in.
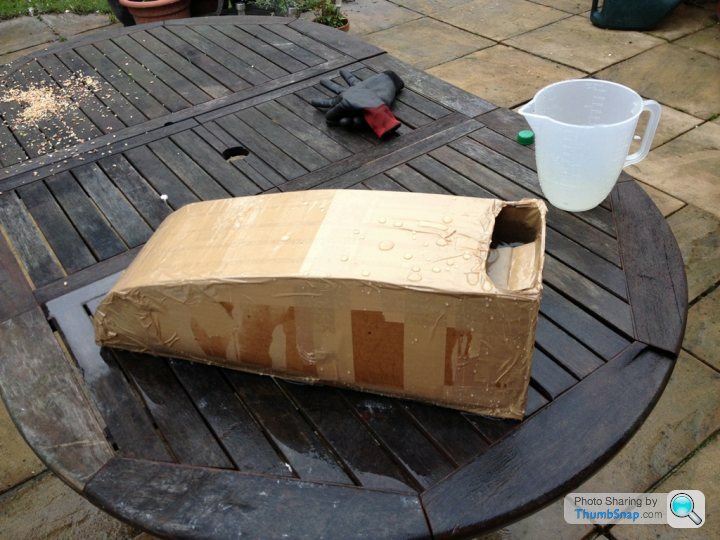
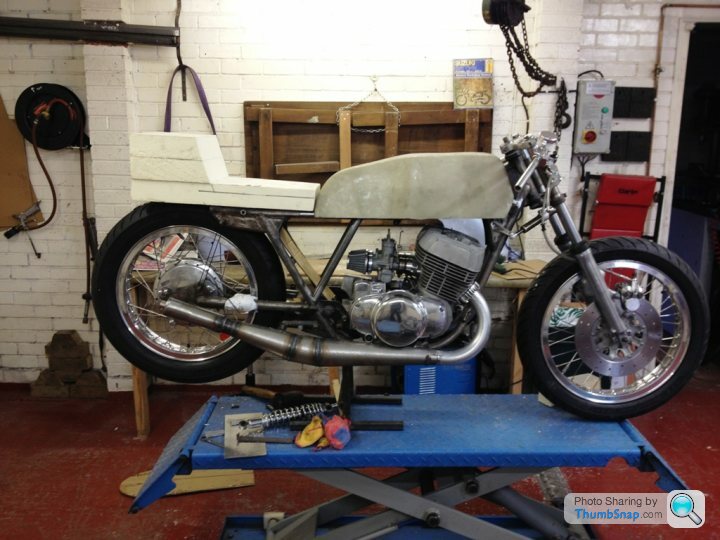
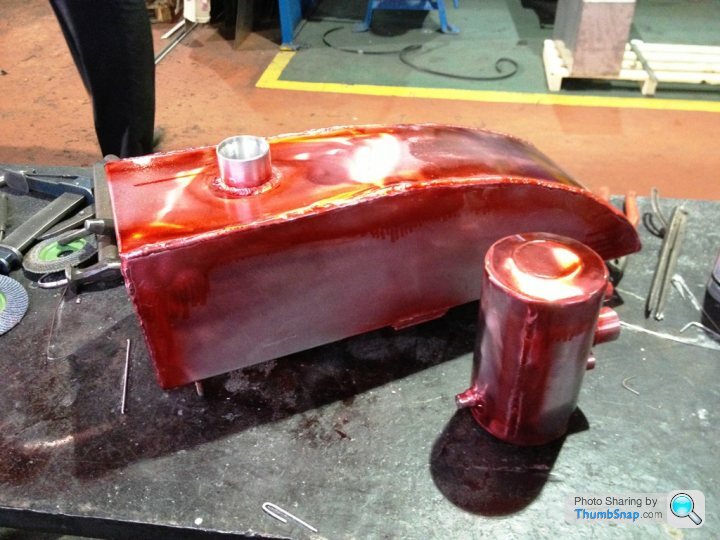
Update to progress. The tank cover is now on the bike, I am making the actual tank now to go under it now... I did the design, and mocked it up in cardboard, but I was concerned it would not be big enough... So I covered the inside with tape and filled it with water, I was surprised it held 16Ltr! That will do for me!
To make the tank I had to learn to TIG weld. I had a session today with a mate who is a welder, he showed me what to do and left me to it for a while. It was easier than I thought, and here is the result after about an hour of practice, I now feel confident enough to weld the tank together after I finish cutting the templates out tomorrow. The plate on the fuel tap will be welded to the bottom of the tank, I have made a spare which I will also weld on the other side, just in case I need another tap fitting at some stage. I won’t drill the spare one through into the tank though…
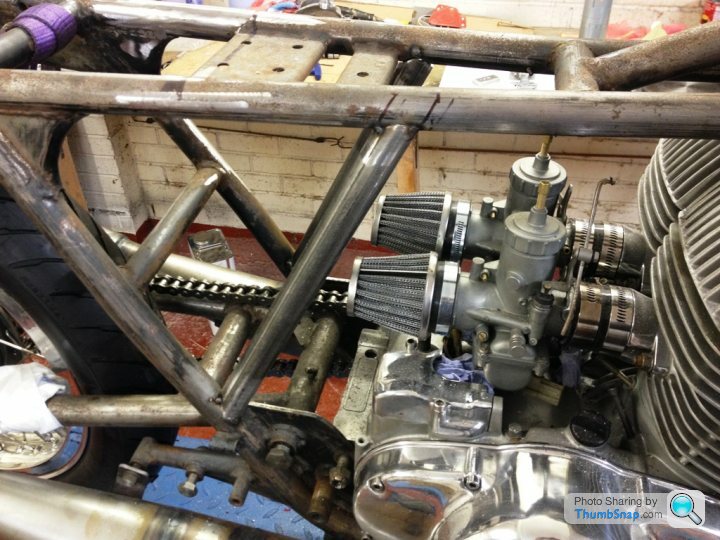
Glad I decided to do a dry build… the tubes I had put on the frame were too close to the carbs so as I had only tacked them on, it was an easy fix to move them. I have also rebuilt the front calliper with a new seal kit. As part of the dry build I am using any old bolts, I will then replace them with stainless when it all comes apart.
I am still undecided about the seat design, but have shelved that for a few days while I think about it, and anyway I need the new shockers to see how far the wheel comes up on max travel, which may influence the seat design.

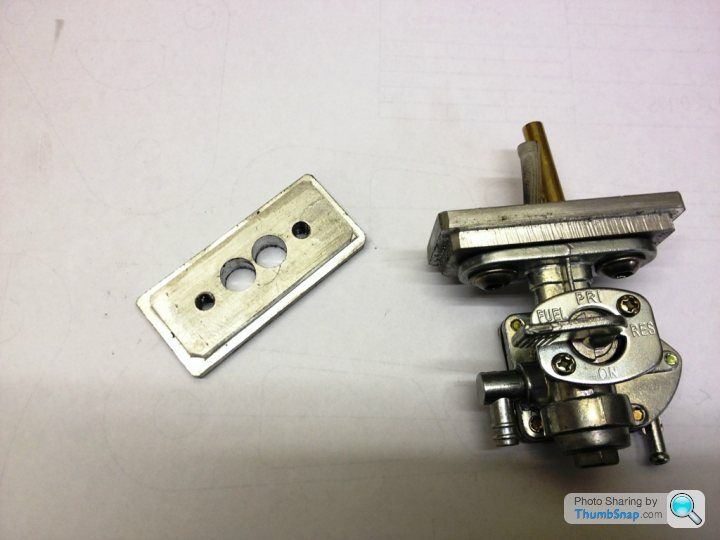
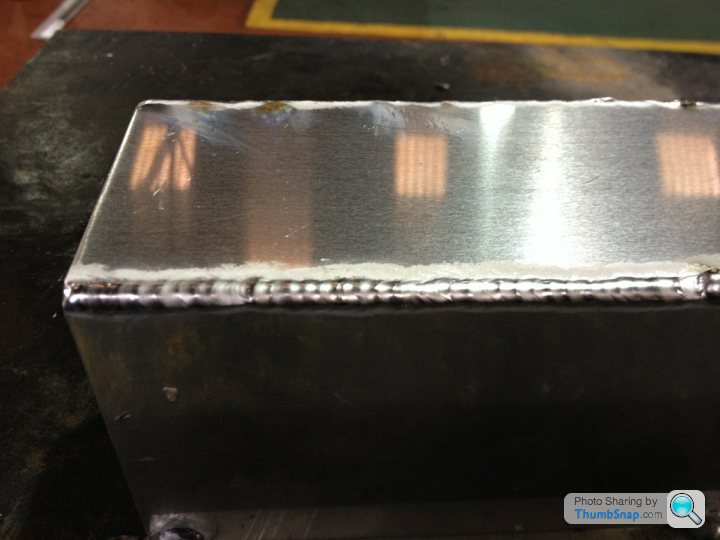
To make the tank I had to learn to TIG weld. I had a session today with a mate who is a welder, he showed me what to do and left me to it for a while. It was easier than I thought, and here is the result after about an hour of practice, I now feel confident enough to weld the tank together after I finish cutting the templates out tomorrow. The plate on the fuel tap will be welded to the bottom of the tank, I have made a spare which I will also weld on the other side, just in case I need another tap fitting at some stage. I won’t drill the spare one through into the tank though…
Glad I decided to do a dry build… the tubes I had put on the frame were too close to the carbs so as I had only tacked them on, it was an easy fix to move them. I have also rebuilt the front calliper with a new seal kit. As part of the dry build I am using any old bolts, I will then replace them with stainless when it all comes apart.
I am still undecided about the seat design, but have shelved that for a few days while I think about it, and anyway I need the new shockers to see how far the wheel comes up on max travel, which may influence the seat design.
Edited by buzzer on Wednesday 6th January 23:48
The Newark bike looks nice!
Been busy in the garage today making the seat, and another mudguard as I didn't like the shape of the first one. the mudguard was easy to get to shape, but the seat took quite a bit longer due to the complex shape. Its there now though and has had the first layup of glass mat. In fact, I have been using glass cloth as it is better for compound curves and falls to the shape as you can see on the mudguard.


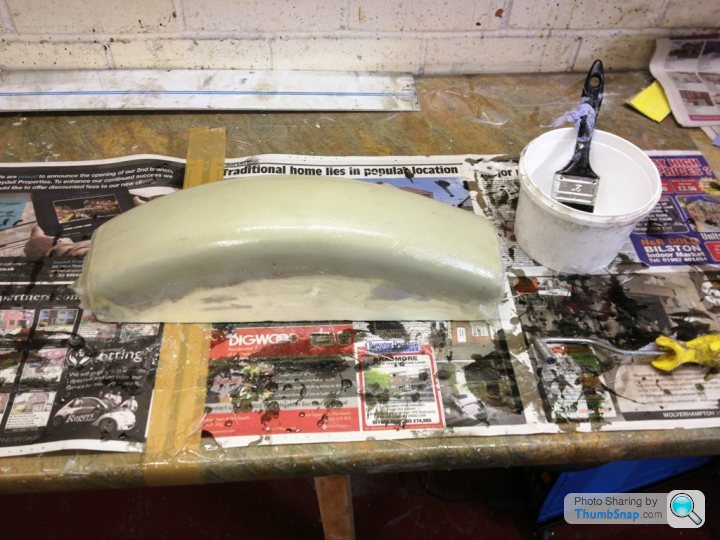
Been busy in the garage today making the seat, and another mudguard as I didn't like the shape of the first one. the mudguard was easy to get to shape, but the seat took quite a bit longer due to the complex shape. Its there now though and has had the first layup of glass mat. In fact, I have been using glass cloth as it is better for compound curves and falls to the shape as you can see on the mudguard.
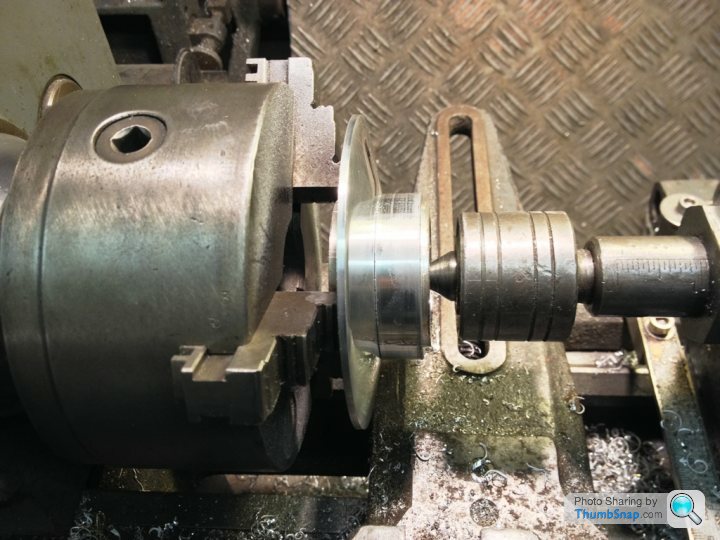
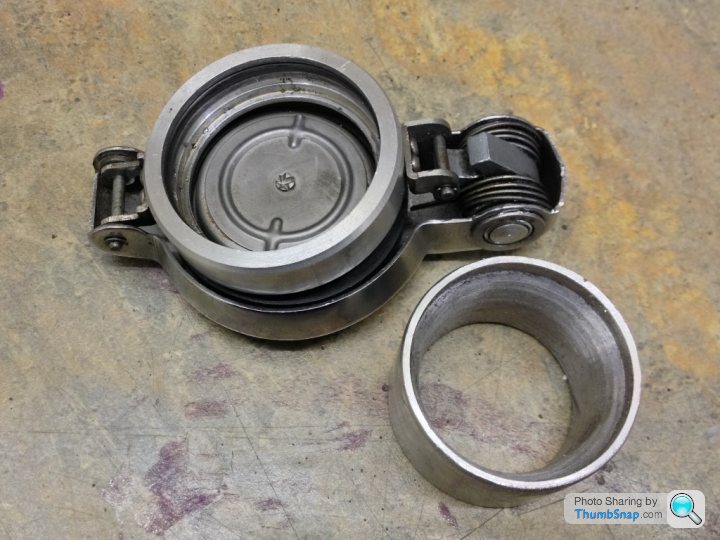
The oil tank and petrol tank are now finished. I welded both up today and used some dye to test for leaks. I didn't want the oil tank ends to be flat so I spun them in the lathe to give an angled dish. an old method of metal forming The filler cap took a bit of thinking about, I have used the original and made an adapter which will fit on with a couple of grub screws and seal with an "O" ring.


Yazza54 said:
Nice work
Are you doing any work on the engine? Or standard everything, carbs pipes etc?
The engine will be standard, although I did tidy up the ports. some pictures on my blog at Are you doing any work on the engine? Or standard everything, carbs pipes etc?
https://jtccc.wordpress.com/our-motorbikes/suzuki-...
Bit more progress.... the bike is now back in bits and the frame is off to the powder coaters tomorrow...
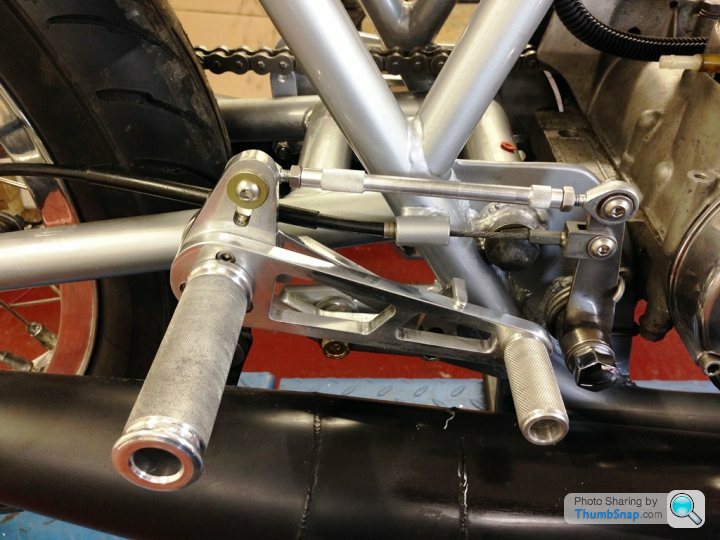
I have been busy making the rear sets, which will be polished once they are trial fitted and all is OK. they took a while to make, but since I converted my milling machine and lathe to digital read outs using some cheap digital calipers, its transformed the ease of use and accuracy!
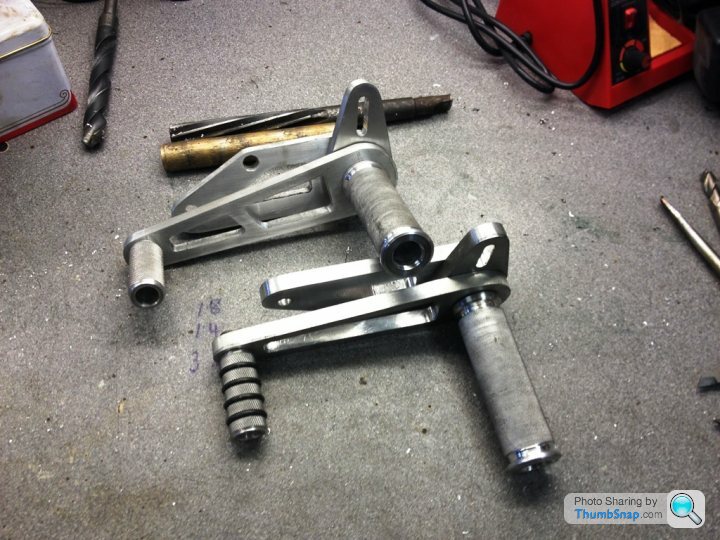
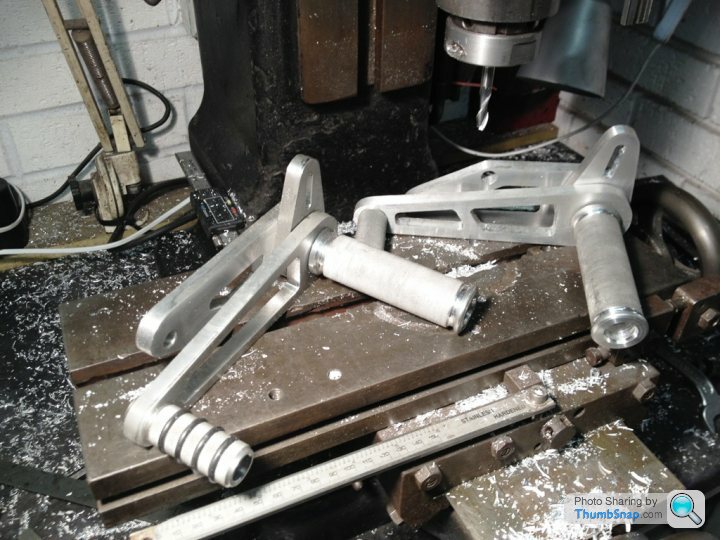
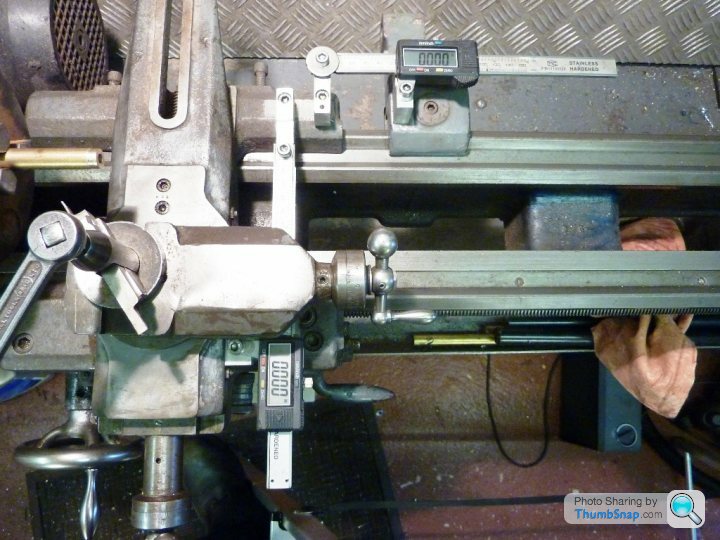
I have been busy making the rear sets, which will be polished once they are trial fitted and all is OK. they took a while to make, but since I converted my milling machine and lathe to digital read outs using some cheap digital calipers, its transformed the ease of use and accuracy!
While the frame is away I have been looking at the wiring. The intention was always to replace it, but as I will be modifying most of the electrics I decided to make a loom from scratch as this will need to incorporate key-less ignition, a modern rectifier and voltage regulator and LED indicators, along with a brake light switch on the front, as opposed to rear brake.
I cur the old loom apart and laid it out on the bench and noted the colours, so where possible I can stick to the original colour scheme. I then measured each wire and made a list. There were around 20 colours, and when the parts guy saw the list he thought he had a big order… until he realised that many of the lengths were just one meter!
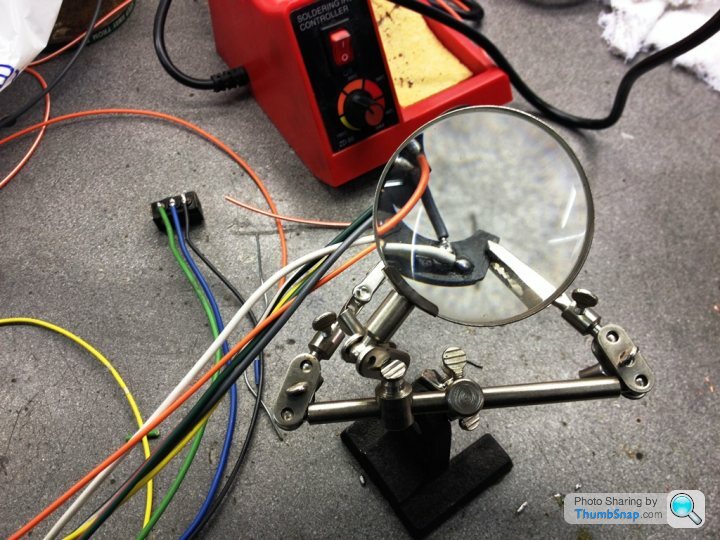
Here is the horn, and light switch being rebuilt, my eyes and fingers are not what they used to be, hence the neat little helper! The horn switch was broken, the small mica insulator was split in half, which is a common fault, so I had to make a new one… I looked around for some material that was resistant to heat (so I could solder the terminal) but importantly was an insulator. I found the perfect material in the splatter shield off an arc welding mask! Perfect for the job.
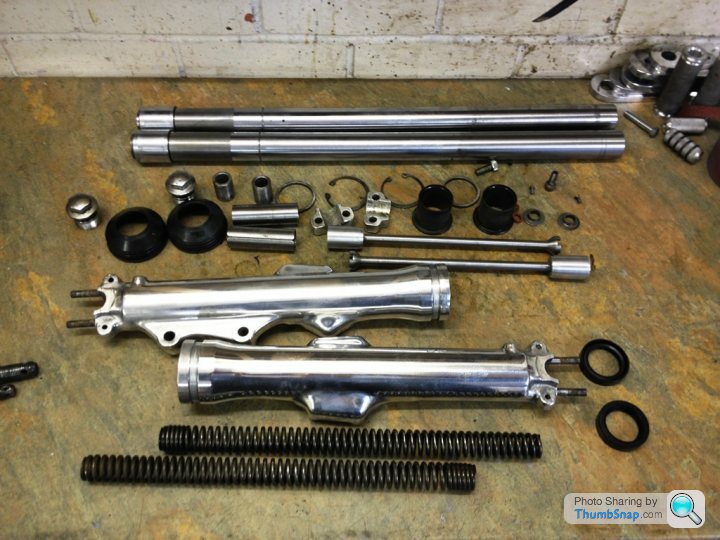
I have also rebuilt the front forks with new seals...

I cur the old loom apart and laid it out on the bench and noted the colours, so where possible I can stick to the original colour scheme. I then measured each wire and made a list. There were around 20 colours, and when the parts guy saw the list he thought he had a big order… until he realised that many of the lengths were just one meter!
Here is the horn, and light switch being rebuilt, my eyes and fingers are not what they used to be, hence the neat little helper! The horn switch was broken, the small mica insulator was split in half, which is a common fault, so I had to make a new one… I looked around for some material that was resistant to heat (so I could solder the terminal) but importantly was an insulator. I found the perfect material in the splatter shield off an arc welding mask! Perfect for the job.
I have also rebuilt the front forks with new seals...
The fibre glass tank is a cover for an alloy one I have made and welded up, which meant I had to learn to TIG weld, which was actually easier than I thought. The cover is too narrow to cover the original tank, which was pretty poor anyway. I also made the oil tank while I was on.
I thought about a fibre glass tank to hold the fuel, but there seems loads of problems these days with the Ethanol in petrol melting them. I know you can line them, but... (mate tells me it now melts the plastic floats in some old carburettors!)
I thought about a fibre glass tank to hold the fuel, but there seems loads of problems these days with the Ethanol in petrol melting them. I know you can line them, but... (mate tells me it now melts the plastic floats in some old carburettors!)
s3fella said:
Yazza54 said:
Great work. Sorry for being nosey but are you retired? I only ask as I'm mega impressive with the rate of progress!!
Are you suggesting a Werthers Original beige colour scheme!? lol Topical as I am trying to decide on colour! The frame is back now and its going together, I have done the frame Silver... I am going to take some pictures and Photoshop some colours on the tank, seat and mudguard ... maybe post them here to see what people think.Yes I am retired... Been retired 5 years (retired at 55...) but I still do half a day a week management consultancy. It does alow me to indulge in my hobbies

I love this stage of a restoration.... putting it together, and doing the wiring... the bit most people hate!
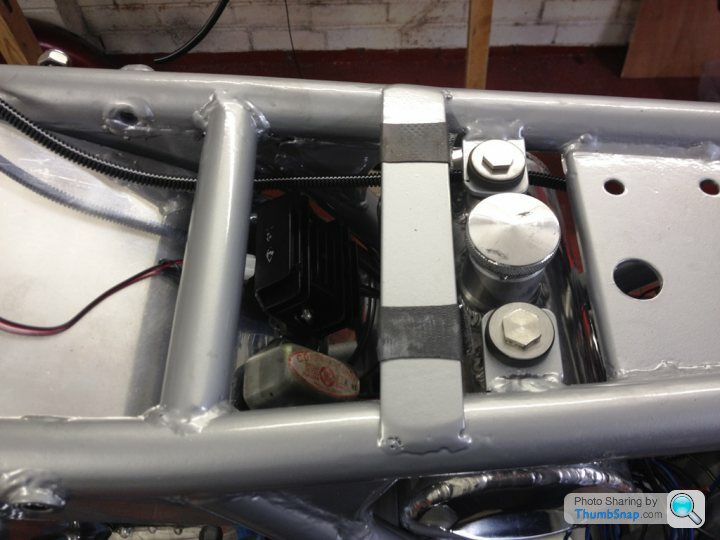
I decided to use the none split spiral sheathing, as it looks better. The rear set on the gear lever side is on and works a treat. The battery is mounted (took me ages to think how to secure it!). Te buzzer is part of the alarm system... I wont have an ignition lock and key, just a remote key fob which will turn it all on.
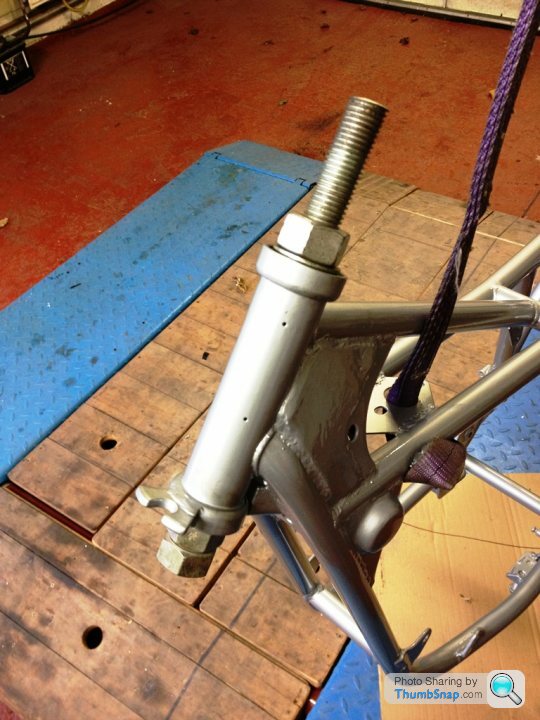
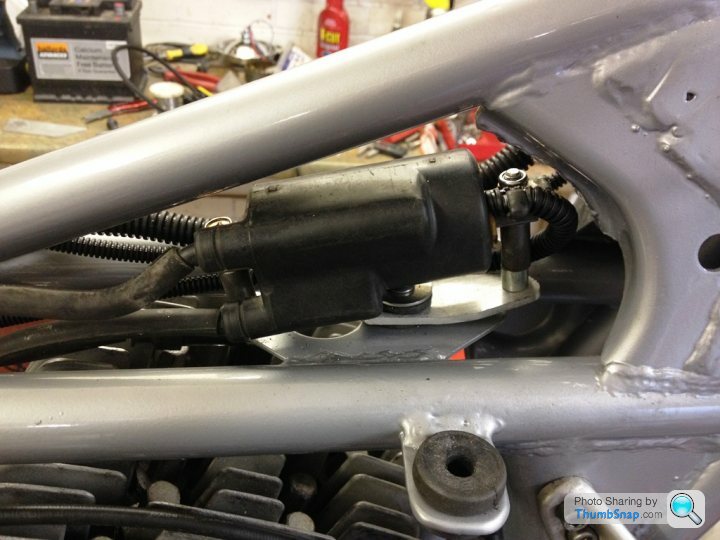
I pulled the headstock bearings in as I hate hammering bearings. Also I have rubber mounted items like the fuel tank, oil tank and coil, as well as the CDI unit (waiting to see if this is any good...) and rectifier...
I like the little LED indicators!

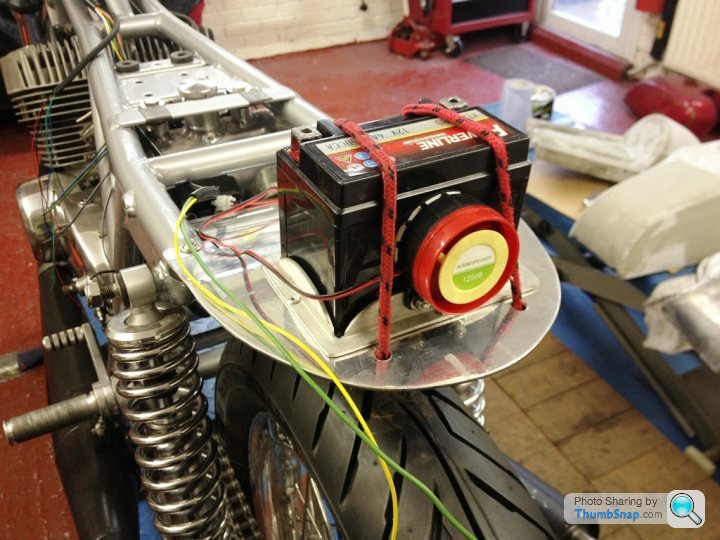

I decided to use the none split spiral sheathing, as it looks better. The rear set on the gear lever side is on and works a treat. The battery is mounted (took me ages to think how to secure it!). Te buzzer is part of the alarm system... I wont have an ignition lock and key, just a remote key fob which will turn it all on.
I pulled the headstock bearings in as I hate hammering bearings. Also I have rubber mounted items like the fuel tank, oil tank and coil, as well as the CDI unit (waiting to see if this is any good...) and rectifier...
I like the little LED indicators!
Chipchap said:
Buzzer
If you had shopped around you might just have managed to find a bigger battery ?
[tongue in cheek comment]
Seriously though can you not find a smaller lighter one ?
A
I don't know why it looks so big in the pictures! its actually quite small. a moped battery. 113 long by 65 x 65.If you had shopped around you might just have managed to find a bigger battery ?
[tongue in cheek comment]
Seriously though can you not find a smaller lighter one ?
A
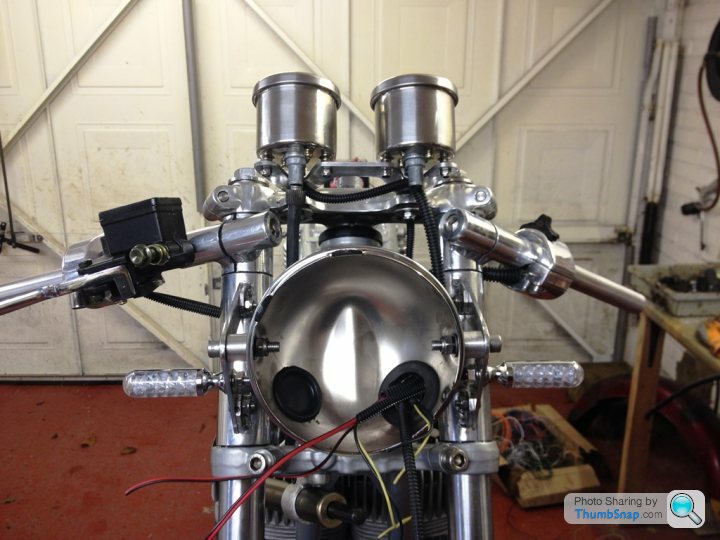
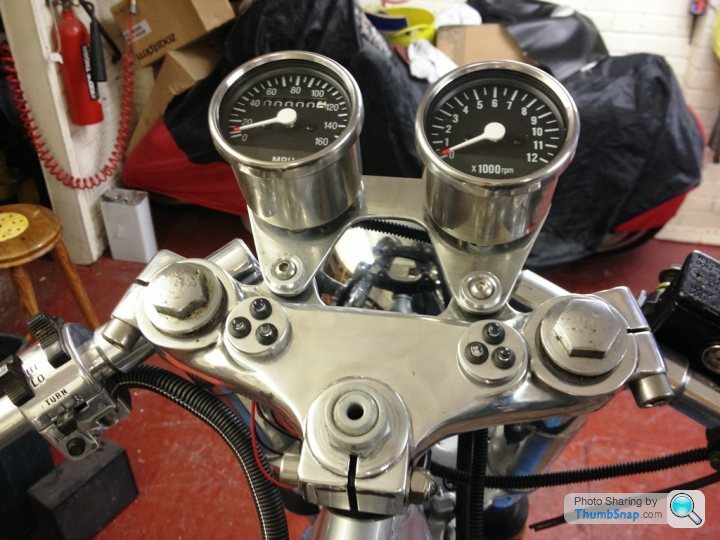
a couple of other pictures. I have fitted 5mm LED's as warning lights for the ignition, indicator warning, high beam, and alarm.
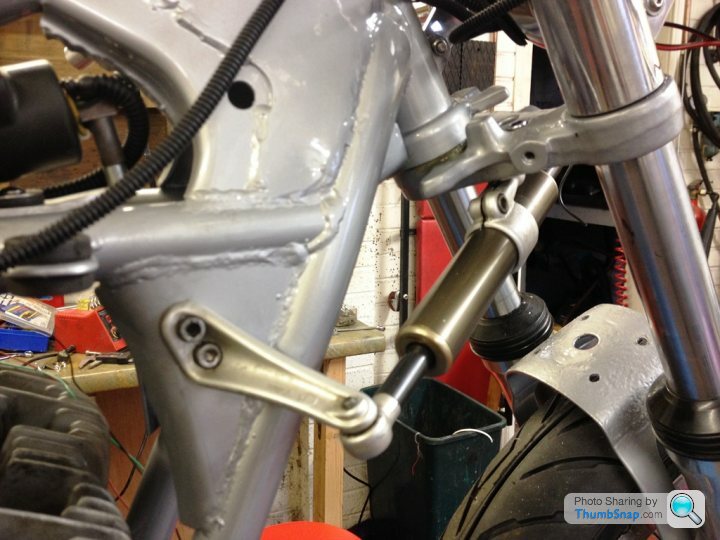
I also picked up this steering damper on Ebay on Christmas day. I put a snipe on it and won it for £5!it fitted perfectly, just needed to drill a couple of holes in the frame. It was off a Cagiva Mito
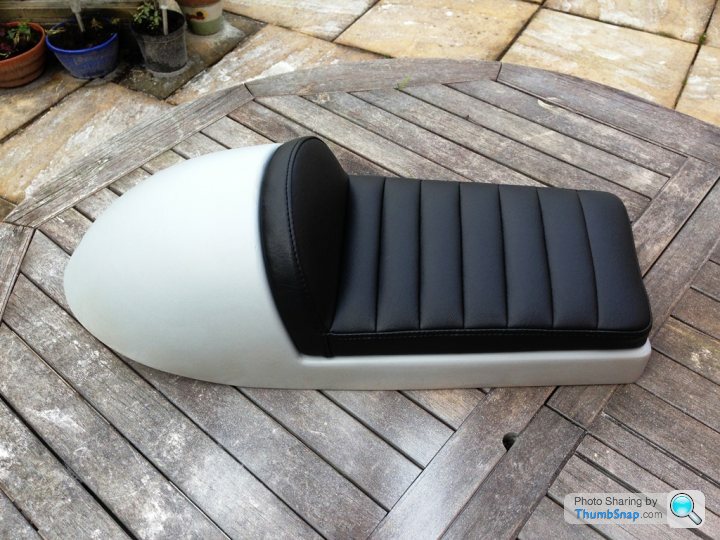
Well the seat came back from the trimmer today. Its a great job! I have been using the company for over 40 years (Aldridge Trimming) and they always do a really good job. In there today were loads of classic cars getting the treatment, just superb craftsmanship.
The seat and painting the frame is the only two jobs I have not done myself so far, the paint as painting a frame creates so much over-spray in the garage, (multiple passes on each tube)and I dont have the skills/ machine to do the upholstery.
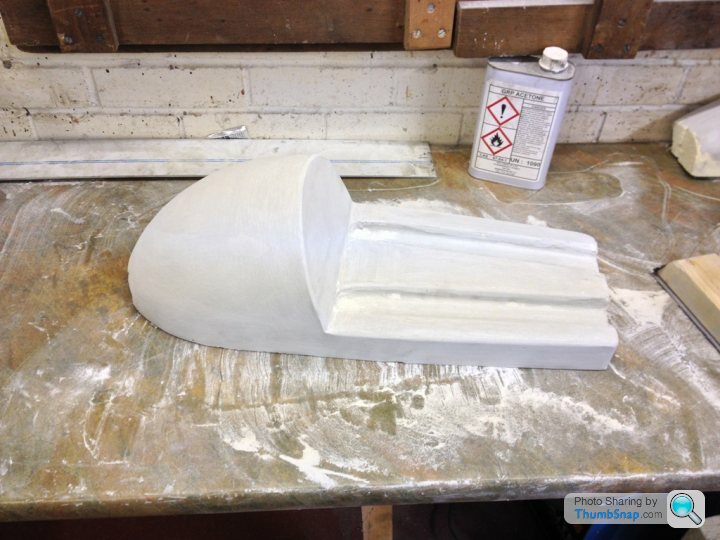
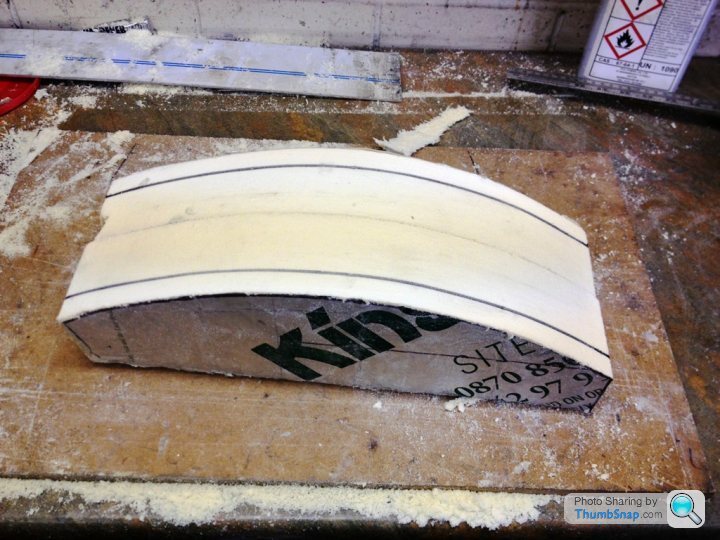
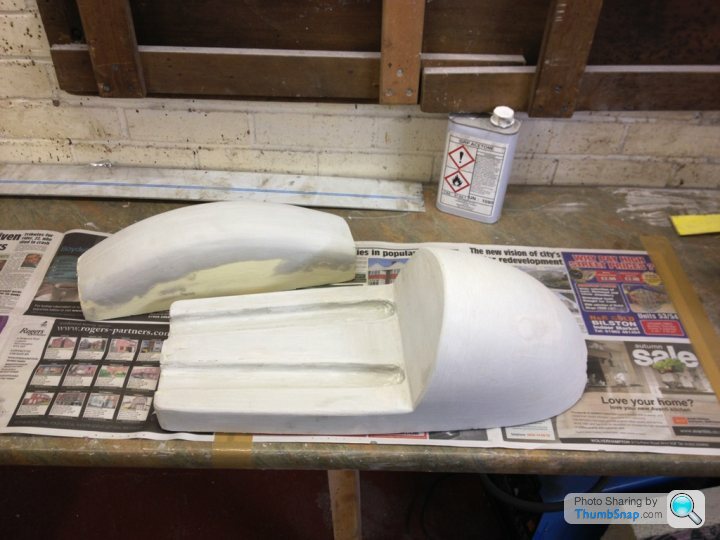
here is how the seat evolved...
Mock-up out of cardboard
Kingspan insulation, cut with a big saw, and sanded to shape (it sands really easy with 40 grit paper, 10 mins to get the basic shape, its that quick!
seat in the making... and mudguard...
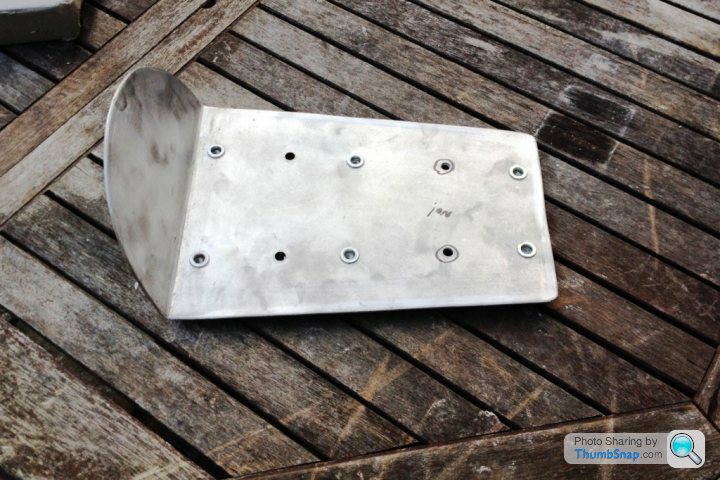
seat pad made out of 3mm alloy plate and rivinuts to hold it on
seat pad back from the trimmers
The seat and painting the frame is the only two jobs I have not done myself so far, the paint as painting a frame creates so much over-spray in the garage, (multiple passes on each tube)and I dont have the skills/ machine to do the upholstery.
here is how the seat evolved...
Mock-up out of cardboard
Kingspan insulation, cut with a big saw, and sanded to shape (it sands really easy with 40 grit paper, 10 mins to get the basic shape, its that quick!
seat in the making... and mudguard...
seat pad made out of 3mm alloy plate and rivinuts to hold it on
seat pad back from the trimmers
Gassing Station | Biker Banter | Top of Page | What's New | My Stuff