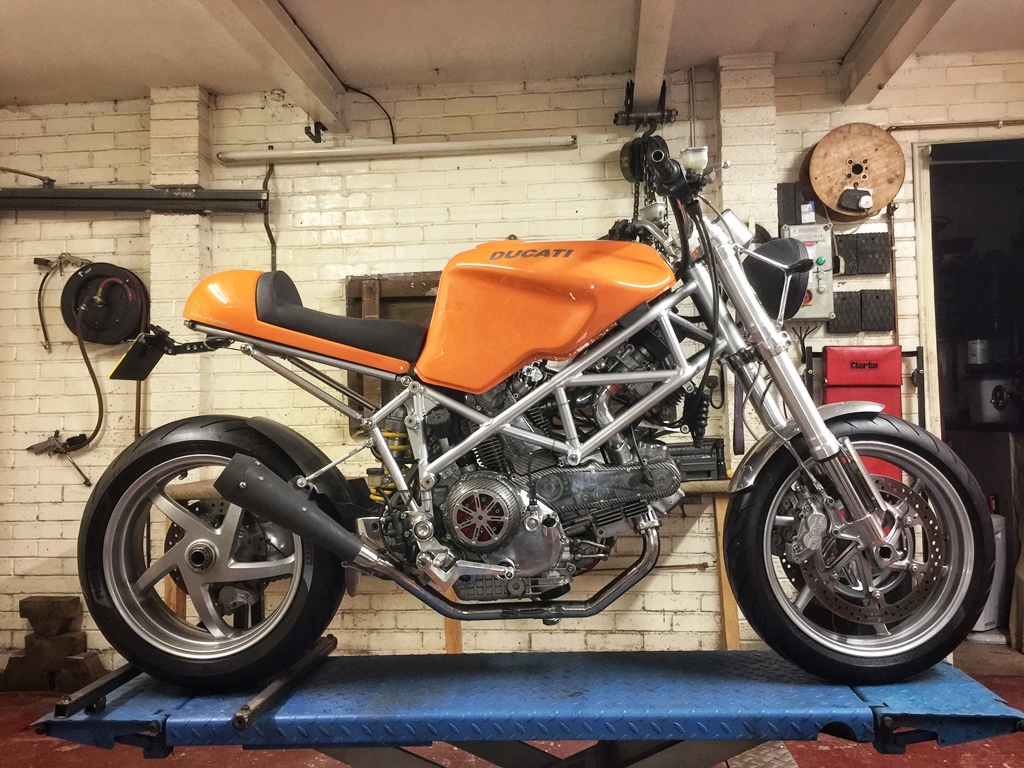
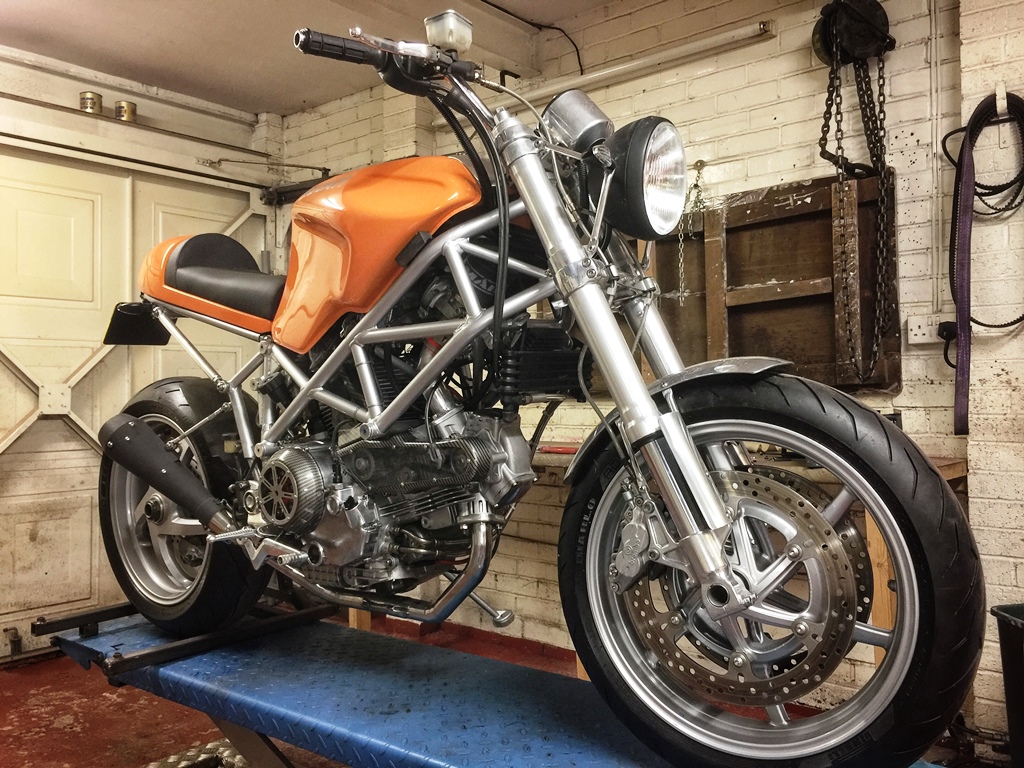
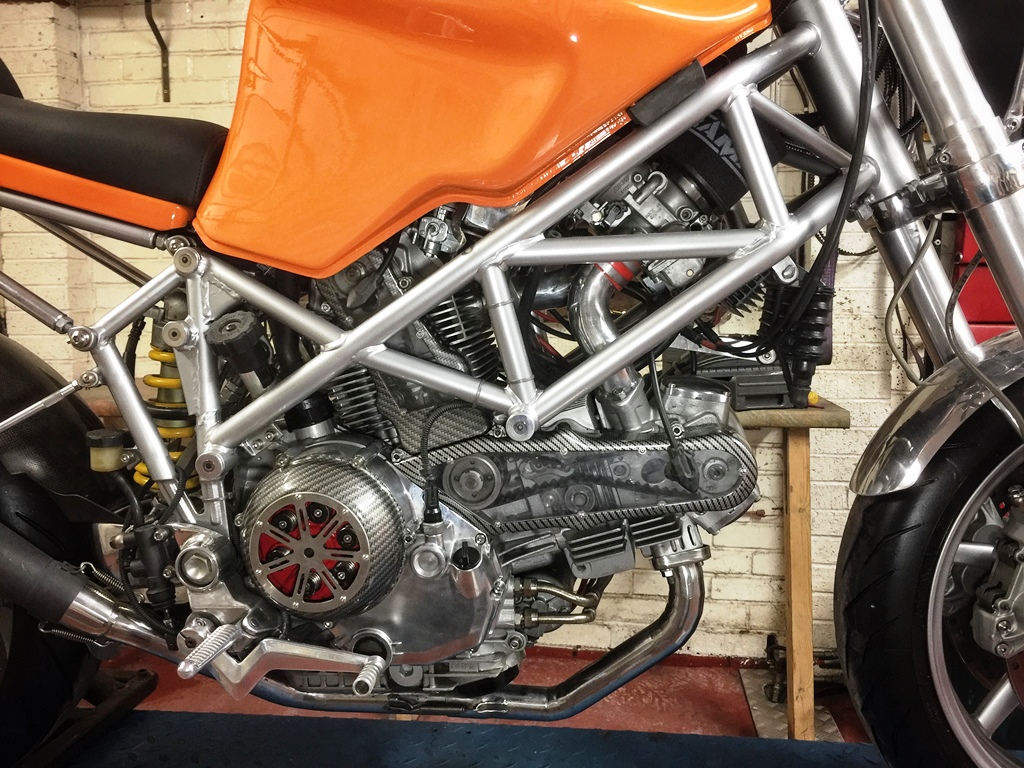
Ducati custom build Mark II
Discussion


December and progress has been a little slow due partly to the holiday, but mainly as Mrs. Buzzer has broken two fingers which means garage time is limited! I am having to do jobs I don’t normally do!
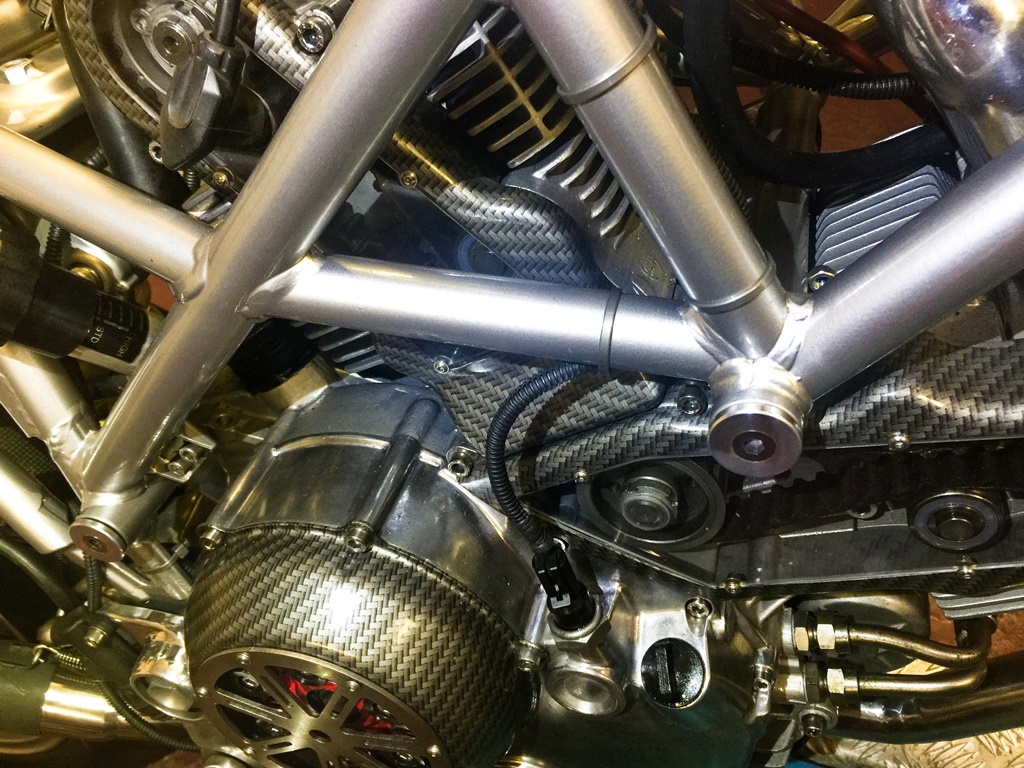
I have managed a couple of small jobs… made some adaptors for the manifold for the vacuum fuel tap, mounted the speedo sensor on the back wheel in place of the original hall sensor (hope the magnets stay in place!) and finally made a new “T” piece for the carbs as I didn’t like the very short connector on the original plastic one.
This needed to be accurate, so out came the micrometer, which my Dad gave me when I was about 16… that was 47 years ago. I have more modern measuring stuff, but this is still the default measuring tool I go to. its still checks out accurate!
I have started the bike, but I have a problem in that I only have a spark on the vertical cylinder... this seems to be a problem with the Ignitech ignition. the guys there are looking at it for me at the moment
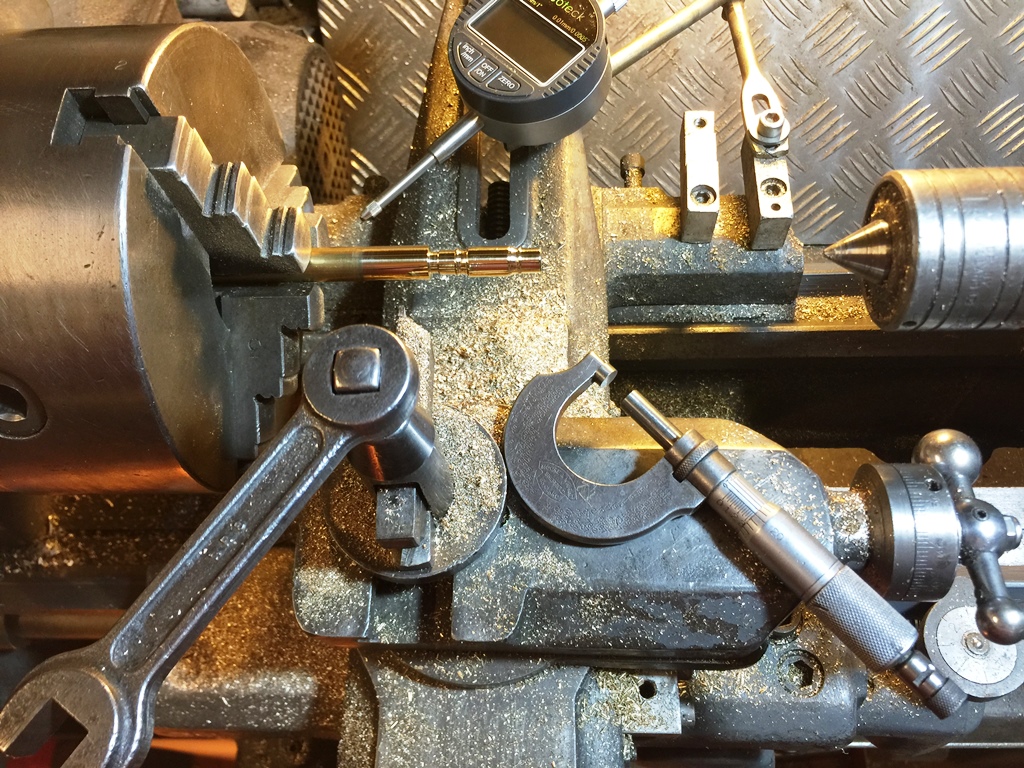
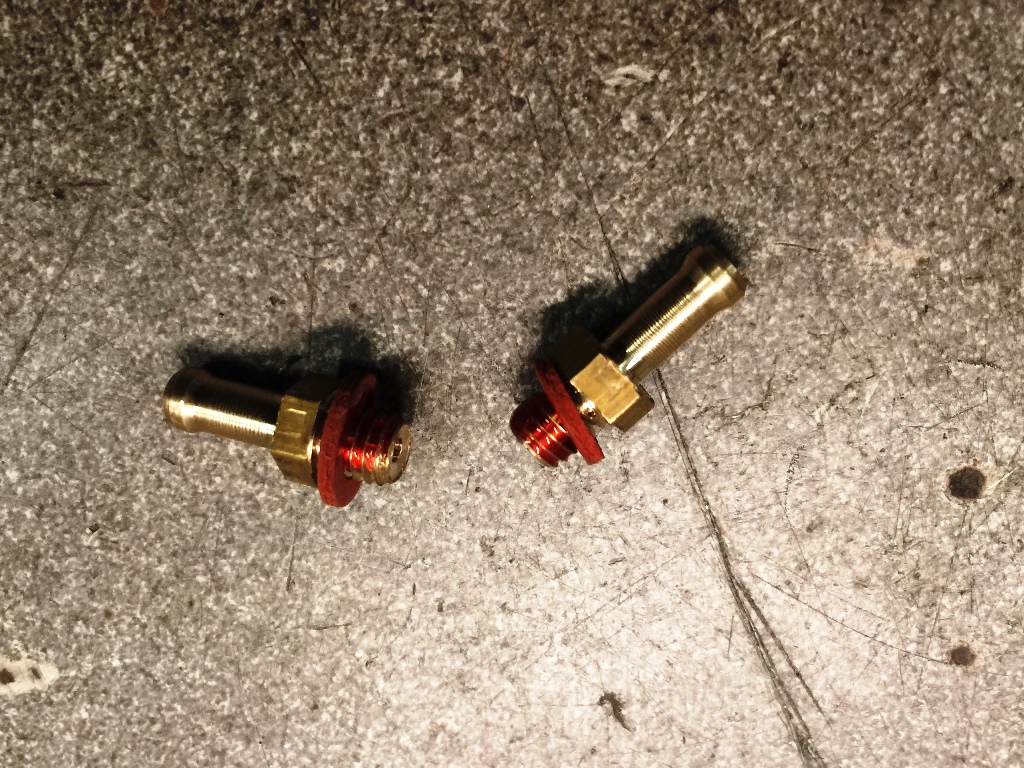
garypotter said:
Wishing you a very merry xmas and thank you for the updates, its a great thread and I have envy for your workmanship.
And I hope the wife makes a speedy recovery
Thanks! Not many updates at the moment... although its only her fingers broken she is in plaster up to her elbow... so cooking, cleaning, she cant drive so lots of shopping trips which as you can imagine I LOVE....!!!And I hope the wife makes a speedy recovery
I do feel for her though... one of her pasions in life is playing the piano....
Still, only 5 weeks to go!
scarble said:
Every vernier I've used always feels like it has too much play in it, micrometers feel better.
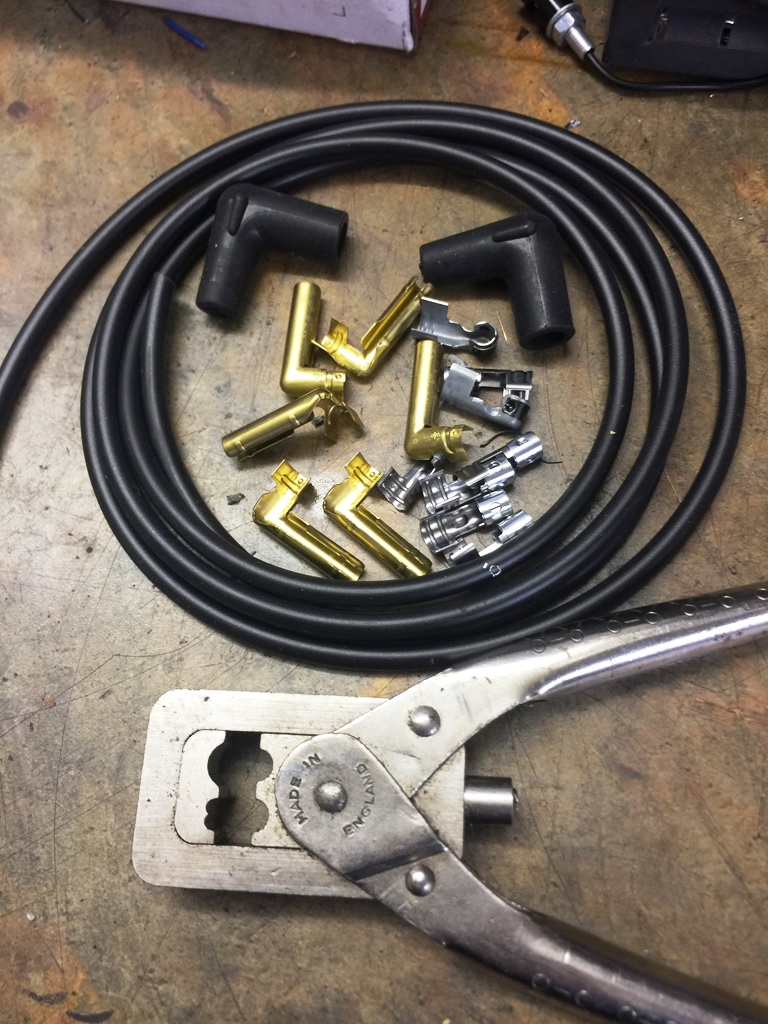
I agree... I do use mine all the time though, so useful to be able to zero the reading... however, I default to the micrometer once I am down to the last few thouManaged to sneak in the garage for a while... still some wiring to finish off, and I have replaced the ignition leads with some new copper core wire. Been years since I made some up, they seem to last well on today's cars and bikes.
As I need to get the pins out of some of the loom connectors, in particular the handlebar switches I used this set of removers... they were only a few pounds but over the years they have been used time and time again! They fit the majority of connectors and allow you to remove and replace the connection pins without damage.

progress really has been slow, garage time is limited due to my wife breaking two fingers and being in plaster up to her elbow....
So its been cooking, cleaning, and as she cant drive... shopping. lots and lots of shopping.... and yet more shopping...
bear with me.... normal service will resume in a few weeks when the plaster comes off
So its been cooking, cleaning, and as she cant drive... shopping. lots and lots of shopping.... and yet more shopping...
bear with me.... normal service will resume in a few weeks when the plaster comes off
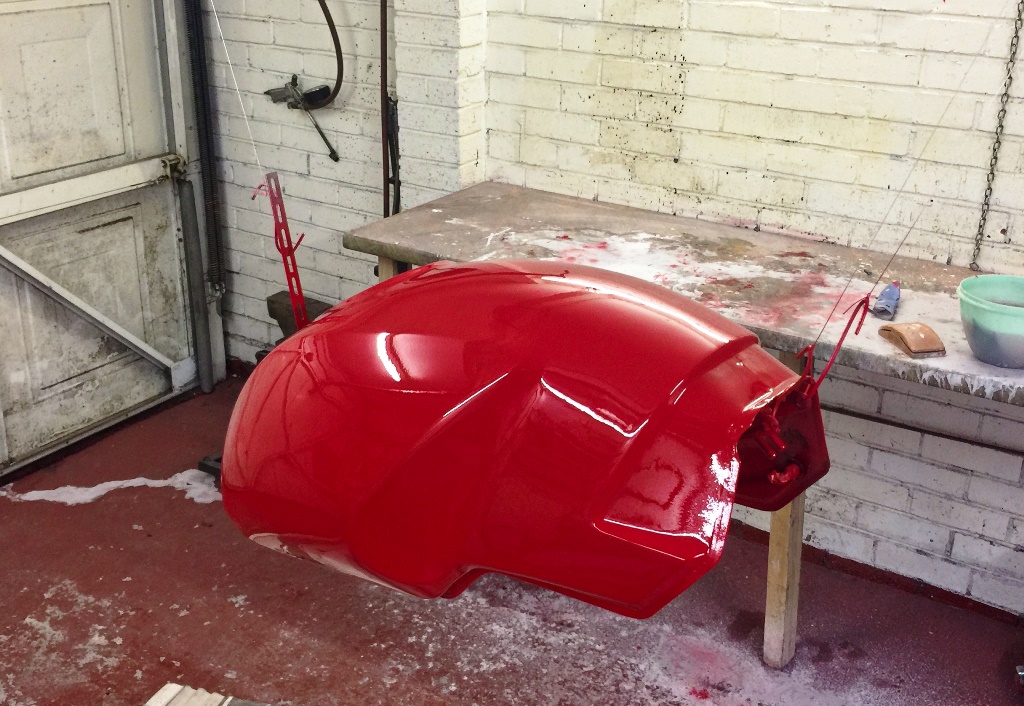
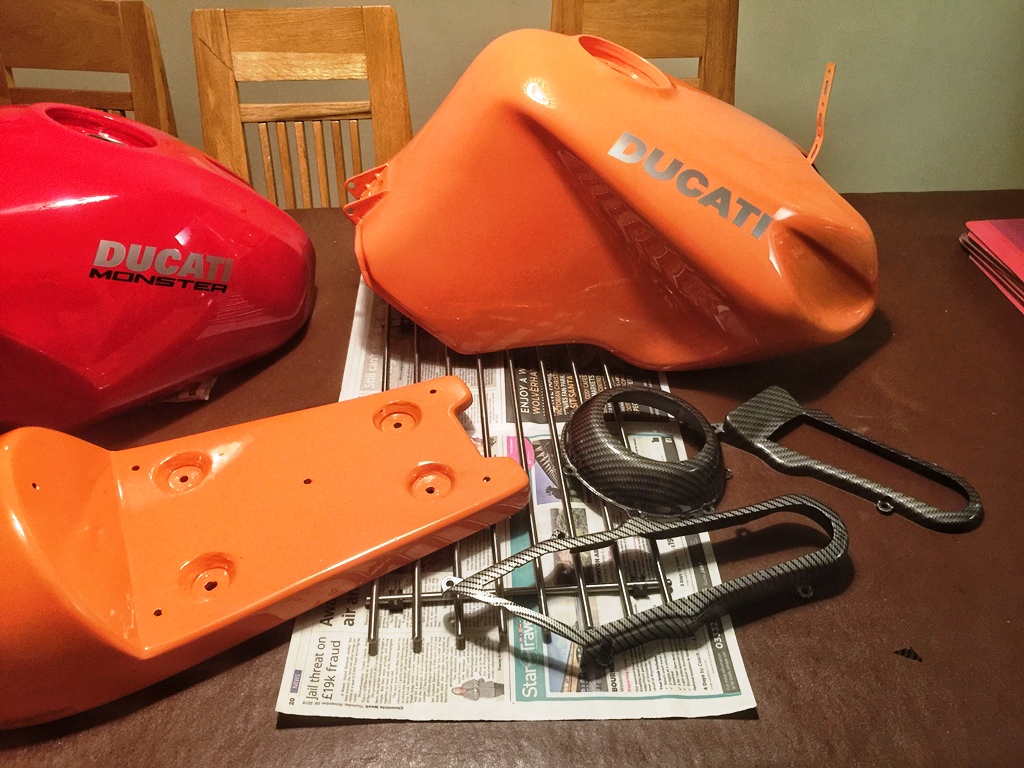
Now the bit I am not too keen on… painting the tanks and seat. not because I don’t like that actual work, its the mess it makes in the garage. There are two tanks as I initially bought a Carbed Monster tank, but it simply didn’t fit, which is a pity as I prefer the shape. Thought I would paint it at the same time and sell it on. Its almost new, the guy I bought it off said when his monster was new it fell over and dented the tank, so he bough a new one. this has been in his loft for almost 20 years! The monster tank will be red… I already have some paint… As for the tank and seat… we will see!

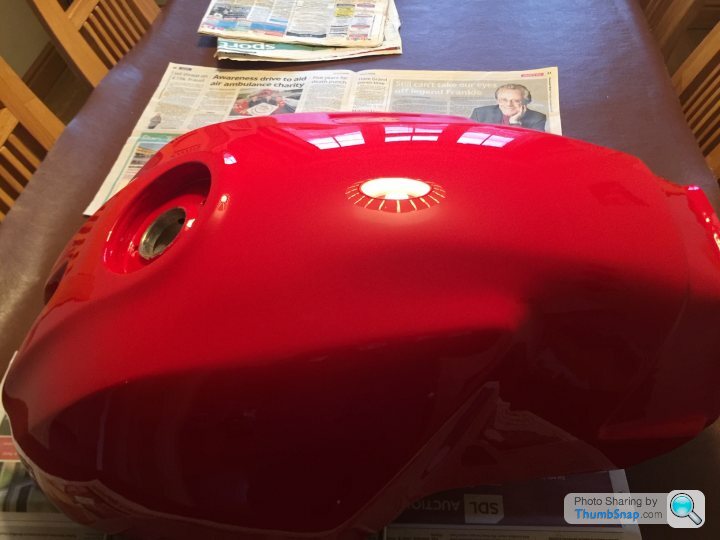


finally decided on the colour after much deliberation.... Orange. The tank and seat divide opinion, some like it, some hate it... may as well do the same with the colour! have to say this paint is really good... but so is my new spray gun...
When I was 20 my dad bought me a second hand Binks Bullows 230, which I have used for over 40 years. I must have bought 5 different guns over the years to replace it, but always came back to it. then last year my mate loaned me a gun to try. Fantastic! I was shocked to learn he paid £18 for it new, complete with three different nozzles!! So I bought one, its brilliant!


When I was 20 my dad bought me a second hand Binks Bullows 230, which I have used for over 40 years. I must have bought 5 different guns over the years to replace it, but always came back to it. then last year my mate loaned me a gun to try. Fantastic! I was shocked to learn he paid £18 for it new, complete with three different nozzles!! So I bought one, its brilliant!
CousinDupree said:
Great!
Can I ask what the new gun is? Are you spraying celly then some 2 pack lacquer?
here it is... its bloody good for the money, its not a professional gun where its stripped and rebuilt many times a day, but its fantastic for the moneyCan I ask what the new gun is? Are you spraying celly then some 2 pack lacquer?
the paint is 2K clear over base. I also use 2K primer which is fantastic. Cellulose is a very poor these days in comparison to 2K. you do have to use an air fed mask though...
https://www.ebay.co.uk/itm/HVLP-Spray-Gun-Kit-Grav...
 f:0
f:0Edited by buzzer on Friday 11th January 16:29
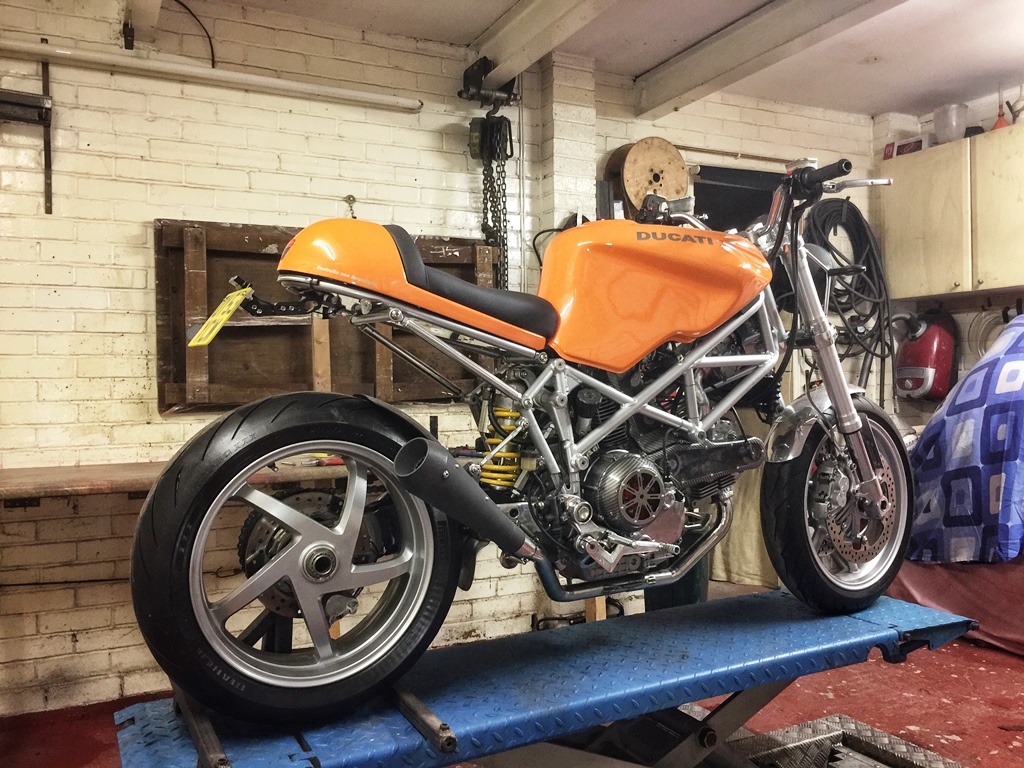
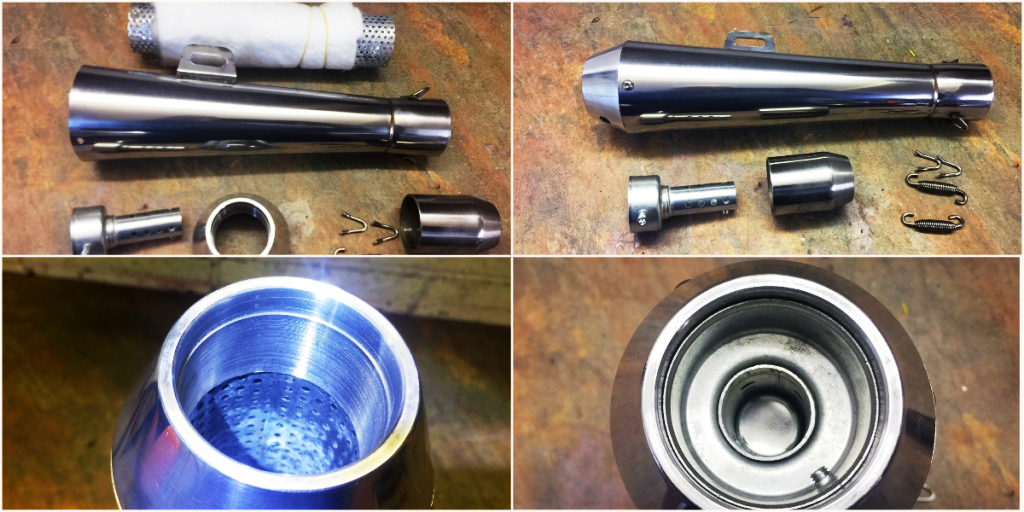
I have been unhappy with the silencer... and decided to make one in Stainless Steel, out of one I bought off Ebay, this time re-packable, and also with a removable baffle for MOT time. Even without the baffle, its acceptable (with my ears!!) with just the resonator now its packed properly.

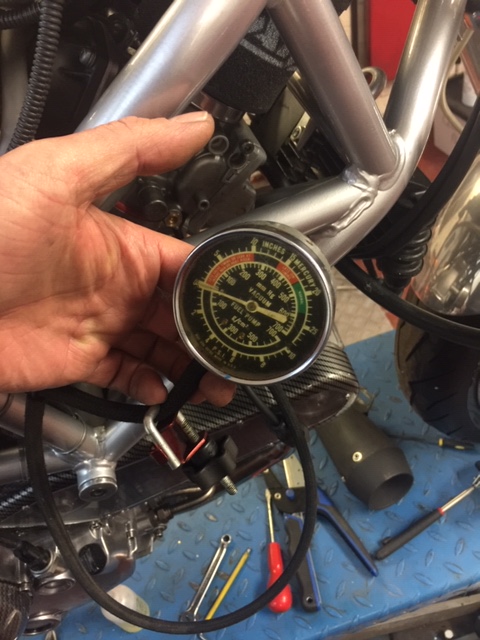
The bike is now running, it sounds fantastic! I will post a video soon! I balanced the carbs with the vacuum gauge. I prefer to use a single gauge as its far more accurate… if ever you have a bank of gauges connect them up to a single vacuum source and check they are calibrated. most are WAY off! with a twin I simply use a “T” piece and clamp the pipes individually with a pair of pliers, alternating from one cylinder to the other… the clamp in the picture is to damp the needle on the gauge. Its a VERY accurate way of doing it… makes a huge difference to the tick over.
Below is the initial configuration of the Ignitech ignition.
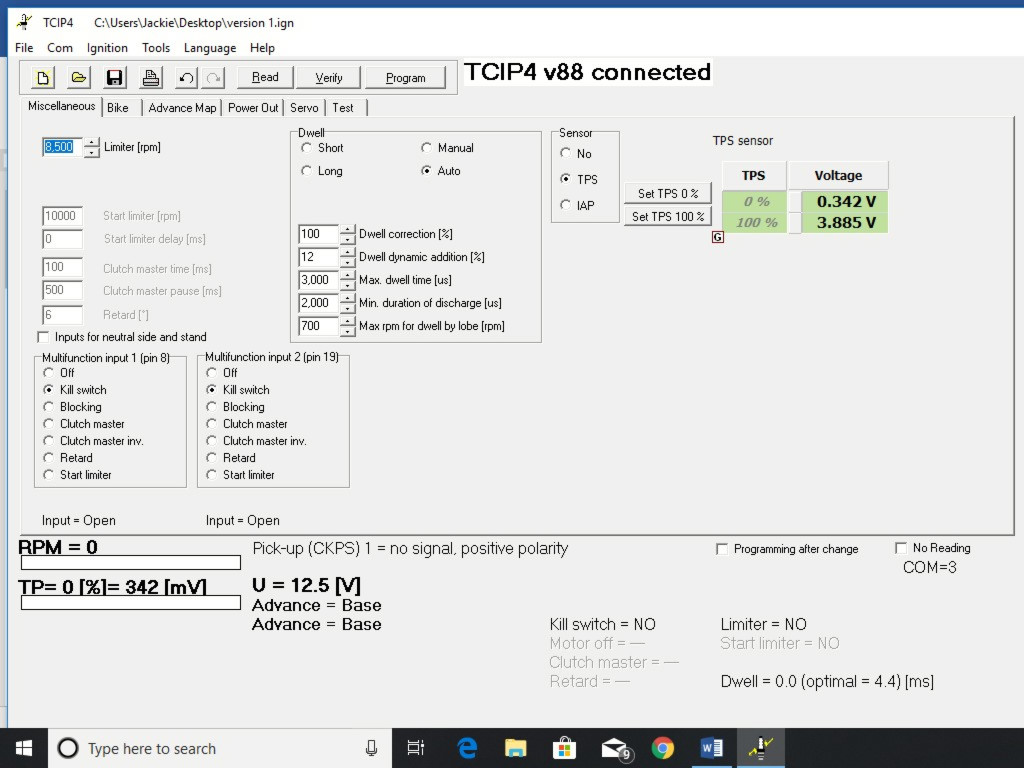
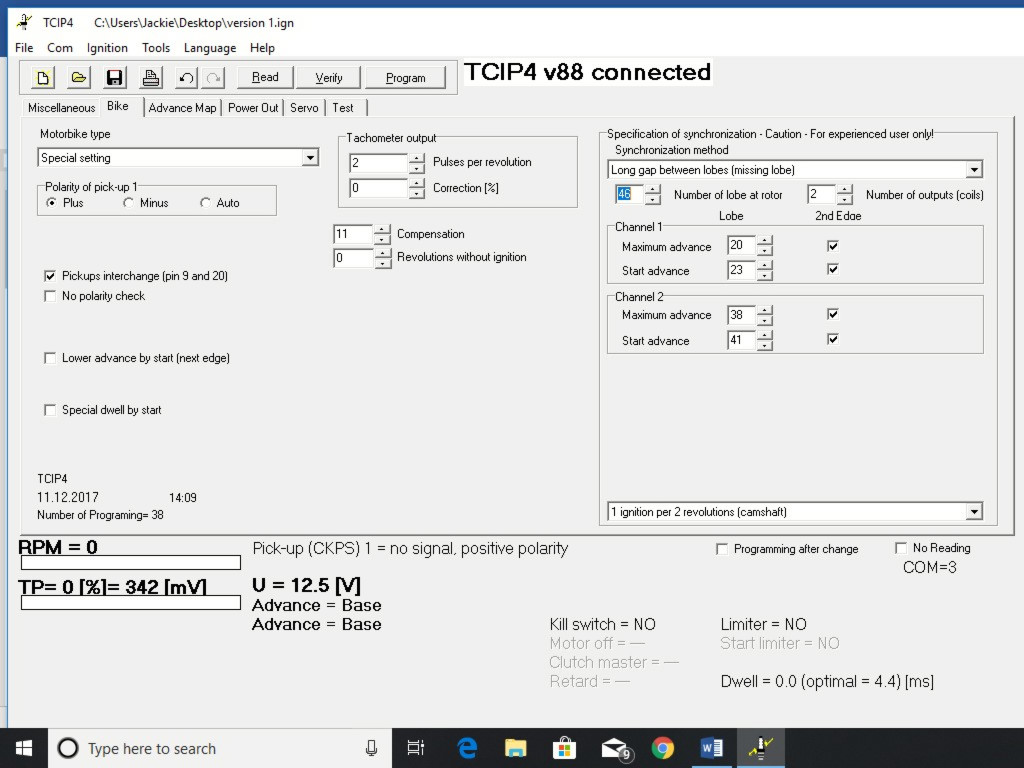


Below is the initial configuration of the Ignitech ignition.
Well here you go, just a short clip... I did take it up a very short private road and it pulls well and sounds... LOUD, but awesome!
https://www.youtube.com/watch?v=EGIS60YPn7w


https://www.youtube.com/watch?v=EGIS60YPn7w
I managed to get a Ducati Performance map and popped the advance data into Excel, along with the data from the Ignitech file. here is is in graph form. the Ducati map has 32 points on the RPM scale that are mapped, and the ignitech 10, which I feel is plenty. A lot of early electronic ignition bikes had two... tick over, and full advance! my old Jota jumped from 10 degrees at tick over, to 34 degrees at 2000 RPM!
there is an alarming blip in the Ignitech graph which may need some investigation when its on the road. the Ducati map is what I am used to seeing on other cars I have played with.
It will be easy enough to replicate the Ducati figures into the Ignitech map though... my mate showed me how to interpolate to match the different scales... but I glazed over after 15 mins!!!
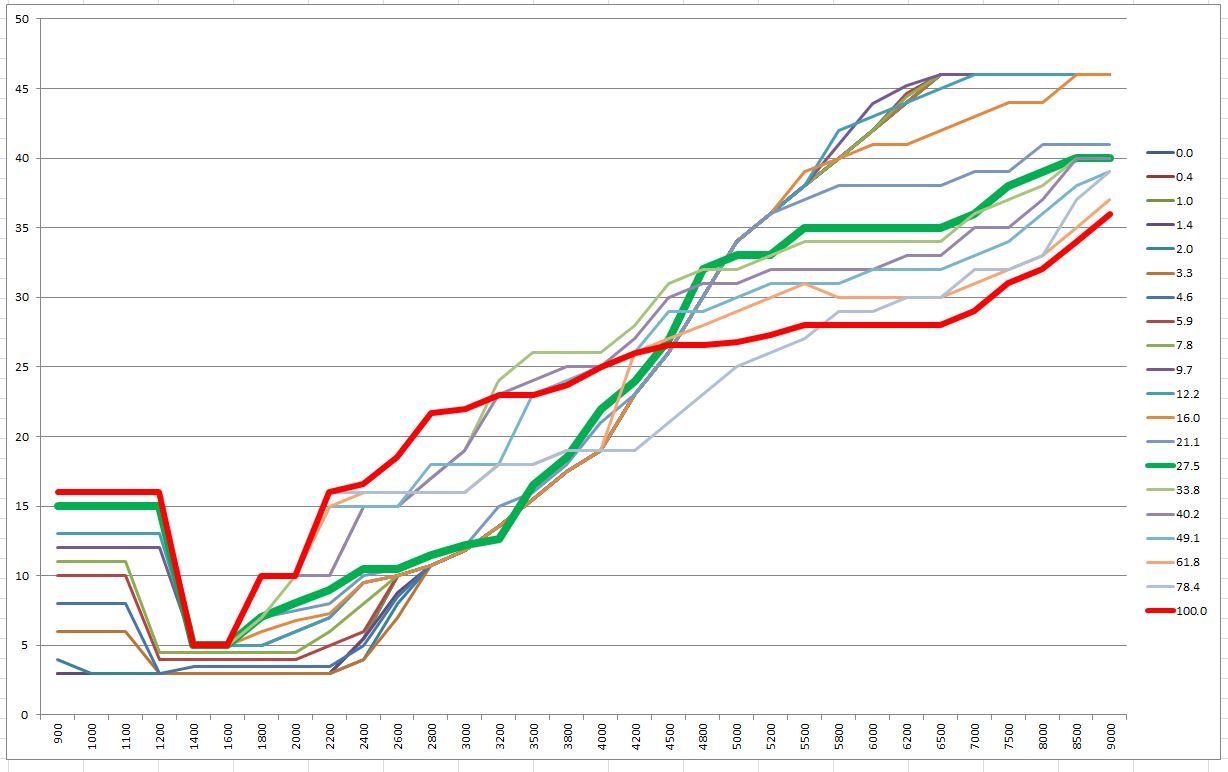
Gassing Station | Biker Banter | Top of Page | What's New | My Stuff