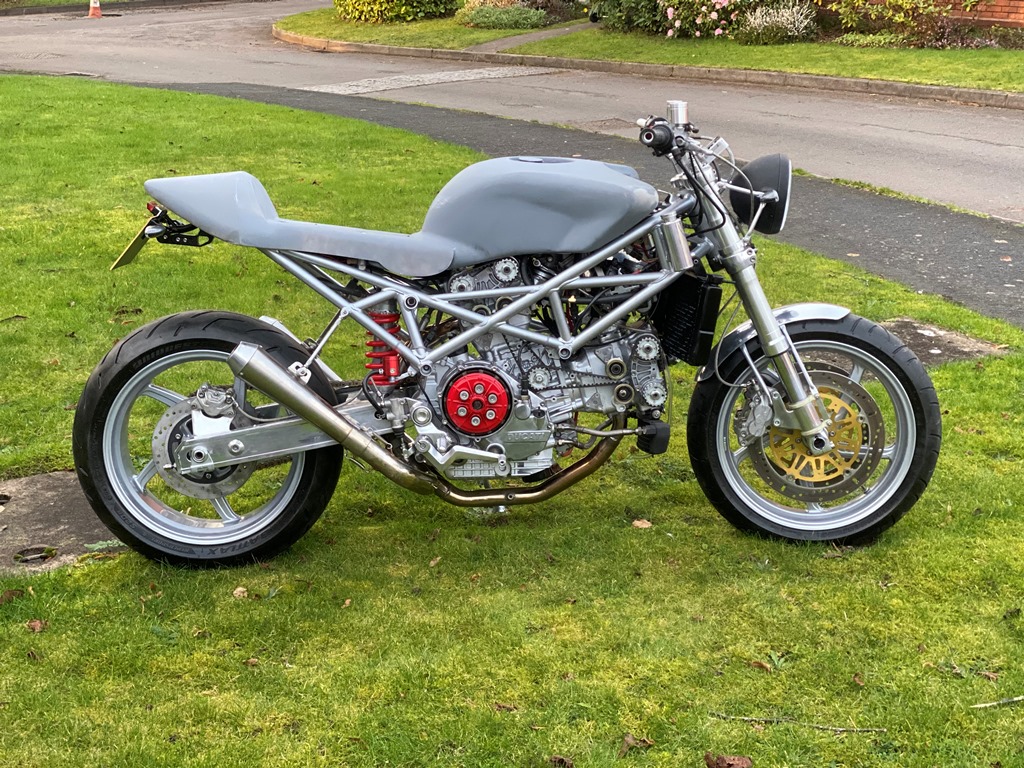
Ducati 996 engine custom build
Discussion


Benni said:
Great job, I am am a little envious for your workshop and amazed by the build speed.
The only thing that looks odd to me is the angle of the front fender struts,
because they are not running parallel to the fork leg.
yes, it is going together rather quickly The only thing that looks odd to me is the angle of the front fender struts,
because they are not running parallel to the fork leg.
 I was however forced to clean all the bathrooms yesterday... I made it quite clear to my wife that they were cleaner than they had been for months.
 speed may slow a little in the next few weeks... she has things planned for me

the struts are in fact parallel... its just the photo angle...
Kev_Mk3 said:
so glad I found this thread, fantastic work cant wait to see it develop more.
you can also follow my blog https://jtccc.wordpress.com/lukeyman said:
Worst 'I've got an iPhone' thread ever...

Cracking build btw.
Listen... it only the third new phone I have ever had, the first was a works Nokia 3310 after i was the last person in the company to hand back my pager. it lasted me years... then a Nokia flip phone.... all the rest have been hand me downs from the kidsCracking build btw.
 I treated myself to a brand new IPhone recently and am now an Apple Fan Boy.
 poo at Paul's said:
I cant be the only one who is disappointed you haven't built a phone of your own yet!
How about a flip iPhone with a 3 week battery life...…….? Yellow, of course!
I try to avoid electronics How about a flip iPhone with a 3 week battery life...…….? Yellow, of course!
even though I am from a technology background 
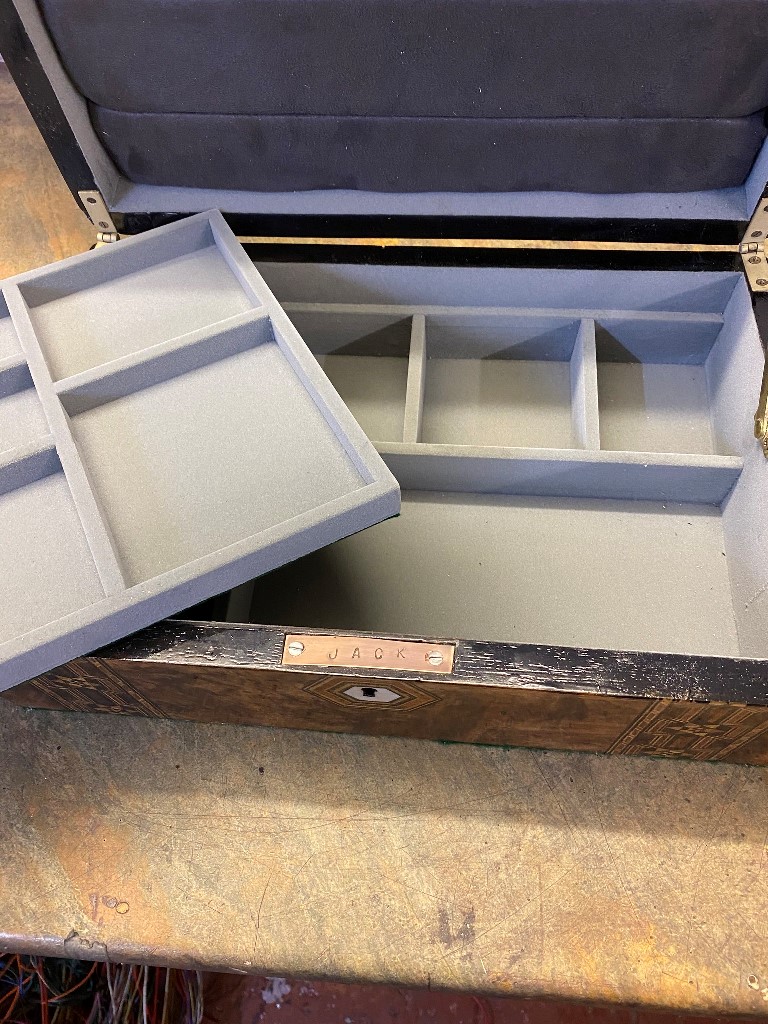
Anyway, I have been busy making my wife's Christmas present, to earn Brownie points... It started life as a writing box, my wife saw it when we were helping clear a friends mother's house, and it was going to be thrown out as it was badly damaged... But my wife liked the box so we took it... been in the loft for a couple of years, I saw it a few months ago, around the time she mentioned she would like a jewellery box... I hope she likes it! The way its been flocked makes it look and feel nice inside, and I am pleased the way the wood has come up with a few coats of 2K lacquer


Back to bike stuff
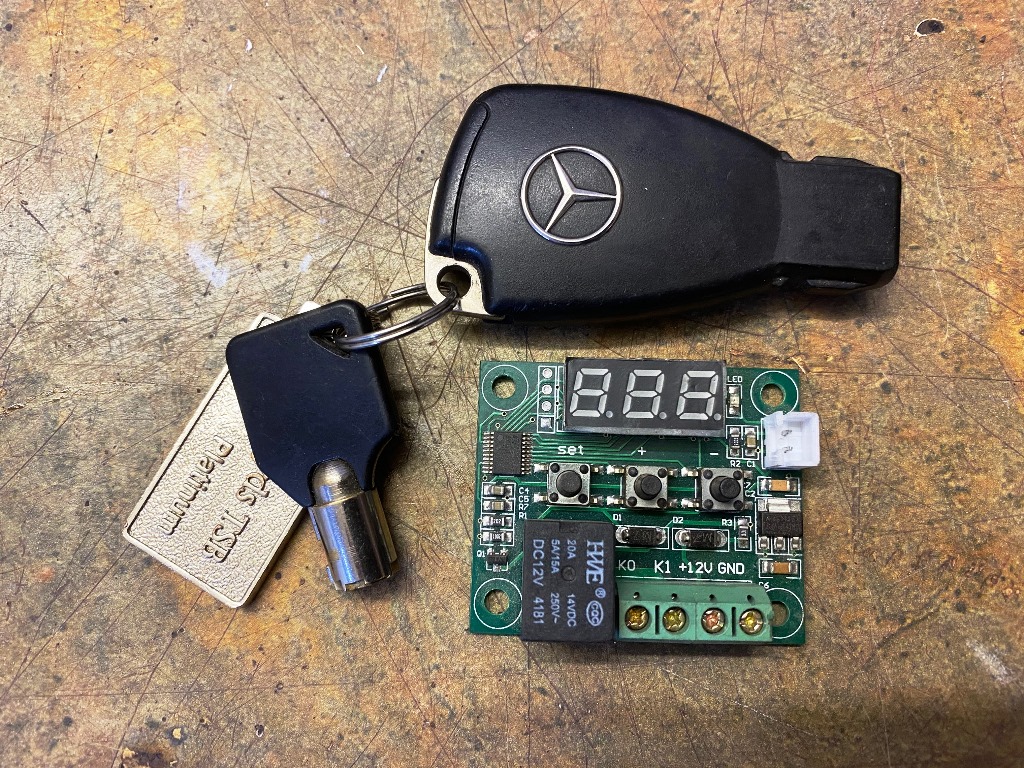
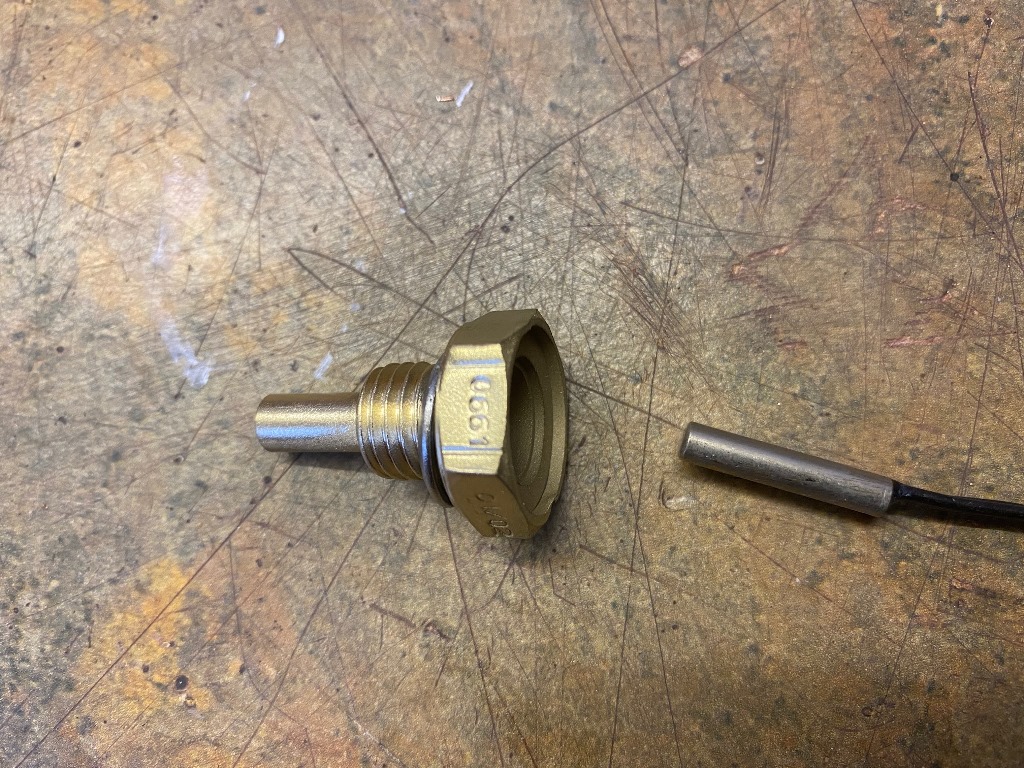
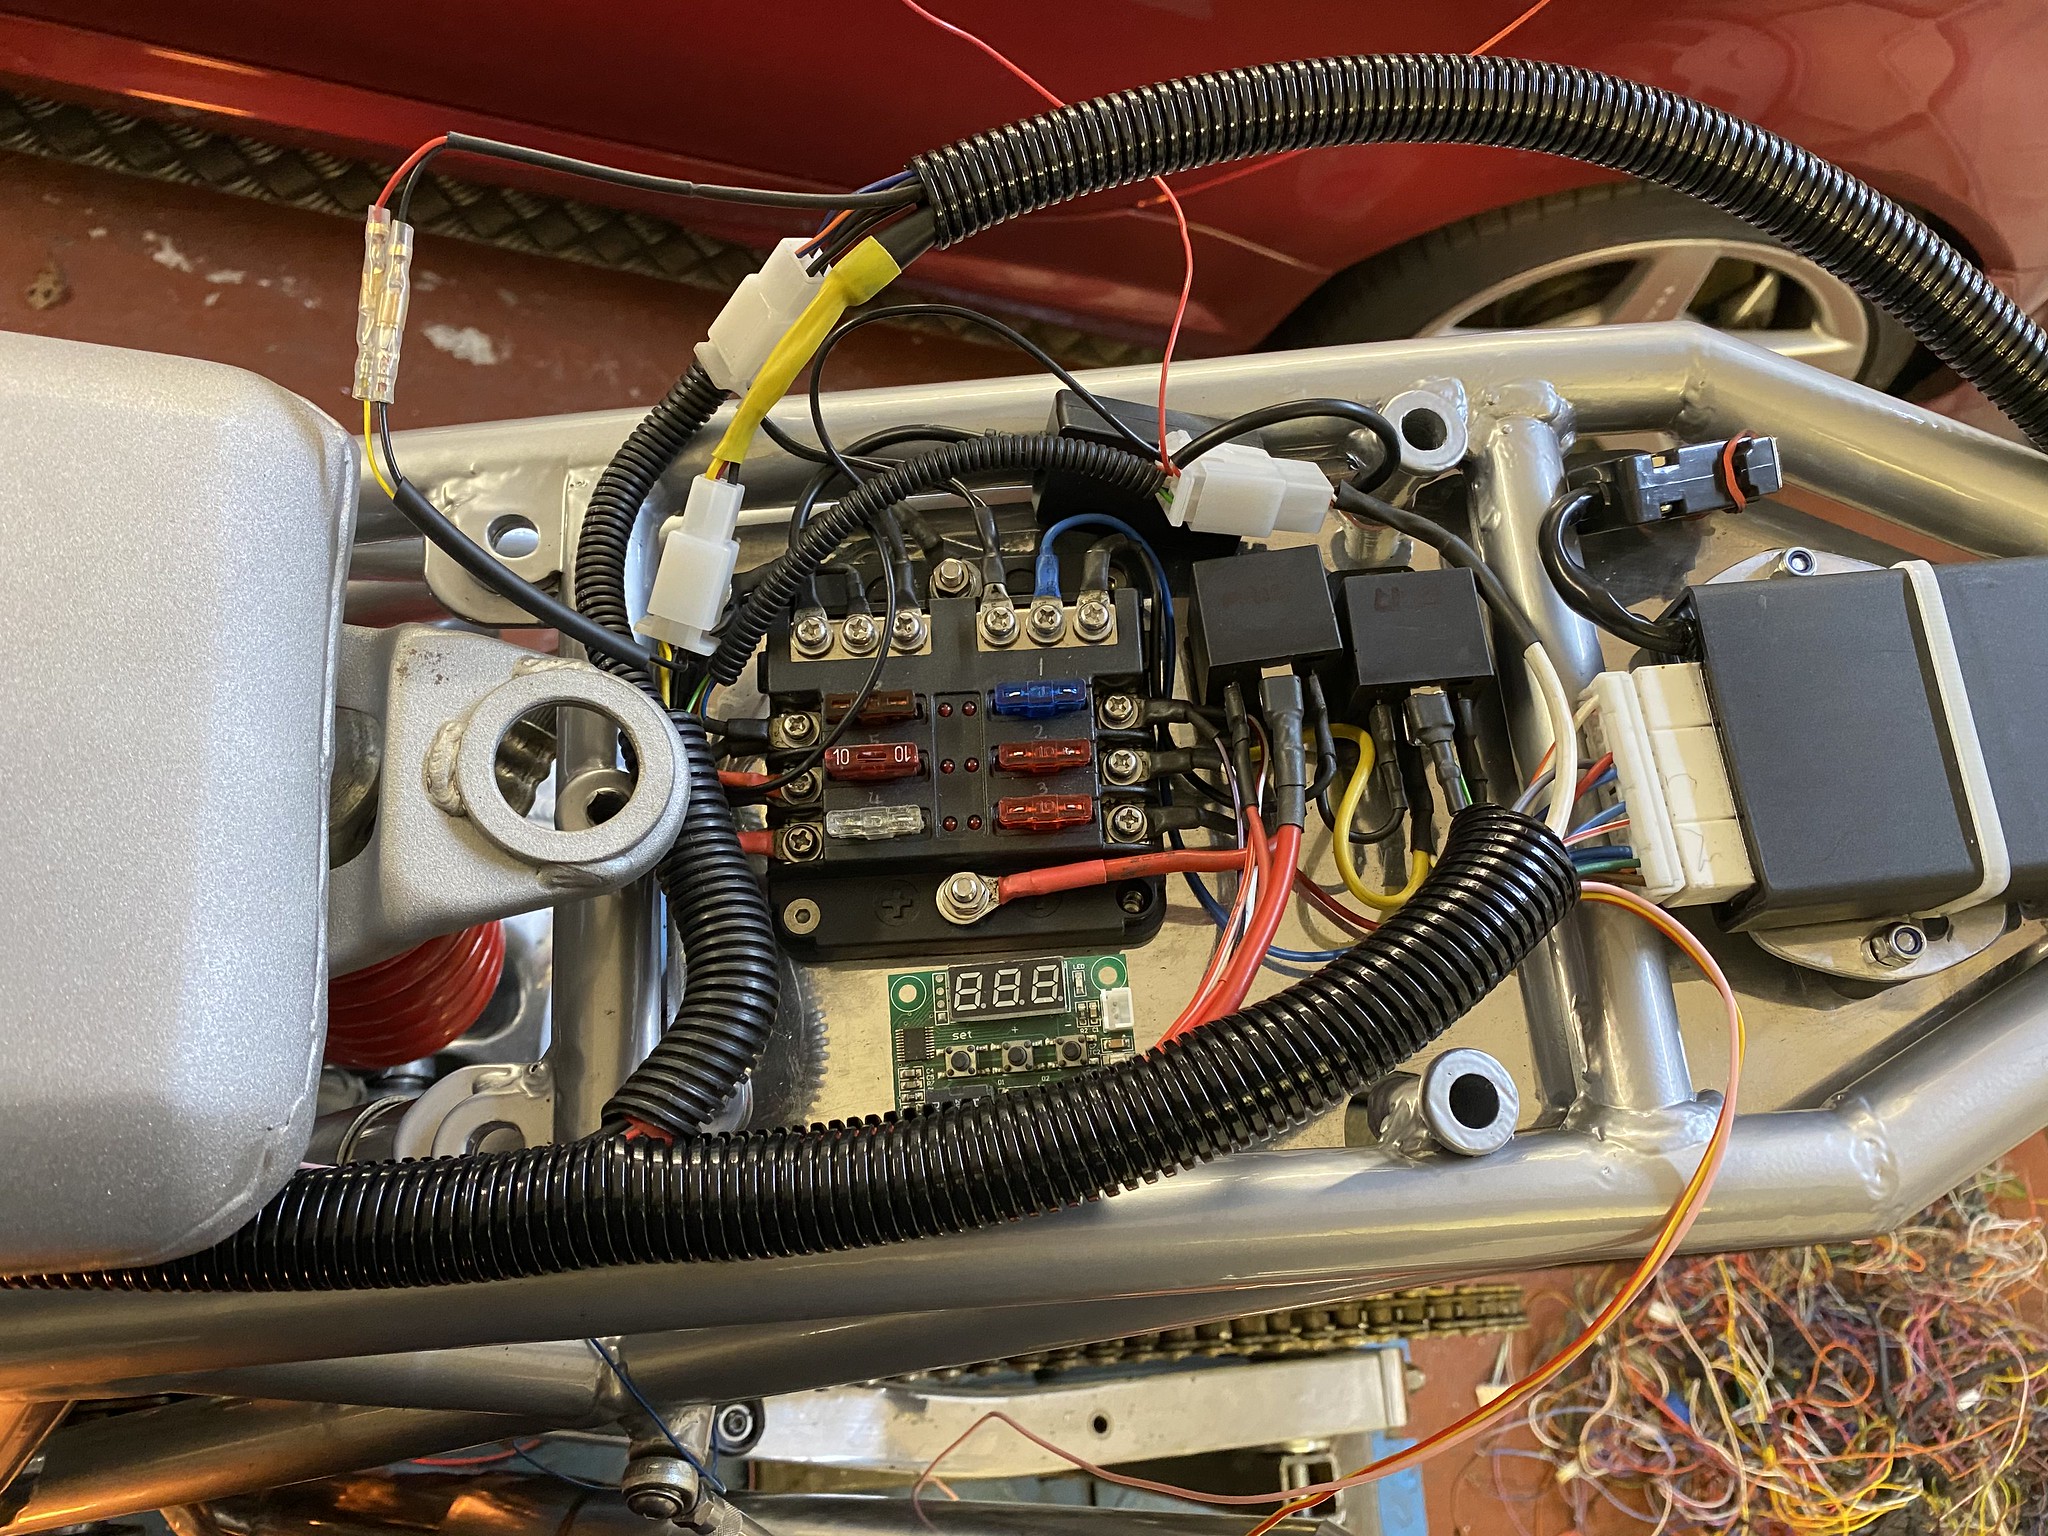
I have been pondering how to switch the radiator fan on and off as I am no longer running with an ECU... I popped around to my mate yesterday and he suggested using one of these units which is adjustable for temperature. he uses them on factory machinery. I have put the thermocouple in the original sensor (snug fit, but used some heat sink Grease used on computer CPU's) and some Araldite to hold it in place. Its 12V, you can adjust the temperature and it has a 20 amp relay on the board which is more than enough for the fan... tested it today in some boiling water and it works well! The unit is very cheap at around £5!
Also made a good start on the wiring.. I know a lot of people struggle with this but I find it easy, enjoyable and quite therapeutic! Sad I know! I start by making a drawing of each circuit on a page, and wire that circuit on the bike. As I go along I write the wire colours on the diagram for future reference. Use pipe cleaners to hold the wire bundles together till all the circuits are in place. then run them through sheathing , and then crimp/solder the ends on!
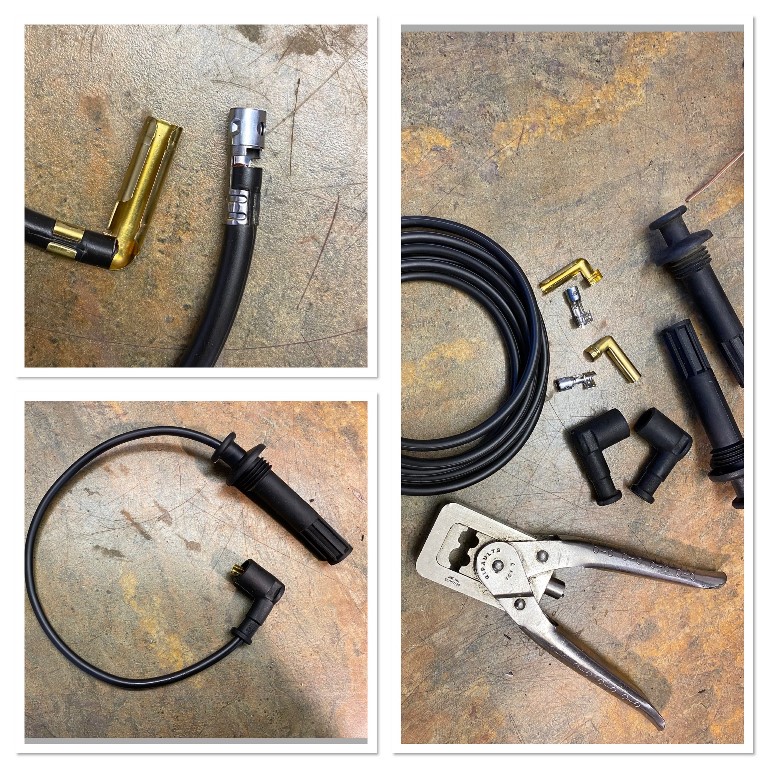
The wiring is coming on well, just a couple of minor circuits to do. I like this fuse box. one lead in, and all the fuses come off that, and it has a single earth point as well. All the ends are crimped and soldered… and covered with the glue lined heat shrink. When its finally done I can tidy it up and tape the joints with self amalgamating tape. As I had changed the location of the coils I needed custom leads, cheap and easy job. That crimp tool has not seen much use since the 70’s though, when it was used all the time! I had better get some resistor plugs as there is not much in the leads!
Also finished the throttle cable. I wanted to make the bracket slightly adjustable, so I made the mounting eccentric. couldn’t be bothered to change the chuck!
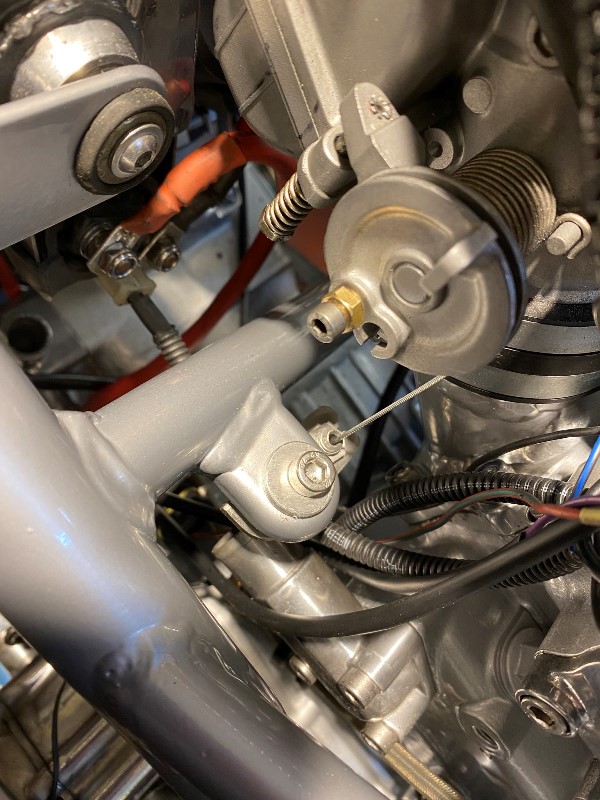
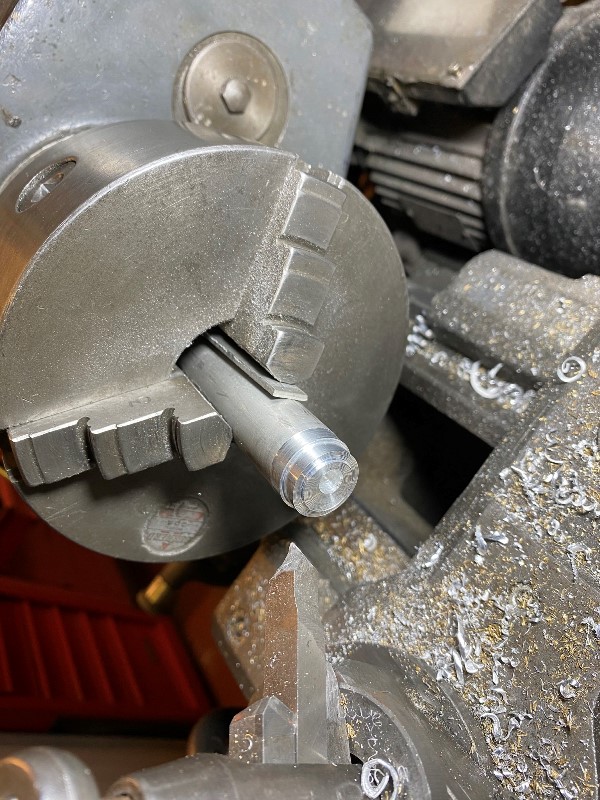
Also finished the throttle cable. I wanted to make the bracket slightly adjustable, so I made the mounting eccentric. couldn’t be bothered to change the chuck!
Not much progress of late... I came down with the flu, and its absolutely knocked me sideways... getting there now though, but not quite recovered yet.... here is a 15 second clip of the throttle linkage
https://youtu.be/GdabgnFPGMs
https://youtu.be/GdabgnFPGMs
Krikkit said:
Very nice, out of interest where do you get your wiring bits from?
For years I have used https://www.vehiclewiringproducts.co.uk/ I love the glue lined heat shrink they sell!I have on occasions used Ebay sellers, but the quality on there is so variable I gave up. the fuesbox however did come off there and is cheap (£10) and actually quite good quality.
for wire, I pop to the local car breakers who always have a loom skip and for a few quid you can help yourself to some longer sections. Buying loads of different colour wire is very expensive otherwise...
the other brilliant tool is this bunch for around £5 on ebays as a "Terminal Removal Tool" its invaluable!

spent a couple of yours in the garage today... still getting over the flu, so I have not been in there long... but long enough to get it started! It actually fired up almost straight away, which I was pleased about. at first I didn't have a spark though.... Seems the kill switch now works backwards. it will be a good anti theft! here its is running for just a few seconds, as there is no water in it yet...
https://www.youtube.com/watch?v=HU0TSbZg13g
https://www.youtube.com/watch?v=HU0TSbZg13g
another short video! there is water in it now so I got it warm...
https://www.youtube.com/watch?v=t_zGWiIyVQs
https://www.youtube.com/watch?v=t_zGWiIyVQs

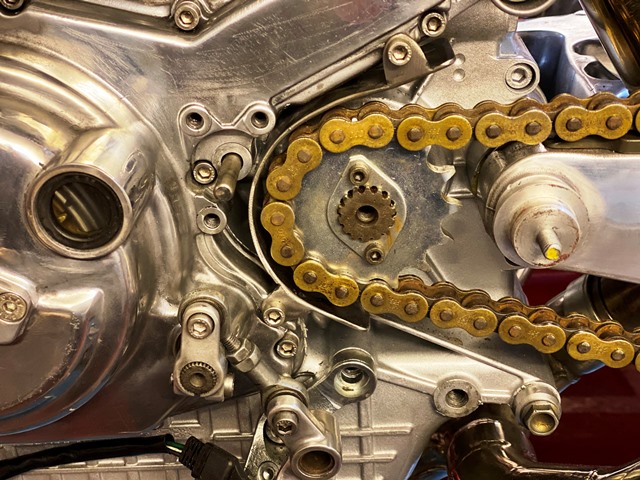
well thanks to a member on the Ducati Custom manufactures group mentioning a case saver, I have now made one out of stainless steel and put it under the chain guard I have made. a bit of googling suggests that chain breakages, and subsequent case damage is all too common on some Ducati bikes! Plenty of case savers on the market and quite cheap, and a dam site cheaper than new cases!
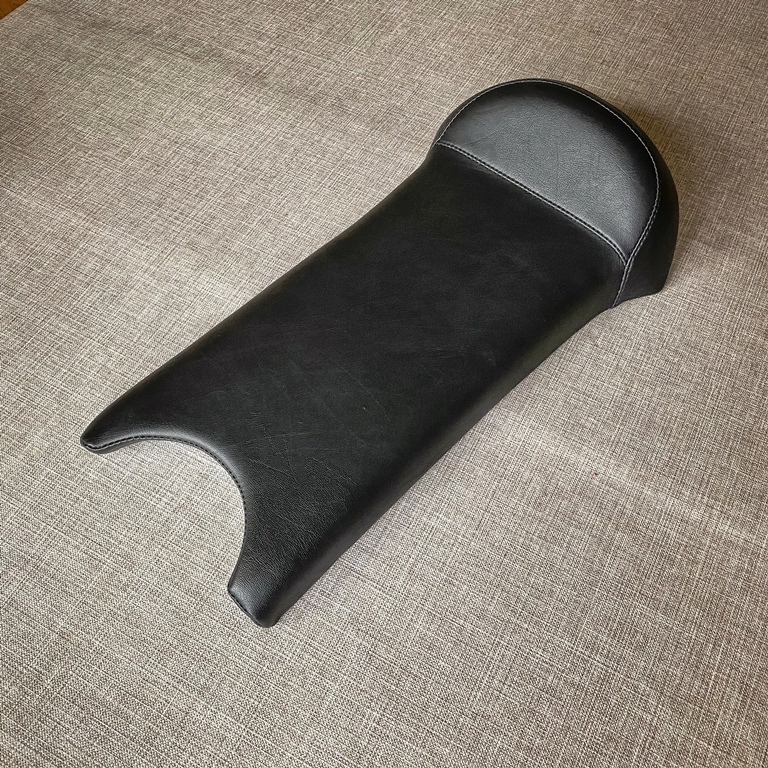
Also made a start on the tank and seat... my wife is moaning about filler dust on her plants!! A trick I learned many years ago is that when you want to get filler to shape, make sharp edges so you can see the lines, then when you are satisfied they are right, sand them off! its much easier that way. its the best way to get something like a car wheel arch spot on… I know the seat will divide opinion… I could have made it any shape, and played around with quite a few shapes at the foam stage… but in the end I decided on this on, as I like it, and that’s all that matters at the end of the day, I build bikes for me!
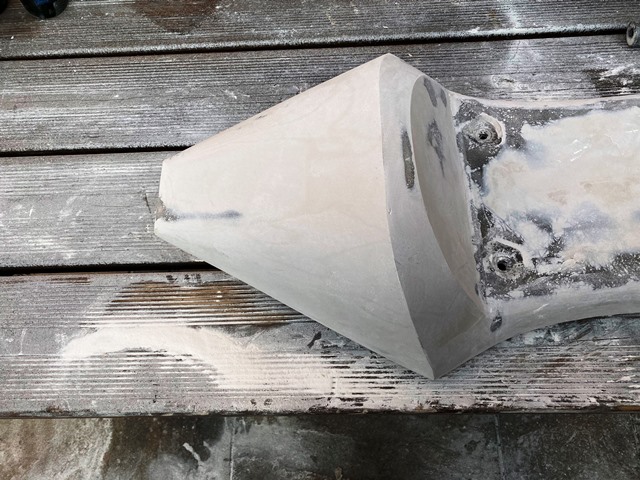
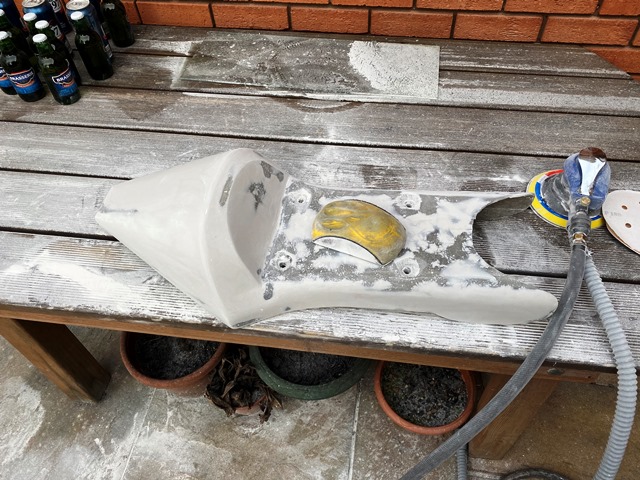
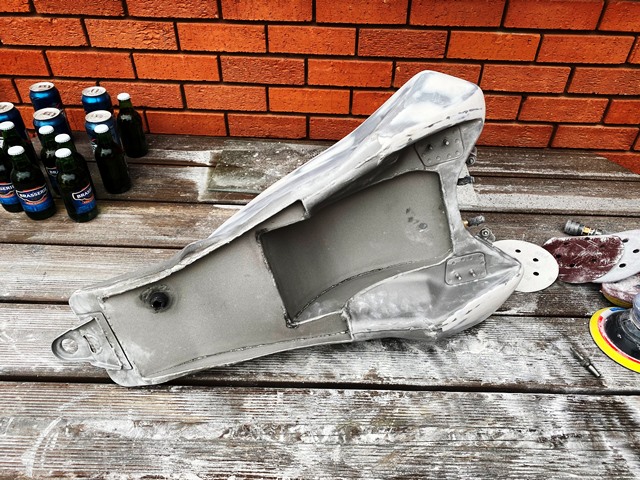
Also made a start on the tank and seat... my wife is moaning about filler dust on her plants!! A trick I learned many years ago is that when you want to get filler to shape, make sharp edges so you can see the lines, then when you are satisfied they are right, sand them off! its much easier that way. its the best way to get something like a car wheel arch spot on… I know the seat will divide opinion… I could have made it any shape, and played around with quite a few shapes at the foam stage… but in the end I decided on this on, as I like it, and that’s all that matters at the end of the day, I build bikes for me!
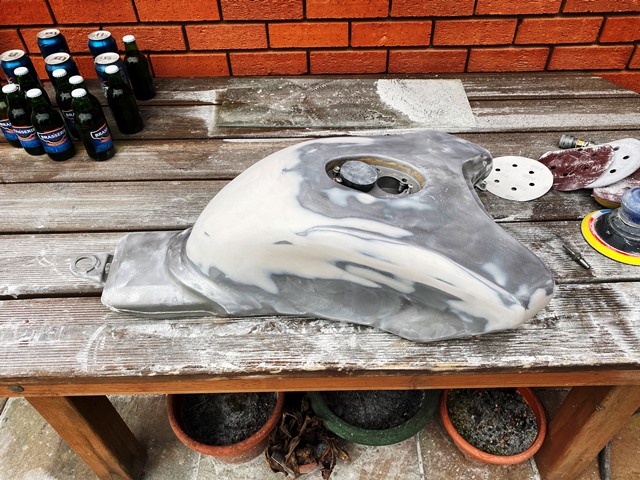
Well here it is in primer... just got to decide on colour now... I have plenty of time to think about it, this will be the last update for a while... I am being kidnapped and sent to a tiny (and I mean tiny!) island where there are no cars, bikes, transport, just beaches... and sun... and no internet. Quite frankly, I don't know how I am going to cope 
phatmanace said:
Do you have a link for the service you've used? - I'm an avid watcher of colin furze videos, he has a Swifty CNC plasma cutter, very cool, but I can't justify one; that said - having a service to get the odd part made up would be super useful!
I am away at the moment, will get you the details... Have you seen Lidl has a plasma cutter for sale on Thursday for £79... mate has one and its very good!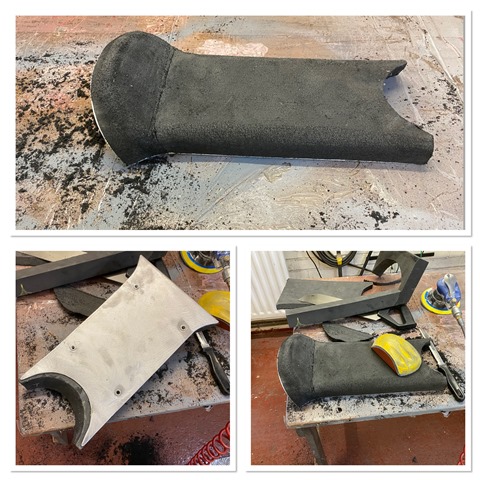
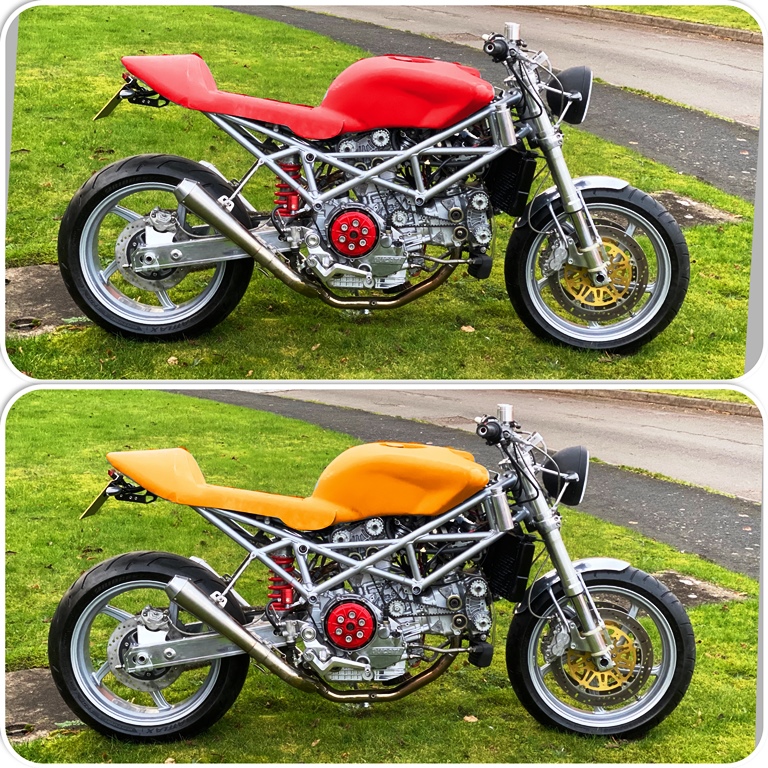
its close to the orange above!
here is the first coat of lacquer… For 40 years I used my trusty Binks Bullows 230 but it was starting to give problems… I tried several guns off Ebay, but despite the Binks problems always went back to it… then a few years ago I bought a cheap (£20) gun off amazon… it had great reviews, and sure enough its brilliant! this is the gloss straight from the gun!
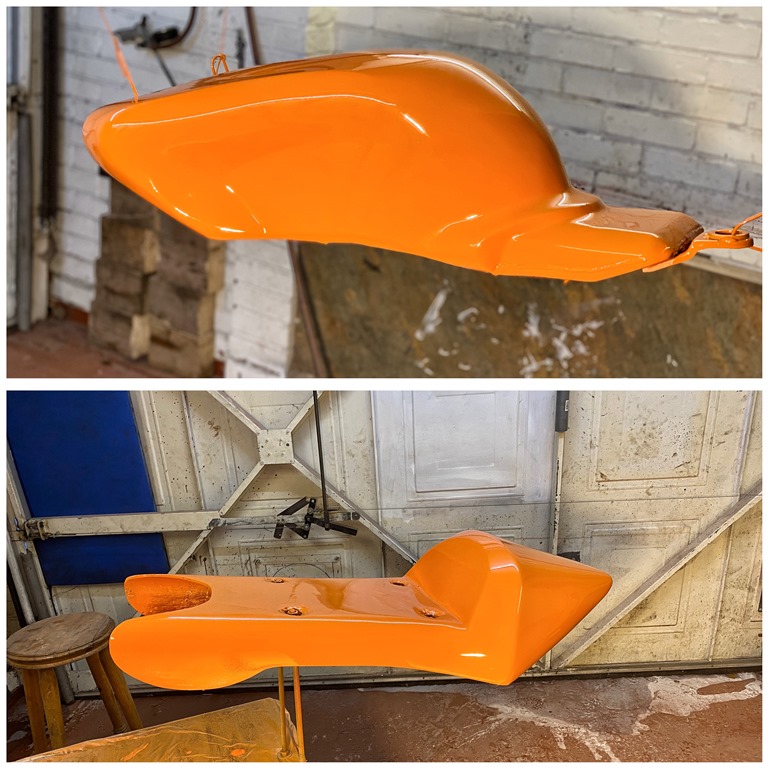
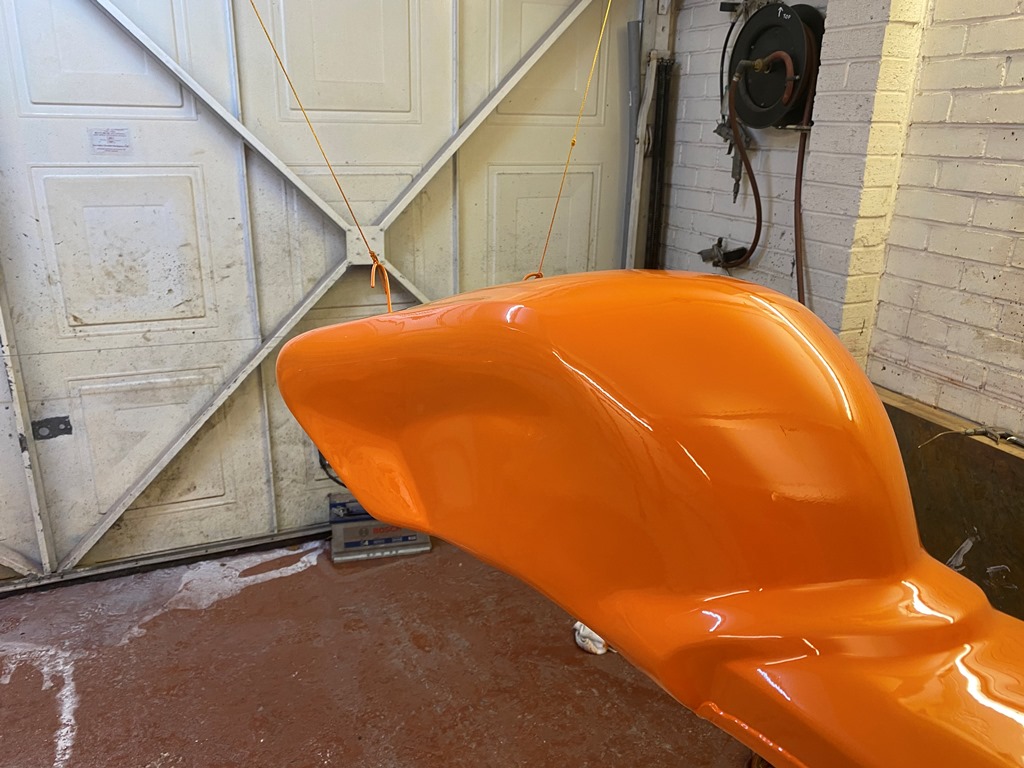
here is the first coat of lacquer… For 40 years I used my trusty Binks Bullows 230 but it was starting to give problems… I tried several guns off Ebay, but despite the Binks problems always went back to it… then a few years ago I bought a cheap (£20) gun off amazon… it had great reviews, and sure enough its brilliant! this is the gloss straight from the gun!
the cueball said:
would look better in red... 
Looks great though, I've got a few of the mini guns from Ebay, used for paint and ACF50 applciation... they seem to work pretty well too..
believe me i took ages to make the decision!Looks great though, I've got a few of the mini guns from Ebay, used for paint and ACF50 applciation... they seem to work pretty well too..
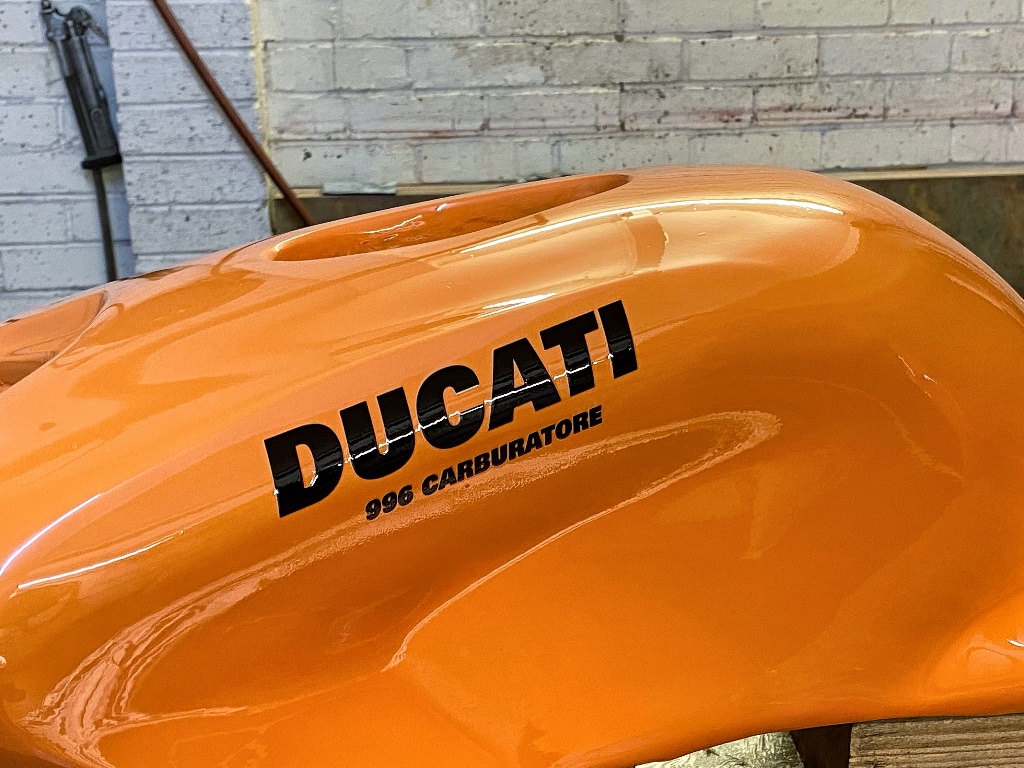
And the final coat.... my heart is always in my mouth when painting over decals... I have found by experience you MUST wipe them over with panel wipe, (NOT thinners) and make sure the first coat of lacquer is a mist coat which then has to tack off... then a couple of coats on top. if you go with a full coat first you always get runs off the lip on each letter! I will let them dry fully in the drying oven... OK, the small bathroom as that is the hottest room in the house!
Gassing Station | Biker Banter | Top of Page | What's New | My Stuff