Another body off thread.
Discussion


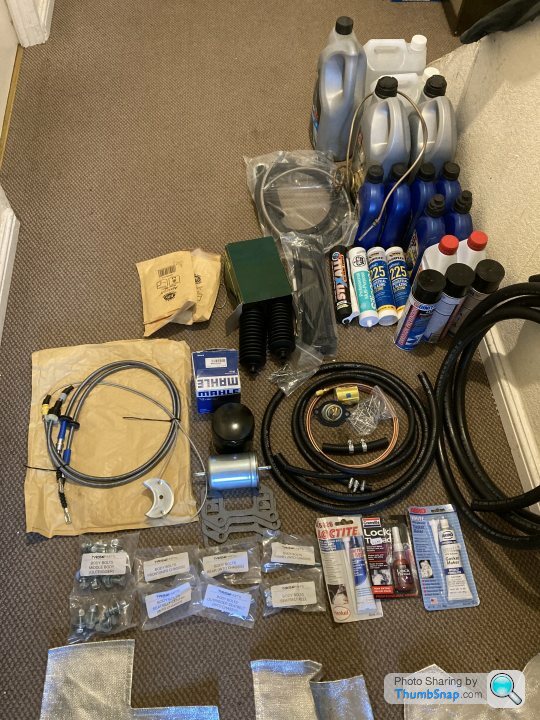
A pile of important bits to fit whilst doing a body off. A number of things I feel could be re used but it simply makes good sense to replace things that are a nightmare with body on at a later date.
Oils and fluids for engine grearbox dif PS, brake/ clutch fluid anti freeze and ionised water.
Heater and fuel hose and correct clips.
Stat and manifold gaskets and new PS hose kit.
Filters and mastics and various sealant products.
Close now
Oils and fluids for engine grearbox dif PS, brake/ clutch fluid anti freeze and ionised water.
Heater and fuel hose and correct clips.
Stat and manifold gaskets and new PS hose kit.
Filters and mastics and various sealant products.
Close now
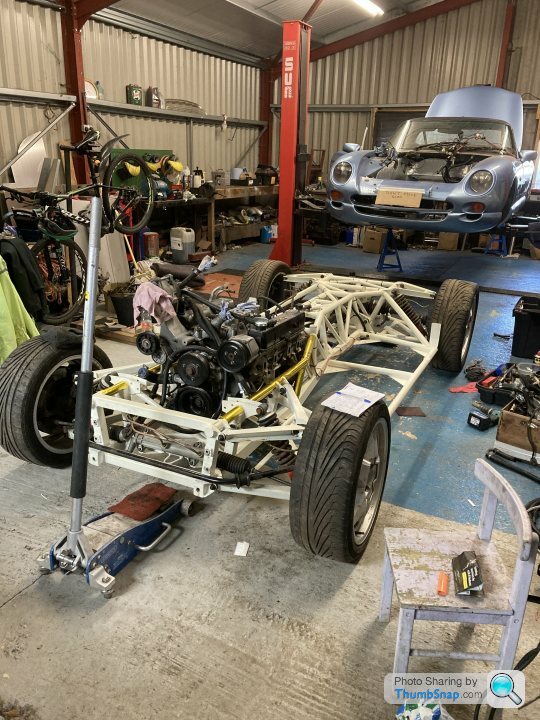
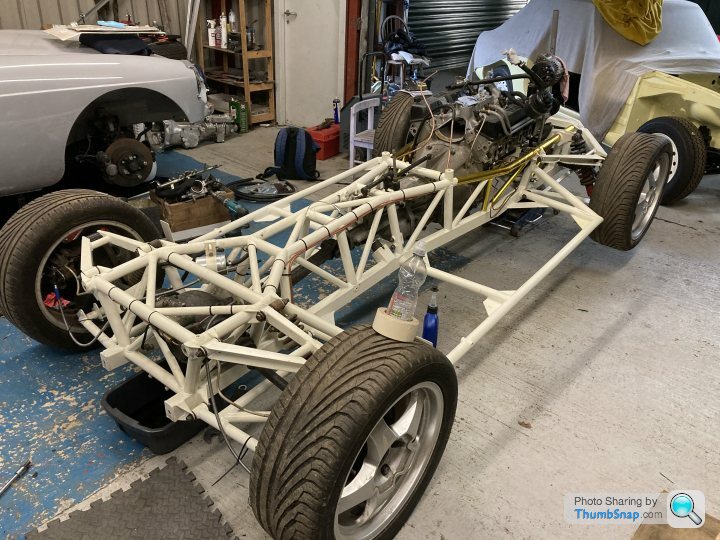
Today I checked all new chassis bolts line up since new outriggers have been fitted incl seat belt anchors. separated body from chassis and removed rivets and all three sections of engine bay heat matting.
Marked and cut holes in new matting around heater hoses and bits and bobs ready to apply them tomorrow.
Steve D noted sometime ago ,,, After a chassis re coating it’s a wise move to re tap the threaded holes that receive chassis bolts while body is off to remove paint/powdercoat.
Getting those front and rear chassis bolts in is not easy at the best of times.
I have a few jobs on the chassis to complete like rubberised stone chip over exposed outrigger sections new handbrake cable, fuel filter and generally do a nut and bolt check.
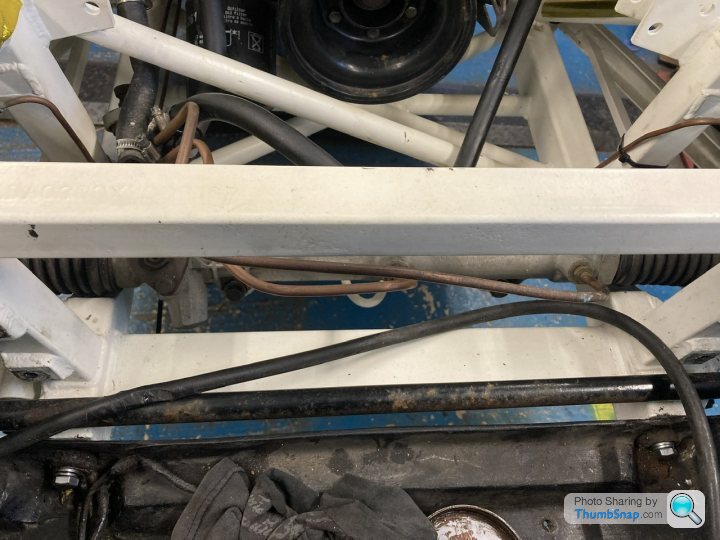
Re route both rear brake and fuel return line inside of transmission tunnel top tube ( to aide replacement in another 20 years time )
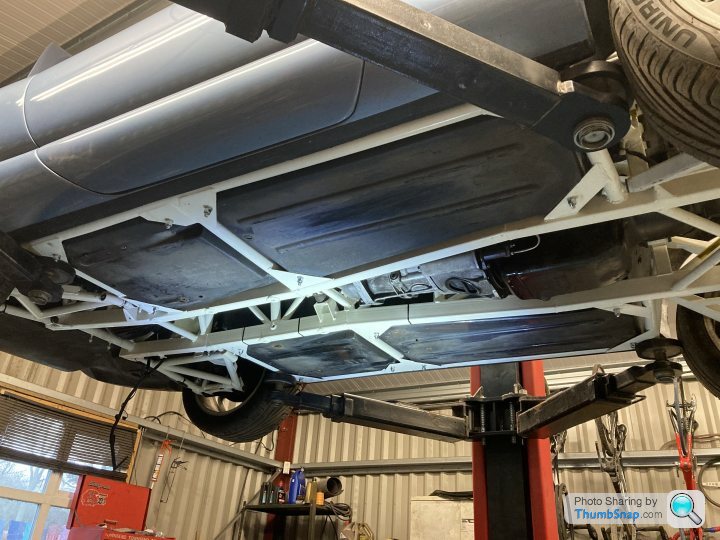
Tidy up under body while I have complete access.
While body is off it’s easier to replace PS hoses so that and an engine clean up as it’s been outside for sometime. Corrosion hits as soon as it’s not used or garaged.
Marked and cut holes in new matting around heater hoses and bits and bobs ready to apply them tomorrow.
Steve D noted sometime ago ,,, After a chassis re coating it’s a wise move to re tap the threaded holes that receive chassis bolts while body is off to remove paint/powdercoat.
Getting those front and rear chassis bolts in is not easy at the best of times.
I have a few jobs on the chassis to complete like rubberised stone chip over exposed outrigger sections new handbrake cable, fuel filter and generally do a nut and bolt check.
Re route both rear brake and fuel return line inside of transmission tunnel top tube ( to aide replacement in another 20 years time )
Tidy up under body while I have complete access.
While body is off it’s easier to replace PS hoses so that and an engine clean up as it’s been outside for sometime. Corrosion hits as soon as it’s not used or garaged.
Thanks Peter / Simon  I was almost there 6 months ago looking at it.
I positioned the car and completed the lift as a one man operation in no time using Steve’s large axle stand technique. The higher the better for old man backs and it allows you to see the underside while pressing the button.
As we are savvy builder types once body was lined up with ramp legs I used marker paint on the floor and pencilled in the wheel centres and longitudinal lines of the tyres.
The idea being I will roll chassis back onto those lines and have a chassis almost exactly in line with the body that has not moved from its position on the ramp.
5 mins work to save 30 giggling it around.
Last time it went down very smoothly so now I’m more confident not such a big deal.
Question
What grease should I use with new steering rack gators.
Thanks Al
I was almost there 6 months ago looking at it. I positioned the car and completed the lift as a one man operation in no time using Steve’s large axle stand technique. The higher the better for old man backs and it allows you to see the underside while pressing the button.
As we are savvy builder types once body was lined up with ramp legs I used marker paint on the floor and pencilled in the wheel centres and longitudinal lines of the tyres.
The idea being I will roll chassis back onto those lines and have a chassis almost exactly in line with the body that has not moved from its position on the ramp.
5 mins work to save 30 giggling it around.
Last time it went down very smoothly so now I’m more confident not such a big deal.
Question
What grease should I use with new steering rack gators.
Thanks Al
Classic Chim said:
Progressing steadily.
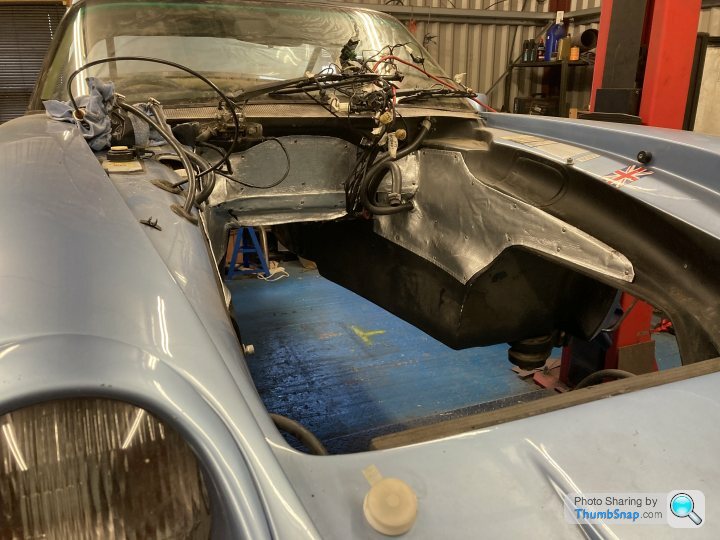
Finished off engine bay heat matting incl sealing up engine wiring harness bung which had split.
Handbrake cable attached.
PS hyd hose kit from TVR PARTS ONLINE fitted.
New thermostat and gasket
Brake and fuel lines finished including clutch slave pipe fitted.
Fuel filter and fuel hoses from pump to filter to solid fuel line fitted.
Lots of cleaning of engine as car stood outside for 6 months,,, not amusing one bit considering I spent years detailing the bugger.
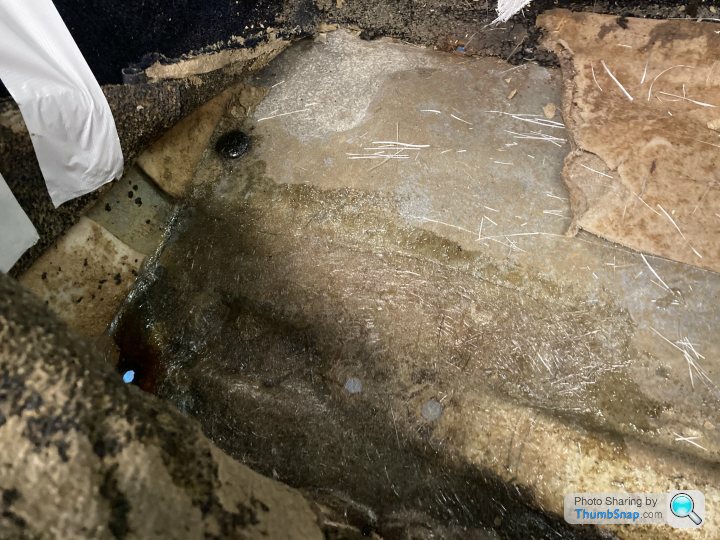
Under sealed body area where Riggers run and rubbed down my drivers side floor area inside car around seat rear bolt hole which has split slightly.
I will be fibreglassing in an extra big washer and strengthening it in this area tomorrow with the fibreglassing.
After lots of thought I’ve decided adding stone chip to riggers is not such a good idea so I’ll likely use the Dinitrol cans to re black the body underside.
I need to replace gearbox and Dif oils next.
I’m ticking the list of jobs off to do whilst body is off and struggling to find excuses not to put body back on..
I love them as a rolling chassis.
I’ll try and remember to take some photo’s tomorrow
ETA hose clips,,,,, important info lol!
I faff about making sure all hose clips can be accessed and undone easily when body is one. Fuel filter hoses are a classic case. The Dif and chassis tubes make access with the body on very tight so I positioned both fuel filter clips to be able to use an extension from underneath the car. Building it is also about the next time someone needs to work on the car.
It’s so very easy to make mistakes now that are a real problem later down the line so for me this is really important to think ahead and consider these scenarios.
The only thing I’m good at which goes right back to childhood is race preparation.
It’s the excellence that’s required on race bikes that sticks with me to this day. I’m no fabricator but I will do my best to build something and consider what it will be like trying to undo something in a field or pit floor down the line.
Mechanics appreciate this and a Tvr mechanic would suss these cock ups in an eye shot so it’s why it takes time and makes me feel good,
Finished off engine bay heat matting incl sealing up engine wiring harness bung which had split.
Handbrake cable attached.
PS hyd hose kit from TVR PARTS ONLINE fitted.
New thermostat and gasket
Brake and fuel lines finished including clutch slave pipe fitted.
Fuel filter and fuel hoses from pump to filter to solid fuel line fitted.
Lots of cleaning of engine as car stood outside for 6 months,,, not amusing one bit considering I spent years detailing the bugger.
Under sealed body area where Riggers run and rubbed down my drivers side floor area inside car around seat rear bolt hole which has split slightly.
I will be fibreglassing in an extra big washer and strengthening it in this area tomorrow with the fibreglassing.
After lots of thought I’ve decided adding stone chip to riggers is not such a good idea so I’ll likely use the Dinitrol cans to re black the body underside.
I need to replace gearbox and Dif oils next.
I’m ticking the list of jobs off to do whilst body is off and struggling to find excuses not to put body back on..
I love them as a rolling chassis.
I’ll try and remember to take some photo’s tomorrow
ETA hose clips,,,,, important info lol!
I faff about making sure all hose clips can be accessed and undone easily when body is one. Fuel filter hoses are a classic case. The Dif and chassis tubes make access with the body on very tight so I positioned both fuel filter clips to be able to use an extension from underneath the car. Building it is also about the next time someone needs to work on the car.
It’s so very easy to make mistakes now that are a real problem later down the line so for me this is really important to think ahead and consider these scenarios.
The only thing I’m good at which goes right back to childhood is race preparation.
It’s the excellence that’s required on race bikes that sticks with me to this day. I’m no fabricator but I will do my best to build something and consider what it will be like trying to undo something in a field or pit floor down the line.
Mechanics appreciate this and a Tvr mechanic would suss these cock ups in an eye shot so it’s why it takes time and makes me feel good,
QBee said:
I hope it both goes well and gives you pleasure, Alun. Looking forward to seeing you and the car again some time soon. 
I’ve got a fair way to go but I just want it assembled enough to finish commissioning it at home if I run out of ramp time Anthony. One way or another it will be back in my possession by the end of next week which coincides with my Covid first jab so yeah finally.....
phazed said:
What was the fibreglass repair for Alun?
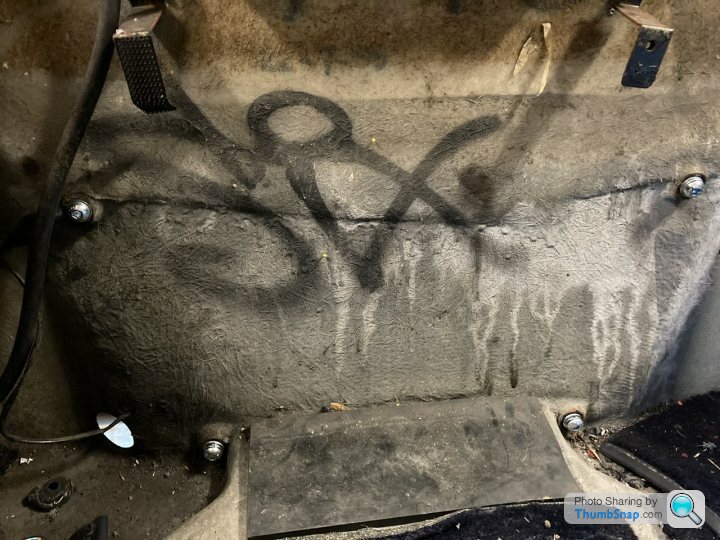
A crack about 2 inches long had developed where the seat mount bolt goes through. I’ve spread the load by adding matting and tomorrow will add more localised layers 100 mm x 100 mm or so just to be sure then use some large washers when bolting seat down. I’m finishing things while it’s on the ramp really. A few details that only showed themselves once it was apart.
Replaced gearbox and Dif oil today though the oil that came out the Dif looked almost new which was a pleasant surprise.
QBee said:
If my experience is anything to go by, don't be too surprised if you're not firing on all 8 the day after your COVID jab.
I got the full range of COVID symptoms, just for 24 hours, including a 38 degree temperature.
All fine the next day.
But then you might not have any issues at all. Good luck
Duly noted. I got the full range of COVID symptoms, just for 24 hours, including a 38 degree temperature.
All fine the next day.
But then you might not have any issues at all. Good luck
I’ve not been firing on all cylinders for years mind


lancepar said:
Alun,
The body was on my restored Chim' when I got it, but the fuel tank was not so the original chassis fixings were not seen by me.
I needed to replace the hex' bolts with domed headed bolts at the top chassis fixings behind the fuel tank because it was catching the hex' bolts when I came to re-fit it, even though it was dimpled.
Lance

That’s correct Lance. . The top ones are as per original TVR and domed, the bottom ones should be hex head but these are what I got sent? It’s harder to use the Allen headed on the bottom ones as they are recessed down so using a socket Allen won’t work. I used a standard Allen Key so it’s actually easier to get a spanner on than an Allen key.
Those bolts hold the whole of the backend up, well actually pinch it to the chassis which then takes the load.
The body was on my restored Chim' when I got it, but the fuel tank was not so the original chassis fixings were not seen by me.
I needed to replace the hex' bolts with domed headed bolts at the top chassis fixings behind the fuel tank because it was catching the hex' bolts when I came to re-fit it, even though it was dimpled.
Lance
That’s correct Lance. . The top ones are as per original TVR and domed, the bottom ones should be hex head but these are what I got sent? It’s harder to use the Allen headed on the bottom ones as they are recessed down so using a socket Allen won’t work. I used a standard Allen Key so it’s actually easier to get a spanner on than an Allen key.
Those bolts hold the whole of the backend up, well actually pinch it to the chassis which then takes the load.
Interesting as my car had no mastic over the top domed bolts. I’ll check my petrol tank for witness marks.
Update.
Wiring has been connected up underneath car and engine harness routed and cable tied up and fully connected to engine bar starter motor wiring, heater hoses and fuel lines connected. fuel rail and coil packs installed.
You think you know your car until you take it apart then leave it a darn year,,, fuel rail on and off twice or was it three times until I got wiring laying how I wanted it which also includes pulling off coil packs to facilitate fuel rail removal. A right faff.
Also all brake lines and clutch slave line connected to 4 point union on the body so they are ready to bleed.
My blood and tears are on this car, I had to wipe it down it was that splattered
Edited by Classic Chim on Wednesday 17th March 19:05
Hi Paul. I’m glad the thread is useful.
Handbrake handle.
I removed both bolts retaining handbrake to chassis from below. I removed Clevis pin so removing cable out the way first I think!
One of those bolts retains the linkage arm to cable so when you take that bolt out from chassis this arm comes away. Hand brake itself now should be free to pull into car a little. This is all from memory of doing it once over a year ago!
I have done a huge amount of work on the car today to the point I’m close to fitting petrol tank and after a few more tweaks and one manifold/ steering arm she’s nearly ready to install radiator.
I will update this post with photos and some detail tomorrow evening.
I have been thinking about the handbrake mechanism this evening as I’m dreading it but aim to tackle it tomorrow so I’ll update those details too.
Hope that helps
Handbrake handle.
I removed both bolts retaining handbrake to chassis from below. I removed Clevis pin so removing cable out the way first I think!
One of those bolts retains the linkage arm to cable so when you take that bolt out from chassis this arm comes away. Hand brake itself now should be free to pull into car a little. This is all from memory of doing it once over a year ago!
I have done a huge amount of work on the car today to the point I’m close to fitting petrol tank and after a few more tweaks and one manifold/ steering arm she’s nearly ready to install radiator.
I will update this post with photos and some detail tomorrow evening.
I have been thinking about the handbrake mechanism this evening as I’m dreading it
but aim to tackle it tomorrow so I’ll update those details too. Hope that helps


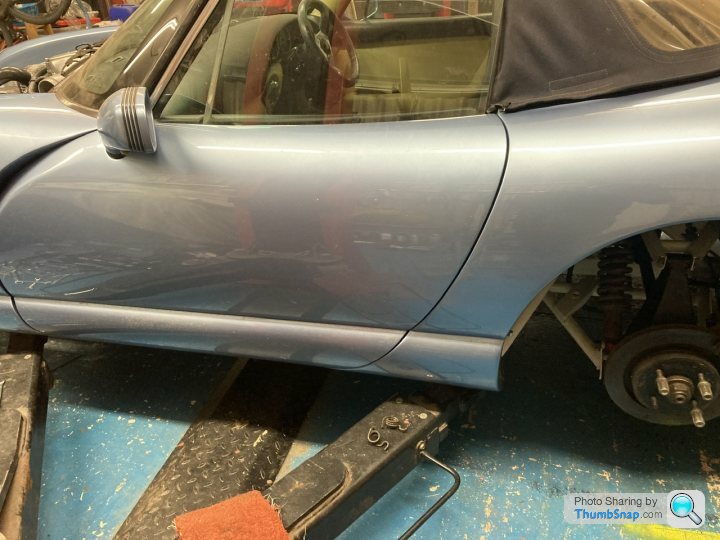
Door gaps.
A rather critical element.
I noticed gaps between rear chassis lower bolt points and the body, 2 mm maybe stretched to 3 mm by pulling the boot upwards so used some home made metal packers painted and sized to fit the rear box section and tapped into place.
I then lifted rear boot by about 1 mm in reality and starting with top rear chassis bolts nipped them up then the lower ones.
I’ve bounced tested the rear of the car a lot.
No movement or change of door gaps detected.
It’s bang on at last.
Paul Goldstar said:
Good work Alun, getting closer...
I got underneath and it was surprisingly easy to reach and ratchet off the handbrake securing bolts tbf. The 13mm one looks like it might be a bit tight to get back in from underneath - did you look to see if you have the inspection hatch?
While I was there i checked the fuel lines and snipped a few more cable ties :-)
The brake lines and clutch pipe into the block were a challenge for my sausage fingers.
Yes I found it less difficult than expected to take off. I got underneath and it was surprisingly easy to reach and ratchet off the handbrake securing bolts tbf. The 13mm one looks like it might be a bit tight to get back in from underneath - did you look to see if you have the inspection hatch?
While I was there i checked the fuel lines and snipped a few more cable ties :-)
The brake lines and clutch pipe into the block were a challenge for my sausage fingers.
It’s not so much fun putting it back on I fear
It’s almost the last thing I’m going to do it seems and no I didn’t look at hatch. I’ll take a photo from inside tomorrow.
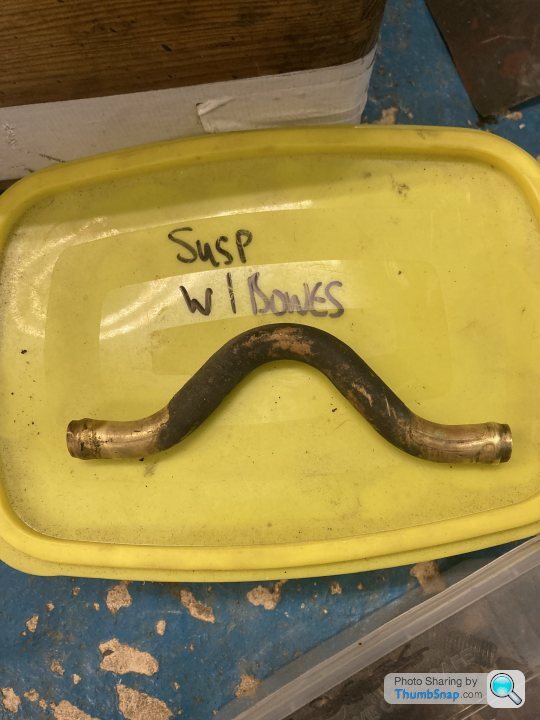
The last piece of a very long jigsaw puzzle.
I’m about to fit my Petrol tank and this little beauty is almost the last piece in my box of Tvr bits to be fitted.
I can’t remember where this fits.
Is this between tank and pump and bridges through the large hole in the boot.
Or is it after that hole and helps clear suspension lug or similar.
16 months ago I took this off
Thanks in advance.
Edited by Classic Chim on Tuesday 23 March 21:51
Gassing Station | Chimaera | Top of Page | What's New | My Stuff