Another body off thread.
Discussion


ChimpOnGas said:
Are you going for outrigger protectors Alun 
It’s a dilemma! Do I make something that closes them in and totally sealed from the elements as without doing that is it better to have air flow as any water and damp might just stay there for months if semi enclosed.
Or just use an oil or bitumen based product on the outriggers before dropping the body on.
I think this is my preferred choice.

Classic Chim said:
ChimpOnGas said:
Are you going for outrigger protectors Alun
It’s a dilemma! Do I make something that closes them in and totally sealed from the elements as without doing that is it better to have air flow as any water and damp might just stay there for months if semi enclosed.
Or just use an oil or bitumen based product on the outriggers before dropping the body on.
I think this is my preferred choice.
But I have decided to protect my outriggers from stone impact damage and road muck thrown up by the tyres, muck that collects in the corners and holds moisture, the shielding I've gone for are the Peter Essling outrigger protectors.
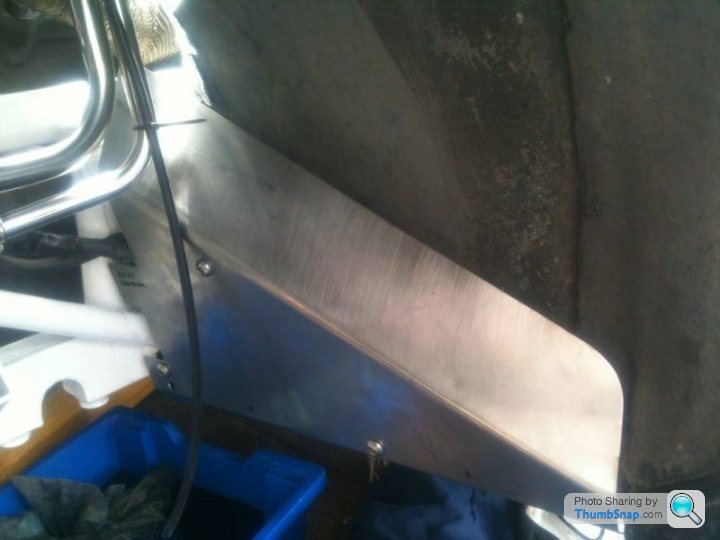
These shields/outrigger protectors are laser cut from stainless steel to a pattern that ensures an excellent fit, the top edge and most importantly the corner is sealed with rubber sheet and bonded using an industrial polyurethane sealant.
However the bottom edge is left completely open to allow drainage, ensure no water is trapped behind, and the outriggers can be flushed from beneath with fresh water.

Permanent steel brackets have been welded in by Alex to eliminate the need for the the above clamps.

I feel confident this is going to be the best option.
Much of the outrigger tube damage as we know is just after the front and rear corners.
This damage is mostly caused by muck trapped and resting on tubes. Once hardened this trapped crud just keeps adding to itself.
As new cars I don’t think owners really had any idea this was going on and how many people in the first 10 years even bothered to check this.
My conclusion is if you keep this muck at bay by regularly cleaning out this area yours riggers would last considerably longer.
This should be part of your maintenance programme going forward so negating the worst effects.
If I simply wrapped my outriggers in thin epdm which has a shelf life of over 25 years and sealed with industrial strength mastic nothing can get at the metal. I have used this material on many commercial office blocks to seal around windows and ground thresholds. Infact all these buildings require rubber seals to stop water ingress and tested to 3.0 bar water pressure to represent a force 9 gale.
It’s rubberised so stones would mostly bounce off it but it would look like outriggers have been disguised or an attempt to hide rot.
The idea above in Dave’s pics is probably the simplest way to protect them but unless they extend underneath some crap will still get atop those tubes I fear. I think I’d like to see them on a car that’s been used in all weathers before committing.
Give Dave a month and he does more miles than most put together so we’ll find out.
I'm interested in your epdm idea Alun, I have my front outrigger protectors sorted but need something for the rears. As you say keeping muck out of the corners is the most important objective, regular hosing with fresh water is good practice but if we can stop the muck collecting there in the first place it would be even better.
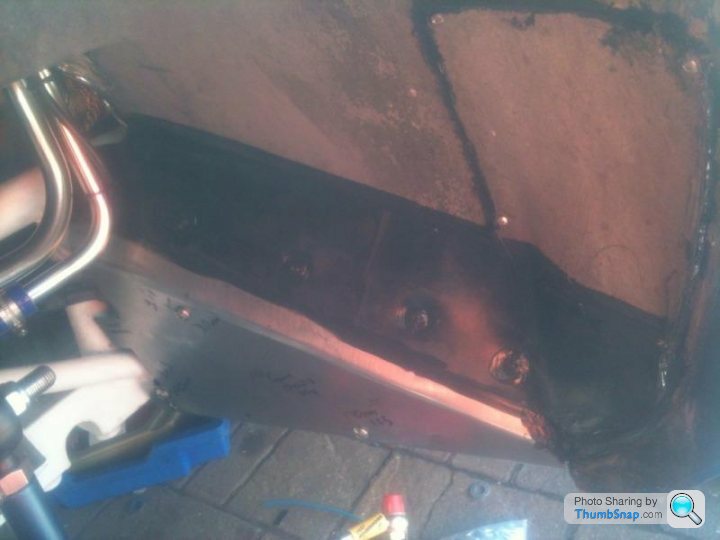
Its also quite clear the road spray blown down the entire length of the outer outrigger tube is very effective at rotting it from the top, as shown here.
As such and in addition to my outrigger protectors I'd be happy with a set of traditional mud flaps as these will push the spray back down into the road rather than allowing it to be blown directly down the outer outrigger tube, we should also remember road spray is'nt just water, it carries a lot of grit too so you end up with a very effective aqua blasting system.

The above I'm sure would be effective but it does look a bit home made, however there are lots of universal mud flap sets on eBay like this set for just £12.59 which would give a more OEM result for very little money.

https://www.ebay.co.uk/itm/UNIVERSAL-Car-Rubber-Bl...
Its also quite clear the road spray blown down the entire length of the outer outrigger tube is very effective at rotting it from the top, as shown here.
As such and in addition to my outrigger protectors I'd be happy with a set of traditional mud flaps as these will push the spray back down into the road rather than allowing it to be blown directly down the outer outrigger tube, we should also remember road spray is'nt just water, it carries a lot of grit too so you end up with a very effective aqua blasting system.
The above I'm sure would be effective but it does look a bit home made, however there are lots of universal mud flap sets on eBay like this set for just £12.59 which would give a more OEM result for very little money.
https://www.ebay.co.uk/itm/UNIVERSAL-Car-Rubber-Bl...
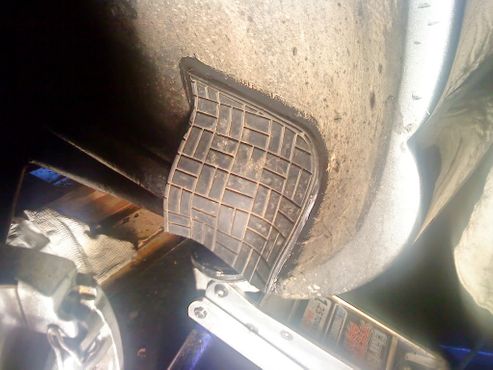
The simplest thing would be to build up a mastic wall on top of riggers and between bodywork just past front and rear corners.
Thus nothing can get past it but riggers are free to be inspected/ washed down.
My body sits within a few mm of riggers so getting something to scrape out muck is easier said than done.
The rot starts from where the crap gets caught and slowly works backwards. Place the mastic wall just before that area and it might just do the trick.
Your corner protectors do just that so better because stones won’t chip the out tubes. Two birds with one stone.
I noticed a lot of what must be water ingress from the floor plate bolts or more the point from a leaky roof which soaks the carpets and through those bolt holes and onto plates and riggers. A damp point.
Bolt heads and washers were very rusty.
Again simply adding a mastic seal before shoving bolts through might make quite a difference to rigger longevity.
Bolt heads and washers were very rusty.
Again simply adding a mastic seal before shoving bolts through might make quite a difference to rigger longevity.
Classic Chim said:
The simplest thing would be to build up a mastic wall on top of riggers and between bodywork just past front and rear corners.
Thus nothing can get past it but riggers are free to be inspected/ washed down.
My body sits within a few mm of riggers so getting something to scrape out muck is easier said than done.
The rot starts from where the crap gets caught and slowly works backwards. Place the mastic wall just before that area and it might just do the trick.
That is just what I did with mine. Used white mastic so it blends in with the chassis. Thus nothing can get past it but riggers are free to be inspected/ washed down.
My body sits within a few mm of riggers so getting something to scrape out muck is easier said than done.
The rot starts from where the crap gets caught and slowly works backwards. Place the mastic wall just before that area and it might just do the trick.
phazed said:
Classic Chim said:
The simplest thing would be to build up a mastic wall on top of riggers and between bodywork just past front and rear corners.
Thus nothing can get past it but riggers are free to be inspected/ washed down.
My body sits within a few mm of riggers so getting something to scrape out muck is easier said than done.
The rot starts from where the crap gets caught and slowly works backwards. Place the mastic wall just before that area and it might just do the trick.
That is just what I did with mine. Used white mastic so it blends in with the chassis. Thus nothing can get past it but riggers are free to be inspected/ washed down.
My body sits within a few mm of riggers so getting something to scrape out muck is easier said than done.
The rot starts from where the crap gets caught and slowly works backwards. Place the mastic wall just before that area and it might just do the trick.
I’m loving this work. 
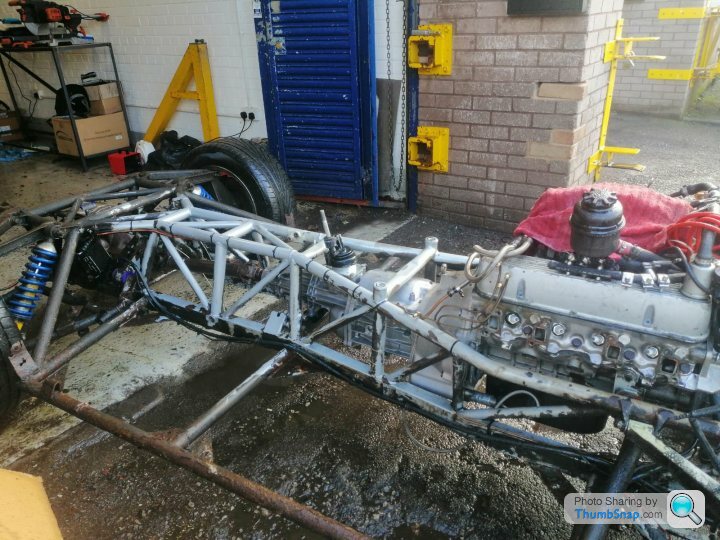
Made a cock up by not mounting gear-lever bracket on gearbox before putting engine in so realised today and took gearbox mounts off allowing me space to get bolts in.
All well that ends well.
Said bracket showing circlip that holds ball and carrier in place

Gear stick bracket mounted to gearbox

Chassis brace bar under gearbox mounted.

DIF and prop painting.

Brake discs and rear hub carriers also painting.

Made a cock up by not mounting gear-lever bracket on gearbox before putting engine in so realised today and took gearbox mounts off allowing me space to get bolts in.
All well that ends well.
Said bracket showing circlip that holds ball and carrier in place
Gear stick bracket mounted to gearbox
Chassis brace bar under gearbox mounted.
DIF and prop painting.
Brake discs and rear hub carriers also painting.
Edited by Classic Chim on Sunday 15th March 00:24


I noticed today the body at the rear where the roll bar lugs would normally be so just in front of the rear wheels is raised to allow space to fit bar. This without a roll bar looks like a classic mud trap area. Without the lugs on the tubes there is loads of space there so unlikely to suffer the same fate as I’ve omitted those lugs.
I’ll take a picture of this area so you can see what I mean.
I’ll take a picture of this area so you can see what I mean.
 t. Love it
Classic Chim said:
SonicHedgeHog said:
Could you use a mesh or lattice grill instead of a metal plate? Big stones would get deflected but the air could still flow.
I like that. Sort of like a stone guard on motorbikes. 
I bought a roll of half inch mesh and took it to the Renault dealer along with the car, and instructed him to fit it in front of said radiator.
It looked neat and did the job. Never had another broken aircon rad.
The Renault dealer was so impressed he sent the idea in to Renault HQ - apparently I was far from the sole person suffering from the problem
ChimpOnGas said:
Looking at the Rustbuster website and for future reference the best value way for people to buy their 121 Epoxy Mastic is to select their 6 litre pack which is £123.00 all in including postage and VAT.

Obviously you only want to buy this amount of product if you're painting the full chassis, wishbones, ect ect ect and even then you'll still end up with two litres more paint than you need, the way I'd look at it Alun is you paid £124.56 ie more or less the same money for all the paint you needed (3.75 litres), so I wouldn't worry about it mate.
Actually you played a blinder without even knowing it as you could have bought two of their 2.25 litre chassis packs but doing so would have cost you £143.98 for 4.5 litres, by far the best thing for people to do is spend £20 less on the 6 litre pack to get 1.5 litres more paint, this makes no sense but it's definitely the way to buy 121 Epoxy Mastic if you need a quantity of 3.5 litres or more.
I think Mr Rustbuster needs to check is pricing policy
Rust looking at this as about to order my paint, the 6.0L kit isn't actually 6.0L of paint, it's 5.0L of paint + 1L of thinner.Obviously you only want to buy this amount of product if you're painting the full chassis, wishbones, ect ect ect and even then you'll still end up with two litres more paint than you need, the way I'd look at it Alun is you paid £124.56 ie more or less the same money for all the paint you needed (3.75 litres), so I wouldn't worry about it mate.
Actually you played a blinder without even knowing it as you could have bought two of their 2.25 litre chassis packs but doing so would have cost you £143.98 for 4.5 litres, by far the best thing for people to do is spend £20 less on the 6 litre pack to get 1.5 litres more paint, this makes no sense but it's definitely the way to buy 121 Epoxy Mastic if you need a quantity of 3.5 litres or more.
I think Mr Rustbuster needs to check is pricing policy
On that basis I think the SML Marine price is probably a bit better as you get 4.5L of paint and 2.5L of thinner for £100, instead of 5.0L for £120. Sounds like the 4.5L will still be plenty to do two coats and the wishbones etc
Gassing Station | Chimaera | Top of Page | What's New | My Stuff