Discussion


Hi chaps,
For the last year or so I've been researching some better seats for my Chimaera, in my opinion the originals just don't hold you in place properly when you're pressing on in the bends
They also give me back ache after about 300 miles when I'm touring France
A few months ago I sat in my mate's mid 80's Porsche 911 and although it hurts me to say it, his sports spec Porker seats are so much better than what TVR were putting in the Griffs & Chims 10 years later.
I've been looking for something that retains the classic looks but offer significantly better lateral support than our flat faced TVR originals.
The problem has been trying to find something that matches this brief yet are narrow enough to fit between the door and central tunnel, I also wanted something good quality that will match my Doeskin interior perfectly.
I'm really not keen on the Caterfield type or Elise seats, to me they just aren't in keeping with the Chimaera's classic grand tourer looks.
So I don't want much then
Then I stumbled across a few interesting posts on PH, like this one over on the "S" forum:
http://www.pistonheads.com/gassing/topic.asp?f=11&...
And this one from the Wedgies:
http://www.pistonheads.com/gassing/topic.asp?h=5&a...
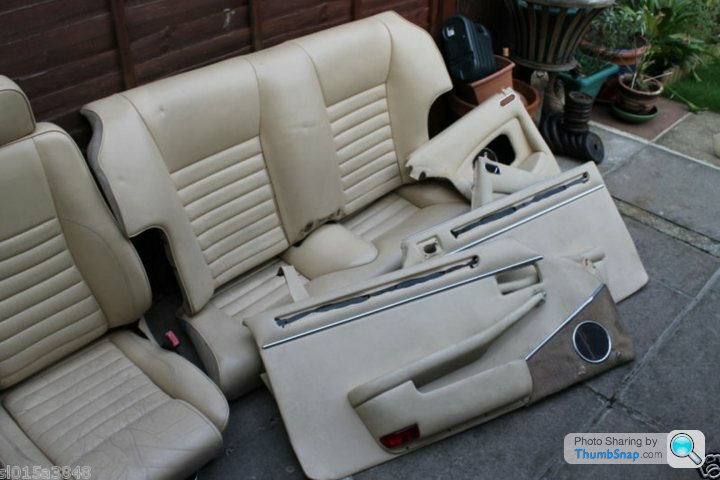
So to cut a long story short I've just won this full set of Jaguar XJS Recaro "Sport Pack" seats on Ebay for the princely sum of £100
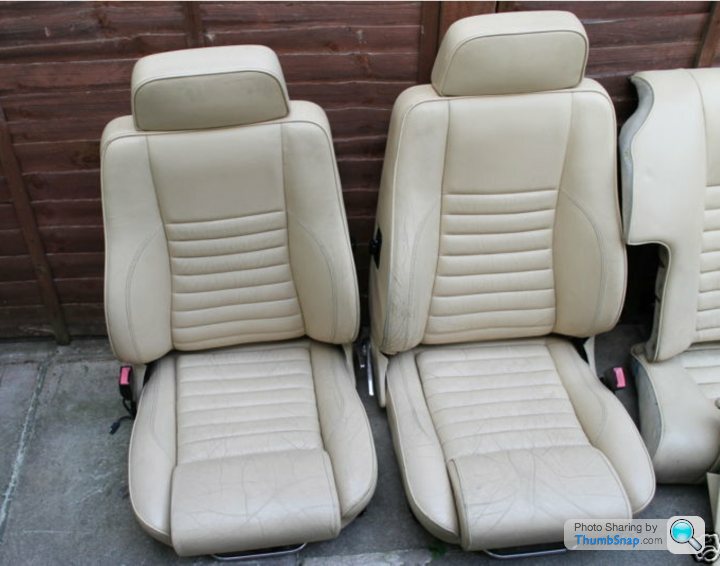
The rear set will go straight back on Ebay for a £50 "Buy it Now" to hopefully out them quick & mean my Jag seats cost me just £25 each.
I'll refurbish the fronts as a little winter project, they look like they'll come up nicely with a deep clean, prep & a £60.00 Doeskin re-colour kit from the Furniture Clinic.
http://www.furnitureclinic.co.uk/Leather_Car_Inter...
http://www.youtube.com/watch?v=aFXkraC9B7o
What do you think guys, has anyone used the Furniture Clinic products?
Tips on using the FC leather dying kit gratefully accepted, Dave.
For the last year or so I've been researching some better seats for my Chimaera, in my opinion the originals just don't hold you in place properly when you're pressing on in the bends
They also give me back ache after about 300 miles when I'm touring France
A few months ago I sat in my mate's mid 80's Porsche 911 and although it hurts me to say it, his sports spec Porker seats are so much better than what TVR were putting in the Griffs & Chims 10 years later.
I've been looking for something that retains the classic looks but offer significantly better lateral support than our flat faced TVR originals.
The problem has been trying to find something that matches this brief yet are narrow enough to fit between the door and central tunnel, I also wanted something good quality that will match my Doeskin interior perfectly.
I'm really not keen on the Caterfield type or Elise seats, to me they just aren't in keeping with the Chimaera's classic grand tourer looks.
So I don't want much then
Then I stumbled across a few interesting posts on PH, like this one over on the "S" forum:
http://www.pistonheads.com/gassing/topic.asp?f=11&...
And this one from the Wedgies:
http://www.pistonheads.com/gassing/topic.asp?h=5&a...
So to cut a long story short I've just won this full set of Jaguar XJS Recaro "Sport Pack" seats on Ebay for the princely sum of £100
The rear set will go straight back on Ebay for a £50 "Buy it Now" to hopefully out them quick & mean my Jag seats cost me just £25 each.
I'll refurbish the fronts as a little winter project, they look like they'll come up nicely with a deep clean, prep & a £60.00 Doeskin re-colour kit from the Furniture Clinic.
http://www.furnitureclinic.co.uk/Leather_Car_Inter...
http://www.youtube.com/watch?v=aFXkraC9B7o
What do you think guys, has anyone used the Furniture Clinic products?
Tips on using the FC leather dying kit gratefully accepted, Dave.
phazed said:
I had an XJS, seats were nice and comfy.
The standard chim seats have little support, you fall out of them on bends and if you're tall, the headrest comes up to my neck!
Yep, they're cr@p!
It's good to know the are comfy Peter, I just hope they fit in a Chimaera OK The standard chim seats have little support, you fall out of them on bends and if you're tall, the headrest comes up to my neck!
Yep, they're cr@p!

Has anyone actually put XJS seats in a Chimaera before?
Or am I the guinea pig?

 & I look forward to seeing you all in a dark tunnel very soon

Any knowledgeable Ebayers out there?
The vendor of my XJS seats is failing to answer my emails?
I haven't done the PayPal thing yet, so I guess technically there is no transaction?
TBH I was hoping to just supply cash on collection (tomorrow).
Should I pay him to complete the Ebay sale contract, or hang on for a response?
It's been a good 24 hours since I won the auction and not a peep from the vendor.
Perhaps I just need to be more patent?
Thoughts from any experience Ebayers appreciated?


phazed said:
I've had an ebayer win a car that I was selling, failed to collect and when I checked on them, they'd bought another car the same day!
Most describing words for them end in an S .
.
Agree, but the flip side Most describing words for them end in an S
.This week I sold my stepper motor to a nice bloke called Andy, he paid me quick smart & I got worried when Royal Mail took a day longer than the 1st class postage should.
Two honest people making an honest transaction.
Seems it either goes this way, or you end up dealing with a complete tosher.
Life

swanny71 said:
I used a normal re-colouring kit and on the advice of FC used their adhesion promotor and cross linker X products.
I'm doing a proper write up of the interior re-furb and will post seperately soon. But here's a quick cut n paste (not spell checked) from what I've noted down about the process so far.
My vinyl process
1.If possible remove the trim form the car – makes the job much easier
2.Scrub with hot soapy water – twice. Rinse and dry.
3.Thorough wipedown alcohol solution – twice. It’s all in the prep!
4.Apply 2 coats of adhesion promoter (mixed with 10% cross linker X) one using a sponge to get in all the awkward spots, second with spray gun. Dry with heat gun after each coat.
5.Apply 2 coats of colourant (again mixed with 10% cross linker X) using a sponge. Dry with heat gun after each coat.
6.Apply 2-3 light coats of colourant using the spray gun, ensure a nice even colour. Dry with heat gun after each coat.
7.Leave it 24 hours
8.Apply 3 coats of gloss sealant. Dry with heat gun after each coat
9.Apply 2-3 coats of satin finish. Dry with heat gun after each coat.
Notes
1.Take your time – prep is the key
2.Apply in a well vented area and wear a mask – fumes are strong
3.I bought a mini compressor, the propellant cans are crap
4.The black colourant was too thick to spray – FC advised to mix in up to 10% water as a thinner
5.Strain the colourant through a paint/coffee filter – you do get the odd lumpy bit which WILL block the spray gun nozzle. When it does become blocked use a pin to clear
6.Make sure you remove any bits of fluff/dust between coats - this is the only thing I was lazy about and have the odd inclusion on the first two bits of trim I did.
Bad photo of my centre console bolster after re-colour from doeskin to black

Excellent Swanny I'm doing a proper write up of the interior re-furb and will post seperately soon. But here's a quick cut n paste (not spell checked) from what I've noted down about the process so far.
My vinyl process
1.If possible remove the trim form the car – makes the job much easier
2.Scrub with hot soapy water – twice. Rinse and dry.
3.Thorough wipedown alcohol solution – twice. It’s all in the prep!
4.Apply 2 coats of adhesion promoter (mixed with 10% cross linker X) one using a sponge to get in all the awkward spots, second with spray gun. Dry with heat gun after each coat.
5.Apply 2 coats of colourant (again mixed with 10% cross linker X) using a sponge. Dry with heat gun after each coat.
6.Apply 2-3 light coats of colourant using the spray gun, ensure a nice even colour. Dry with heat gun after each coat.
7.Leave it 24 hours
8.Apply 3 coats of gloss sealant. Dry with heat gun after each coat
9.Apply 2-3 coats of satin finish. Dry with heat gun after each coat.
Notes
1.Take your time – prep is the key
2.Apply in a well vented area and wear a mask – fumes are strong
3.I bought a mini compressor, the propellant cans are crap
4.The black colourant was too thick to spray – FC advised to mix in up to 10% water as a thinner
5.Strain the colourant through a paint/coffee filter – you do get the odd lumpy bit which WILL block the spray gun nozzle. When it does become blocked use a pin to clear
6.Make sure you remove any bits of fluff/dust between coats - this is the only thing I was lazy about and have the odd inclusion on the first two bits of trim I did.
Bad photo of my centre console bolster after re-colour from doeskin to black

And guess what, Mr Ebay vendor just got in touch and he's not a tosher at all

Seems like a decent bloke & only 45 mins from my house.
How lucky was that!
Collection arranged for mid day tomorrow, easy.
Simon and the new Phazed bloke were right, typical me, I guess I just got all over excited there
CHIMV8 said:
Plus you'll be able to grab more cash back if you sell your original seats......money towards turbi me thinks>>>

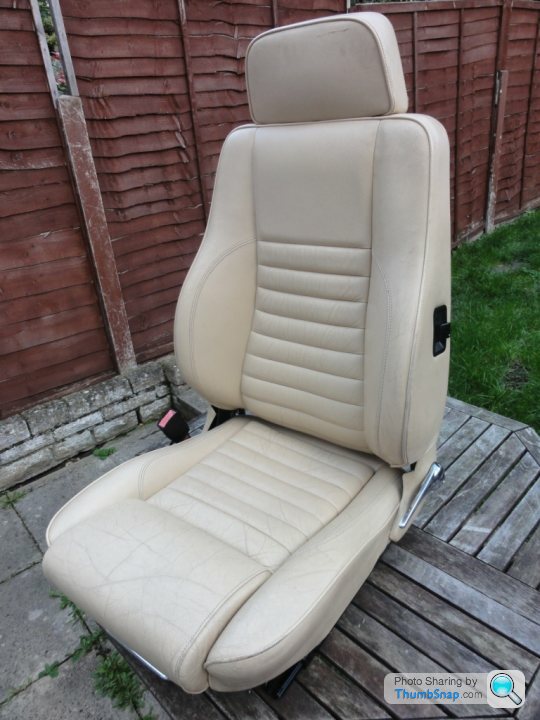
Went over to Enfield at lunchtime to pick up the seats and although I won the full set (fronts & rears) for £100, as I didn't need the rears I offered him £75 for just the fronts and he accepted
So two full leather XJS seats for £37.50 each

Sitting in one revealed it to be very comfy with a lot more lateral support than the TVR ones, just like Phazed said.
They dont exactly pin you in like an Elise seat but on first impressions they seem like an excellent halfway house.
Another nice surprise bonus was I noticed they are heated seats, no idea if the elements work yet but my Chimaera has heated seats with switch, all the wiring & exactly the same connectors so it'll be worth a test.
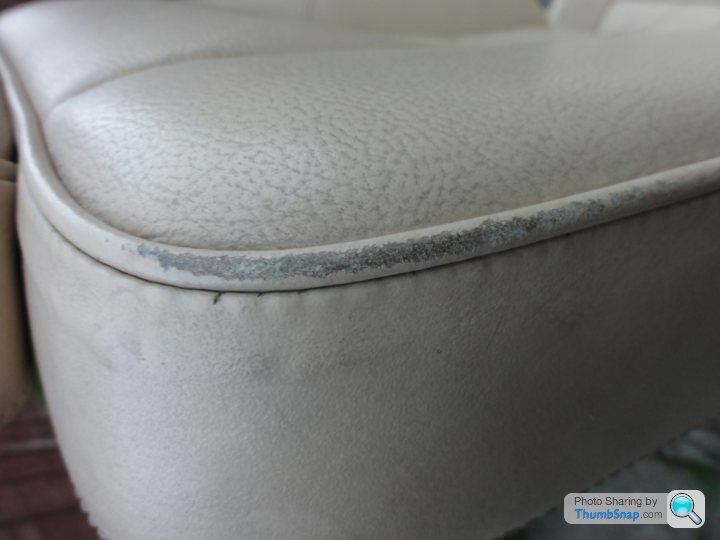
Condition wise they are pretty good, but they definitely need a freshen up and a dye kit to change them to my Doeskin.
Excited I got stuck in with the prep work straight away, sadly I only managed one squab before rain stopped play

Not bad for £37.50 each.
Bum warming electrickery too
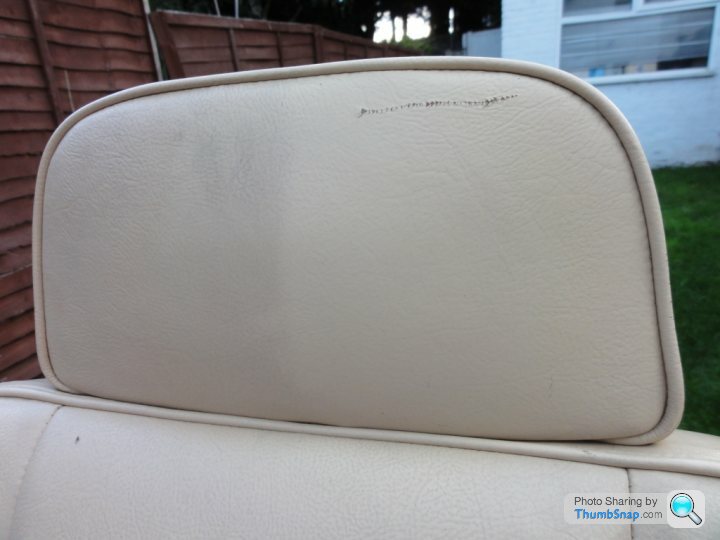
But they are dirty with a few scratches.

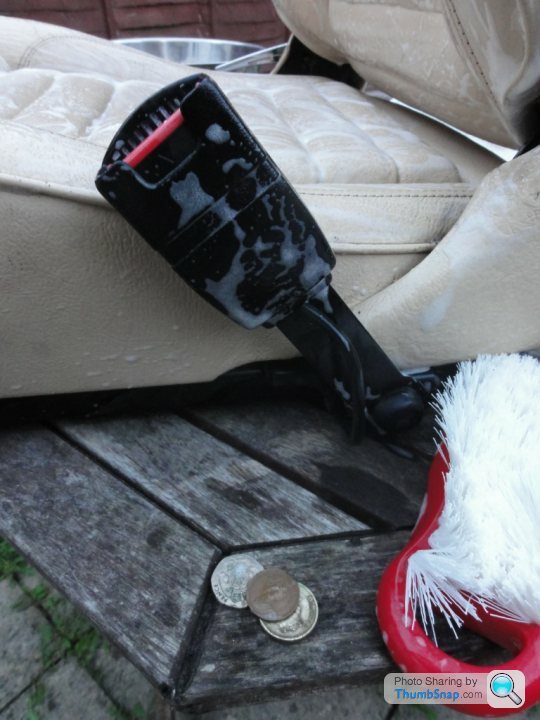
Before breaking the surface with nail polish remover & a 3M ScotchBrite
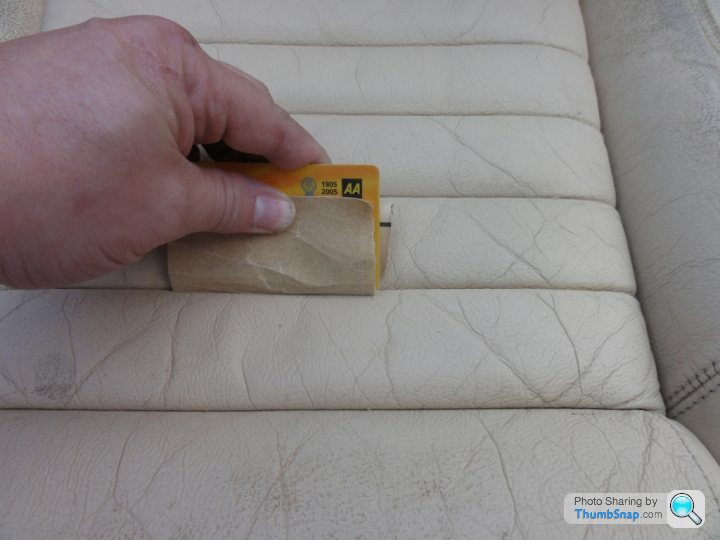
A bit of gentle sanding, my old AA membership card is perfect for getting into the pleats
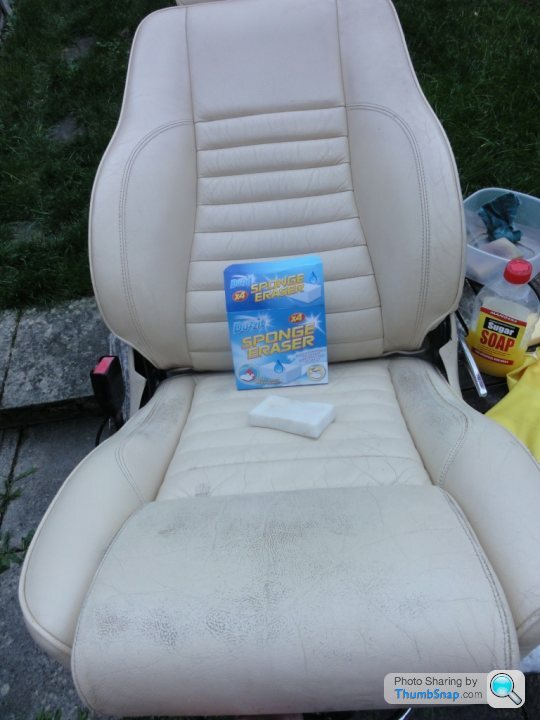
Magic Eraser sponges cut though the surface dirt brilliantly.

Surface now nicely broken & weak existing dye removed, ready for a base coat swab of the Doeskin Gliptone ScuffMaster I had in the shed.
Typical of this type of job the end result is directly proportional the the amount of time you spend at the prep stage.
The passenger squab took me 45 minutes to prepare & is now at that "it looks worse than when I started" stage, the base coat would have sorted that in just another 10 minutes if the heavens hadn't opened
Stay tuned for the next instalment
Brilliant guys, many thanks for all your offers to loan me equipment.
I'll PM you individually to make arrangements.
The consensus opinion of using a compressor over the gas propellent cans seems pretty conclusive.
My current favoured options are Phil's small 2HP compressor connected to the Furniture Clinic's air brush using Brett's connector.
I'll aim for multiple light coats & take Bret's advice of getting an extra pot of the topcoat sealer when I order the kit.
Cheers chaps, used correctly PH is a fantastic knowledge base
Edited by ChimpofDarkness on Sunday 14th October 22:15
brett84 said:
one problem I found with changing seats, looks like you'll have the same thing. Where the seat belt comes over your shoulder it's constantly rubbing and it's marked the colour already. I'm getting some shoulder pads made up in Black with Cream TVR logo to suit, I just hope that they don't look to chavvy, but they will serve a purpose.
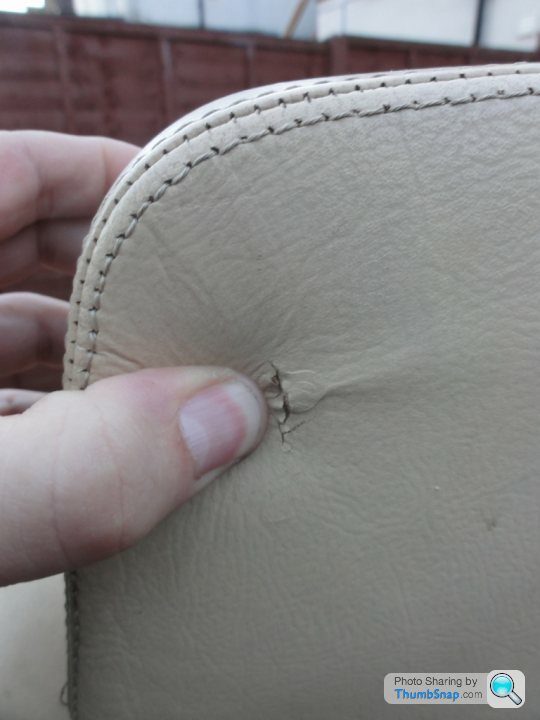
Oh yeah another tip, as you've got cracks/marks in the seats that you have sanded etc, make sure they are properly clean. I thought mine where on first attempt and i must not have stipped the old covering from the cracks on the bolster and the paint reacted so I have to wait for it to dry then strip it all back down again
Thanks Brett, I'll keep cleaning until I'm 100% happy they're as good as I can get em.Oh yeah another tip, as you've got cracks/marks in the seats that you have sanded etc, make sure they are properly clean. I thought mine where on first attempt and i must not have stipped the old covering from the cracks on the bolster and the paint reacted so I have to wait for it to dry then strip it all back down again
I was concidering something this for the belt issue.
http://www.ebay.co.uk/itm/MG-NEW-PAIR-MGB-V8-MIDGE...

Nice seats Phil, where did you get the idea to go XJS
More cleaning today, but the good news is the mine are getting cheaper as they gave up £1.21 in lose change
I've started to add up the costs and I thought it would be interesting to see what my local Furniture Clinic franchise would charge to recolour and restore the seats.
He quoted me £350 all in for the pair, which works out £230.00 more than if I do them myself even if I buy a cheap compressor.
Some challenges ahead though
UPDATE:
I've just got off the phone with the Furniture Clinic.
I wanted to go through what I needed with a human being rather than just place the order online.
I spoke with an extremely helpful Geordie lass called Ashley, who patiently took me through what I needed and the quantities.
By asking a few questions and sharing some photos of the seats I was able to but together the right basket of products first time.
Top service, you really can't beat the human touch
For the benefit of other's contemplating this type of project here's my order.

I should point out I didn't need the leather prep as I used this stuff I had in the shed

It's meant for removing crayon & pen marks, & although quite caustic I tested it on a small area first and it did an amazing job of lifting the original top coat and weak dye, it's left the well fixed dye in place & caused no damage to the leather surface at all.
You can buy it from your local 0.99p store or off Ebay for a bit more, just make sure you only leave it on the surface for a minute as you work it in with a SccotchBrite, then kill it immediately with a thorough water rinse.
I also took the advice of others on here and left out the airbrush kit with propellent cans, thanks all.
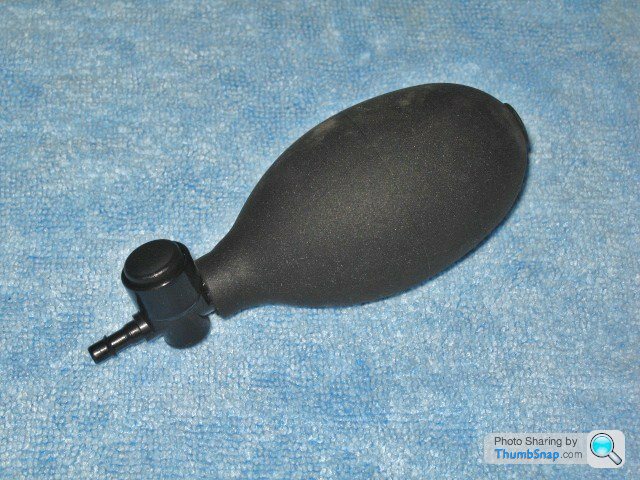
Instead I bought this for six quid off Ebay:
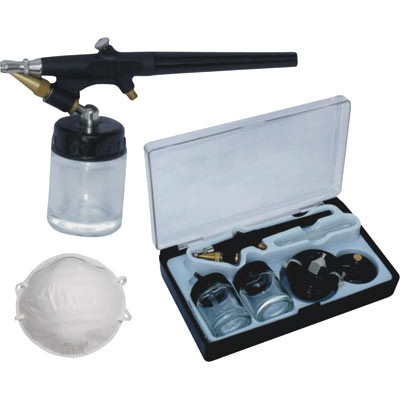
And Bassfiend (Phil) is kindly loaning me a compressor, thanks mate
The rest of the bits and bobs like ScotchBrites, Magic Eraser Sponges, fine sandpaper, cotton wool, sugar soap, cleaning cloths and nail polish remover came to about £13.00.
So with the products from Furniture Clinic the whole lot came in at £93.00, or about £170.00 including buying the seats, less the spare change pocket fallout I keep finding under the squabs
There's quite a bit of work ahead of me to get the finish I want, but encouraged by the results I've seen from others on here, hopefully I'll get a decent result for my £170.00.
If it all works out as I hope, I'll sell my original TVR seats for £300.00 and make a £130.00 profit
Now that's what I call a good value mod
I've just got off the phone with the Furniture Clinic.
I wanted to go through what I needed with a human being rather than just place the order online.
I spoke with an extremely helpful Geordie lass called Ashley, who patiently took me through what I needed and the quantities.
By asking a few questions and sharing some photos of the seats I was able to but together the right basket of products first time.
Top service, you really can't beat the human touch
For the benefit of other's contemplating this type of project here's my order.
I should point out I didn't need the leather prep as I used this stuff I had in the shed
It's meant for removing crayon & pen marks, & although quite caustic I tested it on a small area first and it did an amazing job of lifting the original top coat and weak dye, it's left the well fixed dye in place & caused no damage to the leather surface at all.
You can buy it from your local 0.99p store or off Ebay for a bit more, just make sure you only leave it on the surface for a minute as you work it in with a SccotchBrite, then kill it immediately with a thorough water rinse.
I also took the advice of others on here and left out the airbrush kit with propellent cans, thanks all.
Instead I bought this for six quid off Ebay:
And Bassfiend (Phil) is kindly loaning me a compressor, thanks mate
The rest of the bits and bobs like ScotchBrites, Magic Eraser Sponges, fine sandpaper, cotton wool, sugar soap, cleaning cloths and nail polish remover came to about £13.00.
So with the products from Furniture Clinic the whole lot came in at £93.00, or about £170.00 including buying the seats, less the spare change pocket fallout I keep finding under the squabs
There's quite a bit of work ahead of me to get the finish I want, but encouraged by the results I've seen from others on here, hopefully I'll get a decent result for my £170.00.
If it all works out as I hope, I'll sell my original TVR seats for £300.00 and make a £130.00 profit
Now that's what I call a good value mod
Edited by ChimpofDarkness on Thursday 18th October 19:11
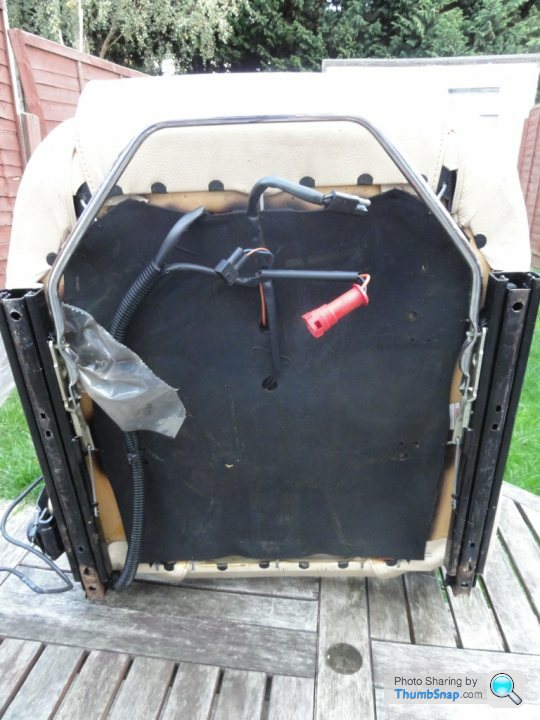
Ok so it became increasingly obvious I was never going to achieve the results I am looking for with the seats in one piece.
With just four bolts & some connectors, it's a no-brainer to split them.


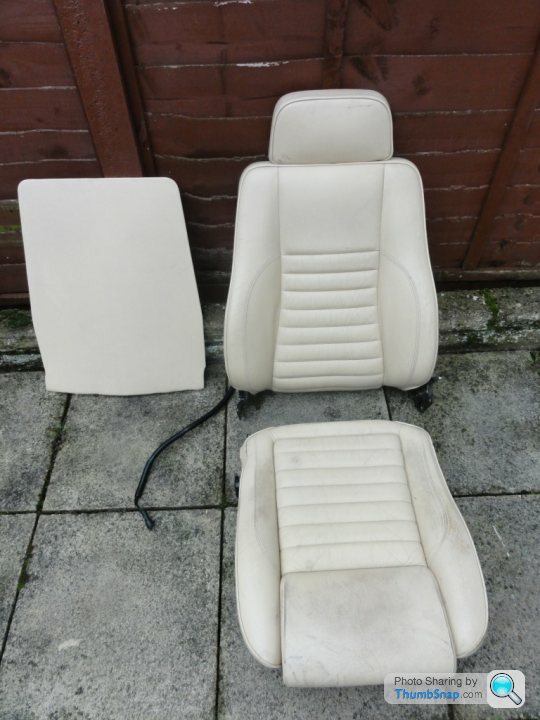
With the seat back removed (four self tappers and it slides out) I found this????
Blow me down it's got electric pumps for inflatable lumber support bladders.

The pumps were removed and will be replaced with manual pumps like this from TVR Power:
before I removed them I connected one of the air pumps to an old 12v battery and this happened
https://www.youtube.com/watch?v=zCV6_FKPuKA
Back to reality & I did some test dying using just the Doeskin Glyptone Scuffmaster & a sponge, here are two of the adjust covers sitting on the original cream coloured seat back:

I'm pretty happy with the little test pieces as it was just a sponge job at this stage, they should look great with a final airbrushed dye coat and four coats of airbrushed sealant (2 gloss knocked back with 2 satin coats).
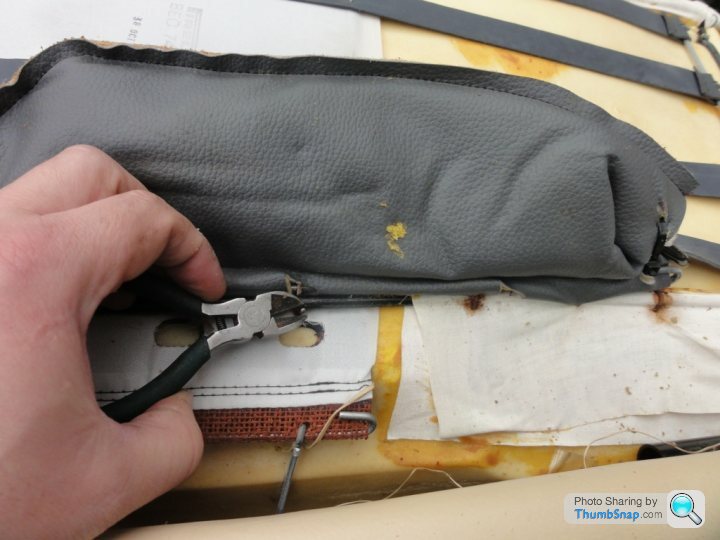
Finally, a word of warning for anyone dying XJS Seats, as I suspected the seat backs are vinyl (leathercloth).
So thanks to Swanny & his vinyl dying tips, I added some cross linker to my Furniture Clinic order which just arrived 10 minutes ago
With just four bolts & some connectors, it's a no-brainer to split them.
With the seat back removed (four self tappers and it slides out) I found this????
Blow me down it's got electric pumps for inflatable lumber support bladders.
The pumps were removed and will be replaced with manual pumps like this from TVR Power:
before I removed them I connected one of the air pumps to an old 12v battery and this happened
https://www.youtube.com/watch?v=zCV6_FKPuKA
Back to reality & I did some test dying using just the Doeskin Glyptone Scuffmaster & a sponge, here are two of the adjust covers sitting on the original cream coloured seat back:
I'm pretty happy with the little test pieces as it was just a sponge job at this stage, they should look great with a final airbrushed dye coat and four coats of airbrushed sealant (2 gloss knocked back with 2 satin coats).
Finally, a word of warning for anyone dying XJS Seats, as I suspected the seat backs are vinyl (leathercloth).
So thanks to Swanny & his vinyl dying tips, I added some cross linker to my Furniture Clinic order which just arrived 10 minutes ago
Gassing Station | Chimaera | Top of Page | What's New | My Stuff