1995 Griffith 500 restoration
Discussion


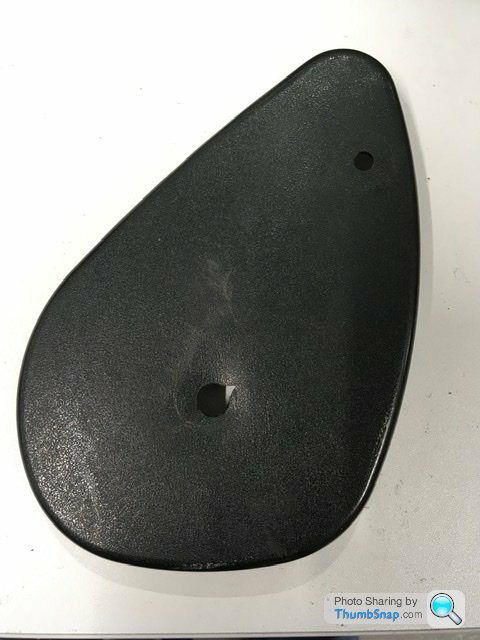
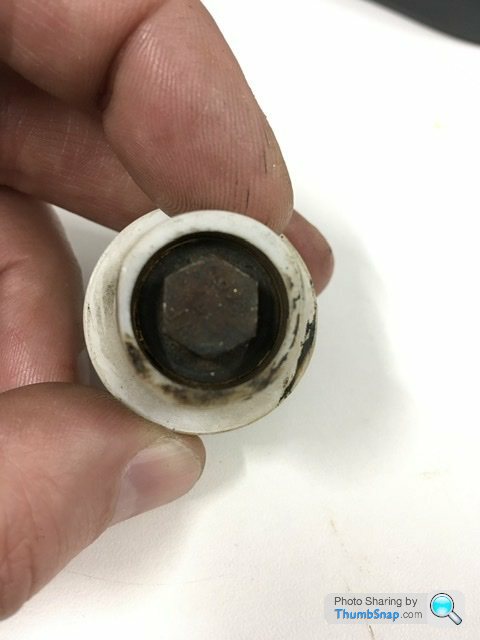
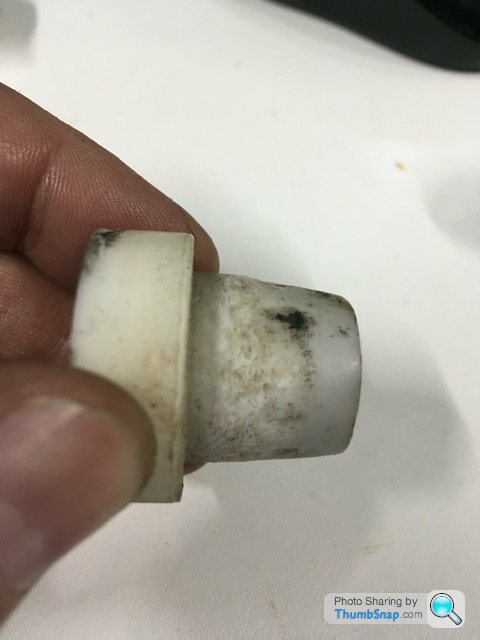
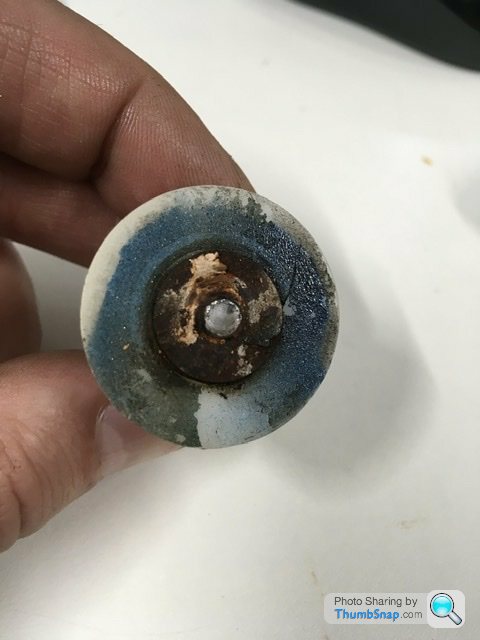
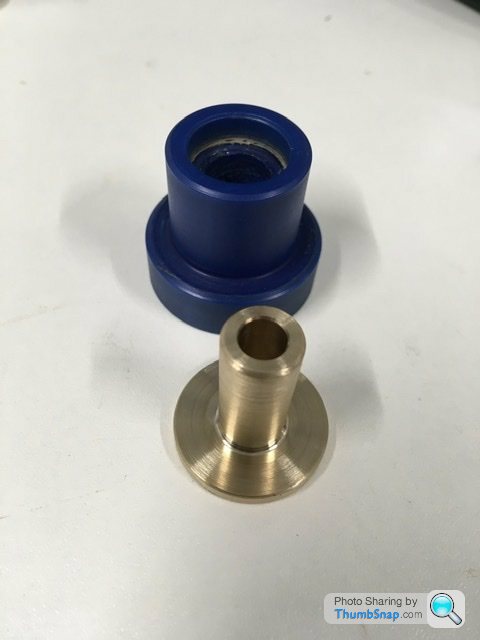
Above is one of the trims that fits the standard Griff seats. Broken as removed by the specialist tvr restorer. I’m sure I would have noticed these rattling around the seat but obviously I must have been mistaken.
So a repair is needed for both of them.
I made these oversized to cover the split in the plastic. One version is screwed on the slightly smaller diameter is I think is a push fit. I can’t be sure until the seats are back together. I think if I cover these trims in a bit of matching leather and then polish the aluminium bits they will look TVR.


RobXjcoupe said:
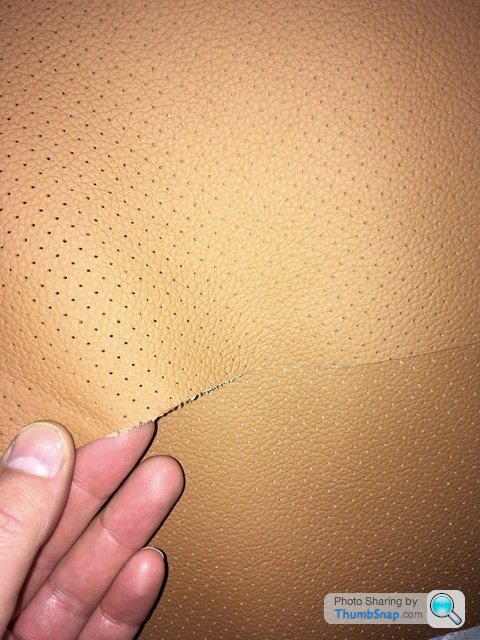
This evening the new leather hides finally arrived. The perforated leather looks good so worth the wait.
I’ll start the interior once the wiring is complete
Where are you using the perforated leather Rob? I’ll start the interior once the wiring is complete
Rather fancy that on the door cards in mine but as I'm really happy with the rest of the interior leather it would have to match the saddle colour perfectly else it would look odd. I ordered carpet door inserts when I bought the car and I was pleased with it because it's more comfortable when wearing a short sleeve shirt on long sweaty drives like at Le Mans but there's no doubt leather looks better.
RichB said:
RobXjcoupe said:
This evening the new leather hides finally arrived. The perforated leather looks good so worth the wait.
I’ll start the interior once the wiring is complete
Where are you using the perforated leather Rob? I’ll start the interior once the wiring is complete
Rather fancy that on the door cards in mine but as I'm really happy with the rest of the interior leather it would have to match the saddle colour perfectly else it would look odd. I ordered carpet door inserts when I bought the car and I was pleased with it because it's more comfortable when wearing a short sleeve shirt on long sweaty drives like at Le Mans but there's no doubt leather looks better.
I personally found the carpet a bit itchy on my arm/elbow but that’s not to say carpet is bad or not.
Regarding matching, I doubt it would unless you have the same batch used saved somewhere and even that may be different if the car has seen a few years of sun.
I thought use the perforated leather within the seat and bolsters with matching areas on the doorcards and the rear parcel shelf. Fingers crossed it should look lovely with black floor carpet…..not quite ready to start the interior just yet as I want the car running first after the wiring mods

Polly Grigora said:
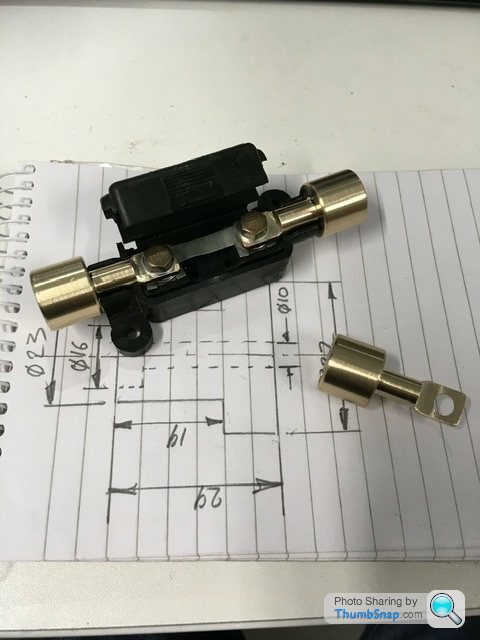
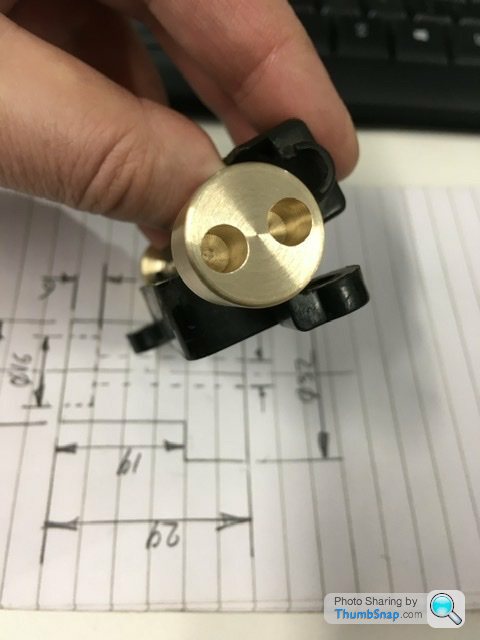
Thank you.I never seem to find the correct sized cable terminals. Either too big for the cable but fit the battery or vice versa. So I make them using bits of otherwise scrap brass bar.
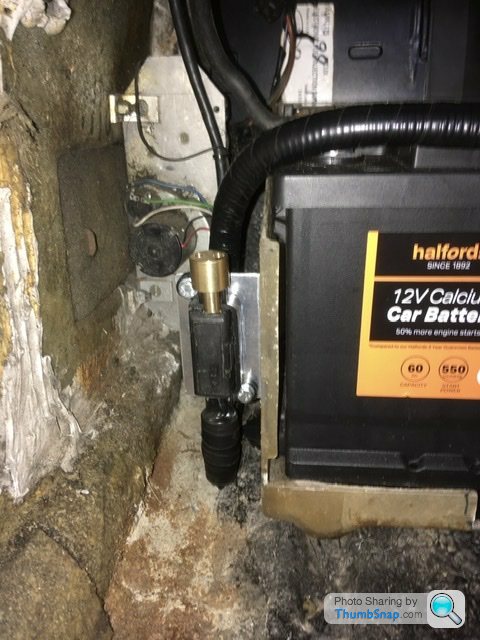
This takes time removing, measuring, cutting and soldering. So now have the new link from the battery to the main fusebox 80amp fused supply. Using the original 80amp fuse holder now bolted to a bracket attached to the battery box. Something else properly secured in a place of access.
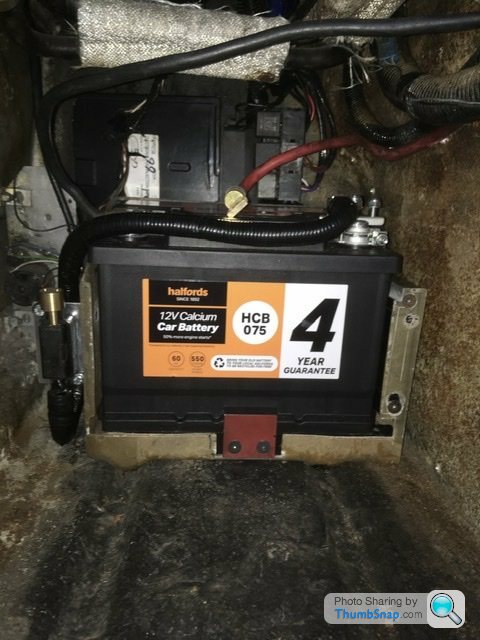
Had a measure of the loom to the fusebox and I’m cutting 900mm off the length. Probably remove 1000mm but would require more mods to the loom elsewhere. A little extra isn’t a bad thing as the glovebox obviously moves open and shut with the loom so I don’t want it too tight it starts straining the wiring.
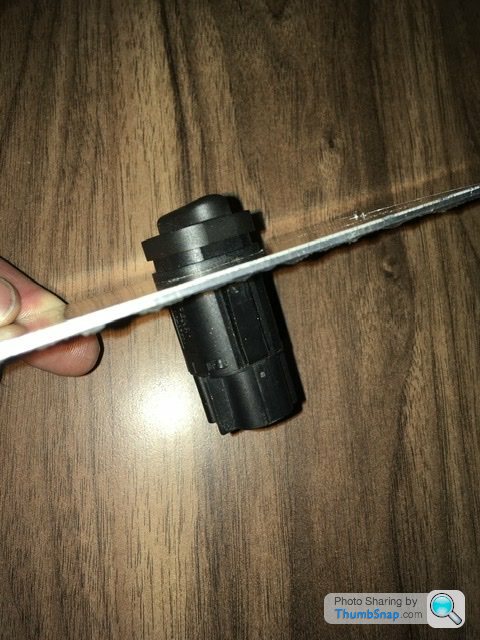
At the bottom of the above picture you can see a ring of silver/grey tape around the fusebox loom, that’s where it’s being cut to shorten it
lancepar said:
RobXjcoupe said:
Nice fix Rob.If peeps need any they and the tilt mechanism were from the Fiat X-19, I got some used ones off ebay.
They can also be obtained in GRP and 3D printing.

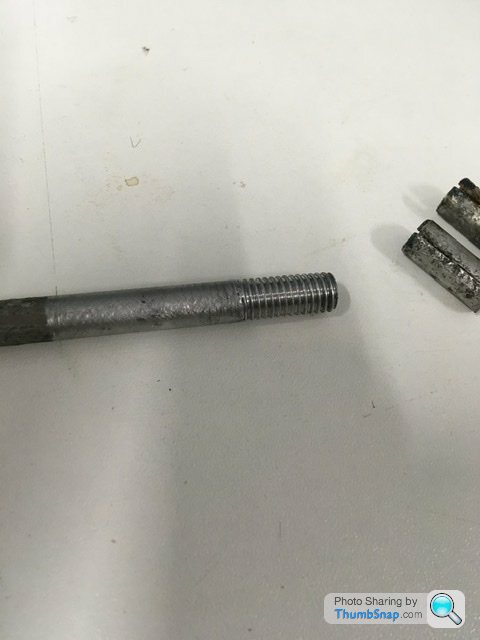
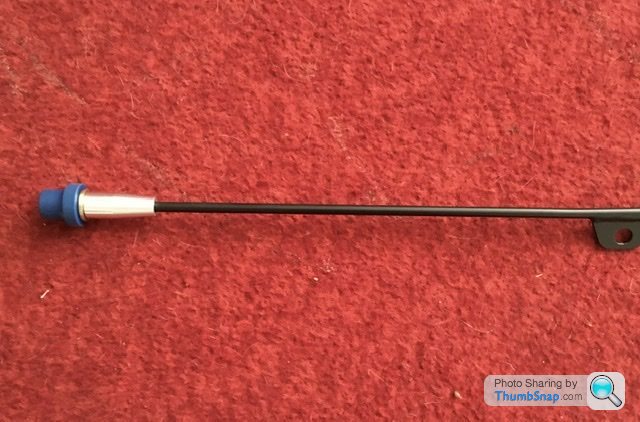
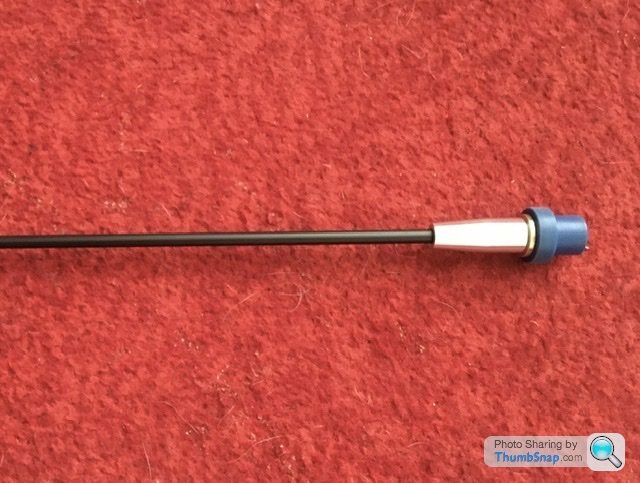
Some might recognise these rather worn and seized up rollers used on the front of the bonnet. Pictures above show one of mine that clearly wasn’t removed before the bonnet was painted. I sheared the bolt holding this one. The other side thankfully came out ok. Once the remainder of the sheared bolt is removed I can fit my new versions below.
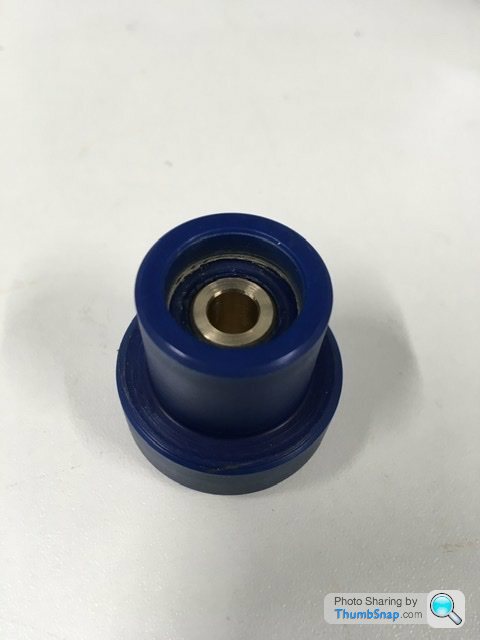
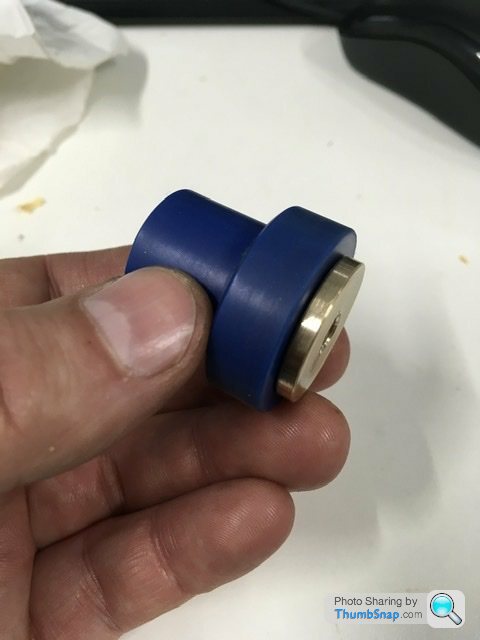
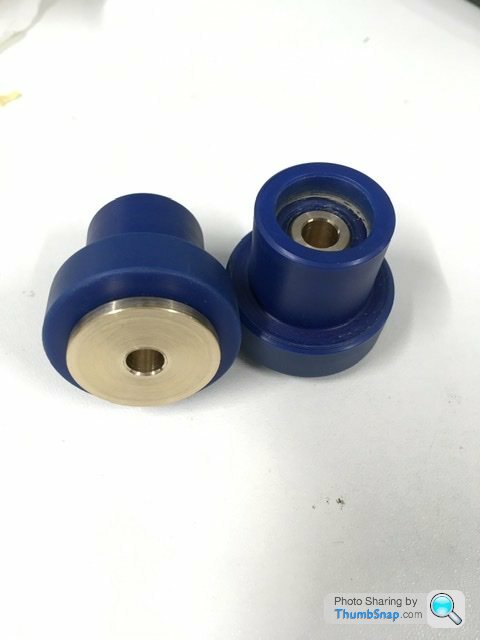
My version has a slightly bigger hole in the centre to fit the top hat shape brass bearing.
The larger diameter on the back is instead of the loose spacer washer and once bolted back in place, the bolt won’t clap the roller solid but allow it to rotate freely. The bar between these rollers needs a bit of work also but that’s for another day.
So now the bar across the front underside of the bonnet that holds the bonnet prop/stay.
Picture below shows the ends cut off because they have split. The aluminium is very dirty and no matter how much cleaning would still be hard to weld properly. Also the bizarre way to hold in place with the back of a bolt of an already threaded insert. Very bad engineering from TVR.
With the split cut off I then threaded the outside of the tube. This is then screwed into a newly made part so now nothing within the tube to split it again. The new part I’ve compensated the cut off length which allows a new thread to be tapped within so the bolt holding the roller can be attached and everything bolted together nice and tight now. The brass inserts fitted within the bonnet will be drilled as a clearance hole for that m6 bolt.
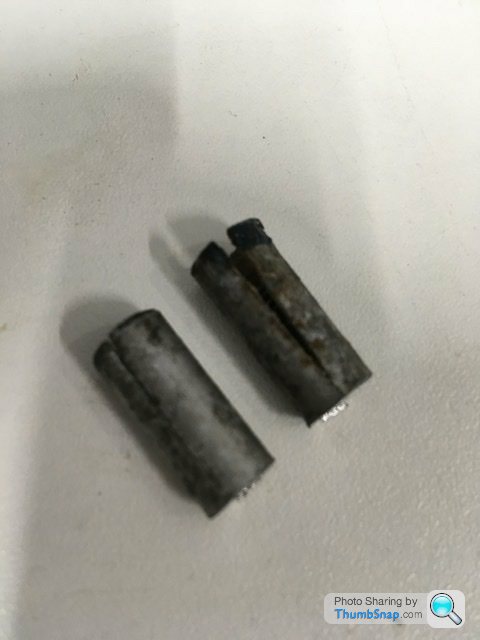
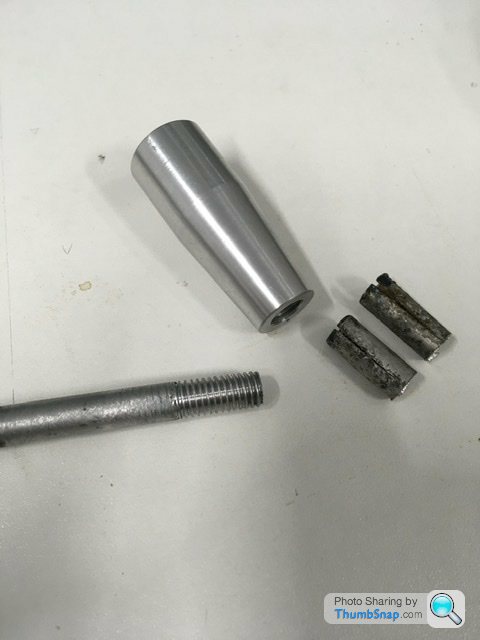
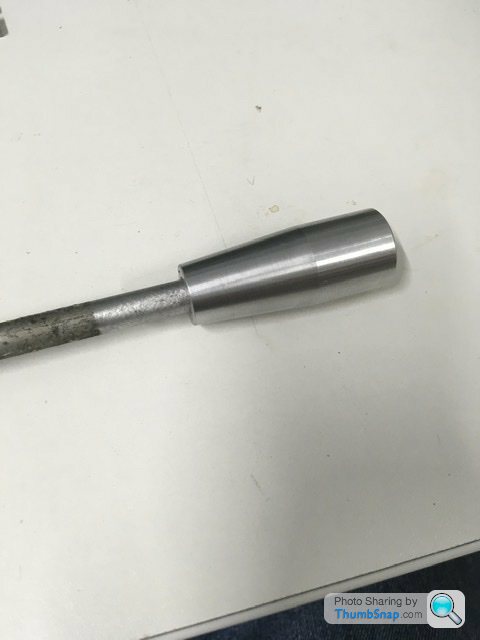
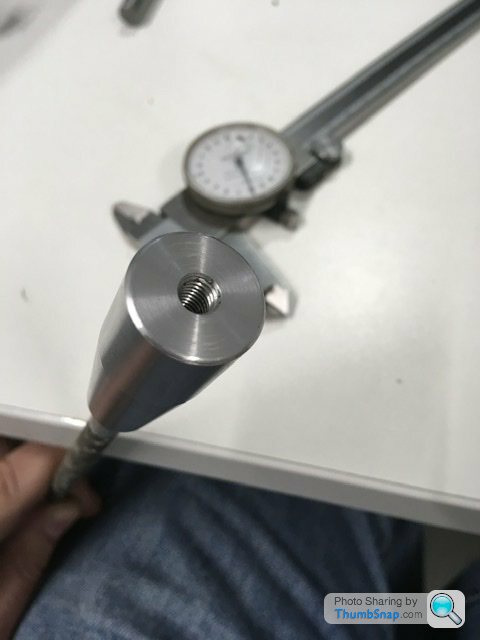
Once I’ve checked the width of this modified part I’ll clean up the original bar and cover with a coat of etch primer and lovely satin black. I’ll keep the new ends in aluminium so it looks more TVR……if they had done it properly lol
Picture below shows the ends cut off because they have split. The aluminium is very dirty and no matter how much cleaning would still be hard to weld properly. Also the bizarre way to hold in place with the back of a bolt of an already threaded insert. Very bad engineering from TVR.
With the split cut off I then threaded the outside of the tube. This is then screwed into a newly made part so now nothing within the tube to split it again. The new part I’ve compensated the cut off length which allows a new thread to be tapped within so the bolt holding the roller can be attached and everything bolted together nice and tight now. The brass inserts fitted within the bonnet will be drilled as a clearance hole for that m6 bolt.
Once I’ve checked the width of this modified part I’ll clean up the original bar and cover with a coat of etch primer and lovely satin black. I’ll keep the new ends in aluminium so it looks more TVR……if they had done it properly lol

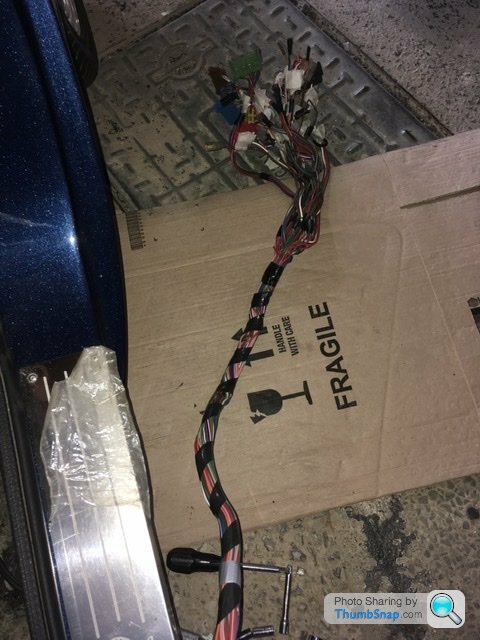
That bonnet bar is now fitted using a pair of stainless steel m6x60mm bolts. New rollers roll now unlike the seized up flat bottomed originals. Wiring is taking a little longer as I ordered the wrong size terminals so I’m still waiting for the correct size to be delivered.
Also finding a place to fit a heated seat button has been more difficult than expected. I’m using a Ford made button that illuminates green when the headlights are turned on and a small led light to show the heated seat circuit is on. These Ford buttons don’t use any relay for a 10am supply that helps keeps things a little simpler. I’m thinking of fitting these switch/buttons into the door panel arm rest in the cigar lighter position on each door. Reason is I need a bit of depth to fit the button and wiring. The centre console doesn’t allow that.
So a bit more wiring to do via the doors now.
Bowks said:
I love the attention to detail. I'm also making a list of all the things mine will need once I turn my attention to the interior.
Nothing more to add except, could you hurry up, I really enjoy the updates...
That last sentence made me chuckle. Nothing more to add except, could you hurry up, I really enjoy the updates...
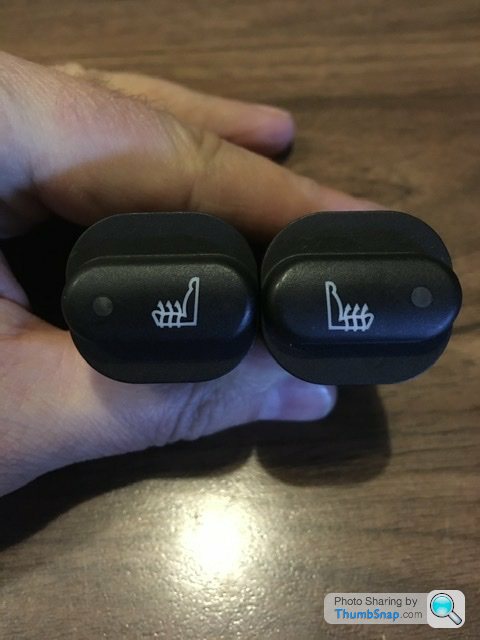
Well a bit more detail on the seat switches then. The buttons originally fit a recess so the top of the switch is slightly proud of the surrounding trim. To do the same on the tvr door panel I need to carefully cut the button shape into the armrest. Then make a bracket to actually clip the switch in place but then secured through the fibreglass via countersunk fixings with the studs on the back to secure the bracket and switch in place. I have two versions of the button. First is a mk1 Ford Focus, the other is Jaguar s-type from the first interior pre-facelift. The Jaguar version has a slightly shaped top button but the actual back end of the switch and wiring plug is exactly the same as the focus. The Jaguar version is my preferred choice at the moment which I think would show just an oval shape similar to the tvr window button shape. Used Jaguar switches are currently cheaper than the mk1 focus version.
Once they arrive in the post I’ll put a few pictures up.
Door trim design I’ve had a little play with just marking the old carpet. I find it interesting playing with shapes trying to find that complementary shape to match existing shapes.
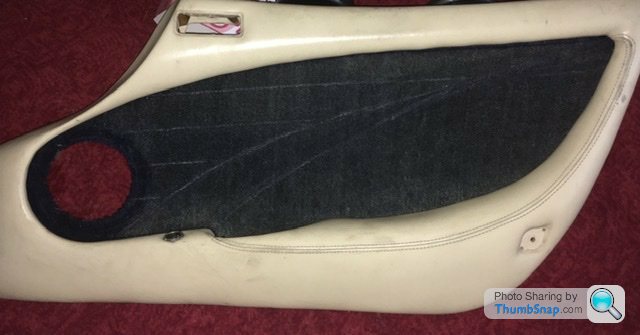
I don’t want a simple stitched pattern. I’m not a lover of the French stitch as it is a weak design. Single top stitch yes. Nothing overly piped but it could be done to give interest within a design. Something properly upholstered. The rough lines show an area to match the curves of the door pocket trim panel. I like that. That could be done in the same alcantara as the dash. So a curved part on the carpet and actual armrest panel within the leather surround. The tick looks a bit like a certain trainer logo but does help blend straight tuck and roll to a curve to the alcantara panel. A double pipe between the alcantara in leather and alcantara then the tick in plain leather with another alcantara pipe then the tuck and roll in perforated leather.
Sounds complicated but it’s getting two colours to highlight the shapes. Anyway just an idea
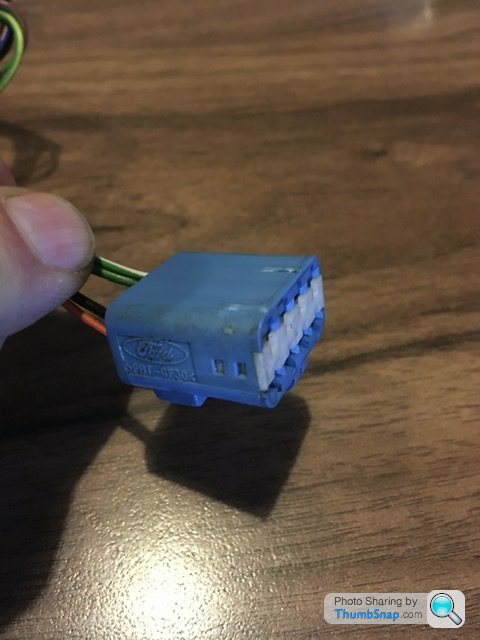
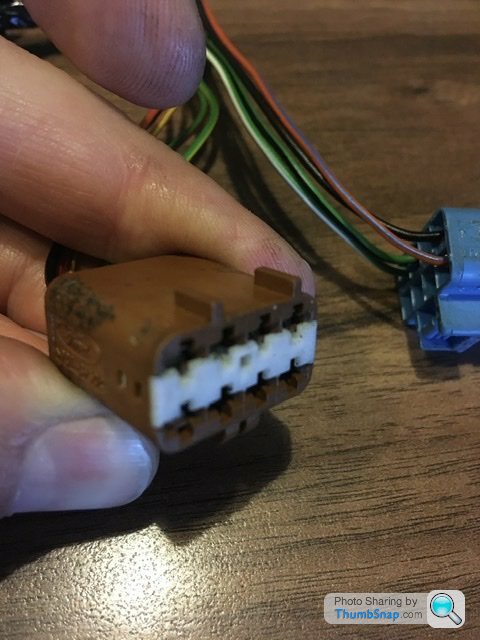
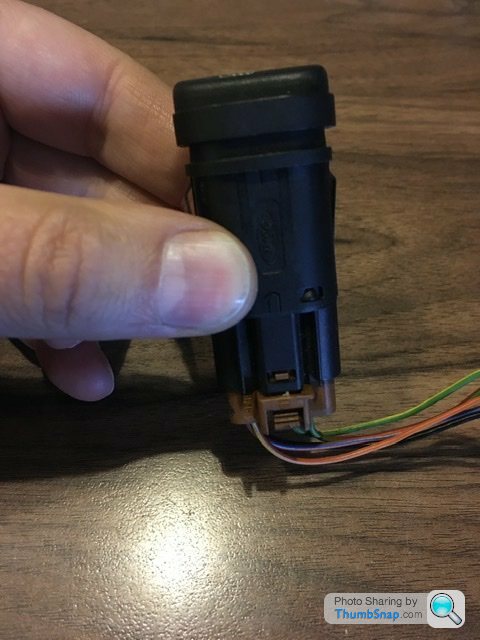
Heat seat switches arrived in the post earlier today. So these are Jag s-type parts and the wiring plugs are from a Ford Focus mk1. The blue wiring connector needed the two location tabs removed to click in place and that’s the only mod to get to fit. The brown connector fitted perfectly with no mods. Switch terminals are the same as the Ford. There is an extra terminal but that is the same on the Ford Focus switch. I only need 4 terminals. Two for the switch illumination and two for the heated seat circuit.
The switches with wiring are quite deep but I’ve had a measure and they will fit in the cigar lighter location lovely. I need to strip the door panels now so as I can fab up the mounting brackets and hardware to give a nice fit so just that oval shape is seen once properly trimmed and secured in place.
The switches with wiring are quite deep but I’ve had a measure and they will fit in the cigar lighter location lovely. I need to strip the door panels now so as I can fab up the mounting brackets and hardware to give a nice fit so just that oval shape is seen once properly trimmed and secured in place.
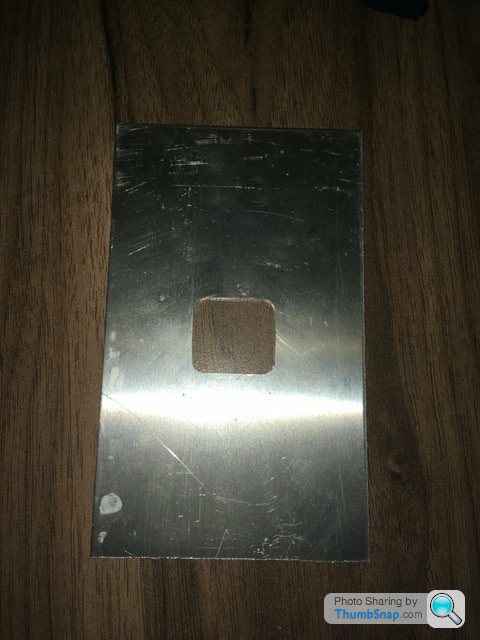
Made a start with the brackets to hold the heated seat buttons. These will take a while to get the final shape to fit under the armrest so went for a bit of aluminium rather than steel.
The machined hole didn’t take long as that was the easy bit. Something to potter with over the bank holiday.
Also spent a few more hours with the wiring. Spent ages threading the bigger gauge wire to power the windows up circuit through the original door conduit and rubber grommets to finish and then realise I forgot to add the heated seat wiring. Called it a day after that!
Finally started the new upholstery

Cutting the new panels in perforated leather.
I’ve just draped the leather over the foam to give an idea of the design with the new bolster fillets. Gives the impression of a slightly wider seat I think rather than the stripe down the middle kinda look
Cutting the new panels in perforated leather.
I’ve just draped the leather over the foam to give an idea of the design with the new bolster fillets. Gives the impression of a slightly wider seat I think rather than the stripe down the middle kinda look
Gassing Station | Griffith | Top of Page | What's New | My Stuff