High spec garden building on a budget
Discussion


I’ve been meaning to start a build thread for a while on this as we get so many questions about DIY garden buildings I thought I’d share my experience.
It all began with my wife deciding she wanted a gym in the garden so having got a few companies around to quote I felt that £20k plus was a bit steep so I decided to have a go myself. I was sure I could do a better job for MUCH less money.
It all started with some 2nd hand patio doors and windows from Ebay which would determine the width of the front. At a smidge under 5m they were perfect for what I needed, although they were brown I felt I could live with that at £311.

Next came the walls. I’d considered all sorts of construction methods but SIPS seemed to be the simplest/quickest/most efficient way to build so I found a job lot on Ebay. 26 was more than I needed but I’ll come to what happened with the spares later.

A sketched a plan and decided that 3.6m x 5m would be the best fit for the bottom corner of the garden.
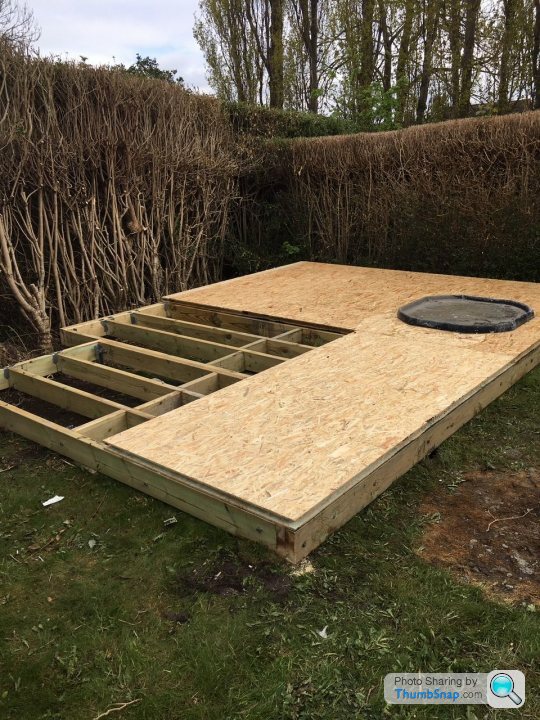
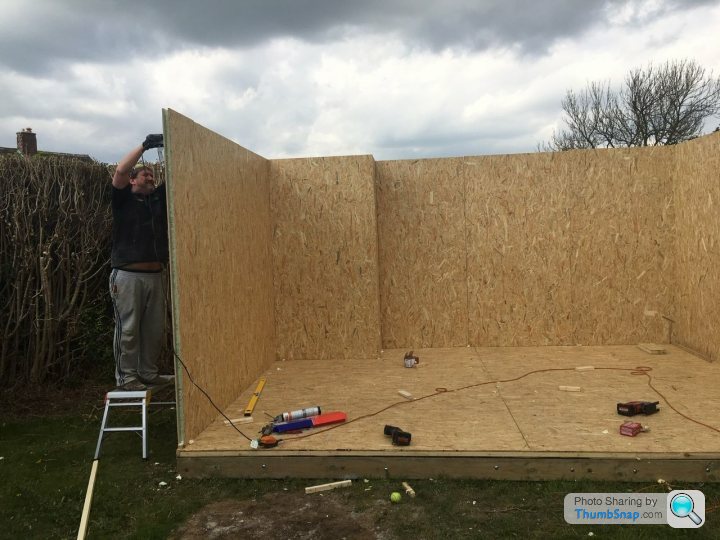
I built a subframe out of 9x2 treated timber which I supported on Uni-Strut legs postcreted 700mm into the garden. The key advantages of building on piles was that it made it very easy to level without lots of groundwork and it kept the timbers off the ground to extend life. I’d hired an auger to drill the holes for the piles but when I got there they couldn’t find it so they lent me a manual post hole digger I was not looking forward to the idea of digging manually but I have to say I was impressed at how easy it was. Made less mess than a petrol auger would have too.
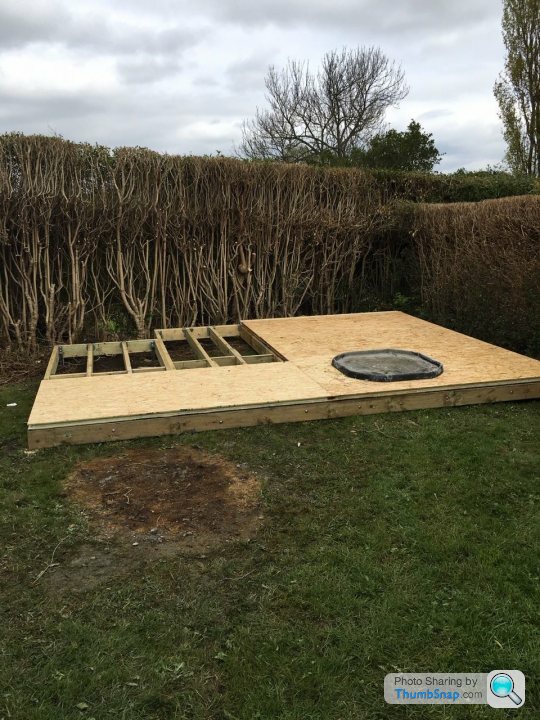
You can see I’d had to cut the hedge back about 2’ to maximise space so it looked a bit butchered at this stage although it’s all grown back ok now.
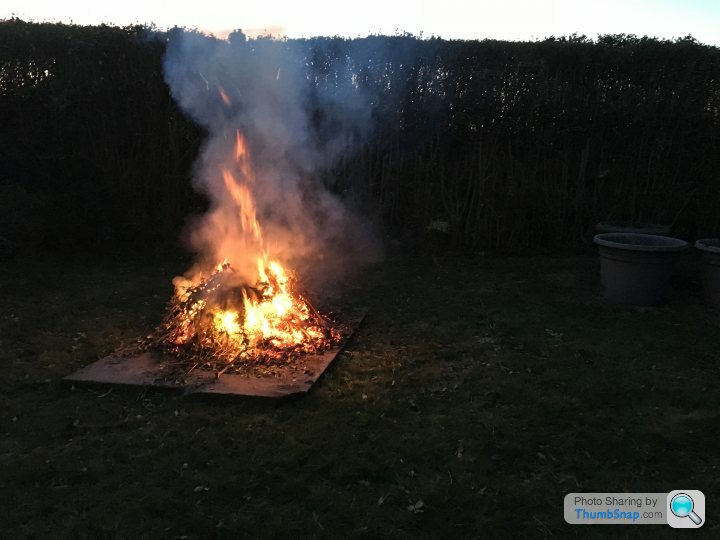
I had a huge bonfire of the hedge and even though I’d put slabs down first you can see where is still scorched the grass underneath. It had pretty much burned down by the time I took this pic.
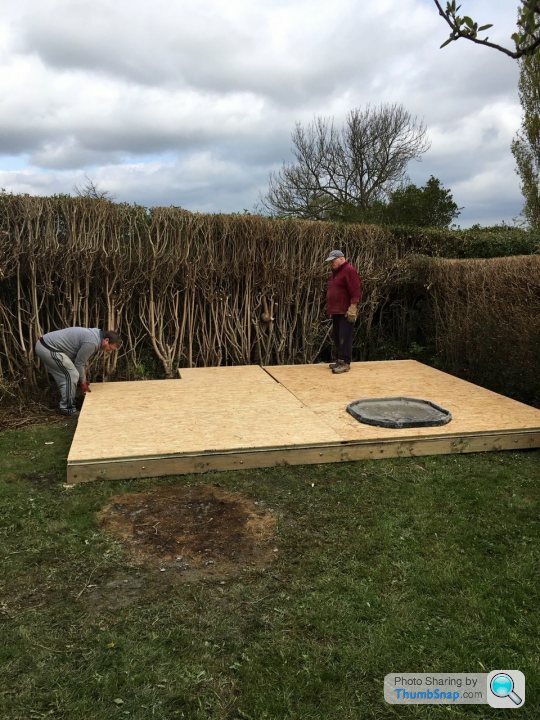
On the frame I laid SIPS panels as the floor and then slotted the sides onto a timber rail and used timber fillets to join them squirting some expanding foam into the channel as I slid them together.
 [url]
[url]
 |https://thumbsnap.com/eSuKU23H[/url]
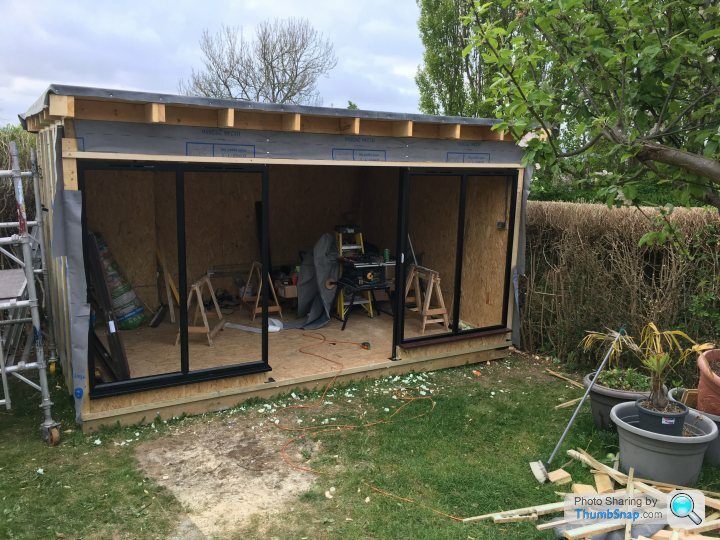
I laid some 9x2 timbers across the structure and used more sips panels for the roof.

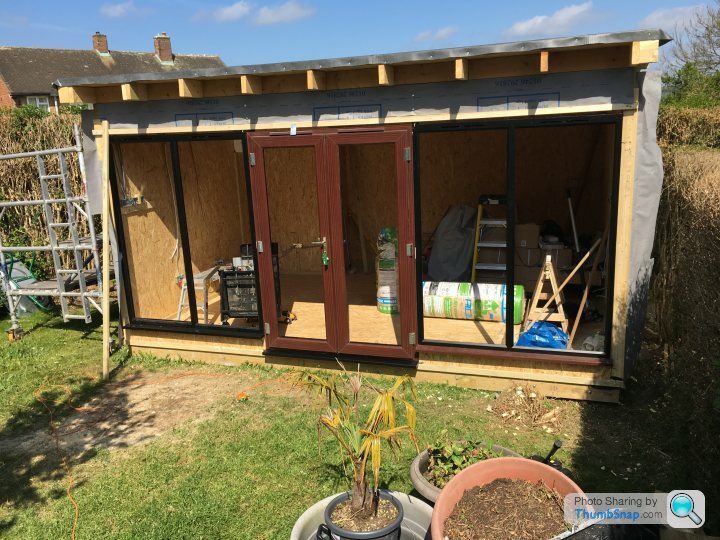
I test fitted the frames although these would be coming out again a few times as the build progressed.

After wrapping in breathable membrane and laying a sheet of EDPM on top it was pretty waterproof inside by the end of the weekend.
edited as some pictures not dispalyed
It all began with my wife deciding she wanted a gym in the garden so having got a few companies around to quote I felt that £20k plus was a bit steep so I decided to have a go myself. I was sure I could do a better job for MUCH less money.
It all started with some 2nd hand patio doors and windows from Ebay which would determine the width of the front. At a smidge under 5m they were perfect for what I needed, although they were brown I felt I could live with that at £311.
Next came the walls. I’d considered all sorts of construction methods but SIPS seemed to be the simplest/quickest/most efficient way to build so I found a job lot on Ebay. 26 was more than I needed but I’ll come to what happened with the spares later.
A sketched a plan and decided that 3.6m x 5m would be the best fit for the bottom corner of the garden.
I built a subframe out of 9x2 treated timber which I supported on Uni-Strut legs postcreted 700mm into the garden. The key advantages of building on piles was that it made it very easy to level without lots of groundwork and it kept the timbers off the ground to extend life. I’d hired an auger to drill the holes for the piles but when I got there they couldn’t find it so they lent me a manual post hole digger
I was not looking forward to the idea of digging manually but I have to say I was impressed at how easy it was. Made less mess than a petrol auger would have too.You can see I’d had to cut the hedge back about 2’ to maximise space so it looked a bit butchered at this stage although it’s all grown back ok now.
I had a huge bonfire of the hedge and even though I’d put slabs down first you can see where is still scorched the grass underneath. It had pretty much burned down by the time I took this pic.
On the frame I laid SIPS panels as the floor and then slotted the sides onto a timber rail and used timber fillets to join them squirting some expanding foam into the channel as I slid them together.
[url]|https://thumbsnap.com/eSuKU23H[/url]I laid some 9x2 timbers across the structure and used more sips panels for the roof.
I test fitted the frames although these would be coming out again a few times as the build progressed.
After wrapping in breathable membrane and laying a sheet of EDPM on top it was pretty waterproof inside by the end of the weekend.
edited as some pictures not dispalyed
Edited by 4Q on Wednesday 26th June 15:32
Edited by 4Q on Tuesday 2nd July 05:44
Quality on a budget, I like it, looking forward to seeing how it ends.
I've recently done a patio and stone walls for relatively little and just done the bathroom in Vinyl click planks for £10 as B&Q were renewing their range so selling off the old stock for £5 per 2msq box.
We built the random walls in the garden, dug out then filled the patio base and got the slabs on 'special offer', I calculated we'd shifted circa 10 tons by hand at the end of it and it felt pretty good to do some honest hard labour as we sit around too much these days.
Yes it was unfortunate but that corner of the garden isn’t square and I wanted the building to be square to the house. The only way to avoid the step in would’ve been to bring the whole thing half a metre forward so there would be more dead space behind. It didn’t make the build any more difficult.
Yes I did under permitted development after a quick call to my local planning dept to confirm it was ok.
I’ve kept a rough total in my head but ill save that until later as I’m remembering things as I’m typing this thread. At a guess though it was around 10% of what I was quoted for a company to build something of lesser spec. I haven't counted my time as I did it evenings and weekends which I don't get paid for anyway. Plus I spent much of the build with a beer in the garden so hardly demanding.

I’ve kept a rough total in my head but ill save that until later as I’m remembering things as I’m typing this thread. At a guess though it was around 10% of what I was quoted for a company to build something of lesser spec. I haven't counted my time as I did it evenings and weekends which I don't get paid for anyway. Plus I spent much of the build with a beer in the garden so hardly demanding.
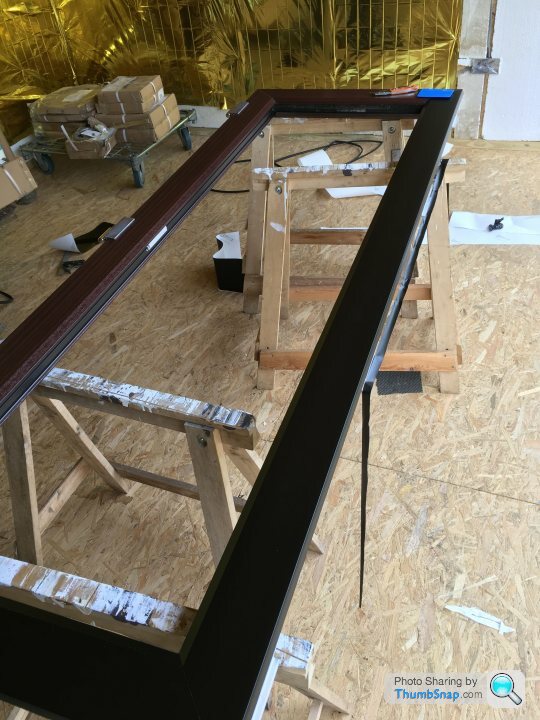
You may notice on an earlier picture that some of the frame is black and some brown. As I mentioned before, it was all brown when I bought it. I didn’t think this would go with the modern feel I was looking for when finished so I looked at ways to recolour it. I settled on vehicle wrapping vinyl in a matt black finish. I removed all the rubbers (the glass was already out), cut the roll of wrap into slightly over sized strips and after thoroughly cleaning the frames with detergent then spirit wipe I wrapped them.
The wrap vinyl is very thin and stretchy and I spoiled the first couple of strips as I got creases but once I’d got the hang of it it was pretty straightforward. I was really pleased with the results. After trimming the sides and mitred corners with a sharp knife and reinserting the rubbers they looked like they been manufactured in black. Some new black trickle vents completed the manufactured look.
The wrap vinyl is very thin and stretchy and I spoiled the first couple of strips as I got creases but once I’d got the hang of it it was pretty straightforward. I was really pleased with the results. After trimming the sides and mitred corners with a sharp knife and reinserting the rubbers they looked like they been manufactured in black. Some new black trickle vents completed the manufactured look.
Edited by 4Q on Thursday 27th June 12:02
Edited by 4Q on Tuesday 2nd July 05:50

Once I’d got the outside weatherproof I could turn my attention to the inside. Although It was made from SIPS panels I wanted the building to be as insulated as practical as although it was built as a gym it made sense to make it multifunctional. I battened out the walls inside to accept plasterboard and once again ebay came up trumps with some polystyrene insulation boards that were a little stained but otherwise new.
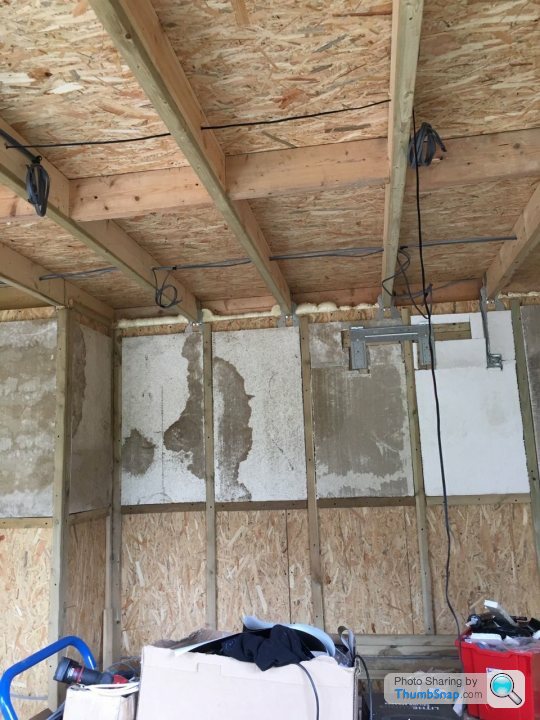
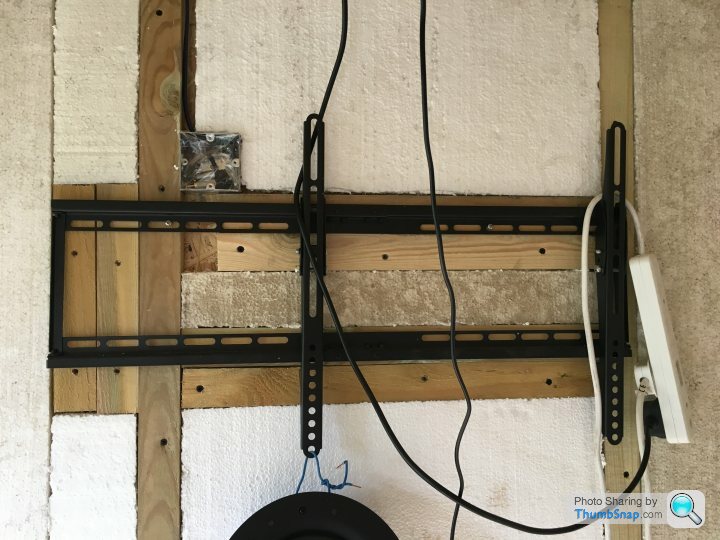
You can see I also put additional battens behind where the tv bracket and other things that would be wall mounted would go so I could get a secure fixing.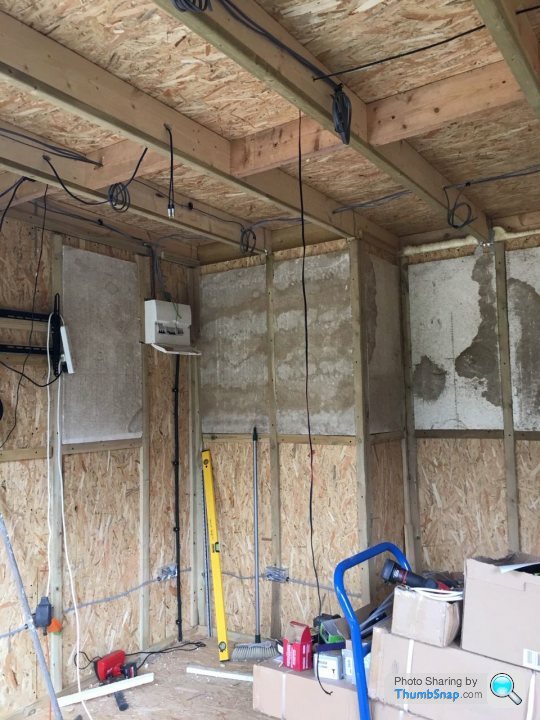
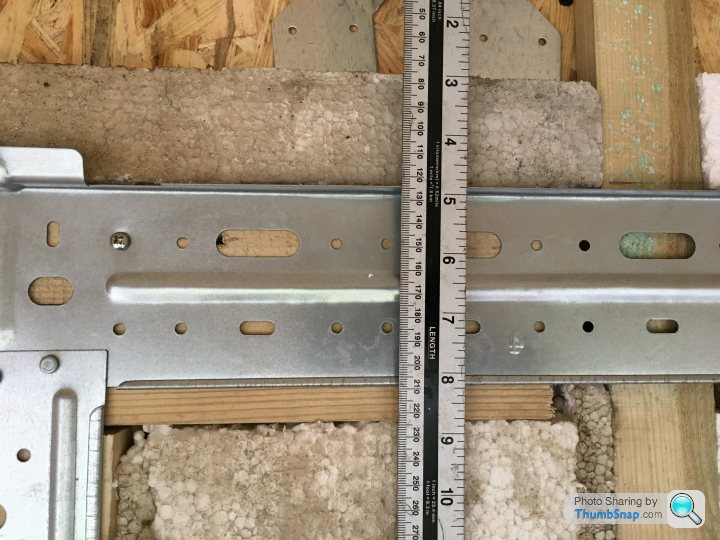
I took photos of a ruler next to the timbers so I would know where they were once it had been boarded over
I did the first fix electrics at the same time putting loads of sockets around the place as we weren’t sure what was going where and I didn’t want to be running extensions.
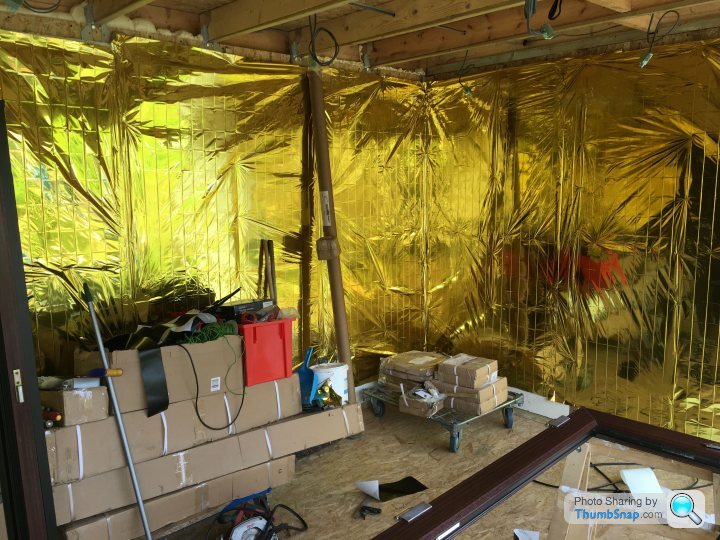
I used some cheap spaceblankets as a reflective insulator but also as a vapour barrier in case of condensation.
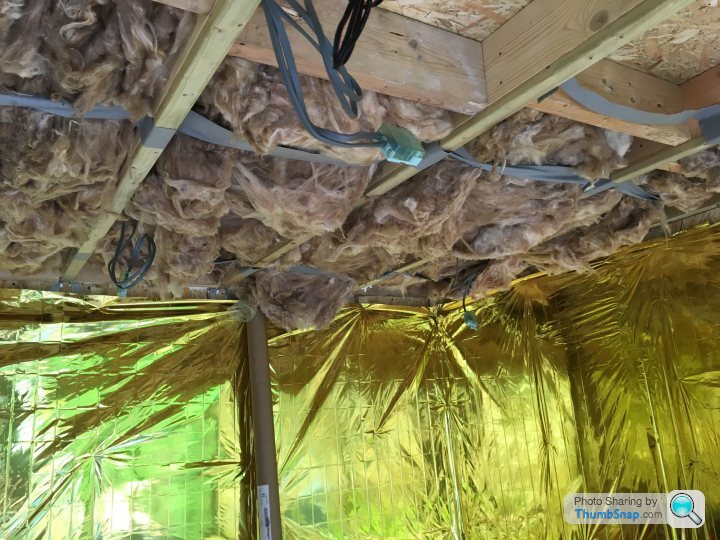
I rockwoolled the ceiling using to some offcut strips of Tyvek to hold it up temporarily.
You can see I also put additional battens behind where the tv bracket and other things that would be wall mounted would go so I could get a secure fixing.
I took photos of a ruler next to the timbers so I would know where they were once it had been boarded over
I did the first fix electrics at the same time putting loads of sockets around the place as we weren’t sure what was going where and I didn’t want to be running extensions.
I used some cheap spaceblankets as a reflective insulator but also as a vapour barrier in case of condensation.
I rockwoolled the ceiling using to some offcut strips of Tyvek to hold it up temporarily.
paulrockliffe said:
RC1807 said:
Well done on the frame wrapping - I'd have painted it to be quicker!
Having just done similar with the panels of a wardrobe, once you've done a few bits this is miles quicker than painting.Cracking work.
The wrapped doors look great, will be interesting to see how then last, but for the money you cant moan, you can always pull it off and replace or do something else and if it does 5-10 years looking good your laughing either way round.
Where they smooth brown (like white ones) or wood texture?
I am surprised you have added polystyrene to the walls given the are SIP units, what thickness of foam was in the panels?
However certainly I am right with you on making it well insulated, especially the roof. Not just for heat retention, but also keeping it cool in summer.
Who is doing the wiring?
Daniel
Gassing Station | Homes, Gardens and DIY | Top of Page | What's New | My Stuff