Rattle cans - have I hit the limit?
Discussion


Calling upon the wisdom of PH as I'm a bit stuck...
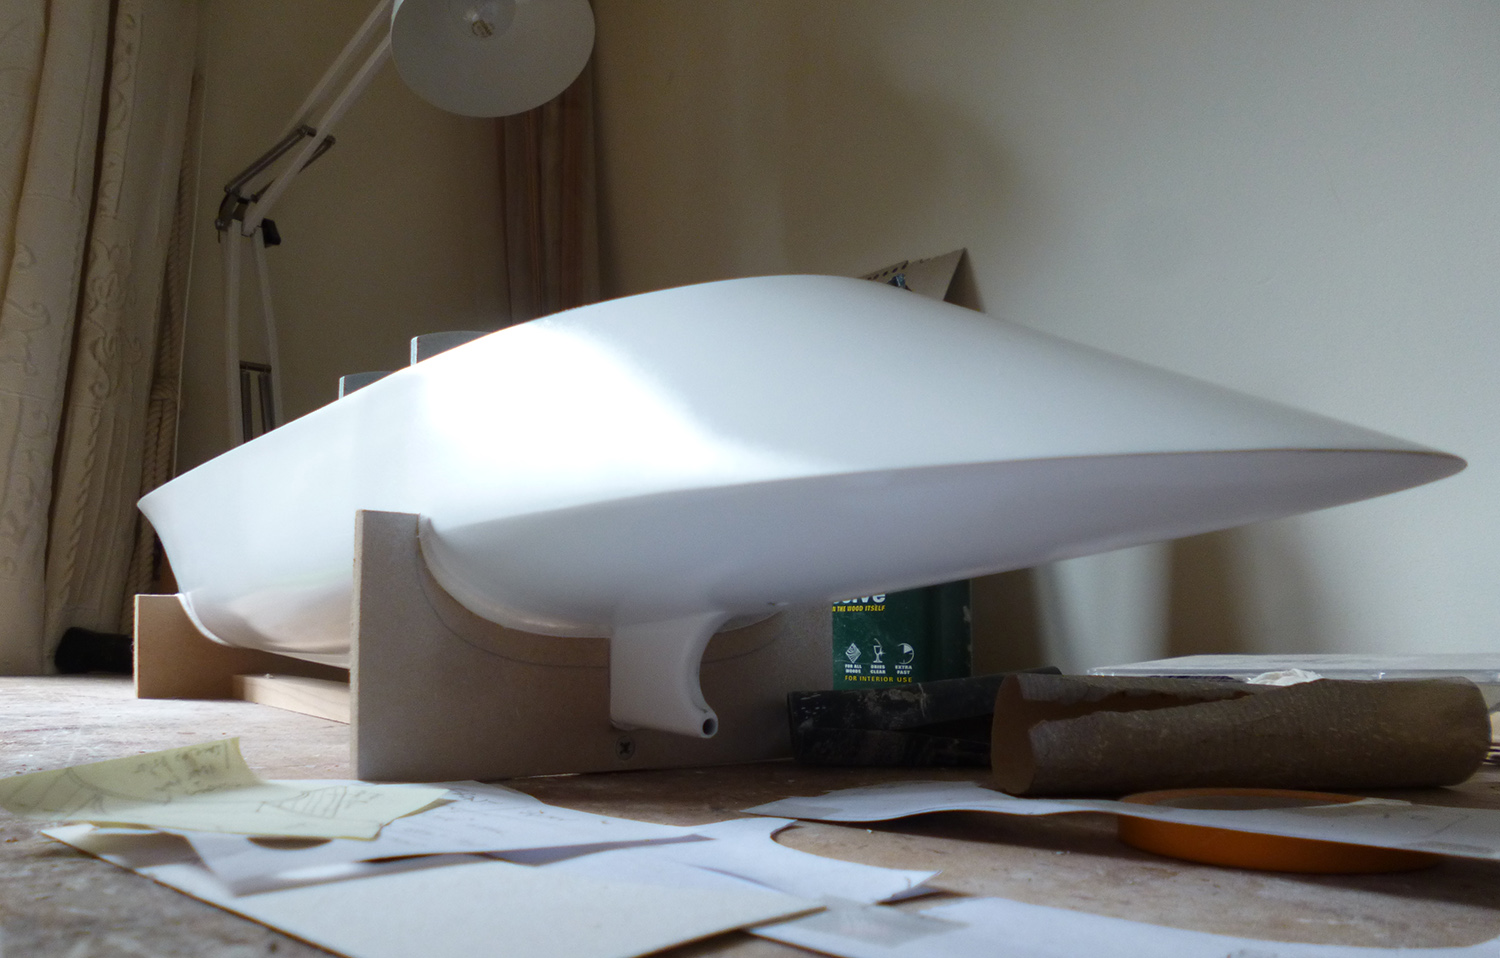
I'm scratchbuilding a 33" long model boat called 'Project X'. As you can see it has a most remarkable hull shape which is the thing that attracted me.
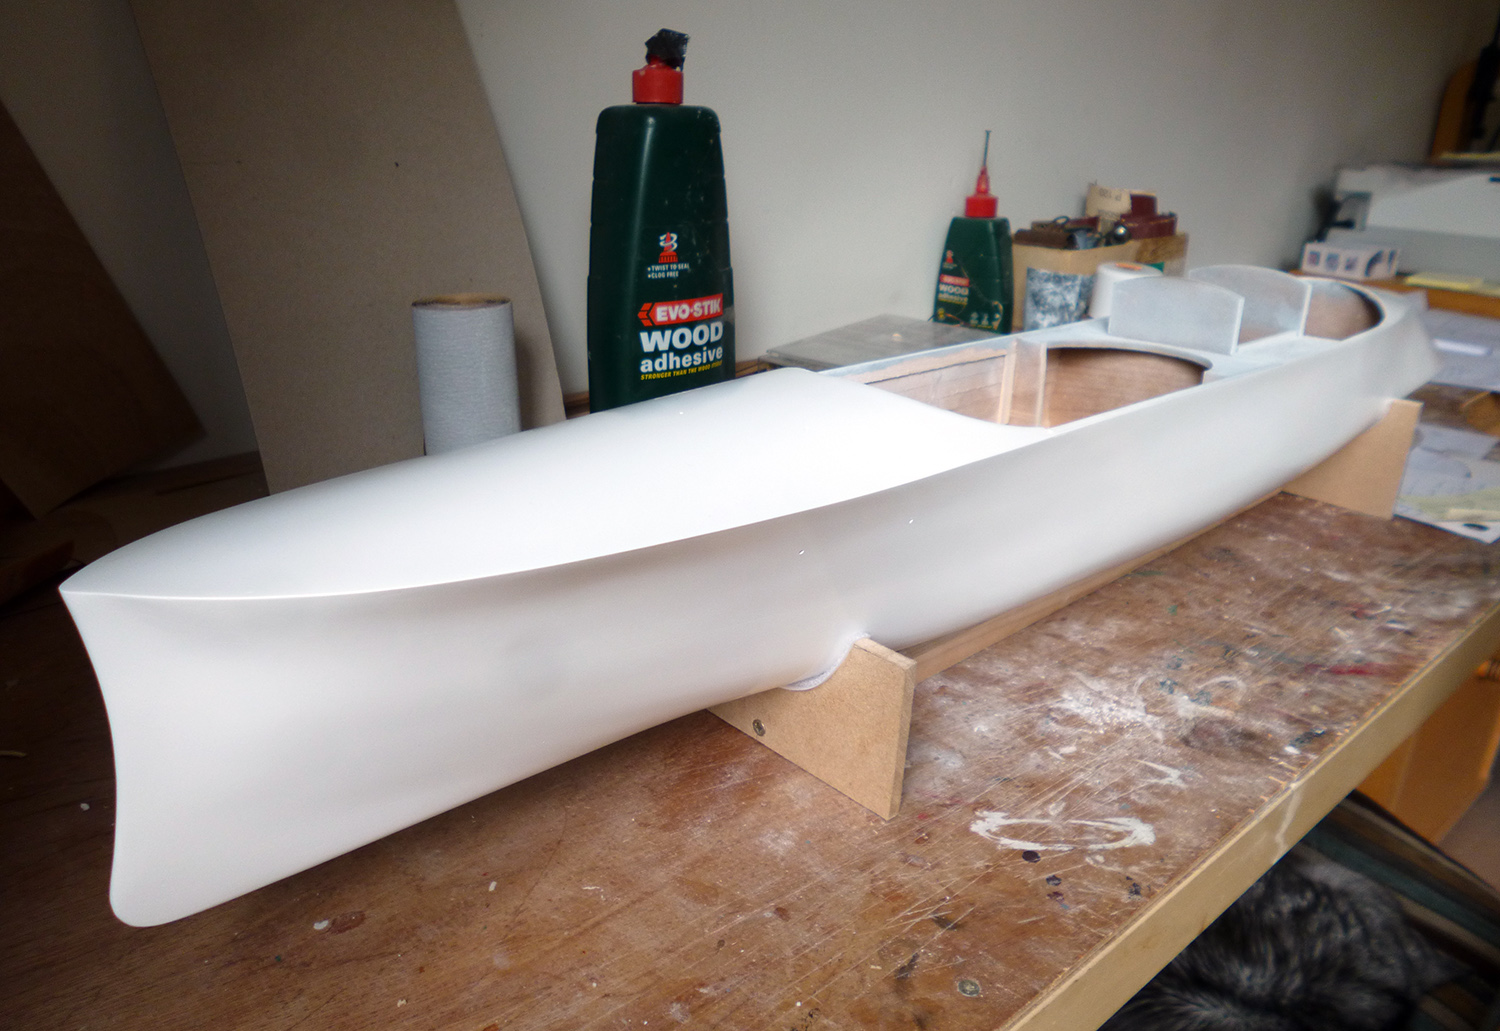

The outside is to be gloss white all over. The problem is that there are so many sides and facets that I can't find a place, other than the foredeck, to make a 'break' allowing me to spray in multiple sessions. I've tried spraying one side and the top first, but then when I do the other side, overspray lands on the just-done areas and dulls them. If I spray too close it runs, if I spray too far away it ends up matt not gloss. I've already had a couple of false starts and had to rub it down and start again.
How can I get this gloss all over?
I'm scratchbuilding a 33" long model boat called 'Project X'. As you can see it has a most remarkable hull shape which is the thing that attracted me.
The outside is to be gloss white all over. The problem is that there are so many sides and facets that I can't find a place, other than the foredeck, to make a 'break' allowing me to spray in multiple sessions. I've tried spraying one side and the top first, but then when I do the other side, overspray lands on the just-done areas and dulls them. If I spray too close it runs, if I spray too far away it ends up matt not gloss. I've already had a couple of false starts and had to rub it down and start again.
How can I get this gloss all over?
Hello.
A few daft questions? Are you spraying indoors or out? What’s the temperature like (that can affect finish).
I always pre-heat rattle cans in buckets of very hot water, before spraying and during.
Would you not consider getting a good finish over the majority. Leaving to harden all over, then polish some of the not-so nice areas with 2000 grit ( or finer), then compound?
Hi Jim - I'm spraying indoors to avoid spray drifting and insects. The paint is Tetrion Easy Spray. I keep it in the airing cupboard so it's slightly warm when used. There's no temperature guide on the can but I know that too cold is bad so the room was at least 10C. I think that if the room was too warm the spray might dry too fast, making overlapping an issue.
I'd hoped to avoid having to flat and polish, because that brings its own issues, and just get it nice straight out of the can. Mind you I do have an Autoglym headlamp polishing kit with all the disks etc in.
The front deck has a decent finish and could be masked because it's defined by sharp edges - but then I wonder if there'd still be a slight join showing when I take the tape off. So to avoid that I'd have to do the perfectly good front deck again, with the risk of making it worse... just can't think of a foolproof method!
I'd hoped to avoid having to flat and polish, because that brings its own issues, and just get it nice straight out of the can. Mind you I do have an Autoglym headlamp polishing kit with all the disks etc in.
r159 said:
I’d knock a stand up that mounts in the top and invert it, you should be able to spray it in a oner
I tried holding it upside down but then you have to spray upwards to do the decks which it doesn't seem to like - once I got too close and it ran so I had to start all over again. The only thing I can think of is to put a clamp on the top of the central former and then, using that as a handle, rotate the boat around as I spray. I just wondered if there was a better idea I hadn't thought of!The front deck has a decent finish and could be masked because it's defined by sharp edges - but then I wonder if there'd still be a slight join showing when I take the tape off. So to avoid that I'd have to do the perfectly good front deck again, with the risk of making it worse... just can't think of a foolproof method!
Hi Simpo,
I tend to spray most of my stuff outdoors as I don’t really have a room suitable in my house, plus my garage has cars within!
I’ve never really had a problem with insects outdoors and I’ve been spraying all sorts of stuff for years like this. Sometimes you have a very minor insect leg or wing to polish out. But I’ve only been able to spray outside recently as the weather has improved, you also need good conditions - especially no wind.
Sometimes in winter though, I have no other option but to spray indoors. Last winter I restored an RC glider for a mate. Sprayed the fuselage gloss white (rattle cans) with it being hung vertically from the ceiling via an elaborate thin wire hook arrangement. Technique is very important, and as always, it might be an idea to have a look on YouTube for tutorials.
It’s really hard to explain in words, but you need to keep the flow / pattern of spray flowing and uniform. And having the edge of the spray pattern ‘ not stopping on a surface’ - the flow of your sweep should stop away from the sprayed area.
You are right about temperature, to hot and the paint will dry to quick.
Obviously the surface has to be nicely prepared before you start, but I’m sure you know that.
It’s worth trying having the cans submerged in hot water prior and during. Can’t remember where or how I learned that one, however I’ve been doing it for decades and swear by it.
To me it seems to increase the pressure from the can propellant, but in a very uniform way.
HTH. Well worth looking at a few YouTube videos.
It’s a tricky one spraying, and takes years of practice and experience.
Here you go, a quick Google, lowers viscosity also.
https://cs.finescale.com/fsm/tools_techniques_and_...
Edited by Jim H on Wednesday 24th April 21:10
Jim H said:
Would you not consider getting a good finish over the majority. Leaving to harden all over, then polish some of the not-so nice areas with 2000 grit ( or finer), then compound?
Hi Jim,A somewhat delayed follow-up as frankly I've been putting it off!
Anyway, the side of the keel was particularly affected by overspray and there was some nice sunlight coming through the window so I thought I'd use it as test area and see how it went. 1500 wet/dry, then 2000, then the 3000 disk from my headlamp restoration kit, then the polish from the same. The result took some care and elbow grease but it looks superb, a natural shine like a car and IMHO better than a pure aerosol finish. It's going to take a while but at last I have a route to the result I'd had in mind, in fact possibly better.

ShredderXLE said:
No idea on the paint finish but what a wonderful looking thing. How did you make a shape like that from scratch? Is it moulded?
It's stupendous isn't it! I love the 'dreadnought' bow combined with a slipper-style back, and just had to make it.I found the model online, a lucky hit. But the official kit was 50" long, too big for my house, and the hull was ready-supplied as a GRP moulding.
http://www.model-steam-boats.co.uk/project%20x.htm...
So I rang the maker and asked if I could buy the plans to scratch-build a smaller version. He was incredibly helpful and sent me hi-res PDFs of plan and elevation, and some photos. The only thing he didn't have was the lines... three sections were in the plans but the rest I had to improvise.
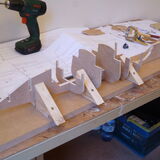
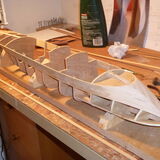
So here's how I made it from scratch - plank on bulkhead:
Here's a nice video I found of the 50" version: https://tinyurl.com/3wf24wyr
ShredderXLE said:
Thankyou! What material are the planks? They must be pretty flexible to bend around the curved parts. Do they have to be steamed or soaked first?
7 x 2mm lime. Yes, much steaming was required! I've made a few POB models before including two other scratchbuilds but the shapes here were unlike anything else - no chine for example.Morning Simpo,
I’m glad you had some success with it.
I’m not sure if vehicle painting is all done by robots now? And what level of quality is achieved. But a lot of paint finishes (sprayed) are very rarely the final state ‘off the gun’.
Some polishing does tend to be required on most finishes.
A lot of years ago a mate of mine (who is a car painter) worked at a huge FIAT plant in Germany. A large amount of brand new cars off the line required some extent of tidying up.
Murph7355 said:
Can you hang it up at chest height? Maybe put a couple of eyelets inside the hull temporarily??
That's a sound idea - but it would mean spraying upwards which doesn't work well.I'm going down the route of 'hand polish'. It takes more time but doesn't rely on getting everything 100% perfect in one go, and gives a really nice sheeny finish

Pack of 3000 grit paper due tomorrow!
Look up soft edge masking foam on YouTube.
It's what bodyshops use to spray to a swage line .
On the top picture,soft edge on the swage line and mask out the hull below
Spray the top.When paint is dry and hard reverse the process .Turn hull over,soft edge the other side of the swage line,mask out the section you've painted and spray the rest of the hull
Unmask, lightly sand the swage line where you've had the foam and compound to get a good finish
Gassing Station | Scale Models | Top of Page | What's New | My Stuff