Macro Photo thread
Discussion


Just been looking over these macro photos and have to say they are stunning, it's quite inspirational to see these photos taken using a variety of cameras and lenses to such great effect.
Well I have the 100mm macro lens so have no excuses now, so will be out looking for a few slow moving insects to photograph. Ironically yesterday I walked past a few enormous sunflowers which had some very busy bees hanging onto them. And guess where the camera was, yup, sat at home!!!
Will try harder and post a few examples on here

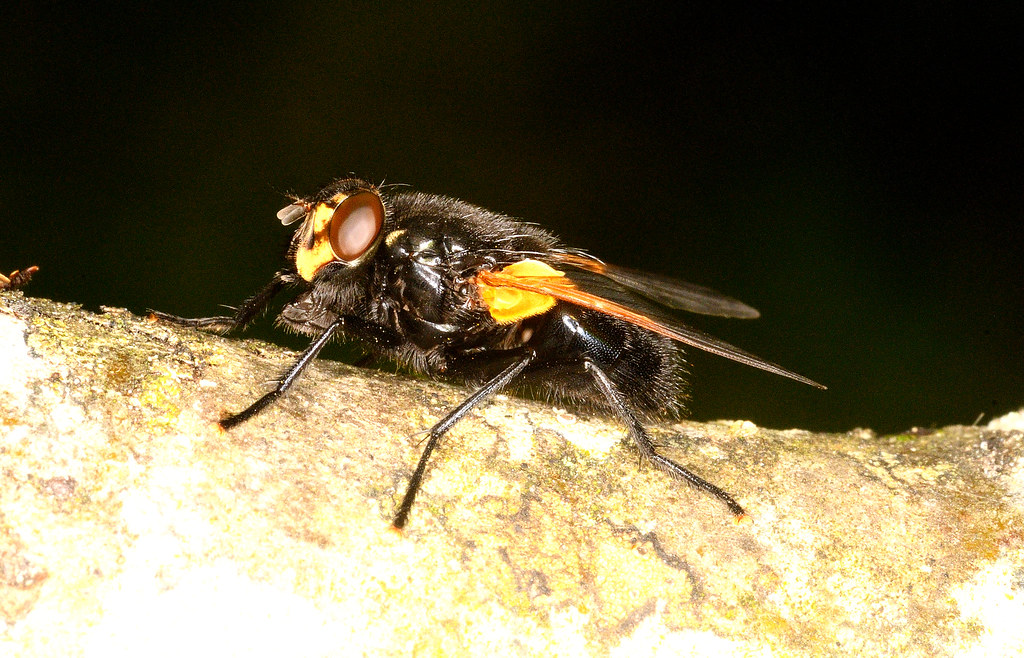
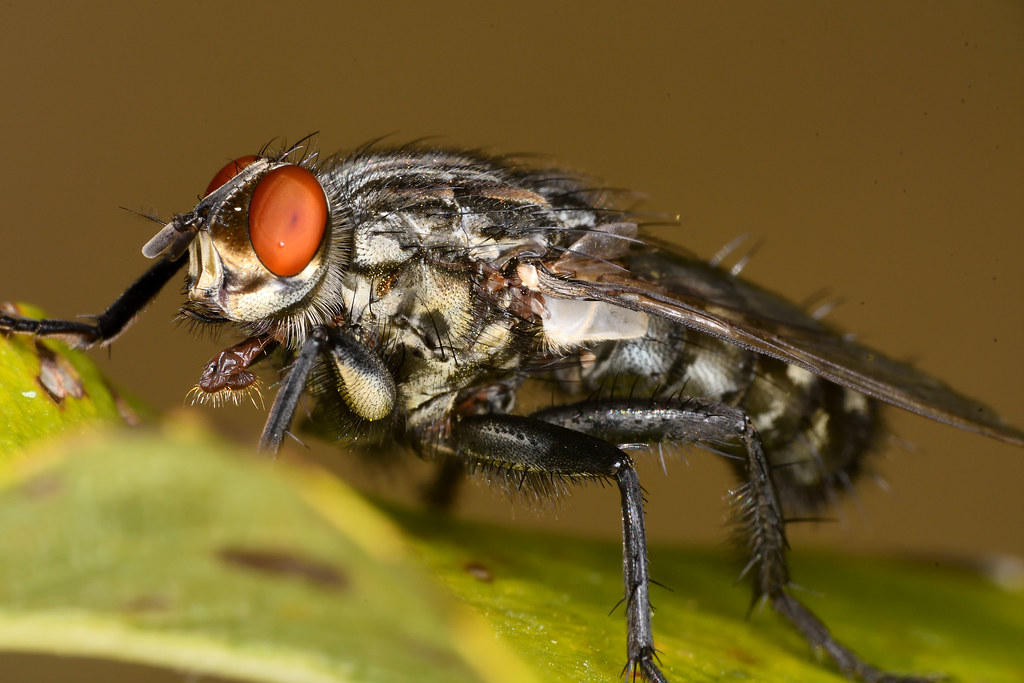
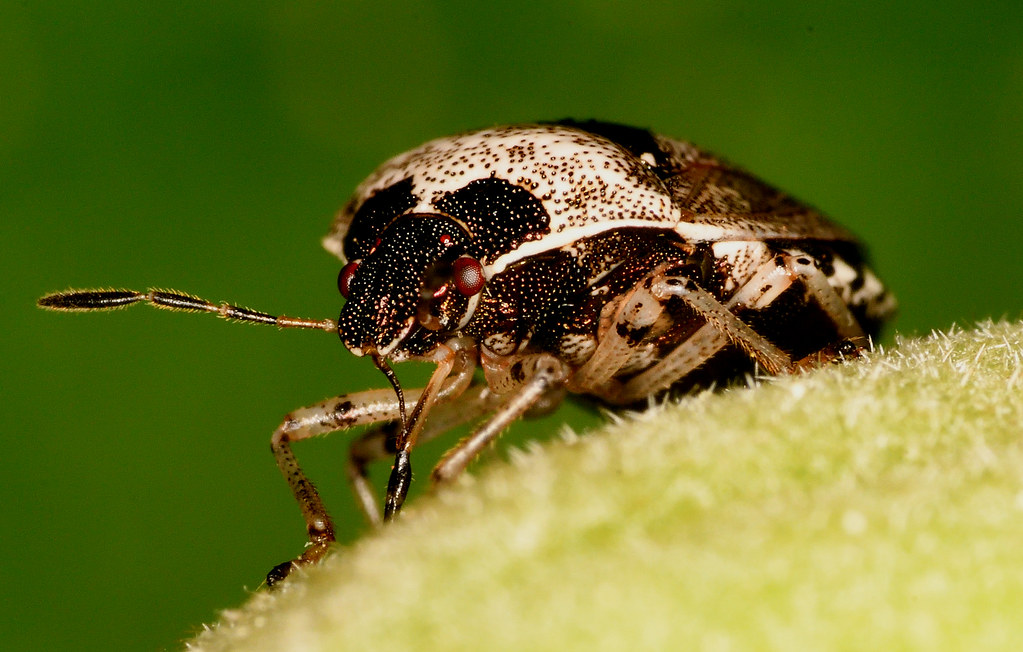
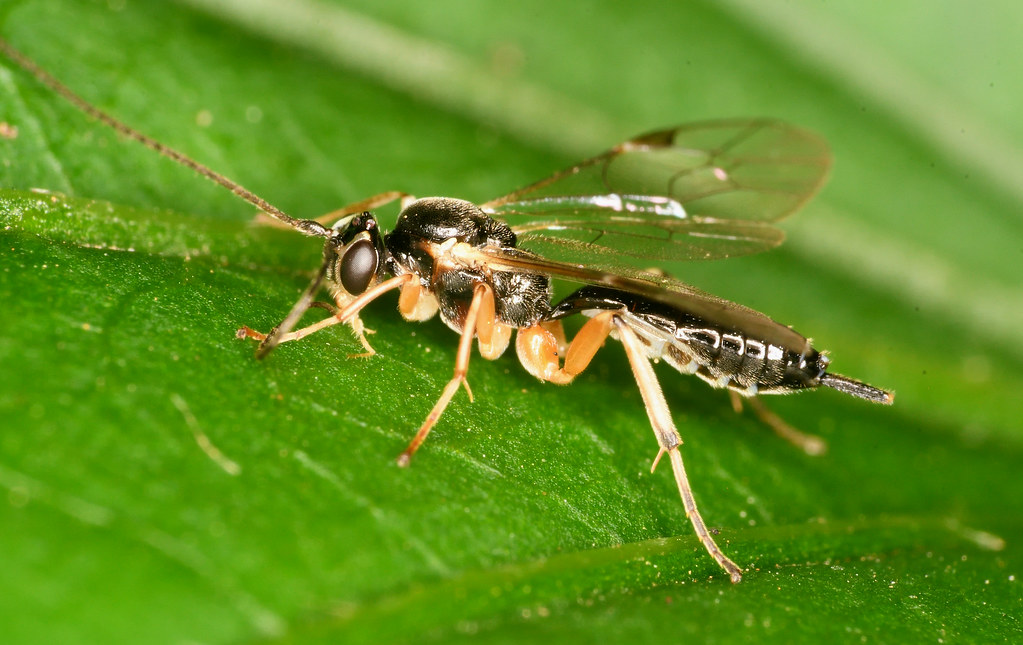
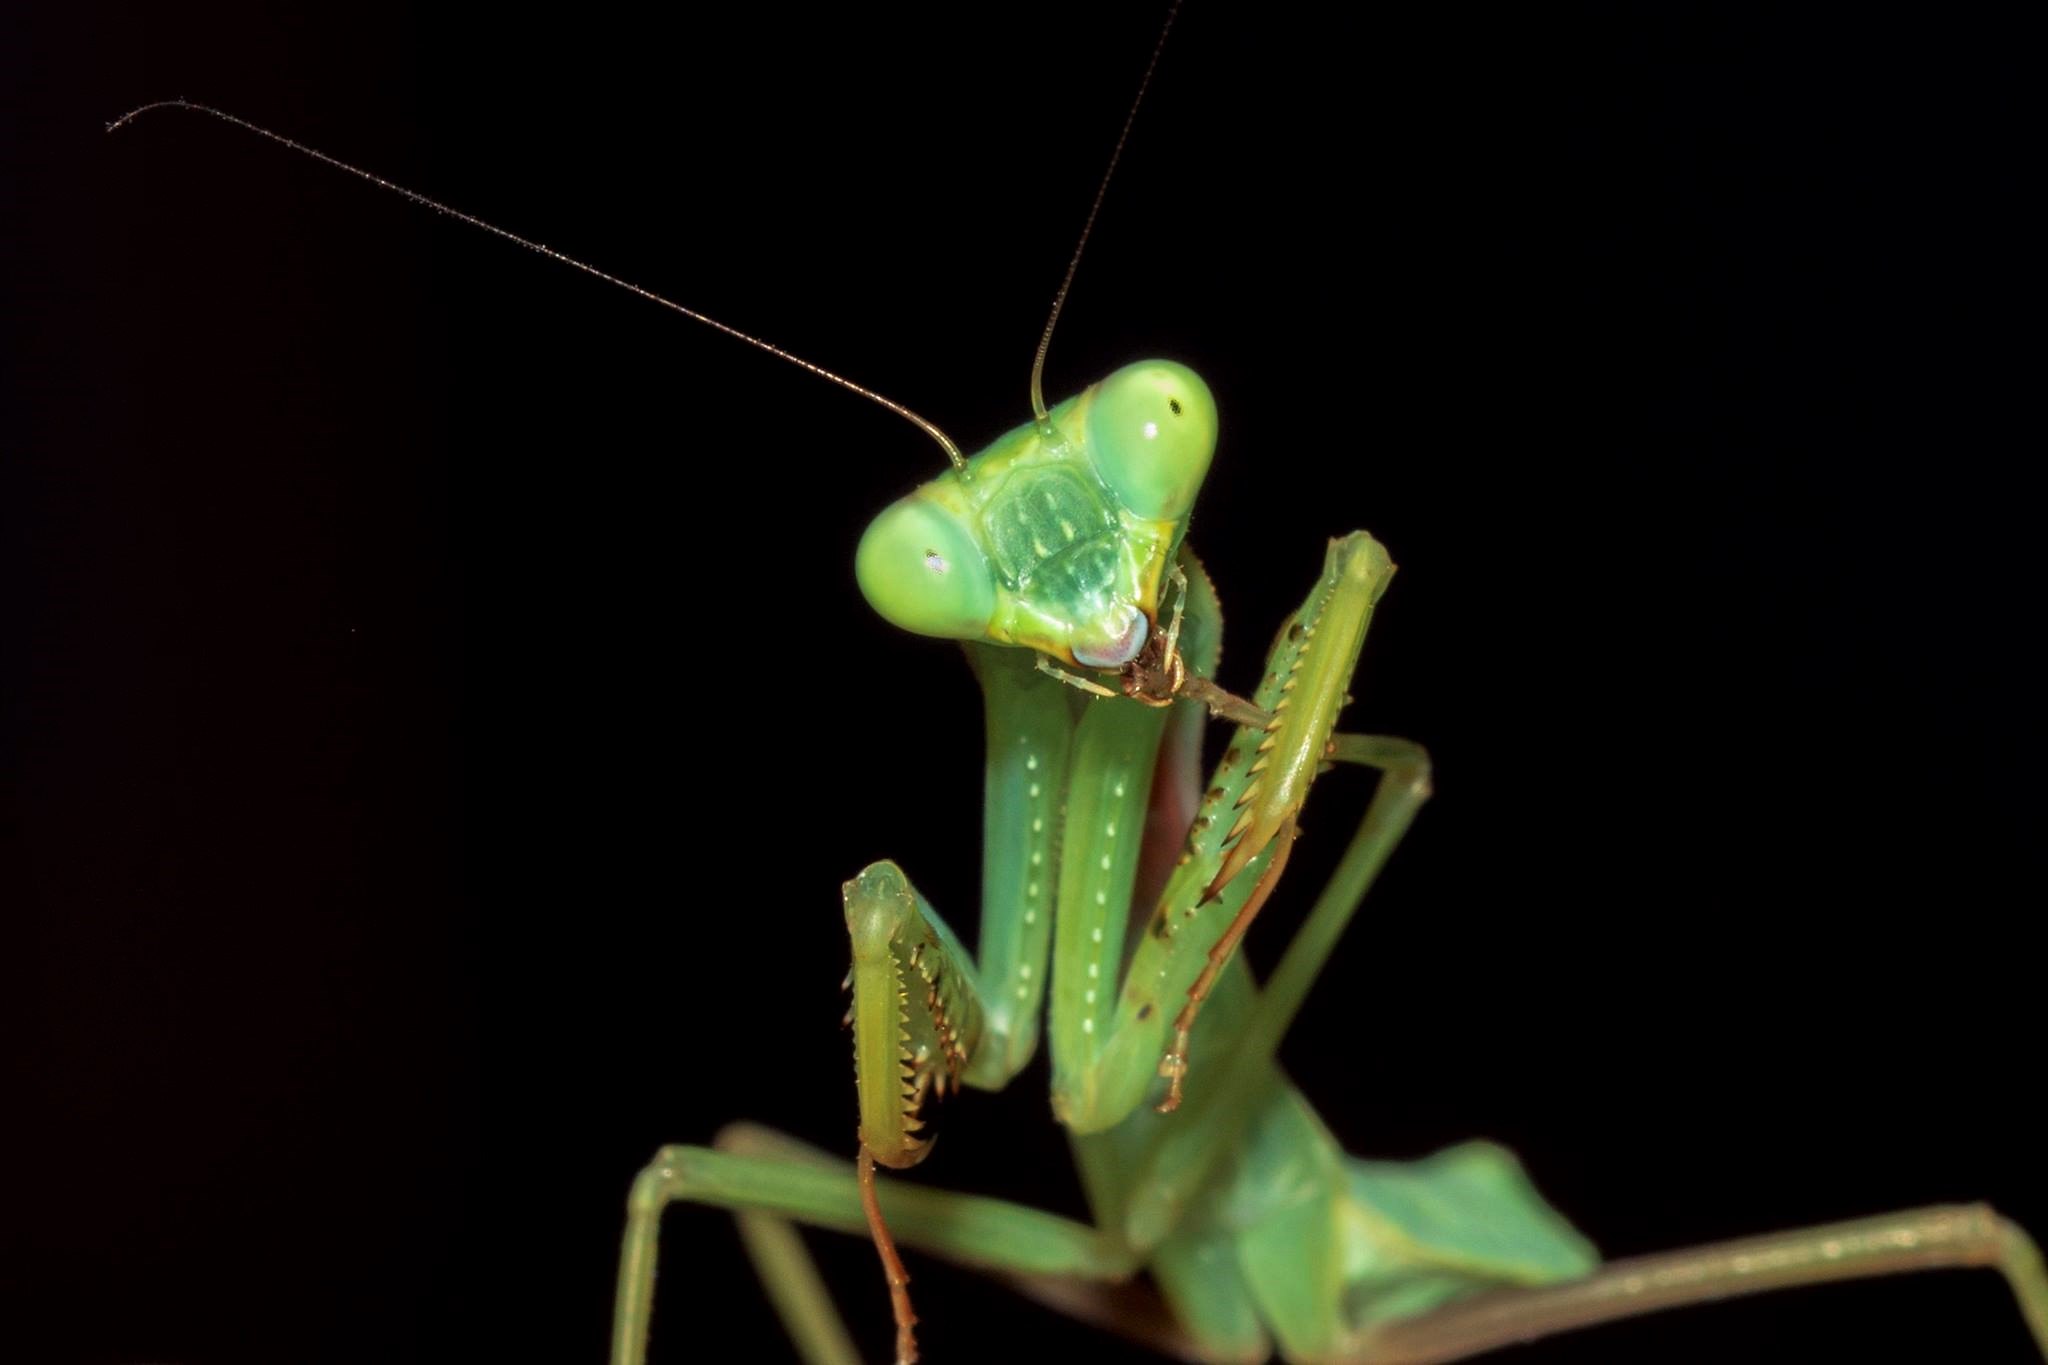
2 weeks away in the UK and no chance of any macro, so back home and straight out in the garden this morning......
 DSC_4367 by Glynn Hobbs, on Flickr
 DSC_4345 by Glynn Hobbs, on Flickr
 DSC_4295 by Glynn Hobbs, on Flickr
 DSC_4287 by Glynn Hobbs, on Flickr
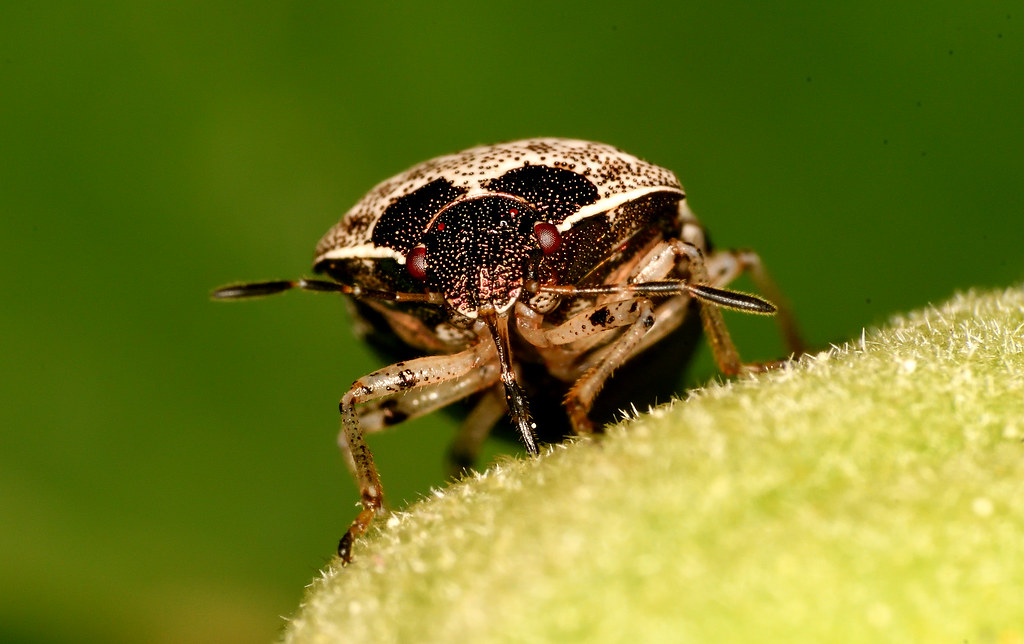 DSC_4279 by Glynn Hobbs, on Flickr
DSC_4367 by Glynn Hobbs, on FlickrDSC_4345 by Glynn Hobbs, on FlickrDSC_4295 by Glynn Hobbs, on FlickrDSC_4287 by Glynn Hobbs, on FlickrDSC_4279 by Glynn Hobbs, on FlickrSome great shots there Glynn, particularly like no. 2.
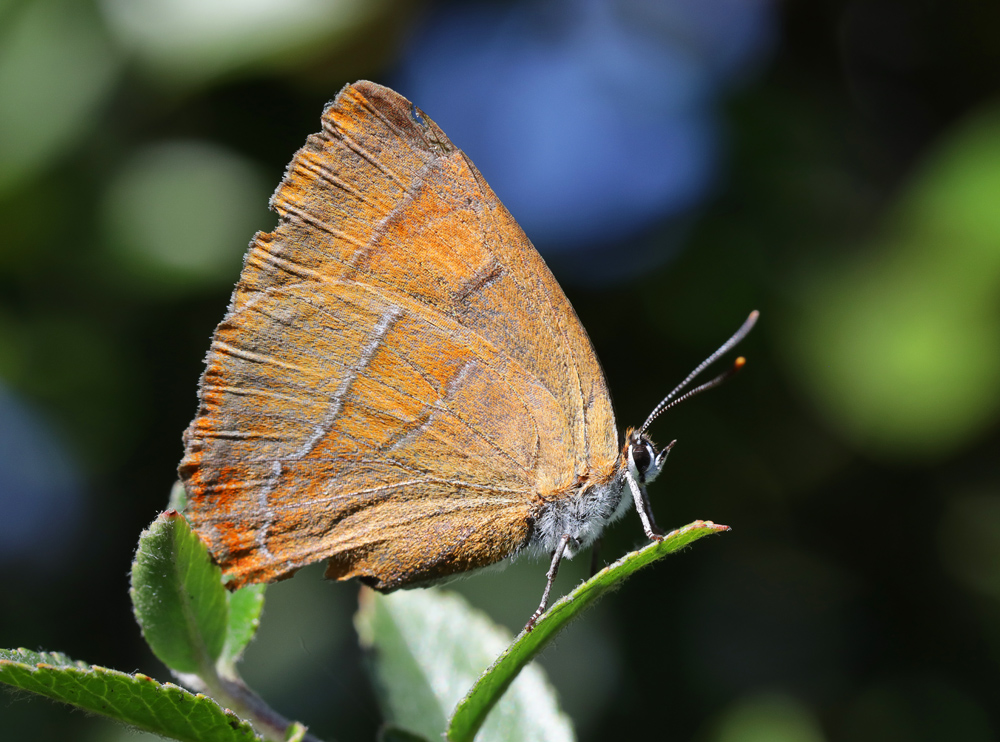 brown hairstreak butterfly by Nigel, on Flickr
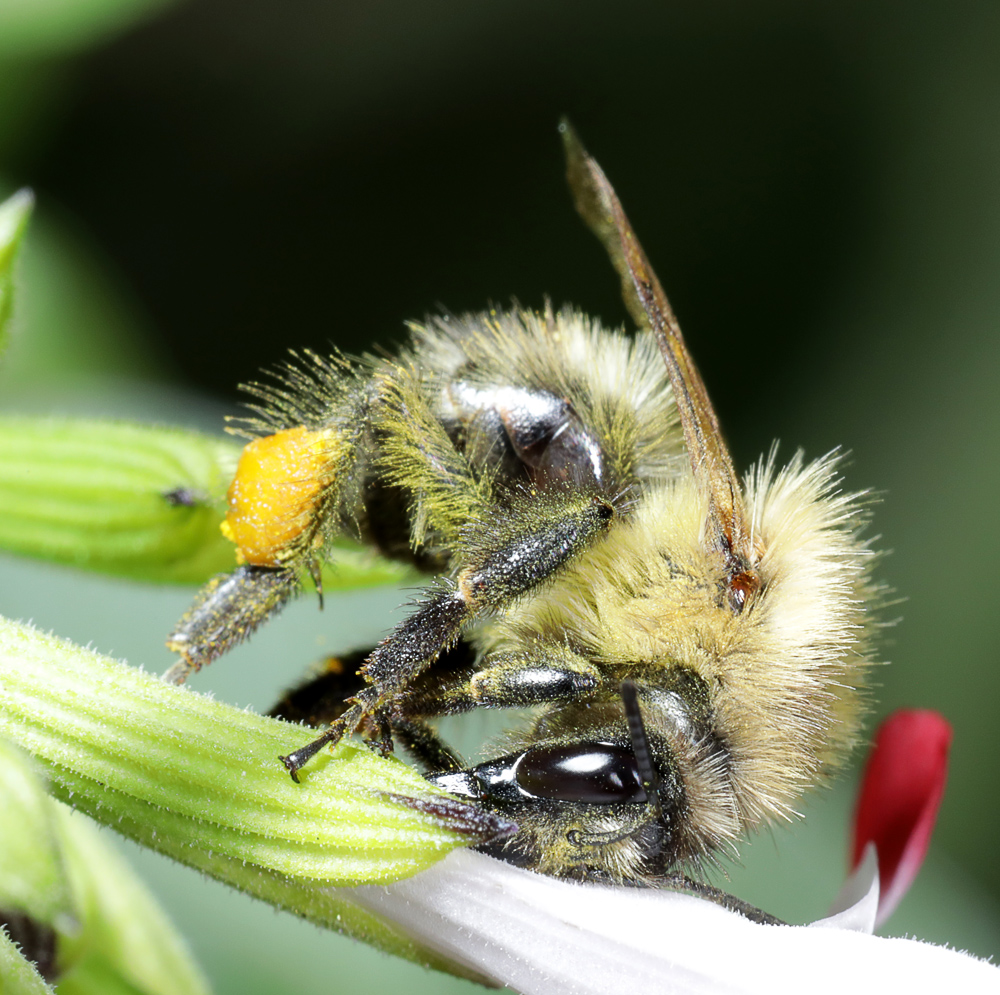 bee on salvia by Nigel, on Flickr
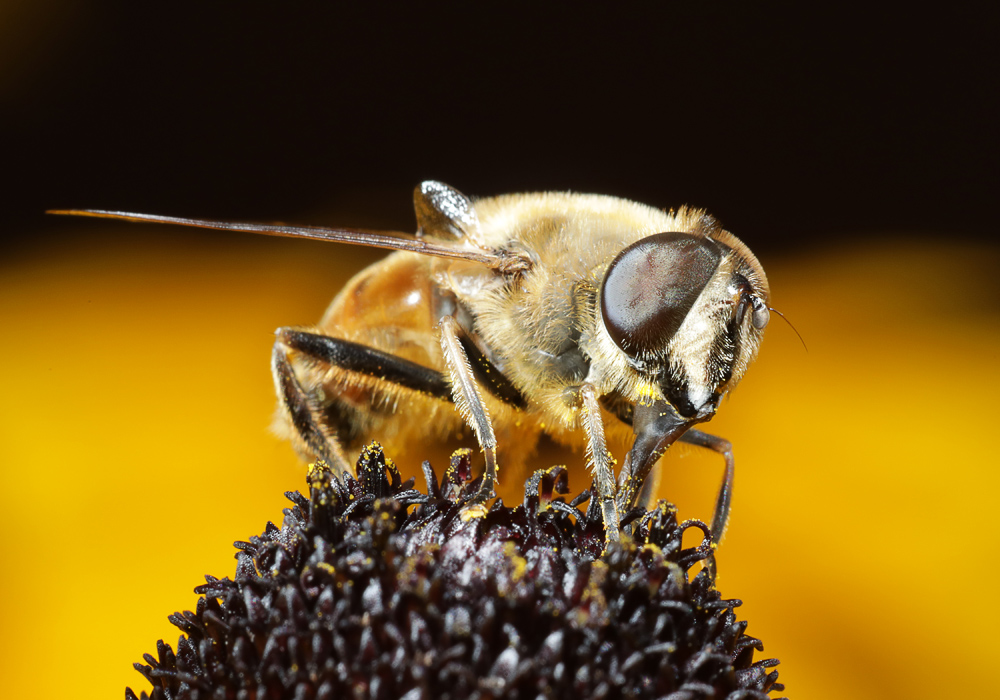 hoverfly on rudbekia by Nigel, on Flickr
brown hairstreak butterfly by Nigel, on Flickrbee on salvia by Nigel, on Flickrhoverfly on rudbekia by Nigel, on Flickr 

Smollet said:
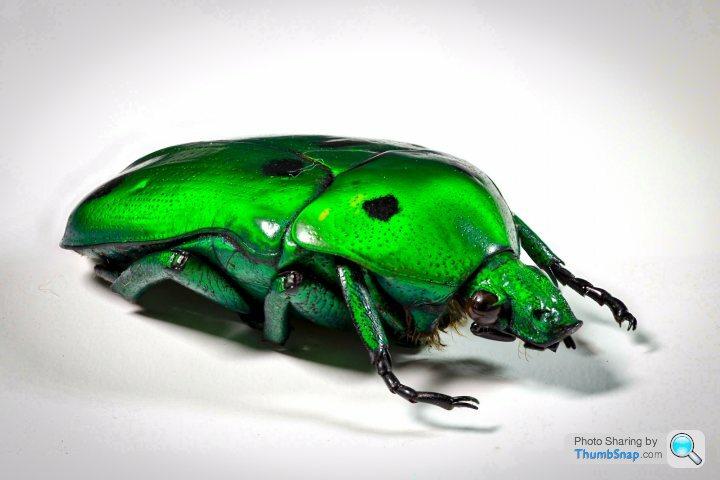
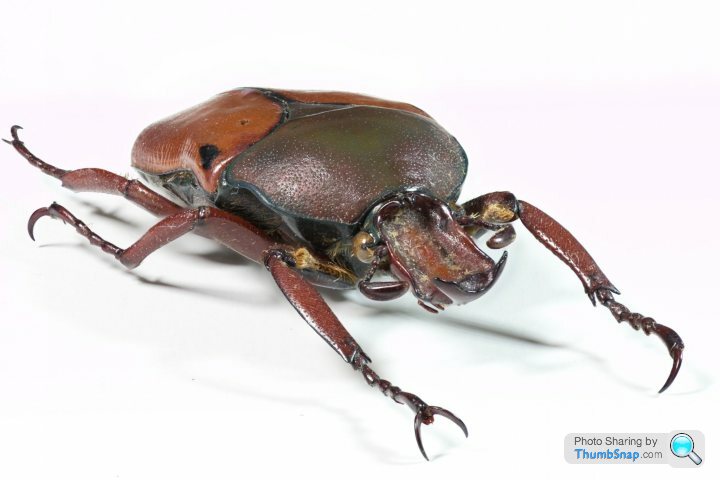
Using Helicon stacking(16 images) with Canon 6D + Sigma 150, F2.8 macro lens

I rather like that but my eye was instantly drawn to what look like shadows in the background and they slightly detract from the overall result IMO. Mainly because I can't unsee them.They should be easy enough to edit out with several approaches possible after which the image would be top class in my opinion.
I suspect they are real shadows but "enhanced" by the stacking process.
Apologies for the critique at the beginning of the post but, imo, there is so much to be gained by a few minutes of processing that I though I should make the suggestion to see if anyone else agreed.
LongQ said:
I rather like that but my eye was instantly drawn to what look like shadows in the background and they slightly detract from the overall result IMO. Mainly because I can't unsee them.
They should be easy enough to edit out with several approaches possible after which the image would be top class in my opinion.
I suspect they are real shadows but "enhanced" by the stacking process.
Apologies for the critique at the beginning of the post but, imo, there is so much to be gained by a few minutes of processing that I though I should make the suggestion to see if anyone else agreed.
All constructive criticism welcome. I’m new to stacking having only started on Friday. Hopefully I’ll improve with time. How would I remove the background shadows?They should be easy enough to edit out with several approaches possible after which the image would be top class in my opinion.
I suspect they are real shadows but "enhanced" by the stacking process.
Apologies for the critique at the beginning of the post but, imo, there is so much to be gained by a few minutes of processing that I though I should make the suggestion to see if anyone else agreed.
Smollet said:
LongQ said:
I rather like that but my eye was instantly drawn to what look like shadows in the background and they slightly detract from the overall result IMO. Mainly because I can't unsee them.
They should be easy enough to edit out with several approaches possible after which the image would be top class in my opinion.
I suspect they are real shadows but "enhanced" by the stacking process.
Apologies for the critique at the beginning of the post but, imo, there is so much to be gained by a few minutes of processing that I though I should make the suggestion to see if anyone else agreed.
All constructive criticism welcome. I’m new to stacking having only started on Friday. Hopefully I’ll improve with time. How would I remove the background shadows?They should be easy enough to edit out with several approaches possible after which the image would be top class in my opinion.
I suspect they are real shadows but "enhanced" by the stacking process.
Apologies for the critique at the beginning of the post but, imo, there is so much to be gained by a few minutes of processing that I though I should make the suggestion to see if anyone else agreed.
I suspect it might be possible but tricky to reliably eliminate the shadows at the point of shooting.
So that leaves some post processing of the image in its current state.
There are probably a number of techniques possible but I would guess that a healing layer adjustment could blend the residual shadows with the background OR one might well be able to darken the background to match the shadow lines for this particular image composition. Your choice whether to go with a dark or not so dark background.
The best way of making the edits (there are likely several options and maybe more than one type of edit required depending upon how critical you might want to be with the result) probably depends mostly on which editor you are using and what facilities it offers.
If you are already into editing then just treat the already stacked image as an original that you want to enhance a little and take it from there. Some sort of tool that allows you merge a range of "colours" or exposure into a single but common colour/exposure without having to undertake tricky "shading and burning" via some sort of hand crafted layer might be a good option for this particular image.
ETA: are the dark parts shadow or shadow aggregation from multiple images or some sort of artifact of subject movement between frames?
If it is movement related can the stacking process allow you to eliminate the frame(s) that cause the "shadow" or, perhaps better, the parts of the frames where there is undesirable movement?
Edited by LongQ on Sunday 14th October 12:49
LongQ said:
So that leaves some post processing of the image in its current state.
There are probably a number of techniques possible but I would guess that a healing layer adjustment could blend the residual shadows with the background OR one might well be able to darken the background to match the shadow lines for this particular image composition. Your choice whether to go with a dark or not so dark background.
The best way of making the edits (there are likely several options and maybe more than one type of edit required depending upon how critical you might want to be with the result) probably depends mostly on which editor you are using and what facilities it offers.
Using Lightroom CC I’ve erased the shadows and upped the black. A better result I feel. What do you think?There are probably a number of techniques possible but I would guess that a healing layer adjustment could blend the residual shadows with the background OR one might well be able to darken the background to match the shadow lines for this particular image composition. Your choice whether to go with a dark or not so dark background.
The best way of making the edits (there are likely several options and maybe more than one type of edit required depending upon how critical you might want to be with the result) probably depends mostly on which editor you are using and what facilities it offers.
Edited by LongQ on Sunday 14th October 12:49

DibblyDobbler said:
Smollet said:
Using Lightroom CC I’ve erased the shadows and upped the black. A better result I feel. What do you think?
Awesome - love it 
ps - please treat yourself to a Flickr account and ditch thumbsnap
But here's a challenge ...
If you look at the background of your original rendition there is quite pleasing dappled dark grey effect. I have no idea what you background was and whether the dappling is a result og the stacking process or was original to the background. You can, for example, get rolls of backing paper for studio work that can give a similar effect.
So as a further challenge that should be possibly using LightRoom, going back to your original image - try to change the bits of dark "shadow" to match the dappled background charcoal colour. I would thing the healing brush tool should be able to do it. But you could also try the opposite adjustment for what did when going black. Now that may take some extra effort compared to going black so don't necessarily spend the time making it perfect - just shifting the "shadows" in the right direction so they almost merge in should be enough to understand how such a change should be possible. Another option to play with when the right image comes along.
Long nights are a good time to work on these experiments.
LongQ said:
Yup, I too like that.
But here's a challenge ...
If you look at the background of your original rendition there is quite pleasing dappled dark grey effect. I have no idea what you background was and whether the dappling is a result og the stacking process or was original to the background. You can, for example, get rolls of backing paper for studio work that can give a similar effect.
So as a further challenge that should be possibly using LightRoom, going back to your original image - try to change the bits of dark "shadow" to match the dappled background charcoal colour. I would thing the healing brush tool should be able to do it. But you could also try the opposite adjustment for what did when going black. Now that may take some extra effort compared to going black so don't necessarily spend the time making it perfect - just shifting the "shadows" in the right direction so they almost merge in should be enough to understand how such a change should be possible. Another option to play with when the right image comes along.
Long nights are a good time to work on these experiments.
Thanks. iirc the back ground was a dark grey sheet. Long nights are best spent in the pub but I'll see what I can come up with.But here's a challenge ...
If you look at the background of your original rendition there is quite pleasing dappled dark grey effect. I have no idea what you background was and whether the dappling is a result og the stacking process or was original to the background. You can, for example, get rolls of backing paper for studio work that can give a similar effect.
So as a further challenge that should be possibly using LightRoom, going back to your original image - try to change the bits of dark "shadow" to match the dappled background charcoal colour. I would thing the healing brush tool should be able to do it. But you could also try the opposite adjustment for what did when going black. Now that may take some extra effort compared to going black so don't necessarily spend the time making it perfect - just shifting the "shadows" in the right direction so they almost merge in should be enough to understand how such a change should be possible. Another option to play with when the right image comes along.
Long nights are a good time to work on these experiments.

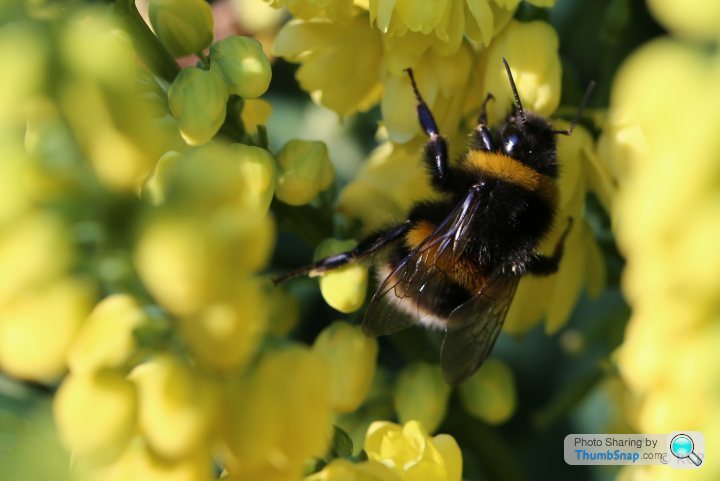
Some late October bee action before the temperature drops in the next few days.
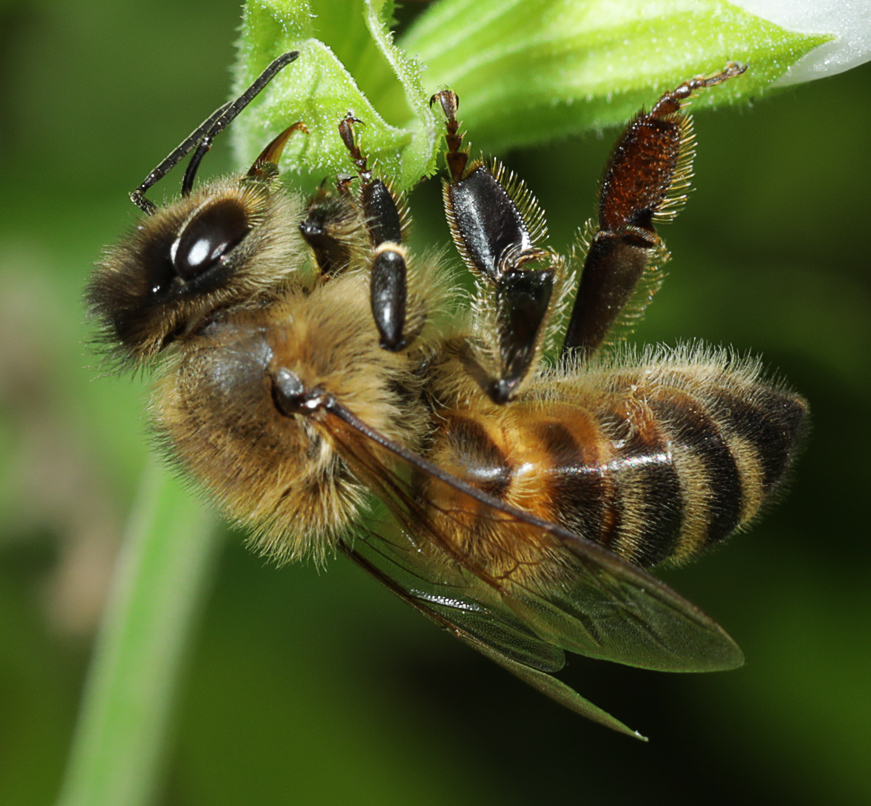 Honey bee on salvia by Nigel, on Flickr
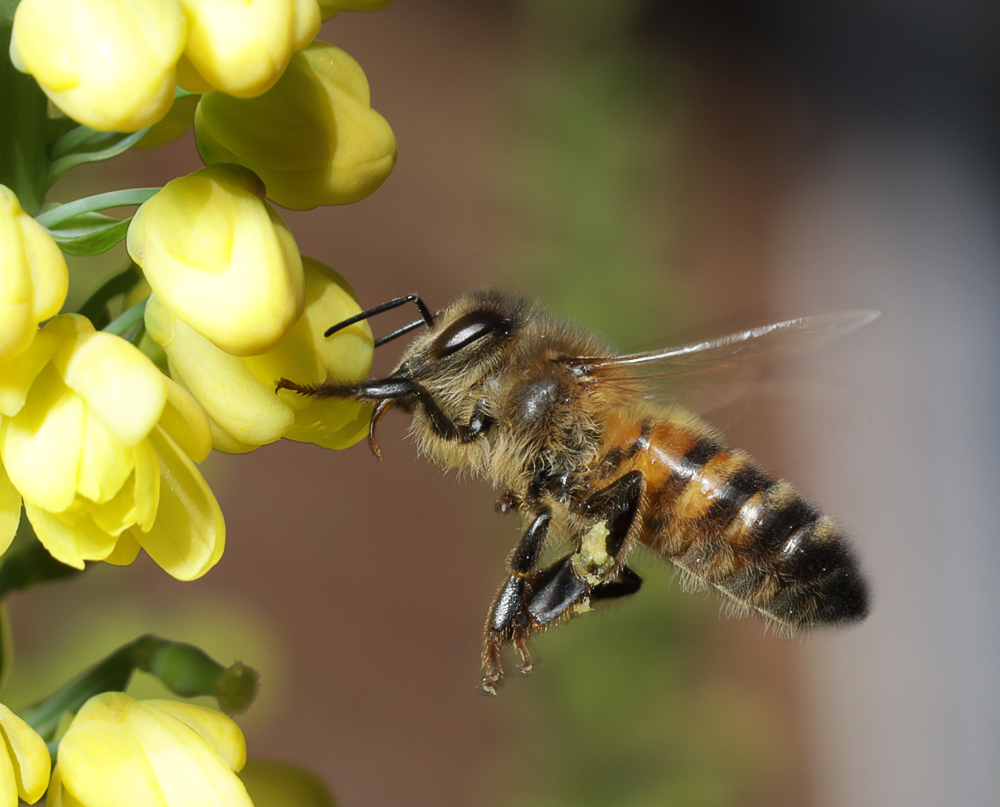 Flying honey bee on mahonia by Nigel, on Flickr
Honey bee on salvia by Nigel, on FlickrFlying honey bee on mahonia by Nigel, on Flickr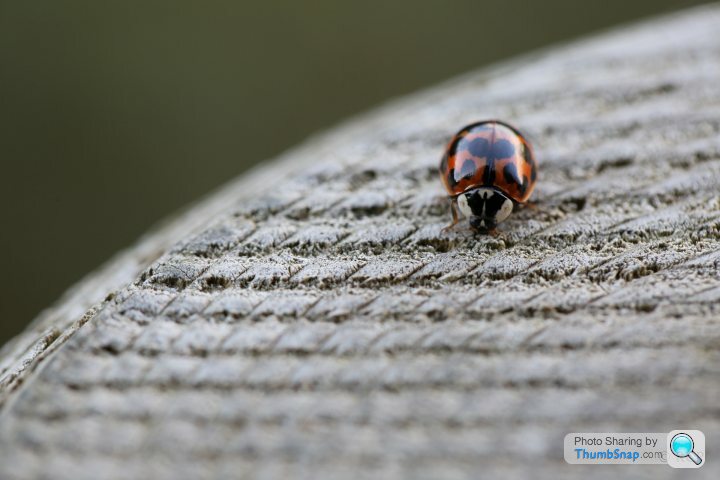
Cheers DD,
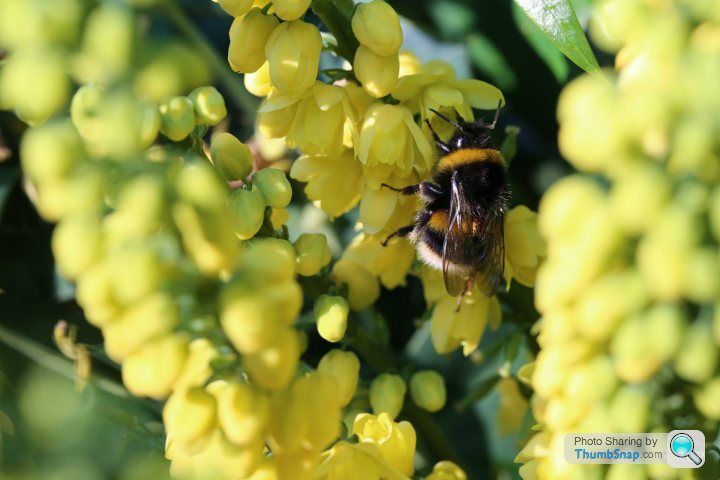
I've now realise that it's very important to have plenty of light on the subject, along with a wide depth of field, so shooting at f/2.8 is way too narrow as can be seen on the photo of the ladybird which I took at f/5, whereas the photo of the bee was taken at f/10 which is better.
I realise that I ought to be hot-linking from the likes of Flickr but I've been experimenting with these pics so haven't uploaded them onto there yet, plus I'm wary of going over the 1000 photo limit for the time being.
Have cropped a couple of other pics down as shown below:
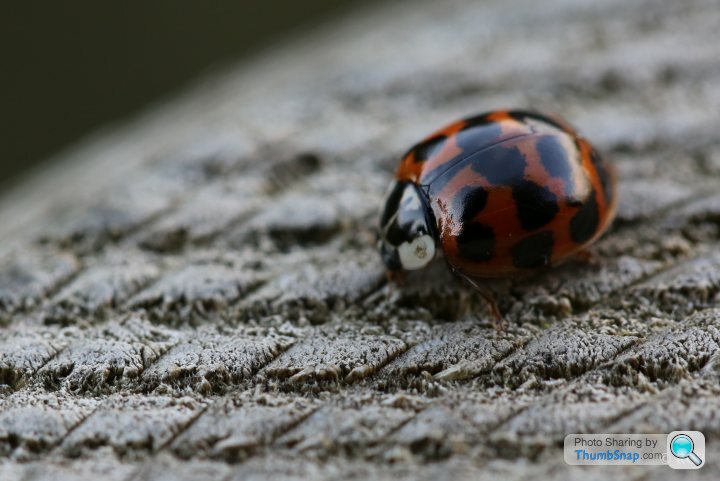
1/160th f/5 ISO 1000
1/125 f/10 ISO 1600
I've now realise that it's very important to have plenty of light on the subject, along with a wide depth of field, so shooting at f/2.8 is way too narrow as can be seen on the photo of the ladybird which I took at f/5, whereas the photo of the bee was taken at f/10 which is better.
I realise that I ought to be hot-linking from the likes of Flickr but I've been experimenting with these pics so haven't uploaded them onto there yet, plus I'm wary of going over the 1000 photo limit for the time being.
Have cropped a couple of other pics down as shown below:

1/160th f/5 ISO 1000

1/125 f/10 ISO 1600
Gassing Station | Photography & Video | Top of Page | What's New | My Stuff