They Said it Couldn't be Done...
Discussion


Finally! one header rail.....
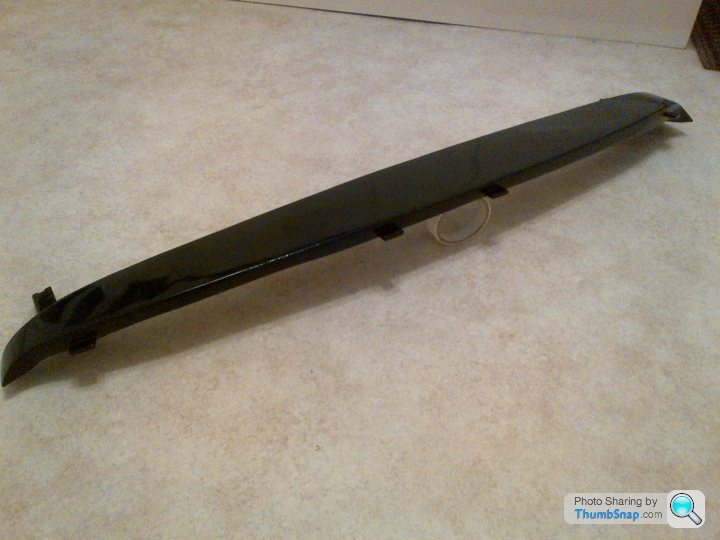
....ready for fitting to the folding frame. I can then start a few more experiments with how the hood fabric might be fitted around the window. So bumpity bump.
....ready for fitting to the folding frame. I can then start a few more experiments with how the hood fabric might be fitted around the window. So bumpity bump.
Well that's a bit of good fortune!
 Or was it pure... Luck?
That header rail looks superb Joe.
If it wasn't going to be covered in fabric, you could ask Pete to show you how to get a perfect finish ;D
When are you going into mass production?
Or was it pure... Luck? That header rail looks superb Joe.
If it wasn't going to be covered in fabric, you could ask Pete to show you how to get a perfect finish ;D
When are you going into mass production?
Edited by glenrobbo on Wednesday 21st January 13:02
phillpot said:
.............and a rear moulding ..
Many thanks Phillpot ..
This came from David Gerald in case anyone needs one.
Once I've got this in place I can start working on positions of the side window seals and where to position the rear window so it won't get snagged or torn when folded.
I've booked the car in with a local trimmer for the 19th April so that's the deadline for sorting out all the little details, some of which I don't even know about yet, and won't until I start trial fitting some pieces of vinyl. The plan is to work with the trimmer between now and April on solving the fiddly details so when he gets it into the workshop he can crack on.
The two interior lights arrived this morning. Unfortunately the larger one with the on/off switch is too big so unless I can find a slimmer one the Audi sun-visor light will be going into the moulding Phillpot has picked up for me.
Thanks to Phillpot for his hospitality last night. Although being made to stay up to 2am polishing stainless steel components was a bit excessive 
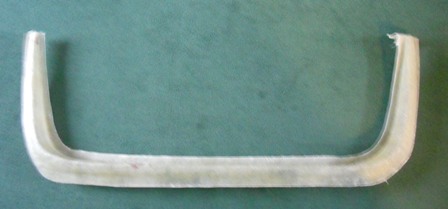
Unfortunately the hood rail is far from what I was expecting. The original part is on average 6mm thick all over where as the one I have here is significantly less than that so I don't think as it stands it will have the rigidity to hold the hood taut. As many of you will know, the hood rail is held to the body by three M6 bolts and washers which are recessed into the glass fibre so that the bolt heads don't foul the hood material. Obviously with the moulding being just the thickness it is that isn't going to work. I've left a meggage and hopefully we'll find a resolution tomorrow. Hopefully this resolution won't involve another 210 mile round trip
Unfortunately the hood rail is far from what I was expecting. The original part is on average 6mm thick all over where as the one I have here is significantly less than that so I don't think as it stands it will have the rigidity to hold the hood taut. As many of you will know, the hood rail is held to the body by three M6 bolts and washers which are recessed into the glass fibre so that the bolt heads don't foul the hood material. Obviously with the moulding being just the thickness it is that isn't going to work. I've left a meggage and hopefully we'll find a resolution tomorrow. Hopefully this resolution won't involve another 210 mile round trip
 ed if I can see why I should have to do it!
Alan Whitaker said:
..........and just have to do a bit of a mod or two to make it fit...
I suppose that just depends on what you definition of what a "mod or two" is. As it stands I've already got to trim it all round to get it to the correct size, drill the holes and glass in the bolts. This is what I'd happily accept as a "mod or two" and am happy to do, but finishing of the manufacturing process to treble the thickness is stretching things a bit far.The point is that they agreed to make a "standard" TVR part from a factory mould. They did not tell me they were just going make me a "starter for 10" which I would have to complete myself. So if the "standard part", and remember we are dealing with a TVR specialist here not some general GF fabricator who doesn't understand the use to which the part is being put, is an average of 6mm thick then what should have been supplied should have been made to the same dimensions. The wholesale cost of the materials used is probably about £10 so the rest was labour. Once the part is set up on the mould the additional time and materials required to make it the correct thickness would have been negligible.
Hi
did you use the 1979 3000S as the thinking behind your roof/hood. There are some on 'Car and Classic' sales
I'm thinking along the lines of the tonneau cover from the same - I realise I cant have the roof and the tonneau fixed to the car at the same time - so maybe roof (hoop and rear screen) through the winter only?
magpies said:
....did you use the 1979 3000S as the thinking behind your roof/hood?...
No, because this design uses side-screens so I'm afraid I just made it up as I went along. All the result of my twisted imagination and why it has taken so long. I think very slowly!magpies said:
...I realise I can't have the roof and the tonneau fixed to the car at the same time - so maybe roof (hoop and rear screen) through the winter only?
Are you talking here about your hard-top conversion?magpies said:
.... so maybe roof (hoop and rear screen) through the winter only?..
There would certainly be a way of having a tonneau fitted at the same time as the "pram hood", either in the up or down position. You just need a bit of lateral thinking  As you can see, I haven't really calmed down about this
 Nice wheels too
 phillpot said:
Give up and get yourself a car that's meant to have a folding hood...
that's the one I mentioned a couple of posts ago = but I don't know how to do linksI’m happy to say we reached an amicable solution. DG sent me some resin, hardener and matting so I could build up the moulding. I've found the commercial product they supplied a lot easier to work with than the DIY stuff. The matting is thicker and the resin stays workable longer and there are no air pockets.

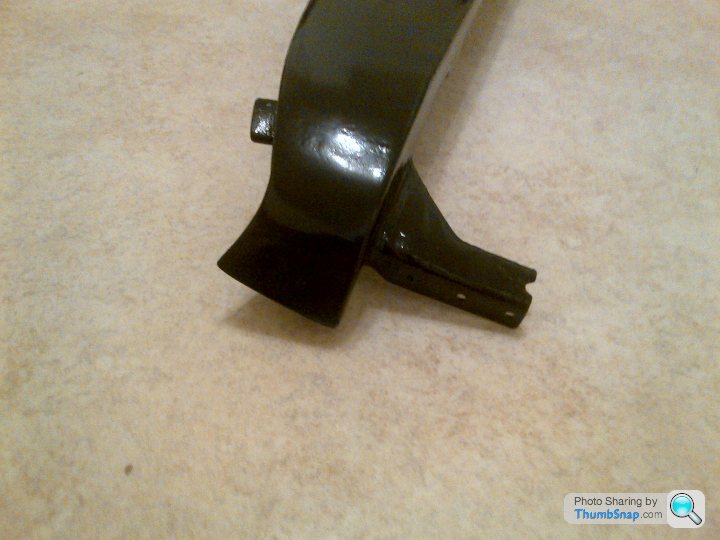
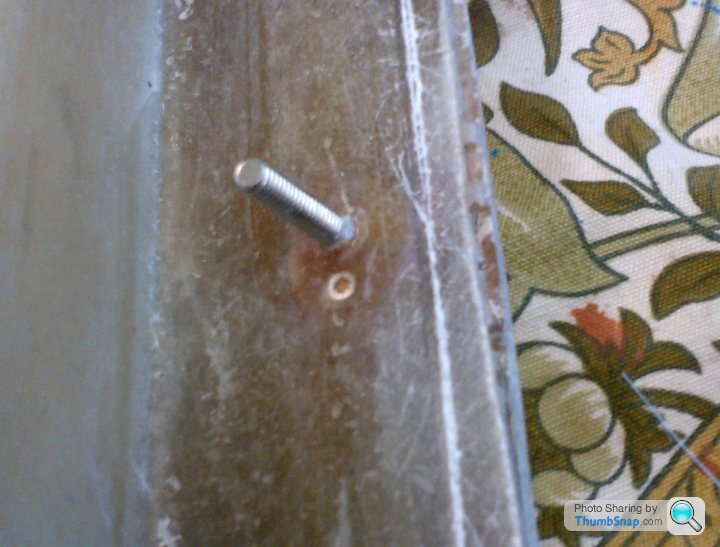
I've bonded in the mounting bolts and used stainless coach bolts in squared out penny washers which were “pegged” in place with little self-tappers. DG did supply the “correct” M6 studs which have broad flat heads and are designed to be bonded in by the resin but I gave it some thought and, rightly or wrongly, went with the DIY option.
As you can see there is still a lot of trimming to be done but the rail is now much stiffer and an even thickness all over. It does seem to stick up a bit on the corners though so we’ll have to wait and see what it looks like when it’s trimmed back to the correct shape.

The moulding as supplied went from ‘B’ post to ‘B’ post, ie not cut back 6” or 7” where the Velcro goes. I’m thinking about leaving this so that is forms a nice neat continuous trim all the way to the ‘B’ post and have the Velcro attached to the moulding.
Onwards and upwards...
I've bonded in the mounting bolts and used stainless coach bolts in squared out penny washers which were “pegged” in place with little self-tappers. DG did supply the “correct” M6 studs which have broad flat heads and are designed to be bonded in by the resin but I gave it some thought and, rightly or wrongly, went with the DIY option.
As you can see there is still a lot of trimming to be done but the rail is now much stiffer and an even thickness all over. It does seem to stick up a bit on the corners though so we’ll have to wait and see what it looks like when it’s trimmed back to the correct shape.
The moulding as supplied went from ‘B’ post to ‘B’ post, ie not cut back 6” or 7” where the Velcro goes. I’m thinking about leaving this so that is forms a nice neat continuous trim all the way to the ‘B’ post and have the Velcro attached to the moulding.
Onwards and upwards...
Gassing Station | S Series | Top of Page | What's New | My Stuff